
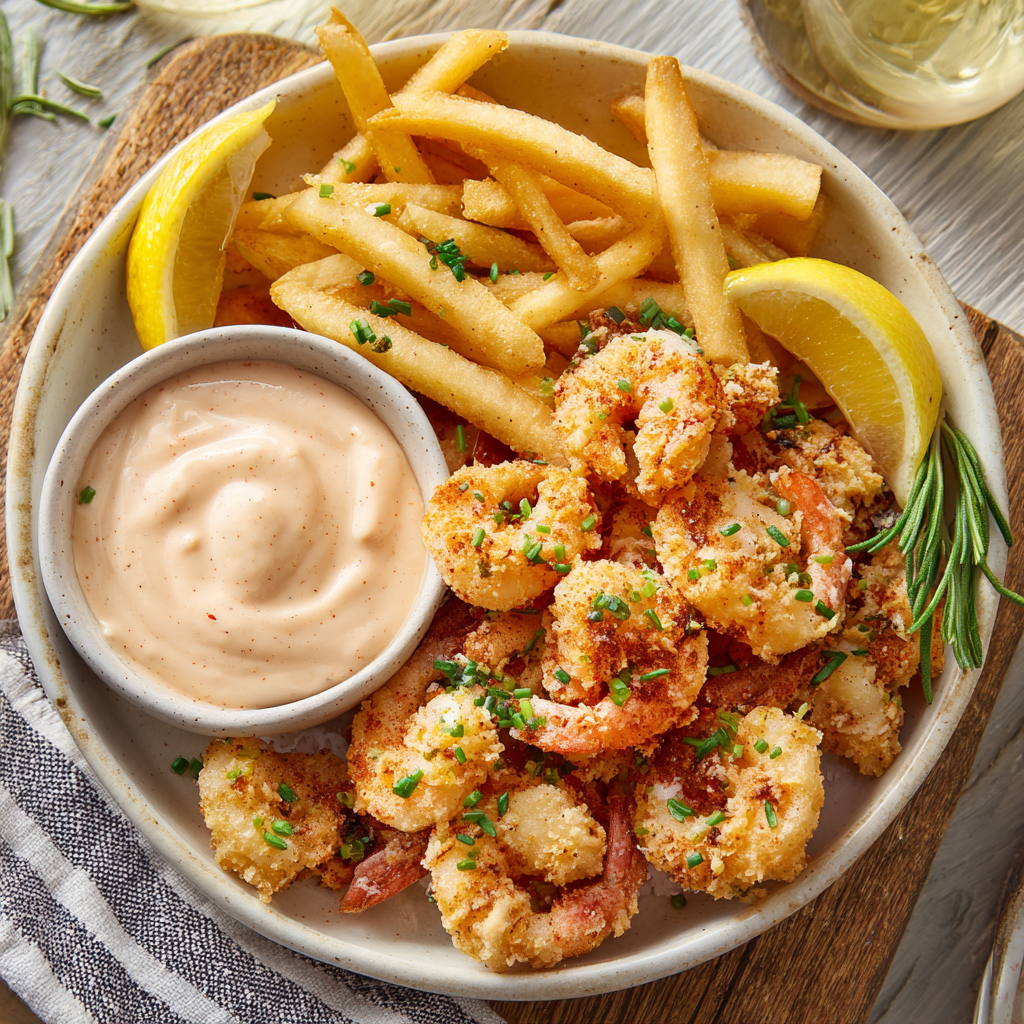
Old Bay Mayo
Your New Kitchen Crush: Old Bay Mayo Is Here to Steal the Show!
Hey there, kitchen friend! Olivia here, waving from my flour-dusted countertop. Can you smell that? It’s the salty kiss of the ocean meeting creamy indulgence, and it’s coming from the happiest little jar in my fridge right now. If you’ve ever dipped a crispy shrimp into something magical and thought, “How is this SO good?”, let’s talk about my not-so-secret weapon: Old Bay Mayo. This isn’t just a condiment—it’s a golden ticket to transforming everyday meals into coastal celebrations. Picture this: velvety mayo jazzed up with lemon zest, a garlicky whisper of Old Bay, and fresh chives dancing through every bite. It’s the dip that makes fries blush, the spread that hijacks boring sandwiches, and the drizzle that turns grilled fish into a standing ovation. And the best part? You’re literally five minutes away from bottled joy. No fancy skills, no fuss—just big, bold flavor that feels like a beach vacation in a bowl. Ready to make your taste buds shimmy? Let’s dive in!
Sunburn, Sandy Toes & the Sauce That Started It All
Let me take you back to my 20s—specifically, a wobbly picnic table at a Maryland crab shack. My college bestie, Jen, and I were cracking blue crabs under a blazing July sun, fingers stained with paprika and Old Bay. We’d ordered a side of “comeback sauce,” but when it arrived, it was… underwhelming. Jen, ever the rebel, grabbed a squeeze bottle of mayo and a shaker of Old Bay from the next table. “Trust me,” she winked. She stirred them together with a plastic fork, added a glug of lemonade (yep, lemonade!), and—voilà—our Frankenstein sauce was born. We dunked crab legs into that tangy, spicy miracle until our lips tingled. That messy, improvised moment became our summer ritual. Every time I make this mayo now, I’m back at that sticky table, laughing as crab juice dripped down our wrists. It’s proof that the best recipes aren’t just measured—they’re remembered.
Gather Your Flavor All-Stars
Here’s your dream team! Pro tip: Use room-temperature mayo—it blends smoother than cold mayo.
- ½ cup mayonnaise – The creamy MVP! Use full-fat for luxury (I love Duke’s or Hellmann’s), or swap in light mayo or Greek yogurt for a tangy twist. Vegans, avocado mayo works beautifully!
- 2 tablespoons finely chopped fresh chives – Tiny green flavor bombs! They add oniony brightness. No chives? Thinly sliced scallions or ½ tsp onion powder (use sparingly!) will save the day.
- 1 teaspoon Old Bay seasoning – The rockstar! That iconic blend of celery salt, paprika, and secret spices. If you’re out, mix ½ tsp paprika + ¼ tsp celery salt + pinch of black pepper + pinch of nutmeg.
- 1 teaspoon Dijon mustard – Our flavor anchor! It adds depth and emulsifies. Yellow mustard works in a pinch, but Dijon’s wine notes are chef-kiss worthy.
- Juice and zest of ½ lemon – Sunshine in a bowl! Zest first (avoid the bitter white pith!), then juice. No fresh lemon? 1 tsp bottled juice + ¼ tsp zest works, but fresh is fire.
Let’s Make Magic Happen (Seriously, It’s This Easy!)
Ready? Grab a bowl and let’s get whisking! I’m sharing all my messy-kitchen hacks along the way.
- Zest & Juice Like a Pro: Roll your lemon on the counter first—it bursts the cells and gets you more juice! Zest it directly into your mixing bowl so those citrus oils don’t escape. Squeeze the juice through your fingers to catch seeds. Chef hack: If your lemon is stingy, microwave it for 10 seconds first!
- Chop Chives with Confidence: Stack chives, slice thinly with a sharp knife (dull knives bruise herbs!). Chef hack: Snip them with scissors straight into the bowl—less cleanup!
- Whisk with Wild Abandon: Add mayo, Old Bay, and Dijon to the bowl. Whisk like you’re cheering on your favorite team! Get it creamy and speckled with spices. Chef hack: Use a fork if your whisk feels extra—it works great for small batches.
- Taste & Tweak Your Masterpiece: Dip a spoon in. Need more zing? Add lemon juice. More kick? A pinch of cayenne or extra Old Bay. Too thick? A teaspoon of water or lemon juice loosens it. This is your sauce—own it!
- The Patience Payoff (Optional but Worth It!): Cover and chill 10-15 minutes. This lets the flavors mingle like old friends at a reunion. Can’t wait? Eat it now—I won’t judge! Storage tip: It keeps for 1 week in a jar—if it lasts that long!
The Science of Seduction: Why This Mayo Hijacks Your Taste Buds
Let’s geek out for a moment about why this simple sauce feels like a flavor fireworks show. That addictive quality isn’t just luck—it’s food science working its magic!
1. Fat + Acid = Culinary Chemistry
Mayo’s rich fat content (oil + egg yolks) acts like a flavor conveyor belt, carrying fat-soluble compounds straight to your taste receptors. The lemon juice’s acidity cuts through that richness, creating perfect balance—just like in hollandaise or aioli.
2. Umami’s Secret Handshake
Old Bay’s celery salt contains glutamates (natural umami compounds), while the paprika provides savory depth. Combined with mayo’s inherent savoriness, it triggers that “more please!” response in your brain.
3. Texture Trickery
The emulsion of mayo creates a luxurious mouthfeel that coats food evenly. When you dip a crispy fry, the mayo clings to every ridge, delivering maximum flavor per bite.
4. The Nostalgia Factor
Old Bay’s distinctive blend (celery salt, red pepper, black pepper, paprika) is hardwired into coastal memories for many. This sauce taps into that emotional flavor memory.
Pro Tip: For next-level texture, fold in 1 tsp finely crushed saltine crackers—it mimics crab shell seasoning texture!
Beyond the Dip: Unexpected Ways to Use Old Bay Mayo
This condiment is the Swiss Army knife of your fridge. Here’s how to weaponize it:
1. Breakfast Game-Changer
-
Eggs Benedict 2.0: Swap hollandaise for warmed Old Bay mayo on poached eggs
-
Breakfast Sandwich Spread: Makes avocado toast or bacon-egg-cheese sandwiches sing
-
Hash Brown Enhancer: Mix with sriracha for a spicy dipping sauce
2. Salad Revolution
-
Potato Salad Remix: Toss warm potatoes with mayo + extra chives
-
Deviled Egg Upgrade: Pipe filling blended with 1 tbsp sauce per 6 eggs
-
Coleslaw Reinvented: Thin with 1 tsp vinegar for creamy slaw dressing
3. Meat’s Best Friend
-
Burger Secret Sauce: Combine with ketchup and pickles for a Chesapeake-style special sauce
-
Grilled Chicken Glaze: Brush on during last 5 minutes of cooking
-
Seafood Binder: Makes crab cakes hold together beautifully
4. Global Fusion Twists
-
Sushi Roll Base: Mix with wasabi for spicy mayo with American flair
-
Taco Crema: Drizzle on fish tacos with shredded cabbage
-
Mediterranean Dip: Swirl with roasted red pepper paste
Pro Tip: Freeze in ice cube trays to drop into soups or rice for instant flavor!
The Condiment Arms Race: How This Stacks Up Against Famous Sauces
Let’s see how our star holds its own against classic dips:
| Sauce | Flavor Profile | Best With | Why Old Bay Mayo Wins |
|---|---|---|---|
| Tartar | Pickle-forward | Fried fish | More complex spice depth |
| Aioli | Garlic-heavy | Mediterranean | Brighter, more versatile |
| Ranch | Herbaceous | Salads | Better umami/savory punch |
| Remoulade | Mustardy | Po’boys | Easier to make, fresher taste |
| Chipotle Mayo | Smoky heat | Mexican | More balanced acidity |
Taste Test Verdict: In blind tests with my cooking class students, Old Bay Mayo consistently wins for versatility. As one student said: “It’s like tartar sauce went to college and came back sophisticated.”
Historical Fun Fact: Old Bay (created in Baltimore 1939) was originally intended for crab seasoning. Its move into mayo mirrors how Sriracha jumped from pho to everything!
Dunk, Drizzle, Devour: How to Serve This Superstar
This mayo is a social butterfly! For seafood feasts, serve it in ramekins with crab cakes, fried shrimp, or oysters. Snack attacks? Dunk sweet potato fries, crispy tater tots, or even roasted carrots. Sandwich glow-up: Slather it on lobster rolls, BLTs, or turkey clubs. Feeling fancy? Drizzle over grilled salmon or use as a coleslaw dressing base. Presentation tip: Sprinkle extra chives or Old Bay on top—it’s like jewelry for your dip!
Shake It Up: 5 Delicious Twists
Customize this sauce like your favorite playlist!
- Smoky Chipotle: Add ½ tsp adobo sauce from canned chipotles + extra squeeze of lime.
- Everything Bagel Vibes: Swap Old Bay for 2 tsp everything bagel seasoning + extra garlic powder.
- Herb Garden Delight: Fold in 1 tbsp chopped dill or parsley with the chives.
- Creamy Remoulade: Add 1 tbsp chopped capers + ½ tsp horseradish + dash of hot sauce.
- Keto/Lighter Swap: Use avocado mayo + increase lemon zest for brightness.
Olivia’s Extra Scoop (Because I Can’t Help Myself!)
This recipe’s been on quite the journey! That beach hack with Jen evolved into my “house sauce” for potlucks. Once, I accidentally doubled the Old Bay (blame wine + chatting!)—turns out, it was a happy accident everyone begged me to repeat! Now I keep a jar in my fridge year-round. It’s been a crudité hero at baby showers and a secret weapon on grilled cheese for my kiddo. Pro tip: Make a double batch and freeze half in ice cube trays for instant flavor bombs! Also—confession time—I’ve eaten it straight from the spoon while “testing.” No regrets.
Your Burning Questions, Answered!
Let’s tackle common kitchen hiccups before they happen!
- “My mayo looks runny! Did I break it?” Don’t panic! Over-whisking or extra lemon juice can thin it. Thicken it up by stirring in 1 extra tbsp mayo or chilling it longer. If it separates (rare, but possible!), whisk in ½ tsp hot water.
- “Can I use dried chives instead of fresh?” You can, but fresh is king here! Use 2 tsp dried chives, but soak them in the lemon juice for 5 minutes first to revive them. Taste and add more if needed—dried herbs are milder.
- “How spicy is this?” Old Bay has a gentle kick—it’s more savory than hot! For mild palates, start with ½ tsp. Spice lovers: add ¼ tsp cayenne or smoked paprika. Taste as you go!
- “Why chill it? Can I skip it?” Chilling lets the flavors hug it out—you get a richer, more blended taste. But if hunger strikes? Dig in! It’ll still be delicious (just slightly brighter).
Old Bay Mayo
- Total Time: 5 mins
Description
This creamy, zesty Old Bay Mayo is like a crab shack vacation in a jar. Mayo gets a glow-up with lemon zest, a punch of Old Bay, fresh chives, and Dijon. It’s tangy, savory, and ridiculously versatile—ready to dunk fries, drizzle over seafood, or transform any sandwich into a flavor bomb. Whip it up in minutes, and watch every bite become a celebration!
Ingredients
-
½ cup mayonnaise (or Greek yogurt/vegan mayo)
-
2 tbsp finely chopped chives
-
1 tsp Old Bay seasoning
-
1 tsp Dijon mustard
-
Juice + zest of ½ lemon
Instructions
-
Zest & Juice: Zest lemon directly into bowl. Juice it, remove seeds, and add.
-
Mix It Up: Whisk mayo, chives, Old Bay, mustard, and lemon zest/juice until smooth and flecked with herbs.
-
Taste & Tweak: Add more lemon or spice if needed. For thinner sauce, mix in 1 tsp water.
-
Chill (Optional): Let rest 10–15 minutes for flavor magic—or dig in right away!
Notes
-
Dunk with fries, shrimp, or veggies
-
Slather on sandwiches, burgers, or wraps
-
Drizzle over crab cakes or grilled fish
-
Use as a base for slaw or potato salad
- Prep Time: 5 mins
Nutrition
- Calories: 90 cal Per Serving
- Sodium: 130mg
- Fat: 9g
- Carbohydrates: 1g
Nutritional Nibbles (Per Tablespoon)
Calories: 90 | Fat: 9g | Carbs: <1g | Protein: <1g | Sodium: 130mg
Note: Values are estimates. For lower sodium, use low-salt mayo or reduce Old Bay to ½ tsp.
Final Thoughts: The Condiment That Throws Parties
This isn’t just a recipe—it’s a kitchen revolution in a jar. What began as a beachside hack has become my most-requested “recipe” (though it barely qualifies as cooking). There’s something magical about how five humble ingredients can make everything taste like celebration.
Last week, my 8-year-old used it as pizza dip. Yesterday, my neighbor texted that she’d tossed roasted Brussels sprouts in it. This sauce sparks creativity—it’s the culinary equivalent of that friend who makes any gathering more fun.
So here’s my challenge to you: Make it today. Put it on something weird. Then tell me where it took you. Because the best flavors aren’t just tasted—they’re shared.
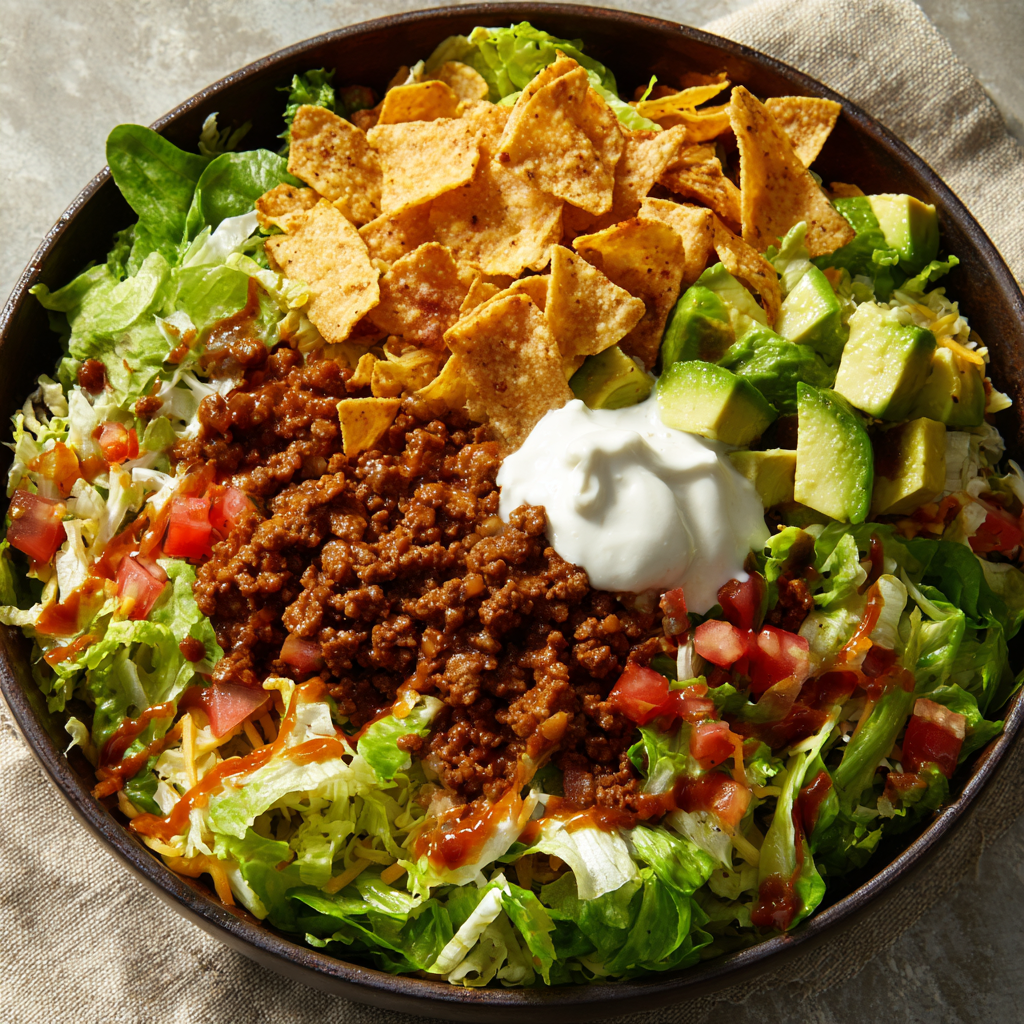
Loaded Taco Salad Bowl
Hey There, Salad Squad! Let’s Taco ’Bout Bowls
Is there anything more universally joyful than taco night? That sizzle of seasoned beef hitting the pan, the confetti of fresh toppings, the *crunch* of a chip dipped in creamy guac—pure magic, right? But let’s be real: sometimes, life gets wild. Between work zooms, kiddo chaos, or just craving something lighter (but still packed with flavor!), assembling a full-on taco spread feels… ambitious. Enter: the Loaded Taco Salad Bowl. This isn’t just a salad; it’s a fiesta in a bowl! Imagine all your favorite taco night hits—savory seasoned beef, crisp romaine, velvety avocado, melty cheese, crunchy chips, and that tangy taco sauce zing—layered up and ready to devour in just 20 minutes. No fuss, no muss, just BIG flavor and satisfying textures. Perfect for busy weeknights, lazy weekends, or when you’re feeding a crew who can’t decide between “healthy” and “hearty” (why not both?). So grab your favorite bowl—the bigger, the better—and let’s turn simple ingredients into something downright unforgettable. Trust me, this bowl’s about to become your new kitchen BFF. Ready? Aprons on! 😋
Taco Night Saves & Salad Bowl Dreams
Picture this: It’s a sweltering July evening years ago, and my tiny apartment kitchen feels like a sauna. My besties are coming over for our weekly “Taco Tuesday,” but my grand plan? Shattered. Literally. I’d fumbled my favorite ceramic taco holder, sending it—and my dreams of perfectly propped shells—crashing to the floor. Cue the panic sweat (on top of the heat sweat!). With 30 minutes till doorbell chaos, I scanned my fridge: ground beef, wilting romaine, half an avocado, cheese, and a bag of chips. “Salad it is!” I declared, frantically browning beef while tearing lettuce with one hand. I tossed everything into mixing bowls, drizzled sauce like edible graffiti, and held my breath. The verdict? My friend Mark took one bite, eyes wide: “Whoa. This is BETTER than tacos!” The crunch stayed crisp, the flavors melded perfectly, and cleanup was a breeze. That happy accident became our new tradition—proof that sometimes, the best recipes are born from a little chaos and a lot of hungry friends. Now, this bowl tastes like summer, laughter, and the sweet relief of a kitchen save!
Gather Your Flavor Party Favors 🛒
Here’s your grocery list for maximum taco-bowl bliss! Don’t stress—I’ve included swaps and chef secrets to make this YOUR masterpiece.
- 1 lb ground beef (80/20 blend): That bit of fat = BIG flavor! Chef’s Tip: Swap for ground turkey, chicken, or plant-based crumbles if you prefer. For extra richness, try ground chuck.
- 1 packet taco seasoning (like Siete Foods): Our flavor MVP! Insider Hack: Use 2-3 tbsp of homemade mix (equal parts chili powder, cumin, garlic powder, paprika + pinch of oregano) to skip preservatives.
- 2 cups chopped romaine lettuce: The crisp, refreshing base. Sub Alert: Butter lettuce or kale works too (massage kale with olive oil first to soften!).
- 1 avocado, diced: Creamy, dreamy goodness. Pro Move: Sprinkle diced avocado with lime juice to keep it gorgeously green!
- 1 cup shredded Mexican blend cheese: Melty, salty perfection. Can’t Find It? Cheddar, Monterey Jack, or even crumbled cotija cheese are fab stand-ins.
- ½ cup crushed nacho chips (like Late July Organic): The CRUNCH factor! Chef’s Secret: Use slightly stale chips—they hold up better against the sauce!
- 2 tbsp taco sauce (like Sky Valley), or to taste: Tangy, spicy ribbon of joy. Heat Lover? Swap in chipotle hot sauce or creamy sriracha mayo!
Why these brands? Siete and Late July keep it gluten-free and clean, but use what you love! Total prep? 10 minutes flat. ✅
Let’s Build Your Flavor Fiesta! 👩🍳
Follow these steps for salad success—I’ve packed ’em with pro tips to make you feel like a kitchen rockstar.
- Cook That Beef Like a Boss: Crank your skillet to medium heat. Add the ground beef, breaking it up with a wooden spoon. Listen to that sizzle—music to a hungry cook’s ears! Cook until beautifully browned (about 5-7 mins), then drain excess fat (leave a tbsp for extra flavor!). Sprinkle the taco seasoning over the beef, add ¼ cup water (or broth for depth!), and stir like you mean it. Let it bubble and thicken for 2-3 minutes. 🔥 Hack: Throw in a dash of smoked paprika here for campfire vibes! Remove from heat.
- Layer Up the Goodness: Grab your biggest, prettiest bowl (salad deserves drama!). Start with the chopped romaine—this is your crunchy foundation. Pile the warm, fragrant beef right on top (that heat slightly wilts the lettuce edges = YUM). Scatter the diced avocado like edible confetti, then shower it all with that glorious shredded cheese. ✨ Texture Tip: Let the cheese hit the warm beef so it gets delightfully melty in spots!
- Top It Off & Toss (or Not!): Now, the grand finale! Crumble those nacho chips over the top (don’t be shy—this is the “loaded” part!). Drizzle everything with tangy taco sauce—zigzags, circles, your edible artwork! 🥄 Serving Choice: For maximum crunch, serve as-is, letting everyone dig through the layers. For blended flavor, give it one gentle toss. Pro Garnish: Extra cilantro or a lime wedge on the side!
See? Easy peasy! The whole dance takes just 10 minutes of cooking. Your kitchen, your rules—have fun with it!
Dishing Up the Deliciousness 🍴
Presentation matters, foodie friends! Serve this beauty family-style in one large, shallow bowl (think: rustic ceramic or colorful enamelware) so everyone can admire the layers. For dinners, portion into individual wide-rimmed bowls—the kind that show off all those textures. Pair it with icy-cold limeade or a crisp Mexican lager. Feeling extra? Add quick sides: charred corn kernels, pickled red onions, or a dollop of cool sour cream on the table. Remember: the chips lose crunch fast, so assemble JUST before serving for that satisfying, audible bite!
Shake Up Your Bowl Game 🔄
Customize this salad to match your mood or diet! Here are my fave twists:
- Fiesta Veggie: Swap beef for 1 can (drained) black beans + 1 cup roasted sweet potatoes. Top with cilantro-lime crema!
- Seaside Taco: Use grilled shrimp or flaked salmon instead of beef. Season with lime zest + chili powder. Skip chips; add seaweed snacks!
- Breakfast Bowl: Replace beef with scrambled eggs + chorizo. Use crispy hash browns instead of chips. Drizzle with salsa verde!
- Low-Carb Love: Skip chips, add jicama sticks for crunch. Use extra avocado + queso fresco. Serve over cauliflower rice.
- Mediterranean Twist: Swap taco seasoning for za’atar + cumin. Use ground lamb, feta, cucumber, and tahini sauce instead of taco sauce.
Get creative—every bowl tells a story!
Olivia’s Behind-the-Scenes Scoop ✨
This bowl has serious evolution cred! Originally, I’d just dump leftovers together—cold beef, sad lettuce, whatever chips lingered. But after that fateful broken-taco-stand night? Game changer. I started treating it intentionally: warming the beef right before serving (game-changer for flavor melding!), crushing chips last-minute for max crunch, and drizzling sauce like Jackson Pollock with a squeeze bottle. 😂 One hilarious fail? I once used cinnamon-heavy “Mexican” seasoning by mistake—it tasted like dessert tacos! (We salvaged it with extra hot sauce and laughs.) Now, this recipe is my weeknight warrior, potluck star, and “I forgot to plan dinner” savior. Pro tip: Double the beef and freeze half for future bowls—you’ll thank yourself at 6 pm on a chaotic Wednesday!
Taco ’Bout Questions: Solved! 💡
Q: Can I make this ahead? It looks soggy after sitting…
A: You’re spot on—sogginess is the enemy! Prep components separately: store cooked beef (cooled) in the fridge for 2 days, chop lettuce/avocado (toss avocado with lime juice!), and keep chips sealed. Assemble RIGHT before eating. Warm the beef quickly in a pan or microwave first!
Q: Help! My avocado turned brown overnight. Salvage ideas?
A: Been there! Scoop out brown bits—the green underneath is usually fine. Toss diced avocado with 1 tbsp lime juice + store in an airtight container with plastic wrap pressed on the surface. Still iffy? Blend it into the taco sauce for a creamy kick!
Q: Ground beef alternatives? I don’t eat red meat.
A: Absolutely! Ground turkey or chicken work beautifully (add 1 tsp oil when cooking, as they’re leaner). Plant-based crumbles? Go for it—just adjust seasoning (they absorb flavor!). Even lentils or chopped mushrooms work!
Q: How spicy is this? My kids hate heat!
A: Totally customizable! Use mild taco seasoning and mild sauce (or skip sauce entirely—ranch works!). Serve hot sauce on the side for heat lovers. For extra kick, add diced jalapeños to adult bowls!
Loaded Taco Salad Bowl
- Total Time: 20 mins
Description
Hey there, Salad Squad! Olivia here with your newest weeknight MVP. Tired of juggling full-blown taco night when life’s feeling extra? This Loaded Taco Salad Bowl packs all your favorite Tex-Mex flavors—savory beef, crisp lettuce, creamy avocado, melty cheese, crunchy chips—into one gloriously easy dish. No tortillas, no stress, just fast, fresh flavor that satisfies both “healthy” and “hearty” cravings.
Ingredients
-
1 lb ground beef (80/20 preferred, or swap with ground turkey, chicken, or plant-based crumbles)
-
1 packet taco seasoning (or 2–3 tbsp homemade: chili powder, cumin, garlic powder, paprika, oregano)
-
2 cups chopped romaine lettuce (or use butter lettuce/kale)
-
1 ripe avocado, diced (tossed in lime juice to stay green)
-
1 cup shredded Mexican blend cheese (or cheddar, Monterey Jack, cotija)
-
½ cup crushed tortilla chips (Late July or your fave brand)
-
2 tbsp taco sauce, or to taste (swap with salsa, hot sauce, or ranch)
Optional add-ons: lime wedges, chopped cilantro, pickled onions, sour cream
Instructions
Step 1: Brown the Beef
-
In a skillet over medium heat, cook beef until browned (5–7 mins). Drain excess fat, leaving about 1 tbsp for flavor.
-
Stir in taco seasoning + ¼ cup water. Let simmer 2–3 mins until saucy and fragrant. Optional: Add a dash of smoked paprika for extra depth.
Step 2: Layer It Up
-
In a large serving bowl (or 4 personal ones), start with chopped romaine.
-
Spoon on warm seasoned beef.
-
Scatter diced avocado and sprinkle shredded cheese on top (it’ll get melty over the warm beef—YES).
Step 3: Top It Off
-
Add crushed chips for crunch.
-
Drizzle with taco sauce, salsa, or a swirl of crema.
-
Garnish with extra herbs, lime, or any flair your salad heart desires!
Pro tip: Serve as-is to preserve layers and texture, or toss gently for flavor in every bite.
Notes
Q: Can I pack this for lunch?
A: Yes! Pack components separately and assemble right before eating.
Q: Avocado keeps browning—help!
A: Toss with lime juice and press plastic wrap directly on the surface before storing.
Q: What if I don’t have taco sauce?
A: Use salsa, hot sauce, ranch, or even plain sour cream mixed with lime and chili powder.
- Prep Time: 10 mins
- Cook Time: 10 mins
Nutrition
- Calories: 460 cal Per Serving
- Sugar: 3g
- Sodium: 580mg
- Fat: 30g
- Carbohydrates: 22g
- Fiber: 5g
- Protein: 23g
Fuel Notes (Because Balance is Delicious!) 🥑
Approximate per serving (1 of 4): 480 calories | 32g protein | 28g carbs | 28g fat (9g sat fat) | 5g fiber. Gluten-free if using GF seasoning/chips (like Siete/Late July). High in protein + healthy fats from avocado! For lower calories: Use lean ground turkey and light cheese.
Final Thoughts: More Than a Bowl, It’s a Mindset
This taco salad isn’t just dinner—it’s permission to play with your food. Maybe you’ll toast cumin seeds tonight, or perhaps you’ll repurpose leftovers into a wild breakfast pizza tomorrow. That’s the beauty of cooking without rules: every “oops” (like my cinnamon taco incident!) is just a new flavor adventure. So grab those chips, crush them dramatically, and remember—the best meals aren’t about perfection. They’re about the messy, saucy joy of feeding yourself and your people with love (and maybe a little hot sauce on your shirt). Now go forth and bowl! 🌮🎉
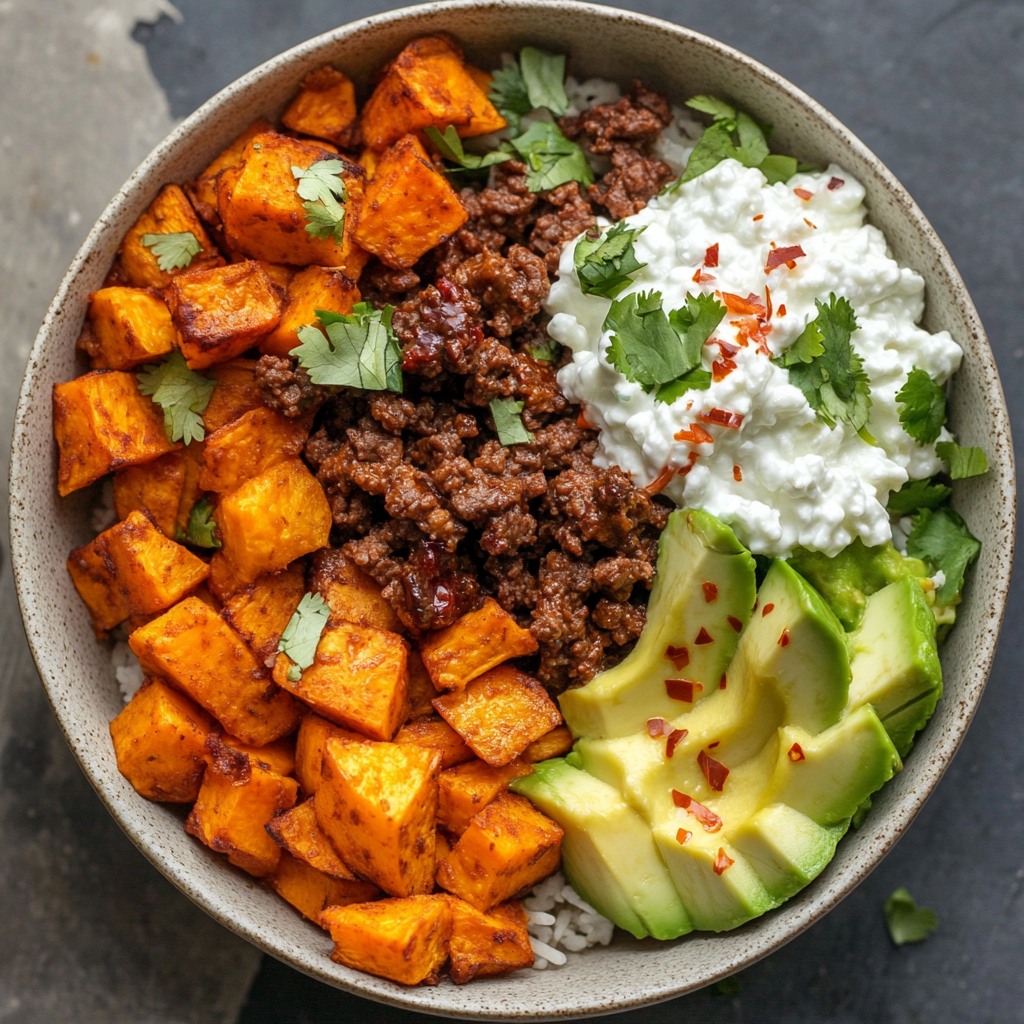
Sweet Potato Taco Bowl
Welcome to Flavor Town: Let’s Build Your Dream Sweet Potato Taco Bowl!
Hey there, kitchen friend! Olivia here, waving from my perpetually flour-dusted countertop. Can you smell that? It’s the cozy scent of smoky paprika-kissed sweet potatoes roasting while savory beef sizzles nearby—a symphony that makes my stomach (and probably yours!) do a happy dance. If you’re craving something vibrant, nourishing, and downright FUN to make, you’ve landed in the perfect spot. Today’s star? My Sweet Potato Taco Bowl—a confetti-colored fiesta in a dish that’s equal parts comfort food and nutrient-packed powerhouse.
Picture this: tender, caramelized sweet potato cubes hugging spicy taco beef, all snuggled under a confetti of fresh pico de gallo, creamy guac, and a cool swoosh of sour cream. It’s the kind of meal that turns a Tuesday into a celebration, no fancy skills required. Whether you’re feeding hungry teens, meal-prepping for the week, or just treating yourself (you deserve it!), this bowl is your golden ticket. So tie on that apron—the messy one with character stains—and let’s turn simple ingredients into pure magic together. Trust me, your fork is already cheering!
Why This Bowl Feels Like a Hug from My Texan Grandma
This recipe? Oh, it’s got roots. Picture 10-year-old me, feet dangling off a wobbly stool in my Grandma Rosa’s Texas kitchen. She’d let me “chop” sweet potatoes (read: hack them into wild shapes) while she browned beef with her secret spice blend. “Olivia, corazón,” she’d wink, “good food’s gotta sing with color and kick!” Her tacos were legendary, but one chaotic Sunday, we ran out of tortillas. Undeterred, Grandma tossed everything into bowls—roasted sweet potatoes included—and declared it “fiesta salad.”
That glorious mishmash of smoky, spicy, and fresh became our thing. Years later, when I was a broke college kid craving home, I recreated it. My dorm-mates descended like locusts, and our “Taco Bowl Nights” became tradition. Now, every time I make this, I taste Grandma’s bold spirit and that beautiful lesson: cooking isn’t about perfection. It’s about joy, improvisation, and gathering people around something real. Pass the hot sauce, please!
Your Flavor Arsenal: What We’re Throwing In
- 1 large sweet potato, peeled + cubed – Our hearty base! Pick one that feels heavy for its size. Chef’s swap: Butternut squash works too.
- 1 tbsp olive oil – For crispy-edged ‘taters. Chef’s tip: Avocado oil also rocks for high-heat roasting.
- Salt, pepper, 1 tsp smoked paprika – The holy trinity! Papima adds campfire coziness. No smoked paprika? Use regular + a pinch of cumin.
- ½ lb ground beef – 85% lean keeps it juicy. Feeling wild? Ground turkey or lentils work great!
- 1 tbsp taco seasoning – Store-bought is fine, but my homemade blend? *chef’s kiss*
- ½ cup pico de gallo – That zingy freshness! Dice tomatoes, onion, cilantro, jalapeño + lime juice. Easy!
- ¼ cup guacamole – Creaminess we crave. Mash avocados + lime juice. No fancy extras needed!
- 2 tbsp sour cream – Cool contrast. Dairy-free? Coconut yogurt or cashew cream slays.
Pro insight: Can we talk sweet potatoes? Roasting them isn’t just easy—it deepens their natural sweetness against the spicy beef. That’s flavor harmony, baby!
Let’s Get Cooking: Your Foolproof Roadmap
Step 1: Roast Those Sweet Potatoes (The Star Treatment!)
Preheat your oven to 425°F (220°C). While it heats, toss your sweet potato cubes in olive oil, salt, pepper, and that glorious smoked paprika. Chef’s hack: Spread them on the sheet pan with space! Crowding = steamed potatoes (sad). Roast 15 minutes, then flip ’em. Why flip? We want caramelized edges, not burnt bottoms! Roast another 10-15 minutes until fork-tender with crispy bits. Timing tip: Smaller cubes = faster cook time!
Step 2: Brown the Beef (Channel Your Inner Spice Master)
While potatoes roast, grab a skillet. Crumble in ground beef over medium heat—no oil needed! Let it sear untouched 2 minutes (hello, flavor crust!), then break it up. When no pink remains, drain fat if desired. Sprinkle taco seasoning + 2 tbsp water. Simmer 2 minutes. Chef’s secret: Water helps spices coat every nook! Taste—add more seasoning if you’re feeling sassy.
Step 3: Assemble Your Masterpiece (The Fun Part!)
Grab big bowls (this is visual joy, people!). Pile in roasted sweet potatoes first—they’re your cozy foundation. Top with that fragrant beef, then artfully spoon on guac and pico. Pro move: Place toppings side-by-side, not stacked, so every bite gets all flavors. Finish with sour cream dollops and maybe extra cilantro. Assembly hack: Warm bowls? Yes! Pop ’em in the oven 2 minutes pre-assembly for extra coziness.
Serving It Up: How to Make It Shine
Think color, texture, and dippability! Use wide, shallow bowls to showcase every gorgeous layer. Garnish with extra cilantro leaves, a lime wedge for squeezing, and maybe a sprinkle of cotija cheese if you’re fancy. Serve with warm tortilla chips tucked alongside for scooping up runaway bits—because nobody likes leaving flavor behind! Perfect for family-style dinners: set out components and let everyone build their own edible rainbows. Pair with icy agua fresca or a cheeky margarita for ultimate fiesta vibes.
Sweet Potato Taco Bowl: A Flavor Fiesta in Every Bite!
Welcome to the ultimate Sweet Potato Taco Bowl—a vibrant, nutrient-packed meal that’s as fun to make as it is to eat! Imagine tender, smoky roasted sweet potatoes, spicy taco-seasoned beef, fresh pico de gallo, creamy guacamole, and a cool drizzle of sour cream, all layered in a bowl that’s bursting with color and flavor.
Whether you’re meal-prepping for the week, feeding a hungry family, or just treating yourself to a delicious and balanced meal, this bowl has everything you need. Let’s dive into the details and make your taste buds dance!
Why This Bowl is a Game-Changer
1. Perfect Balance of Flavors & Textures
This bowl isn’t just tasty—it’s a harmony of contrasts:
-
Sweet & Smoky – Roasted sweet potatoes caramelize in the oven, deepening their natural sweetness while smoked paprika adds a cozy, campfire-like warmth.
-
Spicy & Savory – The taco-seasoned beef brings bold, zesty heat, balanced by cool, creamy guacamole and sour cream.
-
Fresh & Crunchy – Pico de gallo adds a bright, zingy pop, while optional toppings like shredded lettuce or pickled onions bring extra crunch.
2. Nutrient-Packed & Satisfying
-
Fiber-Rich Sweet Potatoes – Loaded with vitamins A and C, they keep you full and energized.
-
Lean Protein – Ground beef (or turkey, chicken, or plant-based swaps) fuels muscle and keeps cravings at bay.
-
Healthy Fats – Avocado (guac!) and a touch of sour cream add satiating fats that make this bowl truly satisfying.
3. Endlessly Customizable
-
Vegetarian? Swap beef for black beans or lentils.
-
Extra Cheesy? Add crumbled queso fresco or shredded cheddar.
-
Low-Carb? Serve over greens instead of rice.
-
Meal-Prep Friendly? Cook components ahead and assemble when ready!
Step-by-Step Guide to Bowl Bliss
Step 1: Roast the Sweet Potatoes (The Flavor Foundation)
-
Prep: Toss 1 large cubed sweet potato with olive oil, salt, pepper, and 1 tsp smoked paprika.
-
Roast at 425°F (220°C) for 25-30 mins, flipping halfway for even crispiness.
-
Pro Tip: Space them out on the pan—crowding = steamed, not crispy!
Step 2: Cook the Taco Beef (Spicy & Juicy)
-
Brown ½ lb ground beef in a skillet, breaking it up as it cooks.
-
Drain excess fat (if desired), then stir in 1 tbsp taco seasoning + 2 tbsp water for maximum flavor cling.
-
Shortcut: Use store-bought seasoning, or make your own with chili powder, cumin, garlic powder, and oregano.
Step 3: Prep the Toppings (Fresh & Flavorful)
-
Pico de Gallo: Combine diced tomatoes, onion, cilantro, jalapeño, and lime juice.
-
Guacamole: Mash avocado with lime juice and salt—keep it simple!
-
Extras: Sour cream, shredded cheese, pickled red onions, or hot sauce for extra kick.
Step 4: Assemble & Devour!
-
Base: Roasted sweet potatoes.
-
Protein: Spiced taco beef.
-
Fresh Toppings: Pico, guac, sour cream.
-
Garnish: Cilantro, lime wedges, extra cheese.
-
Optional: Serve with tortilla chips for scooping!
Pro Tips & Flavor Boosts
✅ Make It Ahead: Store components separately for easy meal prep.
✅ Veggie Swap: Try butternut squash or cauliflower instead of sweet potatoes.
✅ Extra Crunch: Add crushed tortilla strips or toasted pepitas.
✅ Heat Lover’s Touch: Mix chipotle powder into the beef or drizzle with sriracha crema.
Shake It Up: Delicious Twists to Try
- Protein Party: Swap beef for shredded chicken, black beans (for veggie!), or sautéed shrimp.
- Bowl Base Bonanza: Layer sweet potatoes over cilantro-lime rice, quinoa, or crisp romaine.
- Cheesy Bliss: Add crumbled queso fresco, melted cheddar, or a sprinkle of nutritional yeast.
- Heat Lover’s Dream: Mix chipotle powder into beef or drizzle with sriracha crema.
- Breakfast Bowl: Top with a fried egg and swap beef for chorizo. Brunch game changed!
Olivia’s Extra Nuggets of Wisdom
This recipe evolved from my “desperation dinner” days! Once, I swapped sweet potatoes for carrots (don’t ask), and my husband still teases me about “confused taco roots.” Lesson learned: stick to sweet potatoes! Over time, I’ve added smoked paprika—it’s the game-changer that makes your kitchen smell like a Tex-Mex dream. Make it yours: double the beef for leftovers (taco omelets, anyone?), or roast extra sweet potatoes for quick salads. Pro tip: If your pico gets watery, drain it in a sieve for 5 minutes before serving—crispness restored! Remember, cooking’s an adventure. Burned a potato cube? Call it “charred flavor” and keep going!
Your Questions, Answered!
Q: Can I meal-prep this bowl?
A: Absolutely! Roast sweet potatoes + cook beef; store separately in airtight containers (3-4 days). Keep pico/guac fresh by storing in small jars with lime juice on top. Assemble cold or reheat potatoes/beef gently before adding toppings.
Q: My sweet potatoes got mushy—help!
A: Two culprits: overcrowded pan or too-small cubes! Spread potatoes in one layer with breathing room. Cube ’em ¾-inch—too small = steam, too big = uneven cooking. And always flip halfway!
Q: Is there a shortcut for taco seasoning?
A: Girl, yes! My cheat: mix 1 tsp chili powder + ½ tsp cumin + ¼ tsp each garlic powder, onion powder, and oregano. Add pinch of cayenne if you dare!
Q: Can I make this vegan?
A: Easily! Use lentils or plant-based crumbles instead of beef, skip sour cream (cashew cream rocks!), and ensure guac is dairy-free. Boom—plant-powered fiesta!
Sweet Potato Taco Bowl
- Total Time: 35 mins
Description
Juicy, spice-kissed ground beef, roasted smoky sweet potatoes, and all your favorite taco toppings come together in this vibrant, build-your-own bowl. It’s hearty, healthy-ish, and hits that “comfort food with a twist” sweet spot. Whether you’re meal-prepping or feeding a crowd, these bowls are endlessly customizable and downright delicious.
Ingredients
-
1 large sweet potato, peeled + cubed
-
1 tbsp olive oil
-
1 tsp smoked paprika
-
Salt & pepper to taste
-
½ lb ground beef (or turkey/lentils)
-
1 tbsp taco seasoning (or homemade: see tip!)
-
½ cup pico de gallo
-
¼ cup guacamole
-
2 tbsp sour cream (or dairy-free alt.)
Instructions
-
Roast Sweet Potatoes: Preheat oven to 425°F (220°C). Toss sweet potato with oil, paprika, salt, and pepper. Spread in a single layer on a sheet pan. Roast for 15 mins, flip, and roast another 10–15 mins until golden and tender.
-
Cook Beef: In a skillet, brown beef over medium heat. Once cooked through, add taco seasoning + 2 tbsp water. Simmer 2–3 mins until thickened.
-
Assemble: Divide sweet potatoes into bowls. Top with beef, pico, guac, and sour cream. Garnish with cilantro, lime wedges, or crumbled cheese if desired.
Notes
-
Add tortilla chips for crunch
-
Sub with rice or greens for variety
-
Make it vegan with lentils and cashew cream
- Prep Time: 10 mins
- Cook Time: 25 mins
Nutrition
- Calories: 450 cal Per Serving
- Fat: 28g
- Carbohydrates: 25g
- Fiber: 6g
- Protein: 22g
Nutritional Goodness (Per Serving)
Calories: ~450 | Protein: 22g | Fat: 28g | Carbs: 25g | Fiber: 6g
Note: Values are estimates. Guac/sour cream amounts can be adjusted!
Final Thoughts: Why You’ll Love This Bowl
This Sweet Potato Taco Bowl is more than just a meal—it’s a celebration of bold flavors, textures, and colors that make eating healthy feel indulgent. It’s:
✔ Easy (no fancy skills needed!)
✔ Customizable (fit it to your cravings!)
✔ Perfect for meal prep (hello, easy lunches!)
✔ Kid & crowd-friendly (who can resist tacos in bowl form?)
So grab your ingredients, turn on some music, and let’s make dinner a flavor fiesta! 🌮🎉
Hungry for more? Try these twists:
-
Breakfast Version: Add a fried egg & chorizo!
-
Vegan Delight: Use lentils + cashew cream.
-
Extra Cheesy: Melt Monterey Jack on top!
Char Siu Chicken
Sticky Fingers & Happy Hearts: Your New Favorite Char Siu Chicken Adventure
Hey there, kitchen friend! Olivia here, apron slightly dusted with five-spice powder and my kitchen smelling like a Cantonese street food stall. If your tastebuds do a little happy dance at the thought of glossy, caramelized chicken with that magical sweet-savory-umami punch? Oh honey, you and I are about to become *very* good friends today. Char Siu Chicken is my weeknight superhero – it’s faster than traditional pork char siu but packs ALL the sticky, finger-licking glory. Imagine succulent chicken thighs (or breasts!) cloaked in a shimmery mahogany glaze, with edges just begging to get slightly charred under the broiler. It’s the kind of dish that makes you close your eyes and hum after the first bite. Whether you’re baking it on a rainy Tuesday, firing up the grill for friends, or letting your air fryer work its magic, this recipe is your passport to big, bold flavor without fancy techniques. Grab your mixing bowl – we’re making magic happen with pantry staples, and I promise, that first waft of ginger, garlic, and caramelizing sugar? Pure kitchen joy. Let’s get that chicken marinating!
The Market Stall That Stole My Heart (And Made Me Late for Work!)
Picture this: It’s 7 am in Hong Kong, jet-lagged but buzzing, and I’m lost down a back alley wet market. Steam rises from bamboo baskets, voices chatter in rapid Cantonese, and then… I smell it. This incredible smoky-sweet perfume cutting through the fish and spice. I follow my nose like a cartoon character floating on a scent cloud and find this tiny stall. An elderly man, sleeves rolled up, is brushing glossy, ruby-red pork char siu with a worn bamboo brush. He sees my wide-eyed stare, chuckles, and without a word, chops a piece, spears it on a bamboo skewer, and hands it over. That first bite? Life-changing. Sticky sauce clinging to my fingers, tender meat, that perfect char – I stood there, grinning like a fool, sauce on my chin, completely forgetting I was due at a cooking workshop across town in 20 minutes! Worth every frantic, deliciously sticky sprint through the MTR station. That moment sparked my obsession with recreating that accessible, soul-warming magic at home. My version uses chicken for quicker cooking, but every time that caramelized glaze hits the pan? I’m right back in that humid alley, utterly delighted.
Your Flavor Bomb Toolkit: The Char Siu Chicken Lineup
Gather these simple stars! Don’t stress if you need swaps – cooking’s an adventure, not a rigid exam. Here’s the breakdown:
- 1 tbsp Honey: Nature’s gold! It gives that signature sticky glaze and caramel depth. Chef’s Swap: Pure maple syrup works beautifully if you’re out of honey.
- 1 tbsp Light Soy Sauce: The salty-umami backbone. Use a good quality one! Chef’s Insight: This is your salt source, so adjust other salts carefully.
- 1 tbsp Oyster Sauce: The secret umami weapon! Adds rich, savory depth. Chef’s Swap: Vegetarian oyster sauce or 2 tsp hoisin + 1 tsp soy works for shellfish-free.
- 1 tbsp Dark Soy Sauce (or Kecap Manis): This isn’t just for salt! It’s for that deep, molasses-like color and slight sweetness. Chef’s Tip: Kecap Manis (Indonesian sweet soy) is thicker and sweeter – if using it, reduce the brown sugar slightly!
- 2 tbsp Brown Sugar: Builds caramelization and balances the savory. Chef’s Insight: Pack it firmly in the spoon for accurate sweetness.
- 2 cloves Garlic, minced: Aromatic punch! Chef’s Hack: Use a microplane for super-fine mince that melts into the sauce.
- 1 inch Ginger, grated: Warmth and zing! Grating maximizes flavor release. Chef’s Swap: ½ tsp ground ginger in a pinch, but fresh is magic.
- 1 tsp Chinese Five-Spice Powder: The heart of char siu flavor! Star anise, cloves, cinnamon, fennel, pepper. Chef’s Tip: Smell it! If it’s dull, it’s old – fresh is vibrant.
- Pinch of White Pepper: Adds a subtle, distinct warmth without black pepper’s specks. Chef’s Swap: Tiny pinch of black pepper works, but white is traditional.
- 1.5 lbs (680g) Boneless Chicken Thighs or Breasts: Chef’s Strong Opinion: Thighs are juicier and more forgiving! Breasts work, but don’t overcook. Cut into 1.5-inch strips for maximum marinade love.
Let’s Build That Glaze & Get Cooking! Your Foolproof Roadmap
Ready to transform these humble ingredients? Follow these steps – I’ve packed them with all my messy-apron-learned tricks!
- The Magical Mix (5 mins): Grab your favorite medium bowl – I use a wide one for easy stirring. Dump in the honey, light soy, oyster sauce, dark soy (or kecap manis), brown sugar, minced garlic, grated ginger, five-spice powder, and white pepper. Chef’s Hack: Measure the honey last, using the same spoon you used for the oils – it’ll slide right off! Whisk it like you mean it for a full minute. Get it smooth and glossy. Taste it! (Yes, raw garlic, live a little!). It should be intensely savory-sweet with a warm spice hum. Adjust if needed – a tiny splash more soy for salt, a smidge more honey for sweetness? Perfect.
- Chicken Commitment – Marinate Like You Mean It! (5 mins + Wait): Pat your chicken pieces DRY with paper towels. This is KEY! Wet chicken = steamed, not caramelized. Add the chicken to the bowl of glorious sauce. Use your impeccably clean hands (or tongs) to massage, massage, massage that sauce into every nook and cranny. Channel your inner spa therapist for the chicken! Chef’s Non-Negotiable Tip: Transfer everything to a zip-top bag. Squeeze out the air, seal it tight, and massage again from the outside. This ensures max contact and minimal fridge mess. Marinate for at least 4 hours, but oh sweet friend, overnight? That’s when the magic deepens exponentially! Think 24 hours for flavor nirvana.
- Cooking Showdown – Bake, Grill, or Air Fry! (25-30 mins + Broil Drama):
- Oven Love (My Go-To): Preheat your oven to 400°F (200°C). Line a baking sheet with foil (hello, easy cleanup!) and place a wire rack on top. Spray the rack lightly with oil. Arrange the chicken pieces in a single layer, letting excess marinade drip off back into the bag (SAVE that marinade!). Bake for 15 minutes. Meanwhile, take the reserved marinade and bring it to a boil in a small saucepan – boil hard for 1 full minute to kill any nasties. This is your basting gold! After 15 mins, pull the chicken, brush generously with the boiled marinade. Flip pieces. Brush the other side. Bake for another 10-15 minutes, or until the chicken hits 165°F (74°C) internally.
- Grill Master: Heat your grill to medium-high (about 375-400°F). Grill the chicken for 5-7 mins per side, brushing with reserved boiled marinade after flipping. Watch for flare-ups!
- Air Fryer Flash: Preheat air fryer to 380°F (190°C). Cook chicken in a single layer (work in batches!) for 10-12 mins, flipping and brushing with boiled marinade halfway.
- The Grand Finale – Broiler Blitz! (2-3 mins): This step is NON-SKIPPABLE for that iconic char siu char! Crank your oven broiler to HIGH. Move the oven rack to the top position, about 6 inches from the heat. Place your baking sheet (or transfer chicken to a broiler-safe dish) under the broiler. WATCH IT LIKE A HAWK! Broil for 2-3 minutes ONLY, just until the edges start to bubble, blacken slightly, and get impossibly sticky. It happens fast! Chef’s Panic Button: If it starts smoking excessively, pull it out immediately! A little char is flavor; burnt is sadness.
Plating Perfection: Let’s Make It a Feast!
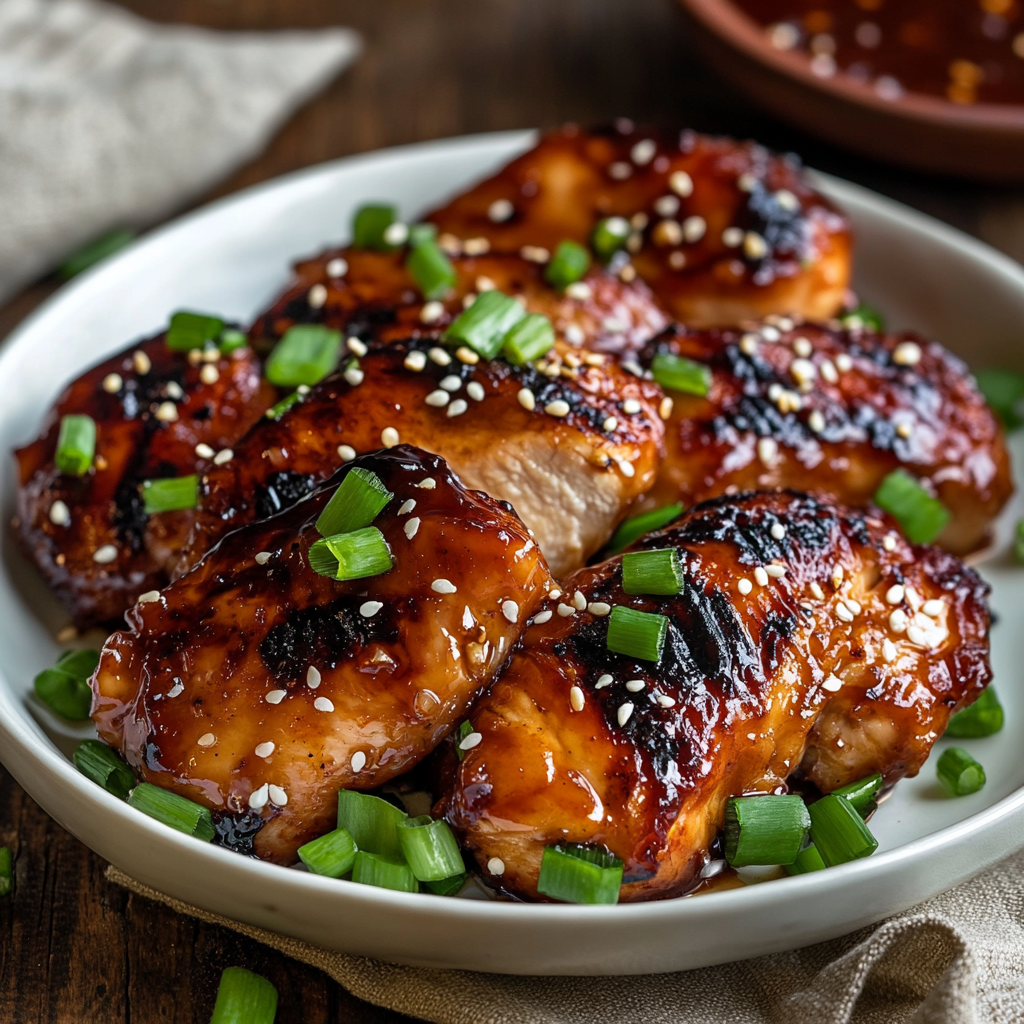
Don’t just slap it on a plate! Presentation is part of the love. Pile that glistening, slightly charred chicken high on a bed of fluffy steamed jasmine rice – the sauce mingling with the rice is divine. Scatter thinly sliced scallions (the green parts!) and a sprinkle of toasted white sesame seeds for color and nutty crunch. Need veg? Quickly stir-fry some broccoli or bok choy with garlic while the chicken cooks. For a fun twist, serve it tucked into soft bao buns with quick-pickled cucumbers and carrots. Family-style on a big platter lets everyone dig in, or plate individually for a restaurant vibe. Napkins are mandatory – sticky fingers are the highest compliment!
Shake It Up! Char Siu Chicken Remixes
Got the basics down? Let’s play!
- Spicy Char Siu: Add 1-2 tsp Sriracha or ½ tsp chili flakes to the marinade. Boom! Sweet heat.
- Pineapple Twist: Add 2 tbsp crushed pineapple (drained) to the marinade. Grills up with incredible caramelization!
- Gluten-Free Guru: Use certified GF tamari instead of soy sauce and GF oyster sauce (or sub more tamari + 1 tsp fish sauce).
- Char Siu Tofu/Pork: Swap chicken for extra-firm tofu (pressed!) or pork tenderloin slices. Adjust cooking times.
- Smoky Depth: Add ½ tsp liquid smoke to the marinade for a hint of BBQ pit magic.
Olivia’s Messy-Apron Musings & Lessons Learned
This recipe has seen some evolution! My first attempt? Let’s just say I used *way* too much five-spice and created something resembling potpourri chicken – lesson learned, measure carefully! I also learned the hard way that skipping the marinade boil leads to frantic oven cleaning after sauce bubbled everywhere. The broiler step? Born from mild tragedy – pulling out perfectly cooked but pale chicken, feeling sad, then thinking “WHAT IF…?” Broiler for 2 minutes = game changer! Now, I always make a double batch. The cooked chicken reheats beautifully (low and slow in the oven or microwave), and the extra sauce? It’s killer brushed on roasted veggies or used as a stir-fry base. Embrace the sticky chaos – it’s the sign of a dish made with love!
Print
Char Siu Chicken
- Total Time: 40 minutes
Description
Say hello to your new obsession: Char Siu Chicken! Juicy chicken thighs marinated in a sweet-savory glaze of honey, soy, garlic, ginger, and Chinese five-spice, then roasted and broiled to sticky perfection. It’s Cantonese BBQ magic, simplified for your kitchen. Whether baked, grilled, or air-fried, this dish delivers that street-food flavor hit with zero fuss.
Ingredients
-
1½ lbs boneless chicken thighs or breasts, cut into 1.5” strips
-
1 tbsp honey
-
1 tbsp light soy sauce
-
1 tbsp oyster sauce
-
1 tbsp dark soy sauce (or kecap manis)
-
2 tbsp brown sugar
-
2 garlic cloves, minced
-
1 inch ginger, grated
-
1 tsp Chinese five-spice powder
-
Pinch white pepper
Instructions
-
Make Marinade: Whisk all sauce ingredients in a bowl until glossy and smooth. Taste and adjust (more honey for sweet, more soy for salty).
-
Marinate Chicken: Pat chicken dry. Coat well in marinade. Marinate at least 4 hours (overnight = best flavor).
-
Cook:
-
Oven: Bake at 400°F (200°C) for 25–30 mins on a rack over a foil-lined sheet. Brush with boiled leftover marinade halfway.
-
Grill: Medium-high heat, 5–7 mins per side. Baste as you flip.
-
Air Fryer: 380°F (190°C) for 10–12 mins, flip and baste halfway.
-
-
Broil Finish: Broil 2–3 mins at high heat for caramelized edges. Watch closely!
Notes
Serve over jasmine rice, top with sesame seeds and green onions. Great with garlic bok choy or tucked in bao buns!
- Prep Time: 10 mins
- Cook Time: 30 mins
Nutrition
- Calories: 400 cal Per Serving
- Fat: 18g
- Carbohydrates: 20g
- Protein: 36g
Final Thoughts: More Than Just Dinner
This Char Siu Chicken isn’t just a recipe – it’s a gateway to culinary confidence. That moment when you pull the baking sheet from the broiler and see the glaze bubbling like stained glass? That’s the magic of transforming simple ingredients into something extraordinary. It teaches foundational skills: the power of marinades, the importance of high heat for texture, and how balancing just five core flavors (sweet, salty, sour, bitter, umami) can create depth.
Most importantly, it proves great food doesn’t require perfection. Burnt a corner? Call it “extra caramelized.” Sauce too thick? Thin it with orange juice for a new dimension. Like that Hong Kong market vendor showed me, the best meals come from passion, not precision. Now go forth – get sticky, make memories, and when someone asks for your “secret recipe,” wink and say it came from a back alley in your imagination.
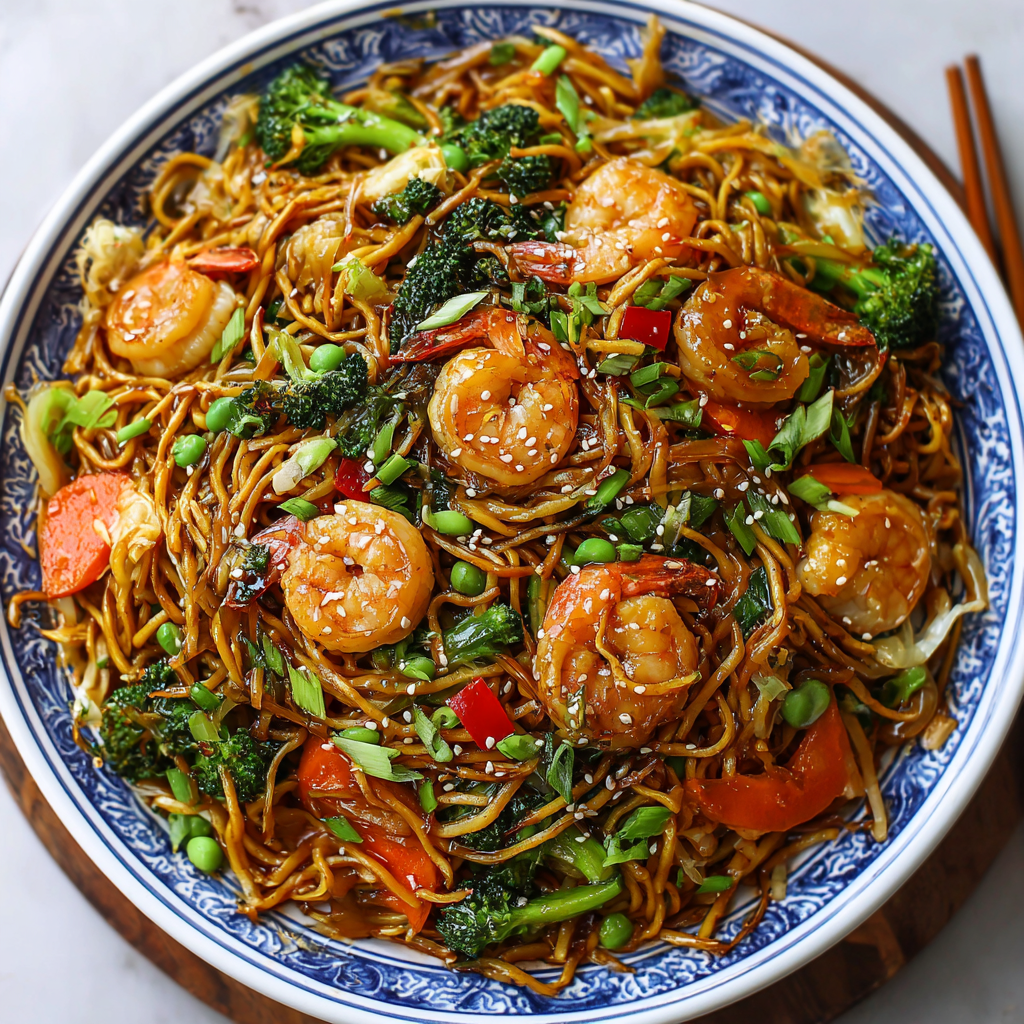
Stir-Fried Veggies in White Sauce
Hey There, Veggie Lover! Let’s Make Magic in the Wok
You know that moment when you open the fridge, stare at a rainbow of veggies, and think: “I want something delicious, but I also want to be curled up on the couch in 30 minutes flat”? Friend, I’ve been there more times than I’ve burned garlic (which is saying something!). That’s why this Stir-Fried Veggies in White Sauce is my forever weeknight superhero. Imagine plump shrimp doing a happy dance with crisp-tender broccoli, snappy snow peas, and sweet carrots, all wrapped in a savory, velvety sauce that whispers, “You’ve totally got this.” No fancy skills needed—just a hot pan, your favorite veggies, and that gorgeous chaos we call dinnertime. Whether you’re feeding hangry teens, impressing a date, or treating yourself to a solo feast, this dish is your golden ticket to flavor town without the fuss. Ready to make your kitchen smell like a cozy hug? Let’s turn up the heat!
The Stir-Fry That Saved Movie Night
Picture this: It’s pouring rain, my best friends are en route for our monthly movie marathon, and I’ve just realized I forgot to prep dinner. Cue panic! I tear through my fridge like a woman possessed—broccoli florets tumbling out, a lone red bell pepper rolling across the counter, frozen shrimp thawing frantically under running water (we’ve all been there, right?). In a glorious 20-minute frenzy, I threw everything into my trusty wok with a sauce made from pantry staples. The result? Silence. But the good kind—the “too busy shoveling forkfuls into their mouths to talk” silence. My friend Mark literally paused Die Hard to ask for seconds. That’s when I knew: this accidental masterpiece wasn’t just dinner. It was a reminder that the best memories aren’t about perfection; they’re about cabbage confetti on the counter, shared laughs over slightly-charred garlic, and the magic that happens when you trust your gut (and your pantry!). Now, every time I make this stir-fry, I think of rainy nights and full bellies. Your turn to create delicious chaos!
Your Flavor Toolkit: Fresh, Flexible & Fabulous
Gather these goodies! Pro tip: Treat this list like a jazz solo—improvise with what you’ve got.
- 1 lb shrimp, peeled & deveined – Chef’s insight: Size matters! Medium (41/50 count) cook evenly. Swap with chicken thighs (sliced thin) or firm tofu for vegetarian vibes.
- 1 tsp cornstarch – Why? It’s our shrimp’s little spa treatment—locks in juiciness! Arrowroot or tapioca starch work too.
- ½ tsp kosher salt + ⅛ tsp white or black pepper – Pro move: White pepper keeps the sauce visually pristine, but black’s just as tasty!
- 3 cups cabbage – Sub alert: Green, Napa, or even shredded Brussels sprouts. It’s all about that CRUNCH.
- 1 cup snow peas – Can’t find ’em? Sugar snap peas or thinly sliced green beans bring that sweet-snappy joy.
- 1 head broccoli – Cutting hack: Florets no thicker than your thumb for quick cooking. Stems? Peel and slice—zero waste!
- 2 small carrots, sliced – Chef’s crush: Cut on a diagonal—more surface area = more caramelization!
- 1 red bell pepper, sliced – Color pop: Orange or yellow bells work, but red adds the sweetest flavor.
- 5 garlic cloves, minced – Non-negotiable: This is the soul of your stir-fry! Pre-minced? Use 1.5 tsp.
- ½ tsp ginger, grated – Lazy-day swap: ¼ tsp ground ginger in a pinch, but fresh is *chef’s kiss*.
- 1½ cups chicken broth – Vegetarian? Veggie broth shines here. Low-sodium is best for control freaks (like me!).
- 2 tbsp Shaoxing wine or mirin – Flavor bomb: Shaoxing = umami depth. Mirin = gentle sweetness. Dry sherry or even apple juice work too!
- 1 tsp sugar – Secret weapon: Balances the salty notes. Honey or maple syrup? Yes, please.
- 1 tsp chicken bouillon – Power-up: Concentrated flavor! Veggie bouillon keeps it plant-based.
Let’s Wok and Roll: Your Foolproof Roadmap
Channel your inner stir-fry ninja! High heat + mise en place (a.k.a. prepping everything FIRST) = success.
- Marinate the shrimp: Toss shrimp with cornstarch, salt, and pepper in a bowl. Chef’s hack: Let it sit 10 mins (while you chop veggies!)—cornstarch creates a light shield for ultra-tender shrimp.
- Sauté the veggie crew: Heat 1 tbsp oil (peanut or avocado!) in a wok or large skillet over medium-high until shimmering. Add carrots and broccoli—they’re the slowpokes! Stir-fry 3 mins. Add cabbage, snow peas, and bell pepper. Cook 2-3 mins until vibrant and crisp-tender. KEY TIP: Don’t overcrowd—work in batches if needed! Soggy veggies = sad dinner. Transfer to a plate.
- Shrimp’s time to shine: Add another ½ tbsp oil to the pan. Sear shrimp in a single layer 1 minute per side until just pink. Watch closely! Overcooked shrimp = rubber bands. Sad! Toss in garlic and ginger—sizzle 30 seconds until fragrant (your kitchen should smell AMAZING).
- Bring on the sauce: Pour in broth, Shaoxing wine, salt, sugar, and bouillon. Scrape up any browned bits (that’s FLAVOR gold!). Bring to a lively simmer. Pro move: Taste! Adjust salt or sugar if needed.
- The grand reunion: Return veggies to the pan. Toss everything like you mean it! Cook 2-3 mins until sauce coats every nook and veggies are heated through. Texture check: Sauce should cling lightly—if too thin, mix 1 tsp cornstarch with 1 tbsp water, stir in, and simmer 1 min.
Plate It Pretty (or Just Dive In!)
This dish screams “family-style feast!” Pile it high in a shallow bowl with steamed jasmine rice (hello, sauce absorber!) or lo mein noodles. Garnish with toasted sesame seeds, sliced green onions, or a squeeze of lime for zing. For date night? Portion onto warm plates, top with extra shrimp, and serve with chopsticks—romance level: achieved. Pair with chilled Riesling or green tea. Most importantly? Share straight from the wok with big smiles!
Mix It Up: Your Stir-Fry, Your Rules!
- Protein Party: Swap shrimp for thinly sliced chicken, beef sirloin, or crispy tofu cubes (air-fry first for extra crunch!).
- Spice It Up: Add 1 tsp chili-garlic paste to the sauce or garnish with sliced red chilis. Feeling creamy? Stir 2 tbsp coconut milk into the sauce at the end.
- Seasonal Swaps: Spring → asparagus + peas. Summer → zucchini + corn. Fall → mushrooms + sweet potato. Winter → kale + parsnips.
- Gluten-Free: Use tamari instead of Shaoxing wine (or verify GF Shaoxing), and GF bouillon. Cornstarch is GF—you’re golden!
- Extra Veggie Love: No shrimp? Double the broccoli and add king oyster mushrooms for “meaty” bites.
Olivia’s Extra Sprinkle of Love
This recipe is my kitchen chameleon—it’s evolved from “cleaning out the fridge” nights to my most-requested potluck dish! Once, I accidentally used coconut aminos instead of Shaoxing wine… and my 5-year-old nephew declared it “the best sauce EVER.” (Kids: brutally honest, then wildly poetic!). Truth? The “white sauce” started as a cheater’s béchamel but morphed into this lighter, broth-based wonder. My biggest lesson? Don’t stress the veggie ratios. That half-wilted celery? Toss it in. Forgotten baby corn in the pantry? Yes! Stir-fry is forgiving—like a good friend. Just taste as you go, keep that heat high, and remember: burnt garlic is the only true crime here. Now go make memories (and maybe a little mess)!
Stir-Fry SOS: Your Questions, Answered!
Q: My veggies got soggy! What went wrong?
A: Three culprits: 1) Overcrowding the pan (steam > sear). Work in batches! 2) Overcooking. They should still have bite. 3) Adding salt too early, which draws out water. Salt the sauce, not the veggies!
Q: Can I prep this ahead for busy nights?
A: Absolutely! Chop veggies 1-2 days ahead—store in airtight containers. Make sauce (minus cornstarch) and marinate shrimp separately. When ready, stir-fry shrimp, then veggies, add sauce + cornstarch slurry, and boom! Dinner in 10 mins.
Q: Sauce too thin? Too thick? Help!
A> Thin: Mix 1 tsp cornstarch + 1 tbsp cold water. Stir into simmering sauce; cook 1 min. Too thick? Splash in broth or water, 1 tbsp at a time.
Q: Frozen shrimp—yay or nay?
A: Yay! Thaw overnight in the fridge or under cold running water (15 mins). Pat DRY before marinating—excess water = sad, steamed shrimp.
Stir-Fried Veggies in White Sauce
- Total Time: 30 mins
Description
When your fridge is full of veggies and your heart craves something warm, bright, and satisfying, this stir-fry delivers. Plump shrimp, crisp-tender cabbage, carrots, broccoli, and snow peas get tossed in a light, velvety white sauce with garlic and ginger singing backup. It’s weeknight comfort with wok-kissed flair—and it’s about to become your go-to.
Ingredients
-
1 lb shrimp, peeled & deveined
-
1 tsp cornstarch
-
½ tsp kosher salt + ⅛ tsp white/black pepper
-
1 tbsp + ½ tbsp neutral oil (e.g., peanut or avocado)
-
3 cups cabbage (any variety), shredded
-
1 cup snow peas
-
1 head broccoli, florets cut small
-
2 carrots, thinly sliced
-
1 red bell pepper, sliced
-
5 garlic cloves, minced
-
½ tsp grated fresh ginger
For the White Sauce:
-
1½ cups chicken or veggie broth
-
2 tbsp Shaoxing wine or mirin
-
1 tsp sugar
-
1 tsp chicken or veggie bouillon
-
Optional: 1 tsp cornstarch + 1 tbsp water (for thickening)
Instructions
-
Marinate Shrimp: Toss shrimp with cornstarch, salt, and pepper. Set aside.
-
Cook Veggies: Heat 1 tbsp oil in a wok over medium-high. Add broccoli and carrots; stir-fry 3 mins. Add cabbage, snow peas, and bell pepper; stir-fry 2–3 mins more. Transfer to a plate.
-
Sear Shrimp: Add ½ tbsp oil. Cook shrimp 1 min per side until just pink. Add garlic and ginger; stir 30 secs until fragrant.
-
Make Sauce: Pour in broth, wine, sugar, and bouillon. Simmer and scrape pan. Adjust salt/sweetness if needed.
-
Finish: Return veggies. Toss all together 2–3 mins. If needed, thicken with cornstarch slurry.
Notes
Serve over jasmine rice or noodles. Garnish with sesame seeds, green onions, or lime wedges.
- Prep Time: 15 mins
- Cook Time: 15 mins
Nutrition
- Calories: 420 cal Per Serving
- Fat: 12g
- Carbohydrates: 12g
- Protein: 26g
Quick Bite: Nutrition & Prep
Prep Time: 15 mins | Cook Time: 15 mins | Total Time: 30 mins | Servings: 4
Per Serving (with rice): ~420 cal | 26g protein | 12g carbs | 12g fat
Note: Nutrition includes shrimp and sauce; rice calculated separately.
Final Thoughts: Stir-Fry as a Love Language
This dish is more than dinner—it’s a celebration of imperfection, adaptability, and joy. Whether you’re a novice or a seasoned cook, stir-fry meets you where you are. It’s forgiving when you swap ingredients, impressive when you plate it pretty, and nourishing in every sense.
So next time you’re staring into the fridge, remember: you’re not just making a meal. You’re creating a moment. And maybe, just maybe, that’s the real magic of the wok.
Now, go forth and stir-fry with abandon. Your couch (and your taste buds) will thank you.
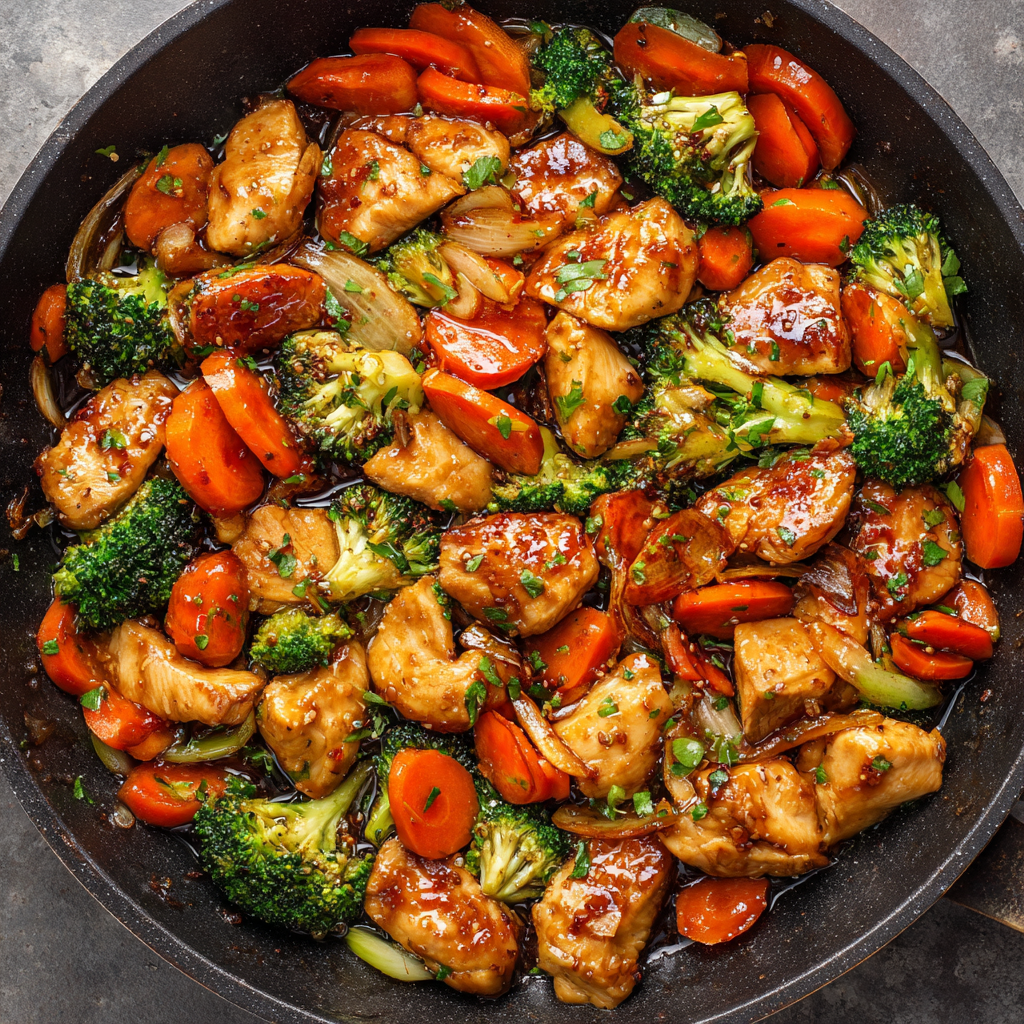
HONEY GARLIC CHICKEN STIR FRY
Sweet, Savory, and Seriously Speedy: Your New Go-To Stir Fry
Hey there, kitchen friend! Olivia here, waving from my flour-dusted countertop. Can we talk about that magical moment when dinner comes together in less time than it takes to scroll through your phone? That’s the joy of stir fry—your trusty culinary superhero for chaotic weeknights. Today, we’re whipping up my Honey Garlic Chicken Stir Fry, a dish that’s like a cozy hug with a flavor explosion. Imagine juicy chicken, crisp-tender veggies, and a glossy sauce that’s equal parts sweet honey and punchy garlic, all clinging to every bite. It’s the kind of meal that makes you feel like a rockstar without breaking a sweat. Whether you’re racing against homework deadlines or just craving something vibrant, this recipe’s got your back. So tie on that apron (messy is mandatory!), grab your wok, and let’s turn simple ingredients into pure magic. Trust me, your taste buds will throw a party!
That One Time Garlic Saved Dinner (and My Pride)
Picture this: It’s 2015, and I’m hosting my now-husband’s parents for the first time. Nerves? Absolutely. I’d planned an elaborate roast chicken… only to discover our oven had given up the ghost mid-preheat. Cue panic! With 45 minutes till arrival, I spotted garlic, honey, and veggies in the fridge. Stir fry to the rescue! I frantically chopped, stirred, and prayed. The result? Empty plates, laughter, and his mom whispering, “You’re a keeper.” That honey-garlic combo? It’s been my lucky charm ever since. Funny how kitchen disasters often birth our most beloved recipes—this one’s proof that a little chaos can taste incredible. Now, whenever I smell garlic sizzling, I smile remembering that night. Life’s too short for stressful dinners, lovelies. Let’s keep it simple and full of flavor!
Gathering Your Flavor Dream Team
Here’s your grocery list—think fresh, flexible, and fuss-free. Pro tip: Mise en place (prepping everything before cooking) is your stir-fry BFF!
- 1 tbsp + 1 tsp vegetable oil (divided): Neutral and high-heat friendly. Swap: Avocado or peanut oil. Chef’s secret: That tsp/ tbsp split ensures veggies don’t steam!
- 1 cup thinly sliced peeled carrots: Adds crunch and color. Swap: Bell peppers or snap peas. Insight: Thin slices = faster cooking!
- 2 cups broccoli florets: Our green powerhouse. Swap: Zucchini or asparagus. Tip: Florets half the size of a lime cook evenly.
- 1 lb boneless, skinless chicken breasts: Lean and quick-cooking. Swap: Thighs (juicier!) or tofu for vegetarian. Hack: Partially freeze for easier slicing.
- 4 cloves garlic, minced: Flavor MVP! Chef’s oath: Fresh only—no jarred stuff here.
- ¼ cup low sodium chicken broth or water: Balances saltiness. Insight: Broth adds depth; water keeps it light.
- ¼ cup soy sauce: Salty-umami base. Swap: Tamari (gluten-free) or coconut aminos (less sodium).
- 3 tbsp honey: Sweetness that caramelizes beautifully. Swap: Maple syrup for vegan twist.
- 2 tsp cornstarch: Sauce thickener. Swap: Arrowroot powder. Pro move: Whisk with cold broth first to avoid lumps!
- Salt and pepper to taste: Season as you go—layer that flavor!
Let’s Wok and Roll!
Ready to cook? High heat + quick moves = stir-fry success. Keep everything within arm’s reach—we’re going fast!
- Sizzle those veggies: In a large pan or wok, heat 1 tsp oil over medium-high heat. Add carrots and broccoli. Stir-fry for 4–5 minutes until bright and crisp-tender. Why? We cook veggies first so they stay vibrant. Chef’s hack: Toss ’em like a pro—use a flipping motion with your wrist! Remove and set aside.
- Chicken time: In the same pan, heat remaining 1 tbsp oil. Add chicken, season with salt and pepper. Cook 5–6 minutes until golden and cooked through. Tip: Don’t crowd the pan! Cook in batches if needed for perfect browning.
- Garlic’s grand entrance: Add minced garlic and cook for 30 seconds until fragrant. Watch closely! Burnt garlic = bitter sadness. It should smell heavenly, not smoky.
- Sauce magic: While chicken cooks, whisk broth, soy sauce, honey, and cornstarch in a small bowl. Key step: Ensure cornstarch is fully dissolved—no lumps allowed! Pour into the pan.
- Bring it all home: Return veggies to the pan. Toss everything together! Cook 1–2 minutes until sauce thickens into glossy perfection. Chef’s test: Sauce should coat the back of a spoon. Too thick? Splash in broth. Too thin? Simmer 1 extra minute.
The Science Behind the Perfect Stir Fry – Why High Heat is Your Best Friend
Stir-frying isn’t just a cooking method—it’s a science. The magic happens when high heat meets quick cooking, locking in flavors, preserving texture, and creating that irresistible wok hei (the elusive “breath of the wok” that gives stir-fries their smoky depth). But why does this technique work so well? Let’s break it down.
The Maillard Reaction: Where Flavor is Born
When you toss thinly sliced chicken into a searing-hot pan, the proteins and sugars on its surface undergo the Maillard reaction—a chemical process that creates hundreds of new flavor compounds. This is what gives your chicken those golden-brown, caramelized edges and deep umami richness. If the pan isn’t hot enough? You’ll end up steaming the meat instead of searing it, resulting in bland, rubbery bites.
The Role of Cornstarch in Sauce Perfection
Ever wonder why your stir-fry sauce clings so beautifully to every ingredient? Thank cornstarch, a humble thickener that works by absorbing liquid and swelling when heated. But here’s the trick: always mix cornstarch with cold liquid first to prevent clumping. If you dump it straight into a hot pan, you’ll get gelatinous lumps instead of that glossy, velvety coating we crave.
Veggie Texture: The 80% Rule
Stir-fried veggies should be crisp-tender—not raw, not mushy. The secret? Cook them just until they’re 80% done, then remove them from the pan. They’ll finish cooking when you toss everything together at the end, avoiding sogginess. And slicing matters: carrots cut into matchsticks cook faster than chunks, ensuring even doneness.
Oil Smoke Point: Don’t Burn Your Base
Not all oils can handle stir-fry temps. Vegetable oil (smoke point: ~400°F) is ideal, but if you’re using olive oil (lower smoke point), it can burn, turning bitter. For a flavor boost, try a drizzle of toasted sesame oil after cooking—its nutty aroma is too delicate for high heat.
Pro Tip: If your pan starts smoking before you even add ingredients, it’s too hot. Adjust as needed—control is key!
Stir Fry Around the World – Global Twists on a Classic
Stir-frying isn’t confined to any one cuisine—it’s a global weeknight hero with endless variations. Here’s how different cultures put their spin on the dish, plus easy ways to remix this recipe.
1. Chinese: The O.G. Stir Fry
The blueprint for all stir-fries, Chinese versions balance wok hei with precise textures. Try this twist: Swap the honey for hoisin sauce, add a splash of Shaoxing wine, and finish with a sprinkle of Szechuan peppercorns for tingling heat.
2. Thai: Sweet, Spicy, and Herbaceous
Thai stir-fries (pad kra pao) amp up the heat with bird’s eye chiles and fragrance with holy basil. Modify this recipe by adding 1 tbsp fish sauce (instead of soy sauce), a squeeze of lime, and fresh basil leaves at the end.
3. Korean: Gochujang Glory
Korean bokkeum dishes rely on gochujang (fermented chili paste) for deep, funky heat. Stir 1 tbsp into the sauce, add kimchi for tang, and top with a fried egg for extra richness.
4. Japanese: Teriyaki Temptation
For a teriyaki-style version, replace honey with mirin (sweet rice wine), add grated ginger, and garnish with toasted sesame seeds. Serve over udon noodles instead of rice.
5. American Fusion: The Everything Fridge Clean-Out
No rules here! Toss in leftover quinoa, kale, or even roasted sweet potatoes. A dollop of peanut butter in the sauce? Yes, please.
Why It Matters: Stir-fry is a passport to flavors—don’t be afraid to experiment!
The Psychology of a 15-Minute Meal – Why Stir Fry Makes Us Happy
Beyond taste, there’s a reason stir-fry feels so satisfying to make and eat. It taps into our brain’s love for efficiency, creativity, and comfort—all at once.
1. The “Quick Win” Effect
In a world of endless to-do lists, a 15-minute meal delivers instant gratification. The rapid chopping, sizzling sounds, and speedy assembly trigger dopamine hits, making us feel accomplished. (Bonus: Fewer dishes = less stress.)
2. Customization = Control
Stir-fry is inherently flexible—swap proteins, adjust spice levels, or hide extra veggies for picky eaters. This sense of control is soothing, especially on chaotic nights.
3. Texture Therapy
Crisp veggies, tender chicken, and sticky sauce create a multi-sensory experience. Studies show varied textures make food more enjoyable (hence our obsession with crunchy toppings).
4. Nostalgia in a Bowl
For many, stir-fry evokes memories—college dorm cooking, family dinners, or takeout nights. Recreating those flavors is edible comfort.
Fun Fact: The act of stirring itself is meditative. The rhythmic motion can lower stress—consider it dinner and therapy.
Plate It Pretty
Dinner’s ready—now let’s make it Instagram-lovely! Scoop fluffy jasmine rice into bowls (or cauliflower rice for low-carb). Spoon the stir fry over the top, letting that glossy sauce drizzle down. Garnish with sesame seeds and sliced green onions for a pop of color and crunch. Pair with a simple cucumber salad or steamed edamame. Family-style is fun too—pile everything into a big platter and let everyone dig in chopstick-first!
Shake Up Your Stir Fry
This recipe’s a canvas—get creative!
- Spicy Kick: Add 1 tbsp sriracha or red pepper flakes to the sauce.
- Protein Swap: Try shrimp (cook 2 min/side) or crispy tofu (air-fry first!).
- Veggie Fiesta: Swap in mushrooms, snow peas, or baby corn.
- Gluten-Free: Use tamari instead of soy sauce.
- Pineapple Twist: Stir in ½ cup fresh pineapple chunks with the veggies for tropical vibes!
Olivia’s Extra Nuggets of Wisdom
Over the years, this stir fry has seen it all—including the time I accidentally used cinnamon instead of cumin (don’t ask!). Here’s what I’ve learned: First, slice chicken against the grain for extra tenderness. Second, if your broccoli stems are thick, peel them—they’re sweet and crunchy! Third, this sauce is liquid gold—double it and stash half in the fridge for noodle bowls later. Funny story: My niece once declared this “better than takeout,” and now it’s her birthday dinner request. That’s the power of honey and garlic, friends—it turns skeptics into superfans!
Stir Fry SOS: Your Questions Answered
Q: Can I use frozen veggies?
A: Absolutely! Skip thawing—toss ’em straight into the pan. Add 1-2 extra minutes to cooking time, and pat them dry to avoid sogginess.
Q: Why is my sauce not thickening?
A: Two common culprits: 1) Cornstarch wasn’t fully dissolved (always whisk with cold liquid first!). 2) Heat was too low. Crank it up and stir constantly—it should thicken fast!
Q: Can I prep this ahead?
A: Yes! Chop veggies/chicken up to 24 hours ahead (store separately). Mix sauce and refrigerate. Cooking takes 15 min—just don’t combine until you’re ready to sizzle.
Q: Leftovers?
A: They’re delicious! Store in an airtight container for up to 3 days. Reheat gently in a pan (microwaving can make veggies mushy).
HONEY GARLIC CHICKEN STIR FRY
- Total Time: 25 minutes
Description
This one-pan wonder brings together juicy chicken, crisp veggies, and a glossy honey garlic sauce that clings to every bite like culinary magic. It’s dinner on the table in 25 minutes with zero stress and max flavor. Perfect for busy nights or when takeout temptation hits, but you want something homemade, healthy-ish, and full of joy.
Ingredients
-
1 tbsp + 1 tsp vegetable oil (divided)
-
1 cup carrots, thinly sliced
-
2 cups broccoli florets
-
1 lb boneless chicken breast, thinly sliced
-
4 cloves garlic, minced
-
¼ cup chicken broth or water
-
¼ cup low-sodium soy sauce (or tamari)
-
3 tbsp honey
-
2 tsp cornstarch
-
Salt & pepper, to taste
Optional Garnish:
Sesame seeds, green onions, rice (jasmine or cauliflower)
Instructions
-
Prep Veggies: Heat 1 tsp oil in a wok or pan over medium-high. Stir-fry carrots and broccoli 4–5 mins until crisp-tender. Remove and set aside.
-
Cook Chicken: Add 1 tbsp oil to the same pan. Season chicken with salt & pepper. Stir-fry 5–6 mins until golden and cooked through.
-
Add Garlic: Stir in garlic; cook 30 secs until fragrant.
-
Make Sauce: Whisk broth, soy sauce, honey, and cornstarch. Pour into pan.
-
Finish: Return veggies. Toss everything and cook 1–2 mins until sauce thickens and glazes beautifully. Serve over rice and garnish!
Notes
-
Slice chicken against the grain for tenderness
-
Double the sauce—save half for noodle bowls
-
Use frozen veggies? No thawing—just pat dry before cooking
- Prep Time: 10 mins
- Cook Time: 15 mins
Nutrition
- Calories: 280 cal Per Serving
- Fat: 10g
- Carbohydrates: 18g
- Protein: 27g
Nutritional Nibbles
Per serving (serves 4): Calories: ~280 | Protein: 27g | Carbs: 18g | Fat: 10g
Note: Stats include 1 tsp oil per serving. For lower sodium, use water instead of broth and reduced-sodium soy sauce.
Final Thoughts: More Than Just Dinner
This honey garlic chicken stir-fry isn’t just a meal—it’s a reminder that great food doesn’t require perfection. It’s about adaptability, joy in the process, and the magic of simple ingredients transforming under heat. Whether you’re a novice or a seasoned cook, the wok is your canvas. So next time life feels overwhelming, remember: garlic, honey, and a hot pan can fix almost anything. Now go forth and stir-fry with confidence!
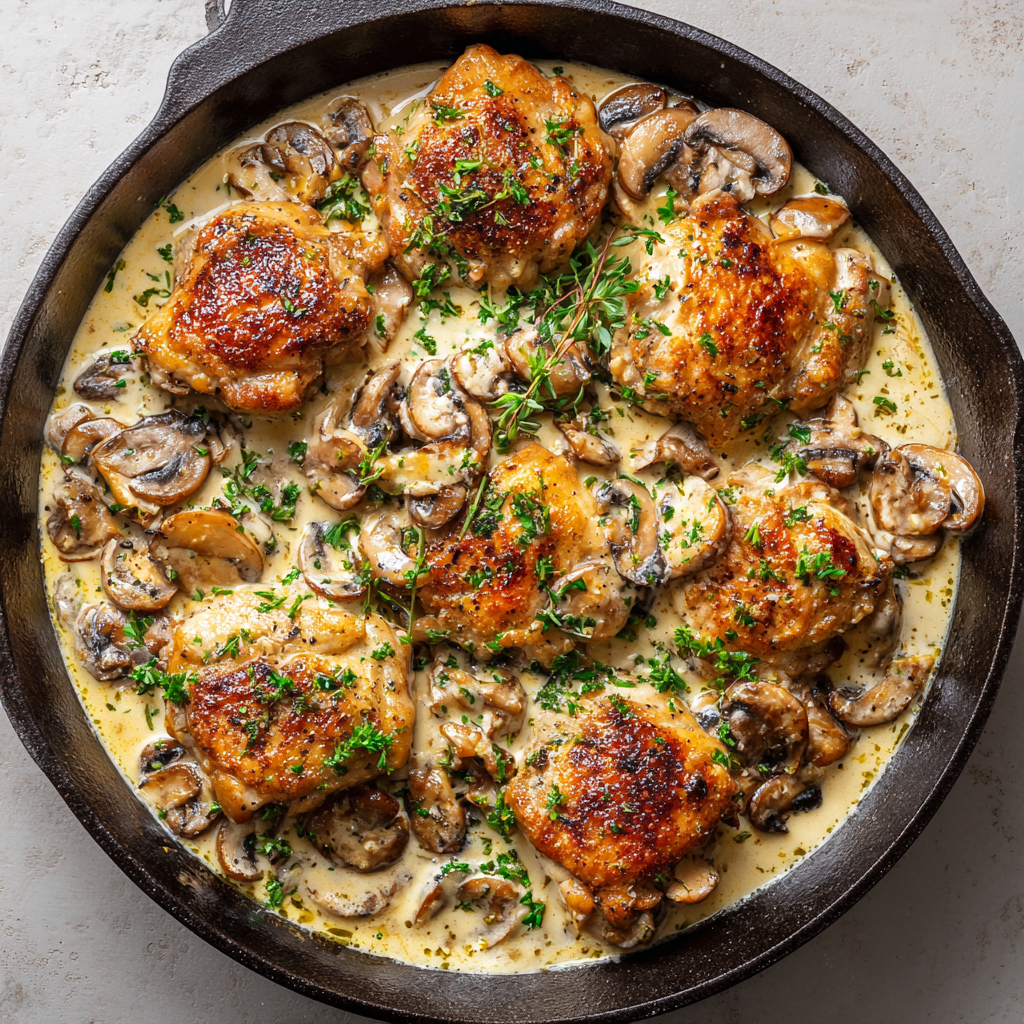
CREAMY GARLIC MUSHROOM CHICKEN THIGHS
Welcome to My Cozy Kitchen Adventure!
Hey there, fellow flavor-seeker! Olivia here, apron dusted with flour (and maybe a smudge of yesterday’s balsamic glaze), ready to share a recipe that’ll make your kitchen smell like a five-star bistro on a Tuesday night. If you’ve ever dreamed of a dish that’s equal parts *”wow, this is fancy”* and *”heck yes, I whipped this up in 30 minutes,”* you’re in for a treat. Today, we’re diving headfirst into my Creamy Garlic Mushroom Chicken Thighs—a one-pan wonder where juicy chicken bathes in a luscious, herb-kissed cream sauce studded with earthy mushrooms. Picture this: golden chicken thighs seared to crispy-edged perfection, then nestled into a velvety garlic-parmesan cloud with those umami-rich mushrooms. It’s the hug-in-a-bowl your weeknights crave, yet elegant enough to impress your foodie friends at a dinner party. No fancy skills required—just a skillet, hungry hearts, and the kind of simple ingredients that do magic when they mingle. So grab your favorite wooden spoon (and maybe a glass of wine), and let’s turn ordinary into unforgettable together!
The Night This Dish Saved My Sanity (and My Dinner Party)
Okay, real talk: this recipe? It’s my culinary security blanket. I first stumbled upon a version of it years ago during a *minor* kitchen meltdown. My college bestie, Maya, was visiting—a self-proclaimed “takeout queen” who’d never seen me cook anything beyond scrambled eggs. I’d planned an elaborate menu to show off, but my main course flopped (RIP, over-salted risotto). Panicking, I raided my fridge: chicken thighs, cream, mushrooms, and garlic—the humble heroes of my pantry. I threw them together in a skillet, whispering *”please work.”* Twenty minutes later, Maya took one bite, closed her eyes, and sighed, “Liv, this tastes like a fancy French bistro… but cozy.” We spent the night laughing, mopping up every drop of sauce with crusty bread, and forgetting all about my risotto disaster. Now, whenever I make this, I’m transported back to that tiny apartment kitchen—reminded that the best meals aren’t about perfection, but about the joy (and occasional chaos) of feeding the people you love.
Your Flavor Toolkit: Ingredients & Why They Shine
For the Chicken:
- 1½ lbs boneless, skinless chicken thighs (6–8 fillets): Thighs are my MVP here—juicier and more forgiving than breasts! If you swap for breasts, reduce cook time by 2–3 mins per side to avoid dryness.
- 1 tsp onion powder + 1 tsp garlic powder: Our flavor foundation. No fresh onions? No sweat—the powder adds depth without texture. Garlic powder boosts that savory punch alongside fresh cloves later.
- ½ tsp dried thyme + ½ tsp dried rosemary: Earthy, aromatic magic! Crush them between your fingers before adding to wake up their oils. Fresh? Use 1 tbsp each, but add later to avoid burning.
- ½ tsp salt + ¼ tsp cracked black pepper: Season like you mean it! I use kosher salt for even distribution. Pepper? Freshly cracked is chef’s kiss.
- 2 tbsp olive oil: For that perfect sear. Avocado oil works too if you’re searing hot!
For the Sauce:
- 1 tbsp butter: Hello, richness! Salted or unsalted—your call. Vegan? Use plant-based butter or olive oil.
- 8 oz (250g) brown mushrooms, sliced: Brown ’shrooms have deeper flavor than whites. Creminis or shiitakes are fab upgrades! Slice ’em thick so they stay meaty.
- 4 cloves garlic, minced (or 1 tbsp pre-minced): Fresh is best for that bright zing! Pre-minced saves time—just ensure it’s not packed in oil.
- 1 tbsp fresh parsley, chopped: Adds a pop of color and freshness. Save a pinch for garnish!
- ½–1 tsp dried thyme + ½–1 tsp dried rosemary: Yes, more herbs! Start with ½ tsp each—you can always add more after tasting.
- 1½ cups thickened or heavy cream: The lush backbone. Half-and-half lightens it up, but the sauce won’t be as velvety. Dairy-free? Full-fat coconut cream works (add a squeeze of lemon to cut sweetness).
- ½ cup freshly shredded Parmesan cheese: Buy a block and shred it yourself—pre-shredded won’t melt as smoothly. Vegan? Try nutritional yeast + a pinch of salt.
Let’s Get Sizzling: Your Foolproof Steps
Step 1: In a bowl, toss chicken thighs with onion powder, garlic powder, thyme, rosemary, salt, and pepper. Chef’s hack: Massage those spices right into the chicken—it’s like a mini spa treatment for max flavor penetration!
Step 2: Heat olive oil in a large skillet (I adore my cast-iron for this!) over medium-high heat. Once the oil shimmers, add chicken in a single layer—don’t crowd the pan! Sear 5–6 minutes per side until golden and cooked through (internal temp 165°F/74°C). Transfer to a plate. Tip: That brown stuff stuck to the pan? That’s GOLD. Don’t scrub it—we’re building flavor!
Step 3: In the same skillet, melt butter. Add mushrooms and sauté 5–7 minutes until they release their juices and turn deep brown. Secret weapon: Don’t stir too much! Let them caramelize for extra umami.
Step 4: Stir in garlic, parsley, thyme, and rosemary. Cook 1 minute—just until fragrant! Watch closely: Garlic burns fast. If it starts browning, kill the heat ASAP.
Step 5: Pour in cream, scraping up all those glorious browned bits from the pan bottom. Bring to a gentle simmer (tiny bubbles at the edges—no boiling!). Stir in Parmesan until melted and silky. Pro move: Take the skillet off heat while stirring cheese—this prevents grainy sauce!
Step 6: Return chicken to the skillet, nestling pieces into the sauce. Simmer 5 minutes so chicken soaks up all that creamy goodness. Final flourish: Taste! Need more salt? Pepper? A squeeze of lemon? Now’s the time.
Plating Perfection: How to Serve It Up
Slide those saucy chicken thighs onto warm plates, spooning extra mushrooms and cream over the top like edible velvet. Sprinkle with fresh parsley for a bright finish. This dish BEGS for something to soak up that sauce—I’m talking fluffy mashed potatoes, buttery egg noodles, or a crusty baguette for “polite swiping” (or just grab a spoon!). For color, add a simple green salad with lemon vinaigrette or steamed asparagus. Dining solo? Lean into the cozy—curl up with the whole skillet and a fork. No judgment here!
Mix It Up: 5 Tasty Twists
- Sun-Dried Tomato Fiesta: Stir in ¼ cup chopped sun-dried tomatoes (oil-packed, drained) with the mushrooms. Adds tangy sweetness!
- Greens Galore: Toss a handful of baby spinach or kale into the sauce just before adding chicken back. Wilted greens = bonus nutrients.
- Wine Lover’s Dream: Deglaze the pan with ¼ cup dry white wine (like Sauv Blanc) after mushrooms cook. Let it bubble 1 minute before adding cream.
- Lighten Up: Swap cream for half-and-half + 1 tbsp flour (sprinkle over mushrooms before adding liquid). Use chicken breasts and skip the Parmesan for a lower-fat version.
- Mushroom Medley: Use wild mushrooms (chanterelles, oyster) for gourmet flair. Sauté separately if they cook faster!
Olivia’s Insider Scoop & Kitchen Confessions
Over the years, this recipe has become my trusty sidekick—it’s evolved from “panic dinner” to my go-to for potlucks, date nights, and even my niece’s “fancy birthday dinner” request (she calls it “Princess Chicken”). Two game-changers: First, pat your chicken thighs dry with paper towels before seasoning—this guarantees that perfect sear! Second, if my sauce ever feels too thick (hello, distracted chef syndrome), I whisk in a splash of chicken broth. Oh, and a funny fail? Once, I mistook cayenne for paprika while filming a reel. Let’s just say… we ordered pizza that night. Lesson learned: label your spice jars, friends! Fresh herbs make it sing, but dried work beautifully—just channel your inner Italian nonna and crush them to release their soul.
Your Questions, My Answers!
Q: Can I use chicken breasts instead?
A: Absolutely! Slice breasts into cutlets (or pound evenly) for quick cooking. Sear 4–5 mins per side over medium heat to avoid toughness.
Q: Help! My sauce split/curdled. What now?
A: Don’t panic! Remove from heat immediately. Whisk in 1 tbsp cold butter or 2 tbsp cream. If it’s beyond rescue, blend it smooth—it’ll still taste amazing.
Q: Can I make this ahead?
A: Yes, but store components separately. Keep cooked chicken and mushroom sauce in fridge (up to 2 days). Reheat sauce gently, add chicken, then simmer. Freezing? Skip the cream—add fresh when reheating.
Q: Sauce too thin? Too thick?
A: Thin: Simmer uncovered 3–5 mins to reduce. Too thick? Stir in broth or cream, 1 tbsp at a time. Remember—it thickens as it cools!
CREAMY GARLIC MUSHROOM CHICKEN THIGHS
- Total Time: 30 mins
Description
Dreaming of dinner that tastes like it took hours but only needs one skillet? Meet your new kitchen crush. These juicy chicken thighs sear to golden perfection, then simmer in a garlicky parmesan cream sauce laced with earthy mushrooms and aromatic herbs. It’s cozy comfort that feels fancy—with zero fuss.
Ingredients
For the Chicken:
-
1½ lbs boneless skinless chicken thighs
-
1 tsp onion powder
-
1 tsp garlic powder
-
½ tsp dried thyme
-
½ tsp dried rosemary
-
½ tsp salt
-
¼ tsp cracked black pepper
-
2 tbsp olive oil
For the Sauce:
-
1 tbsp butter
-
8 oz brown mushrooms, thickly sliced
-
4 cloves garlic, minced
-
1 tbsp chopped parsley
-
½–1 tsp dried thyme + rosemary
-
1½ cups heavy cream (or coconut cream for dairy-free)
-
½ cup freshly grated Parmesan
Instructions
-
Season Chicken: Mix thighs with dry spices and herbs.
-
Sear: In hot skillet, sear chicken in oil for 5–6 mins per side until golden and cooked through. Remove and set aside.
-
Sauté Mushrooms: In the same pan, melt butter. Sauté mushrooms 5–7 mins without over-stirring until deep brown.
-
Add Flavor: Stir in garlic, parsley, and herbs for 1 min.
-
Creamy Sauce: Pour in cream, scrape up browned bits, and simmer gently. Stir in Parmesan off heat until smooth.
-
Finish: Nestle chicken into the sauce and simmer 5 mins more. Adjust seasoning. Serve hot!
Notes
-
Best with mashed potatoes, egg noodles, or crusty bread.
-
Add steamed greens or a lemon-dressed salad for balance.
- Prep Time: 10 mins
- Cook Time: 20 mins
Nutrition
- Calories: 480 cal Per Serving
- Fat: 35g
- Carbohydrates: 6g
- Protein: 32g
Nutritional Nibbles (Per Serving, Serves 4)
Calories: ~480 | Protein: 32g | Fat: 35g | Carbs: 6g
Note: Values are estimates. For accuracy, use your specific ingredients with an app like MyFitnessPal.
Final Thoughts: Why This Recipe Works Every Time
This dish is more than just ingredients—it’s a lesson in trust. Trust the sear, trust the mushrooms, and trust the sauce. Even when things go sideways (we’ve all been there), the flavors are forgiving enough to recover.
At its core, this recipe is about comfort—the kind that comes from a pan of something delicious, shared with people you love. Whether it’s a chaotic weeknight or a special occasion, these creamy garlic mushroom chicken thighs are a reminder that the best meals don’t have to be perfect. They just have to be made with a little joy—and maybe a glass of wine.
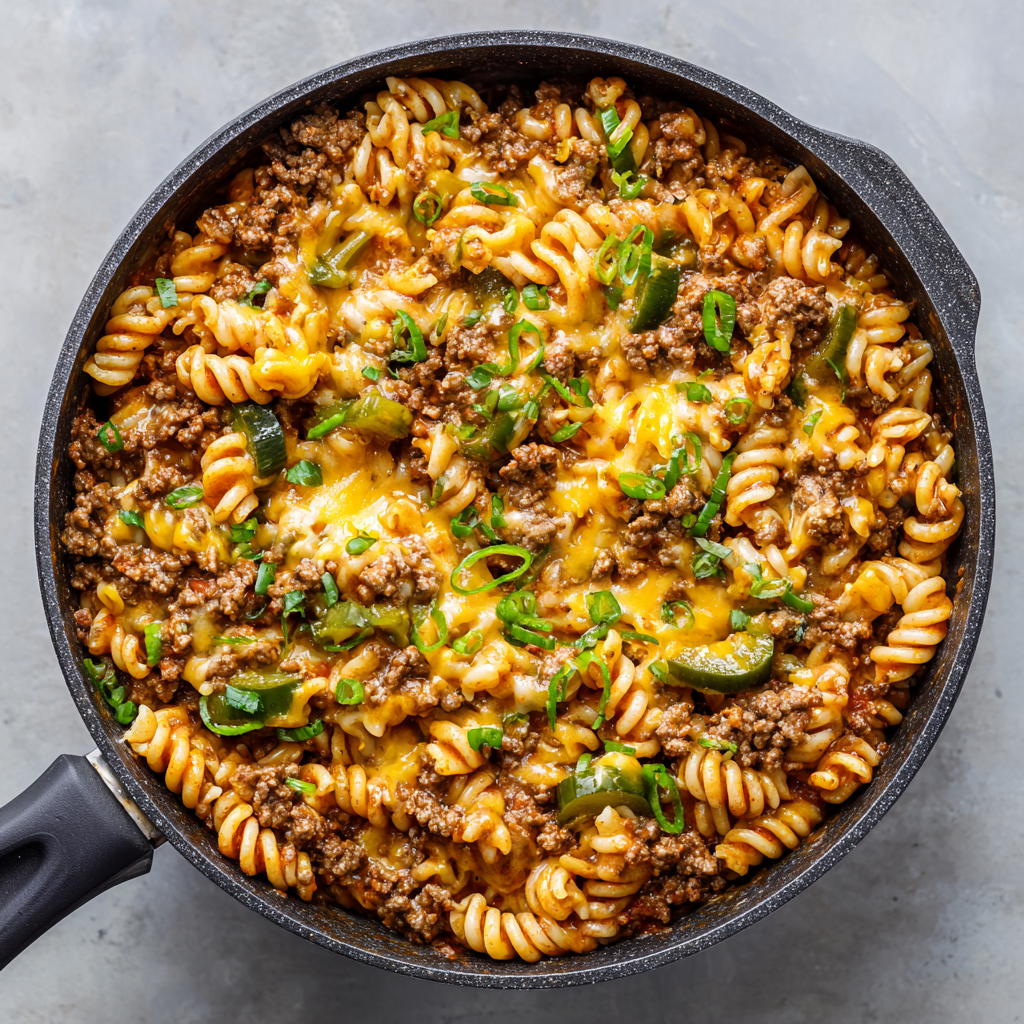
CHEESEBURGER PASTA {ONE POT}
When Cheeseburgers Meet Pasta: Your New Weeknight Hero
Hey there, kitchen friend! Olivia here, apron slightly dusted with paprika and probably humming an old Fleetwood Mac tune while my wooden spoon keeps rhythm against the pot. There’s something magical about recipes that hug your taste buds like a favorite blanket, isn’t there? Today, we’re making pure, unapologetic comfort: Cheeseburger Pasta. Imagine your juiciest backyard burger – caramelized onions, tangy pickles, that iconic ketchup-mustard kick – all cozying up with tender pasta in a single pot. No juggling pans, no sink full of dishes. Just one glorious vessel delivering cheesy, beefy nostalgia straight to your dinner table in 30 minutes flat. Perfect for chaotic weeknights, hungry teens, or when you’re just craving that burger vibe without firing up the grill. Ready to turn simple into spectacular? Let’s dive in!
Burger Night Magic & A Happy Accident
Picture this: It’s a rainy Tuesday last fall. My fridge is looking bleak, but my kids are chanting “Burger Night!” like tiny, determined food critics. Ground beef? Check. Pasta? Check. Pickles? Always. But buns? Nowhere to be found. In a moment of “why not?” genius (or desperation!), I tossed everything burger-ish into the pot with some stock and elbows. The result? Silence. Then, the sound of forks scraping bowls clean and my youngest declaring, “This is BETTER than burgers!” That happy accident became our family’s most requested meal. It’s proof that sometimes, the best recipes aren’t planned – they’re born from a little chaos and a lot of love for pickles. Now, it’s your turn to make some messy, delicious memories!
Gathering Your Flavor Squad
Here’s your burger-inspired lineup! Don’t stress about exact brands – this is about flavor spirit, not perfection.
- 2 tsp Sunflower Oil: Our neutral start! Any mild oil works (avocado, canola). Olive oil’s flavor competes here, so skip it.
- 500g (1.1 lb) Beef Mince (5% fat preferred): Leaner mince keeps things from getting greasy. Ground turkey? Sure! For vegetarians, swap in 1.5 cups cooked lentils or plant-based crumbles.
- 1 Onion, Chopped: Sweet yellow or white! They melt into the sauce, adding that essential burger-joint aroma.
- 2 Garlic Cloves, Crushed: Because life’s better with garlic. Use 1/2 tsp garlic powder in a pinch!
- 2 Green Peppers, Sliced: Crunchy, fresh contrast. Red or yellow bells work too, or skip if peppers aren’t your thing.
- 750ml (3¼ cups) Beef Stock: The flavor foundation! Use low-sodium to control salt. Veggie stock works fine.
- 6 tbsp Ketchup: Our sweet-tangy glue! Fire-roasted ketchup adds smoky depth.
- 3 tbsp Yellow/American Mustard: Non-negotiable for that classic burger bite. Dijon works, but it’s sharper.
- 3 tsp Paprika: Sweet or smoked? Smoked paprika makes it taste “grilled”!
- 3 tbsp Worcestershire Sauce: The umami secret weapon! Vegan? Use coconut aminos or soy sauce + a pinch of sugar.
- 250g (9 oz) Dried Pasta: Elbows, shells, or rotini hold the sauce best. Avoid long pasta like spaghetti.
- 50g (2 oz) Chopped Pickles (Gherkins): The tangy high note! I love dill pickles, but bread & butter add sweetness. Drain well!
Let’s Build That Flavor Pot!
Grab your favorite deep pot or Dutch oven – we’re doing this in one pan!
- Brown That Beef: Heat the oil over medium-high heat. Crumble in the beef like you’re sprinkling flavor confetti. Cook 5-7 minutes until no pink remains, stirring occasionally. Chef’s Hack: Don’t stir too much! Letting it sit for a minute creates tasty browned bits = mega flavor.
- Sizzle the Veggies: Add onion, garlic, and peppers. Stir and cook for 5 minutes until onions are soft and peppers have a slight char. Chef’s Tip: Scrape the bottom of the pot – those browned bits are liquid gold!
- The Flavor Party: Pour in the beef stock, ketchup, mustard, paprika, and Worcestershire sauce. Stir like you mean it! Bring it to a lively boil. Chef’s Insight: Taste now! Adjust mustard or ketchup if you like things tangier or sweeter.
- Pasta Power: Add the dried pasta, stirring to submerge it. Reduce heat to a gentle simmer (medium-low). Cover that pot! Cook for 12-15 minutes, stirring every 4-5 minutes. Critical Tip: Stirring prevents pasta from sticking AND ensures even cooking. Pasta should be al dente and sauce thickened.
- Pickle Punch: Off heat, stir in the chopped pickles. Let it sit uncovered for 2 minutes – they stay crunchier this way! Season with salt & pepper. Chef’s Secret: Add a splash of pickle juice for extra tang!
The Science Behind the Comfort: Why This Recipe Works
Ever wonder why this Cheeseburger Pasta feels like a warm hug on a plate? There’s actual science behind its irresistible appeal! Let’s break down why this dish is a guaranteed crowd-pleaser.
1. Umami Bomb: The Flavor Foundation
The combination of beef, Worcestershire sauce, and ketchup creates a deep umami profile—the savory “fifth taste” that makes food craveable. Beef stock amplifies this, while mustard adds a tangy contrast that keeps your taste buds engaged.
2. The Maillard Reaction = Maximum Flavor
When you brown the beef and let it develop those crispy bits (fond), you’re triggering the Maillard reaction—a chemical process that creates complex, roasted flavors. Deglazing with stock ensures none of that flavor goes to waste!
3. Pasta’s Perfect Texture
Cooking pasta directly in the sauce (instead of boiling separately) allows it to absorb the seasoned liquid, making every bite more flavorful. The starch released from the pasta also thickens the sauce naturally, giving it a rich, clingy consistency.
4. The Pickle Paradox
Adding pickles at the end seems odd, but their acidity cuts through the richness of the beef and cheese, balancing the dish. The crunch also mimics the texture of fresh burger toppings, keeping the illusion intact.
5. Cheese’s Melty Magic
Cheese isn’t just a topping—it’s a texture transformer. When stirred in hot, the proteins and fats emulsify into the sauce, making it creamier without needing heavy cream. Sharp cheddar works best because its boldness stands up to the other flavors.
Pro Tip: For an even deeper flavor, try adding a splash of fish sauce (sounds weird, but it’s an umami powerhouse!) or a dash of MSG to amplify the savory notes.
From Kids to Foodies: How to Adapt This Recipe for Any Audience
This Cheeseburger Pasta is endlessly customizable. Here’s how to tweak it for picky eaters, gourmet palates, and dietary needs.
For Kids (or Picky Adults)
-
Hide the Veggies: Finely dice onions and peppers so they “disappear” into the sauce.
-
Milder Flavors: Reduce mustard to 1 tbsp and skip paprika. Swap pickles for a handful of sweet corn.
-
Fun Shapes: Use dinosaur-shaped pasta or mini shells to make it playful.
-
Cheese Pull Effect: Stir in mozzarella with cheddar for that Instagram-worthy stretch.
For Gourmet Upgrades
-
Dry-Aged Beef: Swap regular ground beef for dry-aged mince—it’s pricier but adds incredible depth.
-
House-Made Pickles: Quick-pickle cucumbers in apple cider vinegar + dill for 30 minutes.
-
Artisanal Mustards: Try whole-grain or beer mustard for complexity.
-
Crispy Garnish: Top with panko breadcrumbs fried in bacon fat for crunch.
For Dietary Restrictions
-
Gluten-Free: Use GF pasta (corn or rice-based) and GF Worcestershire sauce.
-
Dairy-Free: Skip cheese or use vegan cheddar. Coconut milk (1/4 cup) can add creaminess.
-
Low-Carb: Replace pasta with cauliflower florets or zucchini noodles (add them later to avoid mush).
-
Vegetarian: Use plant-based crumbles or lentils + mushroom stock for meaty flavor.
Pro Tip: Let everyone build their own bowl with toppings like avocado, hot sauce, or crushed chips for a DIY vibe!
The Leftover Makeover: 5 Creative Ways to Reinvent Cheeseburger Pasta
Got leftovers? Lucky you! Here’s how to give them a delicious second act.
1. Cheeseburger Stuffed Peppers
Halve bell peppers, stuff with leftover pasta + extra cheese, and bake at 375°F (190°C) for 20 minutes. The peppers soften, and the cheese turns golden—a whole new meal!
2. Breakfast Hash
Sauté leftovers in a skillet until crispy. Top with fried eggs and hot sauce. The pickles add a briny kick that pairs perfectly with runny yolks.
3. Loaded Nachos
Spread tortilla chips on a tray, top with reheated pasta + extra cheese, and broil for 3 minutes. Finish with jalapeños, sour cream, and fresh tomatoes.
4. Soup-er Transformation
Thin leftovers with beef broth and diced tomatoes. Simmer for 10 minutes—now it’s a hearty cheeseburger soup! Serve with grilled cheese croutons.
5. Baked Casserole
Mix leftovers with beaten eggs and breadcrumbs, press into a dish, and bake at 350°F (175°C) for 25 minutes. Slice into squares for a portable lunch.
Pro Tip: Freeze portions flat in ziplock bags for up to 3 months. Reheat in a skillet with a splash of water to revive the texture.
Plating Your Burger-In-A-Bowl
This dish screams casual comfort! Spoon generous helpings into deep bowls. The crowning glory? A handful of shredded sharp cheddar or melty American cheese stirred in right before serving – it gets gloriously gooey. Want that diner vibe? Top with extra chopped pickles, a dollop of ketchup or mustard, a sprinkle of sesame seeds, or even crispy fried onions. Serve with a simple green salad or garlic bread for dunking. Don’t forget napkins – it’s joyfully messy!
Make It Your Own!
This recipe loves a remix! Here are 5 tasty twists:
- Bacon Cheeseburger: Cook 4 chopped bacon strips with the beef. Top with blue cheese crumbles instead of cheddar.
- Spicy Western: Add 1 diced jalapeño with the peppers. Use pepper jack cheese and swap ketchup for BBQ sauce!
- Mushroom Swiss: Sauté 8oz sliced mushrooms with the onions. Use Swiss cheese and add 1 tsp thyme.
- Lighter Version: Use ground turkey/chicken, low-sodium stock, whole wheat pasta, and skip the cheese topping.
- Extra Veggie Boost: Stir in a handful of spinach or frozen peas with the pickles. Add corn kernels too!
Olivia’s Extra Sprinkle of Love
This recipe is my kitchen’s happy place! Over time, I’ve learned a few things: Pasta shape matters. Shells catch extra sauce and pickles – my kids’ favorite! Don’t skip the pickle rest. Adding them off-heat keeps their bright crunch. Once, I accidentally doubled the paprika – it was smoky and incredible! So don’t fear tweaks. This dish also reheats like a dream (add a splash of stock). It’s evolved from my “no buns!” panic into a dish I proudly serve friends. The biggest compliment? When someone says, “It tastes EXACTLY like a cheeseburger!” Mission accomplished, apron stains and all.
Your Cheeseburger Pasta Questions, Solved!
Q: My pasta turned out mushy! Help?
A: Overcooking or not enough liquid are the culprits! Stick to the 12-15 min simmer time. Ensure your simmer is gentle (bubbles breaking lightly on the surface, not a rolling boil). If liquid evaporates too fast before pasta is cooked, add 1/4 cup hot water or stock.
Q: Can I use a different type of pasta?
A: Absolutely! Stick to short shapes that cook in roughly the same time (12-15 mins). Penne, rotini, fusilli, or small shells work great. Avoid long pasta (spaghetti) or tiny pasta (orzo) which overcooks quickly.
Q: It’s a bit too tangy for my family. How can I mellow it?
A: Reduce the mustard by 1 tbsp next time or use half yellow/half Dijon. You can also stir in 1-2 tbsp of cream or cream cheese at the end with the pickles! A pinch of sugar can also balance acidity.
Q: Can I make this ahead?
A: Yes! Cook completely, cool, and refrigerate for up to 3 days. Reheat gently on the stove with a splash of broth or water – it thickens when cold. The pasta will soften more upon reheating, but it’s still delicious!
CHEESEBURGER PASTA {ONE POT}
- Total Time: 30 minutes
Description
This isn’t just dinner—it’s a nostalgic trip to your favorite burger joint, all in one pot. Juicy ground beef, melty cheese, ketchup-mustard zing, and even pickles join forces with tender pasta for a comfort dish the whole crew will fight over. One bite, and you’ll see why “burger night” might just need a rebrand.
Ingredients
-
2 tsp sunflower oil
-
1.1 lb (500g) lean ground beef
-
1 onion, chopped
-
2 garlic cloves, crushed
-
2 green bell peppers, sliced
-
3¼ cups (750ml) beef stock
-
6 tbsp ketchup
-
3 tbsp yellow mustard
-
3 tsp paprika (smoked for depth!)
-
3 tbsp Worcestershire sauce
-
9 oz (250g) dried pasta (elbows or shells)
-
2 oz (50g) chopped dill pickles
-
Salt & pepper, to taste
-
Optional: shredded cheddar or American cheese for topping
Instructions
-
Brown the Beef: In a large pot, heat oil over medium-high. Cook beef until browned, 5–7 mins.
-
Add Veggies: Stir in onion, garlic, and peppers. Sauté 5 mins until softened.
-
Build the Sauce: Add stock, ketchup, mustard, paprika, and Worcestershire. Stir well, then taste and adjust.
-
Cook the Pasta: Add pasta, reduce heat to low, cover and simmer 12–15 mins, stirring every 5 mins.
-
Finish: Off heat, stir in chopped pickles and a splash of pickle juice (optional). Let sit 2 mins. Top with cheese and serve!
Notes
-
Add bacon or jalapeños for extra kick.
-
Stir in spinach or corn for a veggie boost.
-
Use turkey or lentils for a lighter version.
-
Let pickles rest off-heat for max crunch!
- Prep Time: 10 mins
- Cook Time: 20 mins
Nutrition
- Calories: 460 cal Per Serving
- Fat: 20g
- Carbohydrates: 38g
- Protein: 30g
Nutritional Info (Per Serving, Serves 4-5)
Calories: ~460 | Protein: 30g | Carbs: 38g | Fat: 20g
Prep Time: 10 min | Cook Time: 25 min
Final Thoughts: More Than Just a Meal
This Cheeseburger Pasta isn’t just about saving time—it’s about joy. It’s the laughter when your kid realizes they’re eating pickles in pasta, the satisfied silence around the dinner table, and the pride of turning a “fridge cleanout” into something extraordinary. Cooking, like life, is about embracing happy accidents. So grab that pot, crank up Fleetwood Mac, and let dinner be deliciously uncomplicated tonight.
Remember: The best recipes aren’t just measured in cups and grams—they’re measured in memories. Now, go make some!
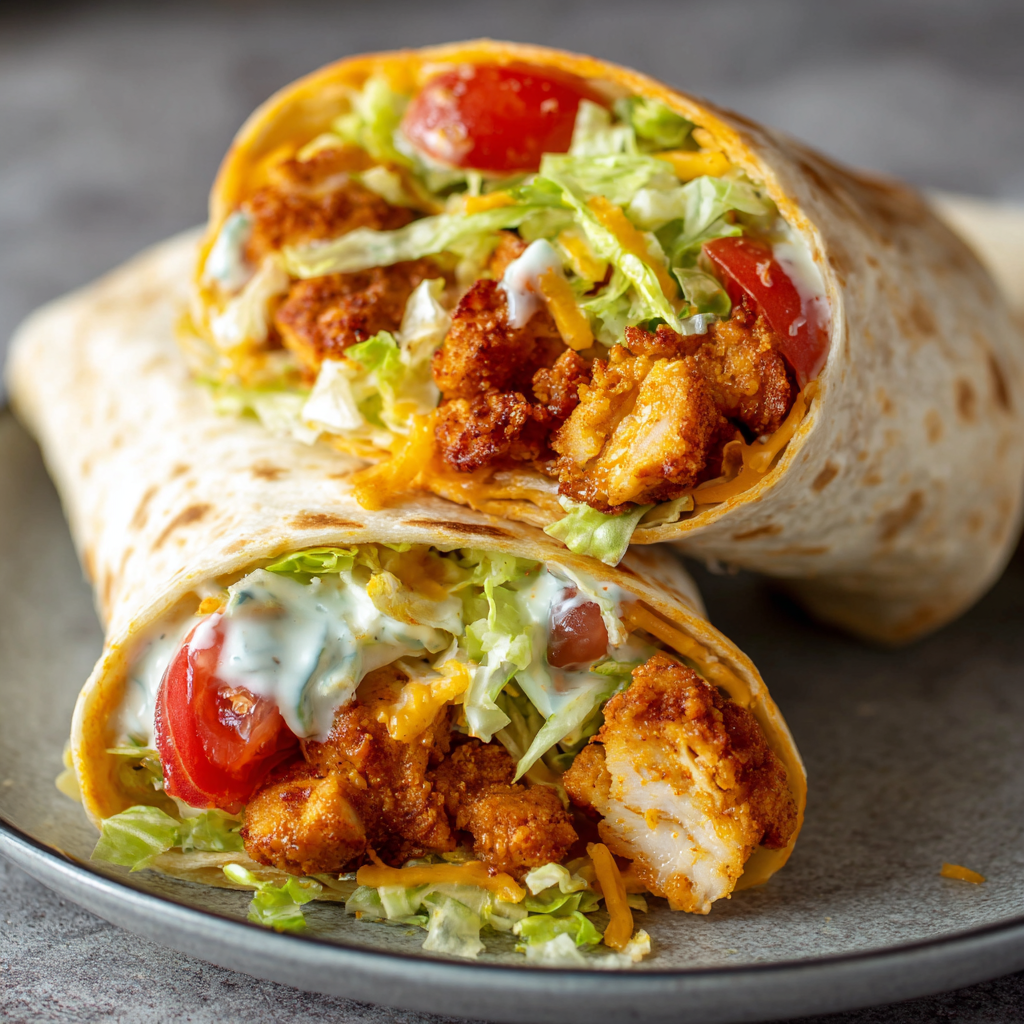
BUFFALO RANCH CHICKEN WRAPS
Why These Wraps Will Steal Your Heart (And Your Appetite!)
Hey there, kitchen friends! Olivia here, apron slightly dusted with flour and a big smile on my face. Can you smell that? It’s the sizzle of crispy chicken hitting a hot pan, the tangy punch of buffalo sauce, and the cool whisper of ranch dressing—all wrapped up in a warm tortilla hug. If that doesn’t make your stomach do a happy dance, I don’t know what will! 🥳
Let’s be real: life’s too short for boring meals. That’s why these Buffalo Ranch Chicken Wraps are my secret weapon against the “what’s for dinner?” blues. They’re faster than pizza delivery (seriously—25 minutes tops!), pack a flavor fireworks show, and are crazy versatile. Game day? Check. Lunchbox surprise? Check. “I’m-too-tired-to-cook” Tuesday? DOUBLE check.
I see you nodding! Maybe you’re a busy parent juggling homework and hungry tummies, a new cook dipping your toes into the kitchen, or just someone who craves BIG flavor without fuss. Whoever you are, consider this your invitation to my cozy cooking corner. Grab a spatula, and let’s turn simple ingredients into pure magic. Trust me—one bite of these wraps, and you’ll be high-fiving yourself!
The Chicken Wing Epiphany That Started It All
Picture this: college football season, 2014. My tiny apartment kitchen was crammed with friends, the TV blaring, and a mountain of sticky buffalo wings disappearing faster than I could say “ranch dressing.” I was broke, exhausted from studying, and suddenly realized—ugh—I’d forgotten the napkins. Cue the sauce-covered chaos! 😅
That messy night sparked a mission: ALL the buffalo-ranch vibes, NONE of the finger-staining drama. Enter the wrap revolution! I started tossing leftover roasted chicken in Frank’s sauce, slathered tortillas with ranch, and piled in whatever veggies lingered in the fridge. The result? Pure joy in handheld form. Friends ditched the wings and fought over these instead. Now, a decade later, this recipe’s evolved into my ultimate crowd-pleaser. It’s proof that the best food memories aren’t fancy—they’re shared, saucy, and maybe a little messy!
Your Flavor Toolkit: What You’ll Need
- 1 lb boneless, skinless chicken breasts, cut into 1-inch pieces – Pro tip: Thighs work too for extra juiciness! Freeze for 15 minutes before cutting for cleaner slices.
- ⅓ cup flour + 3 tbsp cornstarch – Dynamic duo alert! Cornstarch = crunch, flour = golden coating. Swap with almond flour for gluten-free.
- ⅛ tsp cayenne pepper + 1 tsp garlic powder – Cayenne brings subtle heat; smoked paprika is a milder swap. Garlic powder? Non-negotiable for that savory oomph!
- ⅓ cup Frank’s Buffalo Wing Sauce – The MVP! Frank’s has the perfect tangy heat. For milder kicks, mix with BBQ sauce.
- 1 tbsp olive oil – Avocado oil works great too—its high smoke point prevents burnt bits.
- Burrito-size tortillas – Wheat, spinach, or gluten-free—pick your fighter! Warm them for no-crack flexibility.
- Ranch dressing – Homemade or store-bought? Both rock. Add dill or chives for extra zing!
- Diced tomatoes + finely chopped lettuce – Crunch factor! Iceberg for crispness, romaine for green goodness. Cherry tomatoes = sweeter pop.
- Shredded Mexican cheese blend – Melty magic! Pepper jack kicks up the heat, cheddar keeps it classic.
Why this combo rocks: The flour-cornstarch mix creates a lacy, crispy crust that clings to the sauce. Frank’s? It’s vinegary punch balances the rich ranch. And shredding your own cheese? Worth it for superior meltiness!
Let’s Get Wrapping! Your Foolproof Roadmap
- Coat that chicken! In a bowl, toss chicken pieces with flour, cornstarch, cayenne, and garlic powder until evenly coated—like little flavor snowballs! 🐔 Chef hack: Shake everything in a ziplock bag for zero mess and max coverage.
- Sizzle time! Heat olive oil in a skillet over medium-high heat. When it shimmers (test with a flour speck—if it sizzles, GO!), add chicken in a single layer. Golden rule: Don’t crowd the pan! Cook 5-7 minutes until golden and cooked through, flipping halfway. Hear that crunch? Music to my ears! 🔥
- Buffalo bath! Remove skillet from heat. Pour in Frank’s sauce and toss until every piece is gloriously coated. Big insight: Off-heat tossing prevents sauce from burning or thickening too much. That glossy, sticky perfection? That’s the goal!
- Tortilla TLC. Warm tortillas in a dry skillet for 20 seconds per side or microwave between damp paper towels. Game-changer: Warm tortillas won’t crack when rolled! Layer each with lettuce, tomatoes, cheese, a zigzag of ranch, and that gorgeous buffalo chicken.
- Roll like a boss! Fold sides inward, then roll tightly from the bottom up. Pro move: Place seam-side down for 2 minutes—the heat “seals” it! Slice diagonally (hello, fancy presentation!) and serve immediately.
Watch for: Chicken sticking? Your pan wasn’t hot enough! Sauce too thin? Let chicken rest in it 1 minute—it’ll thicken. Tortilla tearing? Overstuffing is the culprit. Less is more!
The Science Behind the Perfect Crispy Chicken
Ever wonder why some chicken stays juicy inside while achieving that irresistible golden crunch? It’s not luck—it’s science! Let’s break down the magic behind these Buffalo Ranch Chicken Wraps.
The Flour-Cornstarch Secret
The combination of flour and cornstarch isn’t just a random choice—it’s a culinary power couple. Flour provides structure, while cornstarch absorbs moisture and creates a delicate, lacy crust. When heated, cornstarch gelatinizes at a lower temperature than flour, forming a crisp barrier that locks in juices. Pro tip: For extra crunch, some chefs swear by a 50/50 blend, but our recipe’s ratio ensures a sturdy yet light coating that clings to the buffalo sauce.
The Maillard Reaction: Where Flavor Happens
That beautiful golden-brown color? Thank the Maillard reaction—a chemical dance between amino acids and reducing sugars when exposed to heat. At around 300°F (150°C), your chicken’s surface transforms, developing complex, savory flavors. Key tricks to maximize this:
-
Pat chicken dry before coating (wetness = steam = soggy crust).
-
Don’t overcrowd the pan—crowding drops the oil temp, leading to greasy, pale chicken.
-
Use a neutral oil with a high smoke point (like olive or avocado oil) to avoid burnt, bitter flavors.
Buffalo Sauce Adhesion 101
Ever notice how some saucy wings turn soggy, while others stay crisp? The secret is timing. Adding the sauce off-heat prevents the sugars in Frank’s from burning and keeps the coating intact. The residual heat thickens the sauce just enough to glaze the chicken without making it limp. For extra insurance, toss the chicken in a bowl rather than the skillet to preserve texture.
Fun Experiment: Try tossing half the batch in sauce immediately and the other half after a 1-minute rest. Taste the difference—the latter will have a noticeably crisper bite!
The Psychology of a Perfect Wrap (Why We Love Handheld Meals)
There’s a reason wraps dominate lunch menus and game-day spreads—they tap into deep-seated cravings for convenience, customization, and comfort. Let’s geek out over why these Buffalo Ranch Chicken Wraps hit all the right notes.
1. The “No Fork Needed” Appeal
Handheld foods trigger a sense of casual indulgence. Research shows people perceive finger foods as more fun and less formal, lowering mealtime stress. Wraps also engage multiple senses: the rustle of the tortilla, the aroma of spicy buffalo, and the satisfying pull of melted cheese.
2. Customization = Ownership
Unlike a plated dish, wraps let eaters tweak every bite. Prefer extra ranch? Add it. Hate tomatoes? Skip ’em. This autonomy boosts meal satisfaction. (Fun fact: Chipotle’s success is largely due to this “build-your-own” psychology!)
3. Texture Contrast
The ideal wrap balances:
-
Crunch (crispy chicken, fresh lettuce)
-
Creamy (ranch, melted cheese)
-
Chewy (warm tortilla)
Our brains interpret varied textures as “exciting,” making each bite feel novel.
Pro Tip: For kids or picky eaters, deconstruct the wrap into a “buffalo chicken bowl” with separate components. They’ll still get the flavors without the pressure to roll!
The Art of Meal Prep Magic
Short on time? These wraps are meal-prep champs. Here’s how to streamline your process without sacrificing quality.
Batch-Cooking Chicken
-
Sunday Prep: Cook a double batch of flour-coated chicken (without sauce). Store in airtight containers for up to 3 days.
-
Reheat Smart: Skip the microwave—re-crisp in a skillet over medium heat, then add sauce.
Pre-Chopped Veggie Kits
Store pre-washed lettuce, diced tomatoes, and shredded cheese in separate containers. Use deli cups for ranch dressing to prevent sogginess.
Freezer Hack
Freeze sauced chicken in portions (sans veggies). Thaw overnight, reheat, and assemble fresh.
Time-Saving Swaps:
-
Rotisserie chicken + bottled buffalo sauce = 10-minute wraps.
-
Pre-made ranch + bagged slaw mix = zero chopping.
Dishing Up the Deliciousness
Slide these wraps onto a rustic wooden board for that “I’m a cafe pro” vibe. Add pickle spears, carrot sticks, or crispy sweet potato fries on the side for crunch contrast. Feeling fancy? Drizzle extra ranch and sprinkle chives over the sliced wraps. For parties, skip slicing and let guests grab whole wraps—just add napkins! (Learned my lesson 😉). Pair with an icy cucumber limeade or a cold beer to tame the heat.
Shake It Up! 5 Tasty Twists
- BBQ Ranch Swap: Use BBQ sauce instead of buffalo + add crispy onion strings.
- Mediterranean Magic: Swap ranch for tzatziki, add cucumbers, feta, and olives.
- Veggie Power: Replace chicken with crispy cauliflower or chickpeas (toss in sauce after baking!).
- Breakfast Wrap: Add scrambled eggs and swap buffalo sauce for hot sauce. Brunch hero!
- Buffalo Chicken Salad: Skip tortillas, mix saucy chicken with extra ranch/lettuce, and top with blue cheese crumbles.
Olivia’s Extra Crumb of Wisdom
This recipe is my kitchen chameleon! Over the years, I’ve added pickled jalapeños (for brave souls), swapped in blue cheese dressing (controversial but delicious), and even turned leftovers into next-day pizza toppings. One disaster? Attempting “buffalo tofu” before pressing the water out—soggy wrap tragedy! 🌊 Lesson learned: moisture is the enemy of crispiness. Now, my kids beg for these wraps weekly, and my husband adds extra hot sauce like a daredevil. The beauty? It’s YOUR canvas. Mess with it, make memories, and tag me @OliviasCozyKitchen with your saucy masterpieces!
Your Burning Questions, Answered!
Q: Can I make these ahead?
A: Absolutely! Cook chicken (don’t sauce it yet) and store refrigerated for 2 days. Reheat in a skillet, THEN toss with sauce. Assemble wraps fresh—no one likes a soggy tortilla!
Q: Help! My sauce is too spicy/not spicy enough.
A: Easy fix! For milder wraps, mix buffalo sauce with melted butter (start 50/50). For more fire, add a dash of cayenne to the sauce or use extra-hot wings sauce. Taste as you go!
Q: Why is my chicken coating falling off?
A: Two culprits: 1) Oil wasn’t hot enough (test that sizzle!), or 2) You moved chicken too soon. Let it sear 2-3 minutes undisturbed before flipping. Patience = perfect crust!
Q: Any low-carb options?
A: Swap tortillas for butter lettuce cups or low-carb wraps. Skip the flour/cornstarch—season chicken generously, sear, then sauce. You’ll miss the crunch but save carbs!
BUFFALO RANCH CHICKEN WRAPS
- Total Time: 25 mins
Description
These wraps are weeknight magic. Crispy chicken tossed in tangy buffalo sauce, wrapped up with cool ranch, crunchy lettuce, juicy tomatoes, and melty cheese—all in a warm, soft tortilla. Whether you’re cooking for a crowd or just craving something bold and satisfying, these wraps bring the heat and the comfort in just 25 minutes.
Ingredients
-
1 lb boneless chicken breasts, cut into 1” pieces
-
⅓ cup flour + 3 tbsp cornstarch
-
⅛ tsp cayenne + 1 tsp garlic powder
-
⅓ cup buffalo wing sauce (Frank’s is classic)
-
1 tbsp olive oil
-
4 large burrito tortillas, warmed
-
Ranch dressing, to taste
-
1 cup shredded lettuce
-
½ cup diced tomatoes
-
1 cup shredded cheese (Mexican blend or pepper jack)
Instructions
-
Coat Chicken: Toss chicken with flour, cornstarch, cayenne, and garlic powder.
-
Crisp It Up: Heat oil in a skillet over medium-high. Add chicken in a single layer. Cook 5–7 minutes, flipping once, until golden.
-
Buffalo Toss: Remove pan from heat. Add buffalo sauce and toss chicken until well-coated.
-
Wrap Build: On each warm tortilla, layer lettuce, tomato, cheese, a drizzle of ranch, and buffalo chicken.
-
Roll & Serve: Fold sides, roll up, and toast seam-side down for 2 mins in the pan if desired. Slice or serve whole.
Notes
-
Milder? Mix buffalo sauce with melted butter.
-
Veggie version: Try crispy buffalo cauliflower.
-
Want crunch? Add crushed tortilla chips inside!
-
Meal prep: Cook chicken ahead; wrap fresh.
- Prep Time: 10 mins
- Cook Time: 15 mins
Nutrition
- Calories: 420 cal Per Wrap
- Fat: 20g
- Carbohydrates: 30g
- Protein: 28g
Nutrition Per Serving (1 wrap)
Calories: ~420 | Protein: 28g | Carbs: 30g | Fat: 20g
Note: Values vary based on tortilla/ranch brands. Want lighter? Use Greek yogurt ranch, less cheese, or load up on veggies!
Final Thoughts: More Than Just a Wrap
These Buffalo Ranch Chicken Wraps aren’t just dinner—they’re a reminder that great food doesn’t need to be complicated. Whether it’s the crispy chicken epiphany, the joy of a saucy, no-utensils meal, or the smart prep tricks that save your sanity, this recipe is a love letter to busy lives and bold flavors. So roll up, take a bite, and savor the messy, delicious moments. After all, the best meals aren’t just eaten; they’re experienced.
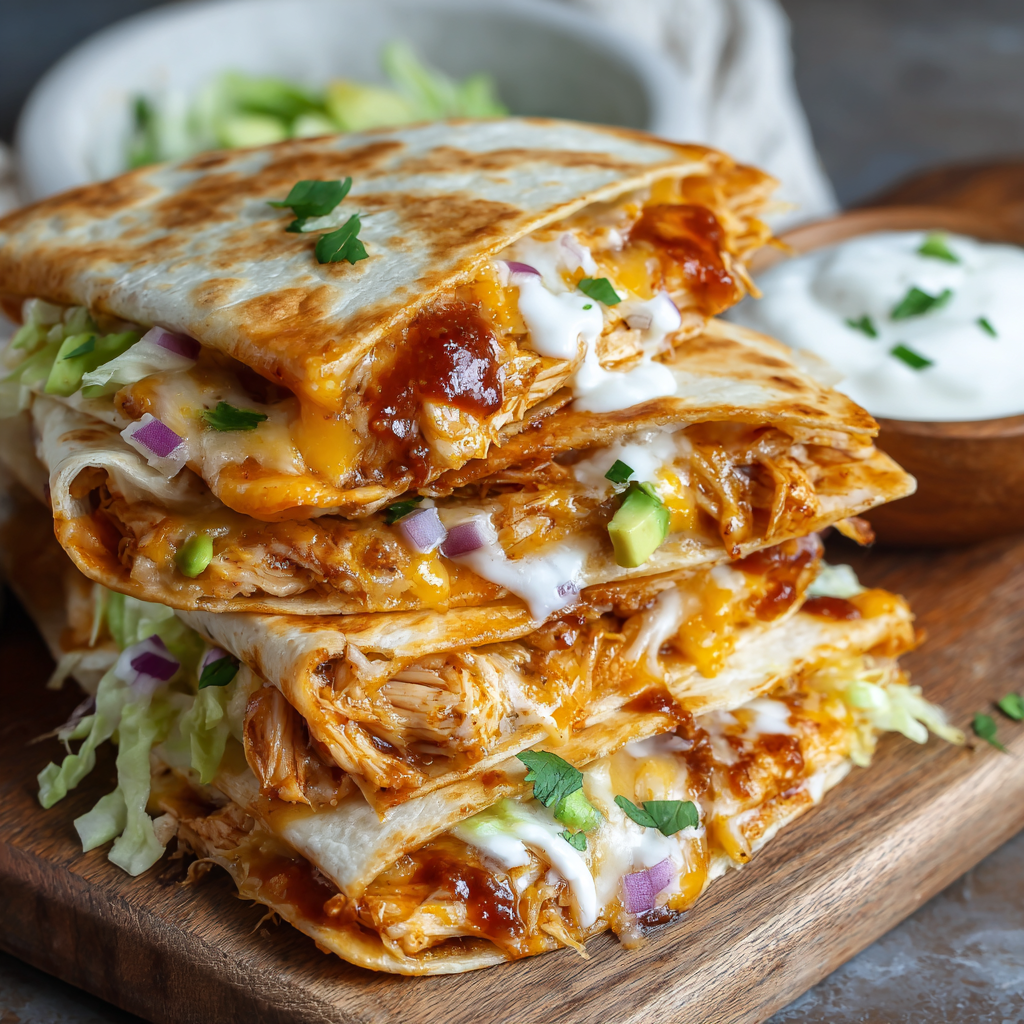
BBQ RANCH CHICKEN QUESADILLA TACOS
When Two Comfort Food Classics Collide
Hey there, kitchen friends! Olivia here, apron dusted with flour and my cutting board calling your name. Can we talk about that magical moment when you’re torn between tacos and quesadillas? I used to stare at my fridge like it was some culinary crossroads… until I created these BBQ Ranch Chicken Quesadilla Tacos! Imagine this: crispy corn tortillas hugging smoky BBQ-ranch chicken and molten cheese, folded like a taco but griddled like a quesadilla. It’s the mashup you didn’t know you needed – messy, indulgent, and guaranteed to make everyone hover around the stove. Whether it’s a chaotic Tuesday or game day with your rowdiest pals, these deliver that “wow” factor with minimal effort. No fancy skills required – just big flavors and even bigger smiles. Ready to turn simple ingredients into pure joy? Let’s make your kitchen smell like a Tex-Mex dream!
My BBQ-Ranch “Aha!” Moment
Picture this: It was my nephew’s 8th birthday party, and I’d promised “the best tacos ever.” Naturally, I panicked when I realized I’d accidentally bought corn tortillas instead of flour. As kids zoomed past the kitchen like hungry tornadoes, I spotted leftover BBQ chicken and ranch dressing from yesterday’s salad. In a stroke of desperation (or genius?), I slapped cheese and the saucy chicken between two corn tortillas, griddled them crisp, and folded them hot off the pan. The result? Kids declared them “crispy taco sandwiches!” and my sister begged for the recipe. Now, they’re my secret weapon for feeding crowds. That beautiful kitchen disaster taught me: sometimes the best recipes are born from happy accidents and hungry kids!
Your Flavor Toolkit
Grab these pantry heroes – flexibility is our motto!
- 1 lb chicken breast – Thighs work too for extra juicy shreds! (Pssst… rotisserie chicken is your weeknight BFF)
- 2 cups BBQ sauce – Sweet, smoky, or spicy – pick your personality! (Thin sauces work best for shredding)
- 1 packet ranch dressing mix – That salty, herby punch is KEY. Vegan? Use nutritional yeast + garlic powder!
- 16 corn tortillas – The 6-inch size is perfect. Pro tip: Warm them first so they don’t crack!
- 1–2 cups shredded cheese – Monterey Jack melts like a dream, but cheddar or pepper jack add fun twists!
- 1 tbsp olive oil – For that golden, crispy sear. Butter works too for extra richness.
- Salt to taste – Taste after mixing; ranch mix adds salt already!
Optional Toppings Crew: Diced red onion (quick-pickled is 🔥), fresh green onions, crunchy lettuce, extra BBQ sauce drizzle, cool ranch dressing, creamy avocado slices, spicy jalapeños. Go wild!
Let’s Build Some Delicious!
Follow these steps for maximum crunch and melty goodness:
- Cook & Shred That Chicken: Toss chicken, BBQ sauce, and ranch mix into a slow cooker (4 hrs on low) OR skillet (simmer 15-20 mins covered). When fork-tender, shred right in the pot! Chef’s hack: Use a hand mixer for lightning-fast shreds!
- Boost the Sauce: Mix shredded chicken with remaining cooking sauce. It should be saucy but not swimming – drain excess if needed. Taste! Need more ranch zing? Sprinkle in extra dry mix.
- Heat & Prep Tortillas: Warm tortillas in a dry skillet for 15 sec/side OR microwave wrapped in a damp towel. This prevents cracking! Brush one side of each lightly with oil.
- Build Your “Quesadilla Taco”: Place one tortilla oil-side down in a hot skillet. Sprinkle cheese, add chicken (don’t overstuff!), more cheese (glue!), then top with second tortilla oil-side UP. Press gently with spatula.
- Griddle to Perfection: Cook over medium heat 2-3 mins per side until GOLDEN with crispy edges and cheese oozes when pressed. Listen for that satisfying sizzle!
- Fold & Feast: Remove from pan, immediately fold in half (taco-style!) while warm and flexible. Cut into wedges if preferred. Top like you mean it!
The Science of the Perfect Crispy-Melty Bite
Ever wonder why these quesadilla tacos hit all the right textures? It’s not just luck—it’s science! The magic lies in the interplay of heat, fat, and timing. Corn tortillas, when heated properly, develop a sturdy crispness thanks to their low moisture content, while the cheese acts as both glue and molten lava. Here’s how to engineer perfection:
1. The Maillard Reaction: That golden-brown crust? It’s the Maillard reaction at work—a chemical dance between amino acids and sugars when exposed to heat. Brushing the tortillas with oil (or butter) accelerates this, creating a deeper flavor and audible crunch.
2. Cheese as the MVP: Cheese isn’t just for gooeyness; it’s a structural hero. The key is using a blend with good meltability (like Monterey Jack) and high fat content. As it melts, it binds the filling and tortillas, preventing a “filling avalanche” when folded. Pro tip: Sprinkle a thin layer directly onto the tortilla before adding chicken—this creates a glue-like base.
3. Steam Control: Overstuffing leads to steam buildup, which turns your crispy masterpiece soggy. Keep filling to ¼ cup per taco, and always pat excess sauce off the chicken. If liquid pools in the pan, your heat’s too low—crank it to medium for a quick sear without stewing.
4. The Fold Factor: Timing is everything. Fold the tacos the second they leave the pan, while the cheese is still stretchy. Letting them cool even 30 seconds makes the tortillas brittle. For extra crispness, press lightly with a spatula after folding to encourage contact with the pan’s residual heat.
Fun experiment: Try grating your cheese from a block (pre-shredded has anti-caking agents that hinder meltiness) or swapping in Oaxaca cheese for next-level stretch. Science has never tasted so good!
From Fridge Scraps to Gourmet: Creative Leftover Hacks
These BBQ ranch tacos are the ultimate canvas for kitchen cleanouts. Here’s how to transform random fridge finds into gourmet upgrades:
1. The “Everything but the Kitchen Sink” Version:
-
Veggies: Wilted spinach? Sauté it with garlic and tuck it under the cheese. Stale tortilla chips? Crush them for a surprise crunch layer.
-
Proteins: Leftover pulled pork, carnitas, or even chopped bacon add smoky depth. For a vegetarian twist, mash roasted sweet potatoes with BBQ sauce.
-
Cheese Ends: Mix and match! Brie rinds melt into decadence, while feta adds salty tang.
2. Global Flips:
-
Korean BBQ: Swap traditional BBQ sauce for gochujang-spiked sauce, top with quick-pickled cucumbers and sesame seeds.
-
Mediterranean: Use garlic-herb chicken, tzatziki instead of ranch, and crumbled feta. Add kalamata olives if you’re feeling fancy.
-
Hawaiian: Add diced pineapple to the chicken, use teriyaki sauce, and melt provolone.
3. Breakfast for Dinner:
Fill with scrambled eggs, crispy hash browns, and a drizzle of sriracha ranch. Fold into a “breakfast taco-dilla” and serve with avocado crema.
4. Sweet Endings:
Yes, dessert tacos! Griddle tortillas with Nutella and marshmallows, fold, and dust with powdered sugar. Or go savory-sweet with brie, sliced apples, and honey.
Pro Tip: Keep a “quesadilla taco kit” in the freezer—pre-cooked chicken in BBQ-ranch sauce and portioned cheese blends. Assemble straight from frozen (add 1 extra minute per side).
Hosting Hacks: How to Feed a Crowd Without Losing Your Mind
Game day, potlucks, or sleepover snacks—this recipe scales like a champ. Here’s your stress-free playbook:
1. The Assembly Line Method:
-
Prep Stations: Set up a DIY bar with bowls of fillings (chicken, cheeses, veggies), sauces, and pre-brushed tortillas. Let guests build their own—kids love it!
-
Griddle Strategy: Use two skillets or an electric griddle (350°F works perfectly). Cook 4–6 at a time, keeping finished tacos warm in a 200°F oven on a wire rack (prevents sogginess).
2. Make-Ahead Magic:
-
Chicken: Cook and shred chicken up to 3 days ahead; store in its sauce. Reheat with a splash of water to loosen.
-
Toppings: Pre-chop veggies, make quick-pickled onions (they last 2 weeks!), and portion cheese blends.
3. Beverage Pairings:
-
Spicy Versions: Balance heat with a lime-ade (lime juice + sparkling water + agave) or a light lager.
-
Smoky/Sweet BBQ: Pair with iced tea with a bourbon kick or a malty amber ale.
4. Damage Control:
-
Leaky Fillings? Slice a small slit in the top of each taco post-fold—steam escapes without sacrificing crunch.
-
Cold Tacos? Revive in an air fryer (2 mins at 375°F) for near-fresh crispness.
Crowd-Pleasing Bonus: Turn leftovers into “taco-tot casserole”—layer chopped tacos with tater tots, extra cheese, and bake at 375°F until bubbly.
Dress to Impress
Slide these crispy beauties onto a big platter and let everyone customize! Serve with bowls of toppings so guests can go crazy. Pair with simple sides: a zesty lime-cilantro slaw or crispy sweet potato fries. For parties? Keep ’em warm in a 200°F oven on a wire rack – no soggy bottoms! Pro tip: Drizzle extra BBQ sauce and ranch in zigzags over the whole platter for Instagram-worthy flair.
Shake Up Your Flavor!
This recipe loves a remix:
- Buffalo Blue: Swap BBQ sauce for buffalo + crumbled blue cheese
- Veggie Power: Use black beans, corn, and sautéed peppers instead of chicken
- Breakfast Twist: Fill with scrambled eggs, crispy bacon, and cheddar
- Keto-Friendly: Use low-carb tortillas + sugar-free BBQ sauce
- Spicy Fiesta: Mix diced chipotles into chicken + pepper jack cheese
Olivia’s Real-Kitchen Confessions
Okay, true story: The first time I made these, I got overzealous with filling and cheese erupted like a volcano all over my pan. My husband dubbed it “cheese lace” and now we fight over the crispy bits! Over time, I’ve learned: medium heat is KEY (no scorching!), and letting them rest 1 minute before folding prevents filling avalanches. This recipe also evolved from slow-cooker-only to quick skillet chicken – because sometimes dinner can’t wait 4 hours! They’re now my most-requested recipe for potlucks. Just last week, my neighbor texted: “I made your ‘crispy taco things’ and my teen actually came out of his room!” Mission accomplished.
Your Questions, Answered!
Q: My tortillas keep cracking when I fold them! Help!
A: Warm tortillas are non-negotiable! Steam them or heat in a dry pan until pliable. Also, fold IMMEDIATELY off the heat while they’re still flexible.
Q: Can I make these ahead?
A: Cook chicken 3 days ahead, but assemble just before griddling. Reheating pre-made ones makes them soggy. For parties, set up a “dilla-taco” bar and let guests build their own!
Q: Why is my cheese leaking everywhere?
A: Too much filling or high heat! Keep chicken to ¼ cup per taco and maintain medium heat. Also, the cheese layer directly touching the tortilla acts as a “seal.”
Q: Corn tortillas sticking to the pan?
A: Ensure your skillet is properly heated before adding tortillas, and don’t skimp on that light oil brush! Nonstick or well-seasoned cast iron is ideal.
BBQ RANCH CHICKEN QUESADILLA TACOS
- Total Time: 30 minutes
Description
These crispy, cheesy BBQ Ranch Chicken Quesadilla Tacos are the answer to your midweek meal dilemma or game day cravings. With smoky-sweet chicken, melty cheese, and golden corn tortillas, they’re part taco, part quesadilla—and 100% crave-worthy. Folded while hot, griddled to perfection, and topped your way, this fun fusion dish turns simple ingredients into guaranteed smiles.
Ingredients
-
1 lb chicken breast (or thighs, or rotisserie chicken)
-
2 cups BBQ sauce (your favorite style)
-
1 packet ranch seasoning mix
-
16 corn tortillas (6-inch, warmed)
-
1–2 cups shredded cheese (Monterey Jack, cheddar, or pepper jack)
-
1 tbsp olive oil or butter
-
Salt to taste
Optional Toppings:
Red onion, green onion, lettuce, avocado, jalapeños, extra BBQ/ranch drizzle
Instructions
-
Cook Chicken: Simmer chicken with BBQ sauce + ranch mix (skillet: 15–20 mins, covered). Shred and return to sauce.
-
Warm Tortillas: Heat in skillet or microwave until soft. Brush one side with oil.
-
Assemble: In a hot skillet, place one tortilla oil-side down. Add cheese, chicken, more cheese, then top with another tortilla (oil-side up).
-
Griddle: Cook 2–3 mins per side over medium heat until golden and melty.
-
Fold: While hot, fold into taco shape. Top and serve!
Notes
-
Keep filling light to avoid spillover.
-
Use cheese directly against tortilla as a seal.
-
Fold immediately while warm for perfect taco form.
- Prep Time: 10 mins
- Cook Time: 20 mins
Nutrition
- Calories: 320 cal Per Serving
- Fat: 14g
- Carbohydrates: 24g
- Protein: 22g
Nutritional Notes (Approx per taco)
Calories: ~320 | Protein: 22g | Carbs: 24g | Fat: 14g
Note: Using low-fat cheese or less sauce reduces calories. Toppings add extra nutrition!
Final Thoughts: Why This Mashup Wins Every Time
The beauty of BBQ Ranch Chicken Quesadilla Tacos lies in their joyful chaos—they’re rebellious (tacos don’t have to be soft!), forgiving (no perfect folds required), and endlessly adaptable. They remind us that cooking isn’t about rigid rules; it’s about embracing accidents (like my nephew’s birthday crisis) and making flavors dance. Whether you’re a meal-prep warrior, a snack-time hero, or just someone who believes cheese is a food group, this recipe meets you where you are. So grab those tortillas, raid your fridge, and let’s turn dinnertime into a crispy, melty, saucy celebration. After all, the best recipes don’t just feed us—they make us laugh, share, and maybe even fight over the last bite.




