
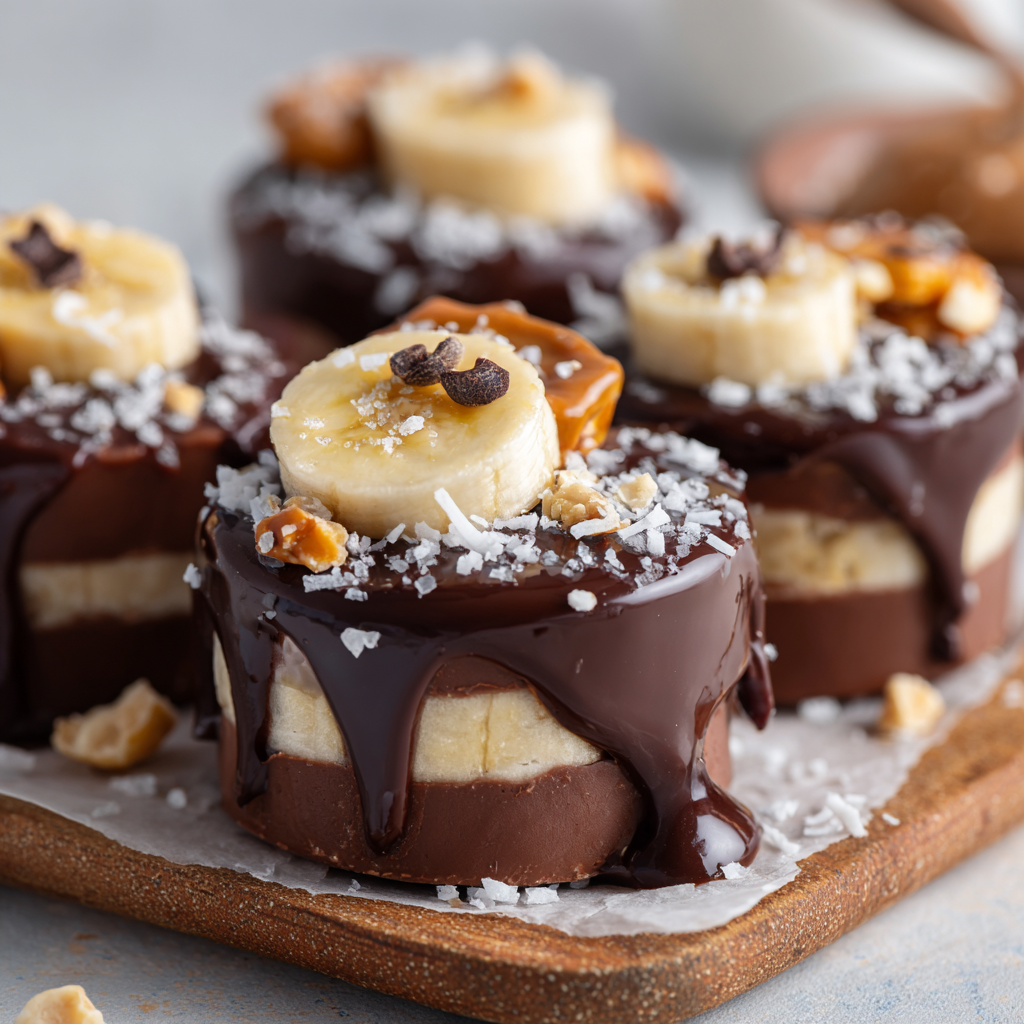
Frozen Chocolate Covered Banana Bites
Introduction
Hey there, kitchen friend! 👋 Picture this: It’s a sweltering summer afternoon, your sweet tooth is doing a happy dance, but the thought of turning on the oven makes you sweat just thinking about it. Enter: **Frozen Chocolate Covered Banana Bites**—your new secret weapon against dessert FOMO. These little bites are pure magic: creamy banana hugs wrapped in a crackly chocolate coat, finished with your favorite crunchy, salty, or nutty flair. They’re ridiculously easy, freezer-friendly, and taste like sunshine on a stick (minus the stick!). Whether you’re wrangling kiddos, hosting a last-minute girls’ night, or just treating yourself after a long day, these bites are your ticket to instant joy. Ready to make your freezer the coolest spot in the house? Let’s dive in!
Why These Bites Feel Like a Hug from My Childhood
Confession time: My obsession with chocolate-dipped bananas started at age 7. Every summer, my grandma would take me to this rickety boardwalk ice cream stand. They sold giant chocolate-dipped bananas on sticks, and I’d always get chocolate smeared from ear to ear. One sticky July day, Grandma winked and said, “Liv, why buy ‘em when we can make ‘em better?” We raced home, sliced bananas into bite-sized coins (no sticks!), raided her pantry for sprinkles and crushed peanuts, and turned her freezer into a chocolate wonderland. That afternoon, covered in melted chocolate and giggling at our messy aprons, I learned something: The best recipes aren’t about perfection. They’re about the *joy* of making something delicious with your own two hands—and maybe licking the bowl after. Every time I make these now, I taste sunshine and hear Grandma’s laugh. 💛
Gather Your Happy-Making Ingredients
**Simple pantry stars, big flavor payoff!** Pro tip: Use ripe-but-firm bananas—spotty yellow, not mushy brown—for the creamiest bite.
- 2 large bananas: Slice into 1-inch rounds! (Chef’s insight: Thicker slices = creamier centers, thinner = more chocolate-per-bite ratio. Your call!)
- 12 oz semi-sweet or dark chocolate, chopped: Use bars, not chips! Chips have stabilizers that can seize. (Sub: Milk chocolate for sweeter vibes, or dairy-free chocolate to keep it vegan.)
- 1 tbsp coconut oil: The magic trick for silky, crackly chocolate! (Sub: Refined coconut oil for neutral taste, or swap with 1 tsp vegetable oil in a pinch.)
- Flaky sea salt: Just a pinch! It’s the Beyoncé of toppings—elevates everything. (Chef’s must: Maldon salt for that *crunch*.)
Optional Topping Party (Pick your faves!):
- Peanut butter: Swipe a dab on banana slices before freezing for PB-choco bliss.
- Crushed pretzels: Sweet + salty = addictive. (Sub: Potato chips for extra crunch drama!)
- Honey drizzle: For floral sweetness—great with chopped nuts.
- Chopped nuts: Pecans, almonds, or pistachios add earthy crunch.
- Shredded coconut: Tropical twist! Toast it first for nutty depth.
Let’s Make Some Magic: Step-by-Step
Prep Bananas & Freeze (1 hour): Line a baking sheet with parchment paper (trust me, no sticking nightmares!). Slice bananas into 1-inch rounds—no need to be a ruler ninja. If using peanut butter or honey, add a tiny dab (½ tsp) on top of each slice. 🔥 Chef Hack: Space banana slices apart so they freeze individually—no banana clumps! Pop the tray flat into the freezer. Set a timer for 1 hour. (Use this time to dance to your favorite playlist or prep toppings!)
Melt Chocolate Like a Pro (5 mins): Chop chocolate bars into small, even pieces (faster melting!). Toss into a *dry* microwave-safe bowl with coconut oil. Microwave in 30-second bursts, stirring vigorously between each. Stop when 90% melted—residual heat will finish the job! ⚠️ Crucial Tip: Never let water touch the chocolate (it seizes!). If it gets thick, add ½ tsp more oil. Stir until glossy and smooth—it should coat a spoon beautifully.
Dip & Decorate (The FUN part! 15 mins): Pull bananas from freezer. Spear a frozen slice with a fork or toothpick. Dunk into chocolate, swirling to coat sides. Let excess drip off (tap fork gently!). Place back on parchment and IMMEDIATELY sprinkle toppings—chocolate sets fast on frozen bananas! 💡 Chef Hack: Work in batches! Keep ½ bananas frozen while dipping the others.
Freeze Until Set (30 mins): Return tray to freezer. Wait patiently (or not—I peek!) until chocolate is hard. ⏱️ Test: Gently poke one—no fingerprint left behind? Done!
Serve & Swoon: Pop bites into a bowl or stack ‘em high! Eat straight from freezer—they soften quickly. Store extras in an airtight container with parchment between layers. (They’ll last 2 weeks… if they survive that long!)
Serving: Keep it Cool & Cute!
These bites shine brightest served frozen! Pile them into mini paper cups for a retro ice cream truck vibe, or skewer 2-3 on cocktail picks for a fun dessert board centerpiece. For parties, set up a toppings bar with crushed cookies, rainbow sprinkles, and melted caramel—let guests DIY! Pair with iced coffee for brunch, or sneak a few into lunchboxes (trust me, you’ll be the coolest adult around).
The Science Behind the Perfect Frozen Bite
Let’s geek out on why this simple recipe works so brilliantly. Understanding the science helps troubleshoot and elevate your results!
1. Banana Texture Magic
Freezing banana slices transforms their cellular structure. The water inside forms tiny ice crystals, creating a creamy, almost ice cream-like texture when bitten. But here’s the key: Ripe but firm bananas have the ideal sugar-to-starch ratio. Overripe bananas turn mushy when frozen (great for smoothies, bad for structural integrity). Pro tip: Slice slightly thicker (1.25 inches) for a “slow melt” effect that mimics gelato.
2. Chocolate Physics 101
Tempering isn’t necessary here because we’re freezing immediately, but coconut oil plays a critical role. Its fatty acids raise the chocolate’s melting point slightly, preventing instant meltdowns on your fingers. The oil also thins the chocolate for smoother dipping. Why bars over chips? Chocolate chips contain stabilizers (like soy lecithin) that can make coatings waxy when frozen.
3. The Freezing Frenzy
Flash-freezing the banana slices before dipping is non-negotiable. This:
-
Prevents chocolate from causing the banana to “sweat” (which leads to separation)
-
Creates a thermal shock that helps chocolate set within seconds
-
Maintains distinct layers instead of a soggy amalgamation
4. Topping Adhesion Science
The milliseconds after dipping are crucial. As frozen banana meets warm chocolate, surface moisture sublimates (turns from ice directly to vapor), creating micro-pores for toppings to embed. Pressing gently within 3 seconds maximizes stickage. Fun fact: Flaky salt sticks better than fine salt because of its larger surface area!
Global Inspirations: Banana Bites Around the World
This treat has cousins across cultures—here’s how to take your taste buds on a world tour:
1. Brazilian Brigadeiro Style
Roll dipped bananas in chocolate sprinkles or crushed beijinho (toasted coconut). Add a pinch of instant coffee to the chocolate for depth.
2. Japanese Matcha Elegance
Whisk 1 tbsp matcha powder into the melted chocolate. Top with black sesame seeds and a drizzle of white chocolate.
3. Australian Fairy Bread Fun
Use white chocolate and coat in rainbow sprinkles (called “hundreds and thousands” Down Under). Add a dusting of freeze-dried strawberry powder.
4. Mediterranean Dream
Infuse chocolate with orange blossom water. Top with pistachios and a zigzag of tahini.
5. South African Inspired
Mix crushed Amarula biscuits into the chocolate. Garnish with caramelized banana chips.
Why It Works: Each version plays with contrasting textures (creamy/crunchy) while honoring local flavor profiles. The base recipe is a passport to creativity!
Meal Prep & Party Hacks
Turn these into your secret weapon for effortless entertaining:
Batch Prep Secrets
-
Pre-Slice & Freeze: Store banana coins in single layers in ziplock bags (up to 1 month). Dip straight from frozen when needed.
-
Chocolate Stations: Melt different chocolates (dark, white, ruby) in slow cookers on “warm” for DIY dipping parties.
-
Topping Kits: Prep small jars of toppings (labeled!) for stress-free assembly.
Next-Level Presentation
-
Chocolate “Claws”: Use a fork to create wavy lines on dipped bananas before freezing.
-
Popsicle Version: Insert toothpicks before freezing for handheld treats.
-
Dessert Board: Arrange with fresh fruit, cookies, and mini spoons of Nutella for dipping.
-
Affogato Style: Serve 2-3 bites with a shot of hot espresso for pouring.
Storage Pro-Tips
-
Avoid Frostbite: Place parchment between layers in an airtight container.
-
Revive Soft Bites: Re-freeze for 15 minutes before serving.
-
Gift Giving: Package in wax paper bags tied with ribbon (include reheating instructions).
Shake It Up: 5 Delicious Twists!
- “Elvis Special”: Spread banana slice with PB + honey, top with crumbled bacon post-dip.
- Tropical Escape: Mix shredded coconut + lime zest into chocolate. Top with macadamia nuts.
- Mint Chip Bliss: Add ¼ tsp peppermint extract to melted chocolate. Roll in crushed Oreos.
- Protein Power: Stir 1 scoop collagen peptides into melted chocolate (undetectable boost!).
- Vegan Cookie Dough: Skip honey, mix vegan chocolate with almond butter, roll in oat flour.
Olivia’s Kitchen Confessions
True story: The first time I made these, I got overzealous with toppings and created “banana avalanches” when I bit in—delicious, but messy! Now I gently press toppings so they stick. Over the years, I’ve learned: **Freezing bananas FIRST is non-negotiable** (warm bananas = sad chocolate soup). Also, using a fork instead of toothpicks gives better chocolate coverage. These bites have starred at every pool party I’ve hosted since 2018—my friend’s toddler calls them “chocolate banana moons.” 🍌🌙 The recipe hasn’t changed much, but my topping game? *Chef’s kiss.*
Your Questions, Answered!
Q: Why did my chocolate get clumpy?
A: Water is the enemy! Ensure your bowl/tools are bone dry. If chocolate seizes, add 1 tsp coconut oil and microwave 10 seconds—it might revive!
Q: Can I use frozen banana slices from the store?
A: Sadly, no—they’re too thin and watery. Fresh bananas freeze creamier!
Q: Help! My toppings won’t stick!
A: Sprinkle IMMEDIATELY after dipping—chocolate sets in seconds on frozen fruit. Press toppings lightly if needed.
Q: How do I prevent banana browning?
A: Freeze ASAP after slicing! A quick spritz of lemon juice works, but can add tang (great with dark chocolate though!).
Frozen Chocolate Covered Banana Bites
- Total Time: 1 hr 50 mins
Description
Beat the heat with these no-bake Frozen Chocolate Banana Bites—your freezer’s answer to summer dessert cravings! Creamy banana rounds dipped in silky chocolate, topped with your favorite crunchy, salty, or nutty twist. They’re sweet, snackable, and ready in under an hour. No oven, no fuss—just frozen fun and instant joy.
Ingredients
-
2 ripe (but firm) bananas, sliced into 1-inch rounds
-
12 oz chopped dark or semi-sweet chocolate
-
1 tbsp coconut oil
-
Flaky sea salt (optional)
Optional toppings:
-
Peanut butter (½ tsp per slice)
-
Crushed pretzels, chopped nuts, shredded coconut, sprinkles, honey drizzle
Instructions
-
Prep & Freeze (1 hour)
Place banana slices (with optional PB/honey) on parchment-lined tray. Freeze for 1 hour until firm. -
Melt the Magic (5 mins)
Microwave chocolate + coconut oil in 30-sec bursts until 90% melted. Stir until smooth and glossy. -
Dip & Decorate (15 mins)
Spear frozen banana slice with fork. Dip into chocolate, let excess drip, place on tray. Sprinkle toppings immediately. -
Freeze to Set (30 mins)
Return tray to freezer until chocolate is fully hardened.
Notes
-
Use a fork for full chocolate coverage
-
Try peppermint extract + crushed Oreos for “Mint Chip” vibes
-
Press toppings gently—no avalanche bites!
-
Store in airtight container with parchment between layers
- Prep Time: 20 mins
Nutrition
- Calories: 90 cal Per Serving
- Sugar: 8g
- Fat: 5g
- Carbohydrates: 12g
- Fiber: 2g
Nutritional Perks (Because Balance!)
Per bite (approx): ~90 kcal | Carbs: 12g | Fat: 5g | Sugar: 8g | Fiber: 2g
🌟 Banana goodness: Potassium + fiber! Dark chocolate = antioxidants. Healthier than ice cream, but feels decadent.
Final Thoughts
Frozen Chocolate Covered Banana Bites are more than a recipe—they’re edible joy capsules. They’ve saved me from melted ice cream disasters, become my go-to hostess gift, and even starred as “healthy-ish” birthday party favors. The beauty lies in their versatility: fancy enough for date night, easy enough for kids’ cooking projects. Every time I pull a batch from the freezer, I’m reminded that the best desserts aren’t about complicated techniques—they’re about that magical moment when crisp chocolate gives way to cold, creamy banana. So raid that fruit bowl, embrace the messy fun, and remember: life’s too short for boring snacks. Now, who’s ready to turn their freezer into a happiness factory? 🍫❄️
P.S. If you invent an amazing new topping combo, name it after yourself and tag me—I live for your kitchen adventures!
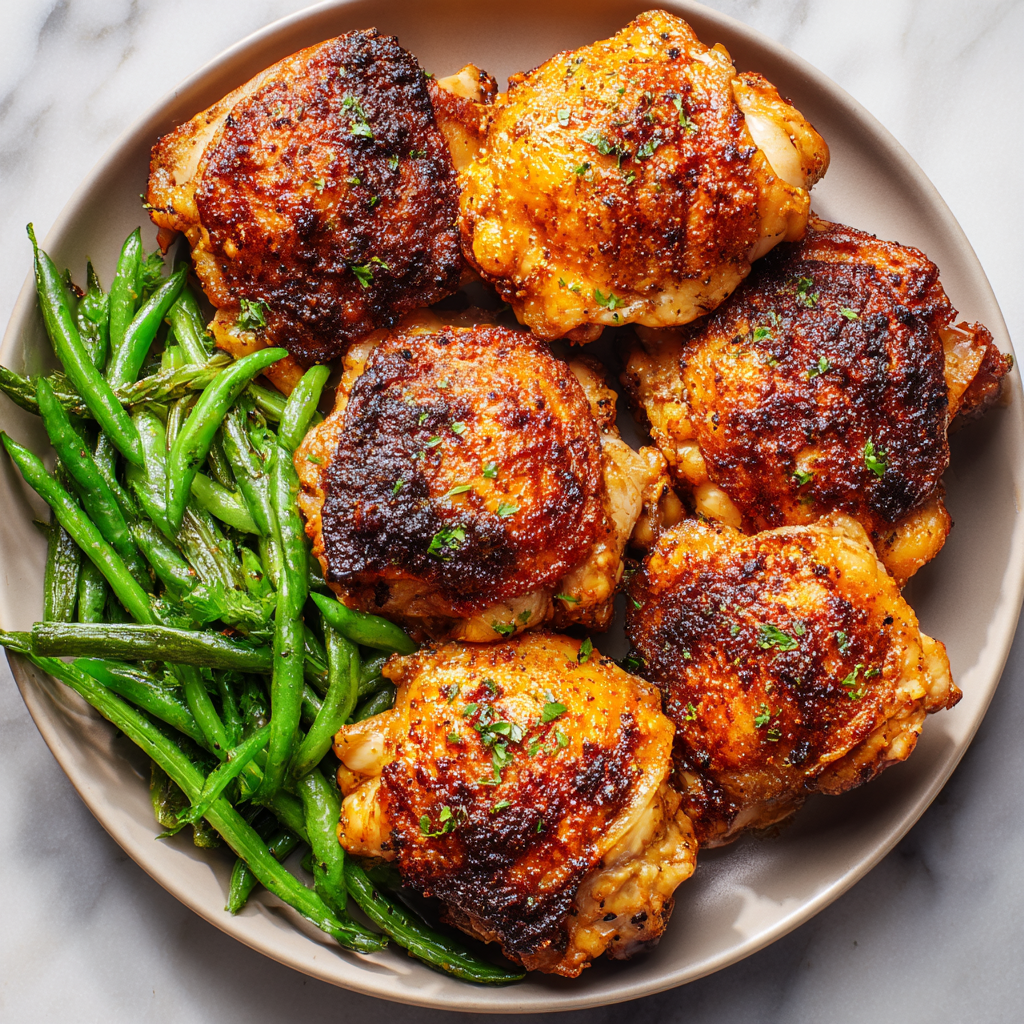
Crispy Air Fryer Chicken Thighs
Your New Busy-Night BFF: Crispy Air Fryer Chicken Thighs
Hey there, kitchen friends! Olivia here, and I can practically smell the excitement through your screen. You know those nights when your schedule’s chaos incarnate, your stomach’s rumbling like a thunderstorm, and takeout menus suddenly feel like complicated math homework? Yeah, we’ve all been there. But what if I told you your air fryer’s about to become your weeknight superhero? These Crispy Air Fryer Chicken Thighs are the golden, juicy, flavor-packed answer to “What’s for dinner?” panic. We’re talking skin so shatteringly crisp it’ll make you swoon, meat so tender it practically hugs your fork, and all done in under 30 minutes with barely any cleanup. No fancy skills needed—just a handful of pantry staples, your trusty air fryer, and that beautiful hunger of yours. Ready to turn chaos into crispy magic? Let’s dive in!
Why Chicken Thighs? A Little Kitchen Confession
Picture this: It’s a rainy Tuesday, my toddler’s building a Lego fortress in the living room, my laptop’s blinking with unanswered emails, and dinner? A distant dream. In my pre-air-fryer days, this scenario meant sad, rubbery chicken breasts. Then, one chaotic evening, I grabbed the humble chicken thighs hiding in my fridge—the ones I usually saved for slow-cooking. Desperation led to experimentation. I tossed them in spices, crossed my fingers, and let the air fryer work its magic. Twenty-five minutes later? A revelation! The skin puffed into a glorious, crackling crown while the meat stayed obscenely juicy. My husband took one bite, looked at me with wide eyes, and mumbled, “This is restaurant good.” Our toddler even abandoned his Legos to steal a piece! That messy, beautiful moment cemented thighs as my forever-weeknight MVP. They’re forgiving (no drying out!), affordable, and packed with flavor—just like the best kitchen memories should be.
Your Flavor Toolkit: Simple Ingredients, Big Impact
Gather these heroes! Each one plays a starring role in our crispy mission:
- 2 lbs bone-in, skin-on chicken thighs (about 4 pieces): The star! Bones keep moisture locked in, and skin = CRISP. Sub? Skinless thighs work (cook 3-5 mins less), but skin-on is life-changing. Pro tip: Pat ’em bone-dry with paper towels for max crispiness!
- 1 tbsp vegetable oil: Our crispy catalyst! Helps spices stick and promotes browning. Olive oil works, but its smoke point is lower—avocado oil is my high-heat fave.
- ½ tbsp salt: Flavor foundation. Kosher salt is ideal (less salty by volume than table salt).
- ½ tsp ground black pepper: That essential warm kick. Freshly cracked is chef’s gold!
- 1 tsp garlic powder: Depth and savory magic. No fresh garlic here—it burns in the air fryer!
- 1 tsp paprika: Sweet smokiness and gorgeous color. Smoked paprika? YES for campfire vibes!
- ½ tsp Italian seasoning: Herby brightness. No blend? Use ¼ tsp each dried oregano and basil.
- 1 tsp Worcestershire sauce or soy sauce (optional): Umami BOMB! Worcestershire adds complexity, soy sauce brings salty depth. Gluten-free? Use tamari.
- 1 tsp balsamic vinegar (optional): My secret weapon! A tiny splash balances richness with tang. Apple cider vinegar works too.
Crispy Perfection: Your Foolproof Roadmap
Let’s transform these beauties! Follow these steps for thigh glory:
- Marinate Like a Boss: “Place chicken in a large Ziploc bag. Add oil and all seasonings. Seal and shake to coat evenly.” → Pro Tip: Massage that bag like you’re kneading happy dough! Get every nook and cranny coated. No bag? Use a bowl—just toss well. Refrigerate for at least 1 hour or overnight for max flavor. Chef Hack: Prep this in the morning—dinner cooks itself later!
- Preheat = Crisp Insurance: “Set your air fryer to 375°F and preheat for 5 minutes.” → Why? A hot start blasts the skin instantly, preventing sog. Don’t skip!
- Cook to Golden Glory: “Arrange chicken thighs skin-side up in a single layer. Air fry for 25–28 minutes until golden brown and crispy.” → Crucial: NO CROWDING! Give ’em space or they’ll steam. Skin-side UP ensures maximum crisp exposure. Halfway through? Pause, peek, but DON’T flip! Flipping = less crispy skin. Internal temp should reach 165°F (use a meat thermometer!). Chef Hack: For EXTRA crisp, spritz skin lightly with oil at the 15-min mark.
The Science Behind Air Fryer Crispiness
Ever wonder why air-fried chicken thighs come out so irresistibly crispy while staying juicy inside? It’s all about the magic of rapid hot air circulation and the Maillard reaction—the scientific process that turns food golden brown and delicious.
How Air Frying Works
Unlike deep frying (where food is submerged in oil), air fryers blast superheated air (up to 400°F) around the food at high speed. This mimics deep frying by:
-
Evaporating surface moisture quickly, which is key for crispiness.
-
Rendering fat from the chicken skin, making it puff up like a potato chip.
-
Creating a caramelized crust via the Maillard reaction (when proteins and sugars brown at high heat).
Why Chicken Thighs Win
Chicken thighs are the ideal cut for air frying because:
-
Higher fat content – The skin and marbling keep the meat moist, even if slightly overcooked.
-
Forgiving texture – Unlike lean breasts, thighs won’t dry out easily.
-
Bone-in advantage – Bones act as a heat buffer, preventing the meat from overcooking before the skin crisps.
Pro Tips for Maximum Crisp
-
Pat the skin dry before seasoning (water = steam = soggy skin).
-
Preheat the air fryer – A hot start ensures immediate browning.
-
Don’t overcrowd – Leave space between thighs for airflow.
-
No flipping needed – Skin-side up the whole time guarantees even crispiness.
Fun fact: A 2020 Journal of Food Science study found that air-fried chicken retains more moisture than oven-baked versions while achieving similar crispiness to deep frying—but with 80% less oil!
Flavor Variations to Keep It Exciting
Once you’ve mastered the basic crispy thigh, try these 5 global flavor twists to keep dinner exciting!
1. Korean Gochujang Glaze
Ingredients: 1 tbsp gochujang (Korean chili paste), 1 tbsp honey, 1 tsp soy sauce, 1 minced garlic clove, 1 tsp sesame oil.
Method: Brush on thighs during the last 5 minutes of cooking. Garnish with sesame seeds and scallions.
2. Mediterranean Lemon & Oregano
Ingredients: Zest of 1 lemon, 2 tbsp olive oil, 1 tsp dried oregano, 2 minced garlic cloves, ½ tsp sumac (optional).
Method: Marinate thighs for 1+ hour. Serve with tzatziki and pita.
3. Nashville Hot Chicken
Ingredients: 1 tbsp cayenne pepper, 1 tsp brown sugar, ½ tsp smoked paprika, 2 tbsp melted butter.
Method: Toss cooked thighs in the spicy butter mixture. Pair with pickles and ranch.
4. Indian Tandoori-Inspired
Ingredients: 1 tbsp tandoori masala, ½ cup Greek yogurt, 1 tbsp lemon juice, 1 tsp grated ginger.
Method: Marinate thighs for 4+ hours. Air fry until charred at edges.
5. BBQ Dry Rub
Ingredients: 1 tbsp brown sugar, 1 tsp smoked paprika, ½ tsp cumin, ½ tsp garlic powder, ¼ tsp chili powder.
Method: Coat thighs before cooking. Spritz with apple cider vinegar mid-cook for tang.
Why These Work:
-
Acids (lemon, vinegar) tenderize the meat.
-
Sugar-based glazes caramelize for sticky-sweet crusts.
-
Yogurt marinades add tang and promote browning.
Air Fryer vs. Oven vs. Deep Fryer – The Ultimate Showdown
Wondering how air-fried chicken thighs stack up against other methods? Let’s break it down:
| Factor | Air Fryer | Oven | Deep Fryer |
|---|---|---|---|
| Crispiness | 9/10 (near-deep-fry) | 7/10 (can dry out) | 10/10 (gold standard) |
| Juiciness | 9/10 | 6/10 | 8/10 |
| Cook Time | 25 mins | 40+ mins | 15 mins (but + oil prep) |
| Cleanup | Easy (nonstick basket) | Moderate (baking sheet) | Messy (oil disposal) |
| Health Factor | Low oil (1 tbsp) | Moderate oil | High oil absorption |
When to Choose Each:
-
Air Fryer: Weeknight speed + crispiness without guilt.
-
Oven: Cooking for a crowd (fits more thighs at once).
-
Deep Fryer: Special occasions (extra crunch but heavy).
Testimonial: A Cook’s Illustrated taste test found air-fried thighs were crispier than oven-baked and nearly identical to deep-fried in blind tastings—but with a fraction of the oil.
Plate It Pretty: Let’s Make It a Feast!
Golden thighs deserve a stage! Slide them onto a warm platter (cold plates = sad chicken). Let them rest 5 mins—juices redistribute, promise! Pair with creamy mashed potatoes for ultimate comfort, or bright garlicky green beans for freshness. Roasted sweet potatoes? Heaven! Drizzle any resting juices over top. Garnish with fresh parsley or a lemon wedge for zing. This is weeknight dinner, elevated!
Shake It Up: Delicious Twists!
Feeling adventurous? Try these:
- Spicy Cajun: Swap Italian seasoning for 1 tsp Cajun seasoning + ¼ tsp cayenne. Boom!
- Lemon-Herb Brightness: Skip paprika. Add zest of 1 lemon + 1 tsp dried thyme to marinade.
- Honey-Garlic Glaze: Last 5 mins of cooking, brush thighs with mix of 1 tbsp honey + 1 tsp minced garlic.
- Keto-Friendly: Already perfect! Serve over cauliflower mash or a crisp salad.
- Dairy-Free Crispy Parm: Post-cooking, sprinkle with nutritional yeast for cheesy vibes.
Olivia’s Extra Nuggets of Wisdom
This recipe’s my kitchen workhorse! It started as a desperate experiment (see: toddler chaos) but evolved into my most-requested dish. Funny story: I once forgot the oil in the marinade—result? Spices blew right off in the air fryer like a flavor tornado! Lesson learned: oil is glue. Over time, I added the balsamic/Worcestershire trick—that tiny tang cuts richness beautifully. Don’t stress exact spice measurements; taste your mix before adding chicken! More garlic? Go for it. Love heat? Add chili flakes. Make it yours! And yes, that crispy skin? Totally worth fighting over. Just ask my husband.
Your Crispy Chicken Queries, Solved!
Let’s tackle common hiccups:
- Q: Skin isn’t crispy! Help! A: Three culprits! 1) Didn’t pat thighs dry pre-marinade. 2) Overcrowded the basket (steam is crisp’s enemy!). 3) Skipped preheating. Fix: Dry well, single layer, preheat always!
- Q: Can I use frozen thighs? A: Thaw first! Cooking frozen = uneven results (soggy outside, raw inside). Thaw overnight in fridge or in cold water bath.
- Q: My spice mix burns! Why? A: Did you use garlic POWDER (good) or minced FRESH garlic (burns)? Stick to dried spices here. Also, ensure sugar-free spices—some blends have hidden sugars that caramelize too fast.
- Q: Cook time for smaller/larger thighs? A: Smaller thighs (6oz): Start checking at 20 mins. Jumbo (10oz+): May need 30-32 mins. Temp is key—always use a thermometer!
Crispy Air Fryer Chicken Thighs
- Total Time: 30 mins
Description
Dinner panic? Solved. These Air Fryer Chicken Thighs bring the CRISP – golden skin, juicy meat, and bold flavor, all in under 30 minutes. With pantry staples and zero fuss, you’ll have restaurant-worthy chicken that even your toddler might abandon Legos for (true story). Ready to rule the weeknight?
Ingredients
-
2 lbs bone-in, skin-on chicken thighs (about 4)
-
1 tbsp vegetable oil (or avocado oil)
-
½ tbsp salt
-
½ tsp black pepper
-
1 tsp garlic powder
-
1 tsp paprika (smoked if desired)
-
½ tsp Italian seasoning
-
1 tsp Worcestershire or soy sauce (optional)
-
1 tsp balsamic vinegar (optional)
Instructions
-
Marinate
Pat chicken dry. In a bag or bowl, toss chicken with oil, spices, and optional Worcestershire/vinegar. Massage well. Chill 1+ hour for max flavor. -
Preheat & Prep
Set air fryer to 375°F and preheat for 5 minutes. Arrange thighs skin-side up in a single layer—don’t crowd! -
Air Fry to Glory
Cook 25–28 mins until skin is deep golden and crispy. Internal temp should reach 165°F. Rest 5 mins before serving.
Notes
-
Skinless thighs? Cook 3–5 mins less.
-
Crispier skin? Spritz with oil at 15-minute mark.
-
Spice it up with Cajun seasoning or lemon zest + thyme.
-
Serve with mashed potatoes, green beans, or a side salad.
- Prep Time: 5 mins
- Cook Time: 25 mins
Nutrition
- Calories: 350 cal Per Serving
- Fat: 24g
- Carbohydrates: 2g
- Protein: 30g
Nutritional Info (Per Serving)
Calories: 350 | Protein: 30g | Fat: 24g | Carbs: 2g
Note: Estimates based on ingredients. Values may vary with swaps.
Final Thoughts
Crispy air fryer chicken thighs aren’t just a recipe—they’re a weeknight revolution. They prove that fast food doesn’t have to mean takeout, and “healthy” doesn’t mean sacrificing crunch. Whether you stick to the classic or globe-trot with flavors, this dish adapts to your cravings.
So next time chaos strikes (and it will), remember: 25 minutes, one appliance, zero stress. That’s the power of a well-cooked thigh. Now go forth and crisp!
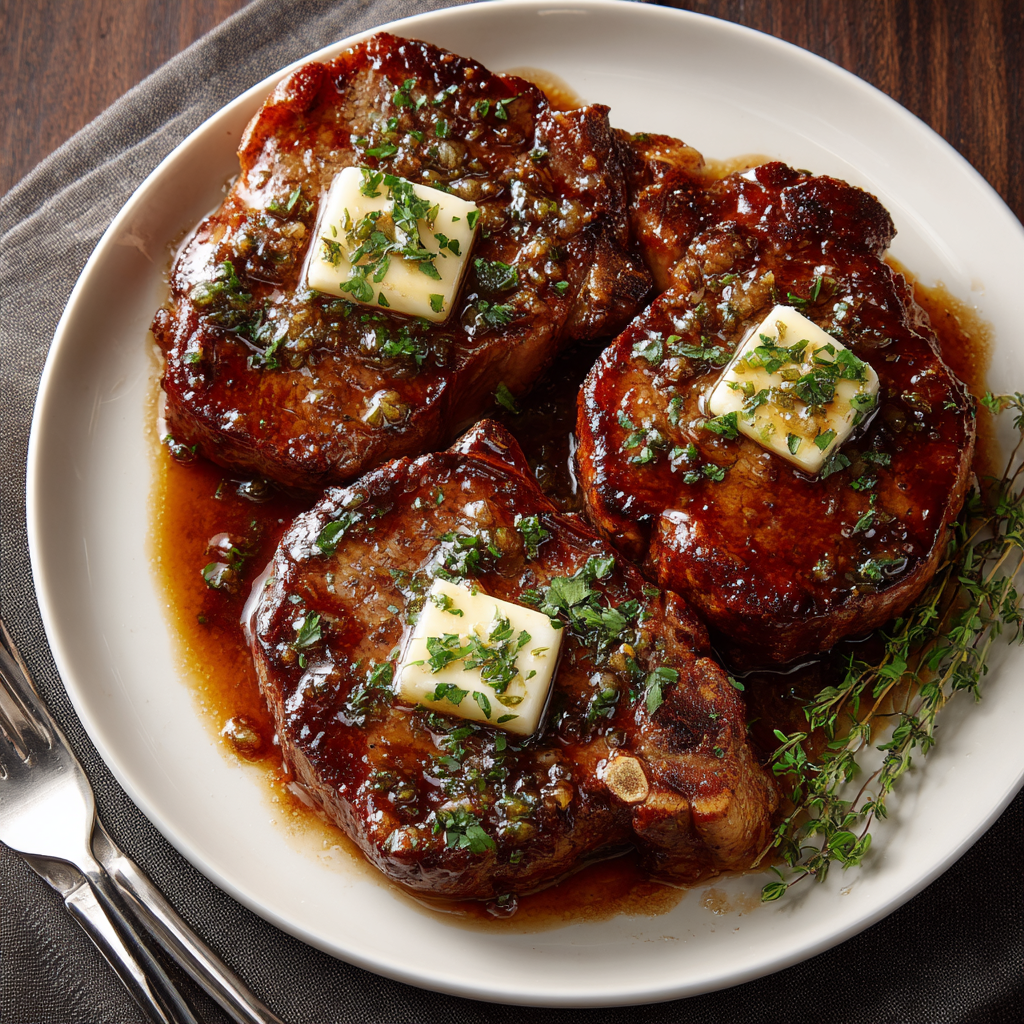
Delicious Brown Sugar Beef Chops
Introduction
Hey there, friend! Olivia here, waving from my flour-dusted kitchen counter. Is there anything better than that moment when dinner hits the table and everyone goes quiet? You know the sound – forks clinking, satisfied sighs, maybe a mumbled “oh wow” between bites. That’s the magic I chase every single day, and it’s exactly what these Brown Sugar Beef Chops deliver. Imagine this: thick, juicy beef chops nestled in a baking dish, topped with melting nuggets of butter and a generous sprinkle of rich brown sugar. As they bake, your kitchen fills with an intoxicating aroma – sweet caramel notes dancing with the deep, savory whispers of soy and Worcestershire sauce. It’s cozy, it’s comforting, and it’s incredibly simple. This isn’t fussy restaurant food; it’s the kind of soul-warming, crowd-pleasing dish that turns an ordinary Tuesday into something special. Whether you’re cooking for your family after a long day or prepping a stress-free meal for weekend guests, these chops are your secret weapon. They prove you don’t need fancy techniques or hours of prep to create something truly unforgettable. Just a handful of pantry staples, a trusty baking dish, and a whole lot of love. Ready to make some delicious magic? Let’s get cooking!
Why These Chops Feel Like Home
This recipe always takes me back to my first tiny apartment kitchen – the one with the oven that only *mostly* worked and the counter space barely big enough for a cutting board. I was hosting my then-boyfriend (now husband!) and his parents for the very first time. Panic mode? Absolutely. I wanted something impressive but foolproof. I remembered my grandma’s trick of baking pork chops with apples and brown sugar, but I craved something bolder, meatier. I grabbed some thick beef chops on sale, raided my pantry, and threw together this sweet-savory glaze almost on a whim. As that incredible smell filled my shoebox kitchen, my nerves melted away. When we sat down, the chops were glistening, sticky, and tender enough to cut with a fork. His dad, a man of few words, went back for seconds and asked for the recipe. That quiet “mmhmm” and the clean plates told me everything. It became our “special occasion that feels easy” meal – anniversaries, promotions, even just celebrating making it through a tough week. It’s more than just a recipe; it’s a reminder that the best meals often come from simple ingredients and a dash of courage.
Gathering Your Flavor Powerhouse
Here’s the beautiful part – just a few key players create massive flavor. Let’s break them down:
- 4 thick (1-inch) beef chops (ribeye or sirloin work well): Thickness is KEY here! Thin chops will overcook and dry out before the glaze works its magic. Ribeye offers incredible marbling for richness, while sirloin is leaner but still beautifully tender when baked this way. Ask your butcher for “bone-in beef ribeye chops” or “top sirloin chops” cut thick.
- 4 tbsp brown sugar, packed: This isn’t just sweetener! The molasses in brown sugar is the secret to that deep caramelization and sticky glaze. Pack it firmly into your measuring spoon for the right amount. Dark brown sugar has more molasses for an even richer flavor, but light works perfectly too. For a less refined option, try coconut sugar!
- 4 tbsp butter: Unsalted is my go-to, so I control the salt. It melts over the chops, basting them in richness and helping the sugar form that luscious, buttery crust. Cold butter straight from the fridge works best for topping.
- 1 tbsp soy sauce: Our salty, savory umami bomb! It balances the sweetness and adds depth. Use low-sodium if you’re watching salt, or swap in tamari for a gluten-free version. Coconut aminos are a great soy-free alternative.
- 1 tbsp Worcestershire sauce: The flavor MVP! It adds complexity with its tangy, savory, slightly fermented notes. Lea & Perrins is the classic. If you need an anchovy-free version, check labels carefully or use an extra splash of soy sauce mixed with a tiny pinch of clove powder.
Cooking Up Comfort: Step-by-Step
Don’t let the simplicity fool you – these little details make all the difference!
- Preheat & Prep (The Foundation): Crank that oven to 350°F (175°C). While it heats, grab a large, sturdy baking dish (a 9×13 inch works great). Lightly grease the bottom with a touch of oil, butter, or cooking spray. This prevents sticking and makes cleanup a breeze. Arrange your beautiful chops in a single layer with a little space between them – no overlapping! This ensures even cooking and perfect glazing. Chef’s Hack: Pat the chops dry with a paper towel before placing them. Removing surface moisture helps the glaze adhere better!
- Flavor Boost (Sweet & Rich Base): Now, the fun part! Take 1 tablespoon of that packed brown sugar and sprinkle it evenly over the top of each chop. Imagine you’re giving each one a sweet, sandy blanket. Next, place one full tablespoon of cold butter right on top of the sugar pile on each chop. Don’t worry if it seems like a lot – it’s melting into pure gold, basting the meat and mingling with the sugar. Chef’s Insight: This direct butter-on-sugar contact jumpstarts the caramelization process as it melts.
- Drizzle & Cover (Umami Injection): Grab your soy and Worcestershire sauces. Drizzle them evenly back and forth over all the chops. You’ll see it pooling deliciously in the bottom of the dish – that’s your flavor foundation! Now, tightly cover the entire dish with aluminum foil, sealing the edges well. This creates a steamy little sauna, ensuring the chops cook through gently and stay incredibly juicy. Pro Tip: Use heavy-duty foil if you have it to prevent any accidental tears during handling.
- Bake & Finish (The Glaze Glory): Slide that covered dish into your preheated oven and bake for 40 minutes. This slow, steamy bake tenderizes the meat. After 40 minutes, carefully remove the dish (steam is hot!) and peel off the foil. Behold! The chops will be cooked, but pale. Return the dish, uncovered, to the oven for the final 20 minutes. THIS is where the magic happens. The butter-sugar mixture bubbles furiously, reducing and caramelizing into that stunning, sticky, mahogany-brown glaze. Watch Closely: If your oven runs hot, check at 15 minutes. You want the tops golden, the sauce thick and syrupy, and an instant-read thermometer reading 145°F (63°C) in the thickest part for medium. Let them rest for 5-10 minutes before serving – this lets the juices redistribute for maximum tenderness!
Serving Your Masterpiece
Presentation is simple but oh-so-satisfying! Use a sturdy spatula to carefully lift each glazed chop onto a warm plate – that sticky glaze is precious cargo! Spoon any extra caramelized sauce pooling in the dish generously over the top. These chops crave simple, comforting sides that won’t compete: creamy mashed potatoes (perfect for soaking up that sauce!), buttered egg noodles, or roasted sweet potatoes. For freshness, add a crisp green salad with a tangy vinaigrette or some simply steamed green beans. Serve immediately and watch those smiles appear!
Make It Your Own: Flavor Twists
Love the base recipe? Try these easy spins!
- Spicy Kick: Add 1/2 tsp crushed red pepper flakes or a few dashes of your favorite hot sauce to the soy/Worcestershire drizzle.
- Herb & Garlic Delight: Sprinkle 1 tsp dried rosemary or thyme and 2 minced garlic cloves over the chops before adding the sugar and butter.
- Smoky Sensation: Add 1/2 tsp smoked paprika to the brown sugar before sprinkling.
- Gluten-Free: Use certified GF tamari instead of soy sauce and ensure your Worcestershire is GF (like Lea & Perrins which is GF in the US).
- Pork Swap: Use thick-cut, bone-in pork chops instead of beef! Adjust baking time – check pork at 30 mins covered, then 15-20 mins uncovered until internal temp reaches 145°F (63°C).
Olivia’s Kitchen Notes
This recipe is a testament to the power of simplicity! Over the years, I’ve learned a few things: First, don’t skip the resting time after baking – it makes the chops incredibly juicy. Second, that uncovered bake time is non-negotiable for glaze perfection! Once, in a pre-coffee haze, I forgot the foil for the first bake. Result? Tough chops and burnt sugar. Lesson learned! Now, I leave a sticky note on the oven as a reminder. I also love using a mix of dark and light brown sugar sometimes for extra molasses depth. The beauty is its adaptability – it’s become my “clean out the crisper” recipe, where I’ll sometimes toss halved baby potatoes or carrot chunks into the dish around the chops during the last 20 minutes of uncovered baking. They roast in that incredible sauce! It’s evolved from a nervous first-date meal to my ultimate weeknight comfort blanket.
Your Questions, Answered!
Let’s tackle some common kitchen queries:
- Q: Can I use thin beef chops?
A: I really don’t recommend it. Thin chops (less than 1-inch) will likely overcook and become tough during the required baking time to develop the glaze. The thick cut ensures a tender interior while the exterior caramelizes. If thin chops are all you have, drastically reduce the covered bake time (start checking at 20 mins) and monitor the uncovered time closely (maybe only 10 mins). But thick is best! - Q: My glaze isn’t thickening/getting sticky. What happened?
A: Two likely culprits: 1) The dish was too crowded, releasing too much liquid. Ensure chops aren’t touching. 2) The oven temp might be off. Use an oven thermometer to verify 350°F. If it’s still thin after the full uncovered time, carefully transfer the chops to a plate, pour the sauce into a small saucepan, and simmer rapidly on the stovetop for 2-4 minutes until reduced and syrupy. Pour back over chops. - Q: Can I make this ahead?
A: You can prep the chops in the baking dish (add sugar, butter, sauces) cover tightly, and refrigerate for up to 4 hours before baking. Let it sit at room temp for 20-30 mins before baking as cold dishes lower the oven temp. Fully cooked chops reheat gently (covered, in a 300°F oven or microwave) but the glaze is best fresh. - Q: Is this recipe freezer-friendly?
A: The cooked chops freeze *okay* for up to 2 months, but the texture of the reheated meat might be slightly less tender, and the glaze can become grainy. It’s best enjoyed fresh! Freeze the raw, seasoned chops (without baking) for better results. Thaw overnight in the fridge before baking as directed.
Delicious Brown Sugar Beef Chops
- Total Time: 1 hr 10 mins
Description
Dinner doesn’t need to be fancy to be unforgettable. These Brown Sugar Beef Chops bring that quiet table moment – when forks pause midair and someone whispers “oh wow.” Picture thick, juicy chops glazed in buttery brown sugar, kissed with soy and Worcestershire, and baked to a sticky, savory-sweet perfection. It’s your new cozy-weeknight or casual-dinner-party star.
Ingredients
-
4 thick-cut beef chops (1″ ribeye or sirloin)
-
4 tbsp brown sugar (light or dark), packed
-
4 tbsp cold unsalted butter
-
1 tbsp soy sauce
-
1 tbsp Worcestershire sauce
Instructions
-
Prep & Arrange
Preheat oven to 350°F (175°C). Lightly grease a 9×13″ baking dish. Pat chops dry and place in a single layer. -
Sweet & Rich Layering
Top each chop with 1 tbsp brown sugar and 1 tbsp cold butter. -
Flavor Boost
Drizzle soy sauce and Worcestershire evenly over all chops. Cover dish tightly with foil. -
Bake & Glaze
Bake covered for 40 mins. Remove foil and bake uncovered for another 20 mins until the glaze is thick and bubbling, and internal temp hits 145°F (63°C). Let rest 5–10 mins.
Notes
-
Add herbs (thyme, garlic) for depth
-
Use smoked paprika for BBQ vibes
-
Works great with thick pork chops too!
-
Toss baby potatoes in during last 20 mins to roast in glaze
- Prep Time: 10 mins
- Cook Time: 60 mins
Nutrition
- Calories: 420 cal Per Serving
- Sugar: 7g
- Fat: 28g
- Carbohydrates: 8g
- Protein: 36g
Nutritional Information (Per Serving, Estimate)
Calories: 420 | Protein: 36g | Fat: 28g | Carbs: 8g | Sugar: 7g
Note: Nutritional values are estimates and can vary based on specific ingredients used (e.g., exact fat content of the chop, type of brown sugar/butter).
Final Thoughts: Why This Recipe Belongs in Your Rotation
This dish is more than just a meal—it’s a reminder that the best cooking is equal parts simplicity and heart. With pantry staples and minimal effort, you create something that feels indulgent, comforting, and universally loved. It’s adaptable (swap beef for pork, play with spices), forgiving (even if the glaze isn’t perfect, it’ll taste amazing), and endlessly rewarding. Whether it’s a hectic weeknight or a lazy Sunday dinner, these brown sugar beef chops promise quiet forks and full bellies—the highest compliment a home cook can receive. So preheat that oven, and let the aroma work its magic. Happy cooking!
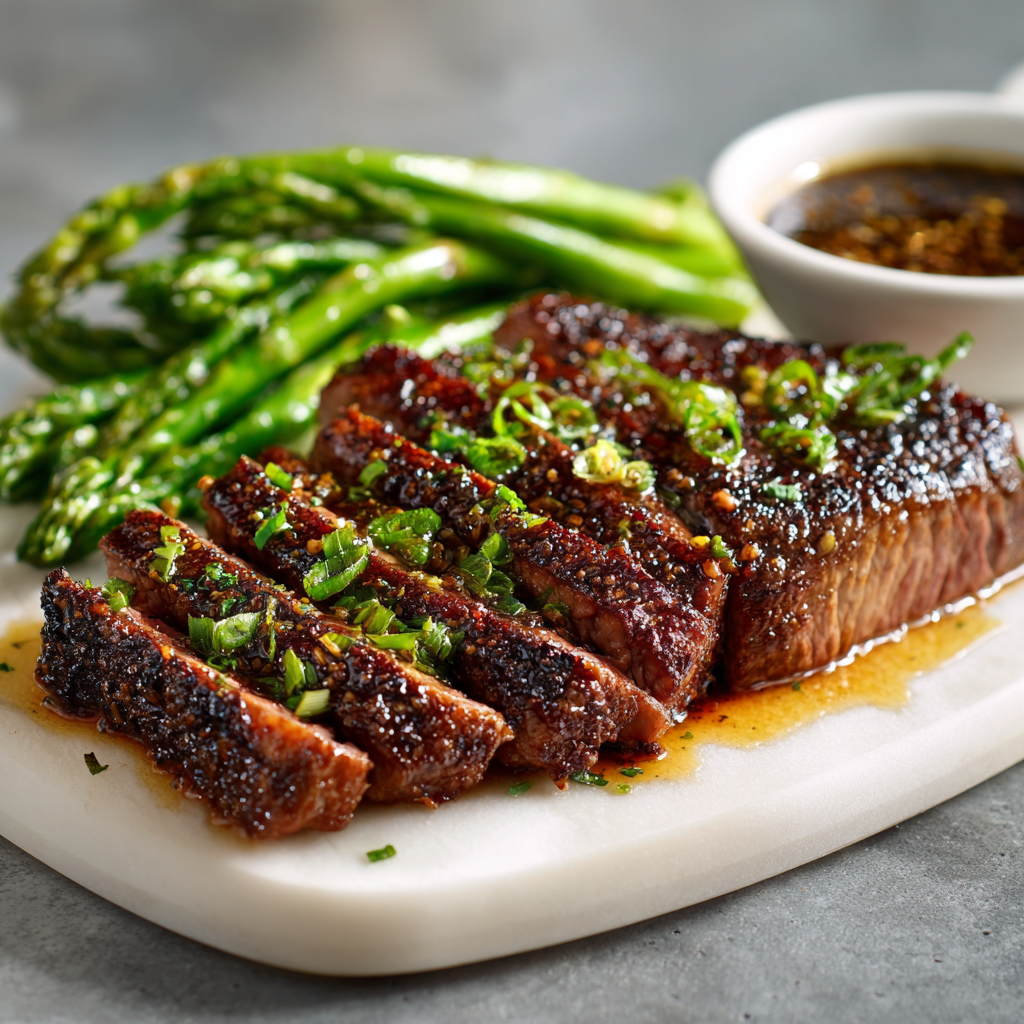
Best Steak Marinade In Existence
Unlock Steak Perfection: The Marinade That’ll Make You a Grill Hero
Hey there, kitchen friends! Olivia here, waving from my flour-dusted countertop. Can you smell that? It’s the sizzle of juicy steak hitting a hot grill, the smoky perfume that makes neighbors peek over fences and stomachs growl in happy anticipation. If you’ve ever stared at a beautiful cut of beef and thought, “How do I make this unforgettable?” – darling, you’ve just found your flavor fairy godmother. This isn’t just any steak marinade; it’s the one my friends beg for at cookouts, the secret handshake in my recipe vault that turns Tuesday dinners into celebrations. We’re talking about a magical potion that tenderizes like a dream and packs a flavor punch so deep, it’ll make your taste buds write sonnets. No fancy skills needed – just enthusiasm and a trusty whisk! Whether you’re grilling under summer stars or pan-searing during a snowstorm, this marinade wraps your steak in a cozy, savory hug. Ready to become the steak whisperer of your friend group? Aprons on – let’s make magic!
How a Kitchen Disaster Birthed My Flavor Obsession
Picture this: It’s my husband’s 30th birthday bash, and I’m determined to impress 20 hungry guests with grilled ribeyes. But rookie mistake – I grabbed “low-sodium” soy sauce by accident. The result? Steak so bland, it could’ve doubled as wallpaper paste. Cue my frantic kitchen scramble! I started wildly dumping pantry staples into a bowl – lemon juice for zing, Worcestershire for depth, garlic powder because obviously – praying for a miracle. That beautiful chaos birthed this marinade. When those rescued steaks hit the grill, the caramelized aroma had everyone crowding around like moths to a flame. My friend Mark took one bite, closed his eyes, and whispered, “Olivia… what is this sorcery?” That messy “save” became our family’s most-requested recipe. Now, every time I whisk it up, I grin remembering how a near-disaster taught me the best flavors come from fearless experimenting (and maybe a tiny kitchen panic).
Your Flavor Dream Team: Simple Ingredients, Big Impact
Grab these pantry pals – each plays a starring role in our symphony of savoriness!
- ⅓ cup soy sauce: Our salty MVP! It penetrates deep, tenderizing while building umami bedrock. Chef’s swap: Tamari for gluten-free, or coconut aminos for lower sodium. Pro tip: Avoid “light” soy – we want that rich color!
- ½ cup olive oil: Carries flavors into every fiber and ensures juicy results. Chef’s insight: Extra virgin adds fruitiness, but regular works. Avocado oil handles high-heat sears beautifully.
- ⅓ cup fresh lemon juice: The bright counterpoint! Acidity tenderizes and cuts richness. Critical note: Bottled juice lacks vibrancy – real lemons only, friends!
- ¼ cup Worcestershire sauce: Our stealth flavor bomber! Adds fermented depth with hints of vinegar and spice. Fun fact: Contains anchovies – omit for vegan and use 2 tbsp balsamic + 1 tsp molasses.
- 1½ tablespoons garlic powder: Delivers consistent, mellow garlic essence without burning. Chef’s confession: Fresh garlic can scorch – powder is our grilled steak guardian angel.
Let’s Marinate: Your Path to Steak Glory
Follow these steps – I’ve packed them with insider tricks for foolproof flavor!
- Whisk it like you mean it! Combine everything in a bowl or mason jar. Chef’s hack: Use the jar method – screw the lid tight and shake violently for 10 seconds! No whisk? No problem. This also makes storage a breeze.
- Meet your meat Place steak in a resealable bag or shallow dish. Pour marinade over it. Game-changer tip: Massage it into the steak like you’re kneading dough. Flip it – show that meat some love! This cuts marinating time by 25%.
- The waiting game Seal/cover and refrigerate 2–8 hours. Golden rule: For thicker cuts (hello, ribeyes!), overnight is luxury. But 2 hours works for quick weeknights! Avoid over-marinating – acidity can make texture mushy past 24 hours.
- Pre-cook pep talk Remove steak from fridge 30 mins pre-grill. Shake off excess marinade. Why? Cold meat seizes up! Patting it dry with paper towels ensures epic crust formation.
- Cook & dream Grill, pan-sear, or broil to your desired doneness. Secret weapon: Baste with reserved (unused) marinade during the last 2 minutes – boil it first for safety!
- The grand finale Rest steak 5–10 mins before slicing. Chant with me: “Resting is not optional!” Those juices redistribute for melt-in-your-mouth bliss.
Serving Your Masterpiece: Set the Stage!
This steak deserves a standing ovation! Slice against the grain into thick, pink-centered ribbons – it maximizes tenderness. Pile them artfully on a warm platter (cold plates steal heat!). Drizzle with any resting juices. Pair with crispy roasted potatoes to soak up marinade magic, and a bright arugula salad with lemon vinaigrette to balance richness. For drama, garnish with flaky sea salt and a quick grind of black pepper. Pro tip: Light candles – even Tuesday steak feels celebratory this way!
The Science Behind the Perfect Steak Marinade
Ever wonder why some steaks taste like heaven while others are tougher than shoe leather? It all comes down to the science of marination. A great marinade does three things: tenderizes, flavors, and retains moisture. Let’s break it down.
Tenderizing Power: Acids & Enzymes
The lemon juice in this marinade isn’t just for zing—it’s a natural tenderizer. The acidity breaks down muscle fibers, making the steak more tender. But be careful: too much acid (or too long in the marinade) can turn your steak mushy. That’s why we balance it with olive oil, which coats the meat and prevents over-tenderizing.
Worcestershire sauce also plays a sneaky role—it contains fermented anchovies, which add enzymes that further soften the meat. If you’ve ever wondered why restaurant steaks are so tender, this is one of their secrets!
Flavor Penetration: Salt & Fat
Soy sauce is the ultimate flavor carrier because of its high salt content. Salt opens up the meat’s protein structure, allowing the marinade to seep deep inside. The olive oil then locks in those flavors while adding richness.
Garlic powder (instead of fresh garlic) ensures even distribution without burning. Fresh garlic can turn bitter when grilled, but garlic powder melts into the marinade, giving consistent taste in every bite.
Moisture Retention: Oil & Timing
A common mistake? Over-marinating. Too long in acidic liquid, and the steak starts to “cook” (like ceviche), leading to a dry, grainy texture. The sweet spot? 2–8 hours, depending on thickness. A thin skirt steak? 2 hours. A thick ribeye? Overnight is fine, but no more than 12 hours.
Pro Tip: The Sugar Factor
Some chefs add honey or brown sugar to their marinades. Why? Sugar helps with caramelization, creating that irresistible crust. If you want extra depth, try adding 1 tbsp of honey—just watch for flare-ups on the grill!
Understanding these principles turns you from a casual cook to a steak scientist. Now, let’s put that knowledge to work!
Choosing the Right Cut: Which Steak Works Best?
Not all steaks are created equal. Some thrive in marinades, while others are better with just salt and pepper. Here’s your ultimate guide to steak cuts and how they interact with this marinade.
Best Cuts for Marinating
-
Flank Steak – Lean and fibrous, it needs a marinade to tenderize. Perfect for fajitas!
-
Skirt Steak – Similar to flank but richer. Soak it for at least 4 hours for maximum flavor.
-
Hanger Steak – The butcher’s secret! Chewy but full of beefy flavor—marinate overnight.
-
Flat Iron Steak – Affordable and tender. 4–6 hours in marinade makes it restaurant-quality.
-
Sirloin – Budget-friendly but benefits from tenderizing. Great for kebabs!
Good, But Not Necessary
-
Ribeye – Already well-marbled and tender. A short marinade (2 hours) adds flavor, but it’s not essential.
-
Strip Steak (NY Strip) – Naturally tender. A quick soak enhances taste, but don’t overdo it.
-
T-Bone/Porterhouse – The filet side stays soft, but the strip side can handle a marinade.
Avoid Marinating These
-
Filet Mignon – Too delicate. A dry rub or light seasoning is better.
-
Tomahawk Steak – Meant to shine on its own. Save the marinade for cheaper cuts.
Thickness Matters!
-
Thin cuts (½ inch or less) – 1–2 hours max. They absorb flavor fast.
-
Medium (1 inch) – 4–6 hours.
-
Thick (1.5 inches+) – 8–12 hours for full penetration.
Bonus: What About Frozen Steak?
You can freeze steak in the marinade—it actually helps the flavors seep in as it thaws. Just pat dry before cooking to avoid steaming.
Choosing the right cut ensures your marinade works for you, not against you. Now, let’s talk cooking methods!
Grill vs. Pan-Sear: Which Method Wins?
You’ve marinated the perfect steak—now, how do you cook it? The method you choose affects texture, flavor, and juiciness. Let’s compare the two best techniques.
Grilling: The Classic Approach
Best for: Ribeye, skirt steak, flank steak
Why? The open flame adds smoky char, enhancing the marinade’s caramelization.
Steps:
-
Preheat grill to high (450°F–500°F).
-
Clean & oil grates to prevent sticking.
-
Sear steak 2–3 mins per side for medium-rare (adjust for thickness).
-
Baste with reserved marinade (boiled first!) in the last minute.
-
Rest 5–10 mins before slicing.
Pros:
-
Smoky flavor
-
Beautiful grill marks
-
Faster cooking
Cons:
-
Risk of flare-ups (marinade drips can cause flames)
-
Less control over temperature
Pan-Searing: The Indoor Alternative
Best for: Filet mignon, strip steak
Why? A cast-iron skillet gives an unbeatable crust.
Steps:
-
Heat skillet on high until smoking.
-
Pat steak dry (key for crust!).
-
Sear 2–3 mins per side, then lower heat to finish.
-
Add butter, garlic, and herbs in the last minute for extra flavor.
-
Rest before serving.
Pros:
-
Perfect crust
-
More controlled cooking
-
No flare-ups
Cons:
-
Less smoky flavor
-
More cleanup
Hybrid Method: Reverse Sear
For thick cuts (2 inches+), try this pro trick:
-
Bake steak at 275°F until internal temp hits 110°F.
-
Sear on grill/pan for crust.
-
Rest and serve.
Why? Ensures even doneness without overcooking.
Final Verdict?
-
Grill for smoky, charred flavor.
-
Pan-sear for ultimate crust.
-
Reverse sear for thick steaks.
Now, let’s wrap it all up!
Mix It Up: Endless Delicious Twists
Play mad scientist with these fun spins:
- Smoky Fiesta: Add 2 tsp chipotle powder + 1 tbsp lime juice instead of lemon. Perfect for fajitas!
- Herb Garden Elegance: Stir in 2 tbsp chopped rosemary + thyme with the marinade. Ideal for filet mignon.
- Asian-Inspired: Swap Worcestershire for 2 tbsp hoisin + 1 tsp sesame oil. Add ginger! Amazing with skirt steak.
- Lower-Sodium: Use coconut aminos instead of soy sauce, and reduce Worcestershire by half.
- Honey-Harissa Kick: Whisk in 1 tbsp honey + 1 tsp harissa paste. Sweet heat heaven!
Olivia’s Notebook: Stories from the Flavor Trenches
This recipe has legs – it’s traveled! I once made it camping using a ziplock bag and a cooler full of snow (glamorous, right?). My biggest evolution? Learning that marinating time isn’t one-size-fits-all. Flank steak? 2 hours max. Tough chuck? Overnight’s your buddy. And funny story – I once mistook vanilla extract for Worcestershire (don’t ask). We dubbed it “Dessert Steak”… not my finest hour. Now I label everything! Over the years, I’ve added a pinch of black pepper for warmth, but the core remains unchanged because, well – perfection. The best part? Watching my 8-year-old dip her pinky in the jar for a taste test, grinning like she’s stolen cookie dough. That’s the real magic.
Steak SOS: Your Questions, Solved!
Let’s tackle those burning marinade mysteries:
Q: Can I reuse the marinade?
A: Big nope! Raw meat juices lurk in there. If you want extra sauce, reserve some pre-meet-contact marinade in a separate jar. Boil used marinade for 5+ mins if you insist, but flavor suffers.
Q: Why no fresh garlic?
A: Love fresh garlic! But it burns easily at high temps, leaving bitterness. Powder distributes evenly without risk. If you insist, use 3 minced cloves – but reduce marinating time to 4 hours max.
Q: My steak turned out tough – help!
A: Two likely culprits: 1) You skipped resting (tsk tsk!), or 2) Wrong cut! This marinade tenderizes, but choose naturally tender cuts like ribeye or strip for best results. Also – always slice AGAINST the grain!
Q: Can I freeze steak in the marinade?
A: Absolutely! Freeze steak + marinade together for up to 3 months. Thaw overnight in fridge before cooking. It’s my ultimate “dinner emergency” hack!
Best Steak Marinade In Existence
- Total Time: 2–8 hours
Description
Say goodbye to bland beef and hello to legendary steaks with this bold, zesty marinade. A savory mix of soy, lemon, garlic, and Worcestershire brings serious depth, tenderness, and that juicy, crave-worthy crust. Whether you’re firing up the grill or sizzling indoors, this 5-minute marinade turns every steak into a flavor-packed showstopper.
Ingredients
-
½ cup olive oil
-
⅓ cup soy sauce
-
⅓ cup fresh lemon juice
-
¼ cup Worcestershire sauce
-
1½ tbsp garlic powder
Optional Flavor Twists:
-
2 tsp chipotle powder (for heat)
-
2 tbsp chopped rosemary/thyme (for herbiness)
-
1 tbsp honey + 1 tsp harissa (for sweet-heat)
Instructions
-
Mix the Magic
Whisk all ingredients in a bowl or shake in a mason jar until combined. -
Marinate the Meat
Place steak in a resealable bag or dish. Pour marinade over it, massage gently, seal, and refrigerate. -
Time it Right
Marinate 2–8 hours (overnight for thick cuts, 2 hours for flank/skirt). Don’t exceed 24 hrs. -
Prep to Cook
Bring steak to room temp for 30 mins. Pat dry before cooking to ensure a great crust. -
Grill & Rest
Cook to desired doneness, let rest 5–10 mins, then slice against the grain.
Notes
-
For extra sauce: Reserve ¼ cup marinade before adding meat. Boil it before serving.
-
Use tamari or coconut aminos for gluten-free or lower sodium versions.
-
Freeze steak + marinade together for easy future meals.
- Prep Time: 5 mins
Nutrition
- Calories: 60 cal Per Serving
- Sodium: 360mg
- Fat: 6g
- Carbohydrates: 1g
- Protein: 1g
Nutritional Notes (Because Knowledge is Yummy!)
Per tablespoon (approx.): Calories 60 | Fat 6g | Sodium 360mg | Carbs 1g | Protein <1g. Remember, most marinade drips off! For lower sodium, see our variation swaps.
Final Thoughts: Your Steak Journey Starts Now
You’ve got the marinade, the science, the best cuts, and the cooking methods—you’re officially a steak master. Whether it’s a casual weeknight dinner or a showstopping BBQ, this marinade will never let you down.
Remember:
-
Marinate wisely (time varies by cut).
-
Cook with confidence (grill or pan—both win).
-
Rest your steak (no cheating!).
Now, go forth and grill like a hero. Your next perfect steak is waiting!

Mountain-Style Buttermilk Ranch Dressing
Hey Ranch Lovers! Let’s Make Magic in a Jar
Picture this: golden fries dunked in creamy, herb-flecked bliss. Crisp veggie sticks disappearing under a cool, tangy avalanche. A salad so lively it practically dances on your tongue. That, my friends, is the power of truly great ranch dressing. I’m Olivia, your slightly flour-dusted guide, and today? We’re ditching the bottle and making my legendary Mountain-Style Buttermilk Ranch from scratch. Forget the gloppy, overly sweet stuff clinging to grocery shelves. This ranch is different. It’s bright, it’s herbaceous, it’s got depth, and it whispers tales of fresh mountain air (more on that soon!).
Why “Mountain-Style”? It’s all about that invigorating freshness! Imagine wild herbs growing on a sun-drenched slope – that’s the vibe we’re capturing. This isn’t just dressing; it’s a flavor bomb waiting to elevate everything it touches. Salads become symphonies. Pizza crusts? Elevated to dippable art. Wings? They’ll weep with joy. And the best part? It whips up faster than you can say “seconds please!” – seriously, 5 minutes flat. I promise, once you taste homemade ranch bursting with real ingredients, there’s no going back. Grab a bowl, your favorite whisk (or even just a fork!), and let’s make something unforgettable together. Your taste buds are about to throw a party!
The Picnic That Started It All
This recipe? It’s steeped in pure, joyful nostalgia. Years ago, my husband and I took a spontaneous weekend trip deep into the Blue Ridge Mountains. We packed a simple picnic: crusty bread, local cheeses, and a giant tub of my grandma’s “secret” ranch for dunking carrots and cucumbers. We found this perfect spot overlooking a valley – wildflowers everywhere, the air crisp and smelling faintly of pine and earth. Hungry from hiking, we tore into that picnic. And oh, that ranch! The tangy buttermilk, the punch of garlic and herbs… it just tasted *more* vibrant up there. Maybe it was the view, maybe it was the company, but that creamy dip seemed to capture the very essence of that fresh mountain air.
Later, back in my kitchen, trying to recreate that feeling, I started tinkering. Grandma’s base was solid (bless her!), but I craved that specific brightness, that herbaceous kick that reminded me of wild mountain thyme and parsley waving in the breeze. More fresh lemon juice went in. I played with the dried herb ratios – bumping up the dill for its grassy notes, the parsley for freshness. The result? This “Mountain-Style” version. Every time I make it now, I’m instantly transported back to that sunny mountainside, laughing with my love, covered in crumbs, completely happy. Food magic, right? That’s the power of a great recipe – it’s a delicious time machine.
Your Ranch Dream Team: Simple Staples, Big Flavor
Gather these pantry heroes! The beauty lies in their simplicity. Here’s what you need and why each one matters:
- ½ cup Mayonnaise: The creamy, lush backbone. Chef’s Insight: Use a good quality, full-fat mayo (like Duke’s or Hellmann’s) for the richest texture and best flavor emulsion. Light mayo can make it thin and lackluster. Vegan? Swap in a high-quality vegan mayo – it works great!
- ½ cup Sour Cream: Adds delightful tang and thickens it beautifully. Sub Tip: Plain, full-fat Greek yogurt is a fantastic, protein-packed substitute. Just know it adds a slightly different tang.
- ½ cup Buttermilk: The essential tang and signature “ranch” liquid base. Chef’s Hack: No buttermilk? Make your own! Stir 1.5 tsp lemon juice or white vinegar into ½ cup regular milk. Let it sit for 5-10 mins until slightly curdled. Voila!
- 1 tsp Dried Dill: Brings that iconic grassy, slightly sweet ranch flavor. Insight: Dried dill holds up better in dressings than fresh for long-term storage, but if using fresh (2 tbsp chopped), add it right before serving.
- 1 tsp Dried Parsley: Gives that fresh, green herbal note and lovely speckled color. Sub Tip: Fresh parsley (1 tbsp chopped) is wonderful, but again, best added fresh.
- ½ tsp Onion Powder: Delivers sweet, savory depth without onion chunks. Chef’s Secret: Onion powder is key for that balanced savoriness – don’t skip it!
- ¼ tsp Salt: Essential for making all the other flavors pop. Insight: Start here, but always taste and adjust after mixing. Different brands vary.
- 1 tsp Black Pepper: Adds a gentle, warming bite. Freshly cracked is ideal!
- 1 tsp Garlic Powder: The aromatic heartthrob! Provides consistent garlic flavor throughout. Chef’s Tip: Love garlic? Add a tiny pinch more, but go easy – it intensifies.
- 1–3 tsp Lemon Juice (to taste): The brightening “mountain air” magic! Key Insight: Start with 1 tsp, mix, then add more to your liking. It cuts the richness and makes the herbs sing. Freshly squeezed is non-negotiable for the best flavor!
Let’s Mix It Up: Effortless Perfection in Minutes
Ready for the easiest “cooking” you’ll do all week? Here’s how we transform these simple ingredients into liquid gold:
- Find Your Bowl & Tools: Grab a medium-sized mixing bowl. A whisk is ideal for smoothness, but a sturdy fork works perfectly well in a pinch! No fancy equipment needed here. Chef’s Hack: Using a bowl with a pour spout? Genius move for easy transferring later!
- Combine the Creamy Base: Plop the mayonnaise and sour cream right into the bowl. Chef’s Tip: If your sour cream or mayo is super cold and stiff, let them sit at room temp for 10 minutes for easier blending. Whisk (or fork!) these two together vigorously until they’re completely smooth, creamy, and homogenous. No streaks! This is the foundation.
- Stream in the Buttermilk: Slowly pour in the buttermilk while continuously whisking. Why slow? This helps it emulsify smoothly into the mayo/sour cream base, preventing any weird separation or lumps. Keep whisking until it’s beautifully smooth and pourable.
- Herb & Spice Powerhouse: Now, the fun part! Sprinkle in all the dried herbs and spices: dried dill, dried parsley, onion powder, salt, black pepper, and garlic powder. Chef’s Insight: Hold the lemon juice for just a sec! Adding the dried herbs now gives them a moment to hydrate slightly in the liquid.
- Brighten with Lemon: Add 1 teaspoon of your freshly squeezed lemon juice. Whisk it all together thoroughly! Critical Taste Test Time! Grab a clean spoon and taste. Does it need more tang? More brightness? This is where you personalize! Add more lemon juice, ½ tsp at a time, whisking and tasting after each addition, until it makes your taste buds zing happily. Need more salt or pepper? Add it now too. Trust your palate!
- Jar it Up & Chill: Pour your glorious creation into a clean jar or airtight container. Seal it tightly. Chef’s Non-Negotiable Step: Pop it straight into the fridge for at least 30 minutes (though an hour is even better!). Why? This resting time is MAGIC. The flavors mingle, the herbs soften and release more flavor, and the whole dressing harmonizes into that incredible “Mountain-Style” depth. Patience, grasshopper!
Dive In! How to Serve Your Homemade Ranch Glory
Okay, the wait is over! That glorious ranch is chilled and ready for its spotlight. Here’s how to make it shine:
The Classic Dip: Pour it into a cute bowl, sprinkle with a tiny pinch of extra dried dill or parsley for flair, and surround it with a vibrant rainbow of crudités – think crisp carrot sticks, cool cucumber slices, crunchy bell peppers, juicy cherry tomatoes, and maybe even some radish chips! Wings, crispy potato wedges, or onion rings? Absolute perfection dunked in this.
Salad Superstar: Drizzle it generously over a classic wedge salad (iceberg, bacon, red onion, tomato), a hearty chopped salad, or even just a simple bed of crisp romaine. It clings beautifully! Pro Tip: Thin it out with a tiny splash more buttermilk if you prefer a pourable salad dressing consistency.
Beyond the Bowl: Get creative! Slather it on burgers or sandwiches instead of mayo. Dollop it onto baked potatoes. Use it as a killer veggie pizza base. Stir a spoonful into mashed potatoes for extra zing. The possibilities are endless!
Make It Your Own: Delicious Twists on the Classic
Love the base? Let’s play! Here are some fun ways to riff on your Mountain-Style Ranch:
- Avocado Lime Fiesta: Blend in half a ripe avocado and swap the lemon juice for fresh lime juice (start with 2 tsp). Adds incredible creaminess and a fresh, south-of-the-border vibe. Perfect for tacos, burrito bowls, or southwest salads!
- Spicy “Kickin’ Ridge” Ranch: Crave heat? Add 1-2 teaspoons of your favorite hot sauce (like Cholula or Frank’s) or ½ – 1 teaspoon of chipotle powder along with the dried spices. Amazing with wings, sweet potato fries, or drizzled over chili.
- Fresh Herb Garden Ranch: For peak summer freshness, swap the dried dill and parsley for 2 tablespoons EACH of finely chopped fresh dill and fresh parsley. Add 1 tbsp chopped fresh chives too! Note: Best used within 2-3 days and the color is stunning.
- Dairy-Free Mountain Trek: Use high-quality vegan mayo and vegan sour cream (or more vegan mayo). Substitute the buttermilk with plain, unsweetened almond milk + 1.5 tsp lemon juice (let sit 5 mins). Works beautifully!
- Everything Bagel Ranch: Stir in 1 tablespoon of Everything Bagel seasoning after chilling! Salty, oniony, seedy perfection on bagels (duh!), roasted veggies, or as a unique dip.
Olivia’s Extra Sprinkle of Thoughts
This recipe is my kitchen workhorse, and it’s evolved beautifully over the years. That initial mountain picnic version was good, but it truly became “Mountain-Style” when I started being bolder with the lemon juice – that brightness was the missing piece! I’ve also learned that using *good* dried herbs makes a huge difference. Old, dusty herbs lurking in the back of the spice cabinet? Toss ’em! Freshness matters, even in dried form. Invest in small quantities and replace them often.
Funny kitchen confession? I once accidentally dumped in a *tablespoon* of garlic powder instead of a teaspoon. Whoops! Let’s just say that batch had serious vampire-repelling properties. My husband bravely ate it (bless him), but we laugh about “Garlic Apocalypse Ranch” now. Lesson learned: measure carefully, especially potent spices! The beauty now is its consistency. It’s foolproof when you follow the steps, and endlessly adaptable. Whether it’s a Tuesday taco night or feeding a crowd for the big game, this ranch is my secret weapon for smiles. Make it, taste it, tweak it, and make it yours!
Your Ranch Questions, Answered!
Let’s tackle those common ranch-making head-scratchers:
Q: My ranch turned out too thin! What happened? How can I fix it?
A: Don’t panic! This usually happens if the buttermilk was added too quickly or the base wasn’t thick enough. Fix: Whisk in an extra tablespoon or two of sour cream or mayonnaise until it thickens up to your liking. Next time, ensure your mayo/sour cream are full-fat and blend them thoroughly *before* slowly streaming in the buttermilk.
Q: Why does it taste bland, even after adding salt?
A: Flavor needs time to develop! Remember that mandatory 30-minute chill? It’s crucial. If it still seems flat after chilling, the likely culprits are under-seasoning or old herbs/spices. Fix: Taste again after chilling. Add tiny pinches more salt, pepper, garlic powder, or dried herbs (especially dill or parsley), whisking well after each addition. Fresh lemon juice can also wake it up. Always use fresh, potent dried herbs!
Q: Can I use fresh herbs instead of dried? How much?
A: Absolutely! Fresh herbs are vibrant and delicious. Use about 3 times the amount of fresh as dried. So, swap 1 tsp dried dill for ~1 tablespoon chopped fresh dill, and 1 tsp dried parsley for ~1 tablespoon chopped fresh parsley. You can also add fresh chives (1 tbsp chopped). Important: Fresh herbs are best added right before serving or within the last hour of chilling for maximum brightness. They also shorten the shelf life slightly – use within 3-4 days.
Q: How long does it REALLY last in the fridge?
A: Stored in a clean, airtight container, this ranch stays fresh and delicious for a solid 7-10 days (sometimes up to 2 weeks if your ingredients were very fresh). Always give it a good stir before using. If it develops an off smell, strange color, or separation that stirring doesn’t fix, it’s time to say goodbye. Trust your senses!
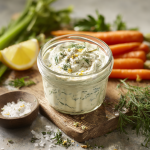
Mountain-Style Buttermilk Ranch Dressing
- Total Time: 35 mins
Description
Forget store-bought blandness—this homemade Mountain-Style Ranch is cool, creamy, and bursting with zesty herbs and citrus brightness. Inspired by wild mountain picnics and perfected with love in the kitchen, this 5-minute dressing turns veggies, wings, and salads into flavor-packed masterpieces. One taste, and your jar of ranch may never make it to the fridge.
Ingredients
-
½ cup mayonnaise
-
½ cup sour cream (or Greek yogurt)
-
½ cup buttermilk (or DIY: milk + lemon juice)
-
1 tsp dried dill
-
1 tsp dried parsley
-
1 tsp black pepper
-
1 tsp garlic powder
-
½ tsp onion powder
-
¼ tsp salt (plus to taste)
-
1–3 tsp fresh lemon juice (to taste)
Instructions
-
Whisk the Base
In a mixing bowl, combine mayo and sour cream until smooth. Slowly whisk in buttermilk until fully blended and pourable. -
Season it Up
Add dill, parsley, pepper, garlic powder, onion powder, and salt. Mix well. -
Brighten with Lemon
Add 1 tsp lemon juice, taste, and adjust with more if needed for zing. -
Chill & Set
Transfer to a jar or container, seal, and chill for at least 30 minutes. This deepens flavor and thickens the dressing.
Notes
-
Too thin? Add more sour cream.
-
Too bland? Bump up lemon juice or salt.
-
Add heat with hot sauce or chipotle.
-
Sub in fresh herbs for vivid flavor (3x the dried amount).
- Prep Time: 5 mins
Nutrition
- Calories: 110 cal Per Serving
- Fat: 11g
- Carbohydrates: 1g
- Protein: 1g
Nutritional Information (Per 2 tbsp serving, approx.)
- Calories: 110
- Fat: 11g
- Carbohydrates: 1g
- Protein: 1g
- Sodium: 180mg
Note: Values are estimates and can vary based on specific brands and measurements used.</
Final Thoughts: The Joy of Homemade Ranch
Making ranch from scratch isn’t just about taste—it’s about reclaiming a staple food from the clutches of overly processed, preservative-laden bottles. This Mountain-Style Buttermilk Ranch is a celebration of real ingredients, bold flavors, and the kind of food that brings people together.
Why Homemade Wins Every Time
-
No mystery ingredients—You control what goes in (and what stays out).
-
Adjustable flavors—Love garlic? Add more. Prefer extra tang? Squeeze more lemon.
-
The freshness factor—Dried herbs and spices taste brighter when they haven’t been sitting on a shelf for months.
A Dressing for Every Occasion
This recipe is more than a dip—it’s a:
-
Party staple (because no veggie platter is complete without it).
-
Weeknight hero (elevates simple salads, roasted veggies, or grilled meats).
-
Crowd-pleaser (everyone loves a good ranch).
The Best Compliment You’ll Get
“Wait, you MADE this ranch? It’s so much better than store-bought!”
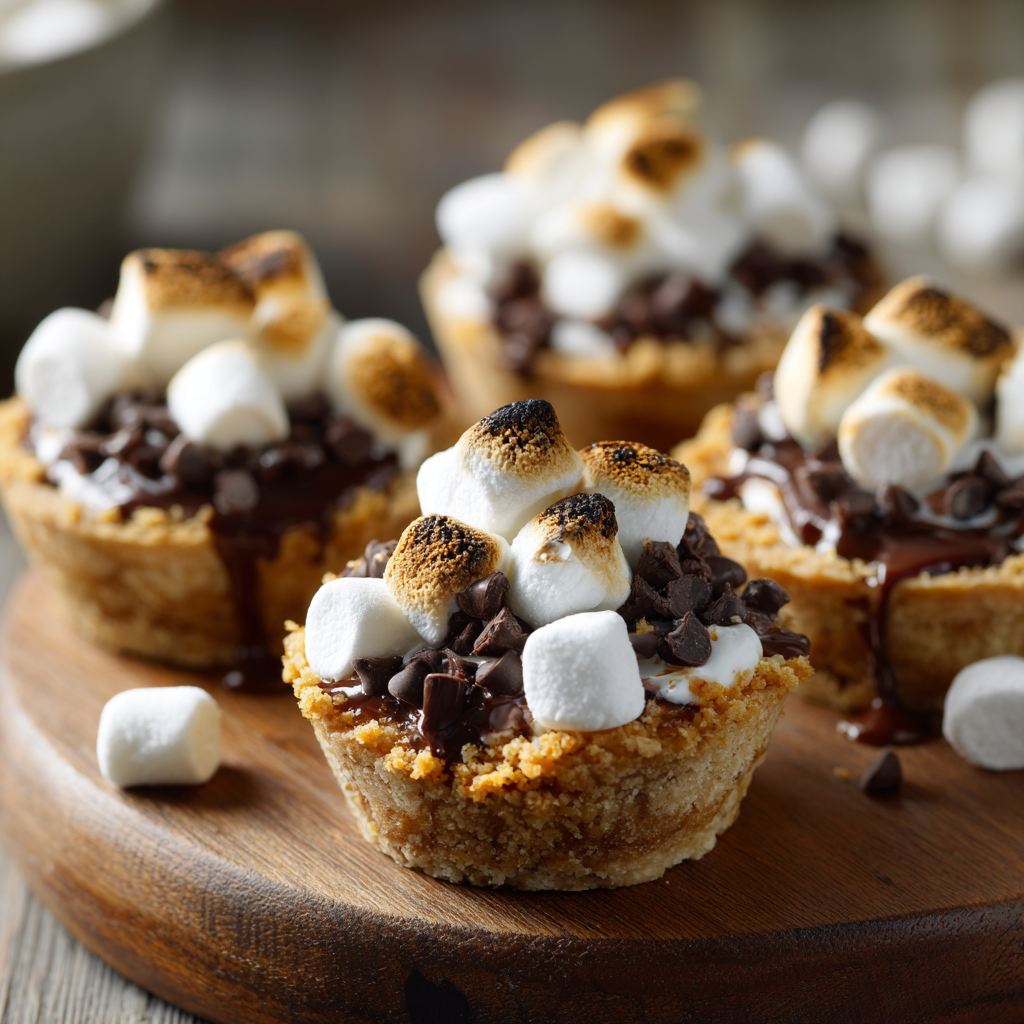
Mini S’mores Pies
Mini S’mores Pies: Your New Go-To for Instant Campfire Magic
Hey there, kitchen friends! Olivia here, apron dusted with graham cracker crumbs and a spoonful of marshmallow fluff stuck to my wrist (the official badge of honor, right?). If your heart does a happy dance at the words “chocolate,” “gooey,” and “zero campfire required,” you’re about to fall head over heels for these Mini S’mores Pies. Picture this: all that nostalgic, sticky-sweet joy of a classic s’more, but baked into adorable, handheld pies with zero smoke in your eyes or twigs in your hair. Perfect for last-minute potlucks, movie nights, or when that 3 pm chocolate craving hits like a freight train!
We’re talking golden, toasty marshmallows hugging molten chocolate pools, all cradled in a buttery graham cracker crust. The best part? You can whip these up faster than you can say “Is the Wi-Fi down?”—seriously, under 15 minutes start to finish. I live for recipes like this: maximum flavor payoff, minimal fuss, and guaranteed to make people ask, “Wait, YOU made these?!” with that impressed eyebrow raise. Whether you’re a baking newbie or a seasoned dessert wizard, these mini pies are your ticket to becoming the undisputed MVP of comfort food. So grab your favorite mixing bowl (or just a spoon!), and let’s turn that oven into your personal campfire.
Why S’mores Still Spark My Sweet Tooth
Let me take you back to my 10th birthday—a “camping” trip in my suburban backyard. My dad, ever the optimist, tried building a fire pit. Spoiler: It mostly produced smoke signals and one charred hot dog. But then… he pulled out graham crackers, a Hershey’s bar, and marshmallows. That first s’more? Pure magic. The chocolate melting against the warm mallow, the crunch giving way to ooey-gooey chaos… it tasted like adventure, even if our “wilderness” was just patchy grass and the neighbor’s yappy poodle. Years later, during a rainy family reunion, I craved that feeling but couldn’t wrangle 20 people around a drizzle-damp fire. Cue lightbulb moment: What if I baked that magic into individual pies? The first batch vanished in 90 seconds flat—my cousin literally licked his plate. Now, these pies are my edible hug, my “remember when?” on a dessert plate. They prove you don’t need a forest to find joy; sometimes, it’s just an oven and a dream.
Your S’mores Squad: Simple Ingredients, Big Personality
- Mini Graham Cracker Pie Crusts (6 count) – The cozy campfire base! Store-bought is my weeknight hero (look near pudding cups!), but homemade? Swap in 1.5 cups crushed grahams + 6 tbsp melted butter + 2 tbsp sugar, pressed into muffin tins. Chef’s Tip: Gluten-free? Use GF grahams!
- Chocolate Chips (1 cup, semisweet or milk) – The molten heart! Semisweet balances sweetness, but milk chocolate screams childhood. Swap Alert: Chopped dark chocolate bars, peanut butter chips, or even a caramel square tucked underneath! Insider Hack: A pinch of flaky salt on the chocolate pre-bake? *Chef’s kiss*.
- Mini Marshmallows or Marshmallow Fluff (1.5 cups) – The cloud-like crown! Minis toast evenly; fluff gives that nostalgic “squish.” Pro Move: Use both! Fluff base + minis on top for double texture. Vegan? Dandies minis or Fluff’s vegan version work wonders.
See? No fancy-pants ingredients! This trio is your ticket to nostalgia town. Just ensure everything’s at room temp—cold chocolate won’t melt as dreamily.
Let’s Bake Some Joy: Foolproof Steps
- Preheat your oven to 375°F (190°C). Why? A hot oven = quick, even toasting without soggy crusts. If it’s not fully preheated, your marshmallows might melt into sad puddles instead of turning golden. (Trust me, I’ve cried over pale ‘mallows before!)
- Fill each crust with chocolate chips. Don’t be shy—pile ’em in! About 2-3 tbsp per crust. Hack: Press chips down gently so they nestle together. This prevents “bald spots” when melting. Want extra luxury? Add a thin square of chocolate bar first, then chips!
- Top with marshmallows or fluff. For minis: Cover chocolate completely in a single layer (½ cup total). For fluff: Dollop 1-2 tbsp and swirl with a wet finger. Golden Rule: Leave a tiny crust border—no marshmallow lava overflows!
- Bake 6-8 minutes. SET A TIMER! At 6 mins, peek: marshmallows should be pillowy-golden, not brown. If using fluff, it’ll puff and gloss. Watch Like a Hawk: Ovens vary! Mine hits perfection at 7 mins. Burnt tops? Tent loosely with foil next time.
- Cool slightly (5 mins). Patience, Grasshopper: This lets chocolate set from lava to velvety. But serve warm for that iconic stretchy pull! Use a butter knife to loosen edges if needed.
Smell that? That’s your childhood calling. And if a marshmallow puff escapes its crust? Call it “chef’s snack tax” and enjoy.
The Science Behind the Perfect S’more Pie
Ever wonder why s’mores taste so darn good? It’s not just nostalgia—it’s science! The magic of a perfect s’more (or in this case, a s’mores pie) lies in the interplay of textures and temperatures. Let’s break it down:
1. The Maillard Reaction (AKA Why Toasted Marshmallows Rule)
When marshmallows heat up, the sugars on their surface undergo the Maillard reaction—the same process that gives seared steaks and toasted bread their delicious depth. At around 310°F (155°C), the sugars caramelize, turning marshmallows golden brown while developing complex, nutty flavors. That’s why baking these pies at 375°F ensures a perfect toast without charring.
2. Chocolate’s Melting Point: The Secret to Gooey Goodness
Chocolate melts between 86°F–90°F (30°F–32°C), which is why even a warm pie will give you that irresistible molten center. Using chips instead of chunks ensures even melting, as their uniform size distributes heat consistently. Pro tip: A pinch of salt on the chocolate before baking enhances flavor by contrasting the sweetness—your taste buds will thank you!
3. Graham Cracker Chemistry: The Structural Hero
Graham crackers contain honey or molasses, which caramelize in the oven, adding a deeper flavor. Their slight acidity (thanks to baking soda) also balances the sweetness. When mixed with butter, the fat coats the crumbs, creating a sturdy yet tender crust that holds up against the gooey filling.
Fun Experiment: Try swapping graham crackers with digestive biscuits or vanilla wafers. The difference in texture and sweetness will surprise you!
The Psychology of Nostalgic Desserts (And Why We Crave S’mores)
Why do s’mores pies feel like a warm hug? Blame your brain! Nostalgic foods trigger dopamine hits by linking taste to happy memories. Here’s why this dessert is a mood booster:
1. Comfort in Repetition
The combo of crunchy, creamy, and gooey is a textural “trifecta” that our brains find deeply satisfying. Research shows contrasting textures make food more enjoyable—think crispy fried chicken with juicy meat or, in this case, buttery crust with melty chocolate.
2. Campfire = Connection
Even if you’re baking indoors, s’mores evoke campfires, which humans have gathered around for millennia. The smell of toasted marshmallows subconsciously signals community and safety. No wonder these pies disappear at parties—they’re edible bonding!
3. The “Effortless Treat” Effect
Unlike layer cakes or macarons, s’mores pies feel approachable. Their simplicity tricks us into thinking, “I can totally make this!” (even if we buy pre-made crusts). That small win releases serotonin, making the baking process as joyful as eating.
Pro Tip: Lean into the nostalgia by serving these with childhood favorites—think mini soda bottles or a side of fruit gummies for a sweet-salty contrast.
Global S’mores Inspirations—Twists from Around the World
Why stop at classic s’mores? Global flavors can elevate these pies into gourmet delights. Here are five international twists:
1. Italian Affogato Pie
Swap chocolate for espresso chips, top with marshmallows, and post-bake, drizzle with warm Nutella. Serve with a scoop of vanilla gelato for a dolce vita vibe.
2. Mexican Hot Chocolate Pie
Mix cinnamon and a pinch of cayenne into the chocolate chips. Post-bake, dust with cocoa powder and serve with churro pieces on the side.
3. Japanese Matcha-White Chocolate Pie
Use white chocolate chips + 1 tsp matcha powder. Top with lightly toasted marshmallows and a sprinkle of black sesame seeds for an earthy-sweet balance.
4. Australian Tim Tam Pie
Crush Tim Tam cookies for the crust, fill with milk chocolate, and add a layer of caramel before the marshmallows. Bonus: Dab with Vegemite if you’re daring!
5. South African Amarula Pie
Soak chocolate chips in Amarula liqueur (or bourbon) before baking. Top with coconut-flake-dusted marshmallows for a tropical twist.
Why It Works: These variations keep the fun, familiar format while introducing new flavors. It’s a low-risk way to “travel” through dessert!
Making It Instagram-Worthy (But Mostly Just Delicious)
Slide these cuties onto a rustic wooden board or colorful plates. For extra ✨sparkle✨: Drizzle melted chocolate over the tops, sprinkle crushed graham crackers, or add a tiny square of chocolate standing upright like a sail. Serving at a party? Label them “Campfire Bites” with mini paper flags! Pair with cold milk, spiked coffee for grown-ups, or—my fave—a scoop of vanilla ice cream melting alongside. Pro tip: Finger food = zero forks needed. Just pass napkins and watch the grins spread!
Mix It Up! 5 Fun Twists
- Salted Caramel Swirl: Add 1 tsp caramel sauce under the chocolate chips. Top with marshmallows + flaky salt.
- Peanut Butter Cup: Swap chocolate for peanut butter chips + mini Reese’s pieces. Top with marshmallows.
- Berry Bliss: Add 3-4 fresh raspberries under chocolate. The tart pop cuts the sweetness!
- “Elvis” Edition: Banana slice + chocolate + peanut butter chips + bacon crumble (yes, really!).
- Vegan & GF: Use GF crusts, vegan chocolate chips, and Dandies marshmallows. Boom—inclusive joy!
Olivia’s Extra Crumb… I Mean, Thoughts!
Funny story: Once, I baked these for my niece’s school bake sale. I was SO proud… until I saw them post-oven. The marshmallows had merged into one GIANT marshmallow monster spanning all six pies! We dubbed it the “S’mores Voltron” and sold it as a shareable dessert. Kids went wild. Lesson learned: Don’t overfill! Over the years, I’ve tweaked this based on reader love: adding sea salt (game-changer), testing nut butters, and confirming that yes, you CAN air-fry these (375°F for 5 mins!). They’ve survived three ovens, one kitchen fire alarm (oops), and my toddler “helping” by eating all the mini marshmallows mid-recipe. Through it all? They remain my edible happy place.
Your S’mores Pie Pitfalls—Solved!
Q: Can I prep these ahead?
A: Totally! Fill crusts (unbaked), cover, and refrigerate 1 day ahead. Add 1-2 extra mins baking time straight from the fridge.
Q: Marshmallows burned! Help!
A: Oven too hot or rack too high! Next time, bake on the middle rack and check at 5 mins. If browning too fast, tent pies with foil.
Q: Can I use large marshmallows?
A: Not recommended—they won’t melt evenly. If you MUST, chop them into mini-sized bits first.
Q: Why is my chocolate not melting?
A: Three culprits: 1) Oven temp too low (use an oven thermometer!), 2) Overcrowded crusts (chips need contact), or 3) Cheap chocolate with low cocoa butter. Splurge a little!

Mini S’mores Pies
- Total Time: 13 mins
Description
Your favorite campfire treat just got a delicious oven upgrade. These Mini S’mores Pies capture all the gooey, chocolatey nostalgia of classic s’mores – no fire pit needed. In under 15 minutes, you’ll have golden marshmallows, melted chocolate, and buttery graham crusts coming together for pure bite-sized bliss. They’re fast, fun, and totally addictive.
Ingredients
-
6 mini graham cracker pie crusts
-
1 cup chocolate chips (semisweet or milk)
-
1½ cups mini marshmallows or marshmallow fluff
Optional Flavor Twists:
-
Flaky sea salt
-
Caramel sauce, berries, peanut butter chips
Instructions
-
Preheat Oven to 375°F (190°C).
-
Fill Each Crust with 2–3 tbsp chocolate chips. Press gently to cover the bottom evenly.
-
Top with Marshmallows or 1–2 tbsp fluff (or both!). Leave a small border to prevent overflow.
-
Bake 6–8 mins on the middle rack. Watch closely – marshmallows should be puffed and golden.
-
Cool for 5 mins before serving. Let chocolate set slightly while staying warm and gooey.
Pro Tip: Drizzle with melted chocolate or sprinkle with crushed grahams for extra flair.
Notes
-
Add raspberries for a tart twist
-
Swap in peanut butter chips or Reese’s minis
-
Try a dash of sea salt for flavor depth
-
Use vegan chocolate & marshmallows for plant-based joy
- Prep Time: 5 mins
- Cook Time: 8 mins
Nutrition
- Calories: 180 cal Per Serving
- Sugar: 16g
- Fat: 8g
- Carbohydrates: 24g
- Protein: 2g
Nutritional Nibbles (Per Pie)
Calories: 180 • Fat: 8g • Carbs: 24g • Sugars: 16g • Protein: 2g
Note: Values are estimates. Vegan/GF swaps may alter this.
Final Thoughts: More Than Just a Dessert
These Mini S’mores Pies are a reminder that joy doesn’t need to be complicated. Whether you stick to the classic or globe-trot with flavors, they’re a celebration of simplicity, nostalgia, and the universal love of chocolate. They’ve survived kitchen disasters, toddler raids, and my questionable oven—yet they always deliver smiles. So here’s to imperfectly perfect desserts, toasty fingers, and the magic of a shared sweet moment. Now, who’s ready to preheat the oven?
Chicken Quesadillas Recipe
Hey, Let’s Make Magic in a Tortilla!
Okay, let’s be real for a second: Is there anything more universally beloved than a hot, crispy quesadilla oozing with melty cheese? That satisfying crunch, the burst of savory filling, the way it somehow feels like a hug from the inside… pure comfort food gold. If your weeknights feel like a chaotic race against the clock (mine totally do!), this Chicken Quesadilla recipe is about to become your shiny culinary knight in shining armor.
Picture this: tender, seasoned chicken mingling with sweet, caramelized peppers and onions, all held together by a glorious blanket of Monterey Jack that stretches for miles. It’s the kind of meal that makes everyone magically appear in the kitchen, noses twitching. “Is it ready yet?” chorus included! The best part? We’re talking seriously simple here. No fancy techniques, no hours of prep – just straightforward, delicious results in about 30 minutes flat.
I developed this version after years of tweaking – it’s the ultimate crowd-pleaser, whether you’re feeding hungry kids, hosting a casual game night, or just treating yourself after a long day. Forget the sad, floppy quesadillas of yore; we’re going for GOLDEN, CRISPY perfection every single time. So, grab your favorite skillet, put on that messy apron (a badge of honor, I say!), and let’s turn simple ingredients into something seriously unforgettable together. Ready to get that cheese melting?
My First Quesadilla Fiasco (And Why I’m Glad It Happened!)
My love affair with quesadillas started… well, a little disastrously. Picture me, age 19, in my first tiny apartment kitchen, determined to impress my college roommate with my “culinary skills.” I had grand visions of a Mexican fiesta. I grabbed some pre-cooked chicken, dumped a mountain of cheese onto a tortilla, threw it in a pan, and promptly walked away to chat. Big mistake! I returned to smoke billowing, a charred hockey puck stuck stubbornly to the pan, and cheese leaking everywhere like a culinary crime scene. My roommate burst out laughing – and honestly, so did I! It was a glorious, messy failure.
But that fiasco taught me the golden rules I swear by now: patience, layering, and medium heat are non-negotiable. It also cemented that quesadillas aren’t just food; they’re connection. We ended up scraping off the salvageable bits, laughing hysterically, and ordering pizza. But the *idea* of that perfect, crispy, cheesy bite stuck with me. Now, every time I make these chicken quesadillas, especially when friends gather around the stove waiting impatiently, I remember that smoky first attempt. It’s a reminder that cooking is about the joy, the shared moments (even the messy ones!), and the journey to getting it gloriously right. This recipe? It’s my redemption arc, perfected just for you!
Your Quesadilla Toolkit: Simple Ingredients, Big Flavor
Gathering your ingredients is half the fun! Here’s exactly what you need for those perfectly balanced, crispy-edged chicken quesadillas. Don’t stress about exact precision – cooking should feel joyful, not rigid!
- 4 cups shredded cooked chicken breast: This is your superstar! Leftover rotisserie chicken is a genius shortcut (my weeknight MVP). No leftovers? Simply poach or bake 2 large chicken breasts until cooked through (165°F), then shred. Want more flavor? Use thighs! They’re juicier.
- 4 tsp taco seasoning: Your flavor bomb! Use your favorite store-bought blend (check for salt content) or whip up a quick homemade mix (chili powder, cumin, garlic powder, onion powder, oregano). Chef’s Tip: Blooming it with the chicken makes the spices sing!
- 1 tsp paprika: Adds subtle smokiness and beautiful color. Smoked paprika is a game-changer if you love that campfire vibe! Sweet paprika works too.
- 1 red bell pepper & 1 green bell pepper, thinly sliced: Color, crunch, and sweetness! The combo is classic. Feel free to use orange or yellow bells, or even poblano for mild heat. Thin slices ensure they soften quickly.
- 1 medium yellow onion, thinly sliced: The aromatic base that gets beautifully sweet when sautéed. Red onion adds a sharper bite if you prefer.
- 4 cups freshly shredded Monterey Jack cheese: MELTABILITY QUEEN! Pre-shredded cheese contains anti-caking agents that can make it grainy. Trust me, shredding your own off the block makes a silkier, gooier melt. Can’t find Jack? Oaxaca, mild cheddar, or a Mexican blend are great subs.
- 8 large flour tortillas (8-10 inch): The vessel! Use sturdy burrito-size tortillas. Corn tortillas work too but are more delicate (use two per quesadilla). Warm them slightly before filling for extra flexibility.
- 4 tbsp unsalted butter: Our crispy-edge secret weapon! Butter gives superior browning and flavor compared to oil. Salted butter works too, just adjust added salt.
- Salt and pepper to taste: Essential seasoning layers. Season your veggies well while sautéing!
Let’s Build Some Quesadilla Magic: Step-by-Step
Alright, team, fire up that skillet! This isn’t just about assembling; it’s about building layers of flavor and achieving that perfect crispy-cheesy harmony. Follow these steps, and you’ll be a quesadilla wizard in no time.
- Sizzle Those Veggies: Grab your trusty large skillet (non-stick or cast iron works great) and place it over medium heat. Add 1 tbsp of the butter. Once it melts and sizzles gently (not furiously!), toss in the sliced bell peppers and onion. Season generously with salt and pepper. Now, here’s the key: Don’t rush this! Sauté, stirring occasionally, for 5-7 minutes. You want them softened but still have a bit of bite, with those beautiful caramelized golden edges. That sweetness is flavor gold! Remove them to a bowl. Chef’s Hack: Wipe out the pan quickly with a paper towel between steps. It prevents burnt spice bits later!
- Spice Up That Chicken: Using the same skillet (no need to wash it thoroughly!), add the shredded chicken. Sprinkle over the taco seasoning and paprika. Stir everything together constantly for just 2-3 minutes. You’re not cooking the chicken through (it’s already cooked!), you’re warming it up and waking up the spices, letting their flavors coat every strand. That heat releases the oils in the spices – hello, flavor town! Remove the chicken to another bowl. Pro Tip: Taste a tiny bit! Does it need more seasoning? Adjust now.
- Prep Your Station (Mise en Place is Key!): Lower the skillet heat to medium (crucial for even browning without burning). Shred your cheese (if you haven’t already), and have your tortillas, butter, chicken, veggies, and cheese bowls lined up near the stove. This “assembly line” setup makes building quesadillas super fast and prevents frantic searching!
- Build & Fold: Add a small pat of butter (about 1/2 tbsp) to the skillet and swirl to coat. Place one tortilla flat in the pan. Working quickly, sprinkle about 1/4 cup of cheese evenly over HALF of the tortilla. This first cheese layer is your “glue.” Next, add a generous scoop of the seasoned chicken (about 1/2 cup), followed by a layer of the sautéed veggies (about 1/4 cup). Top it all off with another 1/4 cup (or slightly more!) of cheese. This top cheese layer melts down, sealing everything inside. Carefully fold the bare half of the tortilla over the filling, creating a perfect half-moon. Golden Rule: Cheese on bottom, filling, cheese on top = no filling escapees!
- The Golden Sear: Let the quesadilla cook undisturbed for 2-3 minutes. Peek underneath – you’re looking for a beautiful, even golden brown. Use a large spatula to carefully flip it over. If you’re nervous, slide the spatula fully underneath for support. Cook the other side for another 2-3 minutes until equally golden and you hear that glorious sizzle of melting cheese. Chef’s Secret: Gently press down with the spatula occasionally – it helps the filling meld and ensures maximum crispy contact.
- Rest & Repeat: Slide your masterpiece onto a cutting board. Resist the urge to cut immediately! Let it rest for 1-2 minutes. This lets the cheese set slightly so it doesn’t all gush out when you slice. While it rests, add another pat of butter to the skillet and start building the next quesadilla. Repeat until all your delicious half-moons are done!
- Slice & Serve: Use a sharp knife or pizza cutter to slice each quesadilla into 3-4 wedges. This makes them easy to handle and dip! Serve immediately while they’re piping hot and irresistibly crispy.
Dipping is Mandatory: Serving Up the Goodness
Presentation is simple but oh-so-satisfying! Arrange those gorgeous golden wedges slightly overlapping on a large platter or individual plates. The star of the show is that melty cheese peeking out! Now, the fun part: DIPPERS! Offer bowls of your favorite accompaniments. Classic salsa (pico de gallo for freshness or a smooth roasted salsa for depth) is non-negotiable. Cool, creamy sour cream balances the heat (if you added any spice). And a big bowl of chunky, vibrant guacamole? Pure heaven. Feeling fancy? A quick squeeze of fresh lime juice over the platter adds a bright zing, or sprinkle with chopped fresh cilantro. This is finger food at its finest – no forks needed, just pure, delicious enjoyment!
Make It Your Own: Delicious Quesadilla Twists
Once you master the basic blueprint, the world is your quesadilla oyster! Get creative and tailor it to your mood or dietary needs:
- Vegetarian Fiesta: Swap the chicken for a can of rinsed black beans (smashed slightly) and corn kernels (fresh, frozen, or roasted). Add a pinch of cumin to the beans for extra flavor!
- Southwest Kick: Add 1/2 cup corn kernels (roast them first for extra smokiness!) and a finely diced jalapeño (seeds removed for less heat) to the veggie sauté. Use Pepper Jack cheese instead of Monterey Jack for a spicy punch.
- BBQ Chicken Twist: Replace the taco seasoning and paprika with 1/3 cup of your favorite BBQ sauce mixed into the warm chicken. Add a handful of thinly sliced red onion (raw for bite) inside the quesadilla with the chicken. Cheddar cheese works great here!
- Breakfast-for-Dinner: Scramble 4 eggs! Skip the taco seasoning. Layer the cooked scrambled eggs, cooked breakfast sausage or bacon bits, sautéed peppers/onions, and cheese. Serve with salsa!
- Lighter Option: Use low-fat cheese, reduce the butter by half (spritz the pan lightly with oil instead), and load up extra veggies. Use whole-wheat tortillas. Serve with Greek yogurt instead of sour cream.
Olivia’s Quesadilla Chronicles: Lessons from a Cheesy Frontline
Oh, the stories these quesadillas could tell! Like the time I tried to flip one too enthusiastically and sent a shower of cheesy chicken across the stovetop. (My dog was *very* pleased that day). Or the countless Sunday afternoons where my nieces and nephews crowd around, each demanding their “special one” – extra cheese, no peppers, just chicken… the negotiation is half the fun! This recipe has truly evolved. I started with just chicken and cheese (solid, but basic). Then came the peppers and onions for sweetness and texture. The paprika was a later addition for that smoky depth, and switching to fresh-shredded cheese? A total game-changer I learned from a taco truck chef who winked and said, “The block is your friend, señora.” The biggest lesson? Don’t fear the mess. A little cheese on the pan, a rogue pepper slice on the counter – it’s all part of the delicious, imperfect, shared joy of cooking. These quesadillas are more than food; they’re my edible love language for busy weeknights and happy gatherings. I hope they become that for you too!
Print
Chicken Quesadillas Recipe
- Total Time: 30 mins
Description
Let’s talk comfort food that actually fits into your schedule. These golden, crispy Chicken Quesadillas are the 30-minute dinner your weeknight chaos didn’t know it needed. Juicy seasoned chicken, caramelized peppers and onions, and gooey Monterey Jack cheese all folded into a buttery tortilla crisped to perfection? Yes, yes, and YES. No oven, no fancy tools – just a skillet and some serious flavor.
Ingredients
-
4 cups shredded cooked chicken
-
4 tsp taco seasoning
-
1 tsp paprika
-
1 red + 1 green bell pepper, thinly sliced
-
1 medium yellow onion, thinly sliced
-
4 cups shredded Monterey Jack cheese
-
8 large flour tortillas (8–10”)
-
4 tbsp unsalted butter
-
Salt & pepper to taste
Instructions
-
Sauté Veggies (5–7 mins)
Melt 1 tbsp butter in skillet over medium heat. Cook peppers and onions until soft and golden. Season with salt & pepper. Set aside. -
Flavor the Chicken (3 mins)
In the same pan, add chicken with taco seasoning and paprika. Stir until warmed and coated. Remove from heat. -
Assembly Line Time
Lower heat. Add ½ tbsp butter to skillet. Place tortilla flat, layer cheese, chicken, veggies, then more cheese on half the tortilla. Fold and press gently. -
Sear to Gold (5–6 mins total)
Cook 2–3 mins per side until crisp and melty. Repeat with remaining tortillas. -
Slice & Serve
Let rest 1–2 mins before slicing into wedges. Serve hot with salsa, sour cream, or guacamole.
Notes
-
Use freshly shredded cheese for best melt.
-
For extra heat, swap in Pepper Jack or add diced jalapeño.
-
Vegetarian? Try beans, corn, and extra cheese.
-
Make it BBQ-style: sub taco seasoning for BBQ sauce and use cheddar.
- Prep Time: 10 mins
- Cook Time: 20 mins
Nutrition
- Calories: 620 cal Per Serving
- Fat: 38g
- Carbohydrates: 34g
- Protein: 37g
-
Final Thoughts: The Quesadilla Philosophy
Quesadillas are more than food—they’re a mindset. They teach us that:
-
Simplicity Shines – Few ingredients, done well, beat complexity.
-
Imperfection is Delicious – Even “failed” flips taste great.
-
Versatility is Power – Adaptable to cravings, cultures, and pantries.
-
Joy is Shared – Few things bond people like pulling apart a cheesy wedge.
So here’s to the humble quesadilla: may your tortillas always be crispy, your cheese stretchy, and your kitchen full of laughter. Now go forth and melt some magic!
-
Bang Bang Chicken
Introduction
Hey there, kitchen friends! Olivia here, wiping flour off my apron while the scent of sizzling chicken fills the air. If your stomach just growled at the words “crispy golden chicken drenched in spicy-sweet sauce,” oh honey, we’re already on the same wavelength. Today we’re making my famous Bang Bang Chicken – that magical crunch-meets-creamy-firework flavor that turns casual dinners into standing-ovation moments. You know those takeout containers you guiltily hide in the recycling? After this, you might just frame one as a trophy because your homemade version will blow any restaurant out of the water.
Picture this: juicy chicken tenderloins with shatteringly crisp panko armor, glazed in a sauce that dances between sweet chili tang and slow-building heat. It’s the kind of dish that makes your neighbor text “What ARE you cooking over there?!” But here’s the secret: it’s shockingly simple. No fancy techniques, no obscure ingredients – just pure, unfiltered joy in every bite. Whether you’re feeding rowdy teens, impressing a date, or treating yourself to a solo feast (zero judgment), this recipe is your golden ticket. So tie on that apron, crank up your favorite playlist, and let’s make some magic!
That One Time Bang Bang Chicken Saved Game Night
Rewind to my college days: tiny apartment, tinier budget, and friends who’d “swing by” right at dinnertime. One rainy Thursday, my crew descended for board games armed with… well, just their appetites. All I had was sad-looking chicken tenders and condiments. Desperation sparked genius. I double-breaded those tenders in crushed cornflakes (panko’s humble ancestor), whipped mayo with sriracha and honey, and dubbed it “Bang Bang” for the explosive flavor. The result? Silence. Then moans. Then demands for the recipe. My friend Mark literally licked his plate. That messy, improvised meal became our ritual – the crunch of chicken punctuating dice rolls and trash talk. It taught me that great food isn’t about perfection; it’s about the loud laughter, the fingers sticky with sauce, and the unexpected moments that taste like belonging. Every time I make this now, I still hear those dice clattering.
Your Flavor Arsenal: Ingredients & Why They Matter
For the Bang Bang Sauce:
- Mayonnaise (1 cup): Our creamy base! Chef’s tip: Full-fat works best for that luscious cling. For lighter vibes, sub Greek yogurt – but expect tangier notes.
- Thai Sweet Chili Sauce (½ cup): The sweet-tart backbone. Insider swap: If you can’t find it, mix apricot jam with a splash of rice vinegar and red pepper flakes.
- Sriracha (1 tsp + 1 tbsp for chicken): Controlled heat! Start with 1 tsp; add more later if you dare. Hothead hack: Add chili garlic paste for deeper fire.
- Honey (3 tsp): Balances the heat with floral sweetness. Allergy-friendly: Maple syrup works beautifully.
For the Chicken:
- Chicken Tenderloins (1.5 lbs): Quick-cooking and tender! Budget swap: Use chicken breasts cut into 1-inch strips.
- Buttermilk (1 cup): Tenderizes and adds tang. Pantry save: Stir 1 tbsp lemon juice/vinegar into regular milk and wait 5 mins.
- All-Purpose Flour + Cornstarch (¾ cup + ½ cup): The crisp-up dream team! Cornstarch = extra crunch. Gluten-free: Use 1:1 GF flour blend.
- Panko Breadcrumbs (2.5 cups): THE secret to audibly crispy chicken. Pro move: Pulse briefly in a blender for finer texture if preferred.
- Egg (1): Binder for our crunchy crust.
- Garlic Powder, Paprika, Salt, Pepper (½ tsp each + S&P): Flavor boosters! Smoky twist: Use smoked paprika instead.
- Oil for Frying: Choose neutral oils with high smoke points – avocado, canola, or peanut oil are perfect.
Let’s Get Crunchy: Step-by-Step Magic
- Marinate the Chicken (15 mins hands-off): Whisk buttermilk, egg, 1 tbsp sriracha, garlic powder, paprika, salt, and pepper in a bowl. Submerge chicken, cover, and chill. Why this rocks: Buttermilk’s acidity tenderizes while spices infuse flavor deep into the meat. Don’t rush this – 30 mins minimum, or go wild and marinate overnight!
- Whip the Bang Bang Sauce (5 mins): Mix mayo, sweet chili sauce, 1 tsp sriracha, and honey until smooth. Taste! Chef’s confession: I always add an extra squirt of honey. Refrigerate – cold sauce on hot chicken is divine.
- Set Up Your Coating Station (10 mins): Organize three shallow bowls:
- Bowl 1: Flour + cornstarch (whisk to combine)
- Bowl 2: Reserved buttermilk marinade
- Bowl 3: Panko breadcrumbs
Game-changing hack: Use one hand for dry coatings and one for wet to avoid “claw hand.”
- Crunchify the Chicken (10 mins):
- Dredge a tenderloin in flour mix (shake off excess)
- Dip into buttermilk, letting excess drip
- Coat thoroughly in panko, PRESSING firmly so crumbs adhere
Golden rule: Place coated pieces on a wire rack while you finish others. This prevents soggy bottoms!
- Fry to Golden Glory (15 mins):
- Heat 2 inches of oil in a heavy pot (like a Dutch oven) to 350°F (175°C). Use a thermometer! Guessing leads to greasy chicken.
- Fry 4-5 pieces at a time (don’t crowd!). They should sizzle gently upon entry. Fry 4-5 mins, flipping once, until deep golden and internal temp hits 165°F.
- Drain on a wire rack over paper towels – NEVER just paper towels alone (steam = soggy sadness).
Safety PSA: Keep kids/pets away from splatter zone. And yes, that splatter guard is worth digging for!
- Sauce & Serve: Drizzle sauce liberally or toss chicken in a bowl with sauce. Presentation pro-tip: Sauce on the side for max crunch longevity!
Serving Up the Joy
Bang Bang Chicken is the ultimate social butterfly! For appetizers, spear pieces with toothpicks beside extra sauce for dipping. Making it a meal? Pile it over steamed jasmine rice with quick-pickled cucumbers (rice vinegar + sugar + sliced cukes, 15 mins!). Craving fresh? Butter lettuce cups with shredded carrots and cilantro make perfect low-carb vessels. Garnish with sliced green onions, sesame seeds, or chopped peanuts. And please – serve it HOT. That crunch waits for no one!
Shake It Up: Delicious Twists
- Bang Bang Shrimp: Swap chicken for peeled jumbo shrimp (fry 2-3 mins). Instant surf-and-turf vibes!
- Oven-Baked Bliss: Spray coated chicken with oil, bake at 425°F (220°C) on a wire rack for 18-20 mins. Less crispy but still delish.
- Keto-Friendly: Replace flour/cornstarch with almond flour + grated Parmesan. Skip honey in sauce (use a pinch of erythritol).
- Mango Tango: Add ¼ cup pureed mango to the sauce. Tropical sweetness meets heat!
- Extra Heat Lovers: Double the sriracha in sauce AND marinade. Add ½ tsp cayenne to flour mix. Fire extinguisher optional.
Olivia’s Kitchen Confessions
This recipe has seen some… chaotic evolutions. Once, mid-fry, my smoke detector became an unwilling sous-chef (lesson: monitor oil temp!). Another time, I subbed crushed pork rinds for panko for a keto friend – shockingly epic! Over the years, I learned that marinating longer = juicier chicken, pressing panko HARD prevents bald spots, and that Bang Bang sauce makes an insane burger spread or veggie dip. The biggest win? Seeing my 7-year-old nephew (a sworn chicken nugget purist) sneak thirds. That’s the power of homemade crunch – it turns skeptics into sauce-slurping believers. Moral of the story? Embrace the mess. Laugh at the splatters. And always make extra sauce.
Your Questions, My Answers
Q: Can I air fry this? How?
A: Absolutely! Spray coated chicken generously with oil. Air fry at 400°F (200°C) for 10-12 mins, flipping halfway. It won’t be AS crispy as deep-fried, but still delicious!
Q: My coating fell off! What went wrong?
A: Three likely culprits: 1) Didn’t shake off excess flour before wet dip (creates a barrier), 2) Didn’t press panko firmly enough, or 3) Oil was too cold – coating absorbs oil instead of sealing. Thermometers are lifesavers!
Q: Can I prep this ahead?
A: Yes, but strategically! Marinate chicken up to 24 hours. Coat in flour/buttermilk/panko and freeze raw on a baking sheet, then transfer to bags for up to 1 month. Fry frozen (add 1-2 mins cook time). Sauce lasts 1 week refrigerated. Avoid frying ahead – re-crisping in a 375°F (190°C) oven for 8-10 mins works okay.
Q: Help! Too spicy/not spicy enough!
A: Taste your sauce BEFORE adding it to chicken! Too mild? Boost sriracha or add chili flakes. Too wild? Stir in extra mayo or a dash of honey/lemon juice. You’re the boss of your Bang Bang.

Bang Bang Chicken
- Total Time: 40 mins
Description
Step aside, takeout! Meet your new flavor obsession: Bang Bang Chicken – tender, juicy chicken wrapped in a golden panko crust, drenched in a sweet-spicy sauce that’ll make your taste buds throw a party. Whether it’s game night or just Tuesday dinner, this dish delivers restaurant-level WOW with simple, pantry-friendly ingredients. Ready to turn ordinary into extraordinary?
Ingredients
For the Sauce:
-
1 cup mayonnaise
-
½ cup Thai sweet chili sauce
-
1 tsp sriracha (or more to taste)
-
3 tsp honey
For the Chicken:
-
1.5 lbs chicken tenderloins
-
1 cup buttermilk
-
1 egg
-
1 tbsp sriracha
-
¾ cup flour + ½ cup cornstarch
-
2.5 cups panko breadcrumbs
-
½ tsp each garlic powder, paprika, salt, pepper
-
Neutral oil for frying
Instructions
-
Marinate (15-30 mins)
Whisk buttermilk, egg, sriracha, spices, and salt. Add chicken, cover, chill. -
Sauce It Up (5 mins)
Mix mayo, chili sauce, sriracha, and honey until smooth. Chill. -
Coat the Chicken (10 mins)
Set up bowls: flour/cornstarch, marinade, panko. Dredge chicken → marinade → panko. Press crumbs firmly! -
Fry Time (15 mins)
Heat oil to 350°F (175°C). Fry in batches for 4-5 mins, until golden. Drain on a rack. -
Serve
Drizzle sauce or serve on the side. Optional toppings: green onions, sesame seeds, chopped peanuts.
Notes
-
Want it spicier? Double the sriracha.
-
Sauce too thick? Loosen with 1 tsp warm water.
-
Air fry at 400°F (200°C) for 10-12 mins for a lighter version.
-
For extra crunch, press panko hard onto chicken!
- Prep Time: 25 mins
- Cook Time: 15 mins
Nutrition
- Calories: 520 cal Per Serving
- Fat: 32g
- Carbohydrates: 18g
- Protein: 35g
Nutritional Snapshot (Per Serving)
Calories: 520 | Net Carbs: 18g | Protein: 35g | Fat: 32g
Note: Values are estimates. Frying oil absorption varies based on temperature and draining method.
Final Thoughts
Bang Bang Chicken isn’t just a recipe—it’s a gateway to creativity in the kitchen. Whether you’re a science nerd optimizing crunch, a globetrotter flavor-hopping via spices, or a busy parent meal-prepping for the week, this dish adapts to your needs. The real magic? That moment when the first bite hits the table, and the only sounds are crunching and contented sighs. So grab that whisk (or that air fryer), and remember: Great cooking isn’t about perfection. It’s about the joy you fold into every step—and the stories you’ll tell between bites. Now, who’s ready to bang out some chicken?
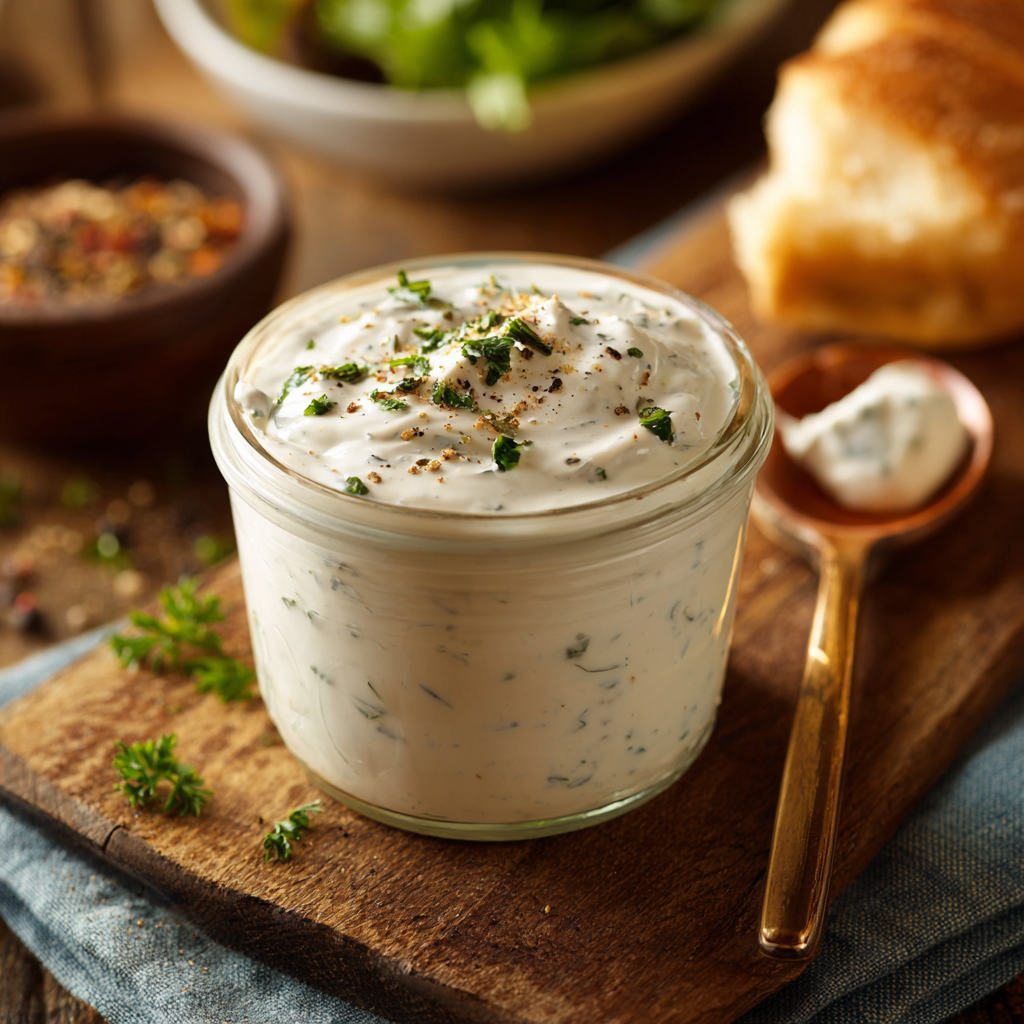
Best Homemade Ranch Dressing
Why Homemade Ranch Dressing is Your New Kitchen Superpower
Hey there, kitchen friend! Olivia here, apron dusted with parsley flakes and a whisk in hand. Can we talk about ranch dressing for a hot second? That cool, creamy, herb-kissed wonder that turns carrot sticks into magic wands and pizza crusts into edible spoons. We’ve all been there – grabbing a bottle from the store, only to find it tastes like… well, disappointment in a squeeze bottle. Too sweet, too thin, or packed with unpronounceable ingredients. What if I told you that in just 5 minutes, you could whip up a ranch so gloriously tangy, rich, and full of personality that it’ll make your taste buds throw a confetti parade? This isn’t just dressing; it’s a flavor revolution in a jar. I’m talking about that perfect balance where the garlic whispers, the buttermilk sings, and the herbs do a happy dance on your tongue. Whether you’re dunking crispy wings, drizzling over a farmer’s market salad, or sneaking spoonfuls straight from the fridge (no judgment!), this homemade ranch is comfort food’s BFF. Forget the bottled stuff forever – let’s make ranch that tastes like a hug from your favorite person. Ready to become a ranch rockstar? Your veggies (and your soul) will thank you.
That Time Ranch Saved My (Culinary) Reputation
Picture this: It’s my first big “grown-up” dinner party years ago. I’d spent days planning – herb-crusted roast chicken, garlic smashed potatoes, fancy green beans. But when my best friend Sam arrived early, she caught me in full panic mode: my salad greens looked sadder than a deflated balloon. “Liv,” she laughed, “you need ranch emergency services!” She marched to my fridge, pulled out buttermilk and sour cream, and started whisking like a wizard. “My grandma’s trick,” she winked. “Ranch makes everything better.” Five minutes later, we’d whipped up a batch, and that humble bowl became the star of the night. Guests raved, dunking everything from breadsticks to chicken skins. One friend even declared, “This tastes like my childhood baseball games – in the best way!” That night taught me a golden rule: Great ranch isn’t just a condiment; it’s a memory-maker, a crowd-uniter, and the ultimate kitchen confidence booster. Now, every time I whisk up a batch, I think of Sam, her grandma, and how something so simple can turn a flop into a standing ovation.
Your Ranch Dream Team: Simple Ingredients, Big Flavor
- ½ cup buttermilk – The tangy backbone! (Chef’s tip: Shake your carton well! No buttermilk? Mix ½ cup milk + 1½ tsp lemon juice/vinegar. Let sit 5 mins.)
- ½ cup mayonnaise – Creaminess central! (Insight: Use full-fat for best texture. Vegan? Swap in avocado mayo – it works!)
- ½ cup sour cream – Adds lush body and gentle tang. (Sub alert: Greek yogurt works for a lighter kick, or use all mayo for ultra-richness.)
- ½ tsp black pepper – Freshly cracked is life-changing! (Why? Pre-ground loses its sparkle. Grind it yourself for brighter flavor.)
- ¼ tsp sea salt – Enhances all the flavors. (Pro move: Start here, then taste & adjust after chilling – salts vary!)
- ¾ tsp garlic powder – The stealth flavor bomb. (Secret weapon: Powder blends smoother than fresh garlic here. Trust the process!)
- ¼ tsp onion powder – Sweet, savory depth. (No sub needed, but 1 tbsp finely minced fresh chives add pretty flecks later!)
- ¾ tsp dried parsley – That classic “ranch” look & herbaceous hint. (Fun twist: Add ¼ tsp dried dill for “dill-uxe” ranch!)
Why dried herbs? They won’t water down your dressing like fresh can, and their flavor concentrates beautifully as it chills. This crew creates a harmony where no single ingredient hogs the mic!
Crafting Your Creamy Masterpiece: Step-by-Step
Step 1: The Smooth Operator Base
Grab a medium bowl (no need for fancy equipment – a trusty whisk and elbow grease work wonders!). Pour in the **buttermilk, mayonnaise, and sour cream**. Now, whisk it like you mean it! Get those lazy lumps out until it’s silky smooth. (Chef’s hack: If your mayo/sour cream is cold and stubborn, let them sit at room temp for 10 mins first. Whisking becomes a breeze!) This creamy canvas is your ranch foundation – smooth now means dreamy texture later.
Step 2: Flavor Party Time!
Sprinkle in the **black pepper, sea salt, garlic powder, onion powder, and dried parsley**. (Pro insight: Add them one at a time? Nah! Dump ’em all in together – efficiency is key here.) Stir gently but thoroughly. See how the creamy white gets those adorable green specks? That’s the magic starting! (Watch out: Over-whisking now can sometimes thin it slightly. A gentle stir incorporates perfectly.)
Step 3: Taste the Rainbow (Well, the Ranch!)
Dip a clean spoon or veggie stick in. **Taste it!** This is non-negotiable, chef! Does it need more garlic punch? A pinch more salt? Maybe an extra crack of pepper? Adjust now. (Kitchen truth bomb: Raw garlic powder tastes sharper now. It mellows beautifully after chilling. Go easy if unsure!)
Step 4: The Patience Payoff – Chill Out!
Cover the bowl (or pour into a cute jar!) and **refrigerate for at least 30 minutes**. (Why wait? This lets the dried herbs rehydrate and the flavors do a slow dance together. Skipping this is like eating cookie dough instead of cookies – good, but not transcendent!) Overnight is even better if you can resist!
Step 5: Jar it Up & Store Like a Pro
Transfer your glorious creation to an **airtight container** (mason jars are my fave – so Instagrammable!). It keeps happily in the fridge for up to 1 week. (Reality check: Mine rarely lasts 3 days because we put it on EVERYTHING.) Give it a quick stir before serving if it separates slightly – no biggie!
Beyond the Salad Bowl: Serving Your Ranch Glory
Okay, superstar, your ranch is ready to shine! Obviously, it’s dip royalty – think crispy carrot sticks, crunchy celery, bell pepper strips, or even hot, salty fries. But let’s get creative! Drizzle it generously over a loaded wedge salad (iceberg, bacon, tomatoes, blue cheese crumbles – yes!). It’s the ultimate wing commander – baked or fried, doesn’t matter. Thin it with a splash more buttermilk for a gorgeous salad dressing. Use it as a burger or sandwich spread (goodbye, boring mayo!). Dollop it on baked potatoes or swirl it into soups (try it on tomato or potato leek!). Heck, dip your pizza crust or even grilled chicken skewers. The possibilities are endless – this ranch is your edible paintbrush!
Shake It Up! Ranch Remix Ideas
Once you master the classic, play with these fun twists:
- Spicy Southwest: Stir in 1 tsp chipotle powder + 2 tbsp finely chopped cilantro. Killer on tacos!
- Green Goddess Ranch: Blend in ¼ cup packed fresh basil + 2 tbsp fresh chives + 1 tbsp lemon juice. Springtime vibes!
- Avocado Lime Ranch: Mash 1 ripe avocado into the base + zest of 1 lime. Creamy & vibrant!
- Everything Bagel Ranch: Fold in 1 tbsp everything bagel seasoning after chilling. Dip pretzels!
- Vegan Dream: Use plant-based mayo, sour cream, and buttermilk (almond milk + lemon juice). Just as delicious!
Olivia’s Ranch Chronicles: Notes from My Messy Apron
This recipe has been my trusty sidekick for years, but it definitely evolved! My first attempt? Let’s just say it tasted like salty mayonnaise with commitment issues. I learned the hard way that balance is everything. Too much garlic powder = vampire repellent. Too little buttermilk = sad, gloppy dip. The “aha!” moment came when I started using full-fat everything (low-fat dairy makes weepy, thin ranch) and embraced the chill time. True story: I once served unchilled ranch to my food critic uncle. He politely asked if I’d “forgotten the flavor.” Lesson learned! Now, I always make it ahead. Another funny fail? Mistaking cayenne for paprika for the “spicy” version. Let’s say our game night involved a lot of milk chugging! Now, I label my spices religiously. This recipe is forgiving, though – that’s the beauty. Make it yours!
Ranch Rescue: Your Questions Answered
Q: My ranch is too thick! Help!
A: No panic! Thin it gradually with a teaspoon or two of extra buttermilk or regular milk, whisking well after each addition, until it’s your perfect dippable consistency.
Q: Can I use fresh herbs instead of dried?
A: Absolutely! Fresh herbs are lovely. Triple the amount (e.g., 2¼ tsp fresh parsley instead of ¾ tsp dried). Finely chop them! Note: Fresh herbs can make the dressing slightly thinner and are best used within 2-3 days.
Q: Why does it taste a bit sharp at first?
A: That’s the raw garlic powder and onion powder saying hello! Chilling is non-negotiable here. As it rests, those sharp edges soften and meld beautifully into a harmonious, mellow flavor. Trust the process – give it that 30 minutes (or more)!
Q: Can I make it ahead? How long does it REALLY last?
A: Yes! Making it 1-2 days ahead is IDEAL – flavors peak around 24 hours. Stored in a truly airtight container in the fridge, it’s safe for 7 days. However, with fresh herbs or dairy substitutions, aim for 3-4 days. Always give it a sniff test – if it smells off or develops mold, toss it.
Best Homemade Ranch Dressing
- Total Time: About 35 minutes
Description
Hey there, kitchen friend! Olivia here, apron dusted with parsley flakes and a whisk in hand. Can we talk about ranch dressing for a hot second? That cool, creamy, herb-kissed wonder that turns carrot sticks into magic wands and pizza crusts into edible spoons. Store-bought often disappoints—too sweet, too thin, or full of mystery ingredients. But in just 5 minutes, you can whip up a ranch so gloriously tangy, rich, and full of personality that your taste buds will throw a confetti parade.
Ingredients
-
½ cup buttermilk* (see tip)
-
½ cup mayonnaise (full-fat for best texture)
-
½ cup sour cream
-
½ tsp freshly cracked black pepper
-
¼ tsp sea salt
-
¾ tsp garlic powder
-
¼ tsp onion powder
-
¾ tsp dried parsley
-
Tip: No buttermilk? Mix ½ cup milk + 1½ tsp lemon juice or vinegar; let sit 5 minutes.
Instructions
-
Mix the Base: In a medium bowl, whisk together buttermilk, mayonnaise, and sour cream until smooth and creamy. (Tip: If mayo or sour cream is cold, let sit 10 minutes before whisking.)
-
Add the Flavor: Sprinkle in black pepper, sea salt, garlic powder, onion powder, and dried parsley all at once. Stir gently to combine — you’ll see pretty green flecks forming.
-
Taste & Adjust: Give it a taste! Want more garlic? Add a pinch. Salt too low? Add a little more. Remember, flavors mellow after chilling.
-
Chill: Cover and refrigerate for at least 30 minutes to let the herbs rehydrate and flavors meld. Overnight chill = next-level ranch magic.
-
Store: Transfer to an airtight container or mason jar. Keeps well in the fridge for up to 1 week. Stir before serving if separation occurs.
Notes
-
Spicy Southwest: Stir in 1 tsp chipotle powder + 2 tbsp chopped cilantro.
-
Green Goddess Ranch: Blend in ¼ cup fresh basil + 2 tbsp fresh chives + 1 tbsp lemon juice.
-
Avocado Lime Ranch: Mash 1 ripe avocado into the base + zest of 1 lime.
-
Everything Bagel Ranch: Fold in 1 tbsp everything bagel seasoning after chilling.
-
Vegan Version: Use plant-based mayo, sour cream, and almond milk + lemon juice for buttermilk.
- Prep Time: 5 minutes
Nutrition
- Calories: 120 cal Per Serving
- Fat: 12g
- Carbohydrates: 1g
- Protein: 1g
Nutritional Snapshot (Per 2 Tbsp Serving)
Calories: 120 | Fat: 12g | Carbs: 1g | Protein: 1g | Sodium: 135mg
(Note: Values are approximate. Using low-fat ingredients will alter counts significantly.)
Final Thoughts: Ranch as a Lifestyle
Homemade ranch isn’t just a condiment—it’s a declaration of independence from mediocre flavors. It’s proof that 5 minutes and real ingredients can outshine any shelf-stable imposter. Whether you’re dunking, drizzling, or straight-up spooning it, this ranch is your kitchen’s secret handshake.
So next time you reach for that bottle at the store, pause. Grab the buttermilk instead. Your taste buds (and your inner child) will thank you.
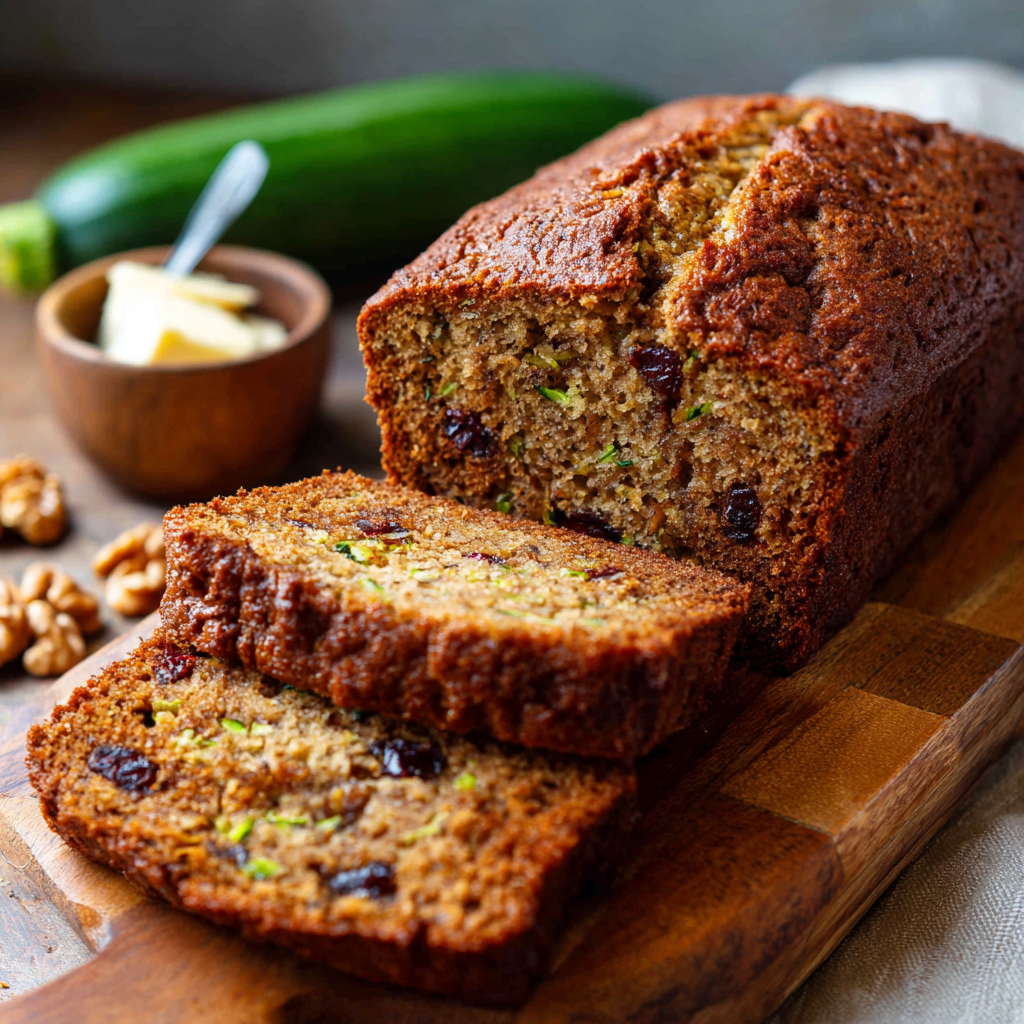
Banana Zucchini Bread
When Life Gives You Zucchinis… Make Magic Bread
Hey there, kitchen friend! Olivia here, waving from my flour-dusted countertop. Can we talk about that moment when your bananas go speckled and your zucchini harvest explodes like confetti? That’s not a problem—it’s a *sign*. A sign you’re destined to bake this outrageously moist, cinnamon-kissed Banana Zucchini Bread. Imagine the best banana bread you’ve ever had, but with a sneaky veggie upgrade that keeps it tender for days. No fancy skills needed—just a grater, a bowl, and that cozy feeling of creating something deliciously wholesome. Whether you’re juggling kids, work, or just craving a slice of comfort with your coffee, this loaf is your edible hug. Ready to turn those overripe bananas and rogue zucchinis into something unforgettable? Aprons on—let’s bake joy!
Grandma’s Garden & My First Kitchen “Oops”
This recipe takes me straight back to summers at Grandma Rose’s farmhouse. She’d send me into her jungle-like garden to “hunt” baseball-bat-sized zucchinis hiding under leaves. One August, I proudly hauled in a 3-pound monster. “Child, that’s not food—that’s a self-defense weapon!” she chuckled. We grated it into everything—fritters, pasta sauce, and yes, her famous “green banana bread.” The first time I tried making it solo? I forgot to squeeze the zucchini. My “loaf” turned into a soggy puddle. Grandma’s advice? “Water belongs in rain barrels, not bread, sweet pea.” Now, I wring those shreds like I’m strangling a kitchen villain. Every time I bake this, I taste sunshine, dirt under my nails, and that beautiful woman’s wisdom.
🛒 Ingredients & Why They Matter
- 3 large eggs – Your binding superstars! Room temp blends smoother. Vegan? Swap 1 tbsp ground flax + 3 tbsp water per egg.
- 1 cup white sugar + ⅔ cup packed brown sugar – White sugar gives structure, brown sugar brings moisture and caramel notes. Too sweet? Reduce to ¾ cup total.
- ¾ cup vegetable oil – Keeps it lusciously moist. Melted coconut oil works for tropical vibes!
- 2 ripe bananas, mashed – The spottier, the better! Frozen-thawed bananas work too (drain excess liquid).
- 1 cup grated zucchini – Chef’s secret: After grating, squeeze DRY in a towel. Trust me—no one wants zucchini soup!
- 2 tsp vanilla extract – The flavor amplifier. Use real vanilla, not imitation—it’s worth it.
- 3½ cups all-purpose flour – Spoon and level to avoid dense bread. Gluten-free? 1:1 GF flour blend works beautifully.
- 1 tbsp ground cinnamon – Hello, warmth! Add a pinch of nutmeg or cardamom for extra coziness.
- 1½ tsp baking powder + 1 tsp baking soda – Your rise-and-shine team. Check expiration dates—old leaveners = flat loaves.
- 1 tsp salt – Balances sweetness. Sea salt or kosher preferred.
- ½ cup dried cranberries (optional) – Tangy pops! Soak in warm water 10 mins to prevent burning.
- ½ cup chopped walnuts (optional) – Toasty crunch! Toast them first for max flavor.
👩🍳 Let’s Bake! Your Foolproof Roadmap
Step 1: Preheat oven to 350°F (175°C). Grease TWO 9×5-inch loaf pans. Chef hack: Line with parchment paper slings for easy lifting!
Step 2: In a large bowl, whisk eggs, both sugars, and oil. Add mashed bananas, zucchini (squeezed dry!), and vanilla. Whisk until glossy. Tip: Lumps are fine—overmixing = tough bread!
Step 3: In a separate bowl, mix flour, cinnamon, baking powder, baking soda, and salt. Chef insight: Sift if your baking soda tends to clump!
Step 4: Gradually stir dry mix into wet ingredients. Key move: Stop when just combined—batter should be shaggy! Fold in cranberries/walnuts if using.
Step 5: Divide batter evenly between pans. Pro-tip: Weigh pans for perfect twins! Sprinkle raw sugar on top for sparkle.
Step 6: Bake 50-60 minutes. Watch for: Golden crust, pulling from pan edges, and a clean toothpick test. Rotate pans halfway!
Step 7: Cool in pans 10 minutes. Transfer to wire rack. Patience warrior: Cutting warm bread = crumbles. Wait 1 hour for clean slices!
✨ Serving: Where Cozy Meets Creative
Slice it thick, toast it lightly, and let the magic begin! For breakfast: schmear with almond butter and banana slices. Dessert vibes? Warm slices with vanilla ice cream and caramel drizzle. Pack slices in lunchboxes with cream cheese “frosting” (whipped cream cheese + honey). Hosting brunch? Cube it, skewer with berries, and call it bread-kabobs—guaranteed giggles!
The Science of Squeezing Zucchini (And Other Moisture Hacks)
Let’s talk about the elephant in the room—why does zucchini bread sometimes turn into a sad, soggy mess? The answer lies in water content. Zucchinis are 95% water, and if you don’t wrangle that moisture, it’ll steam your bread from the inside out. Here’s how to master it:
The Great Zucchini Squeeze
-
Grate & Drain: After shredding, pile zucchini onto a clean kitchen towel, wrap it up, and wring like you’re juicing it. You’ll be shocked at how much liquid comes out. (Pro tip: Save the juice for smoothies or soups!)
-
Salt Trick (Optional): Sprinkle grated zucchini with a pinch of salt, let it sit 10 minutes, then squeeze. Salt draws out extra moisture.
Bananas: The Moisture Multiplier
Overripe bananas aren’t just sweeter—they’re also more hydrating. If yours are extra soft, mash and let them sit in a strainer for 5 minutes to drain excess liquid. Frozen-thawed bananas? Always drain the dark liquid that seeps out.
Oil vs. Butter: The Texture War
-
Oil wins for moisture retention—it coats flour proteins better than butter, keeping bread tender for days.
-
Butter adds flavor but can make bread denser as it solidifies when cool. For best of both worlds, use half oil, half melted butter.
Flour Power—How to Avoid a Dense Loaf
Nothing’s worse than slicing into a brick-like loaf. Here’s how to keep your bread light and airy:
Measuring Matters
-
Spoon & Level Method: Fluff flour in the bag, spoon it into your measuring cup, then level with a knife. Scooping packs flour down, leading to dry, heavy bread.
-
Weigh for Precision: 1 cup all-purpose flour = 120g. A kitchen scale is your secret weapon.
Gluten’s Role
-
Don’t Overmix: Stir wet and dry ingredients just until combined. Overworking flour develops gluten, turning bread tough. Lumps are okay!
-
Alternative Flours:
-
Gluten-Free: Use a 1:1 GF blend with xanthan gum. Add 1 tsp extra baking powder for lift.
-
Whole Wheat: Replace half the AP flour with whole wheat for nuttiness, but add 2 tbsp extra liquid (milk or applesauce).
-
Leavening Lifesavers
-
Baking Powder vs. Soda:
-
Baking soda needs acid (bananas, brown sugar) to activate. Too much = metallic taste.
-
Baking powder works on its own. Check expiration dates—old leaveners won’t rise properly.
-
-
Test for Freshness: Drop 1 tsp baking powder into hot water. If it bubbles violently, it’s alive!
Flavor Boosts & Swaps (Beyond Cinnamon)
Cinnamon is classic, but let’s play with flavors to make this loaf unforgettable:
Spice It Up
-
Chai Version: Add 1 tsp ginger + ½ tsp cardamom + ¼ tsp cloves.
-
Mexican Chocolate: 1 tbsp cinnamon + ½ tsp cayenne (trust me) + ½ cup dark chocolate chunks.
-
Orange Blossom: Zest of 1 orange + 1 tsp orange extract. Pair with dried cherries.
Mix-Ins That Wow
-
Crunchy: Toasted pecans, sunflower seeds, or granola clusters.
-
Chewy: Chopped dates, dried figs, or Turkish apricots (soak in hot water first).
-
Boozy: Soak raisins in rum or bourbon for 30 minutes before folding in.
Frosting & Glazes
-
Cream Cheese Swirl: Mix 4 oz softened cream cheese + ¼ cup sugar + 1 egg yolk. Drop spoonfuls onto batter and swirl with a knife before baking.
-
Lemon Glaze: Whisk 1 cup powdered sugar + 2 tbsp lemon juice + 1 tsp zest. Drizzle over cooled loaf.
🔄 5 Fun Twists to Try
1. Chocolate Craver: Swap cranberries for ⅔ cup chocolate chips + 2 tbsp cocoa powder in dry mix.
2. Tropical Escape: Add ½ cup shredded coconut + ¼ cup diced pineapple (drained well!).
3. Lemon-Zing: Replace vanilla with 1 tbsp lemon zest + 1 tsp lemon extract.
4. Gluten-Free/Dairy-Free: Use GF flour + coconut oil.
5. Protein Boost: Replace ½ cup flour with oat flour or protein powder.
🧑🍳 Olivia’s Kitchen Confessions
This recipe evolved from my “Great Zucchini Flood of 2012.” After my soggy loaf disaster, I started adding an extra banana for insurance. Now, I freeze batches of grated zucchini (squeezed dry!) in 1-cup bags—summer’s gift to future Olivia. My kids call this “confetti bread” and sneak slices before school. Pro tip: Wrap cooled loaves in foil and leave overnight—the flavors MELD into something magical. Last week, my neighbor texted: “Is this bread… healthy?” I winked: “It has vegetables. That’s our secret.”
❓ You Asked, I Answered!
Q: Why is my bread dense/gummy?
A: Classic overmixing! Stop stirring as soon as flour disappears. Also: did you squeeze that zucchini? Excess water = sad, soggy loaves.
Q: Can I make muffins instead?
A: Absolutely! Fill muffin tins ¾ full. Bake 20-25 mins at 375°F (190°C). Perfect for on-the-go snacks!
Q: How long does it keep?
A: Room temp (wrapped): 4 days. Freeze whole loaves up to 3 months. Thaw overnight—it’s like fresh-baked!
Q: Can I reduce sugar?
A> Yes! Drop to 1 cup total sugar (½ white + ½ brown). Bananas add sweetness too!
Banana Zucchini Bread
- Total Time: 1 hour
Description
Hey there, kitchen friend! Olivia here, waving from my flour-dusted countertop. If your bananas are speckled and your zucchinis are multiplying like magic, don’t fret — it’s a sign you’re about to bake something wonderfully cozy and moist. This Banana Zucchini Bread is cinnamon-kissed, tender, and packed with sneaky veggies that keep it soft for days. Perfect for breakfast, snacks, or a comforting treat with your coffee. Ready? Aprons on—let’s bake joy!
Ingredients
-
3 large eggs (room temperature)
-
1 cup white sugar
-
⅔ cup packed brown sugar
-
¾ cup vegetable oil (or melted coconut oil)
-
2 ripe bananas, mashed (the specklier, the better!)
-
1 cup grated zucchini, squeezed dry
-
2 tsp vanilla extract
-
3½ cups all-purpose flour (or gluten-free 1:1 blend)
-
1 tbsp ground cinnamon
-
1½ tsp baking powder
-
1 tsp baking soda
-
1 tsp salt
-
½ cup dried cranberries (optional, soaked 10 minutes in warm water)
-
½ cup chopped toasted walnuts (optional)
Instructions
-
Preheat oven to 350°F (175°C). Grease two 9×5-inch loaf pans or line them with parchment paper for easy removal.
-
In a large bowl, whisk together eggs, white sugar, brown sugar, and oil until smooth. Add mashed bananas, squeezed zucchini, and vanilla extract. Stir gently—lumps are okay!
-
In another bowl, mix flour, cinnamon, baking powder, baking soda, and salt. Sift if needed to avoid clumps.
-
Gradually fold dry ingredients into wet until just combined. Overmixing makes the bread dense! If using, fold in cranberries and walnuts now.
-
Divide batter evenly between pans. Sprinkle raw sugar on top for a little sparkle (optional).
-
Bake for 50-60 minutes, rotating pans halfway through. The bread is done when the crust is golden and a toothpick inserted in the center comes out clean.
-
Let the bread cool in pans for 10 minutes, then transfer to a wire rack to cool completely (about 1 hour). Patience pays off — cutting warm bread causes crumbles.
Notes
-
Squeeze that zucchini well! Excess moisture = soggy bread. Use a clean kitchen towel or cheesecloth to wring it dry.
-
Bananas add natural sweetness, so you can reduce sugar if you prefer less sweet.
-
No eggs? Use 1 tbsp ground flaxseed mixed with 3 tbsp water per egg as a vegan substitute.
-
Want muffins? Use the same batter, fill muffin tins ¾ full, and bake at 375°F (190°C) for 20-25 minutes.
-
Make ahead: Wrap cooled loaves in foil and let rest overnight — flavors meld and improve! Freeze for up to 3 months.
- Prep Time: 15 minutes
- Cook Time: 50-60 minutes
Nutrition
- Calories: 210 cal Per Serving
- Sugar: 16g
- Fat: 9g
- Carbohydrates: 30g
- Fiber: 1g
- Protein: 3g
📊 Nutrition Per Slice (1/20th)
Calories: 210 | Protein: 3g | Carbs: 30g | Fat: 9g | Fiber: 1g | Sugar: 16g
Final Thoughts: Why This Bread is a Life Skill
This isn’t just a recipe—it’s a kitchen survival tactic. It rescues sad bananas, tames zucchini invasions, and solves last-minute “I need a gift!” panics. It’s forgiving (forgot the eggs? Try applesauce). It’s adaptable (allergic to nuts? Skip ’em). And most importantly, it’s memory-making.
Every time I bake it, I’m back in Grandma’s kitchen, laughing at her zucchini jokes. Now, my kids beg to grate the zucchini (and sneak raw batter, obviously). That’s the real magic: not just the bread, but the stories and smiles it creates.




