
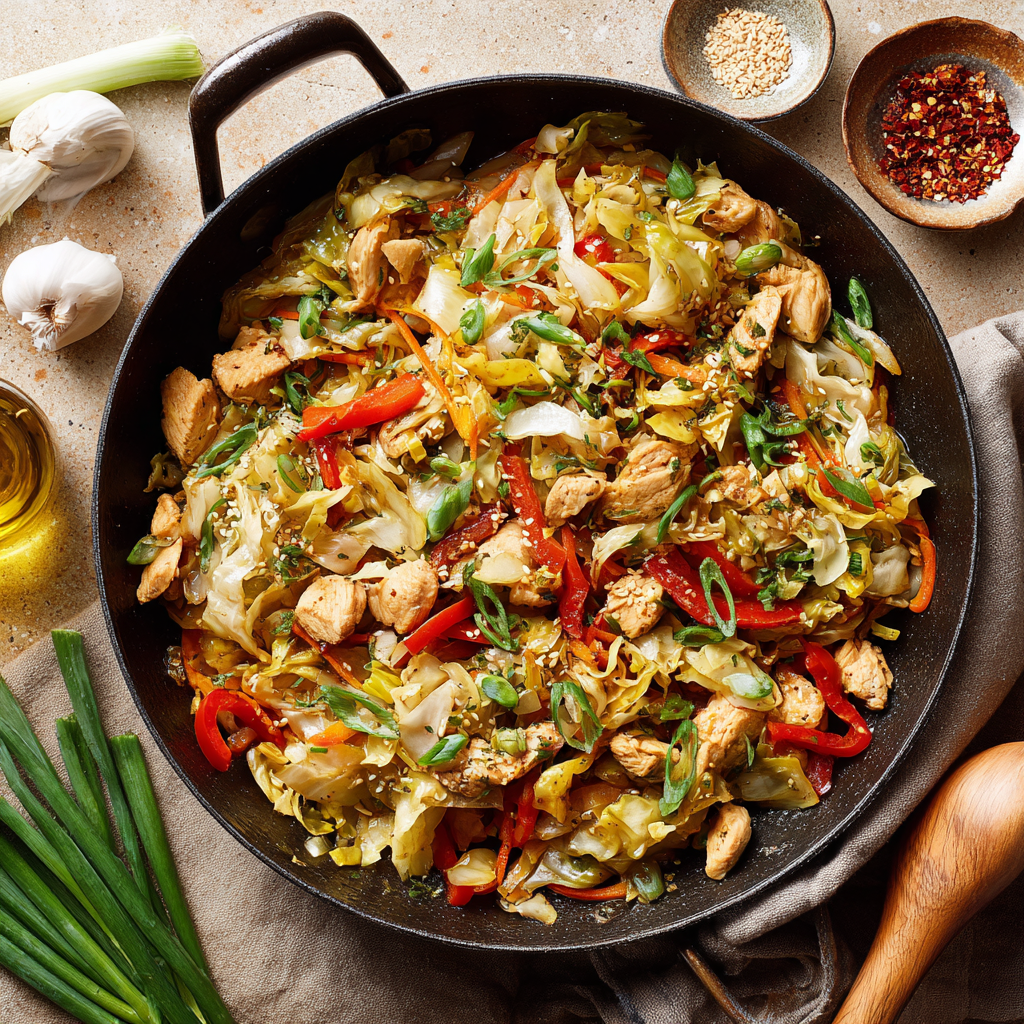
Chicken Cabbage Stir-Fry
Why This Stir-Fry Will Become Your Weeknight Hero
Hey there, friend! Olivia here, waving from my flour-dusted countertop. You know that moment when you fling open the fridge after a crazy day, staring at chicken breasts and a half-head of cabbage like they’re a puzzle? Yeah, we’ve all been there. That’s exactly why this Chicken Cabbage Stir-Fry is my forever love letter to busy kitchens. Imagine tender chicken, rainbow-bright veggies, and a savory sauce clinging to every bite—all ready in 25 minutes flat. No fancy skills needed, just one sizzling skillet and that glorious “ahhh” feeling when dinner solves life’s chaos.
This isn’t just food; it’s a confidence boost. Maybe you’re new to stir-frying or just craving something wholesome without the cleanup marathon. I designed this recipe to be forgiving, flexible, and stupidly delicious. We’re talking crispy cabbage that stays vibrant, chicken that stays juicy, and a sauce you’ll want to slurp with a spoon. And that smell? Garlic + sesame + caramelizing veggies = instant kitchen therapy. So tie on your messiest apron (solidarity, my friend!), and let’s turn humble ingredients into pure magic. Trust me—this dish will hug you back.
The Midnight Stir-Fry That Started It All
Picture this: It’s 11 PM during my college days, my tiny apartment kitchen lit by a single bulb. My roommate, Maya, stumbles in after a brutal double shift. We’re both broke, exhausted, and staring into our sad fridge—nothing but a lonely chicken breast, wilting cabbage, and a bell pepper past its prime. “Stir-fry?” I whisper, like it’s a secret rebellion against instant ramen. We hack everything into haphazard chunks, splash in soy sauce like it’s liquid gold, and giggle as sesame oil perfumes the air. That thrown-together mess? Pure bliss on rice. No fancy techniques, just hunger and heart.
Years later, that chaotic midnight experiment evolved into this recipe. It’s still my go-to when life feels scrambled—a reminder that great food isn’t about perfection. It’s about the cabbage crunch that makes you grin, the way the sauce pools into rice like a savory embrace, and how feeding someone says, “I see you.” Every time I make it, I think of Maya’s tired smile. Now, I’m passing that cozy victory to you. Let’s create your own delicious memories!
Your Flavor-Packed Toolkit
Grab these simple stars! I’ll share swaps and secrets so you can riff like a pro. Pro tip: Chop everything first—stir-fries move FAST!
- 1 tbsp butter – Adds rich depth. Swap with olive oil or avocado oil, but butter’s caramelizing magic is *chef’s kiss*.
- 1 medium onion, sliced – Sweetness foundation. Red onion works for color!
- 2 cloves garlic, minced – Non-negotiable flavor bomb. Use pre-minced to save time—no shame!
- 1 lb chicken breast, diced – Cut uniform 1-inch pieces for even cooking. Thighs add more richness if you prefer.
- 2 cups cabbage, chopped – Green or Napa cabbage both rock. Core it first! It stays crisp—that’s the joy.
- 1 bell pepper, sliced – Any color! Red/yellow add sweetness. Too pricey? Skip or use frozen.
- 1 carrot, julienned – Buy matchstick carrots to cheat. Zucchini ribbons also work.
- 2 tbsp soy sauce – The umami backbone. Coconut aminos for gluten-free.
- 1 tbsp oyster sauce (optional) – Deepens savoriness. Skip if vegan, or sub hoisin + pinch of sugar.
- 1 tsp sesame oil – Stir in LAST. Its nutty aroma fades if cooked too long.
- ½ tsp black pepper + ½ tsp salt – Season in layers! Taste before adding extra salt.
- ¼ tsp crushed red pepper flakes (optional) – My “wake-up” touch. Start small!
- 1 tsp cornstarch mixed with 2 tbsp water (optional) – Thickens sauce beautifully. Arrowroot works too.
- Green onions, for garnish – Freshness and crunch. Scallions = stir-fry confetti!
Let’s Fire Up the Skillet!
Ready? Channel your inner wok master. I’ll guide you step-by-step with hacks to avoid soggy veggies and boost flavor. Key: HIGH heat, quick moves!
- Sizzle your base: Melt butter in a large skillet or wok over medium heat. Add onion and garlic—sauté 2-3 minutes until fragrant. Chef’s hack: Stir constantly! Garlic burns fast. If it does, wipe the pan and restart—it’s worth it.
- Brown that chicken: Crank heat to medium-high. Add chicken in a single layer—don’t crowd! Cook 3 minutes undisturbed for golden edges. Flip, cook 4-5 more minutes until no pink remains. Secret: Undercook slightly—it’ll finish with veggies!
- Veggie party time: Toss in cabbage, bell pepper, and carrot. Stir-fry 4-5 minutes until vibrant but crisp. Hack: Heard sizzling stop? That’s moisture! Turn up heat and stir fast to evaporate.
- Saucy magic: Pour in soy sauce, oyster sauce (if using), sesame oil, pepper, salt, and red pepper flakes. Toss like you mean it—coat everything! Tip: Slide veggies up the skillet sides to heat sauce at the base for 30 seconds first.
- Thicken (optional but divine): Stir cornstarch slurry into the bubbling sauce. Cook 1-2 minutes until glossy. Watch it transform! If too thick, splash in broth or water.
- Finish strong: Kill the heat. Scatter green onions on top. Last-minute stir preserves crunch!
The Science Behind the Perfect Stir-Fry – Why High Heat & Quick Cooking Matter
Ever wonder why restaurant stir-fries taste so much better than your home attempts? It’s not just the chef’s skills—it’s the science of high-heat cooking. Stir-frying is all about the Maillard reaction (that magical browning that creates deep flavor) and retaining crisp textures. Here’s why this method works:
-
High Heat = Faster Cooking = Better Texture
-
Vegetables like cabbage and bell peppers contain cellulose, which breaks down slowly. High heat (400°F+) cooks them quickly, preserving their crunch.
-
Chicken proteins seize up at lower temps, releasing moisture and turning rubbery. Searing locks in juices.
-
-
The “No Crowding” Rule
-
Overloading the pan drops the temperature, causing food to steam instead of fry. Result? Soggy veggies and chewy meat.
-
Pro Tip: Cook in batches if needed, or use a carbon steel wok (it heats evenly and recovers temperature fast).
-
-
Sauce Chemistry
-
Soy sauce contains glutamates (umami), while oyster sauce adds sweetness and viscosity. Cornstarch slurry thickens via starch gelatinization—just 1 tsp makes sauce cling perfectly.
-
Sesame oil’s flavor compounds are volatile; adding it last preserves its nutty aroma.
-
Bonus Hack: Ice-cold meat is harder to slice thinly. Pop chicken in the freezer for 15 minutes before dicing for cleaner cuts!
The Global Stir-Fry Playbook – How This Recipe Adapts Across Cuisines
This stir-fry is a blank canvas—here’s how to take it on a world tour with pantry staples:
1. Chinese-Style (The Classic)
-
Swap butter for peanut oil.
-
Add 1 tsp grated ginger + ½ tsp five-spice powder.
-
Finish with a drizzle of chili oil and Sichuan peppercorns for tingling heat.
2. Thai-Inspired
-
Replace soy sauce with fish sauce + lime juice (1:1 ratio).
-
Toss in 1 tbsp Thai basil at the end.
-
Garnish with crushed peanuts and a pinch of palm sugar.
3. Korean Fusion
-
Use gochujang (1 tbsp) instead of oyster sauce.
-
Add kimchi for tangy crunch.
-
Top with a fried egg (runny yolk = instant sauce).
4. Mexican Fiesta
-
Swap cabbage for shredded red cabbage + lime zest.
-
Season with cumin + smoked paprika.
-
Serve with warm tortillas and avocado crema.
Why This Works: Stir-fries are universal because they rely on aromatics (garlic/ginger) + acid (lime/vinegar) + umami (soy/fish sauce). Mix and match based on what’s in your fridge!
The Psychology of a Weeknight Win – Why This Recipe Reduces Decision Fatigue
After a long day, your brain is fried (pun intended). Here’s why this stir-fry is a mental health hack disguised as dinner:
-
The “No Overthinking” Formula
-
Template cooking (protein + veg + sauce) eliminates decision paralysis.
-
Studies show that limited choices reduce stress—this recipe’s flexibility means you can’t mess it up.
-
-
The Smell = Instant Comfort
-
Garlic and sesame oil trigger nostalgia and appetite via the olfactory system.
-
A 2019 study found that savory aromas lower cortisol levels (hello, stress relief).
-
-
The 25-Minute Confidence Boost
-
Quick wins release dopamine. Chopping veggies = tangible progress.
-
“I made this!” satisfaction beats takeout guilt.
-
Pro Tip: Double the recipe and refrigerate half. Reheating it tomorrow = future-you feels like a genius.
Plating Like a Pro (Minimal Effort, Max Wow)
This dish is a stunner straight from the skillet! For family style, pile it high in a shallow bowl. Rice is classic—jasmine or brown rice soak up sauce beautifully. Noodles? Toss with udon or soba for carb-lovers. Add flair with extra green onions, sesame seeds, or a lime wedge squeeze. My move: Serve with chili crisp on the side for heat-seekers. It’s cozy enough for Tuesday nights but vibrant enough to impress guests!
Shake It Up! 5 Tasty Twists
Make this recipe yours! Here are my favorite riffs:
- Thai-Inspired: Swap soy sauce for 2 tbsp peanut sauce + 1 tbsp lime juice. Top with crushed peanuts!
- Vegetarian Powerhouse: Replace chicken with tofu or chickpeas. Add mushrooms for meaty depth.
- Spicy Garlic Noodles: Toss hot stir-fry with cooked ramen noodles. Double the garlic and red pepper!
- Ginger-Sesame: Add 1 tbsp grated ginger with garlic. Drizzle extra sesame oil at the end.
- Keto-Friendly: Skip cornstarch and carrots. Serve over cauliflower rice—still delish!
Olivia’s Real-Kitchen Confessions
This recipe? It’s survived kitchen disasters! Once, I used fish sauce instead of soy sauce (yikes)—salty tears ensued. Now I label bottles! Over time, I’ve learned: don’t skip the butter (it’s the flavor anchor), and undercook veggies slightly—they keep cooking off-heat. Also, my apron is always stained with sesame oil, and I embrace it! This stir-fry has graced my table for breakups, birthdays, and “I can’t adult today” nights. It’s forgiving—swap veggies based on your crisper drawer. No cabbage? Kale works. No peppers? Snap peas shine. Make it your comfort blanket.
Your Stir-Fry Questions, Solved!
Let’s tackle common hiccups so you cook stress-free:
- Why is my stir-fry soggy? Overcrowding or low heat! Cook in batches if needed. Ensure your skillet is HOT before adding veggies—they should sizzle on contact. Also, salt draws water from cabbage, so add it late in step 4.
- Can I make this ahead? Absolutely! Store cooked stir-fry in an airtight container for 3 days. Reheat in a skillet (not microwave) to revive crispness. Add a splash of water or broth to loosen sauce.
- Too salty? Help! Balance with acidity! A squeeze of lime or rice vinegar brightens it. No lime? Stir in 1 tsp honey or a splash of unsweetened coconut milk to mellow.
- Can I use frozen veggies? Yes—but thaw and pat dry FIRST. Excess water = steam, not sear. Frozen peppers and carrots work; avoid frozen cabbage (it gets mushy).
Chicken Cabbage Stir-Fry
- Total Time: 25 mins
Description
Fast, flexible, and packed with feel-good flavor—this stir-fry is your answer to the “what’s for dinner?” panic. Juicy chicken, crisp cabbage, and a glossy umami sauce all come together in 25 minutes, using just one pan and whatever veggies you’ve got. It’s cozy, colorful, and gloriously low-fuss—a comfort meal that doubles as a confidence boost.
Ingredients
-
1 tbsp butter (or oil)
-
1 onion, sliced
-
2 garlic cloves, minced
-
1 lb chicken breast, diced
-
2 cups cabbage, chopped
-
1 bell pepper, sliced
-
1 carrot, julienned
-
2 tbsp soy sauce
-
1 tbsp oyster sauce (optional)
-
1 tsp sesame oil (stir in last!)
-
½ tsp salt + ½ tsp black pepper
-
¼ tsp red pepper flakes (optional)
-
1 tsp cornstarch + 2 tbsp water (optional thickener)
-
Green onions, for garnish
Instructions
-
Aromatics: Melt butter over medium heat. Add onion and garlic, stir 2–3 mins until fragrant.
-
Chicken: Raise heat, sear chicken 6–8 mins until browned and just cooked through.
-
Veggies: Add cabbage, pepper, and carrot. Stir-fry 4–5 mins until crisp-tender.
-
Sauce Time: Add soy sauce, oyster sauce, sesame oil, seasonings, and stir well.
-
Optional Thickener: Stir in cornstarch slurry and cook 1–2 mins until sauce thickens.
-
Finish: Remove from heat. Garnish with green onions and serve hot!
Notes
-
Use high heat and avoid crowding the pan
-
Add salt after veggies to avoid sogginess
-
Stir sauce ingredients at the skillet’s center for even heating
-
Great over rice, noodles, or cauliflower rice
- Prep Time: 10 mins
- Cook Time: 15 mins
Nutrition
- Calories: 270 cal Per Serving
- Fat: 12g
- Carbohydrates: 10g
- Protein: 28g
Quick Nutrition Snapshot
For my health-savvy friends! Approximate per serving (based on 4 servings):
Calories: 270 | Net Carbs: 10g | Protein: 28g | Fat: 12g
Note: Values include oyster sauce and cornstarch. Omit oyster sauce to reduce sodium. Add rice/noodles for extra carbs.
Final Thoughts: More Than a Meal
This stir-fry isn’t just about feeding your body—it’s a small act of rebellion against chaotic days. It’s the crispy cabbage defiance of “I don’t have time,” the sizzle that says “I’m worth 25 minutes.” Whether you’re a college kid with a hot plate or a parent juggling Zoom calls, this dish meets you where you are.
So tonight, when the fridge seems bleak, remember: chicken + cabbage + courage = dinner magic. And hey, if you burn the garlic? Welcome to the club. We’ve got extra forks.
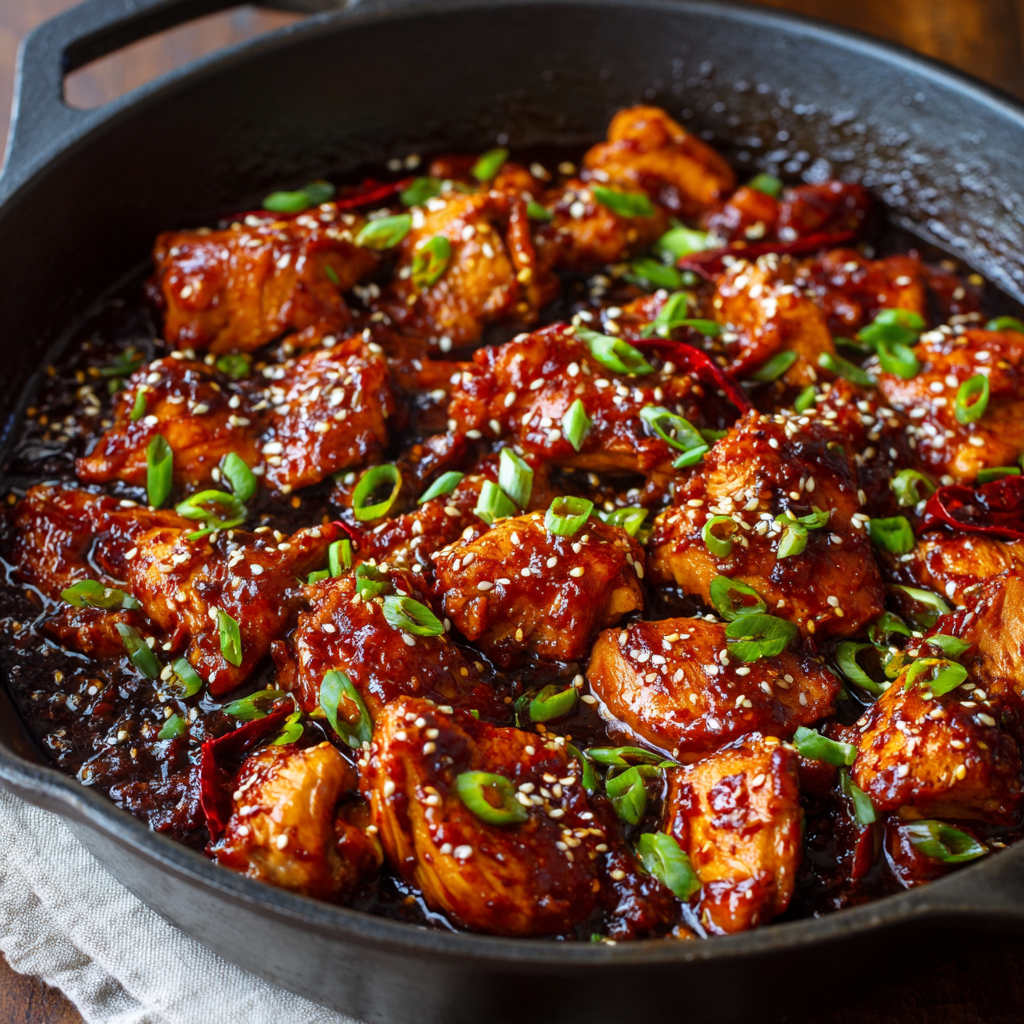
Sticky Honey Gochujang Chicken
Sticky Honey Gochujang Chicken: Your New Weeknight Obsession
Hey there, kitchen friend! Olivia here, waving from my flour-dusted countertop. Can you smell that? It’s the sweet-spicy perfume of caramelizing honey and gochujang hitting a hot pan—a scent that instantly transports me to my happiest place. If you’re craving a dinner that’s faster than takeout but tastes like a flavor fireworks show, you’ve hit the jackpot. This Sticky Honey Gochujang Chicken is my weeknight superhero: 20 minutes, one skillet, and guaranteed empty plates. Imagine tender chicken thighs glazed in a sauce that’s all things magical—fiery from Korean chili paste, golden-sweet from honey, with garlicky depth and that addictive sticky pull. It’s the kind of dish that makes you sneak “just one more bite” straight from the pan (no judgment here!). Whether you’re cooking for picky teens, impressing a date, or treating yourself after a long day, this recipe is your ticket to dinnertime glory. Grab your favorite apron—let’s make magic happen!
The Night I Fell in Love with Gochujang
Picture this: It’s midnight in my tiny first apartment kitchen, rain tapping against the window. My best friend Maya and I just got home from a chaotic double shift at the café, starving and exhausted. We were rummaging through my near-empty fridge—just chicken thighs, a half-used tub of gochujang from a forgotten kimchi experiment, and a bear-shaped honey bottle. “Let’s wing it,” Maya said, already chopping garlic. Twenty minutes later, we sat cross-legged on the floor, chopsticks clacking over a sizzling skillet, giggling as the spicy-sweet sauce made our noses run. That messy, improvised feast became our secret ritual after every tough day. Now, whenever I make this chicken, I still text Maya a photo with the caption: “Emergency comfort food activated.” It’s proof that the best recipes aren’t just about ingredients—they’re about the joy and connection we stir into every bite.
What You’ll Need
- 1½ lbs boneless, skinless chicken thighs – Thighs stay juicy even if you overcook them slightly (unforgiving chicken breasts? Hard pass!). Swap: Chicken breast works if sliced thin, or use tofu cubes for veggie pals!
- 2 tbsp Gochujang (Korean chili paste) – The star! This fermented gem brings heat, umami, and a hint of sweetness. Find it in Asian markets or the international aisle. Spice level: medium-hot. Can’t find it? Mix 1 tbsp sriracha + 1 tbsp miso paste as a quick fix.
- 3 tbsp honey – Balances the heat and creates that glossy stickiness. Chef’s trick: Warm your measuring spoon with hot water first—the honey slides right out! Maple syrup works too.
- 2 tbsp soy sauce – Salty depth that makes flavors pop. Need gluten-free? Tamari is your BFF. Too salty? Use low-sodium soy sauce.
- 2 cloves garlic, minced – Non-negotiable for fragrance! Lazy hack? ½ tsp garlic powder. But fresh is best.
- 1 tbsp vegetable oil – High smoke point = perfect sear. Avocado or canola oil also great. Skip olive oil—it burns too easily here.
- Garnish: Sesame seeds + scallions – These aren’t just pretty! Sesame adds nuttiness, scallions give fresh crunch. No scallions? Try cilantro or thinly sliced radishes.
Pro Tip: Double the sauce ingredients and stash half in a jar—it’s incredible on roasted veggies, shrimp, or even as a burger glaze!
Let’s Get Cooking: Your Foolproof Roadmap
Step 1: Sauce Alchemy! In a medium bowl, combine the gochujang, honey, soy sauce, and minced garlic. Whisk until it’s smooth and looks like molten lava (the good kind!). Chef’s Hack: If your honey is stiff, microwave the jar for 10 seconds first. Taste a dab—adjust honey for sweetness or a splash of rice vinegar for tang if you like!
Step 2: Chicken Sizzle Time! Heat vegetable oil in a large skillet (cast iron or non-stick!) over medium-high heat. Pat chicken thighs super dry with paper towels—this is KEY for golden edges! Add chicken in a single layer (don’t crowd the pan; cook in batches if needed). Sear 6-8 minutes, flipping once, until deeply golden and cooked through. Listen for that satisfying sizzle! No stirring constantly—let it develop a crust.
Step 3: The Sticky Magic Lower heat to medium. Pour that gorgeous sauce over the chicken—it’ll bubble and sputter excitedly! Stir constantly for 2-3 minutes as the sauce reduces into a thick, glossy cloak. Watch closely: When it leaves a trail on the pan bottom when scraped (like parting the Red Sea!), it’s done. Undercook sauce = runny. Overcook = burnt bitterness. Trust your instincts!
Step 4: The Grand Finale Kill the heat. Sprinkle generously with sesame seeds and chopped scallions. Pro Move: Let it rest 2 minutes—the sauce thickens more and clings perfectly.
The Science Behind the Sticky Glaze – Why This Recipe Works
Ever wonder why this Sticky Honey Gochujang Chicken clings to your taste buds like a deliciously persistent koala? There’s actual food science at play here—let’s geek out for a second.
The Maillard Reaction & Perfect Sear
That golden-brown crust on your chicken thighs? Thank the Maillard reaction, the magical chemical process where amino acids and reducing sugars transform under heat, creating complex, savory flavors. Patting the chicken dry before searing isn’t just a fussy step—it ensures maximum browning by eliminating moisture that would otherwise steam the meat. And using high-smoke-point oil (like vegetable or avocado oil) prevents burning while achieving that crisp exterior.
Gochujang: The Umami Bomb
Gochujang isn’t just spicy—it’s a fermented powerhouse of glutamates (natural umami compounds) thanks to its soybean and rice components. When combined with honey’s fructose and soy sauce’s saltiness, it creates a flavor trifecta: sweet, salty, and deeply savory. Fermentation also means gochujang has a subtle tanginess, balancing the richness of the dish.
The Sticky Sauce Secret
Honey isn’t just a sweetener—it’s a natural thickener. When heated, its sugars caramelize and reduce, creating that glossy, clingy texture. Adding the sauce only at the end prevents burning (sugar scorches easily!) while letting the chicken’s fond (those crispy browned bits in the pan) dissolve into the glaze for extra depth.
Why Thighs Triumph
Chicken thighs are forgiving because their higher fat content keeps them juicy even if slightly overcooked. Breasts, with their lean muscle fibers, tighten up fast, leading to dryness. For vegetarians, extra-firm tofu or cauliflower florets work beautifully—just coat them in cornstarch first for a crispy bite.
Pro Tip: For next-level stickiness, add 1 tsp of cornstarch slurry to the sauce—it’ll give you that lacquered takeout-style glaze.
The Cultural Roots of Gochujang – More Than Just a Condiment
Before this ruby-red paste became your fridge’s MVP, it had a rich, centuries-old history in Korean cuisine. Let’s take a quick trip to its origins—and why it’s a global darling today.
From Joseon Dynasty to Your Kitchen
Gochujang’s roots trace back to 18th-century Korea, where it was made in onggi (traditional clay pots) during late winter. Families fermented a mix of chili powder, glutinous rice, fermented soybeans (meju), and salt, then aged it under sunlight for months. This slow fermentation developed its deep umami and subtle sweetness—a far cry from today’s instant sauces!
Gochujang’s Modern Rise
Thanks to Korean pop culture (hello, K-dramas and mukbang videos!), gochujang has gone global. But traditional versions still shine in dishes like bibimbap, tteokbokki (spicy rice cakes), and bulgogi. Unlike Western hot sauces (looking at you, Tabasco), gochujang isn’t just heat—it’s layered complexity with a funky, sweet, and smoky personality.
Health Perks? Yes, Please!
Fermented foods like gochujang are gut-friendly, packed with probiotics and capsaicin (the compound in chilies linked to metabolism boosts). Plus, it’s often lower in sugar than BBQ or teriyaki sauces. Just watch the sodium if you’re sensitive!
Fun Fact: In Korea, some families still make “gochujang kimchi,” blending the paste into kimchi for extra punch.
Leftover Wizardry – 5 Ways to Reinvent Your Sticky Chicken
Got extra Sticky Honey Gochujang Chicken? Don’t just reheat—reinvent it! Here are five genius ways to give leftovers a glow-up.
1. Gochujang Fried Rice
Tear leftover chicken into bits and toss with day-old rice, scrambled eggs, and peas. Stir-fry with a splash of sesame oil and extra gochujang. Top with a runny fried egg—yolk porn guaranteed.
2. Korean-Style Tacos
Pile chicken onto warm corn tortillas with quick-pickled carrots, cilantro, and a drizzle of sriracha mayo. Crumbled cotija cheese optional but highly recommended.
3. Loaded Sweet Potato Bowls
Roast halved sweet potatoes, then stuff with chicken, kimchi, spinach, and a dollop of Greek yogurt (or coconut yogurt for dairy-free). Boom—balanced meal.
4. Spicy Chicken Sliders
Shred chicken, mix with coleslaw (mayo + lime + cabbage), and pile onto Hawaiian rolls. Add a slice of cheddar and broil for melty goodness.
5. Breakfast Hash
Sauté diced potatoes, onions, and chicken in a skillet. Crack eggs on top, cover until whites set, and finish with scallions. Brunch hero!
Pro Tip: Freeze leftover sauce in ice cube trays—future you will high-five present you when it’s stir-fry night.
Serving It Up: How to Shine
Slide that glistening chicken into a shallow bowl—let those sticky trails drape dramatically! For a cozy weeknight vibe, pile it atop steamed jasmine rice (the sauce soaks in beautifully) or slurpable noodles like udon or ramen. Craving crunch? Add quick-pickled cucumbers (mix sliced cukes with rice vinegar, sugar, salt) or a heap of roasted broccoli. Family-style is my jam: Set the skillet right on the table with fluffy rice, lettuce cups for wrapping, and extra scallions. Don’t forget cold beer or sparkling limeade to tame the heat! This dish loves an audience, so gather your crew fast—it disappears quicker than cookies at a bake sale.
Shake It Up: 5 Delicious Twists
- Pineapple Punch: Add ½ cup fresh pineapple chunks with the sauce. Tropical sweetness + spice = vacation vibes!
- Veggie Loaded: Toss in bell peppers, carrots, or snap peas when searing chicken. Sauce coats everything gloriously.
- “Crackling” Crispy: For extra texture, coat chicken in 2 tbsp cornstarch before searing. Hello, crunch!
- Honey-Lime Zen: Swap lime juice for 1 tbsp soy sauce + add zest. Fresher, brighter profile.
- Fiery & Fearless: Add 1 tsp grated ginger + ½ tsp Korean chili flakes (gochugaru) to the sauce. For heat seekers only!
Olivia’s Kitchen Confessions
This recipe has evolved from my “midnight desperation dinner” to a dish I’ve served at fancy potlucks (shh, they don’t know it’s easy!). Once, I accidentally used salted butter instead of oil—shockingly delicious, but my smoke alarm sang opera! Over time, I learned two game-changers: 1) Don’t skip drying the chicken—wet meat steams instead of sears. 2) Embrace the sauce bubble. That furious boil is where the sticky magic happens! My toddler now demands “red chicken” weekly, so I keep gochujang stocked like diapers. Funny how a humble paste can become a family heirloom, right? If you make it, tag me @OliviasCozyKitchen—I live for your saucy skillet photos!
Your Questions, Answered!
Q: My sauce burned! What did I do wrong?
A> Heat was likely too high in Step 3! Medium heat is perfect—the sauce should bubble gently, not volcano-erupt. If it starts darkening too fast, pull the pan off heat for 15 seconds while stirring, then return.
Q: Can I make this ahead?
A> Cook the chicken and sauce separately. Store in the fridge up to 2 days. When ready, reheat chicken in a skillet, then add sauce and simmer 2 minutes. Fresh is best though—that sticky texture shines brightest right off the stove!
Q: Too spicy for my kids? Help!
A> Easy fix! Reduce gochujang to 1 tbsp and add 1 extra tbsp honey. Serve with cooling sides (rice, cucumber slices, avocado). My kiddo-approved version also adds 1 tbsp ketchup for sweetness—no shame!
Q: Why thighs over breasts?
A> Thighs have more fat, so they stay succulent even with high-heat cooking. Breasts dry out fast in this quick recipe—if you use them, slice thin and reduce cook time by 2 minutes.
Sticky Honey Gochujang Chicken
- Total Time: 20 mins
Description
Spicy, sticky, and sweet in all the right ways, this skillet wonder brings big flavor with minimal fuss. Ready in 20 minutes, it’s your new weeknight rescue mission—bold, addictive, and way better than takeout. With juicy chicken thighs glazed in a fiery-sweet gochujang sauce, it’s a dish you’ll crave again before you’ve even finished dinner.
Ingredients
-
1½ lbs boneless, skinless chicken thighs
-
2 tbsp gochujang (Korean chili paste)
-
3 tbsp honey
-
2 tbsp soy sauce (or tamari for gluten-free)
-
2 garlic cloves, minced
-
1 tbsp vegetable oil
-
Garnish: sesame seeds + chopped scallions
Swaps & Hacks:
-
Chicken breast (thin sliced) or tofu
-
Maple syrup instead of honey
-
Cilantro or radishes if no scallions
Instructions
-
Mix Sauce: In a bowl, whisk gochujang, honey, soy sauce, and garlic until smooth.
-
Sear Chicken: Heat oil in a large skillet over medium-high. Pat chicken dry and sear 6–8 mins, flipping once, until golden and cooked through.
-
Glaze & Bubble: Reduce heat to medium. Pour sauce over chicken and stir constantly 2–3 mins until thick, glossy, and sticky.
-
Garnish & Rest: Sprinkle with sesame seeds and scallions. Let sit 2 mins for ultimate clingy sauce perfection.
Notes
-
Dry chicken well—crispy edges need low moisture
-
Watch the sauce closely—it thickens fast!
-
Double sauce batch = instant flavor upgrade for veggies or shrimp
- Prep Time: 5 mins
- Cook Time: 15 mins
Nutrition
- Calories: 350cal Per Serving
- Fat: 20g
- Carbohydrates: 12g
- Protein: 28g
Nutritional Per Serving (Approx):
Calories: 350 | Net Carbs: 12g | Protein: 28g | Fat: 20g
Note: Using chicken breast? Calories drop to ~290, fat to 8g. Vegan version (tofu + maple syrup): ~280 calories.
Final Thoughts: Why This Recipe Deserves a Spot in Your Rotation
This isn’t just another “quick dinner.” It’s a flavor-packed, memory-making, multitasking marvel that proves weeknight meals don’t need to be boring. Whether you’re a gochujang newbie or a fermented chili devotee, this dish bridges comfort and adventure in every bite. It’s flexible enough for meal prep, impressive enough for guests, and simple enough for those “I can’t even” nights.
So here’s to sticky fingers, satisfied bellies, and the joy of discovering a recipe that feels like both a hug and a high-five. Now go forth and make it yours—tag me when you do!
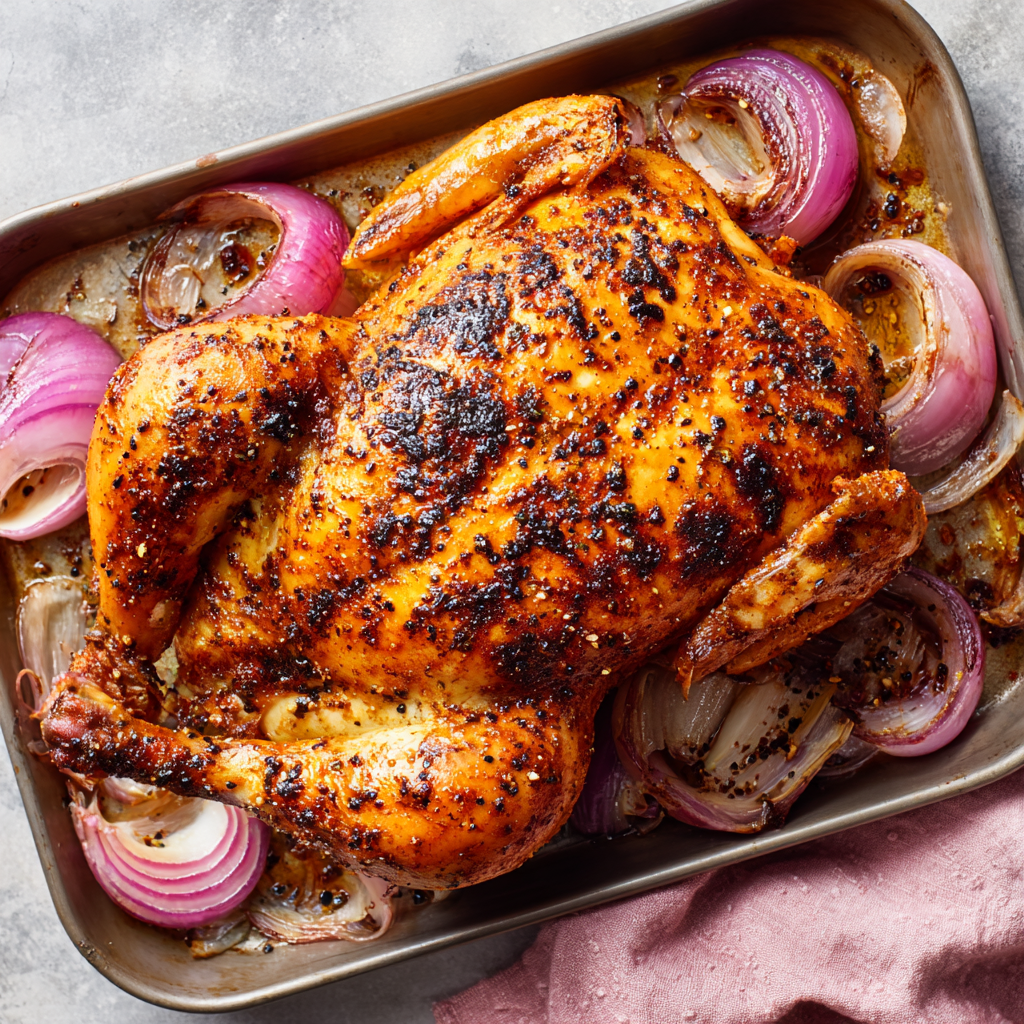
Roast Sticky Chicken – Rotisserie Style
Why This Chicken Will Become Your Kitchen Hero
Hey there, friend! Olivia here, waving from my flour-dusted countertop. Can you smell that? It’s the kind of aroma that makes neighbors peek over fences and kids magically appear in the kitchen – golden, sticky, rotisserie-style chicken, crackling away in the oven. This isn’t just dinner; it’s a warm hug on a plate, the kind of recipe that turns Tuesday into a celebration. And guess what? You don’t need fancy gear or chef-level skills. Just your trusty oven and a sprinkle of patience.
For years, I chased that elusive rotisserie magic – juicy meat pulling away from the bone, skin so flavorful and crisp you fight over it. Grocery store versions are great in a pinch, but nothing beats the pride (and unbeatable taste!) of making it YOURSELF. This Roast Sticky Chicken? It’s my ultimate weeknight warrior and Sunday showstopper. We’re talking minimal hands-on prep (seriously, 15 minutes!), pantry spices doing a flavor tango, and a low-and-slow roast that does all the heavy lifting while you binge your favorite show. It’s perfect for feeding a crowd, meal-prepping dreamy lunches, or just treating yourself. Ready to make your kitchen smell like heaven? Let’s get sticky!
The Chicken That Started It All (And Almost Torched My Kitchen!)
Picture this: It’s my first big dinner party after moving into my tiny apartment. I was determined to impress with a “simple” roast chicken. Simple? Ha! I cranked the oven sky-high, convinced high heat = faster perfection. Spoiler: It resulted in charred skin, dry meat, and enough smoke to trigger the fire alarm – mid-appetizers! My guests cheered (bless them), eating cheese and crackers while I frantically waved a towel at the shrieking alarm.
That disaster became my mission. I tinkered for months – testing temperatures, spice blends, brines, you name it. The breakthrough came during a lazy Sunday. Inspired by rotisserie joints that cook low and slow, I tried a crazy-low 250°F (120°C). Five hours later? Magic. The skin was burnished mahogany, sticky with rendered juices and spices. The meat? Unbelievably tender, falling off the bone. No smoke alarms, just pure, sticky, soul-warming triumph. This recipe is my redemption chicken – proof that sometimes, the slow road is the *only* road to flavor town.
Your Flavor Arsenal (Pantry Power to the Rescue!)
Gather these simple heroes! Don’t stress over exact brands – this blend is incredibly forgiving.
- 4 tsp Salt: The flavor backbone! Coarse kosher salt works best for even seasoning. Chef’s Tip: If using table salt, reduce to 3 tsp – it’s denser!
- 2 tsp Paprika: Sweet or smoked? Smoked adds incredible depth (my fave!), sweet gives classic warmth. Choose your adventure!
- 1 tsp Onion Powder: Instant savory punch. No sub needed, but 1 tbsp finely minced dried onion works in a pinch.
- 1 tsp Dried Thyme: Earthy, cozy notes. Rosemary or poultry seasoning (use 1.5 tsp) make great swaps if thyme isn’t your jam.
- 1 tsp White Pepper: Lends a subtle, unique heat. Secret Weapon: Black pepper works fine (use same amount), but white pepper is traditional for that authentic rotisserie taste.
- ½ tsp Black Pepper: Freshly ground is ideal for brightest flavor.
- ½ tsp Cayenne Pepper: Just enough kick! Omit if sensitive to heat, or add a pinch more for fire lovers.
- ½ tsp Garlic Powder: Essential savory magic. Granulated garlic works too.
- 2 whole Chickens (about 4 lbs each): Size matters! Smaller birds cook faster. Pat them DRY inside and out for maximum crispiness. Budget Hack: One big chicken works too – adjust cooking time slightly.
- 2 Onions, Quartered: These aren’t just for show! They steam inside the cavity, keeping the breast meat incredibly moist and adding subtle sweetness to the drippings. Yellow or white onions are perfect.
Why This Blend Rocks: The salt tenderizes, the spices create that iconic rotisserie crust, and the low heat slowly renders the fat, basting the chicken in its own glorious juices. Pure alchemy!
Let’s Get Cooking: Your Path to Sticky Perfection
Don’t let the 5-hour cook time fool you – active work is minimal! Here’s your foolproof roadmap:
- Mix the Magic Dust: Grab a small bowl. Dump in ALL the spices – salt, paprika, onion powder, thyme, white pepper, black pepper, cayenne, and garlic powder. Whisk them like you mean it! This is your flavor bomb. Chef’s Hack: Make a double or triple batch! Store it in a jar for instant chicken (or pork chops, roasted potatoes…) glory later.
- Rub It Real Good: Place your thoroughly dried chickens on a clean surface. Sprinkle the spice mix GENEROUSLY all over – top, bottom, sides, wings, legs. Don’t be shy! The Pro Move: Gently lift the skin over the breast and thighs and rub spice directly onto the meat. This is KEY for deep flavor penetration! Stuff the cavity of each chicken with those quartered onions – they’re your moisture guardians.
- Patience Pays Off (The Overnight Chill): Place the chickens on a rack set over a baking sheet or plate. DO NOT COVER TIGHTLY. Loosely tent with foil if needed, but airflow is good. Pop them in the fridge, uncovered, for at least 4 hours, but overnight is GOLD. This dry-brine draws out moisture, concentrates flavors, and seasons the meat right through. Trust me, it’s the difference between good and “OH WOW!”
- Low & Slow Roast: Preheat your oven to a low and lovely 250°F (120°C). Place chickens BREAST SIDE DOWN directly in your roasting pan (no rack needed!). Why breast down? It protects the delicate white meat during the long cook, keeping it supremely juicy. Slide them into the oven, uncovered. Relax! For the next 5 hours, life is good. Basting Bonus (Optional): Every 1.5-2 hours, carefully open the oven and spoon those gorgeous pan juices collecting in the bottom back over the chickens. More flavor, more stickiness!
- The Grand Flip & Crisp Finale: After 4.5 hours, it’s showtime! Carefully (steam is hot!) flip the chickens breast side UP. This exposes the skin to direct heat for the final 30 minutes, transforming it into that irresistible, sticky, crispy dream. You’ll see the magic happening!
- Rest is Best: Once gloriously golden and an instant-read thermometer reads 165°F (74°C) in the thickest part of the thigh (not touching bone), pull them out. TENT LOOSELY with foil and let them rest for 20-30 minutes. DO NOT SKIP THIS! Resting lets the juices redistribute, ensuring every bite is moist. Cutting too soon = dry chicken tragedy.
Plating Up the Love
This chicken is a star! For maximum “wow,” place the whole bird (or birds) on a large wooden board or platter. Scatter with fresh thyme sprigs or rosemary for a pop of green. Let everyone admire that sticky crust! Carve tableside or in the kitchen – the meat will be so tender, it practically falls off the bone. Serve those delicious roasted onions from the cavity alongside – they’re flavor bombs! Pour the incredible pan juices into a small pitcher or bowl for drizzling. Perfect partners? Creamy mashed potatoes to soak up the juice, simple roasted veggies, or a bright, crunchy salad to cut the richness.
Make It Your Own! Flavor Twists & Swaps
This recipe is your canvas! Get creative:
- Citrus Zing: Add 1 tsp dried orange peel or lemon pepper to the rub. Stuff the cavity with lemon or orange halves alongside the onions.
- Herb Garden Delight: Swap thyme for 1 tsp dried rosemary or oregano. Toss a few fresh sage leaves under the skin.
- Spicy Cajun Kick: Increase cayenne to 1 tsp and add ½ tsp dried oregano. Fantastic for a bold twist!
- Gluten-Free/Dairy-Free: This recipe is naturally both! Just ensure your spices are pure (no anti-caking additives containing gluten).
- Chicken Pieces Hack: Don’t have whole birds? Use 8 lbs of bone-in, skin-on chicken thighs or drumsticks. Reduce cook time to 3-3.5 hours (check temp at 3 hours!). Rub spice mix everywhere!
Olivia’s Behind-the-Scenes Scoop
Confession: The “sticky” name came from my husband. After his third piece one night, he mumbled, “Soooo sticky… good…” with sauce on his chin. It stuck! (Pun intended!). This recipe has evolved – I initially basted every 30 minutes obsessively (hello, oven light!). Now I know relaxing works just fine. The overnight chill was a game-changer discovered when I prepped birds for a party and forgot them in the fridge an extra day – best mistake ever! The biggest lesson? Low heat isn’t lazy, it’s smart cooking. It renders fat slowly, keeps collagen melting into gelatin (hello, juiciness!), and lets spices meld into something magical. Don’t fear the time – embrace the ease and the incredible payoff!
Your Chicken Questions, Answered!
Q: Do I *really* need to cook it for 5 hours? That seems so long!
A: Yes! The low temperature is crucial. High heat dries out the meat before the fat renders and connective tissues break down. 250°F allows for gentle, even cooking, resulting in that fall-apart tenderness and sticky crust. Trust the process!
Q: My skin isn’t super crispy! What went wrong?
A: A few culprits: 1) Not patting the chicken bone-dry before rubbing (moisture = steam, not crisp). 2) Skipping the overnight chill – drying in the fridge is key for crisp skin. 3) Not flipping breast-side up for the final crisping blast. Ensure the last 30 minutes happen breast-up! 4) Covering during roasting – keep it uncovered!
Q: Can I use just one chicken?
A: Absolutely! Use a 4-5 lb bird. The cook time might be slightly less – start checking the internal temperature at the 4.5-hour mark. The spice mix amount is perfect for one larger chicken too.
Q: Help! My pan juices are smoking/burning.
A: This can happen, especially near the end. Add about ½ cup of water or chicken broth to the pan when you flip the chicken breast-side up. This creates steam, prevents burning, and makes more delicious jus!
Roast Sticky Chicken – Rotisserie Style
- Total Time: 22 minute
Description
Meet the chicken that turns ovens into magic-makers. With pantry spices, no fancy equipment, and a whisper of patience, this rotisserie-style roast becomes your ultimate cozy, crowd-pleasing go-to. Juicy, fall-apart tender, and cloaked in a sticky, spiced crust—it’s what weeknight dreams and Sunday feasts are made of. And the best part? The oven does most of the work. Let’s turn up the flavor and bring home that golden rotisserie glow.
Ingredients
-
2 whole chickens (4 lbs each), patted dry
-
2 onions, quartered (for stuffing)
Spice Rub: -
4 tsp kosher salt (or 3 tsp table salt)
-
2 tsp smoked or sweet paprika
-
1 tsp onion powder
-
1 tsp dried thyme
-
1 tsp white pepper
-
½ tsp black pepper
-
½ tsp cayenne (adjust to taste)
-
½ tsp garlic powder
Instructions
-
Spice Mix: Combine all rub ingredients in a small bowl.
-
Prep Chickens: Rub spice mix generously all over the chickens (including under the skin). Stuff cavities with onion quarters.
-
Overnight Chill: Place uncovered in the fridge for 4+ hours (overnight is ideal) for ultra-flavorful, crisp skin.
-
Roast Low & Slow: Preheat oven to 250°F (120°C). Roast chickens breast-side down in a roasting pan for 4.5 hours. Optional: baste with pan juices every 2 hours.
-
Flip & Crisp: Flip chickens breast-side up. Roast 30 more mins until skin is golden and internal temp hits 165°F (74°C).
-
Rest: Let rest 20–30 mins, tented loosely with foil, before carving.
Notes
-
Always dry the skin before seasoning
-
Don’t skip the chill – it’s the crisping secret
-
Flip for the final 30 minutes for max crust
-
Add broth to pan if drippings start to burn
- Prep Time: 15 mins
- Cook Time: 5 hrs
Nutrition
- Calories: 400cal Per Serving
- Sodium: 900mg
- Fat: 22g
- Carbohydrates: 2g
- Protein: 45g
Nutritional Info (Approximate Per Serving)
Calories: ~400 | Protein: 45g | Fat: 22g (Saturated Fat: 6g) | Carbohydrates: 2g | Fiber: 0g | Sugar: 1g | Sodium: 900mg
Note: Nutrition is estimated based on one serving (approx 6oz cooked meat with skin) from a 4lb chicken. Sodium is higher due to the dry brine – much is left in the pan/drippings.
—
Final Thoughts: Why This Recipe Deserves a Spot in Your Rotation
This Roast Sticky Chicken isn’t just a recipe—it’s a game-changer. It’s the kind of dish that makes you feel like a kitchen rockstar with minimal effort. Whether you’re feeding a family, meal-prepping, or craving something soul-satisfying, this chicken delivers every time.
Why You’ll Love It Forever:
✅ Foolproof: No fancy techniques—just patience and trust in low heat.
✅ Budget-Friendly: Spices and chicken are pantry staples.
✅ Leftover Gold: Reinvents into countless meals.
✅ Impressive Enough for Guests: Looks and tastes like you spent hours (but we know the truth!).
So tie on that apron, preheat your oven, and let this chicken work its magic. One bite of that crispy, sticky, juicy goodness, and you’ll wonder how you ever lived without it. Happy cooking!
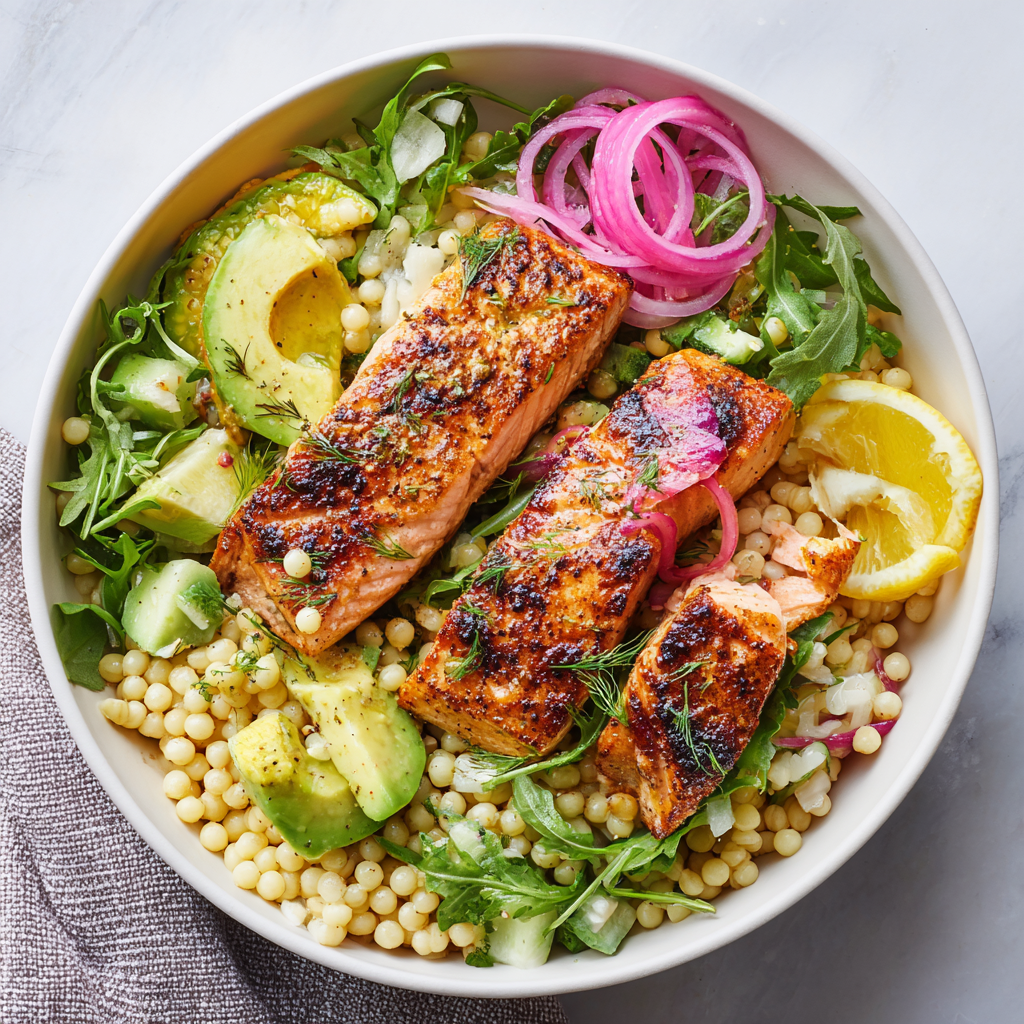
Salmon Couscous Bowls
Sunshine in a Bowl: Why Salmon Couscous Bowls Are My Ultimate Joy-Bringer
Hey there, kitchen friends! Olivia here, apron slightly dusted with couscous and smelling faintly of lemon zest. If your heart does a happy dance when vibrant colors, sizzling sounds, and irresistible aromas collide in a bowl – oh, do I have a treat for you today. These Salmon Couscous Bowls aren’t just dinner; they’re a 25-minute vacation for your taste buds. Picture this: smoky BBQ-kissed salmon flaking over buttery pearl couscous, creamy avocado chunks tumbling through peppery arugula, and that pop of purple from quick-pickled red onions. All hugged together with grassy olive oil and fresh herbs. It’s the kind of meal that looks like you fussed for hours but secretly comes together faster than scrolling through your phone. Perfect for chaotic weeknights yet fancy enough for impressing your bestie at lunch. Whether you’re a salmon skeptic or a seafood superfan, this bowl is about to become your new flavor sanctuary. Ready to make magic?
The Beach Picnic That Started It All
This recipe? It’s got sunshine woven right into its DNA. Picture Malibu, five years ago: my best friend Jamie and I, determined to have a “fancy” beach picnic without actually cooking on the sand. We’d packed seared salmon (cold but still delicious), leftover herby couscous, and whatever veggies survived the cooler. In a moment of hangry inspiration, we dumped everything into one container, squished in avocado slices, and drizzled it with lemon-infused olive oil. The first bite was pure revelation – the cool creaminess against the smoky fish, the chewy pearls of couscous, that peppery arugula crunch! We sat there, sandy toes wiggling, declaring it “accidental genius.” Now, every time I make these bowls, I’m right back on that blanket, laughing as seagulls eyed our lunch. Food memories? They stick to your ribs better than couscous sticks to butter.
Your Flavor Toolkit: What You’ll Need
Grab these goodies – flexibility is your friend here!
- 2 salmon fillets (BBQ cut) → Look for center-cut fillets about 1-inch thick. Skin-on is KEY for that crispy magic! Swap: Trout or arctic char work beautifully.
- 1 cup Israeli couscous, uncooked → Those delightful little pearls! They’re actually tiny pasta balls. Chef insight: Toast them dry in the pan for 2 minutes before boiling for nutty depth. Swap: Regular couscous (adjust cook time) or orzo.
- 1 avocado, diced → Pick one slightly soft near the stem. Too firm? Bury it in rice for 24 hours! Swap: Ripe mango for tropical vibes.
- 1 cup arugula → Its peppery punch cuts the richness. Tired of arugula? Baby spinach or watercress bring their own personality.
- 2 tbsp olive oil + extra for drizzling → Use your good stuff! The fruity notes shine here. Tip: Infuse it with lemon zest while prepping.
- 1 tbsp butter → Makes couscous luxurious. Dairy-free? Coconut oil or more olive oil works.
- 2 tbsp chopped parsley or dill → Parsley = bright freshness; dill = subtle anise kick. Use both if you’re feeling wild!
- ¼ small red onion, thinly sliced → Soak in ice water for 10 mins to mellow the bite. Swap: Quick-pickle them with vinegar & sugar!
- Salt & pepper to taste → Season salmon generously; couscous lightly. Flaky sea salt on avocado? *Chef’s kiss*
- Zest of ½ lemon (optional garnish) → Tiny yellow confetti that wakes up every flavor. Don’t skip!
Let’s Build Your Bowl: Step-by-Step
1. Couscous Confidence (The Fluffy Foundation): Fill a pot with salted water (like the sea!) and bring to a rolling boil. Stir in your Israeli couscous. Cook for 8-10 minutes until tender but still delightfully chewy – bite-test one pearl! Drain well, then immediately return to the pot. Off heat, stir in butter and 1 tbsp olive oil. Chef hack: Cover and let steam for 2 minutes. This plumps them up like happy little pillows! Fluff with a fork and set aside.
2. Salmon Seduction (Crispy Skin Magic): Pat salmon fillets bone-dry with paper towels – this is CRUCIAL for crispy skin! Season generously with salt and pepper. Heat a heavy skillet (cast iron is my MVP) over medium-high. Add 1 tbsp olive oil. When it shimmers, place salmon skin-side down. Resist poking it! Let it sear undisturbed for 4-5 minutes until the skin releases easily and is golden-crisp. Flip gently. Cook another 3-4 minutes for medium (less if you like it rare). Pro tip: Squeeze a tiny bit of lemon juice over the fish in the last minute. Transfer to a plate, skin-side up to keep it crisp.
3. Bowl Brilliance (The Joyful Jumble): In your prettiest bowls, combine the warm couscous, fresh arugula, diced avocado, and those vibrant red onion slices. Toss gently with most of the chopped herbs. Drizzle with a little extra olive oil and a pinch of salt. Chef wisdom: Warm couscous slightly wilts the arugula – it’s a feature, not a bug! Creates harmony. Top with the glorious salmon fillet. Sprinkle with remaining herbs and that bright lemon zest. Optional love: Crack of black pepper, flaky salt on avocado, extra lemon wedge on the side.
Serving Up Sunshine
Presentation is part of the joy! Use wide, shallow bowls to show off those gorgeous layers. Place the salmon skin-side up – let that crispy crown shine! Scatter extra herbs artfully over the top. Serve immediately with lemon wedges on the side for that essential citrus squeeze. Pair with an icy glass of Sauvignon Blanc or sparkling water with cucumber slices. This bowl is a complete meal, but for a crowd? Add a side of grilled asparagus or crusty bread for mopping.
Make It Your Own: Delicious Twists
This bowl is your flavor playground!
- Mediterranean Fling: Swap salmon for grilled shrimp, add kalamata olives, crumbled feta, and roasted red peppers. Use oregano in the couscous.
- Zen Garden (Veggie-Powered): Replace salmon with crispy baked tofu or chickpeas. Add edamame, shredded carrots, and swap couscous for quinoa. Drizzle with ginger-sesame dressing.
- Spicy Fiesta: Rub salmon with chili powder & cumin before searing. Add black beans, corn, and diced jalapeño. Top with cilantro-lime crema.
- Berry Bright: Perfect in summer! Add fresh blueberries or raspberries, swap arugula for baby kale, and use a honey-lemon vinaigrette.
- Deconstructed Everything Bagel: Mix everything bagel seasoning into the couscous butter. Top salmon with a schmear of cream cheese. Add capers!
Olivia’s Kitchen Confessions
This recipe? It’s evolved more than my taste in kitchen towels! That Malibu mashup was delicious chaos. Version 2.0 involved overcooked salmon and mushy couscous (we don’t talk about it). The crispy skin breakthrough happened after I stubbornly refused to flip a stuck fillet – patience pays! Now, it’s my go-to “I need joy STAT” meal. Funny story: Once subbed dried dill for fresh… tasted like a hay bale. Lesson learned! Fresh herbs are non-negotiable. I also started adding the lemon zest garnish after my 5-year-old niece declared the bowl “needed sparkles.” Smart kid. The beauty? It adapts. Use what’s seasonal, what you love. That’s homemade magic.
Your Salmon Bowl Questions, Solved!
Q: Help! My salmon skin always sticks to the pan.
A: Three secrets: Dry fish (pat aggressively!), hot pan (wait for that oil shimmer!), and don’t touch it! Seriously, leave it alone for a full 4-5 mins. It will release when ready. Using a well-seasoned cast iron or non-stick helps too.
Q: Can I use regular couscous instead of Israeli?
A: Absolutely! Cook according to package (usually just pour boiling water over, cover, wait 5 mins). Fluff with a fork. Note: The texture will be finer, less chewy. You might need slightly less liquid/butter.
Q: How do I stop the avocado from turning brown?
A: Assemble the bowl right before serving! If prepping ahead, toss avocado dice with a squeeze of lemon or lime juice – the acid slows oxidation. Press plastic wrap directly onto the surface if storing.
Q: Can I meal prep these bowls?
A: Yes, with strategy! Keep components separate. Store cooked couscous, seared salmon (cooled), sliced onion, and herbs in airtight containers. Prep avocado fresh. Assemble cold or slightly reheated (salmon gently in microwave or oven). Dressing/oil added last.
Salmon Couscous Bowls
- Total Time: 25 mins
Description
This is your golden-hour dinner in a bowl – flaky, BBQ-kissed salmon nestled into buttery pearl couscous, creamy avocado, peppery arugula, and zingy pickled onions, all dressed with herby olive oil and citrus. It’s a flavor-packed, mood-lifting masterpiece – quick enough for a weeknight and fancy enough for a wow-worthy lunch. One bite and you’re back on the beach, pink skies and happy sighs. Let’s bring that sunshine home.
Ingredients
-
-
2 salmon fillets (center-cut, skin-on)
-
1 cup Israeli couscous (or regular)
-
1 avocado, diced
-
1 cup arugula
-
2 tbsp olive oil (plus extra for drizzling)
-
1 tbsp butter
-
2 tbsp chopped parsley or dill
-
¼ red onion, thinly sliced
-
Salt & pepper to taste
-
Zest of ½ lemon
Optional swaps: trout, mango, spinach, orzo
-
Instructions
-
Couscous Base: Boil salted water, cook couscous 8–10 mins. Drain, return to pot. Stir in butter & 1 tbsp olive oil. Cover 2 mins, fluff with fork.
-
Crispy Salmon: Pat fillets dry. Season. Heat skillet with oil. Sear skin-side down 4–5 mins undisturbed. Flip, cook 3–4 mins. Squeeze lemon if desired.
-
Build Your Bowl: Combine couscous, arugula, avocado, red onion, and half the herbs. Drizzle olive oil, toss gently. Top with salmon, herbs, lemon zest.
Notes
-
Toast couscous before boiling for nutty flavor
-
Soak onions in ice water to mellow bite
-
Use lemon zest-infused oil for bonus zing
-
Keep salmon skin-side up for max crisp
- Prep Time: 10 mins
- Cook Time: 15 mins
Nutrition
- Calories: 550 cal Per Serving
- Fat: 28g
- Carbohydrates: 35g
- Fiber: 6g
- Protein: 32g
Nourishment Note (Approximate per Serving)
Calories: ~550 | Protein: 32g | Fat: 28g (Healthy Unsaturated Fats!) | Carbs: 35g | Fiber: 6g | Sugar: 2g
Note: Values can vary based on exact ingredients and portion sizes. Packed with Omega-3s from salmon!
Final Thoughts: Elegance Without Effort
This dish proves that fancy doesn’t mean fussy. It’s a lesson in trusting simple ingredients, high heat, and the magic of last-minute assembly. Those scallops? They’re little edible trophies celebrating your courage to try something quick and luxurious.
And when you set that plate down—scallops gleaming like seared gold atop emerald greens, lemon juice still sizzling in the pan—you’re not just serving dinner. You’re serving confidence, joy, and the quiet thrill of knowing you did this.
Now go forth and sear. And remember: The best meals aren’t measured in hours, but in heartbeats.
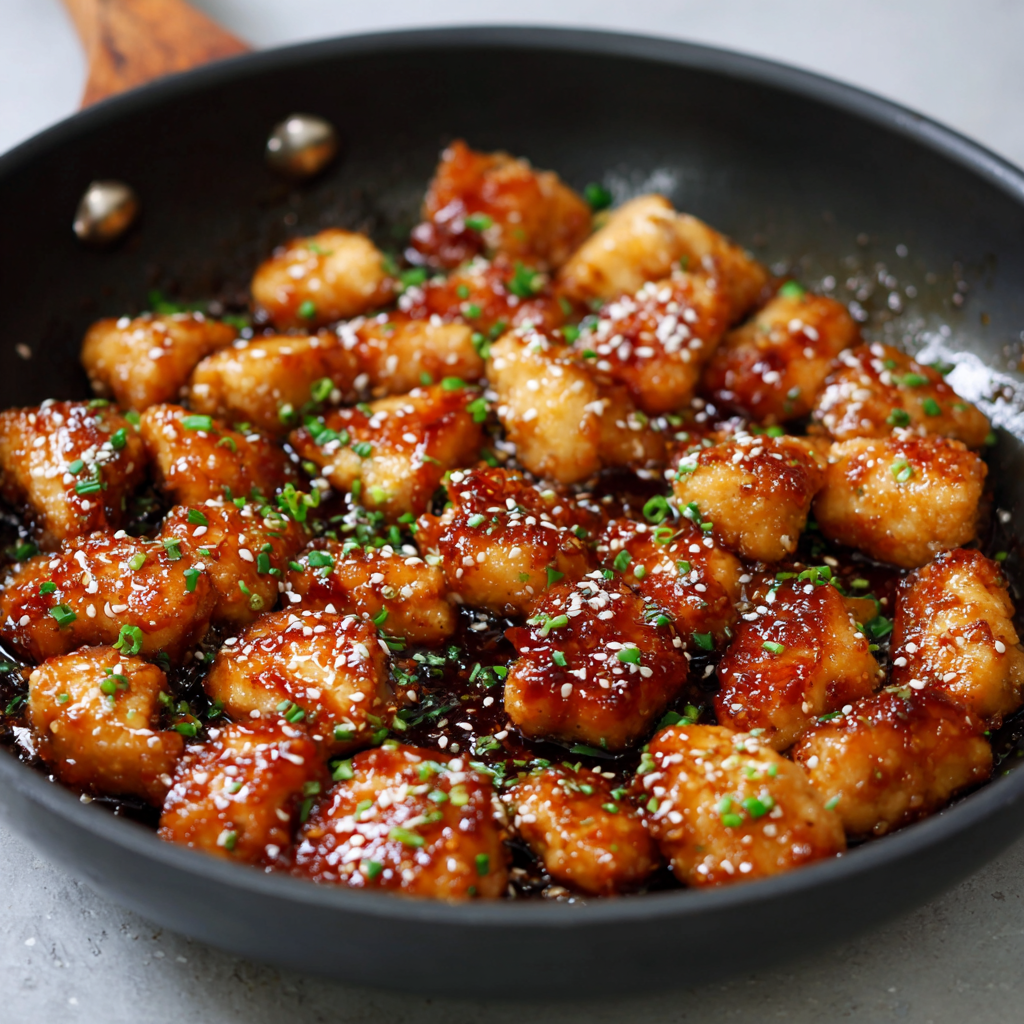
Honey Garlic Chicken Bites
Welcome to My Cozy Kitchen Adventure!
Hey there, friend! Olivia here, apron dusted with flour and a spatula in hand. Can you smell that? It’s the sweet, garlicky perfume of magic happening in my skillet – and today, we’re making pure bite-sized joy: Honey Garlic Chicken Bites. Picture this: crispy golden nuggets of chicken, glazed in a sticky-sweet sauce that clings like your favorite cozy sweater. They’re the kind of recipe that turns chaotic weeknights into something special, and impromptu gatherings into full-blown celebrations.
Whether you’re cooking solo with a podcast humming or wrangling hungry kiddos, this dish gets it. In just 25 minutes (yes, really!), you’ll transform humble chicken into glossy, flavor-packed morsels that disappear faster than cookies at a bake sale. I love recipes like this – no fancy techniques, no obscure ingredients, just honest-to-goodness deliciousness that makes people lean in for seconds. So tie on your apron (embrace the mess – it’s a badge of honor!), grab your favorite skillet, and let’s create something unforgettable together. Trust me, your taste buds will send thank-you notes!
A Midnight Snack That Sparked a Love Affair
This recipe? It’s tied to one of my favorite food memories. Picture college-era Olivia, cramming for finals at 2 AM with my roommate, Maya. Our stomachs growled louder than our textbooks. Raiding our sad, nearly-empty fridge, we found lonely chicken breasts, a sad knob of ginger, and the last drizzle of honey. Desperation breeds genius, right? We cubed the chicken, tossed it with the only starch we had (cornflour, bless it!), and whipped up a sauce that smelled so good, our neighbor actually knocked to ask what we were cooking!
That pan of haphazard, sticky chicken bites became our triumphant midnight feast. We ate it straight from the skillet, giggling like fools, sauce smeared on our chins. It wasn’t pretty, but it was perfect. That messy, joyful moment is baked into this recipe. Every time I make these bites now, I remember Maya’s sauce-smeared grin and that feeling of turning “nothing” into pure magic. Food isn’t just fuel; it’s connection, memory, and shared laughter in a sticky, sweet package.
Your Flavor Toolkit: Simple Ingredients, Big Impact
Gather these pantry heroes! Don’t stress about perfection – cooking’s an adventure.
- 1 lb boneless, skinless chicken breasts, cut into bite-sized pieces: Chef’s Insight: Breasts cook fast and stay tender here! For richer bites, thighs work beautifully (just add 2 mins cook time). Cut uniform 1-inch pieces so everything cooks evenly.
- 2 tbsp cornflour (cornstarch): Why it’s magic: This is your crispy-coat secret! It creates that golden crust without heavy batter. Gluten-free? Arrowroot starch works 1:1.
- ½ tsp salt & ½ tsp black pepper: Pro Tip: Season the cornstarch before coating – it ensures every bite sings!
- 2 tbsp vegetable oil: Substitution Love: Any neutral oil works (avocado, canola). Skip olive oil – its smoke point is too low for our sizzle!
- 4 cloves garlic, minced & 1 tbsp fresh ginger, minced: Flavor Boost: FRESH is non-negotiable here! Jarred works in a pinch, but fresh adds zingy brightness. Grate the ginger if mincing feels fussy.
- ⅓ cup honey: Sweet Swap: Pure maple syrup makes it vegan-friendly! Agave works too, but sauce will be thinner.
- ¼ cup soy sauce: Dietary Note: Use low-sodium if watching salt, or tamari/coconut aminos for gluten-free goodness.
- ¼ cup chicken stock: Pantry Hack: Water works, but stock adds depth. Veggie stock keeps it versatile!
- 1 tbsp rice vinegar: Why it shines: This tiny splash balances the sweetness! Apple cider vinegar subs perfectly.
- Chopped green onions & sesame seeds (optional): Olivia’s Rule: Never skip the garnish! They add color, crunch, and that “chef-kiss” finish.
Let’s Get Sizzling: Your Foolproof Roadmap
Ready for crispy, sticky magic? Follow these steps – I’ve packed ’em with my favorite kitchen hacks!
- Coat Like a Pro: Toss chicken pieces with cornstarch, salt, and pepper in a bowl. Chef’s Secret: Shake it in a ziplock bag for zero mess and maximum even coating! Let it sit 5 mins – the cornstarch “blooms” for extra crispiness.
- Sear for Golden Glory: Heat oil in a large skillet (non-stick or cast-iron!) over medium-high heat. Add chicken in a single layer – don’t crowd the pan! Work in batches if needed. Cook 3-4 mins per side until deeply golden and cooked through. Watch Out: No stirring for the first 2 mins! Let that crust form. Remove chicken and set aside.
- Wake Up the Aromatics: In that same glorious pan (hello, flavor bits!), add garlic and ginger. Sauté 45-60 seconds only until fragrant. Critical Tip: Keep the heat medium now – burnt garlic is bitter sadness!
- Simmer the Sticky Elixir: Pour in honey, soy sauce, chicken stock, and rice vinegar. Whisk, scraping up any browned bits (that’s liquid gold!). Simmer 2-3 minutes until sauce thickens slightly – it should coat the back of a spoon. Texture Check: Too thin? Simmer 1 more min. Too thick? Splash in 1 tbsp water.
- The Grand Glaze: Return chicken to the pan! Toss constantly for 1-2 minutes until every piece is shamelessly coated in that glossy sauce. Final Flourish: Off the heat, sprinkle with green onions and sesame seeds. Serve immediately – this is peak sticky perfection!
Plating Up the Happiness
These bites are social butterflies! Pile them high over fluffy jasmine rice (my fave!) or nutty quinoa to soak up every drop of sauce. For a vibrant bowl, add steamed broccoli or snap peas. Feeling fancy? Skewer them with toothpicks for the ultimate party appetizer – watch them vanish! Need crunch? A side of quick-pickled cucumbers (rice vinegar, sugar, salt) cuts the richness beautifully. And always – always – serve with extra napkins. Sticky fingers = happy hearts.
Make It Your Own: Delicious Twists!
Play with your food! Here are my favorite riffs:
- Fiery Dragon: Add 1 tsp sriracha or ½ tsp red pepper flakes to the sauce with the garlic. Sweet heat = addictive!
- Veggie-Packed Power: Toss in bell peppers or broccoli florets with the chicken during the last 3 mins of cooking.
- Gluten-Free & Soy-Free: Swap soy sauce for tamari or coconut aminos. Double-check your chicken stock is GF!
- Tropical Twist: Replace rice vinegar with 1 tbsp lime juice + 1 tsp lime zest. Garnish with cilantro!
- Protein Swap: Use shrimp (cook 2-3 mins per side) or firm tofu (press well, coat & pan-fry first).
Olivia’s Kitchen Confessions
This recipe is my kitchen workhorse! It started as that scrappy college meal, evolved through countless potlucks (where it’s always the first to disappear), and even survived The Great Sauce Splatter Incident of 2020 (RIP to that white sweater). Over time, I learned: letting the cornstarch-coated chicken sit makes it crispier, fresh ginger is non-negotiable, and doubling the batch is ALWAYS a good idea. My husband jokes I should bottle the sauce – it’s that good! Funny story: Once, I accidentally used powdered ginger instead of fresh… let’s just say it tasted like Christmas gone wrong. Learn from my mistakes! This dish embodies my cooking philosophy: simple ingredients + big flavors + shared joy = magic. Don’t strive for perfection – embrace the sticky, glorious mess!
Your Questions, Answered!
Let’s tackle common hiccups before they happen:
Q: My sauce isn’t thickening! Help!
A: Don’t panic! Two fixes: 1) Simmer sauce a bit longer (up to 5 mins), letting it reduce. 2) Make a quick “slurry”: Mix 1 tsp cornstarch with 1 tbsp cold water, whisk into simmering sauce, cook 1 min. Prevention: Ensure you’re simmering, not boiling, and measure cornstarch accurately for the coating.
Q: Can I prep this ahead?
A> Absolutely! Cook chicken bites & make sauce separately. Store in fridge up to 24 hours. When ready, warm sauce in pan, add chicken, and toss until heated through (add a splash of water if sauce is too thick). Garnish fresh!
Q: Why did my chicken get soggy?
A> Likely culprits: 1) Crowding the pan traps steam. Cook in batches! 2) Adding chicken back to sauce too early – sauce should be thickened first. 3) Over-tossing once coated. Toss gently, just to combine, then serve immediately.
Q: Is dark meat okay? How does it change things?
A> Thigh lovers, rejoice! Boneless, skinless thighs work great – they’re juicier. Cut into bites, coat & cook as directed, but add 1-2 minutes cooking time since thighs have more fat. The sauce loves thigh meat!
Honey Garlic Chicken Bites
Description
Hey there, friend! Olivia here, apron dusted with flour and a spatula in hand. Imagine crispy golden nuggets of chicken glazed in a sticky-sweet honey garlic sauce that hugs every bite like your favorite cozy sweater. This recipe is my go-to for turning chaotic weeknights into celebrations and feeding hungry kids or guests with zero fuss. Ready in just 25 minutes, these bites disappear faster than cookies at a bake sale. Let’s create some unforgettable flavor together!
Ingredients
-
1 lb boneless, skinless chicken breasts, cut into 1-inch bite-sized pieces
-
2 tbsp cornflour (cornstarch)
-
½ tsp salt
-
½ tsp black pepper
-
2 tbsp vegetable oil (or any neutral oil with high smoke point)
-
4 cloves garlic, minced
-
1 tbsp fresh ginger, minced or grated
-
⅓ cup honey (maple syrup for vegan swap)
-
¼ cup soy sauce (low-sodium or tamari for gluten-free)
-
¼ cup chicken stock (or water/veggie stock)
-
1 tbsp rice vinegar (or apple cider vinegar)
-
Chopped green onions & sesame seeds, for garnish (optional)
Instructions
1. Coat the Chicken
-
Toss chicken pieces with cornflour, salt, and pepper in a bowl or ziplock bag. Shake well for an even coat. Let rest 5 minutes — this “blooms” the starch for extra crispiness.
2. Cook Chicken
-
Heat oil in skillet over medium-high heat.
-
Add chicken in a single layer (no crowding!). Cook 3-4 minutes per side until golden and cooked through. Avoid stirring during the first 2 minutes to let crust form. Remove chicken, set aside.
3. Sauté Aromatics
-
In the same skillet, add garlic and ginger. Sauté for 45-60 seconds on medium heat until fragrant but not burnt.
4. Make the Sauce
-
Pour in honey, soy sauce, chicken stock, and rice vinegar. Whisk and scrape browned bits off pan bottom. Simmer 2-3 minutes until sauce thickens and coats the back of a spoon.
-
If too thin, simmer longer; if too thick, add a splash of water.
5. Glaze the Chicken
-
Return chicken to the pan, toss in the sauce for 1-2 minutes until every bite is glossy and coated. Remove from heat.
6. Garnish & Serve
-
Sprinkle with chopped green onions and sesame seeds. Serve immediately over steamed rice, quinoa, or with your favorite veggie sides.
Notes
-
Fiery Dragon: Add 1 tsp sriracha or ½ tsp red pepper flakes to the sauce for sweet heat.
-
Veggie Boost: Toss in bell peppers or broccoli during the last 3 mins of cooking chicken.
-
Gluten-Free & Soy-Free: Swap soy sauce for tamari or coconut aminos, and double-check your stock.
-
Tropical Twist: Use 1 tbsp lime juice + 1 tsp lime zest instead of rice vinegar; garnish with cilantro.
-
Protein Swap: Use shrimp (2-3 mins per side) or pressed tofu (coat & pan-fry first) instead of chicken.
Nutrition
- Calories: 360 cal Per Serving
- Fat: 18g
- Carbohydrates: 18g
Nutritional Snapshot (Per Serving)
Prep Time: 10 mins | Cook Time: 15 mins | Total Time: 25 mins | Servings: 4
Approximate values: Calories: 360 | Net Carbs: 18g | Protein: 28g | Fat: 18g
Note: Values are estimates and can vary based on specific ingredients and portion sizes. Using low-sodium soy sauce and less oil can reduce sodium/fat.
Final Thoughts: Why This Recipe Wins Every Time
These Honey Garlic Chicken Bites are more than just a quick dinner—they’re a versatile, crowd-pleasing staple that:
✅ Takes 25 minutes start to finish
✅ Uses pantry-friendly ingredients
✅ Works for meal prep, parties, or lazy nights
✅ Adapts to dozens of global flavors
Whether you’re a busy parent, a college student, or just craving something fast, flavorful, and foolproof, this recipe delivers. So grab that skillet, embrace the sticky fingers, and make memories—one bite at a time.
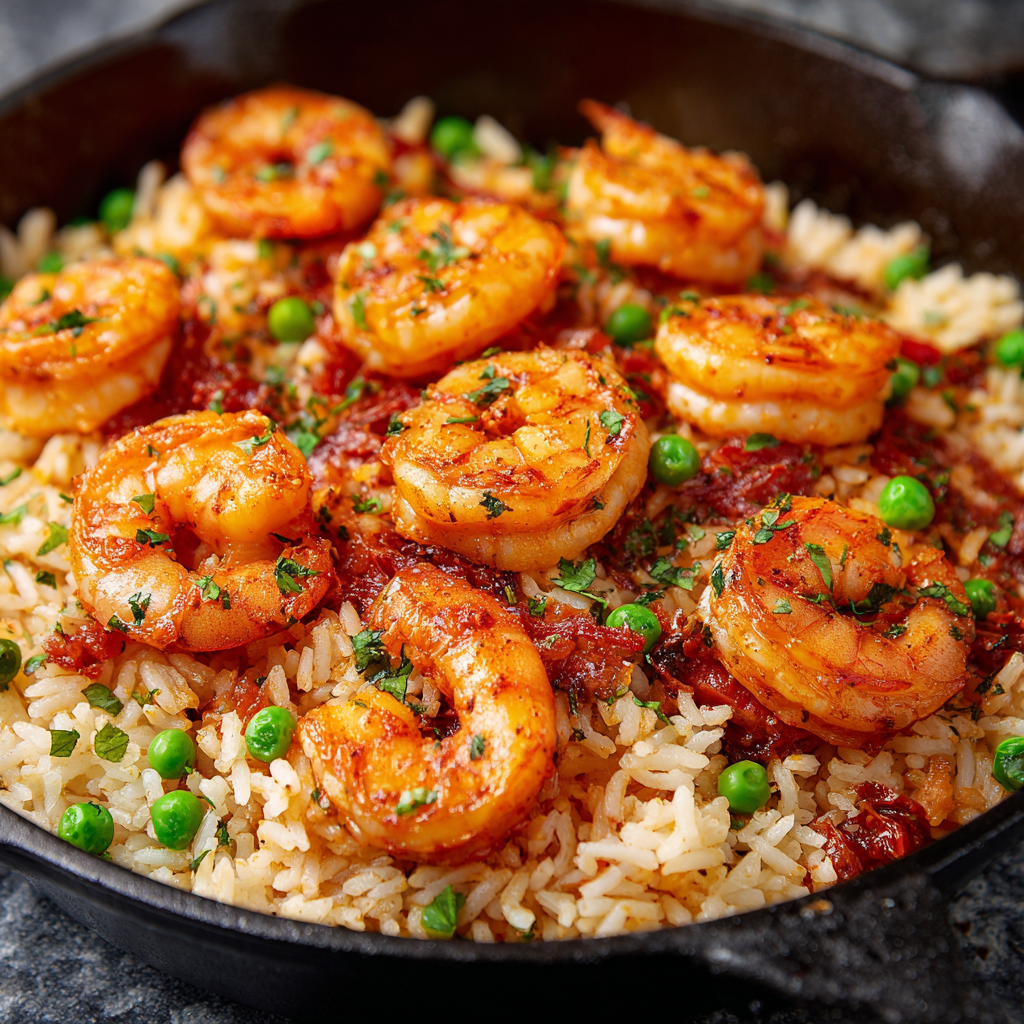
Easy Garlic Butter Shrimp and Rice
Welcome to My Cozy Kitchen: Let’s Make Magic Happen!
Hey there, friend! Olivia here, apron dusted with flour and heart full of excitement. Can you smell that? It’s the sizzle of garlic hitting butter, the cozy promise of a meal that hugs you from the inside out. If your soul does a happy dance when simple ingredients transform into something extraordinary, you’ve found your tribe. Today, we’re whipping up my Easy Garlic Butter Shrimp and Rice—a one-pan wonder that’s become my ultimate weeknight hero. Imagine plump, juicy shrimp swimming in a zesty garlic butter sauce, piled high over tomato-kissed rice studded with sweet peas. It’s vibrant comfort food that lands on the table in under an hour, no fancy skills required. Whether you’re cooking for your soulmate, your rowdy kids, or just treating yourself (you deserve it!), this dish is all about joy, flavor, and that proud “I made this!” moment. So grab your favorite skillet—let’s turn humble ingredients into pure deliciousness together!
A Sunset Feast & My Love Affair with Shrimp
Picture this: me, age 10, barefoot on a rickety dock in Maine, the sky painted orange and pink. My grandpa—a fisherman with salt in his veins—had just hauled in buckets of fresh shrimp. “Livvy-girl,” he’d rumble, “the best meals start with what the sea gives us.” We’d toss those jewels into a battered skillet with garlic and butter right there on the beach, serving them over rice from a steaming pot. No plates, just laughter and buttery fingers as the sun dipped low. That moment? Pure magic. It’s where my obsession with shrimp began—their sweet brininess, how they cook in minutes, how they make any meal feel like a celebration. This recipe? It’s my grown-up homage to Grandpa’s dock-side feasts. Every bite tastes like sunshine, salt air, and love. ❤️
Your Flavor Toolkit: Ingredients & Why They Shine
Gather these goodies! I’ve added notes to empower your swaps and spark your curiosity:
- Onion (1, finely chopped): Our flavor base! Sweet or yellow onions work best. Chef’s hack: Freeze for 10 minutes before chopping—no tears!
- Garlic (8 cloves total, crushed): Yes, 8! Divided between rice and sauce. Substitute: 1 tsp garlic powder = 1 fresh clove, but fresh is magic here.
- White Rice (2½ cups): Long-grain like jasmine or basmati. Insight: Rinse it! Removes starch for fluffier rice.
- White Wine (½ cup + ½ cup): Adds bright acidity. Swap: Use extra stock + 1 tbsp lemon juice if avoiding alcohol.
- Crushed Tomatoes (400g/14 oz): Brings tangy depth. Chef’s pick: San Marzano for sweetness.
- Chicken or Fish Stock (4 cups + ½ cup): Use fish stock for oceanic vibes, chicken for milder flavor. Emergency sub: Veggie broth works!
- Frozen Peas (2 cups): Little pops of sweetness. No thawing needed—they cook perfectly in the rice!
- Shrimp (500g/1 lb): Get raw, peeled, deveined (tails on/off—your call!). Pro tip: Pat them DRY with paper towels for the perfect sear.
- Butter (2 tbsp), Olive Oil (2 tbsp), Lemon Juice (1 tbsp): Our golden trio! Butter = richness, olive oil = high-heat searing, lemon = zingy finish. Always use real butter!
Why this combo rocks: The tomatoes and stock create a rich “sofrito” base for the rice, while the double garlic punch (in rice AND sauce) builds layers of flavor. The peas? They’re your veggie sneak-attack!
Let’s Get Cooking: Simple Steps, Big Rewards
Follow along—I’ve packed each step with tips to make you shine!
- Cook the Rice Base: Heat 1 tbsp olive oil in your largest deep skillet or Dutch oven over medium heat. Sauté onions for 3-4 mins until translucent—don’t rush! Add 4 crushed garlic cloves; stir 30 seconds until fragrant (burnt garlic = sad times). Stir in rice, coating every grain in that oily goodness. Cook 1-2 mins—it’ll turn slightly translucent at the edges. Pour in ½ cup wine (if using); let it bubble and reduce by half, scraping any browned bits. Chef’s hack: That’s FLAVOR GOLD! Add tomatoes, 4 cups stock, peas, salt, and pepper. Bring to a lively simmer, cover tightly, and reduce heat to low. Cook 15-20 mins until rice is tender and liquid’s absorbed. Key tip: NO PEEKING! Trapped steam cooks rice evenly.
- Sear the Shrimp: While rice cooks, heat remaining 1 tbsp olive oil in a separate skillet over medium-high. Pat shrimp VERY dry—this ensures caramelization, not steaming. Season with salt and pepper. Arrange shrimp in one layer (crowd them = steam city). Cook 1-2 mins per side until JUST opaque and pink with a golden kiss. Watch closely: Overcooked shrimp turn rubbery. Remove to a plate immediately.
- Whip Up the Garlic Butter Sauce: In the same shrimp skillet (keep those tasty bits!), melt butter over medium. Add remaining 4 crushed garlic cloves; sauté 30 seconds until golden. Pour in ½ cup wine and ½ cup stock. Bring to a simmer, scraping the pan bottom. Let bubble 3-4 mins until reduced by a third—it’ll lightly coat a spoon. Stir in lemon juice. Pro move: Taste! Add a pinch of red pepper flakes now if you like heat.
- Bring It All Together: Gently fold cooked shrimp into the garlic butter sauce—just 1 minute to warm through. Spoon that saucy shrimp over the fluffy rice. Final flourish: Drizzle any extra sauce from the skillet!
Why this order rocks: Cooking rice and shrimp simultaneously saves time, and building the sauce in the shrimp skillet layers flavors beautifully!
Plate It Like a Pro (No Fancy Skills Needed!)
This dish is a stunner with minimal effort! Scoop the tomato rice into wide, shallow bowls. Top generously with shrimp and that glossy garlic butter sauce. Garnish with a sprinkle of fresh parsley or chives for color, and a lemon wedge on the side for optional zing. Cozy touch: Serve with crusty bread to swipe up every drop of sauce. Perfect for family-style dinners—just plonk the skillet right on the table (with a trivet!) and watch hands reach in. Pair with a crisp green salad or roasted asparagus for a full, vibrant meal. And candles? Always. 🕯️✨
Make It Your Own: Delicious Twists
Play with your food! Here are my favorite riffs:
- Spicy Cajun Kick: Toss shrimp with 1 tbsp Cajun seasoning before searing. Add diced andouille sausage to the rice base!
- Mediterranean Sunshine: Stir ¼ cup chopped Kalamata olives and 2 tbsp capers into the rice. Finish shrimp with a sprinkle of feta cheese.
- Vegetarian Delight: Swap shrimp for 1.5 cups chickpeas (pat dry + sear!). Use veggie stock. Add zucchini with the peas.
- Creamy Dreamy: Stir ¼ cup heavy cream or coconut milk into the garlic butter sauce at the end. Luxurious!
- Seafood Fiesta: Add scallops or diced firm white fish with the shrimp. Cook times may vary slightly.
Olivia’s Behind-the-Scenes Nuggets
This recipe has evolved like a good friendship! Originally, I used jarred tomato sauce—but crushing whole tomatoes myself gave brighter flavor. And that double wine addition? Total accident! I once splashed extra into the shrimp pan and did a happy dance at the result. 🕺 My funniest kitchen fail? Forgetting to devein shrimp for a date-night dinner… let’s just say, romance survived, but I double-check now! Over time, I’ve learned: quality stock is non-negotiable (homemade or premium store-bought), and room-temp shrimp sear better (pull them from the fridge 15 mins early). This dish is forgiving—if your rice is slightly under? Add 2 tbsp stock, cover, and steam off-heat for 5 mins. Perfection is overrated; flavor and fun are everything!
Your Questions, Answered!
Let’s tackle common hiccups so you feel unstoppable:
- Q: My rice is mushy/crunchy! Help?
A: Mushy = too much liquid or over-stirring. Crunchy = not enough liquid or heat too high. Use a tight-fitting lid and trust the timer! If unsure, check rice at 15 mins—add 2 tbsp stock if dry, or simmer uncovered 2 mins if wet. - Q: Can I use brown rice?
A: Absolutely! Increase stock to 5 cups and cook time to 35-40 mins. Add peas in the last 10 mins to avoid mush. - Q: Shrimp cooked too fast—sauce isn’t ready!
A: No stress! Remove shrimp when done. They’ll rewarm perfectly in the sauce later. Undercooked shrimp = danger zone; perfectly cooked > perfect timing. - Q: Can I make this ahead?
A: Cook rice base ahead (store 3 days fridge). Reheat gently with 2 tbsp stock. Cook shrimp and sauce FRESH—they take under 10 mins! Pre-cooked shrimp get rubbery when reheated.
Easy Garlic Butter Shrimp and Rice
- Total Time: 45-50 minutes
Description
Hey there, friend! Olivia here, apron dusted with flour and a heart full of excitement. Imagine plump, juicy shrimp swimming in a zesty garlic butter sauce, served over vibrant tomato-infused rice studded with sweet peas. This one-pan wonder is the ultimate weeknight hero—comforting, flavorful, and ready in under an hour. Whether you’re cooking for loved ones or treating yourself, this dish is a celebration of joy, flavor, and that proud “I made this!” moment. Let’s get cooking!
Ingredients
For the Rice
-
2½ cups long-grain white rice (jasmine or basmati)
-
1 onion, finely chopped
-
4 cloves garlic, crushed (divided)
-
½ cup white wine (or extra stock + 1 tbsp lemon juice)
-
400g (14 oz) crushed tomatoes (San Marzano preferred)
-
4 cups chicken or fish stock
-
2 cups frozen peas (no need to thaw)
-
Salt & pepper, to taste
-
1 tbsp olive oil
For the Shrimp & Sauce
-
500g (1 lb) raw peeled and deveined shrimp (tails on/off your choice)
-
Salt & pepper
-
1 tbsp olive oil
-
2 tbsp butter
-
4 cloves garlic, crushed (remaining)
-
½ cup white wine
-
½ cup chicken or fish stock
-
1 tbsp lemon juice
-
Optional: pinch red pepper flakes for heat
Instructions
1. Cook the Rice Base
-
Heat 1 tbsp olive oil in a large deep skillet or Dutch oven over medium heat.
-
Sauté the onion for 3-4 minutes until translucent.
-
Add 4 crushed garlic cloves, stir 30 seconds until fragrant (don’t burn!).
-
Stir in rice, coating each grain well, cook 1-2 minutes until edges turn translucent.
-
Pour in ½ cup white wine, let it bubble and reduce by half, scraping up any brown bits.
-
Add crushed tomatoes, stock, peas, salt, and pepper. Bring to a lively simmer.
-
Cover tightly, reduce heat to low, and cook 15-20 minutes without stirring or peeking until rice is tender and liquid absorbed.
2. Sear the Shrimp
-
While rice cooks, heat 1 tbsp olive oil in a separate skillet over medium-high heat.
-
Pat shrimp dry, season with salt and pepper.
-
Place shrimp in a single layer, cook 1-2 minutes per side until just opaque and golden. Remove and set aside.
3. Make the Garlic Butter Sauce
-
In the same skillet, melt butter over medium heat.
-
Add remaining 4 crushed garlic cloves, sauté 30 seconds until golden.
-
Pour in ½ cup white wine and ½ cup stock, simmer 3-4 minutes until reduced by a third.
-
Stir in lemon juice and optional red pepper flakes. Taste and adjust seasoning.
4. Combine & Serve
-
Fold shrimp gently into the garlic butter sauce to warm through.
-
Spoon tomato rice onto plates or bowls, top with shrimp and drizzle extra sauce.
-
Garnish with fresh parsley, chives, and lemon wedges.
Notes
-
Rinse rice to remove starch for fluffier results.
-
Pat shrimp dry for perfect sear—avoid overcrowding skillet.
-
Use a tight-fitting lid on rice pot for even cooking.
-
Leftover rice? Add a splash of stock and steam off-heat for 5 minutes.
-
No wine? Substitute with extra stock + lemon juice.
-
Add veggies like zucchini or diced bell peppers for variety.
- Prep Time: 10 minutes
Nutrition
- Calories: 420cal Per Serving
- Fat: 17g
- Carbohydrates: 38g
- Fiber: 3g
- Protein: 28g
Nutritional Info (Per Serving)
Calories: ~420 | Protein: 28g | Carbs: 38g | Fat: 17g | Fiber: 3g
Note: Values are estimates. Using low-sodium stock reduces salt content. Add a side salad to boost fiber!
Final Thoughts: Why This Recipe Will Steal Your Heart (and Stomach!)
This Easy Garlic Butter Shrimp and Rice isn’t just dinner—it’s a love letter to simplicity, flavor, and the messy, beautiful art of home cooking. It’s the dish that says “I’ve got you” on chaotic weeknights and “Let’s celebrate” on slow weekends. With every bite of garlicky shrimp, every forkful of tomato-kissed rice, you’re tasting the kind of meal that lingers in memory long after the plates are cleared.
So tie on that apron, crank up your favorite playlist, and let the sizzle of butter and garlic work its alchemy. Because the best meals aren’t about perfection—they’re about the hands that make them and the hearts they feed. Now go forth, cook with abandon, and don’t forget to lick the spoon!
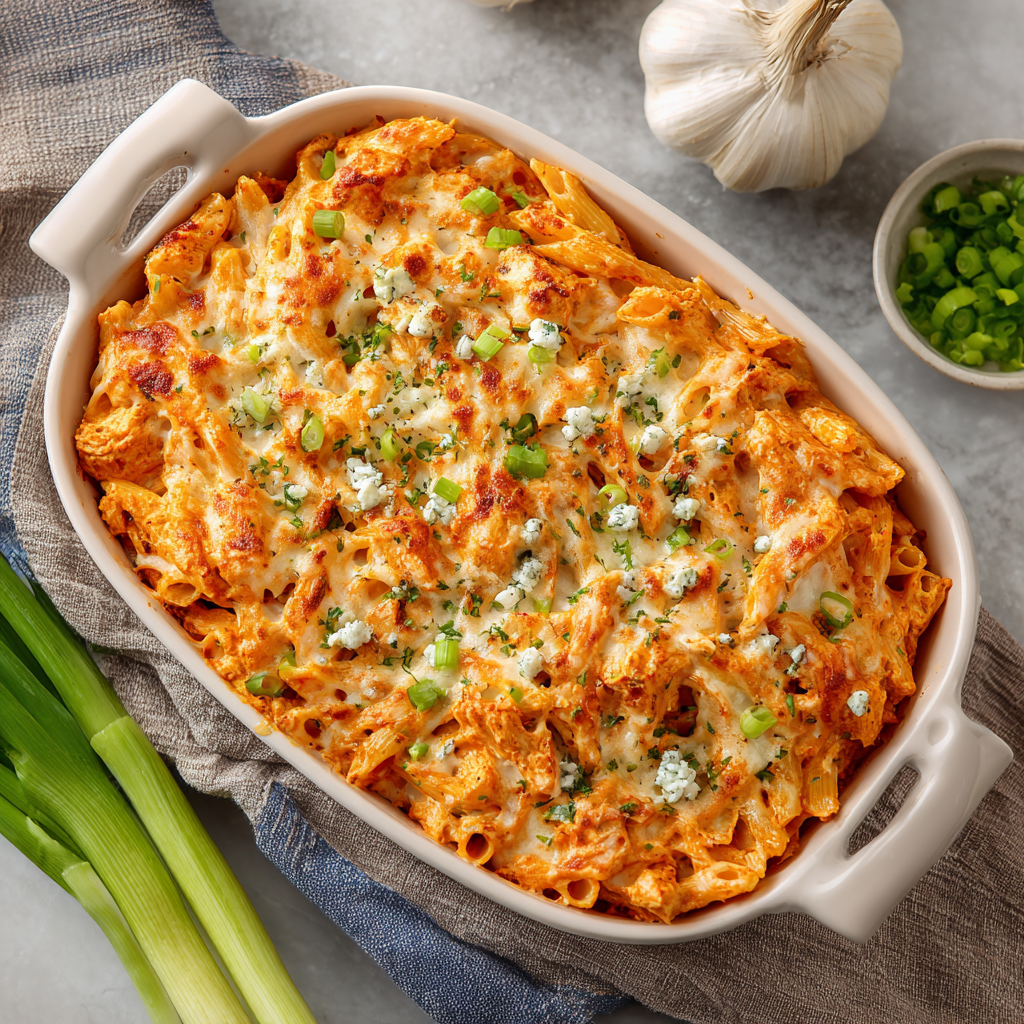
Buffalo Chicken Pasta Bake
Spice Up Your Comfort Zone: Buffalo Chicken Pasta Bake
Hey there, kitchen comrades! Olivia here, apron slightly dusted with flour (and maybe a splash of hot sauce), ready to share a recipe that’s basically a warm hug with a fiery high-five. If your soul sings for creamy, cheesy comfort food but your taste buds crave a little adventure, you’ve landed in the perfect spot. This Buffalo Chicken Pasta Bake is my ultimate crowd-pleaser – the dish I haul out when friends pile in for game night, when the family needs a pick-me-up, or when I simply want to treat myself to something gloriously indulgent. Imagine tender chicken, tangy-hot buffalo sauce, and sweet tomatoes all tangled up with hearty penne, then smothered in a lusciously creamy, ranch-kissed cheese blanket and baked until it’s bubbly and golden. It’s messy, it’s bold, and it’s utterly irresistible. Forget fancy techniques or hours chained to the stove; this is weeknight magic that comes together faster than you can say “pass the ranch!” So grab your favorite mixing bowl, crank up some tunes, and let’s turn up the heat together. Trust me, your kitchen (and everyone you feed) is about to feel very, very cozy.
Game Night Glory: Where This Bake Was Born
Picture this: It’s a chilly Sunday evening years ago. My living room is packed with friends, all glued to the TV, shouting at a football game. I’d promised “snacks,” but inspiration struck late. I had leftover roasted chicken, a half-empty bottle of Frank’s, and a serious craving for carbs. In a whirlwind of “what ifs,” I started tossing shredded chicken with hot sauce and tomatoes, boiled some penne, and whipped up a quick creamy sauce feeling distinctly ranch-like (thanks to my spice drawer heroes: dill, parsley, garlic & onion powder!). I layered it all haphazardly into a dish, buried it under cheese, and shoved it in the oven, crossing my fingers. The smell alone pulled everyone away from the screen. That first bubbling, cheesy, spicy forkful? Pure chaos (in the best way)! Sauce on chins, happy groans, and zero leftovers. It became instant legend in our friend group – “Olivia’s Game Day Glop” (a name I’ve gracefully upgraded!). Now, every time I make it, I’m back in that loud, joyful living room, surrounded by people I love, all bonded over a dish born from pantry chaos and a whole lot of heart (and heat!).
Your Flavor Arsenal: Gathering the Good Stuff
Don’t stress about perfection – cooking is about joy, not rigidity! Here’s what you’ll need for that spicy, creamy magic. Pro tip: Mise en place (fancy for “get everything prepped first”) is your best friend here!
Main Pasta Bake:
- 400g (14 oz) boneless, skinless chicken thighs, diced: Thighs are my MVP for juicy flavor that won’t dry out! Swap: Chicken breast works too (cook 1-2 mins less), or use 2 cups shredded rotisserie chicken for a shortcut!
- 1 tsp paprika: Adds warmth and gorgeous color. Chef’s Whim: Smoked paprika kicks it up a notch!
- 1 onion, diced: The sweet, savory base layer. Yellow or white are perfect.
- 1 clove garlic, minced: Flavor bomb! Use 2 if you’re garlic-obsessed like me.
- Salt & black pepper, to taste: Season as you go! Taste that chicken while browning.
- Cooking oil spray: Keeps things light. A quick spray in the pan is all you need.
- 1 cup (240ml) canned crushed tomatoes (or passata + 1–2 tbsp tomato paste): Tangy depth. Passata + paste mimics it perfectly if crushed isn’t handy.
- ⅓ cup (80ml) hot sauce (like Frank’s Red Hot): The BUFFALO star! Frank’s has that classic vinegar tang. Heat Hack: Start with 1/4 cup if nervous, add more later!
- 350g (12.5 oz) diced fresh tomatoes: Bright pops of freshness! Seasonal Swap: Use drained canned diced tomatoes in winter.
- 240g (8.5 oz) uncooked penne pasta: Holds the sauce beautifully. Rigatoni or fusilli are fun too!
Creamy Topping:
- 100g (3.5 oz) light cream cheese: The creamy dream base! Full-fat works, but light keeps it balanced.
- 1 cup (240ml) chicken stock: Savory liquid gold. Low-sodium is best for control.
- 1 tbsp cornstarch: Our thickener hero. Whisk it with a splash of cold stock first to avoid lumps!
- ½ tsp onion powder & ½ tsp garlic powder: Concentrated ranch-y goodness. Don’t skip!
- 1 tsp dried dill & 1 tsp dried parsley: The herbaceous soul of ranch flavor. Fresh is great (use 1 tbsp each) if you have it.
- 30g (1 oz) cheddar cheese, grated: Sharp bite! Fun Twist: Pepper jack for extra kick!
- 50g (2 oz) mozzarella cheese, grated: Melty, gooey perfection.
- 2 spring onions, thinly sliced: Fresh, colorful crunch on top! Reserve the green parts for garnish.
Let’s Get Cooking: Building Your Flavor Masterpiece
Ready to create some magic? Follow these steps, embrace the sizzle, and remember: confidence is your best ingredient!
- Preheat & Pasta Power: Crank your oven to 375°F (190°C). Get that penne boiling in well-salted water (taste it – it should taste like the sea!) until just al dente (usually 1 minute less than package says). Chef’s Hack: Undercook it slightly! It absorbs sauce in the bake. Drain, toss with a tiny splash of oil to prevent sticking, and set aside.
- Chicken Sizzle Station: Lightly spray a large skillet or Dutch oven and heat over medium-high. Toss in the diced chicken, paprika, onion, garlic, salt, and pepper. Cook, stirring occasionally, for 5-7 minutes until the chicken is browned and cooked through, and the onions are softening. Smell Check: That paprika-onion-garlic aroma? That’s flavor building!
- Buffalo Bliss Sauce: Pour in the crushed tomatoes, fresh diced tomatoes, and that glorious hot sauce! Stir everything together, scraping up any tasty browned bits from the pan bottom (that’s FLAVOR!). Bring it to a lively simmer, then reduce heat slightly. Let it bubble happily for 10 minutes. Texture Tip: The sauce should thicken slightly and the tomatoes soften. Taste it! Adjust salt, pepper, or hot sauce now.
- Pasta Party Time: Dump your drained penne right into the skillet with the buffalo chicken sauce. Gently but thoroughly mix it all up, ensuring every noodle gets coated in that spicy, tomatoey goodness. Pour the whole delicious mess into a 9×13 inch (or similar) baking dish. Spread it out evenly. No-Skid Trick: Give the dish a little shake to settle everything.
- Creamy Dream Topping: Now, the luscious layer! In a small saucepan, whisk together the chicken stock and cornstarch until completely smooth (no lumps!). Add the cream cheese, onion powder, garlic powder, dill, parsley, and the white parts of your sliced spring onions. Whisk constantly over medium heat until the cream cheese melts completely and the mixture thickens noticeably into a velvety sauce (about 5-7 minutes). Lump Patrol: Whisk like you mean it! Remove from heat.
- Cheesy Blanket & Bake: Pour the creamy ranch sauce evenly over the buffalo chicken pasta in the baking dish. Sprinkle the grated cheddar and mozzarella generously over the top, covering every inch. Golden Rule: More cheese = more joy. Pop it into your preheated oven and bake for 20-25 minutes, until the cheese is molten, bubbly, and has gorgeous golden spots.
- Garnish Glory: Carefully remove your masterpiece from the oven (it’s lava-hot!). Immediately scatter the reserved green parts of the spring onions over the top. Pro Move: Let it rest for 5 minutes before serving. This helps it set slightly, making scooping easier!
Dishing Up the Deliciousness
Presentation is part of the fun! Scoop generous portions into deep bowls – you want to capture all that saucy, cheesy goodness. The vibrant orange-red of the buffalo sauce peeking through the creamy, golden cheese topping is already a showstopper, accented perfectly by those bright green spring onions. For the ultimate Buffalo wing experience on a plate, serve it with cool, crunchy celery sticks and extra ranch dressing or blue cheese dip on the side for dipping and drizzling. A simple green salad with a light vinaigrette cuts through the richness beautifully. Don’t forget napkins – this is gloriously messy, finger-licking comfort food meant to be enjoyed with abandon!
Make It Your Own: Delicious Twists
This recipe is a fantastic canvas! Play around with these fun spins:
- Veggie Power-Up: Stir in 1 cup of chopped spinach or kale with the fresh tomatoes, or add 1/2 cup diced celery or bell peppers when cooking the onion.
- “Blue” Cheese Lover: Swap half the mozzarella in the topping for crumbled blue cheese before baking. Intense tang heaven!
- Meatless Marvel: Omit the chicken. Use 1.5 cups cooked lentils or rinsed, drained chickpeas added with the tomatoes. Boost umami with 1 tbsp soy sauce in the buffalo sauce.
- Smoky & Spicy: Use chipotle hot sauce instead of Frank’s, add 1/2 tsp smoked paprika to the chicken, and use pepper jack cheese in the topping.
- Gluten-Free Friend: Use your favorite GF penne and ensure your hot sauce and stock are GF. Swap cornstarch for an equal amount of arrowroot powder in the topping.
Olivia’s Kitchen Chatter
This bake has truly evolved from that frantic game-night experiment! The biggest glow-up? The creamy topping. Originally, I just dolloped plain cream cheese and sprinkled cheese on top. It worked, but the sauce version seeping into the pasta below creates this incredible creamy-spicy marriage that’s just *chef’s kiss*. One time, mid-whisking the topping, my cat decided the spring onion on the counter was a toy and batted it across the room! We used chives instead, laughed it off, and dinner was still delicious. That’s the spirit – don’t sweat the small stuff! This recipe is forgiving. If your sauce seems a bit thin after simmering, mix 1 tsp cornstarch with 1 tbsp water and stir it in. Too thick? Splash in a little extra stock. It’s all about creating something warm, flavorful, and shared with love (even if a spring onion goes rogue!).
Buffalo Bake SOS: Your Questions Answered
Let’s tackle those common kitchen quandaries:
- Q: Can I use chicken breast instead of thighs?
Absolutely! Dice it small and cook just until no longer pink (about 5-6 minutes). Thighs are juicier, but breast works well. Shredded rotisserie chicken is a fantastic 5-minute shortcut – just stir it in with the tomatoes and sauce to heat through. - Q: Help! It’s too spicy for my crew/kids!
No worries! The heat is adjustable. Start with only 1/4 cup hot sauce. After simmering the sauce (Step 3), taste it. You can add a tablespoon of honey or brown sugar, or stir in an extra 1/4 cup of crushed tomatoes to mellow it. Serve with extra ranch or blue cheese dip on the side for cooling dips. - Q: Can I make this ahead of time?
You bet! Assemble the entire bake (through step 6 – topped with cheese) up to 24 hours ahead. Cover tightly and refrigerate. When ready, bake straight from the fridge, adding 10-15 extra minutes (cover loosely with foil if the cheese browns too fast before the center is hot). The creamy topping might thicken more in the fridge; a splash of milk stirred in before topping can help. - Q: My topping sauce is lumpy! Disaster?
Breathe! Lumps happen. Try whisking vigorously off the heat. If stubborn, carefully blend it with an immersion blender or pour it through a fine mesh strainer into a clean pot. Add a splash more stock if needed after straining. It’ll still taste amazing!
Buffalo Chicken Pasta Bake
- Total Time: About 1 hour
Description
Hey kitchen comrades! Olivia here, apron dusted with flour (and maybe a splash of hot sauce), ready to share a dish that’s like a warm hug with a fiery high-five. Creamy, cheesy pasta meets spicy buffalo chicken in this crowd-pleasing bake—perfect for game nights, cozy family dinners, or whenever you want a bold comfort meal without fuss. Juicy chicken, tangy buffalo sauce, fresh tomatoes, all tangled with penne pasta and smothered in a creamy ranch-style cheese sauce baked golden and bubbly. Ready to crank up the heat and cozy up your kitchen? Let’s go!
Ingredients
Pasta Bake
-
400g (14 oz) boneless, skinless chicken thighs, diced (or 2 cups shredded rotisserie chicken)
-
1 tsp paprika (smoked paprika optional)
-
1 onion, diced
-
1 clove garlic, minced
-
Salt & black pepper, to taste
-
Cooking oil spray
-
1 cup (240 ml) canned crushed tomatoes (or passata + 1–2 tbsp tomato paste)
-
⅓ cup (80 ml) hot sauce (Frank’s Red Hot recommended)
-
350g (12.5 oz) diced fresh tomatoes
-
240g (8.5 oz) uncooked penne pasta
Creamy Topping
-
100g (3.5 oz) light cream cheese
-
1 cup (240 ml) chicken stock (low sodium preferred)
-
1 tbsp cornstarch
-
½ tsp onion powder
-
½ tsp garlic powder
-
1 tsp dried dill
-
1 tsp dried parsley
-
30g (1 oz) grated cheddar cheese
-
50g (2 oz) grated mozzarella cheese
-
2 spring onions, thinly sliced (reserve green parts for garnish)
Instructions
Preheat oven to 375°F (190°C).
Boil penne in salted water until just al dente (1 minute less than package suggests). Drain, toss with a little oil, set aside.
Spray a large skillet with oil and heat on medium-high.
Add diced chicken, paprika, onion, garlic, salt, and pepper. Cook 5-7 minutes until chicken is browned and onions are soft.
Add crushed tomatoes, fresh diced tomatoes, and hot sauce to skillet.
Simmer for 10 minutes, stirring occasionally until sauce thickens and tomatoes soften. Adjust seasoning.
Add cooked penne to the skillet. Toss gently to coat all pasta in buffalo sauce.
Transfer mixture to a 9×13 inch baking dish, spreading evenly.
In a small saucepan, whisk cornstarch with a splash of chicken stock until smooth.
Add remaining stock, cream cheese, onion powder, garlic powder, dill, parsley, and white parts of spring onions.
Cook over medium heat, whisking until sauce thickens and cream cheese melts (5-7 minutes).
Pour creamy sauce evenly over the pasta in the baking dish.
Sprinkle cheddar and mozzarella over the top generously.
Bake 20-25 minutes until cheese is bubbly and golden.
Remove from oven, sprinkle reserved green parts of spring onions on top.
Let rest 5 minutes before serving.
Notes
-
Less heat? Start with ¼ cup hot sauce, add honey or brown sugar to tame spice.
-
Make ahead: Assemble up to step 6 a day ahead; refrigerate and bake when ready (add 10-15 mins baking time).
-
Add veggies: Spinach, kale, celery, or bell peppers make great mix-ins.
-
Cheese swap: Try blue cheese for tang or pepper jack for extra kick.
-
Gluten-free: Use GF pasta and ensure stock/hot sauce are GF; arrowroot powder can replace cornstarch.
- Prep Time: 15 minutes
- Cook Time: 25 mins
Nutrition
- Calories: 400cal Per Serving
- Fat: 18g
- Carbohydrates: 28g
- Fiber: 3g
- Protein: 30g
Nutritional Nibbles (Per Serving)
Approximate values for 1 out of 6 servings: ~400 kcal | Protein: 30g | Carbs: 28g | Fat: 18g | Fiber: 3g. Remember, these are estimates. Using different cheese fat content, exact chicken weight, or adding extra veggies will change things!
Final Thoughts: Why This Recipe Deserves a Spot in Your Rotation
This Buffalo Chicken Pasta Bake isn’t just a meal—it’s a mood. It’s the dish you make when:
-
Comfort is non-negotiable
-
Time is tight but flavor can’t be compromised
-
You need a guaranteed crowd-pleaser
It’s flexible, forgiving, and packed with personality—just like the best home cooking should be.
So, the next time you’re staring at a pack of chicken and a bottle of hot sauce, remember this recipe. It’s waiting to turn an ordinary night into something spicy, cheesy, and unforgettable.
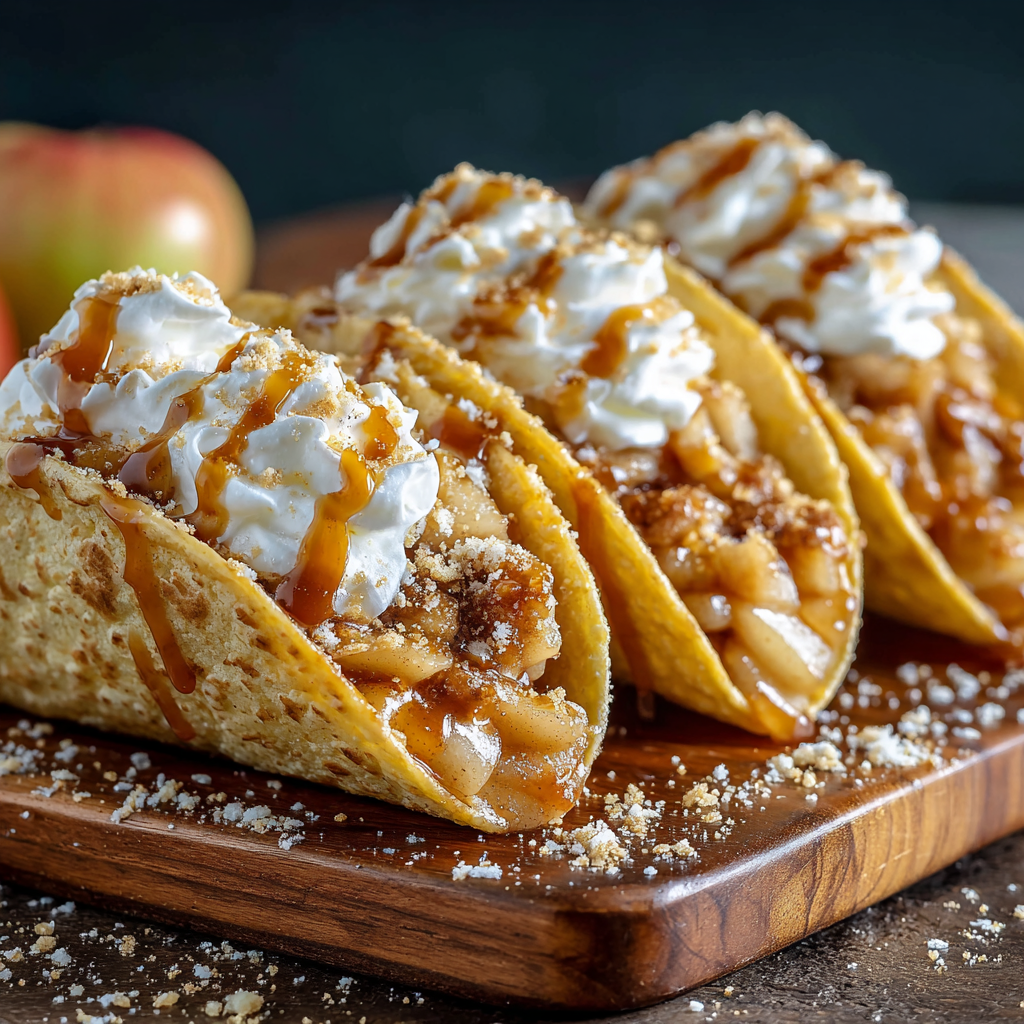
Apple Pie Tacos
When Apple Pie Gets a Playful Makeover!
Hey there, kitchen friends! Olivia here, waving at you from my flour-dusted countertop. Can you smell that? It’s the cozy embrace of cinnamon-kissed apples and buttery pastry—but today, we’re shaking things up! Imagine if your favorite fall dessert decided to take a vacation to Mexico and came back wearing a crispy, handheld outfit. That’s exactly what happened when I dreamed up these Apple Pie Tacos. They’re the lovechild of Sunday pie nostalgia and Tuesday-night taco cravings, and trust me, they’ll make your taste buds do a happy dance.
Picture this: crispy, golden shells hugging warm, gooey apple filling, finished with a river of caramel and a cloud of whipped cream. They’re perfect for game nights, bonfire gatherings, or when you need a little “happy” on a rainy afternoon. No fancy skills required—just a playful spirit and about 20 minutes. So tie on that apron (mine’s already splattered with caramel, no judgment here!), and let’s turn simple ingredients into pure magic. This isn’t just dessert; it’s edible joy!
The Campfire Experiment That Started It All
Let me take you back to last autumn. My niece Lily (who’s 7 going on “professional dessert critic”) challenged me during a family camping trip: “Aunt Liv, can we make apple pie… but in the FIRE?” While I vetoed open-flame pastry, her idea stuck. Later that week, I was staring at leftover taco shells when lightning struck! What if I swapped savory for sweet? My first attempt was… ambitious (let’s just say molten apple filling makes impressive floor art). But after tweaking the shell technique—baking them with buttery vanilla crumbs instead of frying—we struck gold. When Lily took her first bite? Her eyes widened like saucers. “It’s like a pie you can HUG!” she declared. And just like that, our silly campfire dream became the most requested treat at every gathering since. Sometimes the best recipes start with a kid’s wild idea and a happy kitchen accident!
🍏 Your Sweet Taco Toolkit
Grab these simple stars—I’ve added my chef secrets and swaps so you can riff like a pro:
- 6 street taco flour tortillas (4.5-inch) – Tiny size = perfect crunch! No mini tortillas? Cut large ones into quarters using a pizza cutter.
- ⅓ cup salted butter, melted – Salted butter balances the sweet. Vegan? Coconut oil works beautifully.
- ¾ cup finely crushed vanilla wafer crumbs – My “secret armor” for extra crunch & flavor! Chef hack: Blitz cookies in a zip-top bag with a rolling pin—no food processor needed. Graham cracker crumbs work too.
- 1 tsp ground cinnamon or apple pie spice – Use apple pie spice if you have it (hello, cardamom warmth!).
- 20 oz canned apple pie filling – The MVP for busy cooks! Pro tip: Chop apples smaller for easier taco stuffing. Feeling fancy? Sauté fresh sliced apples with brown sugar + lemon juice.
- ¼ cup heavy cream – Transforms filling into luxe “pie custard.” Dairy-free? Full-fat coconut milk is glorious here.
- Whipped cream & caramel sauce (optional) – Go homemade or store-bought—no shame! Salted caramel? *chef’s kiss*
🌮 Let’s Build Some Sweet Magic!
Ready for the fun part? Follow these steps—I’ve packed them with my hard-won kitchen hacks:
- Prep Your Shells: Brush tortillas generously on both sides with melted butter using a pastry brush. (This makes them crisp up like a dream!). Mix wafer crumbs and cinnamon in a shallow dish. Press each tortilla into the crumbs, coating both sides. Watch your fingers—this is sticky business! Pro tip: Lay them on a wire rack for 5 minutes to let the coating “set”—it prevents crumbs from jumping ship in the oven.
- Shape & Bake: Preheat oven to 375°F (190°C). Drape tortillas over oven rack bars OR use a taco mold (I repurpose an upside-down muffin tin—see photo!). Bake 8-10 minutes until golden and crisp like autumn leaves. Critical step: Let shells cool 5 minutes before filling—they crisp up as they rest! (Learned this after my “soggy shell incident of 2022).
- Warm the Filling: While shells bake, combine pie filling and heavy cream in a saucepan. Cook over medium heat, stirring often, until bubbly and thickened (about 5 minutes). Secret weapon: Add a pinch of nutmeg here—it makes the apples sing!
- Assemble with Joy: Spoon warm filling into your crispy shells. Don’t be shy—overflowing apples are the goal! Top immediately with whipped cream so it melts slightly into the filling. Drizzle with caramel like you’re Jackson Pollock creating edible art.
✨ Serving: Where the Party Begins!
Presentation is half the fun! I serve these on a rustic wooden board with extra caramel drizzled artfully around the plate. For gatherings, set up a “taco bar” with toppings in little bowls: crushed nuts, cinnamon sugar, even shredded cheddar for adventurous souls (don’t knock it ’til you try it!). Pair with hot cider or coffee—the contrast of warm filling and cool cream is pure bliss. Pro tip: Have napkins ready. Things get gloriously messy!
When Apple Pie Gets a Playful Makeover!
Hey there, kitchen friends! Olivia here, waving at you from my flour-dusted countertop. Can you smell that? It’s the cozy embrace of cinnamon-kissed apples and buttery pastry—but today, we’re shaking things up! Imagine if your favorite fall dessert decided to take a vacation to Mexico and came back wearing a crispy, handheld outfit. That’s exactly what happened when I dreamed up these Apple Pie Tacos. They’re the lovechild of Sunday pie nostalgia and Tuesday-night taco cravings, and trust me, they’ll make your taste buds do a happy dance.
Picture this: crispy, golden shells hugging warm, gooey apple filling, finished with a river of caramel and a cloud of whipped cream. They’re perfect for game nights, bonfire gatherings, or when you need a little “happy” on a rainy afternoon. No fancy skills required—just a playful spirit and about 20 minutes. So tie on that apron (mine’s already splattered with caramel, no judgment here!), and let’s turn simple ingredients into pure magic. This isn’t just dessert; it’s edible joy!
The Campfire Experiment That Started It All
Let me take you back to last autumn. My niece Lily (who’s 7 going on “professional dessert critic”) challenged me during a family camping trip: “Aunt Liv, can we make apple pie… but in the FIRE?” While I vetoed open-flame pastry, her idea stuck. Later that week, I was staring at leftover taco shells when lightning struck! What if I swapped savory for sweet?
My first attempt was… ambitious (let’s just say molten apple filling makes impressive floor art). But after tweaking the shell technique—baking them with buttery vanilla crumbs instead of frying—we struck gold. When Lily took her first bite? Her eyes widened like saucers. “It’s like a pie you can HUG!” she declared. And just like that, our silly campfire dream became the most requested treat at every gathering since. Sometimes the best recipes start with a kid’s wild idea and a happy kitchen accident!
🍏 Your Sweet Taco Toolkit
Grab these simple stars—I’ve added my chef secrets and swaps so you can riff like a pro:
For the Shells:
-
6 street taco flour tortillas (4.5-inch) – Tiny size = perfect crunch! No mini tortillas? Cut large ones into quarters using a pizza cutter.
-
⅓ cup salted butter, melted – Salted butter balances the sweet. Vegan? Coconut oil works beautifully.
-
¾ cup finely crushed vanilla wafer crumbs – My “secret armor” for extra crunch & flavor! Chef hack: Blitz cookies in a zip-top bag with a rolling pin—no food processor needed. Graham cracker crumbs work too.
-
1 tsp ground cinnamon or apple pie spice – Use apple pie spice if you have it (hello, cardamom warmth!).
For the Filling & Toppings:
-
20 oz canned apple pie filling – The MVP for busy cooks! Pro tip: Chop apples smaller for easier taco stuffing. Feeling fancy? Sauté fresh sliced apples with brown sugar + lemon juice.
-
¼ cup heavy cream – Transforms filling into luxe “pie custard.” Dairy-free? Full-fat coconut milk is glorious here.
-
Whipped cream & caramel sauce (optional) – Go homemade or store-bought—no shame! Salted caramel? chef’s kiss
🌮 Let’s Build Some Sweet Magic!
Ready for the fun part? Follow these steps—I’ve packed them with my hard-won kitchen hacks:
1. Prep Your Shells
-
Brush tortillas generously on both sides with melted butter using a pastry brush. (This makes them crisp up like a dream!).
-
Mix wafer crumbs and cinnamon in a shallow dish. Press each tortilla into the crumbs, coating both sides. Watch your fingers—this is sticky business!
-
Pro tip: Lay them on a wire rack for 5 minutes to let the coating “set”—it prevents crumbs from jumping ship in the oven.
2. Shape & Bake
-
Preheat oven to 375°F (190°C).
-
Drape tortillas over oven rack bars OR use a taco mold (I repurpose an upside-down muffin tin—see photo!).
-
Bake 8-10 minutes until golden and crisp like autumn leaves.
-
Critical step: Let shells cool 5 minutes before filling—they crisp up as they rest! (Learned this after my “soggy shell incident of 2022”).
3. Warm the Filling
-
While shells bake, combine pie filling and heavy cream in a saucepan.
-
Cook over medium heat, stirring often, until bubbly and thickened (about 5 minutes).
-
Secret weapon: Add a pinch of nutmeg here—it makes the apples sing!
4. Assemble with Joy
-
Spoon warm filling into your crispy shells. Don’t be shy—overflowing apples are the goal!
-
Top immediately with whipped cream so it melts slightly into the filling.
-
Drizzle with caramel like you’re Jackson Pollock creating edible art.
✨ Serving: Where the Party Begins!
Presentation is half the fun! I serve these on a rustic wooden board with extra caramel drizzled artfully around the plate. For gatherings, set up a “taco bar” with toppings in little bowls:
-
Crushed pecans or walnuts
-
Cinnamon sugar
-
Shredded coconut
-
A sprinkle of sea salt (trust me, it’s amazing!)
-
Even shredded cheddar for adventurous souls (don’t knock it ’til you try it!)
Pair with:
-
Hot apple cider
-
Spiced coffee
-
Vanilla ice cream (for the ultimate à la mode experience)
Pro tip: Have napkins ready. Things get gloriously messy!
🎨 Delicious Twists to Try
Make it your own with these playful spins:
🍂 Pumpkin Spice Edition
-
Swap apple filling for canned pumpkin mixed with cream cheese + maple syrup.
🍓 Berry Burst
-
Use cherry or blueberry pie filling and top with lemon zest whipped cream.
🌰 Nutty Crunch
-
Add chopped toasted pecans to the filling or shell coating.
🍫 Chocoholic’s Dream
-
Drizzle shells with melted chocolate before filling, or add chocolate chips to the apples.
🌾 Gluten-Free
-
Use GF tortillas and almond flour cookies for crumbs.
👩🍳 Olivia’s Extra Scoop
This recipe was born from pure whimsy, and it’s evolved beautifully. Early versions involved deep-frying (delicious but messy), and once I tried wonton wrappers—cute but too fragile. Baking with the vanilla wafer “armor”? Game-changer! It adds sweetness and protects against sogginess.
Funny story: My husband once tried sneaking one before dinner… and dropped caramel on our white sofa. We now eat them over the sink like juicy peaches!
Storage tip: These tacos also freeze brilliantly—bake shells, cool completely, then freeze in a zip-top bag. Re-crisp at 350°F for 5 minutes. The filling? Always make extra. You’ll want to eat it with a spoon!
❓ Your Questions, Answered!
Q: My shells got soggy! What did I do wrong?
A: Two common culprits:
-
Filling was too hot when added (let it cool 2-3 mins first).
-
Shells weren’t baked long enough. They should sound “tappy” when lightly knocked. Still issues? Double-coat them in crumbs!
Q: Can I make these ahead for a party?
A: Absolutely!
-
Bake shells up to 2 days ahead—store in an airtight container at room temp.
-
Warm filling stovetop day-of.
-
Assemble just before serving to keep shells crisp.
Q: Help! My tortillas ripped when draping.
A: Older tortillas dry out.
-
Brush with extra butter to soften.
-
Or microwave 5 seconds wrapped in a damp towel.
-
If they tear? Patch with crumbs—they’ll bake into place!
Q: Any savory spin ideas?
A: Oh yes!
-
Skip sugar, use corn tortillas.
-
Fill with pulled pork + slaw, or black beans + avocado.
-
Brush shells with garlic butter and coat with crushed tortilla chips!
Nutritional Nibbles (Per Taco)
🔥 Calories: ~270
💪 Carbs: 35g
🥑 Fat: 13g
🍬 Sugar: 18g
🌾 Fiber: 2g
🎨 Delicious Twists to Try
Make it your own with these playful spins:
- Pumpkin Spice Edition: Swap apple filling for canned pumpkin mixed with cream cheese + maple syrup.
- Berry Burst: Use cherry or blueberry pie filling and top with lemon zest whipped cream.
- Nutty Crunch: Add chopped toasted pecans to the filling or shell coating.
- Chocoholic’s Dream: Drizzle shells with melted chocolate before filling, or add chocolate chips to the apples.
- Gluten-Free: Use GF tortillas and almond flour cookies for crumbs.
👩🍳 Olivia’s Extra Scoop
This recipe was born from pure whimsy, and it’s evolved beautifully. Early versions involved deep-frying (delicious but messy), and once I tried wonton wrappers—cute but too fragile. Baking with the vanilla wafer “armor”? Game-changer! It adds sweetness and protects against sogginess. Funny story: My husband once tried sneaking one before dinner… and dropped caramel on our white sofa. We now eat them over the sink like juicy peaches! These tacos also freeze brilliantly—bake shells, cool completely, then freeze in a zip-top bag. Re-crisp at 350°F for 5 minutes. The filling? Always make extra. You’ll want to eat it with a spoon!
❓ Your Questions, Answered!
Q: My shells got soggy! What did I do wrong?
A: Two common culprits: 1) Filling was too hot when added (let it cool 2-3 mins first), or 2) Shells weren’t baked long enough. They should sound “tappy” when lightly knocked. Still issues? Double-coat them in crumbs!
Q: Can I make these ahead for a party?
A: Absolutely! Bake shells up to 2 days ahead—store in an airtight container at room temp. Warm filling stovetop day-of. Assemble just before serving to keep shells crisp.
Q: Help! My tortillas ripped when draping.
A: Older tortillas dry out. Brush with extra butter to soften, or microwave 5 seconds wrapped in a damp towel. If they tear? Patch with crumbs—they’ll bake into place!
Q: Any savory spin ideas?
A: Oh yes! Skip sugar, use corn tortillas. Fill with pulled pork + slaw, or black beans + avocado. Brush shells with garlic butter and coat with crushed tortilla chips!

Apple Pie Tacos
- Total Time: About 25 minutes
Description
Hey kitchen friends! Imagine your favorite cozy apple pie transformed into a crispy, handheld taco—perfect for when you want a fun twist on a classic fall treat. These Apple Pie Tacos are easy to make, deliciously warm with cinnamon-spiced apple filling, and topped with whipped cream and caramel for that extra smile-inducing touch. Let’s get baking!
Ingredients
-
6 small flour tortillas (4.5-inch street taco size)
-
⅓ cup salted butter, melted
-
¾ cup finely crushed vanilla wafer crumbs (or graham cracker crumbs)
-
1 tsp ground cinnamon (or apple pie spice)
-
20 oz canned apple pie filling (or fresh sautéed apples)
-
¼ cup heavy cream (or full-fat coconut milk for dairy-free)
-
Whipped cream and caramel sauce (optional, for topping)
Instructions
Step 1: Prep Your Taco Shells
-
Preheat oven to 375°F (190°C).
-
Brush both sides of each tortilla generously with melted butter.
-
Mix the crushed vanilla wafers and cinnamon in a shallow dish.
-
Press tortillas into the crumb mixture, coating both sides.
-
Let the coated tortillas rest on a wire rack for 5 minutes so the crumbs set.
Step 2: Shape & Bake
-
Drape tortillas over the bars of your oven rack or use a taco mold (an upside-down muffin tin works great).
-
Bake for 8-10 minutes until golden and crisp.
-
Remove and let cool 5 minutes to crisp further.
Step 3: Warm the Filling
-
In a saucepan over medium heat, combine apple pie filling and heavy cream.
-
Stir often until warm, bubbly, and slightly thickened (about 5 minutes).
-
Optional: Add a pinch of nutmeg for extra warmth.
Step 4: Assemble Your Tacos
-
Spoon warm apple filling into crispy shells, letting some overflow for maximum yum.
-
Top with whipped cream and drizzle caramel sauce.
Notes
-
Keep shells crispy: Don’t add hot filling straight away—let it cool a couple minutes to avoid sogginess.
-
Make ahead: Bake shells up to 2 days ahead; store airtight at room temp. Warm filling before serving.
-
Avoid tearing tortillas: Brush extra butter and warm slightly if tortillas are stiff before shaping.
-
Crunch boost: Double coat shells in crumbs for extra texture and flavor.
-
Freeze option: Freeze baked shells in zip bags; reheat at 350°F for 5 minutes before serving.
- Prep Time: 10 minutes
- Cook Time: 10 minutes
Nutrition
- Calories: 270 cal Per Serving
- Sugar: 18g
- Fat: 13g
- Carbohydrates: 35g
- Fiber: 2g
Nutritional Nibbles (Per Taco)
🔥 Calories: ~270 | 💪 Carbs: 35g | 🥑 Fat: 13g | 🍬 Sugar: 18g | 🌾 Fiber: 2g
Note: Toppings add extra calories. For lighter versions, try Greek yogurt instead of whipped cream!
Final Thoughts: A Dessert That Brings the Fun
These Apple Pie Tacos aren’t just a treat—they’re an experience. They take the comfort of apple pie and turn it into something playful, shareable, and downright irresistible. Whether you’re serving them at a party, making them with kids, or just treating yourself, they’re guaranteed to spark joy.
So go ahead—get creative, make a mess, and most importantly, enjoy every bite. Because life’s too short for boring desserts!
Loved this recipe? Save it for later!
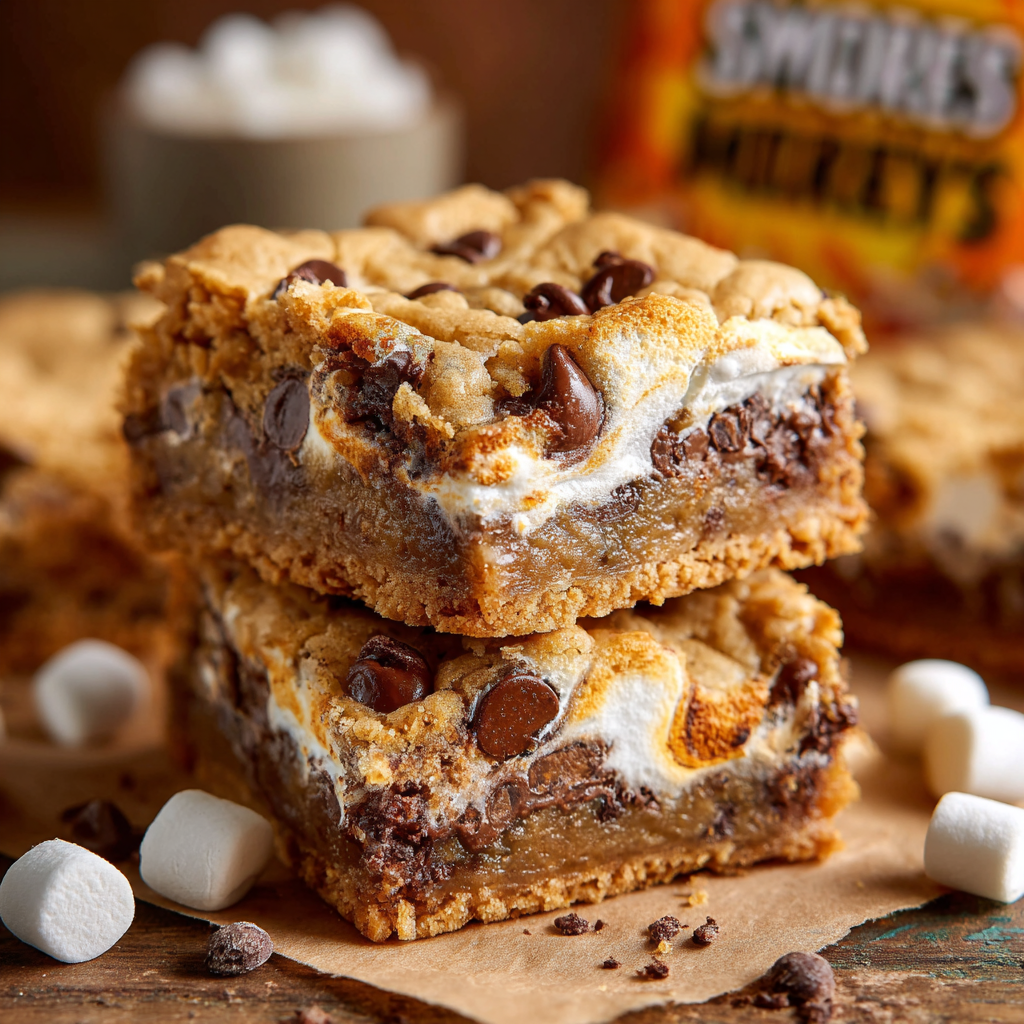
S’mores Cookie Bars
Why These Bars Will Become Your New Favorite “Hug in a Pan”
Hey there, fellow flavor adventurer! Olivia here, apron dusted with graham cracker crumbs and probably a smudge of marshmallow creme on my cheek. You know that moment when you bite into something so ridiculously comforting, it instantly transports you? That’s exactly what happened when I first pulled these S’mores Cookie Bars out of the oven. Imagine: the crackle of a campfire, the scent of toasted marshmallows clinging to your sweater, the joy of squishing chocolate between graham crackers… now bottle that nostalgia into a fudgy, portable bar you can make anytime. No fire pit required!
These aren’t just dessert bars – they’re edible memory capsules. Perfect for when you’re craving that gooey s’mores magic but it’s raining cats and dogs (or you just really don’t feel like battling mosquitoes). They’re the ultimate crowd-pleaser at bake sales, the star of potlucks that’ll have people begging for the recipe, and honestly? My secret weapon for turning a gloomy Tuesday into a celebration. The best part? You likely have most ingredients in your pantry right now. So preheat that oven, friend – we’re about to turn your kitchen into the coziest campsite ever.
That One Rainy Summer & the Birth of a Kitchen Legend
Picture this: Summer ‘08. My family’s annual camping trip got completely washed out by a thunderstorm that just wouldn’t quit. We were crammed into my Aunt Linda’s tiny lakeside cabin, twelve of us, with serious s’mores withdrawal. The campfire was a no-go, and morale was… damp. My cousin Jake, ever the drama king, actually draped himself over the sofa declaring, “All is lost without the sacred s’more!” Challenge accepted.
Raidng Aunt Linda’s pantry felt like a culinary treasure hunt. Graham crackers? Check. Chocolate bars? Obviously. But marshmallows? Nada. All she had was this dusty jar of marshmallow creme way in the back. “It’s now or never,” I thought. I smashed graham crackers into crumbs, swirled that fluffy creme like my life depended on it, and prayed to the baking gods. What emerged was pure magic – these dense, chewy bars with molten chocolate pockets and sticky-sweet marshmallow rivers. The cabin erupted. Jake declared it “better than any campfire s’more,” and Aunt Linda still calls them “The Rainstorm Rescue Bars.” Every time I bake them, I’m back in that cozy, chaotic cabin, proving that sometimes the best memories start with a little kitchen improvisation (and maybe a jar of Fluff!).
Your S’mores Treasure Map: Ingredients & Why They Matter
Gather your squad! These simple ingredients work serious magic together. Here’s the scoop on each:
- ½ cup (113g) unsalted butter, softened – Your flavor foundation! Unsalted lets you control the salt. Chef’s Tip: Softened butter creams beautifully. Can’t wait? Grate cold butter!
- ¾ cup (150g) packed light or dark brown sugar – Dark brown adds deeper molasses notes (my fave!), light keeps it bright. Pack it tight in your measuring cup!
- 1 large egg, room temperature – Binds the party! Room temp blends smoother. Quick Fix: Place your egg in warm water for 5 mins.
- 1 tsp pure vanilla extract – The secret whisper of warmth. Skip the imitation stuff!
- 1 cup (125g) all-purpose flour – Structure queen! Spoon & level it – don’t scoop!
- 1 cup (120g) graham cracker crumbs – The soul of s’mores! Pro Hack: Blitz whole crackers in a food processor or bash them in a zip-top bag. Need gluten-free? Use GF grahams!
- ½ tsp baking powder – Our lift agent for chewy-perfect bars.
- ¼ tsp salt – Balances the sweetness. Essential!
- 1 cup (180g) semi-sweet chocolate chips – Classic campfire vibes. Fun Swap: Try dark chocolate chunks or even peanut butter chips!
- 1 heaping cup marshmallow creme (“Fluff” or homemade) – The GOO factor! Warning: It’s sticky! Spray your spoon with oil. No Fluff? See FAQ below!
Let’s Build Some S’mores Magic: Step-by-Step
Ready? Aprons on! This is where the cozy chaos begins. Don’t worry – I’ll guide you through every sticky step.
- Preheat & Prep (Your First Win!): Crank that oven to 350°F (175°C). Line your 8×8 pan with parchment paper, leaving an overhang on two sides. Why? This creates a sling for easy lifting later! No parchment? Grease it well, but trust me, parchment is your BFF here. Chef’s Secret: Spritz the parchment lightly with oil to prevent any sticking disasters.
- Creamy Dreams (Butter & Sugar Tango): Grab a big bowl and beat that softened butter and brown sugar together for 2-3 minutes with a hand mixer (or stand mixer paddle). You want it light, fluffy, and pale – this incorporates air for a tender crumb! Watch for the change: It’ll go from gritty to glorious. Scrape the bowl sides halfway.
- Egg-cellent Addition (Binding the Joy): Beat in the egg and vanilla. Mix just until combined – maybe 30 seconds. Overbeating eggs can make things tough. Look for: A smooth, glossy mixture. Yum!
- Dry Team Unite (The Gentle Fold): In another bowl, whisk together the flour, graham crumbs, baking powder, and salt. Key Move: Add this dry mix to the wet ingredients all at once. Mix on LOW speed (or by hand) just until no dry streaks remain. Stop before it’s totally uniform! A few streaks are fine – overmixing = tough bars. Fold in the chocolate chips with a spatula.
- Layering the Love (The S’mores Sandwich Effect): This is the fun part! Grab about ⅔ of the dough. Press it firmly and evenly into the bottom of your prepped pan. Tip: Use slightly damp fingers or the bottom of a glass to prevent sticking. Now, gently spread the marshmallow creme over this layer. Fluff Fight Solution: Spray your spatula or offset knife with cooking spray! Dollop it in blobs first, then gently connect them. Sprinkle the remaining chocolate chips evenly over the Fluff. Finally, take pinches of the reserved dough and dot them randomly over the top. Don’t cover completely – we want that marshmallow to peek through!
- Bake to Golden Bliss (Patience, Grasshopper!): Slide the pan into the oven’s center rack. Bake for 22-25 minutes. What to Watch For: The edges will be deeply golden brown, the top dough chunks will look set, and the marshmallow might be bubbling *slightly* around the edges. CRUCIAL: The center will look soft – that’s perfect! It sets as it cools. Overbaking = dry bars. Rotate the pan halfway for even baking.
- The Cool Down (The Hardest Part!): Place the pan on a wire rack. Resist the urge to cut in! Let it cool COMPLETELY – at least 1-2 hours. This allows the molten layers to set so you get clean slices, not a gooey landslide. Speed Trick? Pop it in the fridge for 30 mins after 30 mins of room temp cooling.
- Slice & Savor (Victory Lap!): Use the parchment overhang to lift the entire bar slab out of the pan. Place it on a cutting board. Use a sharp knife, wiping it clean between cuts for neat squares. Enjoy at room temp or zap a piece for 10 seconds for warm, melty heaven!
Serving Up Smiles: How to Present These Beauties
These bars are stars on their own! For maximum cozy vibes, stack them slightly haphazardly on a rustic wooden board or a cheerful vintage plate. A light dusting of graham cracker crumbs or flaky sea salt adds a bakery-worthy touch. Pair them with a cold glass of milk for classic comfort, a steaming mug of coffee for grown-up bliss, or hot chocolate for ultimate s’mores immersion. They’re perfect for picnics (pack in parchment squares!), lunchbox treats (if they last that long), or as the grand finale to a backyard BBQ. Just watch the smiles spread!
Shake Up Your S’mores: 5 Fun Twists!
Got the classic down? Time to play! Here are my favorite riffs:
- Salty-Sweet Surprise: Sprinkle ½ tsp flaky sea salt over the marshmallow layer before adding the top dough.
- Peanut Butter Passion: Swirl ¼ cup peanut butter into the marshmallow creme layer. Use peanut butter chips instead of chocolate chips!
- Fruity Fireworks: Add ½ cup dried cranberries or chopped tart cherries to the dough with the chocolate chips.
- Minty Fresh Campfire: Swap semi-sweet chips for dark chocolate AND add ½ tsp peppermint extract to the dough. Hello, Thin Mint vibes!
- Gluten-Free Getaway: Use certified GF graham crackers for crumbs and a 1-to-1 GF flour blend. Works like a charm!
Olivia’s Extra Scoop: Lessons from the Gooey Trenches
Oh, the stories these bars could tell! Remember my first test batch? I used mini marshmallows instead of creme, thinking it would be “easier.” Big mistake. They melted into a single, sticky, volcanic layer that welded itself to the pan. Lesson learned: Fluff is your friend! Over the years, I’ve tweaked this gem – adding the extra sprinkle of chocolate chips over the Fluff layer was a game-changer for intense chocolate pockets. Storage tip: Keep them airtight at room temp for 3 days, but good luck with that! They freeze beautifully too (see FAQ). The dough also chills well – you can prep it, layer it in the pan, cover, and refrigerate overnight before baking. Perfect for stress-free entertaining! These bars embody my kitchen philosophy: Start with love, embrace the mess (hello, sticky fingers!), and always, always share the results.
Your S’mores Bar SOS: Fixing Common Hiccups
Let’s tackle those burning questions!
- Q: Can I use real marshmallows instead of marshmallow creme? PLEASE?
A: Oh, I feel your pain! You *can*, but it’s tricky. Mini marshmallows (about 1.5 cups) work best. Sprinkle them evenly over the bottom dough layer *before* adding the chocolate chips and top dough. Bake as directed, but expect them to melt completely into a thinner, chewier layer rather than distinct swirls. Cover loosely with foil in the last 5-10 minutes if they start browning too much!
- Q: Help! My bars are a gooey mess when I try to cut them. What did I do wrong?
A: The number one culprit is not cooling completely. That molten marshmallow and chocolate need time to set! Be patient, my friend. Let them cool fully in the pan on a rack. Chilling them briefly helps immensely. Also, ensure you pressed the bottom layer firmly – a loose base makes cutting harder. Use a sharp knife dipped in hot water and wiped clean between cuts.
- Q: Can I freeze these bars for a s’mores emergency stash?
A: Absolutely! They freeze like champions. Cool completely, cut into bars, then flash-freeze them in a single layer on a parchment-lined sheet for 1 hour. Once solid, transfer to an airtight container or freezer bag, separating layers with parchment. Freeze for up to 3 months. Thaw at room temp or warm gently in the microwave (10-15 secs).
- Q: The edges got really dark, but the center seems underdone. How do I prevent that?
A: Oven hotspots strike! First, ensure your rack is in the center. Using a light-colored metal pan (not glass or dark metal) helps prevent over-browning. You can also loosely tent the pan with foil during the last 5-10 minutes of baking. If it happens, don’t despair! Trim the very dark edges (chef’s snack!) – the rest should be delicious.

S’mores Cookie Bars
- Total Time: 45 mins
Description
No firepit? No problem. These gooey, fudgy S’mores Cookie Bars pack all the nostalgia of campfire nights into a bake-anytime square. Imagine golden graham cracker cookie dough sandwiching rivers of marshmallow creme and pockets of melty chocolate. They’re sweet, sticky, chewy, and—yes—completely irresistible. Best of all? You likely have everything on hand to make these today.
Ingredients
-
½ cup (113g) unsalted butter, softened
-
¾ cup (150g) light or dark brown sugar, packed
-
1 large egg (room temp)
-
1 tsp vanilla extract
-
1 cup (125g) all-purpose flour
-
1 cup (120g) graham cracker crumbs
-
½ tsp baking powder
-
¼ tsp salt
-
1 cup (180g) semi-sweet chocolate chips
-
1 heaping cup marshmallow creme (“Fluff”)
Instructions
-
Preheat Oven to 350°F (175°C). Line an 8×8 pan with parchment, leaving overhang.
-
Cream Butter & Sugar until fluffy (2-3 mins). Beat in egg and vanilla.
-
Mix Dry Ingredients (flour, graham crumbs, baking powder, salt) and add to wet. Stir until mostly combined. Fold in chocolate chips.
-
Layer the Dough
-
Press ⅔ of dough into the pan.
-
Spread marshmallow creme gently over it.
-
Sprinkle a few extra chocolate chips.
-
Dot remaining dough on top in pieces (don’t cover fully).
-
-
Bake 22–25 mins until edges are golden and marshmallow is just bubbling. Center will look soft—let it be!
-
Cool Completely in pan before slicing (at least 1–2 hours). For clean cuts, chill 30 mins then slice with a hot, wiped knife.
Notes
-
Sprinkle sea salt over the Fluff for a sweet-savory pop
-
Swirl peanut butter or Nutella into the marshmallow layer
-
Use GF grahams and flour for a gluten-free twist
-
Freeze bars up to 3 months for sweet emergency moments
- Prep Time: 20 mins
- Cook Time: 25 mins
Nutrition
- Calories: 250 cal Per Serving
- Sugar: 18g
- Fat: 12g
- Carbohydrates: 30g
- Fiber: 1g
Nutritional Info (Approximate Per Bar)
🔥 Calories: ~250 | 💪 Carbs: 30g | 🥑 Fat: 12g | 🍬 Sugar: 18g | 🌾 Fiber: 1g
Remember: This is a treat meant for savoring and sharing joy! Enjoy every gooey bite.
Final Thought: More Than Just a Dessert
These S’mores Cookie Bars are a reminder that joy doesn’t need to be complicated. Whether you stick to the classic or globe-trot with flavors, they’re a celebration of simplicity, nostalgia, and the universal love of chocolate.
They’ve survived kitchen disasters, toddler raids, and my questionable oven—yet they always deliver smiles. So here’s to imperfectly perfect desserts, toasty fingers, and the magic of a shared sweet moment.
Now, who’s ready to preheat the oven
No-Bake Cheesecake Jars
Why These Cheesecake Jars Will Steal Your Heart (And Refrigerator Space!)
Hey there, kitchen friend! Olivia here, waving from my flour-dusted countertop. Can we talk about that magical moment when you crave something decadent but don’t want to turn on the oven? When you need a little joy-in-a-jar that makes everyone at book club or potluck go “OOH!”? That’s exactly why I’m head-over-apron for these no-bake cheesecake jars.
Picture this: buttery graham cracker crumbs hugging a cloud of tangy-sweet cheesecake filling, all layered in cute jars you can stash in the fridge. No water baths, no cracked tops, no “did I overbake it?” panic. Just pure, spoonable happiness ready in 20 minutes flat (plus chilling time, but trust me – they’re worth the wait!).
Whether you’re dodging summer heat waves, hosting a last-minute girls’ night, or surprising your neighbor with a “just because” treat, these portable cuties solve dessert dilemmas. They’re like edible sunshine – customizable with seasonal fruits or chocolate shavings, and portion-controlled (unless you eat three… no judgment here!). Grab your favorite jars and let’s make magic happen!
My First Kitchen Disaster Turned Dessert Victory
Confession time: my love affair with no-bake cheesecake started with a catastrophe! Picture 22-year-old me, determined to impress my now-husband with a fancy layered cheesecake. I slaved for hours, only to pull out a sunken, cracked mess from the oven. Heartbroken, I stared at the kitchen wreckage until inspiration struck – I scooped the salvageable filling into mason jars, crushed some cookies on top, and called it “deconstructed cheesecake.”
The result? His eyes lit up like I’d invented dessert! That happy accident taught me two things: 1) Imperfections often taste better than perfection, and 2) Jars make everything cuter and more fun. Now, whenever life gets messy (literally or metaphorically), I whip up these jars. They’ve seen me through book club surprises, postpartum meal trains, and countless “I need chocolate NOW” emergencies. Every spoonful tastes like resilience and a little kitchen rebellion!
Your Cheesecake Toolkit: Simple Stars & Clever Swaps
Gather these rockstars – each plays a special role in our no-bake symphony:
- Graham Cracker Crumbs (1 cup): Our buttery foundation! Pro Tip: Smash crackers in a bag with a rolling pin for therapy + crumbs. Swap with digestive biscuits, gluten-free grahams, or even crushed pretzels for salty-sweet vibes.
- Unsalted Butter (2 tbsp, melted): The glue! Melt it gently to avoid burning. Vegan? Coconut oil works beautifully.
- Full-Fat Cream Cheese (8 oz, softened): NON-NEGOTIABLE for silkiness. Leave it on the counter for 1-2 hours. Low-fat versions make filling weepy – trust me, it’s worth the splurge!
- Cold Heavy Cream (1 cup): Our cloud-maker! Must be icy cold to whip properly. Can’t find it? Full-fat coconut cream (chilled overnight) is a lush dairy-free alternative.
- Granulated Sugar (⅓ cup): Just enough sweetness. For deeper flavor, try brown sugar or maple syrup (reduce cream by 1 tbsp if using liquid sweeteners).
- Sour Cream (2 tbsp, room temp): Secret tang-bomb! Greek yogurt or mascarpone make fabulous stand-ins.
- Lemon Juice (1 tsp) & Pure Vanilla Extract (½ tsp): The flavor enhancers! Lemon brightens, vanilla adds warmth. Use fresh lemon juice – it matters!
Let’s Build Some Joy: Foolproof Layering Guide
Ready for the easiest “baking” session ever? Follow these steps for jar perfection:
- Make Your Crust: Mix graham crumbs with melted butter until it resembles wet sand. Spoon 2-3 tbsp into each jar (I use 8oz mason jars). Press FIRMLY with a shot glass or spoon – this prevents soggy bottoms! Chef Hack: For extra crunch, toast crumbs in a dry pan for 2 minutes before buttering.
- Whip That Cream: Beat heavy cream in a chilled bowl until stiff peaks form. Critical Tip: Over-beating makes butter – stop when peaks stand straight up when you lift the whisk. Set aside.
- Create the Base: In another bowl, beat softened cream cheese, sugar, sour cream, lemon juice, and vanilla until SMOOTH (no lumps!). Scrape the bowl sides! Watch Out: Cold cream cheese = lump city. If yours is still chilly, microwave in 5-second bursts.
- Marry the Mixtures: Add 1/3 of whipped cream to cream cheese mix. Gently fold with a spatula (don’t whisk!) to lighten. Fold in remaining cream in two batches until just combined. Secret: Under-mixing is better than over-mixing – we want airy fluff!
- Jar Assembly: Spoon or pipe filling over crusts. Tap jars lightly on counter to settle. Smooth tops with a damp spoon for that “pro” look.
- The Waiting Game: Chill for at least 2 hours (4 is ideal). Why? This sets the texture and lets flavors mingle. Cover loosely with plastic wrap if stacking.
- Grand Finale: Add toppings RIGHT before serving so they stay fresh. Berries? Chocolate? Caramel drizzle? Go wild!
The Science Behind No-Bake Cheesecake: Why It Works So Well
Let’s geek out for a minute—what makes no-bake cheesecake so gloriously foolproof compared to its baked cousin? It all comes down to emulsions, stabilizers, and temperature control.
The Magic of Cream Cheese + Heavy Cream
-
Cream Cheese provides structure and tang. At room temperature, its fat content (about 33%) blends smoothly, avoiding lumps.
-
Heavy Cream (36-40% fat) whips into stiff peaks because its fat globules trap air. When folded into cream cheese, it creates a mousse-like texture without eggs or baking.
-
Sour Cream or Yogurt adds acidity, which balances sweetness and subtly thickens the filling.
Why No-Bake Doesn’t Need Gelatin (Usually!)
Many recipes rely on gelatin, but ours doesn’t—because cold fat is the star. Chilling sets the filling by:
-
Solidifying the butter in the crust.
-
Firming up the whipped cream’s air bubbles.
-
Allowing the cream cheese to re-thicken after mixing.
Pro Tip: If your kitchen is hot or you’re adding juicy fruit, a sprinkle of powdered sugar (which contains cornstarch) helps stabilize the filling.
The Graham Cracker Secret
Graham crackers contain honey and cinnamon, which caramelize slightly when mixed with butter. Toasting them beforehand deepens their flavor—just like toasting nuts!
The Psychology of Dessert Jars: Why We Love Them
There’s a reason these cheesecake jars feel irresistible—it’s not just taste, it’s psychology.
1. Portion Control (Kind Of)
Jars trick us into feeling satisfied with a “small” treat, even if it’s decadent. The vertical layers make each bite balanced—no “all crust, no filling” regrets!
2. Visual Appeal
Transparent jars showcase the layers, triggering anticipation. Studies show we eat first with our eyes—seeing that creamy filling and crumbly crust makes it taste even better.
3. Nostalgia + Novelty
Mason jars evoke farmhouse charm, picnics, and homemade goodness. But they also feel modern—perfect for Instagram or a trendy café.
4. Customization = Ownership
Letting guests top their own jars (sprinkles! fruit! nuts!) makes them feel involved. It’s the “IKEA Effect”—we value things more when we help create them!
Global No-Bake Cheesecake Twists: A World Tour
Why stop at classic New York style? Let’s travel through desserts worldwide:
1. Japanese Cotton Cheesecake Jar
-
Filling: Fold whipped cream into mascarpone + a touch of matcha or yuzu juice.
-
Crust: Crushed shiroi koibito cookies or mochi bits.
-
Topping: Adzuki bean paste + kinako (roasted soybean flour).
2. Italian Tiramisu Jar
-
Filling: Layers of mascarpone filling + espresso-dipped ladyfingers.
-
Dust with cocoa powder and top with chocolate shavings.
3. Indian Mango Kulfi Cheesecake
-
Filling: Fold mango purée + cardamom into whipped cream cheese.
-
Crust: Crushed pistachios + butter.
-
Freeze briefly for a kulfi-like texture.
4. Brazilian Brigadeiro Cheesecake
-
Filling: Mix melted chocolate brigadeiro (condensed milk + cocoa) into the filling.
-
Crust: Chocolate cookie crumbs + butter.
-
Top with more brigadeiro and sprinkles!
5. Middle Eastern Rosewater Cheesecake
-
Filling: Infuse cream with rosewater + a pinch of saffron.
-
Crust: Crushed baklava or dates.
-
Top with crushed pistachios and edible rose petals.
Each version keeps the no-bake ease but takes your taste buds on vacation!
Making It Instagram-Worthy (Zero Effort Required!)
Presentation is half the fun! For picnics, tie spoons to jars with baker’s twine. Hosting? Arrange jars on a cake stand with edible flowers scattered between them. Feeling fancy? Layer berries under the filling before chilling for a surprise “jam stripe.” Kids adore mini versions in 4oz jars with rainbow sprinkles. Pro move: Set out topping bars at parties – crushed Oreos, salted caramel, toasted nuts – and let guests customize!
Shake Things Up: 5 Delicious Twists
This recipe is your canvas! Try these riffs:
- Lemon Berry Bliss: Add 1 tbsp lemon zest to filling + top with macerated strawberries
- S’mores Party: Use crushed chocolate grahams + swirl melted chocolate into filling. Top with marshmallow fluff torched lightly.
- Pumpkin Spice: Fold ½ cup pumpkin puree + 1 tsp pumpkin spice into filling. Crust? Try gingersnaps!
- Vegan Dream: Use coconut cream, vegan cream cheese, and agave. Crust with coconut oil + gluten-free cookies.
- Espresso Buzz: Dissolve 1 tbsp instant espresso in lemon juice before adding. Top with chocolate-covered espresso beans.
Olivia’s Real-Talk Kitchen Chronicles
Over the years, this recipe has seen some… experiments. Remember that time I added pineapple juice hoping for piña colada vibes? The filling refused to set – lesson learned: acidic fruits can curdle dairy! Now I keep add-ins to toppings or swirl in compotes after filling sets. Another evolution? I used to stress over exact layers. Now I embrace “rustic” swirls – they taste the same! Fun fact: These jars freeze beautifully for up to a month (sans fresh toppings). Just thaw overnight in the fridge. They’re my secret weapon for unexpected guests!
Your Cheesecake Jar SOS Guide
Q: My filling is runny! What went wrong?
A: Three common culprits: 1) Cream cheese wasn’t room temp (causes lumps that won’t incorporate) 2) Heavy cream was warm or under-whipped 3) Over-mixing deflated the whipped cream. Fix: Chill longer (up to 6 hours). If still loose, it’ll taste great as a parfait – layer with granola!
Q: Can I make these ahead?
A: Absolutely! Undecorated jars last 3 days refrigerated. Add toppings within 1 hour of serving. Freeze base layers (without fruit toppings) for 1 month.
Q: Help! My crust is soggy.
A: Pack that crust TIGHTLY and ensure butter is evenly distributed. Too much butter? It seeps. Too little? It crumbles. Aim for damp sand texture. Chilling crusts for 15 minutes before adding filling also helps.
Q: Any low-sugar options?
A: Yes! Swap sugar with powdered erythritol (same amount). Reduce to ¼ cup if using monk fruit. Avoid liquid stevia – it alters texture.

No-Bake Cheesecake Jars
- Total Time: ~2½ hrs
Description
Craving creamy, dreamy dessert without turning on the oven? These no-bake cheesecake jars are rich, tangy, and ridiculously easy—perfect for sweltering days, last-minute gatherings, or spontaneous sweet tooth strikes. Built in layers, bursting with flavor, and made for make-ahead magic, they’ll steal your heart and your fridge space.
Ingredients
Crust:
-
1 cup graham cracker crumbs
-
2 tbsp melted unsalted butter
Filling:
-
8 oz full-fat cream cheese, softened
-
1 cup cold heavy cream
-
⅓ cup granulated sugar
-
2 tbsp sour cream (or Greek yogurt)
-
1 tsp lemon juice
-
½ tsp vanilla extract
Optional toppings:
Fresh berries, chocolate shavings, caramel drizzle, crushed cookies, sprinkles
Instructions
-
Make the Crust
Mix crumbs and melted butter until it resembles damp sand. Press 2–3 tbsp into each jar base. Chill 15 mins for crunch insurance. -
Whip It Good
In a cold bowl, beat heavy cream to stiff peaks. In another bowl, beat cream cheese, sugar, sour cream, lemon juice, and vanilla until smooth. Fold in whipped cream gently until just combined. -
Assemble the Jars
Spoon or pipe cheesecake mixture over crusts. Tap jars lightly to settle. Smooth tops. Chill at least 2 hours (4 is ideal!). -
Top & Serve
Add toppings just before serving. Store jars covered in fridge for up to 3 days.
Notes
-
Use coconut cream + vegan cream cheese for dairy-free delight
-
Try crushed gingersnaps or Oreos for a fun crust twist
-
Add 1 tbsp lemon zest for a citrusy zing
-
Freeze jars (no fruit) for up to 1 month—thaw overnight
- Prep Time: 20 mins
Nutrition
- Calories: 320 cal Per Serving
- Sugar: 14g
- Fat: 24g
- Carbohydrates: 22g
- Protein: 4g
Nutritional Notes (Because Balance is Delicious Too!)
Per serving (1 jar): Calories: ~320 | Carbs: 22g | Fat: 24g | Protein: 4g | Sugar: 14g
Remember: These are estimates. Using reduced-fat ingredients will lower calories but may affect texture. Top with fresh fruit to add nutrients!
Final Thoughts: The Joy of Jar Desserts
These cheesecake jars embody three truths:
-
Simplicity Wins – No fancy tools, no stress.
-
Imperfection is Delicious – Lopsided layers? More charm!
-
Food Should Be Fun – Life’s too short for boring desserts.
So here’s to dessert in jars—may your fridge always have a stash, your whipped cream stay lofty, and your spoon always find joy at the bottom. Now go forth and jar your happiness!




