
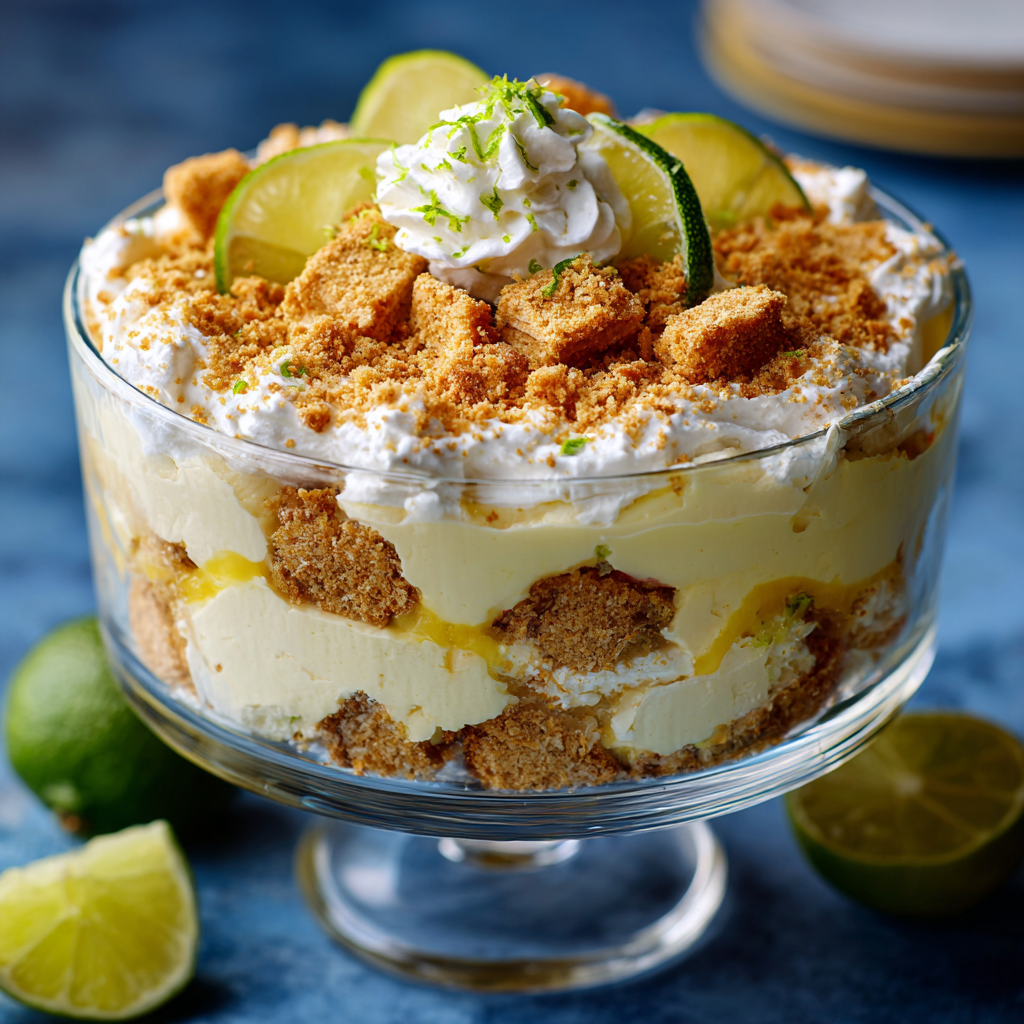
Key Lime Trifle
Your New Go-To Dessert That’s Sunshine in a Bowl
Hey there, fellow flavor-chaser! Olivia here, wiping lime juice off my apron while I type. If your heart does a little happy dance when tangy citrus meets creamy sweetness, you’re about to fall head-over-heels for this Key Lime Trifle. Picture this: layers of buttery graham crackers, zesty lime filling that’ll make your taste buds sing, and clouds of whipped cream—all stacked up in a stunning glass bowl. No baking required? Oh yes! This is the dessert I whip up when I want jaws to drop at potlucks or when my crew begs for “that lime magic” during backyard BBQs. It’s the lovechild of key lime pie and a breezy no-fuss parfait, perfect for when oven real estate is scarce but wow-factor is non-negotiable. Whether you’re a newbie nervously eyeing your mixer or a seasoned spoon-licker, this recipe’s your ticket to effortless glory. Ready to make some citrusy memories? Let’s dive in!
How a Florida Rainstorm Birthed My Trifle Obsession
This recipe? It’s got roots in a soggy Key West vacation where my “perfect” beach day got hijacked by a thunderstorm. Trapped in our tiny rental kitchen with sad, squished limes from a roadside stand, I attempted pie… only to realize I’d forgotten the pie tin! Desperate to salvage the day, I layered the filling with broken graham crackers and dolloped whipped cream into wine glasses. My kids called it “sunshine pudding” as we ate it watching rain pelt the palm trees. That messy improvisation became our family’s most requested treat—now I make it for bridal showers, graduation parties, or whenever life needs a literal pick-me-up. Every bite still tastes like that first sweet rebellion against bad weather.
Gathering Your Sunshine Squad: Ingredients Breakdown
- Graham crackers (14.4-oz box): The crunchy backbone! Use honey or cinnamon ones. Chef’s hack: Leftover vanilla wafers or shortbread work too!
- Unsalted butter (5 tbsp, melted): Helps toast those crumbs to golden perfection. Salted butter? Just skip the added salt.
- Sugar (5 tbsp, divided): We’re splitting this—3 tbsp for crackers, 2 tbsp for cream. Raw sugar adds fun crunch!
- Kosher salt (½ tsp): Balances sweetness. Sub alert: Table salt? Use ¼ tsp.
- Sweetened condensed milk (2 cans): The creamy dream! Don’t swap for evaporated milk—it’s thinner and less sweet.
- Plain Greek yogurt (1½ cups): My tangy twist! Sour cream works, but yogurt keeps it lighter.
- Lime zest (1 tbsp): Where the magic lives! Use a microplane—avoid bitter white pith.
- Key lime juice (½ cup): Bottled is fine (Nellie’s is my fave), but fresh? Even brighter! Regular limes work in a pinch.
- Heavy whipping cream (2 cups): Chill the bowl and beaters for billowy peaks!
- Garnishes: Lime slices + extra cracker crumbs. Edible flowers? Yes, please!
Why these work: The trifle’s magic is in contrasts—crispy/silky, tart/sweet. Greek yogurt cuts condensed milk’s richness, while fresh zest makes bottled juice sing!
Let’s Build Some Layers: Your Foolproof Guide
Step 1: Preheat oven to 350°F. Line that baking sheet with parchment—trust me, cleanup’s a breeze! Chef’s tip: No parchment? Foil sprayed with oil works.
Step 2: Break graham crackers into 1½-inch chunks (they’ll crisp better than crumbs!). Toss with melted butter, 3 tbsp sugar, and salt in a big bowl. Spread evenly—no overlapping! Why? We want toasty edges, not steamed clumps.
Step 3: Bake 10-15 mins until golden. They’ll crisp up as they cool! Reserve ½ cup for garnish. Watchdog warning: Set a timer! They burn FAST after 12 mins.
Step 4: Whisk condensed milk, yogurt, lime zest, and juice in a bowl. Pro insight: Whisk vigorously for 1 minute—this prevents graininess. Taste! Want more zing? Add another tbsp juice.
Step 5: Beat cream + remaining 2 tbsp sugar until stiff peaks form. Hack attack: Freeze your bowl 10 mins first! Pipe through a round tip or spoon dollops later.
Step 6: Assembly time! In a trifle dish or clear bowl:
- Layer 1: ⅓ of crackers (press lightly)
- Layer 2: ½ lime filling (swirl it to edges)
- Layer 3: ⅓ whipped cream
- Repeat! Top with final cream layer.
Presentation pro-tip: Wipe bowl sides with a damp cloth between layers for Instagram-worthy stripes!
Step 7: Garnish with lime wheels and reserved crumbs. Critical step: Refrigerate 2+ hours—this lets crackers soften into cakey perfection!
Showtime: Serving Your Masterpiece
Slide this beauty onto a cake stand with lime slices scattered around the base—pure drama! For parties, I layer individual portions in mason jars: portable sunshine! Pair with cold prosecco or iced hibiscus tea to balance the richness. Pro tip: Use a large spoon to dig DEEP through all layers when serving—you want that perfect bite of creamy, crunchy, tangy bliss in every scoop!
Mix It Up: Delicious Twists
- Berry Burst: Add fresh raspberries or blackberries between layers.
- Tropical Escape: Swap key lime for passionfruit juice + toasted coconut flakes.
- Cheesecake Vibes: Fold 8 oz softened cream cheese into the lime filling.
- Boozy Kick: Brush crackers with 2 tbsp limoncello before layering.
- Vegan Hack: Use coconut condensed milk, cashew yogurt, and coconut cream!
Olivia’s Behind-the-Scenes Scoop
This trifle evolved from my “pie fail” into a fridge magnet for hungry teenagers—my son once ate leftovers for breakfast! Over the years, I’ve learned: 1) Bottled key lime juice is totally respectable (fresh limes? 16+ for ½ cup—ouch!). 2) Letting it sit overnight? Even better—the flavors mingle like old friends. 3) If your cream deflates (we’ve all been there!), fake it with a dollop of store-bought whipped topping. No shame! Funny story: I once brought this to a bake sale in a fishbowl… and someone tried to pay for the bowl!
Your Questions, My Answers!
Q: Can I make this ahead?
A: Absolutely! Assemble 1 day prior—the crackers soften into a cake-like layer. Hold garnishes until serving.
Q: My filling seems runny. Help!
A: Did you use yogurt or sour cream? Greek yogurt thickens best. If it’s loose, pop the bowl (sans cream) in the fridge 30 mins before layering.
Q: Can I freeze this trifle?
A: I don’t recommend it—whipped cream weeps and crackers turn soggy. Store covered in the fridge up to 3 days.
Q: No trifle dish? What works?
A: A clear salad bowl, 9×13 baking dish, or even a pitcher! Visibility is key for those gorgeous layers.

Key Lime Trifle
- Total Time: 2 hrs 30 mins
Description
When life hands you limes, layer them into this creamy, tangy, no-bake Key Lime Trifle! With buttery graham chunks, a zesty lime-yogurt filling, and fluffy whipped cream, it’s like key lime pie and a parfait had a beachy love child. Perfect for potlucks, showers, or rainy days that need a burst of citrus joy—this dessert delivers big flavor with zero oven stress.
Ingredients
-
14.4 oz box graham crackers, broken into chunks
-
5 tbsp melted unsalted butter
-
5 tbsp sugar (divided)
-
½ tsp kosher salt
-
2 cans sweetened condensed milk
-
1½ cups plain Greek yogurt
-
1 tbsp lime zest
-
½ cup key lime juice (bottled or fresh)
-
2 cups heavy whipping cream
-
Garnish: lime slices, reserved crumbs
Optional Twists:
-
Add berries, toasted coconut, or a cheesecake swirl
-
Sub shortbread or vanilla wafers for crackers
-
Use limoncello for a boozy upgrade
Instructions
-
Toast crackers: Toss with butter, 3 tbsp sugar, and salt. Bake at 350°F for 10–15 mins. Cool and reserve ½ cup for topping.
-
Make lime filling: Whisk condensed milk, yogurt, zest, and juice until smooth.
-
Whip cream: Beat cold cream + 2 tbsp sugar to stiff peaks.
-
Assemble: In a trifle dish, layer ⅓ crackers, ½ lime filling, ⅓ whipped cream. Repeat. Top with whipped cream, lime slices, and crumbs.
-
Chill 2+ hours before serving for cake-like texture.
Notes
-
No trifle bowl? Use a glass salad bowl, pitcher, or mason jars.
-
Chill metal bowl for fluffier cream.
-
For clean layers, wipe the bowl’s edge with a damp cloth as you go.
- Prep Time: 25 mins
Nutrition
- Calories: 420 cal Per Serving
- Sugar: 42g
- Fat: 22g
- Carbohydrates: 52g
- Protein: 8g
Nutritional Nibbles (Per Serving)
Calories: 420 • Fat: 22g • Carbs: 52g • Protein: 8g • Sugar: 42g
Note: For lighter versions, use reduced-fat condensed milk + light Cool Whip instead of whipped cream.
Final Thoughts: More Than Just a Dessert
This Key Lime Trifle isn’t just a recipe—it’s a mindset. It’s about embracing imperfections (like my pie-tin-less vacation disaster) and finding joy in improvisation. Every time I make it, I’m reminded that the best creations often come from happy accidents and that food’s real magic lies in connection. Whether you’re serving it at a fancy dinner or eating it straight from the bowl after a tough day, this trifle is a edible hug: bright, comforting, and unapologetically delightful.
So here’s to desserts that defy rules, to limes that outshine storms, and to every cook who’s ever turned a kitchen “oops” into an “ahhh.” Now go forth and layer with abandon!
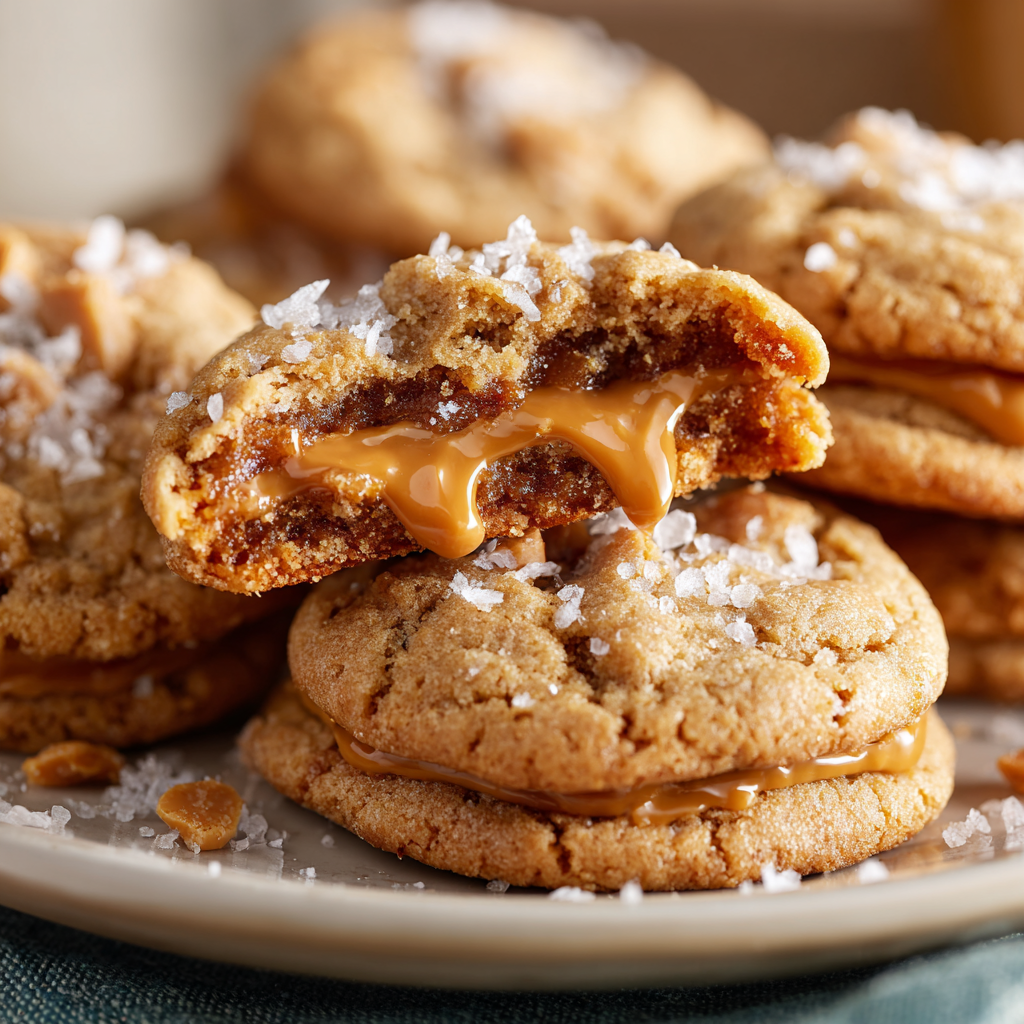
Peanut Butter Stuffed Cookies
Welcome to Cookie Bliss: Peanut Butter Stuffed Heaven!
Hey there, fellow flavor adventurer! Olivia here, apron dusted with flour and heart full of excitement. Can you smell that? It’s the warm, nutty perfume of buttery dough and roasted peanuts dancing in the oven – the kind of scent that makes neighbors materialize at your door with hopeful smiles. Today, we’re diving into my Peanut Butter Stuffed Cookies, a recipe that turns humble ingredients into pure, oozy magic. Imagine this: a tender, sugar-crusted cookie hugging a molten core of sweet peanut butter that flows like golden lava with every bite. These aren’t just cookies; they’re edible hugs, scaled up to make 34 generous portions because joy deserves to be shared (though I won’t judge if you stash a few in your secret snack drawer!). Whether you’re baking for a crowd, meal-prepping sweet treats, or just chasing that nostalgic peanut butter high, this recipe is your ticket to hero status. No fancy skills needed – just a bowl, a spoon, and that gorgeous enthusiasm of yours. Ready to make your kitchen smell like a childhood dream? Let’s roll up our sleeves!
The Cookie That Started With a Happy Accident
Picture this: It’s a rainy Sunday afternoon years ago, and my then-toddler nephew, Leo, is “helping” me bake. We’re making classic peanut butter cookies when he sneaks a spoonful of filling straight from the bowl and plops it onto a waiting dough ball. Before I can intervene, it’s wrapped and baked. The result? A glorious, messy, peanut butter eruption that had us both laughing and licking our fingers. That happy little kitchen oops sparked an obsession! I spent weeks tweaking ratios, testing freezing times, and bribing friends with prototypes (a tough job, but someone had to do it). Now, these cookies are my signature move – the ones I bring to potlucks when I want to hear that collective “Ooh!” and the recipe my sister begs for when Leo’s birthday rolls around. They taste like playfulness, comfort, and the sweet chaos of creating something deliciously unexpected. Every time I pull a batch from the oven, I still see Leo’s peanut-butter-smeared grin.
Gather Your Delicious Arsenal
Here’s your treasure map to cookie nirvana! Pro tip: Measure everything before starting (mise en place for the win!). This makes 34 generous cookies – perfect for gifting or freezing.
Peanut Butter Filling
- 2 ⅛ cups creamy peanut butter: Use conventional not natural/natural style. The stabilizers in regular PB keep the filling firm when baked. Natural PB often separates and leaks. (Insider swap: If you must use natural, stir it well and add 2 extra tbsp powdered sugar).
- 1 ⅛ cups powdered sugar: This sweetens and thickens the filling into that dreamy, scoopable texture. Sift it if it’s lumpy!
Peanut Butter Cookies
- 1 ⅓ cups granulated sugar: For sweetness and that lovely crisp edge.
- 1 ⅓ cups packed light brown sugar: Adds moisture, chewiness, and caramel notes. Pack it firmly into your measuring cup!
- 1 ⅓ cups creamy peanut butter: Again, conventional is best for consistent dough texture.
- ⅔ cup shortening: Gives structure and helps cookies hold their shape around the molten center. (Chef’s Swap: Use all butter if preferred, but expect slightly flatter cookies).
- ⅔ cup unsalted butter, softened: Brings rich flavor. Unsalted lets you control the salt level. Soften at room temp for 1 hour – it should dent easily when pressed.
- 2 ⅔ large eggs: Here’s the fun part! Use 2 whole large eggs + crack a 3rd into a bowl, beat it lightly, and use approx ⅔ (about 2 tbsp). The extra moisture binds our big batch dough perfectly. Save the leftover egg for scrambling!
- 3 ⅙ cups all-purpose flour: The foundation. Spoon & level into your cup – don’t scoop straight from the bag or you’ll pack too much!
- 2 tsp baking soda: Our leavening powerhouse for lift.
- 1 ⅓ tsp baking powder: Adds extra rise for a tender crumb.
- ⅔ tsp kosher salt: Balances the sweetness. If using table salt, reduce to ½ tsp.
- 1 ⅓ cups granulated sugar (for rolling): Creates that irresistible sparkly, crackly crust.
Let’s Bake Some Magic: Step-by-Step
Put on your favorite playlist and let’s get blissfully messy! This process is therapeutic, I promise.
- Freeze the Gooey Heart: Make the filling first! In a medium bowl, blend the 2 ⅛ cups peanut butter and 1 ⅛ cups powdered sugar with a sturdy spoon or hand mixer on low until smooth and thick like Play-Doh. Scoop out level teaspoon-sized balls (I use my #60 scoop – about 1 tsp). You should get exactly 34. Place them on a parchment-lined plate or tray and freeze for at least 30 minutes (crucial step! This prevents meltdown during baking). Chef’s Hack: Roll all filling balls quickly, then pop them in the freezer while you make the dough. Multi-tasking magic!
- Creamy Dreamy Dough Base: In a large bowl, beat the 1 ⅓ cups granulated sugar, 1 ⅓ cups brown sugar, 1 ⅓ cups peanut butter, shortening, and softened butter with an electric mixer on medium-high for 3-4 minutes. It should look super light, fluffy, and pale. Scrape the bowl down! Now, beat in the eggs (remember: 2 whole + approx ⅔ of the third beaten egg) one at a time, mixing well after each. Pro Tip: Room temp eggs blend smoother! Listen for the change in sound – it goes from sloshy to creamy.
- Bring in the Dry Crew: In another bowl, whisk together the flour, baking soda, baking powder, and salt. Gradually add this to the wet ingredients, mixing on low speed just until combined after each addition. Stop mixing as soon as no dry streaks remain – overmixing = tough cookies! The dough will be soft but manageable. Chef’s Insight: Whisking dry ingredients first ensures even leavening distribution – no soda pockets!
- The Big Wrap & Roll: Preheat your oven to 350°F (175°C) and line baking sheets with parchment paper. Place the 1 ⅓ cups rolling sugar in a shallow bowl. Grab your frozen PB filling balls. Scoop a generous tablespoon of dough (I use a #40 scoop, ~ 1.5 tbsp). Flatten it slightly in your palm. Place one frozen PB ball in the center. Gently fold and pinch the dough around it, sealing completely. Roll it smoothly between your palms into a neat ball. Roll the ball generously in the sugar to coat completely. Place on the baking sheet, leaving 2 inches between them (they spread!). Repeat. Hot Tip: Work quickly so the filling stays frozen. If dough gets sticky, pop it in the fridge for 10 mins. Sugar coating = sparkle AND prevents sticking!
- Bake to Golden Perfection: Bake for 10-12 minutes. They’re done when the edges look set and lightly golden, but the centers still look slightly soft and puffy. Do not overbake – they firm up as they cool! Secret Weapon: Rotate your baking sheets halfway through for even browning. Let cookies cool on the baking sheets for 5 minutes (they’re fragile when hot!). Then, transfer them carefully to a wire rack to cool completely. Resist the pull of molten peanut butter for at least 10 mins! Chef’s Warning: They’ll look underdone – that’s GOOD. Carryover cooking is your friend for a soft cookie with a liquid center.
Serving Up the Joy
Presentation is part of the fun! Pile these beauties high on a rustic wooden board or a vintage cake stand for serious “wow” factor. They’re best served slightly warm (pop one in the microwave for 8 seconds if they’ve cooled) when the peanut butter center is gloriously gooey. Pour ice-cold milk for dunking, or go fancy with a drizzle of warm chocolate sauce and a sprinkle of flaky sea salt. For parties, thread mini cookies onto skewers for playful “cookie pops.” Store leftovers (ha!) in an airtight container at room temp for up to 4 days. The filling will firm up but stays delicious. Want warm cookies anytime? Freeze baked cookies and reheat straight from frozen!
Make It Your Own: Delicious Twists!
Got an itch to experiment? Try these fun spins:
- Chocolate Lover’s Dream: Add 1 cup mini chocolate chips to the dough. After baking, drizzle with melted chocolate.
- PB&J Surprise: Press a tiny dollop (½ tsp) of your favorite jam (raspberry is killer!) into the center of the frozen peanut butter ball before wrapping in dough.
- Salty-Sweet Crunch: Roll the sugar-coated dough balls in crushed salted pretzels before baking. Or sprinkle tops with flaky sea salt right after baking.
- Nutty Buddy: Use crunchy peanut butter for the filling (not the dough) for little peanut surprises in the goo. Or roll dough balls in finely chopped peanuts instead of sugar.
- Gluten-Free Goodness: Swap the AP flour 1:1 with a trusted gluten-free blend (like Bob’s Red Mill 1-to-1). Results may be slightly more delicate.
Olivia’s Kitchen Confessions
Alright, truth bomb time: My first test batch looked like peanut butter volcanoes erupting all over the baking sheet! Turns out, skipping the freezer step for the filling is a one-way ticket to Leaky Cookie Town. I also learned the hard way that natural peanut butter, while lovely on toast, turns the filling into soup during baking. This recipe evolved through many messy (but tasty!) fails. The quirky 2 ⅔ eggs? That came from batch #7 when I realized a third whole egg made the dough too wet, but two wasn’t quite enough for our jumbo batch. The partial egg was the Goldilocks solution! Don’t stress perfection – if a little filling peeks out, call it “artisanal.” Baking is about joy, not Pinterest-perfect symmetry. These cookies have fueled countless late-night recipe chats, survived a minor kitchen fire (unrelated!), and been the star of my best friend’s surprise proposal. I hope they weave some delicious memories into your story too!
Your Cookie Queries, Solved!
Let’s tackle those burning questions (besides your oven!):
Q: Help! My filling leaked everywhere! What went wrong?
A: Three likely culprits: 1) Filling balls weren’t frozen solid enough (30 mins MINIMUM!). 2) The dough wasn’t sealed completely around the filling – pinch those seams tight! 3) Overbaking weakens the dough walls. Stick to 10-12 mins max. Even with leaks, they’ll taste amazing!
Q: Can I use natural peanut butter? I only have that.
A: For the dough, it’s usually okay if it’s well-stirred. For the filling, I strongly advise against it. Natural PB has more oil and less stabilizer, making the filling too soft to hold its shape, even frozen. If you absolutely must, add an extra 2-3 tbsp powdered sugar to the filling and freeze it longer (45+ mins), but results may vary.
Q: Can I freeze the dough balls for later?
A: Absolutely! It’s a fantastic hack. Assemble the stuffed, sugar-rolled dough balls. Freeze them solid on a baking sheet, then transfer to a freezer bag. Bake straight from frozen, adding 1-2 extra minutes to the bake time. No need to thaw!

Peanut Butter Stuffed Cookies
- Total Time: 1 hour 15 mins
Description
What happens when a chewy peanut butter cookie hugs a molten peanut butter center? Pure magic. These Peanut Butter Stuffed Cookies are golden-edged, sugar-crusted, and oozing with sweet nutty lava. Whether you’re feeding a crowd or sneaking a warm one solo with a glass of milk, this batch of 34 cookies is a guaranteed joy delivery system. One bite and you’re hooked.
Ingredients
Filling:
-
2 ⅛ cups creamy peanut butter (not natural)
-
1 ⅛ cups powdered sugar
Dough:
-
1 ⅓ cups granulated sugar
-
1 ⅓ cups light brown sugar (packed)
-
1 ⅓ cups creamy peanut butter
-
⅔ cup shortening
-
⅔ cup unsalted butter, softened
-
2 ⅔ large eggs (2 whole + ~2 tbsp of a 3rd, beaten)
-
3 ⅙ cups all-purpose flour
-
2 tsp baking soda
-
1 ⅓ tsp baking powder
-
⅔ tsp kosher salt
-
1 ⅓ cups granulated sugar (for rolling)
Instructions
-
Make the Filling: Mix peanut butter & powdered sugar until thick and scoopable. Shape into 1 tsp balls (34 total) and freeze at least 30 minutes.
-
Make the Dough: Cream both sugars, peanut butter, shortening, and butter until fluffy. Beat in eggs gradually. Whisk dry ingredients separately, then combine just until dough forms.
-
Wrap & Roll: Scoop 1.5 tbsp dough, flatten in hand, wrap around frozen filling. Roll sealed dough ball in sugar. Place 2″ apart on lined baking sheets.
-
Bake: At 350°F (175°C) for 10–12 minutes, until edges are set but centers soft. Cool 5 minutes on the sheet before transferring to a rack.
Notes
-
Don’t skip freezing the filling – it’s essential!
-
Want clean lines? Chill the dough 10 mins before assembling.
-
Use a cookie scoop for uniform size and baking.
- Prep Time: 30 mins (plus chilling)
- Cook Time: 12 mins
Nutrition
- Calories: 230 cal Per Serving
- Fat: 13g
- Carbohydrates: 24g
- Protein: 5g
Final Thoughts: More Than Just a Cookie
These Peanut Butter Stuffed Cookies are a testament to the magic of kitchen mishaps and the joy of sharing. They’re the kind of treat that turns a Tuesday into a celebration, a lunchbox into a love note, and a bake sale into a goldmine. Whether you’re a novice baker or a seasoned pro, remember: the messiest batches often taste the best (ask Leo’s peanut-butter-smeared grin). So preheat that oven, freeze that filling like your cookie dreams depend on it, and get ready for the kind of bite that makes time stand still. After all, life’s too short for boring cookies. Now go forth and stuff relentlessly!
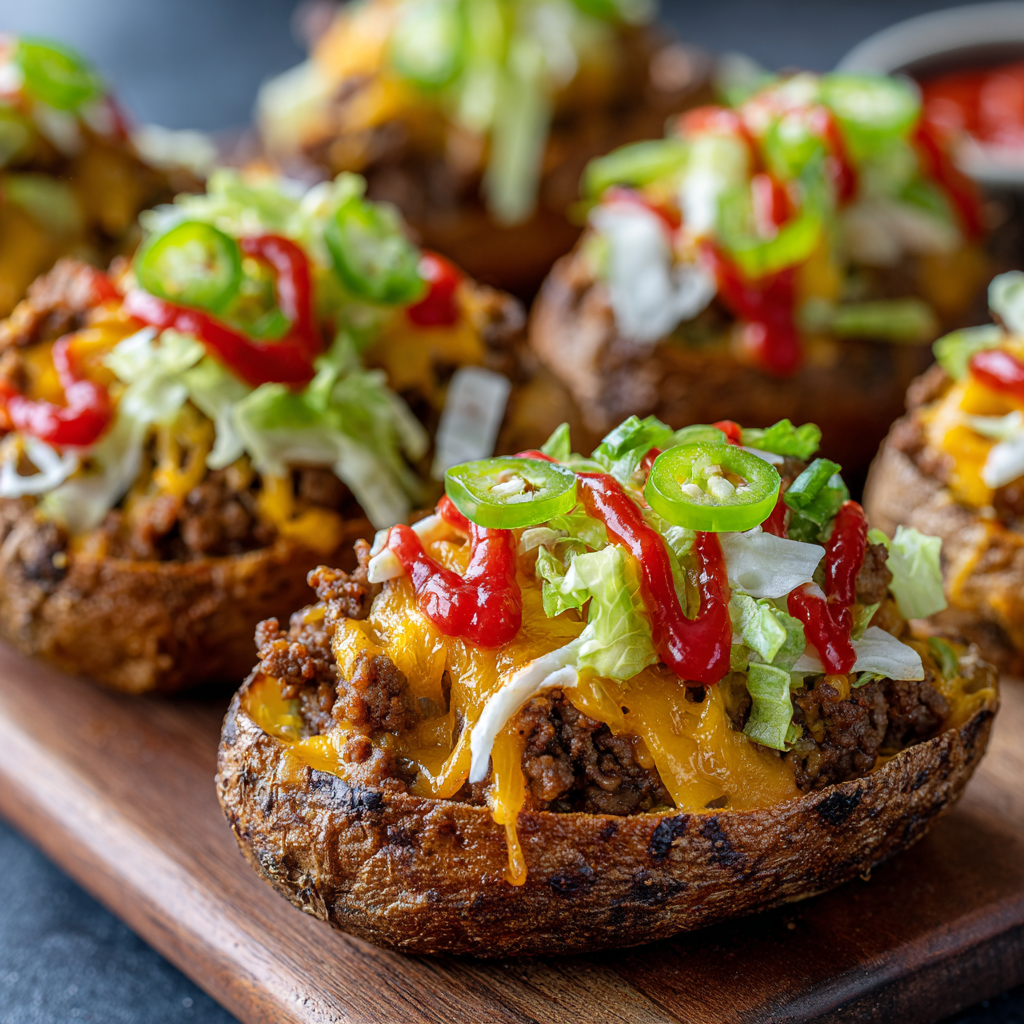
Jalapeño Cheeseburger Potato Skins
When Cheeseburgers Meet Potato Skins: Your New Favorite Handheld Party!
Hey there, kitchen friend! Olivia here, waving from my flour-dusted countertop. Can you smell that? It’s the magical scent of crispy potato skins getting cozy with all your favorite cheeseburger fixings – and I’m bubbling over with excitement to share this game-changer with you. These Jalapeño Cheeseburger Potato Skins are my love letter to messy, joyful eating that brings people together. Imagine: golden potato boats cradling savory ground beef, melted cheddar hugging spicy pickled jalapeños, all finished with a cool crunch of lettuce and that iconic burger-style drizzle. No bun? No problem! We’re keeping it low-carb but maxing out on flavor explosions. Whether you’re hosting game night, craving a fun weeknight twist, or just need a seriously satisfying snack, these handheld wonders deliver every bit of that melty, spicy, finger-licking joy you adore. Grab your apron (embrace the mess – mine’s already stained with hot sauce!), and let’s turn humble potatoes into pure magic!
That One Rainy Tuesday & My Cheeseburger Epiphany
Picture this: It’s pouring rain outside, my fridge is nearly empty, and my stomach is growling for comfort. All I crave is a juicy cheeseburger, but I’m fresh out of buns. I stare at two lonely russet potatoes on my counter like they hold the secrets of the universe… and suddenly, lightning strikes (kitchen inspiration, not the weather kind!). I remember my mom’s loaded potato skins from 90s parties – those crispy vessels begging for bold fillings. What if I smashed burger night and potato night together? I brown some beef, raid my pickle jar for jalapeños, and melt cheddar like my life depends on it. When that first bite hit? Pure bliss! The crispy potato skin shattered, the cheesy beef warmed my soul, and the jalapeño kick made me do a happy dance right there in my mismatched socks. My husband wandered in, sniffing the air like a bloodhound, and demolished three skins before I could say “low-carb.” That rainy experiment became our favorite “fakeaway” – proof that kitchen magic often starts with empty cupboards and a hungry heart!
Gather Your Flavor Crew: Ingredients & Smart Swaps
Here’s your dream team for maximum flavor impact! Don’t stress if you need swaps – cooking is about playing, not perfection.
- 4 medium russet potatoes – Your edible “boats”! Russets rule here – their thick skins crisp beautifully, and fluffy insides scoop like a dream. Chef’s Tip: Pick spuds that feel heavy for their size with smooth skins.
- 1 tbsp olive oil – The crisp-maker! Brushing this on the empty shells = golden, shatter-crisp magic. Swap: Melted butter or avocado oil work great too.
- ½ lb ground beef (80/20 blend) – Flavor MVP! A little fat keeps it juicy. Insider Trick: Brown it well for extra savory depth. Swap: Ground turkey, chicken, or plant-based crumbles.
- 1 tsp onion powder – Our stealth flavor booster! It adds sweet-savory depth fast. Chef Crush: I adore this over fresh onion here – no watery sogginess!
- Salt & pepper to taste – The dynamic duo! Season your beef generously. Pro Move: Taste your filling before stuffing – potatoes need well-seasoned friends.
- 1 cup shredded sharp cheddar – MELT FACTORY! Sharp cheddar packs a punch. Fun Swap: Pepper Jack for extra heat, smoked gouda for BBQ vibes.
- ¼ cup diced pickled jalapeños – The tangy SPARK! Pickled cuts heat with bright acidity. Hot Tip: Reserve some brine for drizzling later if you’re wild!
- ½ cup shredded iceberg lettuce – Crunch & cool relief! Iceberg is classic burger crisp. Fresh Idea: Swap in baby arugula for peppery bite.
- 2 tbsp mayo + 1 tbsp ketchup – The iconic “burger sauce” drizzle! Mix them for creamy-tangy bliss. Secret Weapon: Add a pinch of smoked paprika or dash of hot sauce!
Let’s Build Some Delicious: Your Step-by-Step Adventure
Follow along, friend! I’ve packed each step with my favorite hacks to make these foolproof and fabulous.
- Bake Those Potatoes to Fluffy Perfection: Preheat your oven to 400°F (200°C). Wash and dry your potatoes, then poke each one 5-6 times with a fork (this lets steam escape so they don’t explode – trust me, I learned the messy way!). Place them directly on the oven rack or on a baking sheet. Bake for 45-50 minutes until they yield easily when squeezed (with an oven mitt!). Chef Hack: Rubbing skins lightly with oil before baking makes them extra crispy later! Let cool 10 minutes – they’re HOT. Slice each potato in half lengthwise.
- Scoop & Crisp Your Golden Boats: Use a spoon to carefully scoop out most of the fluffy potato interior, leaving a sturdy ¼-inch shell. (SAVE THAT POTATO GOLD! See Chef’s Notes for ideas). Brush the insides AND outsides generously with olive oil. Sprinkle with salt. Place skin-side UP on the baking sheet. This flip is KEY for maximum crisp! Bake for 10-15 minutes until gloriously golden and crispy. Watch Closely: Ovens vary – you want them crisp, not burnt!
- Cook That Savory Beef Filling: While skins crisp, heat a skillet over medium-high. Add the ground beef, breaking it up with a spoon. Cook until nicely browned (about 5-7 mins). Drain excess fat if needed. Stir in the onion powder, salt, and pepper. Kill the heat and stir in HALF the shredded cheddar – it’ll melt into the beef creating cheesy pockets of joy! Pro Tip: Undercook beef slightly here – it’ll finish baking in the oven.
- Stuff, Top & Melt into Heaven: Divide the cheesy beef filling evenly among your crispy potato boats. Top with diced jalapeños and the remaining cheddar cheese. Pop them back into the oven for 5-7 minutes – just until the cheese is molten and bubbly. Chef’s Warning: Don’t wander off! Melting cheese waits for no one.
- The Grand Finale – Top & Drizzle! Pull those gorgeous skins out. Immediately top with shredded lettuce – the heat slightly wilts it, mimicking that perfect burger experience. Whisk the mayo and ketchup together in a tiny bowl. Drizzle it artistically (or enthusiastically!) over the top using a spoon or squeeze bottle. Fun Finish: Sprinkle on extra jalapeños or a pinch of flaky salt!
Plating Up the Party (No Fancy Skills Required!)
This is the easy, fun part! Slide those loaded potato skins onto a big, colorful platter or rustic wooden board – we eat with our eyes first! Scatter a few extra pickled jalapeño slices around for a vibrant pop. Serve immediately while the cheese is gloriously molten and the potato skins are at peak crispness. Pair them with ice-cold beer, sparkling limeade, or my personal fave – a tangy margarita to dance with the jalapeños. Need dipping sauce? Offer extra burger drizzle on the side for the true enthusiasts (hi, it’s me!). Finger food perfection achieved!
Shake It Up! Delicious Twists on Your Skins
Got an idea? RUN WITH IT! Here are my favorite riffs:
- Bacon BBQ Bliss: Swap beef for cooked, crumbled bacon. Mix 2 tbsp BBQ sauce into the mayo-ketchup drizzle. Top with crispy fried onions instead of lettuce!
- Tex-Mex Fiesta: Use seasoned taco meat (add 1 tsp chili powder + ½ tsp cumin to beef). Swap cheddar for pepper jack. Top with pico de gallo, avocado slices, and a cilantro-lime crema drizzle.
- Breakfast All Day: Fill skins with cooked breakfast sausage or chorizo. Top with a fried or scrambled egg before the final bake, then finish with shredded cheese. Drizzle with sriracha mayo!
- Veggie Powerhouse: Replace beef with 1 cup cooked lentils or mashed black beans seasoned with onion powder, smoked paprika, and a splash of soy sauce. Load up with extra veggies like sautéed mushrooms or corn.
- Buffalo Chicken Kick: Use 1.5 cups shredded cooked chicken tossed in ¼ cup buffalo sauce instead of beef. Swap cheddar for blue cheese crumbles. Drizzle with ranch dressing!
Olivia’s Notebook: Extra Nuggets of Kitchen Wisdom
Oh, how this recipe has evolved! My first attempt involved forgetting to pre-bake the potatoes… resulting in sad, floppy skins that couldn’t hold the filling (RIP, dinner). Lesson learned! Now I swear by the double-bake method for ultimate crunch. DON’T toss that scooped potato! It’s liquid gold. Mash it with butter, milk, chives, and extra cheese for killer side dish, or freeze it for tomorrow’s gnocchi or soup thickener. These skins are also a fantastic make-ahead hack: Bake and crisp the shells up to a day ahead; store covered in the fridge. Warm them for 5 mins before filling. The beef filling can be cooked 1-2 days prior too! Assemble cold, then bake a few extra minutes. Hosting a crowd? Double or triple the recipe – they disappear faster than you can say “cheeseburger”! Remember, cooking is play. Burned a skin? Call it “extra crispy” and load it with extra cheese. Life’s too short for kitchen stress!
Your Questions, Answered: Let’s Fix Those Kitchen Hiccups!
We’ve all been there! Here’s how to tackle common skin struggles:
- Q: My potato skins turned out soggy! What did I do wrong?
A: Sogginess is usually a moisture issue! Ensure you scoop out enough potato (aim for that ¼-inch shell). Brushing BOTH sides with oil and baking skin-side UP is CRUCIAL for evaporation. Also, pat your cooked beef filling dry if it seems watery. Overcrowding the baking sheet traps steam – give them space! - Q: Can I use sweet potatoes instead?
A: Absolutely! Sweet potatoes add a lovely sweetness that pairs surprisingly well with the savory beef and spicy jalapeño. Baking time might be slightly longer (test for fork-tenderness). Their skins are thinner, so be extra gentle when scooping and maybe reduce the second crisp bake by 2-3 mins. - Q: Help! My cheese is browning too fast before the filling is hot.
A: Oven hotspots are sneaky! Try lowering your rack. If cheese starts browning too quickly, loosely tent the skins with foil. You can also microwave the beef filling until piping hot before stuffing, reducing the final bake time to just melt the cheese. - Q: How do I store and reheat leftovers?
A: Store cooled, assembled-but-not-topped skins (no lettuce/drizzle) airtight in the fridge for up to 2 days. Reheat on a baking sheet at 375°F for 10-15 mins until hot and crispy. Add lettuce and drizzle AFTER reheating. Freezing isn’t ideal for the potato texture, but the cooked beef filling freezes beautifully for 3 months!

Jalapeño Cheeseburger Potato Skins
- Total Time: 1 hour 10 mins
Description
Say goodbye to buns and hello to burger-loaded potato boats! These Jalapeño Cheeseburger Potato Skins are everything you love about a juicy cheeseburger—savory beef, melty cheddar, spicy jalapeños—snuggled inside crispy potato shells. Topped with lettuce and that classic burger drizzle, they’re low-carb, high-flavor, and impossible to stop eating. Perfect for game day, snack night, or any time your taste buds demand a party.
Ingredients
-
4 medium russet potatoes
-
1 tbsp olive oil
-
½ lb ground beef (80/20)
-
1 tsp onion powder
-
Salt & pepper, to taste
-
1 cup shredded sharp cheddar cheese
-
¼ cup pickled jalapeños, diced
-
½ cup shredded iceberg lettuce
-
2 tbsp mayo + 1 tbsp ketchup (burger sauce drizzle)
Swap & Flavor Ideas:
-
Sweet potatoes for a twist
-
Pepper Jack for more heat
-
Ground turkey or lentils for a lighter spin
Instructions
-
Bake potatoes: 400°F for 45–50 mins. Cool, halve, and scoop to leave ¼” shell.
-
Crisp skins: Brush inside/outside with oil, sprinkle with salt. Bake skin-side up 10–15 mins until golden.
-
Cook beef: Brown beef in skillet, season with onion powder, salt, and pepper. Stir in half the cheese.
-
Assemble: Fill crisped skins with beef, top with jalapeños and remaining cheese. Bake 5–7 mins to melt.
-
Top & drizzle: Add lettuce. Mix mayo + ketchup, drizzle over each skin. Serve hot!
Notes
-
Double-bake for max crisp
-
Add a fried egg for brunch vibes
-
Save scooped potato for mashed or soup
- Prep Time: 15 mins
- Cook Time: 55 mins
Nutrition
- Calories: 420 cal Per Serving
- Fat: 25g
- Carbohydrates: 28g
- Fiber: 4g
- Protein: 22g
Nutritional Nibbles (Per Serving – 2 Skins)
Calories: 420 | Protein: 22g | Carbohydrates: 28g (Net Carbs: ~24g) | Fat: 25g | Fiber: 4g
Note: Values are estimates and can vary based on specific ingredients used (like beef fat content or cheese type).
Final Thoughts: Why This Recipe Wins Every Time
These Jalapeño Cheeseburger Potato Skins are more than a recipe—they’re a celebration of contrasts. Crispy meets creamy, spicy meets cool, and messy meets irresistible. They prove that the best dishes often come from improvisation (like that rainy-day bun shortage) and that low-carb doesn’t mean low-flavor.
Whether you’re feeding a game-day crowd, craving a fun twist on burger night, or just want to jazz up your spud routine, these skins deliver. They’re forgiving (swap ingredients freely!), adaptable (hello, breakfast version), and guaranteed to spark joy with every bite.
So embrace the cheese drips, the jalapeño-induced grins, and the inevitable requests for seconds. After all, the best meals aren’t just about food—they’re about the memories you make while devouring them. Now go forth and stuff those potatoes like your taste buds depend on it!
Save This Recipe for Later!
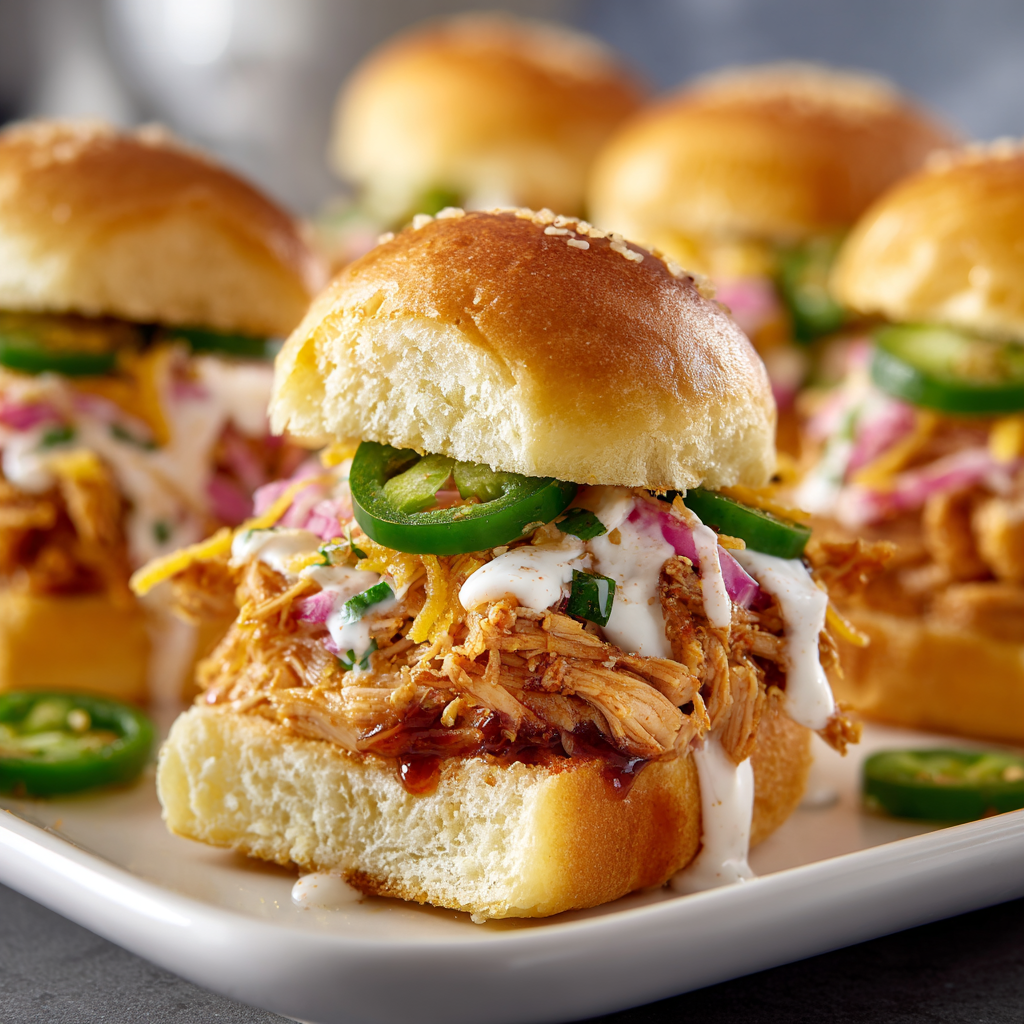
Crispy Jalapeño BBQ Chicken Sliders
Hey There, Flavor Adventurer! Ready for Slider Magic?
Oh, do I have a treat for you today! Picture this: It’s game day (or just a gloriously lazy Sunday), and your kitchen smells like a cross between a Southern BBQ joint and your favorite taqueria. There’s laughter bubbling in the air, friends are clustered around the island, and then… you slide a platter of these bad boys onto the counter. Crispy Jalapeño BBQ Chicken Sliders. Cue the oohs, aahs, and maybe a happy dance or two. That, my friend, is pure kitchen alchemy – turning humble ingredients into little bites of joy that vanish faster than cookies at a bake sale.
These aren’t just any sliders. They’re a flavor symphony: tender, smoky BBQ chicken hugging soft brioche, crowned with golden, shatteringly crispy fried jalapeños, and finished with a cool, creamy drizzle of ranch or spicy chipotle mayo. Sweet meets smoky. Creamy tangos with crunch. Fiery heat gets tamed by cool comfort. Every bite? An explosion. The best part? They come together in about 30 minutes, making you look like a rockstar without breaking a sweat. Seriously, if messy aprons and happy bellies are your love language (they’re totally mine!), you’re about to win dinner. Let’s make some magic!
The Jalapeño That Started It All: A Game Day Revelation
Okay, confession time. This recipe? Born from a near-disaster turned triumph! Picture my tiny apartment kitchen, overflowing with friends for the big game. I’d planned fancy sliders, but my pulled pork was… let’s say, still stubbornly uncooked. Panic mode! I spotted leftover rotisserie chicken and a jar of jalapeños – my “Hail Mary” ingredients. I quickly shredded the chicken, drowned it in smoky BBQ sauce, and on a whim, decided to fry those jalapeños for crunch (desperation breeds innovation, right?).
I’ll never forget the moment my buddy Mike took the first bite. His eyes went wide. “Olivia. WHAT is this magic? The crunch! The heat! The… everything!” The platter was empty before halftime. Turns out, that happy accident captured everything I love about cooking: improvisation, bold flavors, and that unbeatable feeling when people truly connect over food. Now, these sliders are my go-to for any gathering. They’re not just food; they’re edible joy, wrapped in a tiny bun, reminding me that sometimes the best recipes start with a little kitchen chaos and a whole lot of heart.
Your Flavor Toolkit: What You’ll Need
Gather ’round, friends! Here’s your shopping list for slider bliss. Don’t sweat substitutions – cooking should be flexible and fun!
- 2 cups cooked shredded chicken: My ultimate shortcut? Rotisserie chicken! Shred it while warm. Leftover grilled or baked chicken works beautifully too. (Chef’s Tip: Poach 2 boneless breasts in simmering broth for 15 mins if starting fresh – super moist!)
- ½ cup BBQ sauce: Pick your passion! Sweet & smoky, spicy, or tangy Carolina-style. (Chef’s Insight: This is your flavor base – choose one you LOVE! I often mix ¼ cup sweet + ¼ cup spicy.)
- 12 slider buns: Brioche is my MVP for its pillowy softness and hint of sweetness. Potato rolls or Hawaiian rolls are fabulous backups. (Substitution Tip: Mini ciabattas or even soft dinner rolls work in a pinch!)
- 2 fresh jalapeños, thinly sliced: The crispy stars! Wear gloves if sensitive. (Heat Hack: Remove seeds/ribs for milder heat; leave ’em in for FIRE!)
- ½ cup buttermilk: The crispy coating glue! No buttermilk? (Easy Swap: Stir ½ tbsp lemon juice or vinegar into ½ cup regular milk & let sit 5 mins!)
- ½ cup all-purpose flour + ½ tsp paprika, ½ tsp salt, ¼ tsp black pepper: Our crispy armor! Paprika adds color & warmth. (Flavor Boost: Add ¼ tsp garlic powder or onion powder!)
- Oil for frying: Canola, vegetable, or peanut oil are perfect (high smoke point!). You’ll need enough for ½ inch depth in your skillet.
- Ranch or Chipotle Mayo, for drizzling: The cool-down crew! Use store-bought or whip up your own. (Chef’s Fave: Mix ¼ cup mayo + 1 tbsp adobo sauce from chipotle peppers + squeeze of lime!)
Let’s Build Some Slider Dreams: Step-by-Step
Ready to rock? Follow these steps for guaranteed crispy, saucy, utterly irresistible sliders!
- Prep the Chicken Bliss: In a bowl, toss the warm shredded chicken with the BBQ sauce until every piece is gloriously coated. (Pro Hack: Warm this mixture gently in a skillet over low heat for 5 mins! It deepens the flavor and makes the chicken extra succulent.) Cover and set aside.
- Create Crispy Jalapeño Gold:
- Pour the buttermilk into a shallow bowl. Add the jalapeño slices, ensuring they’re fully submerged. Let them soak for 5 minutes. (Why? This helps the flour stick like glue for maximum crunch!)
- In another shallow bowl, whisk together the flour, paprika, salt, and pepper.
- Heat about ½ inch of oil in a heavy skillet (cast iron is ideal!) over medium-high heat. Test the oil: a pinch of flour should sizzle immediately (around 350-375°F).
- Working in batches (DON’T overcrowd!), remove jalapeño slices from buttermilk, letting excess drip off. Dredge thoroughly in the seasoned flour. Gently place into the hot oil. (Safety First: Use tongs and watch for splatters!)
- Fry for 1-2 minutes per side, flipping once, until beautifully golden brown and crispy. (Crisp Factor: Keep that oil hot! If it cools, the jalapeños get greasy.)
- Transfer crispy jalapeños to a wire rack set over paper towels. (Game-Changer: The rack keeps them crispy underneath! Paper towels alone can make them soggy.) Sprinkle lightly with salt while hot.
- Build Your Slider Masterpieces:
- If you love a little toasty structure (I do!), split your slider buns and lightly toast them cut-side-down in a dry skillet or under the broiler for 30-60 seconds. (Texture Tip: Toasting prevents sogginess from the saucy chicken!)
- Pile a generous mound of the BBQ chicken onto the bottom bun.
- Top with 2-3 crispy jalapeño slices (or more! I won’t judge!).
- Drizzle generously with your chosen cool sauce – ranch or chipotle mayo. (Presentation Pizzazz: Use a squeeze bottle or zip-top bag with a tiny corner snipped off for neat drizzles!)
- Cap with the top bun. Press gently. Admire your creation!
Showtime! Serving Your Flavor Bombs
Get ready for the applause! Slide these beauties onto a big, rustic wooden board or a vibrant platter. Scatter any extra crispy jalapeños around for garnish (and sneaky snacking!). Pile up some cooling sidekicks like a tangy vinegar-based coleslaw, crunchy dill pickle spears, or simple carrot sticks. For a full feast, add sweet potato fries or baked beans! Serve immediately while the jalapeños are still audibly crunchy and the chicken is warmly inviting. Watch them disappear – the ultimate compliment!
Mix It Up! Delicious Twists on the Theme
Love the base? Let’s play! Here are some fun spins to make these sliders your own:
- Cheesy Fiesta: Add a slice of pepper jack, sharp cheddar, or melty smoked gouda on the warm chicken before the jalapeños. Let it get slightly oozy!
- Pork or Beef Bliss: Swap the chicken for pulled pork (hello, carnitas!) or shredded beef brisket. The crispy jalapeño topping works magic with any BBQ meat.
- Vegetarian Vibes: Use hearty BBQ jackfruit or seasoned, shredded king oyster mushrooms instead of chicken. Keep that crispy jalapeño crunch!
- Gluten-Free Goodness: Use your favorite GF slider buns and swap the all-purpose flour for a 1:1 GF blend for frying the jalapeños. Easy win!
- Sweet Heat Explosion: Add a thin slice of fresh pineapple or a dab of mango chutney under the chicken layer. Tropical sweetness + BBQ + heat = wow!
Olivia’s Kitchen Chronicles: Slider Stories & Secrets
Oh, these sliders! They’ve seen some things… Remember that near-disaster origin story? Well, they’ve evolved beautifully. I used to painstakingly bread the jalapeños one-by-one, but discovered soaking them *all* together in the buttermilk bath works just as well and saves precious minutes when guests are hovering! The biggest laugh? The time I accidentally used habaneros instead of jalapeños (note to self: label garden harvests!). Let’s just say we had VERY hydrated guests that night, but they still begged for the recipe! Over time, I’ve learned the true secret isn’t just the ingredients; it’s the vibe. Make these with loud music playing, maybe a glass of something fun nearby, and embrace the delicious mess. That apron’s getting dirty for a good cause – pure, unadulterated slider joy. Pass the napkins!
Print
Crispy Jalapeño BBQ Chicken Sliders
- Total Time: 30 mins
Description
Game day, lazy Sunday, or snack-attack Tuesday—these Crispy Jalapeño BBQ Chicken Sliders bring the party. Tender BBQ chicken tucked into pillowy brioche, topped with crispy golden jalapeños and a creamy drizzle of ranch or chipotle mayo. Sweet, smoky, crunchy, creamy—every bite is fireworks. Ready in about 30 minutes, they’re your new MVP. Let’s build some flavor bombs!
Ingredients
-
2 cups shredded cooked chicken (rotisserie = gold)
-
½ cup BBQ sauce (mix sweet + spicy for max flavor)
-
12 brioche or slider buns
-
2 fresh jalapeños, thinly sliced
-
½ cup buttermilk (or milk + lemon juice)
-
½ cup flour
-
½ tsp each: paprika, salt | ¼ tsp pepper
-
Oil for frying (canola or vegetable)
-
Ranch or chipotle mayo for topping
Flavor Upgrades:
-
Cheese slice (pepper jack, cheddar, gouda)
-
Pineapple ring or mango chutney
-
Pulled pork or brisket instead of chicken
Instructions
-
Mix Chicken: Toss warm shredded chicken with BBQ sauce. Keep warm.
-
Crispy Jalapeños:
-
Soak slices in buttermilk 5 mins
-
Dredge in seasoned flour
-
Fry in ½” hot oil (350°F) 1–2 mins/side until golden
-
Drain on rack, sprinkle with salt
-
-
Toast Buns: Split and toast cut-side in dry skillet (30 secs).
-
Assemble:
-
Bottom bun → BBQ chicken → 2–3 fried jalapeños
-
Drizzle sauce → Top bun → Gentle press
-
-
Serve Hot: Garnish with extra jalapeños and crunchy slaw or fries!
Notes
-
Use gloves when slicing jalapeños
-
Fry in batches for max crispiness
-
Wire rack = no soggy bottoms
- Prep Time: 15 mins
- Cook Time: 15 mins
Nutrition
- Calories: 310 cal Per Slice
- Fat: 15g
- Carbohydrates: 28g
- Fiber: 2g
- Protein: 18g
-
Final Thoughts: More Than Just a Bite
These Crispy Jalapeño BBQ Chicken Sliders aren’t just food—they’re edible charisma. They’re the dish that sparks conversations, the recipe that gets scribbled on napkins, the flavor combo that lingers in memory long after the game ends.
What I love most? Their versatility. They’re equally at home at a tailgate, a bridal shower, or a “I-don’t-want-to-cook” Tuesday. They remind us that cooking isn’t about perfection; it’s about connection. (And maybe a little bit about impressing your friends.)
So here’s to happy accidents, to crispy triumphs, and to the joy of sharing something truly delicious. Now, go forth and sliderify the world—one messy, glorious bite at a time.
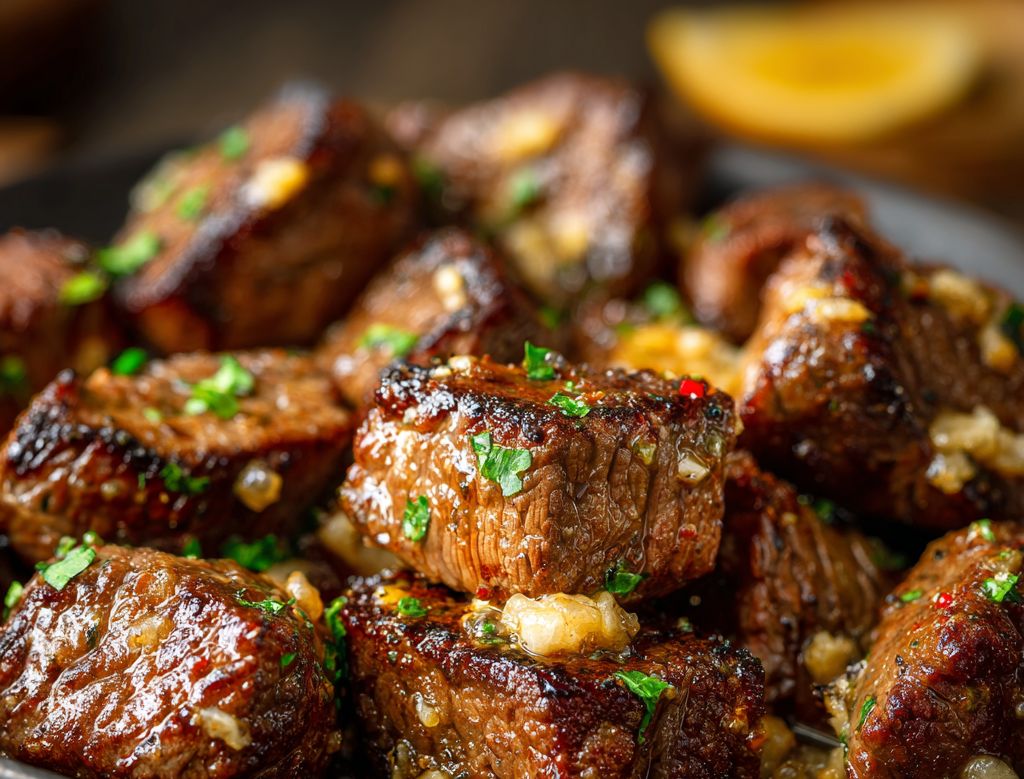
Garlic Butter Steak Bites
Garlic Butter Steak Bites: Your 15-Minute Ticket to Steakhouse Bliss
Hey there, kitchen friend! Olivia here, waving from my flour-dusted countertop. Can we talk about that magical moment when butter hits a hot pan? That sizzle? That smell? That’s pure kitchen alchemy, and today we’re turning it into the fastest, fanciest weeknight dinner you’ve ever met: Garlic Butter Steak Bites. Imagine tender, seared steak cubes swimming in a golden garlic butter glaze, with crispy edges and juicy centers—ready in under 15 minutes. Yes, really! This isn’t just food; it’s a flavor fireworks show that turns “What’s for dinner?” into “Wow, you made this?!” Whether you’re a busy parent, a new cook, or just craving something luxe without the fuss, this recipe’s your golden ticket. No fancy skills needed—just a hot pan, a hungry heart, and that glorious garlic butter magic. Let’s make your kitchen smell like a five-star bistro!
Why This Recipe Feels Like Home
Picture this: It’s my anniversary, pouring rain, and our reservation just got canceled. My husband’s face falls—he’d been dreaming of steak frites all week. So? I raid the fridge: a lonely sirloin, garlic, butter. In 10 frantic minutes, I’m searing steak bites while he roasts potatoes. We eat straight from the skillet, perched on the kitchen counter, rain drumming the windows. And you know what? That buttery, garlicky chaos beat any candlelit table. It was messy, real, and ours. That’s the beauty of these steak bites—they’re emergency gourmet. They’ve saved game nights, impressed in-laws, and turned my “I can’t cook steak!” friend into a searing superstar. Every time that garlic hits the butter, I’m back at that rainy window, laughing with sauce on my chin. That’s the cozy magic I want for you.
Your Flavor Toolkit: Simple Ingredients, Big Impact
Grab these pantry heroes—no wild goose chases required! Pro tip: Quality steak matters most here. See my notes for stress-free swaps.
- 1 lb sirloin steak, cubed → Why sirloin? It’s tender without breaking the bank! Chef hack: Freeze it for 20 minutes before cubing—slices like a dream. Swap with ribeye for extra richness or flank steak if you slice thinly against the grain.
- 1 tbsp olive oil → The searing MVP! Its high smoke point gives you that crust. No olive oil? Avocado or grapeseed oil work too.
- 4 tbsp butter → Unsalted, please! We control the salt. This is your glossy, luxurious sauce base. For dairy-free? Ghee or plant-based butter rocks.
- 1 tbsp chopped garlic → Fresh is best! Jarred works in a pinch, but fresh garlic sings. Insider trick: Add ½ tsp garlic powder too for depth—trust me.
- Salt & pepper → Be generous! Season like you mean it. I use 1 tsp kosher salt + ½ tsp black pepper. Flaky salt at the end? *Chef’s kiss*.
Bonus bling: Finish with parsley (fresh color!), red pepper flakes (heat lovers!), or lemon zest (bright pop!).
Let’s Sizzle: Your Foolproof Roadmap to Perfect Bites
Ready? Aprons optional, confidence mandatory! Active voice steps ahead—you’ve got this.
- Prep like a pro: Pat steak bone-dry with paper towels (wet steak = sad steam, not sear!). Cube into 1.5-inch pieces—uniform size = even cooking. Season all sides with salt and pepper. Hack: Toss in a bowl with 1 tsp cornstarch for extra crunch!
- Sear for glory: Heat olive oil in a heavy skillet (cast iron = best crust!) over high heat until shimmering. Working in batches, add steak in a single layer—DO NOT CROWD! Crowding steams. Let sear untouched 1.5 minutes until golden. Flip, sear another 1.5 minutes. Transfer to a plate. Voice in your ear: “Resist poking! Let that crust form.”
- Butter ballet: Reduce heat to medium. Add butter—it should foam but not burn. Toss in garlic, swirling 30 seconds until fragrant (don’t brown it!). Golden rule: If garlic burns, wipe pan and restart. Burnt garlic = bitter bites.
- Glaze & dazzle: Return steak (and juices!) to the pan. Toss constantly for 1 minute, coating every bite in that glossy garlic butter. Secret move: Add 1 tbsp Worcestershire sauce here for umami fireworks!
- Finish strong: Kill the heat. Taste—adjust salt if needed. Toss in chopped parsley. Serve IMMEDIATELY while sizzling. Why? Steak keeps cooking in residual heat—we want medium-rare, not well-done!
Timeline truth: Batch-searing takes 6 minutes total; butter step takes 2. You’ll be done before takeout arrives!
The Science Behind the Perfect Sear
There’s something almost magical about the moment steak hits a hot pan—the hiss, the aroma, the promise of a crisp, caramelized crust. But achieving that perfect sear isn’t just luck; it’s science. Understanding the Maillard reaction—the chemical process responsible for browning—can elevate your steak bites from good to extraordinary.
Why High Heat Matters
The Maillard reaction occurs when proteins and sugars in the steak break down and recombine under high heat (around 300°F or higher). This creates hundreds of new flavor compounds—nutty, toasty, and deeply savory. If your pan isn’t hot enough, the steak will steam instead of sear, leaving you with gray, chewy meat.
Pro Tip: Test your pan’s readiness by flicking a drop of water onto it. If it dances and evaporates instantly, you’re good to go. If it just sits there, wait another minute.
The Role of Dryness
Moisture is the enemy of searing. Water on the steak’s surface must evaporate before browning can begin, which delays the Maillard reaction. That’s why patting the steak dry with paper towels is non-negotiable. Some chefs even air-dry steak in the fridge for an hour before cooking for extra insurance.
Fat: The Flavor Conductor
Olive oil isn’t just there to prevent sticking—it helps transfer heat evenly to the steak. Butter, added later, brings milk solids that brown and amplify flavor. But butter burns easily, which is why we start with oil (higher smoke point) and add butter at the end.
Fun Fact: The golden foam you see when butter melts? Those are milk solids caramelizing. If they turn dark brown too fast, lower the heat!
Resting (Briefly) for Juiciness
While whole steaks need resting time to redistribute juices, bite-sized pieces are different. Since they’re small, they lose heat fast, so resting isn’t as crucial. However, letting them sit for a minute off the heat before the final butter toss prevents overcooking.
Bottom Line: Searing is about controlling moisture, heat, and timing. Master these, and you’ll never settle for bland steak again.
The Art of Flavor Layering
Garlic butter steak bites may seem simple, but their depth of flavor comes from intentional layering. Each ingredient plays a role, and when added at the right time, they create a symphony of taste.
Salt: The Foundation
Salt isn’t just seasoning—it’s a flavor enhancer. When applied before cooking, it penetrates the meat, improving both taste and texture. Kosher salt is ideal because its coarse grains distribute evenly without over-salting.
Timing Tip: Salt the steak at least 10 minutes before cooking (if time allows). This gives salt a chance to work its way in, resulting in juicier bites.
Pepper: The Aromatic Kick
Black pepper adds a warm, slightly pungent note. But here’s the trick: Add it just before cooking. Unlike salt, pepper can burn in high heat, turning bitter. Freshly cracked is best—pre-ground lacks punch.
Garlic: The Sweet-Savory Star
Garlic’s flavor changes dramatically with heat:
-
Raw: Sharp, pungent
-
Cooked briefly (30 sec): Sweet, nutty
-
Overcooked: Bitter, harsh
That’s why we add minced garlic to the butter just before the steak returns to the pan—long enough to mellow but not burn.
Chef’s Secret: For extra depth, add a pinch of sugar to the garlic butter. It balances acidity and promotes caramelization.
Butter: The Glossy Finisher
Butter’s richness rounds out the sharpness of garlic and pepper. But there’s a trick to using it:
-
Unsalted butter lets you control sodium levels.
-
Cold butter added at the end prevents splitting.
-
Basting (spooning melted butter over the steak) adds even more flavor.
Bonus Layer: A splash of acid (lemon juice or Worcestershire sauce) at the end brightens the dish, cutting through the richness.
Why This Works: Each layer builds on the last—salt enhances meatiness, pepper adds spice, garlic brings sweetness, and butter ties it all together.
Beyond the Skillet—Creative Uses for Steak Bites
These garlic butter steak bites are versatile enough to star in countless dishes. Here’s how to repurpose them beyond the basic plate:
1. The Ultimate Breakfast Hash
Toss leftover steak bites into a skillet with diced potatoes, onions, and bell peppers. Fry until crispy, then top with a fried egg. The garlic butter becomes a built-in sauce.
2. Gourmet Steak Tacos
Warm corn tortillas, add steak bites, and drizzle with chipotle mayo. Top with pickled red onions and cilantro. The richness of the steak pairs perfectly with tangy, crunchy toppings.
3. Loaded Steak Bite Salad
Arrange steak bites over arugula or spinach. Add cherry tomatoes, blue cheese crumbles, and toasted walnuts. Drizzle with balsamic glaze. The warm steak wilts the greens slightly—heavenly.
4. Cheesy Steak Quesadillas
Layer steak bites, sautéed mushrooms, and Monterey Jack cheese between tortillas. Grill until crispy. Serve with salsa verde for dipping.
5. Steak Bite Pasta
Toss cooked fettuccine with the steak bites, garlic butter pan sauce, and a splash of cream. Add Parmesan and parsley. Instant decadence!
Pro Tip: For meal prep, cook a double batch of steak bites. Store half in the fridge for quick salads, omelets, or sandwiches later in the week.
Plate It Pretty: Where These Bites Shine Brightest
These steak bites are social butterflies—they play well with everyone! For weeknight wow, pile them over creamy mashed potatoes or fluffy rice (butter + steak juices = instant sauce). Low-carb? Cauliflower rice soaks up flavor beautifully. Feeling fancy? Layer them on crostini with blue cheese crumbles. My go-to: a big platter with roasted asparagus and blistered cherry tomatoes—the garlic butter becomes a built-in veggie glaze! Pro move: Serve with crusty bread to swipe up every last drop. No sad leftovers here!
Shake It Up: 5 Delicious Twists
Love the base? Try these fun spins!
- Mushroom Madness: Sear mushrooms with the steak. They soak up garlic butter like sponges!
- Spicy Fiesta: Add 1 tsp smoked paprika + ½ tsp cayenne with the garlic. Finish with lime.
- Herb Garden: Swap parsley for rosemary or thyme. Lemon thyme? *Swoon*.
- Asian Zing: Replace butter with sesame oil. Add 1 tbsp soy sauce + ginger with the garlic.
- Paleo/Whole30: Use ghee + coconut aminos. Serve with sweet potato mash!
Olivia’s Kitchen Confessions
This recipe started as a “steak fail” rescue! I’d overcooked a pricey filet, cubed it to hide the crime, and drowned it in garlic butter. The result? My kids begged for seconds! Now, it’s my most-requested recipe for last-minute guests. Over the years, I’ve learned: High heat is non-negotiable (test with one cube—if it doesn’t sizzle, wait!). And that butter? It’ll foam and spit—wear an apron like your favorite armor! Funny story: Once subbed lavender honey for butter during a brain-fog moment… don’t be like me. Stick to savory! Now, it’s your turn to make memories. Tag me @OliviasKitchen—I live for your sizzle videos!
Your Questions, Answered!
Q: My steak is tough! What went wrong?
A: Two culprits! 1) Overcooking—stick to 1.5 mins per side max. 2) Wrong cut—choose tender sirloin or ribeye. Tough cuts (like chuck) need slow cooking.
Q: The garlic burned! Help!
A> No panic! Wipe the pan, reduce heat, and restart the butter step. Burnt garlic = bitter. Pro tip: Add garlic after butter melts—the milk solids buffer the heat.
Q: Can I use frozen steak?
A> Only if thawed completely and patted dry. Frozen steak steams and leaks water—no sear. Thaw overnight in the fridge for best results.
Q: How to reheat without rubbery steak?
A> Gently warm in a skillet over low heat with a splash of broth. Microwaving murders texture!
Garlic Butter Steak Bites
- Total Time: 15 mins
Description
Ready for a flavor explosion that fits into your busiest weeknight? These Garlic Butter Steak Bites are sizzling proof that gourmet doesn’t have to mean complicated. Juicy sirloin cubes seared to crusty perfection, glazed in golden garlic butter—this dish brings steakhouse swagger to your table in 15 flat. Whether it’s a date night save or a last-minute “wow” dinner, this is the recipe that never lets you down.
Ingredients
-
1 lb sirloin steak, cut into 1.5-inch cubes
-
1 tbsp olive oil
-
4 tbsp unsalted butter
-
1 tbsp chopped garlic (about 3 cloves)
-
Salt & pepper to taste (about 1 tsp salt, ½ tsp pepper)
-
Optional: parsley, red pepper flakes, lemon zest
Chef Swaps & Hacks
-
Ribeye for extra richness
-
Ghee or vegan butter for dairy-free
-
Add 1 tbsp Worcestershire for deep umami
Instructions
-
Prep Steak: Pat cubes dry, season with salt & pepper. Optional: toss with 1 tsp cornstarch for crispy crust.
-
Sear: Heat oil in skillet over high heat. In batches, sear steak 1.5 mins per side without crowding. Transfer to plate.
-
Garlic Butter: Lower heat to medium. Melt butter, add garlic—sauté 30 secs until fragrant.
-
Glaze: Return steak and juices to pan. Toss 1 min to coat. Finish with parsley or lemon zest.
-
Serve Hot: Best eaten immediately over mashed potatoes, rice, or with crusty bread.
Notes
-
Let pan get very hot before searing
-
Don’t overcrowd or stir too soon—let crust form
-
Add garlic after butter melts to avoid burning
- Prep Time: 5 mins
- Cook Time: 10 mins
Nutrition
- Calories: 320 cal Per Serving
- Fat: 23g
- Carbohydrates: 1g
- Protein: 27g
Nutrition Facts (Per Serving, 4 servings)
Calories: ~320 | Protein: 27g | Carbs: 1g | Fat: 23g | Fiber: 0g
Note: Values approximate. Using less butter? Fat decreases! Pair with veggies for balance.
Final Thoughts: Why This Recipe Wins Every Time
Garlic butter steak bites are more than a quick dinner—they’re a celebration of simplicity and technique. In just 15 minutes, you get:
-
A restaurant-quality sear at home
-
A customizable flavor base (spicy, herby, umami-rich)
-
A versatile protein that works in countless dishes
They’re proof that great cooking doesn’t require fancy tools or hours in the kitchen—just smart techniques and a little butter. So next time you’re staring into the fridge, wondering what to make, remember: Steakhouse bliss is just a hot pan away.
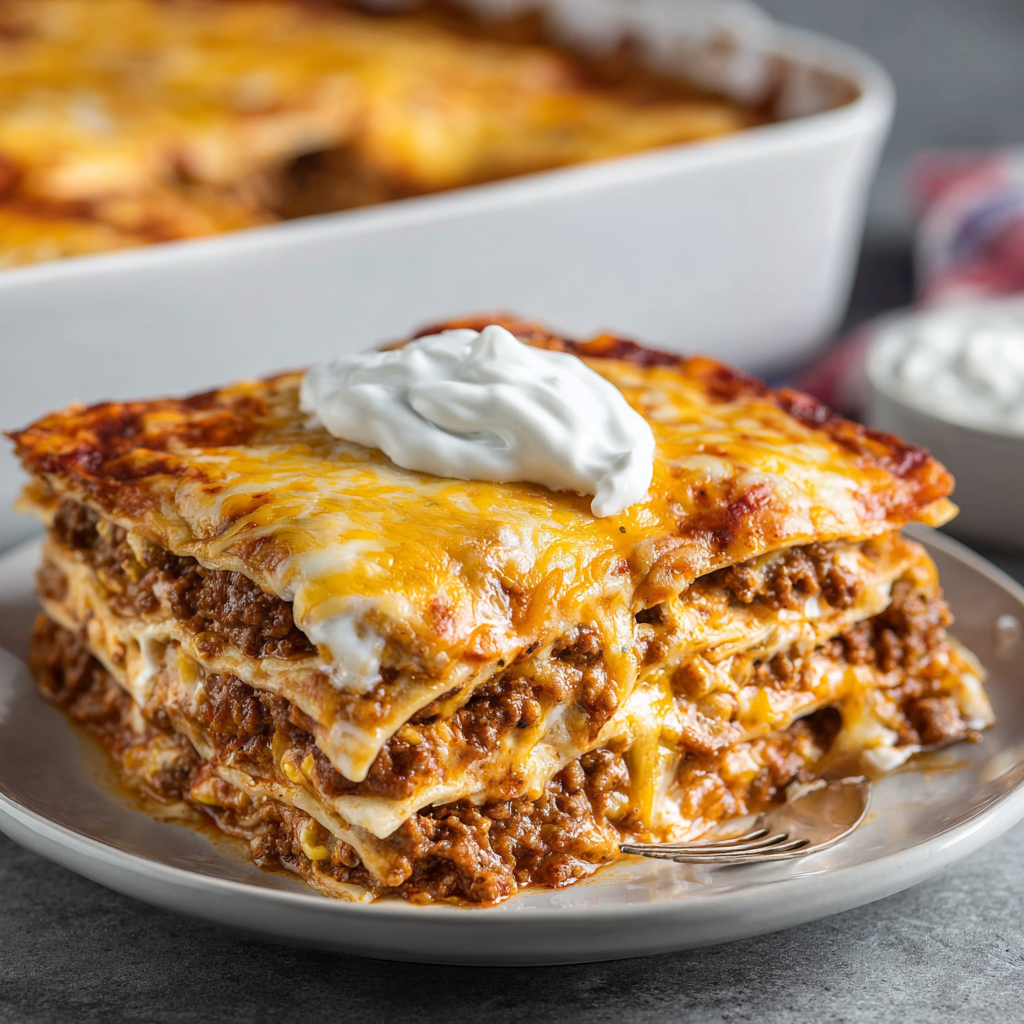
Cheesy Taco Lasagna
The Ultimate Comfort Mashup: Cheesy Taco Lasagna
Hey there, kitchen friend! Olivia here, waving at you from my flour-dusted countertop. Ever have one of those magical food epiphanies where two incredible dishes collide in your brain? That’s exactly how this Cheesy Taco Lasagna was born! Imagine your favorite taco night—all those bold, spicy flavors—cozying up with the layered, cheesy comfort of classic lasagna. It’s like your taste buds get invited to the best potluck ever. Whether you’re wrangling hungry kiddos after soccer practice or hosting your crew for game night, this dish is your golden ticket to happy bellies and empty plates. The best part? We’re ditching fussy noodles for soft tortillas that soak up all that saucy goodness. In about 40 minutes flat, you’ll have a bubbling pan of pure joy that makes leftovers something to actually look forward to. Ready to make magic? Tie on your favorite apron—let’s get layering!
Taco Night Reinvented
Picture this: It’s pouring rain outside, my college roommate Sarah and I are staring into our depressingly empty fridge, and taco Tuesday feels lightyears away. All we have? Half a pack of tortillas, a lonely can of refried beans, and that emergency freezer stash of ground beef. In a stroke of hungry genius (or desperation!), we started layering ingredients like a Mexican-inspired lasagna. Twenty minutes later, we’re crouched over the oven door like cavewomen discovering fire, watching cheese bubble into golden lava. That scrappy little experiment became our ritual—every finals week, breakup, or “I need comfort” moment featured this dish. Now when I make it, I still text Sarah a pic with the caption: “Emergency comfort food activated!” Some recipes are born in fancy kitchens… this one was born in a 500 sq ft apartment with two broke girls and big appetites.
Your Flavor Toolkit
Here’s what you’ll need to build your edible masterpiece (and why each piece matters!):
- 6 soft taco-size flour tortillas: These are our noodle stand-ins! Flour tortillas stay flexible when baked (unlike corn). Chef’s Swap: Use gluten-free tortillas or low-carb almond flour wraps.
- 1 (16 oz) can refried beans: Our flavor-packed “mortar”! Adds creaminess and helps layers stick. Chef’s Tip: Stir in ¼ cup salsa for extra zing!
- 1 lb ground beef: The hearty star! Chef’s Swap: Ground turkey, chicken, or plant-based crumbles work great too.
- 1 packet taco seasoning: Our instant flavor bomb! Chef’s Hack: Make your own with 2 tsp chili powder + 1 tsp cumin + ½ tsp each garlic powder, paprika, salt.
- 4 cups shredded cheese: The glorious glue! I use Mexican blend for meltiness. Chef’s Secret: Toss 1 cup with 1 tsp cornstarch to prevent greasy separation!
- Bonus Toppings (not optional for joy!): Avocado, sour cream, fresh cilantro, pickled jalapeños—make it yours!
Why these work: The tortillas soften into pillowy layers, beans add depth against the spiced meat, and that CHEESE… well, cheese makes everything better, right?
Building Your Flavor Skyscraper
Don’t worry—this isn’t architecture school! Just follow these simple steps for lasagna nirvana:
- Brown that beef! Crumble your ground beef in a skillet over medium-high heat. No oil needed—the fat renders perfectly! Drain any excess grease (pro tip: tilt pan and spoon it out). Sprinkle taco seasoning over the meat, add ¼ cup water, and let it simmer for 5 minutes until saucy. Why water? It wakes up the spices and creates that iconic taco meat texture!
- Oven prep party! Preheat your oven to 375°F (190°C). Grab your trusty 9×13″ baking dish and give it a quick spritz of cooking spray. Lifesaver hack: Rub a tiny bit of oil on with a paper towel if you’re out of spray!
- Layer like a boss! Place 2 tortillas in the dish—it’s okay if they overlap! Spread HALF the refried beans over tortillas (warm beans spread easier!). Top with HALF the beef, then sprinkle with 1 cup cheese. Repeat: tortillas, remaining beans, remaining beef, another cup of cheese. Final layer? Tortillas and ALL remaining cheese. Chef’s secret: Tear tortillas to fill gaps—no perfection needed!
- Bake to bubbly bliss! Cover tightly with foil (prevents cheese scorching!). Bake 20 minutes. Remove foil—this is when the magic happens! Bake 5-10 more minutes until cheese is gloriously golden and edges bubble. Watch closely: Ovens vary—your nose knows when it’s done!
- The golden rule: REST! Let it sit 5 minutes before cutting. Why? This lets layers settle so you get clean slices instead of cheesy avalanches!
The Cultural Mashup Behind Cheesy Taco Lasagna
Food fusion is more than just a trend—it’s a delicious collision of cultures, traditions, and cravings. Cheesy Taco Lasagna is a perfect example of how two beloved dishes can come together to create something entirely new yet comfortingly familiar. But where did this idea originate?
The Roots of Taco Night
Tacos, with their origins in Mexican cuisine, have evolved into a global phenomenon. From street vendors in Mexico City to fast-food chains worldwide, tacos represent versatility—soft or crispy, meat or veggie, spicy or mild. The concept of “Taco Tuesday” became a staple in American households, offering a fun, customizable meal that brings families together.
The Italian Influence of Lasagna
Lasagna, on the other hand, is an Italian classic—layers of pasta, rich meat sauce, and melted cheese baked to perfection. It’s the ultimate comfort food, evoking memories of family gatherings and Sunday dinners. The structure of lasagna—alternating layers of carbs, protein, and cheese—makes it a perfect canvas for reinvention.
When Two Worlds Deliciously Collide
The genius of Cheesy Taco Lasagna lies in its ability to merge the bold, zesty flavors of tacos with the hearty, layered satisfaction of lasagna. By replacing traditional lasagna noodles with soft flour tortillas, we keep the dish light while allowing the tortillas to soak up the taco-seasoned juices. The refried beans act as a creamy binder, much like ricotta in Italian lasagna, while the melted cheese bridges both culinary worlds.
This dish isn’t just about convenience—it’s a celebration of how food traditions can adapt, evolve, and create new memories. Whether you grew up with tacos or lasagna (or both!), this mashup feels like home.
The Science of Perfect Layers
Ever wondered why some lasagnas turn out soggy while others hold their shape beautifully? The secret lies in the balance of moisture, structure, and cheese chemistry. Let’s break down the science behind the perfect Cheesy Taco Lasagna.
The Tortilla Factor
Unlike traditional lasagna noodles, which are parboiled to soften, flour tortillas are already pliable. However, they can become mushy if the dish is too wet. To prevent this:
-
Drain the meat well—excess grease leads to a greasy, unstable lasagna.
-
Use thicker tortillas—they hold up better than ultra-thin ones.
-
Pre-toast if needed—a quick 30-second bake on a dry skillet can add sturdiness.
The Cheese Meltdown
Cheese is the glue that holds everything together, but not all cheeses behave the same way when baked:
-
Mexican blend (cheddar, Monterey Jack, etc.) melts smoothly but can separate if overheated.
-
Adding cornstarch (as suggested in the recipe) prevents oil separation by stabilizing the proteins.
-
Covering with foil initially ensures even melting without premature browning.
The Resting Rule
Letting the lasagna rest after baking isn’t just patience—it’s physics!
-
Proteins set—the cheese firms up slightly, making slicing cleaner.
-
Steam redistributes—if cut too soon, trapped steam escapes, causing a collapse.
-
Flavors meld—just like a good stew, resting allows the layers to harmonize.
By understanding these principles, you can tweak the recipe to your ideal texture—whether you prefer a firmer slice or a gooey, saucy forkful.
Serving & Pairing Like a Pro
A great dish deserves the right sides and drinks to elevate the experience. Here’s how to turn Cheesy Taco Lasagna into a full-blown fiesta!
Toppings That Transform
While the lasagna is delicious alone, toppings add freshness and contrast:
-
Cool & Creamy: Dollops of sour cream, Greek yogurt, or avocado crema balance the heat.
-
Crunchy Texture: Shredded lettuce, diced onions, or crushed tortilla chips add bite.
-
Bright & Zesty: Pico de gallo, pickled jalapeños, or lime wedges cut through richness.
Sidekick Dishes
Round out the meal with these easy pairings:
-
Mexican Street Corn Salad—charred corn, cotija cheese, and chili powder.
-
Cilantro-Lime Rice—light and fragrant, perfect for soaking up extra sauce.
-
Simple Black Bean Salad—tossed with red onion, cumin, and lime vinaigrette.
Drink Pairings
-
Margaritas (Classic or Spicy)—the acidity complements the cheesy richness.
-
Mexican Lager (Modelo, Corona)—crisp and refreshing against bold flavors.
-
Agua Fresca—try watermelon or hibiscus for a non-alcoholic option.
Leftover Magic
This dish reheats beautifully, but why not repurpose it?
-
Breakfast Nachos: Scramble eggs over leftover chunks, top with salsa.
-
Taco Lasagna Quesadillas: Sandwich between tortillas, grill until crispy.
-
Loaded Taco Fries: Spread over crispy fries, broil with extra cheese.
Dress to Impress (Minimal Effort Required!)
Slice your masterpiece into squares—I use a pizza cutter for easy gliding! The beauty? This dish looks vibrant all on its own with those golden cheesy peaks. For maximum wow factor, dollop with cool sour cream, scatter bright red salsa and green avocado chunks, then finish with a confetti of fresh cilantro. Serve right from the pan family-style (less dishes!) with tortilla chips for scooping runaway toppings. Margaritas or icy Mexican beer? Yes please!
Mix It Up, Make It Yours!
This recipe loves a costume change! Try these fun twists:
- Breakfast Edition: Swap beef for scrambled eggs + chorizo! Add roasted potatoes between layers.
- Veggie Fiesta: Replace meat with sautéed zucchini, corn, and black beans. Use pepper jack cheese!
- Green Chile Enchilada Style: Pour 1 cup green enchilada sauce over layers before baking. Top with cotija cheese.
- Low-Carb Lover: Substitute tortillas with thinly sliced zucchini or eggplant. Increase bake time by 10 mins.
- Spicy Devil: Mix 2 chopped chipotles in adobo into beef. Use habanero jack cheese!
Olivia’s Kitchen Confessions
This recipe has come a LONG way since my “dump and pray” college days! I once tried adding a layer of crushed Doritos (verdict: delicious but soggy). My husband now insists we add a sneaky layer of cream cheese mixed with salsa—it’s life-changing! Pro tip: Double the beef and freeze half for emergency nachos. True story: I dropped a whole pan once while rushing to the table. We ate it with spoons straight from the oven rack—still incredible! That’s the beauty of this dish: it’s gloriously forgiving. Make it once, then tweak it forever. That’s how family legends are born!
Your Burning Questions (Answered!)
Q: Can I make this ahead?
A: Absolutely! Assemble (but don’t bake), cover tightly, and refrigerate up to 24 hours. Add 5-10 mins to bake time since it’s cold. You can also freeze unbaked lasagna for 3 months—thaw overnight before baking.
Q: Why is my lasagna watery?
A: Two common culprits: 1) Not draining beef enough—really press it in a colander! 2) Covering while resting—steam condenses. Let it breathe those 5 mins!
Q: Can I use corn tortillas?
A> You can, but they’ll be firmer/crumbly. Quick fix: brush corn tortillas lightly with oil and warm in a skillet first to soften!
Q: Help—my cheese browned too fast!
A: Ovens have hot spots! Next time, place a baking sheet on the rack below to diffuse heat. If it’s browning too quick, tent loosely with foil.
Cheesy Taco Lasagna
- Total Time: 40 mins
Description
When taco night and lasagna get cozy, magic happens. This Cheesy Taco Lasagna is your weeknight hero—layers of spiced beef, creamy refried beans, melty cheese, and soft tortillas baked into bubbling bliss. Born from an empty fridge and a craving for comfort, it’s fast, foolproof, and family-approved. Grab your pan—it’s layering time!
Ingredients
-
6 soft taco-size flour tortillas
-
1 lb ground beef
-
1 (16 oz) can refried beans
-
1 packet taco seasoning (or homemade)
-
4 cups shredded Mexican blend cheese
-
¼ cup water
-
Optional: avocado, sour cream, cilantro, jalapeños for topping
Swaps & Twists
-
Meatless? Use black beans, zucchini, and corn
-
Low-carb? Sub sliced zucchini for tortillas
-
Spicy? Add chipotles in adobo or spicy jack cheese
Instructions
-
Cook the beef: Brown ground beef in a skillet over medium-high. Drain excess fat. Stir in taco seasoning + ¼ cup water. Simmer 5 mins.
-
Preheat oven: Set to 375°F (190°C). Spray a 9×13″ pan.
-
Layer:
-
2 tortillas → half the beans → half the beef → 1 cup cheese
-
Repeat
-
Final layer: tortillas + all remaining cheese
-
-
Bake: Cover with foil. Bake 20 mins. Remove foil, bake 5–10 more mins until bubbly and golden.
-
Rest: Let sit 5 mins before slicing.
Notes
-
Warm beans slightly for easier spreading
-
Tear tortillas to fit like puzzle pieces
-
Letting it rest = cleaner slices
-
Cheese browning too fast? Tent with foil
- Prep Time: 10 mins
- Cook Time: 30 mins
Nutrition
- Calories: 430 cal Per Serving
- Fat: 25g
- Carbohydrates: 28g
- Fiber: 4g
- Protein: 24g
Nutritional Details (Because Balance!)
Per Serving (based on 8 servings):
Calories: ~430 | Protein: ~24g | Carbs: ~28g | Fat: ~25g | Fiber: ~4g
Note: Toppings like sour cream or avocado add extra calories. For lighter version: use ground turkey, low-fat cheese, and extra beans!
Final Thoughts: Why This Dish Wins Every Time
Cheesy Taco Lasagna isn’t just a recipe—it’s a love letter to comfort food. It’s the answer to “What’s for dinner?” when you crave something hearty but don’t want to fuss. It’s the dish that brings friends together, sparks kitchen creativity, and turns leftovers into something exciting.
Whether you stick to the classic version or invent your own spin (breakfast lasagna, anyone?), this recipe proves that the best meals are the ones that feel like a hug on a plate. So grab those tortillas, layer with abandon, and let the cheese do its glorious work. Because in the end, isn’t food just better when it’s cheesy, messy, and shared with people you love?
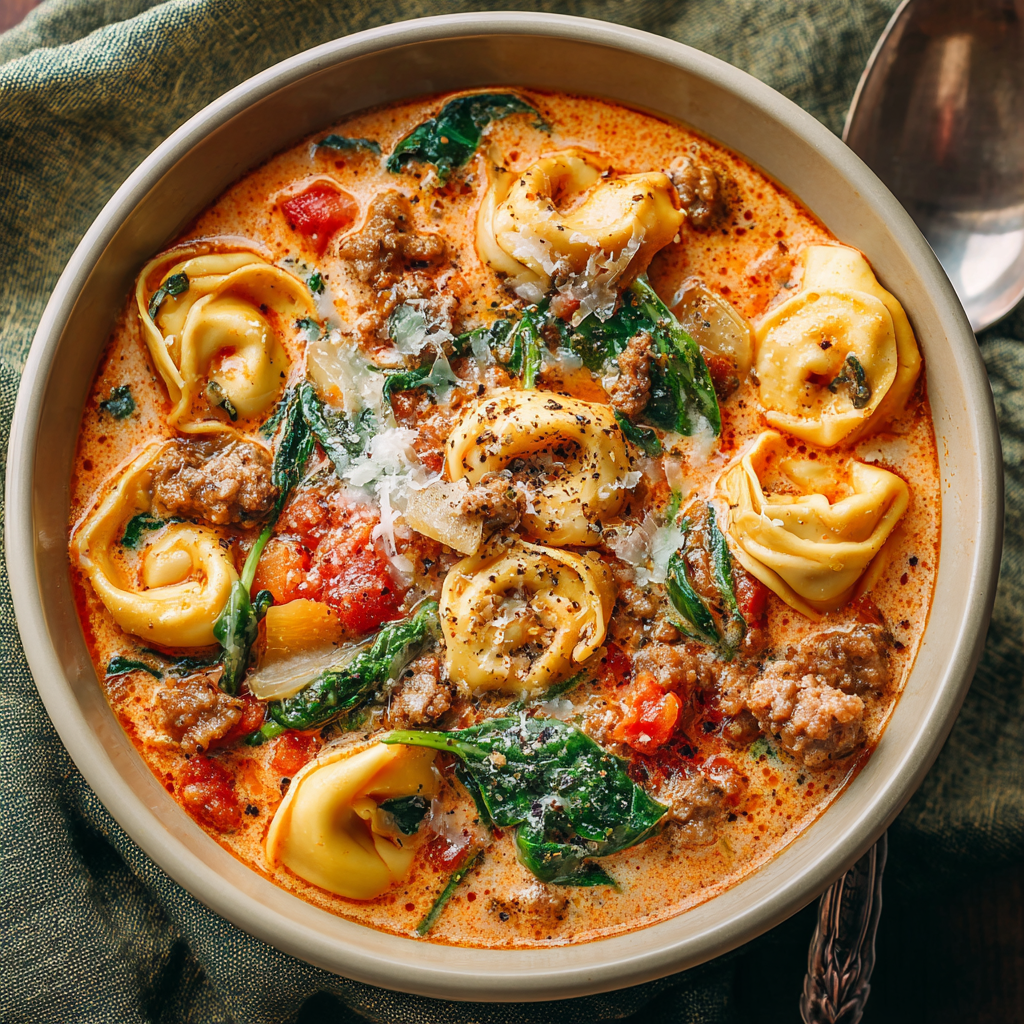
Sausage Tortellini Soup
When Comfort Calls, This Soup Answers
Hey there, kitchen friends! Olivia here. Can we talk about that magical moment when you slide a spoon into a steaming bowl of soup and just *know* it’s going to hug your soul? That’s exactly what this Sausage Tortellini Soup does – it’s like your coziest sweater in edible form. Picture this: plump cheese tortellini bobbing in a velvety tomato broth, spicy Italian sausage crumbles playing hide-and-seek with vibrant spinach, and that creamy richness that makes you close your eyes and sigh. It’s the kind of meal that turns chaotic weeknights into something resembling a Pinterest dream.
I live for recipes like this – ones that taste like you fussed all day but secretly come together faster than a toddler’s tantrum. One pot? Check. Minimal chopping? Double-check. Maximum flavor payoff? Ohhh yes. Whether you’re thawing out after sledding or just need a reset button on a tough day, this soup is your edible security blanket. And the best part? It’s wildly forgiving. No fancy knife skills or chef’s hat required – just a big pot and a hungry heart. So grab your favorite wooden spoon (you know the one with the slightly charred handle) and let’s make some magic happen!
The Blizzard That Started It All
Let me take you back to the Great Snowpocalypse of 2018. My husband and I were newlyweds, holed up in our tiny apartment as two feet of snow buried our street. Our pantry looked like the “before” shot of a grocery haul video: half a bag of frozen tortellini, lonely canned tomatoes, and some sausage I’d bought for pizzas that never happened. Desperation (and hunger!) breeds creativity, right? I threw it all in a pot with broth and the last sad block of cream cheese from the back of the fridge. When that first creamy, spicy, cheesy spoonful hit my lips? Fireworks. Absolute blizzard bliss.
That haphazard experiment became our tradition. Now, every first snowfall, I make this soup while we watch flakes dance outside. It’s evolved (no more sad cream cheese, promise!), but that feeling of warmth and “we’ve got this” comfort? That remains. It’s proof that sometimes the best recipes aren’t planned – they’re born from life’s messy, beautiful, understocked moments. And honestly? Those taste the sweetest.
Your Flavor Dream Team (Plus Swaps!)
Makes 6-8 hearty bowls
- 1 lb Italian sausage – Hot or mild! Remove casings before cooking. Chef’s tip: No sausage? Ground turkey + 1 tsp fennel seeds + ½ tsp red pepper flakes works magic.
- 2 cans (14.5 oz each) diced tomatoes, UNDRAINED – That liquid = free flavor gold! Chef’s insight: Fire-roasted tomatoes add a smoky kick if you’re feeling fancy.
- 4 cups chicken broth – Low-sodium is best here since sausage adds salt. Swap: Veggie broth keeps it meat-free friendly!
- 8 oz cream cheese, cubed – Full-fat for ultra-creaminess (low-fat can get grainy). Hack: Microwave cubes 15 sec to soften – melts like a dream!
- 20 oz cheese tortellini – Fresh or frozen (no thawing needed!). Critical note: Add ONLY when broth is simmering to avoid gummy pasta.
- 3 cups fresh spinach – Packed! It wilts down to nothing. Swap: Kale (ribs removed) or Swiss chard hold up beautifully.
Bonus flavor boosters: 3 minced garlic cloves (add with tomatoes), 1 tsp dried basil, or a Parmesan rind simmered in the broth (remove before serving!).
Let’s Build Your Cozy Masterpiece
- Brown that sausage! Heat a large Dutch oven or soup pot over medium-high. Squeeze sausage from casings into the pot. Cook 5-7 minutes, breaking it up with your spoon, until browned and crumbly. Chef’s secret: Don’t rush this step! Browning = BIG flavor. Drain excess fat but leave about 1 tbsp – it’s liquid gold for richness.
- Simmer the soul of the soup. Add the UNDRAINED tomatoes and chicken broth. Stir, scraping up any browned bits stuck to the pot (that’s FLAVOR, baby!). Now, drop in your cream cheese cubes. Pro move: Stir constantly for 2-3 minutes as the cream cheese melts – this prevents clumping and creates that luscious, velvety base. Once smooth, reduce heat to a gentle simmer (small bubbles, not a rolling boil). Let it hang out here for 5 minutes so flavors start mingling.
- Tortellini time! Stir in the tortellini. Cook according to package directions (usually 5-7 mins for fresh, 7-9 for frozen). CRUCIAL TIP: Set a timer! Overcooked tortellini turns to mush. Stir occasionally to prevent sticking.
- Spinach finale! Turn OFF the heat. Pile in the fresh spinach and stir gently. It’ll wilt in about 60 seconds from the residual heat – this keeps it bright green and vibrant. Taste! Chef’s tweak: Now’s the time to adjust seasoning. Need more zip? A pinch of red pepper flakes. Too rich? A squeeze of lemon brightens it up!
- Serve it up! Ladle deeply into bowls immediately. The soup thickens as it sits, so serve it hot and glorious!
Why this order matters: Adding tortellini too early makes it bloated. Cooking spinach too long turns it slimy. Trust the process – it’s foolproof!
Dishing Up the Comfort
Presentation is part of the joy! Ladle this beauty into wide, shallow bowls so everyone sees those gorgeous tortellini peeking through the creamy tomato broth. The crowning glory? A fluffy cloud of freshly grated Parmesan cheese and a crack of black pepper. Essential partners: Crusty garlic bread for dunking (non-negotiable!) or a simple side salad with tangy vinaigrette to cut the richness. For a dinner party vibe, serve mini bowls as a luxurious starter before a roast chicken. And please – light a candle, put your phone away, and savor that first steamy bite. You earned it!
Make It Uniquely Yours!
This soup is a blank canvas! Try these tasty twists:
- “Tuscan Sun” Style: Swap spinach for sun-dried tomatoes (chopped) + ½ cup chopped artichoke hearts + a swirl of pesto at the end.
- Vegetarian Delight: Omit sausage. Sauté 1 cup diced mushrooms + 1 diced zucchini with 1 tbsp olive oil first. Use veggie broth!
- White Wine Wonder: Deglaze the pot after browning sausage with ½ cup dry white wine. Let it reduce by half before adding tomatoes/broth.
- Spicy Arrabbiata: Use hot sausage + add 1 tsp crushed red pepper flakes with the broth. Top with spicy Calabrian chili oil.
- Lightened Up: Substitute half the cream cheese with ½ cup pureed white beans (cannellini) for creaminess + fiber.
Olivia’s Real-Kitchen Confessions
This soup has seen some things, friends! Once, mid-blizzard, I used strawberry cream cheese because it was all I had (DO NOT RECOMMEND – tasted like spicy pasta dessert!). Another time, my toddler “helped” by dumping in half a box of Cheerios instead of tortellini (we called it “Surprise Soup” and ordered pizza). Over the years, I learned: Undrained tomatoes are non-negotiable (drained makes it too thick), and full-fat cream cheese is worth every calorie. The biggest evolution? Adding the spinach OFF the heat – total game-changer for color and texture! This recipe is resilient. Forgot to drain the sausage fat? It’ll be richer. Simmered it 5 mins too long? Add a splash of broth. It wants to be delicious for you. That’s the beauty of cozy cooking!
Your Soup Questions, Solved!
Q: Can I freeze this soup?
A: Proceed with caution! Cream-based soups can separate when thawed. Best method: Freeze BEFORE adding tortellini and spinach. Thaw, reheat broth, then cook fresh tortellini/spinach in it. If you must freeze leftovers, expect slight texture changes – still tasty though!
Q: My soup got too thick! Help!
A: No panic required! Stir in warm chicken broth or even a splash of milk (½ cup at a time) until it reaches your perfect consistency. Remember, it thickens as it sits!
Q: Can I use dried tortellini?
A: Technically yes, but adjust! Dried pasta needs longer cooking and absorbs more liquid. Cook it separately al dente, then add to the simmering soup for the last 2 mins. Use extra broth too!
Q: Why did my cream cheese get lumpy?
A: Two culprits: Heat too high (must be gentle simmer!) or cold cream cheese. Fix it: Use room-temp cream cheese cubed small, and whisk vigorously as it melts. If lumps form, blend the soup briefly with an immersion blender before adding tortellini.

Sausage Tortellini Soup
- Total Time: 35 mins
Description
When the wind howls and the day feels heavy, this Sausage Tortellini Soup is your edible exhale. Creamy tomato broth, cheesy tortellini, and spicy sausage come together in one pot for the kind of comfort that makes you sigh with every spoonful. Whether it’s your first snowfall or just a rough Tuesday, this soup says: “You’ve got this.” Grab that soup pot – it’s about to get delicious.
Ingredients
-
1 lb Italian sausage (hot or mild, casings removed)
-
2 cans (14.5 oz) diced tomatoes, undrained
-
4 cups chicken broth (low-sodium preferred)
-
8 oz cream cheese, cubed (room temp is best)
-
20 oz cheese tortellini (fresh or frozen)
-
3 cups fresh spinach
-
Optional: 3 garlic cloves (minced), 1 tsp dried basil, Parmesan rind
Swap Tips:
-
No sausage? Use ground turkey + fennel seeds & red pepper flakes
-
Vegetarian? Skip sausage, add mushrooms & zucchini
-
Fancy it up? Fire-roasted tomatoes or a swirl of pesto
Instructions
-
Brown sausage in a large pot over medium-high heat (5–7 mins). Drain excess fat, leave 1 tbsp for richness.
-
Add tomatoes, broth, and cream cheese. Stir constantly as cream cheese melts (2–3 mins). Simmer gently 5 mins.
-
Add tortellini. Cook per package (fresh: ~5 mins, frozen: ~7 mins).
-
Turn off heat. Stir in spinach until wilted (~1 min). Season to taste.
-
Serve hot. Garnish with Parmesan, black pepper, and crusty bread.
Notes
-
Add tortellini only when broth is simmering – prevents sogginess.
-
Always stir while cream cheese melts for a smooth, lump-free broth.
-
Overcooked soup? Thin with broth or milk before serving.
- Prep Time: 10 mins
- Cook Time: 25 mins
Nutrition
- Calories: 430 cal Per Serving
- Fat: 28g
- Carbohydrates: 24g
- Fiber: 3g
- Protein: 22g
Nutritional Notes (Per Serving, Approx 1.5 cups)
Calories: ~430 | Protein: 22g | Carbs: 24g | Fat: 28g | Fiber: 3g
Remember: This is hearty comfort food! Balance it with a lighter meal earlier in the day. Using turkey sausage and light cream cheese reduces fat/calories by about 20%.
Final Thoughts
This Sausage Tortellini Soup is more than a recipe—it’s a story. A story of blizzards and experiments, of toddler chaos and quiet winter nights. It’s proof that the best meals aren’t about perfection; they’re about connection. Connection to ingredients, to memories, and to the people you share the pot with.
So the next time you stir that creamy, tomato-laced broth, remember: You’re not just making dinner. You’re crafting an edible heirloom. One that’ll evolve with you—through substitute ingredients, life changes, and maybe even a few more snowstorms.
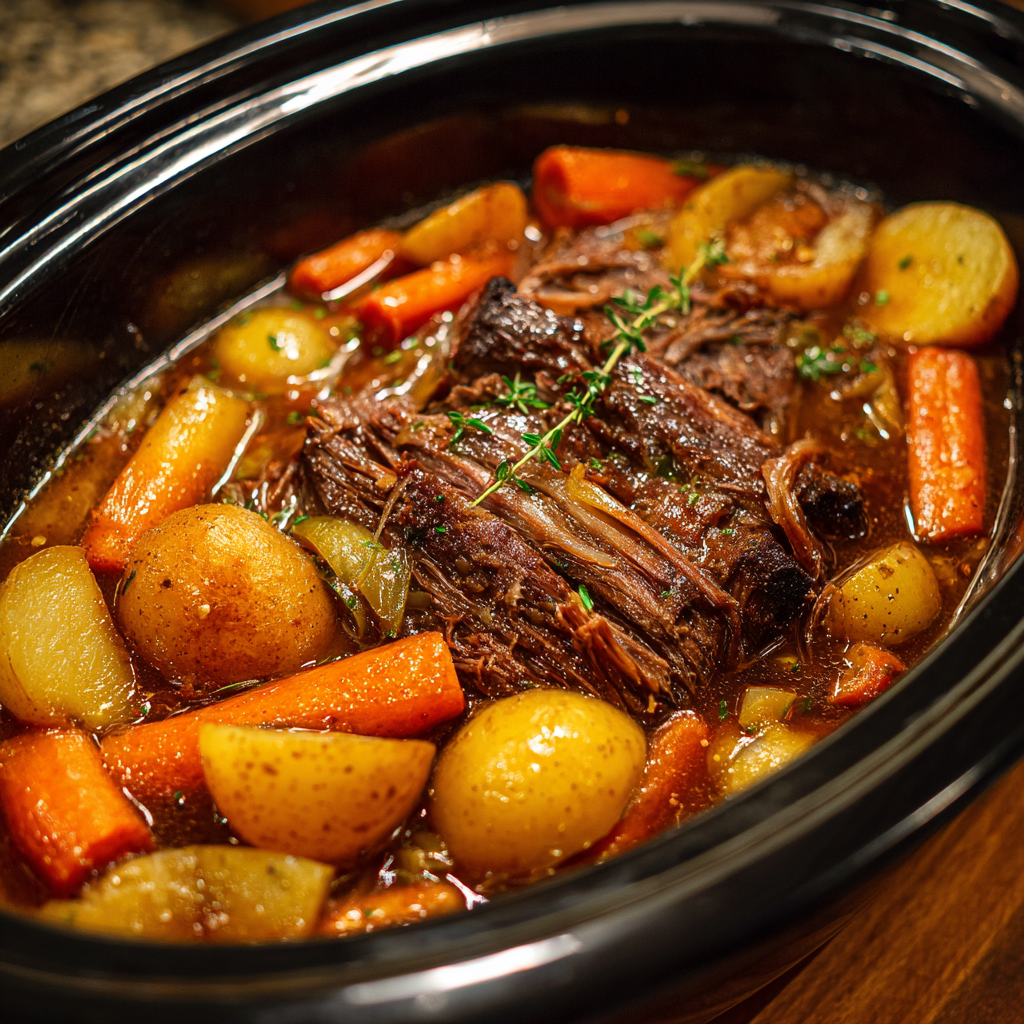
Mississippi Pot Roast
Welcome to the Coziest Corner of My Kitchen!
Hey there, friend! Olivia here, apron dusted with flour and heart full of excitement. Can you smell that? It’s the warm, buttery, tangy-savory aroma of today’s star—Mississippi Pot Roast—simmering away in the slow cooker. If you’ve ever dreamed of a dish that hugs your soul after a long day, gathers the whole family around the table, and requires less effort than folding a fitted sheet (we all know that struggle!), you’ve hit the jackpot. This Southern legend isn’t just dinner; it’s a golden ticket to tender, flavor-packed bliss with just five pantry staples. No fancy techniques, no babysitting the stove—just pure, lazy-day magic. Whether you’re a busy parent, a meal-prep wizard, or just craving comfort, this roast is your new bestie. Ready to make your kitchen smell like a hug? Let’s dive in!
My First Taste of Mississippi Magic
Picture this: It’s a chaotic Tuesday. My toddler’s building a mashed potato volcano, my dog’s eyeing the counter like a furry food critic, and I’m exhausted. Enter my neighbor, Martha—a silver-haired saint with a Pyrex dish of shredded beef that smelled like heaven. “Try this, sugar,” she said. One bite later? I was hooked. The tangy pepperoncini cut through the rich butter, the ranch and onion soup mix created this umami fireworks show, and the meat? It fell apart like a love letter to comfort food. That dish became my lifeline—the meal I’d sneak to new moms, serve at game nights, and even feature at my niece’s graduation party (where my brother-in-law declared it “better than his mama’s”). It’s more than a recipe; it’s my edible security blanket. Martha’s gone now, but every time I make this roast, I swear I hear her chuckle and say, “Told ya it was foolproof.”
Your Flavor Dream Team
Grab these pantry heroes (yes, only 5!):
- 3–4 lb chuck roast – This fatty cut transforms into silk in the slow cooker! Chef’s tip: Skip lean cuts—fat = flavor magic here. For a smaller crowd? Use 2 lbs and halve other ingredients.
- 1 packet ranch seasoning mix – The secret umami bomb! Swap idea: Make your own with garlic powder, dill, and buttermilk powder if avoiding preservatives.
- 1 packet onion soup mix – Salty-sweet depth that’s *chef’s kiss*. Low-sodium hack: Use ½ packet or DIY with dried onions + thyme.
- ½ cup (1 stick) butter – Trust me, it emulsifies into lusciousness. Insider tweak: Use ghee for a richer note, or reduce to ¼ cup if watching calories.
- ½ jar pepperoncinis (6–8 peppers + juice) – The zingy MVP! Fun twist: Use hot cherry peppers for extra kick, or banana peppers for mild tang. Juice = liquid gold—don’t skip it!
See? No obscure spices or last-minute grocery runs. Just dump, cook, and bask in glory!
Let’s Make Magic (The Lazy Way!)
Step 1: Meet Your Slow Cooker’s New BFF
Plop that gorgeous chuck roast right into the pot—no searing needed! Why? Slow cooking breaks down connective tissues low-and-slow for ultimate tenderness. Just trim excess fat if you’re skittish, but leave some for flavor!
Step 2: Shower It With Love (a.k.a. Seasonings!)
Sprinkle ranch and onion soup mixes evenly over the meat like confetti. Pro hack: Pat them lightly so they don’t blow away when you add peppers. This combo creates a savory crust that melts into the broth—no stirring yet!
Step 3: Pepperoncini Party Time!
Scatter those tangy peppers over the top, then drizzle 3–4 spoonfuls of brine from the jar. Watch out: The juice is salty, so no extra salt needed! Add whole peppers for pretty presentation, or slice ’em if you want tang in every bite.
Step 4: Butter Makes It Better
Place the whole stick of butter right on top. Yes, whole! As it melts, it bastes the roast in velvety richness. Key reminder: DO NOT STIR! Layering = flavor infusion without drying out the meat.
Step 5: Slow Dance to Perfection
Cover and cook on low for 8 hours (ideal for meltiness) or high for 4–5 hours. Chef’s test: It’s done when you poke it with a fork and the meat giggles apart. No peeking—heat escape is the enemy!
Step 6: Shred & Soak Up the Goodness
Remove the roast, shred it with two forks (discard any stubborn fat), then return it to the pot. Stir into those glorious juices. Final touch: Let it sit 10 minutes so the meat drinks up all that saucy joy!
How to Serve It Like a Boss
This roast is the ultimate social butterfly! Pile it high over creamy mashed potatoes (my fave—the gravy soaks in like a dream), ladle it onto fluffy rice, or spoon it into crusty rolls for sliders. For a veggie boost, add steamed green beans or roasted carrots on the side. Fancy upgrade? Top with fresh parsley and extra pepperoncini slices. And honey—save those juices! They’re liquid gold for drizzling.
: The Science of Slow Cooking – Why Mississippi Pot Roast Works So Well
Slow cooking isn’t just about convenience—it’s a chemical transformation. Here’s why this method turns a tough chuck roast into buttery, fall-apart perfection:
Collagen Breakdown = Liquid Gold
-
Chuck roast is rich in collagen, a tough connective tissue.
-
At low temps (170–200°F) over hours, collagen dissolves into gelatin, creating that silky, melt-in-your-mouth texture.
-
No searing needed because the long cook time ensures tenderness without drying out.
The Fat Factor
-
Butter + marbled fat in chuck roast emulsify into the cooking liquid, making a self-basting, ultra-rich sauce.
-
Pro Tip: If you trim too much fat, the roast can turn dry. Leave some for flavor!
Acid’s Secret Role
-
Pepperoncini brine isn’t just for tang—its mild acidity helps break down muscle fibers, further tenderizing the meat.
Fun Fact: This dish was accidentally invented in 2001 by a home cook in Mississippi who threw together pantry staples. The internet (and slow cookers everywhere) thank her!
The Flavor Alchemy of Ranch + Onion Soup Mix
These two seasoning packets do way more than just season—they’re umami powerhouses.
Why They Work Together
-
Ranch mix: Contains buttermilk powder, garlic, onion, and herbs—adding creamy, savory depth.
-
Onion soup mix: Packed with dehydrated onions, soy sauce solids, and yeast extract (natural MSG), boosting meaty richness.
Hacks for Customization:
-
Lower sodium? Use ½ packet of each or make DIY versions (see below).
-
Extra herby? Add a teaspoon of thyme or rosemary to the mix.
DIY Ranch Mix (Single Batch):
-
1 tbsp buttermilk powder
-
1 tsp dried parsley
-
½ tsp garlic powder
-
½ tsp onion powder
-
¼ tsp dill
-
¼ tsp black pepper
DIY Onion Soup Mix (Single Batch):
-
2 tbsp dried minced onion
-
1 tsp beef bouillon powder
-
½ tsp onion powder
-
¼ tsp celery seed
-
¼ tsp smoked paprika
Pepperoncini – The Unsung Hero of Mississippi Pot Roast
These mild Italian peppers aren’t just a garnish—they’re essential for balance.
Why Pepperoncini (Not Jalapeños or Banana Peppers)?
-
Mild heat (100–500 Scoville units) – Enough zing to cut through richness without overwhelming.
-
Tangy brine – Adds acidity to brighten the dish (like a splash of vinegar would).
-
Subtle sweetness – Unlike pickled jalapeños, they don’t dominate the flavor.
Pro Tips:
-
Use whole peppers for presentation (they soften beautifully).
-
Slice them if you want more even distribution of tang.
-
Don’t skip the brine! It’s the secret to the roast’s signature “gravy.”
Fun Twist: Try pepperoncini-infused butter for extra depth—melt butter with a few sliced peppers, strain, and use in the recipe.
Shake It Up, Y’all!
1. Italian Stallion: Swap ranch for Italian dressing mix + add sun-dried tomatoes.
2. Keto Queen: Serve over cauliflower mash with extra butter.
3. Spicy Señor: Use jalapeños instead of pepperoncinis + a dash of cumin.
4. Veggie Patch: Add carrots and potatoes in the last 3 hours (no need to stir!).
5. Instant Pot Express: Cook on high pressure for 60 mins + natural release. Boom!
Olivia’s Extra Sprinkle of Love
This recipe’s like my favorite jeans—it just gets better with time. I once made it for my book club and accidentally used double the butter (blame the wine!). Result? A standing ovation! Over the years, I’ve learned: cheap chuck roast works best, generic seasoning packets are totally fine, and leftovers make killer nachos. Funny story: My husband tried to “help” by stirring it mid-cook. The roast survived, but he’s now banned from slow-cooker duty! Moral? Embrace the mess. This dish is forgiving, flexible, and forever delicious.
Your Burning Questions, Answered!
Q: Can I use a different cut of beef?
A: Stick with chuck or brisket! Lean cuts (like sirloin) turn tough. Chuck’s marbling is key for that pull-apart texture.
Q: Help! Mine’s too salty.
A: Easy fix! Use low-sodium soup/ranch mixes next time, or add ½ cup beef broth to dilute. Balance with a squeeze of lime at serving.
Q: Can I make it in the oven?
A: Absolutely! Bake at 275°F in a Dutch oven for 4–5 hours. Add ½ cup broth since liquid evaporates faster.
Q: Why no searing?
A> Controversial, I know! But Mississippi Roast skips it because the slow cooker + butter creates its own rich “broth.” Searing can dry it out if you’re not careful.
Mississippi Pot Roast
- Total Time: About 8 hours
Description
Hey friend! Olivia here, apron dusted with flour and heart full of excitement. Can you smell that? It’s the warm, buttery, tangy-savory aroma of Mississippi Pot Roast simmering in the slow cooker. If you want a dish that hugs your soul after a long day, gathers family around the table, and requires less effort than folding a fitted sheet (we all know that struggle!), you’ve hit the jackpot. This Southern legend is pure lazy-day magic with just five pantry staples. Ready to make your kitchen smell like a hug? Let’s dive in!
Ingredients
-
3–4 lb chuck roast (fatty cut for silky tenderness)
-
1 packet ranch seasoning mix
-
1 packet onion soup mix
-
½ cup (1 stick) butter (ghee or less butter works too)
-
½ jar pepperoncini peppers (6–8 peppers + juice)
Instructions
-
Place the chuck roast in your slow cooker (no searing needed).
-
Sprinkle ranch and onion soup mixes evenly over the meat.
-
Scatter pepperoncini peppers on top and drizzle 3–4 spoonfuls of the pepperoncini juice (it’s salty, so no added salt needed).
-
Place the stick of butter on top—whole! Don’t stir; layering keeps the meat moist and flavorful.
-
Cover and cook on low for 8 hours or high for 4–5 hours until meat shreds easily with a fork.
-
Remove roast, shred, discard excess fat, and return to slow cooker. Stir into juices and let soak for 10 minutes.
Notes
-
Italian Style: Swap ranch for Italian dressing mix; add sun-dried tomatoes.
-
Keto: Serve over cauliflower mash with extra butter.
-
Spicy: Use jalapeños instead of pepperoncinis; add cumin.
-
Veggie Boost: Toss in carrots and potatoes in the last 3 hours.
-
Instant Pot: Cook high pressure 60 mins, natural release.
- Prep Time: 10 minutes
- Cook Time: : 8 hours (low) or 4–5 hours (high)
Nutrition
- Calories: 390 Cal Per Serving
- Fat: 28g
- Carbohydrates: 3g
- Fiber: 1g
- Protein: 32g
Nutritional Nibbles (Per Serving, 8 Servings)
Calories: ~390 • Protein: ~32g • Fat: ~28g • Carbs: ~3g • Fiber: ~1g
Note: Stats include full butter. Reduce butter or use leaner cuts to lower fat.
Final Thoughts: Why This Dish is a Forever Favorite
Mississippi Pot Roast isn’t just a meal—it’s a cultural phenomenon for a reason.
✅ Foolproof – Almost impossible to mess up.
✅ Versatile – Serve on mashed potatoes, in tacos, or even over pizza.
✅ Nostalgic Comfort – Tastes like a hug from Grandma (even if you’ve never been to Mississippi).
Last Pro Tip: Double the recipe and freeze half. Future You will high-five Present You on a busy night.
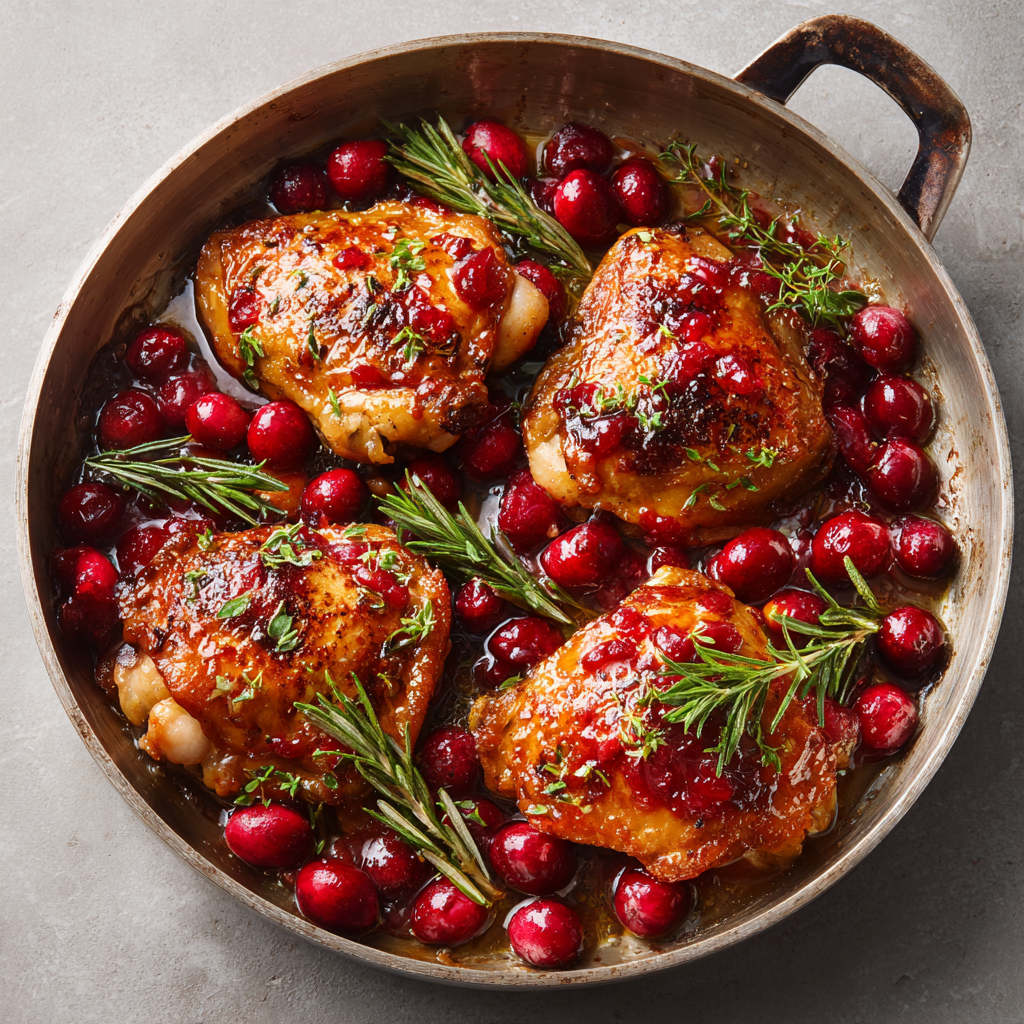
Cranberry Chicken
Meet Your New Favorite Autumn Chicken Recipe!
Hey there, kitchen friend! Olivia here, and I’m practically buzzing with excitement to share this Cranberry Chicken with you. Imagine juicy chicken thighs crisped to golden perfection, swimming in a glossy, tangy-sweet cranberry glaze that’ll make your taste buds dance. It’s the kind of dish that fills your kitchen with cozy, citrusy aromas and turns an ordinary Tuesday into a mini-celebration. Perfect for busy weeknights but fancy enough for holiday gatherings, this recipe is my love letter to autumn flavors. I live for those moments when a simple meal becomes a memory—like when my kids abandon their phones to ask, “What smells so good?” That’s the magic of food that’s both stunning and soul-warming. You don’t need chef-level skills here; just a baking dish and a sense of adventure. So tie on that apron (messy is encouraged!), and let’s create something unforgettable together. Trust me—this cranberry chicken isn’t just dinner. It’s a hug on a plate.
My Cranberry Epiphany: A Thanksgiving Tale
Picture this: It’s Thanksgiving Eve, 2018. My oven suddenly quits, and I’m staring down 12 guests with zero main course. Panic mode? Absolutely. But then I spot a bag of cranberries and chicken thighs in the fridge—my “plan B” ingredients. I whipped up this cranberry glaze in a skillet, poured it over the chicken, and roasted it in my dodgy toaster oven (true story!). As it caramelized, that sweet-tart scent filled the air, and my anxiety melted away. When my grandma took her first bite, she whispered, “Olivia, this is better than turkey.” That’s when it hit me: perfection isn’t about flawless execution; it’s about flavor, heart, and a little improvisation. Now, this dish is my November tradition—a reminder that kitchen “disasters” often birth the best recipes. Every time I make it, I smile at the memory of our toaster-oven triumph!
Your Cranberry Chicken Toolkit
Gather these simple ingredients—they’re pantry heroes with big personalities! I’ve sprinkled in substitutions so you can riff like a rockstar.
- 6 bone-in, skin-on chicken thighs → The bone keeps meat juicy, and crispy skin is non-negotiable for texture! Swap: Boneless thighs work (reduce cook time by 5 mins), or use drumsticks.
- 2 cups fresh cranberries → Their tart pop balances sweetness. Chef tip: Frozen work too—no thawing needed! Avoid dried; they’re too sweet.
- ¼ cup freshly squeezed orange juice → Brightness is key! Bottled juice lacks zing. In a pinch? Lemon juice + ½ tsp sugar.
- ¼ cup dark brown sugar → Molasses depth > light brown sugar. Vegan? Coconut sugar rocks here.
- 2 tbsp maple syrup → Real syrup adds earthy warmth. Sub: Honey or agave.
- 1 tsp orange zest → That citrus perfume! No fresh oranges? Use ¼ tsp dried peel.
- ¼ cup olive oil → EVOO’s fruitiness shines. Neutral oils like avocado work too.
- 6 cloves garlic, crushed → Crushing releases oils for bold flavor. Powder (½ tsp) in emergencies!
- 2 tsp kosher salt → It’s less salty than table salt! If subbing table salt, use 1¼ tsp.
- 1 tsp ground black pepper → Freshly cracked = aromatic bliss. Pre-ground? No shame.
- 2 tsp dried rosemary → Dried holds up to roasting. Fresh? Use 1 tbsp, chopped fine.
Fun fact: Cranberries are natural thickeners—they release pectin as they cook, giving that lush glaze!
Let’s Cook This Beauty: Step-by-Step
Ready for golden, sticky chicken? Follow these steps—I’ve tucked chef hacks into every fold!
- Preheat oven to 400°F (200°C). → Why? A hot start = crispy skin. If oven runs cool, bump to 425°F. (Pro tip: Place a baking sheet inside while preheating—it’ll catch drips!)
- Make the cranberry glaze: In a small saucepan, combine cranberries, orange juice, brown sugar, maple syrup, orange zest, and garlic. Simmer 10 mins until cranberries burst and sauce thickens. → Chef hack: Mash a few berries with a spoon to speed up thickening! Stir often to avoid scorching.
- Prep the chicken: Pat thighs very dry with paper towels. → Critical step! Dry skin = ultimate crispiness. Arrange in a 9×13 baking dish. Sprinkle salt, pepper, and rosemary evenly on both sides. → Insight: Season under the skin too for max flavor!
- Assemble: Pour olive oil over chicken, rubbing it in. Spoon cranberry glaze generously on top. → Don’t drown them! Leave some skin exposed for browning.
- Roast 35-40 mins until internal temp hits 165°F and skin is golden. → Game-changer: Use a meat thermometer! Thighs vary in size.
- Optional broil: Crank to broil for 2-3 mins. → Watch closely! This gives that Instagram-worthy caramelized crust.
- Rest 5 mins. → Patience, chef! Resting lets juices redistribute. Cover loosely with foil.
My mantra: “Burnt bits aren’t mistakes—they’re flavor confetti!”
The Science Behind the Magic: Why This Recipe Works
Ever wonder why this cranberry chicken tastes so darn good? It’s not just luck—it’s science! Let’s geek out over the culinary alchemy happening in your oven.
1. The Maillard Reaction + Caramelization:
When chicken skin hits a 400°F oven, the Maillard reaction kicks in—a chemical dance between amino acids and sugars that creates hundreds of new flavor compounds. That golden crust? Pure umami magic. Meanwhile, the cranberry glaze’s sugars (brown sugar and maple syrup) caramelize, deepening into complex toffee-like notes. Pro tip: A splash of acid (orange juice) balances the sweetness and prevents the glaze from cloying.
2. Fat = Flavor Highway:
Bone-in, skin-on thighs are MVP here. As they roast, fat renders under the skin, basting the meat in its own juices for insane tenderness. Olive oil isn’t just for sautéing—its fruity esters bond with the cranberries’ aromatic compounds, amplifying their tart brightness. (Fun fact: Cranberries contain benzoate, a natural preservative that also enhances savory flavors!)
3. Pectin Power:
Cranberries are packed with pectin, a natural thickener released when heated. As the glaze simmers, pectin teams up with the sugars to create that glossy, jammy texture—no cornstarch needed! Bursting the berries (step 2) speeds this up, but leaving a few whole adds pops of tartness.
4. The Resting Rule:
Skipping the 5-minute rest? Big mistake. Heat causes muscle fibers in chicken to tighten, squeezing out moisture. Resting lets them relax, reabsorbing juices. Tent with foil loosely—steam makes skin soggy!
5. Garlic’s Double Act:
Crushed garlic (not minced!) releases alliinase enzymes, creating allicin—the compound responsible for its pungent kick. Roasting mellows it into sweet, nutty depth. Bonus: Allicin has antimicrobial properties, making this dish as wholesome as it is delicious.
Pro Hack: For extra crispy skin, salt the chicken 1 hour ahead and refrigerate uncovered. This dry-brine draws out moisture, seasoning the meat deeply and drying the skin for maximum crunch.
Cranberry Chicken Around the World: Global Twists
This recipe is a blank canvas—let’s globe-trot with flavor inspirations!
1. Moroccan Spiced:
Swap rosemary for 1 tsp each cumin, coriander, and cinnamon. Add ¼ cup chopped dried apricots to the glaze and garnish with toasted almonds. Serve with couscous for a North African vibe.
2. Thai-Inspired:
Infuse the glaze with 1 tbsp red curry paste and 1 can coconut milk (simmer until thickened). Top with cilantro, lime zest, and crushed peanuts. Jasmine rice mandatory!
3. French Bistro Style:
Deglaze the pan with ½ cup red wine post-roasting. Stir in 2 tbsp butter for a silky sauce. Pair with roasted fennel and crusty baguette.
4. German Fusion:
Add 1 cup sauerkraut and caraway seeds to the baking dish. Swap maple syrup for apple butter. Bratwurst on the side? Yes, please.
5. Mexican Fiesta:
Blend cranberries with chipotle peppers in adobo for a smoky-spicy glaze. Serve with black bean puree and pickled red onions.
Ingredient Spotlight: Cranberries
Native to North America, cranberries were used by Indigenous tribes for pemmican (dried meat mixes). Their high acidity (pH 2.3–2.5!) makes them natural preservatives—perfect for pairing with rich meats.
From My Table to Yours: Reader Stories & Adaptations
This recipe has sparked kitchen adventures worldwide! Here are my favorite reader twists:
1. The “Clean Out the Fridge” Version:
Submitted by Marco, Italy: “No cranberries? I used pomegranate molasses + chopped figs. Unorthodox but incredible!”
2. The 10-Minute Shortcut:
From busy mom Leah: “Air fryer hack: Cook chicken at 380°F for 15 mins, glaze, then 5 more mins. Crispy in half the time!”
3. The Holiday Showstopper:
Food blogger Priya’s take: “I layer this over saffron risotto and garnish with edible gold flakes. Guests lose their minds.”
4. The Paleo Power Bowl:
CrossFit devotee Jake’s riff: “Roasted sweet potatoes + kale under the chicken. Drizzled with tahini. Meal prep hero!”
5. The Sweet Heat Surprise:
Texan firefighter Carlos’s secret: “I add a shot of espresso to the glaze. Sounds weird, but the bitterness plays nice with the berries.”
Your Turn!
Tag #OliviasCranberryChicken with your creations. Each month, I feature one reader’s twist in my newsletter—winner gets a custom apron!
Plating Perfection: How to Serve
Presentation is everything! Scoop a chicken thigh onto warm plates (those juices are liquid gold). Drizzle extra glaze from the dish, and garnish with fresh rosemary or orange zest. Pair with:
- Creamy mashed potatoes → They soak up the cranberry goodness like a dream.
- Roasted Brussels sprouts → Their bitterness balances the sweet glaze.
- Crusty bread → For swiping every last drop of sauce. No leftovers allowed!
For gatherings, serve family-style right in the baking dish—rustic and inviting!
Mix It Up: 5 Flavor Twists
This recipe is your canvas! Try these riffs:
- Spicy Kick: Add 1 diced jalapeño to the glaze. → Fiery + fruity = wow!
- Herb Garden: Swap rosemary for thyme or sage. → Earthy vibes for days.
- Slow-Cooker Style: Skip roasting. Cook chicken and glaze on LOW for 6 hours. → Set-and-forget magic!
- Vegan Vibes: Use cauliflower steaks or tofu. Roast 25 mins. → Glaze is naturally plant-based!
- Festive Fusion: Stir ½ cup bourbon into the glaze. → Hello, holiday cocktail vibes!
Olivia’s Kitchen Confessions
This recipe has evolved like my cooking journey! Originally, I used canned cranberry sauce (shh!), but fresh berries transformed it. My kids now call it “red chicken” and demand it monthly. One hilarious fail: I once subbed lavender for rosemary—big mistake! It tasted like potpourri chicken. Lesson learned: Stick to savory herbs. Over time, I’ve added the broil step because we all deserve that sticky, crackly skin. Pro tip: Double the glaze and freeze half—it’s killer on pork chops or baked Brie! At its heart, this dish is about joy, not perfection. So crank up the music, spill some cranberries, and savor the chaos.
Your Cranberry Chicken Questions, Answered!
Let’s troubleshoot common hiccups—you’ve got this!
- Q: My glaze is too tart! Help!
→ A: Cranberries vary in bitterness. Next time, add 1 extra tbsp maple syrup pre-roasting. Too late? Stir 1 tsp honey into the pan juices before serving. - Q: Skin isn’t crispy. What went wrong?
→ A: Two culprits: 1) Didn’t pat chicken dry enough—moisture is the enemy of crisp! 2) Overcrowded the pan. Space thighs evenly. Still soggy? Broil 5 mins next time. - Q: Can I use chicken breasts?
→ A: Yes, but reduce cook time to 25-30 mins (165°F internal temp). Breasts dry out faster—brush extra glaze halfway through! - Q: Sauce is too thin after roasting.
→ A: Transfer pan juices to a saucepan. Simmer 5 mins to reduce. Thicken with 1 tsp cornstarch + 1 tbsp water if needed.
Cranberry Chicken
- Total Time: 50 mins
Description
Crispy golden chicken meets tangy-sweet cranberry glaze in this irresistibly comforting, 40-minute dinner. With fresh citrus, earthy rosemary, and bubbling cranberries, it brings fall’s greatest hits straight to your plate. Elegant enough for a dinner party, easy enough for a Tuesday. This is the cozy, crowd-pleasing hug your table needs.
Ingredients
-
6 bone-in, skin-on chicken thighs
-
2 cups fresh (or frozen) cranberries
-
¼ cup orange juice
-
¼ cup dark brown sugar
-
2 tbsp maple syrup
-
1 tsp orange zest
-
6 cloves garlic, crushed
-
¼ cup olive oil
-
2 tsp kosher salt
-
1 tsp ground black pepper
-
2 tsp dried rosemary
Instructions
-
Preheat oven to 400°F (200°C).
-
Make the glaze: Simmer cranberries, orange juice, sugar, maple syrup, zest, and garlic in a small pot for 10 mins. Mash berries gently to thicken.
-
Prep chicken: Pat thighs dry. Season with salt, pepper, and rosemary. Arrange in a baking dish.
-
Assemble: Rub with olive oil, spoon glaze on top (leave some skin exposed).
-
Roast 35–40 mins until chicken hits 165°F internally.
-
Broil (optional) 2–3 mins for crispy, caramelized skin.
-
Rest 5 mins. Serve with extra glaze from the pan.
Notes
-
Pat chicken super dry for crisp skin
-
Broil at the end for that sticky, golden finish
-
Frozen cranberries = totally fine (no thawing needed!)
-
Double the glaze—it freezes like a dream!
- Prep Time: 10 mins
- Cook Time: 35–40 mins
Nutrition
- Calories: 390cal Per Serving
- Fat: 25g
- Carbohydrates: 12g
- Protein: 28g
Nutritional Snapshot (Per Serving)
Calories: 390 | Net Carbs: 12g | Protein: 28g | Fat: 25g
Note: Stats are approximate. Using skinless chicken reduces fat by ~8g/serving.
Final Thoughts: More Than a Recipe
This cranberry chicken isn’t just about feeding hungry bellies—it’s about the stories we create while cooking. Maybe it’s the dish your toddler finally gobbles up without protest, or the meal you proudly serve to in-laws. Perhaps it’s your “I survived this Monday” comfort food. However it lands on your table, I hope it reminds you that great food doesn’t require perfection. Burned the edges? Call it “caramelized.” Forgot the rosemary? Your dish is now “minimalist.” The real secret ingredient is always joy.
Now, go forth and roast with abandon! And remember: If my toaster-oven Thanksgiving disaster could birth something beautiful, your kitchen wins are just waiting to happen.
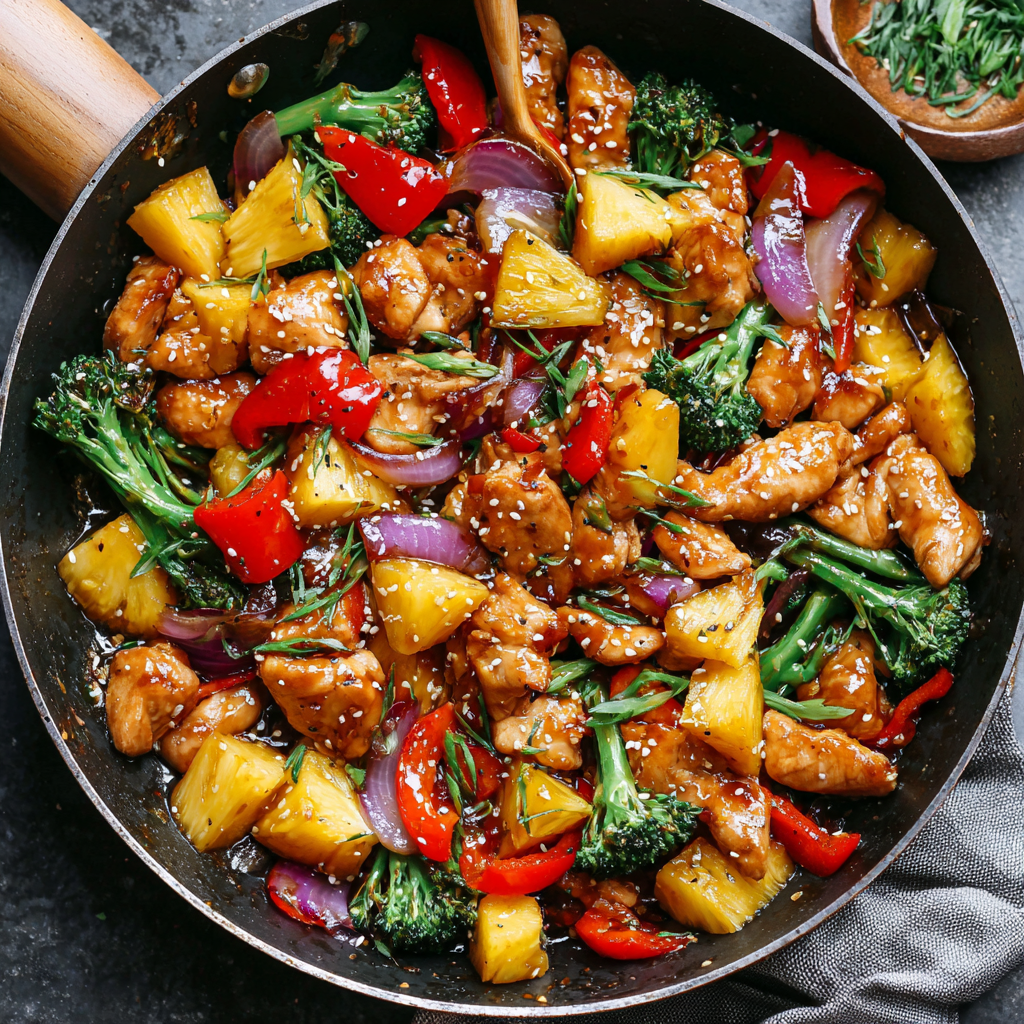
Pineapple Chicken
Bring the Tropics to Your Table with Sizzling Pineapple Chicken!
Hey there, kitchen adventurers! Olivia here, apron dusted with cornstarch and a huge grin on my face because today? We’re making magic happen in under 30 minutes. Picture this: golden chicken glazed in sticky-sweet pineapple goodness, crisp peppers doing a happy dance in the skillet, and that irresistible garlic-ginger aroma that’ll have your family drifting into the kitchen like cartoon characters following a pie. This Pineapple Chicken stir-fry isn’t just dinner—it’s a mini-vacation on a plate. Whether you’re wrangling homework chaos or craving a taste of sunshine after a gray day, this recipe’s your golden ticket. I designed it for real life: fast, flexible, and foolproof. No fancy skills needed—just a hot pan and that gorgeous enthusiasm of yours! So grab your favorite wooden spoon (mine’s stained turmeric-yellow from curry experiments) and let’s turn “What’s for dinner?” into “Wow, can we have this again tomorrow?” Trust me, this dish? It’s a hug from the inside.
My First Taste of Paradise (and a Kitchen Fire Drill!)
Rewind to my college days: tiny apartment, tinier budget, and a tragic habit of burning toast. My roommate Jade, a Hawaii native, decided to cure my culinary blues with her grandma’s “emergency happiness stir-fry.” We cranked up Hawaiian music, chopped pineapples laughing about dorm life, and then—smoke alarm symphony! We’d cranked the heat too high, sending bell peppers into charred confetti. Jade yelled, “Abort mission!” as we frantically waved towels. We salvaged it (barely!), eating straight from the pan while perched on milk crates. That smoky-sweet mess tasted like victory. Now, every time I make this, I smile at Jade’s voice in my head: “Medium-high heat, Liv, not volcano mode!” It’s proof that even kitchen flops become treasured stories. This dish? It’s resilience with a side of pineapple.
Your Tropical Toolkit: Ingredients & Pro Tips
Gather these vibrant players—and remember, flexibility is your superpower!
- 1½ lbs chicken breasts, diced – Thighs work too for extra juiciness! Dice uniform for even cooking.
- 1 small red onion, diced – Adds zingy crunch. Swap for shallots if you’re feeling fancy.
- 1 red + 1 yellow bell pepper, diced – Color explosion! Use orange or green if that’s in your fridge.
- 2 cloves garlic, minced – Fresh is best—bottled lacks oomph. Double if you’re a garlic fiend!
- 1 tsp minced ginger – Freeze ginger knobs and grate frozen—no peeling, maximum zing!
- 1 small head broccoli, chopped – Stems work too—slice thin for quick cooking.
- 1 (20 oz) can pineapple chunks (reserve juice!) – Key flavor bomb! Save that liquid gold for the sauce.
- 2 tbsp oil – Sesame for nutty depth, vegetable for neutral. Peanut oil’s great too!
- Salt & pepper – Season chicken generously—it’s your flavor foundation.
- Sesame seeds – Toasty garnish. Black sesame makes it Instagram-pretty!
For the Sauce (aka Liquid Sunshine):
- ¼ cup pineapple juice – From the can! Fresh juice lacks tangy brightness.
- 2 tbsp rice wine vinegar – Apple cider vinegar in a pinch, but reduce by 1 tsp—it’s stronger!
- ¼ cup honey – Agave or maple syrup for vegan twist. Brown sugar works too!
- ¼ cup soy sauce – Tamari or coconut aminos for gluten-free magic.
- ⅓ cup chicken broth – Veggie broth keeps it plant-friendly. Water in emergencies!
- 1½ tsp sesame oil – Stir in LAST—heat kills its delicate flavor.
- 2 tbsp cornstarch – Non-negotiable thickener! Arrowroot works for paleo diets.
Let’s Stir-Fry! Your Foolproof Roadmap
Ready for sizzle therapy? Follow these steps—I’ve packed ’em with hacks!
- Whisk that sunshine sauce! In a bowl, combine pineapple juice, vinegar, honey, soy sauce, broth, and cornstarch. Whisk until silky—no lumps allowed! Cornstarch loves to clump, so take 30 extra seconds. Set sauce near stove. Pro hack: Add a splash of sriracha here if you like heat!
- Brown that chicken! Heat oil in a large skillet over medium-high. Season chicken with salt and pepper. Cook 5-6 minutes until lightly golden but not fully cooked. Don’t overcrowd the pan—cook in batches if needed! Browning = flavor, so resist stirring constantly. Remove chicken to a plate. It’ll finish cooking later!
- Sizzle those veggies! In the same skillet, add onion, bell peppers, broccoli, garlic, and ginger. Sauté 4-5 minutes until crisp-tender. Garlic and ginger burn fast—add them 1 minute after veggies. Stir nonstop! Broccoli stems? Add them first; florets later.
- Bring the party together! Return chicken to the pan. Add pineapple chunks. Pour sauce over everything. Scrape any browned bits from the pan—that’s flavor gold! Sauce will look thin at first—trust the process.
- Simmer to perfection! Stir gently as sauce bubbles 3-5 minutes until glossy and thick enough to coat the back of a spoon. Bubbles should be lazy and thick—if it’s too thin, simmer 1 more minute. Too thick? Splash in broth. Remove from heat, then stir in sesame oil. Boom—tropical magic!
The Cultural Roots of Pineapple Chicken – A Global Love Affair
Pineapple chicken isn’t just a quick weeknight meal—it’s a dish with a passport stamped by multiple culinary traditions. While many associate it with American-Chinese takeout, its roots stretch from the tropical plantations of Hawaii to the bustling street markets of Thailand.
Hawaii’s Sweet Legacy
In Hawaii, pineapple isn’t just a fruit; it’s a cultural icon. Introduced in the 18th century, pineapples became synonymous with hospitality (hence the door decor!). Native Hawaiians paired them with pork in huli huli dishes, but when Asian immigrants brought stir-frying techniques, pineapple chicken was born. The tangy-sweet balance mirrors the islands’ poke bowls—fresh, vibrant, and uncomplicated.
Thai Twist: Pad Prik King
Across the Pacific, Thailand’s pad prik king (stir-fried curry with chicken) often features pineapple for a sour counterpoint to spicy red curry paste. Unlike the saucy American version, Thai pineapple chicken is drier, with crisper veggies and a fierier kick.
American-Chinese Fusion
Then there’s the U.S. takeout classic—thick, glossy sauce clinging to tender chicken, a product of 20th-century Chinese immigrants adapting recipes to local tastes. Canned pineapple made it affordable, and cornstarch gave it that irresistible cling.
Why It Works Everywhere?
-
Sweet-Savory Balance: Universal appeal—kids and adults alike love it.
-
Adaptability: From Thai chilies to Hawaiian sea salt, it’s a canvas for local flavors.
-
Quick Comfort: Stir-fries are global comfort food, perfect for busy lives.
Next time you take a bite, remember: you’re tasting a world of history!
The Science of the Sizzle – Why This Recipe Works
Ever wonder why pineapple chicken is foolproof? It’s not luck—it’s science! Let’s break down the magic behind each step.
1. Velveting the Chicken
Cornstarch isn’t just for thickening the sauce; it’s the secret to silky chicken. When you coat diced chicken in cornstarch before frying, it creates a protective layer that:
-
Locks in juices (no rubbery meat!).
-
Boosts browning (hello, Maillard reaction!).
-
Prevents protein strands from tightening too fast.
Pro Tip: For extra tenderness, marinate chicken in 1 tsp baking soda + 1 tbsp water for 15 minutes before cooking (rinse well!).
2. Pineapple’s Dual Power
-
Enzyme Action: Fresh pineapple contains bromelain, which tenderizes meat. Canned pineapple (used here) is heat-treated, so it won’t turn chicken mushy but still adds bright acidity.
-
Caramelization: The natural sugars in pineapple juice reduce into a complex, sticky glaze.
3. Sauce Chemistry
The sauce thickens perfectly because:
-
Cornstarch granules swell at 203°F (95°C), creating a glossy texture.
-
Acid (vinegar/pineapple juice) balances sweetness and prevents clumping.
-
Sesame oil added last preserves its delicate nutty aroma (heat destroys it!).
Fun Fact: Stir-frying over high heat creates wok hei (“breath of the wok”)—those smoky, charred notes that elevate homemade versions above takeout!
Beyond the Plate – Creative Uses for Leftovers
Got extra pineapple chicken? Don’t reheat—reinvent! Here are five genius ways to repurpose it:
1. Pineapple Chicken Tacos
-
Shred leftover chicken, pile onto corn tortillas with shredded cabbage, cilantro, and a squeeze of lime.
-
Bonus: Drizzle with sriracha mayo (mix 2 tbsp mayo + 1 tsp sriracha).
2. Tropical Fried Rice
-
Sauté day-old rice with eggs, then stir in chopped leftovers.
-
Pro Move: Add frozen peas and a splash of coconut milk for richness.
3. Hawaiian Pizza Toast
-
Spread naan or sourdough with pizza sauce, top with chicken, pineapple, and mozzarella. Broil 3 minutes!
4. Buddha Bowls
-
Layer quinoa, spinach, chicken, and roasted sweet potatoes. Drizzle with reserved sauce.
5. Crispy Spring Rolls
-
Wrap chicken/veggie mix in rice paper, air-fry at 400°F for 8 minutes. Serve with sweet chili sauce.
Zero-Waste Tip: Freeze sauce in ice cube trays for quick stir-fries later!
Plating Your Tropical Masterpiece
Dish this up like a pro! Fluffy jasmine rice is my go-to—it soaks up that glossy sauce like a dream. For fun, serve in hollowed-out pineapple halves (hello, vacation vibes!). Or pile it over noodles: rice noodles keep it light, udon adds chew. Top with sesame seeds and a cilantro sprinkle if you’re extra. Family-style is best: plonk the skillet right on the table with forks for sharing. Add a lime wedge squeeze for zing! Psst… leftovers? Even better next day—if they last that long.
Shake It Up! 5 Delicious Twists
Make this recipe your own with these riffs:
- Spicy Mango Tango – Swap pineapple for mango chunks, add 1 tbsp chili paste to sauce.
- Teriyaki Twist – Replace honey with 3 tbsp brown sugar + 1 tbsp mirin.
- Veggie Power – Skip chicken, use tofu or chickpeas. Double broccoli and add snap peas!
- Cashew Crunch – Stir in ½ cup roasted cashews with pineapple.
- Pineapple Pepper Express – Use only red bell peppers + 1 diced jalapeño for heat.
Confessions from My Cozy Kitchen
This recipe’s evolved more than my taste in aprons! Originally, I used ketchup (cringe!) until Jade schooled me on pineapple juice’s natural tang. My “hack” for ginger? Frozen grated nuggets—I stash ’em in ice cube trays! One Tuesday disaster: I subbed cornstarch with flour… and created wallpaper paste. Lesson learned! Now, I double the sauce because my kiddo loves it on rice bowls. Funny story: My dog, Butters, once stole a pineapple chunk mid-photo shoot. He’s now my official taste-tester (sans chicken, of course!). Moral? Embrace the mess—it’s where flavor memories are born.
Your Pineapple Chicken Questions, Solved!
Q: My sauce turned out gloopy! What happened?
A> Too much cornstarch or over-simmering! Next time, mix cornstarch with 1 tbsp cold water first. If it’s already thick, stir in broth 1 tbsp at a time off-heat.
Q: Can I use fresh pineapple?
A> Absolutely! Use 1½ cups fresh chunks. Simmer sauce 1 extra minute—canned juice has more concentrated tang. Pro tip: Microwave fresh pineapple 10 seconds to boost juices.
Q: Veggies got soggy. Help!
A> High heat is key! Ensure your pan is ripping hot before adding veggies. Stir constantly, and pull them when bright-colored with a slight crunch. They’ll soften in the sauce later.
Q: Make-ahead tips for busy nights?
A> Chop veggies/chicken up to 2 days ahead—store separately. Whisk sauce and refrigerate (cornstarch may settle; re-whisk before using). Cook time: 15 minutes flat!

Pineapple Chicken
- Total Time: 25–30 mins
Description
Ready for a flavor vacation? This 30-minute Pineapple Chicken delivers tropical vibes with zero stress—juicy chicken, caramelized pineapple, and crisp veggies glazed in a golden, sticky-sweet sauce. It’s bright, bold, and beautifully simple. Whether you’re craving a sunny escape or feeding hangry humans on a weeknight, this dish is your tropical kitchen hero.
Ingredients
-
1½ lbs chicken breasts, diced
-
1 small red onion, diced
-
1 red + 1 yellow bell pepper, diced
-
1 small head broccoli, chopped
-
2 cloves garlic, minced
-
1 tsp minced ginger
-
1 (20 oz) can pineapple chunks (reserve juice)
-
2 tbsp oil (sesame or neutral)
-
Salt & pepper
-
Sesame seeds, for garnish
For the Sauce:
-
¼ cup pineapple juice (from the can)
-
¼ cup honey
-
¼ cup soy sauce
-
¼ cup rice vinegar
-
⅓ cup chicken broth
-
1½ tsp sesame oil (stir in last)
-
2 tbsp cornstarch
Instructions
-
Whisk Sauce: Mix all sauce ingredients except sesame oil until smooth.
-
Sear Chicken: Heat oil in a large skillet over medium-high. Season chicken. Sear 5–6 mins until golden. Set aside.
-
Stir-Fry Veggies: In same pan, sauté onion, peppers, and broccoli 4–5 mins. Add garlic and ginger after 2 mins.
-
Bring It Together: Return chicken, add pineapple chunks and sauce. Stir and simmer 3–5 mins until thick and glossy.
-
Finish: Remove from heat, stir in sesame oil. Garnish with sesame seeds.
Notes
-
High heat = crisp veggies
-
Double the sauce for rice bowls later
-
Serve in pineapple halves for a wow moment
-
Use frozen broccoli? Thaw and pat dry first
- Prep Time: 10 mins
- Cook Time: 15–20 mins
Nutrition
- Calories: 390 cal Per Serving
- Fat: 18g
- Carbohydrates: 20g
- Protein: 30g
Nutritional Sunshine (Per Serving)
Calories: 390 | Net Carbs: 20g | Protein: 30g | Fat: 18g
Note: Using low-sodium soy sauce and omitting honey reduces sodium/sugar. Add extra veggies to boost fiber!
Final Thoughts: More Than Just a Meal
Pineapple chicken is a reminder that cooking is equal parts creativity and connection. Whether it’s Jade’s smoke-alarm adventures in a college kitchen or your toddler stealing pineapple chunks off the counter, this dish gathers stories as fast as it gathers flavor. It’s resilient (forgiving substitutions!), globally inspired, and endlessly adaptable—much like the cooks who make it.
So tonight, when you hear that sizzle and smell ginger curling into the air, know you’re not just feeding hungry mouths. You’re weaving a little tropical sunshine into the everyday. And that? That’s pure magic.




