
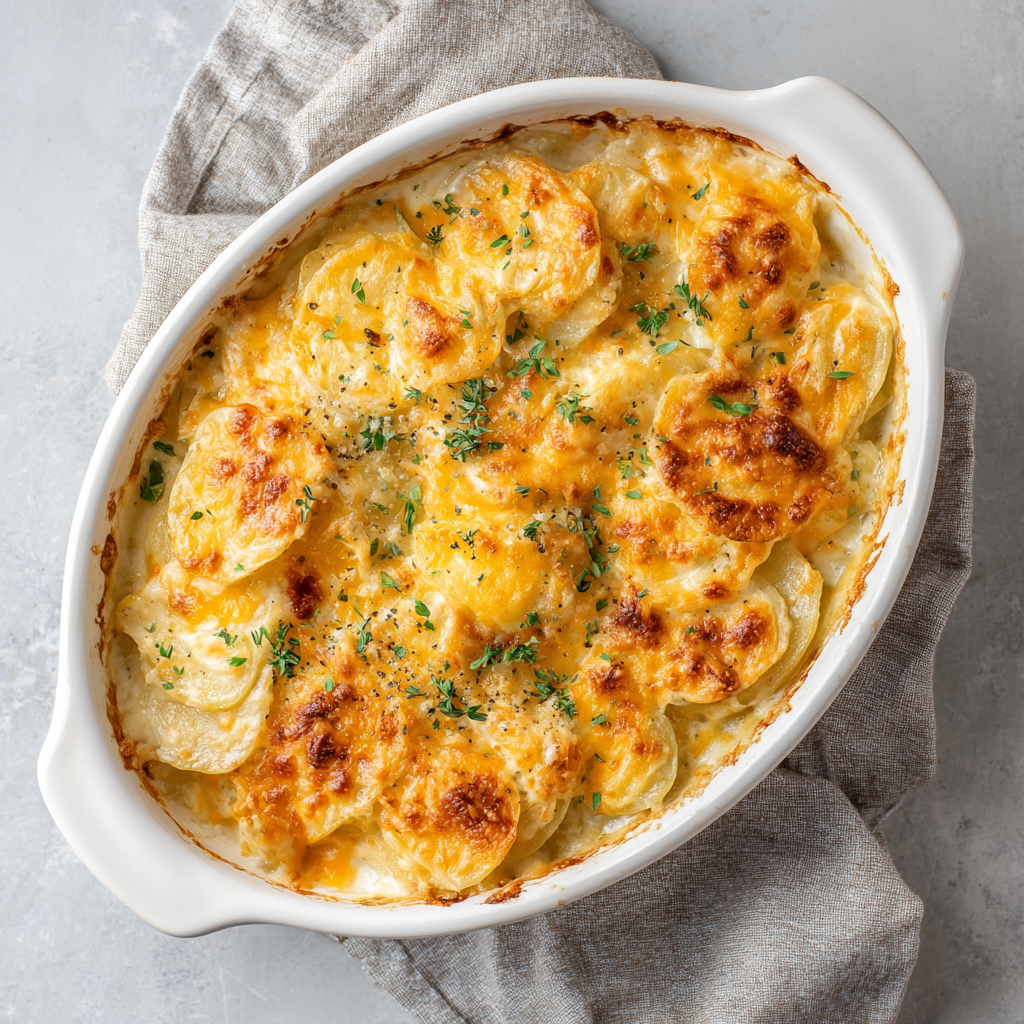
Easy Cheesy Scalloped Potatoes
Easy Cheesy Scalloped Potatoes: Your New Go-To Comfort Food
Hey there, friend! Come on in, grab an apron, and let’s get cozy. There’s something magical about the smell of potatoes, cream, and cheese baking together that feels like a warm hug. It’s the kind of aroma that drifts through the house, pulling everyone into the kitchen with hopeful eyes and empty plates. If you’re looking for a side dish that steals the show, that turns a simple weeknight dinner into a celebration and a holiday feast into something legendary, you’ve found it. These Easy Cheesy Scalloped Potatoes are my ultimate comfort food hero.
Forget everything you think you know about scalloped potatoes being fussy or complicated. This recipe is here to prove that the most unforgettable dishes are often the simplest. We’re talking tender, thinly sliced potatoes smothered in a luxuriously creamy, homemade cheese sauce, all baked until the top is golden and bubbly and the inside is pure, unadulterated comfort. It’s a one-dish wonder that requires no fancy skills, just a love for good, honest food. Whether you’re prepping for a festive gathering or just need a little extra joy on a Tuesday night, this bake is your answer. So, preheat that oven—we’re about to make something incredible together.
A Tale of Two Grandmas and One Perfect Potato
This recipe isn’t just a list of ingredients to me; it’s a page from my family’s storybook. I have this vivid memory of being ten years old, perched on a tall stool in my Grandma Eleanor’s kitchen. She was a no-nonsense woman who believed butter was a primary food group. She’d be layering potatoes with a fierce concentration, her hands moving with a rhythm born from decades of practice. Her version was classic, simple, and perfect.
Just a few houses down lived my Nana Rose, whose kitchen was a chaotic, joyful explosion of experimental flavors. Her scalloped potatoes always had a surprise—a pinch of paprika, a handful of a mysterious cheese from the deli, a crunchy breadcrumb topping. My childhood was a delicious tug-of-war between these two incredible cooks. This recipe is my love letter to both of them. It starts with the foolproof, creamy foundation from Grandma Eleanor but isn’t afraid to embrace a little of Nana Rose’s cheesy, adventurous spirit. It’s the best of both worlds, and every time I make it, I’m right back in those two warm, loving kitchens, surrounded by the best kind of chaos.
Gathering Your Cast of Characters
Let’s talk ingredients! The beauty of this dish is in its simplicity. Each one plays a crucial role in building that deep, comforting flavor. Here’s what you’ll need:
- 2 ½ pounds russet potatoes: Our star player! Russets are starchy, which means they absorb all that creamy sauce beautifully and hold their shape while baking. Chef’s Insight: No need to peel them if you love a little extra texture and nutrients—just give them a really good scrub!
- 2 tbsp unsalted butter: The rich base for our sauce. Using unsalted lets you control the seasoning perfectly.
- 2 tbsp all-purpose flour: This is our thickening agent. Whisking it with the butter creates a “roux,” which is the secret to a sauce that clings to the potatoes instead of being runny.
- 2 cups whole milk: For the creamiest, richest results, whole milk is the way to go. Substitution Tip: For an ultra-decadent version, swap it for half-and-half or even heavy cream. For a lighter option, 2% milk works in a pinch, but the sauce won’t be *quite* as luxe.
- 1 cup shredded sharp cheddar cheese: This brings the big, bold, cheesy flavor. Chef’s Hack: Always shred your own cheese! Pre-shredded bags contain anti-caking agents that can make your sauce grainy and less smooth.
- 1 cup shredded mozzarella cheese: The stretchy, gooey hero that gives us that incredible pull. It melts like a dream.
- ½ tsp garlic powder & ½ tsp onion powder: These pantry power-ups add a deep, savory backbone to the sauce without any chopping required.
- Salt and pepper to taste: Don’t be shy! Potatoes need a good amount of seasoning. Taste your sauce before you pour it.
- Optional: ¼ cup grated Parmesan for topping: This is my Nana Rose move. It creates a deliciously salty, crispy crust that takes the texture to the next level.
- Optional garnish: fresh thyme or parsley: A little sprinkle of green at the end adds a pop of color and a fresh flavor that cuts through the richness beautifully.
Let’s Get Cooking: Building Your Potato Masterpiece
Ready to create some magic? Follow these steps, and you’ll have a perfect bake every single time. I’ve packed this section with all my favorite kitchen hacks to make you feel like a pro.
Step 1: Preheat your oven to 375°F (190°C). Grease a 9×13-inch baking dish with a little butter or non-stick spray. This is your canvas! Chef’s Tip: A glass or ceramic dish distributes heat evenly, preventing those dreaded burnt edges.
Step 2: Peel and thinly slice your potatoes. This is the most important step for the right texture! Chef’s Hack #1: Use a mandoline slicer if you have one—it will give you perfectly uniform, 1/8-inch slices in minutes, which ensures they all cook at the same rate. No mandoline? Just do your best with a sharp knife. Chef’s Hack #2: As you slice, drop the potatoes into a large bowl of cold water. This prevents them from turning brown and also rinses off some excess starch, which helps the sauce cling better.
Step 3: Let’s make the cheese sauce! In a medium saucepan, melt the 2 tbsp of butter over medium heat. Once it’s foaming, whisk in the 2 tbsp of flour. Cook this roux for a full minute, whisking constantly. It should smell a little nutty and look pale blonde. This cooks out the raw flour taste and is the foundation of your sauce.
Step 4: Now, gradually whisk in the milk. I mean gradually! Add just a splash at first and whisk until it’s completely smooth before adding more. This prevents dreaded lumps. Once all the milk is in, add the garlic powder, onion powder, a good pinch of salt, and a few grinds of black pepper. Keep whisking and cooking for 3-5 minutes until the sauce has thickened enough to coat the back of a spoon.
Step 5: Turn the heat down to low. Stir in the shredded cheddar and mozzarella cheese until it’s completely melted, smooth, and glorious. Give it a taste—does it need more salt or pepper? Now’s the time to adjust! Remove it from the heat.
Step 6: Drain your potato slices and pat them dry with a clean kitchen towel. This is key! Wet potatoes will make a watery sauce. Now, let’s layer. Place half of the potato slices in the greased dish, overlapping them slightly like shingles. Pour half of your gorgeous cheese sauce over the top, spreading it to cover the potatoes. Repeat with the remaining potatoes and the rest of the sauce, making sure every last potato is covered in cheesy goodness.
Step 7: Sprinkle the top with that optional Parmesan cheese if you’re using it. Cover the dish tightly with foil. This first stage of baking is like a spa treatment for the potatoes—they get to steam and become tender in the saucy environment.
Step 8: Bake covered for 30 minutes. Then, remove the foil (hello, beautiful top layer!) and bake for another 25-30 minutes. You’re looking for the top to be gorgeously golden brown and the sauce to be bubbling vigorously around the edges.
Step 9: This is the hardest part, I promise: LET IT REST. Take the dish out of the oven and let it sit on the stovetop for at least 10 minutes before you dive in. This allows the sauce to set slightly, so when you cut into it, you get clean, beautiful layers instead of a soupy mess. It’s worth the wait!
How to Serve Your Cheesy Creation
Presentation is part of the fun! For a family-style meal, I just plop the whole baking dish right in the middle of the table with a big serving spoon—it’s rustic, inviting, and says “dig in!” For a more plated look, use a large spoon or square spatula to lift out a perfect portion. A little sprinkle of freshly chopped parsley or thyme right before serving adds a touch of color and a fresh aroma that makes the whole dish sing. These potatoes are the ultimate team player. They pair phenomenally with a simple roasted chicken, a juicy holiday ham, a pan-seared steak, or even a hearty vegetarian lentil loaf. They’re the side dish that makes the main course even better.
Make It Your Own: Delicious Twists & Swaps
Once you’ve mastered the classic, the world is your cheesy potato! Here are a few of my favorite riffs:
- The Herb Garden: Stir 2 tablespoons of finely chopped fresh herbs like chives, rosemary, or thyme right into the cheese sauce.
- Smoky & Spicy: Add a pinch of smoked paprika and cayenne pepper to the sauce, and swap the cheddar for smoked gouda or pepper jack cheese.
- Ultra-Crunchy Top: Mix the Parmesan with 1/4 cup of panko breadcrumbs and a tablespoon of melted butter before sprinkling it on for the final bake.
- Creamy Garlic Lovers: Sauté 2-3 cloves of minced fresh garlic in the butter before adding the flour for a more potent garlic punch.
- Dairy-Free Delight: Use your favorite plant-based butter, milk, and cheeses. The method remains exactly the same!
Olivia’s Kitchen Notes & Stories
This recipe has been through it all with me—it’s been salvaged, adapted, and perfected over years. I’ll never forget the first time I made it for my now-husband when we were dating. I was so nervous I accidentally used powdered sugar instead of flour for the roux (a poorly labeled jar disaster!). We ended up ordering pizza that night, and it’s now our favorite funny story. The lesson? Always taste your ingredients if you’re unsure!
Over time, I’ve learned that the type of potato really does matter. I’ve tried waxy potatoes like Yukon Golds, and while they are delicious, they require a slightly longer baking time and result in a firmer, sliceable bake. Russets give us that classic, fall-apart tender texture we all crave. This dish is also a fantastic make-ahead friend. You can assemble it completely, cover it, and keep it in the fridge for up to 24 hours before baking. Just add an extra 10-15 minutes to the covered baking time since it’s going into the oven cold.
Your Questions, Answered!
Q: My sauce turned out grainy. What happened?
A: This is almost always a cheese issue! Pre-shredded cheese is coated to prevent clumping, but that coating prevents it from melting smoothly into a sauce. The fix is simple: always shred your cheese from a block. Also, make sure your heat is on low when you add the cheese to the sauce. Boiling the sauce after the cheese is added can cause it to break and become oily or grainy.
Q: Why are my potatoes still crunchy after baking?
A: This usually means the potato slices were too thick. Aim for that 1/8-inch thickness—a mandoline is your best friend here. Also, ensure your sauce is bubbling across the entire surface at the end of the bake time. If the top is browning too fast before the inside is cooked, simply place the foil back on top loosely to slow down the browning while the potatoes finish cooking.
Q: Can I prepare this dish ahead of time?
A: Absolutely! Assemble the entire dish, cover it tightly with plastic wrap and then foil, and refrigerate for up to a day. When you’re ready to bake, remove the plastic, put the foil back on, and pop it in the oven. You’ll likely need to add 10-15 minutes to the initial covered baking time since it’s starting from cold.
Q: How do I get that picture-perfect golden brown top?
A> For the ultimate golden, crispy top, make sure you’re using the Parmesan cheese (it browns beautifully). Also, for the last 5 minutes of baking, you can switch your oven to a high broil setting. WATCH IT CONSTANTLY! It can go from golden to burnt in seconds. This little broiling trick gives you that professional, bakery-style finish.
Easy Cheesy Scalloped Potatoes
- Total Time: 35 minute
Description
Golden, bubbly, and loaded with creamy layers of tender potatoes and melty cheese, this dish is the definition of cozy comfort food. It’s simple enough for a Tuesday night yet elegant enough to earn a place at your holiday table. Whether you serve it family-style or plated with a sprig of herbs, these scalloped potatoes are guaranteed to steal the show.
Ingredients
-
2 ½ lbs russet potatoes, thinly sliced (about 1/8 inch)
-
2 tbsp unsalted butter
-
2 tbsp all-purpose flour
-
2 cups whole milk (or half-and-half for extra richness)
-
1 cup shredded sharp cheddar cheese
-
1 cup shredded mozzarella cheese
-
½ tsp garlic powder
-
½ tsp onion powder
-
Salt & black pepper, to taste
-
Optional: ¼ cup grated Parmesan (for topping)
-
Optional garnish: fresh parsley or thyme
Instructions
-
Prep: Preheat oven to 375°F (190°C). Grease a 9×13-inch baking dish.
-
Slice Potatoes: Use a mandoline for even slices; soak in cold water to prevent browning, then pat dry.
-
Make Sauce: Melt butter in a saucepan. Whisk in flour, cooking 1 min. Gradually whisk in milk until smooth and thickened. Add seasonings, then stir in cheeses until melted.
-
Layer: Arrange half the potato slices in dish, slightly overlapping. Pour half the sauce over. Repeat with remaining potatoes and sauce.
-
Top: Sprinkle Parmesan if using. Cover with foil.
-
Bake: 30 min covered, then uncover and bake 25–30 min more until golden and bubbling.
-
Rest: Let sit 10 min before serving for clean, creamy layers.
Notes
-
Smoky Flavor: Swap cheddar for smoked gouda and add paprika.
-
Crunch Factor: Mix Parmesan with panko crumbs and butter for a crispy topping.
-
Herby Touch: Stir fresh rosemary, thyme, or chives into the sauce.
-
Make Ahead: Assemble up to 24 hrs in advance, refrigerate, and bake when ready (add 10–15 min).
- Prep Time: 20 min
- Cook Time: 55–60 min
Nutrition
- Calories: 290 cal Per Serving
- Fat: 15g
- Carbohydrates: 28g
Nutritional Information*
*This is an estimated nutritional breakdown based on the ingredients used. Values can vary depending on specific brands and substitutions.
Per Serving (based on 10 servings): Calories: 290 | Fat: 15g | Saturated Fat: 9g | Cholesterol: 45mg | Sodium: 220mg | Carbohydrates: 28g | Fiber: 2g | Sugar: 4g | Protein: 10g
Final Thoughts: More Than Just a Side Dish
So there you have it—your guide to creating a dish that’s so much more than just potatoes and cheese. It’s a testament to the idea that the most cherished recipes aren’t about perfection; they’re about connection. They’re about the messy, joyful, sometimes-failed attempts that become the stories we tell for years. This pan of Easy Cheesy Scalloped Potatoes is a blank canvas for your own kitchen memories, whether you stick faithfully to the classic or add your own Nana Rose-inspired twist.
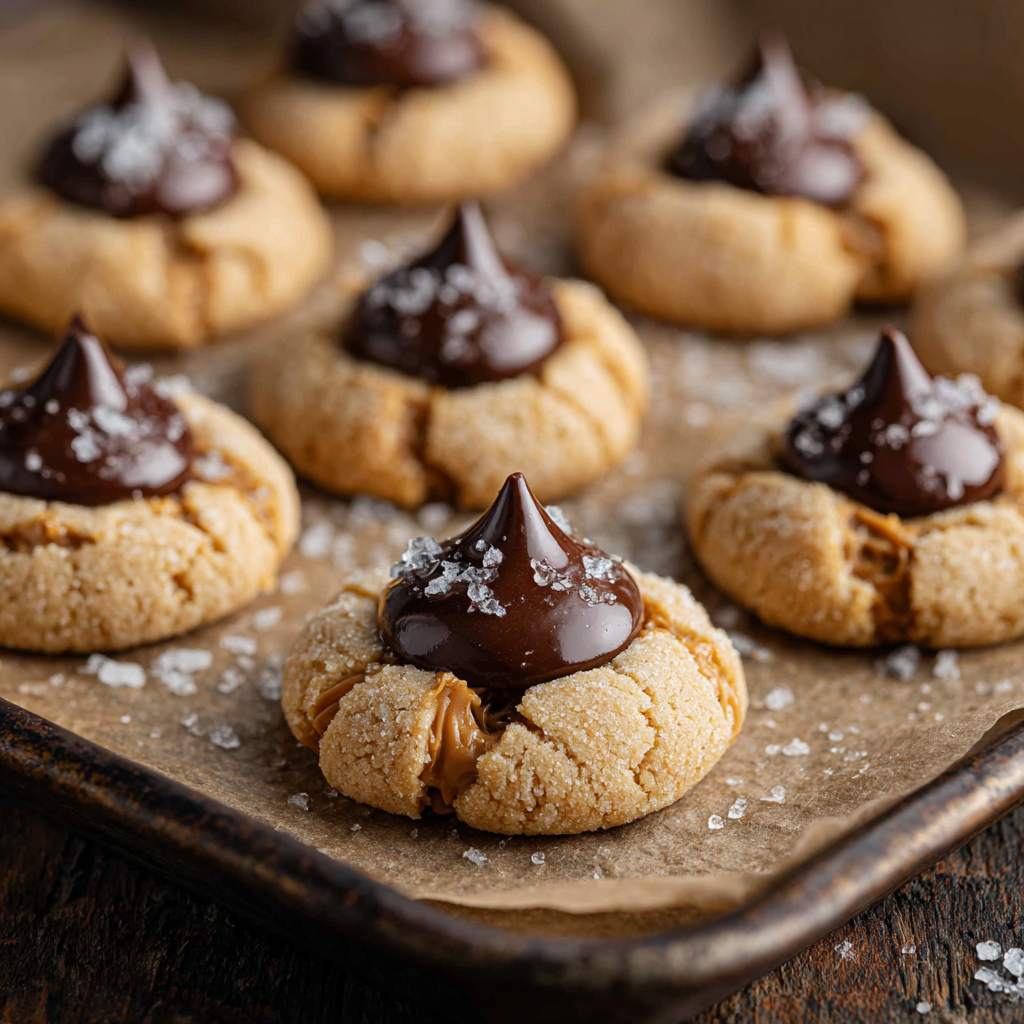
Classic Peanut Butter Blossoms
Welcome to Cookie Bliss: The Ultimate Peanut Butter Blossom
Is there any smell more instantly, joyfully nostalgic than peanut butter cookies baking in the oven? That warm, nutty aroma just seems to hug the whole house. And then there’s the grand finale: that iconic chocolate kiss, gently pressed into the center, just waiting to melt into a pool of chocolatey perfection. If you’re like me, one bite of a Peanut Butter Blossom cookie instantly transports you back to childhood holidays, messy aprons, and the simple, profound joy of a homemade treat. This isn’t just a cookie; it’s a memory you can hold in your hand. Today, we’re making a double batch of these classic beauties because, let’s be real, one batch is never enough. I’ve also sprinkled in a few of my favorite flavor twists to make this beloved recipe feel both comfortingly familiar and excitingly new. So, preheat those ovens, unwrap those kisses, and let’s bake up a whole lot of happiness together.
The Cookie That Stole My Heart
My love affair with Peanut Butter Blossoms started in my grandma’s kitchen. Every December, her countertops would transform into a cookie factory, and I was her chief taste-tester and chocolate kiss unwrapper. I’ll never forget the year she finally let me press the kisses into the warm cookies myself. I was so determined to get it *just right* that I pressed a little too hard on my first one, creating a charmingly lopsided cookie with a kiss that was practically sinking into the center. I was devastated, thinking I’d ruined it. Grandma just laughed her warm, rumbling laugh, popped the “mistake” into my mouth, and said, “Olivia, honey, the best cookies are the ones made with a little extra love—and a little extra chocolate.” That lopsided cookie tasted like pure magic. It taught me that baking isn’t about perfection; it’s about the joy you pour into it. To this day, every time I press a kiss into a cookie, I think of her and that delicious, messy, perfect first try.
Gathering Your Cookie Crew: Ingredients & Insights
This is a double batch, designed for sharing and savoring. Here’s what you’ll need and why each ingredient plays a starring role:
- 3 ½ cups all-purpose flour: The foundation of our cookie. It gives structure. For a slightly more tender cookie, you can swap out ½ cup with bread flour.
- 2 tsp baking soda: Our leavening agent! This is what makes the cookies puff up beautifully. Make sure it’s fresh for the best rise.
- 1 tsp salt: Do not skip this! Salt is the flavor superhero that makes the peanut butter and chocolate taste even more amazing.
- 1 cup creamy peanut butter: The star of the show! Use a standard shelf-stable brand like Jif or Skippy for the ideal texture and consistency. Natural peanut butter (the kind that separates) can make the dough too oily.
- 1 cup unsalted butter, room temperature: Room temp butter is non-negotiable for creaming properly. It should leave a slight indent when you press it. Unsalted lets us control the salt level perfectly.
- 1 cup granulated sugar + 1 cup light brown sugar: White sugar gives us crisp edges and that classic sugary roll, while brown sugar brings moisture, chew, and a lovely caramel note.
- 2 large eggs: They bind everything together and add richness. Make sure they’re at room temperature to emulsify seamlessly into the butter.
- ¼ cup milk: My secret weapon for an extra-soft, cake-like texture. It makes the dough just the right consistency.
- 2 tsp vanilla extract: The flavor enhancer. It rounds out all the other flavors beautifully.
- 1 cup granulated sugar (for rolling): This creates that irresistible crackly, sparkly crust. It’s a textural dream!
- 2 (11 oz) bags of Hershey’s Kisses, unwrapped: The crowning glory! Unwrapping them is a perfect job for eager little helpers (or for you to snack on a few).
Let’s Get Baking: The Step-by-Step Magic
Follow these steps for cookie perfection. I’ve included all my best chef hacks along the way!
Step 1: Preheat & Prep
Preheat your oven to 350°F (175°C). Line your baking sheets with parchment paper. This is my biggest hack for perfect cookies—no sticking, easy cleanup, and even baking. Don’t grease the pans, as it can cause the cookies to spread too much.
Step 2: Whisk the Dry Team
In a medium bowl, whisk together the flour, baking soda, and salt. Whisking is better than sifting here—it aerates the flour and ensures the baking soda and salt are evenly distributed, so every bite is consistent.
Step 3: Cream the Dream Team
In a large bowl, use a hand mixer or stand mixer fitted with a paddle attachment to cream together the room-temperature butter, peanut butter, granulated sugar, and brown sugar. Beat it on medium-high speed for a full 2-3 minutes, until it becomes light, fluffy, and pale in color. This step is crucial for incorporating air, which gives us a tender cookie. Don’t rush it!
Step 4: Incorporate the Wet Ingredients
Beat in the eggs one at a time, making sure each is fully incorporated before adding the next. This prevents the emulsion from breaking. Then, mix in the milk and vanilla. The mixture might look a little curdled at this point—that’s okay! The flour will bring it all together.
Step 5: Bring It All Together
Gradually add the dry ingredients to the wet ingredients, mixing on low speed just until the flour disappears. Do not overmix! Overworking the dough develops gluten, leading to tough cookies. A few stray flour bits are better than overmixing.
Step 6: Roll & Sugar Coat
Use a tablespoon-sized cookie scoop or your hands to portion the dough into 1-inch balls. Roll each ball between your palms until smooth, then roll generously in the reserved cup of granulated sugar. The sugar coating isn’t just for looks; it creates a delightful sweet crunch.
Step 7: Bake to Perfection
Place the dough balls on your prepared baking sheets, spacing them about 2 inches apart. They will spread! Bake for 8-10 minutes. They are done when the edges are just set and very lightly golden. The centers will still look soft and puffy—that’s perfect! They will set up as they cool. Remember, cookies continue to bake on the hot pan after you take them out of the oven.
Step 8: The Grand Finale: The Kiss!
As soon as the cookies come out of the oven, gently but firmly press a Hershey’s Kiss into the center of each one. You’ll hear a little sigh as it sinks in—that’s the sound of success! Let the cookies cool on the baking sheet for at least 5 minutes before transferring them to a wire rack. This allows them to set and prevents the chocolate from smearing.
How to Serve Your Masterpiece
These cookies are best served on a giant platter, piled high for everyone to admire. They are fantastic slightly warm when the chocolate is still gooey, or at room temperature with a cold glass of milk. For a truly decadent experience, place two cookies together with the chocolate kisses facing in to make a mini cookie sandwich—it’s a peanut butter and chocolate lover’s dream come true!
Get Creative: Recipe Variations
Feel free to play with this classic! Here are a few of my favorite twists:
- Nutty Swap: Replace ½ cup of the peanut butter with almond butter or Nutella for a deliciously different flavor profile.
- Spiced Up: Add ½ teaspoon of cinnamon or a pinch of cayenne pepper to the dry ingredients for a warm, subtle kick.
- Chocolate Choice: Use flavored Hershey’s Kisses! Mint, caramel, dark chocolate, or even hugs add a fun surprise.
- Salty-Sweet: Right after pressing in the kiss, sprinkle the warm cookies with a tiny bit of flaky sea salt. It elevates the chocolate and peanut butter incredibly.
- Gluten-Free: Substitute the all-purpose flour with a 1:1 gluten-free baking blend for a celiac-friendly treat.
Olivia’s Chef Notes
This recipe has evolved in my kitchen over the years. I started adding the milk after a small kitchen disaster where my dough was so crumbly I could barely roll it. A splash of milk saved the day and resulted in a softer, more forgiving cookie that I now prefer! Another pro-tip: if you’re a planner, you can scoop and roll the dough balls, then freeze them on a baking sheet before transferring to a freezer bag. Then, you can bake frozen cookies anytime a craving hits—just add a minute or two to the bake time. It’s like having a cookie emergency kit! And remember my grandma’s wisdom: the slightly messy, lopsided cookies often taste the best because they’re made with a little extra heart.
FAQs & Troubleshooting
Q: My cookies spread too much and came out flat. What happened?
A: This is usually caused by butter that was too warm. Make sure your butter is at cool room temperature, not melty. Also, ensure your baking soda is fresh and that you didn’t over-cream the butter and sugar (3 minutes max!). Chilling the dough for 30 minutes before baking can also help prevent spreading.
Q: Why did my Hershey’s Kisses completely melt into the cookie?
A: You likely pressed them into cookies that were too hot. The cookies need to be out of the oven, but if they’re still scalding hot, the chocolate will melt. Wait about 60 seconds after pulling them out before pressing. The cookie should be firm enough to support the kiss without it drowning.
Q: Can I make the dough ahead of time?
A: Absolutely! The dough balls can be stored in an airtight container in the fridge for up to 3 days. Let them sit at room temperature for 15 minutes before rolling in sugar and baking. You can also freeze them for up to 3 months.
Q: My dough is too sticky to roll. Help!
A: This can happen on a warm day. Pop the mixed dough into the refrigerator for 20-30 minutes to firm up. If you’re in a real pinch, lightly dampen your hands with water while rolling to prevent sticking.

Classic Peanut Butter Blossoms
- Total Time: 35 minute
Description
Soft, chewy peanut butter cookies crowned with melty chocolate kisses—these beauties are holiday staples, after-school favorites, and pure nostalgia in every bite. They’re fun to bake, irresistible to eat, and guaranteed to make any cookie platter shine. Whether you’re baking with little helpers or whipping up a batch for yourself, these blossoms bring joy with every press of chocolate. Let’s bake up some happiness!
Ingredients
-
3 ½ cups all-purpose flour
-
2 tsp baking soda
-
1 tsp salt
-
1 cup creamy peanut butter (Jif/Skippy style)
-
1 cup unsalted butter, room temp
-
1 cup granulated sugar
-
1 cup light brown sugar
-
2 large eggs, room temp
-
¼ cup milk
-
2 tsp vanilla extract
-
1 cup granulated sugar (for rolling)
-
2 (11 oz) bags Hershey’s Kisses, unwrapped
Instructions
-
Prep: Preheat oven to 350°F (175°C). Line baking sheets with parchment paper.
-
Mix Dry: Whisk flour, baking soda, and salt in a bowl.
-
Cream Butter & Sugars: In a large bowl, beat butter, peanut butter, granulated sugar, and brown sugar until light and fluffy (2–3 min).
-
Add Wet: Beat in eggs one at a time, then mix in milk and vanilla.
-
Combine: Gradually mix in dry ingredients until just combined. Don’t overmix.
-
Shape: Roll dough into 1-inch balls. Coat in sugar. Place 2 inches apart on baking sheets.
-
Bake: 8–10 minutes, until edges are set and tops puffed.
-
Finish: Press a chocolate kiss into each cookie immediately after baking. Cool 5 min on sheet, then transfer to a rack.
Notes
-
Nutty Swap: Try almond butter or Nutella.
-
Spice It Up: Add ½ tsp cinnamon or a pinch of cayenne.
-
Flavored Kisses: Use mint, caramel, or dark chocolate.
-
Salty-Sweet: Sprinkle flaky sea salt right after adding the kiss.
-
Freezer-Friendly: Roll dough balls and freeze—bake anytime!
- Prep Time: 20 min
- Cook Time: 8–10 min per batch
Nutrition
- Calories: 130 kcal Per cookie
- Sugar: 10g
- Fat: 7g
- Carbohydrates: 14g
- Protein: 2g
Nutritional Information (Approximate, Per Cookie)
Prep Time: 20 minutes | Bake Time: 8-10 minutes per batch | Servings: About 60 cookies
- Calories: 130 kcal
- Fat: 7g
- Sugar: 10g
- Carbohydrates: 14g
- Protein: 2g
Final Thoughts: Share the Bliss
And there you have it—the recipe for more than just a cookie. It’s a recipe for connection, for nostalgia, and for creating new, delicious memories with every batch.
As you pull that final sheet of golden, chocolate-topped cookies from the oven, take a moment to appreciate what you’ve made. This isn’t just a dessert; it’s a tangible piece of warmth and love, ready to be shared. Whether you’re carrying on a family tradition, starting a new one, or simply treating yourself after a long day, you’ve baked a little bit of joy into existence.
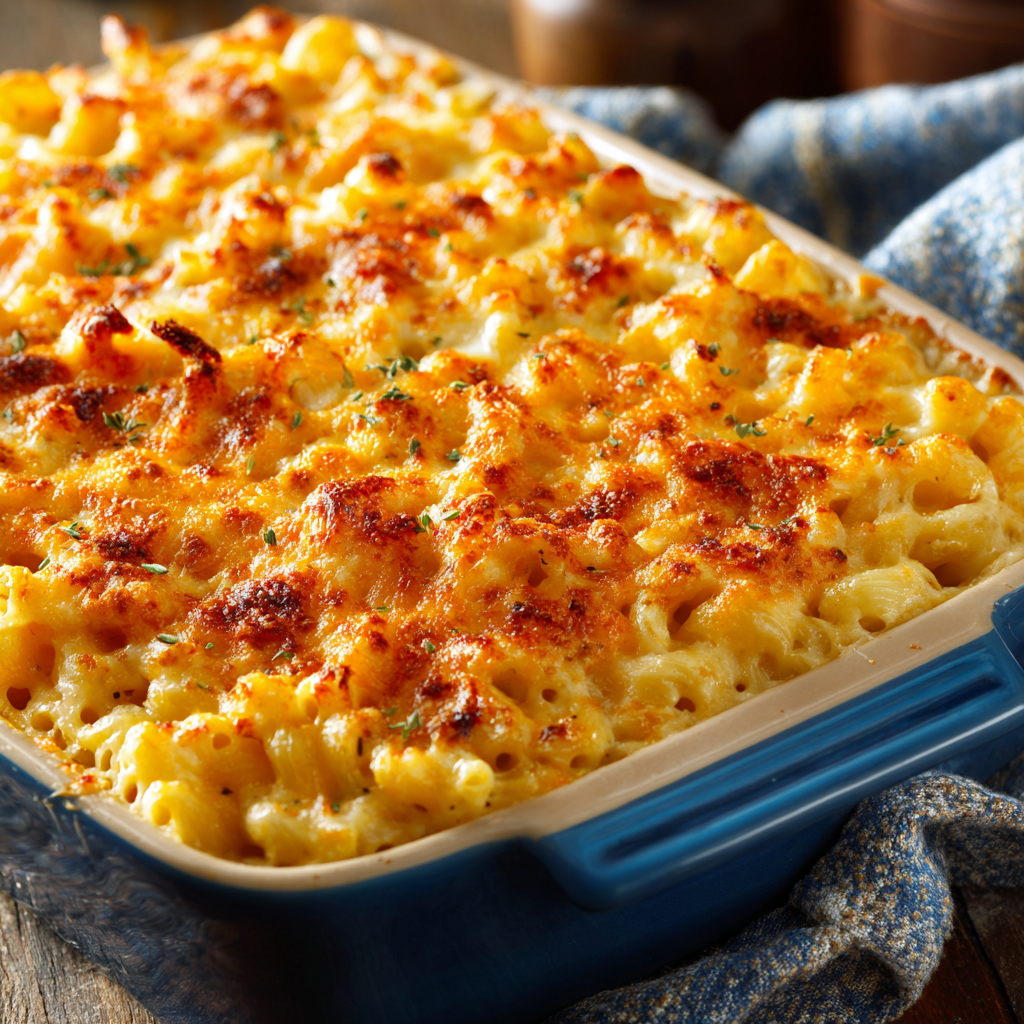
Southern-Style Baked Mac and Cheese
Welcome to My Table: Let’s Make the Ultimate Comfort Food
Hey there, friend! Come on in, pull up a stool, and let’s get something simmering on the stove. If your soul craves a dish that feels like a warm, cheesy, absolutely irresistible hug, you’ve landed in the perfect spot. Today, we’re diving headfirst into the glorious, golden world of Southern-Style Baked Mac and Cheese. This isn’t the boxed stuff of your college days (though we hold no judgment here!). This is the real deal—the kind of mac and cheese that stars at potlucks, earns you a permanent spot at the holiday table, and creates a hush the moment it’s pulled from the oven, its crust shimmering and its center begging to be scooped.
This recipe is a celebration of simplicity and soul. It’s built on a foundation of creamy, custardy goodness and a mix of cheeses that sing in harmony. We’re talking rich, sharp cheddar, wonderfully stretchy mozzarella, and a buttery, golden-brown top that crackles under your spoon. The best part? You don’t need a culinary degree to master it. My goal is to walk you through each step, sharing all my favorite kitchen hacks and stories, so you can create this unforgettable dish with confidence and a whole lot of joy. So, tie on your favorite apron (the messy one with all the stains tells the best stories), and let’s make some magic!
The Dish That Built a Family Tradition
For me, this mac and cheese will forever smell like my Grandma Eleanor’s kitchen on a crisp Thanksgiving morning. The Macy’s parade would be blaring on the small TV in the corner, but the real show was in that oven. I was always her designated “cheese shredder,” a job I took with the utmost seriousness, even if a significant amount of cheddar never actually made it into the bowl. Her recipe was never written down; it was a pinch of this, a “glug” of that, taught with a wink and a nudge.
The year I moved into my first apartment, I was determined to recreate it for my own Friendsgiving. After a slightly panicked phone call (“Grandma, what’s a ‘glug’ in actual measurements?!”) and one slightly over-seasoned test batch, I finally nailed it. The moment my friends dug in, their eyes wide and mouths full, I knew I had unlocked a new tradition. It was more than a side dish; it was a connection, a piece of my history passed down and now shared with my chosen family. That’s the power of food, and it’s exactly why this recipe holds such a special place in my heart (and my recipe box).
Gathering Your Cheesy Arsenal
Here’s everything you’ll need to create this masterpiece. Remember, quality ingredients make a difference, especially when the recipe is this beautifully simple!
- 16 oz elbow macaroni: The classic choice! Its small, tube-like shape is perfect for cradling all that creamy sauce. Chef’s Insight: Don’t overcook it! We’ll boil it just shy of al dente because it will continue to cook and soak up flavor in the oven.
- 4 tbsp unsalted butter: For tossing with the drained pasta. This creates a light barrier that helps prevent the noodles from sticking together and adds a lovely, rich base flavor.
- 3 cups shredded sharp cheddar cheese: The star of the show! Its bold, tangy flavor is non-negotiable for that classic taste. Pro Tip: Always shred your own cheese from a block! Pre-shredded bags contain anti-caking agents that can make your sauce grainy and less smooth.
- 1 cup shredded mozzarella cheese: Our secret weapon for that epic, irresistible pull. Monterey Jack is a fantastic substitute here if you prefer a slightly milder, creamier melt.
- 2 cups whole milk & 1 cup evaporated milk: This dynamic duo forms our custard base. The whole milk provides richness, while the evaporated milk gives it a luxurious, ultra-creamy texture and helps it set up perfectly without being watery. Substitution Tip: You can use all whole milk in a pinch, but the evaporated milk really is a game-changer for texture.
- 2 large eggs: The key to the custard! They bind everything together, creating a rich, sliceable mac and cheese rather than a soupy one.
- 1 tsp salt, ½ tsp black pepper, ½ tsp garlic powder, ½ tsp onion powder, ¼ tsp paprika: Our flavor brigade! This combination adds a deep, savory backbone that makes the cheese flavors pop. The paprika also gives the top a beautiful color.
- Optional: ½ tsp hot sauce or ¼ tsp cayenne pepper: Just a tiny bit! You won’t taste the heat, I promise. It simply enhances the other flavors and cuts through the richness. Highly recommended!
- Optional: ½ cup sour cream: For those days when you want to go next-level decadent. It adds a wonderful tang and makes the final dish even creamier.
Let’s Get Cooking: Building Your Masterpiece
Ready? Let’s transform these simple ingredients into pure comfort. Read through all the steps first, and remember—cooking is supposed to be fun, so don’t stress!
- Preheat and Prep: Preheat your oven to 350°F (175°C). Take a 9×13-inch baking dish and give it a light coating of butter or non-stick spray. This is our golden vessel of joy! Chef’s Hack: Place a large baking sheet on the rack underneath where you’ll place the dish. This catches any potential bubbly-over cheese drips and saves you from a smoky kitchen and a messy oven cleanup!
- Cook the Pasta: Bring a large pot of well-salted water to a rolling boil. Add the elbow macaroni and cook for about 1 minute less than the package directions for al dente. We want the pasta to still have a slight bite because it will continue to cook in the oven. Drain it well, then immediately return it to the hot pot and toss it with the 4 tablespoons of butter until it’s all melted and coated. This buttery blanket is our first layer of flavor and prevents clumping.
- Create the Custard Base: In a large bowl, whisk together the whole milk, evaporated milk, and eggs until they are completely smooth and homogenous. This is crucial! You don’t want streaks of cooked egg white in your final dish. Now, whisk in all of your seasonings: the salt, pepper, garlic powder, onion powder, paprika, and that optional hot sauce or cayenne. Give it a taste and adjust if needed—remember, the cheese will add saltiness, so it should taste just a tad seasoned at this point.
- Layer the Goodness: Now for the fun part! Spread half of your buttered macaroni in an even layer in your prepared baking dish. Top it with half of your shredded cheddar and mozzarella cheeses. Repeat with the remaining macaroni and the other half of the cheeses. This layering ensures every single bite is packed with cheesy goodness from top to bottom.
- The Grand Pour: Slowly and carefully pour your milk and egg mixture evenly over the entire contents of the baking dish. I like to use a ladle to help distribute it gently so I don’t disrupt my beautiful layers. Take a fork and gently shimmy it around the edges and in a few spots in the middle to help the liquid settle all the way to the bottom.
- The Final Touch: For that iconic finish, sprinkle a little extra handful of cheese over the top and dust it with another pinch of paprika. This will create the most beautiful, golden, crackly crust.
- Bake to Perfection: Bake, uncovered, for 35-40 minutes. You’re looking for a deeply golden brown top, edges that are bubbling vigorously, and a center that is set (it might still have a very slight jiggle, which is perfect—it will firm up as it rests). If the top is browning too quickly, you can tent it loosely with foil for the last 10 minutes.
- The Hardest Part: Let it Rest! I know, I know. The aroma is torture. But do not skip this step! Remove the dish from the oven and let it rest on a wire rack for a full 10 minutes before serving. This allows the custard to fully set, making it creamy and sliceable instead of soupy. It’s the secret to that perfect texture.
How to Serve This Celebratory Dish
This mac and cheese is the life of the party! For a true Southern spread, serve it right from the baking dish at the table—let everyone admire that gorgeous crust before you dive in. Use a large spoon or a square-serving spatula to get those beautiful, clean cuts. It’s the ultimate partner for holiday ham, fried chicken, or smothered pork chops. For a cozy weeknight, just grab two forks and the baking dish and dig in alongside a simple, crisp green salad to balance the richness. However you serve it, serve it with love!
Make It Your Own: Delicious Twists & Swaps
The beauty of this recipe is its versatility! Don’t be afraid to play and customize.
- Meat Lover’s Delight: Stir in ½ lb of cooked, crumbled bacon or diced ham along with the pasta layers.
- Veggie Boost: Sauté 1 cup of finely chopped broccoli florets or a handful of fresh spinach and layer it in for a pop of color and nutrition.
- Spicy Kick: Add a diced jalapeño (seeds removed for less heat) to the layers, or use a pepper Jack cheese instead of mozzarella.
- Gourmet Cheese Blend: Swap out a cup of the cheddar for Gruyère or Gouda for a more sophisticated, nutty flavor profile.
- Gluten-Free: Use your favorite gluten-free elbow macaroni and ensure your seasonings are gluten-free. The recipe works perfectly!
From My Kitchen to Yours: A Few Final Thoughts
This recipe has evolved so much from that first phone call with my grandma. I’ve made it in tiny apartments with dodgy ovens and in crowded kitchens with friends all chipping in. I once, in a frantic pre-party moment, tried to substitute pre-shredded cheese and learned the grainy-texture lesson the hard way so you don’t have to! The biggest evolution was adding the eggs for that custard base—it was the final puzzle piece that turned a great mac and cheese into an absolutely legendary one.
Most importantly, this dish has taught me that the best recipes are the ones you make your own. They’re living things, shaped by our memories and our mistakes. So, have fun with it. Put on some music, pour yourself a drink, and enjoy the process. I’m so incredibly excited for you to make this and start your own traditions. Be sure to tag me @OliviasCozyKitchen when you do—I love seeing your creations!
Your Mac and Cheese Questions, Answered!
Q: My baked mac and cheese sometimes turns out watery. What did I do wrong?
A: The most common culprit is not letting it rest! That 10-minute cooling period is non-negotiable for the custard to set. Other factors could be slightly undercooking the pasta (it absorbs more liquid as it bakes) or inaccurate measurements of the milk. Using the evaporated milk helps immensely with this, as it’s thicker and less prone to separating.
Q: Can I make this ahead of time?
A: Absolutely! You can assemble the entire dish up to the point of baking, cover it tightly, and refrigerate it for up to 24 hours. When you’re ready, you may need to add 5-10 minutes to the baking time since it will be going into the oven cold. I don’t recommend freezing it, as the dairy-based sauce can separate and become grainy when thawed and reheated.
Q: Why shred your own cheese? Is it really that important?
A> I promise it is! Pre-shredded cheese is coated with potato starch or cellulose (wood pulp) to prevent it from clumping in the bag. These starches don’t melt well and can create a grainy, gummy texture in your sauce and prevent it from getting super creamy. Taking two extra minutes to shred a block of cheese is the single biggest upgrade you can make to this recipe!
Q: The top isn’t as golden and crispy as I’d like. How can I fix that?
A: For an extra-golden top, you can pop the dish under the broiler for the last 1-2 minutes of cooking. **Watch it like a hawk!** It can go from golden to burnt in seconds. Also, ensure your top layer of cheese is evenly distributed for consistent browning.
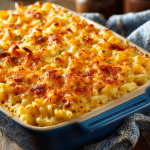
Southern-Style Baked Mac and Cheese
- Total Time: 55 minutes
Description
Warm, cheesy, golden, and downright soul-soothing—this mac and cheese is more than comfort food, it’s tradition on a plate. With layers of rich cheddar, stretchy mozzarella, and a custard base that bakes into creamy perfection, this dish is guaranteed to steal the spotlight at holidays, potlucks, or even a cozy weeknight dinner. Let’s bring a little Southern magic to your table today!
Ingredients
-
16 oz elbow macaroni
-
4 tbsp unsalted butter
-
3 cups shredded sharp cheddar cheese
-
1 cup shredded mozzarella cheese
-
2 cups whole milk
-
1 cup evaporated milk
-
2 large eggs
-
1 tsp salt
-
½ tsp black pepper
-
½ tsp garlic powder
-
½ tsp onion powder
-
¼ tsp paprika
-
Optional: ½ tsp hot sauce or ¼ tsp cayenne, ½ cup sour cream
Instructions
-
Preheat oven to 350°F (175°C). Grease a 9×13-inch baking dish.
-
Cook pasta just shy of al dente, drain, and toss with butter.
-
Make custard base: Whisk together whole milk, evaporated milk, and eggs. Stir in seasonings.
-
Layer: Spread half the pasta, then half the cheeses. Repeat layers.
-
Pour custard evenly over pasta and cheese layers.
-
Top it off with extra cheese and a sprinkle of paprika.
-
Bake uncovered 35–40 minutes until golden and bubbling.
-
Rest 10 minutes before serving for the creamiest texture.
Notes
-
Shred your own cheese for the smoothest melt.
-
Let it rest before serving—this sets the custard.
-
Add bacon, veggies, or swap in Gruyère for your own signature twist.
- Prep Time: 15 min
- Cook Time: 40 min
Nutritional Information*
Prep Time: 15 minutes | Cook Time: 40 minutes | Resting Time: 10 minutes | Servings: 8
*This is an approximate estimate calculated using an online nutrition tool. Values may vary based on specific ingredients used.
Per Serving: Calories: ~400 | Fat: 22g | Saturated Fat: 13g | Carbohydrates: 34g | Fiber: 1g | Sugar: 6g | Protein: 16g
Final Thoughts: Your Tradition Starts Now
And there you have it! From my grandmother’s kitchen to yours, a recipe built not just on ingredients, but on memory, connection, and the simple joy of a meal made with love.
Remember, this Southern-Style Baked Mac and Cheese is more than a dish—it’s a blank canvas for your own stories. It’s the quiet satisfaction of pulling a golden, bubbling dish from the oven. It’s the sound of contented silence around the table, broken only by the gentle crack of that perfect crust. It’s the tradition you’re about to create, one cheesy, glorious spoonful at a time.
So don’t be afraid to make it your own. Embrace the little mishaps (they make the best stories later!), play with the add-ins, and most importantly, share it with people who make you happy. You’ve got all the tools, tips, and heart you need to make it unforgettable.
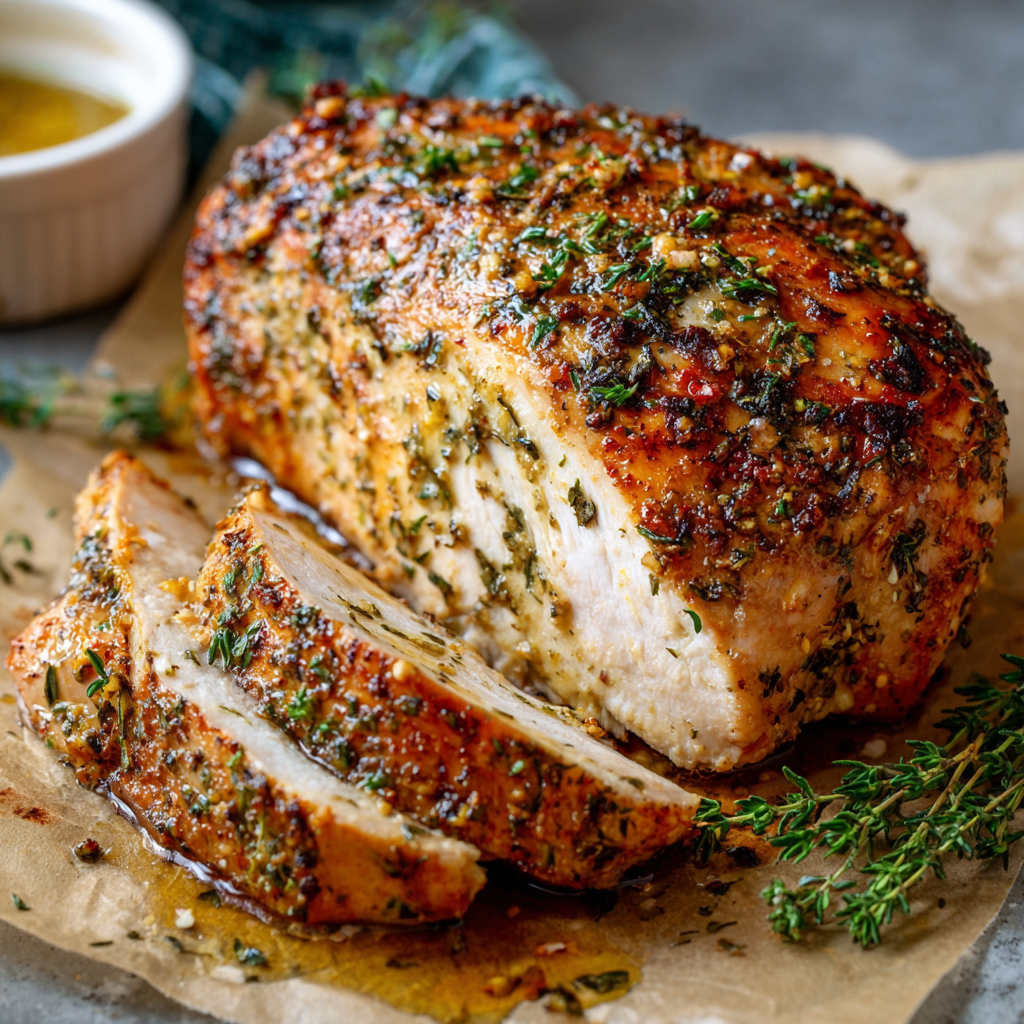
Roasted Boneless Turkey Breast
Your New Favorite Dinner: The Easiest, Juiciest Roasted Turkey Breast
Hey there, friend! Come on in, pull up a stool, and let’s talk about one of my all-time favorite kitchen secrets: the humble, yet absolutely show-stopping, roasted boneless turkey breast. Now, I know what you might be thinking. “Olivia, turkey is for Thanksgiving.” Or, “Isn’t turkey always a little… dry?” I’m here to tell you, with a warm and confident smile, that this recipe is about to change everything.
This isn’t your grandmother’s all-day, whole-bird roasting marathon. This is about simplicity, flavor, and coziness. Imagine this: a beautifully golden, herb-infused piece of turkey, so tender it practically melts under your fork, filling your kitchen with an aroma that feels like a hug. It’s elegant enough for a holiday centerpiece but so incredibly easy that you can whip it up on a busy Wednesday night without breaking a sweat. It’s the perfect solution when you’re craving that comforting, festive feeling but don’t have hours to spare. My goal is to hand you a recipe that makes you feel like a kitchen rockstar, and this herb-roasted turkey breast? It’s your new backstage pass to delicious, confident cooking. So, tie on your apron (the messy one is always the best sign of a good meal to come), and let’s make something unforgettable together.
The Turkey That Started It All
This recipe has a special place in my heart because it was born from a near-disaster. Years ago, I was hosting my now-husband’s family for a non-Thanksgiving dinner in the dead of winter. I wanted to impress them with a classic roast, but the thought of maneuvering a giant, frozen turkey felt daunting. I was short on time and confidence. Panic set in. Then, I spotted it at the butcher counter: a simple, boneless, skinless turkey breast. It looked manageable. It looked friendly.
I gave it a quick rub with whatever herbs I had in the pantry, popped it in the oven with a little broth for company, and prayed for the best. What emerged was nothing short of a miracle. It was juicy, flavorful, and carved into perfect, elegant slices. The dinner was a roaring success, filled with laughter and requests for the recipe. That little turkey breast taught me a powerful lesson: impressive food doesn’t have to be complicated. It’s about heart, a few good ingredients, and the joy of sharing it with your favorite people. This recipe is that lesson, and I’m so excited to share it with you.
Gathering Your Flavorful Arsenal
Here’s what you’ll need to create this masterpiece. The beauty of this list is its simplicity and flexibility—chances are, you have most of this already!
- 2.5 to 3 lbs Boneless, Skinless Turkey Breast: This is our star! Look for one that’s even in thickness for uniform cooking. A skinless cut keeps things lean and means our herb crust gets all the attention. If you can only find a larger one, no worries—just add a little more cooking time.
- 2 tbsp Olive Oil or Melted Butter: This is the glue for our seasoning paste. Olive oil gives a lovely fruitiness, while melted butter adds a classic, rich flavor. Use what you love!
- 1 tsp Salt: Crucial for enhancing the turkey’s natural flavor. I use fine sea salt for this rub. If you’re using kosher salt, you might need a touch more.
- ½ tsp Black Pepper: Freshly cracked is always best for the most vibrant punch!
- 1 tsp Garlic Powder & 1 tsp Onion Powder: These powdered wonders create a consistent, deep flavor base that clings to the meat perfectly without burning. Trust me, they are key here.
- 1 tsp Dried Thyme: This herb is turkey’s best friend. Its earthy, slightly floral notes are just classic. If you have fresh, use about 1 tablespoon.
- ½ tsp Smoked Paprika (optional but highly recommended): This is my secret weapon! It doesn’t add heat, but a gorgeous depth and a hint of smokiness that makes the flavor profile incredible.
- 1 tbsp Chopped Fresh Parsley or Rosemary: Adding a fresh herb at the end brightens everything up. Parsley is bright and grassy, while rosemary is piney and powerful. Your choice!
- ½ cup Chicken or Turkey Broth: This goes in the bottom of the pan. It creates steam to keep the turkey moist and forms the base for a killer pan gravy if you’re feeling fancy.
Let’s Get Roasting: Your Step-by-Step Guide to Juicy Perfection
Ready? This is where the magic happens. Follow these steps, and you’re guaranteed a perfect result.
Step 1: Prep Like a Pro. First, take your turkey breast out of the fridge and let it sit on the counter for about 20-30 minutes. Letting it come closer to room temperature is a tiny step that makes a huge difference in cooking it evenly. Preheat your oven to a cozy 350°F (175°C). Pat the turkey breast completely dry with paper towels. This is non-negotiable, friends! A dry surface is the only way to get that beautiful, flavorful crust we’re after. A wet turkey will just steam.
Step 2: Create Your Flavor Paste. In a small bowl, mix together the olive oil (or melted butter), salt, pepper, garlic powder, onion powder, dried thyme, and that fabulous smoked paprika. It will form a fragrant, paste-like consistency. This is your flavor bomb!
Step 3: The Rub Down. Using your hands (the best tools you own!), rub this seasoning mixture all over the entire surface of the turkey breast. Get it on every nook and cranny! Don’t be shy—give it a good massage. This ensures every single bite is packed with flavor.
Step 4: Into the Pan. Place your beautifully seasoned turkey breast in a roasting pan or a sturdy baking dish. Pour the chicken or turkey broth into the bottom of the pan, around the turkey, not over it. We want to keep that herby top crust dry and crisp. Now, loosely tent the pan with aluminum foil. This little blanket will trap steam and gently cook the turkey, keeping it incredibly juicy.
Step 5: The Two-Stage Roast. Slide the pan into your preheated oven and roast, covered, for 40-50 minutes. After this time, remove the foil (hello, gorgeous turkey!). This is where the magic happens. Return it to the oven, uncovered, for another 15-20 minutes. This final blast of heat will brown the exterior beautifully.
Step 6: The Most Important Step—REST! Pull the turkey out when a meat thermometer inserted into the thickest part reads 160°F – 165°F. Please, I beg you, do not skip the thermometer! It’s your ticket to perfect doneness without the guesswork. Now, transfer the turkey to a cutting board and let it rest for a full 10-15 minutes. This allows the frantic, hot juices to relax and redistribute throughout the meat. If you slice it immediately, all those precious juices will run out, and we’ve worked too hard for that! Sprinkle with your fresh parsley or rosemary right before slicing.
Plating Your Masterpiece
Once rested, use a sharp knife to slice the turkey against the grain into ½-inch thick slices. This ensures each piece is tender and easy to eat. Arrange the beautiful slices on a warm platter. Don’t forget to drizzle a little of those delicious pan juices over the top for extra flavor and a gorgeous sheen. It’s a simple, elegant presentation that says, “I totally have my life together,” even if you spent most of the day in your comfiest pants.
Make It Your Own: Delicious Twists & Swaps
The fun doesn’t stop here! This recipe is a fantastic blank canvas.
- Bright & Zesty: Add the zest of one lemon and a tablespoon of its juice to your seasoning paste. It cuts through the richness beautifully.
- Mustard-Herb Crust: Swap the olive oil for 2 tablespoons of Dijon mustard. It creates a tangy, flavorful crust that is absolutely divine.
- Fresh Herb Blast: Use all fresh herbs! Mince 2 cloves of garlic and use 1 tbsp each of fresh thyme, rosemary, and parsley for a truly garden-fresh flavor.
- Spice It Up: Add ¼ tsp of cayenne pepper or red pepper flakes to the rub for a gentle, warming kick.
- Lower Sodium: Simply reduce the salt to ½ tsp and use a low-sodium broth. The herbs will still provide tons of flavor.
Olivia’s Chef Notes & Kitchen Stories
This recipe has evolved so much since that first nervous attempt! I’ve learned that the smoked paprika was a game-changer I discovered on a whim one day when I was out of regular paprika. I also used to be terrified of undercooking poultry, which led to a few… less-than-juicy results. Investing in a simple digital meat thermometer was the single best thing I ever did for my confidence with roasts, chicken, and even pork. It took the guesswork out and guaranteed perfection every single time. Now, it’s my most-handed-out kitchen tip to friends. Another funny story: I once accidentally used cinnamon instead of paprika (those similar-colored spice jars will get you every time!). We ended up with a strangely “festive” turkey that tasted like Thanksgiving dessert. It was… interesting! We laughed it off and ordered pizza. The moral? Always label your spices and keep a sense of humor in the kitchen!
Your Questions, Answered!
Q: Can I use a frozen turkey breast?
A: You can, but you MUST thaw it completely first. The best way is to thaw it slowly in the refrigerator for 24-48 hours. Trying to roast it from frozen will result in an overcooked exterior and a dangerously undercooked interior. Patting it completely dry after thawing is extra important!
Q: My turkey is still a little pink near the center, but the thermometer says 165°F. Is it safe?
A: Yes, absolutely! Turkey can sometimes retain a slight pink hue, especially if it’s been brined or is from a younger bird. The meat thermometer is the ultimate authority on safety. If it has reached 165°F, it is safe to eat. The color is not a reliable indicator.
Q: Why did my turkey turn out dry?
A: The most common culprits are overcooking and not resting. First, trust your thermometer, not the clock. All ovens vary. Second, that resting period is NOT a suggestion—it’s a mandatory step for juicy meat. If you skipped it, that’s likely the reason. Finally, ensure you tented it with foil for the first part of cooking to lock in those juices.
Q: Can I make gravy from the pan drippings?
A: You bet! After removing the turkey, place the roasting pan on the stove over medium heat. Sprinkle in about 2 tablespoons of flour and whisk it into the drippings for a minute. Slowly pour in 1 to 1.5 cups of broth, whisking constantly until the gravy thickens. Season with a pinch of salt and pepper. It’s liquid gold!
Print
Roasted Boneless Turkey Breast
Description
Golden, tender, and packed with herb flavor — this recipe gives you all the comfort of a holiday roast without the stress of a whole bird. Perfect for weeknights and celebrations!
Ingredients
-
2.5–3 lbs boneless, skinless turkey breast
-
2 tbsp olive oil or melted butter
-
1 tsp salt (sea salt or 1 ½ tsp kosher salt)
-
½ tsp black pepper (freshly cracked)
-
1 tsp garlic powder
-
1 tsp onion powder
-
1 tsp dried thyme (or 1 tbsp fresh)
-
½ tsp smoked paprika (optional, but amazing)
-
1 tbsp fresh parsley or rosemary, chopped (for garnish)
-
½ cup chicken or turkey broth (for pan)
Instructions
1. Prep
-
Preheat oven to 350°F (175°C).
-
Let turkey sit at room temp 20–30 minutes.
-
Pat dry thoroughly with paper towels.
2. Make the rub
Mix olive oil/butter with salt, pepper, garlic powder, onion powder, thyme, and smoked paprika into a paste.
3. Season
Rub the mixture all over the turkey breast (every nook and cranny).
4. Pan setup
Place turkey in roasting pan. Pour broth into bottom of pan (not over the meat). Tent loosely with foil.
5. Roast in two stages
-
Roast covered for 40–50 minutes.
-
Remove foil, return to oven, and roast 15–20 minutes uncovered, until golden.
6. Check doneness
Use a thermometer: internal temp should be 160–165°F (71–74°C).
7. Rest & serve
Transfer to cutting board, rest 10–15 minutes. Slice against the grain into ½-inch slices. Garnish with parsley/rosemary.
Notes
-
Lemon Zest & Juice → add brightness to rub.
-
Mustard-Herb → swap oil for 2 tbsp Dijon mustard.
-
Fresh Herb Blast → replace dried spices with minced fresh garlic, thyme, and rosemary.
-
Spicy Kick → add ¼ tsp cayenne or red pepper flakes.
Nutrition
- Calories: 240 cal Per Serving
- Fat: 9g
- Carbohydrates: 1g
- Protein: 38g
Nutritional Information*
Per Serving (based on 8 servings, using olive oil): Calories: 240 | Protein: 38g | Carbohydrates: 1g | Fat: 9g
*Please note: Nutritional information is an estimate only and can vary based on ingredients and portions used.
Final Thoughts: Your New Weeknight Secret Weapon
So there you have it. What was once a symbol of holiday stress is now your ticket to an effortless, impressive, and downright delicious meal any night of the week. This herb-roasted turkey breast is more than just a recipe—it’s a reminder that the best cooking doesn’t have to be complicated. It’s about trusting a few good ingredients, a simple technique, and yourself.
This beautifully juicy turkey is proof that you can create that warm, festive feeling on a random Tuesday. It’s the answer to “What should I make for dinner?” that will have everyone asking for seconds. You’ve got this. You are now the proud owner of a backstage pass to confident, cozy, and incredibly satisfying cooking.
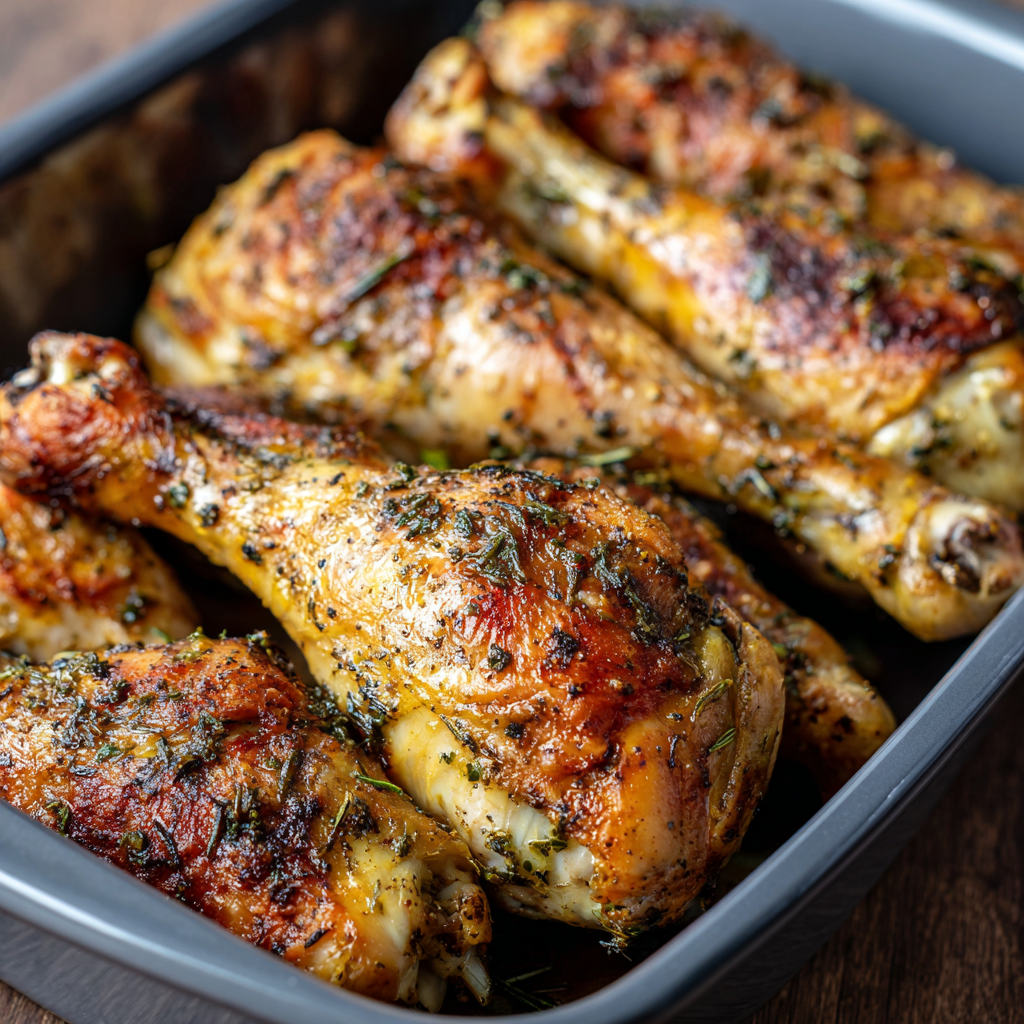
Roasted Turkey Drumsticks
Your New Favorite Dinner: Savory, Juicy & Simple Roasted Turkey Drumsticks
Hey there, friend! Come on in, pull up a stool, and let’s talk about one of my all-time favorite ways to get a seriously impressive, deeply satisfying meal on the table without any of the fuss. I’m talking about roasted turkey drumsticks. Now, I know what you might be thinking—turkey is just for Thanksgiving, right? Wrong! So wonderfully, deliciously wrong.
Turkey legs are the unsung heroes of the poultry world. They’re incredibly flavorful, surprisingly budget-friendly, and they deliver that classic, nostalgic roasted flavor in a perfectly portioned package. No wrestling with a giant bird, no hours of brining, and definitely no dry meat. We’re aiming for crackling-crisp skin that gives way to the most tender, juicy, fall-off-the-bone meat you’ve ever tasted. It’s the kind of meal that makes everyone gather in the kitchen, noses in the air, asking “what is that amazing smell?!” exactly 30 seconds after it goes in the oven. The best part? It’s deceptively simple. You don’t need any fancy skills, just a few good spices and a little bit of love. So, tie on your apron (the messy one, you know the one), and let’s make something unforgettable together.
The Snowy Day & The Great Turkey Leg Experiment
This recipe brings me right back to one particularly snowy December a few years ago. My husband and I had planned a big, festive holiday party, but a massive blizzard rolled in and one by one, all our guests had to cancel. There we were, staring at a fully defrosted… single turkey leg. I’d bought it on a whim at the farmer’s market, intending to test a recipe, and suddenly it was our impromptu Christmas dinner for two.
Instead of being disappointed, we turned it into an event. We lit every candle in the house, put on our favorite holiday jazz album, and opened a bottle of red wine. I whipped up this simple rub, and the smell of garlic, paprika, and rosemary roasting filled our tiny kitchen with the most incredible warmth. We ate those giant, juicy drumsticks straight off the bone, with our fingers, laughing like kids. It was messy, it was cozy, and it was absolutely perfect. It taught me that a special meal isn’t about the occasion or the number of people around the table; it’s about the joy you pour into it. Now, every time I make these, I get a little glimpse of that magical, snowy night.
Gathering Your Flavor Arsenal
Here’s the beautiful part: the ingredient list is short, sweet, and probably already in your pantry. This is where we build layers of flavor, from the inside out!
- 4 turkey drumsticks (about 3–4 lbs total): The star of the show! Look for drumsticks with plump, pink skin. Don’t worry if they seem huge; they shrink a bit as they cook. Pro tip: if you have time, let them sit uncovered on a plate in the fridge for an hour or two before cooking. This helps dry the skin out, which is the secret to ultra-crispiness!
- 2 tbsp olive oil: Our flavor conductor! It helps the spice rub stick and creates that beautiful, golden exterior. Avocado oil works great here too for its high smoke point.
- 1 tsp salt: Essential for enhancing all the natural flavors of the turkey. I use kosher salt for its clean taste.
- ½ tsp black pepper: Freshly cracked is always best for a little sharp, pungent kick.
- 1 tsp smoked paprika: This is my not-so-secret weapon. It doesn’t add heat, but it gives a gorgeous deep red color and a subtle, smoky sweetness that makes the turkey taste like it’s been slow-smoking for hours.
- 1 tsp garlic powder & 1 tsp onion powder: The dynamic duo of savory flavor. They create a robust, all-over seasoning that permeates the meat perfectly. Fresh garlic can burn, but the powders give us consistent, delicious flavor.
- 1 tsp dried thyme or rosemary: Hello, cozy aroma! I adore thyme with poultry, but rosemary brings a powerful, piney warmth. Use what you love! If you have fresh, chop it finely—you’ll need about 1 tablespoon.
- 1 cup chicken or turkey broth: This is our kitchen hack for incredibly moist meat. As it roasts, it creates a steamy environment in the pan and gives us delicious juices for basting. Low-sodium is best so you can control the salt level.
Let’s Get Roasting! Your Foolproof Steps to Perfection
Ready? This is where the magic happens. Follow these steps, and you are guaranteed a show-stopping result.
- Preheat and Prep: First things first, get that oven preheated to 375°F (190°C). Position a rack in the center of the oven. While it’s heating, take your turkey drumsticks and pat them completely dry with paper towels. This is the SINGLE MOST IMPORTANT STEP for crispy skin. Any moisture on the surface will just steam the skin instead of browning it. Be thorough!
- Create the Flavor Paste: In a small bowl, mix together the olive oil, salt, pepper, smoked paprika, garlic powder, onion powder, and your chosen herb. It should form a lovely, fragrant paste. Don’t be shy here! Using your hands (the best tools you have!), rub this mixture all over every inch of the drumsticks. Get under the skin if you can, and really massage it in. Let them sit for 10 minutes while the oven finishes preheating to let the flavors meld.
- Pan and Broth: Place the seasoned drumsticks in a roasting pan or a sturdy baking dish with sides. You don’t want them crammed in; a little space is good. Now, carefully pour the 1 cup of broth into the bottom of the pan. Important: Pour it around the drumsticks, not over them! We worked hard on that dry skin, we don’t want to make it wet again. The broth will steam up and keep the meat incredibly juicy while the skin above it roasts to perfection.
- The First Roast (The Tenderizing Phase): Loosely cover the pan with aluminum foil. This creates a little steam oven that gently cooks the meat, tenderizing it without drying it out. Slide the pan into your preheated oven and roast for 45 minutes.
- Uncover, Baste, and Crisp! After 45 minutes, carefully remove the pan from the oven (it’s steamy!). Take off the foil and behold the glorious, partially cooked drumsticks! Using a spoon or a baster, gather up the flavorful juices from the bottom of the pan and drizzle them all over the drumsticks. This is like giving them a flavor shower. Now, return the pan to the oven, uncovered, for the final 30-40 minutes. This is where the skin will transform into a crispy, crackly, golden-brown masterpiece.
- The Final Test: The drumsticks are done when the skin is deeply browned and an instant-read thermometer inserted into the thickest part of the meat (without touching the bone) reads 175°F. The meat will be juicy and tender at this temperature. If you’re unsure, you can give the meat a little pull with a fork; it should be starting to fall apart easily.
- Rest is Best: This is the hardest part, I know! But you must let the drumsticks rest for 10 minutes after pulling them out of the oven. Tent them loosely with the foil you used earlier. This allows the frantic, hot juices inside the meat to relax and redistribute. If you cut into them right away, all those precious juices will run out onto the cutting board, leaving you with drier meat. Trust me, it’s worth the wait!
How to Serve These Beautiful Drumsticks
Presentation is part of the fun! For a real “wow” factor, serve these drumsticks whole on a large, rustic platter. Drizzle a little of the pan juices over the top and sprinkle with some fresh chopped parsley or thyme for a pop of color. They are a hands-on meal, so provide plenty of napkins! I love to serve them alongside the roasted root vegetables that cooked right in the pan with them (see variations below) and a big, fluffy pile of mashed potatoes or creamy polenta to soak up every last drop of that incredible juice. It’s a feast for the eyes and the soul.
Make It Your Own: Delicious Variations
The beauty of this recipe is its flexibility. Play around and find your family’s favorite version!
- Citrus Herb: Add the zest of one lemon and one orange to the spice rub. Place a few slices of the citrus fruits in the bottom of the pan with the broth for a bright, sunny flavor.
- Cozy Root Veggie Feast: In the first step, toss 2 cups of chopped carrots, potatoes, parsnips, and onions in a tablespoon of the oil and spice mix. Scatter them around the drumsticks in the pan. They’ll roast in the turkey drippings and become the most delicious side dish imaginable.
- Balsamic & Honey Glaze: For the last 15 minutes of cooking, brush the drumsticks with a mix of 2 tbsp balsamic vinegar and 1 tbsp honey. Return to oven to caramelize into a sticky, sweet, and savory glaze.
- Spicy Kick: Add ½ tsp of cayenne pepper or chipotle powder to the rub for a warm, smoky heat that builds with every bite.
- Mustard Herb: Swap the olive oil for 2 tbsp of whole-grain Dijon mustard in the rub. It creates a fantastic crust and adds a tangy depth of flavor.
Olivia’s Chef Notes & Kitchen Stories
This recipe has become a true workhorse in my kitchen. I’ve made it for busy weeknights, for last-minute guests, and even for a quirky, non-traditional “Turkey Leg Thanksgiving” with close friends. It has never, ever let me down. One time, I was filming a quick video of me taking them out of the oven, and I was so excited by how gorgeous they looked that I completely forgot to use a potholder. Let’s just say the pan handle taught me a very quick, very memorable lesson about kitchen safety! (The turkey legs were still delicious, and my pride was the only thing that was wounded.) Over time, I’ve learned that a heavier roasting pan yields even crispier skin because it distributes heat more evenly, but a simple baking dish works perfectly too. Don’t overthink it. The real secret ingredient is always the joy you bring to the process.
Your Questions, Answered!
Q: My skin isn’t as crispy as I’d like. What did I do wrong?
A: The number one culprit is not drying the skin enough before seasoning. Moisture is the enemy of crispiness! Make sure you pat it very thoroughly. Also, ensure your oven is fully preheated and that you’re roasting uncovered for the full final 30-40 minutes. If it’s still not crisp enough, you can pop them under the broiler for 2-3 minutes at the very end, but watch them like a hawk!
Q: Can I use frozen turkey drumsticks?
A: Absolutely! The key is to thaw them safely and completely. The best way is to move them from the freezer to the refrigerator 24-48 hours before you plan to cook. Once fully thawed, pat them extremely dry before proceeding with the recipe. Cooking from frozen is not recommended as the outside will overcook before the inside is safe to eat.
Q: The meat is tender but still pink near the bone. Is it safe?
A: This is a common and totally safe occurrence with turkey legs! The bone can release a protein called myoglobin during cooking, which can tint the surrounding meat a pinkish hue, even when the turkey is fully cooked to a safe temperature. Always trust your thermometer. If it reads 175°F in the thickest part of the meat, it is done and safe to eat.
Q: Can I make this with chicken legs instead?
A: You sure can! The cooking principle is the same, but the time will be less. Chicken legs will likely be done after 25-30 minutes covered and 20-25 minutes uncovered. Always use a thermometer and cook until the internal temperature reaches 175°F.
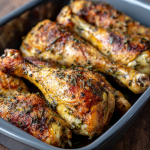
Roasted Turkey Drumsticks
Description
No giant bird, no stress, just perfectly portioned turkey legs with golden, crispy skin and fall-off-the-bone meat. A true weeknight hero—or a festive showstopper!
Ingredients
-
4 turkey drumsticks (3–4 lbs total)
-
2 tbsp olive oil (or avocado oil)
-
1 tsp kosher salt
-
½ tsp freshly cracked black pepper
-
1 tsp smoked paprika
-
1 tsp garlic powder
-
1 tsp onion powder
-
1 tsp dried thyme or rosemary (or 1 tbsp fresh, finely chopped)
-
1 cup chicken or turkey broth (low-sodium preferred)
Instructions
1. Preheat & Prep
Set oven to 375°F (190°C). Pat drumsticks completely dry with paper towels—this is crucial for crispy skin.
2. Make the Flavor Paste
Mix oil, salt, pepper, paprika, garlic powder, onion powder, and herbs into a paste. Rub all over drumsticks (get under the skin if possible).
3. Pan Setup
Place drumsticks in a roasting pan or baking dish. Pour broth into the pan around (not over) the meat.
4. Tenderizing Phase
Cover loosely with foil. Roast 45 minutes.
5. Crisping Phase
Remove foil, baste with pan juices, and return to oven uncovered. Roast another 30–40 minutes, until skin is golden and internal temp reaches 175°F.
6. Rest & Serve
Tent with foil and rest 10 minutes before serving. This locks in the juices.
Notes
-
Citrus Herb → Add zest of 1 lemon + 1 orange to rub, place slices in pan.
-
Root Veggie Feast → Toss carrots, potatoes, onions in spice mix; roast alongside drumsticks.
-
Balsamic Honey Glaze → Brush with 2 tbsp balsamic + 1 tbsp honey in last 15 minutes.
-
Spicy Kick → Add ½ tsp cayenne or chipotle powder to rub.
-
Mustard Herb → Swap oil for 2 tbsp whole-grain Dijon mustard in rub.
Nutrition
- Calories: 310 cal Per Serving
- Fat: 18g
- Carbohydrates: 1g
- Protein: 36g
Nutritional Information*
*This is an estimate for 1 drumstick (assuming 4 drumsticks total) and will vary based on the exact size of the drumsticks and specific ingredients used.
Per Serving (approx.): Calories: 310 | Protein: 36g | Carbohydrates: 1g | Fat: 18g
Final Thoughts: More Than Just a Meal
So there you have it. What might have seemed like a humble ingredient has been transformed into a centerpiece-worthy feast. These roasted turkey drumsticks are proof that the most memorable meals aren’t about complexity or grand gestures, but about simplicity, heart, and a few good spices.
They’re a reminder that you can create magic on a random Tuesday, that a little bit of crispiness can cure a bad day, and that the best recipes are the ones that leave your kitchen smelling like a home and your family asking for seconds.
I hope this recipe becomes a trusted friend in your kitchen, just like it is in mine. I hope it gives you a reason to light a few candles, put on some music, and turn an ordinary evening into a tiny celebration. Most of all, I hope it gives you the confidence to get a little messy, to trust your instincts, and to create your own delicious stories, one perfectly roasted drumstick at a time.
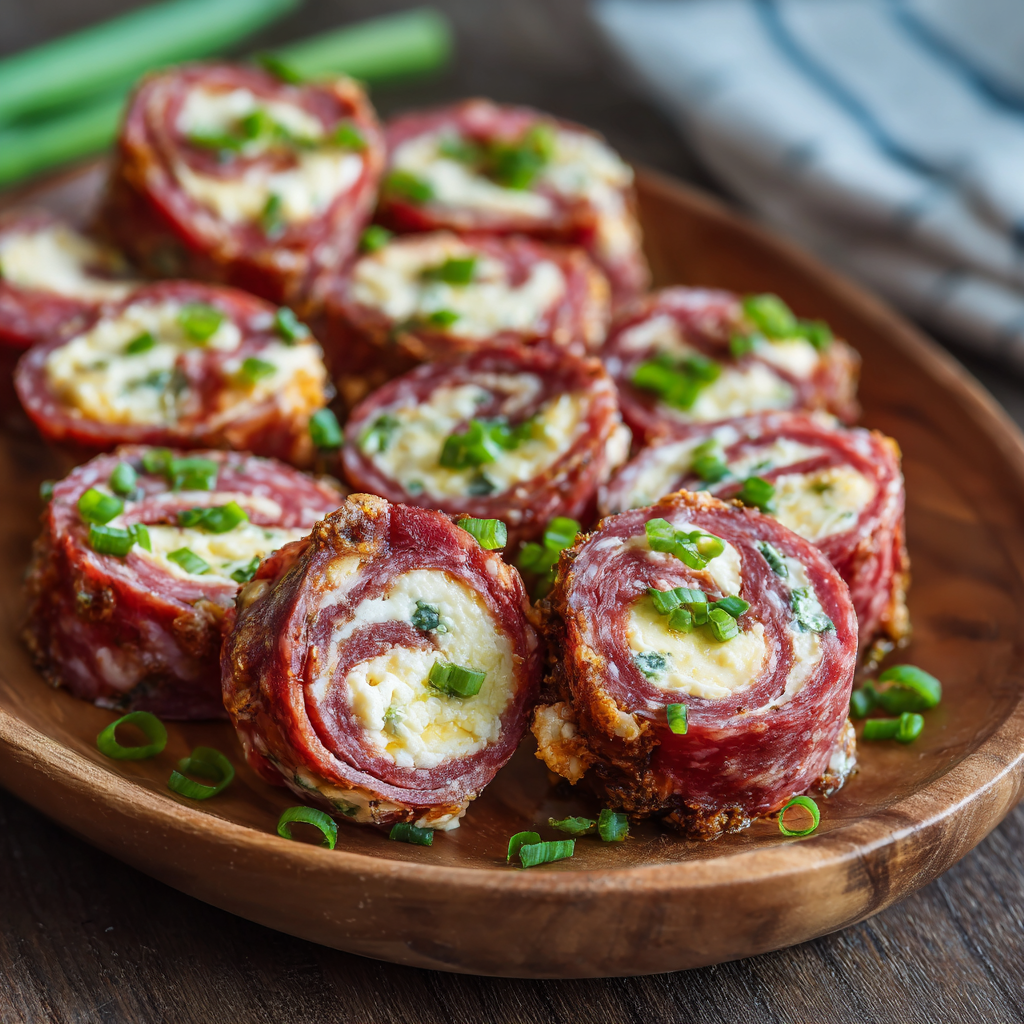
Keto Salami Roll-Ups
The Snack That Saved My Sanity (And My Diet)
Hey there, friend! Come on in, grab an apron—don’t worry, mine’s already a mess—and let’s talk about one of life’s great dilemmas: the need for a snack that’s actually satisfying. You know the feeling. It’s 3 PM. Your energy is dipping, your stomach is staging a full-blown mutiny, and the siren song of the cookie jar is getting louder by the second. Or maybe it’s party prep panic, and you need something impressive that doesn’t require you to turn your kitchen into a Michelin-starred war zone. I’ve been there more times than I can count!
That’s exactly why I’m utterly obsessed with these Keto Salami Roll-Ups. They are my go-to, my secret weapon, my never-fail hero for moments just like these. We’re talking about a snack that is unbelievably quick to make, requires zero cooking, and is packed with so much savory, creamy, tangy flavor that you’ll forget it’s also wildly good for you. They’re low-carb, high-fat, and protein-packed, making them the perfect fuel for a keto lifestyle or for anyone just looking for a delicious, guilt-free bite.
Best of all? This isn’t a fussy recipe. It’s about embracing simplicity and letting a few fantastic ingredients shine. So, whether you’re running out the door, need a quick appetizer to wow your friends, or are just looking for something tasty to keep you going, these little roll-ups are about to become your new best friend in the kitchen. Let’s get rolling!
A Tale of Two Kitchens: My Mom’s Antipasto Platter
This recipe always takes me right back to my mom’s bustling kitchen before a big family gathering. She’d always, without fail, put together a massive antipasto platter. It was a work of art: glistening olives, bright peppers, silky cheeses, and, of course, piles of thinly sliced salami. As a kid, I was fascinated by the salty, spiced meat. I’d sneak pieces when she wasn’t looking, folding them up and popping them in my mouth, feeling wildly sophisticated.
One year, I watched her take a slice of salami, a little piece of mozzarella, and a sliver of pepperoncini, and roll it all together before spearing it with a toothpick. It was a revelation! She called it “lazy man’s antipasto.” To me, it was genius. It was a perfect, portable flavor bomb. My version today is a direct love letter to that moment. I’ve swapped the mozzarella for a creamy, tangy cheese spread that holds everything together, but the spirit is exactly the same—easy, communal, and packed with joy. It’s proof that the best recipes often start with a little nostalgia and a lot of love.
Gathering Your Flavor Dream Team
The beauty here is in the simplicity. Just a handful of ingredients come together to create something truly greater than the sum of its parts. Here’s what you’ll need to make a full batch of 16 roll-ups (perfect for sharing… or not!).
- 16 slices Genoa or Hard Salami (medium thickness): This is your flavor base! Genoa salami brings a gorgeous garlic and red wine flavor, while hard salami offers a firmer bite and a more peppery kick. Chef’s Insight: Don’t go too thin, or the slices might tear when rolling. Don’t go too thick, or they’ll be tough to bite into. The Goldilocks “medium” slice is perfect.
- 8 oz Cream Cheese, softened: This is the creamy, lush glue that holds our masterpiece together. Pro Tip: Let it sit on the counter for 30-60 minutes before you start. Softened cream cheese blends beautifully and won’t tear your salami. For a lighter option, whipped cream cheese works straight from the fridge!
- 4 tbsp Finely Diced Dill Pickles, patted dry: This is our secret weapon for texture and a huge punch of tangy flavor that cuts through the richness. SUPER IMPORTANT TIP: Pat those pickles DRY with a paper towel! Excess moisture is the enemy of a firm filling and will make your roll-ups soggy.
- 2 tbsp Chopped Green Onions (optional): I almost never skip these. They add a mild, fresh oniony bite and a lovely pop of green color. If you’re not a fan, a tiny bit of very finely minced red onion works too.
- 2 tsp Garlic Powder or Italian Seasoning: This is where you customize. Garlic powder gives a pure, savory punch. Italian seasoning (a blend of oregano, basil, thyme, etc.) brings an herby, aromatic quality. Feel free to use one or a mix of both!
Let’s Build Some Flavor Bundles!
Ready? This is literally one of the easiest things you’ll ever make. I promise. We’re going to mix, spread, roll, and devour. Let’s do this!
Step 1: The Creamy Filling
Grab a medium-sized mixing bowl and plop in your beautifully softened cream cheese. Add the finely diced and thoroughly dried pickles, the chopped green onions, and your choice of garlic powder or Italian seasoning. Now, take a spatula and mix it all together until it’s completely combined and gloriously smooth. Chef’s Hack: If you want an even smoother, almost pipeable filling, you can beat this with a hand mixer for 30 seconds. It makes spreading a dream! Taste it. Seriously, do it. This is your moment to adjust. Want more tang? Add a teaspoon of pickle juice. Need more garlic? Go for it! This is your creation.
Step 2: The Salami Stage
Lay your salami slices out on a clean cutting board or a piece of parchment paper. You’ll want to see them all so you can be efficient. Using a small spoon or a butter knife, place about 2 teaspoons of your cream cheese mixture onto the center of each salami slice. Pro Tip: Don’t spread it all the way to the edges! Leave a small border, about a ¼-inch, clear. This prevents the filling from squishing out the sides when you roll.
Step 3: The Roll-Up
This is the fun part. Take one salami slice and gently but firmly roll it up around the filling. Imagine you’re rolling a tiny, delicious carpet. You want it snug but not so tight that the filling bursts through the ends. If you’re using thinner salami, you might be just fine. If you find they want to unroll, or if you’re making these for a party and want them to look extra neat, simply secure them with a toothpick. Fun Twist: For a double-decker delight, take two smaller salami slices, overlap them slightly, add your filling, and roll! It makes a bigger, meatier bite.
Step 4: The Chill (The Test of Willpower)
You can absolutely eat these right now. I won’t stop you. BUT, if you can manage it, place them on a plate or in a container and pop them in the refrigerator for at least 15-30 minutes. This chilling time allows the cream cheese to firm back up, making the roll-ups easier to eat and giving the flavors a precious moment to meld together beautifully. It’s 100% worth the wait.
How to Serve These Little Beauties
Presentation is a breeze! For a casual snack, just pile them high on a plate. For a party, arrange them on a beautiful platter in a swirling pattern or line them up like little soldiers. I love to sprinkle them with an extra pinch of everything bagel seasoning or some fresh chopped chives for a fancy touch. They are fantastic alongside other keto-friendly snacks like olives, cheese cubes, and some crispy celery sticks. Don’t forget a bowl for the toothpicks!
Make It Your Own! Endless Flavor Twists
The basic recipe is a perfect canvas. Get creative and try one of these delicious variations next time:
- The Zesty Kick: Add 2 teaspoons of Dijon mustard or prepared horseradish into the cream cheese mix. It gives a fantastic sharpness that wakes up all your taste buds.
- The Mediterranean: Swap the pickles for 2 tablespoons of finely chopped Kalamata olives and a tablespoon of chopped sun-dried tomatoes (oil-packed, patted dry!).
- The Everything Bagel: After rolling, dredge the outside of the roll-up in Everything Bagel Seasoning. It adds incredible crunch and that iconic flavor.
- Dairy-Free Delight: Use a high-quality dairy-free cream cheese alternative. It works like a charm!
- The Herb Garden: Mix in a tablespoon of fresh, finely chopped dill, chives, or parsley for a burst of freshness.
Olivia’s Chef Notes & Kitchen Confessions
I can’t tell you how many times this recipe has saved me. I once showed up to a potluck empty-handed because I’d spent all my time on a complicated dessert that… well, let’s just say it met an unfortunate end with the kitchen floor. I panicked, ran to the store, grabbed these ingredients, and whipped up two trays of these roll-ups in my friend’s kitchen in 10 minutes flat. They were the first thing to disappear! Everyone thought I’d planned it all along.
Over time, I’ve learned that the key is truly in the drying of the add-ins. I’ve had batches turn out a little watery because I was in a rush and skipped that step. Learn from my mistakes! Now, I’m even known to use a salad spinner for my ultra-wet ingredients like cucumbers or peppers if I’m using them. No joke! This recipe is a staple in my house for weekly meal prep. I make a big batch on Sunday, and my husband and I have them for easy snacks all week long. They keep beautifully.
Your Questions, Answered!
Q: Can I make these ahead of time?
A: Absolutely! They are a meal-prep superstar. Make them up to 24 hours in advance, store them in a single layer or stacked with parchment paper in between in an airtight container in the fridge. They might release a tiny bit of moisture, but they will still taste incredible.
Q: My cream cheese is tearing the salami when I try to roll. What did I do wrong?
A: This usually means two things: either your cream cheese wasn’t soft enough, making it too stiff to spread gently, OR your salami slices are a bit too thin. Next time, make sure your cream cheese is at room temperature and try to source a slightly thicker-cut salami. For this batch, just roll them as best you can—they’ll still taste amazing, even if they’re a little rustic!
Q: Are there any other meats I can use?
A: Of course! This method works with any sturdy, sliced cold cut. Try it with ham, turkey, pastrami, or even prosciutto (though prosciutto is more delicate, so be extra gentle). The flavor profile will change, so feel free to adjust the fillings to match (e.g., ham and cheddar cheese, turkey and cranberry sauce).
Q: How long will they last in the refrigerator?
A: They will keep well for 3-4 days. After that, the salami might start to get a little hard and the filling might weep more moisture. They’ve never lasted that long in my house, though!
Print
Keto Salami Roll-Ups
Description
Savory, creamy, tangy, and ridiculously easy—these no-cook roll-ups are your new go-to snack. Perfect for keto, meal prep, or last-minute party trays.
Ingredients
-
16 slices Genoa or hard salami (medium thickness)
-
8 oz cream cheese, softened (or whipped cream cheese)
-
4 tbsp diced dill pickles, patted dry
-
2 tbsp chopped green onions (optional)
-
2 tsp garlic powder or Italian seasoning
Instructions
Step 1 – Make the filling
Mix softened cream cheese with pickles, green onions, and seasoning until smooth. Adjust to taste—add pickle juice for tang, or extra garlic for punch.
Step 2 – Prep the salami
Lay salami slices flat. Spoon ~2 tsp of filling into the center of each slice. Leave a ¼-inch border around the edge.
Step 3 – Roll it up
Roll salami tightly but gently into little “flavor bundles.” Secure with a toothpick if needed.
Step 4 – Chill & serve
Refrigerate for 15–30 minutes to let flavors meld and filling firm. Serve piled on a plate or arranged neatly on a party platter.
Notes
-
Dry, dry, dry! Moisture = soggy roll-ups. Pat pickles well.
-
Soft cream cheese makes rolling a breeze.
-
Batch prep: Make ahead, store in airtight container up to 24 hours.
Nutritional Information*
*Please note: This is an estimate for 1 roll-up based on the ingredients used. Values may vary depending on your specific brands and ingredients.
- Calories: ~110
- Protein: 6g
- Fat: 9g
- Total Carbohydrates: 1g
- Fiber: 0g
- Net Carbs: 1g
Well, that’s it, my friend! You are now officially a Keto Salami Roll-Up expert. I hope this recipe brings as much joy and convenience to your kitchen as it has to mine. Happy snacking!
With love and a full belly,
Final Thoughts: More Than Just a Snack
So there you have it—my not-so-secret weapon against hanger, party panic, and diet derailment. These Keto Salami Roll-Ups are proof that you don’t need a complicated recipe or a sink full of dishes to create something truly delicious and satisfying.
They’re a reminder that the best food often comes from a place of simplicity, nostalgia, and a desire to gather and share. Whether you’re whipping them up for a last-minute get-together, packing them for a busy day, or simply treating yourself to a mindful snack, these little roll-ups deliver every single time.
They’ve saved my sanity (and my diet) on more occasions than I can count, and I have a feeling they’re about to do the same for you. So here’s to effortless cooking, big flavors, and snacks that truly satisfy.
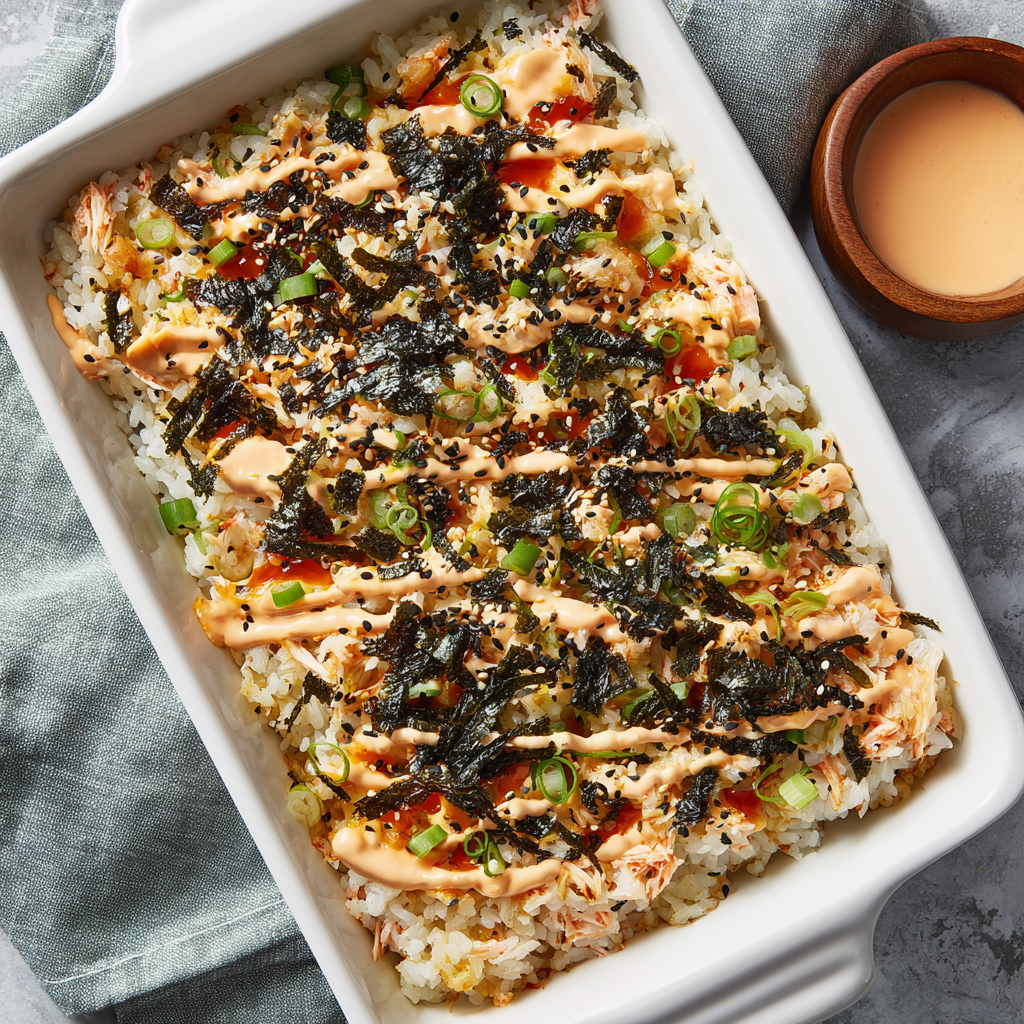
Sushi Bake
Sushi Bake: The Easiest, Most Crowd-Pleasing Sushi Party You’ll Ever Throw!
Hey there, my fellow food lover! Come on in, grab an apron, and let’s get something incredible bubbling in the oven. If the thought of making sushi from scratch—with all that meticulous rolling and hoping it doesn’t fall apart—has ever made you a little nervous, I have the most glorious solution for you. Get ready to fall head-over-heels for Sushi Bake!
Imagine this: all the iconic, craveable flavors of your favorite spicy crab roll—the savory rice, the creamy, spicy filling, the satisfying crunch of nori—but layered up in a warm, comforting casserole dish. It’s deconstructed, it’s shareable, and it is an absolute guaranteed hit at any gathering. This is the dish that turns “I could never make sushi!” into “When can I make this again?!”
I designed this recipe as a double batch because, trust me, you’ll want leftovers (though they’re never guaranteed in my house!). It’s the ultimate centerpiece for a fun Friday night dinner, a potluck showstopper, or a game-day spread that’s miles beyond the usual chips and dip. We’re talking minimal fuss, maximum flavor, and that wonderful feeling of serving something that looks and tastes like you’re a certified sushi master. So, preheat that oven, my friend. We’re about to make magic happen.
My First Bite of Sushi Bake Magic
I’ll never forget the first time I encountered a sushi bake. It was at a massive, chaotic, and incredibly joyful family potluck hosted by my college roommate’s Tita (Auntie) Maria. The table was groaning with lumpia, pansit, and lechon, but right in the center was this unassuming 9×13-inch dish that everyone was flocking to. I saw people eagerly scooping warm, creamy filling and rice onto little squares of nori, their eyes lighting up with each bite.
I grabbed a piece and built my own little scoop, not quite knowing what to expect. The first taste was a revelation. It was warm, comforting, and deeply savory, with the familiar tang of sushi rice and the cool, crisp contrast of the seaweed. It had all the soul-satisfying joy of a casserole but the sophisticated flavor profile of a fancy sushi roll. I must have gone back for thirds. I spent the rest of the party glued to Tita Maria’s side, politely (but persistently) begging for the recipe. She laughed and gave me the basics, a cherished little secret I’ve been tweaking and perfecting ever since. This dish, for me, will always taste like community, celebration, and the beautiful way food can bring us all together.
Gathering Your Sushi Bake Squad (Ingredients)
Here’s your shopping list for this flavor explosion! The beauty of this dish is its flexibility, so I’ve included my favorite chef insights and swaps to make it your own.
- 2 cups cooked sushi rice (short-grain is best!) – The foundation! Sushi rice’s starchiness helps it hold together beautifully. Chef’s Tip: If you can’t find sushi rice, any short or medium-grain white rice will work. Just avoid long-grain like basmati or jasmine, as they won’t have the right sticky texture.
- 4 tbsp rice vinegar, 2 tbsp sugar, 2 tsp salt – The holy trinity for seasoning your rice. This gives it that authentic, tangy-sweet sushi rice flavor. Substitution Tip: No rice vinegar? A mild white wine vinegar or even apple cider vinegar (use a little less) can work in a pinch.
- 4 tbsp sesame seeds – For a lovely nutty flavor and a bit of textural crunch. I use a mix of white and black sesame seeds for a pretty look!
- 10 sheets nori – The essential vehicle for your sushi bake scoops! You can cut them into small squares for easy handling or leave them whole for a DIY experience. Chef’s Insight: Keep your nori in a sealed bag away from moisture so it stays crispy!
- 2 cups imitation crab (surimi), shredded – The classic, affordable, and delicious choice. Substitution Tip: Feel free to upgrade to real cooked crab meat, flaked cooked salmon, chopped cooked shrimp, or even canned tuna (drained well) for a different twist!
- 2 tbsp soy sauce – For that essential umami, savory depth. Use low-sodium if you’re watching salt intake.
- 2 tsp sesame oil – A little bit goes a long way to add an incredible, aromatic nuttiness. Don’t skip this!
- ½ cup cream cheese, softened – The secret to the luxuriously creamy, cohesive filling. Let it sit out for 30 minutes before you start for easiest mixing.
- ½ cup spicy mayo – The flavor kicker! To make your own, simply mix ½ cup mayonnaise with 1-2 tablespoons of sriracha (adjust to your heat preference) and a tiny squeeze of lime juice.
Let’s Build Our Flavor Layers! (Step-by-Step Instructions)
Okay, team! Let’s transform these simple ingredients into something legendary. It’s all about the layers, and it comes together faster than you can say “seconds, please!”
Step 1: Preheat & Prep
Preheat your oven to 400°F (200°C). Grab your trusty 9×13-inch baking dish and give it a light coating of non-stick spray or a wipe of neutral oil. This ensures easy serving later! Chef’s Hack: For super easy cleanup, you can line the dish with parchment paper, leaving a little overhang on two sides. You’ll be able to lift the whole bake out like a pro!
Step 2: The Perfect Sushi Rice Base
Your rice should still be warm for this step—it absorbs the seasoning better. In a large bowl, gently combine the warm cooked rice with the rice vinegar, sugar, and salt. I like to sprinkle the vinegar mixture over the rice and use a cutting and folding motion with a rice paddle or spatula to combine it without smashing the grains. Once it’s evenly mixed, stir in those gorgeous sesame seeds. Now, press this mixture firmly and evenly into the bottom of your prepared baking dish. You’re creating the delicious foundation for our bake! Chef’s Tip: Wet your fingers or the back of a spoon to press the rice down—it won’t stick!
Step 3: The Irresistible Creamy Filling
In another bowl, let’s make the magic happen. Add your shredded imitation crab, soy sauce, sesame oil, softened cream cheese, and spicy mayo. Now, roll up your sleeves and get in there with a fork or your hands! Mix everything until it’s well-combined and creamy. You shouldn’t see any big streaks of plain cream cheese. Chef’s Hack: If you want an extra flavor boost, add a teaspoon of grated fresh ginger or a minced garlic clove to this mixture. It’s a game-changer!
Step 4: Layer & Bake to Perfection
Take your creamy crab mixture and dollop it evenly over the pressed rice layer. Then, use a spatula to spread it gently into one smooth, beautiful, even layer, reaching all the way to the edges. Pop that dish into your preheated oven and bake for 10-12 minutes. You’re not looking for a brown crust, just for it to be heated all the way through, with maybe the faintest golden blush on top. The smell will be absolutely incredible.
Step 5: The Grand Finale (Serving!)
Carefully remove your masterpiece from the oven. Let it sit for just a minute or two—it will be molten hot! This is the time to add any post-bake drizzles like extra sriracha, eel sauce, or a sprinkle of furikake. Now, the fun begins: serve it hot right from the dish! Provide a bowl of nori sheets (or pre-cut squares) and let everyone scoop the warm sushi bake onto their nori, roll it up like a tiny taco, and pop it in their mouth. Pure bliss.
How to Serve Your Sushi Bake Masterpiece
Presentation is part of the fun! I love placing the warm baking dish right in the middle of the table on a trivet, surrounded by small bowls of toppings and stacks of nori. It becomes an interactive, build-your-own adventure that gets everyone talking and laughing. For a low-carb option, offer large, sturdy butter lettuce or romaine leaves as cups for scooping. Don’t forget the chopsticks for those who want to dig in directly! A side of pickled ginger and a small dish of extra soy sauce for dipping are the perfect finishing touches to make the experience feel complete.
Make It Your Own! Delicious Recipe Variations
- Spicy Tuna Twist: Swap the crab for 2 cups of finely chopped, sushi-grade yellowfin tuna mixed with your spicy mayo.
- California Dreamin’: After baking, top the entire casserole with a layer of finely diced avocado and cucumber for that fresh California roll vibe.
- Vegetarian Delight: Replace the crab with finely chopped sautéed mushrooms (shiitake would be amazing!), shredded carrots, and edamame.
- Dragon Style: Top the baked casserole with thin slices of avocado, a drizzle of eel sauce, and a sprinkle of black sesame seeds.
- Extra Crunch: Stir ¼ cup of panko breadcrumbs mixed with a tablespoon of melted butter into the crab mixture before baking for a subtle, crunchy texture.
Olivia’s Chef Notes & Kitchen Stories
This recipe has evolved so much from Tita Maria’s original whispered instructions! I’ve made it for probably a hundred different occasions now, and it never fails. One of my favorite kitchen fails-turned-win was the time I accidentally used *whipped* cream cheese straight from the fridge. It was a bit trickier to mix, but I added a tablespoon of flour to help bind it, and it baked up perfectly! Talk about a happy accident.
The biggest lesson I’ve learned? Don’t stress about perfection. This dish is meant to be fun and forgiving. If your rice layer is a little uneven, or your crab mixture isn’t perfectly smooth, I promise no one will notice once they take that first incredible bite. The real secret ingredient is always the joy of sharing it with people you love.
Sushi Bake FAQs: Your Questions, Answered!
Q: Can I make this sushi bake ahead of time?
A: Absolutely! You can assemble the entire casserole, cover it tightly with plastic wrap or foil, and refrigerate it for up to 24 hours before you need to bake it. When you’re ready, just pop it straight into the preheated oven. You might need to add 2-3 extra minutes to the bake time since it’s starting from cold.
Q: My filling turned out a bit watery. How can I prevent that?
A: This usually happens if the imitation crab has a lot of extra moisture. A great trick is to squeeze the shredded crab in a clean paper towel or kitchen towel before mixing it with the other ingredients. This wrings out any excess liquid and ensures your bake is creamy, not watery.
Q: The nori gets soggy really quickly. Any tips?
A: This is the one tricky part! The key is to serve the nori *on the side* and let everyone build their own bites right before eating. If you top the entire hot casserole with nori, it will steam and soften. Keeping it separate ensures everyone gets that satisfying, crispy crunch.
Q: Can I freeze sushi bake?
A: I don’t recommend freezing the assembled bake, as the creamy and rice components can become grainy and separate upon thawing. It’s truly best enjoyed fresh! However, you can freeze the leftover baked filling and rice separately in airtight containers for up to a month. Thaw in the fridge overnight and reheat gently in the microwave, then assemble your nori scoops.
Sushi Bake
Description
All the flavors of your favorite spicy crab roll—layered up in a warm, bubbly casserole. No rolling mats, no stress, just pure comfort food that’s perfect for sharing.
Ingredients
-
2 cups cooked sushi rice (short-grain)
-
4 tbsp rice vinegar
-
2 tbsp sugar
-
2 tsp salt
-
4 tbsp sesame seeds (black & white mix if possible)
-
10 sheets nori (cut into squares for serving)
-
2 cups imitation crab (surimi), shredded
-
2 tbsp soy sauce
-
2 tsp toasted sesame oil
-
½ cup cream cheese, softened
-
½ cup spicy mayo (½ cup mayo + 1–2 tbsp sriracha + squeeze of lime)
Instructions
Step 1 – Preheat & Prep
Preheat oven to 400°F (200°C). Grease or line a 9×13-inch baking dish.
Step 2 – Sushi Rice Base
While rice is still warm, season with rice vinegar, sugar, and salt. Fold gently until absorbed, then stir in sesame seeds. Press firmly and evenly into baking dish.
Step 3 – Creamy Filling
In a bowl, combine shredded crab, soy sauce, sesame oil, cream cheese, and spicy mayo. Mix until smooth and creamy.
Step 4 – Layer & Bake
Spread crab mixture evenly over rice. Bake for 10–12 minutes, until warmed through with a slight golden blush.
Step 5 – Serve
Scoop hot sushi bake onto crispy nori squares (or lettuce leaves for low-carb). Add optional drizzles: more spicy mayo, eel sauce, or furikake.
Notes
Can I make it ahead? Yes—assemble up to 24 hrs ahead, refrigerate, then bake.
Why is my filling watery? Squeeze crab in a towel before mixing.
How to keep nori crispy? Serve it on the side for DIY scoops.
Can I freeze it? Best fresh, but you can freeze filling and rice separately.
Nutritional Information (Approximate, Per Serving)
This nutritional info is an estimate based on the specific ingredients listed. Values will change with substitutions.
Calories: 320 | Protein: 9g | Carbohydrates: 28g | Fat: 18g | Saturated Fat: 4g | Cholesterol: 25mg | Sodium: 980mg | Potassium: 120mg | Fiber: 1g | Sugar: 5g
Final Thoughts: Your Sushi Party Awaits!
And there you have it! From a cherished memory at a family potluck to a foolproof recipe you can now call your own, Sushi Bake is more than just a dish—it’s an experience. It’s the joyful noise of friends and family gathered around the table, building their perfect bite. It’s the proud feeling of serving something that looks incredibly impressive, knowing secretly how simple it was to create.
So forget the intimidation of perfect sushi rolls. Embrace the warm, comforting, and utterly delicious chaos of the bake. Whether you stick faithfully to the classic spicy crab or adventure into your own custom creations, this recipe is your ticket to becoming the undisputed hero of potlucks, parties, and weeknight dinners.
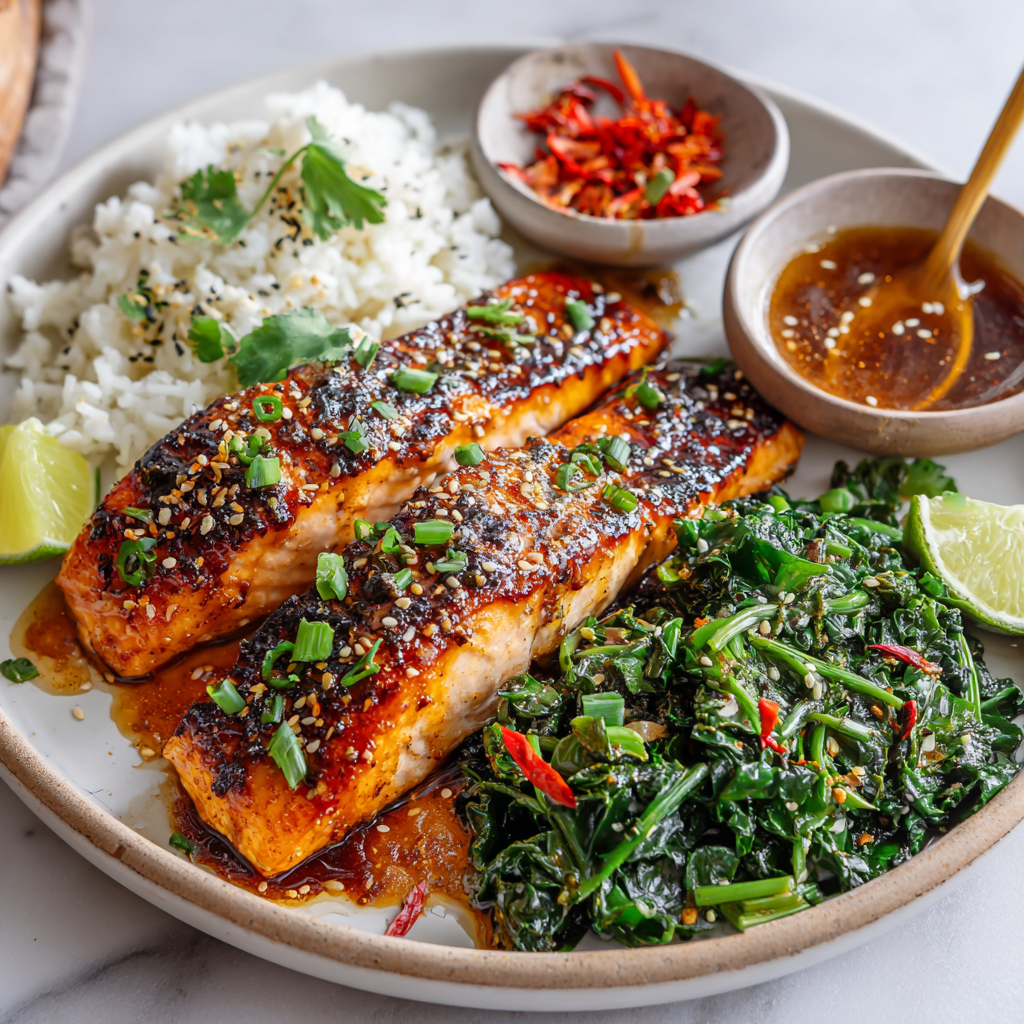
Miso Salmon
Your New Favorite Dinner: Miso Salmon That Feels Like a Hug
Hey there, friend! Come on in, grab an apron, and let’s get something incredible simmering on the stove. Or, in this case, something utterly magical happening in the oven. If your idea of a perfect weeknight involves a meal that’s equal parts ridiculously easy and impressively delicious, then you and I are about to become best kitchen buddies. I’m talking about my go-to, never-fail, always-gets-rave-reviews Miso Salmon.
Picture this: a gorgeous fillet of salmon, transformed by a simple, glossy marinade into something that tastes like it came from a high-end restaurant. The top gets beautifully caramelized and slightly sticky, while the inside stays impossibly tender, flaky, and moist. It’s that perfect dance of savory, sweet, and umami-rich flavor that makes you close your eyes and just say “mmmm” after the first bite. This isn’t just dinner; it’s an experience. It’s the kind of meal that turns a regular Tuesday into a mini celebration, and the best part? It comes together with barely any effort and ingredients you might already have in your pantry. So, let’s ditch the takeout menus and create something unforgettable together.
The Little Apartment Where My Love for Miso Began
This recipe takes me right back to my first tiny apartment after college. My kitchen was so small you could practically touch all four walls at once, and my “gourmet” cooking mostly involved a lot of pasta and jarred sauce. But one rainy evening, a friend came over and introduced me to a small tub of white miso paste. “It’s magic,” she promised, whisking it with a few other pantry staples. I was skeptical. But when that salmon came out of my rickety old oven, glistening and smelling like heaven, my culinary world exploded. We sat on the floor because I didn’t have a proper dining table, eating this incredibly elegant dish off of paper plates. It was in that moment I truly understood that cooking isn’t about a fancy kitchen or complicated techniques. It’s about the joy of sharing something made with your own hands, something bursting with flavor and love. This miso salmon recipe is that memory on a plate for me—simple, cozy, and absolutely packed with happiness.
Gathering Your Flavor Powerhouses
Here’s the beautiful part: the ingredient list is short, sweet, and mighty. Each one plays a crucial role in building that deep, complex flavor we’re after. Let’s break it down!
- 1½ to 2 lbs salmon fillets, skin on or off: I personally love using skin-on for this recipe—the skin gets crispy and protects the flesh during cooking, keeping it super moist. But skin-off works perfectly too! Look for a center-cut piece with even thickness for the most consistent cooking. Chef’s Insight: Feel free to use individual portions instead of one large fillet; just reduce the cooking time by a minute or two.
- 3 tbsp white miso paste: This is the star of the show! White miso (shiro miso) is fermented soybean paste that’s milder, sweeter, and less salty than its red or darker counterparts. It’s pure umami magic. Substitution Tip: In a pinch, yellow miso can work, but it will be a bit saltier and more robust. I’d start with 2 tbsp and taste the marinade before adding the third.
- 2 tbsp mirin: This sweet Japanese rice wine adds a gentle sweetness and helps balance the saltiness of the miso and soy. Substitution Tip: No mirin? No problem! Mix 2 tbsp of unseasoned rice vinegar with 1 tsp of honey or sugar. It won’t be identical, but it’ll get you very close.
- 1 tbsp soy sauce (or tamari for gluten-free): This adds the necessary salty depth and enhances the savory notes. I use low-sodium soy sauce to have better control over the salt level. Tamari is a fantastic gluten-free alternative that’s a bit richer and less sharp.
- 1 tbsp honey or maple syrup: This is our caramelization agent! The sugars help create that gorgeous, sticky, browned top. Honey gives a floral note, while maple syrup adds a warm, cozy depth. Both are delicious.
- 1 tsp sesame oil: Just a teaspoon! This isn’t for cooking; it’s for flavor. Toasted sesame oil adds a nutty, aromatic finish that ties everything together beautifully. Don’t skip it!
- 1 tsp grated fresh ginger (optional but highly recommended): Fresh ginger adds a bright, zesty, and slightly spicy kick that cuts through the richness. I keep a knob of ginger in my freezer and just grate it frozen—no peeling necessary!
Let’s Make Some Magic: Step-by-Step
Ready? This is where the fun begins. I’ll walk you through each step with all my favorite little hacks to ensure your miso salmon is absolutely perfect.
Step 1: The Magical Marinade
In a medium bowl, grab a whisk and combine the miso paste, mirin, soy sauce, honey, sesame oil, and grated ginger. Now, whisk until it’s completely smooth and looks like a creamy, luscious glaze. No miso lumps allowed! Chef’s Hack: If your miso is being stubborn and your honey is thick, you can pop the mixture in the microwave for 10-15 seconds to loosen everything up, which makes whisking a breeze. Just let it cool a bit before adding the salmon.
Step 2: Prep and Marinate the Salmon
Take your salmon fillet and pat it very dry with paper towels. This is a CRUCIAL step! A dry surface allows the marinade to cling on properly and helps us achieve that perfect caramelization instead of a steamy, pale top. Place the salmon in a shallow dish or a large resealable bag. Pour that beautiful marinade all over the salmon, and using your hands or a brush, make sure every single nook and cranny is coated. Chef’s Commentary: Don’t be shy! Get in there and give it a good massage. Let it sit at room temperature for at least 30 minutes. If you have more time, marinate it in the fridge for up to 2 hours. Any longer than that and the salt in the miso/soy can start to actually “cook” the exterior of the fish, making it a bit firm.
Step 3: Preheat and Prep Your Pan
About 5 minutes before your marinating time is up, preheat your oven to 400°F (200°C). If you’re using the broiler function for a faster, more caramelized finish, preheat that on high. Now, line a baking sheet with aluminum foil (for super easy cleanup!) and lightly brush it with a neutral oil like avocado or canola oil. Place a wire rack on the baking sheet if you have one—this promotes air circulation and helps the bottom of the salmon cook evenly without getting soggy. If you don’t have a rack, no worries at all! We’ll just cook it directly on the foil.
Step 4: Bake to Perfection
Take your marinated salmon and place it on the prepared baking sheet, skin-side down if it has skin. Let any excess marinade drip off back into the bowl—you want a good coating, but not a puddle. Now, slide that gorgeousness into the hot oven. For a 1-inch thick fillet, bake for 10-12 minutes. If you’re broiling, place it about 6 inches from the heating element and broil for 6-8 minutes. Watch it closely under the broiler! You’re looking for a deeply browned, caramelized top and for the fish to flake easily with a fork. The internal temperature should read 125-130°F (52-54°C) for medium—it will continue to cook a bit as it rests.
Step 5: The All-Important Rest
This might be the hardest step of all because your kitchen will smell AMAZING and you’ll want to dig in immediately. But trust me on this! Use a spatula to transfer the salmon to a clean plate or cutting board and let it rest for 5 minutes. This allows the juices to redistribute throughout the fish, ensuring every single bite is moist and flavorful.
Plating Your Masterpiece
Now for the fun part! I love to place a large piece of that glistening miso salmon right in the center of a bowl. My absolute favorite way to serve it is over a bed of fluffy jasmine rice or soba noodles, with a big pile of quick-sautéed greens like bok choy or spinach on the side. The extra marinade and salmon juices mingle with the rice underneath… it’s divine. Right before serving, give it a final flourish with a sprinkle of thinly sliced scallions (the green parts!) and a shower of white and black sesame seeds for a little crunch and visual pop. A tiny wedge of lime on the side for squeezing over adds a fantastic burst of brightness.
Make It Your Own: Delicious Twists
The beauty of this recipe is its versatility. Feel free to play around!
- Citrus Zing: Add the zest of one lime or half an orange right into the marinade for a beautiful, fragrant citrus note.
- Spice It Up: Love heat? Add a teaspoon of sriracha or a pinch of red pepper flakes to the marinade mixture.
- Ginger-Garlic Power: Add 1-2 minced garlic cloves along with the ginger for an even more potent flavor punch.
- Low-Carb/Veggie-Packed: Serve your salmon over cauliflower rice or a mix of zucchini noodles (zoodles) for a lighter, veggie-forward meal.
- Air Fryer Method: This works wonderfully! Marinate as directed, then air fry at 375°F (190°C) for 8-10 minutes, until caramelized and cooked through.
Olivia’s Chef Notes & Kitchen Stories
This recipe has been a staple in my kitchen for years, and it’s evolved in the funniest ways. I once, in a pre-coffee haze, mistook the chili powder for paprika and gave my poor husband quite the spicy wake-up call! I’ve also learned that this marinade is basically liquid gold. I almost always double it so I can use half to marinate the salmon and reserve the other half to reduce in a small saucepan while the fish cooks. Simmer it for a few minutes until it thickens into a glorious glaze to drizzle over the top after plating. It’s a next-level move that looks so fancy but takes two minutes. The other thing I’ve learned? This is my ultimate “impress guests with minimal effort” dish. I can be chatting with friends, sipping wine, and then pop this in the oven. Ten minutes later, I’m serving a restaurant-quality meal. It never, ever fails.
Your Miso Salmon Questions, Answered!
Q: Can I marinate the salmon overnight?
A: I don’t recommend it. The miso and soy sauce are quite salty and acidic, and if they sit on the salmon for too long (more than 2-3 hours), they will start to “ceviche” or cure the outer layer of the fish. This will result in a firmer, almost chalky texture on the outside, while the inside might still be undercooked. 30 minutes to 2 hours is the sweet spot!
Q: My marinade burned under the broiler. What happened?
A: This is a common broiler hiccup! The sugars in the honey and mirin can go from perfectly caramelized to burnt very quickly. First, make sure your oven rack is positioned in the middle of the oven, not too close to the heating element (6 inches is ideal). Second, keep a very close eye on it—don’t walk away! If you see it browning too fast, you can even open the oven door a crack to lower the temperature slightly. Baking at 400°F is a safer, more hands-off method if you’re nervous.
Q: Can I use another type of fish?
A: Absolutely! This marinade is fantastic on other firm-fleshed fish like cod, black cod (which is incredible with miso), halibut, or even swordfish steaks. Just adjust the cooking time based on the thickness of your fish.
Q: How do I know when the salmon is done?
A> The best way is to use a fork. Gently press the top of the salmon; it should flake apart easily. You can also use an instant-read thermometer. I pull my salmon at 125-130°F (52-54°C) for a perfectly medium, moist result. Remember, it will continue to cook a bit while resting!
Miso Salmon
Description
This dish is everything a weeknight meal should be: quick, cozy, and packed with flavor. A short marinating time and a handful of pantry ingredients transform salmon into a caramelized, umami-rich masterpiece that tastes like it came straight from a restaurant.
Ingredients
-
1½–2 lbs salmon fillet (skin on or off, evenly thick)
-
3 tbsp white miso paste (or 2 tbsp yellow miso if substituting)
-
2 tbsp mirin (or 2 tbsp rice vinegar + 1 tsp honey)
-
1 tbsp soy sauce (or tamari for gluten-free)
-
1 tbsp honey or maple syrup
-
1 tsp toasted sesame oil
-
1 tsp fresh grated ginger (optional but recommended)
Instructions
Step 1: Make the Marinade
Whisk miso, mirin, soy sauce, honey, sesame oil, and ginger until smooth and glossy. Microwave for 10–15 seconds if needed to loosen miso and honey.
Step 2: Marinate the Salmon
Pat salmon dry. Coat well with marinade in a shallow dish or bag. Let rest at room temperature for 30 minutes (or up to 2 hours in the fridge).
Step 3: Bake or Broil
-
Bake: Preheat oven to 400°F (200°C). Place salmon on a foil-lined, oiled sheet pan. Bake 10–12 minutes, until flaky and caramelized.
-
Broil: Broil 6–8 minutes, 6 inches from heat. Watch closely to avoid burning.
-
Air Fryer: 375°F (190°C) for 8–10 minutes.
Target internal temp: 125–130°F (52–54°C) for medium.
Step 4: Rest & Serve
Let salmon rest 5 minutes before slicing. Garnish with scallions, sesame seeds, and lime wedges.
Notes
-
Citrus Zing: Add lime or orange zest to the marinade.
-
Spicy Kick: Stir in sriracha or chili flakes.
-
Ginger-Garlic: Add 1–2 minced garlic cloves.
-
Extra Glaze: Double the marinade; simmer half separately into a drizzle.
Nutrition
- Calories: 290cal Per Serving
- Fat: 17g
- Carbohydrates: 9g
- Protein: 25g
Nutritional Information (Approximate, per serving)
This information is provided as a courtesy and is an estimate only.
Calories: 290 | Protein: 25g | Carbohydrates: 9g | Fat: 17g | Saturated Fat: 2.5g | Cholesterol: 60mg | Sodium: 650mg | Potassium: 570mg | Sugar: 7g
Salmon is an excellent source of high-quality protein, heart-healthy omega-3 fatty acids, and several key vitamins and minerals like Vitamin B12 and Vitamin D.
Final Thoughts: More Than Just a Recipe
So there you have it. Your ticket to a dinner that feels both like a grand culinary achievement and a cozy, comforting hug. This miso salmon is more than just a list of ingredients and steps; it’s a reminder that the most memorable meals aren’t about perfection. They’re about the joy of creating, the warmth of sharing, and the simple magic that happens when a few good ingredients come together.
It’s the recipe you’ll turn to on busy weeknights when you need something guaranteed to delight, and the one you’ll proudly serve to guests who will swear you’ve been hiding a professional chef in your closet. It’s proof that you don’t need a fancy kitchen to create something extraordinary—just a little miso, a trusty baking sheet, and the willingness to treat yourself to something wonderful.

Mochi Donuts with Vanilla Glaze
Mochi Donuts with Vanilla Glaze: Your New Favorite Chewy, Gluten-Free Treat!
Hey there, friend! Come on in, grab an apron, and let’s get something sweet started. If you’ve ever bitten into a mochi donut and experienced that magical, uniquely chewy, bouncy, and utterly delightful texture, you know it’s a moment of pure joy. And if you haven’t? Oh, you are in for the most wonderful treat. Today, we’re ditching the fancy bakery lines and making our very own batch of Mochi Donuts with Vanilla Glaze right at home.
These aren’t your average cake or yeast donuts. The star here is sweet rice flour (or mochiko), which gives these gorgeous rings their signature soft-yet-chewy, slightly stretchy quality that is downright irresistible. They’re naturally gluten-free, incredibly fun to make, and topped with a simple, shimmering vanilla glaze that cracks perfectly with every bite. Whether you choose to bake them for a slightly lighter feel or fry them for that classic, golden-brown indulgence, I promise you, these donuts will disappear faster than you can say “seconds, please!” So, let’s turn up the music, preheat the oven (or the oil!), and create something truly special together.
The Day I Fell in Love with a Donut
I’ll never forget my first mochi donut. It was a rainy Saturday, and my best friend dragged me to a new pop-up market across town, promising me “life-changing pastries.” I was skeptical—I’m a from-scratch gal, and most trendy treats don’t live up to the hype. But then I saw it: a beautiful, glossy, perfectly round donut covered in a pastel pink glaze. It looked like a piece of art. I took one bite, and my entire concept of what a donut could be just… shifted.
It wasn’t just sweet; it was an experience. The texture was the star—chewy, soft, and Substantial with a satisfying pull. It was fun to eat! We stood there in the drizzle, laughing as we tried to gracefully eat these wonderfully bouncy donuts without getting glaze everywhere (we failed miserably, by the way). It was one of those perfect, simple moments of friendship and fantastic food. I knew right then I had to recreate that magic in my own kitchen, to share that feeling of discovery and joy with my family, and now, with you.
Gathering Your Mochi Donut Ingredients
Part of the beauty of this recipe is its simplicity. You likely have most of this in your pantry already! Here’s what you’ll need to make about a dozen little rings of happiness.
For the Mochi Donuts:
- 2 cups sweet rice flour (mochiko): This is the non-negotiable star of the show! Don’t try to substitute regular rice flour or all-purpose. Sweet rice flour is ground from glutinous rice (don’t worry, it’s gluten-free!) and contains the starch that creates that famous chewy, stretchy mochi texture. I love the Koda Farms or Mochiko brand for consistent results.
- ¾ cup milk: Dairy milk works beautifully, but this is a fantastic place to use your favorite plant-based milk. Unsweetened almond, oat, or coconut milk will all work like a charm, making this recipe easily dairy-free as well.
- ¼ cup sugar: We’re using just enough to sweeten the dough without making it overly sweet, as the glaze will bring most of the sugar power. I use regular granulated sugar.
- 1 tsp baking powder: Our little leavening agent that gives the donuts a bit of lift and a softer, cakier crumb alongside the chew.
- 1 large egg: This helps bind everything together and adds richness to the dough. Let it come to room temperature for easier mixing.
- 2 tbsp melted butter (or coconut oil): Butter adds a lovely, rich flavor. For a dairy-free version, refined coconut oil is my top choice—it melts beautifully and keeps the flavor neutral.
For the Vanilla Glaze:
- 2 cups powdered sugar: The base of our simple, sweet, and crackly glaze. Sift it if it’s lumpy for an ultra-smooth finish.
- ½ tsp vanilla extract: Use the good stuff! Pure vanilla extract makes a world of difference. Or, for a fun twist, try vanilla bean paste to get those gorgeous little speckles.
- 3–4 tbsp milk: Start with 3 tablespoons and add the fourth only if you need it to reach a thick but dippable consistency.
- 1 drop food coloring (optional): This is where you get to play! A drop of pink, yellow, or blue can make these donuts look utterly professional and so joyful.
Let’s Make Some Magic: Step-by-Step Instructions
Ready? This comes together so quickly. Let’s walk through it together—I’ve got plenty of tips to share along the way!
Step 1: Combine Your Dry Ingredients.
In a large mixing bowl, grab your whisk and vigorously whisk together the 2 cups of sweet rice flour, ¼ cup sugar, and 1 teaspoon of baking powder. You want to ensure the baking powder is evenly distributed throughout the flour so every bite is perfect. This is also your chance to break up any little clumps in the flour—a few seconds of whisking now saves you from lumpy batter later!
Chef’s Hack: If you’re a perfectionist (like me!), you can sift these ingredients together. It’s not strictly necessary, but it guarantees an incredibly smooth batter.
Step 2: Mix Your Wet Ingredients.
In a separate, medium-sized bowl, combine the ¾ cup milk, 1 large egg, and 2 tablespoons of melted (and slightly cooled) butter or coconut oil. Whisk it until the egg is fully incorporated and the mixture looks smooth and homogenous. If your butter re-solidifies when it hits the cold milk, don’t panic! Just whisk a little more energetically; it’ll be fine once mixed with the dry ingredients.
Step 3: Bring It All Together.
Now, pour your wet ingredients into the bowl with the dry ingredients. Using a spatula, gently fold and stir until you no longer see any dry streaks of flour. You’ll end up with a thick, smooth, and slightly sticky batter. It should be pourable but hold its shape—think a thick pancake batter or a very soft cookie dough. If it seems too thick to pipe, add a teaspoon of milk at a time until it’s workable.
Chef’s Hack: Don’t overmix! Once it’s combined, stop. Overmixing can sometimes make the gluten in the rice flour tough, and we want tender, chewy donuts.
Step 4: Shape Your Donuts.
You have two fantastic options here: baking or frying.
For Baking (My Easy Go-To): Grease a donut pan generously with non-stick spray or butter. Spoon the batter into a large piping bag or a sturdy zip-top bag with a corner snipped off. Pipe the batter evenly into the prepared donut cavities, filling each about ¾ of the way full. Smooth the tops with a damp finger.
For Frying (The Classic Method): Pipe or spoon 3-inch rings onto small squares of parchment paper. This makes them easy to handle. Heat neutral oil (like vegetable or canola) in a heavy-bottomed pot to 325°F (165°C). Carefully lower the parchment squares into the oil. The donuts will release after a minute, and you can fish out the parchment with tongs. Fry for 2-3 minutes per side until puffed and light golden brown.
Step 5: Bake or Fry to Perfection.
To Bake: Preheat your oven to 350°F (175°C). Bake for 12-15 minutes. They’re done when the tops are set and spring back lightly when touched. The edges might get just the faintest hint of gold.
To Fry: Maintain your oil at 325°F. Fry for 2-3 minutes per side until golden brown. Don’t crowd the pot—fry in batches.
Whichever method you choose, let the donuts cool completely on a wire rack before glazing. This is crucial! A warm donut will melt the glaze and make a messy (though still delicious) puddle.
Step 6: whip Up The Glaze & Decorate!
While the donuts cool, make the glaze. In a medium bowl, whisk together the 2 cups of sifted powdered sugar, ½ teaspoon of vanilla extract, and 3 tablespoons of milk. Whisk until it’s completely smooth and silky. If it’s too thick, add the remaining tablespoon of milk, a teaspoon at a time, until it’s a thick but dippable consistency. Add a drop of food coloring if you’d like!
Now for the best part: dip the top of each cooled donut into the glaze, twist slightly, and lift straight up. Let the excess drip off for a moment, then place it back on the wire rack. Immediately add any sprinkles or toppings before the glaze sets. The glaze will firm up into a beautiful, crackly shell in about 15 minutes.
How to Serve Your Masterpieces
These donuts are best served the day they are made, when their chewy texture is at its prime. Pile them high on a beautiful cake stand for a serious “wow” factor at your next brunch or gathering. They pair wonderfully with a hot cup of coffee, a glass of cold milk, or a delicate green tea. Honestly, there’s no wrong way to enjoy them—standing over the kitchen counter is a perfectly acceptable method, too!
Get Creative: Recipe Variations
The fun doesn’t stop with vanilla! This recipe is a blank canvas for your creativity.
- Matcha Magic: Whisk 1-2 teaspoons of high-quality matcha powder into the dry ingredients for the donut batter. For the glaze, use matcha powder instead of food coloring for a beautiful green hue and earthy flavor.
- Chocolate Dream: Add 2 tablespoons of cocoa powder to the dry ingredients. For a double chocolate hit, make a chocolate glaze by mixing 2 tbsp of cocoa powder into the powdered sugar before adding the milk.
- Citrus Zing: Add the zest of one lemon or orange to the batter. For the glaze, substitute the milk for fresh citrus juice and add a bit of zest for a bright, sunny flavor.
- Fun Toppings: Immediately after glazing, shower your donuts with sprinkles, shredded coconut, crushed freeze-dried strawberries, or a drizzle of melted chocolate.
Olivia’s Chef Notes & Kitchen Stories
This recipe has evolved so much in my kitchen! My first attempt was… a learning experience. I didn’t let the donuts cool and my beautiful glaze just slid right off, creating a delicious but very abstract pastry puddle. My husband, always the optimist, called it “deconstructed donut parfait” and ate it with a spoon.
I’ve also learned that the batter thickness can vary slightly based on your specific brand of flour and the humidity in your kitchen. If it feels too stiff, that extra teaspoon of milk is your best friend. Don’t be afraid to trust your instincts and adjust. Cooking is a conversation between you and the ingredients! These donuts also freeze beautifully (unglazed) for up to a month. Just let them thaw at room temperature and glaze them fresh.
Your Mochi Donut Questions, Answered!
Q: My donuts turned out dense and gummy. What happened?
A: This usually means the batter was overmixed. Remember, once the wet and dry ingredients are combined, stop stirring! Overmixing develops the starch in the rice flour and can lead to a denser texture. Also, ensure your baking powder is fresh for proper lift.
Q: Can I make the batter ahead of time?
A: I don’t recommend it. The baking powder will begin to activate once it hits the liquid, and you want all that power for when the donuts hit the heat. For the best texture, mix and bake/fry right away.
Q: My donuts are sticking to the pan terribly! Help!
A: Grease, grease, grease! Donut pans need a very generous coating of non-stick spray or butter. If you’re frying, the parchment paper trick is essential for easy handling. If a few still stick, just run a small offset spatula or knife around the edges while they’re still warm to loosen them.
Q: Are these donuts supposed to be so chewy?
A: Yes! That’s the magic of mochi. They are meant to have a delightful, bouncy, and pleasantly chewy texture that’s completely different from a standard cake or yeast donut. Embrace the chew!
Print
Mochi Donuts with Vanilla Glaze
Description
Hey friend! If you’ve ever wanted to recreate that magical, chewy, bouncy bite of a mochi donut at home—today’s your day. These beauties are naturally gluten-free thanks to sweet rice flour (mochiko), and they’re topped with a crackly vanilla glaze that’s as fun to make as it is to eat. The best part? You can bake them for a lighter version or fry them for full-on indulgence. Either way, they’re destined to disappear fast!
Ingredients
For the Donuts:
-
2 cups sweet rice flour (mochiko)
-
¾ cup milk (dairy or plant-based)
-
¼ cup granulated sugar
-
1 tsp baking powder
-
1 large egg (room temp)
-
2 tbsp melted butter (or coconut oil)
For the Vanilla Glaze:
-
2 cups powdered sugar, sifted
-
½ tsp vanilla extract
-
3–4 tbsp milk
-
1 drop food coloring (optional)
Instructions
-
Mix dry: In a bowl, whisk mochiko, sugar, and baking powder.
-
Mix wet: In another bowl, whisk milk, egg, and melted butter.
-
Combine: Fold wet into dry until smooth and slightly sticky. Don’t overmix.
-
Shape:
-
Bake: Pipe batter into greased donut pans, filling ¾ full.
-
Fry: Pipe small rings on parchment squares. Fry in 325°F oil, 2–3 min per side.
-
-
Cook:
-
Bake: 350°F for 12–15 min, until set and springy.
-
Fry: Until golden brown, flipping halfway.
-
-
Cool & glaze: Let donuts cool completely. Whisk glaze ingredients until smooth. Dip tops, let excess drip, then set on a rack. Add sprinkles if desired.
Notes
-
Cool first: Glaze only cooled donuts, or it will slide off.
-
Chewy is good: The bounce is the magic of mochi—different from cake donuts.
-
Get creative: Add matcha, cocoa, or citrus zest to the batter or glaze.
Nutrition
- Calories: 210 cal Per Serving
- Carbohydrates: 38g
- Protein: 2g
Quick Nutritional Info
Prep time: 15 min | Cook time: 15 min | Total time: 30 min
Per donut (approx.): 210 calories, 2g protein, 38g carbs, 6g fat
Please note: This is an estimate provided for informational purposes only. Exact values can vary based on specific ingredients used and any substitutions.
Final Thoughts: Your Homemade Happiness
And there you have it! What began as a simple bowl of sweet rice flour has transformed into a batch of incredible, chewy, gluten-free donuts that are truly something special.
I hope this recipe brings a little extra joy and fun into your kitchen. Whether you baked them for a lighter treat or fried them for a truly indulgent moment, you’ve created more than just a dessert—you’ve created an experience. That uniquely satisfying texture, the sweet crack of the vanilla glaze, the pride of making something beautiful from scratch… that’s the real magic.
So, the next time a craving for something wonderfully chewy and sweet strikes, you know exactly what to do. Skip the bakery line and create your own moment of joy. I have a feeling these mochi donuts will become a new favorite in your home, just as they have in mine.
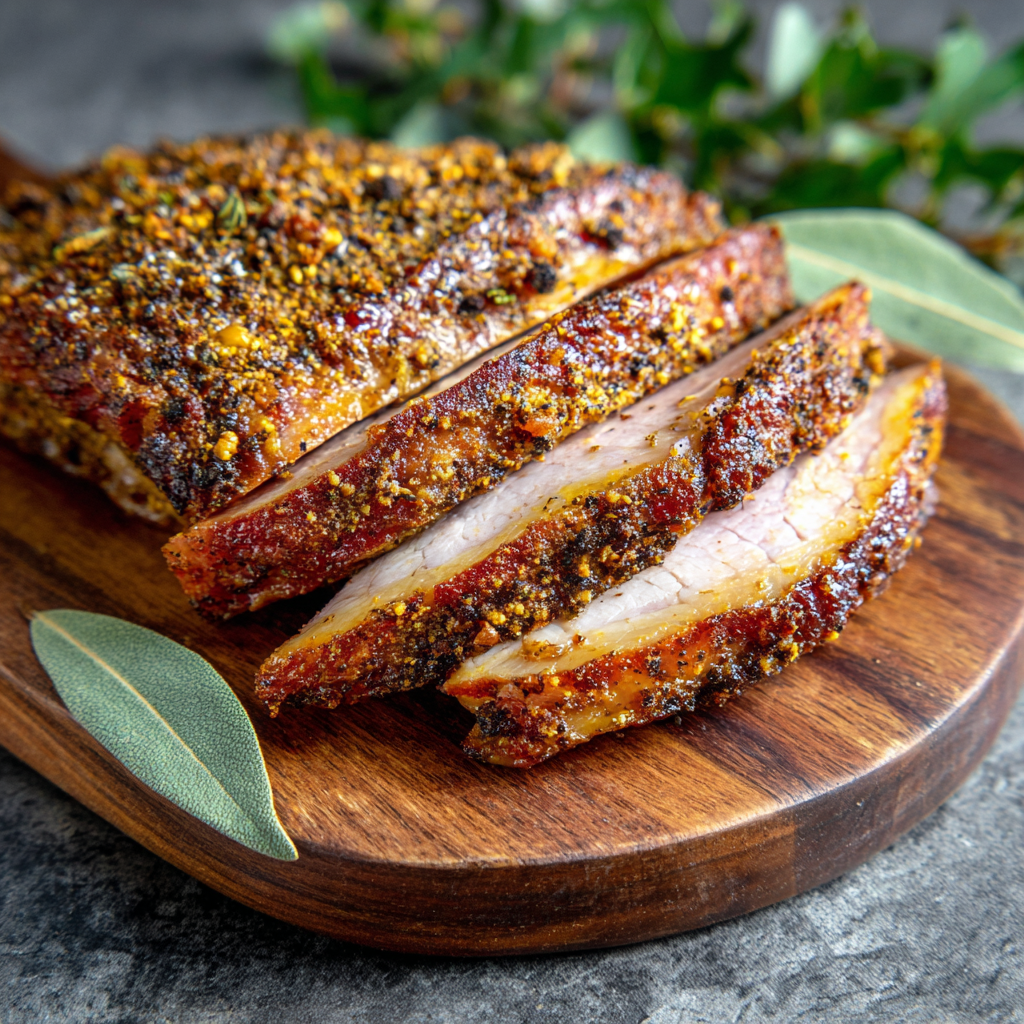
Homemade Turkey Pastrami
Ditch the Deli Counter: Your Guide to Unforgettable Homemade Turkey Pastrami
Hey there, friend! Come on in, grab an apron, and let’s get something simmering. If your kitchen is your happy place and the thought of a truly epic sandwich makes your heart do a little happy dance, you are so in the right spot. Today, we’re rolling up our sleeves and diving into a project that is far more rewarding than it is difficult: Homemade Turkey Pastrami.
Now, I know what you might be thinking. “Olivia, pastrami? That’s deli counter stuff. That’s complicated.” But trust me on this one. Making your own pastrami—especially with lean, versatile turkey breast—is a game-changer. We’re talking about transforming a simple cut of meat into something magical: juicy, impossibly flavorful, brined to perfection, and packed with those warm, bold spices we all love. This isn’t just lunch meat; it’s a labor of love that fills your whole house with the most incredible aroma and ends with you feeling like a certified kitchen rockstar.
The best part? You control everything. No cryptic preservatives, no excessive sodium—just wholesome, beautiful ingredients coming together to create something truly special. Whether you pile it high on rye with a slather of mustard, layer it into a protein-packed wrap, or even snack on it straight from the fridge (no judgment here!), this turkey pastrami is about to become your new favorite thing to make. So, let’s turn up the music, pour ourselves a little iced tea (or coffee!), and embark on this flavor adventure together. I promise, it’s going to be delicious.
The Pastrami Epiphany: A New York Memory
My love affair with pastrami started not in a fancy restaurant, but in a cramped, incredibly loud, and gloriously aromatic deli in New York City. I was there with my grandpa, a man who believed the best life lessons happened over a good meal. We squeezed into a booth, the Formica table sticky with nostalgia, and he ordered us two pastrami on rye, “lean, with a pickle.”
When that sandwich arrived, it was a mountain of meat, steaming gently, the scent of pepper and coriander hitting me like a welcome wave. That first bite was a revelation—the peppery crust, the tender, brined meat that practically melted, the sharp bite of the mustard. It was messy, it was perfect, and it was shared. We didn’t talk much; we just ate, smiled, and nodded at each other in mutual appreciation. That sandwich taught me that food isn’t just fuel; it’s an experience, a memory, a story on a plate.
This homemade turkey pastrami is my tribute to that day. It captures all the bold, comforting spirit of that deli classic but in a way that feels light, approachable, and perfect for our home kitchens. It’s my way of sharing that “wow” moment with you, right at your own table.
Gathering Your Flavor Arsenal: The Ingredients
This is where the magic begins! Brining is the secret handshake of the culinary world—it ensures every single bite is moist and bursting with flavor. Here’s what you’ll need to create your own pastrami masterpiece.
- 4½ lbs Turkey Breasts, skinless and boneless: Look for a whole breast or two smaller ones. The key is an even thickness for consistent brining and cooking. Chef’s Insight: Turkey breast is a fantastic lean canvas that soaks up the brine beautifully. If you’re feeling adventurous, you can use this same brine on thick-cut pork chops or even chicken breasts!
- ⅔ cup Brown Sugar: This isn’t just for sweetness; it balances the salinity and helps create a beautiful color on the finished meat. Substitution Tip: Coconut sugar or even maple syrup will work in a pinch for a slightly different flavor profile.
- 6 tbsp Pickling Spice: The MVP of the brine! This blend usually includes mustard seeds, coriander, allspice, ginger, and chilies. Chef’s Insight: If you have the time, toasting your pickling spice in a dry pan for a minute until fragrant will unlock incredible depth of flavor.
- 2 tbsp Curing Salt (Prague Powder #1): (Optional but recommended for authenticity) This is what gives traditional pastrami its signature pink hue and classic savory flavor. It is not regular table salt. Important Note: It must be used precisely according to weight. If you prefer to skip it, your pastrami will be delicious but will have a more roasted turkey color.
- 1 cup Pickling Salt or Kosher Salt: I prefer kosher salt (like Diamond Crystal) for brining as it’s less salty by volume than table salt and dissolves easily. Substitution Tip: Do not use iodized table salt, as it can impart a metallic taste. If using fine sea salt, use about ¾ cup.
- 1 tsp Ground Cinnamon & ¼ tsp Ground Nutmeg: These warm spices are the “secret” background notes that make this recipe sing. They add a incredible complexity that will have people asking, “What is *in* this?!”
- 16 cups (1 gallon) Filtered Water: Using filtered water ensures no chlorine or other chemicals interfere with the pure, clean flavors of your brine.
Optional Flavor Twists: Feel free to add 4 smashed garlic cloves, 1 tsp black peppercorns, or 2 bay leaves to your brine for an extra layer of aroma. For a subtly sweet twist, replace half the water with apple cider!
Crafting Your Masterpiece: Step-by-Step Instructions
Don’t let the brining time intimidate you! Active hands-on time is minimal. Most of the work happens happily in your fridge while you go about your day. Let’s walk through it.
Step 1: Create the Brine. In your largest stockpot, combine the water, brown sugar, pickling spice, both salts, cinnamon, and nutmeg. Warm it over medium heat, stirring occasionally. We are NOT bringing it to a boil! We just want to heat it enough to dissolve the sugars and salts completely. This should only take about 4-5 minutes. Once dissolved, immediately remove it from the heat. Chef’s Hack: To cool the brine down quickly, fill your sink with ice water and place the entire pot in the ice bath, stirring the brine occasionally. This can cut the cooling time in half!
Step 2: The Brining Bath. Place your turkey breasts in a non-reactive container (like a large glass baking dish, food-safe plastic container, or even a sterilized stockpot). Alternatively, you can use a giant 2-gallon zip-top bag placed inside a bowl or pan (to catch any potential leaks—learned that one the messy way!). Pour the completely cooled brine over the turkey, ensuring it’s fully submerged. If using a container, you can place a plate on top to keep the meat underwater. Pop it, covered, into the refrigerator for 24-48 hours. This slow soak is what transforms the turkey from bland to brilliant.
Step 3: The Dry Wait (Optional but Worth It!). After the brining time is up, remove the turkey from the brine and give it a good rinse under cold water to remove any excess salt and spices stuck to the surface. Pat it completely dry with paper towels. Now, for a pro-level trick: place the rinsed and dried turkey breast on a wire rack set over a baking sheet and put it back in the fridge, uncovered, for at least 2 hours or up to 8. This allows the surface to dry out, which helps form a better texture and allows any smoke or spices to adhere better during cooking. You’ll be amazed at the difference this makes!
Step 4: Cook to Perfection. You have two fantastic options here!
Oven Roasting (Easy & Accessible): Preheat your oven to 300°F (150°C). Place the turkey on a rack in a roasting pan. Roast until the internal temperature in the thickest part reaches 165°F (74°C). This will take about 60-75 minutes.
Smoking (The Ultimate Flavor): If you have a smoker, fire it up to 225-250°F (107-121°C). Use a mild wood like apple, cherry, or maple. Smoke the turkey until it hits that same internal temp of 165°F. This could take 3-4 hours, but the smoky flavor is absolutely incredible.
Chef’s Tip: No matter your method, use a digital meat thermometer! It’s the only way to guarantee perfectly cooked, juicy meat every single time.
Step 5: The Patient Rest. This is the hardest step because the smell will be driving you crazy! But do not skip it. Once cooked, remove the turkey from the heat and let it rest on a cutting board for at least 20-30 minutes. Then, for the absolute best slicing results, wrap it tightly in plastic wrap and refrigerate it until it’s completely cold, preferably overnight. Chilling it firms up the meat, making it easy to slice paper-thin, just like the deli.
Feasting Time: How to Serve Your Turkey Pastrami
The moment has arrived! Unwrap your beautiful creation and use a very sharp knife or a mandoline (carefully!) to slice it as thin as you can. Now, the fun begins. The classic move is, of course, a towering sandwich on seeded rye bread with a generous slather of spicy brown mustard and a crisp dill pickle on the side. But don’t stop there! Dice it up for a incredible pastrami hash for breakfast, layer it into a chef’s salad for lunch, or simply enjoy it straight from the cutting board as a high-protein snack. It’s your masterpiece—enjoy it every way you can imagine!
Make It Your Own: Delicious Variations
Once you’ve mastered the base recipe, the flavor world is your oyster! Here are a few ways to mix it up:
- Coffee-Chili Rub: After brining and drying, pat the surface with a rub made from finely ground coffee, ancho chili powder, and extra black pepper before cooking for a deep, robust crust.
- Citrus Zest Twist: Add the zest of one orange and one lemon to the brine for a bright, fresh note that cuts through the richness.
- Southwest Style: Swap the pickling spice for a blend of cumin, smoked paprika, and oregano for a completely different flavor profile perfect for tacos.
- Lower-Sodium Version: Simply reduce the pickling salt to ¾ cup for a less salty, but still perfectly flavorful, result.
- Salmon Pastrami: Yes, really! Use a large, center-cut salmon filet (skin-on) and brine for only 8-12 hours before cooking. It’s incredible.
Olivia’s Chef Notes & Kitchen Stories
I’ll let you in on a little secret: the first time I made this, I was so impatient that I tried to slice it while it was still warm. It shredded like a sad confetti machine. I learned the hard way that good things come to those who wait (and chill!). This recipe has evolved from that initial slightly frustrating experiment into my go-to for impressing guests. I love watching their faces when I tell them, “Oh, that pastrami? Yeah, I made it.” The look of disbelief is worth every minute of brining time.
This recipe is also a testament to the power of a good brine. I now use this technique as a starting point for all kinds of poultry and pork. It’s a foundational skill that will level up your cooking in so many ways. So embrace the process, have fun with it, and don’t be afraid to get a little messy. That’s what the apron is for!
Your Questions, Answered: FAQs & Troubleshooting
Q: Can I skip the curing salt (Prague Powder)? What will happen?
A: Absolutely, you can skip it. The curing salt is primarily for color and that specific “cured” flavor reminiscent of traditional deli pastrami. Without it, your turkey will be fully cooked, perfectly brined, and delicious, but it will have the appearance of roasted turkey breast (more white/gray than pink). The taste from the spice brine is still phenomenal!
Q: My pastrami turned out a bit too salty for my taste. What can I do?
A: No worries! This can happen depending on the exact salt you use and brining time. For next time, you can reduce the pickling salt to ¾ cup. For this batch, all is not lost! Soak the sliced pastrami in cool water for 5-10 minutes, then pat it dry. This will help leach out some of the excess salt. Also, using it in applications where it’s not the sole star (like in a salad or a hash with potatoes) can help balance it out.
Q: Is it safe to brine for longer than 48 hours?
A: I wouldn’t recommend it for turkey breast. Because it’s a lean, relatively thin cut, brining for too long (more than 72 hours) can start to break down the proteins too much, resulting in a mushy, ham-like texture rather than a firm sliceable one. 48 hours is the sweet spot!
Q: I don’t have a pot big enough for a gallon of brine! What’s my solution?
A: This is a common kitchen dilemma! The easy fix is to use a clean, food-safe plastic bucket or a large, heavy-duty zip-top bag. Double-bag it if you’re nervous about leaks, place it in a baking dish or bowl to catch any spills, and put the whole thing in the fridge. The bag method is actually fantastic because you can flip it easily to ensure even brining.
Print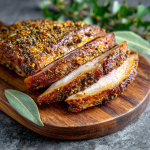
Homemade Turkey Pastrami
Description
Hey friend! If you love a good sandwich but want something fresher, leaner, and more flavorful than what comes wrapped in deli paper, this recipe is for you. Homemade turkey pastrami takes a little patience (thanks to the brine), but the hands-on work is surprisingly simple—and the reward is deli-style slices you made yourself. You’ll control the ingredients, keep things wholesome, and end up with juicy, spice-packed meat that’s perfect for sandwiches, wraps, or snacking straight from the fridge.
Ingredients
-
4 ½ lbs boneless, skinless turkey breast
-
⅔ cup brown sugar
-
6 tbsp pickling spice
-
2 tbsp curing salt (Prague Powder #1, optional)
-
1 cup kosher salt (or ¾ cup fine sea salt)
-
1 tsp ground cinnamon
-
¼ tsp ground nutmeg
-
16 cups (1 gallon) filtered water
Optional add-ins: 4 garlic cloves, 1 tsp black peppercorns, 2 bay leaves, or replace half the water with apple cider.
Instructions
-
Make the brine: In a large pot, combine water, sugar, salts, pickling spice, cinnamon, and nutmeg. Heat gently until dissolved (don’t boil). Cool completely.
-
Brine the turkey: Place turkey in a large non-reactive container or zip-top bag. Cover with cooled brine, making sure it’s fully submerged. Refrigerate 24–48 hours.
-
Dry and rest: Rinse turkey well under cold water and pat dry. Place on a wire rack in the fridge (uncovered) for 2–8 hours for best texture.
-
Cook:
-
Oven: Roast at 300°F (150°C) until internal temp reaches 165°F (74°C), about 60–75 minutes.
-
Smoker (best flavor): Smoke at 225–250°F (107–121°C) with apple or cherry wood, 3–4 hours, until internal temp hits 165°F.
-
-
Rest & chill: Let rest 20–30 minutes. Wrap and refrigerate until fully chilled (ideally overnight) before slicing thinly.
Notes
-
Don’t rush the chill: Slice only when cold—this keeps slices neat and deli-style.
-
Salt check: If worried about saltiness, reduce brine salt to ¾ cup next time.
-
Make it yours: Add citrus zest for brightness, or rub with coffee + chili before cooking for bold flavor.
Nutrition
- Calories: 180 cal Per Serving
- Carbohydrates: 2g
- Protein: 32g
Nutritional Information*
Per Serving (approx. 4 oz / 113g): Calories: 180 | Protein: 32g | Carbohydrates: 2g | Fat: 4g
*Please note: This is an estimate based on the ingredients used and can vary slightly depending on specific brands and any substitutions made. The values account for the majority of the brine ingredients being discarded.
Final Thoughts: Your Kitchen, Your Masterpiece
Well, friend, we’ve reached the end of our turkey pastrami journey. Look at you—briner, smoker (or roaster!), and now, a certified pastrami pro. What started as a simple turkey breast has been transformed through a little patience and a lot of flavor into something truly extraordinary.
Remember, the heart of this recipe isn’t just about ditching the deli counter; it’s about reclaiming the joy of creating something incredible with your own hands. It’s about the anticipation that builds as your kitchen fills with the scent of warm spices, and the pure satisfaction of slicing into your very own, perfectly crafted pastrami.
This is more than just a sandwich filling. It’s a story on a plate—a story you now get to tell. It’s the memory of a New York deli, the warmth of a shared meal, and the pride of a project beautifully completed. So pile it high, share it with someone you love, and savor every single bite of your well-earned triumph.




