
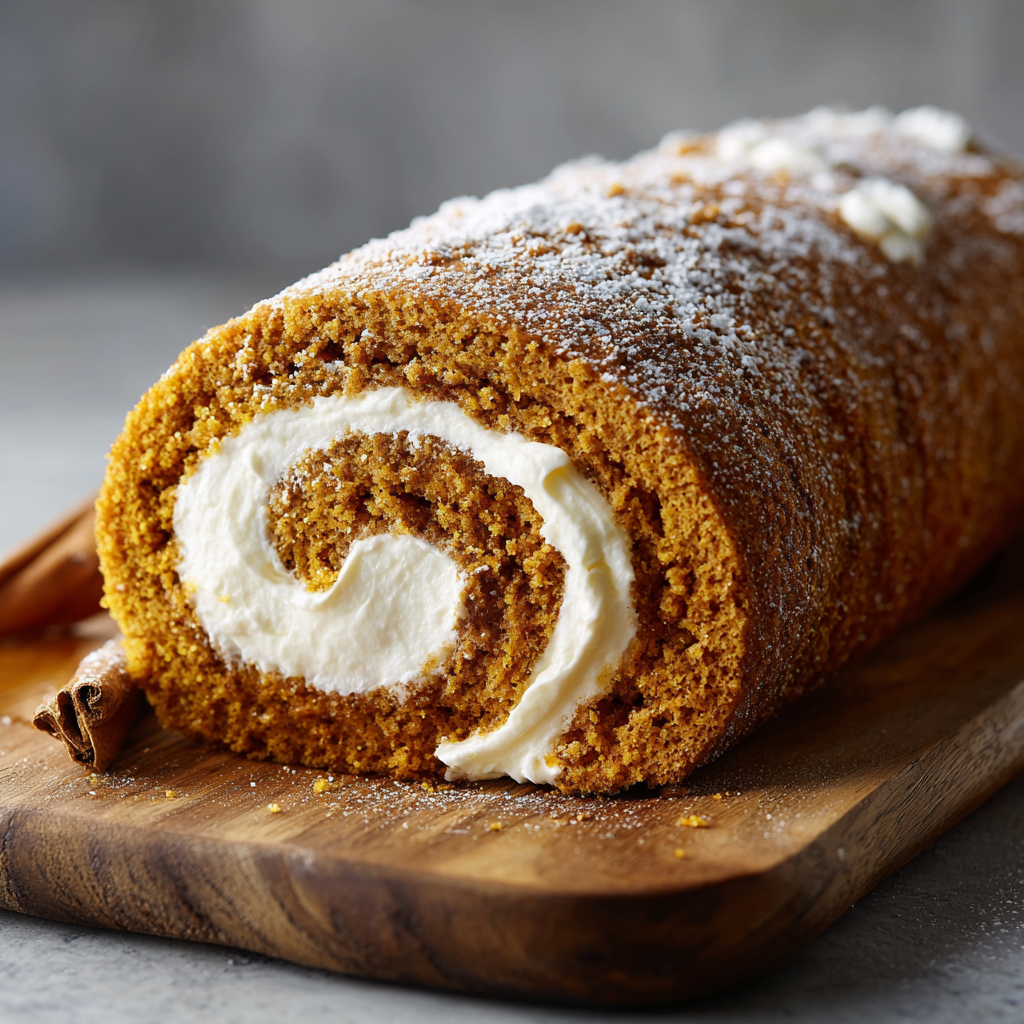
Pumpkin Roll
The Cozy Magic of a Homemade Pumpkin Roll
Hello, my friend! Come on in, grab an apron, and let’s get cozy. Is there anything quite like the smell of cinnamon, nutmeg, and pumpkin wafting through the house? It’s the scent of crisp autumn air, crackling fireplaces, and gatherings filled with laughter. And right at the heart of it all? This stunning, swoon-worthy, and secretly simple Pumpkin Roll.
I know, I know. That beautiful swirl can look a little intimidating. It whispers of professional bakeries and complicated techniques. But let me let you in on a little secret: it’s one of the easiest, most forgiving show-stopper desserts you will ever make. This isn’t about perfection; it’s about the joy of creating something beautiful and delicious with your own two hands. We’re talking a supremely soft, spiced pumpkin cake that’s so tender it just hugs a rich, tangy cream cheese filling. It’s an elegant slice of autumn that promises to be the star of any potluck, holiday table, or even a Tuesday night when you need a little extra joy.
So, if you’ve ever stared longingly at a pumpkin roll in a bakery case, wondering if you could ever pull it off, I’m here to tell you: you absolutely can. And I’ll be with you every step of the way, sharing all my favorite kitchen hacks to ensure your roll is nothing short of magnificent. Let’s turn simple ingredients into something truly unforgettable.
A Rolled-Up Piece of My Family’s Story
This recipe isn’t just a list of ingredients to me; it’s a scrapbook page. I can vividly remember being about ten years old, standing on a wobbly stool next to my grandmother in her flour-dusted kitchen. The air was thick with the promise of Thanksgiving. My job was to “help” by vigorously (and messily) whisking the eggs and sugar until my arm ached, while she measured spices with a knowing pinch.
The magic moment always came right out of the oven. My grandmother, with her weathered oven mitts, would deftly flip the warm cake onto a tea towel dusted with powdered sugar. Without a second of hesitation, she’d start rolling, teaching me the most crucial step: “You have to trick it into remembering its shape, Livvy.” I’d watch, wide-eyed, as the steam rose and the cake obediently curled into a perfect spiral. To me, it was pure kitchen wizardry. Now, every time I make this roll, that memory washes over me. It’s a reminder that the best recipes are the ones passed down, the ones that hold stories, and the ones that, quite literally, bring a little warmth and togetherness into our homes.
Gathering Your Autumn Arsenal
Part of the beauty of this recipe is its simplicity. You likely have most of these ingredients in your pantry right now! Here’s what you’ll need, along with a few of my chef-y insights to set you up for success.
For the Pumpkin Spice Cake:
- ¾ cup all-purpose flour: The structure-builder. For a slightly more tender crumb, you can swap in ½ cup all-purpose and ¼ cup cake flour.
- ¼ tsp salt: The flavor enhancer! It balances the sweetness and makes all the spices pop. Don’t skip it.
- 1 tsp baking soda: Our leavening agent. It gives the cake its light, airy lift. Make sure it’s fresh!
- 1 tsp ground cinnamon & 1 tsp pumpkin pie spice: The soul of the cake! If you don’t have pre-mixed pumpkin pie spice, make your own with ½ tsp ginger, ¼ tsp nutmeg, and ¼ tsp allspice or cloves.
- 1 cup granulated sugar: Sweetness and tenderness. It also helps the eggs whip up into a lovely pale foam.
- 3 large eggs, at room temperature: This is KEY! Room temp eggs whip up much higher and incorporate more air, which is essential for that flexible, sponge-like texture. If you forgot, place them in a bowl of warm water for 5-10 minutes.
- ⅔ cup canned pumpkin puree: Not pumpkin pie filling! We want pure, unadulterated pumpkin. This adds moisture, flavor, and that gorgeous color.
- 1 tsp vanilla extract: The warm, aromatic finishing touch that ties everything together.
For the Cream Cheese Filling:
- 8 oz (one block) cream cheese, softened: Full-fat is best for the creamiest, most stable filling. Let it sit on the counter for at least an hour. If it’s still cold, you’ll have lumpy filling.
- 2 tbsp butter, softened: Unsalted is my preference so I can control the salt. This adds a rich, silky texture to the filling.
- 1 tsp vanilla extract: Because vanilla makes everything better.
- 1 cup powdered sugar: It sweetens and thickens the filling beautifully. Sift it if it’s lumpy!
Let’s Create Some Magic: Step-by-Step
Ready? Don’t be nervous. We’ve got this! Read through all the steps once before you begin, and you’ll be a rolling pro in no time.
1. Prep the Pan: This is our foundation! Take a 10×15 inch jelly roll pan and line it with parchment paper. Here’s my favorite hack: take a tiny dab of butter and grease the pan first. This will make the parchment paper stick to the pan, so it doesn’t slide around when you’re spreading the batter. Leave a bit of parchment overhanging on the short ends—these will be your “handles” to lift the cake out later!
2. Make the Cake Batter: In a medium bowl, whisk together the flour, salt, baking soda, cinnamon, and pumpkin pie spice. Set this aside. Now, in a larger bowl, use an electric mixer to beat the eggs and granulated sugar on high speed for a good 2-3 minutes. You’re done when the mixture is thick, pale yellow, and falls from the beaters in a lazy ribbon. This incorporates air, which is your best friend for a flexible cake! Beat in the pumpkin and vanilla until just combined. Gently fold the dry ingredients into the wet ingredients using a spatula. Mix until you no longer see streaks of flour, but don’t overmix! Overmixing = tough cake.
3. Bake: Spread the batter evenly into your prepared pan, making sure to get it into all the corners. An offset spatula is perfect for this, but the back of a spoon works too. Pop it into a preheated 350°F (175°C) oven and bake for 13-15 minutes. The cake is done when the top is springy to the touch and the edges just barely begin to pull away from the sides of the pan.
4. The Roll (This is the fun part!): While the cake is baking, lay a clean, thin kitchen towel on your counter and dust it generously with powdered sugar. As soon as the cake comes out of the oven, immediately run a knife around the edges to loosen it. Then, use those parchment paper handles to lift the entire cake and flip it over onto the powdered sugar-dusted towel. Carefully peel off the parchment paper. Now, starting at one of the short ends, gently but confidently roll the cake up, towel and all. Yes, the towel gets rolled right inside! This trains the cake to hold its spiral shape as it cools. Let it cool completely on a wire rack, seam-side down, for about an hour. Walk away, have a coffee, and let it do its thing.
5. Make the Filling: In a clean bowl, beat the softened cream cheese and butter together until completely smooth and lump-free. Beat in the vanilla. Gradually add the powdered sugar, beating on low at first to avoid a sugar cloud, then on high until the filling is light and fluffy.
6. Fill and Re-roll: Once the cake is completely cool, carefully unroll it. It’s okay if it stays slightly curled. Spread the cream cheese filling evenly over the entire surface, leaving a small border on all edges. Now, gently re-roll the cake, pushing away from you and using the towel to help guide it. Don’t worry about small cracks; they add character and will be covered by powdered sugar!
7. Chill and Serve: Wrap the completed pumpkin roll tightly in plastic wrap and refrigerate for at least 30-60 minutes. This firms up the filling, sets the shape, and makes it incredibly easy to slice into those beautiful, clean swirls.
How to Serve Your Masterpiece
Presentation is part of the fun! Place your chilled pumpkin roll on a long serving platter. Give it a generous dusting of powdered sugar right before serving—it looks like a light dusting of snow and is just so pretty. For an extra special touch, garnish the plate with a few whole cinnamon sticks, a sprinkle of extra pumpkin pie spice, or even some toasted pecans. Slice it with a sharp serrated knife, wiping the blade clean between cuts for pristine slices. It’s the perfect elegant dessert to serve with a hot cup of coffee, spiced tea, or a glass of cold milk.
Make It Your Own: Delicious Twists
The classic is always a winner, but feel free to play with your food! Here are a few of my favorite variations:
- Gingerbread Spice: Swap the pumpkin pie spice for a blend of 1 tsp cinnamon, 1 tsp ginger, and ¼ tsp cloves for a warm, gingerbread-inspired roll.
- Mapley Goodness: Add 2 tablespoons of real maple syrup to the cream cheese filling and reduce the powdered sugar by 2 tablespoons. Top with a drizzle of maple glaze instead of powdered sugar.
- Nutty Crunch: Sprinkle ½ cup of very finely chopped toasted pecans or walnuts over the cream cheese filling before you re-roll for a wonderful textural contrast.
- Chocolate Swirl: For the chocoholics, add ¼ cup of cocoa powder to the flour mixture and proceed as usual. A chocolate pumpkin roll is a decadent surprise!
- Dairy-Free: Use your favorite plant-based cream cheese and butter alternatives for the filling. The cake itself is already dairy-free!
From My Kitchen to Yours: Chef’s Notes
This recipe has been through many iterations in my kitchen. The first time I tried it alone, I was so nervous I overbaked the cake. It cracked spectacularly upon rolling. You know what I did? I slathered on the filling, rolled it up anyway, and covered the whole thing in a thick blanket of whipped cream. My friends declared it the best “deconstructed pumpkin roll” they’d ever had! The moral of the story? Don’t fear the cracks. This dessert is resilient and delicious no matter what.
Over time, I’ve learned that the true key is speed and confidence when you do the initial hot roll. Don’t second-guess yourself! Just go for it. I also highly recommend using a kitchen scale to measure your flour for the most consistent results. Scooping with a cup can lead to over-measuring and a drier cake. Most of all, have fun with it. Put on some music, enjoy the process, and know that whatever happens, it’s going to taste incredible.
Your Questions, Answered
Q: My cake cracked a lot when I rolled it. What did I do wrong?
A: The most common culprits are overbaking or not rolling it immediately out of the oven. The cake needs to be pliable and warm to be trained into its spiral shape. If it cools even for a minute or two, it becomes more brittle. Next time, make sure your towel and powdered sugar are ready to go before the cake even comes out of the oven. And remember, small cracks are normal and tasty!
Q: Can I make this ahead of time?
A: Absolutely! This is a fantastic make-ahead dessert. You can wrap the filled roll tightly in plastic wrap and keep it in the refrigerator for up to 3 days. You can also freeze it for up to 2 months. Thaw it overnight in the refrigerator before slicing and serving.
Q: My filling is lumpy. How can I fix it?
A: Lumpy filling almost always means your cream cheese and/or butter weren’t soft enough. To fix it, you can try beating it for a few more minutes on high speed. If that doesn’t work, you can press the filling through a fine-mesh sieve to smooth it out. For next time, plan ahead and let your dairy ingredients sit on the counter for a good hour!
Q: Can I use fresh pumpkin puree?
A: You can, but be cautious. Canned pumpkin is consistently thick and dry. Fresh pumpkin puree often contains much more water. If you use it, you must strain it through a cheesecloth for several hours first to remove excess moisture, or your cake could be too wet and gummy.
Pumpkin Roll
Description
Hello, friend! There’s nothing quite like the aroma of cinnamon, nutmeg, and pumpkin filling your kitchen—it instantly feels like fall. This Pumpkin Roll is a show-stopping, yet surprisingly simple dessert: a soft, spiced pumpkin cake rolled around a rich, tangy cream cheese filling. Perfect for holidays, potlucks, or just a cozy evening treat, it’s a beautiful way to share a slice of autumn with your loved ones.
Ingredients
For the Pumpkin Cake:
-
¾ cup all-purpose flour (or ½ cup all-purpose + ¼ cup cake flour for extra tenderness)
-
¼ tsp salt
-
1 tsp baking soda
-
1 tsp ground cinnamon
-
1 tsp pumpkin pie spice (or make your own: ½ tsp ginger, ¼ tsp nutmeg, ¼ tsp allspice/cloves)
-
1 cup granulated sugar
-
3 large eggs, at room temperature
-
⅔ cup canned pumpkin puree (not pumpkin pie filling)
-
1 tsp vanilla extract
For the Cream Cheese Filling:
-
8 oz cream cheese, softened
-
2 tbsp unsalted butter, softened
-
1 tsp vanilla extract
-
1 cup powdered sugar, sifted if lumpy
Instructions
-
Prep the Pan:
-
Line a 10×15-inch jelly roll pan with parchment paper, leaving a little overhang on the short sides for easy lifting. Lightly grease the pan so the parchment sticks.
-
-
Make the Cake Batter:
-
In a medium bowl, whisk together flour, salt, baking soda, cinnamon, and pumpkin pie spice.
-
In a large bowl, beat eggs and sugar on high for 2–3 minutes until pale and thick.
-
Beat in pumpkin and vanilla until just combined.
-
Gently fold in dry ingredients until no flour streaks remain. Don’t overmix!
-
-
Bake:
-
Spread batter evenly in the prepared pan.
-
Bake at 350°F (175°C) for 13–15 minutes, until the cake springs back when touched and edges start to pull away.
-
-
Roll the Cake:
-
Lay a thin kitchen towel on the counter and dust generously with powdered sugar.
-
Immediately loosen edges with a knife, then invert the cake onto the towel and remove parchment.
-
Starting at a short end, gently roll the cake with the towel inside. Let it cool completely for about an hour.
-
-
Prepare the Filling:
-
Beat cream cheese and butter until smooth. Mix in vanilla, then gradually beat in powdered sugar until fluffy.
-
-
Fill and Re-roll:
-
Unroll the cooled cake carefully. Spread filling evenly, leaving a small border on edges.
-
Re-roll the cake, using the towel to guide it gently. Small cracks are fine!
-
-
Chill and Serve:
-
Wrap tightly in plastic wrap and refrigerate for at least 30–60 minutes.
-
Dust with powdered sugar before slicing. Serve with coffee, tea, or milk.
-
Notes
-
Cake Cracks: Overbaking or cooling too long before rolling can cause cracks. Small cracks are normal and don’t affect taste.
-
Make Ahead: Wrap tightly and refrigerate up to 3 days, or freeze for up to 2 months.
-
Lumpy Filling: Ensure cream cheese and butter are fully softened. Beat longer if needed.
-
Fresh Pumpkin: Strain to remove excess water or cake may be too wet.
Variations:
-
Gingerbread Spice: Swap pumpkin pie spice for cinnamon, ginger, and cloves.
-
Maple Filling: Add 2 tbsp maple syrup to filling, reduce powdered sugar by 2 tbsp.
-
Nutty Crunch: Sprinkle finely chopped toasted nuts over filling before rolling.
-
Chocolate Swirl: Add ¼ cup cocoa powder to flour mixture for a chocolate pumpkin roll.
-
Dairy-Free: Use plant-based cream cheese and butter alternatives.
Nutrition
- Calories: ~270 cal Per Serving
- Fat: 10g
- Saturated Fat: 6g
- Carbohydrates: 41g
Nutritional Information (Approximate)
Per slice (based on 10 slices): Calories: ~270, Fat: 10g, Saturated Fat: 6g, Carbohydrates: 41g, Sugar: 33g, Protein: 4g
Please note: This is an estimate generated by an online calculator. For precise nutritional information, please use your preferred calculator with the exact ingredients and brands you use.
Final Thoughts: Your Slice of Autumn Joy
As you place your beautifully swirled pumpkin roll into the refrigerator to set, I hope you take a moment to admire what you’ve created. You didn’t just follow a recipe; you conjured a little bit of autumn magic. You took a handful of simple, humble ingredients and transformed them into a dessert that is as breathtaking to look at as it is delightful to eat.
Remember, the true beauty of this pumpkin roll isn’t in its flawless appearance—though yours looks incredible!—but in the love and care you baked into it. It’s in the warmth of the spices, the tang of the cream cheese, and the memories you’re creating with every slice shared. Whether it becomes the centerpiece of your holiday table or a special treat on a quiet afternoon, this roll is a testament to your capability in the kitchen.
So the next time you see an elegant rolled cake, I hope you smile, knowing you have the secret. It’s not a mystery reserved for professional bakers; it’s a simple, joyful process that you have now mastered.
Thank you for spending this time in the kitchen with me. From my cozy autumn counter to yours, I wish you a season filled with warmth, wonderful flavors, and the confidence to create whatever makes your heart happy.
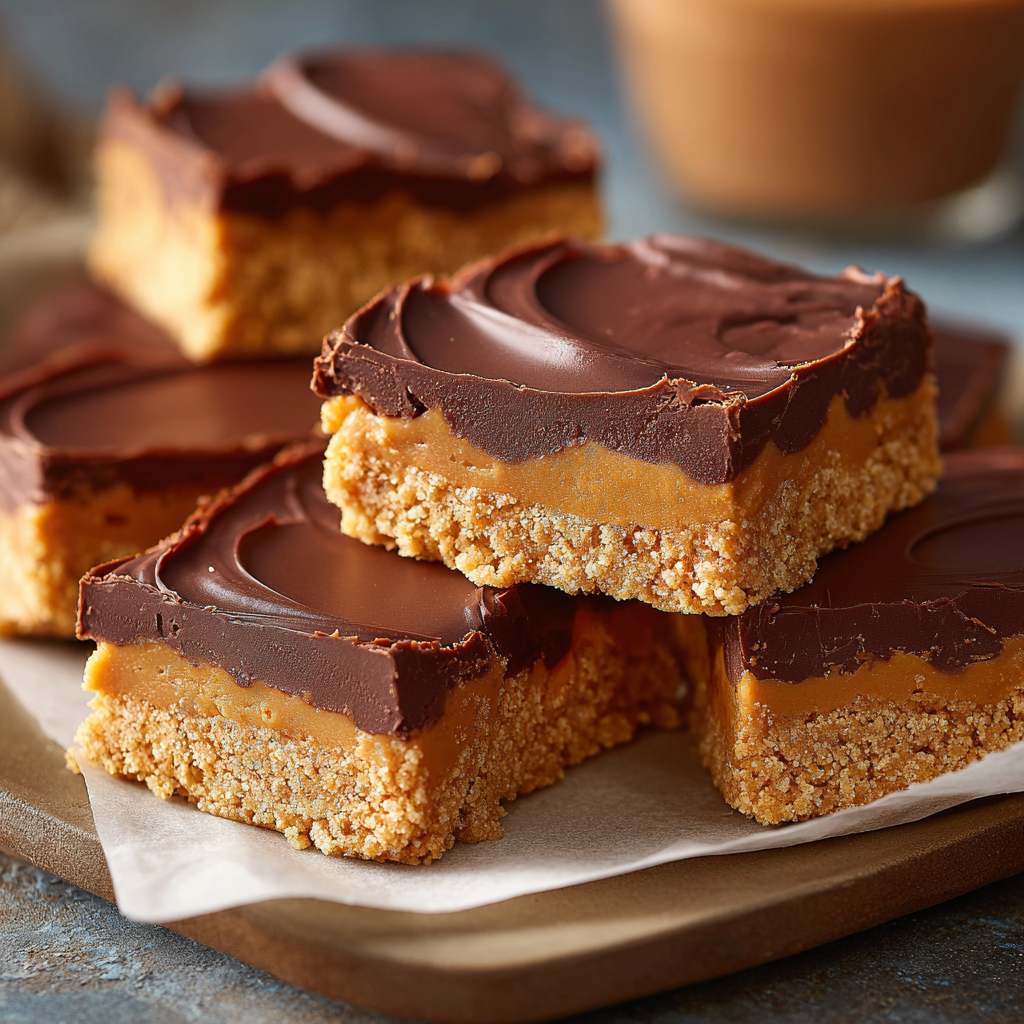
Peanut Butter Bars
Welcome to My Kitchen, Friend!
Is there anything in this world that smells quite as comforting as peanut butter and chocolate melting together? I don’t think so. It’s the smell of after-school snacks, of happy birthday parties, and of that deep, soul-satisfying joy that comes from creating something incredibly delicious with very little effort. If you’re here, I’m guessing you’re my kind of person—someone who believes that the best recipes are often the simplest, and that feeding people is a direct line to the heart.
Today, we’re making my legendary No-Bake Peanut Butter Bars. These aren’t just any bars, my friend. These are the bars that disappeared in under five minutes at my last neighborhood potluck. They’re the bars my nephew specifically requests for his birthday instead of cake. They are, quite simply, a perfect dessert. With a crumbly, salty-sweet graham cracker base and a luxuriously smooth chocolate-peanut butter topping, they taste like a gourmet peanut butter cup that decided to level up.
The best part? You don’t even need to turn on your oven. We’re talking about 15 minutes of active kitchen time. Whether you’re a seasoned baker or someone who considers toast a culinary achievement, this recipe is for you. So, tie on your apron (embrace the mess, it’s part of the fun!), and let’s make something unforgettable together.
The Little League Legacy
This recipe is so much more to me than a list of ingredients. It’s a time machine. Every time I press that graham cracker mixture into the pan, I’m instantly transported to a sun-drenched Saturday morning twenty years ago, standing in my mom’s kitchen. She’d be whipping up a double batch of these for my brother’s little league team.
She wasn’t a fancy cook, but she was a strategic one. She needed something that could survive a few hours in a hot bleacher-side cooler, feed a dozen hungry 10-year-olds, and be universally declared “awesome.” These bars were her secret weapon. I was her official “chocolate spreader” and, more importantly, the “bowel-licker” (a title I wore with immense pride). The smell of melting chocolate and peanut butter is, for me, the smell of anticipation, of community, and of my mom’s quiet love language—feeding her people. It’s a legacy of simplicity and sweetness that I’m just so happy to carry on and now share with you.
Gathering Your Ingredients
Here’s the beautiful cast of characters that will come together to create magic. I’ve included some of my favorite insights and swaps to make this recipe your own!
For the Base:
- 2 cups graham cracker crumbs: This is our foundation! It gives that iconic, slightly honeyed crunch. Chef’s Tip: If you don’t have pre-crushed crumbs, just throw whole graham crackers into a zip-top bag and roll them with a rolling pin. It’s a fantastic (and free!) stress reliever. For a gluten-free version, gluten-free graham-style crackers work perfectly.
- 2 cups confectioners’ sugar: Also known as powdered sugar or icing sugar. This sweetens the base and helps bind it together. There’s no real substitute here, as its fine texture is key to the smooth, fudgy base.
- 1 cup unsalted butter, melted: Richness alert! Using unsalted butter lets you control the salt level. Chef’s Insight: I use unsalted because the peanut butter already has salt. If you only have salted butter, that’s okay! Just maybe skip the optional salt sprinkle later. Margarine also works if that’s your preference.
- 1 cup creamy peanut butter: The star of the show! Use a standard commercial brand like Jif or Skippy for the best texture and consistency. The oils in natural, stir-style peanut butter can separate and make the base greasy. This is the one time I’m a stickler for not going all-natural!
For the Topping:
- 1½ cups semisweet chocolate chips: The perfect partner for peanut butter. Semisweet strikes a lovely balance—not too bitter, not too sweet. Substitution Tip: Feel free to use milk chocolate for a sweeter bar, or dark chocolate for a more sophisticated, less sweet vibe. Chopped chocolate bars also melt beautifully.
- 4 tbsp peanut butter: Adding this to the chocolate topping is my secret weapon! It makes the topping softer, easier to slice, and gives it an incredible creamy peanut butter flavor throughout. It also helps it melt more smoothly.
Let’s Make Some Magic: Step-by-Step
Ready? This is the fun part. Let’s transform these simple ingredients into pure delight.
Step 1: Create the Crumbly Base
In a medium-sized bowl, combine your graham cracker crumbs and confectioners’ sugar. Give them a good whisk to get them acquainted and break up any lumps in the sugar. Now, pour in that glorious melted butter and your one cup of creamy peanut butter. Time to get your hands in there (or use a sturdy spoon)! Mix until everything is fully combined. It will look and feel like a thick, slightly sandy, but moldable dough. This is exactly what you want! Chef’s Hack: If the mixture seems too dry and isn’t holding together, add another tablespoon of melted butter. If it seems too wet, add another tablespoon of graham cracker crumbs.
Step 2: Press It Perfectly
Take a 9×13-inch baking pan. You can grease it lightly, but I’m a huge fan of lining it with parchment paper. Why? Because it creates a sling that lets you lift the entire block of bars out of the pan later for super clean, easy cutting. Trust me on this! Transfer your peanut butter mixture into the prepared pan. Now, press it down firmly and evenly into one unified layer. I like to use the flat bottom of a measuring cup to really press and smooth it out—this ensures you won’t have a crumbly base that falls apart. Get it nice and compact!
Step 3: The Dreamy Topping
In a microwave-safe bowl, combine the semisweet chocolate chips and the 4 tablespoons of peanut butter. Microwave on high in 30-second bursts. After each interval, stop and stir well. Why? Microwaves have hot spots, and stirring ensures everything melts evenly and doesn’t burn. It usually takes about 90 seconds total. You’re looking for a smooth, glossy, pourable lava of deliciousness. Chef’s Commentary: You can absolutely do this step in a double boiler on the stove if you prefer! I just love the speed of the microwave for this.
Step 4: The Big Pour
Pour your melted chocolate and peanut butter mixture directly over the base. Tilt the pan or use an offset spatula (a spoon works too!) to spread it into a perfectly even layer, making sure to cover the base right to the edges. This is your canvas. For a little professional flair, you can drag a butter knife through the topping in a zig-zag or swirl pattern to make it pretty.
Step 5: The Patience Game
This is the hardest part: waiting. Carefully place the pan in the refrigerator to chill. You need to let it set for at least one hour, though two is even better. The bars are ready when the top is firm to the touch and doesn’t give when you press it lightly. This chilling step is non-negotiable—it’s what transforms the layers from goo to glorious, sliceable bars.
Step 6: Slice and Serve!
Once fully set, lift the bars out of the pan using the parchment paper sling and place them on a cutting board. Use a large, sharp knife to slice them into 12 generous bars (or 24 smaller squares for a party!). For the cleanest cuts, you can wipe the knife blade clean between slices. Then, try not to eat them all at once. I believe in you.
How to Serve These Beauties
These bars are stars all on their own, but a little presentation goes a long way! I love placing them on a simple white platter to let that chocolate top shine. For a fancy touch, you can drizzle a little extra melted peanut butter over the top or give them a tiny sprinkle of flaky sea salt right before serving—the salt cuts through the sweetness beautifully. They’re perfect with a cold glass of milk, a hot coffee, or just your bare hands standing over the kitchen sink (no judgment here).
Mix It Up! Recipe Variations
Once you’ve mastered the classic, the playground is open! Here are a few of my favorite twists:
- The Cookie Dough Lover: Replace the graham cracker crumbs with 2 cups of crushed vanilla wafers or Biscoff cookies.
- The Crunch Fanatic: Stir ½ cup of crushed pretzels into the base mixture for a salty crunch, or sprinkle them on top of the chocolate before it sets.
- The Nutty Professor: Mix ½ cup of chopped peanuts, pecans, or almonds into the base for extra texture.
- The White Chocolate Dream: Swap the semisweet chips for white chocolate chips for a sweeter, creamier bar.
- PB&J Swirl: Before chilling, drop small spoonfuls of your favorite jam or jelly over the chocolate topping and use a knife to swirl it in gently.
Chef’s Notes & Kitchen Confessions
This recipe has been my ride-or-die for decades, and it’s evolved in tiny ways. I started adding the extra peanut butter to the chocolate after a minor kitchen disaster where the topping was too hard and cracked when I sliced it. Adding the PB was a “hail mary” that turned into a permanent upgrade! I also used to just grease the pan, but after one too many batches that were hard to get out, the parchment paper sling became law in my kitchen.
A funny story? I once was so excited to make these for a date that I accidentally used garlic powder instead of confectioners’ sugar (they were in similar-looking containers in my pantry—a mistake I only made once!). We ended up ordering pizza and laughing about it, but let me tell you, garlic peanut butter bars are NOT recommended. Label your containers, folks!
FAQs & Troubleshooting
Q: My base is too crumbly and won’t hold together. What did I do wrong?
A: Don’t worry! This usually means the mixture needs a bit more “glue.” The butter is your binder. Try adding another tablespoon of melted butter and mix it in thoroughly. Press it into the pan even more firmly than you think you need to.
Q: Can I use natural peanut butter?
A: I really don’t recommend it for this specific recipe. Natural peanut butters have a different oil content and often separate. This can lead to a greasy, oily base that doesn’t set properly. The stabilizers in conventional creamy peanut butter are actually your friend here, ensuring a perfect, firm texture.
Q: How should I store these, and how long do they last?
A: Because of the butter and chocolate, these bars need to be stored in the refrigerator in an airtight container. They will keep beautifully for up to a week… if they last that long! You can also freeze them for up to 3 months. Just layer them between sheets of parchment paper in a freezer-safe container and thaw in the fridge before serving.
Q: My chocolate topping seized up and got grainy. Help!
A: This usually happens if a tiny bit of steam or water gets into the chocolate while melting. Chocolate is notoriously finicky. To fix it, try adding a tiny bit more fat—a teaspoon of coconut oil or even a little more peanut butter—and stir vigorously as it melts. This can often bring it back to a smooth state.
Peanut Butter Bars
Description
Welcome to my kitchen, friend! Is there anything more comforting than peanut butter and chocolate melting together? These No-Bake Peanut Butter Bars are the ultimate indulgence: a crumbly, salty-sweet graham cracker base topped with creamy chocolate-peanut butter. They taste like a gourmet peanut butter cup, but better. Best of all, no oven required—just 15 minutes of hands-on kitchen magic.
Ingredients
For the Base:
-
2 cups graham cracker crumbs (or crush your own)
-
2 cups confectioners’ sugar
-
1 cup unsalted butter, melted
-
1 cup creamy peanut butter (standard commercial brands recommended)
For the Topping:
-
1½ cups semisweet chocolate chips (or milk/dark chocolate)
-
4 tbsp peanut butter
Optional Variations:
-
Swap graham crackers for crushed vanilla wafers or Biscoff cookies
-
Add ½ cup crushed pretzels or chopped nuts to the base for texture
-
Use white chocolate chips for a sweeter topping
-
Swirl in your favorite jam for a PB&J twist
Instructions
-
Make the Base:
-
In a medium bowl, combine graham cracker crumbs and confectioners’ sugar.
-
Add melted butter and 1 cup peanut butter. Mix until fully combined into a moldable dough.
-
Adjust: too dry? add a tbsp more butter. Too wet? add a tbsp more crumbs.
-
-
Press the Base:
-
Line a 9×13-inch pan with parchment paper for easy removal.
-
Press the peanut butter mixture evenly into the pan using your hands or the flat bottom of a measuring cup.
-
-
Prepare the Topping:
-
In a microwave-safe bowl, combine chocolate chips and 4 tbsp peanut butter.
-
Microwave in 30-second bursts, stirring between each, until smooth and glossy. (Or use a double boiler.)
-
-
Assemble Bars:
-
Pour the melted chocolate-peanut butter mixture over the base.
-
Spread evenly with a spatula or spoon. Optional: make a swirl pattern with a knife.
-
-
Chill:
-
Refrigerate for at least 1 hour (2 hours is better) until firm.
-
-
Slice & Serve:
-
Lift bars out using the parchment sling.
-
Slice into 12 large bars or 24 small squares.
-
Optional: drizzle extra peanut butter or sprinkle flaky sea salt before serving.
-
Notes
-
Base too crumbly? Add more melted butter and press firmly.
-
Chocolate seized? Add a teaspoon of peanut butter or coconut oil and stir until smooth.
-
Storage: Store in an airtight container in the fridge for up to 1 week, or freeze for up to 3 months.
Nutrition
- Calories: 380 cal Per bar
- Fat: 24g
- Saturated Fat: 10g
- Carbohydrates: 35g
Nutritional Information (Per Bar)
Prep Time: 25 minutes | Chill Time: 1 hour | Total Time: 1 hr 25 mins | Servings: 12
Calories: ~380 | Fat: 24g | Saturated Fat: 10g | Carbohydrates: 35g | Fiber: 2g | Sugar: 28g | Protein: 5g
Please note: This is an estimated nutritional breakdown based on the specific ingredients listed. Values may vary depending on your specific brands.
Final Thoughts
There you have it—the legendary, no-fuss, soul-warming bars that have been a constant source of joy in my life. I hope this recipe finds its way into your own collection of go-to favorites, creating new stories and happy memories in your kitchen.
Remember, the very best recipes are the ones that make you feel like a genius, bring people together, and leave a little bit of chocolate on someone’s smile. You’ve absolutely nailed it.
Now, go enjoy your well-deserved treat. You’ve earned every delicious, peanut-buttery bite.
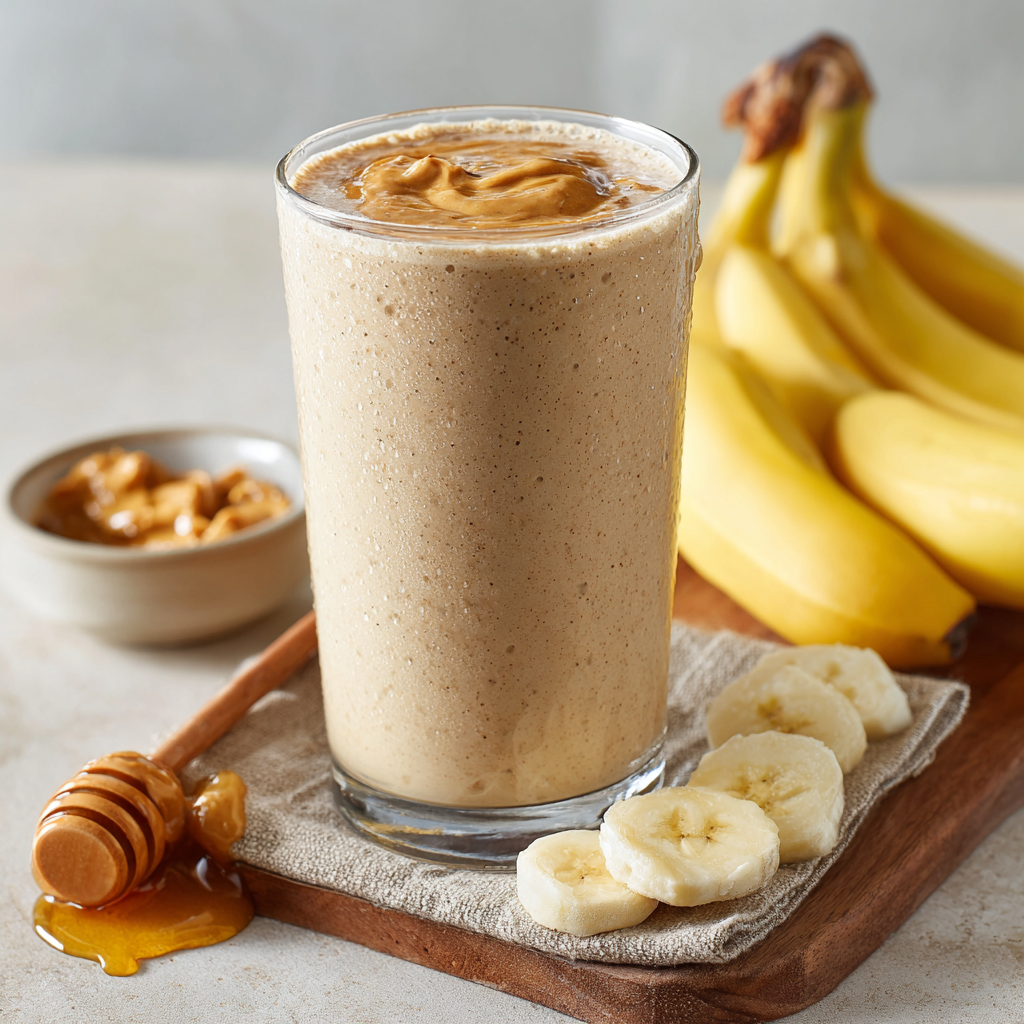
Peanut Butter Banana Smoothie
Your New Favorite Breakfast (Or Snack, Or Dessert!) Is Here
Hey there, friend! Come on in, pull up a stool. Can you smell that? It’s the warm, toasty scent of peanut butter drifting from the toaster, mingling with the sweet, almost caramel-like aroma of a perfectly ripe banana. It’s a smell that instantly transports me to happy, cozy mornings and the simple joy of whipping up something delicious that’s also incredibly good for you.
If you’ve ever found yourself staring into the fridge, hungry but short on time and inspiration, I have the absolute perfect solution for you. This isn’t just any smoothie; this is The One. The Peanut Butter Banana Smoothie that tastes like a decadent milkshake but fuels your body like a champion. It’s creamy, dreamy, and packed with the kind of wholesome energy that will have you glowing from the inside out.
Whether you’re rushing out the door, need a powerful post-workout refuel, or are just craving something sweet and satisfying, this five-minute wonder is your new best friend in the kitchen. It’s a hug in a glass, a nostalgia trip, and a nutrient powerhouse all at once. So, grab your blender—let’s make something unforgettable together.
The Little Yellow Kitchen & The Smoothie That Started It All
This recipe takes me right back to my first apartment after college. The kitchen was… quaint. We’re talking sunshine-yellow laminate countertops, a fridge that hummed like a tractor, and a blender that had seen better decades. But it was mine. My best friend, Sarah, and I were figuring out “adulting,” and that often meant our grocery budget was… creative.
We’d always splurge on two things: a big jar of peanut butter and a bunch of bananas. They were our staples. One particularly broke (but happy!) Sunday, we were craving something sweet for breakfast. We tossed those trusty ingredients into our rickety blender with some milk and ice, crossed our fingers, and hit “blend.” The machine groaned and shook, but it persevered. What emerged was a thick, frosty, miraculously creamy smoothie. We poured it into mismatched mugs, sat on the floor of that little yellow kitchen, and took our first sip.
We looked at each other and our eyes went wide. It was pure magic. It felt indulgent and special, even though it was made from the simplest, most humble ingredients. That moment of shared joy, of creating something wonderful out of almost nothing, is the heart of this recipe for me. It’s a reminder that the best things in life—and in the kitchen—don’t have to be complicated.
Gathering Your Smoothie Dream Team
Here’s what you’ll need to create this creamy masterpiece. The beauty of this recipe is in its flexibility, so I’ve included all my favorite chef-y insights and swaps to make it your own!
- 4 Ripe Bananas, broken into chunks: The riper, the better! Those brown speckles mean natural sugars have developed, making your smoothie incredibly sweet without needing loads of added sweetener. Chef’s Tip: If your bananas are turning spotty, peel them, break them into chunks, and freeze them! Frozen bananas are the SECRET to an luxuriously thick, creamy, almost soft-serve consistency.
- 4 cups Milk: Use whatever you love! Dairy milk adds a classic richness, but unsweetened almond milk keeps it light and nutty. Oat milk makes it extra creamy, and coconut milk adds a lovely tropical twist.
- 1 cup Peanut Butter: This is the star, so use a good one! I adore natural, creamy peanut butter for its pure peanut flavor. Chef’s Insight: Avoid “no-stir” kinds with added hydrogenated oils if you can—the ingredient list should just be “peanuts, salt.” The natural separation is normal! Just give it a good stir.
- 4 tbsp Honey: This is our natural sweetener. Adjust to your taste! If your bananas are super ripe, you might only need 2 tablespoons. Substitution Tip: Maple syrup, agave nectar, or a couple of pitted Medjool dates work beautifully for a vegan version.
- 4 cups Ice Cubes: The chill factor! If you’re using frozen bananas, you can drastically reduce the ice to about 1 cup, which prevents dilution and makes it even thicker.
Twist 1 (My Go-To!): Add ½ tsp cinnamon + 1 tsp vanilla extract. This dynamic duo adds a warm, baking-spice depth that makes the smoothie taste like a sophisticated dessert. It’s a non-negotiable in my kitchen!
Twist 2 (The Power-Up): Blend in ½ cup plain Greek yogurt for a tangy creaminess and protein boost, or 2 scoops of vanilla protein powder to turn this into a serious meal replacement that will keep you full for hours.
Blending Your Way to Bliss: A Step-by-Step Guide
This process is wonderfully simple, but a few little tricks will take your smoothie from “good” to “can I have the recipe?!” levels of amazing. Let’s do this!
- Prep Your Ingredients: This is the “mise en place” (everything in its place) moment! Break your bananas into chunks. Measure out your milk, peanut butter, and honey. If you’re adding any optional ingredients, have them ready to go. This isn’t just chef fussiness—it makes the blending process seamless and ensures you don’t forget anything.
- The Blender Order Matters! Here’s a key hack for a perfectly blended smoothie: add your liquid ingredients to the blender first. Pour in the milk. This helps the blades move freely from the start. Next, add the peanut butter and honey. Then, add your banana chunks and any powdery or dry ingredients (like protein powder or cinnamon). Finally, top it all with the ice. Starting with liquids on the bottom prevents the blades from getting stuck and creates a vortex that pulls everything down into a smooth, lump-free blend.
- Blend Until Silky Smooth: Secure the lid on tightly (a lesson I learned the messy way!). Start on a low speed to initially combine the ingredients, then gradually ramp up to the highest speed. Let it run for a good 30-45 seconds. You’re looking for a completely homogenous, frothy, and creamy texture. If it seems too thick and is struggling to blend, pause, use a spatula to stir it (never a spoon while the blender is off and unplugged!), or add a tiny splash more milk to help it along.
- Taste and Tweak: This is the best part! Pour a little into a glass and give it a taste. Is it sweet enough? Add a drizzle more honey. Want it thicker? Throw in a few more ice cubes and blend again. Want more peanut butter flavor? You guessed it—add another spoonful! This is your creation. Make it perfect for you.
- Serve Immediately: Smoothies are best enjoyed fresh! The frothy top and icy-cold temperature are at their peak right out of the blender. Pour into your favorite glasses and serve right away.
How to Serve This Sunny Delight
Presentation is part of the fun! I love serving this in a large, cheerful mason jar with a fun paper straw. For a real diner-style treat, rim the glass with a little honey and then dip it in crushed peanuts or granola. A final flourish? A tiny dollop of peanut butter swirled on top, a slice of banana on the rim, and a light dusting of cinnamon. It makes an ordinary Tuesday feel like a celebration!
Make It Your Own: Delicious Variations
The base recipe is a blank canvas for your cravings! Here are a few of my favorite riffs:
- Chocolate Peanut Butter Cup: Add 2 tablespoons of unsweetened cocoa powder and use chocolate protein powder for a decadent treat.
- Tropical Twist: Swap peanut butter for almond butter and add a handful of frozen mango and a spoonful of shredded coconut.
- Green Power-Up: Don’t tell the kids! Add a large handful of fresh spinach. I promise, you won’t taste it, but you’ll get a fantastic nutrient boost.
- Coffee Kickstart: Replace 1 cup of milk with 1 cup of cold brew coffee for a morning protein-and-caffeine powerhouse.
- Berry Delight: Add a cup of frozen strawberries or blueberries for a peanut butter and jelly vibe!
Olivia’s Chef Notes & Kitchen Confessions
This recipe has evolved so much from that first shaky blender version in my yellow kitchen. My biggest “aha!” moment was discovering the power of frozen bananas. It was a total game-changer. Not only does it eliminate the need for so much ice (preventing a watery melt), but it creates that unbelievably thick, spoonable, milkshake texture we all crave.
I also have a funny kitchen confession: I am the Queen of Blender Mishaps. I once was so excited to make this that I didn’t secure the lid properly. I hit “blend” and created a peanut butter banana explosion that decorated my ceiling, my cabinets, and my very surprised cat. So learn from my mess—always double-check that lid!
Finally, this recipe is deeply forgiving. No bananas? Try frozen mango. Out of honey? Maple syrup works. Don’t like peanut butter? Almond butter or sunflower seed butter are fantastic. Cooking from the heart means using what you have and making it work. This smoothie is the perfect embodiment of that.
Smoothie FAQs: Your Questions, Answered!
Q: My smoothie is too thin! How can I thicken it up?
A: No worries! The easiest fix is to add more frozen fruit. Toss in a handful of frozen bananas, strawberries, or even mango. You can also add a few more ice cubes, a scoop of yogurt, or even a tablespoon of chia seeds (they’ll absorb liquid and thicken it up nicely).
Q: My smoothie is too thick—it’s not blending! What do I do?
A: This is a common one! First, always start with liquid in the bottom of the blender. If it’s already too thick and the blades are stuck, stop the blender, unplug it, and use a long spatula to stir and loosen the mixture. Add a small splash of milk or water (a tablespoon at a time) to help get the blades moving again.
Q: Can I make this smoothie ahead of time?
A> You can, but it’s best fresh. If you must, store it in a sealed container in the fridge for up to 24 hours. It will separate—that’s totally natural! Just give it a vigorous shake or a quick re-blend before drinking.
Q: Is this smoothie healthy?
A> Absolutely! It’s packed with potassium from the bananas, healthy fats and protein from the peanut butter, and calcium from the milk. Using natural peanut butter and controlling the sweetener makes it a balanced choice. The optional add-ins like Greek yogurt or protein powder make it even more nutritious and filling.
Peanut Butter Banana Smoothie
Description
Hey there, friend! Can you smell that? It’s the warm, toasty aroma of peanut butter meeting sweet, ripe bananas. This Peanut Butter Banana Smoothie tastes like a decadent milkshake but fuels your body like a champion. Perfect for breakfast, a snack, post-workout refuel, or even a dessert, it’s creamy, dreamy, and packed with wholesome energy.
Ingredients
-
4 ripe bananas, broken into chunks (freeze if extra ripe)
-
4 cups milk (dairy, almond, oat, or coconut)
-
1 cup natural peanut butter
-
4 tbsp honey (adjust to taste; or use maple syrup/agave for vegan)
-
4 cups ice cubes (reduce to 1 cup if using frozen bananas)
-
Optional twists:
-
½ tsp cinnamon + 1 tsp vanilla extract
-
½ cup plain Greek yogurt (protein boost)
-
2 scoops vanilla protein powder
-
Instructions
-
Prep Ingredients: Peel and chunk the bananas. Measure milk, peanut butter, honey, and any optional ingredients.
-
Layer Ingredients in Blender: Start with liquids (milk), then peanut butter and honey, followed by bananas and any powders, topping with ice. This prevents blades from getting stuck and ensures smooth blending.
-
Blend: Start low, then gradually go high speed for 30–45 seconds until silky smooth. Add extra milk if needed.
-
Taste & Adjust: Sweet enough? Add more honey. Too thick? Add more milk or ice. More peanut butter flavor? Toss in another spoonful.
-
Serve Immediately: Pour into glasses or mason jars. Optional toppings: a swirl of peanut butter, a banana slice, crushed peanuts, or cinnamon dusting.
Notes
-
Chocolate Peanut Butter Cup: Add 2 tbsp cocoa powder and chocolate protein powder.
-
Tropical Twist: Swap peanut butter for almond butter, add frozen mango, and sprinkle shredded coconut.
-
Green Power-Up: Blend in a handful of fresh spinach—you won’t taste it, but your body will love it.
-
Coffee Kickstart: Replace 1 cup milk with cold brew coffee.
-
Berry Delight: Add 1 cup frozen berries for a peanut butter and jelly vibe.
Nutrition
- Calories: ~250 cal Per Serving
- Fat: 13g
- Carbohydrates: 24g
Nutritional Information*
*This is an estimate for 1 serving (1 cup) using 2% dairy milk, natural peanut butter, and honey, without optional add-ins. Values will vary based on your specific ingredients.
- Calories: ~250
- Fat: 13g
- Carbohydrates: 24g
- Sugar: 16g
- Protein: 9g
- Fiber: 2g
Prep Time: 5 minutes | Total Time: 5 minutes | Servings: 8
I hope you love this recipe as much as I do! It’s more than just a drink; it’s a little moment of joy you can make for yourself anytime. If you make it, tag me on social media—I’d love to see your creations! Until next time, happy blending!
Final Thoughts: Your New Kitchen Staple
And just like that, in the time it takes to choose a podcast, you’ve created something truly wonderful. I hope this smoothie brings a moment of calm, delicious joy to your day, just as it has for me all these years.
This recipe is more than a list of ingredients; it’s an invitation to be flexible, to play with your food, and to find magic in simplicity. It’s a testament to the fact that the most satisfying meals often come together from a few trusty pantry staples and a little bit of love.
So whether this becomes your secret weapon for hectic mornings, your post-workout reward, or your go-to “healthy-ish” dessert, I hope you make it your own. Share it with someone you love, sip it in a moment of quiet solitude, or enjoy it as a burst of energy on a busy afternoon.
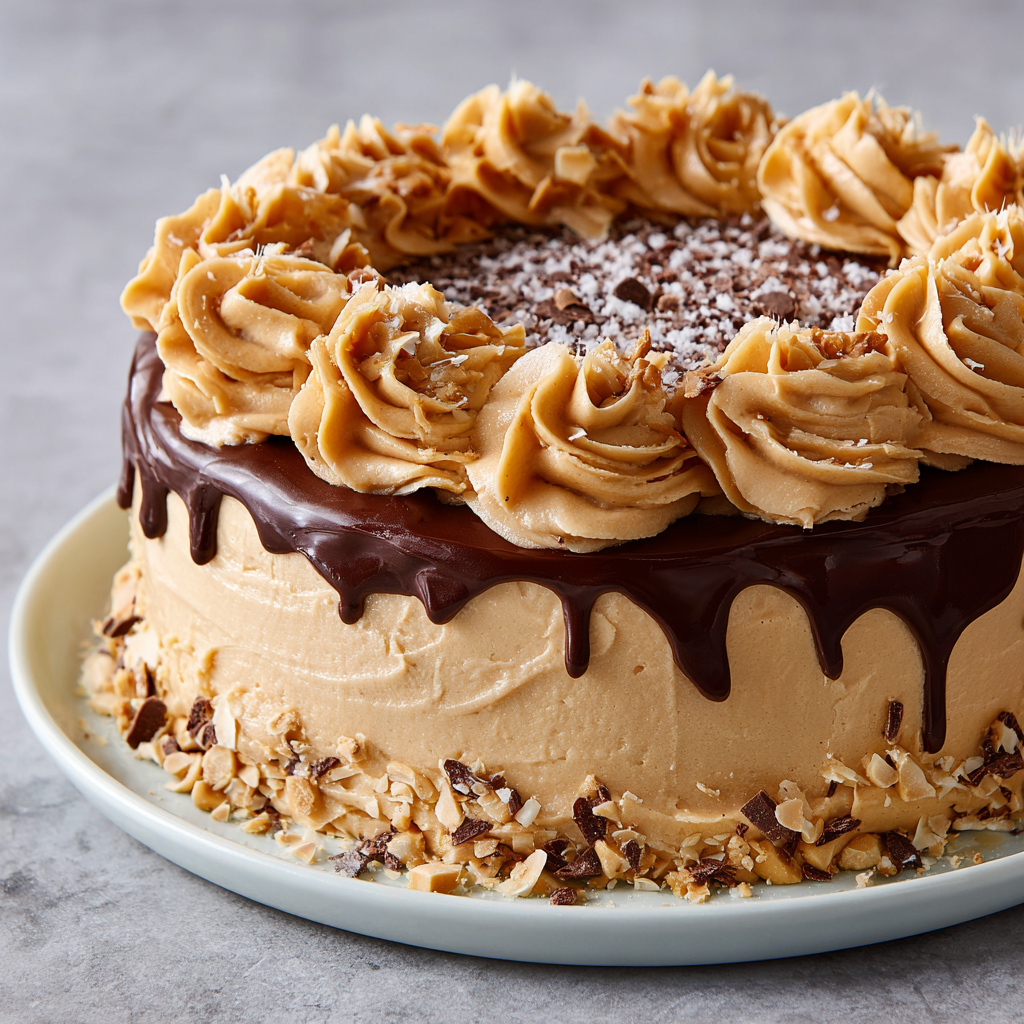
Fluffy Peanut Butter Frosting
The Fluffiest, Dreamiest Peanut Butter Frosting You’ll Ever Make
Hey there, friend! Come on in, grab a spoon, and let’s talk about one of life’s simple, glorious pleasures: peanut butter frosting. I’m not talking about the kind that’s so dense it makes your teeth ache. Oh no. I’m talking about a cloud-like, velvety, perfectly balanced frosting that’s rich with peanut butter flavor but still light enough to eat by the spoonful (no judgment here!). This is the kind of frosting that turns a simple chocolate cupcake into a show-stopper, a humble brownie into a gourmet treat, and a Tuesday into a celebration. It’s my go-to for birthdays, bake sales, and those “I just need a little something sweet” moments. The best part? You don’t need any fancy equipment or a pastry degree. With a few simple ingredients and a few minutes, you can create pure magic. So, tie on your favorite apron—it might get a little messy, but that’s half the fun—and let’s make something unforgettable together.
A Spoonful of Memory
This recipe takes me right back to my grandma’s linoleum-floored kitchen, with the radio always tuned to a scratchy oldies station. She was the queen of “a little of this, a little of that” cooking, and her peanut butter frosting was legendary. She’d let me scrape the beaters, and I’d stand there, wide-eyed, as the pale yellow butter and brown peanut butter swirled together into a creamy, sweet mountain. It was the crowning glory of her infamous “Wacky Cake,” a depression-era chocolate cake made without eggs or milk. That contrast—the moist, dark chocolate cake with the rich, salty-sweet frosting—was my first lesson in flavor balancing. It taught me that the best recipes aren’t just about feeding people; they’re about creating a feeling. Every time I whip up a batch of this frosting, I’m right back in that kitchen, covered in powdered sugar and feeling utterly loved. It’s my hope that this recipe becomes a part of your story, too, creating messy, joyful moments and sweet memories for the people you love.
Gathering Your Frosting Fantastic Four (Plus a Few Friends!)
Here’s the beautiful simplicity of it all. You likely have most of this in your pantry right now! Let’s break it down:
- 2 cups creamy peanut butter – This is your star! For the fluffiest, smoothest texture, use a commercial brand like Jif or Skippy, not a natural-style oil-separating one. The stabilizers in them help create that perfect, spreadable consistency. Chef’s insight: If natural is all you have, give it a *really* good stir to incorporate all the oil first!
- 1 cup (2 sticks) unsalted butter, softened – “Softened” is the key word here! It should be at a cool room temperature, leaving a slight indentation when you press it. This is non-negotiable for a smooth, lump-free frosting. Substitution tip: You can use salted butter, but then definitely omit the extra pinch of salt later on to avoid an overly salty finish.
- 4 cups confectioners’ sugar (powdered sugar) – This sweetens and gives structure. I always recommend sifting it if you have time—it prevents little lumps and makes for an even silkier frosting.
- 6 tbsp milk, or more as needed – Whole milk will give you the richest flavor, but any milk you have on hand works beautifully. For a dairy-free version, unsweetened almond or oat milk are fantastic substitutes.
- 1 tsp vanilla extract (The Warmth Twist) – A splash of good vanilla adds a beautiful, warm depth that makes the peanut flavor sing. Don’t skip it!
- A generous pinch of sea salt (The Balance Twist) – This is the secret weapon! Salt cuts through the sweetness and amplifies the peanut butter flavor, making it taste more complex and, well, more peanutbuttery.
- Optional Bonus: ¼ cup cream cheese, softened – This is my pro hack for a next-level experience. It adds a subtle tang that contrasts the sweetness beautifully and makes the frosting incredibly stable for piping intricate designs.
Let’s Get Whipping: Your Foolproof Steps to Frosting Bliss
Ready? This is where the magic happens. Follow these steps, and you’ll be a frosting hero in no time.
- The Creamy Foundation. In the bowl of your stand mixer fitted with the paddle attachment (a hand mixer works great too!), beat the softened butter and peanut butter together on medium-high speed. Now, set a timer for a full 2-3 minutes. I know it seems like a long time, but this is your #1 tip for achieving that dreamy, fluffy texture! You’re not just mixing; you’re incorporating air. Stop when the mixture is pale, smooth, and wonderfully creamy. Chef’s Hack: If your butter wasn’t quite soft enough, don’t panic! Cut it into tablespoon-sized chunks and let it sit for 10 more minutes. Rushing this step leads to lumpy frosting.
- The Sweet Incorporation. Turn your mixer down to its lowest possible speed. Seriously, the lowest setting. Gradually add the confectioners’ sugar, about a half cup at a time. If you turn the speed up too high, you’ll be greeted by a sweet, powdery cloud all over your kitchen (and yourself!). Let each addition get mostly incorporated before adding the next. Once all the sugar is in, scrape down the sides and bottom of the bowl with a spatula to ensure no dry pockets are hiding.
- The Perfect Consistency. With the mixer still on low, begin adding your milk, one tablespoon at a time. After 4 tablespoons, stop and scrape the bowl again. Check the consistency. Is it still a bit thick and crumbly? Add the 5th, then the 6th. You might not need all of it, or you might need a splash more. You’re looking for a spreadable, smooth, and creamy texture that holds its shape. Chef’s Commentary: Remember, you can always add more liquid, but you can’t take it out! Go slow here.
- The Flavor Finish. Now for the fun part! Add the vanilla extract and that all-important pinch of sea salt. If you’re using the cream cheese bonus, add it now too. Turn the mixer back up to medium-high and let it rip for another 1-2 minutes. Watch as it transforms, becoming even lighter, airier, and paler in color. This final whipping is what makes it “fluffy” peanut butter frosting instead of just “peanut butter” frosting.
- Frost Away! Your masterpiece is ready! Use it immediately to frost completely cooled cakes or cupcakes. If you frost a warm cake, the butter will melt, and you’ll have a delicious but runny mess.
How to Serve Your Peanut Butter Masterpiece
This frosting is the ultimate team player! Slather it generously on a classic yellow or decadent chocolate layer cake for a crowd-pleasing dessert. Pipe a luxurious swirl onto chocolate or vanilla cupcakes and top with a few chocolate chips or chopped peanuts for crunch. For a next-level treat, use it to frost rich brownies or as a sweet dip for apple slices and pretzels. It’s even delicious straight from the spoon—your secret is safe with me!
Get Creative! Fun Flavor Twists
Once you’ve mastered the classic, try one of these easy variations to keep things exciting:
- Chocolate Peanut Butter: Reduce the confectioners’ sugar to 3 cups and add ¾ cup of sifted unsweetened cocoa powder along with it.
- Honey Cinnamon: Substitute 3 tablespoons of honey for 3 tablespoons of the milk and add 1 teaspoon of ground cinnamon with the vanilla.
- Maple Bourbon: Substitute 3 tablespoons of pure maple syrup and 2 tablespoons of bourbon for 5 tablespoons of the milk. (The alcohol cooks off, leaving just amazing flavor!).
- Nutty Swirl: Fold in ½ cup of finely chopped roasted peanuts or Reese’s Pieces at the end for a fun texture.
- Dairy-Free Delight: Use vegan butter sticks, your favorite dairy-free milk, and ensure your peanut butter is dairy-free. It works perfectly!
From My Kitchen to Yours: A Few Parting Thoughts
This recipe has been through it all with me—it’s been doubled for massive birthday cakes, halved for a small batch of cookies, and even once salvaged after I accidentally used salted butter AND added the extra salt (we called it the “Salted Peanut Special” and everyone loved it!). The cream cheese addition was a happy accident one day when I was low on butter, and it’s now my preferred method for its tang and stability. Don’t be afraid to make it your own. The best cooking comes from a place of joy and a little bit of fearless experimentation. Remember, the goal isn’t perfection; it’s the messy, delicious, heart-filled journey of making something with your own two hands.
Your Frosting Questions, Answered!
Q: My frosting is too thin/runny. How can I fix it?
A: No worries! This is an easy fix. Simply add more sifted confectioners’ sugar, a quarter cup at a time, and beat until it thickens up to your desired consistency. Chilling the bowl in the refrigerator for 15-20 minutes can also help firm up the fats and make it easier to whip back to perfection.
Q: My frosting is too thick/dry/crumbly. What did I do wrong?
A: You probably just need a touch more liquid. Add more milk, one teaspoon at a time (not tablespoon!), beating well after each addition until it becomes smooth and spreadable. Going slow is key here!
Q: Can I make this frosting ahead of time?
A: Absolutely! Store it in an airtight container in the refrigerator for up to one week. When you’re ready to use it, let it come to room temperature for about an hour, then give it a quick re-whip with your mixer to bring back its fluffy texture.
Q: Why did you specify not to use natural peanut butter?
A> Great question! Natural peanut butters, where the oil separates out, have a different texture and often a stronger, grittier peanut flavor. They can make the frosting oily, less stable, and more difficult to achieve that light, fluffy consistency we’re after. The creamy, homogenized stuff is simply more reliable for this specific application.
Fluffy Peanut Butter Frosting
- Total Time: 20 minutes
Description
Light, creamy, and melt-in-your-mouth dreamy—this peanut butter frosting is pure magic. Unlike dense versions, this one is whipped to cloud-like perfection, making it just as irresistible by the spoonful as it is on cupcakes or cakes. With a perfect balance of sweet, salty, and nutty, it’s the frosting that transforms simple desserts into unforgettable showstoppers.
Ingredients
-
2 cups creamy peanut butter (Jif or Skippy work best)
-
1 cup (2 sticks) unsalted butter, softened
-
4 cups confectioners’ sugar, sifted
-
6 tbsp milk (more as needed)
-
1 tsp vanilla extract
-
Pinch of sea salt
-
Optional: ¼ cup cream cheese for tang & stability
Instructions
-
Whip base: Beat butter + peanut butter for 2–3 min until pale and fluffy.
-
Add sugar: On low speed, add confectioners’ sugar ½ cup at a time. Scrape bowl.
-
Adjust consistency: Add milk gradually until smooth and spreadable.
-
Flavor boost: Mix in vanilla + pinch of salt (and cream cheese if using).
-
Final whip: Beat 1–2 min on medium-high until light, airy, and silky.
-
Frost: Use immediately on cooled cakes, cupcakes, or brownies.
Notes
-
Chocolate PB: Swap 1 cup sugar for ¾ cup cocoa powder.
-
Honey Cinnamon: Add 3 tbsp honey + 1 tsp cinnamon.
-
Maple Bourbon: Replace 5 tbsp milk with 3 tbsp maple syrup + 2 tbsp bourbon.
-
Nutty Crunch: Fold in ½ cup chopped peanuts or Reese’s Pieces.
-
Dairy-Free: Use vegan butter + plant-based milk.
- Prep Time: 10 min
- Cook Time: 10 min
Nutrition
- Calories: 180 cal Per Serving
- Fat: 12g
Nutritional Information (Per 2 Tbsp Serving)
Prep Time: 10 minutes | Total Time: 10 minutes | Servings: 24
Calories: ~180 | Fat: 12g | Carbs: 17g | Sugar: 16g | Protein: 3g | Fiber: 0.5g
*Please note: This is an estimate provided for informational purposes. Exact values can vary based on specific ingredients used.
Final Thoughts: Your New Secret Weapon
And just like that, you’ve unlocked the power to transform the ordinary into the extraordinary. This isn’t just frosting; it’s a versatile, crowd-pleasing powerhouse that promises to be the star of the show. Whether you’re celebrating a milestone or simply celebrating making it through the week, this fluffy, dreamy peanut butter cloud is your delicious reward.
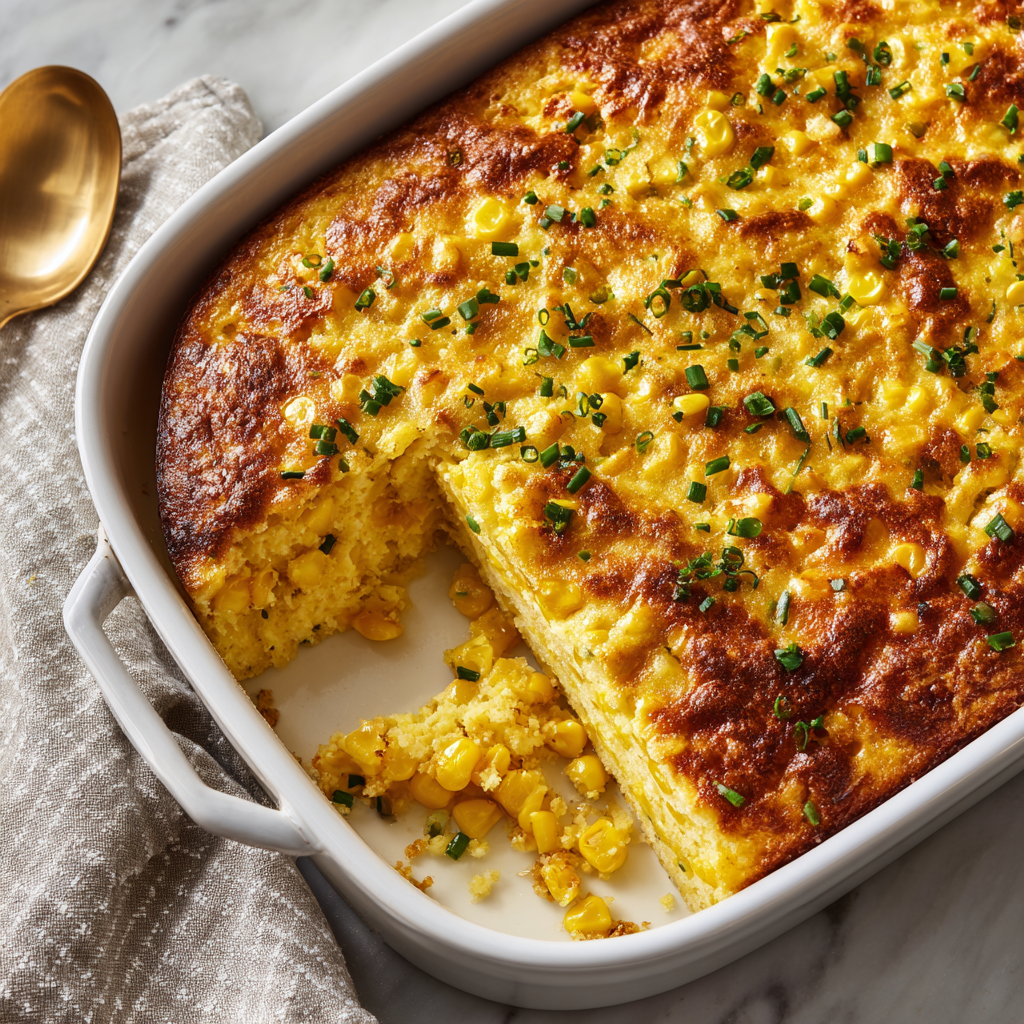
Easy Creamy Corn Casserole
Easy Creamy Corn Casserole: Your New Favorite Comfort Food
Hey there, friend! Come on in, the kitchen’s warm, and I’ve got something incredible baking in the oven. If you’ve ever been to a potluck, a holiday gathering, or a cozy family dinner and spotted that one dish that everyone flocks to—the one that’s always the first to disappear—chances are, it was a version of this magical, creamy corn casserole.
This isn’t just a side dish; it’s a hug on a plate. Imagine the sweet pop of corn kernels nestled in a rich, almost soufflé-like custard, with a golden, tender-crumb top that gives way to a center that’s pure, unadulterated comfort. It’s the love child of cornbread and creamy corn pudding, and it has this magical ability to make any meal feel like a special occasion.
The best part? This is one of those legendary “dump-and-stir” recipes. You literally mix everything in one bowl, pour it into a dish, and let the oven work its magic. No fancy skills required, no complicated techniques—just honest, delicious food that brings people together. So, tie on your favorite apron (the messy one with all the stories), and let’s make a dish that’s about to become a staple in your recipe box.
The Potluck Queen & The Tale of the Empty Dish
This recipe takes me right back to my first-ever neighborhood potluck. I was so nervous! I wanted to bring something that would make me look like I knew my way around a kitchen, but I also didn’t want to be slaving away for hours. My grandma, the wisest woman I’ve ever known, whispered the secret: “Bring the corn casserole, Liv. It never fails.”
I remember carefully placing my still-warm dish on the crowded table, nestled between a towering lasagna and a beautiful, glazed ham. I’ll admit, I felt a little insecure—it looked so simple next to these culinary marvels. But within what felt like minutes, I glanced over and saw a crowd around that corner of the table. I weaved my way through and found my casserole dish… completely scraped clean. A lovely woman I’d just met turned to me and said, “Who made this? I need the recipe. My husband has had three helpings!”
That was the moment I truly understood the power of a great, simple recipe. It wasn’t about being the most complex or gourmet dish on the table. It was about creating something so irresistibly good and comforting that it became the silent star of the show. That empty dish was my badge of honor, and this recipe has been my potluck secret weapon ever since.
Gathering Your Sunshine Ingredients
Here’s what you’ll need to create this masterpiece. The beauty of this list is its simplicity and flexibility. Let’s break it down!
- 2 (15 oz) cans whole kernel corn, drained – This gives our casserole that wonderful, juicy pop of sweetness and texture. Chef’s Insight: For a summer-fresh twist, you can use 3 cups of thawed frozen corn or even fresh corn cut right off the cob!
- 2 (14.75 oz) cans creamed corn – This is the secret to the incredible creamy, pudding-like texture. It’s the heart and soul of the dish, so don’t skip it!
- 2 (8.5 oz) packages dry cornbread mix (like Jiffy) – Our convenient shortcut hero! This mix provides the perfect blend of cornmeal and flour, plus leavening and sweetness, to give the casserole its structure. Substitution Tip: If you can’t find Jiffy, any similar corn muffin mix will work perfectly.
- 2 cups sour cream – This is the key to the rich, tangy moisture that makes this casserole so luxuriously tender. Substitution Tip: Plain, full-fat Greek yogurt can stand in for a slightly lighter, protein-packed option.
- 1 cup (2 sticks) unsalted butter, melted – Butter equals flavor and richness. Melting it ensures it incorporates evenly into the batter. Using unsalted lets you control the overall seasoning.
- 4 large eggs, beaten – Our binding agent! The eggs help set the custard and give the casserole its lovely lift and structure.
Our Flavor Twists (Highly Recommended!)
- 1 cup shredded sharp cheddar cheese – This adds a gorgeous, savory depth and a little cheesy pull. Chef’s Insight: The sharpness cuts through the richness beautifully. Feel free to use pepper jack for a kick!
- ½ cup chopped scallions or chives – A pop of color and a mild, fresh onion flavor that brightens up the entire dish. Chives are a little milder, while scallions offer a bigger punch.
- Optional Kick: 1 small can diced green chiles or a pinch of cayenne – This is my personal favorite add-in! It doesn’t make it spicy, per se, but it adds a fantastic, subtle warmth that keeps people coming back for more.
Let’s Get Mixing! Your Foolproof Steps
See? I told you it was easy. Follow these simple steps, and you’re golden—literally!
- Preheat and Prep: First things first, preheat your oven to 350°F (175°C). This ensures it’s perfectly heated and ready to go when your batter is. Now, grab your 9×13-inch baking dish (or two 9-inch round pans) and give it a good greasing with butter or non-stick spray. Chef’s Hack: For super easy cleanup, you can also line the pan with parchment paper, leaving a little overhang on the sides!
- The Big Mix: Get yourself a large mixing bowl—bigger than you think you’ll need. Trust me on this. Now, simply add all of your ingredients: the drained corn, creamed corn, cornbread mix, sour cream, melted butter, beaten eggs, cheese, scallions, and those optional green chiles if you’re using them. Chef’s Commentary: The order doesn’t matter one bit. This is a no-stress, one-bowl wonder!
- Combine with Care: Using a sturdy spatula or a large spoon, gently fold everything together until it’s just combined. You’ll see the dry cornbread mix disappear into the creamy, corny goodness. Important Tip: Do NOT overmix! A few lumps are absolutely fine. Overmixing can lead to a tougher texture, and we want this baby to be tender and light.
- Into the Pan: Pour your beautifully lumpy batter into your prepared baking dish. Use your spatula to spread it out into a nice, even layer, ensuring it reaches all the corners. Little Touch: I sometimes give the pan a gentle tap on the counter to settle the batter and release any air bubbles.
- Bake to Golden Perfection: Carefully place your dish in the preheated oven and let it bake for 45-50 minutes. You’re looking for a gorgeous golden-brown top and a center that is set but might still have the faintest, most gentle jiggle. Doneness Test: A toothpick or knife inserted into the center should come out clean or with a few moist crumbs (but not wet batter).
- The Hardest Part: Let it Rest! I know, the aroma is driving you wild and you want to dive right in. But patience, young grasshopper! Take the dish out of the oven and let it rest on a cooling rack for at least 10 minutes. This allows the custard to fully set, making it much easier to slice and serve. It’s worth the wait, I promise!
How to Serve This Crowd-Pleaser
This casserole is the ultimate team player on any table. For a classic comfort food feast, slice it into generous squares and serve it alongside a juicy roasted chicken, a glazed ham, or your favorite holiday turkey. It’s also the perfect partner for barbecue—imagine it next to some fall-off-the-bone ribs or pulled pork. The creamy, sweet flavor is a fantastic contrast to smoky, savory meats. For a lighter meal, a simple green salad with a tangy vinaigrette is all you need to balance the richness. However you serve it, get ready for compliments!
Make It Your Own: Delicious Variations
The fun doesn’t stop here! This recipe is a blank canvas for your culinary creativity.
- Southwest Fiesta: Swap the cheddar for pepper jack cheese, add a teaspoon of cumin and a dash of chili powder along with the green chiles. Top with fresh cilantro after baking!
- Herb Garden Delight: Stir in 2 tablespoons of fresh chopped thyme or rosemary for an aromatic, earthy flavor that feels a little more gourmet.
- Bacon Lover’s Dream: Because bacon makes everything better. Fold in ½ cup of cooked, crumbled bacon right into the batter. The smoky saltiness is a game-changer.
- Gluten-Free Friendly: Use a gluten-free cornbread mix (most are naturally GF, but always check the label!) and ensure all other ingredients are certified gluten-free.
- A Little Extra Crunch: For a fantastic textural contrast, sprinkle the top with a ½ cup of crushed butter crackers or French fried onions before baking.
From My Kitchen to Yours: Chef’s Notes
Over the years, this recipe has seen many iterations in my kitchen. I once, in a pre-coffee haze, accidentally used vanilla Greek yogurt instead of plain. Let’s just say a vanilla-y corn casserole is… an acquired taste I do not recommend! We ordered pizza that night.
I’ve also learned that this casserole’s generosity is one of its best traits. It doubles and even triples like a dream for massive gatherings. I simply mix it in my largest stockpot to avoid splatters! The recipe has evolved from the basic can-and-mix version to include my savory twists, and I encourage you to do the same. Add what you love. This dish is forgiving, flexible, and full of heart. It’s less of a strict formula and more of a guideline for creating something delicious and sharing it with people you love. That’s what cooking is all about, isn’t it?
Your Corn Casserole Questions, Answered!
Q: Can I make this corn casserole ahead of time?
A: Absolutely! You have two great options. 1) Assemble Ahead: Mix the entire batter, pour it into your greased dish, cover tightly with plastic wrap, and refrigerate for up to 24 hours. When you’re ready, let it sit on the counter for 20-30 minutes while the oven preheats, then bake as directed (you may need to add 5-10 minutes to the bake time). 2) Freeze: Bake the casserole completely, let it cool entirely, then wrap it tightly in both plastic wrap and foil. Freeze for up to 3 months. Thaw overnight in the fridge and reheat, covered, in a 350°F oven until warmed through.
Q: Why is my casserole still jiggly and wet in the middle after 50 minutes?
A: Don’t worry! Oven temperatures can vary. The most likely culprit is that your oven runs a little cool. Simply leave it in for another 5-10 minutes and check again. Also, ensure you’re using the correct pan size. A deeper, smaller pan will take longer to bake through than a large, shallow 9×13. The toothpick test is your best friend here.
Q: Can I use a different pan?
A: Of course! This recipe is very adaptable. A 9×13-inch pan is standard, but you can use a large oven-safe skillet, a 10-inch cast-iron pan, or even individual ramekins for fun single servings. Just keep a close eye on the baking time—smaller vessels will cook much faster! If using a glass or ceramic dish, remember they retain heat differently than metal, which can also affect baking time.
Q: How do I store leftovers and how long will they keep?
A> Cover the baking dish with foil or transfer leftover portions to an airtight container. It will keep beautifully in the refrigerator for 3-4 days. Reheat individual portions in the microwave for a minute or so, or reheat a larger portion in a 350°F oven until warm throughout (about 15-20 minutes).

Easy Creamy Corn Casserole
- Total Time: 10 minute
Description
Golden on top, creamy in the middle, and bursting with sweet corn flavor—this casserole is comfort food at its finest. With just one bowl and a handful of pantry staples, you’ll have the potluck superstar that always disappears first. A cross between cornbread and custard, it’s the dish that turns any meal into a cozy celebration.
Ingredients
-
2 (15 oz) cans whole kernel corn, drained
-
2 (14.75 oz) cans creamed corn
-
2 (8.5 oz) pkgs cornbread mix (like Jiffy)
-
2 cups sour cream (or plain Greek yogurt)
-
1 cup unsalted butter, melted
-
4 large eggs, beaten
-
Optional Mix-Ins:
-
1 cup shredded sharp cheddar
-
½ cup chopped scallions or chives
-
1 can diced green chiles or pinch of cayenne
-
Instructions
-
Prep: Heat oven to 350°F (175°C). Grease a 9×13″ dish.
-
Mix: In a large bowl, stir together all ingredients until just combined (don’t overmix).
-
Bake: Pour into dish, spread evenly. Bake 45–50 min until golden and set (toothpick comes out clean).
-
Rest: Let sit 10 min before serving to set custard.
Notes
-
Southwest: Use pepper jack + cumin + chili powder.
-
Herby: Fold in fresh thyme or rosemary.
-
Bacon Lover’s: Add ½ cup crumbled bacon.
-
Crunch Top: Sprinkle crushed butter crackers or fried onions before baking.
- Prep Time: 10 min
- Cook Time: 45–50 min
Nutritional Information*
Prep Time: 10 minutes | Cook Time: 45-50 minutes | Total Time: ~55 minutes | Servings: 16
Calories per serving: ~280 | Fat: 17g | Carbs: 27g | Sugar: 6g | Protein: 5g | Fiber: 2g
*Please note: This is an estimate based on the specific ingredients listed and may vary depending on brands and any substitutions used.
Final Thoughts: A Dish to Share and Cherish
And just like that, with a few simple stirs and a warm oven, you’ve created more than a side dish. You’ve made a centerpiece for conversation, a reason to gather around the table, and a guaranteed crowd-pleaser that will have everyone asking for the recipe.
This creamy corn casserole is a beautiful reminder that the most beloved dishes aren’t always the most complicated. They’re the ones made with a handful of honest ingredients and a generous helping of heart. It’s the taste of community, of potlucks, of holidays, and of cozy weeknight dinners where the only thing that matters is sharing a good meal with good people.
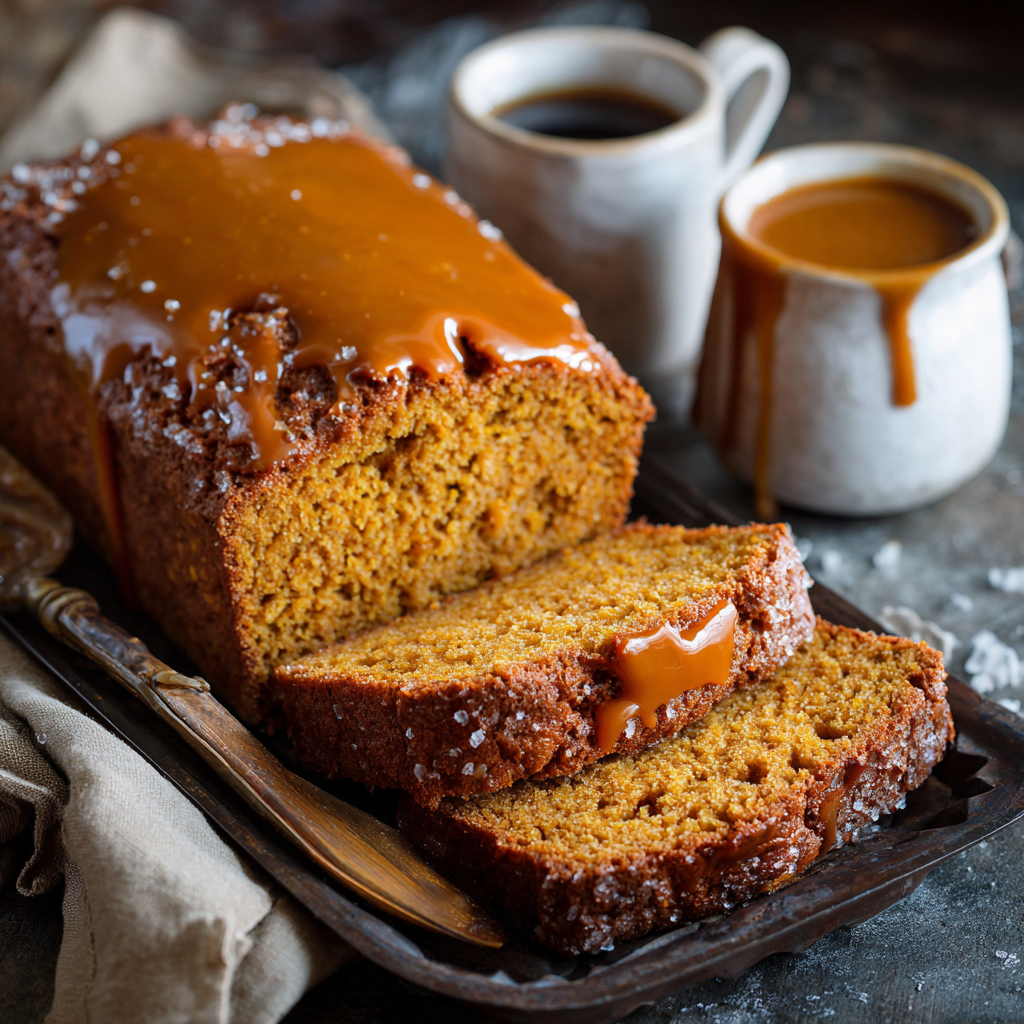
Butterscotch Pumpkin Bread
The Cozy Magic of Butterscotch Pumpkin Bread
Hello, my fellow flavor-chasers! Is there anything better than the smell of something spiced and wonderful baking in the oven on a crisp autumn day? It’s like a warm hug for your entire house. If you’re anything like me, your heart does a little happy dance the moment you catch that first whiff of cinnamon and pumpkin wafting from the kitchen. It’s the official scent of cozy sweaters, crackling fires, and gathering with your favorite people. And today, my friend, we are taking that classic, comforting feeling and turning it up to eleven with my absolute obsession this season: Butterscotch Pumpkin Bread.
This isn’t just any pumpkin bread. Oh no. This is the loaf of your dreams—incredibly moist, packed with warm spice, and swirled with the deep, caramel-like sweetness of butterscotch. The secret? A magical little box of instant butterscotch pudding mix and the nutty, toasty goodness of browned butter. It might sound fancy, but I promise you, it’s one of the easiest, most foolproof recipes in my arsenal. We’re creating something unforgettable with simple ingredients and a whole lot of heart. So, tie on your favorite apron (the messy one is always the best!), preheat that oven, and let’s bake some happiness together.
A Slice of Memory
This recipe always takes me right back to my Grandma Eleanor’s kitchen. She was a wizard with a wooden spoon and believed firmly that most of life’s problems could be solved with a freshly baked treat. Every fall, without fail, she’d bake her famous pumpkin bread. The whole block knew about it! She’d wrap warm slices in wax paper and deliver them to neighbors, her smile as bright as the autumn leaves.
My version is a loving, slightly indulgent twist on her classic. One year, I was baking her recipe but realized I was out of vanilla extract. Panic! All I had was a box of butterscotch pudding mix staring at me from the pantry. In a moment of “what’s the worst that could happen?” inspiration, I tossed it in. I also decided to brown the butter, a trick I learned from a pastry chef friend. The result? Pure magic. The loaf was moister, more flavorful, and had this rich, complex sweetness that humble vanilla could never provide. Grandma would have absolutely approved of this delicious rebellion. Now, it’s my go-to, and I love thinking I’m carrying on her tradition, just with a little extra butterscotch-y sparkle.
Gathering Your Cozy Ingredients
Here’s what you’ll need to create this autumnal masterpiece. The beauty of this recipe is in its simplicity and the power of a few key players!
- ½ cup unsalted butter – We’re browning this! Browned butter is the single best trick to add a deep, nutty, toffee-like flavor to your baking. It transforms ordinary butter into liquid gold. Chef’s Insight: Use real butter, not margarine, for the best flavor here.
- 1 cup canned pumpkin puree – Not pumpkin pie filling! Make sure you grab the plain puree. It’s the star that provides moisture, color, and that iconic fall flavor. Substitution Tip: Fresh puree works too, but make sure it’s thick and not watery.
- 1 box (3.4 oz) instant butterscotch pudding mix – The secret weapon! This little box does double duty: it adds incredible butterscotch flavor and, thanks to its starches, guarantees an unbelievably moist and tender crumb. Don’t cook it, just use the dry powder.
- ½ cup packed brown sugar – Its molasses content pairs perfectly with the pumpkin and butterscotch, adding a warm, caramel depth.
- ½ cup granulated sugar – This balances the deeper brown sugar with a clean sweetness to create the perfect level of deliciousness.
- 2 large eggs – They bind everything together and add structure. Make sure they’re at room temperature to blend into the batter smoothly.
- 1½ cups all-purpose flour – The foundation of our loaf. Chef’s Insight: For a lighter texture, fluff your flour with a spoon before measuring, then level it off. Don’t scoop directly from the bag or you’ll pack in too much!
- 1 tsp baking soda – Our leavening agent! It gives the bread its rise and beautiful dome.
- ½ tsp salt – Crucial for balancing all the sweetness and making the flavors pop. Never skip it!
- 1 tsp cinnamon & ½ tsp nutmeg – The dynamic duo of cozy spices. They complement the pumpkin beautifully. Substitution Tip: Feel free to use 1 ½ tsp of pumpkin pie spice instead if that’s what you have on hand.
Let’s Get Baking: Step-by-Step
Ready to make some magic? Follow these steps for a perfect, bakery-worthy loaf every single time.
- Preheat and Prep: Preheat your oven to 350°F (175°C). Grease a 9×5-inch loaf pan thoroughly with butter or non-stick spray. I like to add a parchment paper sling for easy lifting later! Chef’s Hack: A light dusting of flour after greasing will ensure your bread releases perfectly without any stuck-on bits.
- Brown the Butter: This is the most important step! Melt the butter in a light-colored saucepan over medium heat. It will foam, then crackle. Swirl the pan frequently and keep a close eye on it. Soon, you’ll see little brown bits forming at the bottom and it will smell incredibly nutty and delicious. The second it reaches this golden-brown stage, immediately take it off the heat and pour it into a heatproof bowl to stop the cooking. Let it cool for about 10-15 minutes. Commentary: Don’t walk away! Butter goes from perfectly browned to burnt in seconds. Trust your nose—it will tell you when it’s ready.
- Combine the Wet Goods: In a large mixing bowl, combine the cooled browned butter (scrape in all those tasty brown bits!), pumpkin puree, dry pudding mix, brown sugar, and granulated sugar. Whisk it all together until it’s completely smooth and beautifully homogeneous.
- Add the Eggs: Crack in the eggs one at a time, whisking well after each addition until they are fully incorporated. Your batter should be smooth, thick, and glossy.
- Whisk the Dry Ingredients: In a separate, medium bowl, whisk together the flour, baking soda, salt, cinnamon, and nutmeg. This ensures the leavening and spices are evenly distributed throughout the flour, preventing little bitter pockets of baking soda. Chef’s Hack: Sifting the dry ingredients together is an extra step that guarantees a super tender crumb. I do it if I have the time!
- Bring It All Together: Gradually add the dry ingredients to the wet ingredients. Use a spatula and fold gently until just combined. A few streaks of flour are okay! Overmixing is the enemy of tender quick breads—it develops gluten and leads to a tough, dense loaf. Commentary: I mean it! Put the mixer down. Fold with a spatula until you no longer see dry flour, then stop.
- Bake to Perfection: Pour the batter into your prepared loaf pan and smooth the top. Pop it into the preheated oven and bake for 60-65 minutes. The bread is done when it’s deeply golden brown on top and a toothpick or cake tester inserted into the very center comes out clean or with just a few moist crumbs attached. Chef’s Hack: If the top is browning too quickly, tent it loosely with aluminum foil for the last 15-20 minutes of baking.
- Cool (The Hardest Part!): Let the loaf cool in the pan on a wire rack for at least 15-20 minutes. This allows it to set. Then, run a knife around the edges and carefully lift it out (using your parchment sling if you made one!) to cool completely on the rack. I know it’s tempting, but slicing into it while it’s warm will cause it to crumble. Let it cool for the perfect slice!
Serving Your Masterpiece
This bread is glorious all on its own, but a little styling goes a long way! For a simple breakfast or snack, a thick, generous slice is perfect. For a more decadent dessert, warm a slice slightly and serve it with a dollop of freshly whipped cream or a scoop of vanilla bean ice cream. The contrast of warm spice and cold cream is divine. A drizzle of salted caramel or a simple dusting of powdered sugar takes it over the top for a holiday gathering. And of course, it is non-negotiable that you enjoy it with a hot mug of coffee, spiced chai, or a cold glass of milk.
Make It Your Own: Delicious Variations
The best recipes are a canvas for your creativity! Here are a few ways to play with this classic:
- Chocolate Chip Bliss: Fold in ¾ cup of semi-sweet or dark chocolate chips into the batter before baking. Chocolate and pumpkin are a match made in heaven.
- Nutty Crunch: Add ½ cup of chopped toasted pecans or walnuts for a wonderful textural contrast.
- Streusel Topping: Mix ¼ cup flour, ¼ cup brown sugar, 2 tbsp cold butter, and a pinch of cinnamon with a fork until crumbly. Sprinkle over the batter before baking for a crunchy, sweet topping.
- Ginger Spice: Add ¼ cup of finely chopped crystallized ginger for a warm, spicy kick.
- Gluten-Free Swap: Use a 1:1 gluten-free all-purpose flour blend in place of the regular flour. The pudding mix helps keep it moist!
Chef’s Notes & Kitchen Confessions
This recipe has become such a staple in my home that I almost always have a loaf in the freezer for last-minute guests or a sudden cozy craving. It freezes beautifully for up to 3 months! Just wrap it tightly in plastic wrap and then foil. Thaw on the counter overnight.
I’ve also learned a funny lesson the hard way: always warn people the pudding mix is a *dry ingredient*. The first time I made this for a friend, she called me in a panic, convinced she had to make the pudding first. We had a good laugh, and her second attempt was perfect! So remember, just tear open the box and dump the powder right in. No cooking required. This recipe is wonderfully forgiving and flexible, so don’t stress. Baking is supposed to be fun, so put on some music, enjoy the process, and get ready for your kitchen to smell absolutely incredible.
Your Questions, Answered!
Q: My bread is dense and gummy in the middle. What happened?
A: The most common culprit here is overmixing the batter! Once you add the flour, mix only until it’s *just* combined. The second possibility is underbaking. Ovens can vary, so make sure your toothpick comes out completely clean. If it’s still wet, give it another 5 minutes and check again.
Q: Can I use a different pudding flavor?
A: Absolutely! While butterscotch is our favorite, vanilla pudding mix works wonderfully for a more classic flavor. I’ve also had great success with cheesecake-flavored pudding mix for a tangy twist.
Q: I don’t have time to brown the butter. Can I just melt it?
A: You can, and your bread will still be delicious! However, browning the butter adds a deep, nutty, caramelized flavor that truly makes this recipe special. It only takes a few extra minutes and is 100% worth the effort for that “wow” factor.
Q: Why did my bread sink in the middle?
A: This usually points to too much leavening or underbaking. Make sure your baking soda is fresh (it should fizz when added to vinegar) and that you test for doneness properly. Also, avoid opening the oven door too early in the baking process, as a sudden temperature drop can cause the loaf to fall.
Butterscotch Pumpkin Bread
- Total Time: 20 minute
Description
Moist, spiced, and kissed with caramel sweetness, this bread is autumn baked into a loaf. The secret? Browned butter for nutty depth and instant butterscotch pudding mix for an irresistibly soft crumb. Every slice is a warm hug, perfect with coffee, tea, or a cozy evening by the fire.
Ingredients
-
½ cup unsalted butter, browned & cooled
-
1 cup pumpkin puree (not pie filling)
-
1 box (3.4 oz) instant butterscotch pudding mix (dry)
-
½ cup brown sugar, packed
-
½ cup granulated sugar
-
2 large eggs, room temp
-
1 ½ cups all-purpose flour
-
1 tsp baking soda
-
½ tsp salt
-
1 tsp cinnamon
-
½ tsp nutmeg
Instructions
-
Prep oven & pan: Heat oven to 350°F (175°C). Grease a 9×5″ loaf pan, line with parchment sling.
-
Brown butter: Cook butter in a light pan until golden with nutty aroma. Cool 10–15 min.
-
Mix wet: In a bowl, whisk browned butter, pumpkin, pudding mix, sugars until smooth. Add eggs one at a time.
-
Mix dry: In another bowl, whisk flour, baking soda, salt, cinnamon, nutmeg.
-
Combine: Fold dry into wet just until no flour streaks remain. Do not overmix.
-
Bake: Pour into pan, smooth top. Bake 60–65 min until toothpick comes out clean. Tent with foil if browning too fast.
-
Cool: Rest 15 min in pan, then lift out to cool fully before slicing.
Notes
-
Chocolate chip swirl: Add ¾ cup dark or semi-sweet chips.
-
Nutty crunch: Stir in ½ cup pecans or walnuts.
-
Streusel top: Sprinkle with cinnamon-sugar crumble before baking.
-
Ginger kick: Fold in chopped crystallized ginger.
-
Gluten-free: Use 1:1 GF flour blend.
- Prep Time: 20 min
- Cook Time: 60–65 min
Nutrition
- Calories: 250cal Per Slice
Nutritional Information*
*This is an estimated calculation provided for informational purposes only. Actual values may vary based on specific ingredients used.
Per slice (based on 12 slices): Calories: ~250 | Fat: 10g | Saturated Fat: 6g | Carbohydrates: 37g | Sugar: 21g | Protein: 3g | Fiber: 1g | Sodium: 220mg
Final Thoughts: Share the Cozy
There you have it—my heart, in a loaf pan. This Butterscotch Pumpkin Bread is more than just a recipe; it’s a feeling. It’s the warmth of my grandma’s kitchen, the joy of a happy accident with a pudding mix, and the cozy comfort of a perfect autumn afternoon, all baked into one incredible slice.

Creamy Mashed Potatoes
The Ultimate Comfort: My Quest for the Perfect Creamy Mashed Potatoes
Hello, my friend! Come on in, grab an apron, and let’s get something wonderful simmering on the stove. Is there any smell in the world more instantly comforting than potatoes boiling away, ready to be transformed into something magical? I’m talking, of course, about the undisputed champion of the side dish world: creamy mashed potatoes.
This isn’t just any recipe; this is my go-to, my secret weapon, the one dish I’m always asked to bring to potlucks and the first thing I crave when the weather turns chilly. We’re not making just *good* mashed potatoes today. We’re crafting a bowl of clouds. We’re creating a silky, buttery, profoundly satisfying experience that turns a simple meal into a hug on a plate.
Whether you’re prepping for a grand holiday feast with a table full of family or simply need a cozy companion for a weeknight roast chicken, this recipe is your new best friend. I’ve made these more times than I can count, and through all that practice (and a few happy accidents!), I’ve landed on what I truly believe is the perfect ratio of fluff to cream, of butter to tang. So, let’s roll up our sleeves, put on some good music, and make a memory together. This is more than a recipe; it’s a little piece of my kitchen heart, and I’m so thrilled to share it with you.
The Mashed Potato That Started It All
My love affair with mashed potatoes didn’t begin in a fancy cooking school; it started at my grandmother’s formica-topped kitchen table. Every Sunday, without fail, the entire family would gather for a roast beef dinner. But for me, the star of the show was never the meat—it was the mountain of mashed potatoes my Nana would whip up.
I remember perching on a stool, watching her work. She didn’t use a recipe, of course. It was all done by feel—a glug of warm milk from the little saucepan, a few generous pats of butter from the old blue dish, and a hearty scoop of sour cream straight from the container. She’d mash by hand, her wooden potato masher moving with a rhythmic certainty that I found mesmerizing. The final flourish was always a well of melted butter right in the center of the serving bowl, which we kids would fight over dipping our rolls into.
Those potatoes were more than food; they were the centerpiece of our conversation, the thing that made us all slow down and enjoy each other’s company. They taught me that the best recipes aren’t about perfection—they’re about love, simplicity, and the joy of sharing. This recipe is my homage to her, a little nod to the past that I now get to build upon in my own kitchen. Every time I make them, I can almost hear her laughter echoing in mine.
Gathering Your Clouds: The Ingredients
Simple dishes demand quality ingredients. There’s nowhere to hide in a bowl of mashed potatoes, so each element plays a crucial role. Here’s what you’ll need and why each one matters:
- 3 pounds Yukon Gold or Russet potatoes, peeled and cut into chunks – This is your foundation! Yukon Golds are my absolute favorite for mashed potatoes. They have a naturally buttery flavor and a creamy, waxy texture that mashes into pure silk. Russets are a fantastic second choice; they’re starchier and will give you a fluffier, more absorbent mash. Chef’s Insight: For the creamiest results, Yukon Golds can’t be beat!
- 1 cup whole milk or half-and-half, warmed – Cold milk will shock the potatoes and make them gummy. Always, always warm your dairy! Whole milk gives you classic flavor, while half-and-half kicks the richness up a serious notch. Substitution Tip: Heavy cream or even warmed buttermilk (for a fantastic tang) work beautifully here too.
- ½ cup unsalted butter, room temperature – Unsalted is key so you can control the final salt level. Room temp butter incorporates seamlessly, melting into the hot potatoes without making them greasy. This is your flavor engine!
- ½ cup sour cream – This is my not-so-secret weapon! Sour cream adds an incredible layer of tangy complexity and a luxurious creaminess that milk alone can’t achieve. It prevents the potatoes from being one-dimensionally rich and makes them truly unforgettable. Substitution Tip: Full-fat Greek yogurt is a great swap if that’s what you have on hand.
- Salt and pepper to taste – Don’t be shy! Potatoes need a lot of salt. I use fine sea salt while mashing and often finish with a flaky Maldon salt on top for a little crunch.
- Optional: 2 garlic cloves, peeled and boiled with the potatoes – For a subtle, sweet garlic flavor that permeates the entire dish. It’s gentle, not overpowering.
- Optional garnish: chopped chives, parsley, or a pat of butter – A little fresh green on top makes everything look and taste more vibrant!
Creating the Magic: Step-by-Step Instructions
Ready to make the creamiest, dreamiest potatoes of your life? Follow these steps, and you’ll be a mashed potato hero. I’ve packed this section with all my best tips and hacks to ensure your success!
Step 1: The Perfect Boil
Place your peeled and chunked potatoes (and the optional garlic cloves) in a large pot. Cover them with cold water—starting from cold ensures they cook evenly all the way through. Add a generous pinch of salt to the water; this is your first chance to season them from the inside out. Bring the pot to a boil over high heat, then immediately reduce the heat to maintain a gentle simmer. Boiling them too aggressively can cause the outside to become mushy before the inside is cooked. Cook for 15-20 minutes, or until the potatoes are completely fork-tender.
Step 2: Drain and Dry
This step is CRUCIAL and often overlooked! Drain the potatoes thoroughly in a colander. Then, return them to the hot pot they cooked in. Now, here’s my big hack: place the pot back on the warm (but turned off) burner for about 2 minutes. Let the residual heat evaporate any excess moisture from the potatoes. Watery potatoes are the enemy of creamy mashed potatoes! You’ll see little wisps of steam coming off them—that’s exactly what you want.
Step 3: The Great Mash
Now, for the main event! How you mash matters. For the ultimate smooth and fluffy texture, I swear by a potato ricer or a food mill. It presses the potatoes through tiny holes, creating a gorgeous, lump-free consistency without overworking the starches (which can make them gluey). If you’re using a standard masher, that’s totally fine! Just mash patiently until you’ve worked out most of the big lumps. Word to the wise: Avoid using a food processor or hand mixer if you can. They tend to overwork the potatoes and can turn them into a sticky, gummy paste.
Step 4: The Creamy Embrace
Once your potatoes are mashed, it’s time to add the good stuff! First, add all of your room-temperature butter. Stir it in until it’s completely melted and absorbed. Adding the fat first helps coat the starch molecules, which creates a protective layer against becoming gluey when you add the liquid. Next, slowly pour in your warmed milk or half-and-half while stirring constantly. You may not need the entire cup—stop when you reach your desired consistency. Finally, fold in the glorious sour cream. This is where the magic happens! The tang and richness it adds are just incredible.
Step 5: Season to Shine
Taste! Taste! Taste! Now is the time to season generously with salt and freshly ground black pepper. Keep stirring and tasting until the flavors sing. You’ll know it’s right when the potatoes no longer taste bland but like a perfect, balanced dish.
Step 6: Serve Immediately
Transfer your beautiful, creamy creation to a warm serving bowl. I like to make a little well in the center with the back of a spoon and drop in one last pat of butter, letting it melt into a golden pool. A sprinkle of fresh chives or parsley adds a perfect fresh finish. Serve them right away while they’re hot and happy!
How to Serve Your Masterpiece
These creamy mashed potatoes are the ultimate team player. For a classic comfort food night, serve them alongside a juicy pot roast or roasted chicken, making sure to spoon plenty of those delicious pan juices over the top. They are the essential bed for saucy dishes like beef stroganoff or hearty stews. For a holiday spread, transfer them to a beautiful dish, smooth the top, and run a fork over it to create pretty ridges that will get delightfully crispy if you pop them under the broiler for a few minutes. Don’t forget the gravy boat! No matter how you serve them, the goal is one thing: to gather and enjoy.
Get Creative! Flavor Twists & Swaps
Once you’ve mastered the classic, the world is your potato! Here are a few of my favorite ways to mix things up:
- Cheesy Heaven: Stir in ¾ cup of freshly grated sharp cheddar, Parmesan, or Gruyère cheese along with the butter. Let it melt into glorious, stringy goodness.
- Roasted Garlic Bliss: Swap the boiled garlic for a whole head of roasted garlic. The sweet, caramelized flavor is a game-changer. Simply squeeze the soft cloves right into the mash.
- Herb Garden Fresh: Fold in a¼ cup of finely chopped fresh herbs like chives, parsley, dill, or rosemary at the very end for a burst of freshness.
- Cream Cheese Swap: Out of sour cream? Use an equal amount of full-fat cream cheese for a different kind of tang and incredible richness.
- Dairy-Free Delight: Use vegan butter, warm unsweetened oat milk or almond milk, and a dollop of vegan sour cream or plain vegan yogurt. It works like a charm!
Olivia’s Chef Notes & Kitchen Stories
This recipe has been a living, evolving thing in my kitchen. I’ll never forget the first time I decided to add sour cream on a whim—I was out of cream and it was a blizzard outside. It was such a happy accident that it’s now a non-negotiable part of the recipe! I’ve also learned a few things the hard way. Like the time I got impatient and tried to whip hot potatoes with my stand mixer. Let’s just say we ended up with something resembling wallpaper paste, and we ordered pizza that night. It was a delicious lesson in patience and technique.
The beauty of this dish is its simplicity and its capacity for memory. It’s the first solid food I gave my daughter (sans pepper, of course!), and it’s the dish my husband requests every time he needs a pick-me-up. I hope this recipe becomes a canvas for your own kitchen stories and happy accidents. Make it your own!
Your Mashed Potato Questions, Answered!
Q: Why are my mashed potatoes gluey or gummy?
A: This is almost always caused by overworking the starch! If you use a food processor, blender, or even an electric hand mixer on high speed, it breaks down the starch cells too much, releasing excess starch that creates a glue-like texture. Stick to a ricer, food mill, or a good old-fashioned hand masher for the best results. Also, make sure not to over-boil your potatoes until they are waterlogged.
Q: Can I make these ahead of time?
A: Absolutely! Make them up to a day in advance. Let them cool completely, then transfer to a baking dish, smooth the top, and dot with a little butter. Cover tightly and refrigerate. When you’re ready, reheat them in a 350°F (175°C) oven, covered for about 30 minutes. You may need to stir in a tiny splash of warm milk to loosen them up again. They might not be *quite* as perfect as fresh, but they’ll still be delicious!
Q: My mashed potatoes are too thin/runny. How can I fix them?
A: Don’t panic! The easiest fix is to put them back on the stove over low heat, stirring constantly, to evaporate some of the extra moisture. If that doesn’t work, you can stir in a tablespoon or two of instant potato flakes—they’ll soak up the excess liquid without much flavor change. For next time, remember to drain well and let them steam dry in the hot pot!
Q: What’s the best way to reheat leftover mashed potatoes?
A: The microwave is quick but can make them uneven. The best method is on the stovetop! Place them in a saucepan over low heat and stir in a small splash of milk or cream as they warm to bring back their creamy texture. You can also reheat them in the oven in a covered, oven-safe dish at 350°F until warmed through.
Creamy Mashed Potatoes
- Total Time: 30 minutes
Description
Fluffy, buttery, and melt-in-your-mouth delicious, these mashed potatoes are the ultimate comfort food. With the perfect balance of richness and tang, they’re more than just a side dish—they’re the heart of the table. Whether it’s Sunday dinner or a holiday feast, this recipe brings everyone closer with each spoonful.
Ingredients
-
3 lbs Yukon Gold or Russet potatoes, peeled & chunked
-
1 cup whole milk or half-and-half, warmed
-
½ cup unsalted butter, room temp
-
½ cup sour cream (or full-fat Greek yogurt)
-
Salt & black pepper, to taste
-
Optional: 2 garlic cloves (boiled with potatoes)
-
Optional garnish: chives, parsley, or extra butter
Instructions
-
Boil: Place potatoes (and garlic, if using) in cold salted water. Simmer gently until fork-tender, 15–20 min.
-
Drain & dry: Drain well. Return to hot pot for 2 min to steam off excess moisture.
-
Mash: Use a potato ricer, food mill, or hand masher. Avoid blenders/mixers (they make potatoes gluey).
-
Mix in: Stir in butter until melted. Slowly add warm milk until creamy. Fold in sour cream.
-
Season: Add salt and pepper to taste. Adjust creaminess with more milk if needed.
-
Serve: Transfer to warm bowl, add a butter well, and garnish with herbs.
Notes
-
Cheesy: Stir in ¾ cup cheddar, Parmesan, or Gruyère.
-
Roasted Garlic: Add a whole roasted head of garlic.
-
Herbed: Mix in fresh parsley, chives, or dill.
-
Cream Cheese: Swap sour cream for ½ cup cream cheese.
-
Dairy-Free: Use vegan butter + oat/almond milk + vegan yogurt.
- Prep Time: 10 min
- Cook Time: 20mins
Nutrition
- Calories: 260 cal Per Serving
- Fat: 12g
- Carbohydrates: 30g
- Fiber: 2g
Nutritional Information
Prep Time: 10 minutes | Cook Time: 20 minutes | Servings: 8
Approximate values per serving:
Calories: 260 | Fat: 12g | Saturated Fat: 8g | Carbohydrates: 30g | Fiber: 2g | Sugar: 2g | Protein: 4g
Please note: This is an estimate provided for informational purposes only. Actual values will vary based on ingredient brands and specific portions used.
Final Thoughts: A Bowl Full of Love
And there you have it, my friend. We’ve reached the end of our potato journey, and I hope your kitchen is filled with the incredible, comforting aroma of a job well done.
Remember, this recipe is more than just a list of ingredients and steps—it’s an invitation. An invitation to slow down, to savor the simple act of creating something with your own hands, and to share it with the people you love. Whether you’re carrying on a family tradition like my Nana’s or starting a brand-new one of your own, these creamy mashed potatoes are a blank canvas for your own memories.
Don’t be afraid to make them your own. Add the extra pat of butter, experiment with that twist of roasted garlic, or stir in a handful of your favorite sharp cheese. The greatest dishes aren’t made by rigidly following rules, but by cooking with joy and a little bit of heart.
Candy Cane Cookies
The Ultimate Holiday Cookie: Festive Candy Cane Cookies
Hello, my fellow food lovers! Olivia here, welcoming you back to my kitchen. Can you smell that? It’s the unmistakable scent of butter, sugar, and a little bit of holiday magic wafting through the air. There’s something about this time of year that makes me want to tie on my favorite (and yes, perpetually messy) apron, crank up the Christmas carols, and fill every available surface with homemade cookies. And if there’s one cookie that truly captures the playful, festive spirit of the season, it’s the iconic Candy Cane Cookie.
These aren’t just any cookies; they’re a project of pure joy. They’re soft, buttery, and infused with just the right amount of cool peppermint, all swirled together in a cheerful red-and-white twist that looks just like the classic holiday candy. They’re the star of every cookie swap, the treasure hidden in holiday gift tins, and the perfect companion to a steaming mug of hot cocoa on a chilly afternoon. Best of all, they’re so much fun to make. So, whether you’re a seasoned baker or a nervous newbie, I promise you can handle this. Let’s create some delicious, edible holiday cheer together!
A Twist of Nostalgia: My First Candy Cane Cookie Disaster
I’ll never forget the first time I attempted these cookies. I was about ten years old, “helping” my grandmother in her wonderfully chaotic kitchen. We had the dough made, the red food coloring at the ready, and grand ambitions of creating a platoon of perfect peppermint soldiers. Well, my little hands had a different idea. Instead of gently twisting the ropes of dough, I manhandled them. The result? Not elegant candy canes, but a baking sheet full of what my brother lovingly called “Christmas slugs” – pinkish-brown, blobby, and slightly sad.
But you know what? They still tasted incredible. That day, my grandma taught me one of the most important kitchen lessons I’ve ever learned: it doesn’t have to be perfect to be wonderful. The joy is in the making, the laughing, and the sharing. Now, every year when I twist these dough ropes, I think of her and her unwavering patience. I’ve perfected the technique since then (no more slugs, I promise!), but the heart of the recipe—the fun, the family, and the fantastic flavor—remains exactly the same.
Gathering Your Cookie Crew: The Ingredients
This is a simple, classic shortbread-style dough, and each ingredient plays a key role. Here’s what you’ll need and why it’s important:
- 1 cup unsalted butter, softened – This is the foundation of our rich, tender cookie. Using unsalted butter lets us control the salt level. Chef’s Insight: “Softened” means your butter should give slightly when you press it, but your finger shouldn’t sink right through. Leave it on the counter for about an hour before you start.
- 1 cup powdered sugar, sifted – Powdered sugar gives us a melt-in-your-mouth texture that granulated sugar can’t. Sifting it first prevents lumps and makes for a smoother dough. It’s a small step that makes a big difference!
- 1 large egg, room temperature – The egg binds everything together. A room-temperature egg incorporates much more easily into the butter and sugar, creating a smoother, more emulsified dough.
- 1 tsp vanilla extract – This adds a warm, familiar depth of flavor that complements the peppermint beautifully. Fun Swap: Try almond extract for a subtle, nutty twist that’s absolutely divine.
- ½ tsp peppermint extract – The star of the show! Start with ½ tsp; it provides a clear, cool flavor without being overwhelming. You can always add a tiny bit more if you’re a serious peppermint fan.
- 2 ½ cups all-purpose flour – The structure of our cookie. I always fluff my flour with a spoon before gently scooping and leveling it off with a knife. This prevents accidentally using too much and ending up with dry dough.
- ½ tsp salt – Never skip the salt! It balances the sweetness and enhances all the other flavors. It’s the secret weapon in every good dessert.
- Red gel food coloring (or natural alternative like beet powder) – Gel food coloring gives a vibrant red color without adding extra liquid to the dough. For a natural route, mix 1-2 teaspoons of beet powder with a few drops of water to form a paste before kneading it in.
- Optional: Coarse sea salt or sparkling sugar for garnish – A tiny sprinkle just before baking adds a delightful crunch and a professional finish.
Let’s Get Twisting: The Step-by-Step Guide
Ready to make some magic? Follow these steps, and you’ll have a bakery-worthy batch of cookies in no time. Read through all the steps first—it’s my number one tip for any baking project!
Step 1: The Creamy Foundation
In the bowl of a stand mixer fitted with the paddle attachment (or a large bowl with a hand mixer), beat the softened butter and sifted powdered sugar together on medium speed. We’re not just mixing; we’re “creaming.” Beat it for a full 2-3 minutes until it becomes noticeably lighter in color and fluffy. This incorporates air, which is key for a tender cookie. Don’t rush this step!
Step 2: Bringing it Together
Scrape down the sides of the bowl with a rubber spatula. Add the room-temperature egg, vanilla extract, and peppermint extract. Mix on medium until everything is perfectly smooth and combined. It should look like a velvety, pale yellow batter.
Step 3: The Dry Team
In a separate bowl, whisk together your flour and salt. This ensures the salt is evenly distributed. With the mixer on low speed, gradually add the flour mixture to the wet ingredients. Mix just until the flour disappears and a soft dough forms. Overmixing at this stage can make the cookies tough, so as soon as you don’t see any dry flour, stop the mixer!
Step 4: Seeing Red (Half of It, Anyway)
Divide the dough right in half. Place one half back in the mixer bowl. This is where we add our color! Add your red gel food coloring a few drops at a time, mixing on low until you achieve a uniform, festive red. If using a natural beet paste, you’ll need to knead it in by hand on a clean surface. Pro tip: Wear disposable gloves for this part unless you want holiday-red hands for the day!
Step 5: The Patience Part (Chill Time!)
Wrap each ball of dough in plastic wrap and chill them in the refrigerator for at least 30 minutes. This is non-negotiable! Chilling firms up the butter, making the dough much easier to handle and roll. It also prevents the cookies from spreading too much in the oven.
Step 6: Preheat and Prep
While the dough chills, preheat your oven to 350°F (175°C) and line your baking sheets with parchment paper. Trust me, parchment paper is your best friend for easy cleanup and preventing any sticking.
Step 7: The Main Event – Shaping the Canes
Now for the fun part! Take about 1 teaspoon of the plain dough and roll it on a clean surface into a rope about 4-5 inches long. Do the same with a teaspoon of the red dough. Place the two ropes side-by-side and gently press them together at one end. Now, simply twist them together like a barber pole! Gently curl the top down to form the classic candy cane hook. Place them on your prepared baking sheet about 2 inches apart. If the dough gets too soft and sticky, just pop it back in the fridge for 10 minutes.
Step 8: Bake to Perfection
Bake for 9-11 minutes. You’re looking for the cookies to be “set” – they should not look wet or shiny on top. The edges might just be starting to show the faintest hint of golden brown. They will still be very soft, and that’s perfect! They firm up as they cool. Do not overbake!
Step 9: The Cool Down
Let the cookies cool on the baking sheet for 5 minutes. This allows them to finish setting up. Then, carefully transfer them to a wire rack to cool completely. If you’re adding a sugar garnish, do it now while they’re still slightly warm so it sticks.
Sharing the Joy: How to Serve Them
These cookies are a showstopper all on their own! Pile them high on a vintage holiday platter for your Christmas party. For gifting, place them in a cellophane bag tied with a festive ribbon, or carefully layer them in a holiday tin between sheets of parchment paper. And my favorite way to enjoy them? With a giant mug of rich hot chocolate, preferably by the light of the Christmas tree. They’re also a delightful, sweet surprise tucked into a lunchbox or enjoyed as a midday treat.
Make Them Your Own: Delicious Variations
Feel like playing? Here are a few fun ways to switch up this classic recipe:
- The Chocolate Drizzle: Melt some white chocolate chips and drizzle it over the cooled cookies. Immediately sprinkle with crushed candy canes for extra peppermint crunch and color.
- The Flavor Twist: Add a pinch of cinnamon or a dash of nutmeg to the dry ingredients for a warm, spiced undertone that pairs wonderfully with the peppermint.
- The Softer Bite: For an even more tender, meltaway texture, replace 2 tablespoons of the flour with 1 tablespoon of cornstarch.
- The “Grinch” Version: Use green food coloring instead of red for a fun, Dr. Seuss-inspired treat!
- The Allergy-Friendly Swap: Use a trusted gluten-free 1:1 flour blend to make them gluten-free. For dairy-free, use a high-quality plant-based butter.
From My Kitchen to Yours: Chef’s Notes
This recipe has been through many iterations in my kitchen. I’ve learned that the key to the perfect twist is confidence! Don’t be timid when rolling the ropes; a firm, even pressure gives you the best shape. If they break, just smoosh them together and start again. No one will know! I also used to skip the chilling step (impatience is my baking nemesis), but I can now definitively say it is 100% worth the wait. It’s the difference between a crisp, defined candy cane and a… well, a Christmas slug. My family still teases me about that first batch, and it’s a reminder that the best recipes are the ones that come with a story and a whole lot of love.
Your Questions, Answered: FAQs & Troubleshooting
Q: My dough is too sticky to roll! What did I do wrong?
A: This usually means the dough needs more chilling time. Pop it back in the fridge for another 15-20 minutes. It could also be that you slightly under-measured your flour. Next time, ensure you’re using the “spoon and level” method for accuracy.
Q: Why did my cookies spread and lose their shape?
A: The most common culprits are butter that was too warm or not chilling the dough long enough. Your butter should be softened, not melted. Also, make sure your oven is fully preheated before the baking sheets go in.
Q: Can I make the dough ahead of time?
A: Absolutely! You can make the dough, wrap it tightly, and keep it in the refrigerator for up to 2 days. Let it sit at room temperature for about 10-15 minutes before attempting to roll it out, or it might be too hard.
Q: My red dough is staining my white dough when I twist. Help!
A: This can happen, especially with very potent food colorings. Make sure your doughs are well-chilled, as firmer dough bleeds less. Also, work quickly and handle the dough as little as possible when twisting.
Print
Candy Cane Cookies
- Total Time: 40 minutes
Description
Soft, buttery, and infused with peppermint cheer, these holiday cookies are as fun to make as they are to eat. Twisted into whimsical red-and-white candy canes, they bring instant joy to cookie platters, holiday tins, and cozy evenings by the Christmas tree. A recipe that’s equal parts nostalgia and magic.
Ingredients
-
1 cup unsalted butter, softened
-
1 cup powdered sugar, sifted
-
1 large egg, room temp
-
1 tsp vanilla extract
-
½ tsp peppermint extract
-
2 ½ cups all-purpose flour
-
½ tsp salt
-
Red gel food coloring (or beet paste for natural color)
-
Optional: Coarse sugar or sparkling sugar for garnish
Instructions
-
Cream base: Beat butter + powdered sugar until light and fluffy (2–3 min).
-
Add wet: Mix in egg, vanilla, and peppermint until smooth.
-
Add dry: Whisk flour + salt separately, then mix into wet until just combined.
-
Divide & color: Split dough in half. Tint one half red. Wrap both and chill 30 min.
-
Preheat: Oven to 350°F (175°C). Line baking sheets with parchment.
-
Shape: Roll 1 tsp of plain dough + 1 tsp of red dough into 4–5 inch ropes. Twist together, bend into candy cane shape. Place 2 inches apart on sheets.
-
Bake: 9–11 min until set (edges barely golden). Do not overbake.
-
Cool: Rest on sheet 5 min, then transfer to a wire rack. Garnish with sugar if desired.
Notes
-
Chocolate Drizzle: Add melted white chocolate + crushed candy canes.
-
Flavor Twist: Mix in a dash of cinnamon or nutmeg with the flour.
-
Grinch Style: Swap red for green food coloring.
-
Allergy-Friendly: Use gluten-free flour blend or dairy-free butter.
- Prep Time: 30 min
- Cook Time: 10 min
Nutritional Information*
Prep Time: 30 minutes | Chill Time: 30 minutes | Bake Time: 10 minutes | Servings: About 30 cookies
*This is an estimate provided for informational purposes only. I am not a nutritionist.
Approximate Per Cookie: Calories: 110 | Sugar: 6g | Fat: 6g | Carbohydrates: 12g | Protein: 1g
Final Thoughts: More Than Just a Cookie
As the last cookie cools on the rack and you survey your kitchen—dusted with a fine layer of powdered sugar and filled with the incredible scent of peppermint and butter—I hope you feel a deep sense of accomplishment and joy. You haven’t just baked a batch of cookies; you’ve crafted little edible symbols of the season, each twist telling a story.
These Candy Cane Cookies are a beautiful reminder of what makes holiday baking so special. It’s not about achieving impossible perfection. It’s about the warmth of the oven on a cold day, the laughter that comes with a slightly lopsided cane, and the love stirred into every single ingredient. It’s about carrying on traditions and creating new ones.
Apple Cider Crinkle Cookies
Welcome to the Coziest Corner of the Kitchen!
Hey there, friend! Can you smell that? It’s the unmistakable scent of autumn swirling through my kitchen today—cinnamon, ginger, and the sweet, tangy aroma of apple cider bubbling away on the stove. There’s a chill in the air outside, but in here, it’s all warmth, laughter, and the promise of something seriously delicious coming out of the oven. If your idea of a perfect fall day involves a comfy sweater, a warm drink, and a plate of cookies that taste like a hug, you are absolutely in the right place. Today, we’re not just baking cookies; we’re crafting little edible pieces of autumn magic. We’re making my famous, wildly requested, and utterly irresistible Apple Cider Crinkle Cookies.
These aren’t your average cookies. Oh no. These soft, pillowy gems are packed with the concentrated flavor of reduced apple cider and a symphony of warm spices. They’re rolled in sugar not once, but twice, creating that iconic, crackled, snow-dusted look that just begs you to take a bite. The best part? We’re going big with a double batch because, trust me, one dozen is never enough. They disappear faster than you can say “is that cardamom I taste?” So, tie on your favorite apron (the messy one with stories is always the best), put on some cozy tunes, and let’s bake up a storm together. This is going to be fun!
The Day the Crinkle Cookie Was Born
This recipe has a special place in my heart because it was born from a happy accident and a serious craving. A few years back, my husband Mark and I took a weekend trip to a little orchard upstate. We came home with a half-gallon of the most incredible, fresh-pressed apple cider you’ve ever tasted. We drank it, cooked with it, and still had so much left! I’m the kind of person who can’t stand wasting good food, so I started reducing a big pot of it to make a syrup for pancakes.
As that rich, spiced syrup cooled on the stove, the entire house smelled like a fall festival. I was also in the middle of testing a molasses cookie recipe, and I had a lightbulb moment. What if I swapped the molasses for this reduced cider? The result was… magic. The first batch was good, but the second batch, where I doubled the spices and added a hint of orange zest? That was the one. Mark took one bite, his eyes went wide, and he said, “Okay, these are it. You need to make these forever.” And so, a tradition was born. Now, the smell of apple cider reducing on my stove is my official signal that the cozy season has begun.
Gathering Your Autumn Arsenal
Here’s everything you’ll need to create these spiced wonders. I’ve included all my favorite chef insights and substitutions to make this recipe work for you!
- 4 cups (1 liter) Apple Cider: This is the star! Don’t use apple juice; you want the robust, spiced flavor of real cider. We reduce it down to about 1 cup to concentrate its flavor into a powerful syrup. Chef’s Tip: Look for local, fresh-pressed cider at farmers’ markets for the most incredible flavor.
- 1 cup (226g) Unsalted Butter, softened: The base of our cozy cookie. Unsalted lets us control the salt level. Substitution: If you only have salted butter, just reduce the added salt in the recipe to ½ tsp.
- 1 ½ cups (300g) Packed Brown Sugar: Light or dark brown sugar works—dark will give a deeper, almost caramel-like molasses flavor. It adds moisture and that classic chewy texture.
- 4 Large Eggs: They bind everything together and add structure. Make sure they’re at room temperature to create a smoother, fluffier dough.
- 2 tsp Vanilla Extract: The classic flavor enhancer. Always use pure vanilla extract for the best taste.
- ½ tsp Apple or Maple Extract (Optional Twist!): This is my secret weapon for an extra punch of orchard flavor! It’s optional but highly recommended.
- 4 cups (592g) All-Purpose Flour: The foundation of our cookie. For a slightly more tender cookie, you can swap one cup with cake flour.
- 3 tsp Ground Cinnamon & 2 tsp Ground Ginger: The dynamic duo of warmth. Don’t be shy!
- 1 tsp Ground Cardamom & 1 tsp Ground Nutmeg: Here’s where we get fancy! Cardamom adds a beautiful, complex floral note, and nutmeg brings a familiar, nutty warmth. Chef’s Insight: For the absolute best flavor, grate your own nutmeg. The difference is incredible!
- 2 tsp Baking Powder: Our leavening agent, responsible for the perfect rise and soft texture.
- 1 tsp Salt: Crucial for balancing all the sweetness and making the spices pop. Never skip the salt!
- Zest of 1 Orange (Optional Twist!): The bright, citrusy notes cut through the richness and make the apple flavor sing. A total game-changer.
- ½ cup (100g) Granulated Sugar & 1 cup (130g) Powdered Sugar: For the iconic double-roll! The granulated sugar helps the powdered sugar stick and creates that gorgeous crinkled effect.
Let’s Bake! Your Foolproof Cookie Roadmap
Ready to make some magic? Follow these steps, and you’ll have perfect cookies every single time. I’m chatting right alongside you with all my best tips!
Step 1: Reduce the Cider. Pour your 4 cups of apple cider into a medium, wide saucepan. Bring it to a simmer over medium heat. Let it bubble away, stirring occasionally, for 20-30 minutes until it’s reduced down to about 1 cup of deeply amber, syrupy liquid. Chef’s Hack: Use a wooden chopstick to mark the 1-cup level in your measuring cup before you start. Dip it in the reduced cider to see how close you are! This is the most important step for intense flavor, so don’t rush it. Let it cool completely before using.
Step 2: Cream the Butter & Sugar. In a large bowl, use a hand mixer or stand mixer with a paddle attachment to beat the softened butter and brown sugar together on medium speed for 2-3 minutes. You want it to be light, fluffy, and pale in color. This incorporates air, which helps with the texture.
Step 3: Add the Wet Ingredients. Beat in the eggs, one at a time, making sure each is fully incorporated before adding the next. This prevents the batter from breaking. Now, mix in the vanilla extract, your optional apple/maple extract, and the completely cooled reduced apple cider. It might look a little curdled at this point—that’s okay! The flour will bring it all together.
Step 4: Combine the Dry Ingredients. In a separate bowl, whisk together the flour, baking powder, salt, cinnamon, ginger, cardamom, nutmeg, and orange zest (if using). Whisking ensures the baking powder and spices are evenly distributed so you don’t get a bitter bite.
Step 5: Bring the Dough Together. Gradually add the dry ingredients to the wet ingredients, mixing on low speed just until the flour disappears. The dough will be very soft and sticky—this is exactly what we want! Chef’s Tip: Avoid overmixing! This develops gluten and can lead to tough cookies.
Step 6: The Essential Chill. Cover the bowl with plastic wrap and refrigerate for at least 2 hours, or ideally overnight. Do not skip this! Chilling firms up the butter, allowing the cookies to spread less and hold their shape. It also gives the flavors time to meld and deepen beautifully.
Step 7: Preheat & Prep. Preheat your oven to 350°F (175°C). Line your baking sheets with parchment paper. This prevents sticking and makes cleanup a breeze.
Step 8: The Sugar Coating Dance. Place the granulated sugar in one small bowl and the powdered sugar in another. Using a cookie scoop (a #40 scoop, about 1.5 tablespoons, is perfect), portion out the dough and roll it into a ball. Roll it first in the granulated sugar, then generously in the powdered sugar. Chef’s Hack: Really coat it well in the powdered sugar—this is what gives you that beautiful, dramatic crinkle and snowy finish.
Step 9: Bake to Perfection. Place the dough balls about 2 inches apart on your prepared baking sheets. Bake for 10-12 minutes. The cookies are done when the tops are crackled and the edges are set. They might still look a tiny bit soft in the center—that’s perfect! They will continue to set as they cool. Chef’s Insight: For even baking, rotate your baking sheets halfway through the bake time.
Step 10: Cool & (Optional) Drizzle. Let the cookies cool on the baking sheet for 5 minutes before transferring them to a wire rack to cool completely. If you’re going for the extra glaze, whisk together 1 cup of powdered sugar with 1-2 tablespoons of apple cider until you have a drizzle-able consistency. Drizzle it over the cooled cookies for an extra hit of apple goodness.
How to Serve These Autumn Jewels
Presentation is part of the joy! Pile these crinkle cookies high on a rustic wooden board or a beautiful vintage plate. They are an absolute dream served still slightly warm with a cold glass of milk or a hot mug of spiced chai. For the ultimate fall experience, serve them alongside a sharp cheddar cheese—the sweet and savory combination is out of this world! They’re the perfect cookie for a holiday cookie swap, a Thanksgiving dessert table, or just because it’s Tuesday.
Make Them Your Own! Delicious Twists
Feel like playing? Here are a few of my favorite ways to mix things up:
- Gluten-Free Swap: Use a 1:1 gluten-free all-purpose flour blend. I recommend one that contains xanthan gum for the best texture.
- Vegan Version: Use vegan butter and flax eggs (1 tbsp ground flaxseed mixed with 3 tbsp water per egg, set for 5 mins). The texture will be slightly different but still delicious.
- Spice Explorer: Add a pinch of black pepper for a subtle kick, or swap the cardamom for allspice or cloves.
- Stuffed Cookie: Press a small cube of softened caramel or a few white chocolate chips into the center of the dough ball before rolling in sugar.
- Maple Kissed: Replace the vanilla and apple extract with 1 teaspoon of maple extract for a Vermont-inspired treat.
Olivia’s Kitchen Notebook
This recipe has evolved so much since that first happy accident! I’ve learned that reducing the cider is non-negotiable—it’s the soul of the cookie. The addition of cardamom and orange zest came after a reader suggested it, and I’m forever grateful. It elevated the cookies from “great” to “I-need-the-whole-batch” status. A funny story: I once, in a pre-coffee haze, forgot to add the reduced cider entirely. I baked them anyway out of curiosity and ended up with very bland, spiced shortbread. We laughed, dubbed them “What-Did-Olivia-Forget-This-Time Cookies,” and crumbled them over yogurt. Even the mistakes can be tasty!
Your Questions, Answered!
Q: My cookies didn’t crinkle much. What happened?
A: The most common culprit is not chilling the dough long enough. A firm, cold dough is essential for that signature crackle. Also, make sure your baking powder is fresh! Old baking powder loses its potency. And don’t skimp on the powdered sugar coating—it provides the resistance needed to crack.
Q: Can I freeze the dough?
A: Absolutely! This dough freezes beautifully. After portioning into balls, freeze them solid on a baking sheet, then transfer to a freezer bag. You can bake them straight from the freezer—just add 1-2 minutes to the bake time. No need to thaw!
Q: My powdered sugar coating melted/disappeared in the oven. Why?
A: This is why we do the double roll! The layer of granulated sugar underneath acts as a barrier, preventing the powdered sugar from being absorbed into the dough. If you skip the first roll, the powdered sugar will often melt away. Ensure a good, thick coating of both.
Q: The dough is too sticky to roll after chilling. Help!
A: If it’s too firm, let it sit at room temperature for 5-10 minutes. If it’s too sticky, your hands might be warming it up too much. Try dusting your hands lightly with flour or using food-safe gloves to handle the dough quickly.
Apple Cider Crinkle Cookies
- Total Time: 30 minute
Description
Soft, spiced, and kissed with apple cider magic, these cookies taste like autumn in every bite. Rolled in sugar twice for that snowy crinkle look, they’re cozy, chewy, and irresistibly fragrant with cinnamon, ginger, and cardamom. Perfect for cookie swaps, Thanksgiving tables, or simply for pairing with a warm mug of cider on a crisp fall afternoon.
Ingredients
-
4 cups (1L) apple cider (reduced to 1 cup)
-
1 cup (226g) unsalted butter, softened
-
1 ½ cups (300g) packed brown sugar
-
4 large eggs, room temp
-
2 tsp vanilla extract
-
½ tsp apple or maple extract (optional)
-
4 cups (592g) all-purpose flour
-
2 tsp baking powder
-
1 tsp salt
-
3 tsp ground cinnamon
-
2 tsp ground ginger
-
1 tsp cardamom
-
1 tsp nutmeg
-
Zest of 1 orange (optional)
-
½ cup (100g) granulated sugar (for rolling)
-
1 cup (130g) powdered sugar (for rolling)
Instructions
-
Reduce cider: Simmer 4 cups apple cider until it becomes 1 cup of syrup. Cool completely.
-
Cream butter & sugar: Beat butter + brown sugar until fluffy (2–3 min).
-
Add wet: Mix in eggs one at a time, then vanilla, optional extract, and cooled cider.
-
Whisk dry: In another bowl, whisk flour, baking powder, salt, spices, and zest.
-
Mix dough: Add dry mix to wet just until combined. Dough will be sticky.
-
Chill: Cover and refrigerate at least 2 hrs (overnight best).
-
Preheat: Oven to 350°F (175°C). Line baking sheets with parchment.
-
Roll: Scoop 1.5 tbsp dough, roll into balls. Coat first in granulated sugar, then generously in powdered sugar.
-
Bake: 10–12 min, until crackled on top and edges set. Cool 5 min before transferring to a rack.
Notes
-
Gluten-Free: Swap for a 1:1 GF flour blend with xanthan gum.
-
Vegan: Use plant-based butter + flax eggs.
-
Caramel Surprise: Stuff each dough ball with a caramel cube before rolling.
-
Spice Boost: Add a pinch of black pepper or swap cardamom for allspice.
- Prep Time: 30 min (plus chilling)
- Cook Time: 10–12 min
Nutrition
- Calories: 120 cal Per Serving
Nutritional Information*
*This is an approximate estimate calculated using an online nutrition calculator. Values may vary based on specific ingredients used.
Per Cookie (1 of 48): Calories: 120 | Total Fat: 5g | Saturated Fat: 3g | Cholesterol: 25mg | Sodium: 65mg | Total Carbohydrates: 17g | Dietary Fiber: 0g | Sugars: 10g | Protein: 2g
There you have it! My heart and soul in cookie form. I truly hope you love making and sharing these Apple Cider Crinkle Cookies as much as I do. Remember, baking is about the joy of creating and the love you stir into every batch. Now, go preheat that oven! And if you make them, I’d love to hear about it. Tag me on social media @OliviasCozyKitchen so I can see your beautiful creations!
Winter Chocolate Chip Christmas Cookies
Your New Favorite Holiday Cookie is Here!
Hey there, friend! Come on in, the oven’s preheating and I’ve got a fresh cup of coffee with your name on it. Is there anything in the world that smells more like pure, unadulterated joy than cookies baking in the oven? That warm, buttery, sugary aroma just seems to wrap itself around you like a cozy hug, promising something delicious is just minutes away. Especially during the holiday season, baking becomes more than just making a treat—it’s a ritual. It’s the soundtrack of festive music, the glitter of sprinkles on the counter, and the happy chaos of creating something to share with the people you love most.
And today, we’re taking that feeling and dialing it all the way up to eleven. We’re making my absolute, hands-down, must-bake-every-year Winter Chocolate Chip Christmas Cookies. This isn’t just your standard chocolate chipper (though I love those dearly!). This is a festive, show-stopping version that’s soft, chewy, and absolutely bursting with holiday magic. We’re talking rich semi-sweet chocolate, creamy pockets of white chocolate, a cool, crunchy peppermint surprise, and a snowy topping of the prettiest sprinkles. They’re the cookie that makes everyone’s eyes light up, and I cannot wait to share them with you. So, tie on your favorite apron—the messy one with the stories—and let’s make some memories together.
The Cookie That Started a Tradition
This recipe has a special place in my heart because it was born from a near-disaster! Years ago, I was whipping up a classic batch of chocolate chip cookies for our annual holiday party. In my rush, I accidentally knocked over a box of candy canes my niece had been decorating with. A shower of red-and-white peppermint shards went flying… right into my mixing bowl of cookie dough! My first instinct was to panic, but my husband (the ever-pragmatic taste-tester) said, “Wait… that might be genius.”
We baked them off, crossed our fingers, and what emerged from the oven was nothing short of a holiday miracle. The warm chocolate paired with the cool, melting peppermint was a revelation. The classic cookie had been transformed into something utterly festive and new. Now, I intentionally “accidentally” add candy canes every year. It’s become our little family’s official start to the season—the moment we crush the first candy cane, we know the magic has begun. It’s a happy little reminder that the best creations often come from a beautiful mess.
Gathering Your Cookie Crew (The Ingredients!)
Here’s your shopping list for holiday happiness! The beauty of this recipe is its flexibility—I’ve included my favorite substitutions and chef insights so you can make it your own.
- 1 cup unsalted butter, softened – This is the foundation of our rich, chewy texture. Chef’s Tip: “Softened” means cool to the touch but your finger can leave a gentle indent. Don’t let it get oily or melted! For a dairy-free swap, a high-quality plant-based butter works wonderfully.
- 1 cup granulated sugar + 1 cup packed brown sugar – The white sugar helps them spread and crisp up slightly, while the brown sugar (pack it tight!) brings that deep molasses flavor and super-soft, chewy center.
- 2 large eggs – They act as the binder, bringing everything together. Make sure they’re at room temperature to create a smoother, more emulsified dough.
- 2 tsp vanilla extract – The flavor enhancer! Use the real stuff—it makes a world of difference.
- 3 cups all-purpose flour – The structure of our cookie. For a slightly denser, chewier cookie, you can swap one cup for bread flour.
- 1 tsp baking soda + ½ tsp baking powder – Our leavening dream team. The baking soda helps with browning and spread, while the baking powder gives a little lift.
- ¼ tsp salt – Do not skip this! Salt balances the sweetness and makes all the flavors pop.
- 2 cups semi-sweet chocolate chips – My personal favorite for that classic, rich chocolate hit. Feel free to use dark chocolate chips for a less sweet option.
- ½ cup white chocolate chips – These add creamy, sweet pockets that look like little snow drifts in the baked cookie.
- 1 cup crushed candy canes – The star of the show! I place them in a zip-top bag and crush them with a rolling pin. You want a mix of fine powder and small chunks for the perfect texture and flavor.
- Snowflake sprinkles (for decoration) – Because we eat with our eyes first! These are purely for festive joy.
Let’s Bake! Your Step-by-Step Guide to Cookie Perfection
Ready? Let’s do this! Follow these steps, and you’ll have a kitchen that smells like Santa’s workshop in no time.
- Preheat oven to 350°F (175°C). Line baking sheets with parchment paper. – This is non-negotiable for me! Parchment paper prevents sticking and makes cleanup an absolute dream. Silicone baking mats work great, too.
- In a large bowl, cream butter, granulated sugar, and brown sugar until light and fluffy. – This is the MOST important step for texture! Cream for a good 2-3 minutes with a hand mixer or stand mixer. You want it to be pale in color and fluffy. This incorporates air, which is key for a perfect cookie.
- Beat in eggs and vanilla until well combined. – Add them one at a time, mixing well after each addition. Scrape down the sides of the bowl to ensure everything is perfectly mixed.
- In a separate bowl, whisk together flour, baking soda, baking powder, and salt. – Whisking the dry ingredients separately ensures the leavening agents and salt are evenly distributed throughout the flour, so you get a consistent bake in every single cookie.
- Gradually add dry ingredients to the wet mixture. – I add it in three parts, mixing on low speed just until the flour disappears. Do not overmix! Overworking the flour can lead to tough, cakey cookies.
- Fold in chocolate chips, white chocolate chips, and crushed candy canes. – Use a sturdy spatula and gently fold until everything is evenly distributed. Try to save a handful of each to press on top of the dough balls before baking—this makes them look bakery-level gorgeous.
- Scoop dough into 1½ tbsp-sized balls. Place on baking sheets and top each with snowflake sprinkles. – I use a medium cookie scoop for uniform size and easy portioning. Give them about 2 inches of space to spread. Press a few extra chips and candy cane pieces on top for that picture-perfect finish.
- Bake for 10–12 minutes or until edges are lightly golden. Centers will continue to set as they cool. – They might look a tad underdone in the middle—that’s exactly what you want! They will set up beautifully as they cool, giving you that dreamy, soft-and-chewy texture.
- Let cool on the baking sheet for 5 minutes, then transfer to a wire rack. – This allows them to firm up just enough to move without breaking. Try to resist eating one straight from the oven… though I won’t judge if you can’t!
How to Serve These Holiday Stars
Presentation is part of the fun! Pile these warm, festive cookies high on a beautiful vintage platter or a rustic wooden board. For the ultimate holiday experience, serve them alongside a glass of ice-cold milk, a mug of rich hot chocolate, or a warm peppermint tea. They are the perfect ending to a festive dinner, the star of your cookie swap, or a wonderful homemade gift stacked high in a cellophane bag tied with a big red ribbon.
Make It Your Own! Delicious Recipe Variations
This dough is your canvas! Get creative with these fun twists:
- Peppermint Explosion: Add ½ tsp of peppermint extract to the wet ingredients for an extra burst of cool, wintery flavor.
- Peppermint Bark Swap: Instead of white chocolate chips, use ¾ cup of chopped peppermint bark for double the peppermint goodness.
- Cozy Spice: Whisk ½ tsp of cinnamon and a pinch of nutmeg into the dry ingredients for a subtle, warm note that feels like Christmas.
- Nutty Delight: Fold in ¾ cup of chopped toasted pecans or walnuts for a fantastic crunch.
- Double Chocolate: Replace ¼ cup of flour with ¼ cup of unsweetened cocoa powder for the ultimate chocolate lover’s cookie.
Olivia’s Chef Notes & Kitchen Stories
Over the years, I’ve learned a few tricks that make these cookies even better. First, if you have the time, chill the dough for at least 30 minutes (or up to 48 hours!). Chilled dough spreads less, resulting in a thicker, chewier cookie with even more developed flavor. It’s a game-changer!
Second, this recipe is a fantastic make-ahead option. You can scoop the dough balls, freeze them solid on a baking sheet, and then toss them into a freezer bag. Then, whenever cookie cravings strike (or unexpected guests arrive!), you can bake them straight from the freezer, adding just a minute or two to the bake time. Fresh, warm cookies in 15 minutes? Yes, please!
This recipe is a testament to the fact that the best things in life are often unplanned. My candy cane catastrophe turned into our most beloved tradition. So don’t be afraid of a little kitchen chaos—it might just lead to your next masterpiece.
Your Cookie Questions, Answered!
Q: My cookies spread too much and turned out flat. What happened?
A: This is usually caused by butter that is too warm or melted. Ensure your butter is just softened, not melted. Another culprit could be your baking soda—make sure it’s fresh! Finally, try chilling your dough for 30 minutes before baking to prevent excessive spreading.
Q: Can I make these cookies without the candy canes?
A: Absolutely! If you’re not a peppermint fan, simply leave them out. You’ll still have an incredible double chocolate chip cookie. You could replace them with an extra ½ cup of chocolate chips or some toasted nuts.
Q: Why are my cookies cakey and puffy instead of flat and chewy?
A: Cakey cookies are often the result of using too much flour. Next time, try fluffing your flour with a spoon, spooning it into your measuring cup, and leveling it off with a knife instead of dipping the cup directly into the bag. This prevents over-packing. Also, ensure you’re not overmixing the dough once the flour is added.
Q: The candy canes melted and made a huge mess. Help!
A> They will melt and spread a little—that’s part of their charm! But to keep the pretty red-and-white swirls, make sure you’re using real candy canes or peppermint candies, not soft starlight mints. Also, incorporating them as chunks (not just fine dust) and making sure your dough is properly chilled before baking will help them hold their shape better.

Winter Chocolate Chip Christmas Cookies
- Total Time: 20 minute
Description
Soft, chewy, and sparkling with holiday magic—these cookies are everything you want on a festive table. With rich semi-sweet chocolate, creamy white chocolate, a peppermint crunch, and a snowy sprinkle finish, they’re the kind of treat that brings everyone back for “just one more.” Perfect for gifting, swapping, or pairing with a mug of cocoa by the tree.
Ingredients
-
1 cup unsalted butter, softened
-
1 cup granulated sugar
-
1 cup packed brown sugar
-
2 large eggs (room temp)
-
2 tsp vanilla extract
-
3 cups all-purpose flour
-
1 tsp baking soda
-
½ tsp baking powder
-
¼ tsp salt
-
2 cups semi-sweet chocolate chips
-
½ cup white chocolate chips
-
1 cup crushed candy canes
-
Snowflake sprinkles (for decorating)
Instructions
-
Preheat oven to 350°F (175°C). Line baking sheets with parchment.
-
Cream butter and both sugars until pale and fluffy (2–3 minutes).
-
Beat in eggs, one at a time, then vanilla.
-
In a separate bowl, whisk flour, baking soda, baking powder, and salt.
-
Gradually add dry mix to wet, stirring until just combined.
-
Fold in chocolate chips, white chocolate, and crushed candy canes.
-
Scoop 1½ tbsp dough balls onto baking sheets; top with sprinkles and extra chips.
-
Bake 10–12 min until edges are golden and centers soft.
-
Cool 5 min on sheets, then transfer to a wire rack.
Notes
-
Peppermint Bark: Swap white chocolate for chopped peppermint bark.
-
Spiced Holiday: Add ½ tsp cinnamon + pinch of nutmeg to dry mix.
-
Nutty Crunch: Fold in ¾ cup toasted pecans or walnuts.
-
Double Chocolate: Replace ¼ cup flour with cocoa powder.
- Prep Time: 20 min
- Cook Time: 10–12 min
Nutrition
- Calories: 180 cal Per Serving
- Fat: 9g
- Carbohydrates: 23g
Nutritional Information (Approximate, Per Cookie)
This is just a general estimate and will vary based on specific ingredients used.
- Calories: 180 kcal
- Fat: 9g
- Sugar: 15g
- Carbohydrates: 23g
Final Thoughts: Share the Love & the Cookies
Well, friend, we’ve reached the best part: the eating. I hope your kitchen is filled with that incredible holiday scent and your cooling rack is stacked high with these beautiful, festive cookies.
More than just a recipe, I hope this becomes a moment of joy in your season. I hope you find yourself licking batter off your thumb, laughing as you crush candy canes, and feeling that deep, simple satisfaction of creating something wonderful with your own hands.




