
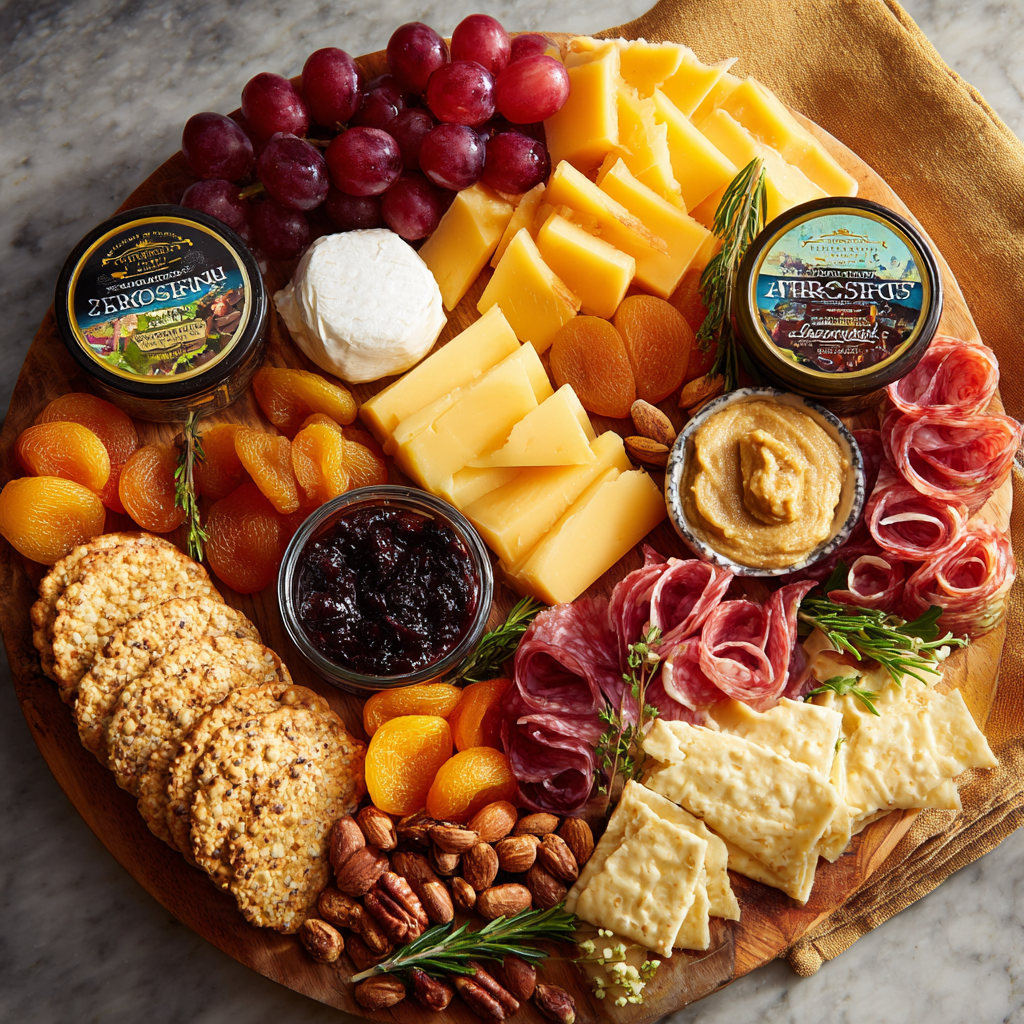
Thanksgiving Charcuterie Board – The Ultimate Holiday Spread
Your New Favorite Thanksgiving Tradition Starts Here
Hey friends! Olivia here. Can you smell it? That crisp, cozy, unmistakable scent of autumn is officially in the air. It’s the season of gratitude, gathering, and let’s be real—absolutely incredible food. And while we all eagerly await the main event (hello, golden-brown turkey and creamy mashed potatoes), let’s talk about the show-stopping opener that will have your guests swooning before they even sit down: The Ultimate Thanksgiving Charcuterie Board.
This isn’t just a plate of cheese and crackers. Oh no. This is a sprawling, abundant, edible centerpiece that celebrates every flavor of fall. It’s sweet, savory, crunchy, and creamy—a symphony of textures and tastes that welcomes everyone to the table and gets the conversation flowing. The best part? It looks like a work of art, but I promise, it’s incredibly simple to assemble. No fancy skills required, just a love for good food and a desire to create something beautiful for the people you love. So, grab your biggest board or platter, and let’s build a holiday memory, one delicious bite at a time.
A Board That Builds Connection
I’ll never forget the first time I decided to go all-out on a Thanksgiving board. It was my turn to host our friend group’s “Friendsgiving,” and I was a ball of nervous energy. I wanted everything to be perfect. The turkey was brining, the pies were prepped, but I was stressed about those awkward pre-dinner moments. You know the ones—where everyone is hovering, hungry, and asking “Can I help with anything?”
I needed an edible distraction. Something that could be enjoyed over stories and laughter. I pulled out everything I had—a wedge of brie, some leftover cranberry sauce from a test batch, nuts, apples, and a few rolls of prosciutto. I arranged it all haphazardly on a large wooden cutting board and placed it in the center of the living room. It was an instant magnet. Within minutes, everyone was gathered around, nibbling, pairing flavors, and laughing. The board didn’t just feed them; it broke the ice and set the tone for the entire evening. It became the unsung hero of the night, and it’s been a non-negotiable part of my holiday hosting ever since. It’s a reminder that the best meals aren’t just about eating; they’re about connecting.
Gathering Your Autumn Bounty
Here’s your shopping list for a board that serves 10-15 lucky people. Remember, this is a guide! Feel free to swap based on what you love or what looks good at the market.
- Manchego Cheese: A semi-hard Spanish cheese with a lovely, slightly salty and nutty flavor. It’s fantastic with a drizzle of honey. Substitute: A good aged Gouda or Pecorino Romano.
- Unexpected Cheddar (sharp, crumbly): Trader Joe’s fans, you know this one! It has a parmesan-like sharpness and a crumbly texture. Substitute: An extra-sharp white cheddar or a crumbly goat cheese.
- Triple Cream Brie: The ultimate crowd-pleaser. Soft, buttery, and decadently creamy. Let it come to room temperature for maximum spreadability.
- Fig Butter or Fruit Preserves: Adds a sweet, jammy element that pairs perfectly with salty meats and creamy cheese.
- Pumpkin Butter (highly recommended!): This is the secret weapon for seasonal flair! Its warm spices scream “autumn.”
- Truffle Marcona Almonds (about 3 oz): These are a gourmet upgrade. Marcona almonds are buttery and tender, and the truffle oil adds an earthy, luxurious depth. Substitute: Toasted walnuts or pecans.
- Dried Apricots (about 4 oz): Their chewy texture and tangy-sweet flavor are a perfect bridge between cheese and meat.
- Sweetened Dried Orange Slices: They look stunning and offer a bright, citrusy punch. Substitute: Fresh orange or clementine wedges.
- Two Colors of Grapes (red and green): For visual contrast and a juicy, fresh burst. I like to keep some on the vine for a rustic look.
- One Honeycrisp Apple, sliced: My favorite for boards—crisp, sweet, and slow to brown. Toss slices in a tiny bit of lemon juice if prepping ahead.
- Trio of Spanish Meats (about 6 oz total – prosciutto, salami, chorizo): Salty, savory, and packed with flavor. Prosciutto can be draped, salami can be folded or stacked, and chorizo adds a little spice.
- Assorted Crackers & Crunch: A mix of textures is key! I use Stone Ground Wheat Crackers, Pistachio Pomegranate Crisps, Cheddar Cheese Sticks, and Pita Bite Crackers.
- Fresh Rosemary Sprigs & Fresh Sage Leaves: These aren’t just for garnish! They add incredible aroma and can be used as a fragrant base for cheeses or bowls.
Let’s Build Your Masterpiece!
Alright, let’s get our hands dirty (figuratively, please wash them first!). Assembly is the fun part. Don’t overthink it—we’re going for abundant and inviting, not perfectly symmetrical.
- Anchor Your Board: Start by placing your small bowls (for the fig butter and pumpkin butter) on the board. This helps define your space. No bowls? No problem! You can just place dollops directly on the board later.
- Place the Cheeses: Take your cheeses out of the fridge about 30 minutes before assembling. Arrange them strategically around the board, spaced apart. Chef’s Hack: Cut a few slices or take a small wedge out of each cheese. This “invites” your guests to dig in and shows them it’s okay to start eating!
- Create Crackers & Crisps Clusters: Fan out your different crackers in various sections of the board. Curve them, stack a few, and create little piles. This looks more dynamic than lining them up like soldiers.
- Artful Meats: Time for the charcuterie! Fold prosciutto into lovely, loose ribbons. Stack salami in little piles or create “salami roses” by folding slices into the cups of a mini muffin tin for 10 minutes. Scatter the chorizo throughout.
- Fill in the Gaps: This is where the magic happens! Start filling all those empty spaces with your fruits and nuts. Create bunches of grapes, clusters of dried apricots, and scatter those gorgeous truffle almonds. Add your apple slices in a crescent shape or tuck them near the cheeses.
- The Final Flourishes: Add spoonfuls of your preserves and butters into the bowls (or right onto the board). Take your fresh herbs and tuck them generously throughout the board. The rosemary sprigs and sage leaves add a beautiful pop of green and make the whole thing smell like Thanksgiving. Drizzle a little honey over the manchego if you’re feeling fancy!
- Step Back and Admire! You did it! Take a picture—you’ll want to remember this. Then, set it out and watch it become the heart of the party.
Setting the Scene
Place your finished board right in the center of the action—on the coffee table for pre-dinner mingling or right on the dining table as an edible centerpiece. Make sure to have plenty of small plates, napkins, and cheese knives or small spreaders nearby so guests can easily serve themselves. A little pro-tip: keep a small bowl off to the side for discarded grape stems or toothpicks to keep the board itself tidy.
Make It Your Own!
The beauty of a charcuterie board is its flexibility. Here are a few twists to suit any taste:
- Sweet Tooth: Add dark chocolate chunks, gingerbread cookies, or candied pecans.
- Savory Lover: Include marinated olives, cornichons (little pickles), and grainy mustard.
- Thanksgiving Leftovers: After the big day, add small piles of shredded turkey (tossed in a little gravy) and leftover cranberry sauce.
- Vegetarian: Skip the meats and add more veggie-focused elements like roasted chickpeas, blanched green beans, and a variety of hummus.
- Gluten-Free: Ensure all crackers and crisps are certified GF, and you’re good to go!
Olivia’s Extra Thoughts & Kitchen Confessions
Over the years, this board has evolved from a simple appetizer to a signature part of my holiday. I used to stress about having the “perfect” variety, but I’ve learned that abundance and heart are what matter most. One year, my cat, Whisk, decided to help by trying to run off with a slice of prosciutto—so now I assemble in a pet-free zone! Another tip: if you’re short on time, don’t be afraid to delegate. Ask a friend to bring their favorite cheese or a box of fancy crackers. It becomes a collaborative effort, which is really what the holidays are all about. Most importantly, have fun with it! There are no mistakes here, only delicious discoveries.
Your Questions, Answered!
Q: How far in advance can I assemble this board?
A: You can prep all your components 1 day ahead. Keep cheeses, meats, washed fruits, and sliced apples (tossed in lemon juice) in separate airtight containers in the fridge. I highly recommend assembling the board no more than 1-2 hours before your guests arrive. This keeps crackers from getting soggy and cheeses at the perfect temperature.
Q: My board is looking a little sparse. How can I fill it out?
A: No worries! This is a common fear. “Filler” foods are your best friend. Extra clusters of nuts, more bunches of grapes, additional crackers, or even just artfully placing more fresh herbs can make a board look incredibly lush and abundant without a ton of extra cost.
Q: What if I don’t have a fancy board?
A> Use what you have! A large cutting board, a baking sheet lined with parchment paper, a big platter, or even a clean countertop can serve as your “board.” The food is the star, not the surface it’s on.
Q: Help! My brie is cold and hard to slice.
A> The key is letting all your cheeses sit out at room temperature for at least 30 minutes before serving. This unlocks their full flavor and makes them easy to spread or slice. If you forget, just pre-slice it before placing it on the board.

Thanksgiving Charcuterie Board – The Ultimate Holiday Spread
Description
Abundant, colorful, and bursting with fall flavors, this board isn’t just cheese and crackers—it’s an edible centerpiece that celebrates the season. Sweet, savory, crunchy, and creamy, every bite sparks conversation and connection. Easy to assemble, endlessly customizable, and guaranteed to wow your guests.
Ingredients
-
Cheese Trio: Manchego, sharp cheddar, triple cream brie
-
Spreads: Fig butter or preserves, pumpkin butter
-
Meats: Prosciutto, salami, chorizo (~6 oz total)
-
Crunch: Assorted crackers & crisps (4 varieties)
-
Fruit: 2-color grapes, Honeycrisp apple (sliced), dried apricots, dried orange slices
-
Nuts: Truffle Marcona almonds (or toasted walnuts/pecans)
-
Fresh herbs: Rosemary sprigs & sage leaves (garnish & aroma)
Instructions
-
Anchor with bowls: Place fig butter & pumpkin butter in small bowls on the board.
-
Add cheeses: Space them apart, pre-slice or wedge for easy grabbing.
-
Arrange crackers: Fan or pile them for texture.
-
Fold meats: Drape prosciutto, stack salami, scatter chorizo.
-
Fill gaps: Add fruit, nuts, and apple slices.
-
Final touches: Spoon preserves, tuck herbs throughout, drizzle honey over manchego.
-
Serve & enjoy: Place in the center of the table with small plates and knives.
Notes
-
Sweet Tooth: Dark chocolate, candied pecans, ginger cookies.
-
Savory Lovers: Add olives, pickles, or grainy mustard.
-
Vegetarian: Replace meats with roasted chickpeas, hummus, extra veg.
-
Leftovers Board: Use shredded turkey & cranberry sauce.
Nutritional Information*
*This is an estimated nutritional breakdown per serving, assuming the board serves 12 and all ingredients are used.
Calories: 320 | Protein: 12g | Fat: 20g | Carbohydrates: 22g | Sugar: 9g | Fiber: 3g | Sodium: 480mg
Prep Time: 25 minutes
Total Time: 25 minutes
Yield: Serves 10-15
Final Thoughts: Your New Holiday Anchor
As you step back and admire your creation—a sprawling, vibrant tapestry of autumn’s finest flavors—remember that you’ve built more than just an appetizer. You’ve crafted the centerpiece for your holiday’s first memories. This board is an invitation, a conversation starter, and a generous offering of warmth and welcome.
The true beauty of this charcuterie board lies not in its perfection, but in its power to gather people. It’s the backdrop for laughter as friends pair a spicy chorizo with sweet pumpkin butter, for the quiet “mmm” of someone discovering triple-cream brie on a crisp apple slice, and for the joyful chaos of everyone mingling and connecting before the feast.
This Thanksgiving, let this board be your anchor. It’s a simple, stress-free way to begin the celebration, ensuring that from the moment your guests arrive, they feel welcomed, nourished, and deeply appreciated. So take a deep breath, inhale the scent of rosemary and sage, and know that you’ve already created something wonderful.
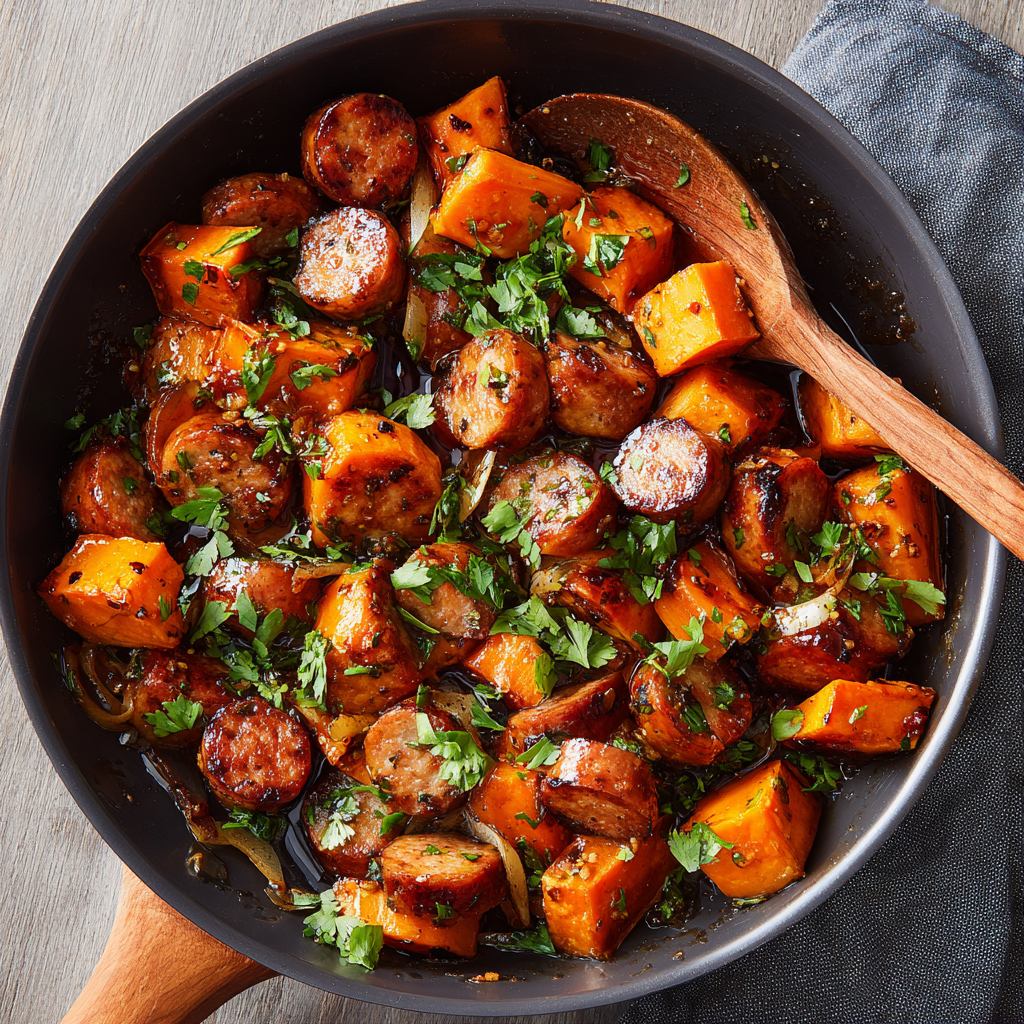
Honey Garlic Sausage & Sweet Potatoes
Your New Favorite Weeknight Dinner is Here, Friends!
Hey there, and welcome back to my kitchen! Can you smell that? It’s the incredible, mouth-watering aroma of garlic sizzling in honey, sweet potatoes getting all roasty and tender, and sausage browning to juicy perfection. If your stomach just growled in solidarity, you’re my kind of people.
Today, we’re making a dish that is the very definition of cozy, satisfying, and downright easy. This isn’t just a recipe; it’s your ticket to a stress-free, delicious dinner that looks like you spent hours on it, but secretly comes together in about the time it takes to watch your favorite sitcom. We’re talking about my legendary One-Pan Honey Garlic Sausage & Sweet Potatoes.
This dish is a symphony of flavors and textures. You get the savory, herby punch from the sausage, the natural, caramelized sweetness from the potatoes, and that glossy, sticky, sweet-and-salty honey garlic glaze that coats every single bite. It’s the kind of meal that makes everyone at the table go quiet for a second, followed by a chorus of “Wow, this is so good.” And the best part? It all happens on one single sheet pan. That’s right—minimal cleanup for maximum flavor. That’s a win in my book any day of the week. So, grab your favorite apron (the messy one with all the character!), and let’s make something amazing together.
The Night This Dish Saved Dinner
I have to tell you about the very first time this recipe came to life in my kitchen. It was one of those chaotic Wednesday nights. My husband was working late, the kids were hangry, and my grand plans for an elaborate dinner had completely evaporated. I stared into the fridge, hoping for inspiration to strike, and saw a pack of Italian sausage and a lonely sweet potato staring back at me.
In a moment of “what do I have to lose?” energy, I cubed the potato, sliced the sausage, and whipped together a quick glaze from pantry staples. I tossed it all on a pan, shoved it in the oven, and crossed my fingers. Twenty-five minutes later, I opened the oven to a minor miracle. The sauce had caramelized into a beautiful, sticky glaze, the potatoes were perfectly tender, and the sausage was beautifully browned. The entire house smelled incredible. We sat down to eat, and the chaos of the day just melted away. It was one of those happy, messy, real-life moments where simple, honest food truly brings everyone together. This dish has been in our regular rotation ever since, a delicious reminder that the best meals don’t have to be complicated.
Gathering Your Flavor All-Stars
Here’s everything you’ll need to create this magic. The beauty of this recipe is in its simplicity, so each ingredient really gets a chance to shine!
- 2 lbs Italian or chicken sausage: I love using Italian sausage for its built-in fennel and herb flavor—it’s a huge flavor booster! You can use sweet, mild, or hot depending on your spice preference. For a leaner option, chicken sausage works beautifully. If using links, you can slice them into coins (for more crispy edges) or leave them whole (for a juicier bite).
- 4 large sweet potatoes, peeled and cubed: Try to cut them into fairly uniform 1-inch cubes so they all cook at the same rate. No one wants a mix of mushy and undercooked potatoes! The sweet potato roasts up so creamy and sweet, which is the perfect contrast to the savory sausage.
- ½ cup honey: This is the base of our glorious glaze. It creates that irresistible sticky sweetness. For a deeper flavor, try using dark honey or even pure maple syrup as a great vegan substitute.
- 6 cloves garlic, minced: Don’t you dare use the jarred stuff! Fresh garlic is non-negotiable here. It infuses the sauce with a pungent, aromatic kick that gets mellow and sweet as it roasts. Trust me, it’s worth the extra minute of mincing.
- 4 tablespoons soy sauce (or tamari for gluten-free): This is our salty, umami powerhouse. It balances the sweetness of the honey perfectly. I always use low-sodium soy sauce to control the salt level. Tamari is a fantastic 1:1 gluten-free swap.
- 2 tablespoons olive oil: This helps the sauce emulsify and ensures our veggies don’t stick to the pan. Avocado oil is another great high-heat option.
- 2 teaspoons paprika (smoked or sweet): Smoked paprika is my secret weapon! It adds a subtle, smoky depth that makes the entire dish taste like it’s been cooking for hours. Sweet paprika works just fine if that’s what you have.
- Salt and black pepper, to taste: Season as you go! I always add a good pinch of each to the sauce and then check for seasoning at the end.
- Fresh parsley, chopped (for garnish): This isn’t just for looks! A sprinkle of fresh, green parsley at the end adds a bright, fresh note that cuts through the richness beautifully.
Let’s Make Some Magic: Step-by-Step
Okay, team! Let’s fire up the oven and get this show on the road. I’ll walk you through every step with my favorite chef hacks to ensure your dish turns out perfectly.
Step 1: Preheat your oven to 425°F (220°C). This high heat is key! It gives us that gorgeous caramelization on the outside of the sweet potatoes and sausage while keeping the insides tender. While that’s heating up, let’s make our sauce.
Step 2: In a small bowl, grab a whisk and combine the honey, minced garlic, soy sauce, olive oil, paprika, and a good crack of black pepper. Whisk it until it’s smooth and beautifully combined. Chef’s Hack: If your honey is super thick, pop the bowl in the microwave for 10-15 seconds to loosen it up—it’ll make whisking a breeze. Give the sauce a little taste. Isn’t that incredible? That’s the flavor powerhouse right there.
Step 3: Now, onto your largest, most trusted sheet pan. Dump your cubed sweet potatoes and sausage onto the pan. Chef’s Hack: For easy cleanup and to prevent any sticking, I always line my pan with parchment paper or a silicone baking mat. It’s a total game-changer.
Step 4: Drizzle that glorious honey garlic sauce all over the potatoes and sausage. Now, roll up your sleeves and get in there with your hands (or two spoons) and toss everything until every single piece is thoroughly and lovingly coated. This ensures every bite is packed with flavor.
Step 5: Spread everything out into a single, even layer. This is crucial! If the pan is overcrowded, the ingredients will steam instead of roast, and we won’t get those delicious caramelized edges. If things look a bit crowded, don’t be afraid to use two pans.
Step 6: Slide that pan into your preheated oven and roast for 25-30 minutes. Now, here’s the most important tip: stir everything halfway through! Set a timer for 15 minutes. When it goes off, pull the pan out, give everything a good stir and flip, and spread it back out. This promotes even cooking and browning on all sides.
Step 7: You’ll know it’s done when the sweet potatoes are tender enough to easily pierce with a fork, the sausage is cooked through and beautifully browned, and the sauce has thickened and caramelized into a sticky glaze on everything. Your kitchen will smell like a dream!
Step 8: Take the pan out of the oven (don’t forget your oven mitts!) and immediately garnish with a generous handful of fresh, chopped parsley. Let it rest for just a couple of minutes before serving—this lets the flavors settle and makes it the perfect temperature for eating.
How to Serve It Up in Style
This dish is a complete meal all on its own, but how you present it makes it even more special! I love serving it family-style, right in the middle of the table on the sheet pan (placed on a trivet, of course!). It’s rustic, inviting, and lets everyone dig in. For a prettier plate, spoon a generous portion into a shallow bowl. The deep colors of the dish look stunning against white ceramic. For a complete meal, a simple side of steamed garlicky greens like kale or broccoli is perfect for soaking up any extra glaze. And don’t forget a final extra drizzle of honey right at the end for that wow factor!
Make It Your Own: Delicious Twists
This recipe is incredibly versatile! Play around with these ideas to keep it exciting:
- Tangy Twist: Whisk 1-2 teaspoons of Dijon mustard into the sauce for a lovely sharpness that cuts the sweetness.
- Spice It Up: Add 1 teaspoon of crushed red pepper flakes to the sauce for a gentle (or not-so-gentle) kick of heat.
- Garden Veggie Boost: Toss in 1 large sliced red onion or a chopped bell pepper (any color!) with the potatoes and sausage for extra color, flavor, and nutrients.
- Cheesy Finish: Crumble some tangy feta or creamy goat cheese over the top right after it comes out of the oven. The salty, creamy cheese is a dream with the sweet glaze.
- Depth of Flavor: Add a splash of balsamic vinegar to the sauce for a complex acidity that balances everything beautifully.
From My Kitchen to Yours: Chef’s Notes
Over the years, this recipe has seen many iterations. I’ve learned a few things! First, if you’re using pre-cooked sausage, that’s totally fine! Just add it to the pan for the last 10-15 minutes of cooking so it heats through and gets a little crispy without drying out. Second, don’t skip the parchment paper. I once got overconfident and didn’t use it, and let’s just say I spent a good 20 minutes scrubbing caramelized honey off my favorite sheet pan. Lesson learned the hard way! Finally, this recipe is a fantastic “clean out the fridge” meal. Got some carrots that need using? Chop ’em up! A lone zucchini? Throw it in! It’s a forgiving and flexible formula for a fantastic dinner.
Your Questions, Answered!
Q: My sauce burned on the pan! What did I do wrong?
A: Oh no! This usually happens for one of two reasons: 1) The oven rack was too high. Make sure your pan is in the center of the oven for even heat. 2) There wasn’t enough oil in the sauce or the honey was very sugar-rich and prone to burning. Lining your pan with parchment is the best defense! If parts are burning but the potatoes aren’t cooked, simply stir more frequently and tent the pan with foil for the remaining cook time.
Q: Can I make this ahead of time?
A: You can absolutely do some prep ahead! You can cube the sweet potatoes and keep them submerged in water in the fridge for up to 24 hours (this actually keeps them fresh). You can also mix the sauce up to a day in advance and store it in a jar in the fridge. When you’re ready, just drain the potatoes, pat them dry, toss everything together, and bake!
Q: My sweet potatoes are still hard after 30 minutes. Help!
A: This is almost always due to the size of the cubes. If they were cut too large, they’ll need more time. Just pop the pan back in for 5-10 minute increments until they’re tender. Next time, aim for that 1-inch dice for perfect results. Also, all ovens vary, so an oven thermometer can help you ensure your temperature is accurate.
Q: Is this recipe freezer-friendly?
A> You can freeze it, but with a caveat. The texture of the sweet potatoes can become a little grainy and watery upon thawing. It will still taste good, but the texture won’t be as perfect as when fresh. I recommend enjoying it straight from the oven for the best experience.

Honey Garlic Sausage & Sweet Potatoes
- Total Time: 40 mins
Description
Sweet, savory, sticky, and comforting—this one-pan wonder delivers crispy-edged sausage, caramelized sweet potatoes, and a glossy honey garlic glaze that ties it all together. It looks like Sunday supper, but comes together in under 40 minutes. Perfect for busy nights, hungry families, or anyone craving a cozy, no-fuss meal.
Ingredients
-
2 lbs Italian or chicken sausage (sliced or whole)
-
4 large sweet potatoes, peeled & cubed (1-inch)
-
½ cup honey (or maple syrup)
-
6 cloves garlic, minced
-
4 tbsp soy sauce (or tamari for GF)
-
2 tbsp olive oil (or avocado oil)
-
2 tsp smoked or sweet paprika
-
Salt & black pepper, to taste
-
Fresh parsley, chopped (for garnish)
Instructions
-
Preheat oven to 425°F (220°C). Line a sheet pan with parchment.
-
Whisk together honey, garlic, soy sauce, oil, paprika, and black pepper.
-
Place sausage and sweet potatoes on the pan. Pour sauce over and toss until evenly coated.
-
Spread into a single layer (use 2 pans if crowded).
-
Roast 25–30 min, stirring halfway, until potatoes are tender and sausage is browned.
-
Garnish with parsley. Serve warm straight from the pan or plated with greens.
Notes
-
Tangy Twist: Add 1–2 tsp Dijon mustard to the sauce.
-
Spicy Kick: Mix in crushed red pepper flakes.
-
Veggie Boost: Add bell peppers or onions.
-
Cheesy Finish: Top with feta or goat cheese after baking.
- Prep Time: : 10 min
Nutrition
- Calories: 410 cal Per Serving
- Fat: 22g
- Carbohydrates: 38g
- Protein: 18g
Nutritional Information*
Per serving (based on 8 servings):
Calories: 410 | Protein: 18g | Fat: 22g | Carbohydrates: 38g | Sugar: 18g | Fiber: 5g | Sodium: 620mg
*Please note: This is an estimate provided by an online nutrition calculator. Actual values will vary based on the specific ingredients and brands you use.
Prep Time: 10 minutes | Cook Time: 25-30 minutes | Total Time: ~40 minutes | Yield: Serves 6-8
I truly hope this recipe becomes a beloved favorite in your home, just like it is in mine. If you make it (and I really hope you do!), please tag me on Instagram @OliviasCozyKitchen so I can see your beautiful creations! Now, go enjoy your well-deserved, delicious dinner. You’ve earned it!
With love and a full belly,
Final Thoughts
So there you have it, friends! Your new go-to, no-fuss, maximum-flavor weeknight hero. This One-Pan Honey Garlic Sausage & Sweet Potatoes is more than just a meal; it’s a promise of less time cleaning and more time enjoying. It’s the delicious solution for busy evenings, the crowd-pleaser for unexpected guests, and the cozy comfort food that never fails to hit the spot.
It’s a recipe that proves the best dinners aren’t about complexity, but about combining a few humble, honest ingredients with a little bit of heat and a whole lot of heart. I hope this dish finds its way onto your table again and again, becoming a beloved part of your own family’s story. It’s earned a permanent spot in our rotation, and I have a feeling it’s about to earn one in yours, too.
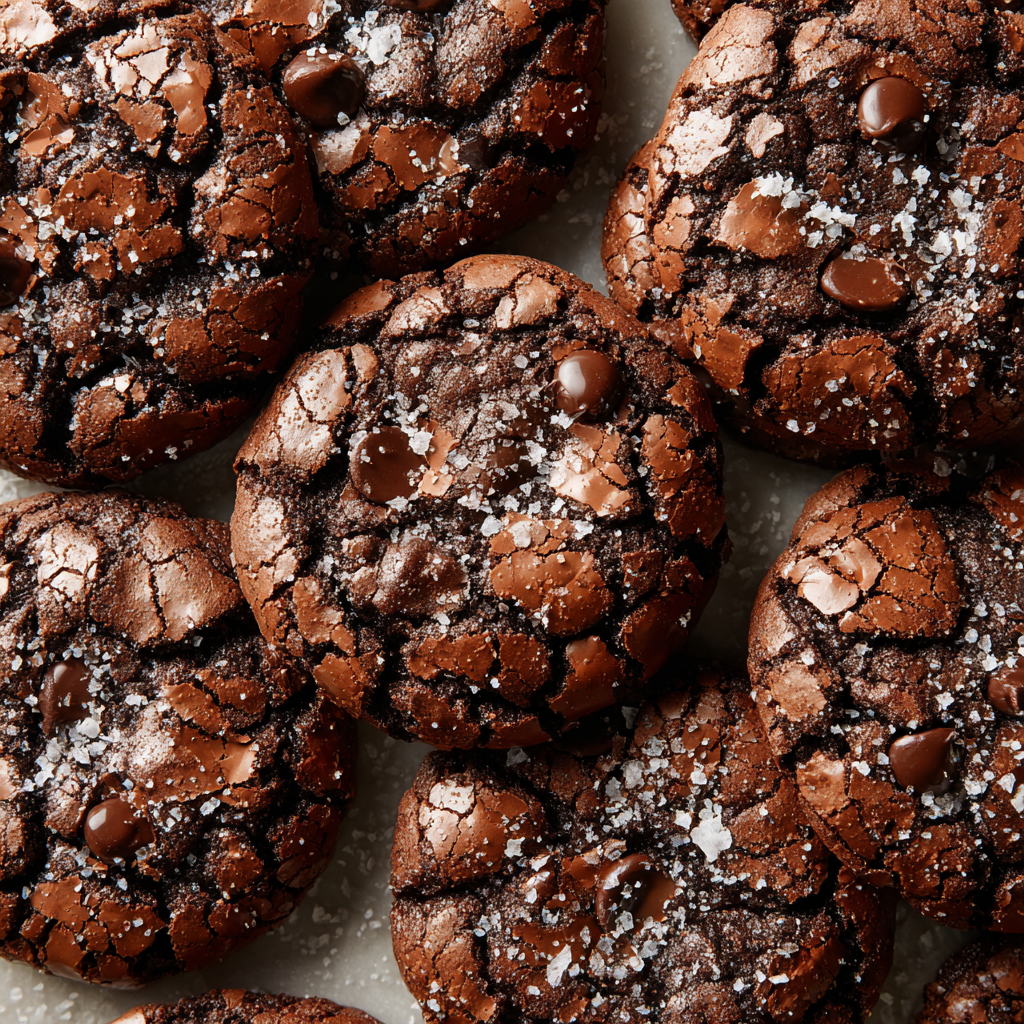
Fudgy Double Chocolate Crinkle Cookies
The Cookie That Started It All
Hello, my fellow flavor-chasers! Is there anything in this world quite as magical as the smell of chocolate cookies baking in the oven? That rich, decadent aroma that wafts through the house, promising something truly special is just minutes away. It’s a universal signal for “get to the kitchen, because joy is being served.” And if there’s one cookie that has become the undisputed champion of my kitchen, the recipe I’m asked for again and again, it’s these.
Welcome to my ultimate, show-stopping, heart-melting Fudgy Double Chocolate Crinkle Cookies. We’re not just making cookies here, friends. We’re crafting little pockets of pure happiness. Imagine the chewiest, fudgiest brownie you’ve ever had, but in cookie form, with a gorgeous, crackled, snowy-dusted top and an interior that’s irresistibly gooey. We’ve doubled the batch because, trust me, you’ll want plenty to share (or not, no judgment here!). And we’ve added a couple of my secret weapon twists—a hint of espresso to make the chocolate sing and a whisper of cinnamon for a mysterious warmth that keeps everyone coming back for just one more.
This isn’t a fussy, complicated recipe. It’s a journey. It’s about getting your hands a little dusty with cocoa powder, about the anticipation of chilling the dough, and the pure triumph of pulling a tray of perfectly cracked cookies from the oven. So, tie on your favorite apron (the messy one with the stories), preheat your oven, and let’s bake some memories together.
Nana’s Cookie Jar & My Chocolate Epiphany
My love affair with crinkle cookies began not in a fancy bakery, but at my Nana’s Formica kitchen table. Her cookie jar, a rotund ceramic pig with a cheerful smile, was always stocked. But her classic lemon crinkles, while delicious, always left my little chocoholic heart wanting more. I’d dream of a version so deeply chocolatey it would satisfy my most intense cravings.
Years later, during my first December in my own apartment, I was determined to create a cookie that would be the star of my holiday boxes. I wanted that nostalgic, crackled look of Nana’s cookies but with the soul of the fudgiest brownie. Batch after batch emerged from my tiny oven. Some were too cakey, others too flat. But then… it happened. I added melted chocolate to the dough instead of just cocoa, a trick I learned from a brownie recipe. The result was an epiphany. The texture was pure magic – crisp, sugary shell giving way to a dense, molten center. I brought them to a party, and they were gone in minutes. Friends texted me for days asking for the recipe. That was the moment this cookie became my signature, a little piece of my kitchen heart I’m so thrilled to finally share with you.
Gathering Your Chocolate Dream Team
Here’s everything you’ll need for our double batch of heaven. Remember, baking is a science, but it’s also about intuition! I’ve included my best tips and swaps for each ingredient.
- 190g (1½ cups) plain all-purpose flour: The foundation of our cookie. For a slightly chewier texture, you can swap in 60g (½ cup) of bread flour, but all-purpose works perfectly.
- 4 tbsp cocoa powder: Use natural, unsweetened cocoa powder for that classic, sharp chocolate flavor. Dutch-process will work but will result in a darker, milder cookie.
- 2 tsp baking powder: This is our primary leavening agent, responsible for creating those beautiful cracks and a little lift.
- ½ tsp salt: Non-negotiable! Salt is the wingman for chocolate, amplifying its depth and complexity and preventing the cookies from tasting flat or too sweet.
- 450g (2½ cups) dark chocolate, chopped: This is the star! Use a bar of chocolate you love eating (around 60-70% cocoa works best), not chocolate chips. Chips contain stabilizers that don’t melt as smoothly. Chef’s Insight: The quality of your chocolate directly impacts the flavor of your cookie. This is your chance to shine!
- 113g (½ cup) butter: Salted or unsalted is fine. I often use salted for an extra hint of savoriness. If using unsalted, just add an extra pinch to the dry ingredients.
- 4 eggs, room temperature: Crucial! Room temp eggs incorporate much more easily into the sugar, creating a thicker, paler, and more voluminous batter which is key for texture.
- 200g (1½ cups) caster or granulated sugar: White sugar gives us that crisp exterior.
- 180g (1 cup) demerara or raw sugar: The molasses notes in these sugars add a wonderful depth and chewy moisture. You can use all granulated sugar in a pinch, but the texture won’t be as complex.
- 2 tsp vanilla extract: The supporting actor that makes all the other flavors pop.
- 1 tsp instant espresso powder (optional twist): My secret weapon! It doesn’t make the cookies taste like coffee; it just magnifies the chocolate flavor exponentially. Don’t skip it!
- 1 tsp ground cinnamon (optional twist): This adds a subtle, warm undertone that makes people say, “Wow, what is that?!” It’s unexpected and utterly delicious.
- 170g (1 cup) dark or milk chocolate chips (or both!): For those glorious melty pockets! Using a mix of dark and milk is my favorite for balanced indulgence.
Let’s Get Baking: The Foolproof Method
Follow these steps, and you’ll be a crinkle cookie master in no time. I’ve packed each step with my best kitchen hacks to ensure your success.
- Melt chocolate & butter: Combine the chopped dark chocolate and butter in a heatproof bowl. You can melt this over a pan of gently simmering water (a double boiler), making sure the bowl doesn’t touch the water. Or, do it my quick way: microwave in 30-second bursts, stirring well between each burst, until completely smooth and glossy. Chef’s Hack: Let this mixture cool for at least 10-15 minutes. If it’s too hot, it will cook the eggs when you add it later. We want warm, not hot.
- Mix dry ingredients: In a separate medium bowl, whisk together the flour, cocoa powder, baking powder, salt, and our optional power-ups: cinnamon and espresso powder. Whisking here is important to eliminate any lumps and ensure everything is evenly distributed. Set this aside.
- Make the batter: In a large bowl, combine the eggs, granulated sugar, and demerara sugar. Using a hand mixer or a stand mixer with the whisk attachment, beat them on medium-high speed for a full 2-3 minutes. This step is non-negotiable for that crackly top! You’re looking for the mixture to become thick, pale, and ribbon-like—when you lift the beaters, the mixture should fall back onto itself in a ribbon that holds its shape for a few seconds before dissolving.
- Combine: Beat in the vanilla extract. Now, with the mixer on low, gradually pour in the slightly cooled chocolate-butter mixture. Mix until it’s fully combined and the batter is a beautiful, uniform dark brown. Switch to a spatula. Add the entire bowl of dry ingredients and gently fold them in. Stop when you just see the last traces of flour disappear. Overmixing is the enemy of a fudgy texture! Finally, fold in your chocolate chips.
- Chill dough: Cover the bowl with plastic wrap and chill for at least 1 hour, or ideally up to overnight. Chef’s Hack: This is the secret to a dense, fudgy center and prevents the cookies from spreading too much. The dough will firm up significantly. If you chill overnight, let it sit at room temp for 15-20 minutes before scooping.
- Preheat oven: When you’re ready to bake, preheat your oven to 350°F (175°C). Line your baking sheets with parchment paper. Do not grease the pan! The parchment provides just the right amount of grip and prevents sticking.
- Shape cookies: Use a tablespoon-sized cookie scoop or a heaping tablespoon to portion out the dough. Roll them into rough balls—they don’t need to be perfect. Space them about 2 inches apart on the baking sheet as they will spread a little.
- Bake: Bake for 10-12 minutes. Chef’s Hack: You want to pull them out when the tops are beautifully cracked and look dry, but the centers still look soft and slightly underbaked. They will continue to set as they cool on the hot pan. This is the key to that gooey center!
- Cool: Let the cookies cool on the baking sheet for a full 5 minutes. This allows them to set enough to handle without falling apart. Then, use a spatula to transfer them to a wire rack to cool completely… or enjoy a few warm and melty straight from the pan. I won’t tell!
How to Serve These Chocolate Beauties
Presentation is part of the fun! Pile these cookies high on a rustic wooden board or a vintage cake stand for a stunning effect. They are perfect with a tall glass of cold milk for the ultimate classic combo. For a truly decadent adult treat, serve them slightly warm alongside a glass of red wine, a rich stout, or a shot of espresso. They also make incredible ice cream sandwich cookies—just sandwich a scoop of vanilla bean or coffee ice cream between two cooled cookies and enjoy immediately (or roll the edges in mini chocolate chips for extra pizzazz).
Make It Your Own: Delicious Variations
The beauty of this base recipe is how adaptable it is! Here are a few of my favorite twists:
- Peppermint Sparkle: Add 1 tsp of peppermint extract (not peppermint oil, it’s too strong) with the vanilla. After rolling the dough balls, roll them in crushed candy canes instead of sugar for a festive holiday treat.
- Salted Caramel Pocket: Press a soft caramel candy (like a Kraft caramel) into the center of each dough ball before baking. Sprinkle the baked cookies with a little flaky sea salt.
- Orange Zest Delight: Add the zest of one large orange to the sugar before beating it with the eggs. The citrus brightens the deep chocolate flavor beautifully.
- Gluten-Free Goodness: Substitute the all-purpose flour with a 1:1 gluten-free baking blend. The texture might be slightly more delicate but just as delicious!
- Mocha Madness: For an extra coffee kick, add an additional 1 tsp of espresso powder and use all dark chocolate chips.
From My Kitchen to Yours: A Few Final Thoughts
This recipe has evolved so much from that first batch in my tiny apartment kitchen. I’ve learned that the chilling time is truly the secret handshake to cookie society—it can’t be rushed. I’ve also learned that the optional ingredients? They’re not really optional in my house anymore. The espresso and cinnamon are now permanently written into my stained, well-loved copy of the recipe.
A funny story: I once, in a frantic pre-holiday baking marathon, forgot the baking powder. The result was a tray of delicious but completely flat, dense chocolate puddles. They still tasted amazing (it’s hard to ruin this much chocolate), but they had zero crinkle. It was a great reminder that every ingredient has a job! So now, I always line up my ingredients (mise en place!) before I start. It saves me from my own excited distractions. This recipe is a labor of love, and I hope it becomes a cherished one in your home too.
Your Questions, Answered!
Q: My cookies didn’t crack! What happened?
A: The most common culprits are not beating the eggs and sugar for long enough, or not chilling the dough. The eggs need to be aerated to create that crackly texture, and the dough needs to be cold to set quickly in the oven and fracture. Also, make sure your baking powder is fresh!
Q: Can I freeze the cookie dough?
A: Absolutely! This dough freezes beautifully. Scoop the dough into balls and freeze them solid on a parchment-lined sheet. Then, transfer them to a freezer bag. You can bake them straight from the freezer; just add 1-2 minutes to the baking time. It’s like having fresh cookies on demand!
Q: My cookies spread too much and became flat.
A: This is almost always a dough temperature issue. Your dough was likely too warm when it went into the oven. Ensure you chill it for the full time. If your kitchen is very warm, you can even pop the shaped dough balls on the tray back into the fridge for 10 minutes before baking.
Q: Can I use all cocoa powder instead of melting chocolate?
A> I don’t recommend it for this specific recipe. The melted chocolate is what gives these cookies their distinctively fudgy, brownie-like interior. A recipe with only cocoa powder will yield a cakier, lighter cookie.
Fudgy Double Chocolate Crinkle Cookies
Description
Think fudgy brownie meets chewy cookie, dressed up in a crackly, powdered-sugar coat. These crinkle cookies are gooey inside, crisp outside, and infused with secret touches—espresso to boost the chocolate, cinnamon for cozy warmth. They’re the kind of cookie that disappears in minutes and earns you requests for the recipe every single time.
Ingredients
-
190g (1½ cups) all-purpose flour
-
4 tbsp cocoa powder
-
2 tsp baking powder
-
½ tsp salt
-
450g (2½ cups) dark chocolate, chopped
-
113g (½ cup) butter
-
4 large eggs, room temperature
-
200g (1½ cups) granulated sugar
-
180g (1 cup) demerara/raw sugar
-
2 tsp vanilla extract
-
1 tsp instant espresso powder (optional)
-
1 tsp ground cinnamon (optional)
-
170g (1 cup) chocolate chips (dark, milk, or mix)
Instructions
-
Melt chocolate & butter until smooth. Cool 10–15 min.
-
Whisk dry mix: flour, cocoa, baking powder, salt (+ espresso & cinnamon if using).
-
Beat eggs & sugars for 2–3 min until pale and ribbon-like. Add vanilla.
-
Mix in chocolate-butter, then fold in dry ingredients. Add chocolate chips.
-
Chill dough at least 1 hr (overnight best).
-
Preheat oven to 350°F (175°C). Line trays with parchment.
-
Scoop & roll into balls. Coat generously in powdered sugar.
-
Bake 10–12 min until tops are crackled but centers still soft. Cool 5 min on tray.
Notes
-
Pile high on a platter with cold milk.
-
Pair with espresso or red wine for adults.
-
Sandwich with ice cream for an indulgent twist.
Nutrition
- Calories: 160 cal Per cookie
- Fat: 8g
- Carbohydrates: 18g
Nutritional Information (Approximate, Per Cookie)
Calories: 160kcal | Carbohydrates: 18g | Protein: 2g | Fat: 8g | Saturated Fat: 5g | Cholesterol: 25mg | Sodium: 65mg | Fiber: 1g | Sugar: 14g
Final Thoughts: More Than a Cookie
In the end, these Fudgy Double Chocolate Crinkle Cookies are so much more than a list of ingredients and a set of instructions. They are a story. They are the legacy of a Nana’s cookie jar, the triumph of a chocolate epiphany in a tiny apartment, and the joy of sharing something made with love.
This recipe is an invitation—to slow down, to get your hands dusty with cocoa, to fill your home with that irreplaceable, heartwarming aroma, and to create your own moments of connection. Whether you’re baking them for a holiday party, a school bake sale, or just a quiet Tuesday treat, you’re not just making cookies. You’re crafting little pockets of pure, unadulterated joy.
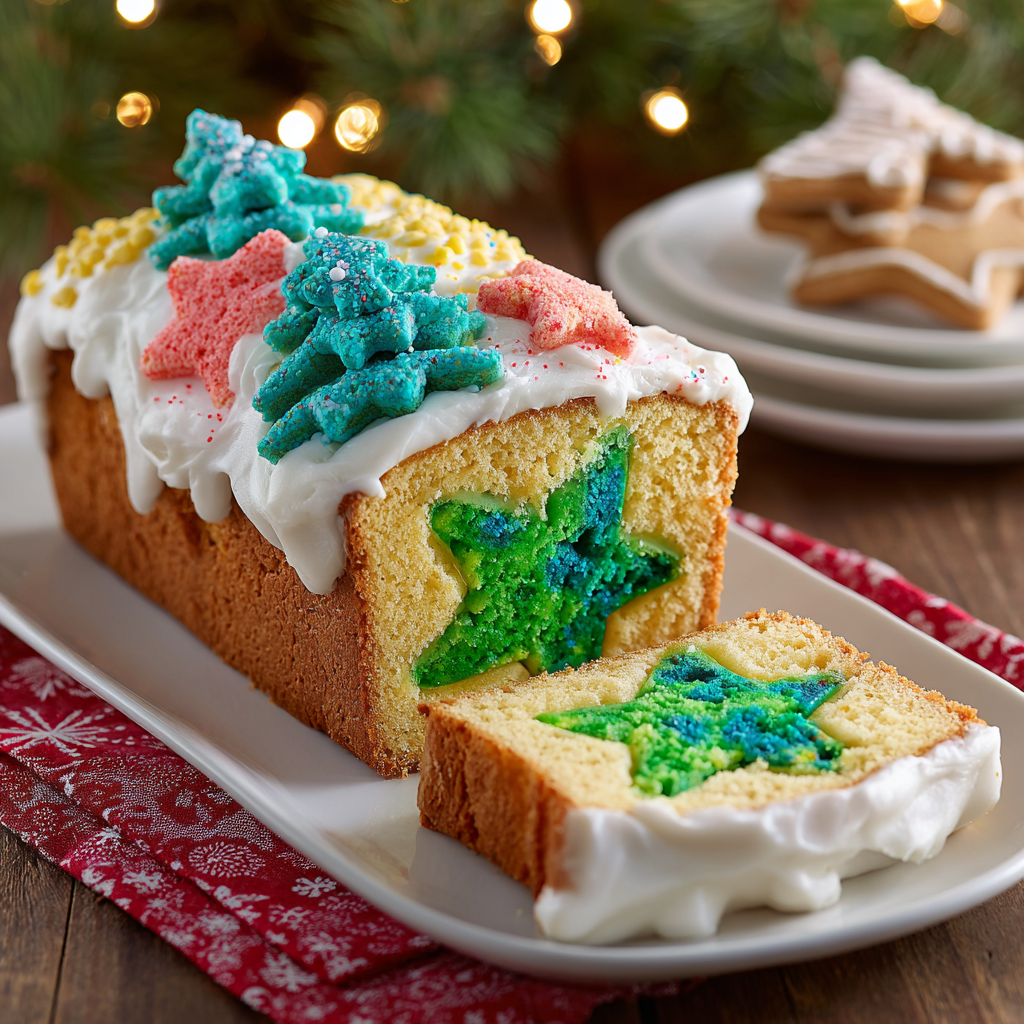
Holiday Surprise Inside Loaf Cake
Your New Favorite Holiday Baking Project is Here!
Hey there, friend! Come on in, the oven’s preheated and I’ve got a sprinkle-covered counter to prove we’re about to have some serious fun. Is there anything better than the smell of a cake baking during the holidays? That warm, sugary vanilla scent just seems to hug the whole house, doesn’t it? It’s pure magic. But what if I told you we could take that cozy feeling and add a huge dose of pure, unadulterated *wow* factor?
Today, we’re making my famous Holiday Surprise Inside Loaf Cake. This isn’t just any cake; it’s a delicious secret waiting to be revealed. Imagine the scene: you’ve just finished a lovely holiday meal. The conversation is flowing, everyone is full and happy. You bring out this beautifully frosted, unassuming loaf cake. There are oohs and aahs over the frosting. Then, you slice the first piece. A collective gasp fills the room. Right there, in the very center of the slice, is a perfect, brightly colored holiday shape—a Christmas tree, a star, a heart! The look on your loved ones’ faces is the absolute best reward. It’s a moment of genuine, childlike wonder, and you created it. The best part? It’s so much easier than it looks. I promise, with my step-by-step guide, you’ll feel like a baking wizard. So, tie on your favorite apron (the messy one with stories), and let’s create some kitchen magic together!
The Little Cake That Started It All
This recipe always takes me right back to my grandma’s kitchen, with its checkered curtains and the constant hum of her ancient stand mixer. One particularly chaotic Christmas Eve, when I was about ten, she decided we needed a “project” to keep my cousins and me from bouncing off the walls. She whipped up a simple vanilla batter, dyed half of it a shocking emerald green, and baked it in a thin sheet. With a rusty star-shaped cookie cutter, she carved out wobbly shapes and then did something that seemed utterly crazy to my young eyes: she stood them up in another pan and poured more batter on top!
We were convinced she’d lost it. But when that cake cooled and she sliced it, revealing a perfect green star in every single piece, our minds were completely blown. It felt like real magic. More than the sugar rush, I was hooked on the *idea* of it—that cooking could be playful, surprising, and a way to create joy for others. This loaf cake is my modern, slightly fancied-up homage to her. It’s my go-to recipe for bringing that same wide-eyed wonder to my own holiday table now. Every slice feels like a little gift, and a sweet nod to the woman who first showed me that the best recipes are the ones that come with a story.
Gathering Your Magical Ingredients
Here’s everything you’ll need to make the magic happen. I’m a big believer in keeping things simple and approachable, so we’re using a fantastic boxed mix as our base—it’s reliable, delicious, and lets us focus on the fun, creative part! Remember, baking is a science, but the decorations are pure art.
- 2 boxes Pillsbury White Cake Mix (plus the eggs, oil, and water called for on the box) – Using a classic white cake mix gives us a neutral, fluffy canvas that makes our colorful surprise pop! The Pillsbury brand is my favorite for this because it has a fine, tender crumb that holds the shape beautifully.
- Green Gel Food Coloring – I highly recommend gel food coloring over the liquid kind. The gels are much more concentrated, so you can get a vibrant, festive green (or red, or blue!) without adding extra liquid that could throw off the batter’s consistency. You’ll need just a tiny bit!
- 1 tub Pillsbury White Frosting – Again, we’re keeping it simple and delicious! This frosting is the perfect glue for our decorations and pipes like a dream. Feel free to use vanilla or even cream cheese flavor if you prefer.
- Crushed Holiday Cookies – This is where you can get creative! I used crushed-up peppermint sugar cookies for a little crunch and festive color. Sprinkles, crushed candy canes, or even red and green sanding sugar would be absolutely gorgeous here.
- Tree-Shaped Cookie Cutter (or any holiday shape!) – The star of the show! A tree is classic, but a star, heart, snowman, or even a bell would be utterly charming. Make sure it’s a size that will fit standing up in your loaf pan.
- Piping Bag fitted with a 1M Tip – This is my secret weapon for making any dessert look professionally pretty in seconds. The 1M tip creates those beautiful, classic swirls. If you don’t have a piping bag, a zip-top bag with the corner snipped off works in a pinch, though the swirls won’t be as defined.
Let’s Bake Some Magic: Step-by-Step
Okay, team! Let’s do this. Read through all the steps once before you begin—it helps the process feel smooth and stress-free. You’ve got this!
Step 1: Make the Surprise Shape Layer
First, preheat your oven to the temperature specified on your cake mix box (usually 350°F/175°C). Grease and flour a 9×13 inch baking pan, or line it with parchment paper for super easy removal. Now, prepare one box of the cake mix according to the package directions. This is where we add the magic potion! Add your gel food coloring, a little at a time, and stir until you achieve a deep, vibrant green (or your color of choice). You want it to be darker than you think—it will bake up slightly lighter. Pour the beautifully colored batter into your prepared pan and bake as directed. Let it cool completely in the pan on a wire rack. Chef’s Hack: Rushing this cooling step is the number one mistake! If the cake is even slightly warm, your shapes will tear and crumble. Patience, young grasshopper!
Step 2: Carve Your Shapes
Once the green cake layer is completely cool, run a knife around the edges and turn it out onto a cutting board. Now, take your holiday cookie cutter and press it firmly into the cake. Try to get as many shapes as you can from the sheet. Gently push the shaped pieces out. Don’t worry if they seem a little fragile; they’ll firm up even more. Pro Tip: If any pieces break, don’t despair! They make for a fantastic baker’s snack. You really only need 4-5 good, solid shapes for the loaf.
Step 3: Prepare the Loaf Base & Assemble
Reduce your oven temperature to 325°F (165°C). This lower temp helps the taller, denser loaf cake bake evenly without over-browning the outside. Grease and flour a 9×5 inch loaf pan thoroughly. Now, prepare the second box of cake mix, but leave this batter plain and white—this is our canvas! Pour a thin layer of the white batter into the bottom of your loaf pan, just enough to cover it. This is our foundation. Now, for the big moment! Take your green tree shapes and stand them upright, in a tight single row, down the center of the pan. They should be touching each other. The Key: They MUST stand up straight! Now, slowly and carefully, pour the remaining white batter around the sides and over the top of the trees. Use a spoon to help guide the batter and ensure it completely envelops the shapes. Tap the pan gently on the counter a few times to release any air bubbles.
Step 4: Bake to Perfection
Place the loaf pan in the center of your preheated oven. Because we’re baking a denser loaf, it will take longer than the box directions for the layer cake. Start checking for doneness at around 45-50 minutes. The true test? Insert a toothpick into the white batter part (not directly into a green tree). If it comes out clean or with a few moist crumbs, it’s done! The top should be a lovely golden brown. Let the cake cool in the pan for 15-20 minutes, then carefully turn it out onto a wire rack to cool completely. Absolutely no frosting a warm cake! I mean it. The frosting will melt into a sad, gloppy puddle.
Step 5: Decorate & Reveal!
Once the cake is totally cool, it’s time for the final flourish! Scoop your tub of frosting into the piping bag fitted with the 1M tip. Pipe generous swirls along the top of the loaf. If you’re new to piping, just practice a few swirls on a piece of parchment first—it’s easier than you think! Finally, sprinkle your crushed holiday cookies all over the frosting for that festive, crunchy finish. Now, the hardest part: waiting until you’re with your friends and family to slice it and reveal the surprise!
How to Serve Your Masterpiece
Presentation is part of the fun! Place the fully decorated loaf cake on a beautiful wooden cutting board or a long, elegant platter. Use a sharp, serrated knife to slice it—a gentle sawing motion will give you the cleanest cuts and the best reveal of that hidden shape. Wipe the knife clean between slices for picture-perfect presentation every time. Serve each slice on its own little plate. This cake is rich and sweet, so it needs no accompaniment, but a glass of cold milk, a hot cup of coffee, or even a dollop of lightly sweetened whipped cream on the side would be absolutely divine.
Get Creative: Endless Variations!
The beauty of this concept is that you can run with it! Here are a few ways to make this recipe your own:
- Peppermint Red & White: Use red food coloring for the inner shapes and add ½ tsp of peppermint extract to the white batter. Crush candy canes on top for garnish.
- Chocolate Lover’s Dream: Use a chocolate cake mix for the outer loaf and a bright red or green vanilla cake for the inside shapes. Frost with chocolate buttercream!
- Confetti Birthday Party: Make the inner shapes a fun color and add rainbow sprinkles to the white batter! Perfect for a birthday brunch.
- Lemon Blueberry: Add the zest of one lemon to the white batter and use blue food coloring for the inner shapes. Frost with a tangy lemon glaze instead of buttercream.
- Gluten-Free Friendly: Simply use your favorite gluten-free white cake mix and ensure your cookies for garnish are also GF!
Olivia’s Chef Notes & Kitchen Stories
I’ve made this cake more times than I can count, and it has evolved from my grandma’s wobbly stars into my signature holiday showstopper. One year, in a fit of over-enthusiasm, I used nearly a whole bottle of green food coloring. Let’s just say the inner trees were… electric. Vibrantly, alarmingly electric green. My husband joked that we were serving The Grinch cake. It was hilarious and still delicious, but I learned my lesson: a little gel color goes a very long way! Another time, I was rushing and didn’t get my shapes stood up perfectly straight. The resulting slices had charmingly lopsided, drunken-looking trees, which honestly got more laughs than perfect ones would have. So remember, even the “mistakes” can turn into happy accidents and great stories. The goal is fun and flavor, not perfection.
Your Questions, Answered!
Q: My inner shapes sunk to the bottom/moved during baking! What did I do wrong?
A: This usually happens for one of two reasons: 1) The bottom layer of white batter wasn’t thick enough to act as an anchor. Make sure you have a solid foundation before standing up your shapes. 2) The batter was too thin. If you feel your batter is runny, you can add 1-2 tablespoons of all-purpose flour to the second mix to thicken it slightly, which will help support the shapes.
Q: Can I make this from scratch instead of using a box mix?
A: Absolutely! Use your favorite vanilla cake recipe. You’ll need enough batter to fill one 9×13 inch pan (for the colored layer) and one 9×5 inch loaf pan (for the main cake). Just ensure your scratch recipe has a structure sturdy enough to hold the shapes—a classic butter cake works perfectly.
Q: Can I make this cake ahead of time?
A: You sure can! The baked, unfrosted loaf cake can be wrapped tightly in plastic wrap and stored at room temperature for one day, or frozen for up to a month. Thaw overnight before frosting. I highly recommend frosting it the day you plan to serve it for the freshest look and taste.
Q: My shapes are crumbling when I try to cut them! Help!
A: This is almost always because the green cake layer wasn’t 100% cool. It needs to be completely room temperature to be firm enough to cut cleanly. Pop it in the fridge for 15 minutes if you’re in a hurry!

Holiday Surprise Inside Loaf Cake
Description
A simple loaf cake with a hidden holiday shape inside—part magic trick, part dessert, and guaranteed to wow your guests. Each slice reveals a festive surprise, from a tree to a star to a heart, making this cake as fun to bake as it is to serve. It’s a story, a memory, and a celebration all in one bite.
Ingredients
-
2 boxes Pillsbury White Cake Mix (plus eggs, oil, water per box)
-
Green gel food coloring (or red/blue for variations)
-
1 tub Pillsbury White Frosting (or vanilla/cream cheese)
-
Crushed holiday cookies, sprinkles, or candy canes
-
Holiday cookie cutter (tree, star, heart, etc.)
-
Piping bag + 1M tip (or zip-top bag for swirls)
Instructions
-
Color & Bake Layer: Mix 1 box of cake, tint with gel coloring, bake in 9×13″ pan. Cool fully.
-
Cut Shapes: Use cookie cutter to press out holiday shapes. Set aside.
-
Assemble Loaf: Preheat oven to 325°F. Grease 9×5″ loaf pan. Mix 2nd box of cake. Pour thin layer of white batter, stand colored shapes upright in a row, cover fully with remaining batter.
-
Bake: 45–55 min, until toothpick in white cake comes out clean. Cool completely.
-
Frost & Decorate: Pipe frosting swirls on top, sprinkle crushed cookies or candy.
-
Serve & Reveal: Slice with a serrated knife for the big “wow” moment!
Notes
-
Peppermint Red & White: Red shapes, peppermint extract, candy cane topping.
-
Chocolate Dream: Chocolate loaf with bright red or green shapes.
-
Confetti Party: Rainbow sprinkles in batter + colorful shapes.
-
Lemon Blueberry: Lemon zest in batter + blue shapes, glaze instead of frosting.
Nutrition
- Calories: 290 cal Per Slice
- Fat: 12g
- Carbohydrates: 40g
Nutritional Information (Approximate)
Per slice (based on 12 slices): 290 calories | 12g fat | 40g carbs | 2g protein. Please note this is an estimate and can vary based on specific brands of ingredients used and any substitutions.
ts! This easy holiday loaf cake hides a festive surprise inside. A fun & magical baking project for all!
Final Thoughts: You’re Ready to Create the Magic
And there you have it! Your step-by-step guide to creating a holiday moment that’s equal parts baking and pure, unadulterated joy. This Holiday Surprise Inside Loaf Cake is more than just a dessert; it’s a conversation starter, a memory maker, and a beautiful way to share a piece of your heart (and your kitchen) with the people you love.
Remember, the true secret ingredient here isn’t the green food coloring or the perfect frosting swirl—it’s the spirit of playfulness. Whether your trees stand perfectly straight or lean with charming character, whether your frosting is pristine or delightfully messy, what matters is the love and the story baked into every slice.
So, don your apron, embrace the sprinkle-covered counter, and preheat that oven. You are not just baking a cake; you are crafting an experience, a moment of wide-eyed wonder that your friends and family will be talking about long after the last crumb is gone.
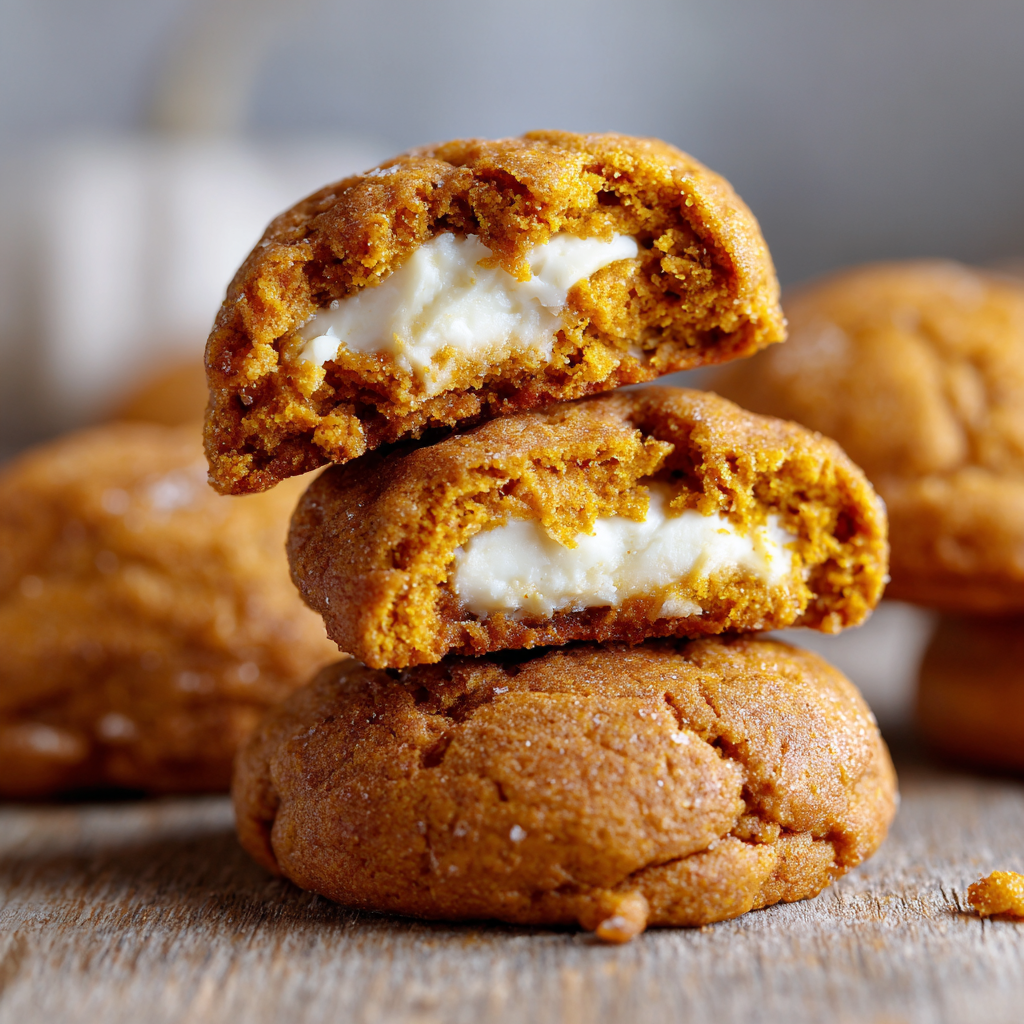
Pumpkin Cheesecake Cookies
Welcome to the Coziest Cookie of the Season!
Hey there, friend! Come on in, grab an apron, and get ready to fill your kitchen with the most incredible aroma of fall. I’m talking about the warm hug of cinnamon, the sweet earthiness of pumpkin, and the promise of something truly special coming out of your oven. If you’ve been searching for that one show-stopping treat that will have everyone begging for the recipe, your search is officially over. Welcome to the glorious world of Pumpkin Cheesecake Cookies.
Imagine this: a soft, cake-like pumpkin cookie, spiced to perfection with all those cozy flavors we crave this time of year. But then, you take a bite and discover the most magical, creamy, tangy surprise right in the very center. A dollop of sweetened cream cheese filling that melts just slightly into the warm cookie, creating a pocket of pure bliss. It’s the best part of a pumpkin spice latte and the best part of a slice of New York cheesecake, all rolled into one handheld, utterly irresistible cookie.
I know stuffed cookies can sound a little intimidating, but I promise you, we’re going to walk through this together. This recipe is designed for real life, for home cooks who might be juggling a million things but still want to create something extraordinary. So, preheat your oven (in your mind, for now!), and let’s make some magic together.
The Day I Accidentally Created a Legend
This recipe, like so many of my favorites, was born from a happy accident and a serious craving. It was a classic rainy autumn Sunday. The kind of day that demands comfy socks, a good movie, and something baking in the oven. I had a can of pumpkin purée staring at me from the pantry and a brick of cream cheese in the fridge that needed a purpose.
My original plan was simple: a batch of classic pumpkin cookies. But as I was mixing the dough, my mind started to wander. I remembered the incredible cream cheese frosting I was planning to make for a carrot cake later in the week. And then it hit me: what if the frosting was inside the cookie? I’m not gonna lie, my first attempt was… a mess. The filling oozed everywhere, creating delicious but very flat, puddle-like cookies. My husband, ever the supportive taste-tester, still declared them a win, but I knew I could do better.
After a few more experiments (and a very patient family), I cracked the code: freeze the filling! That one simple trick changed everything. It’s my little kitchen secret that makes these cookies not only possible but absolutely foolproof. Now, these cookies are a non-negotiable part of our fall tradition. They’re the first thing I make when the leaves start to turn, and they’re always on the table for Friendsgiving. They’re more than a cookie; they’re a little edible memory.
Gathering Your Cookie Crew: The Ingredients
Let’s talk ingredients! Everything here is pretty straightforward, but I’ve included some of my chef-y insights and substitution tips to make sure you feel confident.
For the Cheesecake Filling:
- 8 oz (one block) full-fat cream cheese, softened: Full-fat is non-negotiable here, friends. It provides the structure and rich, tangy flavor we love. Low-fat will make the filling too watery. Chef’s Tip: To soften quickly, take it out of the foil and microwave for 15-20 seconds on 50% power.
- 3 tbsp powdered sugar: This sweetens the filling without making it grainy. It also helps it firm up a bit.
- ½ tsp vanilla extract: A little splash of vanilla warmth to complement the spices.
For the Pumpkin Cookie Dough:
- 2½ cups all-purpose flour: The foundation of our cookie. Spoon and level it into your measuring cup to avoid a dense, dry dough.
- 1 tsp baking soda + 1 tsp baking powder: Our leavening dream team! This combo gives the cookies their perfect rise and tender, cake-like texture.
- A generous pinch of salt: Crucial for balancing all the sweetness and making the flavors pop.
- ½ cup unsalted butter, softened: Unsalted lets us control the salt level. If you only have salted, just omit the extra pinch of salt.
- ½ cup brown sugar + ½ cup granulated sugar: Brown sugar adds moisture and molasses depth, while white sugar helps the cookies spread and crisp up slightly. For a deeper flavor, try using all brown sugar!
- 1 cup pumpkin purée: Not pumpkin pie filling! Make sure you’re using plain, pure pumpkin purée. This is our star ingredient and the source of all that moisture.
- 1 tbsp ground cinnamon: The heart of the spice blend. Don’t be shy!
- ¼ tsp ground nutmeg + ¼ tsp ground cloves: These are the supporting actors that make the cinnamon shine. Freshly grated nutmeg is a game-changer if you have it.
- 1 tsp vanilla extract: The flavor bridge that ties everything together.
Let’s Get Baking: Step-by-Step Instructions
Okay, team! Here’s where the fun begins. Read through these steps once before you start. You’ve got this!
Step 1: Make and Freeze the Filling. In a medium bowl, beat the softened cream cheese, powdered sugar, and vanilla together until it’s completely smooth and no lumps remain. This is easiest with a hand mixer, but a sturdy whisk and some elbow grease work too! Now, using a small cookie scoop or a teaspoon, scoop out the mixture into about 18-20 little dollops onto a parchment-lined plate or baking sheet. Pop these into the freezer for at least 30-45 minutes. This is the secret weapon! You want them solid and easy to handle.
Step 2: Whisk the Dry Ingredients. In a large bowl, whisk together your flour, baking soda, baking powder, salt, and all those gorgeous spices (cinnamon, nutmeg, cloves). Whisking ensures the leavening agents are evenly distributed, so every cookie rises perfectly. Set this bowl aside.
Step 3: Cream the Wet Ingredients. In another large bowl (I know, dishes!), beat the softened butter and both sugars together on medium-high speed for a good 1-2 minutes. You want it to become light, fluffy, and pale in color. This step incorporates air, which is key for texture. Scrape down the sides of the bowl, then beat in the pumpkin purée and vanilla. It might look a little curdled at this point—that’s totally normal! The moisture from the pumpkin sometimes separates from the butter. Don’t panic.
Step 4: Combine and Chill the Dough. Gradually add your dry ingredient mixture to the wet ingredients, mixing on low speed until just combined. The dough will be very soft and sticky—that’s exactly what we want! Cover the bowl and chill the dough for 20-30 minutes. This firms it up just enough to make it manageable for stuffing. Don’t skip this chill!
Step 5: Assemble the Magic. Preheat your oven to 350°F (175°C) and line two baking sheets with parchment paper. Take your chilled dough and your frozen cream cheese dollops. For each cookie, scoop about 2 tablespoons of dough. Flatten it slightly in the palm of your hand. Place one frozen cream cheese ball in the center, then gently wrap the dough around it, pinching the seams to seal it completely. The most important part: make sure no filling is peeking out! If you want, you can roll the sealed cookie ball in a little cinnamon sugar for a sparkly, crunchy exterior.
Step 6: Bake to Perfection. Place the stuffed dough balls on your prepared baking sheets, about 2 inches apart. Bake for 12-14 minutes. The cookies will still look very soft in the center and won’t have browned much—that’s okay! They are done when the edges look set. Do not overbake! Let them cool on the baking sheet for at least 10-15 minutes. They will continue to firm up as they cool. Transferring them too early might cause a cheesecake eruption (tasty, but messy!).
How to Serve These Beauties
Once they’re fully cooled, it’s time for the grand reveal! These cookies are fantastic all on their own, still slightly warm from the oven with that gooey center. For an extra decadent touch, dust them with a light shower of powdered sugar or a quick drizzle of vanilla glaze. Serve them on a big wooden board at your next gathering with a pot of coffee or a glass of cold milk. Watch them disappear and get ready to accept all the compliments!
Make It Your Own: Recipe Variations
- White Chocolate Chip: Fold ¾ cup of white chocolate chips into the cookie dough before chilling. The sweet white chocolate is a dream with the pumpkin and cream cheese.
- Gingersnap Twist: Add 1 tablespoon of freshly grated ginger to the dough and roll the assembled cookies in crushed gingersnap crumbs instead of cinnamon sugar.
- Pecan Praline: Press a pecan half onto the top of each cookie ball before baking, or fold ½ cup of chopped, toasted pecans into the dough.
- Gluten-Free Friendly: Swap the all-purpose flour for a 1:1 gluten-free baking blend. I’ve had great success with Bob’s Red Mill.
- Maple Kissed: Replace the granulated sugar in the cookie dough with ½ cup of pure maple syrup. You may need to add an extra 2-3 tablespoons of flour to compensate for the extra liquid.
Olivia’s Chef Notes & Kitchen Stories
This recipe has evolved so much from my first oozy, messy batch! The biggest lesson learned was patience. Chilling the dough and freezing the filling are not suggestions—they are the commandments for perfect Pumpkin Cheesecake Cookies. I can’t emphasize that enough.
One funny story: I once, in a huge rush, tried to skip the dough chilling step. I figured I could just work quickly with the sticky dough. Big mistake. It was like trying to stuff a snowball with melting butter. The dough was everywhere, the filling was melting, and I ended up with about six vaguely cookie-shaped blobs and a lot of laughter. We still ate them, of course, but it was a glorious mess. So learn from my haste! Embrace the chill time. Use it to clean up the kitchen or pour yourself a cup of tea. It’s worth the wait.
Your Questions, Answered: FAQs & Troubleshooting
Q: My filling still leaked out everywhere! What did I do wrong?
A: The two most common culprits are 1) The filling wasn’t frozen solid enough. Make sure those dollops are rock-hard! And 2) The dough wasn’t sealed completely. Take your time to pinch every seam shut, ensuring no cream cheese is visible. A little dough overhang is your friend.
Q: Can I make these ahead of time?
A: Absolutely! You can freeze the unbaked, assembled cookie balls on a baking sheet, then transfer them to a freezer bag. They can go straight from the freezer to the oven; just add 1-2 minutes to the bake time. You can also keep the baked cookies in an airtight container in the fridge for up to 4 days.
Q: My cookies came out cakey and puffy, not flat. Is that normal?
A: Yes! This is a cake-like cookie dough because of the pumpkin purée. They shouldn’t spread thin like a chocolate chip cookie. The puffiness is a sign of a perfectly tender, soft cookie.
Q: Can I use homemade pumpkin purée?
A: You can, but be cautious. Homemade purée often has more water content than canned. If using homemade, I recommend straining it through a cheesecloth for a few hours first to remove excess liquid. Too much water will make the dough too wet and difficult to handle.

Pumpkin Cheesecake Cookies
Description
Soft, spiced pumpkin cookies with a creamy cheesecake surprise hidden inside—these beauties are fall in cookie form. Each bite delivers pumpkin spice warmth, tangy cream cheese bliss, and that irresistible “just one more” feeling. Perfect for Friendsgiving, holiday trays, or curling up with a blanket and a cup of coffee. These cookies aren’t just dessert; they’re a memory in the making.
Ingredients
Cheesecake Filling:
-
8 oz cream cheese, softened (full-fat)
-
3 tbsp powdered sugar
-
½ tsp vanilla extract
Pumpkin Cookie Dough:
-
2½ cups all-purpose flour
-
1 tsp baking soda
-
1 tsp baking powder
-
Pinch of salt
-
½ cup unsalted butter, softened
-
½ cup brown sugar
-
½ cup granulated sugar
-
1 cup pumpkin purée (not pie filling)
-
1 tbsp ground cinnamon
-
¼ tsp ground nutmeg
-
¼ tsp ground cloves
-
1 tsp vanilla extract
Instructions
-
Filling: Beat cream cheese, powdered sugar & vanilla until smooth. Scoop into ~20 dollops on a lined tray. Freeze 30–45 min until solid.
-
Dry mix: Whisk flour, baking soda, baking powder, salt & spices.
-
Wet mix: Cream butter & sugars until fluffy. Beat in pumpkin & vanilla (it may look curdled—don’t worry).
-
Combine: Add dry mix to wet mix until just combined. Chill dough 20–30 min.
-
Assemble: Scoop ~2 tbsp dough, flatten in hand, wrap around a frozen cream cheese ball. Seal seams completely. Optional: roll in cinnamon sugar.
-
Bake: Place 2″ apart on lined trays. Bake at 350°F (175°C) for 12–14 min. Cookies should look set at the edges but soft in the center.
-
Cool: Rest on tray 10–15 min before moving—this prevents “cheesecake eruptions.”
Notes
-
White Chocolate: Fold ¾ cup chips into dough.
-
Gingersnap Twist: Roll in crushed gingersnap crumbs.
-
Pecan Praline: Add toasted pecans to dough or press one on top.
-
Maple Kissed: Swap granulated sugar for ½ cup maple syrup + 2–3 tbsp extra flour.
-
Gluten-Free: Use a 1:1 GF flour blend.
Nutrition
- Calories: 220 cal Per Cookie
- Fat: 10g
- Carbohydrates: 28g
Nutritional Information (Approximate, per cookie)
Calories: 220kcal | Carbohydrates: 28g | Protein: 3g | Fat: 10g | Saturated Fat: 6g | Cholesterol: 30mg | Sodium: 120mg | Sugar: 15g
Final Thoughts: Your New Favorite Autumn Tradition
And there you have it! What started as a rainy day experiment has now become your secret weapon for creating pure, autumnal joy. These Pumpkin Cheesecake Cookies are more than just a dessert; they’re a experience. They’re the satisfying process of creating something beautiful, the incredible aroma that fills your home, and the unforgettable moment when someone takes that first bite and their eyes light up.
Remember, the heart of this recipe isn’t just in the pumpkin or the cream cheese—it’s in the love and the little bit of patience you pour into it. Don’t fear the chilling steps; embrace them as the secret rituals that guarantee cookie perfection.
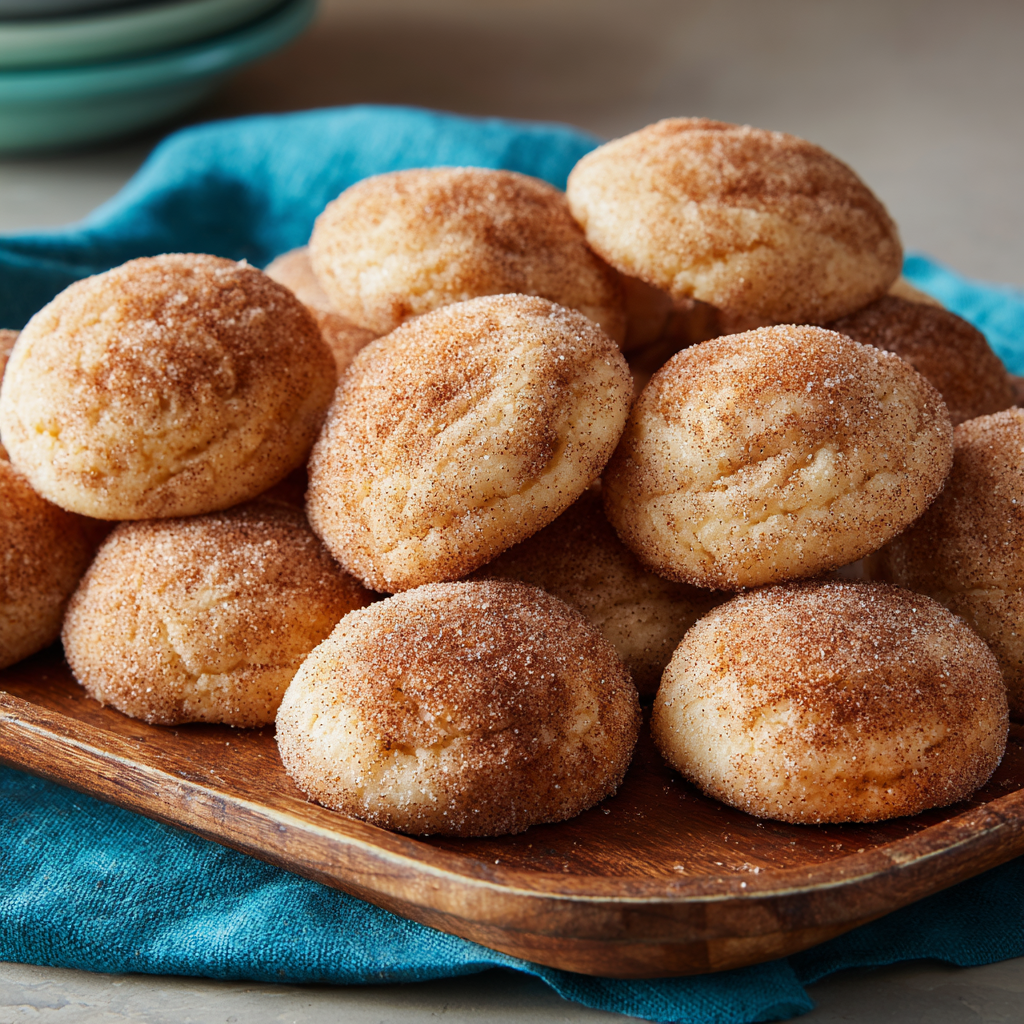
Cinnamon Cream Cheese Cookies
The Cookie That Feels Like a Hug: My Cinnamon Cream Cheese Cookies
Hey there, friend! Come on in, pull up a stool, and let’s get something sweet in the oven. Is there anything quite like the smell of cinnamon and sugar wafting through the house? It’s instant comfort. It’s the scent of happy weekends, holiday gatherings, and those perfect little moments of peace we steal for ourselves with a warm cookie and a cup of coffee.
Today, we’re baking my absolute favorite: Cinnamon Cream Cheese Cookies. Now, I know what you might be thinking—cream cheese in a cookie? Trust me, it’s the secret weapon. It’s the reason these cookies aren’t just good; they’re unforgettable. They bake up impossibly soft and tender with a delicate, slightly cracked top, all wrapped in a cozy, sparkly coat of cinnamon sugar. They’re like the lovechild of a snickerdoodle and a cheesecake, and they are about to become your new baking obsession.
This recipe is a double batch, and that is 100% intentional. You’ll want to share these (they make you look like a baking superhero), but I won’t judge you one bit if you “forget” to tell anyone they exist and keep them all for yourself. They’re that good. So, tie on your favorite apron—the messy one with all the stories—and let’s make some magic.
A Pinch of Nostalgia & A Heaping Scoop of Love
This recipe always takes me right back to my Grandma Eleanor’s kitchen. She was a formidable baker, a woman who measured flour by “feel” and considered a recipe more of a gentle suggestion than a strict rule. Her version of these was simpler, just a classic snickerdoodle, but she’d always let me be in charge of rolling the dough balls in the cinnamon-sugar mixture. I’d end up with more of it on my hands and face than on the cookies, and she’d just laugh, her eyes crinkling at the corners.
When I started developing my own recipes, I wanted to create something that captured that warm, spiced, childhood joy but felt a little more… grown-up. Adding the cream cheese was my “aha!” moment. It gave the cookie a tangy richness and a melt-in-your-mouth texture that my grandma’s didn’t have. The first time I made them for my family, they declared them even better than the original. (Sorry, Grandma! I think she’d approve.) For me, that’s what cooking is all about: honoring the traditions we love while adding our own delicious twist.
Gathering Your Cookie Crew: The Ingredients
Here’s your shopping list for this cozy baking session. I’ve included all my little chef insights and substitution tips to make sure you have success, no matter what’s in your pantry!
- 1 cup (2 sticks) unsalted butter, softened – This is the base of our flavor. Using unsalted lets you control the salt level. Chef’s Tip: “Softened” means cool to the touch but leaves a slight indent when you press it. Don’t let it get oily or melted!
- 8 oz cream cheese, softened – The SECRET WEAPON! It creates an incredibly tender, moist crumb and a subtle tang. Use the full-fat block for the best texture. Low-fat will make the dough too wet.
- 1½ cups powdered sugar – This gives the cookie a finer, softer texture than granulated sugar would. No need to sift it unless it’s very lumpy.
- ¼ cup light brown sugar (our optional twist!) – This is my little upgrade for depth. The molasses in the brown sugar adds a warm, caramel-like note that pairs perfectly with the cinnamon.
- 2 large eggs – They bind everything together. Make sure they’re at room temperature to create a smooth, emulsified dough.
- 1 tsp baking powder – Our leavening agent! It gives the cookies their slight lift and that perfect, tender crackle on top.
- 2 tsp vanilla bean paste or extract – Vanilla bean paste has those beautiful little specks and a richer flavor, but a good quality extract works wonderfully too.
- ½ tsp maple extract (our second optional twist!) – This is the coziest flavor hack. It whispers “autumn morning” and complements the cinnamon beautifully. If you don’t have it, just use an extra ½ tsp of vanilla.
- Pinch of kosher salt – Crucial for balancing all the sweetness and making the flavors pop!
- 3½ cups all-purpose flour – The structure of our cookie. I fluff my flour with a spoon, spoon it into the measuring cup, and level it off to avoid over-packing.
For the Coating:
- ½ cup granulated sugar
- 2 tbsp ground cinnamon – Use the good stuff! Fresh, fragrant cinnamon makes a world of difference.
- ½ tsp ground nutmeg (our third optional twist!) – A tiny pinch adds a warm, aromatic complexity. It’s like a cozy sweater for your cookies.
Let’s Get Baking: The Step-by-Step Magic
Ready? Let’s do this! Preheat that oven to 350°F (175°C) and line your baking sheets with parchment paper. (Trust me, parchment is a baker’s best friend for easy cleanup and no sticking.)
- Cream the Good Stuff: In a large bowl, beat the softened butter and cream cheese together until they’re completely smooth and creamy. This should take about 2 minutes with an electric mixer. No lumps allowed! This step incorporates air, which is key for texture.
- Add the Sweetness & Soul: Add the powdered sugar, brown sugar (if using), eggs, vanilla, maple extract, baking powder, and salt. Mix on medium speed until everything is beautifully combined and the mixture looks light and fluffy. Scrape down the sides of the bowl to make sure no hidden pockets of butter are hiding.
- Bring in the Flour Power: Now, with your mixer on low speed, gradually add the flour. I add it in about three parts to avoid a white cloud of flour erupting in your kitchen! Mix just until the flour disappears and a soft dough forms. Don’t overmix! Overworking the dough = tough cookies, and we want tender, melt-in-your-mouth goodness.
- Create the Cinnamon-Sugar Hug: In a small, shallow bowl, whisk together the ½ cup of granulated sugar, cinnamon, and nutmeg. This is your coating station. Take a moment to inhale. Isn’t that just the best smell in the world?
- Scoop, Roll, & Coat: Use a tablespoon-sized cookie scoop (or a regular spoon) to portion out the dough. Roll each portion between your palms into a smooth ball. This is a great job for a helper! Roll each ball generously in the cinnamon-sugar mixture until it’s completely covered. Place the balls about 2 inches apart on your prepared baking sheets.
- The Flattening Trick: Here’s my chef hack: use the bottom of a glass or measuring cup to gently flatten each dough ball just slightly. This encourages them to spread evenly and gives you that perfect cookie shape. Don’t smash them flat—just a gentle press.
- Bake to Perfection: Bake for 10-12 minutes. You’re looking for set edges and those lovely little cracks on top. The centers might still look a tiny bit soft—that’s perfect! They will continue to set as they cool. This is the secret to a soft cookie. Do not overbake!
- The Patient Cool-Down: Let the cookies cool on the hot baking sheet for 5 full minutes. This is non-negotiable! They need this time to firm up enough to move. Then, transfer them to a wire rack to cool completely. Try to wait at least until they’re warm, not scalding hot, before you dive in. I believe in you.
How to Serve These Little Pieces of Joy
Presentation is part of the fun! Pile these cinnamon cream cheese cookies high on a rustic wooden board or a vintage cake stand for that “I’m a professional baker” look. They’re sublime still slightly warm from the oven, with a cold glass of milk for the ultimate classic combo. For the adults, serve them alongside a strong cup of coffee or a latte—the spices are a perfect match. They also make a incredible dessert, slightly crumbled over a scoop of vanilla bean ice cream. You really can’t go wrong.
Make It Your Own: Delicious Variations
The beauty of this recipe is its versatility! Here are a few ways to play with the flavors:
- Apple Pie Twist: Add ½ tsp of apple pie spice to the dough along with the flour. Roll the balls in a cinnamon-sugar-apple pie spice mix.
- Chocolate Chip Cinnamon: Fold in 1 cup of semi-sweet or white chocolate chips after you mix in the flour. A classic combo for a reason!
- Gluten-Free Friendly: Swap the all-purpose flour for a 1:1 gluten-free baking blend. I’ve had great success with Bob’s Red Mill and Cup4Cup blends.
- Citrus Zing: Add the zest of one orange to the dough for a bright, sunny contrast to the warm spices.
- “Everything” Spice: For a deeper spice profile, add a pinch of cardamom and ginger to your cinnamon-sugar coating.
From My Kitchen to Yours: Chef’s Notes
This recipe has evolved so much over the years! The first time I made them, I completely forgot the baking powder (a true kitchen fail). They baked into delicious, dense little hockey pucks—still tasty, but not the soft pillows we were going for. Lesson learned: always pre-measure your ingredients! Another time, I was in a huge rush and used cold cream cheese. My mixer protested loudly, and I ended up with little chunks of cream cheese throughout the dough. They baked up like mini cream cheese-filled surprises, which my friends actually loved. So even a “mistake” can turn into a happy accident!
These cookies freeze beautifully. You can freeze the rolled, unbaked dough balls on a tray and then transfer them to a zip-top bag. Bake straight from frozen, adding a minute or two to the baking time. Having ready-to-bake cookie dough in the freezer is my ultimate secret for always being prepared for guests—or a sudden cookie craving.
Your Questions, Answered
Q: My dough is really sticky and hard to roll. What did I do wrong?
A: This usually happens if the butter or cream cheese was too warm or if you’re in a very warm kitchen. Don’t panic! Pop the bowl of dough into the refrigerator for 20-30 minutes to firm it up. You can also lightly dampen your hands with water to prevent sticking while you roll the balls.
Q: Why are my cookies flat and spread out too much?
A: The most common culprit is butter that was too soft or even melted. Remember, softened is key! Also, double-check that you used baking *powder* and not baking *soda*. If all else fails, a quick 15-minute chill of the shaped dough balls on the baking sheet before they go in the oven can work wonders.
Q: Can I make the dough ahead of time?
A: Absolutely! You can cover the bowl and refrigerate the dough for up to 2 days. Let it sit at room temperature for about 20 minutes before scooping and rolling so it’s easier to handle.
Q: My cinnamon sugar coating melted away in the oven. How do I get it to stay?
A: Make sure you’re rolling the dough balls thoroughly so they have a thick, even layer of cinnamon sugar. The gentle flattening step also helps press the sugar into the dough so it stays put. Using a coarser sugar (like turbinado) for the coating can also help it stand up better to baking.
Cinnamon Cream Cheese Cookies
Description
Soft, tender, and wrapped in a sparkly cinnamon-sugar coat, these cookies are pure comfort in every bite. Thanks to cream cheese, they bake up melt-in-your-mouth rich with a gentle tang that makes them unforgettable. Imagine a snickerdoodle with a cheesecake twist—cozy, nostalgic, and just a little elevated. Whether you’re baking for the holidays, gifting a friend, or sneaking a midnight snack, these cookies always bring joy.
Ingredients
Cookie Dough:
-
1 cup (2 sticks) unsalted butter, softened
-
8 oz cream cheese, softened (full-fat block)
-
1½ cups powdered sugar
-
¼ cup light brown sugar (optional, for depth)
-
2 large eggs, room temp
-
1 tsp baking powder
-
2 tsp vanilla bean paste or extract
-
½ tsp maple extract (optional)
-
Pinch of kosher salt
-
3½ cups all-purpose flour
Cinnamon-Sugar Coating:
-
½ cup granulated sugar
-
2 tbsp ground cinnamon
-
½ tsp ground nutmeg (optional)
Instructions
-
Prep: Preheat oven to 350°F (175°C). Line baking sheets with parchment.
-
Cream: Beat butter & cream cheese until smooth (2 min).
-
Mix in sugars, eggs, vanilla, maple extract, baking powder, and salt until fluffy.
-
Add flour gradually, mixing until just combined.
-
Make coating: Stir sugar, cinnamon, and nutmeg in a shallow bowl.
-
Shape: Scoop 1 tbsp dough, roll into balls, and coat in cinnamon sugar. Place 2″ apart on trays.
-
Flatten slightly with the bottom of a glass.
-
Bake 10–12 min, until edges are set and tops crackle. Centers should look just soft.
-
Cool 5 min on tray, then transfer to a rack.
Notes
-
Apple Pie Twist: Add apple pie spice to dough & coating.
-
Chocolate Chip: Fold in 1 cup chocolate chips.
-
Gluten-Free: Use a 1:1 gluten-free flour blend.
-
Citrus Zing: Add orange zest to the dough.
-
Spice Lover’s Mix: Add cardamom or ginger to the sugar coating.
Nutrition
- Calories: 95 cal Per Serving
- Fat: 5g
- Carbohydrates: 11g
- Protein: 1g
Nutritional Information*
Makes: ~56 cookies | Prep time: 10 mins | Bake time: 10 mins | Total time: 20 mins
*This is an estimate provided for informational purposes only. I am not a nutritionist.
Per cookie (approx): 120 calories | 6g fat | 14g carbs | 1g protein
There you have it! My heart and soul in cookie form. I truly hope you love baking (and eating!) these Cinnamon Cream Cheese Cookies as much as I do. Tag me on social media @OliviasCozyKitchen if you make them—I always love seeing your creations! Happy baking!
Final Thoughts: More Than Just a Cookie
So there you have it. A batch of dough, a cloud of cinnamon sugar, and a kitchen filled with the kind of warmth that seeps right into your soul.
These Cinnamon Cream Cheese Cookies are more than just a treat; they’re an experience. They’re a recipe built on a foundation of happy memories, perfected with a secret ingredient that makes them irresistibly tender and uniquely yours. Whether you’re baking them to fill your own cookie jar for a week of cozy moments, to impress friends at a gathering, or to create new traditions with someone you love, I hope they bring you as much joy as they bring me.
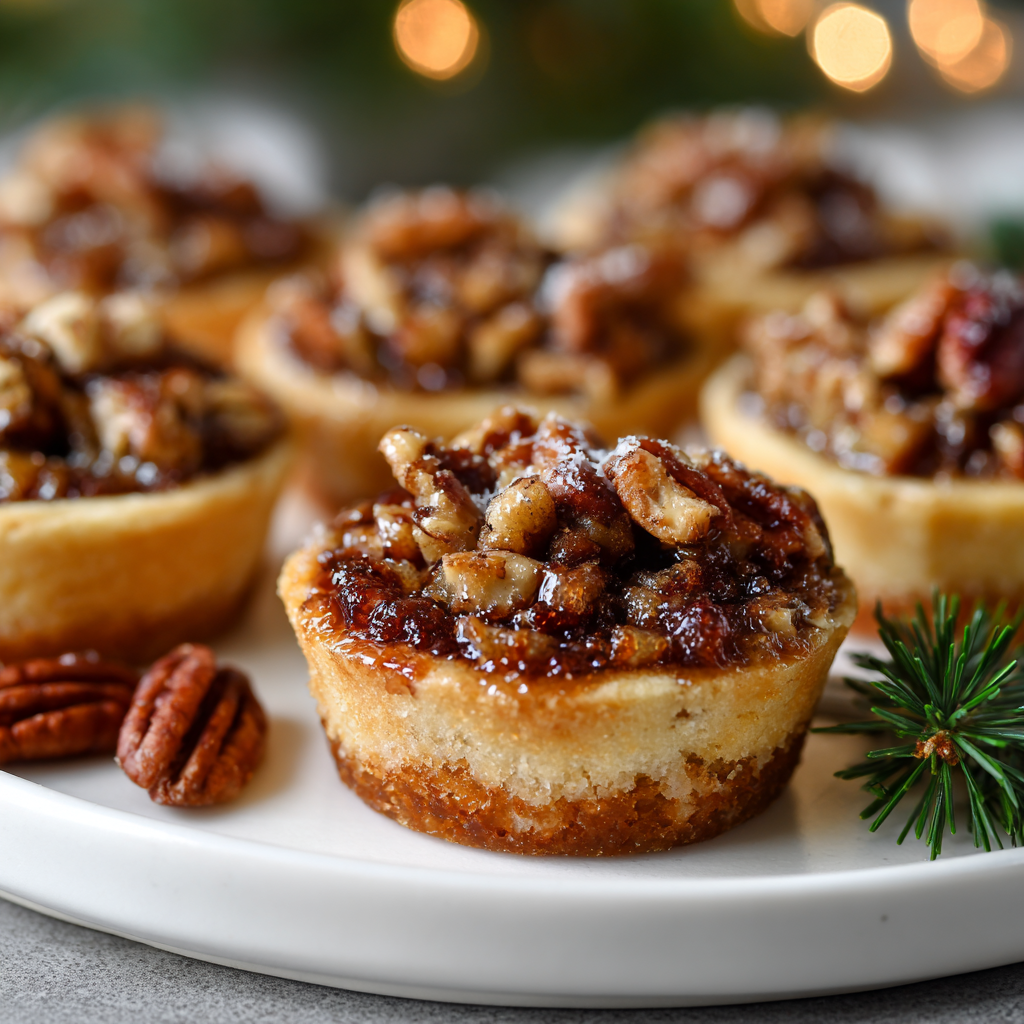
Pecan Pie Cookie Cups
Welcome to the Coziest Corner of the Kitchen!
Hey there, friend! Come on in, grab an apron, and get ready to fill your kitchen with the most incredible aroma. You know that moment when you walk into a house and smell something sweet, buttery, and nutty baking in the oven? That instant feeling of warmth and welcome? That’s exactly what we’re creating today. We’re taking everything we adore about a classic, soul-warming pecan pie and transforming it into a delightfully handheld, bite-sized treat: Pecan Pie Cookie Cups. Imagine a soft, buttery vanilla cookie cup that cradles a gooey, rich, and perfectly sweet pecan filling. It’s the ultimate dessert mashup, and I promise, it’s about to become your new favorite thing to bake. Whether you’re prepping for a holiday cookie swap, need a stunning addition to your dessert board, or simply want to treat yourself on a Tuesday afternoon, these little cups of joy are the answer. They deliver all the flavor of a traditional pie without the commitment of slicing and serving, making them the ultimate fuss-free, crowd-pleasing superstar. So, let’s preheat those ovens and turn up the fun—we’re about to make some magic!
The Day I Ditched the Pie Plate
This recipe was born from a little bit of chaos and a whole lot of love, as the best recipes often are. A few years ago, I was in charge of dessert for our big family Thanksgiving. The menu was set: turkey, stuffing, the works… and of course, my grandfather’s famous pecan pie. Well, in the glorious hustle of the day, with cousins running underfoot and dogs begging for scraps, I somehow managed to overfill the pie crust. What emerged from the oven was… abstract. A delicious, caramelized, sticky mess that had bubbled over and welded itself to the oven floor. It had soul, but it wasn’t winning any beauty contests. Panic set in! But then, I looked at the bowl of leftover filling and the ball of pie dough I had reserved. In a “nothing left to lose” moment, I pressed little bits of the dough into a muffin tin, poured in the extra filling, and crossed my fingers. Fifteen minutes later, I pulled out these perfect, golden, individual pecan pie cups. They were a revelation! Not only did they save the day, but they were arguably better—each person got their own perfect, gooey-to-crust ratio. Now, I use a simple cookie dough for an even easier, more versatile base, but the spirit of that happy kitchen accident lives on in every batch.
Gathering Your Kitchen Crew (The Ingredients!)
Here’s your shopping list! These are simple, pantry-friendly ingredients that work together to create something truly special.
For the Cookie Base:
- ½ cup unsalted butter, softened: This is the foundation of our rich, tender cookie cup. Using unsalted lets us control the salt level. Chef’s Tip: True “softened” butter should give slightly when you press it but still hold its shape. Too melty and your cups might spread!
- ½ cup granulated sugar: It sweetens the dough and helps create a lovely light texture when creamed with the butter.
- 1 large egg yolk: The yolk adds richness and helps bind our dough without making it too cakey. Save the white for a healthy omelet tomorrow!
- 1 tsp vanilla extract: Pure vanilla is my go-to for that warm, classic flavor that complements the pecans so beautifully.
- 1¼ cups all-purpose flour: The structure of our cookie cup. Spoon and level it into your measuring cup to avoid a dense, dry dough.
- ¼ tsp salt: Never skip this! Salt is the flavor enhancer that makes the sweet ingredients truly sing.
For the Pecan Filling:
- ½ cup chopped pecans: The star of the show! I like to chop them roughly for great texture. Toasting them beforehand (350°F for 5-7 minutes) will unlock an incredible, deep nutty flavor.
- ¼ cup packed brown sugar: Pack it firmly into your measuring cup. Its molasses notes are essential for that classic, caramely pecan pie taste.
- ¼ cup light corn syrup: This is the key to the signature gooey, glossy filling. Substitution Tip: Pure maple syrup or honey can work in a pinch, but the texture and flavor will be slightly different.
- 1 tbsp unsalted butter, melted: Added richness for a luxurious filling.
- ½ tsp vanilla extract: A second hit of vanilla in the filling ties everything together.
- Pinch of salt: Balances the sweetness and elevates all the other flavors in the filling.
Let’s Get Baking: The Fun Part!
Ready to create? Follow these steps for perfect little cookie cups every single time.
- Preheat and Prep: Preheat your oven to 350°F (175°C). This is non-negotiable for even baking! Generously grease a mini muffin pan with butter or non-stick spray. This ensures our cookie cups pop out easily after their bake. Chef’s Hack: If you’re nervous about sticking, you can use mini muffin liners for absolute insurance.
- Cream the Butter & Sugar: In a medium bowl, use a hand mixer (or some good old-fashioned elbow grease with a wooden spoon) to cream together the softened butter and granulated sugar. We’re looking for it to become light, pale yellow, and fluffy. This step incorporates air, which is the secret to a tender cookie base. This should take about 2 minutes with a mixer.
- Add Wet Ingredients: Beat in the single egg yolk and the teaspoon of vanilla extract. Mix just until they are fully incorporated. Scrape down the sides of the bowl with a spatula to make sure everything is getting to know each other.
- Bring in the Dry Goods: Add the flour and salt to the bowl. Now, switch to mixing with a spatula or wooden spoon. Mix until a soft, cohesive dough forms. It might seem crumbly at first, but it will come together as you mix. Don’t overmix! We want tender cups, not tough ones.
- Form the Cups: Divide your dough into 12 equal pieces. Roll each piece into a smooth ball. Press each ball firmly into the bottom and up the sides of each prepared mini muffin cup, forming a little well. I like to use my fingers or the back of a small, rounded measuring spoon to help shape a perfect, even cup. Make sure the dough goes about halfway up the sides.
- Whisk the Filling: In a separate small bowl, combine all the filling ingredients: the chopped pecans, packed brown sugar, corn syrup, melted butter, vanilla, and that all-important pinch of salt. Stir it until everything is beautifully combined and glossy.
- Fill ‘Em Up: Spoon a heaping teaspoon of the pecan filling mixture into each cookie dough cup. It’s okay if it looks like a lot—the filling will bubble and settle as it bakes. You should use it all up!
- Bake to Perfection: Slide the pan into your preheated oven and bake for 14-16 minutes. You’ll know they’re done when the edges of the cookie cups are a light golden brown and the pecan filling is actively bubbling all over. That bubbling is your sign that the sugar has caramelized perfectly.
- The All-Important Cool Down: This is the hardest part: patience! Remove the pan from the oven and let it cool on a wire rack for at least 10 minutes. The filling is molten lava right now and needs time to set. After 10 minutes, you can gently use a small offset spatula or butter knife to coax each cookie cup out of the pan. Transfer them to the wire rack to cool completely. They will firm up as they cool, revealing their perfect, gooey texture.
How to Serve These Little Treasures
Presentation is part of the fun! Arrange these gorgeous Pecan Pie Cookie Cups on a beautiful rustic wooden board or a vintage cake stand. For a truly decadent touch, add a tiny dollop of freshly whipped cream or a small scoop of vanilla bean ice cream on the side. The contrast of the warm, gooey cup with the cold, creamy ice cream is pure heaven. They’re the perfect self-contained dessert for a party—no plates or forks needed, just happy fingers and smiling faces!
Mix It Up! Creative Twists
Once you’ve mastered the classic, the world is your oyster! Try these fun variations:
- Chocolate Drizzle: Melt some dark or milk chocolate and drizzle it over the cooled cups for an elegant finish.
- Bourbon Kissed: Add ½ tablespoon of bourbon to the pecan filling for a wonderfully warm, adult-friendly depth of flavor.
- Salty Sweet: Finish the baked cups with a light sprinkle of flaky sea salt right when they come out of the oven.
- Cranberry Pecan: Fold 2 tablespoons of dried cranberries into the filling for a festive, tart twist.
- Gluten-Free: Swap the all-purpose flour for a 1:1 gluten-free baking blend to make everyone at the table happy.
Olivia’s Chef Notes & Kitchen Stories
This recipe has become a staple in my home, especially during the holidays. I’ve probably made a hundred batches by now! My biggest lesson learned? That 10-minute cooling time in the pan is not a suggestion—it’s a commandment. I once got impatient and tried to remove one immediately. Let’s just say I had to eat the evidence to hide my mistake (it was still delicious, just structurally… challenged). Over time, I’ve started toasting my pecans without fail—it adds such a profound nuttiness. I’ve also learned that this dough is incredibly forgiving. If you think you’ve pressed it too thin, just patch it with a little extra dough. No one will ever know! These little cups are about joy, not perfection. So put on some music, enjoy the process, and get ready for the compliments to roll in.
Your Questions, Answered!
Q: My filling overflowed! What happened?
A: Don’t worry, it happens! This usually means the wells in your cookie dough weren’t quite deep enough or the filling was *slightly* overfilled. It’s a cosmetic issue—they’ll still taste amazing. Next time, really press that dough up the sides to create a sturdy barrier. Placing a baking sheet on the rack below your muffin pan can catch any drips for easier clean-up.
Q: Can I make these ahead of time?
A: Absolutely! These are a great make-ahead dessert. Once completely cooled, store them in an airtight container at room temperature for up to 2 days. The cookie base might soften slightly from the filling, but they’re still delicious. You can also freeze them for up to 2 months.
Q: My cookie cups are stuck in the pan. Help!
A: First, ensure you greased the pan thoroughly. If they’re stuck, don’t force them! Let the pan cool completely. Then, gently run a thin knife or offset spatula around the edges again. Sometimes a little gentle twisting motion can help release them. For next time, the mini muffin liners are a foolproof solution.
Q: Can I use a regular muffin pan?
A: You can, but you’ll get fewer cookie cups (probably about 6-8), and the baking time will need to be increased by 3-5 minutes. Keep a close eye on them until the edges are golden and the filling is bubbly.
Pecan Pie Cookie Cups
Description
All the rich, nutty magic of pecan pie—reimagined into adorable, handheld cookie cups. A buttery vanilla cookie base cradles gooey caramel-pecan filling, creating the perfect balance of crisp, chewy, and melt-in-your-mouth sweetness. They’re fuss-free, crowd-pleasing, and guaranteed to disappear fast—whether on a holiday dessert board, at a cookie swap, or as a well-earned Tuesday treat.
Ingredients
Cookie Base:
-
½ cup unsalted butter, softened
-
½ cup granulated sugar
-
1 large egg yolk
-
1 tsp vanilla extract
-
1¼ cups all-purpose flour
-
¼ tsp salt
Pecan Filling:
-
½ cup chopped pecans (toasted if possible)
-
¼ cup packed brown sugar
-
¼ cup light corn syrup (or maple/honey substitute)
-
1 tbsp unsalted butter, melted
-
½ tsp vanilla extract
-
Pinch of salt
Instructions
-
Preheat oven to 350°F (175°C). Grease a mini muffin pan.
-
Cream butter & sugar until light and fluffy (2 min).
-
Mix in egg yolk and vanilla. Stir in flour and salt until a soft dough forms.
-
Shape 12 dough balls. Press into muffin wells, forming cups up the sides.
-
Whisk filling ingredients together until glossy.
-
Spoon filling into each cup (about 1 heaping tsp).
-
Bake 14–16 min, until cookie edges are golden and filling is bubbling.
-
Cool in pan 10 min, then gently remove and let cool fully.
Notes
-
Chocolate drizzle: Add melted chocolate over cooled cups.
-
Bourbon twist: Stir ½ tbsp bourbon into filling.
-
Salty finish: Sprinkle flaky sea salt right after baking.
-
Festive flair: Add a few dried cranberries to the filling.
Nutrition
- Calories: 210 cal Per Cookie
- Fat: 12g
- Carbohydrates: 24g
Nutritional Information*
Per Cookie Cup (approx): 210 calories | 12g fat | 24g carbs | 2g protein
*This information is provided as a courtesy and is an estimate only. Please note that nutritional information may vary based on the specific brands of products used. We recommend calculating the nutritional information based on the specific ingredients you use.
Final Thoughts: Your New Go-To Recipe Awaits
And there you have it! From a kitchen mishap to a cherished recipe, these Pecan Pie Cookie Cups are proof that the best creations often come from a little bit of love and a happy accident.
They truly are the perfect little package: all the nostalgic, soul-warming flavor of a classic pecan pie, baked into a portable, shareable, and utterly adorable treat. Whether they’re the star of your holiday table, a gift for a neighbor, or a special weeknight indulgence, they’re guaranteed to make any moment feel a little more cozy and celebratory.
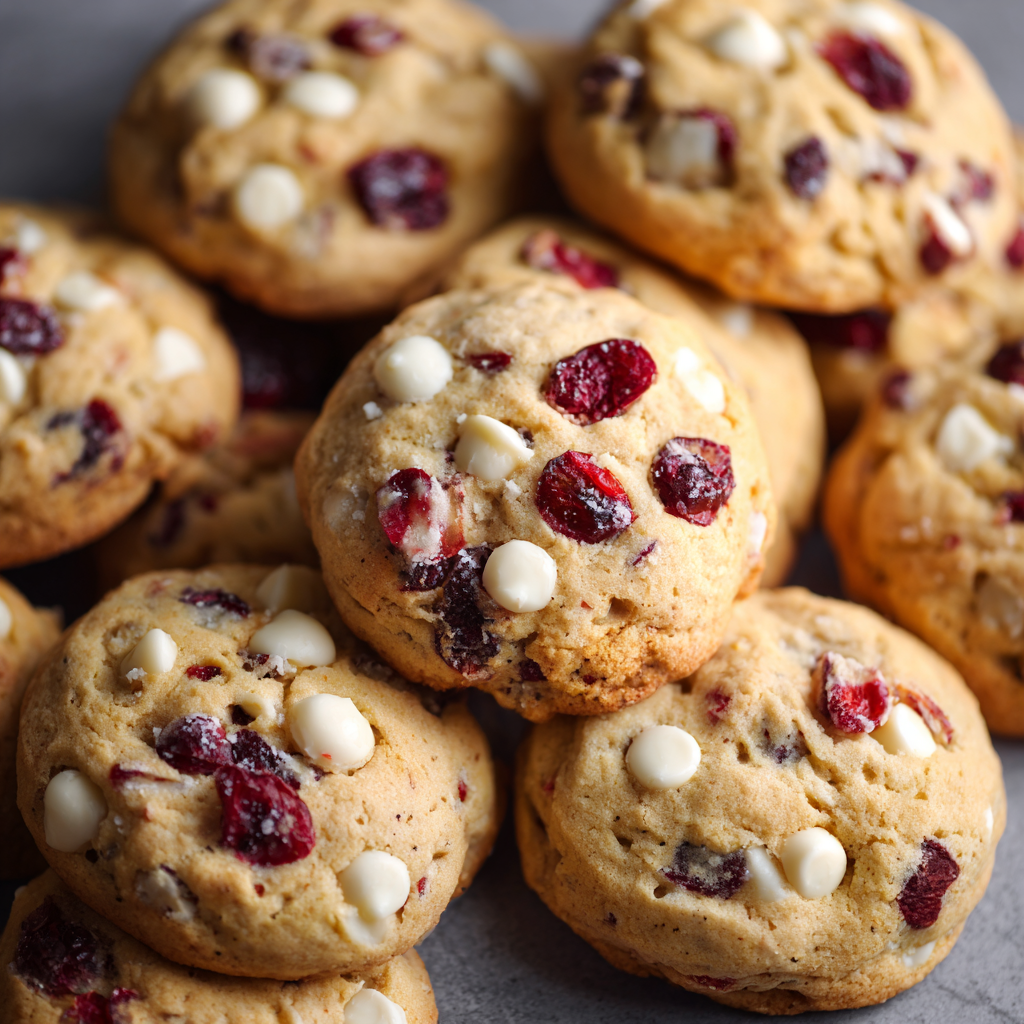
Cranberry Christmas Cookies
The Cookie That Sparkles: Cranberry Christmas Cookies
Hello, my friend! Come on in, grab an apron, and let’s get this kitchen smelling like a holiday dream. Is there anything better than the warm, buttery scent of cookies baking in the oven while festive music plays in the background? I think not. These Cranberry Christmas Cookies are more than just a treat; they’re little edible ornaments, bursting with tart cranberries, creamy white chocolate, and the sunny zing of orange zest. They’re the kind of cookie that makes people’s eyes light up—the perfect blend of sweet, tart, and downright festive.
I designed this recipe specifically for sharing. We’re making a big, beautiful double batch because, let’s be honest, one cookie is never enough. They’re soft, they’re chewy, and they have that perfect golden edge. Whether you’re packing tins for neighbors, leaving a plate out for Santa, or simply treating yourself to a moment of cozy bliss with a cup of hot cocoa, these cookies are your new holiday heroes. So, preheat that oven, and let’s create some magic together!
A Kitchen Full of Laughter & (A Little) Flour
This recipe always takes me right back to my first Christmas in this house. My best friend, Sarah, and I decided to host a massive cookie decorating party. We had grand plans, royal icing in every color, and about six different cookie recipes to tackle. Of course, we vastly overestimated our energy levels! By the third batch, we were covered in flour, laughing hysterically, and our meticulously planned schedule was completely out the window.
In a moment of “let’s-just-throw-something-easy-together,” I whipped up a version of these cranberry-white chocolate cookies. They were supposed to be a simple, no-fuss dough to pop in the oven while we focused on the intricate sugar cookies. But you know what? They were the absolute star of the party. Everyone kept sneaking back to the kitchen to grab “just one more.” They were the first platter to empty. That night taught me a beautiful lesson: the best holiday memories aren’t about perfection. They’re about the joy of creating together, the mess, the laughter, and the surprisingly incredible cookies that come from a happy, chaotic kitchen.
Gathering Your Cookie Crew (The Ingredients!)
Here’s your shopping list for these festive delights. Remember, baking is a science, but it’s also an art—don’t be afraid to make it your own!
- 2 cups (450g) unsalted butter, softened: This is the foundation of our rich, tender cookie. Chef’s Tip: “Softened” means cool to the touch but your finger can leave a gentle indent. Don’t melt it! If you forget to take it out early, cut it into chunks and it will soften faster.
- 2 cups (400g) granulated sugar: For sweetness and that perfect chewy texture.
- 2 tsp vanilla extract: The classic flavor we all know and love. Use the real stuff—it makes a difference!
- ½ tsp almond extract (optional twist for depth): This is my secret weapon! It doesn’t taste like strong almond; it just adds a beautiful, warm depth that makes the cranberry and orange flavors sing. Highly recommend!
- 4 large eggs: They bind everything together and add structure. Make sure they’re at room temperature to emulsify properly with the butter.
- 5 cups (600g) all-purpose flour: The main structure of our cookie. For accuracy, I recommend using a kitchen scale. If you don’t have one, fluff your flour with a spoon, spoon it into your measuring cup, and level it off. Don’t pack it down!
- 2 tsp baking powder: Our leavening agent for a little lift.
- 1 tsp salt: Crucial for balancing all the sweetness and enhancing every other flavor.
- 2 cups (240g) dried cranberries: Our star! They provide that gorgeous pop of color and a wonderful tart contrast to the sweet dough and chocolate. Craisins work perfectly.
- 1 cup (170g) white chocolate chips: Creamy, sweet, and dreamy. You can also chop up a bar of high-quality white chocolate for irregular, melty pockets.
- Zest of 2 oranges (optional but highly recommended): This is the sunshine in every bite! The citrus oil brightens the entire cookie and cuts through the richness. Please don’t skip it!
Let’s Bake! Your Step-by-Step Guide to Cookie Bliss
Okay, team! Let’s do this. Read through all the steps once before you begin. You’ve got this!
- Preheat oven to 350°F (175°C). Line baking sheets with parchment paper. This is non-negotiable for me! Parchment paper guarantees no sticking and makes cleanup an absolute dream. Silicone baking mats work great, too.
- In a large bowl, cream butter and sugar until light and fluffy. This is the most important step! Creaming incorporates air into your dough, which gives you a lighter, softer cookie. Use a hand mixer or stand mixer fitted with the paddle attachment. Beat on medium-high speed for a good 2-3 minutes until the mixture is pale yellow and has visibly increased in volume. Don’t rush this.
- Add eggs one at a time, beating well after each addition. Adding them one by one allows them to fully emulsify into the butter mixture. This prevents a greasy, separated dough. Scrape down the sides of the bowl as needed.
- Stir in vanilla, almond extract, and orange zest. Now your kitchen should already be smelling incredible. Mix just until these beautiful flavors are evenly distributed.
- In a separate bowl, whisk together flour, baking powder, and salt. Whisking your dry ingredients does two things: it combines them evenly so you don’t get a pocket of baking powder, and it aerates the flour, making your final cookie texture even better.
- Gradually mix the dry ingredients into the wet ingredients. I usually add the flour mixture in three parts, mixing on low speed until *just* combined after each addition. Stop as soon as you no longer see streaks of flour. Overmixing at this stage leads to tough cookies, and we want tender, melt-in-your-mouth cookies!
- Fold in dried cranberries and white chocolate chips. Put down the mixer! Grab a sturdy spatula and gently fold these in by hand. This ensures you don’t break up the cranberries or overwork the dough.
- Drop dough by rounded tablespoons onto baking sheets, spacing 2 inches apart. A cookie scoop is your best friend here for uniform size and easy handling. That 2-inch space is crucial—these cookies need room to spread and become their beautiful, golden selves.
- Bake for 12–15 minutes, or until edges are lightly golden. Ovens vary, so keep an eye on them. The centers might still look a tiny bit soft—that’s perfect! They will continue to set as they cool. This is the secret to a soft, chewy center.
- Let cool on baking sheet for 5 minutes before transferring to a wire rack. This is the patience test! Letting them rest on the sheet allows them to firm up enough to move without breaking. Then, transfer them to a rack to cool completely. This prevents the bottoms from getting soggy.
How to Serve These Holiday Stars
Presentation is part of the fun! Pile these gorgeous, red-and-white-speckled cookies high on a vintage cake stand or a simple wooden board. They look absolutely stunning next to other Christmas classics like gingerbread men or shortbread. For an extra festive touch, you can drizzle them with a little melted white chocolate and sprinkle with coarse sparkling sugar while the drizzle is still wet. Serve them alongside a pot of strong coffee, a mug of rich hot chocolate, or a glass of cold milk for the ultimate happy sigh.
Make It Your Own: Delicious Variations
- Nutty Delight: Fold in 1 cup of chopped pecans or walnuts along with the cranberries and chocolate for a wonderful crunch.
- Triple Citrus: Add the zest of one lemon or one lime along with the orange zest for an even brighter, zingier flavor profile.
- Dark Chocolate Swap: Not a white chocolate fan? Substitute semi-sweet or dark chocolate chips for a deeper, richer flavor.
- Gluten-Free Friendly: Use a 1:1 gluten-free all-purpose flour blend in place of the regular flour. The texture will be slightly more delicate but still delicious.
- Cran-Orange Bliss: Soak your dried cranberries in orange juice for 30 minutes before adding them to the dough. Drain any excess liquid first. This plumps them up and infuses them with even more orange flavor!
From My Kitchen to Yours: Chef’s Notes
This recipe has evolved so much over the years! The almond extract was a happy accident—I grabbed the wrong bottle once and never looked back. I’ve also learned that a 15-minute chill of the dough (if you can wait!) makes them spread just a tiny bit less, giving you a slightly thicker, cakeier cookie. Both ways are fantastic. My husband is officially the official taste-tester, and he has a very serious job of pointing to the “perfectly golden” ones he claims need to be “quality tested” immediately. The best part about this recipe is its flexibility and the sheer joy it brings to everyone who tries one. It’s a little piece of my holiday heart, and now it’s yours, too.
Your Questions, Answered!
Q: My cookies spread too much and came out flat. What happened?
A: This is usually due to butter that is too warm or an oven that’s not hot enough. Make sure your butter is softened but not melty. Also, ensure your baking powder is fresh! If it’s expired, it won’t provide the necessary lift. As a quick fix, you can pop the dough in the fridge for 15-20 minutes before scooping and baking.
Q: Can I use fresh or frozen cranberries instead of dried?
A: I don’t recommend it for this particular recipe. Fresh or frozen cranberries contain a lot of water, which they will release during baking. This can make your cookies soggy, cause them to spread unpredictably, and the burst berries can create colorful but messy streaks. Dried cranberries provide the perfect chewy, tart burst without altering the dough’s texture.
Q: Can I make the dough ahead of time?
A: Absolutely! You can scoop the dough onto a baking sheet, freeze the balls solid, and then transfer them to a freezer bag. They’ll keep for up to 3 months. When you’re ready to bake, just place the frozen dough balls on a parchment-lined sheet and add 1-2 minutes to the baking time. No need to thaw!
Q: My white chocolate chips melted everywhere. How can I prevent that?
A: This is a common and totally okay occurrence! If you prefer distinct chips, you can try using higher-quality white chocolate chips or chunks, which often have a higher cocoa butter content and hold their shape better. You can also toss them in a tablespoon of the measured flour before folding them in—this helps them stay put!

Cranberry Christmas Cookies
- Total Time: 30 mins
Description
Imagine buttery cookies speckled with ruby-red cranberries, creamy white chocolate, and a burst of orange zest—soft, chewy, and glowing with holiday cheer. These cookies are like edible ornaments, perfect for gifting, sharing, or savoring with a steaming mug of cocoa. They’re simple to make, utterly irresistible, and guaranteed to become a new holiday tradition.
Ingredients
-
2 cups (450g) unsalted butter, softened
-
2 cups (400g) sugar
-
2 tsp vanilla extract
-
½ tsp almond extract (optional, for depth)
-
4 large eggs, room temp
-
5 cups (600g) all-purpose flour
-
2 tsp baking powder
-
1 tsp salt
-
2 cups (240g) dried cranberries
-
1 cup (170g) white chocolate chips (or chunks)
-
Zest of 2 oranges
Instructions
-
Preheat oven to 350°F (175°C). Line trays with parchment.
-
Cream butter & sugar until pale and fluffy (2–3 min).
-
Add eggs one at a time, then mix in vanilla, almond extract, and zest.
-
Whisk dry ingredients (flour, baking powder, salt) in a separate bowl.
-
Combine dry with wet in three parts, mixing gently until just blended.
-
Fold in cranberries and white chocolate.
-
Scoop dough into balls (1 tbsp each), place 2 inches apart.
-
Bake 12–15 min, until edges are golden and centers slightly soft.
-
Cool on sheet 5 min, then transfer to rack.
Notes
-
Add 1 cup chopped pecans or walnuts for crunch.
-
Swap white chocolate for dark for a richer flavor.
-
Try a triple-citrus zest (orange, lemon, lime).
-
Chill dough 15 min before baking for thicker cookies.
- Prep Time: 15 min
- Cook Time: 15 min
Nutrition
- Calories: 150 cal Per Cookie
- Fat: 7g
- Carbohydrates: 20g
Nutritional Information (Per Cookie)
Makes: 48 cookies | Prep time: 15 mins | Cook time: 15 mins | Total time: 30 mins
Per cookie (approx): 150 calories | 7g fat | 20g carbs | 2g protein
Final Thoughts: More Than Just a Cookie
As you pull that final tray of golden, cranberry-studded cookies from the oven, I hope you feel a deep sense of accomplishment and joy. You’ve created more than just a delicious treat; you’ve crafted edible joy, a tangible piece of the holiday spirit.
These Cranberry Christmas Cookies are a reminder that the greatest magic of the season isn’t found in perfection, but in the shared moments of creation. It’s in the flour-dusted countertops, the laughter that echoes in the kitchen, and the simple, profound pleasure of offering something made with your own hands to someone you love.
This recipe is my gift to you—a trusted, forgiving friend for your holiday gatherings. It’s designed to be a starting point for your own traditions, your own happy accidents, and your own stories. So whether you’re keeping the whole batch for your family, gifting them in tins wrapped with ribbon, or leaving a few out for Santa, know that you’re sharing a little sparkle of Christmas cheer.

Classic Christmas Gingerbread Cookies
The Heartbeat of the Holidays: My Classic Christmas Gingerbread Cookies
Hello, my friend, and welcome back to my kitchen! Can you smell it? That unmistakable, soul-warming aroma of ginger, cinnamon, and molasses that seems to weave its way into every corner of the house the moment December arrives. It’s the scent of anticipation, of cozy nights by the fire, and of memories just waiting to be made. If there’s one recipe that truly captures the magic of the season for me, it’s this one: my Classic Christmas Gingerbread Cookies.
These aren’t just any cookies. They’re the kind that tell a story with every bite. They have a perfect balance of deep, rich molasses and warm, cozy spices, with a satisfying snap at the edges and a slightly chewy heart. They’re sturdy enough to hold their own under a mountain of royal icing and intricate piping, yet tender enough to melt in your mouth with a cup of hot cocoa. This is my go-to double batch, designed specifically for sharing, for gifting, and for leaving out for Santa (with a few sneaky extras tucked away for the chef, of course!).
I’ve added a couple of my own little twists over the years—a hint of orange zest and a whisper of black pepper—that elevate these cookies from simply nostalgic to utterly unforgettable. But the best part? This recipe is your blank canvas. It’s a project of love, a reason to gather your favorite people around the kitchen counter, and a delicious way to create something beautiful together. So, tie on your favorite apron, put on some festive music, and let’s bake a batch of holiday cheer.
The Cookie That Started It All: A Messy, Magical Memory
My love affair with gingerbread started not in a fancy kitchen, but on a flour-dusted table at my grandmother’s house. I must have been about six years old, standing on a wobbly stool, my small hands completely covered in sticky dough. My job was “sprinkling,” which, in reality, meant I created a blizzard of flour over everything within a three-foot radius—including the cat, who was not amused.
Nana, with infinite patience, would guide my hands as we pressed the cookie cutter into the rolled-out dough. We’d make trees, bells, and the occasional lopsided star. But the real prize was the gingerbread man. She’d always let me press the raisins in for his eyes and buttons, and without fail, I’d eat at least two raisins for every one that made it onto a cookie. The kitchen was warm, the air was sweet, and I felt like the most important chef in the world. Those cookies, imperfect and raisin-deficient as they were, tasted like pure magic. They tasted like love. To this day, every time I bake this recipe, I’m right back at that table, and I remember that the mess and the imperfections are often where the real joy is hidden.
Gathering Your Cozy Ingredients
This recipe is a beautiful blend of pantry staples and a few special players that create that iconic flavor. Here’s what you’ll need for this glorious double batch:
- 2 large eggs: Our binder! They bring the dough together and add richness. Make sure they’re at room temperature to create a smoother, more emulsified dough.
- 5 cups all-purpose flour: The foundation. It gives our cookies their structure. For a slightly more tender cookie, you can swap one cup for whole wheat pastry flour, but all-purpose is perfect here.
- 2 tbsp ground ginger: The star of the show! This gives our cookies that warm, spicy kick. Don’t be shy with it.
- 2 tbsp ground cinnamon: The supporting actor that brings warmth and sweetness. If you have Vietnamese cinnamon, use it—it’s a game-changer!
- ½ tsp ground cloves (optional twist): This adds a deep, intense warmth. A little goes a long way, so feel free to omit it if you’re not a clove fan.
- ¼ tsp finely ground black pepper (optional twist for warmth): Trust me on this! It doesn’t make the cookies spicy; it just adds a subtle, complex warmth that makes people wonder, “What is that amazing flavor?” It’s my secret weapon.
- 1 cup (2 sticks) unsalted butter, room temp: For flavor and tenderness. Using unsalted lets us control the salt level. It MUST be at room temp for proper creaming. If you forget to take it out, you can quickly soften it by cutting it into tablespoons and letting it sit for 15 minutes.
- 1¼ cups brown sugar: This adds a molasses-kissed sweetness and moisture that white sugar just can’t provide. I use dark brown for a deeper flavor, but light brown works great too.
- 1 cup molasses: The soul of the gingerbread! It provides that deep, almost bitter-sweet flavor and beautiful dark color. I prefer unsulphured molasses for a cleaner taste.
- 2 tsp vanilla extract: The flavor enhancer. It rounds out all the spices beautifully.
- Zest of 1 orange (optional festive twist): This bright, citrusy note cuts through the richness and makes the spices pop. It’s a non-negotiable addition in my kitchen!
- A generous pinch of salt: Don’t forget this! It balances all the sweetness and enhances every other flavor in the bowl.
For the Royal Icing:
- 4 cups powdered sugar: The base of our icing, providing sweetness and structure when it sets.
- 3 tbsp meringue powder (or 2 egg whites): Meringue powder is my go-to as it’s stable and safe (no raw egg concerns). If you use fresh egg whites, ensure they are pasteurized.
- 6–8 tbsp water: We’ll add this slowly to get the perfect piping or flooding consistency.
- Food coloring, as desired: Gel food coloring is best as it won’t water down your icing!
Let’s Bake! Your Step-by-Step Guide to Gingerbread Perfection
Ready to create some magic? Follow these steps, and you’ll have a kitchen full of heavenly smells and a counter full of gorgeous cookies in no time.
- Cream the Butter and Sugar: In the bowl of a stand mixer fitted with the paddle attachment (or in a large bowl with a hand mixer), cream together the room-temperature butter and brown sugar on medium-high speed for a full 2-3 minutes. Chef’s Hack: We’re not just mixing; we’re aerating! This step is crucial for giving the cookies a slightly lighter texture. You’ll know it’s ready when the mixture turns pale and fluffy.
- Combine the Wet Ingredients: Scrape down the sides of the bowl. Add the eggs, one at a time, mixing well after each addition. Then, pour in the molasses, vanilla extract, and that glorious orange zest. Mix on medium until everything is beautifully combined and smooth. It might look a little curdled at this point—that’s okay! The flour will bring it all together.
- Whisk the Dry Ingredients: In a separate, large bowl, whisk together the flour, ginger, cinnamon, cloves, black pepper, and that pinch of salt. Chef’s Insight: Whisking the dry ingredients separately ensures the spices are evenly distributed throughout the dough, so no one gets a bite of just flour!
- Bring the Dough Together: With the mixer on low speed, gradually add the dry ingredients to the wet ingredients. Mix until just combined and a stiff dough forms. Do not overmix! As soon as you no longer see streaks of flour, stop the mixer. The dough will be quite thick and sturdy.
- Chill Out: Divide the dough into two equal disks, wrap each tightly in plastic wrap, and refrigerate for at least 1 hour (and up to 2 days). Chef’s Tip: This chilling step is non-negotiable. It firms up the butter, making the dough much easier to roll out without sticking, and it allows the flavors to meld together beautifully.
- Roll and Cut: Preheat your oven to 350°F (175°C). Line your baking sheets with parchment paper. On a lightly floured surface, roll one disk of dough to a consistent ¼-inch thickness. Chef’s Hack: If the dough is too hard to roll, let it sit at room temperature for 5-10 minutes. Use festive cookie cutters to cut out your shapes, dipping them in flour between cuts to prevent sticking. Place the shapes on the prepared baking sheets about 1 inch apart.
- Bake to Perfection: Bake for 8-10 minutes. The cookies are done when the edges are just set and firm to the touch. They might still look a little soft in the center—that’s what we want for a slightly chewy center! Chef’s Note: For perfectly even baking, rotate your baking sheets halfway through the bake time.
- Cool Completely: Let the cookies cool on the baking sheet for 5 minutes before transferring them to a wire rack to cool completely. They must be completely cool before you ice them, or the icing will just melt right off!
- Make the Royal Icing: In a clean mixer bowl, combine the powdered sugar and meringue powder. With the whisk attachment, start mixing on low, gradually adding water one tablespoon at a time. Increase speed to high and beat for 1-2 minutes, until the icing forms stiff, glossy peaks. You want it to be thick enough that a knife drawn through it leaves a clear path. Separate into smaller bowls and color as desired. To thin for “flooding” (filling in shapes), add water drop by drop.
- Decorate! This is the fun part! Use piping bags or zip-top bags with a tiny corner snipped off to decorate your cookies. Let your inner artist shine. Let the icing set completely, for at least 1 hour, before stacking or packaging.
Sharing the Gingerbread Joy: How to Serve
These cookies are a celebration all on their own! Pile them high on a vintage cake stand for a gorgeous centerpiece at your holiday gathering. Package them in clear cellophane bags tied with a rustic ribbon for the most heartfelt homemade gift. Of course, they’re best served with a steaming mug of spiced apple cider, strong coffee, or a cold glass of milk for the ultimate nostalgic experience. Don’t forget to leave a few out on Christmas Eve with a carefully written note for Santa—it’s a tradition he surely appreciates.
Make It Your Own: Festive Recipe Variations
The beauty of this recipe is its versatility! Here are a few ways to switch it up:
- Lemon Zest instead of Orange: For a brighter, tangier twist, swap the orange zest for the zest of one lemon.
- Gluten-Free Swap: Use a 1:1 gluten-free all-purpose flour blend. The texture will be slightly more delicate but just as delicious.
- Vegan-Friendly: Use vegan butter sticks and a flax egg (1 tbsp ground flaxseed mixed with 3 tbsp water per egg, set for 5 mins). For the icing, use aquafaba (the liquid from a can of chickpeas) whipped with powdered sugar instead of meringue powder.
- Spice Adventurer: Add a pinch of cardamom or allspice to the dry mix for an even more complex spice profile.
- Simple Glaze: If royal icing feels too fussy, whisk together 2 cups of powdered sugar with 2-3 tablespoons of milk or citrus juice and a drop of vanilla for a simple, drizzle-able glaze.
Olivia’s Chef Notes & Kitchen Stories
This recipe has been my holiday constant for over a decade, but it’s seen its fair share of kitchen disasters! One year, I was so excited to start baking that I used melted butter instead of softened. The result was a puddle of spicy, delicious soup that could never be rolled. We ended up baking it in a pan and calling it “gingerbread brittle”—it was still devoured!
The orange zest and black pepper were happy accidents born from a “what if?” moment. I had an orange on the counter and thought, “Why not?” The pepper was a bold move after enjoying it in a fancy chocolate bar. Together, they became the signature of my recipe. It just goes to show that the best cooking often comes from a place of curiosity and play. So don’t be afraid to make this recipe your own. Your kitchen, your rules!
Your Gingerbread Questions, Answered!
Q: My dough is too sticky to roll! What did I do wrong?
A: This usually means it needs more chilling time. Pop it back in the fridge for another 30 minutes. If it’s still sticky, your kitchen might be very warm. Don’t be afraid to use a generous dusting of flour on your rolling pin and surface. You can also roll the dough between two sheets of parchment paper, which eliminates the need for extra flour.
Q: Why are my cookies tough instead of crisp and tender?
A: The most common culprit is overmixing the dough once the flour is added. Mix until *just* combined. The second reason is over-baking. Pull them out when the edges are set, even if the centers look soft—they’ll firm up as they cool.
Q: Can I make the dough ahead of time?
A: Absolutely! The dough disks can be wrapped tightly and refrigerated for up to 2 days. You can also freeze them for up to 3 months. Just thaw overnight in the fridge before rolling.
Q: My royal icing is too runny/thick. How can I fix it?
A: Icing consistency is everything! If it’s too runny, beat in more powdered sugar, a tablespoon at a time. If it’s too thick to pipe, add water literally a drop at a time until it reaches a smooth, toothpaste-like consistency for outlining. For flooding (filling), you want it to be slightly thinner—like syrup.

Classic Christmas Gingerbread Cookies
- Total Time: 16 minute
Description
There’s nothing like the smell of ginger, cinnamon, and molasses drifting through the house to mark the start of the holiday season. These gingerbread cookies are crisp at the edges, slightly chewy in the center, and packed with festive spice. They’re perfect for decorating, gifting, or sneaking with a mug of cocoa. A hint of orange zest and a whisper of black pepper give them a memorable twist—your kitchen will feel like pure Christmas magic.
Ingredients
-
2 large eggs, room temperature
-
5 cups all-purpose flour
-
2 tbsp ground ginger
-
2 tbsp ground cinnamon
-
½ tsp ground cloves (optional)
-
¼ tsp finely ground black pepper (optional)
-
1 cup (2 sticks) unsalted butter, room temp
-
1¼ cups dark brown sugar
-
1 cup molasses (unsulphured)
-
2 tsp vanilla extract
-
Zest of 1 orange (optional)
-
Pinch of salt
Royal Icing:
-
4 cups powdered sugar
-
3 tbsp meringue powder (or 2 pasteurized egg whites)
-
6–8 tbsp water
-
Food coloring (gel recommended)
Instructions
-
Cream butter & sugar – Beat butter and brown sugar until pale and fluffy.
-
Add wet ingredients – Mix in eggs one at a time, then molasses, vanilla, and orange zest.
-
Mix dry ingredients – Whisk flour, ginger, cinnamon, cloves, pepper, and salt.
-
Form dough – Slowly combine wet and dry until stiff dough forms.
-
Chill – Wrap in disks and refrigerate at least 1 hour.
-
Roll & cut – Roll to ¼ inch thick, cut festive shapes, and place on parchment-lined trays.
-
Bake – 8–10 minutes at 350°F (175°C). Cool completely before decorating.
-
Make icing – Beat powdered sugar, meringue powder, and water until glossy peaks form. Tint with colors and decorate cookies.
Notes
-
Chill dough well for easier rolling.
-
Rotate trays halfway for even baking.
-
Let cookies cool fully before icing to avoid melting.
- Prep Time: 25 min
- Cook Time: 10 min per tray
Nutrition
- Calories: 120 cal Per cookie
- Fat: 4g
- Carbohydrates: 20g
Nutritional Information (Approximate, per cookie)
Calories: 120kcal | Carbohydrates: 20g | Protein: 1g | Fat: 4g | Saturated Fat: 3g | Cholesterol: 18mg | Sodium: 15mg | Sugar: 12g
Note: This is an estimate based on the ingredients used and will vary slightly with decoration.
Final Thoughts
In the end, these Classic Christmas Gingerbread Cookies are so much more than a mix of flour, sugar, and spice. They are a recipe for connection. They are the tangible warmth of a memory, the joyful mess of a shared tradition, and the sweet, spicy scent of the holidays themselves.
This dough is forgiving, this process is joyful, and the result is pure, unadulterated magic. Whether you’re recreating a cherished childhood memory or starting a brand-new tradition of your own, I hope this recipe finds its way into your kitchen and your heart. May your rolling pin be dusted, your icing be smooth, and your holiday season be filled with the same warmth and joy that these cookies bring.

Classic Chicken Noodle Soup
Your New Favorite Bowl of Sunshine: Classic Chicken Noodle Soup
Hey there, friend! Come on in, grab an apron, and let’s get something simmering on the stove. Is there anything in the world that smells more like home than a big pot of chicken noodle soup bubbling away? That incredible aroma of garlic, thyme, and savory broth wafting through the house is like a warm hug for your soul. It’s the ultimate signal that all is right in the world, even if it’s chilly and gray outside.
This isn’t just any soup; this is my go-to, my number one, my never-fail classic. We’re talking about a from-scratch, deeply flavorful, nourishing bowl of comfort that’s surprisingly simple to make. Forget the canned stuff! This homemade version is packed with tender, juicy chicken, soft egg noodles, and sweet carrots and celery, all swimming in a golden broth that’s pure magic. It’s the meal you crave when you need a little pick-me-up, when you’re feeding a crowd, or when you just want to wrap your hands around a steaming bowl of something wonderful.
I promise you, this recipe is totally approachable. You don’t need to be a professional chef to make something incredible. All you need is one big pot and about 40 minutes. So, let’s make some memories together, one delicious spoonful at a time. This is more than just food; it’s a feeling. And I’m so excited to share it with you.
The Soup That Heals Everything
This recipe takes me right back to my childhood kitchen, standing on a wobbly step-stool next to my mom. Every single fall, without fail, as soon as the leaves started to turn, she’d declare it “Soup Season.” But this soup wasn’t just for chilly days; it was her remedy for everything. A bad day at school? Chicken noodle soup. A case of the sniffles? Chicken noodle soup. Heartache after my first crush? You guessed it—a giant, steaming bowl of love.
I vividly remember her pulling the meat from a still-warm rotisserie chicken, the way she’d hum while meticulously chopping the celery into perfect little moons. The sound of the sizzle when the onions hit the hot oil was the official starting gun for dinnertime. She’d always let me drop the noodles into the boiling broth, a job I took very seriously. To this day, the scent of thyme and simmering chicken broth is the most potent nostalgia trip I can take. It’s my edible security blanket, and now, I get to share that same feeling of comfort and care with you and my own family. That’s the beautiful thing about food; it carries stories.
Gathering Your Cozy Ingredients
Here’s everything you’ll need to create this masterpiece. The beauty of soup is its flexibility, so I’ve included my favorite chef-y insights and substitutions to make this recipe your own!
- 1 tbsp olive oil – This is our cooking fat to get those veggies soft and sweet. You can absolutely use butter for a richer flavor, or avocado oil if you prefer!
- 1 medium onion, diced – Yellow onions are perfect here for their balance of sweetness and sharpness. No yellow? A white onion will work just fine.
- 3 garlic cloves, minced – Fresh is best! It gives a punchy, aromatic base that powder just can’t match.
- 3 carrots, peeled and sliced – They add a wonderful sweetness and that classic pop of color. If you’re in a pinch, a handful of baby carrots chopped up is a great shortcut.
- 3 celery stalks, sliced – Don’t skip the celery! It provides a crucial earthy, savory note (and great crunch if you add it fresh at the end for garnish).
- 8 cups chicken broth (low sodium) – Chef’s Tip: Using low-sodium broth is KEY! It lets you control the salt level yourself at the end. I prefer a good quality boxed broth, but bouillon cubes dissolved in water work in a pinch.
- 2 cups cooked shredded chicken – This is where a store-bought rotisserie chicken is your best friend! It’s flavorful, incredibly easy, and a huge time-saver. You can also poach your own chicken breasts or thighs, or use leftover Thanksgiving turkey!
- 2 cups egg noodles – The classic choice! I use the wide ones for extra comfort. Any small pasta like ditalini, orzo, or even stars will work. For a gluten-free version, your favorite GF pasta is perfect—just check the cooking time.
- 1 tsp dried thyme & 1 tsp dried parsley – This is our herb power duo. Thyme is earthy and classic, while parsley adds a fresh note. If you have fresh herbs, use triple the amount!
- Salt and pepper to taste – Season in layers! A little at the beginning with the veggies, and then be generous at the end.
- Juice of ½ lemon (optional) – This is my secret weapon! A splash of acid at the very end brightens all the flavors and makes the soup taste homemade and incredible. Don’t skip it!
- Fresh parsley for garnish (optional) – A little green on top makes it pretty and adds a fresh flavor finish.
Let’s Make Some Magic: Step-by-Step
Okay, apron on? Let’s do this! I’ll walk you through each step with all my favorite tips and tricks to ensure your soup is absolutely perfect.
- Build Your Flavor Base: Heat the olive oil in a large Dutch oven or heavy-bottomed pot over medium heat. Once the oil shimmers, add your diced onion, sliced carrots, and celery. Now, here’s a pro tip: don’t rush this! Sauté them for a good 5-7 minutes, until the onions turn translucent and the carrots just begin to soften. We’re not looking for color, we’re looking to sweeten them and build a deep foundation of flavor. This step is called “sweating” the vegetables, and it’s the secret to a rich, non-watery soup.
- Wake Up the Aromatics: Push the veggies to the side and add the minced garlic, dried thyme, and dried parsley. Let the garlic cook for just about 60 seconds until it becomes incredibly fragrant. Oh, that smell! It’s incredible. If you add the garlic too early with the hard veggies, it can burn and turn bitter, so this quick bloom at the end is perfect.
- The Big Pour & Simmer: Carefully pour in all 8 cups of chicken broth. Scrape any little browned bits off the bottom of the pot—that’s pure flavor! Bring the whole pot to a rolling boil, then immediately reduce the heat to a gentle simmer. Let it cook for about 10 minutes. This gives the carrots time to become tender and lets the herbs infuse the broth.
- Noodle Time! Now, add your egg noodles. Stir them in, submerging them completely. Let them simmer for the time recommended on the package, usually 8-10 minutes. We’re cooking them directly in the broth, which helps thicken it slightly and makes everything taste more cohesive. Important Hack: If you think you might have leftovers, consider cooking the noodles in a separate pot of boiling water and adding them to each bowl when you serve. This prevents them from soaking up all the broth and becoming mushy in the fridge.
- Bring in the Chicken: Once the noodles are tender, stir in your pre-cooked, shredded chicken. We’re just heating it through here, which should only take 2-3 minutes. Since the chicken is already cooked, this keeps it juicy and tender instead of tough and stringy.
- The Final Flourish: Turn off the heat. This is the most important step! Now, season with salt and pepper. Start with a teaspoon of salt, taste, and add more until it’s perfect for you. Then, squeeze in the juice of half a lemon. I promise, this is not optional! It cuts through the richness and makes every flavor pop. Give it one final stir.
- Serve it Up: Ladle the soup into deep bowls. Garnish with a sprinkle of fresh parsley if you’re feeling fancy. And that’s it! You just made homemade chicken noodle soup from scratch.
How to Serve Your Masterpiece
This soup is a star all on its own, but I love serving it with a thick, crusty slice of warm, buttered sourdough bread for dipping. It’s also fantastic with a side of simple buttery crackers or a light, crisp salad to balance the comfort. For a fun twist, set up a “soup bar” with extra toppings: a little bowl of grated Parmesan cheese, extra fresh herbs, a drizzle of hot sauce for those who like a kick, or even a dollop of pesto. Let everyone customize their perfect bowl!
Make It Your Own: Delicious Variations
The best recipes are the ones you can play with! Here are a few of my favorite ways to mix it up:
- Lemon-Herb Bliss: Add the zest of one lemon along with the juice and throw in a few sprigs of fresh dill with the parsley. It’s so bright and fresh!
- Spicy Kick: Sauté a pinch of red pepper flakes with the garlic for a gentle heat, or offer your favorite hot sauce on the side.
- Creamy Dreamy: Stir in 1/2 cup of heavy cream or full-fat coconut milk at the very end for a luxuriously creamy version.
- Veggie-Packed Powerhouse: Add a handful of spinach or kale in the last 2 minutes of cooking, or throw in some frozen peas with the chicken.
- Gluten-Free & Grain-Free: Use your favorite gluten-free pasta or swap the noodles entirely for cauliflower rice (add it for the last 5 minutes of simmering).
From My Kitchen to Yours: Chef’s Notes
This recipe has evolved so much over the years! My first attempt in my college apartment involved boiled chicken breasts that turned to rubber and way, way too much salt. We live and we learn, right? The biggest game-changer for me was discovering the power of the rotisserie chicken hack. It’s a total lifesaver on busy weeknights and adds so much more flavor than plain poached breast.
Another funny story: I once, in a jet-lagged haze, added a tablespoon of cinnamon instead of a teaspoon of thyme. Let’s just say it was… interesting. Not my best work! It became “Moroccan-inspired chicken soup” for that night, and we ordered pizza. The moral of the story? Always taste as you go and double-check your spice jars!
Your Soup Questions, Answered!
Q: My noodles got really soggy and bloated after storing the leftovers. How can I prevent this?
A: This is the most common issue! The noodles continue to absorb liquid as they sit. The best fix is to cook your noodles separately from the soup. Store the broth, veggies, and chicken in one container and the noodles in another. Combine them when you reheat a portion. It keeps everything perfectly textured!
Q: Can I make this in a slow cooker or Instant Pot?
A: Absolutely! For the Slow Cooker: Sauté the veggies first (for best flavor!), then add them to the crock with the broth, herbs, and raw chicken breast. Cook on low for 6-7 hours. Remove the chicken, shred it, then add it back with the cooked noodles and lemon juice. For the Instant Pot: Use the sauté function for the veggies, then add broth, herbs, and raw chicken. Cook on high pressure for 10 minutes, quick release. Shred chicken, then use the sauté function again to cook the noodles until tender.
Q: My broth tastes a little flat. What can I do?
A: No problem! This is where seasoning in layers is key. First, make sure you’ve added enough salt—it makes all the difference. Next, that squeeze of lemon juice is a miracle worker for brightness. If it’s still lacking, a dash of soy sauce or Worcestershire sauce can add umami depth, or a spoonful of miso paste whisked in at the end is incredible.
Q: Can I freeze this soup?
A: You can, but I recommend freezing it WITHOUT the noodles for the best texture. The noodles can become mushy when thawed and reheated. Freeze the broth, chicken, and veggie mixture. When you’re ready to eat, thaw it, reheat it on the stove, and cook a fresh batch of noodles to add in.

Classic Chicken Noodle Soup
Description
Hey there, friend! There’s nothing like the smell of chicken, garlic, thyme, and simmering broth filling your kitchen—it’s pure comfort in a bowl. This homemade chicken noodle soup is deeply flavorful, nourishing, and surprisingly simple. Forget canned soup! With tender chicken, soft egg noodles, and sweet carrots and celery, it’s the ultimate cozy meal for any day.
Ingredients
oup Base:
-
1 tbsp olive oil (or butter for richer flavor)
-
1 medium onion, diced
-
3 garlic cloves, minced
-
3 carrots, peeled and sliced
-
3 celery stalks, sliced
-
8 cups low-sodium chicken broth
-
2 cups cooked, shredded chicken (rotisserie chicken is perfect)
-
2 cups egg noodles (any small pasta works)
-
1 tsp dried thyme
-
1 tsp dried parsley
-
Salt and pepper, to taste
-
Juice of ½ lemon (optional, but highly recommended)
-
Fresh parsley, for garnish (optional)
Instructions
-
Build the Flavor Base:
-
Heat olive oil in a large pot over medium heat.
-
Add onion, carrots, and celery. Sauté 5–7 minutes until onions are translucent and veggies begin to soften.
-
-
Wake Up the Aromatics:
-
Push veggies aside and add garlic, thyme, and parsley. Cook 60 seconds until fragrant.
-
-
Simmer the Broth:
-
Pour in chicken broth, scraping up any browned bits.
-
Bring to a boil, then reduce heat to a gentle simmer for 10 minutes.
-
-
Cook the Noodles:
-
Add egg noodles and simmer until tender (usually 8–10 minutes). Tip: For leftovers, cook noodles separately to prevent sogginess.
-
-
Add the Chicken:
-
Stir in shredded chicken and heat 2–3 minutes.
-
-
Finish and Season:
-
Remove from heat, season with salt and pepper, and stir in lemon juice.
-
Garnish with fresh parsley if desired.
-
Notes
-
Rotisserie chicken is a huge time-saver and adds extra flavor.
-
Taste as you go! A squeeze of lemon brightens flavors and balances richness.
-
Noodles stored in soup can become mushy—cook separately for leftovers.
Nutrition
- Calories: 250 cal Per Serving
- Fat: 8g
- Carbohydrates: 22g
- Fiber: 2g
- Protein: 18g
Nutritional Information*
Prep Time: 15 mins | Cook Time: 25 mins | Total Time: 40 mins
Calories: ~250 | Fat: 8g | Carbs: 22g | Protein: 18g | Fiber: 2g | Sodium: ~550mg
*Please note: These values are estimates based on the ingredients used and will vary with substitutions.
Final Thoughts: A Spoonful of Comfort
And just like that, my friend, we’ve done it. In less than an hour, we’ve transformed simple, humble ingredients into a pot of liquid gold. I hope your kitchen is filled with that incredible, soul-warming aroma and that you’re already feeling a sense of accomplishment and coziness.
This recipe is a reminder that the most powerful meals aren’t about fancy techniques or expensive ingredients. They’re about the love and care you pour into the pot. This soup is a promise—a promise of comfort on a cold day, of nourishment when you’re feeling under the weather, and of a simple, satisfying meal that brings people together.
Don’t be afraid to make it your own. Tweak the herbs, add more veggies, or give it a spicy kick. The best part of cooking is putting your own stamp on a classic. This soup is your new blank canvas.
So, from my family’s story to yours, thank you for spending this time in the kitchen with me. I hope this recipe becomes a trusted, go-to favorite in your home, creating its own set of warm memories and happy bellies for years to come.




