
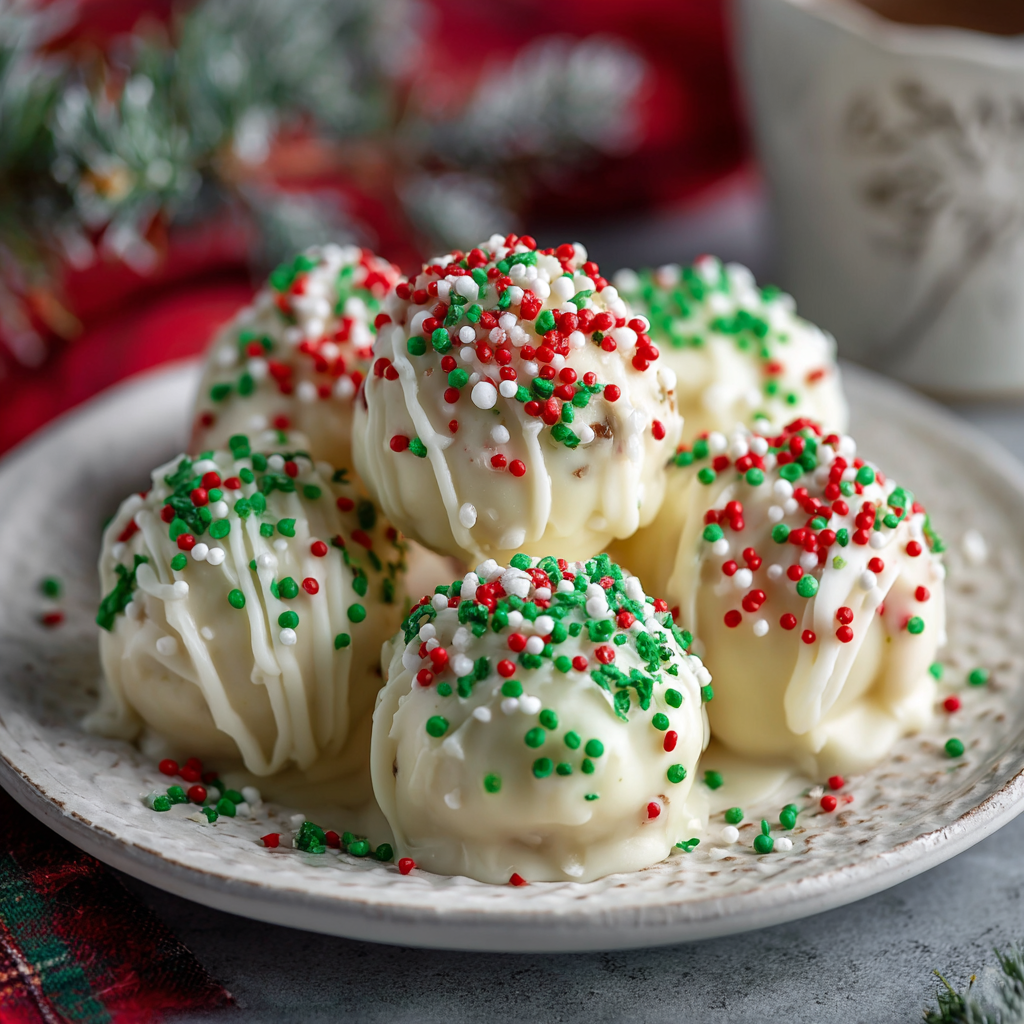
Christmas Cookie Cake Balls
Your New Favorite Holiday Treat: Christmas Cookie Cake Balls!
Hello, my friend! Can you smell that? It’s that time of year again. The air is crisp, the lights are twinkling, and my kitchen is officially covered in a light dusting of powdered sugar and holiday cheer. If you’re anything like me, your favorite holiday memories aren’t just about the big presents or the perfect tree—they’re about the moments gathered around the table, the laughter that echoes from the kitchen, and the joy of sharing something you made with your own two hands. That’s the magic I live for, and today, we’re creating a big batch of it.
We’re talking about Christmas Cookie Cake Balls, and let me tell you, these little orbs of joy are about to become your secret weapon for the season. Imagine this: soft, crumbly sugar cookie, mashed together with sweet vanilla frosting, rolled into a perfect bite, and then dunked in a luxurious coat of creamy white chocolate. They’re like if a cookie and a cake pop had a beautiful, sprinkle-covered holiday baby. The best part? They are unbelievably easy. You don’t need to be a pastry chef or have hours to spare. With just a few simple ingredients and a whole lot of love, you can whip up a batch of these that will have everyone begging for the recipe. So, tie on your favorite festive apron, put on some holiday tunes, and let’s make some magic together!
A Sweet Slice of Christmas Memory
I have to share a little story with you. The very first time I made a version of these cake balls, it was a complete kitchen disaster that turned into one of our most beloved family traditions. I was about ten years old, “helping” my grandma in her wonderfully chaotic kitchen on Christmas Eve. We were behind schedule, as one often is, and we had a batch of sugar cookies that… well, let’s just say they got a little too friendly with the bottom of the oven. They were burnt on the edges and a tad too crisp for Santa’s liking.
My grandma, who never let a single thing go to waste, looked at those cookies, looked at me, and declared, “Well, Olivia, we’re not throwing these out. We’re just going to turn them into something new!” She crumbled those cookies into a bowl, mixed in some frosting from a jar, and let me roll the sticky, sweet mixture into lopsided little balls. We dipped them in the only chocolate we had—a half-eaten bar of semi-sweet—and decorated them with the red and green sprinkles I was supposed to be saving for the cut-out cookies. They were messy, imperfect, and absolutely delicious. Now, every year, we intentionally “mess up” a batch of cookies just to make them. It’s our funny, sweet little reminder that sometimes the best things in life—and in the kitchen—come from happy accidents and a willingness to get a little creative.
Gathering Your Merry Ingredients
The beauty of this recipe is its beautiful simplicity. You likely have most of this in your pantry right now! Here’s what you’ll need to create about two dozen little bites of heaven.
- 1 box vanilla or sugar cookie mix (baked and cooled) – This is our fantastic shortcut and the base of our cake balls. I love using a classic sugar cookie mix for its soft, sweet crumb. Chef’s Insight: Bake the cookies according to the package directions, but let them get just a *hint* golden brown. We want them soft, not crispy! Let them cool completely before crumbling. No mix? No problem! You can absolutely use your favorite homemade sugar cookie recipe—you’ll need about 3 cups of crumbled cookies.
- ½ cup vanilla frosting – This is the “glue” that holds our cake balls together and adds a wonderful moisture and sweetness. Substitution Tip: Use store-bought for ultimate ease, or your favorite homemade buttercream! Cream cheese frosting also works beautifully for a slightly tangy twist. If you’re out of vanilla, chocolate or even strawberry frosting would be a fun, colorful surprise inside!
- 1 bag (12 oz) white chocolate chips or white candy melts – This is our gorgeous, creamy coating. Chef’s Insight: I have a slight preference for high-quality white chocolate chips (like Ghirardelli or Guittard) for their superior flavor, but candy melts are fantastic because they set harder and are more forgiving for beginners. They also come in vibrant colors if you want to get really creative!
- Red and green sprinkles – The festive finishing touch! Substitution Tip: Use jimmies, nonpareils, sanding sugar, crushed candy canes, or even a drizzle of dark chocolate for decoration. This is where your personality can shine!
Let’s Get Rolling: Your Foolproof Steps to Success
Ready to get your hands a little messy? This is the fun part! Follow these steps, and you’ll have perfect cake balls in no time.
- Crumble and Combine: Take your completely cooled cookies and place them in a large mixing bowl. Now, get crumbing! You can use your hands (my preferred method for feeling connected to the food!), a pastry cutter, or even the back of a fork. You want fine, even crumbs—no big chunks! Once you have a bowl of beautiful sandy crumbs, plop in that half-cup of frosting. Start mixing with a spatula and then, I promise, you’ll want to switch to using your hands. Mix and squish until no dry crumbs remain and the mixture holds together when you pinch it. It should feel like a soft, slightly sticky dough.
- Roll and Rest: Now, let’s portion them out. I use a small cookie scoop (about 1 tablespoon size) to keep them all uniform, but a regular spoon works just fine. Scoop up some mixture and roll it between your palms to form a smooth, 1-inch ball. Pro Chef Hack: If the mixture is too sticky to handle, pop it in the fridge for 15 minutes. It will firm up beautifully. Place each rolled ball on a baking sheet lined with parchment paper or a silicone mat. Once they’re all rolled, this is the most important step: FREEZE THEM for 15-20 minutes. Don’t skip this! This firms them up, making them much, much easier to dip without falling apart in the warm chocolate.
- Melt the Magic: While the balls are chilling, melt your coating. You can use a double boiler, but I’m a fan of the microwave for speed and fewer dishes. Place your white chocolate or candy melts in a microwave-safe bowl. Heat on 50% power in 30-second intervals, stirring vigorously between each burst. This is key! Heating on low power and stirring prevents the chocolate from seizing and becoming a grainy mess. Stop heating when just a few small lumps remain—the residual heat will melt them as you stir. You want it smooth and pourable.
- The Big Dip: Take your tray of firm cake balls out of the freezer. Now, let’s dip! I like to use a fork or a specialty dipping tool. Drop a ball into the melted chocolate. Use your fork to gently roll it around until it’s completely coated. Lift it out, let the excess chocolate drip off by gently tapping the fork on the edge of the bowl, and then carefully slide it back onto your parchment-lined tray. Work relatively quickly here!
- Sprinkle Immediately! This is a race against the clock. The chocolate shell sets fast. The moment you place a dipped ball back on the tray, shower it with your festive sprinkles. If you wait even 30 seconds, the chocolate will start to set and the sprinkles won’t stick. Get the whole tray dipped first, then go back and sprinkle? Nope! Do it one by one. Trust me on this. It’s worth it for that perfect festive coverage.
- Set and Serve: Once all your cake balls are beautifully dressed in their chocolate and sprinkles, let them set completely. You can leave them at room temperature if your kitchen isn’t too warm, or pop the whole tray in the refrigerator for about 15 minutes to speed up the process. The chocolate will become firm to the touch.
How to Serve These Holiday Gems
Presentation is part of the fun! For a casual family treat, simply pile them high on a beautiful holiday platter. If you’re gifting them or serving them at a party, I love placing each one in a mini paper cupcake liner—it makes them look professional and keeps fingers clean. Arrange them in a festive cookie tin between layers of parchment paper for the perfect homemade gift. They also look stunning stacked on a cake stand as the centerpiece of your dessert table. However you serve them, be prepared for them to disappear quickly!
Mix It Up! Fun Flavor Variations
The basic formula is your canvas—paint it with flavor! Here are a few of my favorite twists:
- Peppermint Bliss: Use a chocolate cookie mix instead of vanilla. Add ¼ teaspoon of peppermint extract to the cookie crumb and frosting mixture. Dip in dark chocolate and top with crushed candy canes.
- Gingerbread Spice: Use a gingerbread cookie mix. Add a pinch of extra cinnamon and nutmeg to the crumbs. Dip in white chocolate and decorate with a single cinnamon red hot candy.
- Confetti Funfetti: Use a funfetti cake mix, baked and cooled into cookies! Use vanilla frosting and white chocolate coating, and roll the balls in rainbow sprinkles for a birthday-themed treat.
- Lemon Berry: Use a lemon cookie mix. Add a teaspoon of lemon zest to the crumbs. Dip in white chocolate and top with a tiny piece of freeze-dried raspberry for a tangy, vibrant pop.
- Nutty Delight: Stir ¼ cup of very finely chopped toasted pecans or almonds into the crumb mixture before adding the frosting for a lovely crunch.
Olivia’s Chef Notes & Kitchen Confessions
Over the years, I’ve made approximately one million of these cake balls (a slight exaggeration, but it feels true!), and I’ve learned a thing or two. First, embrace the mess. Your hands will get covered in chocolate and sprinkles will find their way to every corner of your kitchen. It’s part of the charm! Second, if your first few dips are messy, don’t stress. The first one is always the “chef’s treat” for quality control (a.k.a., eating immediately). You’ll get the hang of it.
This recipe has evolved from my grandma’s salvage operation into my go-to holiday gift. I now double, even triple, the batch and set up a decorating station with my kids. We have bowls of different sprinkles, crushed candies, and even edible glitter. It’s become less about the perfect treat and more about the time we spend together, laughing and creating. That, to me, is the real recipe.
Your Questions, Answered!
Q: My cake ball mixture is too wet and sticky! What did I do wrong?
A: This usually means you had a particularly moist batch of cookies or added a *scant* too much frosting. Don’t panic! Just add a tiny bit more of your cookie crumbs (if you have any left) or even a tablespoon of crushed graham cracker or vanilla wafer crumbs to help soak up the extra moisture. If it’s beyond saving, just pop the whole mixture in the fridge for 20-30 minutes; it will be much easier to handle.
Q: My white chocolate is clumpy and thick, not smooth. How can I fix it?
A> Ah, seized chocolate! It happens to the best of us, usually from overheating or a single drop of water getting in the bowl. The best fix is prevention: use a completely dry bowl and melt slowly. If it’s already seized, try adding a tiny bit of solid vegetable shortening (like Crisco) or coconut oil (about ½ teaspoon at a time) and stir vigorously over low heat. This can sometimes bring it back to a dippable consistency.
Q: Can I make these ahead of time?
A> Absolutely! They are fantastic make-ahead treats. Once set, store them in a single layer in an airtight container in the refrigerator for up to 1 week. You can also freeze them for up to 3 months! Just thaw in the refrigerator overnight before serving.
Q: Why did my cake balls crack after dipping?
A> This is almost always a temperature shock issue. If your cake balls are too cold (straight from the freezer into very warm chocolate), the expansion can cause tiny cracks. The sweet spot is a firm but not rock-hard cake ball. Let them sit out of the freezer for just a minute or two before dipping if this happens.
Christmas Cookie Cake Balls
- Total Time: 25 minutes
Description
These little bites of holiday magic are soft, sweet, and oh-so-festive! Crumbled sugar cookies mixed with creamy frosting are rolled into perfect bites, dipped in smooth white chocolate, and showered in sprinkles. They’re the ultimate no-fuss treat—easy enough for kids to help with, fancy enough for gifting, and guaranteed to vanish from your dessert table.
Ingredients
-
1 box vanilla or sugar cookie mix (baked & cooled)
-
½ cup vanilla frosting (store-bought or homemade)
-
1 bag (12 oz) white chocolate chips or candy melts
-
Red & green sprinkles (or crushed candy canes, sanding sugar, etc.)
Instructions
-
Crumble cookies into fine crumbs in a large bowl.
-
Mix in frosting until a soft, sticky dough forms.
-
Roll into 1-inch balls; place on parchment-lined tray. Freeze 15–20 min.
-
Melt chocolate in 30-sec bursts at 50% power, stirring until smooth.
-
Dip chilled balls in chocolate, coat fully, and let excess drip off.
-
Sprinkle immediately before chocolate sets.
-
Set at room temp (20–30 min) or refrigerate (15 min) until firm.
Notes
-
If the mixture feels too sticky, chill briefly before rolling.
-
Always sprinkle right after dipping—chocolate sets fast!
-
For variety: try gingerbread crumbs + white chocolate, chocolate cookies + peppermint, or even fill the centers with a surprise candy.
- Prep Time: 25 min
Nutritional Information*
*Please note: This is an estimated nutritional breakdown based on the specific ingredients listed and a yield of 24 cake balls. It will vary based on the specific brands of cookie mix, frosting, and chocolate you use.
Per cake ball (approx.): Calories: 120 | Fat: 6g | Saturated Fat: 3.5g | Carbohydrates: 16g | Sugar: 12g | Protein: 1g | Fiber: 0g | Sodium: 80mg
Prep Time: 10 minutes | Chill Time: 20 minutes | Total Time: 30 minutes | Yield: About 24 balls
Final Thoughts: Share the Joy
And there you have it! Your very own batch of Christmas magic, ready to be shared and savored. These Christmas Cookie Cake Balls are more than just a dessert; they’re a conversation starter, a gift from the heart, and a delicious testament to the fact that the best memories are often the imperfect ones.
So, as you look at your finished platter of sprinkle-dusted delights, I hope you feel a deep sense of pride—not just for creating something incredibly tasty, but for taking a moment to create joy. This holiday season, may your home be warm, your heart be full, and your kitchen be filled with the sweet, happy mess of making memories.

Elf Hat Cones
Welcome to the Most Whimsical Kitchen Party of the Year!
Is there anything better than the pure, unadulterated joy of holiday baking? That magical feeling when your kitchen smells like sugar and happiness, and every countertop is a potential canvas for something delicious and delightful. If you’re like me, you live for those moments—the ones that turn simple ingredients into edible memories. And today, my friend, we are creating a memory that is as fun to make as it is to eat. We’re whipping up a batch of utterly adorable, completely irresistible Elf Hat Cones!
Imagine this: crispy sugar cones, transformed into the most cheerful little elf hats you’ve ever seen, decked out in vibrant green and a confetti of festive sprinkles. They’re the ultimate edible craft, perfect for little helpers with big imaginations, cookie platters that need a show-stopping centerpiece, or simply as a sweet project to make your December afternoons a little brighter. You don’t need a degree in pastry arts or a pantry full of fancy tools. All you need is a sense of fun and about 30 minutes. So, tie on your favorite (probably messy) apron, put on some holiday tunes, and let’s turn these simple cones into a holiday sensation that will have everyone grinning from ear to ear!
The Christmas My Kitchen Turned into Santa’s Workshop
I’ll never forget the Christmas my niece, Lily, then five years old, declared she was going to be “Head Elf” for our family gathering. This involved a lot of tinsel, a very serious demeanor, and a deep desire to help me in the kitchen. I knew we needed a project that was safe, engaging, and, most importantly, magical. That’s when the idea for these Elf Hat Cones was born!
We laid out all our ingredients like an elf’s toolkit. Lily’s job was sprinkles (a role she took with the utmost gravity). As we dipped and decorated, her little face was a picture of concentration and wonder. The moment we placed the final hat on a platter, she gasped. “Aunt Livvy,” she whispered, “they’re perfect. The elves will love them.” That simple afternoon of melted chocolate and sticky fingers is one of my most treasured holiday memories. It wasn’t about perfection; it was about the pure, sugary joy of creating something together. Every time I make these now, I think of her and that magical feeling of believing. I hope these little hats bring that same spark of joy and togetherness to your kitchen.
Gathering Your Elf Toolkit: Ingredients & Insights
Here’s everything you need to assemble your edible workshop. The beauty of this recipe is in its simplicity and the easy swaps you can make!
- 12 sugar cones: These are our hat foundations! I love their sweet, crispy texture and sturdy shape. Chef’s Insight: Make sure your cones are fresh and not stale or soft. If you can’t find sugar cones, you could use waffle cones, but their pointed tops aren’t as pronounced, so the “hat” shape might be a little different.
- 2 cups green candy melts: This is the classic, vibrant green “felt” of our elf hats. Substitution Tip: No candy melts? No problem! You can use 2 cups of high-quality white chocolate chips mixed with 1-2 teaspoons of green gel food coloring (liquid food coloring can cause chocolate to seize). Melt slowly and stir gently for a smooth, rich coating.
- ¼ cup holiday sprinkles: The more colorful, the better! This is where you can really let your personality shine. Use classic red and green, go for a winter wonderland theme with blues and whites, or even use themed sprinkles like tiny trees or stars. Chef’s Insight: Jimmies (long sprinkles) and nonpareils (tiny balls) work best as they stick easily to the chocolate.
- Optional: mini marshmallows or M&Ms for hat toppers: A single mini marshmallow perched on the very tip of the hat is just the cutest thing. An red or green M&M works beautifully too for a pop of color!
- Optional: royal icing or frosting for trimming edges: A little piped white frosting around the base mimics the fuzzy brim of an elf’s hat. A small store-bought tub of vanilla frosting works perfectly for this—just pop it in a zip-top bag, snip a tiny corner, and you have an instant piping bag!
Let’s Build Some Hats! Your Step-by-Step Guide
Ready to get your hands a little messy? Follow these steps for foolproof, fabulous elf hats.
- Prep Your Station: Before you even think about melting chocolate, line a baking sheet with parchment paper. This is your drying rack and will save you from a huge sticky mess later. Have your sprinkles and toppings open and within easy reach. Once the chocolate is melted, you’ll need to work relatively quickly! Chef’s Hack: If your kitchen is warm, pop your lined baking sheet in the fridge for 10 minutes before you start. A cold surface helps the chocolate set faster.
- Melt the Chocolate: Place your candy melts (or white chocolate chips) in a microwave-safe bowl that is deep enough to dip a cone. Heat in 30-second bursts on medium power, stirring well between each burst. It usually takes about 90 seconds total. Stop heating when there are still a few lumps and stir until they melt completely. This prevents the chocolate from burning. Chef’s Commentary: The goal is smooth and fluid. If your chocolate seems too thick, you can add a tiny, tiny amount of coconut oil or vegetable shortening (about ½ tsp) to thin it out and make dipping easier.
- The Dip: Hold a sugar cone by its wide base. Carefully dip it tip-down into the melted green chocolate. Swirl it gently to coat all sides. Lift it out and let the excess chocolate drip back into the bowl for a few seconds. You want a nice, even coat without any globby bits. Chef’s Tip: To get a clean base, after dipping, gently tap your wrist while holding the cone over the bowl to shake off any last drips.
- Decorating & Sprinkling: Place the dipped cone upright on your prepared parchment paper. Now, the fun part! Immediately, while the chocolate is still wet, shower it with sprinkles. If you’re adding a marshmallow or M&M topper, gently press it onto the very tip of the cone now. Chef’s Hack: For less mess, hold the cone over a separate small bowl while you add sprinkles, letting the excess fall into the bowl for re-use.
- Add the Fuzzy Brim (Optional): Once all your hats are dipped and sprinkled, it’s time for the finishing touch. If you’re using frosting for the brim, pipe a zig-zag or a simple band of white frosting around the base of each hat. It doesn’t have to be perfect—a little whimsy is what we’re going for!
- The Waiting Game (The Hardest Part!): Allow the chocolate to set completely. You can let them sit at room temperature for about 20-30 minutes, or if you’re impatient like me, pop the entire baking sheet into the refrigerator for 10-15 minutes until the chocolate is firm to the touch.
How to Serve Your Festive Creation
Presentation is part of the magic! Arrange your completed Elf Hat Cones on a festive platter as a standalone treat. They make a incredible centerpiece for a holiday dessert table. For an extra special touch, place them individually on small plates as a fun place setting for a kids’ holiday party. You can also gently nestle them among cookies on a holiday cookie tray—they’ll instantly become the star of the show. They’re a guaranteed conversation starter and are just begging to be Instagrammed!
Mix It Up! Fun Elf Hat Variations
Once you’ve mastered the classic green hat, the sky’s the limit! Here are a few ways to customize your creations:
- The Snow Elf: Use white candy melts and blue and silver sprinkles for a frosty, wintery vibe.
- Chocolate Lover’s Hat: Dip the cones in melted milk or dark chocolate and use red and gold sprinkles for a rich, decadent twist.
- Nut-Free/Dairy-Free Friendly: Use dairy-free white chocolate and ensure your sprinkles are certified dairy-free. A great option for accommodating allergies without sacrificing fun.
- The “Filled” Hat: Before dipping, fill the cone about 1/3 of the way with mini chocolate chips, M&Ms, or even a small treat like a Ferrero Rocher for a delicious surprise inside!
- Peppermint Twist: Add a drop or two of peppermint extract to your melted candy coating and crush up candy canes to use as your sprinkles.
Liv’s Kitchen Confidential: Notes from My Apron Pocket
This recipe has seen many Christmases and has evolved from a slightly lopsided, messy experiment into our family’s favorite holiday tradition. One year, in a fit of ambition, I tried to dip two cones at once. Do not recommend. I ended up with two cones fused together into a weird chocolate bridge and green chocolate all over my arms. The dog was very interested in helping me clean up that day! The lesson? Embrace the mess. Laugh when a sprinkle goes flying. Let the kids do it their way. The slightly imperfect, heavily sprinkled hats made by tiny hands are always the most loved. Over time, I’ve learned that a deep bowl for dipping is non-negotiable and that setting a timer for the microwave is the best way to avoid chocolate disasters. But the most important ingredient, always, is a dash of holiday spirit and a heaping spoonful of fun.
Your Elf Hat Questions, Answered!
Q: My chocolate coating is really thick and clumpy. What did I do wrong?
A: This usually means the chocolate was overheated. Candy melts can be a little finicky. Next time, try heating for shorter intervals and stirring more. If it’s already seized, it’s tricky to fix, but you can try adding that tiny bit of coconut oil (½ tsp at a time) and stirring vigorously to see if you can bring it back to a smooth state.
Q: My sprinkles won’t stick! Help!
A: The number one reason for sprinkles not sticking is that the chocolate has already started to set. You have to work quickly! Dip one cone, immediately add sprinkles, then move on to the next. If you’re working with a helper, try an assembly line: one person dips, the next person decorates.
Q: Can I make these ahead of time?
A: Absolutely! These hold up really well. Once the chocolate is completely set, store them in a single layer in an airtight container at room temperature for up to 3 days. Avoid the fridge for long-term storage if possible, as it can introduce moisture and make the cones lose their crunch.
Q: The cones are rolling around while I’m trying to decorate them. Any tips?
A: This is a common frustration! To keep them steady, you can create a simple stand by poking small holes in a cardboard box and placing the cone bases in the holes while they dry. Alternatively, you can rest them in the cups of a muffin tin to hold them upright after decorating.

Elf Hat Cones
Description
Bring a sprinkle of whimsy to your holiday kitchen with these colorful Elf Hat Cones! Crispy sugar cones get a magical makeover with green candy coating, festive sprinkles, and playful toppers. They’re quick to make, impossible not to smile at, and perfect for holiday parties, cookie trays, or a fun family craft afternoon. No baking required—just melt, dip, decorate, and enjoy!
Ingredients
-
12 sugar cones
-
2 cups green candy melts (or white chocolate + green gel color)
-
¼ cup holiday sprinkles
-
Mini marshmallows or M&Ms (optional toppers)
-
White frosting (optional trim for the brim)
Instructions
-
Prep: Line a baking sheet with parchment. Set out sprinkles & toppers.
-
Melt: Heat candy melts in 30-sec bursts, stirring until smooth. Add ½ tsp coconut oil if too thick.
-
Dip: Hold cone by base, dip tip-first into melted coating, swirling to cover. Tap gently to remove excess.
-
Decorate: Stand cone upright on parchment. While coating is wet, add sprinkles and topper.
-
Optional Brim: Pipe frosting around the base for a fluffy “hat trim.”
-
Set: Let sit at room temp 20–30 min, or refrigerate for 10 min, until firm.
Notes
-
Work one cone at a time so sprinkles stick before the coating sets.
-
Use a muffin tin to hold cones upright while drying.
-
Try fun variations: white & blue “snow elf” hats, chocolate-coated “cocoa elf” hats, or even filled hats with hidden candies inside.
Quick Nutrition Note
These are a fun, occasional treat! Please note that nutritional info is estimated and can vary based on specific brands of ingredients and how heavily you apply the sprinkles and frosting.
Estimated per cone: Calories: ~140 | Fat: 6g | Sugar: 14g | Carbs: 18g | Protein: 1g
Final Thoughts: Your Whimsical Kitchen Awaits
And there you have it! In the time it takes to watch a holiday special, you’ve created a troop of cheerful, edible elves ready to spread joy. Remember, the true magic of these Elf Hat Cones isn’t just in their adorable appearance—it’s in the laughter shared while making them, the concentration on a little helper’s face, and the proud moment of presenting your delicious creation.
This isn’t a recipe that demands perfection. It’s an invitation to play, to get a little messy, and to weave a sweet, simple memory into the fabric of your holiday season. So whether you’re building them solo with a cup of cocoa or leading a full-scale elf workshop with your favorite tiny humans, embrace the moment. You’re not just decorating cones; you’re crafting joy.

Melting Snowman Cookies
Welcome to the Coziest Corner of the Kitchen!
Hello, my fellow flavor-seekers and kitchen adventurers! Olivia here, welcoming you back to my cozy little nook on the internet. Is there anything better than the smell of sugar cookies wafting from the oven? It’s a scent that instantly wraps you in a warm hug, promising sweet memories and even sweeter treats. Today, we’re rolling up our sleeves (and probably getting a little flour on our noses) for a project that’s equal parts baking and pure, unadulterated joy. We’re making Melting Snowman Cookies!
If you’ve ever looked out the window at a frosty, magical world and then felt a little sad when Mr. Snowman on the lawn started to droop, this recipe is for you. We’re capturing that wonderfully whimsical moment in cookie form! These aren’t just desserts; they’re tiny, edible stories. They’re the kind of treat that makes kids’ eyes go wide with wonder and brings out the inner child in every adult. They’re perfect for holiday parties, snowy weekend afternoons, or any time you need a dose of playful creativity in your kitchen.
The best part? You absolutely do not need to be a pastry chef to pull these off. We’re using a fantastically simple, no-chill sugar cookie dough as our base (yes, you read that right—no waiting!), and the decorating is all about having fun. No pressure, just pure, sugary fun. So, preheat your oven, grab your favorite mixing bowl, and let’s create some magic together!
A Snowy Kitchen Memory
This recipe always takes me right back to one specific, snowed-in December afternoon when my niece, Maya, was about five years old. We’d been building a truly magnificent, lopsided snowman in the yard, complete with a carrot nose and my favorite scarf. But later, as we sipped hot chocolate inside, we watched our frosty friend begin his slow, graceful surrender to the warmer air.
Maya’s bottom lip started to tremble. “He’s melting, Auntie Liv!” Instead of a lesson on the states of matter, I saw a kitchen opportunity. “What if,” I said, “we make cookies that look just like him? That way, we can always remember how funny and cute he looked today?” Her tears vanished instantly. We raced to the kitchen, pulled out flour, sugar, and a bag of marshmallows, and started experimenting. The first batch was… abstract. The second was better. By the third, we had created our very first melting snowman cookie, complete with a licorice scarf. Her giggles as she gave one cookie crossed-eyes and another a big, frown were the best sound in the world. Now, it’s our yearly tradition. It’s a sweet reminder that sometimes, the most beautiful and delicious things come from a little imperfection and a whole lot of love.
Gathering Your Snowman Squad: The Ingredients
This recipe is in two simple parts: the cookie base and the decorating dream team. I’ve included my favorite tips and swaps for each ingredient to make your baking experience seamless!
For the Sugar Cookies (Makes about 24 cookies):
- 1 cup (2 sticks) unsalted butter, softened – This is the foundation of our rich, tender cookie. Chef’s Insight: “Softened” means your butter should give slightly when you press it but still hold its shape. Too soft or melted, and your cookies will spread too much!
- 1 cup granulated sugar – For that classic sweetness and helps create a slight crispness on the edges.
- 1 large egg – Binds everything together beautifully. Make sure it’s at room temperature to cream smoothly with the butter and sugar.
- 1½ tsp pure vanilla extract – The flavor hero! It adds a warm, comforting depth. For a fun twist, you could use 1 tsp vanilla and ½ tsp almond extract.
- 2½ cups all-purpose flour – The structure of our cookie. Pro Tip: Fluff your flour with a spoon, spoon it into your measuring cup, and level it off. Don’t scoop directly from the bag—it packs the flour down and can lead to dry cookies!
- ½ tsp baking powder – Our little leavening agent that gives the cookies a perfect, slight lift.
- ¼ tsp salt – Never skip the salt! It balances the sweetness and makes all the flavors pop.
For the Decorating:
- 24 large marshmallows – The snowman’s body! Standard white marshmallows work perfectly. For a gourmet touch, you could use homemade marshmallows cut in half.
- 1½ cups white cookie icing – This is the “snow puddle” our snowman is melting into. You can use a good-quality store-bought vanilla or white icing (look for one that sets firm) or make your own simple powdered sugar glaze (I mix 2 cups powdered sugar with 2-3 tbsp milk and ½ tsp vanilla until smooth).
- Black decorating gel – This is ideal for drawing the eyes, coal buttons, and twiggy arms because it’s easy to control. You can also use melted chocolate in a piping bag.
- Orange icing or orange sprinkle bits – For the classic carrot nose! I love using orange sprinkles (the long, cylindrical ones) for a cute, textured look. Orange coloring gel mixed into a small amount of white icing also works.
- Colored icing, candy ropes (like Airheads Xtremes), or even fruit roll-ups – This is where your personality shines! Use these to create tiny, colorful scarves and extra buttons.
Let’s Build a Snowman! Step-by-Step Instructions
Ready to create? Follow these steps, and you’ll have a troop of adorable melting snowmen in no time. I’ve packed this section with all my favorite hacks to ensure your success!
Step 1: Preheat and Prep
Preheat your oven to 350°F (175°C). This is our first and most crucial step for even baking! Line your baking sheets with parchment paper. Chef’s Hack: Parchment paper is a lifesaver. It prevents sticking and makes cleanup an absolute dream. No parchment? A light coating of baking spray works too.
Step 2: Cream the Butter and Sugar
In a large bowl, beat the softened butter and granulated sugar together with an electric mixer on medium speed for 2-3 minutes. Why we do this: We’re not just mixing; we’re creaming. This process incorporates tiny air bubbles into the fat, which helps leaven the cookies and gives them a lighter texture. You’ll know it’s ready when the mixture becomes pale yellow and fluffy.
Step 3: Add the Wet Ingredients
Beat in the egg and vanilla extract until they are fully incorporated and the mixture looks smooth. Scrape down the sides of the bowl with a spatula to make sure everything is homogenous.
Step 4: Combine the Dry Ingredients
In a separate, medium-sized bowl, whisk together the flour, baking powder, and salt. This ensures the leavening and salt are evenly distributed throughout the flour. Chef’s Hack: Whisking = no need to sift!
Step 5: Bring the Dough Together
Gradually add the dry ingredients to the wet ingredients, mixing on low speed just until the flour disappears and a soft dough forms. Key Tip: Don’t overmix! Overworking the dough after adding the flour can develop the gluten and make the cookies tough. As soon as you see no more dry flour spots, stop the mixer.
Step 6: Roll and Cut
This dough is wonderfully workable right away. Roll tablespoon-sized portions of dough into balls and place them about 2 inches apart on your prepared baking sheets. Then, gently flatten each ball to about a ½-inch thick circle. Why? This helps them bake into the perfect round, flat base for our snowman to melt on. You can also use the bottom of a glass dipped in sugar to flatten them for a little extra sparkle.
Step 7: Bake to Perfection
Bake for 8-10 minutes. You’re looking for the edges to be just barely starting to turn a light golden brown. The centers might still look a tiny bit soft—that’s perfect! They will continue to set up as they cool. Chef’s Secret: For perfectly round cookies, take a circular cookie cutter slightly larger than your baked cookie and swirl it around the warm cookie straight out of the oven to “tame” any uneven edges.
Step 8: Cool Completely
This is non-negotiable! Let the cookies cool on the baking sheet for 5 minutes before transferring them to a wire rack to cool completely. If you try to decorate warm cookies, the icing will just melt into a messy puddle (and not the cute kind!).
Step 9: Create the Icing Puddle
Once the cookies are completely cool, spread a generous, uneven circle of white icing on each one. Don’t make it a perfect circle—the messier and more puddle-like, the better!
Step 10: Place the Marshmallow
This is the fun part! Immediately, while the icing is still wet, place a large marshmallow on its side onto the icing puddle. Gently press and squish it down so it looks like it’s melting into the icing. You can angle it, smoosh it more on one side—get creative! The wet icing acts as the glue.
Step 11: Decorate Your Snowman
Allow the icing to set completely (this usually takes about 30 minutes to an hour). Once the marshmallow is securely stuck, it’s time to give your snowman personality! Use the black gel to draw eyes, a smile, and little stick arms. Add an orange sprinkle or a dot of orange icing for the nose. Finally, use your colored icings or candy to draw on a cheerful scarf and some buttons. And voila! You’ve made magic.
How to Serve Your Frosty Friends
These cookies are a showstopper all on their own! Pile them high on a festive platter for a holiday party—they are guaranteed to be the center of conversation. For a cute individual treat, place each cookie in a small cupcake liner before arranging them on a tray. They also make incredible food gifts! Package a few in a clear cellophane bag tied with a ribbon for a homemade gift that comes straight from the heart (and the kitchen).
Make It Your Own! Recipe Variations
The fun doesn’t have to stop here! Let your creativity run wild with these simple twists:
- Chocolate Lover: Use a chocolate sugar cookie as the base for a “muddy” melting snowman!
- Peppermint Twist: Add a ¼ tsp of peppermint extract to the cookie dough and crush some candy canes to sprinkle on the icing puddle for a festive, crunchy touch.
- Gingerbread Snowman: Use your favorite gingerbread cookie recipe for the base. The spiced cookie pairs wonderfully with the sweet marshmallow and icing.
- Gluten-Free: Substitute the all-purpose flour with a 1:1 gluten-free baking blend. Your snowmen will be just as adorable!
- “Snowball” Version: For a quicker version, skip rolling the dough and make drop cookies. Press the marshmallow into the top of a warm cookie right out of the oven—it will get delightfully gooey!
Chef’s Notes: From My Kitchen to Yours
This recipe has evolved so much since that first snowy afternoon with Maya. We’ve learned that kitchen shears are fantastic for snipping candy ropes and fruit roll-ups into perfect little scarf shapes. I also highly recommend enlisting little helpers for the decorating stage—their imaginations are boundless! I’ve seen snowmen with blueberry noses, raisin buttons, and scarves made from every color of the rainbow. One year, a particularly creative nephew gave his snowman a tiny pretzel stick umbrella. It was iconic.
The beauty of this recipe is in its imperfection. No two snowmen will ever look alike, and that’s what makes them special. So don’t stress about making them look “perfect.” Embrace the wobbles, the cross-eyed looks, and the slightly-too-long scarves. That’s where the real charm lies.
FAQs & Troubleshooting: Your Questions, Answered!
Q: My cookies spread too much and lost their round shape. What happened?
A: This is almost always a temperature issue! The most common culprits are butter that was too soft or even melted, or an oven that wasn’t fully preheated. Make sure your butter is just softened and your baking sheets are cool when you place the dough on them. Chilling the dough balls for 15 minutes before baking can also help prevent spread.
Q: My marshmallow won’t stick to the cookie. Help!
A: This means the icing had likely started to set before you placed the marshmallow. The key is to work on a few cookies at a time. Ice 2-3 cookies, then immediately place the marshmallows on them. Then, move on to the next batch. The icing needs to still be wet and sticky to act as glue.
Q: Can I make the cookie dough ahead of time?
A: Absolutely! You can prepare the dough, wrap it tightly in plastic wrap, and keep it in the refrigerator for up to 3 days. Let it sit at room temperature for about 15-20 minutes until it’s soft enough to roll. You can also freeze the dough for up to 3 months. Thaw overnight in the fridge before using.
Q: How should I store the finished cookies, and how long do they last?
A> Store your decorated cookies in a single layer in an airtight container at room temperature. They are best enjoyed within 2-3 days. The marshmallow can start to get a little hard after that. I don’t recommend refrigerating them, as it can cause the cookies to soften and the marshmallow to sweat.

Melting Snowman Cookies
Description
These playful cookies capture the magic of winter in the sweetest way. A soft sugar cookie base becomes the stage for a marshmallow “snowman” sinking into a puddle of icing, complete with scarves, carrot noses, and twiggy arms. They’re whimsical, kid-approved, and guaranteed to bring laughter to your kitchen. Whether for a holiday party or a snowy afternoon activity, these cookies turn simple baking into edible storytelling.
Ingredients
For the Sugar Cookies (24 cookies)
-
1 cup (2 sticks) unsalted butter, softened
-
1 cup granulated sugar
-
1 large egg (room temp)
-
1½ tsp vanilla extract
-
2½ cups all-purpose flour
-
½ tsp baking powder
-
¼ tsp salt
For Decorating
-
24 large marshmallows
-
1½ cups white icing (store-bought or homemade glaze)
-
Black decorating gel (eyes, buttons, arms)
-
Orange icing or sprinkles (noses)
-
Colored icing or candy ropes (scarves & details)
Instructions
-
Preheat oven to 350°F (175°C). Line baking sheets with parchment.
-
Cream butter + sugar (2–3 min) until pale and fluffy. Beat in egg + vanilla.
-
Mix dry ingredients (flour, baking powder, salt), then add gradually to wet. Stop once combined.
-
Shape cookies: Roll tablespoon-sized dough balls, flatten to ½-inch thick, and place 2” apart.
-
Bake 8–10 min until edges set and centers look soft. Cool completely.
-
Ice puddles: Spread white icing in uneven “puddle” shapes.
-
Add marshmallows: While icing is wet, press a marshmallow on its side into each puddle.
-
Decorate: Use gel for eyes, smiles, and arms. Add orange noses and candy scarves. Let set.
Notes
-
Work in small batches when adding marshmallows so the icing doesn’t dry.
-
Chill dough briefly (10–15 min) if cookies spread too much.
-
Use gel food coloring for vibrant details without thinning icing.
Nutritional Information (Estimated Per Cookie)
Calories: ~170 | Fat: 7g | Saturated Fat: 4g | Cholesterol: 25mg | Sodium: 35mg | Carbohydrates: 22g | Sugar: 15g | Protein: 1g
Please note: This is an estimate based on the ingredients used and may vary depending on specific brands and portion sizes.
Final Thoughts: Your Cozy Kitchen Adventure Awaits
And there you have it, my friends—your very own troop of whimsical, wobbly, wonderfully imperfect melting snowman cookies! I hope this recipe has brought a little bit of that magical, snowy-day feeling into your kitchen, no matter the weather outside.
Remember, baking isn’t about achieving flawless perfection. It’s about the flour on your nose, the laughter shared with a little helper, and the sweet, simple joy of creating something with your own two hands. These cookies are a celebration of that spirit. They’re a reminder that sometimes the most beautiful moments come from a little mess and a whole lot of heart.
So, whether you’re carrying on a cherished tradition or starting a brand new one, I’m so incredibly grateful you chose to spend your time here in my cozy corner. I can’t wait to hear about your own kitchen adventures and see the unique personalities your snowmen take on!

Santa’s Belly Sugar Cookies
Santa’s Belly Sugar Cookies: The Most Festive (and Delicious) Cookie on the Block!
Hello, my fellow kitchen adventurers! Olivia here, waving at you from a kitchen that currently looks like a festive bomb went off – and I wouldn’t have it any other way. Is there anything that captures the magic of the holiday season quite like the smell of buttery sugar cookies baking in the oven? It’s a scent that promises joy, togetherness, and a whole lot of deliciousness. It’s the universal signal that the most wonderful time of the year is truly here.
Today, we’re not just making any sugar cookie. Oh no. We’re creating a centerpiece, a conversation starter, the cookie that will have everyone at your cookie exchange gasping with delight. We’re making Santa’s Belly Sugar Cookies! These adorable treats are a buttery, tender sugar cookie base transformed into jolly old St. Nick himself with a swath of red icing, a sleek black belt, and a shiny golden buckle. They’re fun, they’re festive, and I promise, they are an absolute blast to make. Whether you’re baking with little ones, having a girls’ night in, or simply treating yourself to some creative kitchen therapy, these cookies are the perfect project. So, tie on your favorite (probably messy) apron, put on some holiday tunes, and let’s create some magic together!
A Cookie Tradition is Born
This recipe holds a special place in my heart because it was born out of a near-disaster that turned into our favorite holiday tradition. Years ago, I was attempting a complicated gingerbread house with intricate royal icing details. Let’s just say the walls were more “leaning tower of Pisa” than “cozy holiday cottage.” Frustrated but determined to use my red and black icing, I looked at a simple round sugar cookie I had baked as a test and saw a blank canvas. A little red icing here, a black belt there… and just like that, Santa’s belly appeared!
My family erupted in laughter. It was silly, it was simple, and it was utterly perfect. We spent the rest of the evening transforming every round cookie into a jolly Santa, laughing and decorating together. That messy gingerbread house was long forgotten. Now, every year, the first weekend of December is dedicated to baking these cookies. The kitchen fills with music, the air with the scent of vanilla and butter, and our hearts with the joy of creating something together. It’s a reminder that the best moments aren’t about perfection; they’re about the love and laughter you stir into the mix.
Gathering Your Cookie Crew (a.k.a. The Ingredients)
This recipe uses simple, pantry-staple ingredients for the cookie itself, letting the fun decorations do all the talking. Here’s what you’ll need to make about two dozen cheerful Santa cookies:
For the Sugar Cookies:
- 1 cup (2 sticks) unsalted butter, softened – This is the foundation of our rich, tender cookie. Using unsalted butter lets us control the salt level perfectly. Chef’s Insight: Your butter is perfectly softened when you can press your finger into it easily and leave an indentation, but it’s not greasy or melted. This is key for creaming!
- 1 cup granulated sugar – For that classic, sweet sugar cookie flavor and helping to create a slight crispness on the edges.
- 1 large egg – Our binding agent, bringing the dough together and adding structure. Make sure it’s at room temperature to blend smoothly with the butter and sugar.
- 1½ tsp pure vanilla extract – The flavor MVP! Pure vanilla adds a warm, deep flavor that imitation vanilla just can’t match.
- 2½ cups all-purpose flour – The structure of our cookie. I like to fluff my flour in the container, spoon it into the measuring cup, and level it off to avoid over-packing and ending up with dry dough.
- ½ tsp baking powder – Our little leavening helper that gives the cookies a slight lift and a soft, cake-like texture, preventing them from being too hard.
- ¼ tsp salt – The flavor enhancer! Salt balances the sweetness and makes all the other flavors pop. Don’t skip it!
For the Festive Decorations:
- Red royal icing or red-tinted cookie icing – This is Santa’s iconic red suit! I’m a huge fan of using a pre-made red royal icing in a tub or a squeeze bottle for ease and vibrant color. If you’re tinting your own, use gel food coloring for the most intense red without thinning your icing too much.
- Black decorating gel or black icing – For the belt. Decorating gels in a tube are fantastic here because they are thick, easy to control, and set with a slight shine.
- Yellow or gold icing, fondant, or even a yellow candy melt – For the buckle! This is where you can get creative. Pre-colored yellow tube icing works, but I love using a small piece of rolled fondant or a single yellow candy melt placed on while the black icing is still wet.
Let’s Build Santa’s Belly! Step-by-Step Instructions
Ready to create some cookie magic? Follow these steps, and you’ll have a tray of perfect, jolly cookies in no time. I’ve packed this section with all my best tips and tricks I’ve learned over the years!
- Preheat and Prep: Preheat your oven to 350°F (175°C). Line your baking sheets with parchment paper. This is my number one secret for perfectly baked cookies – no sticking, even baking, and easy clean-up! Chef’s Hack: If you have light-colored baking sheets, use them! They reflect heat and prevent the bottoms of your cookies from over-browning. Dark sheets can absorb too much heat.
- Cream the Good Stuff: In a large bowl, beat the softened butter and granulated sugar together on medium-high speed for a full 2-3 minutes. We’re not just mixing; we’re creaming. This process incorporates air into the dough, which is what gives our cookies that lovely, light texture. You’ll know it’s ready when the mixture becomes pale yellow and fluffy.
- Incorporate the Wet Ingredients: Beat in the egg and vanilla extract until everything is beautifully combined and smooth. Scrape down the sides of the bowl with a spatula to make sure no rogue butter is hiding down there.
- Bring in the Dry Team: In a separate bowl, whisk together the flour, baking powder, and salt. This ensures the leavening and salt are evenly distributed. Gradually add the dry ingredients to the wet ingredients, mixing on low speed just until the flour disappears and a soft dough forms. Pro Tip: Over-mixing at this stage can develop the gluten in the flour and make your cookies tough. Mix until just combined!
- The Chill Factor: This step is non-negotiable! Form the dough into a disc, wrap it in plastic wrap, and chill it in the refrigerator for at least 20-30 minutes. Chilling the dough solidifies the butter, which prevents the cookies from spreading too much in the oven. It also makes the dough much easier to roll out.
- Roll and Cut: On a lightly floured surface, roll your dough out to about a ¼-inch thickness. This is the perfect thickness – sturdy enough to hold the icing but not too thick to bake evenly. Use a simple round cookie cutter (about 3 inches in diameter is perfect) to cut out your circles. Place them on your prepared baking sheets about 2 inches apart. Kitchen Story: I save the scraps, re-roll them once, and cut out more circles. Any more than that and the cookies can get a bit tough from over-working the dough.
- Bake to Perfection: Bake for 8-10 minutes. You’re looking for the edges to be set and just barely starting to turn a light golden brown. The centers should still look soft. This is crucial! They will continue to cook on the hot baking sheet as they cool. Over-baking is the enemy of a soft sugar cookie!
- The Patient Part: Let the cookies cool on the baking sheet for 5 minutes before transferring them to a wire rack to cool completely. I know it’s tempting to start decorating, but if you ice a warm cookie, it will melt into a puddle of sadness. Let’s avoid the puddle.
- Time for the Red Suit: Once the cookies are completely cool, it’s time to decorate! Frost the top of each cookie with your red icing, leaving a small border of cookie visible around the edge to be the “fur trim” of Santa’s suit. Let this layer of icing set completely. If you’re using royal icing, this might take an hour or two. If you’re using a thicker canned icing, it might set faster.
- Add the Belt and Buckle: Once the red icing is dry to the touch, pipe a thick black belt horizontally across the center of the cookie. While the black icing is still wet, carefully place your gold buckle in the center. If you’re using yellow icing to pipe a buckle, you can do it once the black belt has set a little. And voilà! You’ve just created a squadron of jolly Santa cookies!
How to Serve Up Some Holiday Cheer
Presentation is part of the fun! Pile these cheerful cookies high on a festive platter or a rustic wooden board for a gorgeous holiday dessert table. They are the ultimate cookie exchange offering – guaranteed to make you the most popular baker there. They also make adorable edible gifts! Stack a few in a clear cellophane bag, tie it with a ribbon, and you have a heartfelt, homemade present that anyone would love to receive. Of course, they’re also best served with a cold glass of milk for Santa (and for you!) and a big, happy smile.
Mix It Up! Fun Recipe Variations
Feel like putting your own spin on this classic? Go for it! Here are a few ideas:
- Chocolate Lover’s Santa: Add ½ cup of cocoa powder to the dry ingredients for a chocolate sugar cookie base. Santa’s suit will be a deep, delicious brown instead of red!
- Peppermint Twist: Add ½ teaspoon of peppermint extract along with the vanilla for a cool, festive flavor that pairs perfectly with the sweet icing.
- “Fancy Belt” Santa: Use a strip of a chocolate bar (like a Hershey’s bar) for the belt and a piece of a yellow peanut butter cup or a square of caramel for the buckle!
- Gluten-Free Jolly Old Elf: Substitute the all-purpose flour with a 1:1 gluten-free baking blend. I’ve had great success with Bob’s Red Mill and King Arthur blends.
- Citrus Zest: Add the zest of one orange to the dough for a bright, citrusy note that cuts through the sweetness beautifully.
Olivia’s Chef Notes & Kitchen Stories
This recipe has evolved so much since that first frantic gingerbread rescue mission! One year, I was out of black gel and had to get creative. I melted dark chocolate chips with a tiny bit of coconut oil and used a piping bag – it worked like a charm and tasted amazing! Another time, my nephew decided Santa needed a face, so we added two little white dots for eyes and a rosy red cheek. It was adorable. Don’t be afraid to play and make this recipe your own.
The biggest lesson I’ve learned? Embrace the imperfections. Maybe one Santa’s belt is a little wobbly, or another’s buckle is off-center. It gives them character! They are homemade with love, and that’s what makes them special. The goal is to have fun and fill your home with the spirit of the season. Now, go make a beautiful, delicious mess!
FAQs & Troubleshooting
Q: My cookies spread too much and lost their round shape! What happened?
A: This is usually caused by butter that was too warm. Make sure your butter is just softened, not melted. Chilling the dough is also critical – don’t skip it! Also, double-check that your baking powder isn’t expired, as it provides the necessary lift.
Q: My red icing isn’t very vibrant. How do I get that bright, classic Santa red?
A: Liquid food coloring can dilute your icing. I highly recommend using gel food coloring. It’s highly concentrated, so you need less of it to achieve a deep, bold red without changing the consistency of your icing. Start with a little and add more until you get the color you want.
Q: Can I make the cookie dough ahead of time?
A: Absolutely! This dough is perfect for making ahead. Wrap the disc of dough tightly in plastic wrap and you can refrigerate it for up to 3 days. You can also freeze it for up to 3 months. Just thaw it overnight in the fridge before rolling it out.
Q: The black gel icing is smearing into the red. How can I prevent this?
A: Patience is key here! You must let the base layer of red icing dry completely before adding the black details. If it’s still even slightly tacky, the black gel can bleed. To speed things up, you can place the iced cookies in a single layer in front of a fan on a low setting.

Santa’s Belly Sugar Cookies
Description
These cookies are pure holiday cheer baked into a circle! Buttery, tender sugar cookies get dressed up as Santa’s jolly belly with red icing, a black belt, and a golden buckle. They’re festive, fun, and the perfect treat for cookie swaps, edible gifts, or cozy nights by the fire. Grab your apron and turn your kitchen into Santa’s sweetest workshop!
Ingredients
For the Cookies
-
1 cup (2 sticks) unsalted butter, softened
-
1 cup granulated sugar
-
1 large egg (room temp)
-
1½ tsp vanilla extract
-
2½ cups all-purpose flour
-
½ tsp baking powder
-
¼ tsp salt
For Decorating
-
Red royal icing (or red-tinted cookie icing)
-
Black decorating gel or black icing
-
Yellow or gold icing, fondant, or candy melt (for buckle)
Instructions
-
Preheat oven to 350°F (175°C). Line baking sheets with parchment.
-
Cream butter + sugar until pale and fluffy (2–3 min). Beat in egg + vanilla.
-
Whisk flour, baking powder, salt separately, then mix into wet just until combined.
-
Chill dough 20–30 min wrapped in plastic.
-
Roll dough ¼-inch thick, cut circles (3-inch cutter). Place 2” apart on trays.
-
Bake 8–10 min until edges are set but centers look soft. Cool fully before decorating.
-
Decorate: Spread red icing for Santa’s suit. Once set, add black belt, then a yellow buckle.
Nutrition
- Calories: 160 cal Per Serving
- Sugar: 12g
- Fat: 7g
- Saturated Fat: 4.5g
- Carbohydrates: 20g
Nutritional Information (Estimated Per Cookie)
Calories: ~160 | Fat: 7g | Saturated Fat: 4.5g | Cholesterol: 25mg | Sodium: 35mg | Carbohydrates: 20g | Sugar: 12g | Protein: 1g
*Please note: This is an estimate based on the ingredients used and will vary slightly depending on specific brands and decoration amounts.
Final Thoughts: More Than Just a Cookie
As the last cookie is decorated and the final holiday tune fades from the speakers, I hope you look at your tray of jolly Santa bellies with a immense sense of pride and joy. These cookies are so much more than just a festive treat; they are a tangible piece of holiday magic, created by your own hands.
Remember, the true magic of this recipe isn’t in achieving a perfectly straight belt or a flawlessly round buckle. It’s in the laughter that filled your kitchen, the flour dusted on your nose, and the shared moment of creativity. It’s in the tradition you’ve either continued or just begun. These cheerful cookies are a celebration of the season’s simple pleasures: warmth, togetherness, and the pure, uncomplicated joy of giving something made with love.
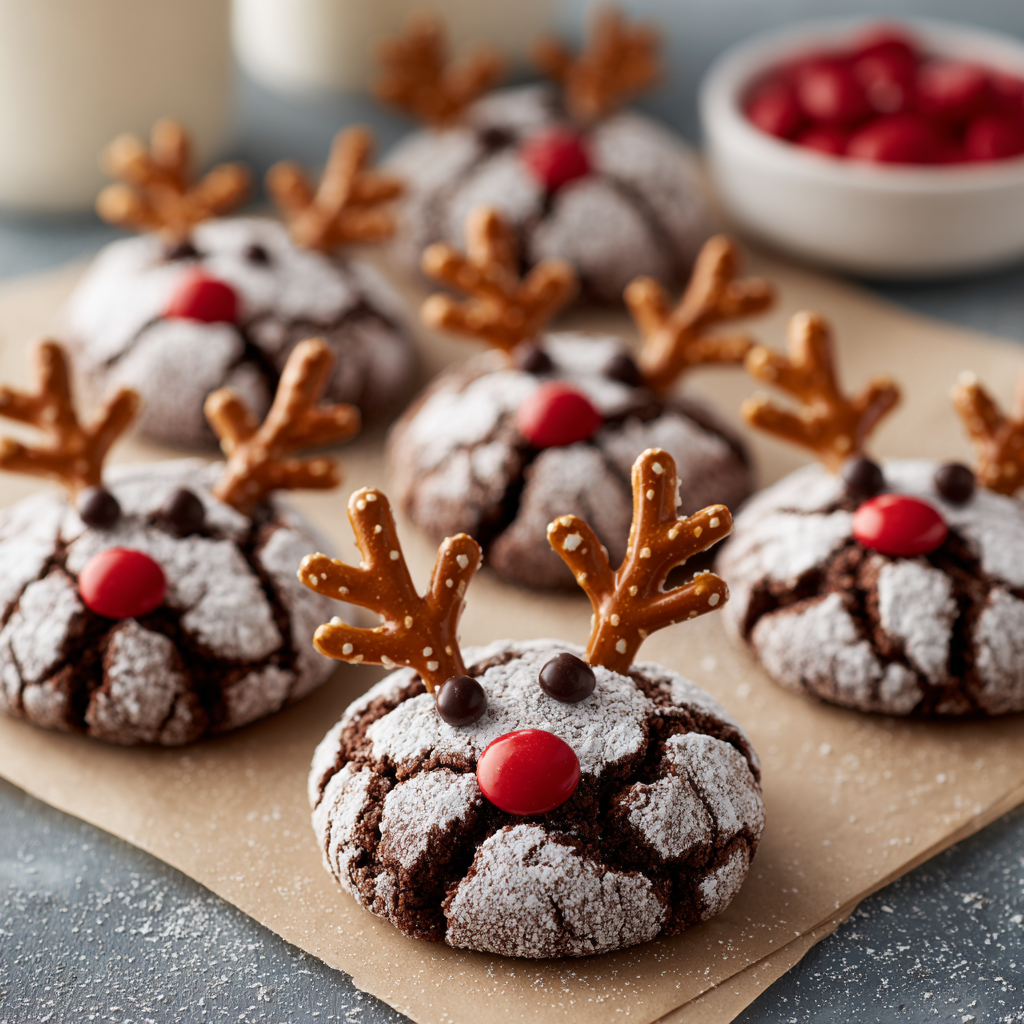
Chocolate Crinkle Reindeer Cookies
Welcome to the Coziest Cookie Hour of the Year!
Is there anything that captures the magic of the holiday season quite like the smell of chocolate cookies baking in the oven? That rich, warm, cocoa-infused aroma that wafts through the house, pulling everyone into the kitchen with a single, irresistible scent. If you’re anything like me, baking during the holidays isn’t just about the final product—it’s about the entire experience. It’s about putting on your favorite festive apron, turning up the holiday tunes, and creating little edible works of art that spark pure joy.
Today, we’re taking a beloved classic—the deeply fudgy, crackly-topped chocolate crinkle cookie—and giving it a full dose of Christmas whimsy. We’re transforming them into the most adorable Chocolate Crinkle Reindeer Cookies you’ve ever seen! With pretzel antlers, a cute red nose, and sweet little eyes, these cookies are as fun to make as they are to eat. They’re the perfect project to tackle with little helpers in the kitchen, a fantastic addition to any cookie swap, and guaranteed to be the star of your holiday dessert platter. So, let’s preheat those ovens, grab a mixing bowl, and create some delicious, edible magic together!
A Herd of Reindeer is Born: A Kitchen Mishap Turned Tradition
I have to confess: the invention of these reindeer cookies was a happy little accident. Years ago, I was baking my standard chocolate crinkles for a big family Christmas Eve gathering. In my usual pre-holiday frenzy, I had trays of cookies cooling on every available surface. My then-toddler nephew, Leo, was “helping” me by carefully arranging pretzel sticks on a plate nearby. You can probably see where this is going.
One wobbly step later, and a whole pile of broken pretzel pieces scattered across a tray of warm, just-out-of-the-oven crinkle cookies. Instead of frustration, we both burst out laughing. “Aunt Liv,” he giggled, “they look like little reindeer with broken antlers!” We quickly raided the pantry for red M&M’s and chocolate chips, and within minutes, we had created our very first rudolph. It was messy, imperfect, and absolutely perfect. Now, making a whole herd of these reindeer cookies with Leo is one of our most cherished holiday traditions. It just goes to show that the best recipes often come from a little bit of chaos and a whole lot of heart.
Gathering Your Reindeer Cookie Squad: Ingredients & Insights
This recipe uses simple, pantry-staple ingredients for the cookie base, which is a dream! The magic is in the decoration. Here’s everything you’ll need, along with a few of my chef-y tips to ensure your cookies are flawless.
For the Crinkle Cookies:
- ½ cup unsalted butter, melted – Using melted butter gives us a fudgier, denser cookie, which is exactly what we want for that classic crinkle texture. If you only have salted butter, that’s okay! Just omit the added ¼ tsp salt later on.
- 1 cup granulated sugar – This sweetens the deal and helps create those beautiful crackles on the surface.
- 2 large eggs – Make sure they’re at room temperature! This helps them incorporate smoothly into the melted butter and sugar, creating a cohesive dough. A quick tip: to bring eggs to room temp fast, place them in a bowl of warm water for 5-10 minutes.
- 1 tsp vanilla extract – The vanilla works behind the scenes to enhance the rich chocolate flavor. Don’t skip it!
- 1 cup unsweetened cocoa powder – This is the star of the show! Use a good-quality cocoa powder for the deepest, richest chocolate flavor. I prefer Dutch-processed for its smoothness, but natural unsweetened cocoa works perfectly here too.
- 1 cup all-purpose flour – The foundation of our cookie. For a slightly chewier cookie, you can swap in bread flour. For gluten-free, a 1:1 GF baking blend works wonderfully.
- 1 tsp baking powder – Our leavening agent! It gives the cookies just the right amount of lift, helping to create those iconic cracks.
- ¼ tsp salt – Crucial for balancing the sweetness and making the chocolate flavor pop.
- ½ cup powdered sugar, for rolling – This is what gives the cookies their snowy, wintery look. Don’t be shy when rolling—a thick, generous coating is key for maximum contrast.
For Decorating Your Reindeer:
- 48 mini pretzels, broken in half (antlers) – The classic “twist” mini pretzels are perfect. Gently break them in half to create the antler shapes. If they break unevenly, don’t worry! It just gives your reindeer more personality.
- 24 red candy-coated chocolates (noses) – Red M&M’s or Red Hots are the classic choices. For a nut-free version, use Skittles or a round red candy like Sixlets.
- 48 mini chocolate chips or candy eyes (eyes) – Mini chocolate chips placed point-side down work great. But for extra whimsy and ease, I absolutely adore using store-bought edible candy eyes. They stick easily and are so fun!
- Optional: a few tsp of melted chocolate for “gluing” – If your decorations are being stubborn and not sticking to the cooled cookies, a tiny dab of melted chocolate or frosting is the perfect edible glue.
Let’s Build a Reindeer: Step-by-Step Instructions
Ready to create your edible reindeer herd? Follow these steps for cookie success! I’ve packed them with all my favorite kitchen hacks to make the process smooth and fun.
- Preheat and Prep. Preheat your oven to 350°F (175°C). Line two baking sheets with parchment paper. This is non-negotiable for me! It prevents sticking and makes cleanup an absolute breeze. Chef’s Hack: If you don’t have parchment, you can use silicone baking mats or a very light coating of non-stick spray.
- Combine Wet Ingredients. In a large bowl, whisk together the melted butter and granulated sugar until they’re well combined. It might look a little gritty, that’s normal! Add the room-temperature eggs and vanilla extract, and whisk vigorously for a good minute until the mixture becomes smooth, slightly thickened, and pale in color. This step incorporates air, which helps with the texture.
- Embrace the Chocolate. Sift in the cocoa powder. I know sifting feels like an extra step, but it’s worth it to avoid any lumpy, dry pockets of cocoa in your dough. Mix until you have a thick, glossy, and incredibly chocolatey batter.
- Bring in the Dry Team. In a separate medium bowl, whisk together the flour, baking powder, and salt. This ensures the leavening and salt are evenly distributed throughout the flour. Gradually add these dry ingredients to the chocolate mixture, stirring with a spatula until just combined. Don’t overmix! The dough will be very thick and fudgy. Chef’s Hack: If the dough feels too sticky to handle, that’s perfect! It’s meant to be soft. We’ll fix that with chilling.
- The Chill Factor. Cover the bowl with plastic wrap and chill the dough for at least 30 minutes. This is the secret weapon! Chilling the dough firms it up, making it easy to roll, and it also prevents the cookies from spreading too much in the oven. You can chill it for up to 2 days if you want to get a head start!
- Roll and Coat. Place your powdered sugar in a small bowl. Using a tablespoon or a small cookie scoop (about 1 inch in size), portion out the dough and roll it into balls. Roll each ball generously in the powdered sugar until it’s completely covered in a white, snowy coat. Place them about 2 inches apart on your prepared baking sheets. Chef’s Hack: For extra crackly tops, roll the balls in powdered sugar a second time right before baking!
- Bake to Perfection. Bake for 10-12 minutes. The cookies are done when the tops are beautifully crackled and the edges are set. The centers will still look soft—that’s what we want! They will firm up as they cool. Chef’s Hack: Ovens can vary, so start checking at 9 minutes. Remember, it’s better to underbake slightly than overbake for a fudgy center.
- Cool (But Not Too Much!). Allow the cookies to cool on the baking sheet for 5 minutes. This is the most important step for decorating! They need to be firm enough to handle but still warm so that the pretzels and candies will stick slightly when pressed in.
- Decorate! Now for the fun part! Gently press two pretzel halves into the top of each cookie for antlers. Add two mini chocolate chips or candy eyes, and finally, press a red candy in the center for the nose. If any pieces feel loose, use a tiny dab of melted chocolate as edible glue to secure them. Let the cookies cool completely on a wire rack to set completely.
How to Serve Your Festive Herd
Presentation is part of the fun! Pile these reindeer cookies high on a rustic wooden board or a festive holiday platter. They look adorable arranged so their antlers are intertwining. For a really magical touch, place them around a bowl of eggnog or a plate of other Christmas cookies as if the reindeer are grazing. They are the ultimate crowd-pleaser at parties and make for the sweetest food gift when packaged in a cellophane bag tied with a ribbon.
Get Creative: Recipe Variations
Feel free to play with this recipe and make it your own! Here are a few fun twists:
- Peppermint Rudolph: Add ½ tsp of peppermint extract to the dough along with the vanilla. Use a white chocolate chip for the nose instead of red candy for a peppermint twist.
- Gluten-Free Gang: Use a 1:1 gluten-free all-purpose flour blend and ensure your pretzels are a certified gluten-free brand.
- Nutty Buddy: Add ½ cup of finely chopped toasted pecans or walnuts to the dough for a delightful crunch.
- Orange Chocolate: Add the zest of one orange to the dough for a bright, citrusy note that pairs beautifully with chocolate.
- Blitzen’s Blue Nose: Who says Rudolph has to have a red nose? Use blue or green M&M’s to create a whole team of colorful reindeer!
Chef’s Notes: From My Kitchen to Yours
This recipe has evolved so much since that first pretzel-spill incident! I’ve learned that the dough is incredibly forgiving. If you’re short on time, you can even freeze the rolled, powdered-sugar-coated dough balls on a tray and then transfer them to a freezer bag. Bake them straight from the freezer, adding a minute or two to the baking time—hello, instant fresh cookies for unexpected guests!
My biggest piece of advice? Don’t strive for perfection. Some reindeer will have lopsided antlers. Some might be cross-eyed. It gives them character and makes them even more charming. The goal is to have fun and create something delicious that makes people smile. Every time I make these, I think of my nephew’s giggles, and that’s the real secret ingredient.
FAQs & Troubleshooting
Q: My cookies didn’t crackle much. What happened?
A: The most common culprit is not using enough powdered sugar when rolling. You want a thick, white coat! Also, ensure your dough was adequately chilled. If the dough is too warm, it will spread too quickly in the oven and the cracks won’t have time to form properly.
Q: My cookies spread too much and are flat.
A: This is almost always a dough temperature issue. Make sure you chill the dough for the full 30 minutes (or longer). If your kitchen is very warm, an extra 15 minutes can make a big difference. Also, double-check that your baking powder is fresh and not expired.
Q: The decorations won’t stick! Help!
A: You have to decorate while the cookies are still warm. The residual heat acts like a light glue. If your cookies have cooled completely, simply use a tiny dab of melted chocolate, frosting, or even a dot of corn syrup on the back of each pretzel and candy to stick them on. It works like a charm.
Q: Can I make the dough ahead of time?
A: Absolutely! The dough can be kept covered in the refrigerator for up to 2 days. You can also freeze the rolled dough balls (before rolling in powdered sugar) for up to 3 months. When ready to bake, let them thaw just enough to be able to roll them in sugar, and then bake as directed.

Chocolate Crinkle Reindeer Cookies
- Total Time: 7 minute
Description
Nothing says holiday magic like the smell of chocolate cookies fresh from the oven. These Chocolate Crinkle Reindeer Cookies are festive, fun, and oh-so delicious. With fudgy centers, snowy powdered sugar tops, and whimsical reindeer faces, they’re as much a joy to decorate as they are to eat. Gather your little helpers, crank up the holiday tunes, and make some sweet memories in the kitchen!
Ingredients
For the Cookies
-
½ cup unsalted butter, melted
-
1 cup granulated sugar
-
2 large eggs (room temp)
-
1 tsp vanilla extract
-
1 cup unsweetened cocoa powder
-
1 cup all-purpose flour
-
1 tsp baking powder
-
¼ tsp salt
-
½ cup powdered sugar (for rolling)
For Decorating
-
48 mini pretzels, broken in half (antlers)
-
24 red candies (noses)
-
48 mini chocolate chips or candy eyes (eyes)
-
Optional: melted chocolate for “glue”
Instructions
-
Preheat oven to 350°F (175°C). Line 2 baking sheets with parchment.
-
Mix wet ingredients: Whisk butter + sugar, then add eggs and vanilla until smooth.
-
Add cocoa, mix well, then stir in flour, baking powder, and salt. Dough will be thick.
-
Chill dough at least 30 minutes.
-
Roll into balls (1 tbsp each), coat generously in powdered sugar. Place 2” apart.
-
Bake 10–12 min until crackled on top. Centers should look slightly soft.
-
Cool 5 min, then decorate: pretzel antlers, candy eyes, and red noses. Use melted chocolate if needed. Let set fully on a rack.
Notes
-
Roll cookies twice in powdered sugar for bold crackles.
-
Decorate while warm so toppings stick.
-
Freeze dough balls for up to 3 months for quick holiday baking.
- Prep Time: 20 min (+30 min chilling)
- Cook Time: 10–12 min per batch
Nutrition
- Calories: 140 cal Per cookie
- Fat: 6g
- Carbohydrates: 20g
Nutritional Information (Per Cookie)
Estimated per cookie:
Calories: ~140 | Fat: 6g | Carbs: 20g | Sugar: 14g | Protein: 2g
Please note: This is an estimate based on the ingredients used and may vary depending on specific brands and portion sizes.
Final Thoughts: A Recipe for More Than Just Cookies
As you pull your final tray of reindeer from the oven and step back to admire your festive herd, I hope you feel a deep sense of accomplishment and joy. You’ve created more than just a batch of cookies; you’ve crafted edible memories, filled your home with that irreplaceable holiday aroma, and perhaps even started a new tradition of your own.
Remember, the true magic of this recipe doesn’t lie in achieving cookie perfection. It’s in the laughter that comes from a crooked pretzel antler, the shared focus of placing two tiny eyes just right, and the warmth of sharing something made with your own hands. These Chocolate Crinkle Reindeer Cookies are a celebration of the season’s coziest moments—the messy, the sweet, and the utterly heartwarming.
So, from my kitchen to yours, I wish you the happiest of holidays. May it be filled with delicious treats, cherished time with loved ones, and plenty of delicious, edible magic.
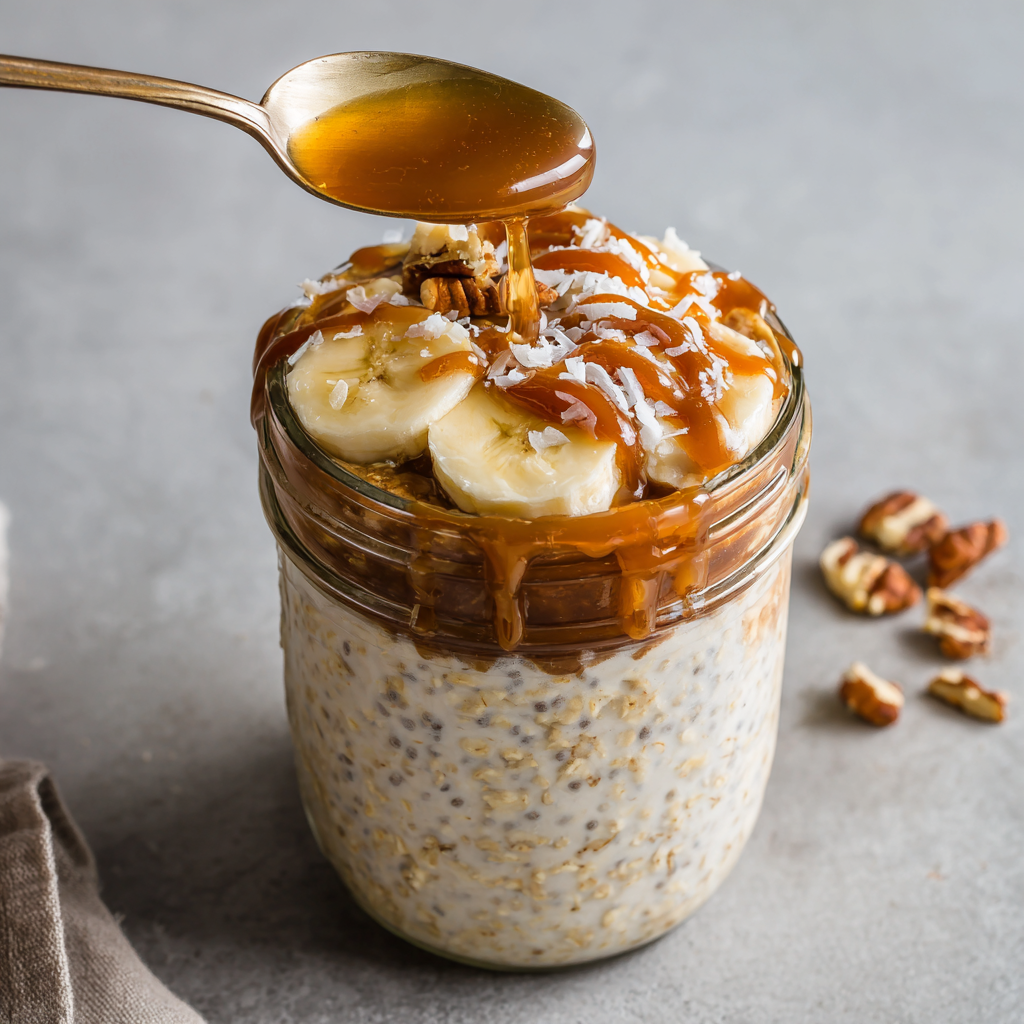
Maple Brown Sugar Overnight Oats
Your New Favorite Morning Ritual Starts Tonight
Hey there, friend! Can you smell that? It’s the crisp, cozy scent of a perfect autumn morning. You know the one—where the air is just cool enough for your favorite sweater, the sun is casting that beautiful golden glow, and the only thing that could possibly make it better is a warm, comforting, soul-hugging breakfast waiting for you. Now, imagine that feeling, but you get to hit the snooze button. Yes, really. Because that incredible breakfast is already made, chilling in your fridge, just begging to be devoured.
That’s the magic of overnight oats. And not just any overnight oats. We’re talking about the ultimate cozy breakfast: Maple Brown Sugar Overnight Oats. This isn’t just a meal; it’s a warm hug in a jar. It’s the nostalgic, caramelized sweetness of your favorite stovetop oatmeal, transformed into a no-cook, make-ahead dream. It’s creamy, it’s rich, and it’s packed with the kind of flavor that makes you feel like you’ve spent hours in the kitchen, when in reality, you spent about five minutes the night before.
Whether you’re a busy parent herding kids out the door, a professional trying to conquer the morning rush, or someone who just believes that a good day starts with a great breakfast, this recipe is your new best friend. It’s forgiving, endlessly customizable, and so delicious it feels like a treat. So, let’s grab a jar and get ready to make your future self very, very happy. Your mornings are about to get a whole lot sweeter and a whole lot easier.
A Bowl of Sweet Memories
This recipe takes me right back to my grandma’s kitchen table. Every fall, without fail, she’d have a big, steaming pot of oatmeal bubbling away on her vintage stove. But it wasn’t just any oatmeal—it was her famous maple and brown sugar version. She’d stir in the dark brown sugar until it melted into a deep, caramel-like syrup, then drizzle real maple syrup from a neighbor’s farm on top. The whole house would smell like sweet, toasted comfort.
I’d climb up onto a wooden stool, my legs swinging, and she’d place a bowl in front of me, always with a pat of butter melting into a golden pool in the center. We’d eat together in the quiet of the early morning, and it was our little ritual. This overnight oats version is my busy-adult-life homage to her. It captures that exact same soul-warming flavor profile—the deep molasses notes from the brown sugar, the rich, earthy sweetness of pure maple—but in a format that fits my on-the-go schedule. It’s my way of keeping that cozy tradition alive, one jar at a time. Every bite is a little taste of home.
Gathering Your Cozy Ingredients
Here’s what you’ll need to create this simple masterpiece. The beauty of this recipe is in its simplicity, and I’ve included some chef-y insights and easy swaps for each ingredient!
- 1 cup old-fashioned rolled oats – This is our base! Chef Insight: Rolled oats are key here—they soften perfectly overnight but still retain a lovely texture. Avoid using quick oats; they’ll turn far too mushy. Steel-cut oats won’t soften enough without cooking, so stick with the good old-fashioned kind.
- 1 cup almond milk (or any milk of choice) – This is our liquid. Substitution Tip: Any milk works wonderfully! Dairy milk, oat milk, soy milk, or coconut milk will all create a creamy, delicious result. Use what you love and have on hand.
- 2 tablespoons Greek yogurt – The secret weapon for creaminess and a protein punch! Chef Insight: The yogurt adds a tangy richness that makes these oats taste incredibly decadent. For a dairy-free version, swap in your favorite plain coconut or almond-based yogurt.
- 2 tablespoons maple syrup – For that authentic, unmistakable flavor. Chef Insight: Please, please use the real stuff! Pure maple syrup has a complex flavor that imitation pancake syrup just can’t match. It’s the heart of this recipe.
- 2 tablespoons brown sugar – This is where that deep, caramel-like, nostalgic sweetness comes from. Chef Insight: I prefer dark brown sugar for its stronger molasses flavor, but light brown sugar works perfectly too if it’s what you have.
- ½ teaspoon vanilla extract – The flavor enhancer. Chef Insight: A splash of vanilla rounds out all the other flavors and adds a warm, comforting aroma. It’s a small ingredient that makes a big difference!
Let’s Make Magic in a Jar
This is the easiest “cooking” you’ll ever do. I promise. Let’s walk through it together.
Step 1: The Big Combine
Grab a medium-sized mixing bowl. I like to mix in a bowl first to ensure everything is evenly distributed before I divide it into jars—it prevents any clumps of brown sugar from hiding at the bottom! To the bowl, add your rolled oats, milk, Greek yogurt, maple syrup, brown sugar, and vanilla extract.
Step 2: The Stir Down
Now, take a spoon or a small whisk and stir everything together. Really go to town on it! You want to see the brown sugar dissolve completely and the yogurt become one with the milk, creating a smooth, creamy, tan-colored liquid embracing the oats. This should only take a minute or two. Chef Hack: If your brown sugar is a little hard, don’t worry. The liquid will help break it down as it sits. Just make sure you break up any huge lumps with the back of your spoon.
Step 3: Jar It Up
Once your mixture is beautifully combined, it’s time for its overnight home. Divide the mixture evenly between two jars or airtight containers. I’m a huge fan of using 16-ounce mason jars—they’re the perfect size and look adorable. Leave a little room at the top if you plan on adding toppings later. Screw the lids on tightly.
Step 4: The Waiting Game (The Hardest Part!)
Place your jars in the refrigerator. Now, walk away. Let the magic happen. The oats need at least 4 hours to properly soften and absorb all that delicious liquid, but ideally, let them hang out overnight for a full 8 hours. This isn’t just about softening; it’s about the flavors melding and becoming something greater than the sum of their parts.
Step 5: Serve and Shine
In the morning, take your jar out of the fridge. Give the oats a really good stir. You might notice a little liquid has separated—that’s totally normal! Stirring reincorporates it into a perfectly creamy consistency. Now, the fun part: top with all your favorite extras and dive in!
How to Serve Your Masterpiece
I love eating these oats straight from the jar—it feels so personal and cozy! But if you’re serving to guests or just want to make it feel extra special, spoon the oats into a beautiful bowl. This gives you more room to get creative with your toppings. Create a little “bar” with toasted nuts, fresh fruit, a extra drizzle of maple syrup, and a sprinkle of cinnamon. Let everyone build their own perfect bowl. It’s a wonderful, interactive way to start a weekend brunch!
Make It Your Own: Delicious Twists
The canvas of this recipe is begging for your personal touch! Here are a few of my favorite ways to mix it up:
- Apple Pie: Stir in ½ teaspoon of cinnamon and a handful of finely chopped apples (or a spoonful of apple compote) into the base mixture before refrigerating. Top with a few extra apple pieces and a crunch of granola.
- Peanut Butter Banana: Swirl a tablespoon of creamy peanut butter into the assembled jars. In the morning, top with fresh banana slices and a few dark chocolate chips.
- Tropical Escape: Use coconut milk instead of almond milk and stir in 1-2 tablespoons of toasted coconut. Top with fresh mango or pineapple chunks and a sprinkle of macadamia nuts.
- Chocolate Hazelnut: Add 1 tablespoon of cocoa powder to the base mixture and use Nutella instead of peanut butter for your swirl. Thank me later.
- Protein Power-Up: Add a scoop of your favorite vanilla or unflavored collagen peptides or protein powder to the mix. You may need to add a tiny splash more milk to keep the consistency perfect.
From My Kitchen to Yours
This recipe has been a staple in my kitchen for years, and it’s evolved in the funniest ways. I once, in a pre-coffee haze, accidentally used salted caramel Greek yogurt I had intended for a dessert. Best mistake ever! It added this incredible salty-sweet dimension that was absolutely divine. So don’t be afraid to experiment.
I’ve also learned that these oats are incredibly forgiving. Too thick? Stir in a splash more milk in the morning. Too sweet for your taste? Dial back the brown sugar next time. They keep beautifully for up to 4 days in the fridge, making them the ultimate meal prep hero. I often make a quadruple batch on a Sunday night, and my husband and I have breakfast sorted for most of the week. It’s one less thing to think about on busy mornings, and that, my friends, is true luxury.
Your Questions, Answered
Q: My oats turned out really watery. What happened?
A: This usually happens for one of two reasons! First, not all oats are created equal. Some brands absorb liquid more slowly. If you find yours are too runny in the morning, just give them a good stir and let them sit for another 15-30 minutes. They’ll often thicken up. Second, it could be the type of yogurt or milk used. Next time, you can try reducing the milk by a tablespoon or two, or using a thicker, full-fat yogurt.
Q: Can I make these warm?
A: Absolutely! While they are designed to be eaten cold, I totally get the craving for a warm breakfast. To heat them, simply transfer the oats to a microwave-safe bowl and heat in 30-second intervals, stirring in between, until warm. You will likely need to add a little extra milk or water as the microwave can thicken them significantly.
Q: Are overnight oats healthy?
A: They can be a fantastic, balanced start to your day! This recipe provides a good mix of complex carbs from the oats, protein from the Greek yogurt, and healthy fats if you add nuts or nut butter. You control the sugar. To make it lighter, you can reduce the maple syrup and brown sugar slightly and rely more on the natural sweetness of your toppings like berries or banana.
Q: How long do they last in the fridge?
A: They will stay fresh and delicious in airtight containers for 3 to 4 days. This makes them perfect for weekly meal prep. Just hold off on adding any fresh fruit toppings (like banana or apple) until the morning you plan to eat them to prevent browning and sogginess.
Maple Brown Sugar Overnight Oats
Description
Wake up to the comforting, caramelized sweetness of maple and brown sugar without spending a minute in the kitchen. These overnight oats are creamy, rich, and perfectly customizable—your future self will thank you. A cozy, make-ahead breakfast that feels indulgent but fuels your day with wholesome ingredients.
Ingredients
-
1 cup old-fashioned rolled oats
-
1 cup almond milk (or milk of choice)
-
2 tablespoons Greek yogurt (or plant-based yogurt)
-
2 tablespoons maple syrup
-
2 tablespoons brown sugar (dark or light)
-
½ teaspoon vanilla extract
Optional Toppings & Flavor Boosters:
-
Fresh fruit (banana, berries, or chopped apples)
-
Nuts or granola
-
Cinnamon, cocoa powder, or nutmeg
-
Nut butter or chocolate-hazelnut spread
Instructions
-
Mix Ingredients: In a medium bowl, combine oats, milk, yogurt, maple syrup, brown sugar, and vanilla extract. Stir until smooth and creamy.
-
Jar It Up: Divide evenly between two 16-ounce jars or airtight containers. Leave a little space at the top for toppings.
-
Chill: Refrigerate for at least 4 hours, ideally overnight (8 hours) to let the oats soften and the flavors meld.
-
Serve: Stir well before eating. Top with your favorite extras and enjoy cold or warm slightly in the microwave (30-second intervals, stirring in between).
Notes
-
Too thick? Stir in a splash of milk in the morning.
-
Too sweet? Reduce maple syrup or brown sugar next time.
-
Meal prep friendly: Keeps 3–4 days in the fridge. Add fresh fruit right before eating.
-
Warm option: Heat in the microwave, stirring and adding a splash of milk as needed.
Nutrition
- Calories: 310 cal Per Serving
- Sugar: 20 g
- Fat: 6 g
- Carbohydrates: 52 g
- Protein: 9 g
Nutritional Information*
Per serving (approx., without optional toppings):
Calories: 310 | Protein: 9g | Fat: 6g | Carbohydrates: 52g | Sugar: 20g | Fiber: 4g
*Please note: This is an estimate based on the specific ingredients I used. Your exact nutritional information will vary based on the brands and specific products you choose.
Prep Time: 5 minutes | Chill Time: 4–8 hours | Total Time: 5 minutes active | Yield: 2 servings
Final Thoughts: Your Tomorrow, Made Better Today
In the quiet of the evening, taking those five minutes to prepare these jars is more than just meal prep. It’s a small act of kindness for your future self. It’s a promise of a morning that begins with nourishment and comfort, not stress and scramble. It’s the gift of a few extra minutes to sip your coffee, breathe in the fresh air, or simply enjoy a moment of peace before the day begins.
This recipe is a love letter to those busy mornings and a nod to the slow, sweet traditions that make a house a home. It’s a blank canvas waiting for your personal touch, a reliable foundation you can return to again and again.
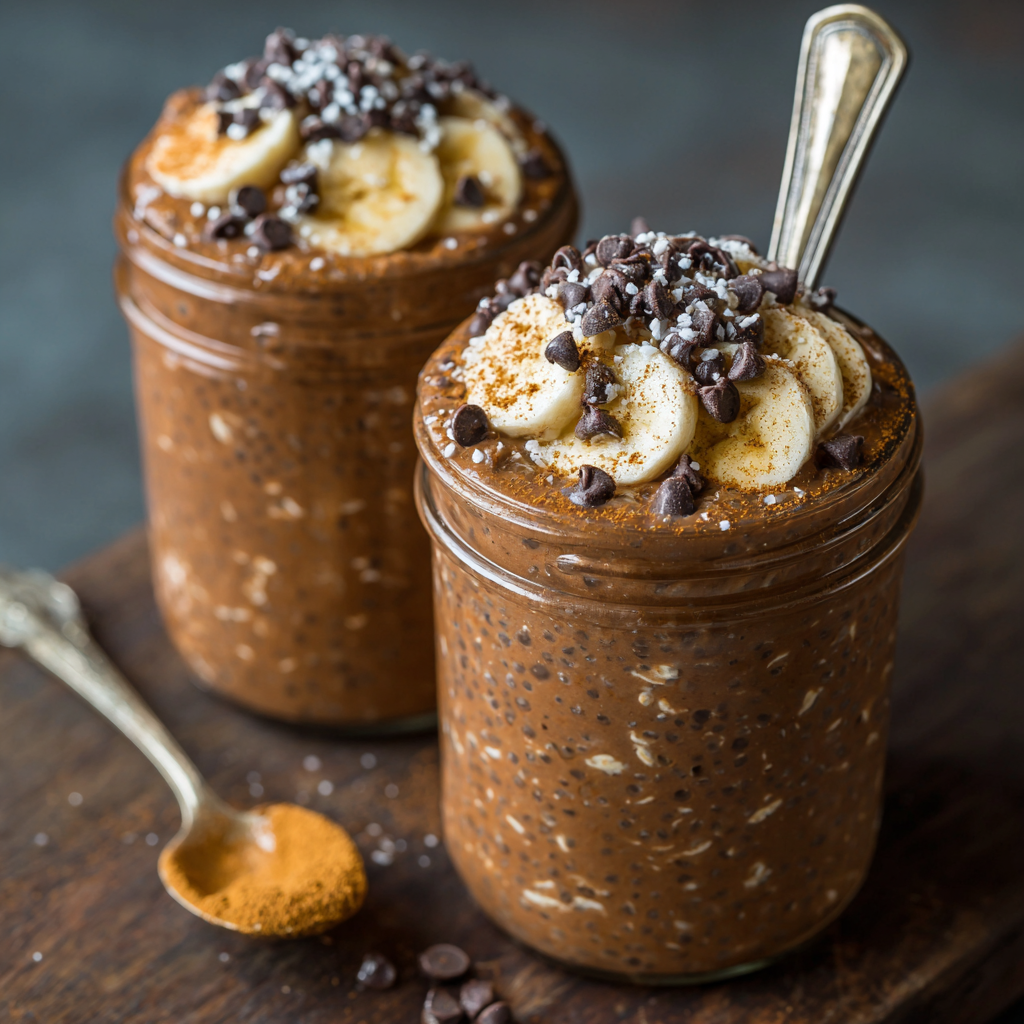
Chocolate Protein Overnight Oats
Your New Favorite Morning Ritual Is Waiting in the Fridge
Good morning, sunshine! Or, let’s be real—good morning to whoever is currently squinting at their screen, desperately in need of a coffee and a breakfast that doesn’t require any actual thinking. I see you. I am you on most mornings. The struggle between wanting something decadent and needing something nutritious is a daily battle in my kitchen. But what if I told you that the ultimate solution is already waiting for you? A breakfast that feels like a forbidden dessert but fuels your body like a champion? Friends, meet your new obsession: Chocolate Protein Overnight Oats.
This isn’t just any bowl of oats. This is a thick, creamy, spoon-standing-up-straight kind of situation. It’s packed with enough protein to keep you full and energized for hours, and it’s studded with melty mini chocolate chips that deliver a little satisfying crunch in every single bite. It’s the perfect meal prep hero, the ultimate post-workout reward, and the answer for those days when you want a healthy breakfast that tastes like you’re getting away with something. The best part? You literally mix it in one bowl before bed, and wake up to a ready-made masterpiece. No fancy skills required, just a hungry heart and a love for chocolate. Let’s make it!
The Night I Accidentally Created Breakfast Magic
This recipe was born out of pure, unadulterated kitchen laziness—and a serious chocolate craving. It was a typical chaotic Sunday evening. I’d just finished a big meal prep session, my apron was covered in spaghetti sauce, and I was staring into the fridge, already dreading the morning rush. I knew I needed a solid breakfast to power through a busy Monday, but the thought of washing another dish made me want to weep. I had a half-used shaker of chocolate protein powder on the counter from my afternoon smoothie, and a giant canister of oats staring back at me.
In a moment of “why not?” inspiration, I grabbed a big mixing bowl and started throwing things in: oats, protein powder, milk, a handful of chia seeds for that pudding-like texture I love, and yes, a very generous pour of chocolate chips because joy is a non-negotiable ingredient. I gave it a stir, slapped a lid on it, and shoved it in the fridge, fully expecting a weird, chalky experiment. The next morning, I took one skeptical bite… and my world changed. It was cold, creamy, intensely chocolatey, and so satisfying. It was like eating chocolate mousse for breakfast, but without the guilt! That happy accident is now a weekly ritual in our house, and I am so thrilled to share the official, perfected version with you.
Gathering Your Chocolate Dream Team
Here’s everything you need to create this protein-packed masterpiece. Don’t stress if you’re missing something—I’ve included my favorite swaps and chef secrets for each ingredient!
- 12 tablespoons Chocolate Protein Powder: This is the star of the show, providing the primary protein punch and chocolate flavor. Chef’s Insight: I prefer a whey-casein blend or plant-based pea protein blend for the creamiest texture. If your powder is very sweet, you may want to reduce the maple syrup later!
- 4 cups Rolled Oats (Old-Fashioned Oats): The hearty base of our dish. Chef’s Insight: Do not use quick oats or steel-cut oats here. Quick oats will turn to mush, and steel-cut won’t soften enough. Rolled oats give the perfect chewy yet soft texture.
- 4–5 tablespoons Chia Seeds: These little powerhouses are magic! They absorb liquid and create a lovely, thick, pudding-like consistency. Substitution Tip: If you don’t have chia seeds, you can use an additional 2 tablespoons of oats, but the texture won’t be quite as luxurious.
- 4 cups Milk: The liquid that brings it all together. Substitution Tip: Any milk works beautifully! I often use unsweetened almond milk or oat milk. For an extra protein boost, use Fairlife milk or another high-protein milk alternative.
- 4 tablespoons Maple Syrup: Our natural sweetener. Substitution Tip: Feel free to use honey, agave nectar, or even a few pitted dates blended with the milk. Start with less—you can always add more sweetness after it’s chilled!
- 4–5 tablespoons Mini Chocolate Chips: For those essential melty, chocolatey bursts! Chef’s Insight: I use mini chips because they distribute the chocolate flavor more evenly than regular-sized chips. Dark chocolate chips are a fantastic option for a less sweet, more intense chocolate experience.
- ½ cup Greek Yogurt: The secret weapon for next-level creaminess and a tangy kick that balances the sweetness. Substitution Tip: Any yogurt works! Use a dairy-free yogurt to keep this vegan. You can also omit it, but you’ll miss out on that incredible richness.
- 2–4 tablespoons Unsweetened Cocoa Powder: For the true chocolate lovers! This deepens the chocolate flavor from the protein powder and makes it taste like a real treat. Chef’s Insight: Use a high-quality cocoa powder (I love Dutch-processed) for the best, most intense flavor.
Let’s Make Some No-Fuss Magic
This is the easiest “cooking” you’ll ever do. I promise. Put on some good music, grab your biggest bowl, and let’s get mixing.
Step 1: The Dry Team Assembly
Grab that large mixing bowl—I’m talking a big one, because this makes a generous batch for the week. To the bowl, add your rolled oats, chocolate protein powder, chia seeds, and that glorious unsweetened cocoa powder (if you’re using it). Now, here’s a little chef hack: take a whisk and give these dry ingredients a good whisking. This is the best way to break up any lumps in the protein powder and cocoa powder and ensure everything is evenly distributed. No one wants a pocket of plain protein powder in their chocolatey bite!
Step 2: The Wet Team Welcoming Committee
Now, pour in your milk of choice. Add the Greek yogurt and the maple syrup. Pro Tip: If your yogurt is cold and thick, it can be a little clumpy when you first stir it in. Don’t panic! Just keep stirring. It will eventually smooth out into the mixture perfectly. This is also the time to add any vanilla extract or instant espresso powder if you’re going for those flavor twists.
Step 3: The Grand Fusion
Take a sturdy spatula or a large spoon and start stirring! Go slow at first to incorporate the dry ingredients, then stir more vigorously until you see no more dry patches. The mixture will look a bit liquidy at first—that’s exactly what we want. The chia seeds and oats need all that liquid to plump up into creamy perfection overnight. Final flourish: stir in your mini chocolate chips. I like to save a small handful for topping later, because I’m extra like that.
Step 4: The Beauty Rest
This is the hardest part: waiting. Divide the mixture evenly between 8 jars, containers, or one big airtight container. Press the lids on tightly and pop them in the refrigerator. You need a minimum of 3 hours, but honestly, letting it go overnight (8+ hours) is ideal. This gives the oats and chia seeds all the time they need to soften, absorb the liquid, and transform into that spoonable, pudding-like texture we’re after.
Step 5: The Grand Finale (Serving!)
In the morning, grab your jar. Give the oats a really good stir. You might see a little liquid separation on top—that’s totally normal! Stirring reincorporates it and makes it creamy again. Now, top it with your heart’s desire: more chocolate chips, sliced banana, a drizzle of peanut butter, a handful of berries… the world is your oyster! Eat it cold straight from the fridge—it’s so refreshing and satisfying.
How to Serve Your Chocolatey Masterpiece
I love eating these oats straight from the jar—it feels so personal and satisfying! But if you’re serving it to guests or just want to make a weekday morning feel special, presentation is key. Spoon a generous portion into a beautiful bowl. Top it with a artful drizzle of almond butter, a sprinkle of extra chocolate chips, a few fresh raspberries for a pop of color and tartness, and maybe even a tiny pinch of flaky sea salt. The salt is a game-changer—it makes the chocolate flavor sing! Serve it with a side of hot coffee or a cold glass of milk for the ultimate breakfast experience.
Make It Your Own! Delicious Twists & Swaps
The beauty of this base recipe is its versatility. Here are a few of my favorite ways to mix it up:
- Cookie Dream: Swirl in 2-4 tablespoons of cashew butter or almond butter and use vanilla protein powder instead of chocolate. Stir in a handful of cacao nibs for a cookie dough vibe.
- Mocha Madness: Add 1 teaspoon of instant espresso powder to the dry ingredients. It won’t make it taste like coffee, but it will deepen the chocolate flavor incredibly.
- Tropical Escape: Use coconut milk and stir in ¼ cup of shredded coconut. Top with mango or pineapple chunks in the morning.
- Peanut Butter Cup: Layer the overnight oat mixture with spoonfuls of peanut butter in your jar. In the morning, give it one swirl to create a marbled, PB&Chocolate effect.
- Berry Bliss: After chilling, stir in a handful of fresh raspberries or sliced strawberries. The berry juice swirled into the chocolate is divine.
Olivia’s Kitchen Notes & Stories
This recipe has evolved so much since that first lazy Sunday night! I’ve learned that the type of protein powder makes a huge difference. Some brands absorb more liquid than others. If you find your oats are too thick in the morning, just stir in a splash of milk until it reaches your desired consistency. If they’re too thin (rare, but it happens), let them sit for another hour or so—the chia seeds will continue to work their magic.
One of my favorite kitchen fails turned into a win: I once ran out of maple syrup and used a mashed, very ripe banana instead. It added a wonderful natural sweetness and made the whole batch even creamier! Don’t be afraid to play around. This is your breakfast canvas. The goal is to make something you’re genuinely excited to wake up and eat. That’s what cooking from the heart is all about.
Your Overnight Oats Questions, Answered!
Q: My oats turned out really dry and thick. What happened?
A: This usually means your protein powder was a super-thirsty one! No problem at all. This is an easy fix. In the morning, simply stir in a splash of milk (a tablespoon or two at a time) until it reaches your perfect, creamy consistency. It’s much easier to thin out thick oats than to thicken runny ones!
Q: Can I make this vegan?
A: Absolutely! This recipe is incredibly easy to veganize. Use a plant-based protein powder (I love a good vegan chocolate blend), your favorite non-dairy milk (almond and oat work best), a dairy-free yogurt, and ensure your chocolate chips are vegan-friendly. It works like a dream.
Q: How long will these last in the fridge?
A: They keep beautifully! In airtight containers, they will stay fresh and delicious for up to 5 days. This makes them the ultimate make-ahead breakfast for a busy week. I don’t recommend freezing them, as the texture of the oats can become a bit grainy when thawed.
Q: My protein powder made it taste chalky. How can I avoid that?
A: Ah, the protein powder variable! This is a common issue. First, make sure you are whisking your dry ingredients very thoroughly to eliminate lumps. Second, letting it sit overnight is crucial—this allows the powder to fully hydrate and blend into the mixture, significantly reducing any chalky taste. If it’s still a problem, try a different brand of protein powder next time; some are simply formulated better for recipes like this.
Print
Chocolate Protein Overnight Oats
Description
Start your day with a breakfast that feels like dessert but fuels your body like a champion. Thick, creamy, and packed with protein, these chocolate overnight oats are loaded with melty chocolate chips, chia seeds for pudding-like texture, and optional toppings to make each bite extraordinary. Perfect for meal prep, post-workout mornings, or any day you want a chocolatey, satisfying start.
Ingredients
-
4 cups old-fashioned rolled oats
-
12 tablespoons chocolate protein powder (whey, casein, or plant-based)
-
4–5 tablespoons chia seeds
-
4 cups milk of choice (unsweetened almond, oat, or dairy)
-
4 tablespoons maple syrup (or honey/agave)
-
4–5 tablespoons mini chocolate chips
-
½ cup Greek yogurt (or plant-based yogurt)
-
2–4 tablespoons unsweetened cocoa powder (optional, for extra chocolatey flavor)
Optional Toppings & Flavor Boosters:
-
Sliced banana, berries, or raspberries
-
Almond or peanut butter
-
Shredded coconut or cacao nibs
-
Flaky sea salt
-
Instant espresso powder (for mocha flavor)
Instructions
Instructions
-
Mix Dry Ingredients: In a large mixing bowl, whisk together oats, chocolate protein powder, chia seeds, and cocoa powder (if using) until evenly combined.
-
Add Wet Ingredients: Pour in milk, yogurt, and maple syrup. Stir until smooth and fully incorporated. Don’t worry if the mixture looks liquidy—it will thicken overnight.
-
Fold in Chocolate Chips: Reserve a small handful for topping, then gently stir the rest into the mixture.
-
Refrigerate: Divide into 8 jars or one large airtight container. Cover and refrigerate for at least 3 hours, preferably overnight (8+ hours).
-
Serve: Stir well before eating. Top with your favorite additions: fresh fruit, nut butter, extra chocolate chips, or a sprinkle of sea salt. Enjoy cold or warm slightly in the microwave for a cozy start.
Notes
-
Vegan: Use plant-based protein powder, non-dairy milk, and vegan chocolate chips.
-
Cookie Dough Style: Add 2–4 tablespoons almond or cashew butter and cacao nibs.
-
Mocha Twist: Stir in 1 teaspoon instant espresso powder for a deeper chocolate flavor.
-
Tropical: Use coconut milk, add shredded coconut, and top with pineapple or mango chunks.
-
Peanut Butter Cup: Layer peanut butter in jars and swirl in the morning.
Consistency Fixes:
-
Too thick? Stir in a splash of milk before eating.
-
Too thin? Let it sit longer—chia seeds will thicken overnight.
Nutrition
- Calories: 340 cal Per Serving
- Fat: 9 g
- Carbohydrates: 36 g
- Protein: 22 g
Nutritional Information*
Per serving (approx., based on 8 servings using unsweetened almond milk and sugar-free protein powder):
- Calories: 340
- Protein: 22g
- Fat: 9g
- Carbohydrates: 36g
- Sugar: 8g
- Fiber: 6g
*Please note: This is an estimate and can vary greatly based on the specific brands and ingredients you use.
Prep Time: 5 minutes | Chill Time: 3+ hours | Total Time: ~5 minutes active | Yield: 8 servings
Final Thoughts: Your Effortless, Chocolatey Mornings Await
And just like that, you’ve unlocked the secret to a morning that feels both indulgent and empowering. These Chocolate Protein Overnight Oats are more than just a convenient breakfast; they’re a promise to your future self—a promise of a day that starts with a satisfying, no-fuss treat that truly fuels you.
Remember, the magic is in the preparation. Those five minutes you spend tonight are a gift to the tired, hungry, caffeine-craving version of you who will exist tomorrow morning. That version of you will be so grateful to open the fridge and find a jar of creamy, chocolatey joy waiting, no effort required.
So, embrace the simplicity. Celebrate the healthy decadence. Don’t be afraid to make this recipe your own with different mix-ins and toppings. This is your kitchen, your rules, and your new favorite morning ritual.
Here’s to sleeping in, to meal prep that actually works, and to eating chocolate for breakfast without a single shred of guilt.
Sweet dreams and even sweeter mornings,
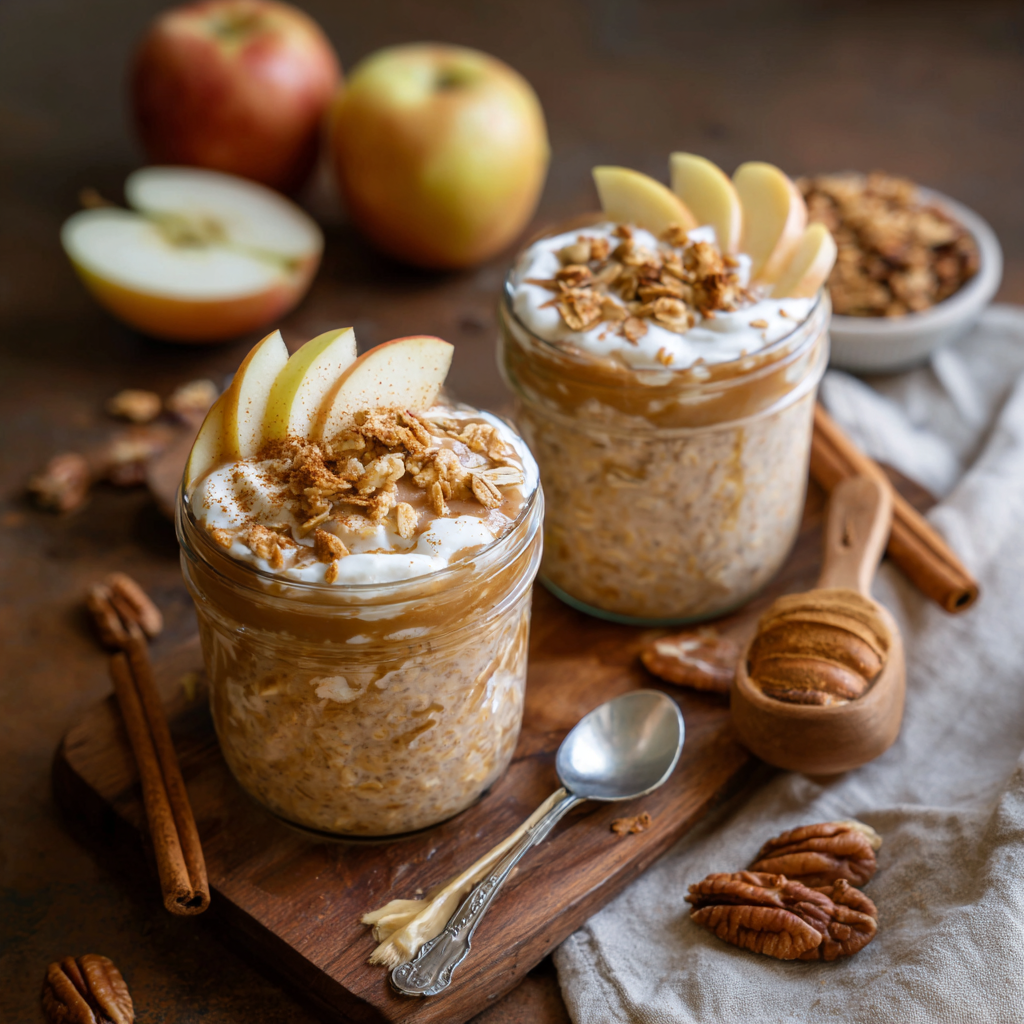
Apple Cinnamon Overnight Oats
Wake Up to a Bowl of Cozy: Apple Cinnamon Overnight Oats
Is there anything better than the smell of apples and cinnamon wafting through the house? It’s the ultimate hug in scent form, a promise of something sweet, spiced, and deeply comforting. It’s the smell of lazy weekend baking, of family gatherings, and for so many of us, of pure, unadulterated joy. But let’s be real, friends—most of our weekday mornings don’t involve leisurely rolling out pie dough or patiently waiting for a crumble to turn golden brown. Mornings are for hitting the snooze button one too many times, for scrambling to find matching socks, and for wondering how on earth you’re going to get a nutritious, delicious breakfast on the table without losing your mind.
That’s where this little jar of magic comes in. Imagine if you could capture all the warm, nostalgic flavor of a freshly baked apple pie and turn it into a breakfast you can grab straight from the fridge. A breakfast that’s ready for you, not the other way around. A breakfast that feels like a treat but fuels your body with the good stuff. Sounds like a dream, right? Well, pull up a chair, because I’m about to share my absolute favorite solution to busy mornings: my Cozy Apple Cinnamon Overnight Oats.
This isn’t just another oatmeal recipe. This is your secret weapon for winning the morning. It’s creamy, satisfying, naturally sweetened, and packed with fiber and protein to keep you full and focused until lunch. Whether you’re a meal-prep pro or just looking for a no-fuss breakfast option, this recipe is your new best friend. So, let’s ditch the morning stress and embrace a breakfast that feels like a warm, cozy embrace.
The Story Behind the Jar: A Nostalgic Nudge
This recipe has roots that go way back for me, straight to my grandma’s kitchen. Every fall, without fail, my family would take a trip to a local orchard. We’d come home with bushels of apples, our cheeks wind-chapped and our spirits high. The next day, my grandma’s tiny kitchen would transform into a pie-making factory. Flour dusted every surface, and the air was so thick with the scent of cinnamon and baking apples you could almost taste it.
My job was the coveted role of “apple peeler.” I’d sit at the table with this clunky, manual peeler-corer-slicer contraption, cranking the handle and watching the apple magically transform into one long, continuous spiral. I’d always sneak a few slices, dipping them in the bowl of cinnamon sugar meant for the pie filling. That raw, crunchy apple coated in sweet spice was my little secret treat. This recipe is my grown-up, breakfast-approved version of that memory. It’s that same incredible flavor combination, but layered into a creamy, dreamy, make-ahead oat jar that makes my present-day self just as happy as my sugar-dipped, ten-year-old self.
Gathering Your Cozy Ingredients
One of the best things about this recipe is its simplicity. You likely have most of these ingredients in your pantry right now! Here’s what you’ll need to make two perfect servings:
- 1 cup old-fashioned rolled oats – These are the heart of the dish! Rolled oats (sometimes called old-fashioned oats) are perfect for overnight oats because they soften beautifully in liquid without turning to complete mush. Chef’s Insight: Avoid using quick oats or steel-cut oats here. Quick oats will get too soft and pasty, and steel-cut oats need to be cooked and won’t absorb the liquid properly cold.
- 1 cup almond milk (or milk of choice) – I love the light, nutty flavor of unsweetened almond milk, but this is your canvas! Substitution Tip: Any milk works wonderfully—dairy milk, oat milk, soy milk, or coconut milk. Use what you love and have on hand!
- 2 tablespoons Greek yogurt – This is the secret weapon for an incredibly creamy, protein-packed texture and a slight tang that balances the sweetness. Substitution Tip: For a dairy-free version, use a plant-based yogurt like coconut or almond yogurt. For a richer taste, vanilla yogurt is a delicious option!
- ½ cup unsweetened applesauce – This acts as a natural sweetener and gives the entire jar a wonderful, apple-forward flavor in every single bite. It also adds to the creamy factor! Chef’s Insight: Using unsweetened lets you control the overall sweetness with the maple syrup. If you only have sweetened, just reduce the maple syrup a touch.
- 1 teaspoon cinnamon – The co-star of the show! You can’t have apple pie vibes without a hearty dose of warm, cozy cinnamon.
- 2 tablespoons maple syrup – My favorite natural sweetener for this. It complements the apple and cinnamon flavors perfectly. Substitution Tip: Honey, agave nectar, or even a pinch of brown sugar would work well here too.
- ½ teaspoon vanilla extract – The flavor enhancer! Vanilla rounds out all the other flavors and makes everything taste more… well, like dessert for breakfast.
Flavor Boosters & Toppings (The Fun Part!)
- ½ cup finely chopped fresh apple – For a fantastic textural contrast! I love a crisp, fresh dice of Honeycrisp or Granny Smith apple stirred in right before serving. Pro Hack: For an even more “apple pie” experience, sauté the chopped apple in a tiny bit of butter or coconut oil with a pinch of cinnamon until just softened. Let it cool before adding. *Chef’s kiss*
- 2 tablespoons chopped walnuts or pecans – The essential crunch! Toasting them first in a dry pan takes this to a whole new level of flavor.
- 1 tablespoon chia seeds – An easy way to add a boost of fiber, omega-3s, and a lovely pudding-like thickness.
- ⅛ teaspoon nutmeg or allspice – For those of you who love deep, warm spices. A little goes a long way!
- A spoonful of almond butter or a sprinkle of granola – For the ultimate texture and flavor finish on top.
Let’s Make Some Magic: Your Step-by-Step Guide
Ready to assemble your future breakfast? This process could not be easier. I promise you’ll be done in five minutes flat. Let’s do this!
- Grab Your Vessel. I highly recommend using two 16-ounce (pint-sized) mason jars with lids. They’re perfect for storing, serving, and transporting. A bowl with a tight-fitting lid works great too! Chef’s Hack: Using individual jars means your breakfast is already pre-portioned and ready to grab-n-go. No messy scooping from a big container in the morning!
- The Big Combine. To a medium mixing bowl, add your rolled oats, almond milk, Greek yogurt, applesauce, cinnamon, maple syrup, and vanilla extract. Chef’s Tip: Adding everything to a bowl to mix first, rather than layering in the jar, ensures every single oat is evenly coated in the spiced, creamy liquid. This is the key to avoiding any dry, clumpy bits!
- Mix It Up! Grab a spoon or a small whisk and stir everything together until it’s completely combined and smooth. You shouldn’t see any streaks of yogurt or dry pockets of oats. The mixture will look a bit loose—that’s perfect! The oats will soak up all that goodness overnight.
- Jar It Up. Now, divide the mixture evenly between your two jars. Screw the lids on tightly. Give each jar a little shake or a tap on the counter to settle everything and remove any air bubbles. Chef’s Hack: If you’re adding chia seeds, this is the time to stir them in now! They’ll plump up beautifully as it chills.
- The Waiting Game (The Hardest Part!). Place your jars in the refrigerator for at least 4 hours, but ideally overnight. This non-negotiable chill time is when the transformation happens. The oats slowly absorb the liquid, softening and plumping up to create that perfect, creamy, spoonable consistency.
- Serve and Shine! In the morning, give the oats a really good stir. They might have settled, and stirring reincorporates any liquid and fluffs them right up. Now, the fun begins: top with all your favorites! I love adding my fresh chopped apple, a sprinkle of toasted pecans, and an extra drizzle of maple syrup. Enjoy straight from the jar!
How to Serve Your Masterpiece
These oats are delicious straight from the fridge for a cool, refreshing breakfast, especially in the warmer months. But if you’re craving that “warm apple pie” feeling, you have options! You can microwave a jar (without the metal lid, please!) for 45-60 seconds, stirring halfway, until just warmed through. I love serving mine in a shallow bowl to make room for all the gorgeous toppings. Pile high with those sautéed apples, a generous dollop of yogurt, a crunchy nut blanket, and a final dusting of cinnamon. It’s a breakfast that looks as incredible as it tastes.
Make It Your Own: Delicious Variations
The beauty of this base recipe is its adaptability. Play around and find your perfect combo!
- Vegan Delight: Use plant-based milk and yogurt. Maple syrup is already vegan, so you’re good to go!
- Protein Power-Up: Stir in a scoop of vanilla or unflavored protein powder with the other ingredients. You may need to add a splash more milk to get the right consistency.
- Pear Ginger Twist: Swap the applesauce for pureed pear and the cinnamon for ¼ tsp of ground ginger and a pinch of cardamom.
- “Apple Pie à la Mode”: Right before serving, stir in a tablespoon of a vanilla protein powder or a splash of vanilla creamer for that ice cream effect.
- Tropical Escape: Use coconut milk, swap the applesauce for mango puree, and trade the cinnamon for a pinch of nutmeg. Top with toasted coconut flakes!
Chef’s Notes from My (Messy) Kitchen
This recipe has evolved so much from my first attempt, which was basically oats, milk, and a sad sprinkle of cinnamon. Adding the Greek yogurt was a total game-changer for creaminess, and the applesauce is the trick to getting that apple flavor in every single bite, not just from the toppings. I can’t tell you how many times I’ve made a double batch of these on a Sunday night, only to find my partner “testing” one on a Monday afternoon. They’re that good! One of my favorite kitchen memories is of my niece, who is a notoriously picky eater, devouring an entire jar and asking for more. She had no idea she was eating something so good for her—she just knew it tasted like dessert. That, right there, is a win in my book.
Your Overnight Oats Questions, Answered!
Q: My oats came out too thick and gloppy. What happened?
A: No worries, this is an easy fix! They likely just need a bit more liquid. Different brands of oats and yogurt have varying absorption rates. Simply stir in a splash of your milk of choice until it reaches your preferred consistency. Remember, you can always add liquid, but you can’t take it away!
Q: Can I make a bigger batch for the whole week?
A: Absolutely! This recipe doubles, triples, or even quadruples beautifully. I find they keep perfectly for up to 4-5 days in the fridge. Just give them a good stir before serving. For the best texture, I’d recommend making a big batch on Sunday to enjoy through Thursday or Friday.
Q: My oats are kind of bland. How can I boost the flavor?
A: The most common culprit is not enough salt or spice! Even a tiny pinch of salt will make all the other flavors pop. Don’t be shy with the cinnamon, and definitely try the optional add-ins like nutmeg or vanilla. Toasting your nuts before adding them also adds a huge depth of flavor.
Q: Are overnight oats eaten cold? I’m not sure I’ll like that.
A: They are traditionally eaten cold, but you are 100% allowed to break the rules! Gently warming them in the microwave for 60-90 seconds is a fantastic way to enjoy them. It makes them extra cozy and really brings out the apple pie aroma. Just be sure to use a microwave-safe container.
Apple Cinnamon Overnight Oats
Description
Imagine the warm, comforting aroma of apples and cinnamon greeting you in the morning—like a hug in a jar. This breakfast captures all the flavors of a fresh-baked apple pie without the fuss, making it creamy, naturally sweetened, and protein-packed. Perfect for busy mornings or meal prep, it’s a cozy, nourishing start to your day.
Ingredients
-
1 cup old-fashioned rolled oats
-
1 cup almond milk (or milk of choice)
-
2 tablespoons Greek yogurt (or plant-based yogurt)
-
½ cup unsweetened applesauce
-
1 teaspoon cinnamon
-
2 tablespoons maple syrup
-
½ teaspoon vanilla extract
Optional Add-Ins & Toppings:
-
½ cup finely chopped fresh apple
-
2 tablespoons chopped walnuts or pecans (toasted)
-
1 tablespoon chia seeds
-
⅛ teaspoon nutmeg or allspice
-
A spoonful of almond butter or sprinkle of granola
Instructions
-
Mix Ingredients: In a medium bowl, combine oats, milk, yogurt, applesauce, cinnamon, maple syrup, and vanilla. If using chia seeds or spices, add them now.
-
Stir Well: Ensure everything is evenly combined. Mixture will be slightly loose—that’s perfect!
-
Jar It Up: Divide the mixture between two jars or airtight containers. Screw on lids and give a gentle shake to settle.
-
Refrigerate: Chill for at least 4 hours or overnight. The oats will absorb the liquid and become creamy.
-
Serve: Stir well before eating. Top with fresh apple, nuts, almond butter, granola, or extra maple syrup. Enjoy cold or warm in the microwave for 60–90 seconds.
Notes
-
Vegan: Use plant-based milk and yogurt.
-
Protein Boost: Stir in a scoop of protein powder, adding a splash of milk if needed.
-
Pear Ginger Twist: Swap applesauce for pear puree and cinnamon for ground ginger and a pinch of cardamom.
-
Apple Pie à la Mode: Stir in a little vanilla protein powder or vanilla creamer before serving.
-
Tropical Escape: Use coconut milk, mango puree, and a pinch of nutmeg; top with toasted coconut flakes.
-
Adjusting Consistency: If too thick, add a splash of milk. If too thin, add a bit more oats or chia seeds.
Nutrition
- Calories: 300 cal Per Serving
Nutritional Information*
*This is an estimate for one serving made with unsweetened almond milk, plain Greek yogurt, and without optional toppings. Values will change based on your specific ingredients and additions.
- Calories: 300
- Protein: 9g
- Fat: 7g
- Carbohydrates: 45g
- Sugar: 14g
- Fiber: 5g
Prep Time: 5 minutes | Chill Time: 4–8 hours | Total Time: 5 minutes active | Yield: 2 servings
Final Thoughts: Your Peaceful Morning, Served in a Jar
And just like that, you’ve mastered the art of the stress-free, spectacular breakfast. You’ve captured the soul-warming essence of a baked apple dessert and transformed it into a nourishing way to start your day. These Cozy Apple Cinnamon Overnight Oats are more than just a meal; they’re a promise to your future self—a promise of a morning where you can actually savor your coffee, breathe, and enjoy a moment of delicious calm before the day begins.
Remember, this recipe is your perfect foundation, but it’s also your playground. Don’t be afraid to make it your own! Raid your pantry, use that last bit of yogurt, or swirl in your favorite nut butter. The goal isn’t perfection; it’s simplicity, nourishment, and a little bit of joy in a jar.
So here’s to ditching the morning scramble and embracing a routine that feels like a warm, cozy hug. Here’s to more slow sips of coffee and fewer frantic searches for car keys. And here’s to you, giving yourself the gift of a good morning, one prepared-ahead spoonful at a time.
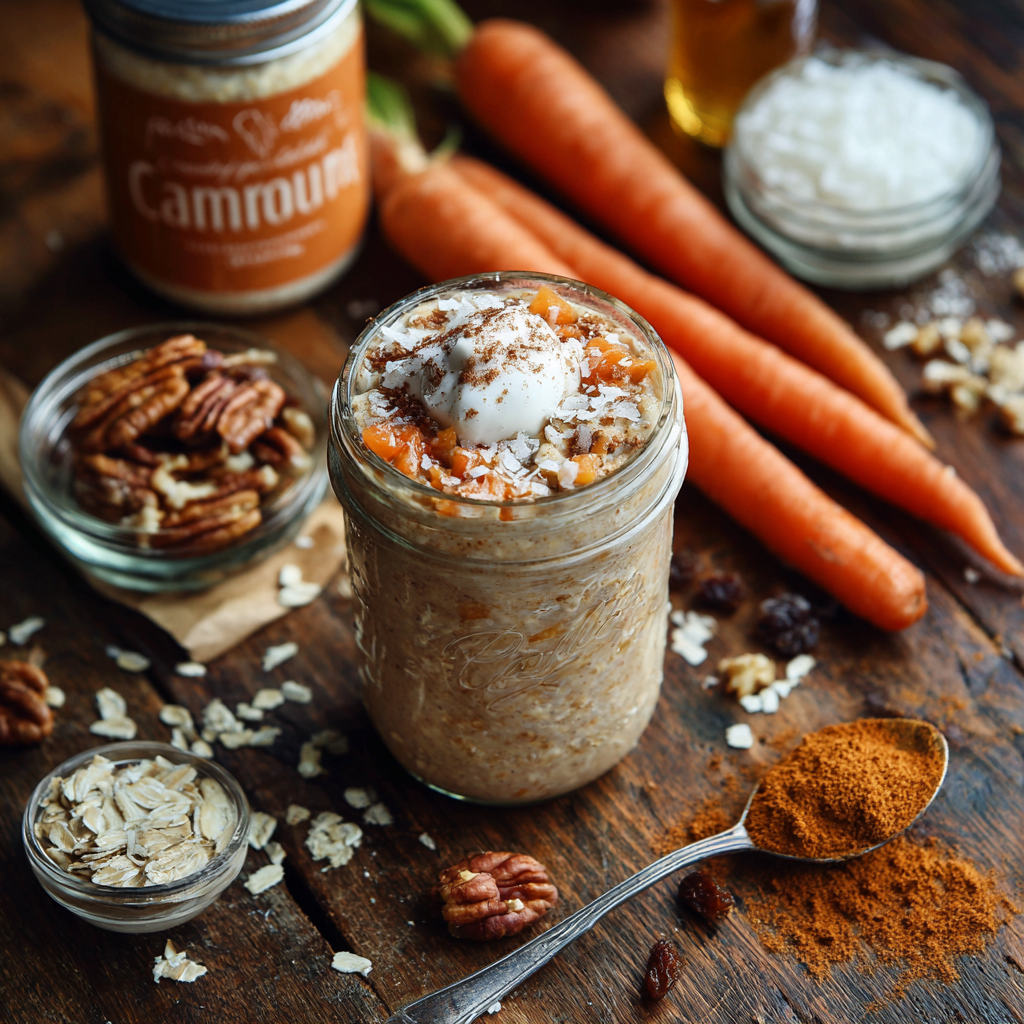
Carrot Cake Overnight Oats
Wake Up to a Slice of Heaven: Carrot Cake Overnight Oats
Good morning, sunshine! Or perhaps you’re reading this late at night, planning for a tomorrow that feels a little less chaotic and a lot more delicious. Either way, I’m so glad you’re here. If your mornings are anything like mine, they’re a beautiful, hectic whirlwind of finding matching socks, answering emails that popped up at 6 AM, and trying to remember if you actually drank your coffee or just thought about drinking it. In the middle of all that, breakfast often gets lost in the shuffle, doesn’t it? We end up grabbing something meh, or worse, skipping it entirely, only to be hit by a serious case of the hangries by 10:30 AM.
But what if I told you that the solution to your morning madness is waiting for you in the fridge? What if you could open a jar and find a breakfast that tastes like you fussed for hours, but secretly only took you five minutes? Friends, meet my absolute obsession: Carrot Cake Overnight Oats. This isn’t just any breakfast; it’s a creamy, dreamy, spiced-to-perfection hug in a jar that transforms humble ingredients into something truly magical. It captures the very soul of a classic, homemade carrot cake—the warmth of cinnamon, the sweet chew of raisins, the cozy comfort of real grated carrots—but packages it all up as a nourishing, protein-packed, make-ahead power breakfast. It’s the treat you can feel genuinely good about, and I cannot wait for you to make it your own. Let’s get mixing!
A Slice of Memory
This recipe, for me, is so much more than a convenient breakfast. It’s a direct line back to my Grandma Rose’s kitchen, a place that always smelled of sugar, spice, and unconditional love. Her from-scratch carrot cake was the stuff of legend, the undisputed star of every family birthday, potluck, and holiday gathering. The process was a ritual: me, perched on a step-stool, “supervising” as she grated mountains of carrots. Her, patiently teaching me how to fold the batter just so, always letting me sneak a taste of the cream cheese frosting from the beaters.
Those afternoons weren’t just about baking a cake; they were about connection, about stories told over a mixing bowl, about the simple joy of creating something with your hands to share with people you adore. This jar of overnight oats is my little love letter to those moments. It’s my way of capturing that nostalgic, heartwarming flavor and weaving it into the fabric of my own busy life. It’s a reminder that even on the most frantic mornings, we can still savor a little piece of comfort, a little taste of home, and a whole lot of love.
Gathering Your Sunshine Ingredients
The beauty of this recipe lies in its simplicity! You likely have most of these pantry staples already. Here’s what you’ll need to make two generous servings:
- 1 cup old-fashioned rolled oats: These are the non-negotiable star! Their sturdy texture holds up perfectly to soaking without turning to mush. Chef’s Tip: Avoid using quick oats or instant oats—they’ll absorb too much liquid and give you a pasty, less appealing texture.
- 1 cup almond milk (or any milk of choice): This is our liquid base. I love the light, nutty flavor of unsweetened almond milk here, but this is your canvas! Dairy milk, oat milk, cashew milk—they all work beautifully. Use what you love!
- 2 tablespoons Greek yogurt: This is the secret weapon for an luxuriously creamy, protein-packed result. It adds a lovely tang that mimics the cream cheese frosting vibe. For a dairy-free version, a thick coconut yogurt works wonders.
- ½ cup grated carrots (about 2 small carrots): Use the small holes on your box grater for the best texture. You want them to blend seamlessly into the oats, not be big, crunchy chunks. Pro Hack: Pre-grate a bunch of carrots and keep them in an airtight container in the fridge for super-fast breakfast assembly all week!
- 2 tablespoons raisins: They plump up overnight into little sweet, chewy gems. Not a raisin fan? Diced dried apricots or even chopped dates would be fantastic.
- 2 tablespoons maple syrup: Our natural sweetener. It adds that deep, caramel-like sweetness that plays so nicely with the warm spices. Honey or agave nectar are great substitutes.
- 1 teaspoon cinnamon: The essential warming spice that makes it truly taste like carrot cake. Don’t be shy with it!
- ½ teaspoon vanilla extract: The flavor enhancer. It rounds out all the other flavors and adds a layer of cozy warmth.
Optional, But Highly Encouraged, Add-Ins:
- 2 tablespoons chopped walnuts or pecans: For that crucial crunch and nutty flavor. I love toasting them first for an extra depth of flavor!
- 2 teaspoons chia seeds: They thicken the mixture even more and give a fantastic boost of fiber and omega-3s. You won’t even taste them!
- ⅛ teaspoon nutmeg or ginger: A pinch of either (or both!) takes the spice profile to the next level.
- 1–2 tablespoons shredded coconut: Adds a lovely tropical touch and chewy texture.
- A dollop of cream cheese or coconut yogurt on top: This is the “frosting” move! Swirl it on right before serving for the full carrot cake experience.
Let’s Make Magic: Your Foolproof Steps
This is the easiest “cooking” you’ll ever do. I promise. Grab a medium-sized mixing bowl, a spoon, and two jars or airtight containers (I’m a sucker for a good mason jar—it just makes everything look prettier!).
- Combine Everything: In your bowl, add the rolled oats, almond milk, Greek yogurt, grated carrots, raisins, maple syrup, cinnamon, and vanilla extract. If you’re using any of the extra spices (nutmeg/ginger) or chia seeds, toss those in now. Chef’s Chatter: Don’t worry if it looks a little loose and soupy at this stage! Trust the process. The oats and chia seeds are thirsty little things and will absorb all that liquid, transforming into a perfectly creamy consistency by morning.
- Stir Until Fully Mixed: Grab your spoon and stir everything together with gusto! You want to make sure the yogurt and maple syrup are completely distributed and there are no dry pockets of oats hiding at the bottom of the bowl. Little Hack: I like to give it a good stir, let it sit for a minute, and then stir again. This helps prevent any clumping and ensures every single oat gets coated in that spiced, sweet, carroty goodness.
- Divide and Conquer: Now, evenly divide the mixture between your two jars or containers. Screw the lids on tightly. This is the moment of triumph! You’ve just prepped breakfast.
- The Waiting Game (The Hardest Part!): Place your jars in the refrigerator and let them work their magic for at least 4 hours, but ideally overnight (hence the name!). This long, slow soak is what allows the flavors to meld together beautifully and the texture to become wonderfully soft and pudding-like.
- Serve and Shine: In the morning, give the oats a good stir. They might have separated a tiny bit—that’s totally normal! Stirring reincorporates everything into creamy perfection. Now, top with your favorites: a sprinkle of toasted walnuts, a drizzle of extra maple syrup, a dollop of “frosting,” or a dusting of cinnamon. Enjoy straight from the jar!
How to Serve Your Masterpiece
Presentation is part of the fun! I love eating these oats straight from the jar for ultimate convenience. For a prettier presentation, especially if you’re serving to guests or just want to treat yourself, spoon the oats into a bowl. Top it artfully with a generous sprinkle of toasted pecans, a few extra raisins, a tiny swirl of yogurt or cream cheese “frosting,” and a final light dusting of cinnamon. It instantly elevates it from simple breakfast to a brunch-worthy dish. Pair it with a hot cup of coffee or tea, and you have the perfect start to any day.
Make It Your Own: Delicious Variations
The best recipes are the ones you can play with! Here are a few ways to twist this classic:
- Tropical Twist: Swap the raisins for chopped dried pineapple and mango, use coconut milk, and top with toasted coconut flakes and macadamia nuts.
- Protein Power-Up: Stir in a scoop of vanilla or unflavored protein powder with the other ingredients. You may need to add a tiny splash more milk to compensate.
- Apple Pie Vibe: Replace the carrots with finely grated apple and use apple pie spice instead of just cinnamon.
- Nut-Free & Seed Crunch: Omit the nuts and instead top with a tablespoon of pumpkin seeds (pepitas) or sunflower seeds for crunch.
- Pumpkin Spice Everything: Use ¼ cup canned pumpkin puree along with the carrots and add a dash of pumpkin pie spice. So autumnal!
Chef Olivia’s Notebook
This recipe has been a staple in my kitchen for years, and it’s evolved in the best ways. My biggest “aha!” moment was realizing that grating the carrots super finely was a total game-changer—no one wants a chunky mouthful of raw carrot at 7 AM! I also used to mix my nuts in right away, but I learned I far prefer the textural contrast of adding them fresh on top right before serving. They stay crunchy and perfect. And a funny story? I once accidentally used cayenne pepper instead of cinnamon in a pre-coffee daze. Let me tell you, that was a spicy wake-up call I do not recommend! Always double-check your spice jars, friends. The moral of the story is: don’t be afraid to experiment, but maybe keep the caffeine close by.
Your Questions, Answered!
Q: Can I make this vegan?
A: Absolutely, and it’s incredibly easy! Simply use a plant-based milk (almond, oat, and soy are my top picks) and swap the Greek yogurt for a thick, plain dairy-free yogurt. Coconut yogurt is my favorite for its richness. Ensure your maple syrup is vegan (it almost always is) and you’re all set!
Q: How long will these overnight oats last in the fridge?
A: They keep beautifully! I find they are at their best within 3-4 days. This makes them a fantastic candidate for weekly meal prep. Just portion them out into individual jars on a Sunday, and you have a ready-to-go breakfast for the next few mornings.
Q: My oats came out too thick/dry. How can I fix it?
A: No problem! Oats can vary by brand, and sometimes they just thirstier than others. Simply stir in an extra splash of your chosen milk until you reach your desired consistency. I always recommend doing this right before eating.
Q: Can I use quick oats instead?
A: I really don’t recommend it for the best texture. Quick oats are cut smaller and pre-steamed, so they absorb liquid much faster and become very soft and almost mushy. Old-fashioned rolled oats provide the ideal hearty yet creamy texture that holds up overnight.
Carrot Cake Overnight Oats
Description
Good morning! If your mornings are hectic, this is the breakfast that has your back. Creamy, spiced, and full of cozy carrot cake flavors, these overnight oats are ready in five minutes and waiting for you in the fridge. Sweet, satisfying, and protein-packed, they make mornings feel like a treat—without the fuss.
Ingredients
-
1 cup old-fashioned rolled oats
-
1 cup almond milk (or milk of choice)
-
2 tablespoons Greek yogurt (or dairy-free yogurt)
-
½ cup grated carrots (about 2 small carrots)
-
2 tablespoons raisins (or chopped dates/dried apricots)
-
2 tablespoons maple syrup (or honey/agave)
-
1 teaspoon cinnamon
-
½ teaspoon vanilla extract
Optional Add-Ins:
-
2 tablespoons chopped walnuts or pecans (toasted for extra flavor)
-
2 teaspoons chia seeds
-
⅛ teaspoon nutmeg or ginger
-
1–2 tablespoons shredded coconut
-
Dollop of cream cheese or coconut yogurt on top
Instructions
-
Mix Ingredients: In a medium bowl, combine oats, milk, yogurt, grated carrots, raisins, maple syrup, cinnamon, vanilla, and any optional spices or chia seeds.
-
Stir Well: Ensure all ingredients are evenly mixed, with no dry pockets of oats.
-
Divide: Spoon the mixture into two jars or airtight containers. Seal tightly.
-
Refrigerate: Let sit in the fridge for at least 4 hours or overnight. The oats will absorb the liquid and become creamy.
-
Serve: Stir well before eating. Top with nuts, extra raisins, a dollop of yogurt/cream cheese, or a drizzle of maple syrup. Enjoy straight from the jar or in a bowl!
Notes
-
Vegan: Use plant-based milk and dairy-free yogurt.
-
Thicker/Opposite: If too thick, stir in extra milk before eating; if too thin, add more oats or chia seeds.
-
Flavor twists:
-
Tropical: Swap raisins for dried pineapple/mango, use coconut milk, top with coconut flakes.
-
Apple Pie: Replace carrots with grated apple, add apple pie spice.
-
Pumpkin Spice: Add ¼ cup pumpkin puree and pumpkin pie spice.
-
-
Prep Ahead: Oats keep 3–4 days in the fridge—perfect for weekly meal prep.
Nutrition
- Calories: 320 cal Per Serving
- Sugar: 16 g
- Carbohydrates: 48 g
- Protein: 10 g
Nutritional Information*
*This is an estimate for one serving made with unsweetened almond milk, Greek yogurt, and without optional toppings. It will vary based on your specific ingredients and brands.
- Calories: 320
- Protein: 10g
- Fat: 8g
- Carbohydrates: 48g
- Sugar: 16g
- Fiber: 6g
Prep Time: 5 minutes | Chill Time: 4–8 hours | Total Time: 5 minutes active | Yield: 2 servings
Final Thoughts: Your Tomorrow Just Got Brighter
And just like that, tomorrow’s breakfast is solved. With a few simple stirs, you’ve not only prepped a meal but prepped a moment of peace for your future self. A moment where you can actually sit down, breathe, and savor something that truly tastes like a treat.
These Carrot Cake Overnight Oats are more than just fuel; they’re a promise of a better morning. They’re a reminder that taking a few minutes for yourself tonight is an act of kindness for the person you’ll be tomorrow. Whether you’re enjoying them at your desk, on the go, or savored slowly with a sunrise, I hope this jar brings you a little bit of joy, a whole lot of comfort, and the energy to take on your day.
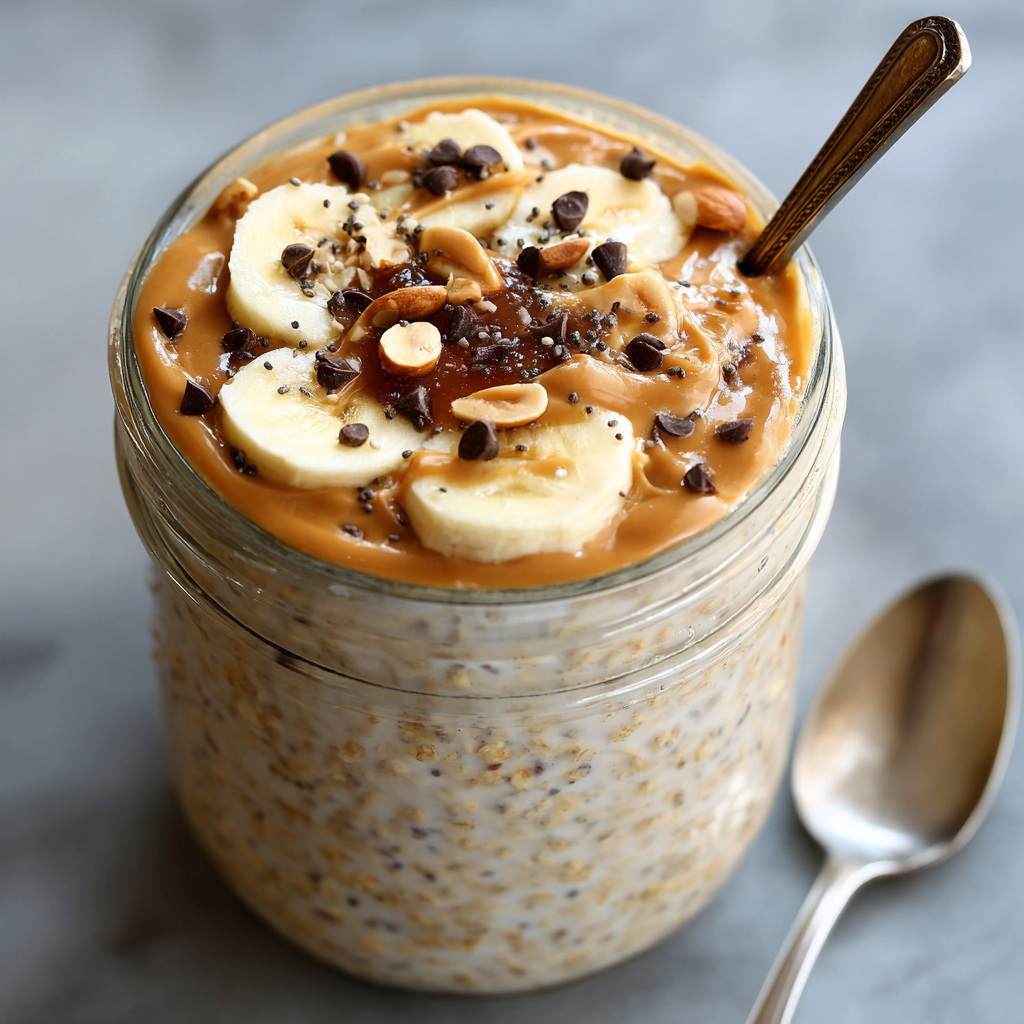
Peanut Butter Overnight Oats
Your New Favorite Morning Ritual Is Just a Jar Away
Hey there, friend! Come on in, the coffee’s fresh and I have the most exciting breakfast news to share. Have you ever had one of those mornings where you’re simultaneously running late, desperately hungry, and craving something that feels like a warm hug but works with your on-the-go schedule? I’ve been there more times than I’d like to admit, usually while frantically searching the pantry for something—anything—that isn’t a sad, stale granola bar.
That’s exactly why I’m utterly obsessed with overnight oats, and today, we’re making the queen of them all: Peanut Butter Overnight Oats. This isn’t just breakfast; it’s a creamy, dreamy, no-cook masterpiece that you prepare the night before and greet you with zero fuss in the AM. Imagine the rich, roasty flavor of your favorite peanut butter swirled into wholesome oats, all sweetened with a touch of maple syrup. It’s indulgent enough to feel like a treat but packed with enough protein and fiber to power you through your busiest day. This recipe is your secret weapon for feeling like a meal-prep hero, even if you’re still half-asleep. Let’s get our jar on!
The Midnight Snack That Started It All
My love affair with this particular jar of goodness started in my college apartment kitchen, at roughly 11:37 p.m., during a classic study session fueled by panic and peanut butter. I had a 7 a.m. exam the next morning and needed a breakfast I could literally grab and run with. I stared into the abyss of my nearly empty fridge—milk, a single-serving cup of yogurt, and the ever-faithful jar of peanut butter. I had oats in the cupboard. In a sleep-deprived moment of genius (or desperation!), I threw it all into a used pasta sauce jar, gave it a stir, and shoved it in the fridge, not knowing what to expect.
The next morning, that haphazard concoction was a revelation. It was cold, creamy, thick, and satisfying—everything my usual rushed toast was not. I felt prepared, nourished, and oddly sophisticated eating breakfast from a jar. It became my non-negotiable ritual during those chaotic years. Now, I’ve perfected that midnight experiment into a foolproof recipe that’s seen me through early morning flights, hectic workdays, and lazy weekend brunches alike. It’s more than a recipe; it’s a little jar of readiness and self-care.
Gathering Your Jar-Worthy Ingredients
Here’s the beautiful part: you likely have most of this in your kitchen right now. This is a no-fuss, pantry-raiding kind of recipe! Here’s what you’ll need for two perfect servings:
- 1 cup old-fashioned rolled oats: These are the MVP! Don’t use quick oats or steel-cut—rolled oats have the perfect texture to soften overnight without turning into complete mush. They’re the ideal canvas for our creamy creation.
- 1 cup almond milk (or any milk of choice): This is our liquid base. I love unsweetened almond milk for its light, nutty flavor that pairs so well with peanut butter, but any milk works beautifully—dairy, oat, soy, coconut! Use what you love.
- 2 tablespoons Greek yogurt: This is the secret weapon for next-level creaminess and a serious protein boost! It adds a lovely tang that balances the sweetness. For a dairy-free version, a plain coconut yogurt works great.
- 2 tablespoons creamy peanut butter: The star of the show! Use a natural, drippy peanut butter for the best texture and to avoid added sugars and oils. If you only have the classic shelf-stable kind, that’s okay—just know you might need to whisk a little more vigorously to get it fully incorporated.
- 2 tablespoons maple syrup: Our natural sweetener. I love the caramel-like flavor it brings. You can adjust this to your taste—start with one tablespoon if you prefer less sweetness! Honey or agave nectar are fantastic substitutes.
- A generous pinch of salt: Trust me on this! Salt is a flavor enhancer. It makes the peanut butter taste richer and the oats more flavorful. Don’t skip it.
Let’s Assemble Our Breakfast Dreams
This is the easiest “cooking” you’ll ever do. I promise. Grab a medium mixing bowl, a whisk (or a fork!), and your two favorite jars or airtight containers.
- Combine Everything. Seriously, just dump it all in! Add the rolled oats, almond milk, Greek yogurt, peanut butter, maple syrup, and that all-important pinch of salt right into your bowl. No need for fancy steps here.
- Whisk Until Smooth. Now, channel your inner chef and whisk it all together! The goal is to break up the peanut butter and yogurt completely and create a smooth, uniform mixture. You shouldn’t see any big streaks or clumps. Chef’s Hack: If your peanut butter is particularly thick and stubborn, you can microwave it for 10-15 seconds first to make it nice and runny. It blends in like a dream!
- Taste and Adjust. This is a crucial step I always do. Dip a spoon in and give it a taste. Want it sweeter? Add a touch more maple syrup. Want more peanut butter flavor? Go for another half tablespoon! This is your breakfast—make it yours.
- Jar It Up. Divide the mixture evenly between your two jars or containers. screw the lids on tightly. Give each jar a little shake or tap on the counter to settle everything and remove any air bubbles.
- The Waiting Game (The Hardest Part!). Pop those jars in the refrigerator for at least 4 hours, but ideally overnight. This magic time allows the oats to absorb all the liquid, soften, and become wonderfully creamy. The transformation is worth the wait!
- Serve and Celebrate. The next morning, give the oats a good stir. They might have separated a tiny bit—that’s totally normal! Stirring reincorporates everything into creamy perfection. Now, top with your favorite goodies and dig in!
How to Serve Your Masterpiece
This is where the fun really begins! I love eating these oats straight from the jar, but a beautiful bowl feels extra special. Give your oats a hearty stir first. Then, go to town with the toppings. I’m talking a drizzle of extra peanut butter, a handful of fresh banana slices, a sprinkle of chopped peanuts for crunch, or even a few dark chocolate chips because, well, it’s chocolate. For a fresh twist, a handful of berries adds a lovely burst of juiciness. It’s a choose-your-own-adventure breakfast!
Make It Your Own: Delicious Twists
Once you’ve mastered the base, the flavor world is your oyster! Here are a few of my favorite riffs:
- PB&J Swirl: Layer in a tablespoon of your favorite jam or berry compote at the bottom or top of the jar before refrigerating. Swirl gently before eating.
- Chocolate Peanut Butter Cup: Whisk 1 tablespoon of unsweetened cocoa powder into the base mixture. Top with cacao nibs or chocolate chips.
- Apple Cinnamon PB: Stir ½ teaspoon of cinnamon into the mix and top with finely diced fresh apple in the morning.
- Tropical Vacation: Use coconut milk as your liquid, and top with shredded coconut, diced mango, and a few macadamia nuts.
- Protein Powerhouse: Stir a scoop of your favorite vanilla or chocolate protein powder into the mix. You may need to add a splash more milk to get the right consistency.
Olivia’s Chef Notes & Kitchen Stories
This recipe has been my loyal companion for years, and it’s evolved from that first questionable pasta-sauce-jar experiment. I’ve learned a few things along the way! First, the type of peanut butter truly matters. Natural peanut butter gives a far superior flavor and creamier texture than the standard kind with hydrogenated oils. Secondly, I used to be impatient and only wait 2 hours—big mistake. The full overnight soak is non-negotiable for the ideal creamy-yet-chewy texture.
Funny story: I once, in a pre-coffee haze, accidentally used salted *almonds* instead of oatmeal. Let’s just say my first bite of pure, salted, soaked almonds was… a shocking and crunchy surprise. Always double-check your container labels, folks! Now, I keep my oats in a giant, clearly marked jar right next to the fridge. Lesson learned!
Your Questions, Answered!
Q: My oats turned out really thick and dry. What happened?
A: No worries! This just means your oats absorbed a bit more liquid than usual. Different brands of oats and peanut butter can vary. Simply stir in a splash of your chosen milk in the morning until it reaches your preferred consistency.
Q: Can I make a bigger batch for the whole week?
A: Absolutely! This recipe scales up beautifully. You can make up to 4-5 servings at once in a large container. I find the texture is best within 3-4 days, so it’s perfect for weekly prep. Just give it a good stir each time before serving.
Q: Are overnight oats eaten cold? Can I heat them up?
A: They are traditionally eaten cold, straight from the fridge. But I know it’s not for everyone! You can absolutely warm them up. gently heat them in the microwave for 60-90 seconds, stirring halfway through. They become wonderfully warm and porridge-like.
Q: I don’t like Greek yogurt. Can I leave it out?
A> You can, but you’ll lose some creaminess and protein. A great substitute is a tablespoon of chia seeds! They will plump up and help create that thick, pudding-like texture we love.
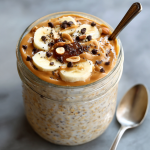
Peanut Butter Overnight Oats
Description
Creamy, nutty, and naturally sweetened—these overnight oats feel indulgent yet fuel your day with protein, fiber, and wholesome goodness. Prep them the night before and wake up to a ready-made jar of comfort that tastes like a peanut butter dream.
Ingredients
-
1 cup rolled oats (not quick or steel-cut)
-
1 cup almond milk (or milk of choice)
-
2 tbsp Greek yogurt (or coconut yogurt)
-
2 tbsp creamy natural peanut butter
-
2 tbsp maple syrup (or honey/agave)
-
Pinch of salt
Instructions
-
Mix base: In a bowl, whisk together oats, milk, yogurt, peanut butter, maple syrup, and salt until smooth.
-
Taste & adjust: Add more sweetness or peanut butter to your liking.
-
Jar it: Divide evenly into 2 jars or containers. Seal tightly.
-
Chill: Refrigerate for at least 4 hours, preferably overnight.
-
Serve: Stir well in the morning. Top with banana, berries, extra peanut butter, chopped nuts, or chocolate chips.
Notes
-
PB&J Swirl: Add jam or compote before chilling.
-
Chocolate PB Cup: Mix in 1 tbsp cocoa powder, top with cacao nibs.
-
Apple Cinnamon: Add ½ tsp cinnamon + diced apples.
-
Tropical: Use coconut milk, top with mango & shredded coconut.
-
Protein Boost: Add protein powder + extra splash of milk.
Nutrition
- Calories: 340 cal Per Serving
- Sugar: 10g
- Fat: 14g
- Carbohydrates: 40g
- Protein: 12g
Nutritional Information (Per Serving)
Please note: This is an estimate and can vary based on specific ingredients and brands used.
Calories: 340 | Protein: 12g | Fat: 14g | Carbohydrates: 40g | Sugar: 10g | Fiber: 6g
Final Thoughts: Your Mornings, Transformed
And just like that, you’re armed with the secret to a happier, healthier, and utterly delicious morning. This little jar is so much more than just oats and peanut butter—it’s a promise to your future self.
It’s the promise of a few extra minutes of sleep, of a calm moment savoring something you genuinely love before the day begins, and of knowing you’ve already accomplished one thing perfectly. Whether you’re a busy parent, a student cramming for exams, or simply someone who believes breakfast should taste like dessert, this recipe is your new best friend.




