
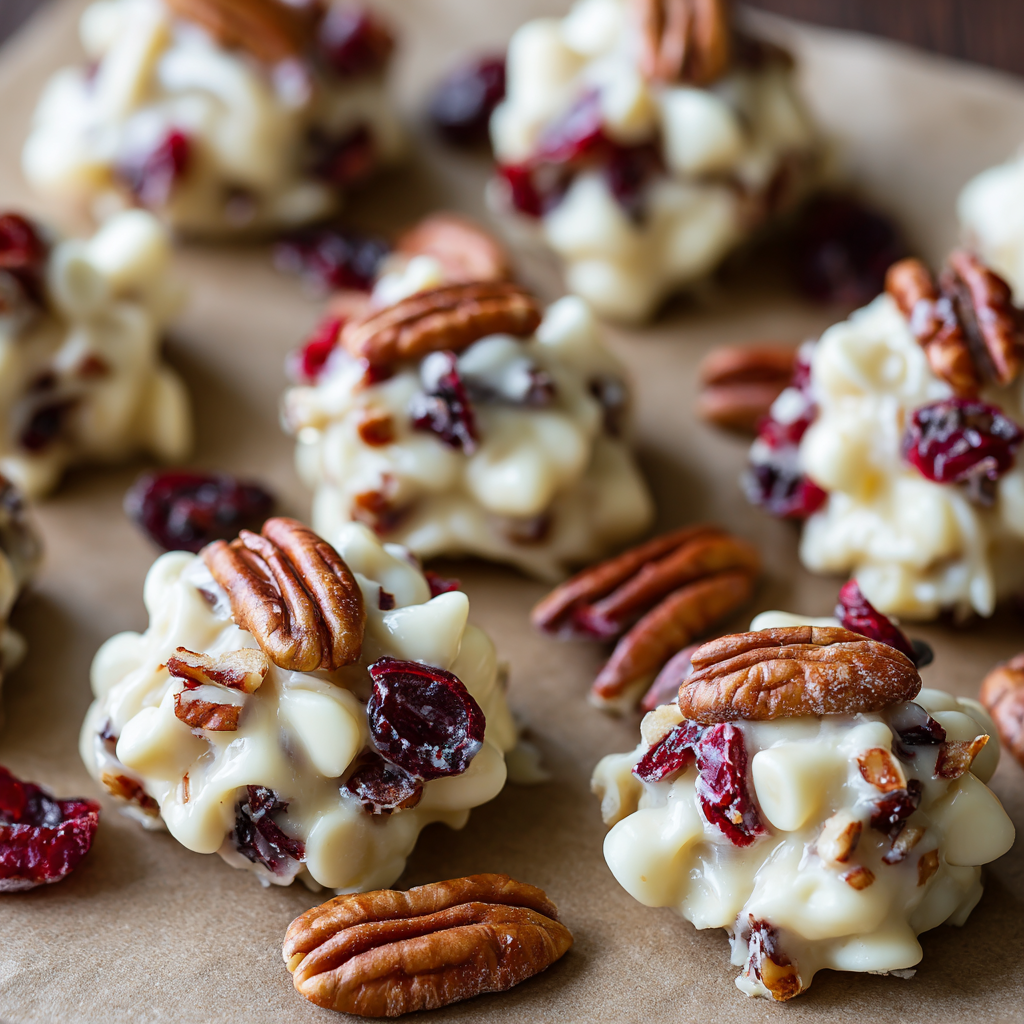
White Chocolate Cranberry Pecan Clusters
Your New Favorite Holiday Bite: White Chocolate Cranberry Pecan Clusters
Hey there, friend! Come on in, the kitchen’s warm, and I just put the kettle on. Can you smell that? It’s the unmistakable scent of melted white chocolate and toasted pecans—a combo that, for me, smells exactly like holiday joy. If your idea of a perfect December afternoon involves more sprinkles than stress, more mixing bowls than mall crowds, then you and I are going to get along just fine.
I’m a firm believer that the best holiday traditions aren’t always the most complicated. Sometimes, magic lives in the simplest recipes—the ones that come together in minutes but create memories that last a lifetime. That’s exactly what these White Chocolate Cranberry Pecan Clusters are all about. They’re little mounds of sweet, creamy, tangy, and crunchy perfection, all held together with a sprinkle of love (and a pinch of sea salt, because we’re fancy like that).
Whether you’re a seasoned baker or someone who considers ordering takeout a form of “cooking,” this recipe is your new best friend. It’s no-bake, requires zero fancy equipment, and is practically foolproof. We’re talking about a 10-minute prep time that yields the most impressive, giftable, and downright delicious holiday treat. So, tie on your favorite apron (the messy one with stories is always my pick), and let’s make some kitchen magic together!
A Sweet Slice of Memory
This recipe will always remind me of my Grandma Eleanor’s kitchen. Her house during the holidays wasn’t a place of pristine perfection; it was a wonderfully chaotic symphony of bubbling pots, dustings of flour on every surface, and the constant hum of laughter. One year, when I was about ten, I was deemed “old enough” to help with the Christmas candy-making. My job? The clusters.
Grandma believed the secret was in the toasting of the pecans. She’d let me shake the skillet, watching the nuts go from pale to a deep, fragrant brown. Then, we’d melt the chocolate in a double boiler she’d had since the 1950s, and I’d get to stir in the cranberries, creating a swirl of vibrant red in a sea of white. We’d drop messy spoonfuls onto wax paper, and she’d always let me sneak the bowl to scrape clean. It wasn’t about the perfect shape; it was about the time together. To this day, the taste of white chocolate and cranberries instantly transports me back to that linoleum floor, standing on a step-stool next to her, feeling so proud of our delicious, lumpy creations. It’s that feeling of cozy, homemade love that I hope this recipe brings to your kitchen, too.
Gathering Your Cozy Ingredients
The beauty of this recipe is in its short, sweet ingredient list. Every component plays a starring role, so let’s chat about them! Here’s what you’ll need:
- 1 cup white chocolate chips: This is our creamy, sweet base. A quick chef insight: not all white chocolate is created equal! Look for brands with real cocoa butter for the best flavor and smooth melting. Avoid “white baking morsels” that use palm oil; they can be trickier to work with and don’t taste as rich.
- ½ cup dried cranberries: Our pop of tangy, chewy goodness. They cut through the sweetness of the chocolate beautifully. For a fun twist, you could use orange-infused cranberries or even chopped dried cherries!
- ½ cup pecans, roughly chopped: This is where we get our essential crunch and nutty, buttery flavor. Pro Tip: Toasting your pecans beforehand is a non-negotiable game-changer. It deepens their flavor immensely and makes the whole kitchen smell amazing.
- ½ tsp vanilla extract: A little splash of warmth and depth. It enhances all the other flavors. If you’re feeling extravagant, vanilla bean paste would be incredible here, adding those lovely little specks.
- A generous pinch of sea salt: Don’t you dare skip this! The salt is the secret weapon. It elevates the sweet white chocolate and makes every single flavor pop. I prefer flaky sea salt for a little textural surprise in every bite.
Let’s Make Some Magic: Step-by-Step
Ready? This is the fun part. Let’s transform these simple ingredients into something spectacular.
Step 1: Prep Your Station. Line a baking sheet with parchment paper. Do this first! Trust me, you don’t want to be scrambling for parchment with melted chocolate on your hands. This little prep step ensures your clusters will release easily and makes cleanup a dream.
Step 2: Toast Those Pecans! While this isn’t always listed in the direct instructions, it’s my number one chef hack. Spread your chopped pecans in a single layer on a dry skillet over medium heat. Toast for 3-5 minutes, shaking the pan often, until they become fragrant and take on a slightly darker color. Immediately transfer them to a plate to cool. This prevents them from burning and stops the cooking process. This step adds a whole new layer of flavor that will make your clusters taste gourmet.
Step 3: Melt the Chocolate. Place the white chocolate chips in a microwave-safe bowl. Microwave on high for 20 seconds. Stop. Take it out and stir. I know it’s tempting to just set it for a full minute, but patience is key here. White chocolate is delicate and can easily scorch or “seize” (turn into a grainy, clumpy mess) if overheated. Return to the microwave for another 20 seconds and stir again. Repeat until the chocolate is almost entirely melted. The residual heat will finish the job as you stir it into a smooth, velvety pool.
Step 4: The Grand Mix-In. Once your chocolate is smooth, immediately stir in the vanilla extract and that pinch of sea salt. Now, add in your cooled, toasted pecans and the dried cranberries. Fold everything together gently but thoroughly until every nut and berry is gloriously coated in chocolate. The mixture will be thick and chunky—that’s exactly what we want!
Step 5: Form the Clusters. Using a tablespoon or a small cookie scoop, drop mounds of the mixture onto your prepared parchment paper. Don’t worry about making them perfect circles! Part of their rustic, homemade charm is their irregular, cluster-like shape. If you like, you can gently press the mixture together with your fingers to compact it slightly.
Step 6: Set to Perfection. You have two options here. You can let the clusters set at room temperature, which will take about 30-45 minutes depending on how warm your kitchen is. Or, for a quicker set, pop the entire baking sheet into the refrigerator for 15-20 minutes. The fridge method is my go-to when I’m impatient (which is always).
How to Serve These Little Gems
Once set, these clusters are ready to shine! Pile them high on a beautiful holiday platter alongside other cookies and treats—they’ll be the star of the show. For gifting, place them in clear cellophane bags tied with a festive ribbon, or stack them in a festive tin between layers of parchment paper. They also make a wonderful homemade hostess gift during the holiday party season. Just be warned: you might need to make a double batch, as it’s incredibly hard not to “test” just one… or three… straight from the tray!
Make It Your Own: Delicious Variations
The fun doesn’t stop here! This recipe is a fantastic blank canvas. Here are a few ways to switch it up:
- Dark Chocolate Dream: Not a white chocolate fan? Swap it out for dark or semi-sweet chocolate chips for a richer, deeper flavor.
- Tropical Twist: Replace the cranberries with chopped dried mango and the pecans with macadamia nuts. Add a tiny sprinkle of coconut flakes on top before setting.
- Nut-Free Necessity: Have a nut allergy? Use roasted pumpkin seeds (pepitas) or sunflower seeds instead of pecans for that crucial crunch.
- Candy Cane Crush: Add a holiday crunch by stirring in 2 tablespoons of crushed candy canes along with the cranberries. It adds a beautiful pink swirl and a festive peppermint zing.
- Orange Zest Zing: Add the zest of one orange to the melted chocolate for a bright, citrusy note that pairs wonderfully with cranberry.
Chef’s Notes & Kitchen Stories
This recipe has evolved so much from my grandma’s original version. She was a “a little of this, a pinch of that” kind of cook, and I’ve had to do a lot of testing to get the ratios just right for you! One of my favorite kitchen fails was the time I got overzealous with the sea salt. I mean, I really went for it. Let’s just say we ended up with “Salted White Chocolate Clusters with a side of cranberry and pecan.” They were… intense. My husband, bless him, still ate them, but we learned a valuable lesson that day: a “generous pinch” is not the same as a “liberal pouring.”
I also highly recommend making these with a friend or, even better, with kids. It’s a fantastic, low-mess recipe for little hands to help with (the stirring and scooping is right at their skill level!). The joy is truly in the making. So put on some holiday music, pour yourself a cup of cocoa, and enjoy the process.
Your Questions, Answered!
Q: My white chocolate seized and became grainy! What did I do wrong and can I fix it?
A: This usually means a tiny bit of moisture got into the chocolate or it was overheated. To try and save it, immediately stir in a teaspoon of solid vegetable shortening (like Crisco) or a tiny amount of coconut oil (not butter, as it contains water!). Sometimes this can bring it back to a smooth state. The best method is prevention: use a completely dry bowl and melt slowly!
Q: Can I use almond bark or candy melts instead?
A: You absolutely can! They are often more forgiving and easier to melt. The flavor will be a bit sweeter and less complex than real white chocolate, but they work great for a quick and easy option. Follow the melting directions on the package.
Q: How far in advance can I make these? How should I store them?
A: These clusters are perfect for making ahead! Store them in an airtight container at room temperature for up to a week, or in the fridge for up to two weeks. They can also be frozen for up to 3 months. Just separate layers with parchment paper so they don’t stick together.
Q: My clusters are falling apart! What happened?
A: This typically means you need a bit more “glue” (chocolate) to hold everything together. Next time, try upping the white chocolate by another 1/4 cup. Also, make sure you’re pressing the mixture together slightly when you form the clusters on the baking sheet.
White Chocolate Cranberry Pecan Clusters
- Total Time: ~30 min
Description
These little clusters are everything the holidays should taste like—sweet, tangy, crunchy, and just the right touch of salty. They come together in minutes, need no baking, and look like they belong in a festive gift tin. Perfect for sharing, gifting, or enjoying with a hot cup of tea on a cozy afternoon. Let’s bring a little magic to your kitchen with a recipe that’s as simple as it is irresistible.
Ingredients
-
1 cup white chocolate chips (choose real cocoa butter for best flavor)
-
½ cup dried cranberries
-
½ cup pecans, roughly chopped & toasted
-
½ tsp vanilla extract
-
1 pinch flaky sea salt
Instructions
-
Prep: Line a baking sheet with parchment paper.
-
Toast Nuts: In a dry skillet, toast pecans 3–5 min until fragrant. Cool.
-
Melt Chocolate: Microwave white chocolate in 20-sec bursts, stirring until smooth.
-
Mix: Stir in vanilla and sea salt. Fold in cranberries and pecans until coated.
-
Shape: Drop spoonfuls onto parchment. Don’t worry about perfect shapes—rustic is beautiful.
-
Set: Let rest 30–45 min at room temp, or chill 15–20 min in the fridge.
Notes
-
Swap white chocolate for dark or semi-sweet.
-
Use pumpkin seeds for a nut-free crunch.
-
Stir in crushed candy canes for holiday sparkle.
-
Add orange zest for a citrus twist.
- Prep Time: 10 min
Nutrition
- Calories: 120 cal Per Serving
- Fat: 7g
- Carbohydrates: 12g
Quick Nutritional Info
This is just a general estimate per cluster (based on a batch of 12), provided for informational purposes. For precise dietary needs, use a nutrition calculator with your exact ingredients.
Per Cluster: ~120 calories | 7g fat | 12g carbs | 2g protein
Allergy Info: Contains tree nuts (pecans) and dairy (from the white chocolate). For a dairy-free/vegan version, simply use a high-quality vegan white chocolate alternative.
Final Thoughts: A Recipe for More Than Just Clusters
Well, friend, there you have it. In the time it takes to watch a holiday special, you can create a treat that’s bursting with flavor, nostalgia, and pure, uncomplicated joy.
These White Chocolate Cranberry Pecan Clusters are more than just a no-bake dessert. They’re a reminder that the heart of the holidays isn’t found in a perfectly curated Instagram feed, but in the messy, happy, delicious moments we create. They’re for the laughter that echoes in the kitchen, for the pride of making something with your own two hands, and for the simple act of sharing something sweet with someone you love.
So, whether you’re whipping up a batch for a cookie swap, crafting a heartfelt gift, or simply treating yourself after a long day, I hope this recipe brings a little bit of that magic into your home. May your chocolate melt smoothly, your pecans toast perfectly, and your holiday season be filled with the kind of simple, cozy joy that these little clusters represent.
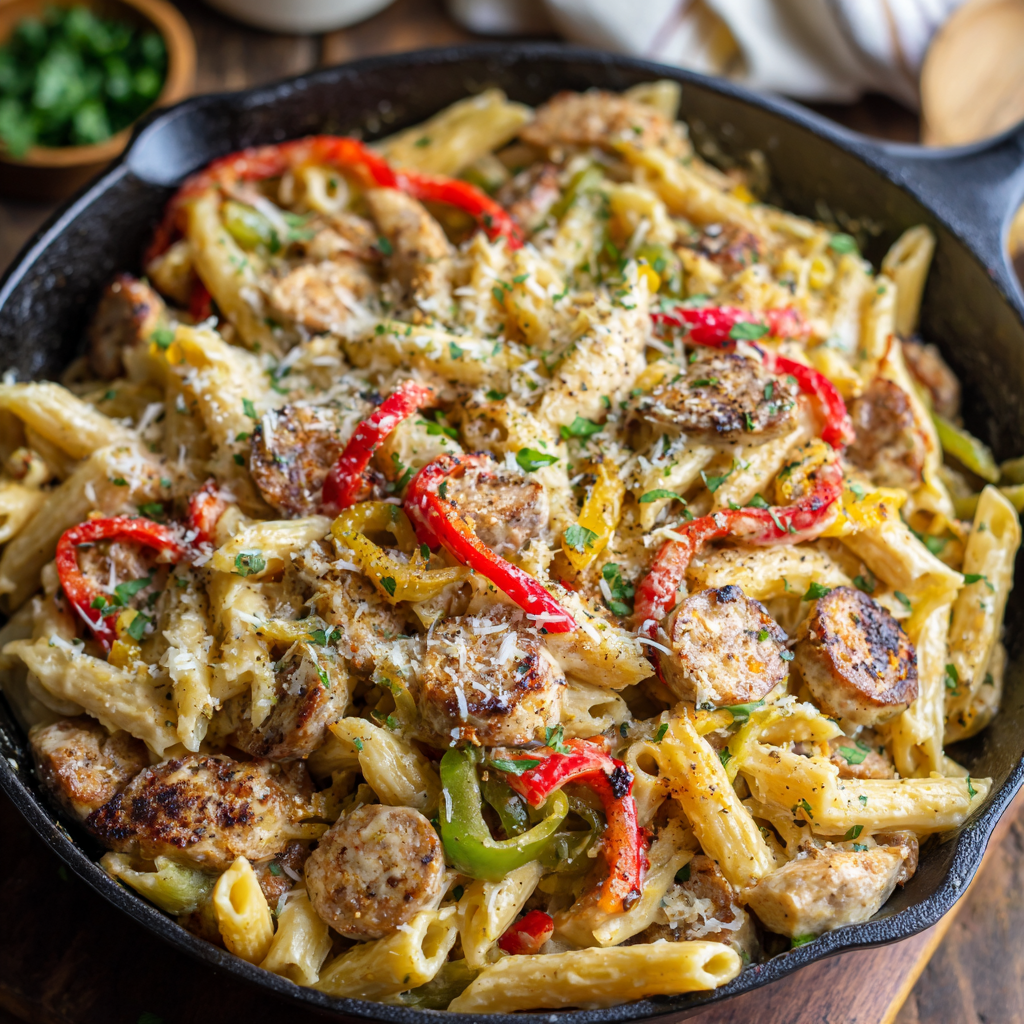
Creamy Cajun Chicken Pasta with Sausage
Your New Favorite Weeknight (Or Anytime!) Dinner is Here!
Hey there, friend! Come on in, pull up a stool, and let me tell you about a dish that has absolutely stolen my heart (and probably will steal yours, too). If your idea of a perfect meal involves a big, comforting bowl of pasta, a sauce so creamy you want to swim in it, and a kick of smoky, bold flavor that wakes up every single taste bud, then you are in for the treat of your life. Welcome to my world-famous (okay, family-and-friends-famous) Creamy Cajun Chicken Pasta with Sausage.
This isn’t just dinner; it’s an experience. It’s the kind of meal that makes everyone gather around the kitchen island, forks in hand, trying to sneak a bite straight from the skillet. It’s the glorious love child of a cozy pasta bake and a lively jambalaya, and it comes together in one pan with a rhythm that’s as satisfying as the first bite. We’re talking juicy chicken, perfectly seared smoked sausage, vibrant bell peppers, and tender onions, all dancing together in a rich, Cajun-spiced cream sauce that clings to every curve of al dente penne. Whether you serve it straight from the stovetop or bake it with a buttery, golden-brown crust, this dish promises to be unforgettable. So, tie on your favorite apron (the messy one with all the stories), and let’s make some magic!
The Dinner Party That Started It All
This recipe has a special place in my kitchen lore. It was born out of a near-disaster turned triumphant success during one of my first big dinner parties years ago. I had ambitiously planned a complicated, four-course menu. Of course, the main course decided to rebel, becoming an inedible, salty mess with just an hour until my guests arrived. Panic mode: activated!
I took a deep breath, looked at what I had on hand—some chicken, a lonely link of smoked sausage, peppers that needed using, and always, always pasta—and started cooking from the heart, not the recipe book. I threw it all in my biggest skillet, seasoned it with my favorite Cajun blend, and created a creamy sauce with evaporated milk (a genius pantry staple!). The result? My friends devoured it, declared it the best thing I’d ever made, and one of them even asked for the recipe “exactly as written,” which, at that moment, existed only in my head. It was a powerful reminder that the best meals aren’t about perfection; they’re about passion, a little improvisation, and the joy of sharing. This pasta is that spirit, captured in a dish.
Gathering Your Flavor Dream Team
Here’s everything you’ll need to create this creamy, spicy masterpiece. Don’t be intimidated by the list—it’s mostly pantry staples and a few fresh heroes!
- 12 oz Penne Pasta: I love penne because its ridges and hollow center grab onto the sauce perfectly. Feel free to use rigatoni, fusilli, or even fettuccine if that’s what you have!
- 1 lb Chicken Breast, diced: Boneless, skinless thighs work wonderfully here, too, for an even juicier, richer bite.
- 8 oz Smoked Sausage, sliced: Andouille sausage is the classic choice for authentic Cajun flavor, but any good-quality smoked sausage or kielbasa will be delicious. This is your secret weapon for that deep, smoky base note.
- 1 Red Bell Pepper & 1 Green Bell Pepper, sliced: The vibrant color and sweet flavor are non-negotiable for me. Add a yellow or orange pepper for a rainbow effect!
- 1 small Onion, sliced: A yellow or white onion brings a wonderful sweetness when sautéed.
- 2 tbsp Cajun Seasoning: Chef’s Insight: Not all Cajun seasonings are created equal! Some are saltier or spicier than others. I recommend starting with 1 tablespoon and tasting before adding the second. My favorite hack? Making my own blend with paprika, garlic powder, onion powder, oregano, cayenne, and black pepper to control the salt and heat.
- 1 tbsp Olive Oil: For sautéing our proteins and veggies to perfection.
- 1 can (12 oz) Evaporated Milk: This is the game-changer! It creates a luxuriously creamy sauce without the risk of curdling that heavy cream sometimes has. It’s my not-so-secret weapon for a flawless, silky texture every time.
- ½ cup grated Parmesan Cheese: Brings a salty, umami punch that deepens the entire sauce.
- 1 cup shredded Monterey Jack Cheese: For that glorious, stretchy, melty goodness. A blend of Mozzarella and a little cheddar also works beautifully.
- ½ cup Breadcrumbs & 1 tbsp Butter (optional): If you’re opting for the baked version, this duo creates the most satisfying, crispy, golden-brown topping that contrasts beautifully with the creamy pasta below.
Let’s Get Cooking: Your Foolproof Guide
Follow these steps, and you’ll have a restaurant-quality dish on your table in no time. I’ve packed this section with all my favorite chef hacks to ensure your success!
Step 1: The Pasta Prep. Cook your penne in a large pot of well-salted boiling water until it’s just al dente (meaning it still has a slight bite to it). Remember, it will continue to cook a little in the sauce later, so undercooking it slightly here is a pro move. Drain it and set it aside. Chef’s Hack: Reserve about a cup of the starchy pasta water before you drain it. If your sauce gets a little too thick later, a splash of this magical water will loosen it up and help it emulsify beautifully.
Step 2: Sizzle Your Proteins. Heat the olive oil in a large, heavy-bottomed skillet or Dutch oven over medium-high heat. Add the diced chicken and cook for 5-6 minutes, until it’s browned on all sides and mostly cooked through. Don’t crowd the pan—give the chicken space to sear, not steam! Push the chicken to one side and add the sliced sausage. Let it sauté for 2-3 minutes until it gets some delicious crispy edges. That crispiness equals big flavor.
Step 3: Veggie Time! Now, add your beautiful sliced peppers and onions right into the skillet with the chicken and sausage. Sprinkle the Cajun seasoning over everything. Give it all a good stir to coat every piece in those gorgeous spices. Cook for 5-7 minutes, stirring occasionally, until the vegetables have softened and the onions become translucent. Your kitchen should smell absolutely incredible right now.
Step 4: Create the Creamy Dream. Reduce the heat to medium-low. Pour in the entire can of evaporated milk, then add your grated Parmesan and most of the Monterey Jack cheese (save a little for topping if you’re baking!). Stir continuously until the cheeses have melted completely and the sauce becomes smooth and begins to thicken slightly. This should only take 3-4 minutes. Chef’s Tip: Keeping the heat gentle here prevents the dairy from breaking or curdling.
Step 5: The Grand Finale. Add your drained, al dente pasta directly into the skillet. Use tongs to toss and fold everything together, ensuring every single piece of pasta gets coated in that glorious, creamy, spicy sauce. Let it simmer together for just a minute or two so the pasta can drink up some of that sauce. If it seems too thick, add a splash of that reserved pasta water until it reaches your desired consistency.
Step 6: To Bake or Not to Bake? For skillet-style, you’re done! Serve it hot straight from the pan—it’s rustic and gorgeous. For the baked version, transfer the pasta mixture to a greased baking dish. Top with the remaining Monterey Jack cheese. In a small bowl, mix the breadcrumbs with melted butter and sprinkle it evenly over the top. Pop it into a preheated 375°F (190°C) oven for 15 minutes, or until the top is golden and bubbly.
How to Serve This Masterpiece
Presentation is part of the fun! I love serving this family-style, right in the cast-iron skillet I cooked it in (with a trivet, of course!). Garnish with a little extra sprinkle of fresh parsley or chopped green onions for a pop of color and freshness. This dish is rich and hearty, so a simple side is all you need. A crisp green salad with a tangy vinaigrette, some garlic bread to scoop up every last bit of sauce, or simply some steamed green beans are the perfect companions. Don’t forget the iced tea, lemonade, or a cold beer!
Make It Your Own: Delicious Twists & Swaps
The beauty of this recipe is its flexibility. Play around and make it suit your taste!
- Seafood Sensation: Swap the chicken and sausage for peeled shrimp and crawfish tails. Add the seafood in the last 3-4 minutes of cooking to avoid overcooking.
- Vegetarian Delight: Omit the meat and add in sliced mushrooms, zucchini, and extra bell peppers. Use a plant-based smoked sausage for that smoky flavor and ensure your Cajun seasoning is vegetarian-friendly.
- Extra Creamy: Stir in 4 oz of softened cream cheese along with the evaporated milk for an ultra-luxurious, tangy sauce.
- Spice Level Control: For a milder dish, use a sweet paprika-based seasoning and omit the cayenne. For extra heat, add a pinch of crushed red pepper flakes with the Cajun seasoning.
- Gluten-Free Friendly: Use your favorite gluten-free pasta and ensure your sausage and Cajun seasoning are gluten-free. The sauce is naturally gluten-free!
From My Kitchen to Yours: Chef’s Notes
This recipe has evolved so much since that fateful dinner party! I’ve learned that the evaporated milk trick is the ultimate key to a foolproof sauce—it never, ever graines or separates on me, which is a win in my book. I also used to meticulously measure the Cajun seasoning, but now I just shake it from the jar with joyful abandon (though I’ve given you careful measurements here so you don’t blow your head off!). One of my favorite kitchen memories involving this dish is my nephew, who is a notoriously picky eater, devouring two full bowls and then asking if we could have it for breakfast the next day. That’s the power of a truly great, cozy meal—it brings everyone to the table, no matter their age or preferences. I hope it becomes a legend in your home, too.
FAQs & Troubleshooting: Your Questions, Answered
Q: My sauce turned out too thin. How can I thicken it?
A: No worries! First, let it simmer for a few more minutes; the evaporation will naturally thicken it. If it’s still too thin, make a quick slurry by mixing 1 tablespoon of cornstarch with 2 tablespoons of cold water. Whisk this into the simmering sauce and it should thicken up within a minute.
Q: My sauce is too thick! Help!
A> This is an easy fix! This is why we reserved that starchy pasta water. Simply add a splash (a tablespoon at a time) and stir until it loosens to your perfect consistency. If you don’t have pasta water, regular milk or even a little chicken broth will work.
Q: Can I make this ahead of time?
A> Absolutely. You can assemble the entire dish (without baking it) and store it covered in the fridge for up to 24 hours. When you’re ready, you may need to add a tiny splash of milk before baking, as the pasta will continue to absorb the sauce. Add 5-10 minutes to the baking time since it will be going in cold.
Q: Is this dish super spicy?
A> It’s all in your control! The spice level depends entirely on the brand of Cajun seasoning you use. I recommend starting with half the amount, tasting after the veggies have cooked, and then adding more until it’s perfect for you. You can always add more spice, but you can’t take it out!
Creamy Cajun Chicken Pasta with Sausage
Description
Picture this: juicy chicken, smoky sausage, tender bell peppers and onions, all tossed in a luxuriously creamy Cajun-spiced sauce that clings to every bite of al dente penne. Serve it straight from the skillet or bake it with a crispy, golden topping—either way, this dish is unforgettable.
Ingredients
Pasta & Protein:
-
12 oz penne pasta (or rigatoni, fusilli, fettuccine)
-
1 lb chicken breast, diced (or thighs for juicier meat)
-
8 oz smoked sausage, sliced (Andouille preferred)
Veggies & Flavor:
-
1 red bell pepper, sliced
-
1 green bell pepper, sliced (optional: yellow/orange for color)
-
1 small onion, sliced
-
2 tbsp Cajun seasoning (adjust to taste)
-
1 tbsp olive oil
Creamy Sauce:
-
1 can (12 oz) evaporated milk
-
½ cup grated Parmesan cheese
-
1 cup shredded Monterey Jack cheese (reserve a bit for topping if baking)
Optional Baked Topping:
-
½ cup breadcrumbs
-
1 tbsp butter, melted
Instructions
1. Cook Pasta:
Cook penne in salted boiling water until just al dente. Reserve 1 cup pasta water before draining. Set pasta aside.
2. Sauté Proteins:
Heat olive oil in a large skillet over medium-high heat. Cook chicken 5–6 minutes until browned and mostly cooked through. Push chicken aside and sauté sausage 2–3 minutes until crispy edges form.
3. Add Veggies:
Add peppers and onions. Sprinkle with Cajun seasoning and stir to coat. Cook 5–7 minutes until veggies soften and onions are translucent.
4. Make Creamy Sauce:
Reduce heat to medium-low. Pour in evaporated milk, Parmesan, and most of the Monterey Jack cheese. Stir until melted and smooth. Simmer 3–4 minutes to thicken slightly.
5. Combine Pasta & Sauce:
Add drained pasta to skillet. Toss to coat evenly in the creamy sauce. Add reserved pasta water if needed to reach desired consistency.
6. Optional Baking Step:
Transfer to a greased baking dish. Top with remaining Monterey Jack cheese. Mix breadcrumbs with melted butter and sprinkle on top. Bake at 375°F (190°C) for 15 minutes until golden and bubbly.
7. Serve:
Garnish with parsley or green onions. Serve with a side salad, garlic bread, or steamed green veggies.
Notes
-
Evaporated milk creates a silky sauce that won’t curdle.
-
Browning chicken and sausage separately develops deeper flavor.
-
Use reserved pasta water to adjust sauce consistency.
-
Bake only if you want a golden, crunchy topping; skillet version is perfect as-is.
Nutrition
- Calories: ~520 cal Per Serving
- Fat: 21g
- Carbohydrates: 45g
- Protein: 33g
Nutritional Information
(Approximate values per serving for the skillet version, based on 6 servings)
Calories: 520 | Protein: 33g | Carbohydrates: 45g | Fat: 21g | Saturated Fat: 8g | Cholesterol: 85mg | Sodium: 780mg | Fiber: 3g | Sugar: 8g
Please note: Nutritional information is an estimate and can vary greatly based on the specific brands of ingredients you use.
Final Thoughts
And just like that, you’ve created more than just a meal—you’ve crafted a centerpiece for connection, a bowl full of bold, comforting joy that’s meant to be shared. This Creamy Cajun Chicken Pasta is a testament to the magic that happens when simple, honest ingredients are brought together with a little bit of spice and a whole lot of heart.
It proves that the best dinners aren’t about complicated techniques or a sink full of every pot and pan you own. They’re about that one glorious skillet, bubbling with goodness, that draws everyone in. They’re about the stories told over second helpings and the satisfied silence that falls as everyone digs in.
Whether it’s a hectic Tuesday night, a festive gathering with friends, or your new go-to “wow” dish for a potluck, this pasta is ready for the occasion. So, serve it up, pass the garlic bread, and take a bow. You’ve just made dinner the best part of the day.
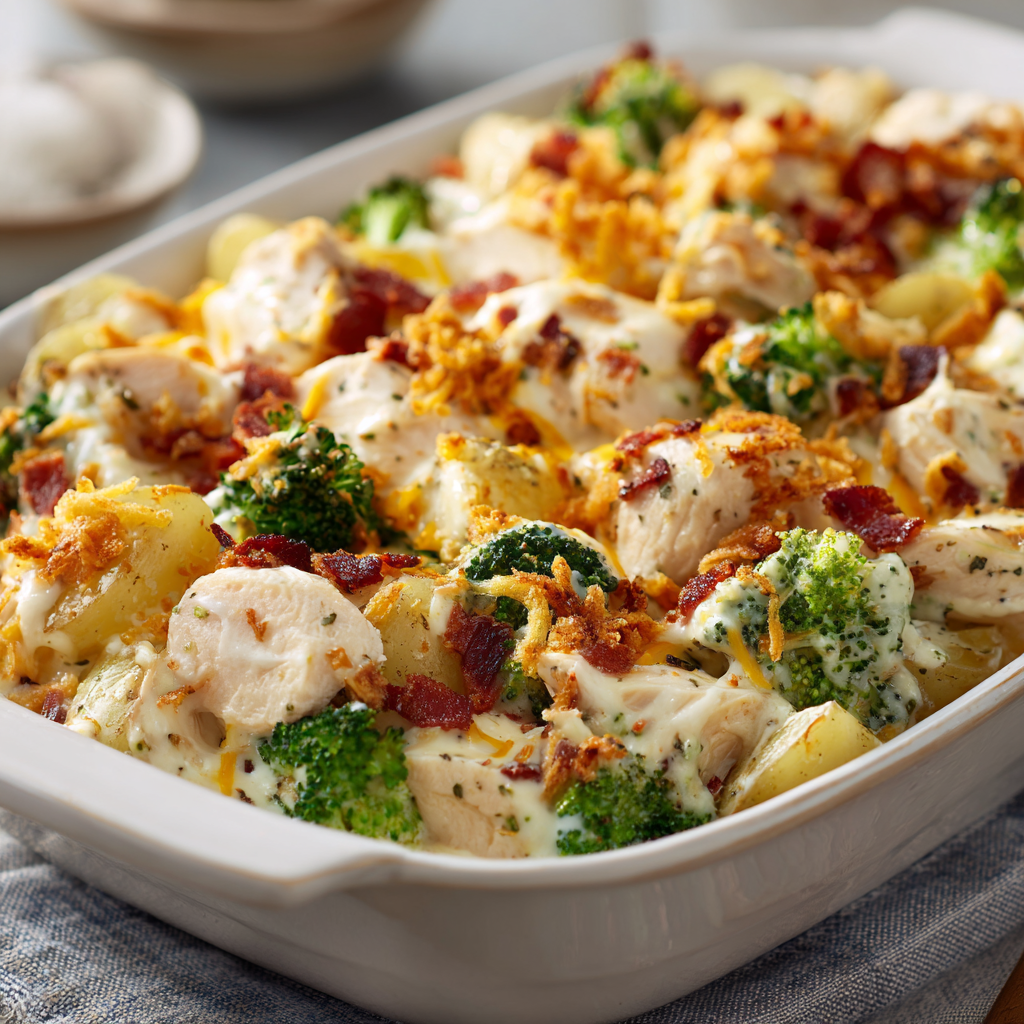
Cheesy Ranch Chicken & Potato Casserole
Your New Favorite Dinner is Waiting in This Cozy, Cheesy Casserole
Hey there, friend! Come on in, grab an apron, and let’s get something simmering. You know those days when the weather turns a little crisp, your schedule is packed to the brim, and all you want is a meal that feels like a warm, delicious hug from the inside out? Yeah, me too. That’s exactly why I’m so excited to share this recipe with you today.
We’re talking about a Cheesy Ranch Chicken & Potato Casserole that is an absolute game-changer for busy weeknights, lazy Sundays, or anytime you need to feed a hungry crowd with minimal fuss and maximum flavor. Imagine this: tender chunks of chicken, hearty roasted potatoes, fresh green broccoli, and the salty, smoky crunch of bacon, all swirled together with that iconic, herby ranch flavor and smothered in a blanket of the gooiest, meltiest cheese you can imagine. Is your mouth watering yet? Because mine definitely is.
The best part? This isn’t one of those fussy, complicated casseroles that dirties every dish in your kitchen. It’s approachable, forgiving, and designed to make you feel like a kitchen rockstar. Whether you’re a seasoned pro or just starting your cooking journey, this dish is your ticket to a seriously satisfying meal that will have everyone asking for seconds. So, preheat that oven, because we’re about to create some magic together.
The Potluck Hero That Started It All
This recipe holds a special place in my heart because it’s my ultimate potluck and new-baby-meal hero. I first threw it together years ago for a dear friend who had just welcomed her second baby. I wanted to bring something that was comforting, required zero effort from her to reheat, and could feed her whole family (and any visiting grandparents) for a couple of days.
I raided my fridge and pantry, finding some leftover roasted potatoes from dinner the night before, a couple of chicken breasts, and a head of broccoli that needed a purpose. I combined it all with my trusty bottle of ranch and a mountain of cheese, crossed my fingers, and popped it in the oven. The text I got later that evening said it all: “Olivia, this is incredible. My three-year-old actually ate the broccoli. Who are you, and what have you done with my child?!” I knew right then I had a winner. It’s been my go-to “food that cares” recipe ever since, and now, it’s yours too.
Gathering Your Flavor Squad: The Ingredients
Here’s everything you’ll need to bring this cozy masterpiece to life. Don’t be afraid to make it your own with the substitutions I’ve listed!
- 2 lbs chicken breast, diced: I like to use breast for its lean, quick-cooking quality, but feel free to swap in an equal amount of boneless, skinless chicken thighs for even more juicy, flavorful meat. If you’re really short on time, a rotisserie chicken (shredded) works beautifully here—just fold it in at the end with the other ingredients instead of baking it raw.
- 3 cups roasted potatoes, cubed: The roasted flavor is key! It adds a depth you don’t get from boiled potatoes. I typically cube Yukon Golds or red potatoes, toss them in a little olive oil, salt, and pepper, and roast at 400°F for about 20-25 minutes until tender. Pro Tip: You can do this step up to 2 days ahead to make assembly a breeze.
- 2 cups broccoli florets, lightly steamed: Broccoli adds a pop of color and a fresh contrast to all the richness. Lightly steaming it first ensures it bakes up perfectly tender, not mushy or raw. No steamer? A quick 1-minute blanch in boiling water works too. Frozen broccoli florets (thawed and patted dry) are a fantastic shortcut!
- 4 slices bacon, cooked and crumbled: Bacon is our flavor booster! It adds that irresistible smoky, salty, crunchy element. For a time-saver, use pre-cooked bacon bits from the store, but for the best flavor, cooking your own is always worth it.
- ½ cup ranch dressing: This is the secret sauce that brings the whole party together! Use your favorite bottled brand, or if you’re feeling ambitious, my homemade buttermilk ranch takes it to a whole new level.
- 1 cup shredded cheddar cheese: Sharp cheddar gives us that classic, tangy cheesiness we all love. Buy a block and shred it yourself for the best melt—pre-shredded cheese is coated to prevent clumping, which can make your sauce a little grainy.
- 1 cup shredded Monterey Jack cheese: I love the combo of cheddar for flavor and Monterey Jack for its superb melting, ultra-gooey qualities. A Mexican blend cheese would also work wonderfully here.
- 1 cup crispy fried onions (optional topping): Do not skip these! They add an incredible texture and a buttery, savory crunch that takes this casserole from great to absolutely legendary. They are the crowning glory!
Let’s Build Some Deliciousness: Step-by-Step Instructions
Ready to cook? Follow these steps for a foolproof, fabulous casserole every single time.
Step 1: Preheat and Prep. First things first, preheat your oven to 375°F (190°C). This is the perfect temperature to cook the chicken through, melt the cheese beautifully, and get everything hot and bubbly without burning. While it’s heating, grab your trusty 9×13 inch baking dish and give it a light coating of non-stick spray, butter, or a quick wipe of oil. This little step ensures your cleanup will be just as easy as the cooking process!
Step 2: The Big Toss. Now for the fun part! In a large mixing bowl—I’m talking large—combine your diced chicken, pre-roasted potatoes, steamed broccoli florets, and most of your crumbled bacon (save a little for garnish if you’re feeling fancy!). Pour that ½ cup of ranch dressing over everything. Here’s my chef hack: use a sturdy spatula or your clean hands to toss and fold everything together. You want every single nook and cranny of the chicken and potatoes to be coated in that creamy, herby ranch goodness. This is the base of all our flavor, so be thorough!
Step 3: The Transfer. Once everything is happily combined, gently transfer the mixture into your prepared baking dish. Spread it out into one even layer. This is important for even cooking—you don’t want a giant pile of chicken in one corner and just potatoes in another. An even layer means everything bakes at the same rate.
Step 4: The Cheesy Blanket. Time for the best part: the cheese! Take your shredded cheddar and Monterey Jack cheeses and sprinkle them evenly over the entire top of the casserole. Don’t skimp! Cover every bit of the chicken and potato mixture. This cheesy layer will melt into a golden, bubbly, protective crust that is simply irresistible.
Step 5: Bake to Perfection. Place your beautiful, cheese-topped casserole into the preheated oven and bake it uncovered for 25-30 minutes. You’ll know it’s done when the cheese is completely melted, the edges are bubbly and lightly golden, and the chicken is cooked through (you can check by cutting into a larger piece of chicken in the center—it should be white with no pink).
Step 6: The Grand Finale (The Topping!). If you’re using the crispy fried onions—which I highly, highly recommend—now is their time to shine. Pull the casserole out of the oven at the 25-minute mark and quickly sprinkle the fried onions evenly over the top. Pop it back in for the final 3-5 minutes of baking. This just warms them through and lets them settle into the cheese without losing their iconic crunch.
Step 7: Rest and Serve. I know it’s tempting to dive right in, but let the casserole sit for about 5 minutes after pulling it out of the oven. This allows the sauce to thicken up just slightly and makes it much easier to serve up neat, beautiful portions. Then, dig in!
How to Serve This Cozy Masterpiece
This casserole is a complete meal all on its own, but I love serving it with a simple, bright side salad with a tangy vinaigrette to cut through the richness. A few slices of crusty garlic bread are also never a bad idea for soaking up any extra cheesy sauce. For a fun family-style dinner, I just place the baking dish right in the middle of the table with a big serving spoon and let everyone help themselves. It’s the kind of food that encourages passing plates and sharing stories—and that’s my favorite kind of meal.
Make It Your Own: Delicious Variations
The beauty of a casserole is its flexibility! Here are a few ways to mix it up:
- Buffalo Style: Swap the ranch for buffalo sauce and use a blue cheese or gorgonzola crumble along with the cheddar for a spicy kick.
- Italian Twist: Use Italian dressing instead of ranch, and swap the cheeses for mozzarella and parmesan. Add a pinch of red pepper flakes!
- Lighter Version: Use Greek yogurt ranch dressing, low-fat cheese, and add extra broccoli. You can also use sweet potatoes instead of russets.
- Southwestern Flair: Add a can of drained black beans, a cup of corn (thawed if frozen), and a diced jalapeño. Use a Tex-Mex cheese blend and top with crushed tortilla chips instead of fried onions.
- Pork or Beef: Don’t have chicken? Diced ham or browned ground beef are fantastic substitutes.
From My Kitchen to Yours: Chef’s Notes
This recipe has evolved so much over the years! The first time I made it, I used raw potatoes and boiled them, which worked but made the final texture a bit softer. Roasting the potatoes first was a total revelation—it gives them so much more character and helps them hold their shape. I’ve also learned that the order of operations is key: tossing the raw chicken in the ranch dressing acts like a quick marinade, ensuring every bite is flavorful and moist. And a funny story? I once was so distracted chatting with a friend that I accidentally used Catalina French dressing instead of ranch! It was… interesting. Not my best work. Let’s just stick to ranch, shall we?
Your Questions, Answered: FAQs & Troubleshooting
Q: Can I assemble this casserole ahead of time?
A: Absolutely! You can assemble the entire casserole (through step 4, without baking) up to 24 hours in advance. Cover it tightly with plastic wrap or foil and store it in the fridge. When you’re ready to bake, you may need to add 5-10 minutes to the baking time since it will be going into the oven cold. Hold off on adding the fried onions until the very end, as directed.
Q: My casserole seems a bit dry. What happened?
A: The most common culprit is overbaking. All ovens vary, so make sure you’re checking at the 25-minute mark. Using chicken breasts can also sometimes lead to dryness if they are overcooked. Next time, try using thighs for a more forgiving, juicier result. Also, ensure you’re using the full ½ cup of ranch—it’s our main source of moisture!
Q: Can I freeze this?
A: You can, but with a caveat. Cream-based sauces and potatoes can sometimes become a bit grainy or separate upon thawing and reheating. For best results, freeze before baking. Assemble the casserole (without the fried onion topping), wrap it extremely well in a few layers of plastic wrap and foil, and freeze for up to 2 months. Thaw overnight in the fridge before baking as directed, adding a few extra minutes to the bake time. I wouldn’t recommend freezing after baking.
Q: Is there a way to make this gluten-free?
A: Easily! Just ensure your ranch dressing and crispy fried onions are certified gluten-free brands. Many brands, like Hidden Valley and others, now offer GF ranch. For the onions, French’s Gluten-Free Original Crispy Fried Onions are perfect.
Print
Cheesy Ranch Chicken & Potato Casserole
Description
Hey friend! Picture this: tender chicken, roasted potatoes, fresh broccoli, crispy bacon, all wrapped in creamy ranch and topped with gooey, melty cheese. This casserole is comfort food at its finest—perfect for busy weeknights, lazy Sundays, or feeding a hungry crowd with minimal fuss.
Ingredients
Protein & Veggies:
-
2 lbs chicken breast, diced (or thighs for juicier meat; rotisserie chicken works too)
-
3 cups roasted potatoes, cubed (Yukon Gold or red)
-
2 cups broccoli florets, lightly steamed
Flavor Boosters:
-
4 slices bacon, cooked and crumbled (save a little for garnish)
-
½ cup ranch dressing
Cheese Layer:
-
1 cup shredded cheddar cheese
-
1 cup shredded Monterey Jack cheese
Optional Topping:
-
1 cup crispy fried onions
Instructions
1. Preheat & Prep:
Preheat oven to 375°F (190°C). Grease a 9×13-inch baking dish with non-stick spray or a light coating of oil.
2. Toss Ingredients:
In a large bowl, combine diced chicken, roasted potatoes, broccoli, and most of the crumbled bacon. Pour in ranch dressing and toss until everything is evenly coated.
3. Transfer to Baking Dish:
Spread the mixture into an even layer for uniform cooking.
4. Add the Cheese:
Sprinkle cheddar and Monterey Jack evenly over the top. Cover every bit for that golden, bubbly finish.
5. Bake:
Bake uncovered for 25–30 minutes until cheese is melted, edges are bubbly, and chicken is cooked through.
6. Add Topping (Optional):
Sprinkle fried onions over the top and bake an additional 3–5 minutes to warm them through.
7. Rest & Serve:
Let the casserole rest 5 minutes before serving. Enjoy as is or pair with a bright side salad or crusty garlic bread.
Notes
-
Buffalo Style: Swap ranch for buffalo sauce and use blue cheese with cheddar.
-
Italian Twist: Use Italian dressing; cheeses: mozzarella + Parmesan. Add red pepper flakes.
-
Lighter Version: Greek yogurt ranch, low-fat cheese, extra broccoli, or sweet potatoes.
-
Southwestern Flair: Add black beans, corn, diced jalapeño, and top with crushed tortilla chips.
-
Protein Swap: Diced ham or browned ground beef works in place of chicken.
Nutritional Information*
*This is an estimate for 1 serving (without fried onions) based on the ingredients listed. Values may vary based on specific brands and substitutions used.
Per Serving (1 of 6): Calories: 480 | Protein: 35g | Carbohydrates: 24g | Fat: 26g
Final Thoughts: Your New Weeknight Best Friend
As you pull this golden, bubbling masterpiece from the oven and breathe in the incredible aroma of cheese, ranch, and roasted goodness, I hope you feel a deep sense of accomplishment—and hunger! This casserole is more than just a meal; it’s a reliable solution for those nights when you need something truly satisfying without the stress.
It’s a testament to the fact that the most beloved recipes aren’t always the most complicated ones. They’re the ones that bring people together, that create a quiet moment of “mmmm” around the dinner table, and that leave you with a happy belly and a clean kitchen. This Cheesy Ranch Chicken & Potato Casserole is that recipe. It’s hearty, forgiving, and endlessly adaptable to whatever you have in your fridge.
So whether you’re feeding a busy family, comforting a friend, or simply treating yourself to a warm, home-cooked meal, remember this: the best dinners aren’t about perfection. They’re about flavor, ease, and the simple joy of a dish made with care. This casserole delivers on all fronts. I have a feeling it’s going to become a regular in your rotation, just like it is in mine.
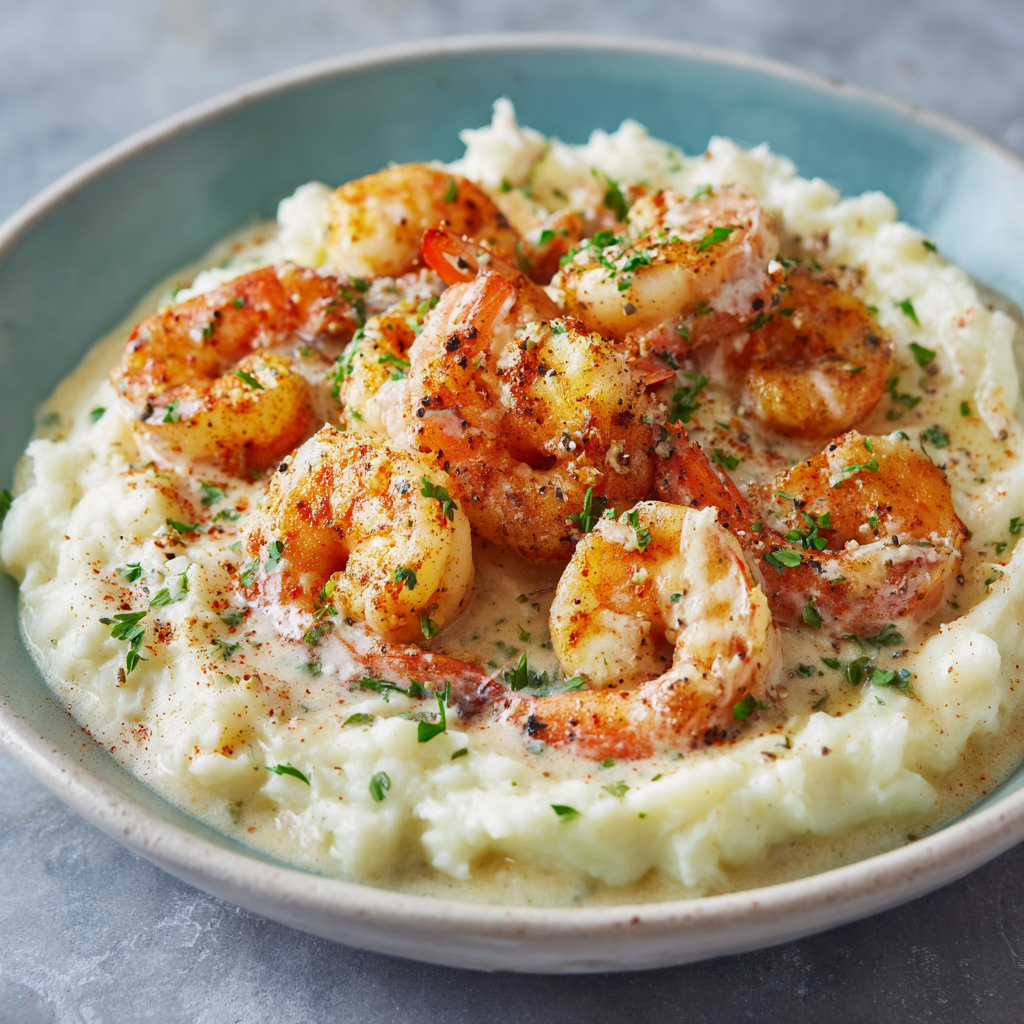
Garlic Butter Shrimp with Creamy Parmesan Sauce & Mashed Potatoes
Garlic Butter Shrimp with Creamy Parmesan Sauce & Mashed Potatoes
Hey there, friend! Come on in, pull up a stool. Can you smell that? It’s the unmistakable, soul-warming aroma of garlic sizzling in butter, juicy shrimp hitting a hot pan, and fluffy mashed potatoes waiting to soak up every last drop of a creamy, dreamy Parmesan sauce. If your stomach just did a happy little dance, you’re exactly where you’re supposed to be.
This right here—this Garlic Butter Shrimp situation—is what I call a “hug on a plate.” It’s the kind of meal that feels indulgent and restaurant-quality but is secretly so simple to whip up in your own kitchen. It’s my go-to for those nights when I want to feel a little fancy without any of the fuss. Whether you’re trying to impress a date, treating your family to something special, or just having a solo “I deserve this” kind of evening, this dish delivers big on flavor and comfort. So, tie on your favorite apron (the messy one with all the stories), and let’s create something unforgettable together.
The Dinner That Started It All
This recipe takes me right back to my first “fancy” dinner party. I was 22, living in my first apartment that was about the size of a postage stamp, and I was determined to host a meal that would wow my friends. My budget was… let’s call it “aspirational,” but my ambition was sky-high. I needed something that looked and tasted like a million bucks but cost closer to ten.
Enter: this Garlic Butter Shrimp. I remember my tiny kitchen filled with laughter, the clinking of our (mismatched) wine glasses, and the sheer panic I felt when I thought I’d overcooked the shrimp. But when we all sat down, dug into those creamy, garlicky plates, and there was a moment of pure, happy silence? I knew I had stumbled onto something magic. It was the moment I truly understood that cooking isn’t about perfection; it’s about the joy you share. This dish has been a part of my story ever since.
Gathering Your Kitchen Crew: The Ingredients
Here’s everything you’ll need to create this masterpiece. Don’t stress if you need to make a swap or two—cooking is all about making it work for you!
For the Mashed Potatoes:
- 2 lbs Yukon Gold or Russet potatoes, peeled and cubed: Yukon Golds are my MVP here—they mash up creamier and buttery-er naturally. Russets are fantastic for a fluffier texture. Your call!
- 1/2 cup warm milk: Warm milk is the KEY! Cold milk will make your potatoes gummy. I just pop it in the microwave for 30 seconds before adding.
- 1/4 cup butter: Salted or unsalted is fine. This is comfort food, let’s not hold back.
- Salt, to taste: Potatoes need more salt than you think. Season, taste, and season again!
For the Shrimp:
- 1 lb large shrimp (16/20 or 21/25 count), peeled and deveined: I buy them frozen and thaw them in a bowl of cold water for 15 minutes. Pat them DRY with paper towels—this is the secret to a perfect sear!
- 2 tbsp olive oil: A good base for searing.
- 1 tsp paprika: Sweet or smoked paprika both work. Smoked will add a beautiful, deep warmth.
- 1 tsp garlic powder: Doubling down on that garlic flavor. We’re not messing around.
- Salt & black pepper, to taste: Season generously!
For the Creamy Garlic Parmesan Sauce:
- 2 tbsp butter: Because more butter is always the answer.
- 4 cloves garlic, minced: Fresh is best here for that punchy, aromatic flavor.
- 1 cup heavy cream: This creates the luscious, luxurious base of our sauce. For a lighter version, half-and-half works in a pinch, but it won’t thicken up quite as much.
- 1/2 cup freshly grated Parmesan cheese: Please, I beg you, grab a block and grate it yourself! The pre-shredded stuff has anti-caking agents that can make your sauce grainy and less smooth.
- 1 tsp Dijon mustard (optional): My little chef’s hack! It doesn’t make the sauce taste like mustard; it just adds a incredible depth of flavor and helps emulsify the sauce. Trust me on this.
- Salt & pepper, to taste: The Parmesan is salty, so taste before you add more salt.
- Fresh thyme or parsley, for garnish: A pop of green for freshness and pretty factor.
Let’s Get Cooking: Step-by-Step Instructions
Ready to work some magic? Follow these steps and you’ll have a restaurant-worthy meal in no time.
1. Prepare the Potatoes: Get your peeled and cubed potatoes into a large pot of cold, generously salted water. Bring it to a boil over high heat, then reduce to a simmer. Let them cook for about 15-20 minutes, or until they are fork-tender. Drain them really well in a colander. Return them to the hot pot and let them sit for a minute off the heat to steam off any excess water—this is another secret to non-watery mash! Mash them with a potato masher or ricer, then stir in the warm milk and butter until smooth and creamy. Cover and set aside to keep warm.
2. Cook the Shrimp: While the potatoes are boiling, pat your shrimp completely dry with paper towels. This is non-negotiable for a good sear! In a bowl, toss them with the olive oil, paprika, garlic powder, salt, and pepper. Heat a large skillet over medium-high heat. Once the pan is hot, add the shrimp in a single layer. Don’t crowd the pan—cook in batches if you need to! Sear for just 1-2 minutes per side. They cook FAST. You’re looking for them to turn pink and opaque. The second they curl up, they’re done. Immediately remove them from the skillet and set them aside on a plate. They will continue to cook a tiny bit from residual heat, so it’s better to undercook slightly here.
3. Make the Dreamy Sauce: Reduce the skillet heat to medium. No need to clean it—all those browned bits at the bottom are pure flavor gold! Add the 2 tablespoons of butter. Once it’s melted, add the minced garlic and sauté for just about 60 seconds until it’s fragrant. Don’t let it burn! Pour in the heavy cream, add the grated Parmesan, and that sneaky teaspoon of Dijon mustard. Whisk it all together, scraping up all those delicious browned bits from the bottom of the pan. Let it simmer gently for 3-4 minutes, whisking occasionally, until the cheese is fully melted and the sauce has thickened enough to coat the back of a spoon. Taste it and season with salt and pepper as needed.
4. Bring It All Home: Turn off the heat. Add the cooked shrimp back into the skillet with the sauce and give everything a gentle toss to coat. Those beautiful shrimp will warm right back up in the sauce.
Plating Your Masterpiece
Time for the grand finale! Spoon a generous bed of those fluffy mashed potatoes onto each plate. Use the back of your spoon to make a little well in the center—this is where the goodness goes. Carefully arrange the saucy shrimp over the potatoes, making sure to drizzle every last bit of that creamy garlic Parmesan sauce over the top. Finish it with a sprinkle of fresh thyme or parsley and maybe an extra pinch of Parmesan because, why not? Serve immediately and get ready for the compliments to roll in.
Make It Your Own: Delicious Variations
This recipe is a fantastic canvas! Here are a few ways to play with it:
- Lemon Lover’s: Add the zest of one lemon to the shrimp seasoning and a big squeeze of fresh lemon juice into the sauce at the very end. It brightens everything up beautifully.
- Spicy Kick: Add a pinch (or more!) of red pepper flakes to the shrimp while they cook, or a dash of cayenne pepper to the sauce.
- Different Protein: Not a shrimp fan? Thinly sliced chicken breast or scallops work wonderfully with this method and sauce.
- Lighter Twist: Swap the mashed potatoes for cauliflower mash or zucchini noodles for a lower-carb option. The sauce is so good, it’ll make anything taste amazing.
- Mushroom Magic: Sauté some sliced cremini mushrooms in the pan after cooking the shrimp, then proceed with the sauce. Earthy and incredible!
Olivia’s Chef Notes
This recipe has evolved so much since that first dinner party! I’ve learned a few things along the way. The Dijon mustard was a happy accident one day when I was out of white wine—it’s now a permanent member of the recipe. I also used to be terrified of overcooking shrimp, so I’d undercook them. My poor friends… Now I know the visual cues are everything: pink color, opaque flesh, and a gentle C-shape curl. If they’re forming a tight O, they’re overdone!
The biggest lesson? This meal is meant to be shared. Don’t fret if it’s not “perfect.” The slightly lumpy potatoes and the one shrimp that got a little too crispy are just proof that it was made with love. Now, go make some memories!
Your Questions, Answered
Q: My sauce turned out grainy/oily. What happened?
A: This usually happens for one of two reasons! First, the heat was too high when you added the cream and cheese, causing it to break. Keep it at a gentle simmer. Second, you might have used pre-shredded Parmesan cheese. The cellulose in it prevents it from melting smoothly. Always grate your own from a block for a silky sauce!
Q: Can I make any part of this ahead of time?
A: Absolutely! You can peel and cube the potatoes and keep them submerged in cold water in the fridge for a few hours before cooking. You can also make the entire mashed potato portion ahead and gently reheat it with a splash of extra milk. I don’t recommend cooking the shrimp ahead, as they can become rubbery when reheated.
Q: My sauce is too thin! How can I thicken it?
A: No worries! Let it simmer a little longer—it will continue to reduce and thicken. If you’re really in a pinch, you can make a quick slurry by mixing 1 teaspoon of cornstarch with 1 tablespoon of cold water and whisking it into the simmering sauce. Let it cook for another minute.
Q: What can I use instead of heavy cream?
A: Half-and-half will work, but your sauce will be a bit thinner. You could also use full-fat coconut milk for a dairy-free alternative, though the flavor will change. For a lighter option, whole milk will work in a true pinch, but you’ll need to simmer it longer to reduce and thicken, and it won’t be quite as rich.
Garlic Butter Shrimp with Creamy Parmesan Sauce & Mashed Potatoes
Description
Hey friend! Picture this: garlic sizzling in butter, juicy shrimp hitting a hot pan, and fluffy mashed potatoes ready to soak up every last drop of creamy Parmesan sauce. This dish is indulgent, restaurant-quality, and surprisingly easy to make at home. Perfect for a date night, family dinner, or a solo treat, it’s comfort food that feels fancy with zero fuss.
Ingredients
For the Mashed Potatoes:
-
2 lbs Yukon Gold or Russet potatoes, peeled and cubed
-
½ cup warm milk
-
¼ cup butter
-
Salt, to taste
For the Shrimp:
-
1 lb large shrimp (peeled & deveined)
-
2 tbsp olive oil
-
1 tsp paprika (sweet or smoked)
-
1 tsp garlic powder
-
Salt & black pepper, to taste
For the Creamy Garlic Parmesan Sauce:
-
2 tbsp butter
-
4 cloves garlic, minced
-
1 cup heavy cream
-
½ cup freshly grated Parmesan cheese
-
1 tsp Dijon mustard (optional)
-
Salt & pepper, to taste
-
Fresh thyme or parsley, for garnish
Instructions
1. Make the Mashed Potatoes:
Place potatoes in a large pot of cold, salted water. Bring to a boil, then simmer for 15–20 minutes until fork-tender. Drain and return to pot to steam off excess water. Mash with warm milk and butter until creamy. Keep warm.
2. Cook the Shrimp:
Pat shrimp dry. Toss with olive oil, paprika, garlic powder, salt, and pepper. Heat a skillet over medium-high heat and cook shrimp 1–2 minutes per side until pink and opaque. Remove and set aside.
3. Prepare the Sauce:
In the same skillet, melt butter over medium heat. Add garlic and sauté 60 seconds. Stir in heavy cream, Parmesan, and Dijon mustard. Simmer 3–4 minutes until sauce thickens and cheese melts. Season with salt and pepper.
4. Combine:
Turn off heat, add shrimp to the sauce, and gently toss to coat.
5. Plate:
Spoon mashed potatoes onto plates, create a small well, and arrange shrimp and sauce on top. Garnish with thyme or parsley and extra Parmesan if desired. Serve immediately.
Notes
-
Lemon Lover’s: Add lemon zest to shrimp and a squeeze of juice to the sauce.
-
Spicy Kick: Add red pepper flakes to shrimp or cayenne to sauce.
-
Alternate Protein: Chicken or scallops work beautifully.
-
Lighter Option: Serve with cauliflower mash or zucchini noodles.
-
Mushroom Magic: Sauté cremini mushrooms in the pan before adding sauce.
Nutritional Information*
Per Serving (1 of 4): Calories: ~560 | Protein: 32g | Carbohydrates: 40g | Fat: 30g
*This information is provided as an estimate only and may vary based on specific ingredients and portion sizes.
Final Thoughts: A Dish Worth Savoring
And just like that, you’ve done it. You’ve transformed simple, humble ingredients into a symphony of flavor and comfort that’s sure to become a regular in your recipe rotation. This Garlic Butter Shrimp with Creamy Parmesan Sauce over Mashed Potatoes is more than just a meal; it’s an experience. It’s the satisfying sizzle, the intoxicating aroma that fills your home, and the quiet, happy moment when everyone at the table digs in and just… smiles.
It’s a reminder that you don’t need a special occasion to create something special. Sometimes, the most memorable moments are born on a regular Tuesday, gathered around a table with good food and even better company.
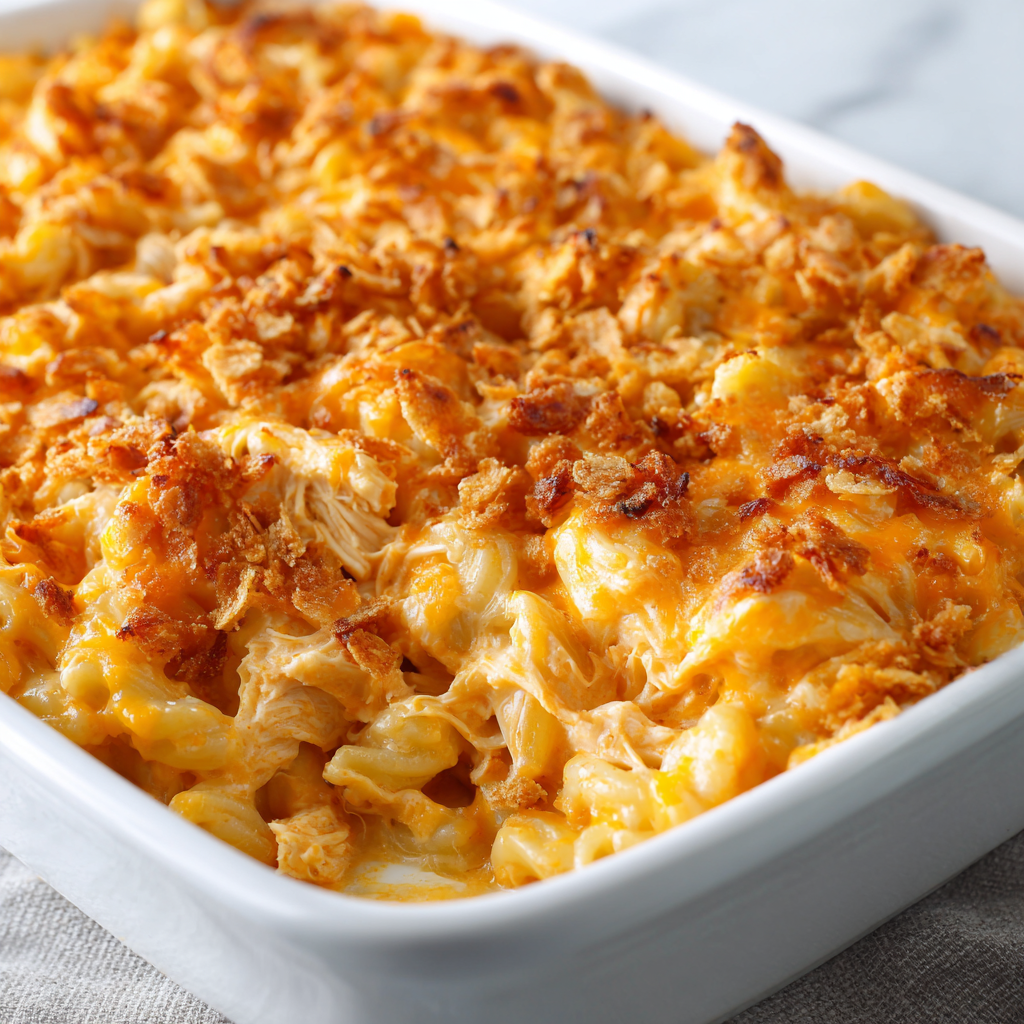
Buffalo Chicken Mac and Cheese Bake
Let’s Turn Up the Heat on Comfort Food
Hey there, friend! Come on in, grab an apron, and get ready to make your kitchen smell absolutely incredible. If you’ve ever found yourself torn between the creamy, soul-soothing embrace of classic mac and cheese and the spicy, tangy thrill of buffalo chicken wings, I have fantastic news: you don’t have to choose. Today, we’re marrying these two iconic comfort foods into one spectacular, crowd-pleasing dish: my Buffalo Chicken Mac and Cheese Bake.
This isn’t just any casserole. This is the main event. It’s the dish that disappears first at potlucks, the one that makes game day feel like a five-star event, and the ultimate cozy dinner that has everyone scraping the baking dish clean. We’re talking tender pasta and juicy shredded chicken swirled in a luxuriously creamy, subtly tangy cheese sauce that’s got just the right amount of kick. Then, we top it all off with a blanket of more melted cheese and an optional but highly recommended buttery, crunchy topping for that perfect textural contrast.
I promise you, this recipe is as easy as it is impressive. You don’t need any fancy techniques or hard-to-find ingredients. We’re using simple, honest food to create something truly unforgettable. So, preheat that oven, because we’re about to create some magic together. Let’s get cooking!
The Party That Started It All
This recipe was born out of a happy little kitchen accident, as the best ones often are. It was years ago, during a big playoff game at our house. I’d made a huge tray of my classic mac and cheese and a massive platter of slow-cooker buffalo chicken sliders. As the game went into double overtime, the hunger levels hit a new high, and the two dishes ended up right next to each other on the buffet table.
I watched as my friend, Sarah, absolutely notorious for her “plate stacking,” decided to spoon a generous helping of the saucy buffalo chicken right on top of her mac and cheese. She took one bite, her eyes went wide, and she literally grabbed my arm. “Olivia. You have to try this. This is it. This is THE dish.”
We all followed her lead, creating a bit of a buffet table mash-up mess, and the consensus was immediate and unanimous: this combination was legendary. The very next week, I was in my kitchen, apron on, determined to perfect the fusion. After a few tweaks (and a few very happy taste-testers), this bake was officially added to the permanent roster. It’s been a star player ever since, bringing people together one delicious, cheesy, spicy spoonful at a time.
Gathering Your Flavor All-Stars
Here’s everything you’ll need to bring this glorious bake to life. I’ve included some of my favorite insights and swaps to make this recipe your own!
- 2 cups shredded cooked chicken: This is your protein powerhouse! I love using the meat from a store-bought rotisserie chicken for ultimate ease and flavor. Leftover grilled or baked chicken works perfectly too. For a shortcut, canned chicken (drained well) can work in a pinch!
- 3 cups cooked elbow pasta: The classic vessel for all that cheesy goodness. Elbows are great because their curves trap the sauce. Feel free to use cavatappi, shells, or even rotini for fun twists! Pro tip: cook your pasta just to al dente—it will soften a bit more while baking and won’t turn mushy.
- 8 oz cream cheese, softened: The secret weapon for ultra-creamy, luxuriously smooth sauce. Let it sit on the counter for an hour before you start. If you forget, you can soften it in the microwave in 15-second bursts. For a lighter version, Neufchâtel cheese works beautifully.
- ½ cup ranch dressing: This adds a cool, herby tang that balances the heat of the buffalo sauce perfectly. Use your favorite brand, homemade, or even a blue cheese dressing if you’re a traditional wing lover!
- 2 cups shredded sharp cheddar cheese: Please, I beg you, shred your own cheese! Pre-shredded bags contain anti-caking agents that can make your sauce grainy. A block of sharp cheddar grated fresh will melt into silky, gooey perfection. I use half in the sauce and half on top.
- ½ cup buffalo sauce (adjust to taste): This is where you control the heat! I use Frank’s RedHot because it’s the classic wing sauce. Start with ½ cup if you’re sensitive to spice, and you can always add more. For more flavor and less heat, a “mild” buffalo wing sauce is a great option.
- ½ cup crushed Ritz crackers (optional): The crowning glory! This buttery, crunchy topping is a non-negotiable for me. It provides the most satisfying contrast to the creamy pasta below.
- 2 tbsp melted butter (optional, for topping): Mixed with the cracker crumbs, it creates that golden, crunchy crust we dream about.
Let’s Build Our Masterpiece, Step-by-Step
Ready to layer up the flavors? Follow these steps for a foolproof, fantastic result. I’ve packed each one with my best chef hacks to ensure your success!
Step 1: Preheat and Prep. Preheat your oven to 375°F (190°C). Take a moment to grease your 9×13 inch baking dish with a little butter or non-stick spray. This simple step guarantees an easy cleanup and those coveted crispy cheese edges everyone fights over.
Step 2: Create the Creamy Dream Base. In a large mixing bowl, combine the softened cream cheese, ranch dressing, buffalo sauce, and one cup of your freshly shredded cheddar cheese. Now, roll up your sleeves and mix until it’s completely smooth and harmonious. A silicone spatula is my tool of choice here—it scrapes the bowl clean and mixes efficiently. Taste it! This is your chance to adjust the spice level. Want more kick? Add another tablespoon of buffalo sauce.
Step 3: Bring It All Together. Now for the fun part! Add your cooked (and drained) pasta and the shredded chicken to the bowl with your sauce. Use a gentle folding motion to combine everything. You want every single piece of pasta and every strand of chicken to be lovingly coated in that creamy, spicy, tangy sauce. Don’t stir too vigorously—we’re keeping those pasta shapes intact!
Step 4: The Grand Transfer & First Cheese Layer. Carefully pour the entire mixture into your prepared baking dish. Use your spatula to spread it out into a nice, even layer. Now, shower the top with the remaining one cup of cheddar cheese. This is going to create that beautiful, molten, cheesy lid we all know and love.
Step 5: The Crunchy Crown (Don’t Skip This!). If you’re going for the topping (and you really should), place your Ritz crackers in a zip-top bag and crush them with your hands or a rolling pin. You want a mix of fine crumbs and a few larger pieces for texture. Drizzle in the melted butter, seal the bag, and shake it until the crumbs are evenly coated. Sprinkle this buttery goodness evenly over the cheese layer.
Step 6: Bake to Perfection. Place your beautiful creation in the preheated oven, uncovered, for 25-30 minutes. You’re waiting for that magical moment: the edges should be bubbling vigorously, and the top should be a gorgeous, golden brown. If the topping is browning too quickly, you can lay a small piece of foil loosely over the top for the last few minutes.
Step 7: The Hardest Part—Wait! I know, the aroma is torture. But trust me on this: let the bake rest for about 5-10 minutes after pulling it out of the oven. This allows the sauce to thicken up slightly, making it easier to serve beautiful, clean scoops instead of a cheesy lava flow.
How to Serve This Crowd-Pleaser
Presentation is part of the fun! I love serving this right from the baking dish at the center of the table for that cozy, family-style vibe. Use a large spoon to scoop down to the bottom, ensuring you get all the layers in each serving. The perfect plate includes a generous square of the bake, perhaps with a fresh sprinkle of chopped chives or parsley for a pop of color. The essential companions? Extra buffalo sauce for the heat-seekers, a big dollop of cool ranch or blue cheese dressing for dipping, and a handful of crisp celery sticks on the side to complete the “wing night” experience. It’s the ultimate comfort food plate!
Make It Your Own: Delicious Twists
The beauty of this recipe is its versatility! Here are a few ways to switch it up:
- Blue Cheese Bliss: Swap the ranch dressing for blue cheese dressing and add ½ cup of crumbled blue cheese to the sauce mixture. A must for blue cheese fanatics!
- Vegetarian Vibes: Simply omit the chicken and add in a cup of roasted cauliflower florets or broccoli for a veggie-packed version that’s just as satisfying.
- Extra Veggie Boost: Sauté a finely diced celery and carrot rib with a little onion and mix it in with the pasta for hidden nutrients and great flavor.
- Bacon Bomb: Because bacon makes everything better. Top the finished bake with ½ cup of cooked, crumbled bacon along with the cracker topping.
- Lightened Up: Use low-fat cream cheese, Greek yogurt instead of ranch, and reduced-fat cheese. The flavor will still be fantastic!
From My Kitchen to Yours: Chef’s Notes
Over the years, this recipe has seen many game days and potlucks, and it’s evolved a little each time. I once accidentally used a whole cup of buffalo sauce because I was chatting away with my sister—it was SPICY, but my brother-in-law declared it the best batch ever! I’ve also learned that this bake freezes beautifully. Assemble it completely (without baking), wrap it tightly in a few layers of plastic wrap and foil, and freeze for up to 3 months. Thaw in the fridge overnight and then bake as directed, adding a few extra minutes to the time. It’s my secret weapon for having a homemade meal ready for last-minute guests. Most importantly, have fun with it! Cooking is about joy, not perfection.
Your Questions, Answered!
Q: My sauce seemed a little thick before baking. Is that normal?
A: Absolutely! The pasta will continue to absorb liquid as it bakes, and the cream cheese and shredded cheese will melt into a perfectly creamy sauce. A thick mixture going into the oven is exactly what you want. If you’re concerned, you can reserve a tablespoon or two of the pasta cooking water and mix it in to loosen it up slightly.
Q: Can I make this ahead of time?
A: You sure can! Follow steps 1-5 to assemble the dish, cover it tightly with plastic wrap, and refrigerate for up to 24 hours. When you’re ready, let it sit on the counter for 20-30 minutes while the oven preheats, then bake as directed. You might need to add 5-10 minutes to the baking time since it’s starting from cold.
Q: What’s the best pasta shape to use besides elbows?
A: Any short pasta with nooks and crannies is wonderful! Cavatappi (corkscrews) are my second favorite—their spirals hold onto the sauce incredibly well. Shells, rotini, or even penne are all excellent choices.
Q: My cheese topping didn’t get golden brown. What happened?
A: This usually means your oven rack is too low. For optimal browning, make sure your baking dish is in the center of the oven. If it’s still not browning to your liking in the last few minutes, you can switch the oven to a quick broil setting—but WATCH IT CLOSELY! It can go from golden to burnt in seconds.
Buffalo Chicken Mac and Cheese Bake
Description
Hey friend! Imagine the creamy, cheesy magic of classic mac and cheese meeting the bold, tangy kick of buffalo chicken. That’s exactly what we’re making today: a warm, indulgent bake that’s perfect for game day, potlucks, or a family dinner that disappears in minutes. With tender pasta, shredded chicken, and a luscious buffalo-cheese sauce, this dish hits all the comfort-food notes. Optional crunchy topping? Absolutely recommended.
Ingredients
-
2 cups shredded cooked chicken (rotisserie or leftover chicken works best)
-
3 cups cooked elbow pasta (cavatappi, shells, or rotini are fine too)
-
8 oz cream cheese, softened
-
½ cup ranch dressing (or blue cheese for a twist)
-
2 cups shredded sharp cheddar cheese, divided
-
½ cup buffalo sauce (adjust to taste)
-
½ cup crushed Ritz crackers (optional)
-
2 tbsp melted butter (for topping, optional)
Instructions
1. Preheat & Prep:
Preheat oven to 375°F (190°C). Grease a 9×13 inch baking dish with butter or non-stick spray.
2. Make the Sauce:
In a large bowl, combine softened cream cheese, ranch dressing, buffalo sauce, and 1 cup cheddar. Mix until smooth. Taste and adjust spice if desired.
3. Combine Pasta & Chicken:
Gently fold cooked pasta and shredded chicken into the sauce until every piece is coated.
4. Layer & Cheese:
Transfer the mixture to the prepared dish. Sprinkle the remaining 1 cup cheddar evenly over the top.
5. Add Crunchy Topping (Optional):
Crush Ritz crackers in a zip-top bag, mix with melted butter, and sprinkle over cheese.
6. Bake:
Bake uncovered for 25-30 minutes, until bubbling and golden. If the topping browns too quickly, loosely cover with foil.
7. Rest Before Serving:
Let bake rest 5-10 minutes. Serve with extra buffalo sauce, ranch/blue cheese, and celery sticks for the ultimate comfort experience.
Notes
-
Blue Cheese Lover: Swap ranch for blue cheese and add ½ cup crumbled blue cheese.
-
Vegetarian: Skip chicken and add roasted cauliflower or broccoli.
-
Extra Veggies: Sauté diced celery, carrot, and onion for hidden nutrients.
-
Bacon Bomb: Top with ½ cup crumbled bacon before baking.
-
Make Ahead: Assemble up to 24 hours ahead, refrigerate, then bake (add 5-10 minutes if starting cold).
-
Cheese Tip: Shred cheese yourself to avoid grainy sauce from pre-shredded cheese.
Nutrition
- Calories: 460 cal Per Serving
- Fat: 22g
- Carbohydrates: 32g
- Protein: 28g
Nutritional Information*
*This is an estimated nutritional breakdown for one serving (without the optional cracker topping) and will vary based on specific ingredients used.
Per Serving (1 of 6): Calories: 460 | Protein: 28g | Carbohydrates: 32g | Fat: 22g
Final Thoughts: The Ultimate Comfort Food Mash-Up
There you have it! From my happy kitchen accident to your dinner table, this Buffalo Chicken Mac and Cheese Bake is more than just a meal—it’s an experience. It’s the glorious, cheesy, spicy answer to the question of what to make when you want to impress a crowd, comfort your family, or simply treat yourself to something spectacularly delicious.
Remember, the best dishes are the ones made with a dash of creativity and a heaping spoonful of joy. Don’t be afraid to make it your own, adjust the heat to your liking, and most importantly, share it with people who appreciate a good, hearty, flavor-packed bite.
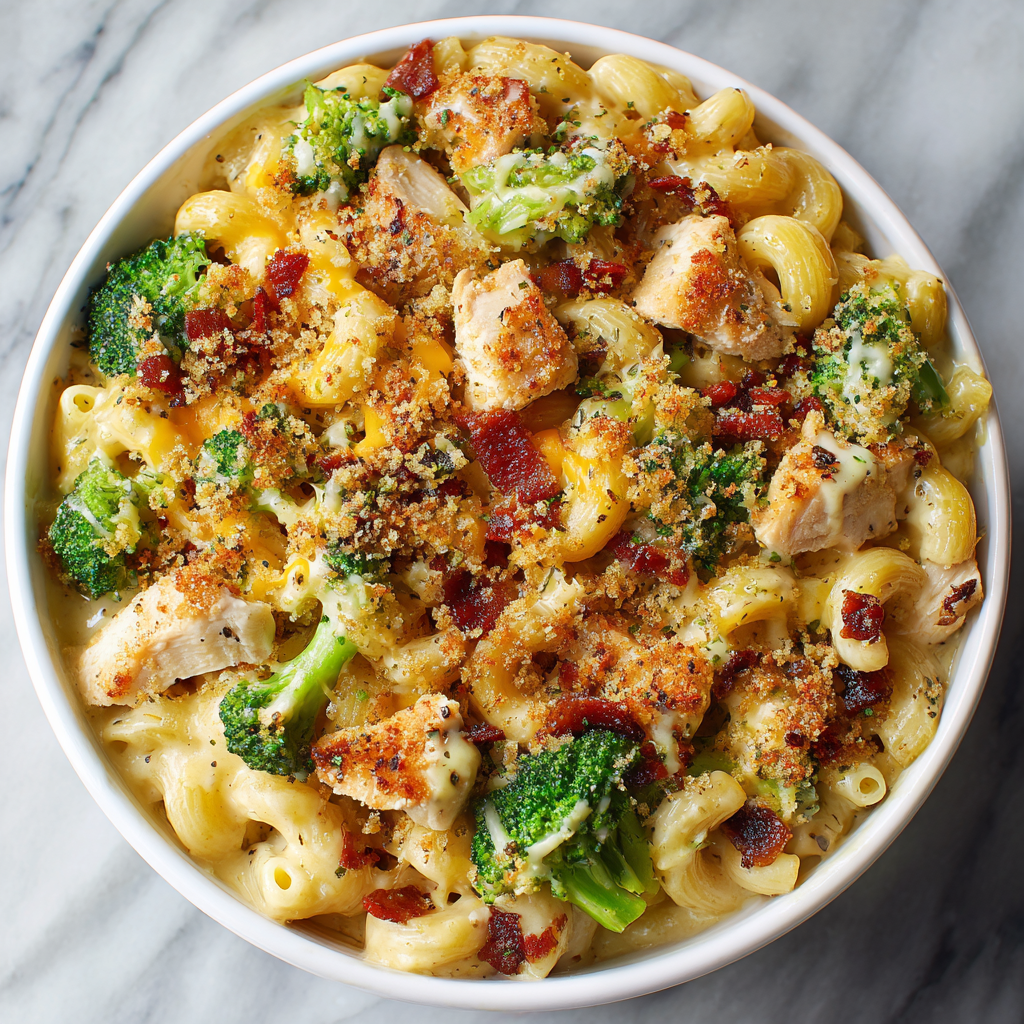
Chicken Mac and Cheese with Bacon and Broccoli
Welcome to My Cozy Kitchen!
Hey there, friend! Come on in, grab an apron, and let’s get cooking. If your idea of a perfect meal involves a big, comforting bowl of creamy, cheesy pasta loaded with savory chicken, crispy bacon, and fresh green broccoli, then you and I are about to become the best of kitchen buddies. This isn’t just any mac and cheese; this is a hearty, one-pot wonder designed to feed a crowd (or your future self with amazing leftovers). The smell alone will have everyone gathered around the stove, plates in hand, begging for a taste. We’re talking about the kind of meal that turns a regular Tuesday into a celebration. It’s cozy, it’s customizable, and it’s about to become your new favorite go-to recipe. So, preheat that pot, and let’s make some magic together!
The Mac and Cheese That Started It All
This recipe takes me right back to my first-ever potluck dinner as a newlywed. I was so nervous! I wanted to bring something that screamed “I’m a competent and fun adult!” but my cooking skills were… a work in progress. My grandmother, a woman who believed butter and cheese could solve most of life’s problems, whispered her secret: “Take something everyone loves, and just make it more.” So, I took my basic mac and cheese and loaded it up with everything I had in the fridge—chicken, bacon, broccoli. It was a Hail Mary pass onto a platter. The second I walked in, the giant pot was like a magnet. It was the first dish to disappear, and I spent the whole night beaming, giving out the recipe on napkins. It taught me that the best food isn’t about being fancy; it’s about being generous, a little brave, and utterly delicious. This dish is that spirit in a pot—a little bit of comfort, a whole lot of love, and always a crowd-pleaser.
Gathering Your Ingredients
Here’s everything you’ll need to create this masterpiece. The beauty of this recipe is its flexibility, so don’t stress if you need to make a swap or two!
- 2 tbsp olive oil: Our cooking fat to get that chicken beautifully golden. Avocado oil works great here too.
- 1 lb bacon, diced: For that irreplaceable smoky, salty, crispy goodness. For a leaner option, try turkey bacon or even pancetta.
- 2 lb chicken breasts: I like to halve them lengthwise for quicker, more even cooking. Feel free to use chicken thighs for even more juicy flavor!
- 1 tsp kosher salt, 1/2 tsp black pepper, 1 tsp paprika: This simple trio is our flavor base for the chicken. The paprika adds a subtle warmth and gorgeous color.
- 8 cloves garlic, minced: Don’t you dare skimp! Fresh is best for that punchy, aromatic depth.
- 24 oz (1.5 lb) elbow pasta: The classic mac and cheese shape! Its nooks and crannies hold onto all that creamy sauce. Cavatappi or shells are fun alternatives.
- 8 cups low-sodium chicken broth: Using low-sodium allows you to control the salt level, especially since the bacon and cheese bring their own saltiness.
- 24 oz evaporated milk (2 cans): My secret weapon for ultra-creamy, non-grainy sauce without making a roux! It’s magic.
- 20 oz sharp cheddar cheese, freshly shredded: PLEASE shred your own! Pre-shredded bags contain anti-caking agents that can make your sauce grainy and less smooth. Sharp cheddar gives us that classic, tangy flavor.
- 8 oz Monterey Jack cheese, shredded: Our “twist” cheese! It melts like an absolute dream, adding a buttery, mild flavor that complements the cheddar perfectly.
- 24 oz broccoli florets: Fresh is ideal for the best texture and bright green color. You can use frozen—just thaw and pat dry first to avoid watering down the sauce.
- 2 tsp Dijon mustard: The “why is this so good?!” ingredient. It doesn’t taste mustardy; it just adds a incredible depth of flavor and helps emulsify the sauce.
For the Optional Crunchy Topping (Highly Recommended!):
- 1 cup panko breadcrumbs: They stay so much crispier than regular breadcrumbs.
- 2 tbsp butter, melted: To toast the panko to golden perfection.
- 1/2 cup Parmesan cheese: For a salty, savory kick in every crunchy bite.
Let’s Get Cooking: Your Step-by-Step Guide
Follow these steps, and you’ll have a perfect, creamy, one-pot mac and cheese in no time. I’ve packed each step with my best tips and tricks!
Step 1: Bacon First! Place your large pot or Dutch oven over medium heat. Add the diced bacon and cook, stirring occasionally, until it’s beautifully crispy and has rendered its fat. This takes about 8-10 minutes. Use a slotted spoon to remove the bacon to a paper towel-lined plate, leaving about 1 tablespoon of that glorious bacon drippings in the pot. This liquid gold is packed with flavor we’re going to use to cook everything else!
Step 2: Golden Chicken: Pat your chicken breasts dry with a paper towel—this is the key to getting a good sear, not a steam! Halve them lengthwise if they’re large. Season both sides generously with the salt, pepper, and paprika. Add the olive oil to the pot with the bacon drippings. Place the chicken in the pot and cook for about 4-5 minutes per side, until it’s golden brown on the outside and cooked through. Remove the chicken to a cutting board to rest. It will finish cooking from residual heat, and resting ensures it stays juicy.
Step 3: Pasta Power: Now, to the same pot, add the minced garlic. Stir for just 30 seconds until fragrant—don’t let it burn! Immediately add the dry elbow pasta. Pour in the chicken broth and evaporated milk. Give everything a good stir, scraping up any browned bits from the bottom of the pot (that’s pure flavor!). Bring the liquid to a lively simmer, then reduce the heat to medium-low to maintain the simmer. Cook for 8-10 minutes, stirring frequently to prevent the pasta from sticking. You want the pasta to be just al dente (slightly firm to the bite) because it will continue to cook a little later.
Step 4: The Big Cheese: Turn the heat down to low. It’s cheese time! Gradually add the shredded cheddar and Monterey Jack cheeses, one handful at a time, stirring constantly and waiting for each addition to melt before adding the next. This patience is the secret to a smooth, velvety sauce, not a clumpy one. Once all the cheese is melted and creamy, stir in the Dijon mustard. Taste it! This is where you can adjust seasoning—add more salt or pepper if you like.
Step 5: Bring It All Home: While the cheese was melting, you should have diced your rested chicken. Now, add the diced chicken, crispy bacon, and broccoli florets to the cheesy pasta. Stir gently but thoroughly to combine. Let it cook for another 2-3 minutes, just until the broccoli turns bright green and is tender-crisp. You want a little bite to it for texture! Remove the pot from the heat.
Step 6: The Optional (But Amazing) Finishing Touch: If you’re going for the baked version, preheat your broiler to high. In a small bowl, mix the panko, melted butter, and Parmesan cheese. Transfer the mac and cheese to a 9×13 inch baking dish (or keep it in your oven-safe pot!). Sprinkle the panko mixture evenly over the top. Place it under the broiler for 2-3 minutes, WATCHING IT CONSTANTLY, until the topping is golden brown and crunchy. And that’s it! You’ve just created comfort food perfection.
How to Serve This masterpiece
This dish is a complete meal in a pot, so serving is a breeze! Ladle generous portions into deep bowls. The steam rising, the cheese stretching—it’s a beautiful thing. For a lovely touch, garnish with a little extra sprinkle of fresh chopped parsley or chives and a crack of black pepper. It pairs wonderfully with a simple side salad with a light vinaigrette to cut through the richness, and a crisp glass of white wine or a cold cider. Most importantly, serve it with a big smile to your very happy, hungry people.
Make It Your Own: Delicious Variations
The fun doesn’t stop here! This recipe is a fantastic canvas for your creativity.
- Spicy Southwest: Swap the paprika for 1 tbsp of taco seasoning. Use a blend of pepper Jack and cheddar cheese. Stir in a 4 oz can of diced green chiles with the broccoli.
- Everything But the Kitchen Sink: Add a cup of frozen peas and carrots with the broccoli for extra veggie power and color.
- Gluten-Free/Different Pasta: Use your favorite gluten-free pasta and ensure your broth is gluten-free. The cooking time may vary slightly, so check the package instructions.
- Buffalo Chicken: Toss the diced cooked chicken in 1/2 cup of buffalo sauce before adding it back in. Use a colby jack and blue cheese crumble combo for the cheeses!
- Lighter Version: Use turkey bacon, low-fat evaporated milk, and reduced-fat cheese. The sauce will be slightly less rich but still delicious.
From My Kitchen to Yours: Chef’s Notes
This recipe has evolved so much from that first nervous potluck attempt! I’ve learned a few things along the way. First, the Dijon mustard was a happy accident—I knocked it into the pot once and decided to just roll with it. Best mistake ever! Second, I’ve found that letting the finished mac and cheese sit for 5-10 minutes off the heat before serving allows the sauce to thicken up perfectly. It goes from “perfect” to “sublime.” And a funny story: I once was talking so much while cooking that I added the cheese before the pasta was done. The sauce got a bit grainy, but you know what? My friends still ate every last bite and asked for the recipe. It’s a forgiving, wonderful dish. Don’t be afraid of it!
Your Questions, Answered
Q: My sauce seems a little thin. How can I thicken it up?
A: Don’t worry! First, let it sit for 5-10 minutes; the pasta will continue to absorb the liquid. If it’s still too thin, make a quick slurry by mixing 1 tablespoon of cornstarch with 2 tablespoons of cold water or milk. Stir this into the mac and cheese and simmer for another minute or two until thickened.
Q: Can I make this ahead of time?
A: Absolutely! Assemble the entire dish (without the panko topping) and let it cool completely. Store it covered in the fridge for up to 2 days. When ready, you may need to add a splash of milk or broth when reheating as the pasta will absorb liquid. Reheat on the stovetop over medium-low heat, stirring often, or in a 350°F oven until bubbly. Then add the panko topping and broil.
Q: Why did my cheese sauce turn out grainy or clumpy?
A: This usually happens for one of two reasons: 1) The heat was too high when the cheese was added. Always add cheese off the heat or on the lowest possible setting. 2) Pre-shredded bagged cheese was used. These cheeses are coated to prevent clumping in the bag, which also prevents them from melting smoothly into a sauce. Freshly shredding your cheese is the #1 way to guarantee a silky-smooth sauce.
Q: Can I use frozen broccoli?
A: You can! There’s no need to cook it first. Thaw it completely and pat it very dry with paper towels to remove excess moisture. Add it at the very end, as directed, and just heat it through. This prevents your sauce from becoming watery.
Chicken Mac and Cheese with Bacon and Broccoli
Description
This one-pot wonder is comfort food at its finest—creamy, cheesy pasta loaded with juicy chicken, smoky bacon, and crisp-tender broccoli. It’s hearty enough to stand on its own, feeds a crowd, and is always the first dish to vanish at the table.
Ingredients
Base
-
2 tbsp olive oil
-
1 lb bacon, diced
-
2 lb chicken breasts (or thighs), halved lengthwise
-
1 tsp kosher salt
-
½ tsp black pepper
-
1 tsp paprika
-
8 cloves garlic, minced
-
24 oz elbow pasta (1.5 lb)
-
8 cups low-sodium chicken broth
-
24 oz evaporated milk (2 cans)
-
20 oz sharp cheddar cheese, freshly shredded
-
8 oz Monterey Jack cheese, shredded
-
24 oz broccoli florets
-
2 tsp Dijon mustard
Optional Topping
-
1 cup panko breadcrumbs
-
2 tbsp melted butter
-
½ cup Parmesan cheese
Instructions
-
Cook the bacon: In a large pot/Dutch oven over medium heat, cook bacon until crispy (≈8–10 min). Remove with a slotted spoon; leave 1 tbsp bacon fat in pot.
-
Sear the chicken: Season chicken with salt, pepper, and paprika. Add olive oil to pot. Cook chicken 4–5 min per side until golden and cooked through. Transfer to rest.
-
Cook pasta: Add garlic, sauté 30 sec. Stir in dry pasta, broth, and evaporated milk. Scrape up browned bits. Simmer 8–10 min, stirring often, until pasta is al dente.
-
Make sauce: Reduce heat to low. Add cheeses slowly, a handful at a time, stirring until smooth. Stir in Dijon mustard. Taste and adjust seasoning.
-
Combine: Dice chicken. Stir in chicken, bacon, and broccoli. Cook 2–3 min until broccoli is bright green and tender-crisp.
-
Optional topping: Mix panko, butter, and Parmesan. Sprinkle over pasta in an oven-safe dish. Broil 2–3 min until golden and crisp.
Notes
-
Rest chicken before dicing—this keeps it juicy.
-
Add cheese slowly over low heat for the creamiest sauce.
-
Let the mac rest 5–10 min before serving; the sauce thickens beautifully.
Nutrition
- Calories: 790 cal Per Serving
- Fat: 38g
Nutritional Information (Per Serving)
Please note: This is an estimate and will vary based on specific ingredients used.
Yield: 12 Servings | Serving Size: Approximately 1.5 cups
Calories: ~790 | Total Fat: 38g | Saturated Fat: 18g | Cholesterol: 145mg | Sodium: 1120mg | Total Carbohydrates: 58g | Dietary Fiber: 6g | Sugar: 10g | Protein: 45g
Final Thoughts: A Bowl Full of Comfort
Well, friend, we’ve done it. We’ve transformed simple ingredients into a pot of pure, unadulterated comfort. This isn’t just a recipe; it’s a warm hug in a bowl, a solution for busy weeknights, and the star of every potluck. I hope it brings as much joy to your table as it has to mine over the years.
Remember, the best meals are the ones made with a pinch of adventure and a whole lot of heart. Don’t be afraid to make this recipe your own—tweak it, add your favorite ingredients, and create your own kitchen stories. That’s what cooking is all about.
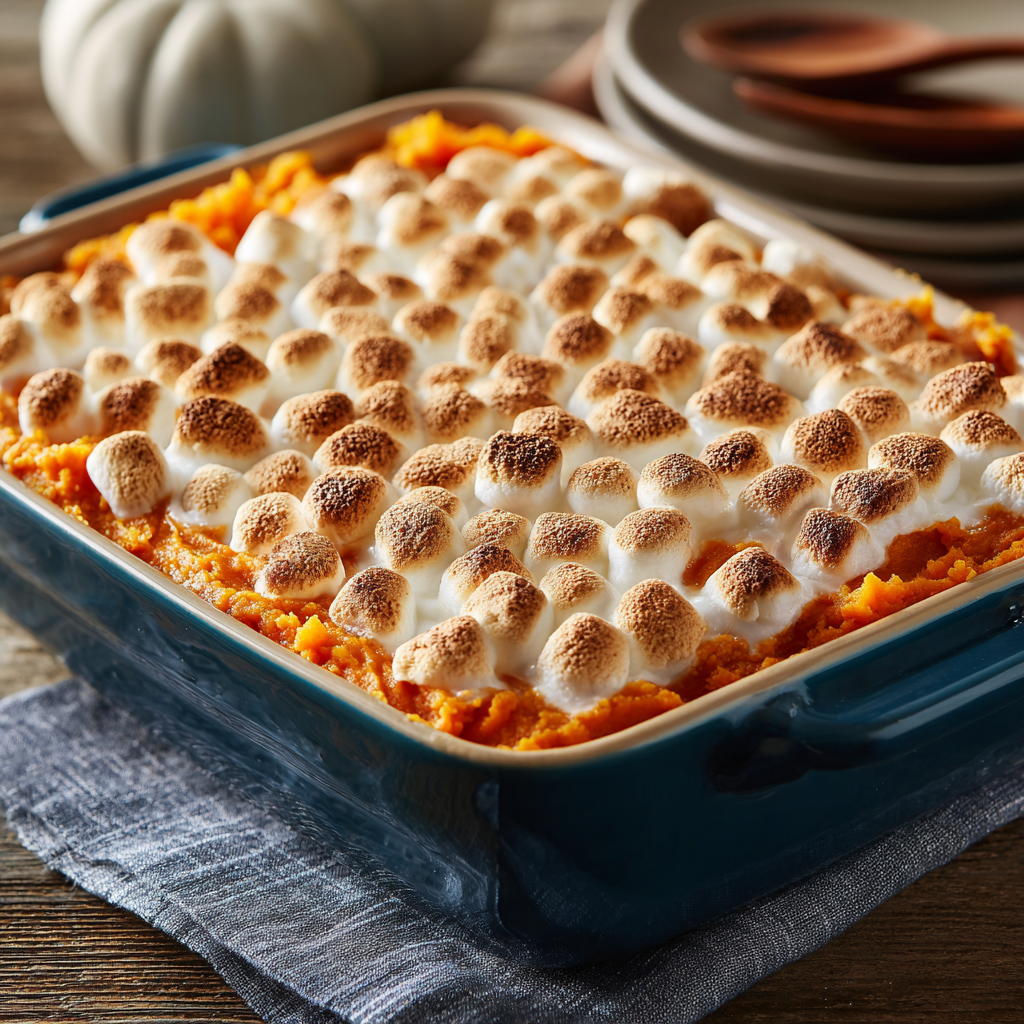
Sweet Potato Casserole with Marshmallows
There’s Magic in That First Bite
Hey there, friend! Come on in, grab an apron, and let’s get cozy. Is there any smell in the world that screams “the holidays are here!” quite like the scent of cinnamon and sweet potatoes baking, topped with those perfectly toasted, gooey marshmallows? I don’t think so. This dish isn’t just a side; it’s a headline act. It’s the one everyone secretly saves room for, the one that sparks a chorus of “oohs” and “aahs” when it comes out of the oven, and the one that tastes like a warm, sweet hug.
I’m a firm believer that the best recipes are the ones that do double duty: they’re incredibly delicious, but they’re also incredibly simple. This Sweet Potato Casserole with Marshmallows is the absolute gold standard of that philosophy. We’re taking humble, wholesome ingredients and transforming them into something spectacularly festive. No fancy culinary degree required—just a willingness to whip, spread, and bake your way to holiday hero status. So, let’s preheat those ovens and create some magic together. I promise, this recipe will become a non-negotiable part of your family’s feast for years to come.
The Marshmallow That Started It All
My love affair with this casserole started, as many great food stories do, in my Grandma Eleanor’s kitchen. I was maybe seven years old, perched on a wobbly stool, designated official “taste-tester.” My job was crucial: sample the mashed sweet potatoes and confirm the cinnamon levels were just right. Grandma would hand me the wooden spoon, I’d take a serious bite, and with a mouthful of orange goodness, I’d give a solemn nod of approval.
But the real magic happened when she brought out the bag of jet-puffed marshmallows. She’d let me pour them into a big bowl, and I’d sneak a few (or ten) while she wasn’t looking. Then came the best part—scattering them over the top of the casserole. It looked like a fluffy, white cloud covering a sunset. When it came out of the oven, transformed into a bubbling, golden-brown landscape, my dad would always joke that we needed to guard it from “marshmallow snatchers” (usually him). That first bite, a perfect balance of creamy sweet potato and crispy, melty marshmallow, is a core memory. It’s more than a recipe; it’s a taste of home, of laughter, and of love. And that’s exactly the feeling I want to help you create in your own kitchen.
Gathering Your Cozy Ingredients
Here’s your shopping list for this symphony of sweetness and comfort. Remember, the best dishes start with the best ingredients!
- 4 large sweet potatoes (about 3 lbs), peeled and cubed: This is our star! Look for firm potatoes with smooth, deep orange skin. Chef’s Insight: Don’t have time to peel and boil? A 40-oz can of pure sweet potato puree (not pie filling!) works in a serious pinch. Just reduce the milk by a tablespoon or two as it’s often a bit wetter.
- 1/2 cup unsalted butter, melted: For rich, creamy depth. Using unsalted lets us control the salt level perfectly. Substitution Tip: For a dairy-free version, high-quality vegan butter works wonderfully here.
- 1/2 cup brown sugar, packed: This adds a deep, molasses-like sweetness that white sugar just can’t match. Substitution Tip: Coconut sugar is a great 1:1 swap for a less refined option.
- 1/4 cup milk (whole or 2%): This helps achieve that luxuriously smooth, whipped texture. Substitution Tip: Any milk you have on hand works—almond, oat, or even canned coconut milk for a hint of tropical flavor.
- 2 large eggs: Our binding agent! They give the sweet potato base structure so it’s fluffy and holds its shape, not runny. Chef’s Insight: Make sure to whisk them before adding to avoid overmixing!
- 1 tsp vanilla extract: The secret weapon that makes everything taste more… well, everything! It enhances all the other flavors.
- 1/2 tsp cinnamon & 1/4 tsp nutmeg: The dynamic duo of warmth. Chef’s Insight: For the *ultimate* flavor boost, grate your nutmeg fresh. It’s a game-changer.
- Pinch of salt: Never, ever skip this! Salt is the wingman for sweetness—it makes all the flavors pop and balance each other out.
- 3 cups mini marshmallows: The glorious, gooey, toasted crown. Minis are key because they create an even layer of melty perfection.
Let’s Build Your Casserole Masterpiece
Okay, team! Let’s turn these beautiful ingredients into the star of your table. Follow these steps, and you really can’t go wrong.
Step 1: Preheat and Prep. Crank that oven to 350°F (175°C) and grab your favorite 9×13-inch baking dish. Give it a light but thorough coating of butter, cooking spray, or a quick wipe with oil. This ensures your beautiful casserole will slide out without a fight later. Chef’s Hack: If you’re worried about sticky marshmallow overflow (a happy problem!), you can lay a sheet of foil on the rack below your dish to catch any drips.
Step 2: Cook the Sweet Potatoes. Get a large pot of water boiling and add a generous pinch of salt—it seasons the potatoes from the inside out. Add your cubed sweet potatoes and let them bubble away for about 15 minutes, or until they are completely fork-tender. You should meet zero resistance when you poke them! Chef’s Tip: Cubing them evenly is the key to them all cooking at the same rate. Drain them extremely well in a colander. Any extra water will make your casserole soupy, so let them sit and steam dry for a few minutes.
Step 3: The Great Mash & Mix. Now for the fun, cathartic part! Transfer the drained potatoes to a large mixing bowl. Using a potato masher, hand mixer, or even a sturdy fork, mash them until they are completely smooth with no lumps. Now, pour in that glorious melted butter, packed brown sugar, milk, your pre-whisked eggs, vanilla, cinnamon, nutmeg, and that all-important pinch of salt. Chef’s Hack: Use a hand mixer on medium speed for about 1-2 minutes. This incorporates air and makes the filling incredibly light and fluffy, almost like a sweet potato mousse! Just be careful not to overmix once the eggs are in.
Step 4: Spread the Love. Pour your beautifully smooth and fragrant sweet potato mixture into your prepared baking dish. Use a spatula to spread it into a gloriously even layer, getting right into the corners. We’re creating the perfect canvas for our marshmallow masterpiece.
Step 5: The Marshmallow Blanket. This is the best step. Take your 3 cups of mini marshmallows and scatter them evenly across the entire surface. Don’t be shy! You want a full, complete layer. I like to press them down *just slightly* so they nestle into the sweet potatoes and won’t roll off when you move the dish.
Step 6: Bake to Golden Perfection. Place your unbaked masterpiece in the preheated oven and bake, uncovered, for 20-25 minutes. You’re waiting for two things: the edges of the sweet potatoes to be bubbly and the marshmallows to be deeply golden brown. Chef’s Pro Tip: Keep a close eye after the 20-minute mark! Marshmallows can go from perfectly toasted to sadly scorched in a matter of minutes. That gorgeous, toasty color is what gives that incredible flavor.
Step 7: The (Brief) Tortuous Wait. I know, it’s hard. The smell is intoxicating and everyone will be hovering. But trust me, let it rest on a cooling rack for at least 5 minutes before you dive in. This allows the casserole to set slightly, making it easier to serve beautiful, clean scoops instead of a gooey (albeit delicious) mess.
How to Serve This Showstopper
Presentation is part of the fun! Use a large spoon or a square-edged serving spatula to scoop down through that marshmallow crust and into the creamy base below, ensuring everyone gets a perfect ratio of topping to filling. Serve it right from the baking dish placed on a trivet for that classic, homey feel. It pairs divinely with the savory notes of roast turkey or glazed ham, and a bright, crisp green vegetable like roasted Brussels sprouts or green beans almondine to cut through the richness. It’s the undisputed sweet queen of the savory holiday table.
Make It Your Own: Delicious Twists
Feel like playing? This recipe is a fantastic canvas for your creativity!
- Pecan Praline Crunch: Skip the marshmallows! Mix 1 cup chopped pecans, 1/2 cup brown sugar, 1/4 cup flour, and 3 tbsp melted butter. Sprinkle over the sweet potato base and bake for the same amount of time.
- Maple Kissed: Replace the brown sugar with 1/2 cup pure maple syrup and add an extra 2 tablespoons of butter. The flavor is incredible.
- Spice It Up: Add a pinch of ground ginger and a dash of allspice to the potato mixture for an even deeper spice profile.
- Bourbon Bliss: Stir 2 tablespoons of good bourbon into the sweet potato mix for a warm, adult-only kick.
- Vegan Dream: Use vegan butter, flax eggs (2 tbsp ground flaxseed + 5 tbsp water), plant-based milk, and Dandies or Trader Joe’s vegan marshmallows. It works perfectly!
From My Kitchen to Yours
This recipe has evolved so much over the years in my kitchen. I started by strictly following my grandma’s handwritten card, but I’ve made it my own. My biggest “aha!” moment was realizing that whipping the potatoes with a mixer instead of just mashing them created this ethereal, cloud-like texture that just melts in your mouth. I also learned the hard way that full-sized marshmallows don’t toast as evenly and can create chewy, sticky pockets instead of a uniform crispy-gooey layer. Minis are the undisputed champion here!
One Thanksgiving, I was so busy chatting and sipping wine that I completely forgot the casserole in the oven. The marshmallows went from golden to… well, let’s call them *extra* crispy. I was devastated, but my guests just broke off the blackened bits and declared the smoky flavor underneath “innovative.” A kitchen disaster turned into a funny story—proof that even when things don’t go perfectly, the meal and the company are what truly matter.
Your Questions, Answered!
Q: Can I make this casserole ahead of time?
A: Absolutely! You can prepare the sweet potato base (through Step 4) up to 2 days in advance. Cover it tightly with plastic wrap and store it in the fridge. When you’re ready to bake, let it sit on the counter for 30 minutes to take the chill off, top with marshmallows, and bake. You might need to add 5-10 minutes to the baking time since it’s starting from cold.
Q: Why is my casserole coming out watery?
A: The most common culprit is not draining the boiled sweet potatoes well enough. Let them sit in the colander for a good 5-10 minutes to release all their steam and moisture. Another tip is to make sure you’re using the right size of potatoes—if yours are huge, you might have exceeded the 3 lbs, which means more natural water content. The other ingredients balance that out.
Q: My marshmallows are burning before the casserole is hot! Help!
A> This is a classic oven rack problem! If your marshmallows are on the top rack too close to the heating element, they’ll burn quickly. Bake your casserole in the middle of the oven for even heating. If they are still browning too fast, you can loosely tent the dish with foil for the first 15 minutes of baking, then remove it for the last 5-10 minutes to let them get golden.
Q: Can I use yams instead of sweet potatoes?
A> In most American supermarkets, the moist, orange-fleshed vegetables labeled “yams” are actually a variety of sweet potato! True yams are starchier and less sweet. So, yes, what you find in the store will work perfectly for this recipe. Don’t sweat the label.
Sweet Potato Casserole with Marshmallows
Description
This cozy holiday classic takes humble sweet potatoes and transforms them into the star of your table. Creamy, lightly spiced, and crowned with a gooey, golden marshmallow topping, it’s a dish that tastes like a warm hug. Every bite brings nostalgia, comfort, and celebration—no holiday table feels complete without it.
Ingredients
-
4 large sweet potatoes (about 3 lbs), peeled & cubed
-
½ cup unsalted butter, melted
-
½ cup packed brown sugar
-
¼ cup milk (whole or 2%)
-
2 large eggs, whisked
-
1 tsp vanilla extract
-
½ tsp cinnamon
-
¼ tsp nutmeg
-
Pinch of salt
-
3 cups mini marshmallows
Instructions
-
Prep: Preheat oven to 350°F (175°C). Grease a 9×13″ baking dish.
-
Cook potatoes: Boil sweet potatoes in salted water until fork-tender (≈15 min). Drain very well.
-
Mash & mix: Mash potatoes smooth. Mix in butter, brown sugar, milk, eggs, vanilla, cinnamon, nutmeg, and salt. Use a hand mixer for extra lightness.
-
Assemble: Spread mixture evenly in the baking dish. Top with marshmallows in a full, even layer.
-
Bake: 20–25 min, until marshmallows are golden and filling is bubbly.
-
Rest: Cool 5 min before serving for neater scoops.
Notes
-
Drain potatoes very well—extra water = runny casserole.
-
Bake in the middle of the oven to avoid burning marshmallows.
-
For nutty crunch, swap marshmallows for a pecan praline topping.
-
Make ahead: Prep filling up to 2 days in advance; add marshmallows before baking.
Nutrition
- Calories: 280 cal Per Serving
- Sugar: 30g
- Fat: 9g
- Saturated Fat: 5.5g
- Carbohydrates: 48g
Nutritional Info (Approximate, per serving)
Yield: 10-12 servings | Serving Size: 1/12 of recipe
Calories: ~280 | Fat: 9g | Saturated Fat: 5.5g | Cholesterol: 50mg | Sodium: 85mg | Carbohydrates: 48g | Fiber: 4g | Sugar: 30g | Protein: 4g
Remember, this is a celebratory treat meant to be enjoyed for the joy and connection it brings! It’s all about balance.
Final Thoughts: A Dish That Feels Like Home
As you pull that golden, bubbling casserole from the oven and place it proudly in the center of your table, take a moment to soak it all in. You’ve just created more than a side dish; you’ve crafted a experience. The crackle of the toasted marshmallow top, the warm steam carrying scents of cinnamon and nutmeg, and the eager smiles around the table—this is the heart of the holiday season, right here.
This Sweet Potato Casserole is a beautiful reminder that the most cherished recipes aren’t about complexity or perfection. They’re about comfort, connection, and the simple, profound joy of sharing something made with love. It’s a dish that welcomes everyone to the table, evoking childhood memories for some and creating brand new traditions for others.
So serve it up with a generous heart. Watch as spoons dive through that crispy, gooey topping to the creamy sweetness below. Listen for the happy sighs and the requests for “just one more scoop.” You haven’t just followed a recipe; you’ve bottled a little bit of holiday magic.
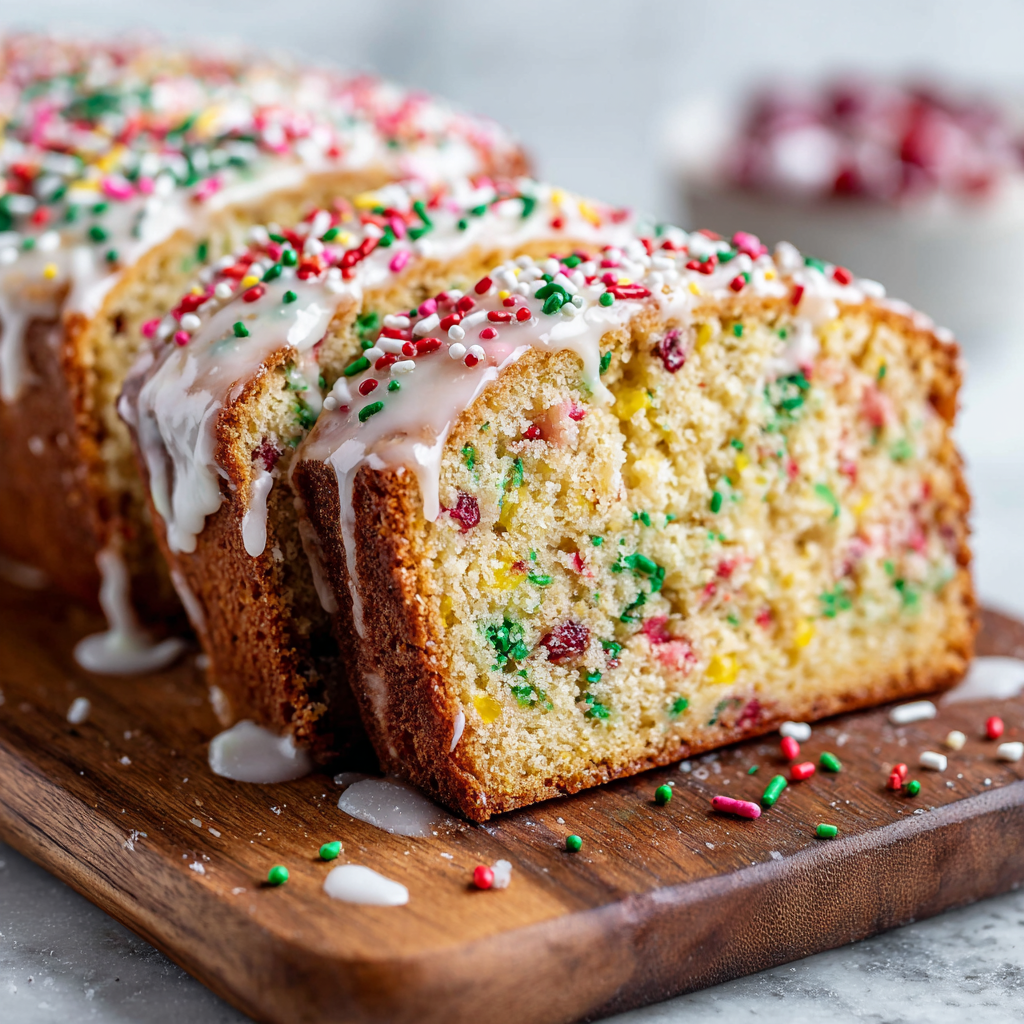
Christmas Sprinkle Buttermilk Bread
Your New Favorite Holiday Tradition: Christmas Sprinkle Buttermilk Bread
Hey there, friend! Come on in, grab an apron, and let’s get baking. There’s something magical happening in the kitchen today, and it involves rainbows of sprinkles, the tangy richness of buttermilk, and the warm, buttery scent of something truly special baking in the oven. If your idea of a perfect December day involves a cozy sweater, a festive playlist, and a counter dusted with a little bit of flour (and maybe a few rogue sprinkles), then you are absolutely in the right place.
Today, we’re making my Christmas Sprinkle Buttermilk Bread. This isn’t just any quick bread; this is a loaf that sparkles with pure joy. It’s tender, it’s sweet without being overly so, and every single slice is a confetti-filled celebration. It’s the kind of bake that makes kids’ eyes go wide with wonder and brings a nostalgic smile to every adult’s face. It’s perfect for holiday mornings with a cup of coffee, as a hostess gift that truly stands out, or as the star of your Christmas brunch spread. The best part? It’s incredibly easy to make. No yeast, no waiting for dough to rise—just simple, straightforward mixing that results in pure magic. So, let’s preheat those ovens and create something unforgettable together!
A Sprinkle of Nostalgia: Why This Bread Means So Much
This recipe always takes me right back to my grandma’s kitchen. She was the queen of “a little bit of this, a little bit of that” cooking, but her holiday baking was a precise and cherished ritual. Every Christmas Eve, she’d let me stand on a wobbly wooden stool next to her and help make what she called her “Celebration Bread.” It was a simple buttermilk loaf, but she’d let me pour in an entire cup of the brightest, most colorful sprinkles she could find. To me, it was like we were baking happiness right into the batter.
The moment it came out of the oven, she’d always say the same thing: “Olivia, look! We baked a rainbow!” She’d slice it while it was still almost too warm, the sprinkles slightly melted into colorful swirls, and we’d enjoy the first piece together. It wasn’t about fancy techniques or expensive ingredients; it was about the shared moment, the mess, and the love. That’s the spirit I’ve baked into this recipe. It’s my modern twist on her classic—a touch of almond extract for depth, a glossy glaze for extra sparkle—but its heart remains the same: simple, joyful, and made for sharing.
Gathering Your Sparkly Ingredients
Here’s everything you’ll need to create two beautiful loaves of this festive bread. The beauty of this recipe is its flexibility, so I’ve included my favorite chef insights and substitutions to make it work for you!
For the Bread (Makes 2 Loaves):
- 4 cups all-purpose flour: The sturdy foundation of our bread. For a slightly lighter crumb, you can swap one cup for cake flour, but all-purpose works perfectly.
- 2 cups sugar: This gives the bread its lovely sweetness and helps create a tender texture. Granulated sugar is ideal here.
- 3 tsp baking powder + 1 tsp baking soda: Our dynamic leavening duo! The baking powder provides the main lift, while the baking soda reacts with the acidic buttermilk to create a beautiful, tender rise. Make sure they’re fresh for the best results.
- 2 tsp kosher salt: Do not skip this! Salt is crucial for balancing all the sweetness and enhancing the overall flavor. If you’re using fine table salt, reduce to about 1 1/4 teaspoons.
- 2 cups buttermilk: The secret weapon! Buttermilk adds a wonderful tang and reacts with the leaveners for an incredibly moist, tender crumb. Chef’s Tip: No buttermilk? No problem! Make a quick substitute by placing 2 tablespoons of white vinegar or lemon juice in a measuring cup and filling it with milk to the 2-cup line. Let it sit for 5 minutes until it curdles. Good as gold!
- 2 large eggs, lightly beaten: They bind everything together and add richness. Make sure they’re at room temperature for a smoother, more emulsified batter.
- 1 cup unsalted butter, melted and cooled: Melted butter gives this bread its decadent, moist texture and that classic, comforting buttery flavor. Let it cool slightly so it doesn’t cook the eggs when you mix it in.
- 1 tsp almond extract: My favorite “secret” ingredient! It adds a beautiful, warm depth that makes people say, “Wow, what is that flavor?” It pairs magically with the vanilla and butter. If you’re not a fan, just use an extra teaspoon of vanilla extract.
- 1 cup Christmas sprinkles (jimmies work best): The star of the show! Use the long, skinny “jimmies” rather than nonpareils (the tiny round balls), as they hold their color better during baking and don’t bleed as much.
- Optional Twist: 1 cup white chocolate chips or 1/2 cup dried cranberries: White chocolate is a decadent, creamy addition. Dried cranberries add a lovely tartness that cuts through the sweetness beautifully. Feel free to use both!
For the Glaze:
- 4 cups powdered sugar, sifted: Sifting is non-negotiable here! It prevents lumps and gives us a perfectly smooth, glossy glaze.
- 6 tbsp buttermilk: Thins the glaze and adds a subtle tang. You can use milk or heavy cream if needed.
- 2 tbsp light corn syrup: The key to a shiny, professional-looking glaze that sets beautifully. It prevents the sugar from crystallizing.
- Festive nonpareils for topping: Now’s the time for the tiny round sprinkles! They add a fantastic crunch and extra pop of color on top.
Let’s Bake: Step-by-Step Instructions
Ready to make some magic? Follow these steps for a foolproof, beautiful bake. Remember, the key to a tender quick bread is to not overmix the batter!
- Preheat and Prep: Preheat your oven to 350°F (175°C). This is so important for an even rise. While it’s heating, generously grease two 9×5-inch loaf pans with butter or non-stick spray. For absolute insurance against sticking, I like to line the pans with parchment paper, leaving a little overhang on the long sides. This makes it a breeze to lift the finished loaves out! Chef’s Hack: If you only have one loaf pan, no worries! Just cover the second portion of batter and pop it in the fridge while the first loaf bakes. It’ll be just fine.
- Whisk the Dry Team: In a large bowl, grab your whisk and thoroughly combine the flour, sugar, baking powder, baking soda, and salt. Whisking now ensures the leaveners and salt are evenly distributed, so you get a consistent rise and flavor in every bite. Take a moment to admire the snowy white mixture—it’s the blank canvas for our rainbow!
- Combine the Wet Team: In a separate medium bowl, whisk together the buttermilk, lightly beaten eggs, melted (and cooled!) butter, and almond extract. Whisk until it’s smooth and beautifully emulsified. See how the mixture is smooth and uniform? That’s what we want!
- The Big Merge: Pour your wet ingredients into the bowl with the dry ingredients. Now, put that whisk away and grab a sturdy spatula or a wooden spoon. Gently fold the mixture together. I use a figure-eight motion, scraping the bottom and sides of the bowl. Critical Tip: Mix until the flour is just incorporated. A few streaks and lumps are totally okay! Overmixing is the enemy of tenderness, as it develops the gluten in the flour and can make the bread tough.
- Fold in the Fun: Now for the best part! Sprinkle your cup of Christmas jimmies (and any optional add-ins like white chocolate chips) over the batter. Gently fold them in until they’re evenly distributed. Try not to overdo it, or the colors might start to streak.
- Divide and Conquer: Carefully divide the beautiful, sparkly batter evenly between your two prepared loaf pans. I like to use a kitchen scale for perfect accuracy, but eyeballing it works too! Smooth the tops with the back of your spatula so they bake evenly.
- Bake to Golden Perfection: Place the pans in the center of your preheated oven and bake for 45-55 minutes. Rotate the pans halfway through for even browning. The bread is done when the top is a lovely golden brown, the edges are pulling away from the pan slightly, and a toothpick or cake tester inserted into the center comes out clean or with a few moist crumbs (but no wet batter).
- The All-Important Cool Down: This is the hardest part—waiting! Let the loaves cool in their pans on a wire rack for at least 20 minutes. This allows the structure to set. Then, run a knife around the edges and use the parchment paper sling to lift them out. Let them cool completely on the wire rack before glazing. Chef’s Warning: Glazing a warm loaf will cause the glaze to melt and slide right off! Patience is key.
- Make the Glaze: Once the loaves are completely cool, make your glaze. In a medium bowl, whisk together the sifted powdered sugar, 6 tablespoons of buttermilk, and the corn syrup. Whisk until it’s completely smooth and has a thick but pourable consistency. Want it thinner? Add more buttermilk, a teaspoon at a time. Thicker? A bit more powdered sugar.
- Decorate and Celebrate! Drizzle the gorgeous white glaze over the cooled loaves. I like to use a spoon, but you can also put the glaze in a zip-top bag, snip off a corner, and pipe it on. Immediately, while the glaze is still wet, shower the tops with those festive nonpareils. This is your moment to be extra!
How to Serve This Holiday Showstopper
This bread is a superstar all on its own, but a little presentation goes a long way! For a beautiful brunch spread, place the whole loaf on a rustic wooden cutting board and let guests slice their own pieces. It’s fantastic alongside a steaming cup of coffee, hot chocolate, or a glass of cold milk. For an extra indulgent treat, lightly toast a slice and spread it with a little salted butter or even a smear of cream cheese. The warmth makes the sprinkles and glaze even more delightful. However you serve it, it’s guaranteed to bring smiles.
Mix It Up! Fun Recipe Variations
Feel free to get creative and make this recipe your own! Here are a few of my favorite twists:
- Lemon Blueberry Sparkle: Omit the almond extract. Add the zest of two lemons to the wet ingredients and fold in 1 cup of fresh or frozen blueberries (tossed in a tbsp of flour) instead of sprinkles.
- Chocolate Chip Craze: A classic! Swap the Christmas sprinkles for 1 ½ cups of semi-sweet or milk chocolate chips. Perfect for any time of year.
- Cranberry Orange Bliss: Add the zest of one orange to the wet ingredients and fold in 3/4 cup of dried cranberries. The citrus and tart fruit are a holiday match made in heaven.
- Funfetti Birthday Edition: Use rainbow sprinkles and replace the almond extract with clear vanilla extract for that classic “birthday cake” flavor. Perfect for celebrations beyond Christmas!
- Gluten-Free Friendly: Use a 1:1 gluten-free all-purpose flour blend. The result is just as tender and delicious!
Chef Olivia’s Notes from My Kitchen to Yours
This recipe has evolved so much since my grandma’s first version. I’ve learned a few things the hard way (like the Great Sprinkle Bleed of 2015—trust me, jimmies are best!) so you don’t have to. This bread freezes like an absolute dream. I almost always double the batch. We enjoy one loaf immediately, and I wrap the second, unglazed loaf tightly in plastic wrap and then foil, and freeze it for up to 3 months. When a last-minute guest pops over or I need a quick gift, I just thaw it overnight, whip up a quick glaze, and it’s good as new. It’s my ultimate kitchen hack for a stress-free holiday season. Remember, baking is about joy, not perfection. If your glaze isn’t perfectly even or a few sprinkles bleed, it doesn’t matter. It was made with love, and that’s the most important ingredient of all.
Your Questions, Answered!
Q: My sprinkles bled color into the batter! What did I do wrong?
A: Ah, the classic sprinkle bleed! This usually happens if you use the tiny round nonpareils instead of the longer “jimmies.” Jimmies have a protective coating that helps them hold their color during baking. Also, be sure to fold them in gently at the very end; overmixing can exacerbate the issue. A little bleeding is totally normal and still tastes delicious!
Q: Can I make this into muffins instead of loaves?
A: Absolutely! This batter makes fantastic Christmas sprinkle muffins. Divide the batter into a lined muffin tin, filling each cup about 2/3 full. Bake at the same temperature for 18-22 minutes, or until a toothpick comes out clean. This recipe should yield about 24 standard muffins.
Q: Why is my bread dense and gummy in the middle?
A: This is almost always a sign of overmixing. Remember, once you add the wet ingredients to the dry, you want to mix until *just* combined. A few lumps are your friend! It could also be that the bread needed a few more minutes in the oven. Ovens vary, so always use the toothpick test as your guide.
Q: I don’t have corn syrup for the glaze. Can I leave it out?
A: You can, but the glaze will be more opaque and will dry with a matte finish instead of a shiny, glossy one. It will still taste great! You could also substitute a tablespoon of honey or maple syrup, though it will impart a very slight flavor.
Christmas Sprinkle Buttermilk Bread
Description
This festive quick bread is pure holiday happiness baked into a loaf. Soft, buttery, and tender from rich buttermilk, every slice bursts with colorful sprinkles and a touch of almond warmth. Finished with a glossy glaze and a shower of festive nonpareils, it’s a showstopper for Christmas morning, a brunch centerpiece, or the sweetest edible gift. Best of all—it’s simple, fuss-free, and guaranteed to bring big smiles.
Ingredients
Bread:
-
4 cups all-purpose flour
-
2 cups sugar
-
3 tsp baking powder
-
1 tsp baking soda
-
2 tsp kosher salt
-
2 cups buttermilk
-
2 large eggs (room temp)
-
1 cup unsalted butter, melted & cooled
-
1 tsp almond extract (or extra vanilla)
-
1 cup Christmas sprinkles (jimmies)
-
Optional: 1 cup white chocolate chips or ½ cup dried cranberries
Glaze:
-
4 cups powdered sugar, sifted
-
6 tbsp buttermilk
-
2 tbsp light corn syrup
-
Festive nonpareils, for topping
Instructions
-
Prep: Preheat oven to 350°F (175°C). Grease or line two 9×5″ loaf pans.
-
Mix dry: Whisk flour, sugar, baking powder, baking soda, and salt.
-
Mix wet: Whisk buttermilk, eggs, melted butter, and almond extract.
-
Combine: Fold wet into dry until just combined (a few lumps are okay).
-
Add sprinkles: Gently fold in jimmies and optional add-ins.
-
Bake: Divide batter between pans. Bake 45–55 min, until golden and a toothpick comes out clean. Cool 20 min in pans, then transfer to racks.
-
Glaze: Whisk powdered sugar, buttermilk, and corn syrup until smooth. Drizzle over cooled loaves, then top with festive nonpareils.
Nutrition
- Calories: 510cal Per Slice
- Sugar: 62g
- Fat: 17g
- Saturated Fat: 10g
- Carbohydrates: 86g
Nutritional Information (Approximate, Per Slice)
Yield: 2 Loaves, 16 Slices Total | Serving Size: 1 Slice (1/16th of a loaf)
Calories: ~510 | Fat: 17g | Saturated Fat: 10g | Carbohydrates: 86g | Fiber: 1g | Sugar: 62g | Protein: 5g
Note: This is an estimate based on the ingredients used and includes the glaze. Values will vary if you make substitutions.
Final Thoughts: A Loaf Full of Love
As the last of the glittering glaze sets and your kitchen fills with the proud, sweet scent of a bake well done, I hope you take a moment to simply admire what you’ve created. You haven’t just made bread; you’ve baked a loaf brimming with color, joy, and the unmistakable magic of the season.
This Christmas Sprinkle Buttermilk Bread is more than a recipe—it’s an invitation to slow down and savor the sweet, simple moments that make the holidays so special. It’s a reminder that the best traditions often start with a sprinkle of fun and a heaping cup of love. Whether you’re sharing a slice with loved ones over morning coffee, gifting a loaf to a friend, or simply enjoying a quiet moment with a treat you made yourself, this bread is a celebration.
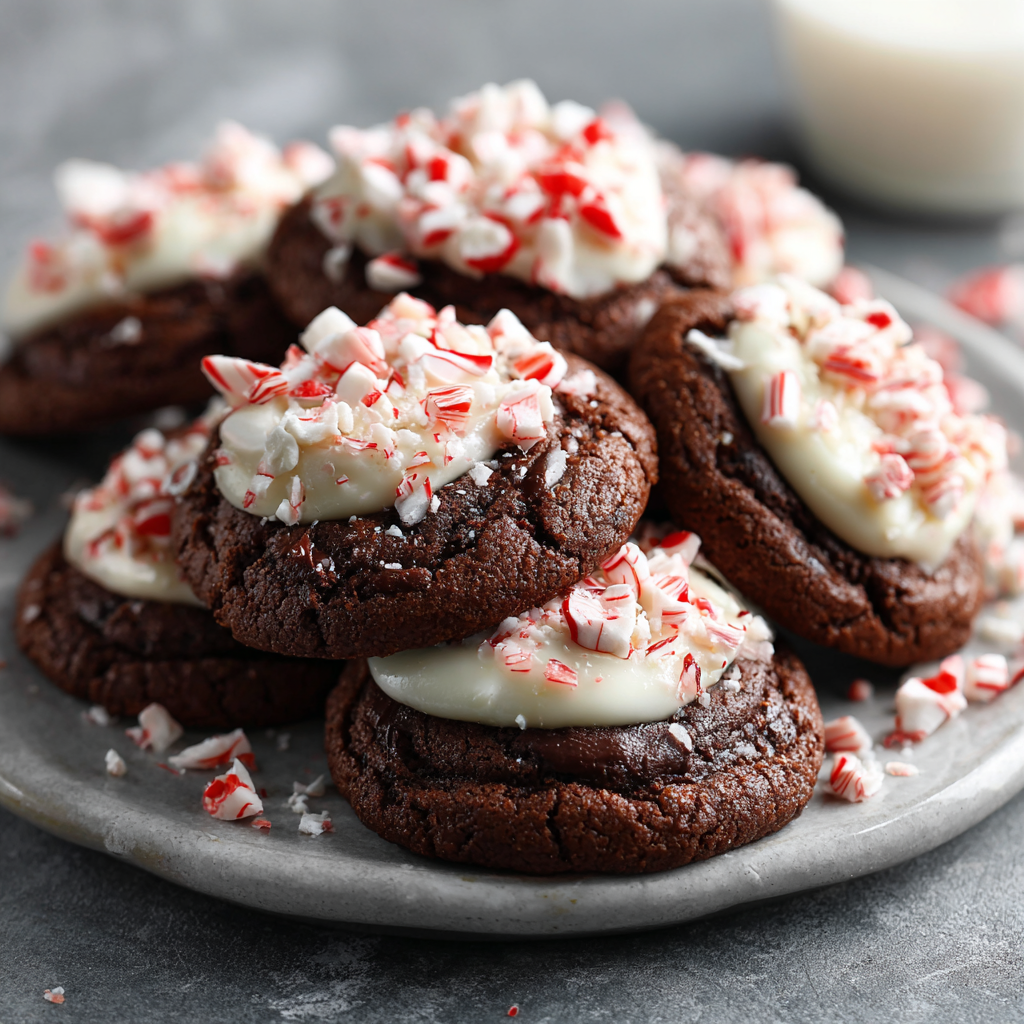
Chocolate Peppermint Fudge Cookies
Welcome to the Coziest Cookie Hour of the Year!
Hey there, friend! Come on in, grab an apron, and let’s get this kitchen smelling absolutely magical. Is there anything quite like the scent of rich, dark chocolate cookies baking in the oven, especially when it’s paired with the cool, festive whisper of peppermint? It’s the kind of aroma that pulls everyone into the kitchen, noses first, with hopeful smiles. If you’re like me, you believe that some of the best memories are made right next to a warm oven, and these Chocolate Peppermint Fudge Cookies are memory-makers in the best way possible.
We’re talking about a cookie that’s an entire holiday celebration in one perfect, handheld bite. Imagine a cookie so profoundly chewy and fudgy it almost feels like a brownie, topped with a cloud of silky, peppermint-kissed buttercream and a cheerful crunch of crushed candy cane. It’s rich, it’s decadent, and it has that little secret ingredient—a hint of espresso—that makes the chocolate flavor sing from the rooftops. This isn’t just a cookie; it’s a mood. It’s putting on your favorite holiday sweater, turning on the festive tunes, and spreading pure, unadulterated joy. And the best part? You absolutely do not need to be a pastry chef to master them. I’ve packed all my favorite tips and tricks right here to guide you. So, preheat that oven, and let’s bake some happiness together!
The Cookie That Started a Tradition
This recipe holds a special, and slightly hilarious, place in my heart. It all started years ago, during my first-ever holiday party in my tiny first apartment. I was determined to impress my new friends with my baking skills, but my ambitious plans for a yule log cake ended in a chocolatey, rolled-up disaster. With only hours to go, I panicked! I scanned my pantry, saw a bag of cocoa powder and some leftover candy canes from the previous year, and decided to just go for it. I threw together a dough based on my favorite brownie recipe, crossed my fingers, and hoped for the best.
The result was these accidentally incredible cookies. They were a little misshapen and my frosting was… enthusiastic… with the peppermint extract (we’ll talk about that later!), but my friends devoured them. They became the hit of the party, and someone lovingly dubbed them my “Christmas Crack Cookies.” Now, I make a double batch every single year without fail. They’re my first cookie of the season, a promise of the joy to come, and a delicious reminder that sometimes the best things in life—and in the kitchen—are happy accidents.
Gathering Your Cookie Crew: The Ingredients
Here’s your shopping list for chocolatey, pepperminty perfection! Don’t be intimidated by the list; a lot of these are pantry staples, and I’ve included all my best substitution hacks right here.
For the Cookie Dough:
- 2 cups unsalted butter, softened: This is the foundation of our rich, tender cookie. Using unsalted lets you control the salt level. Chef’s Insight: “Softened” means your finger leaves a gentle indent. Don’t melt it! If you forget to take it out, cut it into tablespoons and let it sit for 15-20 minutes.
- 1 ½ cups packed brown sugar & ⅔ cup white granulated sugar: The brown sugar brings deep molasses notes and chew, while the white sugar helps with spread and crispness.
- 2 large eggs: They bind everything together and add structure. Make sure they’re at room temperature to create a smoother, more emulsified dough.
- 4 tsp vanilla extract: Yes, four teaspoons! It seems like a lot, but trust me, it adds a beautiful warmth that complements the chocolate.
- 2 tbsp molasses (optional but recommended): This is my secret weapon for extra chew and a更深层 (shēn céng – deeper) flavor. If you don’t have it, you can skip it.
- 2 tbsp light corn syrup: Don’t panic! This is the ultimate hack for a gloriously chewy, fudgy texture that stays soft for days. It prevents sugar crystallization.
- 3 ½ cups all-purpose flour: The structure of our cookie. For a slightly denser, more brownie-like cookie, you can swap ½ cup with bread flour.
- 2 tsp baking soda & 1 tsp baking powder: Our leavening dream team. They work together to give the cookies the perfect amount of lift and spread.
- ½ tsp salt: Crucial for balancing all the sweetness and making the chocolate flavor pop. Omit if you only have salted butter.
- 1 ⅓ cups cocoa powder: Use natural, unsweetened cocoa powder for this recipe. Dutch-process can react differently with the leaveners.
- 4 tsp espresso powder: The magic maker! This doesn’t make the cookies taste like coffee; it intensifies and deepens the chocolate flavor exponentially. Don’t skip it!
For the Peppermint Frosting:
- 1 cup unsalted butter & ½ cup shortening: The shortening helps create a stable, fluffy frosting that holds its shape beautifully at room temperature. You can use all butter if you prefer, but the texture might be slightly softer.
- 6 cups powdered sugar: Sift it if you have time! This prevents lumps in your super-smooth frosting.
- 8 tbsp heavy cream: This creates a rich, luxurious texture. You can use milk, but you’ll likely need less, so add slowly.
- 1 tsp vanilla extract & 1 tsp peppermint extract: Start with 1 tsp of peppermint! It’s potent. You can always add more to taste. I prefer using pure peppermint extract over imitation for the cleanest flavor.
- Crushed peppermint candies or candy canes: For that iconic festive crunch and look.
- Optional: 1-2 drops red food coloring: For a pretty swirl effect. Gel food coloring works best as it won’t thin out your frosting.
Let’s Get Baking: The Step-by-Step Guide
Ready to create some magic? Follow these steps, and read my little commentary along the way—it’s like I’m right there with you, handing you the spatula!
- Preheat and Prep: Preheat your oven to 350°F (175°C). Line your baking sheets with parchment paper. Chef’s Hack: If you don’t have parchment, you can use a silicone baking mat or even just give the pan a very light greasing. Parchment is my #1 for easy cleanup and perfect browning.
- Cream the Good Stuff: In a large bowl, cream together the softened butter, brown sugar, and granulated sugar. Use an electric hand mixer or a stand mixer with the paddle attachment. Beat it on medium-high speed for a good 2-3 minutes until it’s light, fluffy, and pale in color. This step is non-negotiable for the perfect texture—it incorporates air!
- Combine the Wet Team: Add the eggs, one at a time, beating well after each addition. Then, beat in the vanilla extract, molasses (if using), and corn syrup. Scrape down the sides of the bowl to make sure everything is fully incorporated. Your mixture might look a little curdled at this point if your eggs were cold—don’t sweat it! It’ll all come together.
- Whisk the Dry Team: In a separate bowl, whisk together the flour, cocoa powder, baking soda, baking powder, salt, and espresso powder. Chef’s Tip: Whisking is important here! It ensures the leaveners and salt are evenly distributed throughout the flour and cocoa, so every cookie is consistent.
- Bring It All Together: Gradually add the dry ingredients to the wet ingredients, mixing on low speed just until the flour disappears and a soft, thick dough forms. Do not overmix! Overmixing develops gluten and can lead to tough cookies. Stop as soon as you no longer see dry streaks.
- Scoop and Roll: Roll the dough into 1.5-inch balls. I use a medium cookie scoop (about 1.5 tablespoons) for perfect uniformity. Place the dough balls about 2 inches apart on your prepared baking sheets. They will spread! Chef’s Hack: For an ultra-chewy cookie, you can roll the balls slightly taller than they are wide.
- Bake to Fudgy Perfection: Bake for 8-10 minutes. The cookies will look soft and puffy when you take them out. This is key! They will firm up as they cool. You want the edges to be set, but the centers should still look slightly underbaked. For a crispier cookie, add 1-2 minutes.
- The Patient Part: Let the cookies cool on the baking sheet for at least 5 minutes before transferring them to a wire rack to cool completely. I know it’s hard, but you must let them cool entirely before frosting! Otherwise, your beautiful frosting will melt into a puddle (still delicious, but not as pretty!).
- Whip Up the Frosting: While the cookies cool, make the frosting. In a clean bowl, beat the butter and shortening together until smooth and creamy. Gradually add the powdered sugar, one cup at a time, beating on low speed initially to avoid a sugar cloud! Add the heavy cream, vanilla, and peppermint extract. Increase the speed to high and beat for 2-3 minutes until light and fluffy. If you want a pink swirl, separate a small amount of frosting into another bowl, add a drop or two of red food coloring, and mix. You can then swirl it into the main batch or pipe it on top.
- Frost and Festive-fy: Once the cookies are completely cool, frost them generously with a knife or offset spatula. Immediately sprinkle with the crushed peppermint candies so they stick. Admire your beautiful work!
How to Serve These Holiday Stars
Presentation is part of the fun! Pile these cookies high on a rustic wooden board or a festive holiday platter. They look absolutely stunning with the white frosting and red peppermint bits. I love serving them with a big glass of cold milk for the kids (and kids at heart!) or a nice hot mug of coffee or peppermint hot chocolate for the adults. They are the ultimate cookie swap contribution, a gorgeous addition to any dessert table, and the perfect edible gift stacked in a cute cellophane bag tied with a ribbon.
Mix It Up! Delicious Variations
Feel like playing? Here are a few fun ways to customize these cookies:
- Peppermint Patty Style: Skip the frosting and sandwich two cookies together with a layer of simple peppermint buttercream or even a melted Andes mint in the middle!
- Dark Chocolate Drizzle: For a less sweet option, forego the frosting and simply drizzle melted dark chocolate over the cooled cookies before sprinkling with peppermint.
- Mint Chocolate Chip: Add 1 cup of mini chocolate chips to the dough and reduce the peppermint extract in the frosting to ½ tsp for a subtler mint flavor.
- Gluten-Free Friendly: Substitute the all-purpose flour with a 1:1 gluten-free baking blend. The texture will be slightly more delicate but still delicious.
- “Hot Chocolate” Cookies: Add ½ cup of mini marshmallows to the dough along with the dry ingredients. They’ll get toasty and gooey in the oven!
Olivia’s Chef Notes & Kitchen Stories
This recipe has evolved so much from that first panicked batch! The biggest lesson I learned was about the peppermint extract. The first time, I added a full tablespoon thinking “more is more!” and we all ended with a powerful, mouth-tingling, almost medicinal mint experience. It was… intense. Now, I’ve found the perfect balance—1 teaspoon gives you that wonderful holiday flavor without feeling like you’re eating toothpaste. Start there, taste, and add more in tiny increments if you’re a true mint fiend.
Another fun evolution was adding the corn syrup and molasses. The original recipe was good, but these two ingredients transformed it from a good chocolate cookie to an unbelievably fudgy, chewy, stay-soft-for-a-week masterpiece. Don’t be afraid of them! They are the secret to the most incredible texture. Finally, my favorite kitchen hack for these is to always, always make a double batch and freeze half the dough. That way, I can have warm, festive cookies anytime a craving (or an unexpected guest!) strikes.
Your Questions, Answered!
Q: My cookies spread too much and turned out flat. What happened?
A: This is usually caused by butter that is too warm or melted. Make sure your butter is just softened, not melted. Another culprit could be over-creaming the butter and sugar, or your baking soda/powder might be old. Chilling the dough for 30 minutes before baking can also help prevent excess spread.
Q: My cookies are too cakey and puffy, not fudgy. How can I fix that?
A: A cakey texture often comes from overmixing the dough once the flour is added, which develops gluten. Mix just until combined! Also, make sure you’re measuring your flour correctly. The “scoop and sweep” method can pack in too much flour. For best results, spoon your flour into the measuring cup and level it off.
Q: Can I make the dough ahead of time?
A: Absolutely! The dough balls freeze beautifully. Place them on a parchment-lined sheet, freeze until solid (1-2 hours), then transfer to a freezer bag. You can bake them straight from the freezer; just add 1-2 minutes to the baking time.
Q: My frosting is too thin/too thick. How can I adjust it?
A> Frosting is easy to fix! Too thin? Beat in more powdered sugar, a ¼ cup at a time, until it reaches your desired consistency. Too thick? Add more cream or milk, a teaspoon at a time, until it’s spreadable. Remember, it’s always easier to add liquid than to take it away!
Chocolate Peppermint Fudge Cookies
Description
These cookies are the holiday season in edible form—deeply fudgy like a brownie, topped with fluffy peppermint buttercream, and finished with a sparkle of crushed candy canes. They’re rich, chewy, and full of festive cheer, with a hint of espresso to make the chocolate flavor pop. Bake a batch, and you’ll have a tray of pure holiday magic that will make your kitchen smell like joy itself.
Ingredients
For the Cookies:
-
2 cups unsalted butter, softened
-
1 ½ cups brown sugar
-
⅔ cup white sugar
-
2 large eggs (room temp)
-
4 tsp vanilla extract
-
2 tbsp molasses (optional, adds chew)
-
2 tbsp light corn syrup
-
3 ½ cups all-purpose flour
-
1 ⅓ cups cocoa powder
-
2 tsp baking soda
-
1 tsp baking powder
-
½ tsp salt
-
4 tsp espresso powder
For the Peppermint Frosting:
-
1 cup butter + ½ cup shortening
-
6 cups powdered sugar
-
8 tbsp heavy cream
-
1 tsp vanilla extract
-
1 tsp peppermint extract
-
Crushed candy canes (for topping)
-
Optional: 1–2 drops red food coloring
Instructions
-
Prep: Preheat oven to 350°F (175°C). Line baking sheets with parchment.
-
Cream: Beat butter + sugars until light and fluffy. Mix in eggs, vanilla, molasses, and corn syrup.
-
Dry mix: Whisk flour, cocoa, baking soda, baking powder, salt, and espresso powder.
-
Combine: Add dry to wet, mixing until just combined.
-
Shape: Scoop into 1.5-inch balls, place 2 inches apart.
-
Bake: 8–10 min, until edges are set but centers soft. Cool fully.
-
Frost: Beat butter + shortening, add powdered sugar gradually, then cream, vanilla, and peppermint. Whip until fluffy.
-
Decorate: Frost cooled cookies, sprinkle with crushed candy canes.
Notes
-
Slightly underbake for the fudgiest texture.
-
Chill dough 30 min if cookies spread too much.
-
For a swirl effect, tint part of the frosting pink and pipe together with white.
-
Freeze cookie dough balls for last-minute holiday baking.
Nutritional Information (Per Frosted Cookie, Approximate)
Calories: 260 | Fat: 14g | Saturated Fat: 8g | Carbs: 34g | Sugar: 24g | Protein: 2g | Sodium: 95mg
Please note: This is an estimate provided by an online nutrition calculator. It is not a substitute for professional dietary advice.
Final Thoughts
And there you have it! From a kitchen disaster to a beloved holiday tradition, these Chocolate Peppermint Fudge Cookies are more than just a recipe—they’re an invitation to create joy. They’re proof that the most magical moments often come from a little bit of improvisation and a whole lot of heart.
So, as you pull that final tray from the oven and sprinkle on the last of the candy cane crunch, take a moment. Breathe in that incredible aroma of chocolate and peppermint, and feel the warmth of the oven on your face. You’ve just baked more than cookies; you’ve baked happiness. You’ve created a reason to gather, to share, and to make someone’s day a little brighter.
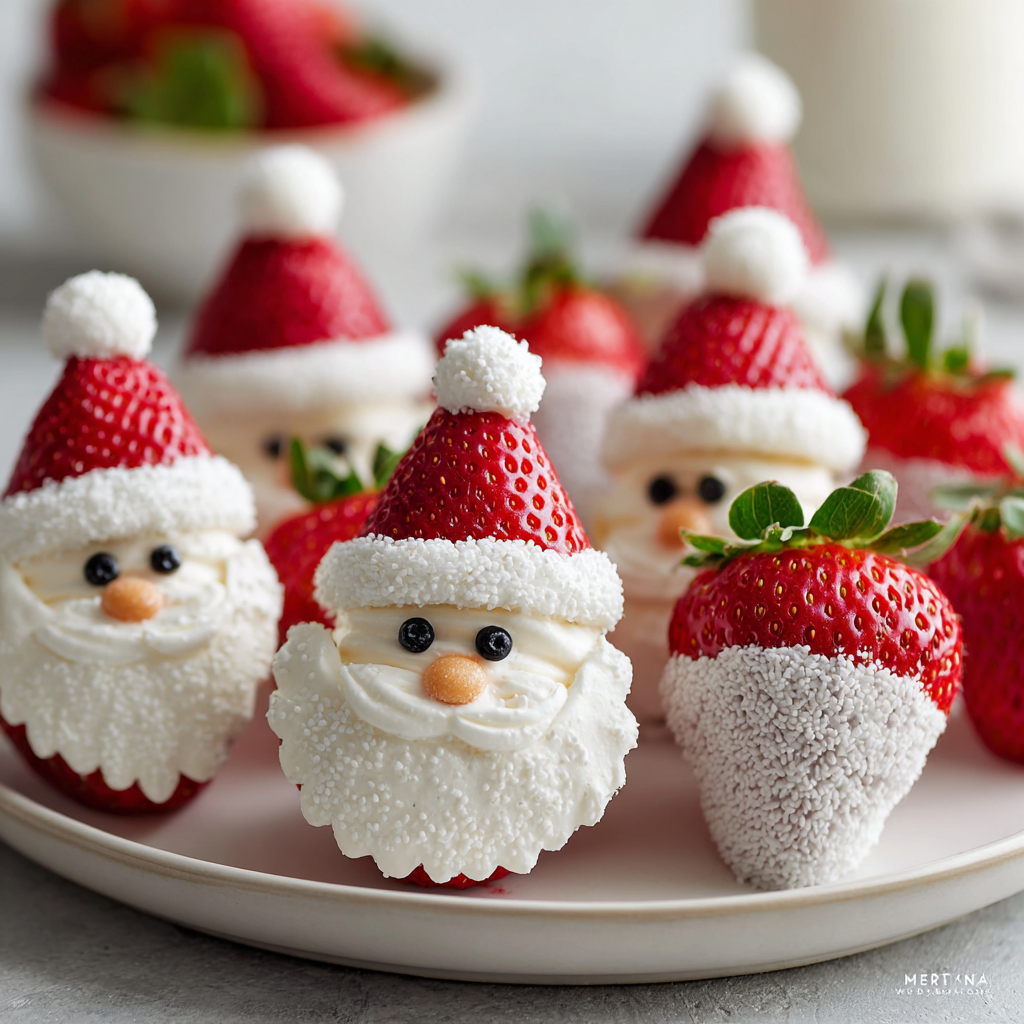
Strawberry Santas
Let’s Make Some Holiday Magic!
Hey there, friend! Come on in—can you smell that? It’s the scent of fresh berries and a whole lot of holiday excitement. There’s something truly magical about this time of year, isn’t there? The twinkling lights, the cozy sweaters, and of course, the incredible food that brings everyone together. But let’s be real: between all the gift shopping, decorating, and general festive chaos, the last thing any of us needs is a complicated, time-consuming recipe that dirties every bowl in the kitchen.
That’s exactly why I’m so utterly obsessed with these Strawberry Santas. They are the definition of festive fun without the fuss. Imagine plump, juicy strawberries transformed into jolly little Santas with creamy white hats and cheerful faces. They’re almost too cute to eat… almost! The best part? They’re completely no-bake, vegan-friendly, and require just a handful of simple ingredients. Whether you’re hosting a big holiday party, looking for a fun activity to do with the kids, or just want to add a pop of festive cheer to your dessert table, these little guys are your secret weapon. They come together in minutes but deliver maximum joy. So, tie on your favorite apron (the messy one with stories to tell!), and let’s create some edible holiday magic together.
The Santa That Stole Christmas (Dessert)
I’ll never forget the first time a Strawberry Santa made an appearance in my kitchen. It was a few years ago, right in the middle of a classic holiday meltdown. I was hosting my first big Christmas Eve dinner for the whole family, and I had ambitiously planned a menu that would make a professional chef sweat. The main course was… fine. But my grand finale, a complicated Yule Log cake, was an unmitigated disaster. It cracked, it oozed, and it looked less like a log and more like a culinary crime scene.
With guests arriving in an hour, I was on the verge of tears, rummaging through the fridge for a backup plan. I found a pint of gorgeous, red strawberries and a block of vegan cream cheese I’d bought for bagels. In a moment of pure, desperate inspiration, I started slicing and piping, and like magic, these cheerful little Santas began to appear. I placed them on a platter, half expecting a pity party. Instead, they were the absolute star of the night! My nephew declared them “the best Christmas thing ever,” and my grandma, who is notoriously hard to please, asked for the recipe. They saved the day and taught me a priceless lesson: the most memorable food isn’t about perfection; it’s about joy, creativity, and a little bit of whimsy.
Gathering Your Santa Squad: The Ingredients
The beauty of this recipe is in its simplicity. You only need a few key players to create something utterly delightful. Here’s what you’ll need to round up:
- 10–15 large fresh strawberries: This is your Santa canvas! Look for berries that are uniformly red, firm to the touch, and have a classic Santa-like shape—plump at the bottom and slightly tapered at the top. The bigger, the better, as they’re easier to decorate. Avoid any that are mushy or have white shoulders.
- ½ cup melted vegan white chocolate: This forms the base of our fluffy, creamy “hat” mixture. I love using the baking chips from brands like Enjoy Life or Pascha. They melt beautifully and have a lovely sweet flavor. Chef’s Insight: If you can’t find vegan white chocolate, you can substitute with ½ cup of plain vegan butter or coconut butter (warmed to a soft, pipeable consistency) whipped with 1 cup of powdered sugar. It’ll be a bit sweeter but just as delicious!
- ¼ cup vegan cream cheese: This is the secret ingredient that gives our hat filling its tangy, creamy depth and helps it hold its shape perfectly. Brands like Tofutti or Kite Hill work wonderfully. Make sure it’s at room temperature to avoid lumps in your mixture.
- Black sesame seeds or black sprinkles (for eyes): I’m a huge fan of using black sesame seeds—they add a cute, minimalist look and a tiny little crunch. But classic round black sprinkles work fantastically too!
- Red round sprinkles, red icing, or gel (for nose): This is where your Santa’s personality shines! A single red sprinkle is quick and easy. For a more playful look, a tiny dot of red icing or gel works wonders.
Building Your Jolly Crew: Step-by-Step
Alright, let’s get our hands dirty (in the best way possible)! This process is so much fun and goes by in a flash. Read through all the steps once before you begin.
Step 1: The Melting Pot
First, we need to create our luscious, pipeable hat mixture. Gently melt your vegan white chocolate. You can do this in a double boiler on the stove, but my favorite quick method is in the microwave. Pop it in a microwave-safe bowl and heat in 20-second bursts, stirring well in between. Stop when it’s just about smooth—don’t overheat it! Once melted, let it cool for just a minute. Now, add your room-temperature vegan cream cheese. Grab a whisk and beat it all together until it’s completely smooth, creamy, and uniform. You shouldn’t see any streaks of cream cheese. Voilà! You’ve just made Santa hat magic.
Step 2: Bag It Up
Scoop all of your beautiful white mixture into a piping bag. If you want your Santas to have a really professional, festive look, fit the bag with a star tip (like a Wilton 1M or 2D) before you fill it. This will give you those wonderful textured swirls that look like fur on Santa’s hat. No piping bag? No problem! A sturdy plastic zip-top bag with a tiny corner snipped off works just as well. You can even just use a small spoon—these Santas are charming no matter what!
Step 3: Berry Prep
Time to get our strawberries ready for their transformation. Give them a good rinse under cool water and then pat them completely dry with a clean kitchen towel or paper towels. This is crucial! Any extra moisture will make the creamy hat slide right off. Now, take a sharp paring knife and slice off the green leaf top. You want to create a flat, stable base so your Santa can stand up proudly on the plate. Next, slice each berry in half horizontally. The bottom half is Santa’s jolly body, and the top half is his iconic floppy hat.
Step 4: The Grand Assembly
This is the best part! Take the bottom half of a strawberry (the body) and pipe a generous dollop of your cream mixture right on top. Start from the outside and swirl inward to build a tall, proud peak. Now, gently take the top half of the strawberry (the hat) and place it on top of the cream at a playful, jaunty angle. Don’t press down too hard—just let it rest gently. See? He’s already taking shape!
Step 5: Give Him a Face
Now for the personality! Using a toothpick or a pair of clean tweezers, carefully add two tiny black sesame seeds or sprinkles for his eyes. Then, add one red sprinkle or a tiny dot of red icing for his cheerful little nose. And just like that, you’ve created a holiday legend! Repeat with all your strawberries.
How to Serve Your Festive Friends
Presentation is half the fun with these cuties! I love to line them up on a simple white platter or a rustic wooden board—they really pop against a neutral background. For a true winter wonderland effect, dust the platter with a very light snowfall of powdered sugar or shredded coconut before placing your Santas. They’re perfect as a standalone treat, but they also play well with others. Tuck them around a vegan cheesecake or a plate of Christmas cookies for a show-stopping dessert spread. Serve them immediately for the best texture, or you can chill them for up to an hour before your guests arrive.
Mix It Up! Santa’s Got Range
Feel like playing? This recipe is a wonderful template for creativity!
- Chocolate Lovers: Use vegan dark or milk chocolate instead of white chocolate for a richer hat.
- Coconut Dream: Fold 2 tablespoons of finely shredded coconut into the cream mixture for a tropical twist.
- Peppermint Twist: Add a drop or two of peppermint extract to the filling for a cool, festive flavor.
- Nut-Free Note: Ensure your vegan chocolate is certified nut-free if allergies are a concern.
- Berry Santa Clan: Try this with other firm berries like large raspberries to create a whole family!
Notes from My Kitchen to Yours
Over the years, I’ve made hundreds of these little Santas, and let me tell you, they never fail to bring a smile. My recipe has evolved a tiny bit—I started with just sweetened whipped coconut cream, but adding the melted chocolate makes the hats so much sturdier and easier for beginners to pipe. The funniest mishap? One year I was piping away while chatting with my sister, not realizing I’d accidentally used a tip that was far too large. I created a squad of Santas with absolutely massive, comically oversized hats. We called them “Gangsta Santas,” and they were a huge hit. So remember, there’s no wrong way to do this! Embrace the imperfections—they often have the most character.
Your Santa Questions, Answered!
Q: My cream cheese mixture is lumpy! What did I do wrong?
A: This usually happens if the cream cheese was too cold when added to the melted chocolate. The temperature difference causes the chocolate to seize up a bit. To fix it, you can try gently warming the entire mixture over a double boiler for a few seconds while whisking vigorously. If that doesn’t work, just pipe with enthusiasm! The lumps will be disguised as “texture” in the Santa hat, and I promise they’ll still taste amazing.
Q: Can I make these ahead of time?
A: You can prep the components ahead of time! Wash and cut the strawberries, store them in an airtight container in the fridge lined with a paper towel. Make the filling and keep it in a sealed piping bag in the fridge. Let it sit at room temp for 15-20 minutes before piping to soften. For the absolute best look and texture, I recommend assembling them no more than 1-2 hours before serving.
Q: My Santas are wobbly and won’t stand up!
A: This is almost always due to the base of the strawberry not being flat enough. When you slice off the green top, make sure you’re cutting straight across to create a stable foundation. If you have a particularly curvy berry, you can shave off a tiny bit from the base to help it sit straight. You can also pipe a little dot of the cream mixture on the plate first to act as edible glue!
Q: Is there a nut-free option for the white chocolate?
A: Absolutely! Many vegan white chocolates are made in facilities with nuts, so always check the label. For a guaranteed nut-free option, use the substitution mentioned in the ingredients list: whip together ½ cup softened vegan butter (like Melt or Earth Balance sticks) with 1 cup of powdered sugar and a splash of vanilla until smooth and pipeable.
Print
Strawberry Santas
Description
Bring some whimsy to your holiday table with these no-bake Strawberry Santas! Juicy berries transform into jolly little treats with creamy white “hats,” cheerful faces, and festive charm. They’re vegan-friendly, take just minutes to assemble, and are guaranteed to make everyone smile. Perfect for parties, family fun with kids, or as a last-minute dessert that looks like you spent hours.
Ingredients
-
10–15 large fresh strawberries
-
½ cup vegan white chocolate (melted)
-
¼ cup vegan cream cheese (room temp)
-
Black sesame seeds or black sprinkles (eyes)
-
Red round sprinkles or gel (nose)
Instructions
-
Make the filling: Melt white chocolate until smooth. Whisk in vegan cream cheese until creamy. Cool slightly.
-
Pipe bag ready: Transfer mixture to a piping bag with star tip (or use a zip-top bag).
-
Prep berries: Wash, dry, and slice off the leafy tops to create flat bases. Cut each strawberry in half (bottom = body, top = hat).
-
Assemble: Pipe filling on the base half, place the top half as the hat.
-
Decorate: Add two black sprinkles for eyes and one red sprinkle/gel dot for the nose.
-
Serve immediately or chill up to 1 hour.
Notes
-
Dry strawberries well—moisture makes the hats slide.
-
Cut flat bases so they stand tall and steady.
-
Pipe a tiny “glue” dot of filling under wobbly Santas.
-
For variety, try peppermint extract, shredded coconut, or dark chocolate hats.
Nutrition
- Calories: 60cal per Santa
- Fat: 3.5g
- Carbohydrates: 6g
Nutritional Info (per Santa, approx.)
Calories: 60 | Fat: 3.5g | Saturated Fat: 2g | Carbohydrates: 6g | Sugar: 5g | Protein: 0.5g | Fiber: 0.5g | Sodium: 10mg
Prep Time: 15 minutes | Total Time: 15 minutes | Yield: 10–15 Strawberry Santas
Final Thoughts: More Than Just a Dessert
As we put away the piping bags and admire our platter of cheerful, edible Santas, it’s clear this recipe is about so much more than just a dessert. It’s a reminder that the heart of the holiday season isn’t found in flawless, picture-perfect feasts, but in the moments of shared creativity, laughter, and love.
These Strawberry Santas are proof that magic doesn’t have to be complicated. With a few simple ingredients and a playful spirit, you can create something that sparks pure joy—the kind that makes a child’s eyes light up and a grandparent ask for the recipe. They are a testament to the beauty of imperfection, whether your Santas stand tall or have a charming wobble, whether their hats are neatly piped or gloriously oversized.




