
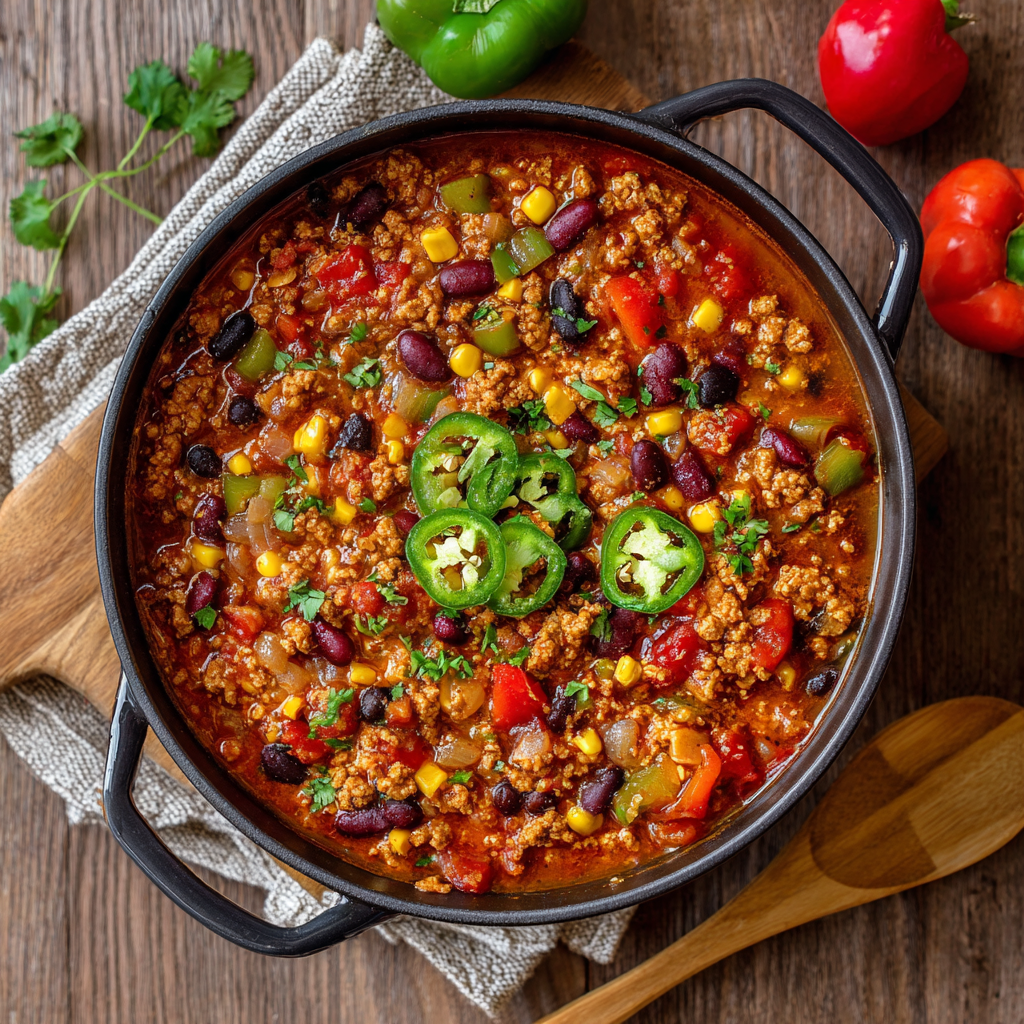
Meal Prep Chili (Turkey, Beef, or Vegetarian)
Your New Favorite Meal Prep Hero Is Here!
Hey there, friend! Come on in, grab a wooden spoon, and let’s get cozy. Is there anything quite like the smell of chili simmering on the stove? That rich, savory aroma of tomatoes, spices, and comfort that seems to hug every corner of the house? If you’re like me, that smell is a direct line to your happiest memories—game days, family gatherings, or just a quiet Tuesday night that needed a little extra warmth.
This isn’t just any chili recipe. This is your new secret weapon. This is the kind of meal that understands your life. It’s for the days you’re buzzing with energy and the days you have absolutely none left to give. It’s for feeding a crowd or making sure future-you has a delicious, homemade lunch waiting. We’re talking about a big, beautiful pot of cozy that you can make with ground turkey, classic beef, or keep entirely plant-based. It’s packed with protein, vibrant veggies, and so much flavor. It’s forgiving, flexible, and freezes like an absolute dream. So, let’s tie on those aprons (messy ones are welcome here!) and make something incredible together.
The Chili That Started It All
My love affair with chili began in my first crummy apartment. I had a kitchen the size of a postage stamp and a budget even smaller. A group of us were getting together to watch football, and I, in a bold (or foolish) move, volunteered to make the chili. I had no idea what I was doing. I used the cheapest ground beef, canned beans I rinsed forever, and a spice mix I cobbled together from the dusty jars in the back of my cupboard.
I remember the sheer panic as I tasted it. It was… fine. But fine isn’t great. In a last-ditch effort, I squeezed in a little lime juice and threw in a pinch of brown sugar from a coffee packet. Magic. It was like the entire pot woke up. That humble pot of chili was scraped clean that day. It wasn’t about fancy ingredients; it was about heart, a little improvisation, and the joy of feeding people. That’s the spirit I’ve built into this recipe—forgiving, flexible, and always, always made with love.
Gathering Your Cozy Ingredients
Here’s everything you’ll need to create this masterpiece. Remember, these are guidelines—your kitchen, your rules!
- 1 tbsp olive oil – Our cooking fat of choice! It has a great flavor and can take the heat. Avocado oil works beautifully too.
- 1 lb ground turkey, beef, or plant-based crumbles – The star of your show! I love lean turkey for a lighter feel, beef for classic richness, or going meatless for a veggie-powered version. For a whole food vegetarian option, skip the crumbles and use an extra can of beans.
- 1 small onion, diced – The flavor foundation. Yellow or white onions are perfect here, lending a sweet, savory depth.
- 3 cloves garlic, minced – Non-negotiable for me! It adds that pungent, aromatic kick that makes everything taste more complex.
- 1 bell pepper, chopped – I use red for a touch of sweetness, but any color will do. It adds a wonderful texture and freshness.
- 1 jalapeño, minced (optional for heat) – My little chef’s hack: leave the seeds in if you love a good kick, or remove them for a milder, flavorful warmth.
- 1 (15 oz) can black beans, drained and rinsed – Rinsing is key! It washes off that thick, starchy canning liquid, giving you better texture and flavor.
- 1 (15 oz) can kidney beans, drained and rinsed – The classic chili bean. They hold their shape beautifully and have a lovely, meaty texture.
- 1 (15 oz) can corn, drained – Little bursts of sweet sunshine! They balance the heat and add a fantastic pop of color.
- 1 (28 oz) can diced tomatoes – The liquid base of our chili. I prefer fire-roasted diced tomatoes for an extra layer of smoky flavor.
- 1 (6 oz) can tomato paste – This is our flavor concentrator! It thickens the chili and gives it that deep, rich tomato backbone.
- 1½ tbsp chili powder – The soul of the dish. Make sure yours is fresh for the best flavor—if it’s been in your cupboard for years, it’s time for a new one!
- 1 tsp cumin – Earthy, warm, and absolutely essential. It’s what makes chili taste like chili.
- 1 tsp smoked paprika – My secret weapon! It adds a subtle smokiness that makes the chili taste like it’s been simmering for hours.
- Salt & pepper, to taste – Season as you go! Taste, taste, taste.
- 1½ cups water or broth – Broth (vegetable or beef) will add more depth, but water works perfectly fine too, as the tomatoes and spices are plenty flavorful.
Let’s Make Some Magic: Step-by-Step
Step 1: Sauté Your Aromatics
Heat the olive oil in a large Dutch oven or heavy-bottomed pot over medium heat. Once it shimmers, add your diced onion. Cook, stirring occasionally, for about 4-5 minutes until they become soft and translucent. Now, add the garlic and cook for just another 60 seconds until fragrant—you’ll smell it! Don’t let the garlic brown, or it can turn bitter. This one-two punch of onion and garlic is building your flavor foundation.
Step 2: Brown the Meat (If Using)
If you’re using ground meat or plant-based crumbles, now’s the time! Add it to the pot with the onions and garlic. Use your spoon to break it up into small crumbles. Cook until it’s no longer pink, about 5-7 minutes. If you’re using beef, you can drain off any excess fat at this point (though a little adds flavor!). For a vegetarian chili, you can just move right on to the next step—how easy is that?
Step 3: Bloom the Spices
This is the most important chef hack I can give you! Add the chopped bell pepper, jalapeño, chili powder, cumin, smoked paprika, and a big pinch of salt and pepper directly onto the meat and onion mixture. Stir it all together and cook for a full 2 minutes. You’re toasting the spices in the oil, which wakes up their essential oils and makes their flavor 10 times richer and deeper. Your kitchen will smell incredible.
Step 4: Bring It All Together
Time for the grand addition! Add the drained and rinsed black beans, kidney beans, corn, the entire can of diced tomatoes (with their juices!), and the tomato paste. Pour in your water or broth. Now, grab your spoon and give everything a big, hearty stir, making sure to scrape up any browned bits from the bottom of the pot—that’s pure flavor!
Step 5: Simmer into Cozy Perfection
Bring your chili to a lively simmer. Once it’s bubbling, reduce the heat to low, cover the pot with a lid, and let it gently cook for 25-30 minutes. Stir it occasionally to prevent sticking. You’ll know it’s done when the flavors have melded together beautifully and the chili has thickened to your liking. The wait is the hardest part!
Step 6: The Final Touch – Taste and Adjust!
Turn off the heat. Taste your creation! This is where you make it yours. Does it need more salt? A pinch more cumin? A squeeze of lime juice for brightness? A teaspoon of brown sugar to balance the acidity? Adjust until it’s perfect for you. Let it cool for 15-20 minutes before portioning it into your meal prep containers.
How to Serve Your Masterpiece
Ladle that steaming, glorious chili into bowls. Now, the fun part: the toppings! I love a build-your-own-bowl setup for guests (or for a fun Tuesday night). Set out bowls of shredded cheddar cheese, a big dollop of sour cream or Greek yogurt, sliced fresh jalapeños, a handful of crispy tortilla strips or Fritos, and a generous handful of fresh cilantro or chopped green onions. For the ultimate cozy experience, serve it over a scoop of fluffy rice, with a side of warm cornbread, or with a baked potato waiting to be split open and smothered.
Make It Your Own: Delicious Variations
- Pumpkin Black Bean Chili: Stir in 1 cup of pure pumpkin puree along with the tomatoes for a fall-inspired, velvety twist that’s packed with nutrients.
- White Chicken Chili: Swap the ground meat for shredded rotisserie chicken, use cannellini beans instead of kidney/black beans, and use green chiles instead of jalapeño. Use chicken broth and finish with a squeeze of lime and a handful of fresh cilantro.
- Sweet Potato & Black Bean: Add two diced medium sweet potatoes when you add the bell pepper. They’ll soften and add a wonderful sweetness that plays so well with the spices.
- Extra Smoky & Spicy: Add a chipotle pepper in adobo sauce (minced) when you add the spices for a deep, smoky heat. A little goes a long way!
- Instant Pot/Slow Cooker Method: Sauté the aromatics and brown meat using the sauté function on your Instant Pot. Add everything else, secure the lid, and cook on high pressure for 15 minutes. For the slow cooker, brown everything on the stove first, then transfer to the crock and cook on low for 6-8 hours or high for 3-4 hours.
Olivia’s Chef Notes
This recipe has evolved so much from that first apartment batch. I’ve learned that chili is never a chore; it’s a creative outlet. Don’t be afraid to play! I once accidentally used cinnamon instead of cumin (those jars look awfully similar when you’re not paying attention!). It was… interesting. But you know what? I served it with a laugh, and my friends still talk about “The Cinnamon Incident.” The point is, it’s just cooking. Have fun with it.
I also firmly believe chili is always better the next day. The flavors have more time to get to know each other and become best friends. So if you can, make it a day ahead! The patience is worth it. This recipe is a love letter to easy, comforting, and communal eating. I hope it becomes a staple in your home like it is in mine.
Your Chili Questions, Answered!
Q: My chili is too thin! How can I thicken it?
A: No worries! The easiest way is to simmer it uncovered for an extra 10-15 minutes, allowing the excess liquid to evaporate. If you’re still in a hurry, you can make a quick slurry: mix 1 tablespoon of cornstarch with 2 tablespoons of cold water until smooth. Stir this into your simmering chili and let it cook for a few minutes until thickened.
Q: My chili is too thick! How can I thin it out?
A: Easy fix! Simply stir in a little more broth or water, ¼ cup at a time, until it reaches your desired consistency. Heat it through after adding the liquid.
Q: I made it, but the flavors taste a bit flat. What can I do?
A: This is common! Flatness is usually a sign that it needs more salt or acidity. First, try adding a bit more salt, tasting as you go. If that doesn’t quite fix it, add a splash of acidity—a squeeze of fresh lime juice or a tiny dash of apple cider vinegar can work wonders to brighten and balance all the flavors.
Q: Can I use dried beans instead of canned?
A: Absolutely, and good for you! You’ll need to plan ahead. For this recipe, you’d want about ¾ cup of each type of dried bean. Soak them overnight in water, then drain and rinse. You can then add them to the pot with the tomatoes and broth, but you will need to simmer the chili for at least 1-1.5 hours, or until the beans are completely tender. You will also likely need to add more liquid (broth or water) during cooking.
Meal Prep Chili (Turkey, Beef, or Vegetarian)
Description
Hey there, friend! Let’s pull up a chair, grab a spoon, and fill your kitchen with the warm, comforting aroma of a pot of chili simmering on the stove. This isn’t just any chili—it’s a flexible, forgiving, flavor-packed recipe that works for ground turkey, beef, or even plant-based options. Perfect for game days, family dinners, or making ahead for easy meal prep, it’s cozy, nourishing, and delicious.
Ingredients
-
1 tbsp olive oil (or avocado oil)
-
1 lb ground turkey, beef, or plant-based crumbles
-
1 small onion, diced
-
3 cloves garlic, minced
-
1 bell pepper, chopped (red, yellow, or green)
-
1 jalapeño, minced (optional for heat)
-
1 (15 oz) can black beans, drained and rinsed
-
1 (15 oz) can kidney beans, drained and rinsed
-
1 (15 oz) can corn, drained
-
1 (28 oz) can diced tomatoes (fire-roasted optional)
-
1 (6 oz) can tomato paste
-
1½ tbsp chili powder
-
1 tsp cumin
-
1 tsp smoked paprika
-
Salt & pepper, to taste
-
1½ cups water or broth (vegetable or beef)
Instructions
Step 1: Sauté Aromatics
Heat oil in a large pot over medium heat. Add onions and cook 4-5 minutes until soft. Stir in garlic and cook 1 minute, until fragrant.
Step 2: Brown the Meat
Add ground meat or plant-based crumbles. Cook 5-7 minutes until no longer pink, breaking it up into small pieces. Drain excess fat if needed.
Step 3: Bloom the Spices
Stir in bell pepper, jalapeño, chili powder, cumin, smoked paprika, salt, and pepper. Cook 2 minutes to release flavors.
Step 4: Add the Beans & Tomatoes
Add black beans, kidney beans, corn, diced tomatoes, tomato paste, and water/broth. Stir well, scraping up any bits from the bottom of the pot.
Step 5: Simmer
Bring to a simmer, then reduce heat to low. Cover and cook 25-30 minutes, stirring occasionally. Adjust thickness by simmering uncovered or adding liquid as needed.
Step 6: Taste & Adjust
Add salt, a squeeze of lime, or a pinch of sugar to balance flavors. Let chili cool slightly before portioning for meal prep.
Notes
-
Pumpkin Black Bean Chili: Stir in 1 cup pumpkin puree for a creamy, fall-inspired version.
-
White Chicken Chili: Use shredded chicken, cannellini beans, and green chiles; finish with lime and cilantro.
-
Sweet Potato Chili: Add diced sweet potatoes when adding bell peppers for a subtle sweetness.
-
Extra Smoky Heat: Mince a chipotle in adobo and add with spices.
-
Make Ahead: Chili tastes even better the next day; it freezes beautifully.
Nutritional Information*
*Estimated based on recipe made with ground turkey. Values will vary with substitutions.
Per Serving (approx. 1.5 cups): Calories: ~350 | Protein: 25g | Carbohydrates: 28g | Fat: 15g | Fiber: 8g | Sugar: 7g
Final Thoughts: Your Pot of Possibility
This chili is more than just a meal; it’s a promise to yourself. A promise that a hectic week can still include nourishing, homemade food. A promise that feeding your family or friends something delicious doesn’t have to be complicated or expensive. It’s a blank canvas in a bowl, waiting for your personal touch—whether that’s an extra sprinkle of smoked paprika, a daring dash of hot sauce, or a mountain of your favorite toppings.
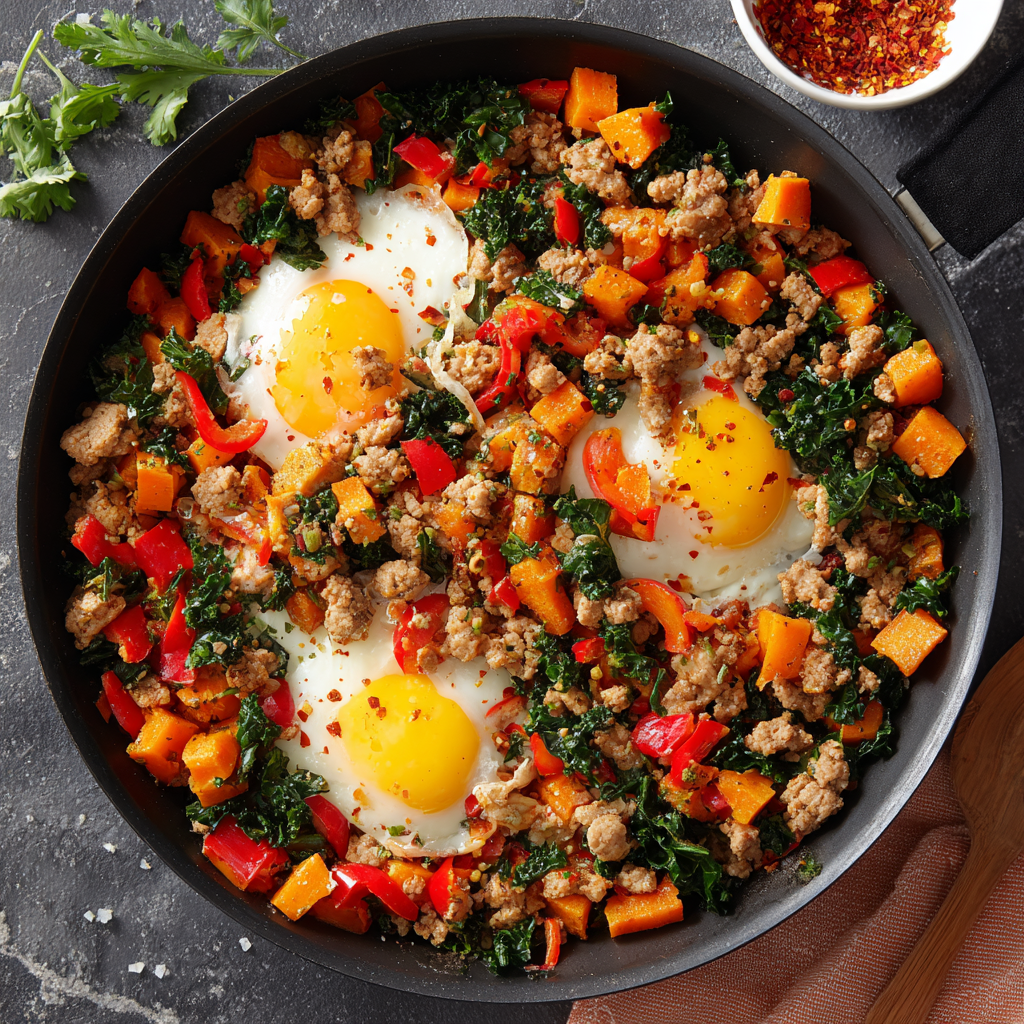
Turkey & Sweet Potato Skillet
Let’s Make Some Cozy Kitchen Magic: Your New Favorite Skillet Awaits!
Hey there, friend! Come on in, pull up a stool, and let’s get something delicious simmering. You know those days when you’re craving something that feels like a warm hug from the inside out, but you also want to feel good about what you’re eating? The kind of meal that’s nourishing, packed with flavor, and doesn’t leave you with a mountain of dishes? Yeah, I have those days all the time. That’s exactly why this Turkey & Sweet Potato Skillet is my absolute hero.
This isn’t just another one-pan recipe. This is a vibrant, colorful, and incredibly versatile dish that has saved my dinner routine more times than I can count. We’re talking lean protein, gorgeous sweet potatoes, colorful bell peppers, and a pop of green from kale, all brought together with a smoky, cozy spice blend that will make your whole kitchen smell incredible. It’s the kind of meal that proves healthy eating doesn’t have to be boring or complicated. Whether you scoop it into a bowl, wrap it in a warm tortilla, or crown it with a perfectly runny egg, this skillet is ready to become your weeknight bestie. So, grab your favorite pan, and let’s create something unforgettable together!
The Little Skillet That Could: A Tale of Kitchen Chaos & Triumph
I’ll never forget the first time this dish truly came to the rescue. It was a typical chaotic Tuesday. My daughter was working on a science project that involved, I kid you not, a miniature volcano made of baking soda and hope, the dog was chasing his tail like it owed him money, and I had approximately 20 minutes to get a healthy dinner on the table before we had to rush out the door for piano practice. The pressure was on!
I stood in front of the fridge, doing that universal “what-on-earth-am-I-making” stare. I saw a pack of ground turkey, a lonely sweet potato rolling around in the crisper drawer, and a half-used bag of kale. Inspiration struck. I threw it all in my most trusted cast-iron skillet, gave it a heavy-handed dash of my favorite smoked paprika, and crossed my fingers. Twenty minutes later, we were sitting down to a meal that was not only devoured with happy sounds but also made us feel energized and ready to tackle the rest of the evening. It was a moment of pure, unplanned kitchen triumph. This skillet has been a symbol of easy, flexible, and downright delicious winning ever since. It’s my reminder that the best meals often come from a little bit of chaos and a whole lot of heart.
Gathering Your Flavorful Cast of Characters
Here’s everything you’ll need to bring this cozy masterpiece to life. Don’t stress if you’re missing something—cooking is all about making it your own!
- 1 lb ground turkey: I love using 93% lean for a great balance of flavor and health. Feel free to swap in ground chicken, lean beef, or even a plant-based ground crumble for a vegetarian twist! The recipe is a fantastic canvas.
- 2 medium sweet potatoes, diced small: The key here is small, even dice (about 1/2-inch cubes) so they cook quickly and evenly. Their natural sweetness is the perfect counterpoint to the smoky spices. Butternut squash is a great stand-in if that’s what you have on hand.
- 1 bell pepper (any color), chopped: I use whatever color is on sale or looks brightest at the store! Each color has a slightly different flavor profile—red is sweeter, green is more bitter—so mix it up!
- 2 cups chopped kale: I prefer the texture of lacinato (dinosaur) kale, but curly kale works perfectly too. Pro Chef Tip: Give the leaves a good massage with a tiny bit of olive oil before chopping to break down the fibers and make them more tender. No kale? Spinach or Swiss chard are fabulous substitutes—just add spinach at the very end as it wilts in seconds.
- 2 cloves garlic, minced: Fresh is best here for that punchy, aromatic flavor. In a pinch, 1/2 tsp of garlic powder will work.
- 1 tsp smoked paprika: This is the non-negotiable star of the spice show! It gives that deep, smoky, almost bacony flavor. If you only have regular paprika, the flavor will be milder and less smoky.
- 1 tsp ground cumin: Adds a warm, earthy, and slightly citrusy note that pairs magically with the sweet potato and paprika.
- Salt & pepper, to taste: Season as you go! I always taste and adjust at the end.
- 2 tbsp olive oil: Divided for cooking the potatoes and the turkey. Avocado oil is another great high-heat option.
Let’s Get Cooking: Your Step-by-Step Guide to Skillet Perfection
Okay, apron on! Let’s transform these simple ingredients into something magical. Follow these steps, and you really can’t go wrong.
- Heat 1 tbsp olive oil in a large skillet over medium heat. I’m a huge fan of using a well-seasoned cast-iron or a sturdy stainless steel skillet here—they create a beautiful sear and distribute heat evenly. Chef’s Hack: To test if your oil is hot enough, flick a tiny drop of water into the pan. If it sizzles and dances, you’re good to go!
- Add your diced sweet potatoes and sauté for 7–8 minutes until they are just tender. Don’t rush this step! We’re not looking for them to be completely soft yet, just getting a head start on cooking and getting some nice color on the edges. Give them a stir occasionally to prevent sticking. Once they’re perfectly par-cooked, scoop them out onto a plate and set them aside. This is our mise en place moment—having everything ready makes the process so smooth.
- Add the remaining 1 tbsp of oil to the same skillet, then add the ground turkey. No need to wash the pan—all those little browned sweet potato bits are extra flavor! Break up the turkey with a wooden spoon or spatula as it cooks. Cook for about 5–6 minutes, until there’s no more pink. You should hear a happy sizzle!
- Now, for the flavor boost! Stir in the minced garlic, chopped bell pepper, smoked paprika, cumin, salt, and pepper. Ahhh, smell that? This is where the magic really happens. Cooking the spices for just a minute or two with the turkey and aromatics “blooms” them, unlocking their full, incredible flavor potential. Your kitchen is going to smell absolutely insane right now.
- Time for the grand reunion! Add the kale and the cooked sweet potatoes back into the skillet. Gently fold everything together. The kale will seem like a lot at first, but it wilts down beautifully.
- Cook for another 2–3 minutes, stirring everything together, until the kale has wilted and the sweet potatoes are heated through and perfectly tender. Give it a final taste. Does it need more salt? A crack of black pepper? Adjust to your liking! You’ve just made a masterpiece.
How to Serve Up This Cozy Creation
This dish is a chameleon! Here are a few of my favorite ways to serve it up. For a super cozy, comforting meal, simply spoon it into deep bowls and eat it as-is. To take it to the next level, top it with a fried or poached egg—that rich, runny yolk creates the most luxurious sauce. For a fun, hands-on approach, serve it with warm whole-wheat tortillas, lettuce cups, or even crispy taco shells for a build-your-own wrap bar. A dollop of creamy avocado, a sprinkle of fresh cilantro, or a dash of hot sauce are all fantastic finishing touches!
Make It Your Own: Delicious Recipe Variations
- Southwest Fiesta: Stir in a can of black beans (drained and rinsed) and a cup of frozen corn with the kale. Finish with a squeeze of lime juice and a handful of fresh cilantro.
- Mediterranean Twist: Swap the spices for 1 tsp dried oregano and 1/2 tsp cinnamon. Use spinach instead of kale and finish by crumbling over some feta cheese and a drizzle of tzatziki.
- Spice Lover’s Dream: Add 1/4 tsp of cayenne pepper or a finely chopped chipotle pepper in adobo sauce to the spice mix for a serious kick.
- Whole30/Paleo Friendly: This recipe is already almost there! Just ensure your turkey is sugar-free and served in a compliant way (e.g., in a bowl or lettuce wrap).
From My Kitchen to Yours: A Few Extra Thoughts
This recipe has evolved so much since that first chaotic Tuesday! I’ve learned that the smaller you dice the sweet potatoes, the happier you’ll be—nobody wants a crunchy spud in their cozy skillet. I also used to add the kale much earlier, which turned it a sad, army-green color. Adding it at the end keeps it vibrant and perfectly wilted. One time, I was out of kale and used a whole bag of fresh spinach instead. It vanished into the dish, making it incredibly moist and giving my veggie-skeptic husband zero things to pick out. A happy accident! This recipe is forgiving, so don’t be afraid to play around. It’s a testament to the beauty of a well-stocked pantry and a little creativity.
Your Questions, Answered!
Q: Can I make this Turkey Sweet Potato Skillet ahead of time?
A: Absolutely! This is a fantastic meal-prep hero. Let it cool completely and store it in an airtight container in the fridge for up to 4 days. It reheats beautifully in the microwave or on the stovetop with a tiny splash of water or broth to keep it moist.
Q: My sweet potatoes are taking forever to cook and are burning on the outside. What did I do wrong?
A: Ah, the classic dilemma! This almost always means your dice was too large or your heat was too high. For next time, aim for a consistent 1/2-inch dice. If it’s happening now, just add a couple tablespoons of water or broth to the pan after the first few minutes of sautéing and cover it with a lid for a bit to steam them until tender.
Q: Can I freeze this dish?
A: You can, but with a caveat. The texture of the kale and sweet potatoes can become a little soft and watery upon thawing. It will still taste great, but the texture won’t be *quite* as perfect. For best results, eat it within 4 days from the fridge.
Q: Is there a way to make this in an Instant Pot?
A: For sure! Use the Sauté function to brown the turkey. Add everything except the kale and stir. Cook on High Pressure for 4 minutes, then do a quick release. Stir in the kale until it wilts. Easy!

Turkey & Sweet Potato Skillet
- Total Time: 30 minutes
Description
This one-pan wonder is everything you want on a busy weeknight: hearty, colorful, and on the table in 30 minutes. Lean ground turkey, sweet potatoes, bell peppers, and kale come together in a smoky, cozy spice mix that fills your kitchen with irresistible aromas. Whether you eat it straight from the skillet, tuck it into tortillas, or crown it with a fried egg, this dish feels like a warm hug you’ll want again and again.
Ingredients
-
1 lb ground turkey (or chicken, beef, or plant-based crumble)
-
2 medium sweet potatoes, diced ½-inch
-
1 bell pepper, chopped
-
2 cups kale, chopped (or spinach/chard)
-
2 cloves garlic, minced
-
1 tsp smoked paprika
-
1 tsp cumin
-
2 tbsp olive oil, divided
-
Salt & pepper, to taste
Instructions
-
Heat 1 tbsp olive oil in a large skillet over medium. Add diced sweet potatoes; cook 7–8 min until lightly golden and just tender. Remove and set aside.
-
Add remaining oil. Brown turkey 5–6 min, breaking it up as it cooks.
-
Stir in garlic, bell pepper, paprika, cumin, salt & pepper. Cook 2–3 min until fragrant.
-
Return sweet potatoes to skillet. Add kale, stirring until wilted and potatoes are tender (2–3 min).
-
Taste and adjust seasoning. Serve hot—straight from the skillet or however you like!
Notes
-
Bowl style: Top with avocado, cilantro, or hot sauce.
-
Egg-topped: Add a fried or poached egg for a luxe finish.
-
Wraps: Spoon into tortillas or lettuce cups for handheld fun.
- Prep Time: 10 min
- Cook Time: 20 min
Nutrition
- Calories: 340 cal Per Serving
- Carbohydrates: 18g
- Protein: 28g
Nutritional Information (Per Serving)
~340 Calories | 28g Protein | 18g Carbohydrates | 18g Fat
Please note: This is an estimate and can vary based on specific ingredients used and portion sizes.
Prep Time: 10 mins | Cook Time: 20 mins | Total Time: 30 mins
Final Thoughts: Your New Weeknight Victory
And just like that, you’ve done it! In the time it takes to watch half a sitcom, you’ve created a meal that’s as nourishing as it is delicious. This Turkey & Sweet Potato Skillet is proof that a healthy, satisfying dinner doesn’t require a complicated recipe or a sink full of dishes. It’s all about simplicity, smart flavors, and a little bit of kitchen confidence.
Remember, this recipe is your blueprint, not a rigid rulebook. It’s designed to be twisted, tweaked, and made your own with whatever you have in the fridge. It’s the meal that will see you through busy weeknights, last-minute meal prep, and those days when you just need a reliable, cozy hug in a bowl.
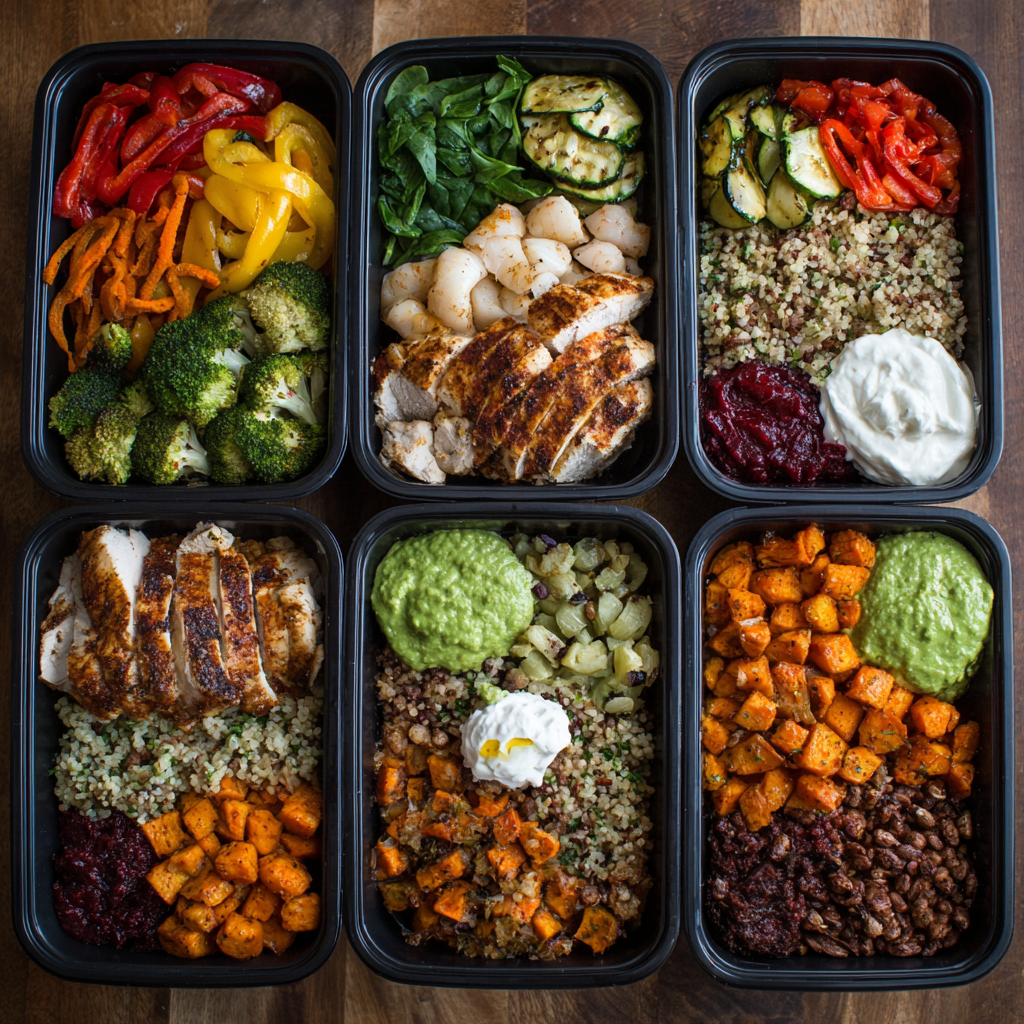
Ultimate Meal Prep Bowl – Mix & Match for the Week
Ditch the Boring Lunch: Your Ultimate Mix & Match Meal Prep Bowl Blueprint!
Hey there, friend! Come on in, the coffee’s fresh and I’ve got a serious game-changer to share with you today. If your weekdays are a chaotic whirlwind of meetings, errands, and “what on earth am I going to eat for lunch?!” panic, you are not alone. I’ve been there more times than I can count, staring into the fridge at 6 PM with that familiar sense of dread, ultimately reaching for… well, something less than inspiring.
But what if I told you that just one hour on a Sunday could set you up for a week of vibrant, delicious, and truly satisfying meals? Meals you’ll actually look forward to? I’m not talking about sad, steamed broccoli and plain chicken breast destined for the microwave. Oh no. We’re building flavor-packed, colorful bowls that are anything but boring. Think hearty grains, lean proteins, rainbow veggies, and creamy, zesty sauces that make your taste buds sing.
This isn’t just a recipe; it’s a formula. A blueprint for freedom in the kitchen! It’s designed to be flexible, forgiving, and fun. Whether you’re feeding a family, prepping for one, or navigating dietary needs, this mix-and-match approach is your new secret weapon. So, grab your favorite apron (the messy one with stories, obviously), and let’s turn meal prep from a chore into your favorite act of weekly self-care. Let’s build some bowls!
The Bowl That Started It All: A Tale of Trial, Error, and Tzatziki
This whole meal prep obsession started, like many of my best kitchen adventures, out of sheer necessity and a little bit of desperation. A few years back, I was juggling a hectic schedule, and my lunches were a disaster—a random assortment of crackers, a sad desk salad, or, let’s be real, a quick trip to the nearest cafe for a overpriced sandwich. I felt sluggish, uninspired, and my wallet was definitely feeling the pinch.
One Sunday, after a particularly glorious farmers’ market haul, I decided enough was enough. I roasted every vegetable I had—zucchini, peppers, red onions, you name it. I whipped up a quick batch of lemon-oregano chicken thighs (breasts were too intimidating back then!), and I made a giant vat of quinoa. I didn’t have a plan; I was just cooking to soothe my soul. I threw it all into containers with a big spoonful of the tzatziki I’d made for a party and a crumbling of feta.
The next day at lunch, I opened that container and it was a revelation. It was colorful, it was fresh, and it was mine. That first bite was more than just fuel; it was a moment of calm in a crazy day. It tasted like I had my life together, even when I absolutely did not. That was the “aha!” moment. Meal prep didn’t have to be a rigid, bland science. It could be creative, delicious, and feel like a giant hug from past-you to present-you. And it all started with a bowl.
Your Bowl-Building Shopping List
The beauty of this system is that you are the master of your domain! Use this list as inspiration. Raid your fridge, see what’s on sale, and choose what makes your heart happy. This is your culinary canvas!
The Ultimate Meal Prep Formula (Makes 4-5 servings)
Each glorious bowl = 1 Protein + 1 Grain/Base + 2 Veggies + 1 Flavor Boost
Choose Your Protein (Pick 1 or 2 to prep)
- Grilled Chicken Breast: My go-to! I pound it to an even thickness for perfect cooking every time. Chef’s Tip: Marinate for 30 minutes in lemon juice, olive oil, garlic, and dried oregano for a Mediterranean vibe.
- Ground Turkey or Lean Beef: Perfect for a taco-style bowl! Brown it with taco seasoning, cumin, and a pinch of chili powder.
- Baked Tofu or Tempeh: The ultimate veggie-powered protein. Chef’s Tip: Press your tofu for 30 minutes first, then cube and toss in cornstarch and soy sauce for a crispy, baked exterior.
- Hard-Boiled Eggs: So simple, so satisfying. A fantastic no-cook option. Peel them right before you assemble your bowls.
- Salmon or Shrimp: Cooks super fast! For salmon, I just season with salt, pepper, and a drizzle of maple syrup or honey, then bake at 400°F for 12-15 minutes.
Choose Your Grain or Base (Pick 1)
- Brown Rice or Quinoa: Classic, hearty, and filling. I cook my grains in low-sodium broth instead of water for an instant flavor upgrade.
- Farro or Couscous: Farro has a wonderful chewy texture, and couscous is lightning-fast to prepare. A great way to mix it up!
- Cauliflower Rice: The perfect low-carb, veggie-packed base. Chef’s Tip: Sauté it from frozen in a dry pan to cook off any excess moisture so your bowl doesn’t get soggy.
- Roasted Sweet Potato Cubes: Yes, they can be the base! Roast them with smoked paprika for a sweet and smoky foundation.
Add Your Veggies (Pick at least 2!)
- Roasted Broccoli, Bell Peppers, Zucchini: Roasting is magic—it caramelizes the natural sugars and creates incredible flavor. Toss with olive oil, salt, and pepper at 425°F for 20-25 minutes.
- Raw Carrots, Cucumber, Spinach, Red Cabbage: For crunch and freshness! I love using a vegetable peeler to create beautiful carrot and cucumber ribbons.
- Sautéed Kale or Mushrooms: Sauté kale with a little garlic until just wilted. Mushrooms cooked down with a splash of tamari are umami heaven.
Flavor Boosts & Toppings (The BEST part!)
- Hummus or Guacamole: Creamy, dreamy, and packed with healthy fats. A dollop transforms everything. Sub Tip: If you’re worried about guac browning, place the pit in the container with it or squeeze extra lime juice on top.
- Tahini Sauce, Tzatziki, or Yogurt Sauce: My absolute favorite category. A simple tahini sauce (tahini, lemon juice, water, garlic) goes with literally everything.
- Salsa or Pico de Gallo: Brings a bright, acidic kick that cuts through richer ingredients.
- Feta, Nuts, Seeds, or Fresh Herbs: The finishing touches! Crumbled feta, toasted pepitas, slivered almonds, or a huge handful of fresh cilantro or parsley add texture and a final pop of flavor.
- A Drizzle of Sriracha, Balsamic Glaze, or Soy Sauce: Your liquid gold. Keep a few small bottles in your desk drawer for an easy lunchtime upgrade.
Let’s Get Prepping: Your Step-by-Step Blueprint
Okay, apron on, music playing, let’s do this! We’re going to work efficiently, using your oven and stovetop simultaneously. This whole process should take you about 45-60 minutes, start to finish.
- Preheat and Plan. First, preheat your oven to 425°F (220°C). Take a deep breath and glance at your chosen ingredients. Get out all your baking sheets, pots, and pans. This is called “mise en place” – getting everything in its place. It feels fancy and makes you look like a pro.
- Attack the Oven. Chop your chosen roasting vegetables into even, bite-sized pieces. This ensures they cook at the same rate. Toss them in a large bowl with a good glug of olive oil, salt, and pepper. Don’t be shy with the seasoning! Spread them in a single layer on a parchment-lined baking sheet (for easy cleanup!). Pop them in the oven and set your timer for 20 minutes. If you’re doing sweet potatoes, they might go on a separate sheet as they can take longer (closer to 30 mins).
- Start Your Grains. While the veggies are roasting, get your grain cooking. If you’re doing quinoa or rice, get it going on the stove according to package directions (remember: broth instead of water!). This is usually a bring-to-a-boil-then-simmer situation, which means it will happily cook itself while you focus on other things.
- Cook Your Protein. This is your main active cooking time. If you’re grilling chicken, heat your grill pan or skillet over medium-high heat. Cook for 5-7 minutes per side, depending on thickness. If you’re using ground meat, brown it in a skillet, breaking it up as it cooks, and add your spices. If you’re baking tofu or salmon, now’s the time to get it in the oven (maybe on another rack with the veggies).
- The Grace Period. Your protein is resting, your grains are simmering, your veggies are roasting. This is the perfect time to wash and chop any raw veggies you’re using—spinach, cucumber, etc. Also, mix up your sauces! Whisk together that tahini sauce or spoon your store-bought hummus into small containers.
- Cool and Assemble. Once everything is cooked, let it all cool for about 10-15 minutes. Putting steaming hot food directly into containers creates condensation, which leads to sogginess—the enemy of good meal prep! I spread my grains and proteins on a large plate or baking sheet to speed up the cooling process. Then, it’s assembly line time! Grab your containers and start building. I usually do a base of grain, then protein, then a mix of roasted and raw veggies.
- Store Smart. Keep your sauces and any super crunchy toppings (like nuts or seeds) separate in small containers or bags. Only add them right before you eat to maintain perfect texture. Pop everything in the fridge, and give yourself a massive high-five. You did it!
How to Serve Your Masterpiece
When lunchtime rolls around, it’s showtime! If you’ve kept your components separate, you can even mix and match throughout the week to keep things interesting. To serve, simply grab your base container and your sauce/topping container. Drizzle your glorious sauce over the top, sprinkle on your crunchy toppings and fresh herbs, and give it a good mix. If you’re reheating, do so gently in the microwave for 1-2 minutes, stopping to stir halfway. The goal is to warm it through without nuking it into oblivion. Then, add your cold toppings and enjoy immediately!
Mix It Up! Endless Bowl Variations
The fun never ends! Here are a few of my favorite themed combinations to spark your creativity:
- Mexican Fiesta: Cumin-lime chicken or black beans, cilantro-lime cauliflower rice, roasted corn and peppers, pico de gallo, guacamole, and a drizzle of hot sauce.
- Asian Ginger-Sesame: Sesame-baked tofu or shrimp, brown rice, sautéed shiitake mushrooms and snap peas, shredded red cabbage and carrots, with a ginger-soy-sesame oil dressing and a sprinkle of sesame seeds.
- Garden Herb & Lemon: Lemon-herb grilled chicken or chickpeas, farro, roasted zucchini and asparagus, a big handful of arugula, with a herby yogurt sauce and lemon wedge.
- Breakfast-for-Lunch: Scrambled eggs or turkey sausage, roasted sweet potato base, sautéed peppers and onions, with a dollop of salsa or avocado.
Olivia’s Chef Notes & Kitchen Confessions
This formula has evolved so much since that first fateful bowl. I used to be terrified of undercooking chicken, so I’d murder it into a dry, chewy hockey puck. I’ve learned that a good meat thermometer is a meal prepper’s best friend—pull chicken at 165°F and let it rest! I also once tried to prep sliced avocado for the whole week… it was a brown, mushy tragedy by Monday afternoon. Lesson learned: some things are worth doing fresh.
Don’t be afraid to play with spices! A little smoked paprika, a dash of curry powder, or a sprinkle of everything bagel seasoning can completely transform a bowl without any extra effort. My kitchen is almost always a beautiful disaster during prep Sunday, but seeing my fridge stocked with colorful, ready-to-go food is the most satisfying clean-up reward ever.
Meal Prep Bowl FAQs: Your Questions, Answered!
Q: How long do these bowls actually last in the fridge?
A: For best quality and food safety, aim to eat them within 4 days. The proteins and grains hold up beautifully. If you’re using a more delicate green like spinach, it might wilt a bit by day 4, but it’s still perfectly safe to eat.
Q: My bowls get soggy! How do I prevent that?
A: Sogginess is public enemy #1! The key is three-fold: 1) Let everything cool completely before assembling. 2) Store wet ingredients (sauces, juicy tomatoes) separately. 3) If using raw veggies that release water (like cucumbers), you can pack them separately or add them the day you plan to eat them.
Q: Can I freeze these bowls?
A: You can, but with caution. Grains (rice, quinoa) and proteins (cooked chicken, beef) freeze very well. Roasted veggies can become mushy upon thawing. I don’t recommend freezing any bowls with dairy-based sauces or raw veggies. For freezing, portion the cooled grain and protein into freezer-safe bags or containers, press out the air, and freeze for up to 3 months. Thaw in the fridge overnight before assembling your bowl with fresh components.
Q: I’m bored of the same bowl every day. Help!
A: This is why we keep components separate! Don’t assemble everything into individual containers at once. Instead, store each category (protein, grain, veggie A, veggie B) in its own large container. Each morning, you can build a custom bowl, choosing a different combination each time. It feels like a whole new meal!
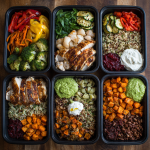
Ultimate Meal Prep Bowl – Mix & Match for the Week
- Total Time: 19 minute
Description
Say goodbye to sad desk salads and hello to vibrant, flavor-packed bowls that actually make you excited for lunch. With just an hour of prep, you’ll stock your fridge with nourishing, customizable meals that are as fun to build as they are to eat. Think of this as your blueprint—pick a protein, add a base, pile on veggies, and finish with a sauce or topping. The result? Endless variety, zero boredom.
Ingredients
1 Protein + 1 Grain/Base + 2 Veggies + 1 Flavor Boost
Proteins (choose 1–2)
-
Grilled chicken (marinated in lemon, olive oil, garlic, oregano)
-
Ground turkey or beef (seasoned taco-style)
-
Baked tofu or tempeh (pressed & tossed in soy sauce + cornstarch)
-
Hard-boiled eggs
-
Salmon or shrimp (roasted with honey or maple drizzle)
Grains/Bases
-
Brown rice, quinoa (cook in broth for extra flavor)
-
Farro or couscous
-
Cauliflower rice (low-carb, sautéed)
-
Roasted sweet potato cubes (smoky with paprika)
Veggies
-
Roasted: broccoli, zucchini, bell peppers, red onion
-
Raw: cucumber, carrots, spinach, red cabbage
-
Sautéed: kale, mushrooms
Flavor Boosts
-
Creamy: hummus, tzatziki, tahini, guacamole
-
Fresh: herbs, salsa, pico de gallo
-
Crunch: nuts, seeds, crumbled feta
-
Drizzle: sriracha, balsamic glaze, soy sauce
Instructions
-
Roast Veggies: 425°F (220°C) for 20–25 min.
-
Cook Grain: Simmer quinoa/rice in broth until fluffy.
-
Prepare Protein: Grill chicken, brown turkey, bake salmon, or roast tofu.
-
Cool & Assemble: Let ingredients cool before portioning. Build bowls with base → protein → veggies → sauce/toppings.
-
Store Smart: Keep sauces and crunchy toppings separate until serving.
Notes
-
Mexican Fiesta: Chicken, cauliflower rice, roasted corn + peppers, pico, guac.
-
Asian Sesame: Tofu, brown rice, sautéed mushrooms + snap peas, sesame-ginger dressing.
-
Mediterranean: Salmon, farro, roasted zucchini + asparagus, tzatziki, feta.
-
Breakfast-for-Lunch: Eggs, roasted sweet potato, peppers + onions, salsa.
- Prep Time: 45–60 min (batch prep)
Nutrition
- Calories: 500–600 cal Per bowl
- Fat: 20–25g
- Carbohydrates: 45–55g
- Protein: 35–40g
Nutritional Information*
*This is a general estimate based on a sample bowl with 4oz grilled chicken breast, ½ cup quinoa, 1 cup roasted broccoli and peppers, and 2 tbsp tahini sauce. Values will vary dramatically based on your specific ingredients and portions.
- Calories: ~500-600
- Protein: ~35-40g
- Carbohydrates: ~45-55g
- Fat: ~20-25g
Final Thoughts: Your Week, Conquered.
Just like that, you’ve done it. You’ve taken control of the chaos and turned it into something beautiful, nutritious, and downright delicious. Look at that fridge! It’s no longer a cavern of questionable leftovers; it’s a curated collection of possibilities, a gallery of your own making.
Remember, this blueprint isn’t about perfection. It’s about progress. Some weeks you’ll roast every vegetable known to humankind, and other weeks, a bag of pre-shredded carrots and a container of store-bought hummus will be your MVP. And that’s more than okay—it’s brilliant.
The real magic of this system isn’t just in the time or money you’ll save (though you’ll save a ton of both). It’s in the peace of mind you’ve just gifted your future self. All those hectic weekdays just got a whole lot brighter with a lunch you can truly look forward to.
So here’s to ditching the boring lunch for good. Here’s to more energy, less stress, and the simple, profound joy of a meal made with your own hands. You’ve got this, my friend. Now go forth and build your masterpiece.
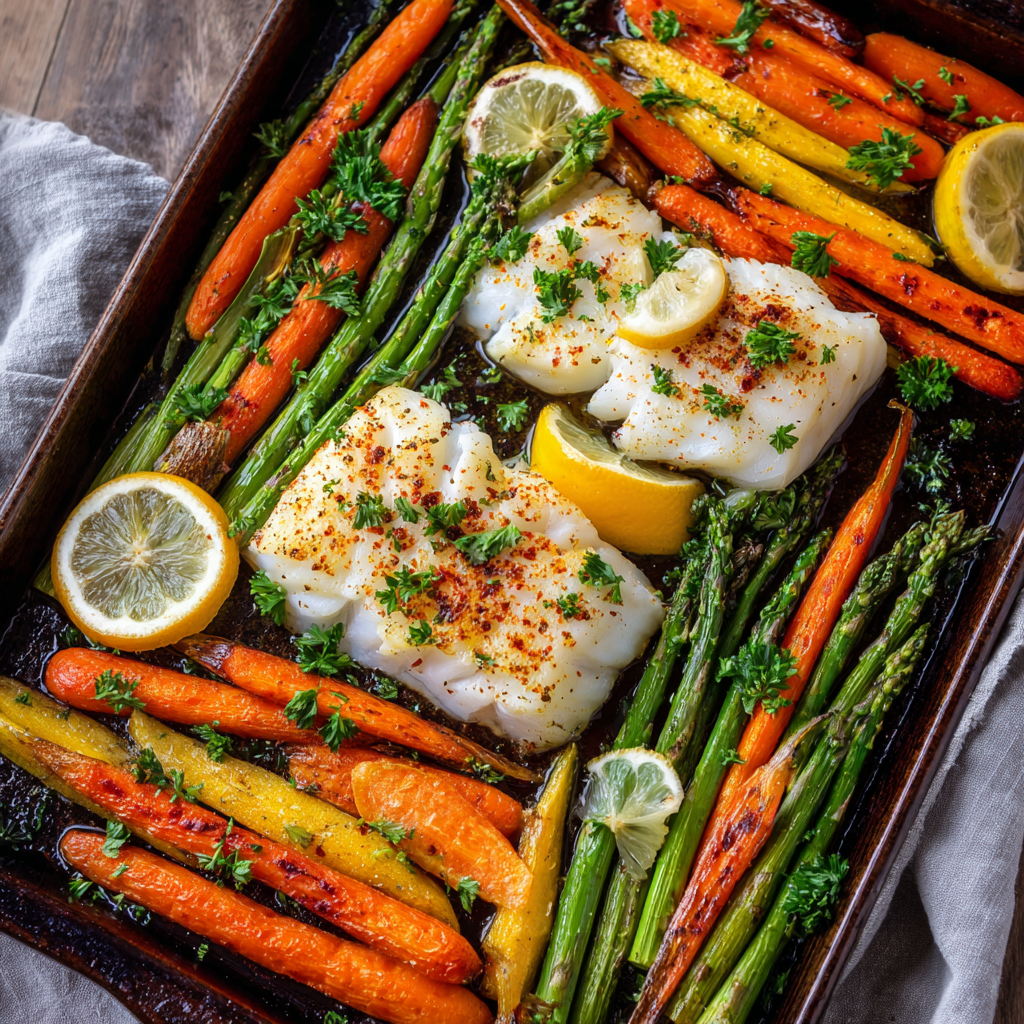
Baked Cod with Roasted Veggies
Your New Favorite Weeknight Dinner is Here!
Hey there, friend! Come on in, grab an apron, and let’s get something delicious simmering. Have you ever had one of those days where you stare into the fridge, willing a magical, healthy, and ridiculously easy dinner to just… appear? You’re craving something that feels nourishing and special, but you also don’t want to spend the next hour wrestling with a mountain of pots and pans. I see you nodding! We’ve all been there, and that’s exactly why this recipe for Baked Cod with Roasted Veggies is about to become your new kitchen bestie.
This isn’t just another fish recipe. This is my go-to for a meal that is light yet satisfying, packed with flavor but not with effort. We’re talking tender, flaky cod fillets, kissed with garlic and smoky paprika, roasted on a single sheet pan alongside bright, crisp-tender asparagus and sweet, earthy carrots. In under 30 minutes, you’ll have a complete, beautiful meal on the table that will have everyone asking for seconds. It’s the kind of dish that proves you don’t need fancy techniques or a ton of time to create something truly wonderful. So, preheat that oven—we’re about to make magic happen.
The Little Beach Town & The Perfect Fish Dinner
This recipe always takes me right back to a tiny, sun-bleached cottage my family used to rent every summer in a small New England fishing village. The air always smelled like salt and pine, and the highlight of every trip was a late afternoon walk down to the pier where the day’s catch was coming in. My dad would pick out the freshest cod he could find, still glistening, while my mom and I would raid the farm stand for whatever veggies looked best that day.
Back at the cottage, with the screen door slamming shut behind us, we’d throw everything together with olive oil, lemon, and whatever herbs we had. The simplicity was the whole point. We’d eat it straight off the baking sheet, squeezed onto the porch, listening to the crickets and feeling completely, utterly happy. That’s the feeling I try to capture every time I make this dish—the pure, uncomplicated joy of a meal made with fresh ingredients and shared with people you love. It’s more than dinner; it’s a little edible vacation.
Gathering Your Flavor All-Stars
One of the best things about this recipe is its simplicity. We’re using a handful of humble ingredients and letting their natural flavors shine. Here’s what you’ll need to make this cozy masterpiece for 2-3 people:
- 2–3 cod fillets (about 6 oz each): The star of the show! Look for firm, thick, pearly-white fillets with a fresh, clean smell (never fishy). Chef’s Insight: If cod isn’t available, other firm white fish like haddock, halibut, or basa work beautifully. Thaw frozen fillets completely in the fridge overnight and pat them very dry for the best result.
- 1 bunch asparagus, trimmed: Our green veggie hero. Substitution Tip: No asparagus? No problem! Green beans, broccoli florets, or zucchini spears are fantastic here. The key is choosing a veggie that roasts in about the same time as the fish.
- 2 large carrots, peeled and sliced: They add a wonderful sweetness and a pop of vibrant color. I like to slice them on a slight diagonal—it looks prettier and allows for more caramelized edges! Chef’s Insight: Feel free to swap in bell peppers, sweet potatoes (cut very small), or parsnips.
- 2 tbsp olive oil, divided: This is our cooking medium and flavor carrier. Substitution Tip: Avocado oil is a great high-heat alternative with a neutral flavor.
- 2 cloves garlic, minced: Non-negotiable for that savory, aromatic punch! Chef’s Insight: For a gentler, sweeter flavor, you can use ½ tsp of garlic powder in a pinch.
- 1 tsp smoked paprika: This is the secret weapon! It doesn’t add heat, but a deep, smoky complexity that makes the cod taste like it came off a grill. Substitution Tip: Regular sweet paprika works, but you’ll lose that smoky magic. A tiny pinch of cayenne can add a kick if you like heat.
- Salt & pepper, to taste: The essential flavor enhancers. I use a coarse sea salt and freshly cracked black pepper—it makes a difference!
- Lemon wedges, for serving: Absolutely crucial. That bright, fresh squeeze at the end lifts every single flavor and ties the whole dish together.
- Optional: fresh parsley for garnish: A little sprinkle of green herbs at the end makes it look restaurant-quality and adds a fresh flavor note.
Let’s Make Some Magic: Step-by-Step
Ready to see how easily this all comes together? Follow these steps, and you’ll have a flawless dinner in no time. I’ve packed this section with all my favorite little hacks to ensure your success!
- Preheat oven to 400°F (200°C). Line a baking sheet with parchment paper. Chef’s Hack: Preheating is key! A properly hot oven is what gives us those beautifully roasted veggies and perfectly cooked fish, not a steamed mess. The parchment paper isn’t just for easy cleanup; it also prevents sticking without needing a ton of extra oil.
- In a small bowl, mix 1 tbsp olive oil with garlic, paprika, salt, and pepper. Chef’s Commentary: Give this mixture a quick taste on your finger (it’s raw garlic, so be brave!). This is your chance to adjust the seasoning before it goes on the fish. Want more smoke? Add a pinch more paprika. This little bowl of goodness is where the flavor for our cod is born.
- Place cod fillets on one side of the sheet and brush with the garlic-oil mixture. Chef’s Hack: Leave a little space between the fillets so the heat can circulate evenly. Be generous and get that flavorful oil all over the top of each fillet. We’re not seasoning the bottom, so all the love goes on top!
- Toss asparagus and carrots with remaining 1 tbsp olive oil, salt, and pepper. Spread on the other side of the baking sheet. Chef’s Hack: The best way to do this is right on the pan! Drizzle the veggies with oil, sprinkle with salt and pepper, and use your hands to toss them until they’re evenly coated. This saves you from dirtying another bowl. The key is to keep the fish and veggies in their own zones so the veggies can get nicely roasted without making the fish watery.
- Bake for 18–20 minutes, or until cod flakes easily with a fork and veggies are tender. Chef’s Commentary: Oven times can vary, so start checking at the 15-minute mark. The perfect cod is opaque all the way through and will flake apart gently when pressed with a fork. Don’t overcook it, or it can become dry. The veggies should be tender-crisp with a few deliciously caramelized spots.
- Serve with lemon wedges and garnish with parsley if desired. Chef’s Hack: Do not, I repeat, DO NOT skip the lemon wedge squeeze at the end. It’s the final, essential layer of flavor that makes everything pop.
Plating Your Perfect Plate
This meal is a beauty straight from the pan, so serving is a breeze! I love to use a large spatula to gently transfer a cod fillet to the center of a warm plate. Then, artfully pile the roasted carrots and asparagus alongside it. The vibrant orange and green against the white fish is just gorgeous. Give the whole thing a generous squeeze of fresh lemon right at the table so everyone gets that amazing aroma. For a complete meal, this pairs wonderfully with a quick quinoa pilaf, a simple arugula salad, or just a big slice of crusty bread to soak up any delicious juices left on the plate.
Make It Your Own: Delicious Variations
The beauty of a formula this simple is how easily you can adapt it! Here are a few of my favorite twists:
- Lemon-Herb Bliss: Swap the paprika for the zest of one lemon and a tablespoon of chopped fresh herbs like dill, parsley, or thyme in the oil mixture.
- Mediterranean Twist: Replace the carrots and asparagus with cherry tomatoes, sliced red onion, and kalamata olives. Crumble a little feta cheese over the veggies in the last 5 minutes of baking.
- Spicy Kick: Add a ¼ teaspoon of cayenne pepper or a few red pepper flakes to the oil mixture for a bit of heat.
- Bread Crumb Topping: For a bit of crunch, mix ¼ cup of panko breadcrumbs with a tablespoon of melted butter and a pinch of garlic powder. Sprinkle over the cod before baking.
- Dairy-Free “Butter”: For a richer flavor, brush the fish with melted vegan butter or ghee instead of olive oil.
Olivia’s Chef Notes & Kitchen Stories
This recipe has been with me for years, and it’s evolved in the most fun ways. I once made it for a first date, nervously checking the oven every two minutes, convinced I was going to serve a dried-out disaster. Turns out, it was perfect, and we spent the whole dinner talking about our favorite food memories instead of stressing. (He loved it, by the way!).
The biggest lesson I’ve learned? Trust your instincts, not just the timer. Your oven is unique, and your fillets might be thinner or thicker than mine. The “flake with a fork” test is your most reliable tool. Also, don’t be afraid to get creative with the veggies—it’s a fantastic way to clean out the fridge. This dish is forgiving and wants you to succeed. It’s less of a strict recipe and more of a template for a wonderful, stress-free dinner.
Your Questions, Answered!
I’ve gotten so many wonderful questions about this recipe over the years. Here are the most common ones to help you out:
Q: My veggies aren’t cooking at the same rate as my fish. What did I do wrong?
A: This is the most common hiccup! It usually means the veggie pieces were too large. The key is to cut all your veggies into uniform, bite-sized pieces so they cook evenly. If you’re using a harder vegetable like potatoes or carrots, you can give them a 5-minute head start in the oven before adding the fish and quicker-cooking veggies like asparagus.
Q: How can I tell if the cod is cooked through without overcooking it?
A: The visual and tactile clues are your best friends. The fish will turn from translucent to completely opaque white. Gently press the top of the fillet with a fork or your finger; it should feel firm but still yield slightly (it will continue to cook a bit after you take it out of the oven). The most reliable test is the “flake test.” Take a fork and try to flake apart a piece of the fish at its thickest point. If it flakes easily and is opaque all the way through, it’s done!
Q: Can I use frozen cod fillets?
A: Absolutely! It’s a great budget-friendly option. The most important step is to thaw them completely in the refrigerator overnight. Then, take them out of the package and pat them incredibly dry with paper towels. If you put wet fish on the pan, it will steam instead of roast and won’t get those lovely caramelized edges.
Q: My fish stuck to the pan! How do I prevent that?
A> Parchment paper is your best defense against sticking! If you don’t have any, you can generously grease the baking sheet with a little extra olive oil or cooking spray. Also, ensure your fish is patted dry and avoid moving it around on the pan once it’s placed.

Baked Cod with Roasted Veggies
Description
This is the ultimate weeknight dinner—healthy, hearty, and on the table in under 30 minutes. Flaky, garlicky cod roasts to perfection alongside sweet carrots and crisp-tender asparagus, all on one sheet pan for easy cleanup. It’s nourishing, light, and bursting with fresh flavor—proof that simple ingredients can create something extraordinary.
Ingredients
-
2–3 cod fillets (6 oz each, fresh or thawed frozen)
-
1 bunch asparagus, trimmed
-
2 large carrots, peeled & sliced
-
2 tbsp olive oil, divided
-
2 cloves garlic, minced (or ½ tsp garlic powder)
-
1 tsp smoked paprika
-
Salt & pepper, to taste
-
Lemon wedges, for serving
-
Optional: fresh parsley for garnish
Instructions
-
Preheat oven to 400°F (200°C). Line a baking sheet with parchment paper.
-
Season Cod: Mix 1 tbsp olive oil, garlic, paprika, salt, and pepper. Brush over fillets.
-
Prep Veggies: Toss asparagus & carrots with remaining oil, salt, and pepper. Spread on other half of pan.
-
Bake: Roast 18–20 minutes, until cod flakes with a fork and veggies are tender.
-
Finish: Serve hot with lemon wedges and parsley.
Notes
-
Mediterranean: Use cherry tomatoes, red onion & olives. Finish with feta.
-
Lemon-Herb: Swap paprika for lemon zest + fresh dill or thyme.
-
Spicy: Add cayenne or red pepper flakes to seasoning mix.
-
Crunchy: Sprinkle cod with panko mixed with butter & garlic before baking.
Nutritional Information*
*This is an estimate for informational purposes and may vary based on specific ingredients used.
Per Serving (based on 2 servings): Calories: ~300 | Protein: 30g | Carbohydrates: 10g | Fat: 15g
This meal is an excellent source of lean protein, vitamins from the vibrant vegetables, and healthy fats from the olive oil.
Final Thoughts: Your New Weeknight Victory
And just like that, you’ve done it. In less time than it takes for a pizza to be delivered, you’ve created a meal that is wholesome, elegant, and deeply satisfying. This Baked Cod with Roasted Veggies is more than just a recipe; it’s your ticket to reclaiming those busy weeknights.
It proves that a healthy dinner doesn’t have to be bland or complicated. It’s a reminder that the most memorable meals are often the simplest ones, built on fresh ingredients and a little bit of know-how. This is the kind of dish that builds confidence in the kitchen—a reliable, go-to solution for when you need a win.
So the next time that 5 p.m. panic starts to set in, I hope you remember this sheet pan waiting for you. Preheat the oven, grab whatever veggies are in the drawer, and give yourself the gift of a stress-free, delicious dinner. You’ve totally got this.
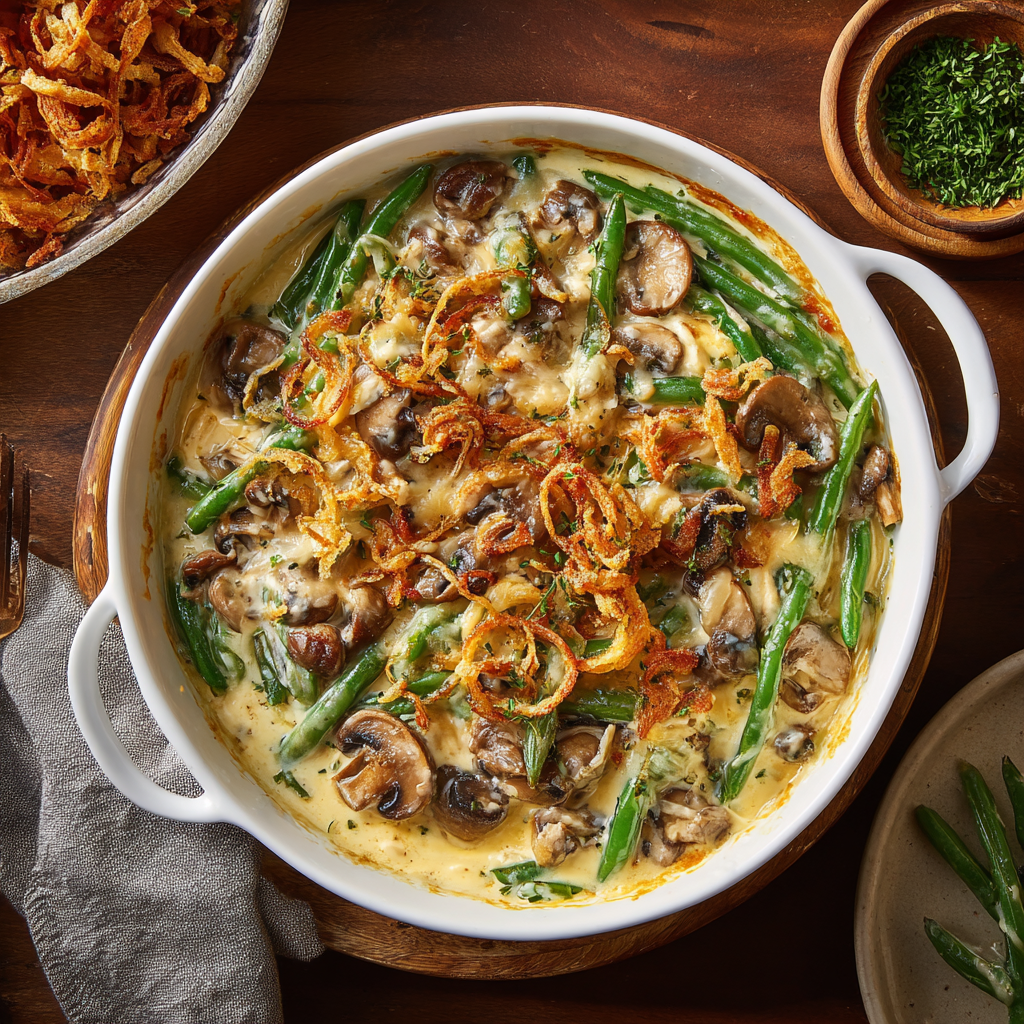
Paula Deen’s Green Bean Casserole
Forget Everything You Know About Green Bean Casserole
Hey there, friend! Olivia here, welcoming you back to my cozy kitchen. Can you smell that? It’s the unmistakable, soul-warming aroma of something cheesy, savory, and baking to golden perfection. It’s the scent of holiday gatherings, of potluck triumphs, and of pure, unadulterated comfort. Today, we’re tackling a true classic, but we’re doing it the right way – from scratch!
Now, I know what you’re thinking. You’re picturing that classic green bean casserole recipe on the back of the canned fried onions. It’s a nostalgic staple, and hey, no judgment from me! But what if I told you we could create something a thousand times more delicious, with fresh, vibrant ingredients, and it’s almost just as easy? We’re talking about Paula Deen’s Green Bean Casserole, but with our own little Olivia-approved twists.
This isn’t just a side dish; it’s the main event. It’s a creamy, dreamy, cheesy masterpiece featuring fresh green beans, earthy sautéed mushrooms, and a from-scratch sauce so good you’ll want to eat it with a spoon. Topped with that iconic crispy onion crunch, this casserole is guaranteed to steal the show at your next dinner table gathering. So, tie on your favorite apron (the messy one is always the best!), and let’s create some magic together.
The Casserole That Started It All
My love affair with this dish started not in a fancy restaurant, but at my best friend’s chaotic, loving, and incredibly loud family Thanksgiving. I was about 16, and my job was “Green Bean Casserole Duty.” I proudly opened the cans, mixed it all together, and plopped it in the oven. Her grandmother, a formidable Southern woman named Miss Martha, took one bite, smiled politely, and said, “Bless your heart, child. Next year, I’ll show you how we really do it.”
The following November, I stood in her flour-dusted kitchen and watched her work. There were no cans. Instead, there were fresh beans she’d snapped that morning, mushrooms she sautéed in a cast-iron skillet, and a roux she whisked with the focus of a scientist. She handed me a spoon to taste the sauce before it went into the dish. It was a revelation. It was rich, deeply savory, and packed with real flavor. That first bite of the finished casserole was a core memory—the crispy topping giving way to the most luxurious, creamy interior. It was the moment I realized that “from scratch” isn’t about being fancy; it’s about pouring real, honest love into the food we share. This recipe is my homage to Miss Martha and that life-changing lesson.
Gathering Your Cozy Kitchen Crew (The Ingredients!)
Here’s your shopping list for flavor town! Don’t be intimidated by the length; we’re just using real, whole ingredients. I’ve included all my best tips and swaps to make this work for you.
- 1 ½ lbs. fresh green beans, trimmed – This is our star! Fresh beans give a wonderful crisp-tender texture and vibrant flavor that canned beans just can’t match. Chef’s Insight: Look for beans that are firm and snap easily. No fresh? Frozen whole green beans (thawed) are a great backup! Avoid canned—they’ll get too mushy.
- ½ tsp baking soda – A little kitchen magic trick! Adding a pinch of baking soda to the blanching water helps the beans maintain their bright green color and tenderizes them just a bit faster.
- 2 chicken bouillon cubes – We’re boiling the beans in a flavor bath! This simple step infuses them with a savory depth from the inside out. Vegetarian? Use vegetable bouillon instead.
- 1 cup chicken broth – The base of our luxurious sauce. Again, veggie broth works perfectly here for a vegetarian version.
- 1 cup half and half – This gives us the perfect level of creaminess—rich but not overly heavy. No half and half? Whole milk will work, though the sauce will be a tad thinner. For a richer sauce, use heavy cream.
- 1 tsp Worcestershire sauce – Our secret weapon! It adds a complex, umami-packed savory note. (Check labels for anchovies if you need a vegetarian option; there are anchovy-free versions out there!).
- ½ tsp each: onion powder, dried parsley, mustard powder – The flavor trifecta! Onion powder gives a consistent base flavor, parsley adds a tiny hint of freshness, and mustard powder provides a subtle tang that cuts through the richness.
- ¼ tsp each: salt, pepper – Seasoning essentials. We’ll adjust to taste later!
- 8 oz. mushrooms, sliced – I use cremini (baby bella) for their earthy flavor, but white button mushrooms work great too. Slicing them yourself is best for texture!
- Pinch of salt (for mushrooms) – Drawing out the moisture is key to getting them beautifully browned and flavorful.
- 3 cloves garlic, minced – Because is it even a recipe without garlic? Fresh is best here!
- 5 tbsp butter, divided Butter makes everything better, and we’re using it for both sautéing and building our roux. Salted or unsalted is fine—just taste before adding extra salt later.
- 3 tbsp flour – This combines with the butter to create our roux, the thickening agent for our sauce. All-purpose is perfect.
- 3 tbsp grated Parmesan cheese – A little bit of salty, nutty Parmesan adds a fantastic layer of flavor to the sauce.
- 2 ¼ cups shredded cheddar cheese – The king of cheese pull! I recommend shredding a block of sharp cheddar yourself for the best meltability. Pre-shredded bags contain anti-caking agents that can make the sauce grainy.
- 1 ½ cups crispy fried onions – The iconic crowning glory! You can find these in the canned vegetable aisle. While we’re making the rest from scratch, this is one shortcut I fully endorse for that classic crunch.
Let’s Get Cooking: Building Your Masterpiece
Okay, team! Let’s break this down into simple, foolproof steps. Read through them once before you start—it’s like having a roadmap to deliciousness.
- Prep Your Beans: Bring a large pot of water to a rolling boil. Add the baking soda and bouillon cubes—watch it fizz! That’s the science happening. Add your trimmed green beans and boil them for just 5-7 minutes. We want them just tender but still with a good snap (al dente!). Chef’s Hack: While they boil, prepare a large bowl of ice water. As soon as the beans are done, drain them and immediately plunge them into the ice bath. This “shocks” them, stopping the cooking process and locking in that gorgeous green color. Drain again and set aside.
- Sauté Those Veggies: Place a large skillet or Dutch oven over medium-high heat. Melt 2 tablespoons of your butter. Add the sliced mushrooms and that pinch of salt. Don’t crowd them! Let them sit without stirring for a minute or two to get a beautiful brown sear. Then, give them a toss and cook until they’ve released their water and are deeply browned. Add the minced garlic and cook for one more minute, until fragrant. Your kitchen should smell amazing right now.
- Create the Roux (& Don’t Panic!): Push the mushrooms to the side of the skillet. Reduce the heat to medium. Add the remaining 3 tablespoons of butter to the center of the skillet and let it melt. Sprinkle the flour over the melted butter and immediately start whisking! Cook this pasty mixture (your roux) for about 1 minute. It will smell a bit toasty and nutty—that’s exactly what we want! This cooks out the raw flour taste.
- Whisk, Whisk, Whisk!: Now, slowly pour in the chicken broth while whisking constantly. I mean CONSTANTLY. This is the key to a lump-free sauce. Once the broth is incorporated and smooth, slowly whisk in the half and half. Keep whisking until the mixture is smooth and begins to gently simmer and thicken. This should take 3-5 minutes.
- Season to Perfection: Now, stir in your Worcestershire sauce, onion powder, dried parsley, mustard powder, salt, and pepper. Let the sauce simmer for another 2-3 minutes. Give it a taste! This is your moment. Does it need more pepper? A pinch more salt? Adjust it to your liking.
- Get Cheesy: Turn the heat down to low. Now, stir in the grated Parmesan and 2 cups of the shredded cheddar cheese. Keep stirring until the cheese is fully melted and the sauce is incredibly smooth and luxurious. Remove the skillet from the heat.
- Combine & Assemble: Now, fold those beautiful blanched green beans into the cheesy mushroom sauce. Make sure every bean is coated in that gloriousness. Carefully pour the entire mixture into a greased 9×13 inch baking dish and spread it out evenly.
- The Grand Finale (The Topping!): Sprinkle the remaining ¼ cup of cheddar cheese over the top. Finally, crown your creation with an even layer of those crispy fried onions. They’ll bake into the most perfect, golden, crunchy crust.
- Bake to Bubbly Glory: Pop that dish into a preheated 350°F (175°C) oven and bake for 25-30 minutes. You’re waiting for the edges to be vigorously bubbly and the topping to be a deep, golden brown. Let it rest for about 5-10 minutes before serving. This allows the sauce to set slightly so it doesn’t run everywhere when you scoop it.
How to Serve This Show-Stopping Side
This casserole is a star, so let it shine! Use a large spoon or serving spatula to scoop out hearty portions, making sure to get all the way to the bottom for those saucy beans. I love serving it right from the baking dish placed on a trivet in the middle of the table—it just feels homey and inviting. It’s the perfect companion to your holiday turkey, a glazed ham, or even a weeknight roasted chicken. For a true comfort food feast, pair it with my Creamy Garlic Mashed Potatoes and a simple arugula salad with a bright vinaigrette to balance the richness. Don’t forget the extra crispy onions on the side for those who want an extra crunch on their serving!
Make It Your Own! Delicious Variations
The beauty of this recipe is its adaptability. Play with it and make it yours!
- Bacon Lover’s Dream: Cook 6 slices of chopped bacon until crispy. Use the bacon fat to sauté your mushrooms for an insane depth of flavor, and sprinkle the cooked bacon bits on top with the crispy onions.
- “Cream Of” Shortcut: In a serious time crunch? You can substitute the chicken broth, half and half, and flour with a can of cream of mushroom soup. Sauté the mushrooms and garlic, stir in the soup, half a soup can of milk, the Worcestershire, and seasonings, then proceed with the cheese and beans. It’s a hybrid hack!
- Ultra Green & Healthy: Swap the green beans for fresh broccoli florets or asparagus pieces. Use whole wheat flour and low-fat milk to lighten it up a touch.
- Wild Mushroom Fancy Version: Use a mix of wild mushrooms like shiitake, oyster, and cremini for a more complex, gourmet earthiness.
- Spicy Kick: Add a few dashes of your favorite hot sauce to the cheese sauce, or sprinkle a little cayenne pepper or smoked paprika over the top before baking.
Olivia’s Chef Notes & Kitchen Stories
This recipe has evolved so much in my kitchen over the years. I once, in a pre-coffee haze, accidentally used powdered sugar instead of flour for the roux. Let me tell you, a sweet, cheesy, mushroom sauce is… not it. We ordered pizza that night and I learned to always label my mason jars!
The biggest game-changer for me was the blanching step with the bouillon and baking soda. It seems like a small thing, but it genuinely makes the beans so much more flavorful and vibrant. This casserole is also the ultimate make-ahead friend. I often assemble the whole thing (right up to adding the crispy onion topping), cover it tightly, and refrigerate it overnight. The next day, I just pop it in the oven straight from the fridge, adding an extra 5-10 minutes to the baking time. It’s a lifesaver for holiday chaos. This dish is all about joy, comfort, and sharing. Don’t stress about perfection—embrace the messy, cheesy, wonderful process.
Your Questions, Answered!
Q: My sauce turned out grainy. What happened?
A: This is almost always a cheese issue! Pre-shredded bagged cheese contains starches to prevent clumping, and these can seize up and become grainy when melted into a sauce. For a super smooth sauce, always shred your cheese from a block. Also, make sure your heat is on low when you add the cheese, and don’t let the sauce boil after the cheese is melted.
Q: Can I make this entire casserole ahead of time?
A: Absolutely! It’s a fantastic make-ahead dish. Assemble the casserole completely (including the crispy onion topping), cover it tightly with plastic wrap or foil, and refrigerate for up to 24 hours. When you’re ready, bake it straight from the fridge. You’ll likely need to add 5-15 minutes to the baking time since it will be starting from cold. Keep an eye on the topping—if the onions are getting too brown before the inside is hot, tent the dish loosely with foil.
Q: My casserole is too runny. How can I fix it?
A: A runny casserole usually means the sauce needed a little more time to thicken on the stovetop before baking. Next time, let the sauce simmer a bit longer until it nicely coats the back of a spoon. For this batch, just let it rest for a full 10-15 minutes after baking. It will continue to thicken as it cools. You can also try adding a tablespoon of cornstarch slurry (equal parts cornstarch and cold water, mixed) to the simmering sauce on the stove if you catch it before it’s too late.
Q: Is there a way to make this vegetarian?
A: Easily! Use vegetable bouillon cubes to boil the beans and vegetable broth in the sauce. Just be sure to check your Worcestershire sauce label, as many traditional brands contain anchovies. Look for an anchovy-free or specifically vegetarian Worcestershire sauce (most health food stores carry one).

Paula Deen’s Green Bean Casserole
- Total Time: 45 min
Description
This isn’t your grandma’s canned version—it’s fresher, cheesier, and guaranteed to wow. Imagine crisp-tender green beans, sautéed mushrooms, and a from-scratch creamy cheese sauce, all bubbling beneath a golden crown of crispy fried onions. It’s comfort food elevated, the kind of dish that earns “just one more scoop” at every holiday table.
Ingredients
-
1 ½ lbs fresh green beans, trimmed (or thawed frozen)
-
½ tsp baking soda
-
2 chicken (or veggie) bouillon cubes
-
1 cup chicken (or veggie) broth
-
1 cup half & half (or whole milk/heavy cream)
-
1 tsp Worcestershire sauce (vegetarian if needed)
-
½ tsp each: onion powder, dried parsley, mustard powder
-
¼ tsp salt + pepper
-
8 oz mushrooms, sliced
-
3 cloves garlic, minced
-
5 tbsp butter, divided
-
3 tbsp flour
-
3 tbsp grated Parmesan
-
2 ¼ cups shredded sharp cheddar
-
1 ½ cups crispy fried onions
Instructions
-
Blanch Beans: Boil beans in water with baking soda + bouillon 5–7 min. Shock in ice water; drain.
-
Sauté Mushrooms: Melt 2 tbsp butter in skillet. Brown mushrooms with a pinch of salt, then add garlic for 1 min.
-
Make Roux: Push mushrooms aside. Melt 3 tbsp butter, whisk in flour for 1 min until nutty. Slowly whisk in broth, then half & half. Simmer until thickened.
-
Season & Cheese: Stir in Worcestershire, spices, salt & pepper. Add Parmesan + 2 cups cheddar. Melt until smooth.
-
Assemble: Fold in green beans. Transfer to greased 9×13 dish. Top with ¼ cup cheddar + crispy onions.
-
Bake: 350°F (175°C), 25–30 min until bubbly & golden. Rest 5–10 min before serving.
Notes
-
Add crispy bacon for smoky flavor.
-
Swap beans for broccoli or asparagus.
-
Use wild mushrooms for a gourmet twist.
-
Make ahead: Assemble (without baking), refrigerate up to 24 hrs, then bake with extra 5–10 min.
- Prep Time: 15 min
- Cook Time: 30 min
Nutritional Information (Per Serving – Approx.)
This is a rough estimate based on the ingredients used. Values can vary based on specific brands and ingredient choices.
- Calories: 290
- Fat: 20g
- Carbohydrates: 14g
- Protein: 11g
Prep Time: 15 mins | Cook Time: 30 mins | Total Time: 45 mins
Make-Ahead Tip: Assemble 1 day ahead and bake just before serving!
Final Thoughts: From My Kitchen to Yours
Well, friend, there you have it. We’ve taken a beloved classic and transformed it into something truly extraordinary, all from the comfort of our own kitchens. This isn’t just a recipe; it’s an invitation to slow down, to savor the process, and to create something with your own two hands that’s brimming with real, honest flavor.
Forget the cans and the shortcuts for just one meal. Embrace the satisfying sizzle of mushrooms in butter, the magic of a perfectly smooth roux, and the incredible aroma that will fill your home as this casserole bakes to golden perfection. This is the dish that will have everyone asking for the recipe. It’s the one that creates new family traditions and maybe even a core memory or two, just like it did for me in Miss Martha’s kitchen.
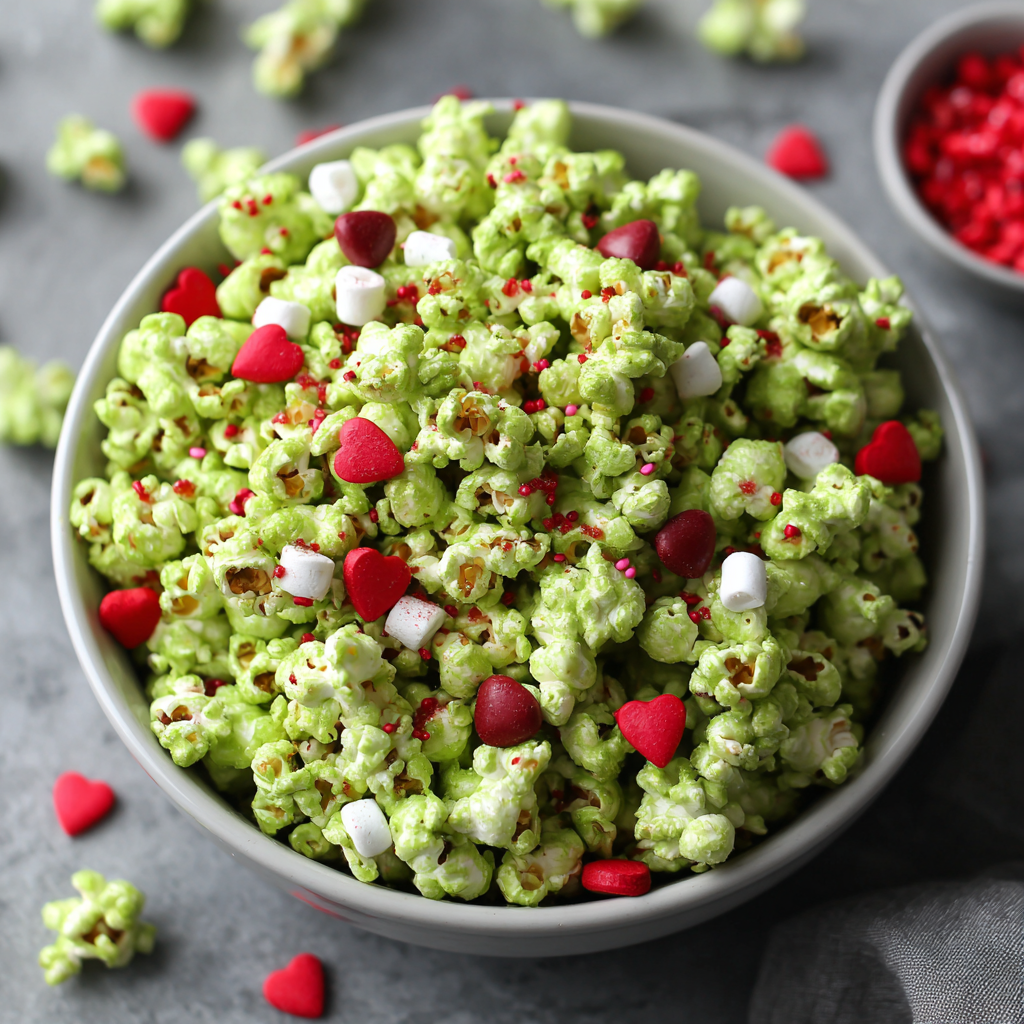
Grinch Popcorn
Grinch Popcorn: The Sweet, Salty, & Festive Treat Your Holiday Needs!
Hello, my fellow food-lovers, and welcome back to my cozy kitchen! Can you smell that? It’s not just the scent of buttery popcorn filling the air—it’s the unmistakable aroma of the holidays. Twinkling lights are going up, favorite movies are queuing on the screen, and that magical feeling of togetherness is starting to settle in. And for me, nothing captures that whimsical, joyful spirit quite like a big, shareable bowl of something delicious.
If your family is anything like mine, the annual viewing of How the Grinch Stole Christmas! is a non-negotiable tradition. It’s the perfect excuse to curl up on the couch, laugh at Max the dog, and maybe even shed a happy tear when the Grinch’s heart grows three sizes. But every great movie night needs an even greater snack, right? That’s where this show-stopping Grinch Popcorn comes in!
This isn’t just any popcorn. This is a confectionery trip straight to Whoville! We’re talking fluffy white popcorn, enrobed in a brilliantly green, sweet marshmallow glaze, and studded with cheerful red candy hearts. It’s the perfect combination of sweet, salty, and crunchy—a treat that’s as fun to look at as it is to eat. Best of all? It comes together in about 15 minutes with zero fancy skills required. So, tie on your favorite (probably messy) apron, and let’s create some holiday magic together!
A Whoville-Worthy Memory: The Popcorn That Started a Tradition
I’ll never forget the first time I decided to get creative with our movie snacks. It was my son’s first Christmas where he was truly captivated by the Grinch’s antics. His little eyes were wide, glued to the screen during the song sequences. I was in the kitchen, whipping up a simple batch of stovetop popcorn for us to share, when I glanced at the TV and saw all the Whos down in Whoville preparing their feast. Their food was so colorful and playful! I looked down at my plain bowl of popcorn and thought, “We can do better. We can be more *Whovillian*!”
A quick raid of the pantry revealed a bag of marshmallows, green food coloring from a birthday cake project, and a leftover box of red cinnamon hearts. Twenty minutes later, I presented my masterpiece: a slightly lopsided, very brightly green, and utterly charming bowl of Grinch popcorn. The look of pure wonder on my family’s faces was worth every sticky spoon. It was an instant hit. Now, making a big batch of this Grinch Popcorn is as much a part of our holiday tradition as hanging stockings or singing carols. It’s a little project that sparks so much joy and always, always leads to a happy, popcorn-filled snuggle on the couch.
Gathering Your Whoville Ingredients
This recipe is wonderfully simple, and each ingredient plays a key role in creating that perfect Grinchy flavor and vibe. Here’s what you’ll need:
- 10 cups plain popped popcorn – This is about ⅓ cup of unpopped kernels. I’m a stovetop popcorn purist (a little oil in a big pot, shake it like you mean it!), but a bag of plain, natural microwave popcorn works perfectly in a pinch. Chef’s Insight: Avoid pre-buttered or flavored popcorn, as it will clash with our sweet marshmallow glaze.
- 3 tbsp butter – Unsalted is my go-to, so I can control the salt level. This adds that rich, creamy base flavor for our glaze. Substitution Tip: A high-quality vegan butter works beautifully for a dairy-free version!
- 3 cups mini marshmallows – The mini ones melt down faster and more evenly than their large counterparts, creating that iconic, sticky-sweet binder. Chef’s Insight: For the best texture, make sure your marshmallows are fresh and not stale.
- Green food coloring – This is where the magic happens! Gel food coloring gives you a vibrant, bold green color without thinning out the marshmallow mixture. Liquid works too; you’ll just need a few more drops.
- Red candy hearts – The iconic “heart that grew three sizes”! Those classic red cinnamon hearts are perfect. Substitution Tip: No hearts? No problem! Red M&Ms, Sixlets, red sprinkles, or even chopped-up red jelly beans make fabulous stand-ins.
- Sprinkles (optional) – Because everything is better with sprinkles! I love adding a mix of green and white sprinkles for extra festive crunch and sparkle.
- Sea salt (a pinch for balance) – This is my secret weapon! A tiny pinch of flaky sea salt sprinkled over the top at the end cuts through the sweetness and enhances every single flavor. Trust me on this one.
Let’s Make Some Magic: Step-by-Step Instructions
Ready to create? This process is quick, so it’s best to have all your ingredients measured and ready to go. Let’s get popping!
Step 1: Pop & Prep
First, pop that corn! If you’re using kernels, heat 1-2 tablespoons of neutral oil (like coconut or avocado) in a large, heavy-bottomed pot over medium heat. Add a couple of test kernels and put the lid on. When they pop, you know the oil is hot enough. Add the rest of the ⅓ cup kernels, put the lid back on, and shake the pot gently until the popping slows down. Immediately pour the popcorn into a very large bowl. If you’re using microwave popcorn, pop it according to the package directions and pour it into the bowl. Chef’s Hack: Take a minute to pick out any unpopped kernels! This is a crucial step for happy, crunch-loving mouths later.
Step 2: Make the Grinch Glaze
In a medium-sized saucepan, melt your 3 tablespoons of butter over low heat. We’re using low heat for a reason—we want everything to melt gently without burning. Once the butter is melted, add all 3 cups of mini marshmallows. Stir constantly with a spatula or wooden spoon until the marshmallows are completely melted and the mixture is smooth and lava-like. This should only take 3-4 minutes. Chef’s Hack: If the heat is too high, the marshmallows can become tough and chewy instead of beautifully smooth.
Now for the color! Remove the saucepan from the heat. Add your green food coloring. I recommend starting with 3-4 drops of gel color (or 8-10 drops of liquid) and stirring it in. You can always add more to reach that perfect, vibrant Whoville green, but you can’t take it away! Stir until the color is completely uniform.
Step 3: Combine with Love
Working relatively quickly (the marshmallow will start to set as it cools), pour the glorious green glaze over your waiting popcorn. Use a heat-proof spatula to gently fold and toss the popcorn, ensuring each and every piece gets a gorgeous coat of green goodness. Try to be gentle to avoid crushing too many fluffy kernels. Chef’s Hack: If your bowl isn’t big enough for easy tossing, you can drizzle the glaze over popcorn spread out on a parchment-lined baking sheet and then use two spatulas to mix and coat.
Step 4: Decorate Your Masterpiece
While the marshmallow popcorn is still warm and sticky, it’s time for the best part: decorating! Immediately scatter your red candy hearts and optional sprinkles over the top. This is also the perfect time to add that all-important pinch of flaky sea salt. The salt will stick to the surface, ready to surprise and delight with every salty-sweet bite.
Step 5: Set & Serve
Allow your creation to sit at room temperature for about 10-15 minutes. This lets the marshmallow coating set up so it’s not overly sticky to the touch. Once it’s cooled, you can break it into delightful clusters with your hands or a spatula. Pile it high in a big festive bowl, or portion it out into individual treat bags for gifting!
How to Serve Your Grinch Popcorn
Presentation is part of the fun! I love serving this popcorn in a large, colorful bowl right in the center of the coffee table for everyone to grab from during the movie. For a party, you can create individual portions in clear cellophane bags tied with a green or red ribbon—they make incredible edible party favors or classroom treats. If you’re feeling extra crafty, pack it into clean, clear mason jars and add a tag that says “Your Heart Grew Three Sizes Today!” for a truly adorable homemade gift.
Get Creative: Fun Recipe Variations
The beauty of this recipe is how adaptable it is! Feel free to make it your own with these fun twists:
- Chocolate Drizzle: Melt white chocolate chips and drizzle it over the set popcorn for a “snowy” effect that tastes incredible.
- Peppermint Twist: Add ¼ teaspoon of peppermint extract to the marshmallow mixture along with the food coloring for a cool, festive flavor.
- Super Seed Crunch: For a slightly healthier crunch, toss in a handful of pumpkin seeds (pepitas) or sunflower seeds with the popcorn before adding the glaze.
- Gluten-Free & Vegan: This recipe is naturally gluten-free! To make it vegan, simply use vegan butter and ensure your marshmallows and candies are vegan-friendly (Dandies marshmallows and YumEarth candies are great options).
Chef’s Notes: From My Kitchen to Yours
This recipe has seen a few iterations in my kitchen. The first time, as I mentioned, was a happy accident. The second time, I learned the hard way that adding the food coloring *after* taking the marshmallow off the heat prevents those weird colored streaks on your saucepan! I’ve also learned that a tiny pinch of salt is the absolute key to taking this treat from “very sweet” to “absolutely addictive.”
One of my favorite kitchen stories involves this popcorn. I once decided to quadruple the batch for my son’s entire grade level. Let’s just say I underestimated the sheer volume of 40 cups of popcorn. I had to mix it in my biggest stockpot, and my husband had to hold the pot steady while I tossed it with both arms. We were covered in green speckles and laughing hysterically by the end of it. The moral of the story? Maybe work in batches for a crowd!
Your Grinch Popcorn Questions, Answered!
Q: My popcorn turned out really hard and chewy. What did I do wrong?
A: This usually happens if the marshmallow mixture was cooked over too high a heat or for too long. It can cause the sugar to harden. Next time, keep the heat firmly on low and remove the pan from the heat as soon as the marshmallows are fully melted. Stirring in the food coloring off the heat will also help prevent overcooking.
Q: Can I make this popcorn ahead of time?
A: You can! It’s best enjoyed the day it’s made for maximum freshness and crunch, but it will keep perfectly in an airtight container at room temperature for up to 3 days. If it’s particularly humid, it might lose a little of its crunch a bit sooner.
Q: Help! My hands and tools are covered in sticky green marshmallow. How do I clean up?
A: Welcome to the club! The best way to clean marshmallow goo is with very hot, soapy water. The heat will melt it right off. For stuck-on bits on your saucepan, fill it with hot water and bring it to a simmer on the stove. The marshmallow will dissolve and you can easily wash it out.
Q: My food coloring wasn’t vibrant enough. How can I get a deeper green?
A: Gel food coloring is your best friend here! It’s highly concentrated, so you need less of it to achieve a bold color without altering the consistency of the marshmallow. If you only have liquid coloring, you may need to add quite a few more drops. Just add one drop at a time and stir well before adding more until you hit the perfect Grinchy shade.

Grinch Popcorn
- Total Time: 15 mins
Description
Movie night just got a major upgrade! Imagine buttery popcorn coated in gooey green marshmallow glaze, sprinkled with red candy hearts, and finished with a pinch of sea salt for balance. This whimsical snack is crunchy, colorful, and guaranteed to bring smiles bigger than the Grinch’s heart at the end of the story. The best part? It comes together in 15 minutes—no stress, just pure holiday magic. Perfect for cozy nights, parties, or edible gifts!
Ingredients
-
10 cups plain popped popcorn (about ⅓ cup kernels)
-
3 tbsp unsalted butter (or vegan butter)
-
3 cups mini marshmallows
-
Green gel food coloring (or liquid)
-
Red candy hearts (or red M&Ms, sprinkles, jelly beans)
-
Optional: festive sprinkles
-
Pinch of flaky sea salt
Instructions
-
Pop Corn: Pop kernels on stovetop or microwave. Transfer to large bowl; remove unpopped kernels.
-
Make Grinch Glaze: Melt butter over low heat. Stir in marshmallows until smooth. Remove from heat, add food coloring, and stir until bright green.
-
Coat Popcorn: Pour glaze over popcorn. Gently fold until evenly coated.
-
Decorate: While still sticky, sprinkle with red hearts, optional sprinkles, and a pinch of sea salt.
-
Set & Serve: Let sit 10–15 minutes. Break into clusters and serve in a big festive bowl or pack into bags/jars for gifting.
Notes
-
Snowy Effect: Drizzle white chocolate over cooled popcorn.
-
Minty Twist: Add ¼ tsp peppermint extract to marshmallow mix.
-
Healthier Crunch: Toss in pumpkin or sunflower seeds before coating.
-
Vegan-Friendly: Use vegan butter, marshmallows, and candies.
- Prep Time: 10 min
- Cook Time: 5 mins
Nutrition
- Calories: 160 cal Per Serving
- Sugar: 16g
- Fat: 5g
- Carbohydrates: 28g
Nutritional Information (Per Serving)
Please note: This is an approximate calculation based on the ingredients used and will vary with specific brands and substitutions. This information is provided as a courtesy only.
- Calories: 160
- Fat: 5g
- Carbohydrates: 28g
- Sugars: 16g
- Protein: 1g
Prep Time: 10 mins | Cook Time: 5 mins | Total Time: 15 mins | Storage: Airtight container for up to 3 days.
Final Thoughts: More Than Just a Snack
So there you have it—the simple, sticky, and utterly joyful recipe for Grinch Popcorn. But as you’ve seen, this treat is about so much more than just melted marshmallows and food coloring.
It’s about the laughter that fills the room as your hands turn a little green. It’s about the tradition of gathering together to watch a beloved movie for the hundredth time. It’s about seeing that spark of magic in someone’s eyes when you present them with a bowl of Whoville whimsy.
This popcorn is a reminder that the best parts of the holidays aren’t found in perfectly wrapped presents or flawless decorations. They’re found in the messy, creative, and heartfelt moments we share with the people we love. It’s a little edible testament to the idea that, just like the Grinch, our hearts can grow three sizes when we focus on togetherness, joy, and a really good snack.

Christmas Tree Brownies
Welcome to the Coziest Kitchen on the Internet!
Hello, my fellow flavor-lover! Can you feel it? That crisp, magical buzz in the air that only comes once a year? It’s the season of twinkling lights, heartfelt gatherings, and the unmistakable scent of something sweet baking in the oven. If your heart, like mine, does a little happy dance at the thought of creating edible holiday magic, then you are absolutely in the right place. Today, we’re taking a beloved classic—the humble, fudgy, utterly irresistible brownie—and turning it into the most adorable, show-stopping centerpiece for your holiday table. Get ready to unleash your inner holiday elf because we’re making Christmas Tree Brownies!
This isn’t just a recipe; it’s a passport to pure, unadulterated fun. I’m talking about a project that’s perfect for a festive solo baking session with your favorite holiday playlist or a wildly entertaining activity to keep little hands (and big ones!) busy. The best part? You don’t need to be a pastry chef or have hours to spare. We’re starting with a simple boxed mix because, let’s be real, sometimes the magic is in the decorating, not the labor. So, tie on your favorite—probably messy—apron, pour yourself a cup of cocoa (or something a little stronger!), and let’s create some delicious, sprinkle-filled memories together.
A Story of Sweet (and Slightly Crooked) Beginnings
This recipe holds a seriously special place in my heart. It all started a few years ago when my then five-year-old niece, Chloe, declared she was my “sous-chef” for our annual holiday cookie decorating party. The plan was ambitious: gingerbread houses, intricately decorated sugar cookies, the works. But after a flour explosion that would make a blizzard jealous and a minor icing-related meltdown (from me, not her), we needed a Plan B. Something easy, fast, and foolproof.
I spotted a pan of cooling brownies and a lightbulb went off. We grabbed a glass, cut them into rough triangles, and got to work. Chloe’s little face was a picture of pure concentration as she turned those brown lumps into a forest of green Christmas trees, applying sprinkles with the serious dedication of a artist. Were they perfectly symmetrical? Not even close. Was there more icing on her face than on the brownies? Absolutely. But the joy and pride she felt were 100% real. Now, it’s our non-negotiable tradition. It reminds me that the holidays aren’t about perfection; they’re about the messy, sweet, and wonderfully imperfect moments we create together.
Gathering Your Merry Ingredients
Here’s your shopping list for this festive adventure! Remember, cooking is an art, not a science—feel free to get creative with substitutions.
- 1 box of store-bought brownie mix (plus the oil, eggs, and water it calls for): This is our fantastic shortcut! I’m a huge fan of using a fudge-style mix for a denser, sturdier brownie that holds its shape when cut. My personal favorite is Ghirardelli Triple Chocolate, but any brand you love will work beautifully.
- ½ container of vanilla icing: The trusty canvas for our edible trees. Chef’s Insight: Let the icing sit at room temperature for a bit before you use it—it will be much easier to stir and color. For a richer flavor, you could substitute with cream cheese frosting!
- Green food coloring: Gel food coloring is my top chef hack here! It gives you a vibrant, beautiful green hue without thinning out your icing like liquid coloring can. You’ll only need a tiny dab!
- Festive sprinkles: This is where your personality shines! Use classic red and green nonpareils, little silver balls, colorful sanding sugar, or even tiny holiday-shaped sprinkles. Raid your cupboard and have fun!
- Candy canes OR pretzel sticks: The all-important tree trunk! Substitution Tip: Candy canes add a lovely peppermint flavor, while pretzel sticks offer a delicious sweet-and-salty contrast. For a nut-free option, go with the pretzels. You can break candy canes in half or use mini ones.
- Optional: Star-shaped sprinkles or a yellow candy for the tree topper: The perfect finishing touch! A single yellow M&M, a star sprinkle, or even a dab of yellow icing will complete your masterpiece.
Let’s Build a Forest of Brownie Trees!
Follow these steps, and you’ll have a plateful of holiday cheer in no time. I’ve packed this section with all my favorite tips and tricks to ensure your success!
- Bake Those Brownies: First, preheat your oven according to your brownie mix’s package directions. Pro-Tip: Line your baking pan (usually a 9×13) with parchment paper, leaving a little overhang on two sides. This is our secret weapon for effortlessly lifting the entire slab of brownies out of the pan later for clean, crumble-free cutting! Prepare the mix as directed and spread the batter evenly into your prepared pan. Bake until a toothpick inserted into the center comes out with a few moist crumbs clinging to it. Do not overbake! We want them fudgy and dense, not cakey and dry.
- The All-Important Cool Down: I know, I know. This is the hardest part. But patience, young grasshopper! You MUST let the brownies cool completely in the pan on a wire rack. If you try to cut or frost them while they’re warm, they will fall apart, and the icing will melt into a sad, runny puddle. To speed things up, you can even pop the cooled pan into the refrigerator for 30 minutes. This makes them even easier to handle.
- Slice into Triangles: Once your brownies are completely cool, use the parchment paper to lift the entire block out of the pan and onto a cutting board. Now, grab a sharp knife. Here’s the easy method: first, cut the brownies into squares or rectangles. Then, take each square and carefully cut it diagonally from one corner to the opposite corner to create two triangles. Easy peasy! For smaller trees, you can cut smaller squares to start.
- Color Your Frosting: Scoop about half the container of vanilla icing into a small bowl. Add your green food coloring. Chef’s Hack: Start with a little! You can always add more to deepen the color. If you’re using gel coloring, a toothpick is perfect for grabbing a small amount. Stir vigorously until the color is uniform and gorgeous. If you want to pipe your icing, you can spoon it into a zip-top bag and snip a tiny corner off, or use a piping bag fitted with a star tip for a cool textured look.
- Deck the Trees with Icing and Sprinkles: Now for the fun part! Using a butter knife or a small offset spatula, spread or pipe the green icing onto each brownie triangle. Work one tree at a time: ice it, then immediately add your sprinkles before the icing sets. This ensures those festive “ornaments” stick right where you want them!
- Add the Trunk and Star: Almost there! Gently press a piece of candy cane or a pretzel stick into the base of each tree for the trunk. Finally, add your star sprinkle or a dab of yellow icing to the very top. Ta-da! You’ve just created edible holiday magic.
How to Serve Your Holiday Masterpiece
Presentation is part of the fun! Arrange your forest of Christmas Tree Brownies on a large platter or a festive cake stand. For a real “wow” factor, dust the platter with a light snowfall of powdered sugar before placing the trees. You can even create a little winter scene with some shredded coconut “snow” and a few plastic reindeer or Santa figurines around the edge of the plate. They’re the perfect sweet ending to a holiday meal or the star of the show at your cookie exchange party.
Get Creative: Festive Twists & Swaps
Feel like mixing it up? This recipe is a fantastic blank canvas for your creativity!
- Peppermint Patty: Add a layer of peppermint flavor by placing a thin After Eight mint or a York Peppermint Pattie on the brownie batter before baking. The mint will melt into the brownie as it bakes!
- Nutty Wonderland: Stir ½ cup of chopped pecans or walnuts into your brownie batter before baking for a delightful crunch.
- Gluten-Free Joy: Use your favorite gluten-free brownie mix and ensure your pretzels and sprinkles are certified gluten-free. It’s an easy swap that lets everyone join the fun.
- Dark Chocolate Forest: Use chocolate frosting instead of vanilla! Color it green for a deeper, richer-looking tree, or leave it brown and use white sprinkles to mimic snow-covered branches.
- Orange Chocolate: Add a teaspoon of orange zest to the brownie batter and use orange extract in the icing instead of food coloring for a citrusy, sophisticated twist.
Olivia’s Chef Notes & Kitchen Confessions
Over the years, this recipe has seen it all. There was the infamous “Leaning Tower of Brownie” year where I used too much icing, making the trees top-heavy and wobbly (solution: less icing!). There was the year I accidentally used red food coloring instead of green and created a forest of… well, let’s not go there. The point is, it always turns out delicious, and it always brings a smile.
My biggest evolution was discovering the parchment paper sling. Before that, I was trying to pry brownies out of the pan with a spatula, resulting in more of a “brownie crumble forest” than intact trees. Embrace the parchment—it’s a game-changer. Most of all, remember to have fun and not stress. If a tree breaks, that’s just the chef’s treat. Happy baking, my friend!
Your Questions, Answered!
Q: My brownies are crumbling when I try to cut them! What did I do wrong?
A: Oh, I’ve been there! This usually happens for one of two reasons: 1) The brownies were still warm. They need to be completely cool to firm up. 2) They were slightly overbaked. Next time, try baking for a minute or two less. For now, don’t worry! Crumble them up, mix with a little of the icing, and roll into truffle balls. Roll them in sprinkles—instant holiday cake pops!
Q: My green icing is too runny and is sliding off the brownies. Help!
A: This is likely because the brownies were still warm, or you used a liquid food coloring which can thin out the icing. If the icing itself is runny, you can thicken it up by adding a tablespoon or two of powdered sugar and stirring it in. Gel food coloring is your best bet for vibrant color without the runny mess!
Q: Can I make these ahead of time?
A: You absolutely can! Bake and cut the brownies up to 2 days ahead. Store them in an airtight container at room temperature. I recommend frosting and decorating them the day you plan to serve them for the freshest look and best texture. The assembled trees are best enjoyed within 2-3 days.
Q: I don’t have a piping bag. What can I use instead?
A: No problem! A simple zip-top plastic bag is a perfect substitute. Just spoon your colored icing into the bag, seal it, and snip a very small corner off the bottom. You can pipe lines or just use it to spread the icing more neatly. A butter knife or a small spoon works just fine, too!

Christmas Tree Brownies
Description
Brownies are already a crowd favorite—but dress them up as Christmas trees, and suddenly you’ve got the star of your holiday table. This recipe takes a simple boxed mix and turns it into a festive, sprinkle-studded forest. Perfect for a family activity, a cookie exchange showstopper, or just a cozy afternoon project with cocoa and carols. Best of all, it’s foolproof, fun, and fabulously festive.
Ingredients
-
1 box brownie mix (plus oil, eggs & water per package)
-
½ container vanilla icing (or cream cheese frosting)
-
Green gel food coloring
-
Festive sprinkles
-
Candy canes or pretzel sticks (for tree trunks)
-
Optional: Star sprinkles or yellow candies for toppers
Instructions
-
Bake: Prepare brownies per package in a parchment-lined 9×13 pan. Bake until fudgy (don’t overbake). Cool completely.
-
Cut: Lift brownies out using parchment. Slice into squares, then cut diagonally to form triangles (trees).
-
Tint Icing: Stir green gel food coloring into icing until vibrant. Spoon into a piping bag or zip-top bag with the corner snipped.
-
Decorate: Pipe or spread green icing on each triangle. Add sprinkles immediately before icing sets.
-
Add Trunks & Stars: Insert candy cane halves or pretzel sticks into the base of each brownie for the trunk. Finish with a star sprinkle or yellow candy topper.
-
Set & Serve: Let icing firm up, then arrange your “forest” on a platter dusted with powdered sugar sno
Notes
-
Add crushed candy canes to the icing for a peppermint kick.
-
Stir nuts or chocolate chunks into brownie batter for extra richness.
-
Use white icing with blue sprinkles for a frosty, snow-covered forest look.
-
Gluten-free? Just swap in a GF brownie mix and certified GF sprinkles.
Nutritional Information (Per Tree – Approximate)
Calories: 180 | Fat: 7g | Carbs: 28g | Sugars: 18g | Protein: 1g
Prep Time: 20 mins | Total Time: 30 mins (plus cooling) | Level: Super easy! | Storage: Best enjoyed within 2–3 days in an airtight container.
Final Thoughts: Your Sweet, Messy, Perfect Holiday Masterpiece
And there you have it! Your very own forest of festive, fudgy Christmas Tree Brownies, ready to bring a little extra magic and a whole lot of joy to your holiday celebrations.
Remember, the true secret ingredient here isn’t in the boxed mix or the vibrant green icing—it’s the spirit of fun you bring to the process. So what if your trees are a little crooked or your sprinkles are a little lopsided? Those aren’t mistakes; they’re proof of a wonderful, hands-on memory made in the kitchen. This holiday season, give yourself the gift of letting go of perfection. Embrace the messy, sweet, and wonderfully real moments of connection, whether you’re decorating solo with a cup of cocoa or surrounded by loved ones with icing on their noses.

Gingerdoodle Cookies
The Cookie That Started a Family Tradition: Gingerdoodles!
Hey there, friend! Come on in, grab an apron, and get ready to fill your kitchen with the most incredible aroma you’ve ever smelled. I’m talking about the warm, spicy, soul-hugging scent of molasses and cinnamon, with that unmistakable cozy feeling of gingerbread. But we’re not just making gingerbread today. And we’re not just making snickerdoodles. Oh no. We’re creating magic by fusing them into one absolutely perfect cookie: the Gingerdoodle.
Imagine the soft, chewy, melt-in-your-mouth texture of the best snickerdoodle you’ve ever had. Now, infuse it with the deep, warm, and wonderfully spiced heart of a classic gingerbread cookie. Roll that perfect dough ball in a blanket of cinnamon-sugar, and boom—you have a cookie that is greater than the sum of its parts. This is the cookie that disappears from the cooling rack in minutes. It’s the star of every holiday cookie exchange, the treat that has my friends texting me for the recipe before they’ve even left my driveway, and the ultimate companion to a hot cup of coffee on a chilly afternoon.
The best part? You don’t need any fancy skills or equipment. This recipe is all about heart, a little bit of messy fun, and creating something truly special from simple ingredients. So, whether you’re a seasoned baker or this is your first time creaming butter and sugar, I’m right here with you. Let’s preheat those ovens and bake a batch of memories together.
The “Oops” That Became Our Favorite Christmas Eve Tradition
I have to confess, the Gingerdoodle was born from a beautiful kitchen mishap. It was Christmas Eve, years ago, and I was in a baking frenzy. Tins of cookies covered every surface, and I was determined to make one last batch of my grandma’s famous snickerdoodles. In my sugar-and-spice-induced haze, I reached for the molasses instead of the vanilla extract. I realized my mistake a second too late, after a generous glug had already plopped into the butter mixture.
My heart sank for a second. But instead of starting over, my inner flavor enthusiast got curious. “What if…?” I thought. I grabbed the jar of ginger and added a spoonful. Then a pinch of cloves. I rolled the now deeply fragrant dough in the usual cinnamon sugar, crossed my fingers, and slid the tray into the oven. What emerged were not snickerdoodles. They were something new. Something better. They were puffy, crackled, and had this incredible spicy-sweet depth. My family devoured them, declaring them the best cookie I’d ever made. Now, we can’t imagine a Christmas Eve without that “happy accident.” It’s a lovely reminder that sometimes the best things in life—and in the kitchen—aren’t perfect. They’re spontaneous, a little messy, and made with a whole lot of love.
Gathering Your Gingerdoodle Ingredients
Let’s talk about our players! This list might look long, but I promise it’s mostly spices you likely already have. Using quality ingredients here makes a world of difference, especially with the molasses and spices.
For the Spice Sugar Coating:
- ¾ cup granulated sugar: This creates that classic, crackly, sweet crust we all love. The coarse grains help create that perfect texture.
- 3 tsp ground cinnamon: The warm, familiar flavor that pairs magically with the ginger. Don’t be shy with it!
For the Dry Ingredients:
- 4 ½ cups all-purpose flour: The foundation of our cookie. I like to fluff my flour with a spoon before scooping and leveling it off with a knife to avoid dense, dry cookies.
- 2 tbsp cornstarch: This is my secret weapon for an unbelievably soft and tender cookie! It gives them that bakery-style softness that stays for days.
- 4 tsp baking soda: Our leavening agent. It helps the cookies puff up and gives them that slight tang that snickerdoodles are known for. Make sure it’s fresh!
- 1 tsp salt: Crucial for balancing all the sweetness and making the spices pop. Never skip the salt!
- 2 tsp ground ginger: The star of the spice show! It provides that warm, peppery kick that defines the gingerbread flavor.
- ½ tsp ground cloves: Adds a deep, intense warmth. A little goes a very long way here.
- ¼ tsp ground nutmeg: Lends a sweet, nutty complexity that rounds out the whole spice profile beautifully.
For the Wet Ingredients:
- 1 ½ cups (3 sticks) unsalted butter, softened: Softened is the key word! It should be cool to the touch but leave a slight indent when you press it. This creams perfectly with the sugar for a light, fluffy texture. For a dairy-free swap, use a high-quality plant-based butter.
- 1 ½ cups light brown sugar: This adds a rich molasses flavor and moisture, thanks to its higher content. It’s what gives the cookies their chewy center.
- ½ cup molasses: The soul of the gingerbread flavor! I prefer unsulphured molasses for its cleaner, smoother taste. Blackstrap molasses is too bitter for cookies.
- 2 large eggs: They bind everything together and add richness. Bring them to room temperature for best incorporation.
- 4 tsp vanilla extract: A generous amount enhances all the other flavors and adds a beautiful aroma. Use the real stuff if you can!
Let’s Bake: Step-by-Step Gingerdoodle Magic
Okay, team! Let’s turn these beautiful ingredients into cookie perfection. Read through these steps once before you start—it makes the process so smooth and fun.
Step 1: Preheat your oven to 350°F (175°C). This is non-negotiable for the perfect bake! Line your baking sheets with parchment paper. Not only does this prevent sticking, but it also makes cleanup an absolute dream. I never bake cookies without it.
Step 2: In a small, adorable bowl, mix together the ¾ cup granulated sugar and 3 tsp cinnamon for the coating. Set this aside. You’ll thank yourself later for having it ready to go.
Step 3: In a large bowl, grab your whisk and thoroughly combine all the dry ingredients: flour, cornstarch, baking soda, salt, ginger, cloves, and nutmeg. Whisking now ensures the spices and leavening are evenly distributed, so every single bite is perfectly spiced. No one wants a pocket of baking soda! Set this bowl aside.
Step 4: In another large bowl (I know, dishes—but it’s worth it!), use a hand mixer or a stand mixer with the paddle attachment to beat the softened butter and light brown sugar together. Now, here’s a chef hack: beat it on medium-high speed for a full 2-3 minutes until it’s light, fluffy, and pale in color. This step incorporates air into the dough, which is a secret to a softer, cakier cookie texture. Don’t rush this!
Step 5: Add the molasses, eggs, and vanilla extract to the butter mixture. Mix on medium speed until everything is beautifully combined. It might look a little curdled at first, but just keep mixing—it will come together into a smooth, glorious, fragrant brown mixture.
Step 6: Now, with your mixer on low speed, gradually add the dry ingredients to the wet ingredients. Mix until just combined and no streaks of flour remain. Be careful not to overmix! Overworking the dough develops gluten and can lead to tough cookies. We want tender, melt-in-your-mouth goodness.
Step 7: Time for the fun, slightly messy part! Use a 1.5-tablespoon cookie scoop (or a spoon) to portion out the dough. Roll each portion between your palms into a smooth ball. Pro-tip: if the dough is too sticky, pop it in the fridge for 15 minutes. Roll each ball generously in the cinnamon-sugar mixture until completely coated. Place the dough balls on your prepared baking sheet about 2 inches apart to give them room to spread.
Step 8: Here’s another chef’s choice for you: For a thicker, puffier cookie, bake them as is. For a slightly chewier, crisper-edged cookie, use the bottom of a glass or your fingers to gently flatten each ball just a bit. I love them chewy, so I always give them a gentle press.
Step 9: Bake for 9-11 minutes. The cookies are done when the edges are set and look slightly dry, but the centers still look soft, puffy, and ever-so-slightly underbaked. They will firm up as they cool. This is the single most important tip for a soft cookie! Do not overbake them.
Step 10: Remove the pan from the oven and let the cookies cool on the hot baking sheet for 5 full minutes. This allows them to set up without becoming rock hard. Then, transfer them to a wire rack to cool completely. Try to resist eating at least one while it’s still warm and gooey… I dare you.
How to Serve Your Gingerdoodle Masterpieces
These cookies are stars all on their own, but presentation is part of the fun! Pile them high on a rustic wooden board or a vintage cake stand for a gorgeous, homey look. They are the ultimate cookie for gifting—tie a stack with baker’s twine and wrap them in cellophane for a present anyone would adore. Of course, serving them still slightly warm with a cold glass of milk is a classic for a reason. For the adults, pair one with a hot mug of coffee, a chai latte, or even a sweet dessert wine. The spices complement them beautifully!
Get Creative: Gingerdoodle Variations
Once you’ve mastered the classic, feel free to play with these fun twists!
- Double Ginger Kick: Add ¼ cup of finely chopped crystallized ginger to the dough for chewy, spicy bursts of flavor.
- Molasses Swap: For a deeper, darker flavor, use dark brown sugar instead of light brown sugar.
- Chocolate Chip Spice: Fold in 1 cup of white chocolate chips or dark chocolate chunks. Chocolate and spice are a match made in heaven.
- Gluten-Free Friendly: Substitute the all-purpose flour with a 1:1 gluten-free baking blend. The texture is nearly identical!
- Orange Zest Twist: Add the zest of one orange to the wet ingredients for a bright, citrusy note that cuts through the spice.
Olivia’s Chef Notes & Kitchen Stories
This recipe has evolved so much since that first accidental batch! I’ve learned that the dough benefits hugely from a chill session. If you have the time, cover the mixed dough and refrigerate it for 30-60 minutes. This prevents overspreading and allows the flavors to deepen even more. It also makes the dough much easier to roll. I also have a funny story: I once, in a major multitasking fail, mistook cayenne pepper for paprika. Let’s just say I created a “Spicy Fire-Doodle” that was… memorable. Always double-check your spice jars! These days, this recipe is my go-to for potlucks. I always bring a few extra copies of the recipe written on cute cards because I know I’ll be asked for it.
Your Gingerdoodle Questions, Answered!
Q: My cookies spread too much and became flat. What happened?
A: This is usually caused by butter that is too warm! Ensure your butter is softened but still cool, not melty. Also, your baking soda might be old and lost its potency (check the expiration date). Finally, if your kitchen is very warm, chilling the dough for 30 minutes before baking will work wonders.
Q: My cookies are too cakey and puffy, not chewy. How can I fix that?
A> This likely means you added a bit too much flour. Next time, try fluffing your flour with a spoon before gently scooping it into your measuring cup and leveling it off with a knife. Avoid tapping the cup or packing the flour down. Using a kitchen scale for the most accurate measurement is always best!
Q: Can I make the dough ahead of time and bake it later?
A: Absolutely! This dough is a great make-ahead option. After portioning the dough into balls, you can freeze them on a parchment-lined tray. Once solid, transfer them to a freezer bag. You can bake them straight from the freezer—just add 1-2 minutes to the baking time. No need to thaw!
Q: The spices are a little strong for my kids. Can I tone them down?
A: Of course! Baking is all about personal taste. Feel free to reduce the ginger to 1 ½ tsp and the cloves to ¼ tsp for a milder spice profile. They’ll still be delicious.

Gingerdoodle Cookies
Description
What do you get when gingerbread collides with snickerdoodles? Pure cookie magic. Gingerdoodles are soft, chewy, spiced just right, and rolled in a sweet cinnamon-sugar coat that crackles beautifully in the oven. Born from a happy kitchen accident, these cookies have become a holiday must-bake—comforting, cozy, and unforgettable. Whether you’re baking for a cookie swap, gifting, or just treating yourself with a cup of coffee, these will be the ones everyone remembers.
Ingredients
Spice Sugar Coating
-
¾ cup granulated sugar
-
3 tsp ground cinnamon
Dry Ingredients
-
4 ½ cups all-purpose flour
-
2 tbsp cornstarch
-
4 tsp baking soda
-
1 tsp salt
-
2 tsp ground ginger
-
½ tsp ground cloves
-
¼ tsp ground nutmeg
Wet Ingredients
-
1 ½ cups (3 sticks) unsalted butter, softened
-
1 ½ cups light brown sugar
-
½ cup molasses
-
2 large eggs (room temp)
-
4 tsp vanilla extract
Instructions
-
Preheat oven to 350°F (175°C). Line baking sheets with parchment.
-
Mix sugar + cinnamon in a small bowl for coating; set aside.
-
In a large bowl, whisk flour, cornstarch, baking soda, salt, and spices.
-
Beat butter + brown sugar until fluffy (2–3 min). Add molasses, eggs, and vanilla; mix until smooth.
-
Gradually add dry mix to wet, stirring just until combined. Chill dough 15–30 min if sticky.
-
Scoop 1.5 tbsp dough, roll into balls, coat generously in cinnamon-sugar. Place 2 in. apart.
-
Bake 9–11 min, until edges are set but centers look slightly underbaked.
-
Cool 5 min on pan, then transfer to rack.
Notes
-
Add crystallized ginger for extra zing.
-
Swap dark brown sugar for richer flavor.
-
Stir in white or dark chocolate chips.
-
Chill dough for thicker cookies.
-
Freeze dough balls to bake fresh anytime.
Nutritional Information (Per Cookie – Approximate)
Calories: 145 | Fat: 6g | Carbohydrates: 22g | Sugar: 12g | Protein: 1.5g
Prep Time: 15 mins | Cook Time: 10 mins | Total Time: 25 mins | Storage: Keeps soft for up to 7 days in an airtight container at room temperature.
Final Thoughts: More Than Just a Cookie
In the end, the Gingerdoodle is so much more than a clever fusion of two classic recipes. It’s a reminder that the most cherished family traditions often begin not with perfection, but with a happy accident and a willingness to embrace the “oops.”
This cookie is a story—a story of a Christmas Eve mix-up that became a non-negotiable part of your family’s holiday. It’s a lesson that the best memories are often baked with a dash of spontaneity and a whole lot of love. Every time you smell that warm, spicy aroma filling your kitchen, you’re not just baking; you’re creating an experience, a feeling, and a connection to those who gather around your table.
So, as you share these crackly, sugar-dusted treasures with friends and family, know that you’re sharing more than a treat. You’re sharing a piece of a story—one that’s now yours to continue. We hope this recipe becomes the beautiful, messy, and delicious beginning of a new tradition in your home.

Pretzel Wreaths
Sweet, Salty & So Festive: Your New Favorite Holiday Pretzel Wreaths!
Hello, my friend! Come on in, grab an apron—the fun, flour-dusted kind, not the pristine one for company—and let’s get ready to make some magic. Is there anything better than the smell of the holidays? That cozy blend of cinnamon, pine, and… pretzels? You heard me right! Today, we’re whipping up the most adorable, downright delicious, and incredibly easy treat that will steal the show on any cookie tray: No-Bake Pretzel Wreaths!
If you’re looking at your calendar and feeling that familiar pang of holiday stress, this recipe is your new best friend. We’re talking zero oven time, minimal mess (I promise!), and maximum festive cheer. These sweet-and-salty wreaths combine crunchy mini pretzels with smooth green candy coating, a flurry of colorful sprinkles, and the cutest little Twizzler bows you ever did see. They’re perfect for gifting to neighbors, setting out for Santa, or just keeping all to yourself with a cup of hot cocoa. The best part? You don’t need to be a pastry chef to make something that looks absolutely professional. This is all about having fun in the kitchen and creating something that sparks joy. So, let’s turn up the holiday tunes, pour ourselves something merry, and create these little edible wreaths together!
A Wreath-Making Tradition is Born
This recipe always takes me right back to one particularly chaotic, flour-filled Christmas Eve. I was about ten years old, and my mom, in her infinite wisdom, decided we needed a last-minute, kid-friendly activity to keep my cousins and me from bouncing off the walls with anticipation. She cleared the kitchen table, dumped out a bag of pretzels, melted some chocolate, and told us to “create.”
We were architects of confectionery disaster. There were more sprinkles on the floor than on our creations, and my attempt at a bow looked more like a squished beetle. But you know what? We were utterly captivated. We felt like real chefs, and when we proudly presented our lopsided, overly-sprinkled wreaths to the family later that night, you would have thought we’d sculpted them from marzipan. That messy, joyful, collaborative spirit is what I want to bring to you with this recipe. It’s not about perfection; it’s about the memory you make while your fingers get a little sticky. It’s a tradition I’ve carried forward, and now I’m so excited to share it with you.
Gathering Your festive Supplies
This is the best kind of shopping list—short, sweet, and forgiving! Here’s everything you need to make about a dozen beautiful wreaths.
- Mini Pretzels (1 bag): The foundation of our wreath! Their classic twist shape is perfect for mimicking bundled evergreen branches. Chef’s Insight: Grab the “mini” ones, not the tiny “pretzel snaps.” You want a good base to build on! If you need a gluten-free option, there are fantastic GF mini pretzels available that work just as beautifully.
- Green Candy Melts (1 cup): This is what gives our wreaths that gorgeous, festive green color and holds everything together. Substitution Tip: No candy melts? No problem! You can use 1 cup of high-quality white chocolate chips or almond bark. Gently melt it and stir in a few drops of green gel food coloring (liquid food coloring can cause the chocolate to seize). Gel color gives a much richer, more vibrant hue!
- Twizzlers (Pull & Peel variety): This is our ribbon! The Pull & Peel kind is ideal because you can easily separate the strands and shape them into perfect, pliable bows. Red is the classic choice, but feel free to get creative with other festive colors!
- Holiday Sprinkles: The “cheer” in our holiday cheer! Use whatever mix makes you happy—little red and green nonpareils, tiny sugar stars, or a mix of festive shapes. This is where your personality shines through.
- Parchment Paper: Our trusty workhorse. This prevents the candy-coated pretzels from sticking to your baking sheet and makes cleanup an absolute dream. Wax paper can work in a pinch, but parchment is always my go-to for no-stick success.
Let’s Build Some Wreaths! Your Step-by-Step Guide
Ready to create? Follow these steps, and you’ll have a tray of gorgeous wreaths in no time. I’ve packed this section with all my favorite tips and hacks to make the process smooth and fun!
- Prep Your Station: Before you even think about melting, line a large baking sheet with parchment paper. This is your “wreath workshop.” Have all your ingredients measured and within arm’s reach. Trust me, when you’re working with melted candy, having everything ready to go is the key to a stress-free experience. Chef’s Hack: If your kitchen is warm, you can even pop the baking sheet in the fridge for a few minutes before starting. A cool surface helps the candy set faster!
- Melt the Candy Coating: Pour your green candy melts into a microwave-safe bowl. Heat them in the microwave in 20-second bursts, stirring vigorously between each burst. Stop when just a few small lumps remain—the residual heat will melt them as you stir. Chef’s Hack: NEVER over-microwave hoping to melt those last lumps; you’ll scorch the candy and end up with a thick, clumpy mess. Low and slow is the way to go! For ultra-smooth dipping, you can add a tiny teaspoon of coconut oil to the melts before microwaving.
- Dip and Arrange the First Layer: Now for the fun part! Take a mini pretzel and fully submerge it into the melted green candy. Use a fork or a dipping tool to lift it out, gently tapping off any excess coating. Place it on your parchment paper. Continue dipping and placing pretzels, arranging them in a circle. You’ll need about 6-7 pretzels to form the base of your wreath. Don’t worry about perfection here; a slightly rustic look is part of the charm!
- Build the Second Layer: This is the secret to a sturdy, professional-looking wreath! Once your first circle is down, immediately dip more pretzels and gently layer them on top of the first circle, slightly offsetting them to fill in any gaps. This double layer adds height and stability, making your wreath look lush and full, just like a real evergreen wreath.
- Decorate with Sprinkles: This step requires speed! While the candy coating is still wet, generously sprinkle your holiday sprinkles over the wreath. This is a fantastic job for little helpers—they love it! Chef’s Tip: To contain the sprinkle explosion, try holding your wreath over the bowl of sprinkles as you add them. The excess will fall back into the bowl for reuse.
- Create the Bow: Take your Pull & Peel Twizzler and separate two strands. Pinch each strand in the middle to form two simple loops, then press them together in the center to create a bow shape. You can use a tiny dot of leftover melted candy as “glue” to hold the center of the bow together. Before the candy on your wreath fully sets, gently press your beautiful Twizzler bow onto the bottom of the wreath.
- Let Them Set: Patience, grasshopper! Allow your wreaths to set completely at room temperature. This usually takes about 15-20 minutes. If you’re in a hurry, you can carefully transfer the entire baking sheet to the refrigerator for about 5-7 minutes to speed up the process. They’re ready when the candy coating is firm to the touch and doesn’t give when you press it lightly.
How to Serve and Share Your Edible Masterpieces
Once your wreaths are set and ready to shine, the fun really begins! These make the most stunning addition to any holiday cookie tray. Nestle them amongst classic sugar cookies and fudge for a pop of color and texture. They are also perfect for packaging! Stack them in a clear cellophane bag, tie them with a beautiful ribbon, and you have an incredibly thoughtful, handmade gift for teachers, mail carriers, friends, and neighbors. They’re a guaranteed smile-maker.
Get Creative! Fun Flavor Twists & Swaps
The classic version is divine, but don’t be afraid to play with your food! Here are a few ways to mix it up:
- Chocolate Peppermint: Use dark chocolate candy melts instead of green. Decorate with crushed candy canes for a classic holiday combo.
- White Christmas: Use white candy melts and decorate with blue and silver sprinkles for a beautiful, frosty look.
- Nutty Delight: After adding sprinkles, press a few chopped pecans, peanuts, or pretzel pieces into the coating for extra crunch and flavor.
- Fruity Fun: Use strawberry or cherry flavored candy melts and red sprinkles for a non-traditional, vibrant wreath. Perfect for Valentine’s Day!
- Dairy-Free Delight: Use dairy-free white chocolate and plant-based food coloring to accommodate allergies.
Olivia’s Chef Notes & Kitchen Confessions
This recipe has evolved so much from that first lopsided Christmas Eve attempt! My biggest lesson learned? The type of candy melt matters. I once tried to use a cheap, off-brand coating, and it never fully set, leaving me with a tray of delicious but tragically smeary wreaths. Now, I’m loyal to a couple of trusted brands I find at craft stores or the baking aisle.
And a funny story: one year, my dog, Barney, a golden retriever with a heart of gold and a stomach of steel, managed to quietly sneak an entire wreath off the counter. He didn’t eat it—oh no. He carefully carried it to his bed and simply licked all the candy coating and sprinkles off, leaving behind a sad, bare pile of pretzels. I couldn’t even be mad; it was too clever (and oddly neat)! So, consider this a warning to keep your creations safe from four-legged snack enthusiasts!
Your Questions, Answered!
Q: My candy coating is too thick and clumpy! What did I do wrong?
A: This usually means it got a little too hot. Candy melts can be finicky. If it’s too thick to dip smoothly, try adding a tiny, tiny amount of neutral oil (like coconut or vegetable) or paramount crystals (if you have them) and stirring vigorously. If it’s truly seized, it’s often best to start over. Remember, low heat and frequent stirring are your best friends!
Q: Can I make these ahead of time?
A: Absolutely! These are a great make-ahead treat. Once fully set, store them in a single layer in an airtight container at room temperature. They’ll stay fresh and crunchy for up to a week. For gifting, I usually make them no more than two days in advance to ensure maximum freshness.
Q: My sprinkles won’t stick! What’s the trick?
A: The key is timing. You have to add the sprinkles while the candy coating is still wet and tacky. If you finish a whole tray of wreaths first and then go back to add sprinkles, the coating will have already started to set. Work on one or two wreaths at a time: dip, place, layer, and immediately decorate before moving on to the next.
Q: The Twizzler bow won’t stay on. Help!
A: If the candy coating has already set when you try to add the bow, it won’t adhere. The fix is simple: use a tiny dab of the leftover melted candy as edible glue. Just touch a toothpick to the melted candy and put a small dot on the wreath where you want the bow, then press the bow onto it. It will harden and act as a perfect adhesive.

Pretzel Wreaths
Description
Here’s the treat that checks every holiday box—adorable, giftable, sweet, salty, and so easy. These edible wreaths need no oven time, just a little dipping, sprinkling, and bow-tying. They’re perfect for cookie trays, homemade gifts, or a fun kitchen project with kids. Get ready to make a snack that looks straight out of a bakery but takes just minutes to pull together!
Ingredients
-
1 bag mini pretzels (not snaps)
-
1 cup green candy melts (or white chocolate + gel food coloring)
-
Twizzlers Pull & Peel (for bows)
-
Holiday sprinkles of choice
-
Parchment paper
Instructions
-
Prep: Line a baking sheet with parchment. Have all ingredients ready.
-
Melt Coating: Microwave candy melts in 20-sec bursts, stirring until smooth. Add 1 tsp coconut oil if needed for fluidity.
-
First Layer: Dip pretzels into coating, shake off excess, and arrange 6–7 in a circle on parchment.
-
Second Layer: Repeat, layering more coated pretzels on top to build a full, sturdy wreath.
-
Decorate: While still wet, add sprinkles generously.
-
Add Bow: Separate two Twizzler strands, shape into a bow, and press onto the wreath with a dab of melted candy “glue.”
-
Set: Let rest 15–20 min at room temp or 5–7 min in the fridge until firm.
Notes
-
Peppermint Pop: Use dark chocolate + crushed candy canes.
-
Winter Wonderland: White melts + blue/silver sprinkles.
-
Nutty Crunch: Add chopped pecans or peanuts before the candy sets.
-
Allergy-Friendly: Use gluten-free pretzels + dairy-free candy coating.
Nutrition
- Calories: 110cal Per Serving
- Fat: 3g
- Carbohydrates: 20g
Quick Nutritional Info
Per Wreath (Approximate): ~110 calories | 3g fat | 20g carbs | 1g protein
Allergy Info: Contains gluten and dairy. Use gluten-free pretzels and dairy-free chocolate/candy melts to make this recipe gluten-free and dairy-free.
Final Thoughts: Your Holiday Kitchen Awaits
Well, my friend, there you have it—your complete guide to creating the most festive, fun, and foolproof holiday treat. These Sweet & Salty Pretzel Wreaths are so much more than just a recipe; they’re an invitation to slow down, get a little messy, and soak in the joy of the season.
Remember, perfection is not the goal here. A lopsided bow or a sprinkle avalanche just adds to the charm and the story. This is about the laughter that fills the kitchen, the pride of creating something beautiful with your own hands, and the simple pleasure of sharing something made with love.
Gingerbread Layer Cake with Spiced Cream Cheese Frosting
Welcome to the Coziest Bake of the Season!
Hello, my friend! Can you smell that? That incredible, heart-warming aroma of ginger, cinnamon, and molasses wafting through the air? It’s the official scent of the holidays in my kitchen, and today, we’re baking the ultimate centerpiece to celebrate it: my famously moist and warmly spiced Gingerbread Layer Cake with Spiced Cream Cheese Frosting.
This isn’t just any cake. This is a tall, stunning, showstopper of a dessert that promises to turn heads and gather everyone around the table. Imagine layers of incredibly tender, deeply spiced cake that’s dark, rich, and perfectly sweet, all stacked high with a luxuriously smooth and tangy cream cheese frosting that’s been kissed with a hint of warming spice. It’s the kind of cake that sparks pure joy, the one everyone asks for seconds of, and the recipe you’ll proudly pull out for every special gathering from now until the New Year.
I know layer cakes can feel a little intimidating, but I promise you, this one is built for success. We’re going to walk through every single step together, with all my favorite chef hacks and tips to ensure your cake is not only beautiful but absolutely unforgettable. So, tie on your favorite apron (the messy ones are the best, aren’t they?), preheat that oven, and let’s make some magic!
A Slice of Holiday Memory
This cake recipe is my edible heirloom. It’s evolved from my grandmother’s classic gingerbread loaf, a humble, square-cut treat she’d serve warm with a dollop of whipped cream. I loved it, but even as a kid, I dreamed bigger. I wanted drama. I wanted layers. I wanted a cake that looked as spectacular as it tasted.
One particularly snowy Christmas Eve, I decided to experiment. I was about sixteen, feeling wildly ambitious, and I attempted to turn her simple recipe into a towering layer cake. Let’s just say the first attempt was… a learning experience. The layers were dense, the frosting slid right off, and it looked more like a gingerbread pancake stack! But my family, being the wonderful souls they are, ate every last crumb and declared it a triumph. Their encouragement fueled my kitchen curiosity. Over the years, I’ve tweaked, tested, and perfected it—adding sour cream for unbelievable moisture, introducing a hint of orange zest for brightness, and nailing the frosting-to-cake ratio. Now, it’s the first thing my nieces request when they come to visit. It’s more than a cake; it’s a delicious piece of our family story, and I’m so thrilled to share it with you.
Gathering Your Cozy Ingredients
Here’s everything you’ll need to create this holiday masterpiece. Don’t be daunted by the list—a lot of it is spices and pantry staples! Read through the notes for each; they’re little nuggets of kitchen wisdom to help you understand the “why” behind the “what.”
For the Gingerbread Cake Layers:
- 6 cups all-purpose flour: The structure of our cake. Make sure to spoon it into your measuring cup and level it off for accuracy—no packing it down!
- 3 cups granulated sugar & 2 ½ cups dark brown sugar: The white sugar adds sweetness and helps create a tender crumb, while the dark brown sugar brings that deep, almost caramel-like molasses flavor and extra moisture. Light brown sugar works in a pinch, but dark is my preference for a richer taste.
- 4 Tbsp ground ginger, 2 Tbsp cinnamon, 1 tsp ground cloves: The holy trinity of gingerbread spice! Be bold here—fresh, high-quality spices make all the difference. If your spices have been in the cabinet for over a year, it’s time for an update.
- 5 tsp baking powder: Our primary leavening agent to give this dense cake a beautiful, slight lift.
- 2 tsp salt: Crucial for balancing all the sweetness and making the spices pop. Never skip the salt!
- 1 cup (2 sticks) unsalted butter, room temperature: Using room temp butter is non-negotiable! It will cream perfectly with the dry ingredients to create a crumbly texture that ensures a tender cake.
- 2 cups egg whites (from about 16 large eggs) or 8 whole eggs: Using just whites creates a lighter, brighter crumb and a paler color that contrasts beautifully with the dark spices. Using whole eggs will give a slightly richer, denser result—both are delicious!
- 3 cups sour cream, room temperature: This is the SECRET WEAPON! Sour cream is the key to an unbelievably moist and tender cake with a subtle tang. Full-fat Greek yogurt is a great substitute.
- 1 cup neutral oil (like vegetable or canola): Oil guarantees a moist cake that stays soft for days.
- ½ cup unsulphured molasses: The heart and soul of gingerbread. Use unsulphured for a cleaner, smoother flavor. Don’t use blackstrap—it’s too bitter.
- 2 tsp pure vanilla extract: The flavor enhancer that rounds out all the other notes.
- Twist: Zest of 2 oranges OR 2 Tbsp espresso powder: My chef’s insight! The orange zest adds a fantastic citrusy brightness that cuts through the richness. The espresso powder doesn’t make it taste like coffee; it deepens the chocolatey notes of the molasses and spices. You can’t go wrong with either!
For the Spiced Cream Cheese Frosting:
- 4 cups (8 sticks) unsalted butter, room temperature: Yes, it’s a lot! This is a big cake. Room temp butter is essential for a smooth, non-lumpy frosting.
- 2 cups (16 oz) full-fat block cream cheese, room temperature: Use the blocks, not the spreadable kind in a tub. The tub kind has added stabilizers and has too much moisture, which will make your frosting runny.
- 2 Tbsp pure vanilla extract: Seems like a lot, but trust me, it makes the frosting taste incredible.
- 1 tsp salt: The key to avoiding overly sweet frosting. It balances the tang and sweetness perfectly.
- 20 cups powdered sugar, sifted: Sifting is a pain, I know, but it prevents lumps in your otherwise silky-smooth frosting. You may need slightly more or less.
- ⅔ cup heavy cream, room temperature: This loosens the frosting to the perfect spreading consistency. Milk works too, but cream makes it richer.
- Twist: 2 tsp cinnamon + ½ tsp freshly grated nutmeg: Optional, but highly recommended for that extra “wow” factor of spiced warmth.
For Decorating (Get Creative!):
- Sugared cranberries
- Fresh rosemary sprigs
- Crumbled gingerbread cookies
- A dusting of cinnamon
- Gel food coloring (for tinting frosting)
Let’s Build This Beautiful Cake: Step-by-Step
Ready? Let’s do this. Follow these steps, and you’ll have a flawless cake. I’m chatting right alongside you with all my best tips!
Step 1: Prep Like a Pro. Preheat your oven to 350°F (175°C). Grease the bottoms and sides of four 9-inch round cake pans with butter or non-stick spray. Then, line the bottoms with parchment paper circles. This double insurance policy guarantees your cakes will release perfectly. Trust me, you don’t want to skip the parchment!
Step 2: Combine the Dry Goods. In the bowl of your stand mixer (or a very large bowl if using a hand mixer), whisk together the flour, both sugars, ginger, cinnamon, baking powder, salt, and cloves. Give it a good whisk for at least a minute to ensure the leavening and spices are evenly distributed. Now, add the room temperature butter. Mix on low speed until the mixture looks like coarse, damp sand with no large lumps of butter remaining. This step coats the flour in fat, leading to a tender texture.
Step 3: The Wet Team Unites. In a separate large bowl, whisk together the egg whites (or whole eggs), room temperature sour cream, oil, molasses, and vanilla until the mixture is smooth and homogenous. If you’re using the orange zest or espresso powder, whisk it in here! This is where you add that special twist.
Step 4: Bring It All Together. With the mixer on low speed, gradually pour the wet ingredients into the dry butter-flour mixture. Once mostly combined, increase the speed to medium and mix for about 60-90 seconds just until the batter is smooth and no streaks of flour remain. Do not overmix! Overmixing develops gluten and can make the cake tough.
Step 5: Divide and Conquer. This is where a kitchen scale is your best friend for perfectly even layers! If you have one, weigh the total batter and divide by four. If not, use a measuring cup to distribute the batter equally among your four prepared pans. Smooth the tops with a spatula.
Step 6: Bake to Perfection. Place the pans in the oven, preferably on two racks, but not directly over each other. Bake for 30-34 minutes. The cakes are done when the tops spring back lightly when touched and a toothpick inserted into the center comes out with a few moist crumbs attached. Chef’s Hack: Rotate the pans halfway through baking for even browning.
Step 7: The All-Important Cool Down. Let the cakes cool in their pans on a wire rack for 20 minutes. Then, run a knife around the edge of each pan, invert the cakes onto the rack, peel off the parchment paper, and let them cool completely. I mean, completely, totally, 100% cool. If you frost a warm cake, the frosting will melt into a puddle. Patience is a virtue here! To speed things up, you can wrap the cooled layers in plastic wrap and pop them in the fridge for an hour.
Step 8: Whip Up the Dreamy Frosting. While the cakes cool, make the frosting. In your clean stand mixer bowl, beat the room temperature butter and cream cheese together on medium-high speed for 3-4 minutes, until it’s very light, fluffy, and pale. Scrape down the bowl. Add the vanilla and salt and mix to combine. With the mixer on low, gradually add the sifted powdered sugar until incorporated. Finally, pour in the heavy cream. Turn the mixer to medium-high and beat for another 2-3 minutes until incredibly light and fluffy. If using the extra spices, add them now. If your kitchen is warm and the frosting seems soft, chill it for 15-20 minutes before using.
Step 9: Stack, Frost, and Decorate! Place your first cake layer on a cake stand or plate. Spread a generous, even layer of frosting over the top. Repeat with the remaining layers. Apply a thin layer of frosting all over the cake—this is the “crumb coat.” It locks in any loose crumbs. Chill the cake for 15 minutes to set this coat. Then, apply the final, thick, beautiful layer of frosting. Smooth the sides and swirl the top. Now, decorate to your heart’s content with your chosen festive toppings!
How to Serve Your Masterpiece
This cake is a star, so let it shine! Use a long, sharp knife dipped in hot water and wiped dry between each cut for flawlessly clean slices. Serve it on its own for a truly decadent experience, or with a lightly sweetened whipped cream or a scoop of vanilla bean ice cream on the side. A cup of strong coffee, hot cocoa, or even a glass of cold milk is the perfect companion to each spicy, sweet, and tangy bite.
Make It Your Own: Delicious Variations
Feel free to play with this recipe to suit your taste or dietary needs!
- Gluten-Free: Swap the all-purpose flour for a 1:1 gluten-free baking blend. I recommend one that includes xanthan gum.
- Dairy-Free: Use plant-based butter and sour cream. For the frosting, use dairy-free cream cheese and butter alternatives. Coconut cream can often sub for heavy cream.
- Flavor Twist – Chocolate Chip: Fold 1-2 cups of mini chocolate chips into the batter before dividing into pans.
- Flavor Twist – Orange Bliss: Add the zest of two oranges to the batter AND add 2 tablespoons of orange juice to the frosting for a bright, citrus-forward cake.
- Smaller Batch: Halve the entire recipe to make a two-layer 9-inch cake. Baking time may be slightly less, so start checking at 25 minutes.
Olivia’s Chef Notes & Kitchen Stories
This recipe has been through it all with me! One year, I was so busy chatting with family that I accidentally added a full cup of molasses instead of a half. The cake was incredibly dark and robust, but everyone actually loved the intense flavor. It’s a forgiving recipe!
My biggest tip? Read the recipe twice before you start. Mis en place—getting all your ingredients measured and ready—is the true secret to stress-free baking. It feels so professional and makes the process a joy instead of a scramble.
Also, don’t stress if your layers aren’t perfectly level or your frosting isn’t bakery-smooth. This cake is about homemade heart. A rustic look with swoops and swirls is just as beautiful. The love you bake into it is what everyone will truly taste.
Your Questions, Answered!
Q: Can I make the cake layers ahead of time?
A: Absolutely! This cake is fantastic for making ahead. Bake the layers, let them cool completely, then wrap each one tightly in plastic wrap and store them at room temperature for up to 24 hours or in the freezer for up to 2 months. Thaw frozen layers in the refrigerator overnight before frosting. You can also make the frosting 2-3 days ahead and keep it refrigerated. Let it come to room temperature and re-whip it before using.
Q: My frosting is too runny! How can I fix it?
A: Don’t panic! This usually happens if the butter or cream cheese was too warm. Pop the entire bowl of frosting into the refrigerator for 20-30 minutes to firm up, then re-whip it. If it’s still too soft, you can add a bit more sifted powdered sugar, a quarter cup at a time, until it reaches a spreadable consistency.
Q: Why is my cake dense and not fluffy?
A: The most common culprits are overmixing the batter (which develops gluten) or old baking powder that has lost its potency. Always make sure your leavening agents are fresh! Also, ensure you measured your flour correctly—scooping directly from the bag with the measuring cup can pack in too much flour, leading to a dry, dense cake.
Q: Can I use blackstrap molasses?
A: I don’t recommend it. Blackstrap molasses is much more bitter and intense than unsulphured molasses (which is sometimes just labeled “molasses”). Using blackstrap will result in a cake that is overly strong and bitter. Stick with unsulphured for the best, balanced flavor.
Gingerbread Layer Cake with Spiced Cream Cheese Frosting
- Total Time: 59 minute
Description
Welcome to the coziest bake of the season! Imagine the scent of ginger, cinnamon, and molasses filling your kitchen as a tall, elegant cake takes shape. This isn’t just dessert—it’s the centerpiece of your holiday table. Tender layers of spiced gingerbread meet tangy, spiced cream cheese frosting for a showstopper that tastes like pure holiday magic. Whether you’re baking for family, friends, or just to make the season brighter, this cake is guaranteed to gather smiles (and requests for seconds).
Ingredients
For the Cake Layers:
-
6 cups all-purpose flour
-
3 cups granulated sugar
-
2 ½ cups dark brown sugar
-
4 Tbsp ground ginger
-
2 Tbsp ground cinnamon
-
1 tsp ground cloves
-
5 tsp baking powder
-
2 tsp salt
-
1 cup (2 sticks) unsalted butter, room temp
-
2 cups egg whites (or 8 whole eggs)
-
3 cups sour cream, room temp
-
1 cup neutral oil
-
½ cup unsulphured molasses
-
2 tsp vanilla extract
-
Zest of 2 oranges or 2 Tbsp espresso powder (optional twist)
For the Frosting:
-
4 cups (8 sticks) unsalted butter, room temp
-
2 cups (16 oz) cream cheese, room temp
-
2 Tbsp vanilla extract
-
1 tsp salt
-
20 cups powdered sugar, sifted
-
⅔ cup heavy cream
-
2 tsp cinnamon + ½ tsp nutmeg (optional)
For Decorating:
Sugared cranberries, rosemary sprigs, gingerbread cookie crumbs, or a dusting of cinnamon
Instructions
-
Prep: Preheat oven to 350°F (175°C). Grease & line four 9-inch round cake pans with parchment.
-
Mix Dry: Whisk flour, sugars, spices, baking powder & salt. Cut in butter until sandy.
-
Mix Wet: Whisk eggs, sour cream, oil, molasses, vanilla & zest/espresso.
-
Combine: Slowly mix wet into dry until smooth (don’t overmix!).
-
Bake: Divide batter evenly among pans. Bake 30–34 min until toothpick comes out with moist crumbs. Cool completely.
-
Frosting: Beat butter + cream cheese until fluffy. Add vanilla & salt. Gradually mix in powdered sugar, then cream. Beat until light. Add spices if using.
-
Assemble: Layer cake + frosting, apply crumb coat, chill, then frost generously. Decorate as desired.
- Prep Time: 40 min
- Cook Time: 30–34 min
Nutrition
- Calories: 540cal Per Serving
- Fat: 25g
- Carbohydrates: 72g
- Protein: 6g
Final Thoughts: You Did It!
And there you have it! Your very own stunning Gingerbread Layer Cake, created with your own two hands. Take a moment to admire it—the layers, the frosting, the beautiful decorations. That’s not just a cake; it’s a testament to your creativity and a generous gift of love from your kitchen.
Remember, the true magic of this cake isn’t just in its perfect blend of spices or its impossibly moist crumb. It’s in the stories shared around the table while enjoying it. It’s in the cozy silence of a kitchen filled with its warm aroma. It’s in the proud smile you get when someone takes their first, awe-inspiring bite.




