
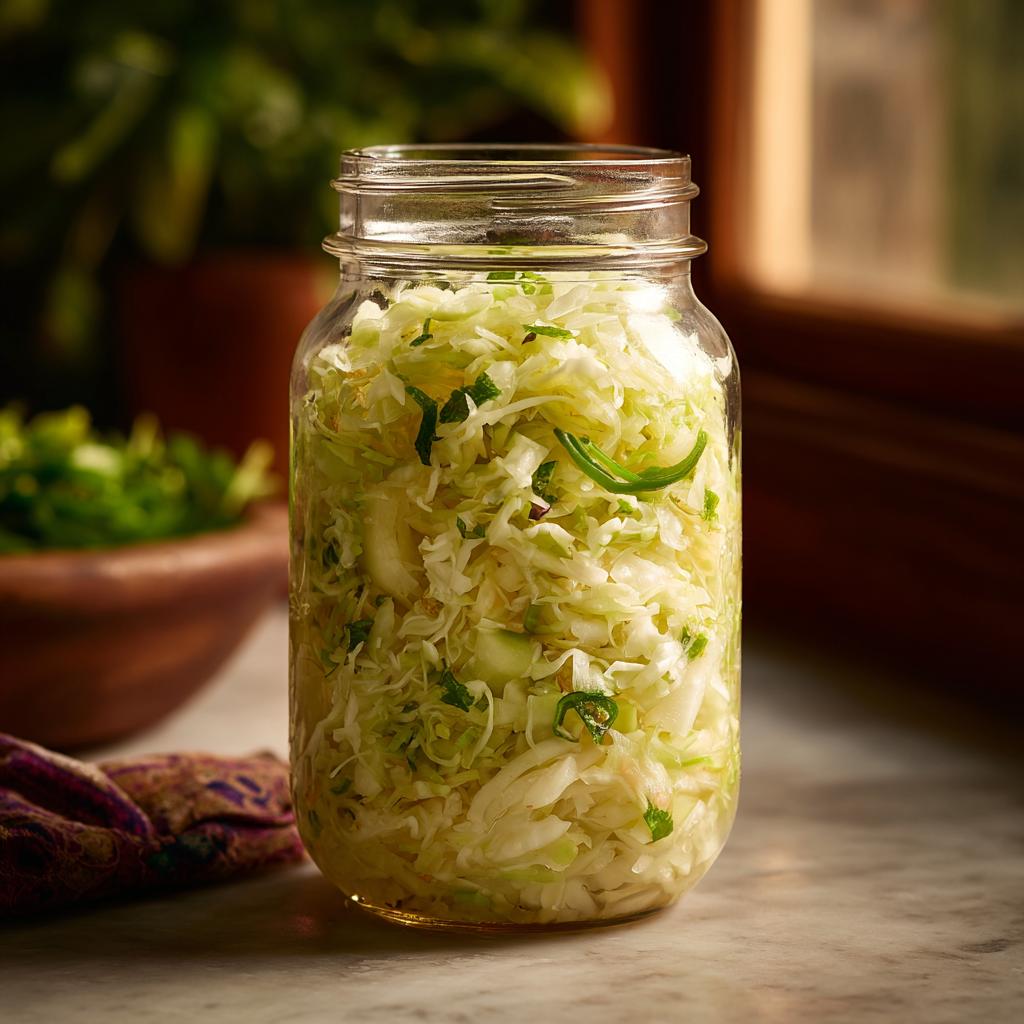
Zesty Homemade Sauerkraut
Forget the Jar: Let’s Make Zingy, Crunchy, Homemade Sauerkraut!
Hey there, friend! Come on in, pull up a stool, and let’s get our hands a little messy. Is there anything quite like the smell of something incredible happening in your kitchen? Not the instant-gratification kind of smell, but the slow, patient, magical kind. The kind that whispers of transformation and fills your home with the promise of something truly special. That’s the magic we’re making today.
We’re talking about homemade sauerkraut. Now, before you picture dusty jars from a century ago, let me stop you right there. This isn’t your grandma’s kraut (though I love and respect her version!). This is a vibrant, living, zingy condiment that’s about to become your new kitchen obsession. We’re taking crisp green cabbage and, with a little patience and a lot of flavor, turning it into a tangy, probiotic powerhouse that crackles with every bite.
And because we love a good flavor adventure here, we’re not stopping at basic. We’re folding in the sweet, subtle crunch of green apple and a gentle, warming kick of fresh jalapeño. It’s a symphony of sweet, spicy, salty, and sour that will absolutely revolutionize your hot dogs, burgers, salads, and bowls. The best part? You don’t need any fancy equipment or a culinary degree. All you need is cabbage, salt, your two hands, and a willingness to embrace a little kitchen alchemy. Ready to make something unforgettable? Let’s dive in.
A Jar of Sunshine in the Middle of Winter
My love affair with fermentation started on a bleak, slushy February day. I was craving something bright and fresh, but the grocery store produce section was looking a little… sad. I remembered my great-aunt used to make her own pickles and kraut, and I figured, how hard could it be? I chopped, I salted, I massaged, and I stuffed it all into a giant jar. Then, I waited.
For over a week, that jar sat on my counter, bubbling away like a quiet, scientific experiment. I’d peek at it every day, wondering if I’d just created a science project disaster. But on day ten, I tentatively unscrewed the lid. The smell that wafted out wasn’t funky; it was complex, tangy, and alive. I took a bite, and my entire world brightened. That first taste of my own homemade kraut, bursting with a zingy vitality, was like capturing a little jar of summer sunshine. It was a powerful reminder that the most satisfying flavors often come from the simplest ingredients and a little bit of patience. Now, I always have a jar fermenting—it’s my edible, probiotic security blanket!
Gathering Your Fermentation Friends
Here’s the beautiful part: the ingredient list is gloriously short. The magic happens between the cabbage and the salt. Everything else is just for fun! This recipe makes a big batch (about 40 servings) because, trust me, you’ll want plenty to share and to last.
- 2 heads Green Cabbage (approx. 4–6 lbs total): This is our star! Look for heads that are firm, heavy for their size, and have vibrant, crisp outer leaves. The outer leaves are important—we’ll use them later! Chef’s Insight: The weight can vary, so we’ll go by the salt-to-cabbage ratio, not volume.
- 3–4 tbsp Natural Salt (1½–2 tsp per pound of cabbage): This is non-negotiable. You must use a salt without anti-caking agents or iodine, as they can interfere with fermentation. Fine sea salt, pickling salt, or Himalayan pink salt are perfect. Substitution Tip: Do not use table salt! The additives can give your kraut a metallic taste and inhibit the good bacteria.
- 2 tbsp Caraway Seeds (optional but classic): This is the quintessential kraut spice. It adds a wonderful, warm, anise-like flavor that just feels right. Substitution Tip: Not a fan? Try dill seeds, coriander seeds, or even a bay leaf for a different aromatic profile.
- 1 Green Apple, julienned: Our first twist! The apple adds a subtle, sweet crunch that beautifully balances the tangy saltiness. Granny Smith is perfect for its firm texture and tartness. Chef’s Insight: Julienne it (cut into matchsticks) so it integrates seamlessly with the shredded cabbage.
- 1 Small Jalapeño, thinly sliced: Twist number two! This isn’t about making it super spicy; it’s about a gentle, building warmth. Remove the seeds and membranes for just a hint of heat, or leave them in for a bigger kick. Substitution Tip: A pinch of red pepper flakes works in a pinch, but fresh is best!
- 1 tsp Mustard Seeds: The secret weapon! These little guys add a fantastic tangy, slightly pungent depth that makes the flavor profile incredibly complex. You’ll be surprised what a difference they make.
Let’s Get Our Kraut On: A Step-by-Step Guide
Don’t be intimidated! This process is incredibly meditative and satisfying. Put on some good music, and let’s get to work.
Step 1: Shred & Prep
Remove any wilted or damaged outer leaves from your cabbage heads. Set aside two of the nicest, largest outer leaves—we’ll need these later! Cut each cabbage in half and cut out the tough core. Now, shred it. You can use a sharp knife to slice it thinly, a mandoline (watch those fingers!), or the shredding disk on your food processor. Place all that beautiful shredded cabbage into the largest mixing bowl you own. Chef’s Hack: A food processor makes this step lightning fast. It’s a game-changer for large batches!
Step 2: Salt & Squeeze (The Arm Workout!)
Sprinkle the salt over the cabbage. Now, roll up your sleeves and get in there with clean hands! Start massaging, squeezing, and crushing the cabbage. At first, it will seem like there’s not enough liquid, but keep going. After about 5-10 minutes, you’ll feel the cabbage become limp and wet, and a pool of brine will form at the bottom of the bowl. This is liquid gold! Chef’s Commentary: This step is crucial. You’re not just mixing; you’re breaking down the cabbage cell walls to draw out its natural water, which becomes the brine that protects it during fermentation. Think of it as a therapeutic kitchen workout.
Step 3: Flavor Boost
Now, add in your caraway seeds, the julienned apple, sliced jalapeño, and mustard seeds. Mix everything together with your hands until the add-ins are evenly distributed throughout the cabbage mixture.
Step 4: Pack Tightly
Time to pack your fermentation vessel. You can use a dedicated fermentation crock, a very large glass jar, or a few regular-sized mason jars. Whatever you use, it must be scrupulously clean. Start transferring handfuls of the cabbage mixture into your jar(s). With every handful, press down firmly and aggressively with your fist or a kraut pounder. You want to eliminate any air pockets and encourage the brine to rise over the top of the cabbage. Chef’s Hack: The end of a rolling pin or a clean glass jar works perfectly as a pounder if you don’t have a fancy tool.
Step 5: Submerge & Cover
Once all your cabbage is packed tightly into the jar and completely covered by its own brine, it’s time to make sure it stays that way. Take one of the reserved whole cabbage leaves, fold it up, and place it on top of the shredded mix. This acts as a primary barrier. Then, you need a weight. A glass fermentation weight is ideal, but you can also use a small, clean zip-top bag filled with a little brine (so if it leaks, it doesn’t dilute your ferment). The goal is to keep every bit of cabbage pushed down under the brine. Finally, cover the jar with a cloth secured with a rubber band or a special fermentation lid that allows gases to escape but keeps bugs out. Chef’s Note: Do NOT screw a regular lid on tightly! The building CO2 gases need to escape, or you could have a jar explosion on your hands.
Step 6: Ferment & Wait
Place your jar(s) in a cool, dark spot (a kitchen cupboard or on the counter away from direct light) at room temperature (ideally 65-75°F). Now, the hard part: wait. Fermentation is a wild process, and the timeline depends on the temperature of your home. It can take anywhere from 10 to 21 days. Start tasting it with a clean fork around day 10. It’s ready when it’s reached a level of tanginess that you love!
Step 7: Taste & Store
Once your kraut is perfectly tangy and crunchy, remove the weight, screw on a regular lid, and move it to the refrigerator. The cold drastically slows down fermentation, preserving your kraut at its peak for months!
How to Serve Your Homemade Masterpiece
This kraut is so much more than a hot dog topper! Its bright, crunchy texture elevates everything it touches. I love it piled high on a grilled bratwurst with spicy mustard, of course. But try it stirred into a grain bowl for a probiotic punch, folded into a tuna or chicken salad for crunch, or as a topping for avocado toast. It’s incredible on pulled pork sandwiches, tacos, or even eaten straight from the jar with a fork as a healthy, gut-loving snack. Get creative!
Mix It Up: Endless Kraut Possibilities
The fun doesn’t stop here! Once you master the basic method, a world of flavor combinations opens up.
- Beet & Ginger: Add 1-2 shredded raw beets and a tablespoon of freshly grated ginger for a stunning pink kraut with a zesty kick.
- Classic Caraway: Stick with the traditional! Just cabbage, salt, and caraway seeds for a pure, nostalgic flavor.
- Turmeric & Black Pepper: Add 1 tbsp of grated fresh turmeric and 1 tsp of freshly cracked black pepper for an anti-inflammatory, golden-hued kraut.
- Vegan Kimchi-style: Add garlic, ginger, a dash of soy sauce (or coconut aminos), and a sprinkle of Korean chili flakes (gochugaru).
- Seed-Free: Simply omit the caraway and mustard seeds for an AIP-friendly version that still lets the apple and jalapeño shine.
Olivia’s Chef Notes & Kitchen Confessions
This recipe has evolved so much since that first February batch. I started adding the apple after a happy accident—a slice fell into the bowl while I was snacking, and I just went with it. Best mistake ever! The jalapeño was a request from my spice-loving partner, and it turned out to be the perfect balancing act.
A funny story: my first time, I was so paranoid about mold that I checked the jar ten times a day. I didn’t pack it down well enough, and a few tiny bits of cabbage floated to the surface and developed a little kahm yeast (harmless, but not pretty). I almost threw the whole batch out! I’ve since learned that as long as everything is submerged, you’re golden. The key is to be brave, trust the process, and keep everything under the brine. This kraut has become my go-to hostess gift, and it’s always a huge hit. There’s something so special about giving someone a jar of food you made with your own hands that’s also bursting with health.
Your Kraut Questions, Answered!
Q: I see bubbles and my jar is hissing when I open it. Is that normal?
A: Absolutely! Rejoice! Those bubbles and that hiss are the sound of successful fermentation. It means the lactic acid bacteria are happily doing their job, eating the sugars and producing carbon dioxide and acid. It’s a sign of a healthy, active ferment.
Q: There’s a white, cloudy film on top of the brine. Is it mold?
A: Cloudy brine is completely normal and expected—it’s a sign of a thriving microbial community. The thing to watch for is fuzzy, colorful mold (white, green, pink, black). If you see fuzzy mold, you should discard the batch. However, a white, flat, kind of powdery-looking film is usually harmless Kahm yeast, which is safe but can impart an off-flavor. You can skim it off the top and the kraut underneath is fine. Remember: if it’s colorful and fuzzy, toss it. If it’s white and flat, skim it.
Q: My kraut isn’t sour enough/took forever to ferment. What happened?
A: Temperature is the biggest factor here. If your house is on the cooler side (below 65°F), fermentation will proceed at a much slower pace. Be patient; it might take the full 3 weeks. Conversely, if it’s very warm, it will ferment faster. Taste is your best guide, not the calendar!
Q: The brine level dropped below the cabbage after a few days. What should I do?
A: This can happen as the cabbage absorbs liquid. It’s an easy fix! Simply make a fresh bit of brine by dissolving 1 teaspoon of salt in 1 cup of water. Pour just enough of this over your kraut to cover the exposed vegetables and re-weight it.
Zesty Homemade Sauerkraut
- Total Time: Varies by taste
Description
This kraut is alive with flavor—sweet apple, gentle jalapeño heat, and a tangy zing that wakes up anything it touches. All you need is cabbage, salt, and patience to unlock the magic of fermentation.
Ingredients
-
2 heads green cabbage (4–6 lbs total)
-
3–4 tbsp natural salt (1½–2 tsp per lb cabbage)
-
2 tbsp caraway seeds (optional)
-
1 green apple, julienned
-
1 small jalapeño, thinly sliced
-
1 tsp mustard seeds
Instructions
-
Shred & Prep – Save 2 large outer cabbage leaves. Shred cabbage, removing cores.
-
Salt & Massage – Sprinkle salt, massage 5–10 min until limp and brine forms.
-
Flavor Boost – Mix in caraway, apple, jalapeño, mustard seeds.
-
Pack – Firmly press into clean jars, packing tightly so brine rises above cabbage.
-
Submerge – Cover with reserved leaf + weight. Ensure all cabbage stays under brine.
-
Ferment – Cover loosely with cloth or vented lid. Store at room temp, 65–75°F, for 10–21 days. Taste after day 10.
-
Finish – When tangy and crunchy, remove weight, seal jar, and refrigerate. Keeps for months!
Notes
Use it on hot dogs, burgers, grain bowls, tacos—or eat it straight from the jar for a gut-healthy snack.
- Prep Time: 30 mins
A Little Nourishment Note
Per Serving (approx. 2 tbsp): Calories: ~12 | Carbs: 3g | Fat: 0g | Sugar: 1g | Rich in probiotics, fiber, Vitamin C, and antioxidants.
This is a true superfood! The fermentation process creates beneficial probiotics that support gut health, and cabbage itself is packed with nutrients.
Prep Time: 30 min | Fermentation Time: 10–21 days | Total Time: Varies based on taste
Final Thoughts: Your Jar of Patience & Pride
And there you have it—your very own jar of zingy, living, homemade sauerkraut. What started as a simple head of cabbage has transformed, through a little salt and a lot of patience, into something truly extraordinary. This isn’t just a condiment; it’s a testament to the magic of slow food and the incredible power of your own two hands.
Remember, fermentation is less of a exact science and more of a relationship. It asks you to be present, to observe, and to trust the process. That bubbling jar on your counter is a tiny ecosystem you helped create, a delicious reminder that the best things in life often can’t be rushed.
So don’t be afraid to peek, to taste, and to learn. Your first batch might be perfect, or it might teach you something for the next one. That’s the beauty of it. This kraut is yours—a unique, tangy, crunchy expression of your kitchen curiosity.

Broiled Lobster Tails
Your Fancy Restaurant Dinner, Made Effortlessly at Home
Hey there, friend! Come on in, pull up a stool. Can you smell that? It’s the incredible, buttery, slightly smoky aroma of broiled lobster tails wafting from my oven. If that smell doesn’t scream “celebration,” I don’t know what does. I’m a firm believer that you shouldn’t have to wait for a special occasion to create a special occasion. And that’s exactly what this recipe is all about.
Now, I know what you might be thinking. “Lobster? That seems… fancy. And complicated. And maybe a little intimidating.” I’m here to tell you, with a warm heart and a slightly flour-dusted apron, that it is anything but! Broiling lobster tails is one of the fastest, easiest, and most foolproof ways to achieve restaurant-quality luxury right in your own kitchen. We’re talking about 20 minutes from fridge to table. Seriously!
This method is my absolute favorite. It creates a gorgeous, lightly crisp top while keeping the meat underneath incredibly tender, juicy, and infused with the most delicious garlic-parika-lemon butter. It’s a showstopper of a meal that requires minimal effort, leaving you more time to sip some wine, light a candle, and actually enjoy the company you’re cooking for. So, let’s ditch the intimidation and dive headfirst into this delicious, decadent project together. You’ve totally got this.
The Lobster Tale: A Birthday Tradition
This recipe always takes me right back to my dad’s 50th birthday. My mom, ever the planner, decided we were going to recreate a classic New England surf-and-turf feast. The steaks were easy, but the lobster? We were novices. I remember us huddled over the kitchen counter, giggling like maniacs as we tried to figure out how to wrestle these alien-looking creatures. There was a lot of “You do it!” “No, you do it!” and a minor panic about the shell-snipping.
But once we got the hang of it, the magic happened. The moment those tails went under the broiler and the butter started sizzling, the whole house transformed. It smelled like a five-star restaurant. When we sat down to eat, the look on my dad’s face—pure, unadulterated joy—was everything. It wasn’t just about the food; it was about the shared experience, the slight chaos, and the triumphant, delicious result. That’s the spirit I want to bring to your kitchen today. It’s not about perfection; it’s about the fun and the love you stir into every bite.
Gathering Your Seaside treasures
Beautiful food starts with beautiful ingredients. Here’s everything you’ll need to create this masterpiece for four. Don’t forget to check the notes for substitutions—cooking should be flexible and fun!
- 4 whole lobster tails (5–6 oz each): The star of the show! Look for frozen raw lobster tails in the freezer section. Thaw them completely in the refrigerator overnight for the best texture. The shells should be a vibrant, pretty color.
- 1 cup butter, melted: This is the luxurious blanket that coats our lobster. I use unsalted butter so I can control the salt level myself. For a richer flavor, try European-style butter!
- 1 tsp paprika: This isn’t just for color! It adds a gentle, sweet smokiness that complements the lobster’s natural sweetness beautifully. Smoked paprika is a fantastic alternative for a deeper flavor.
- Salt and ground white pepper, to taste: White pepper is my little chef’s secret here. It gives a gentle heat without the visual distraction of black specks, keeping that beautiful lobster meat looking pristine. But black pepper works in a pinch!
- 1 lemon, cut into wedges: The bright, acidic zing of fresh lemon is non-negotiable. It cuts through the richness of the butter and makes the entire dish sing.
Optional Flavor Twists (My Favorite Part!):
- 2 cloves garlic, minced: Stir this right into the melted butter. Garlic and lobster are a match made in heaven.
- 1 tsp fresh lemon zest: This intensifies the lemon flavor without adding more liquid. Zest it right into the butter mixture!
- 1 tsp chopped fresh parsley or chives: A pop of fresh green color and a mild, herbal flavor for garnish.
- Pinch of cayenne or chili flakes: Just a tiny pinch stirred into the butter adds a wonderful, subtle warmth that builds with each bite.
- 1 tbsp white wine or lemon juice: A splash added to the butter sauce adds another layer of complexity and acidity.
Let’s Get Cooking: Your Foolproof Guide
Ready? Apron on? Let’s do this. Follow these steps and you’ll have perfect lobster in no time.
Step 1: Prep the Lobster Tails
First, position your oven rack so it sits about 5-7 inches from the top heating element. Now, preheat your broiler to high. While it’s heating up, let’s butterfly those tails! Take your kitchen shears (strong, sharp scissors work too) and, starting at the open end of the tail, cut straight down the middle of the top shell all the way to the very end of the tail fin. Try to cut through the shell without cutting deep into the meat itself. Now, use your fingers to gently pry the shell open. Loosen the meat from the shell, keeping it attached at the base (the end with the fin), and lift the meat so it rests on top of the split shell. This exposes the maximum surface area to the heat, ensuring even cooking and creating those lovely crispy edges. Pat the meat dry with a paper towel—this helps the butter adhere better!
Step 2: Create the Magic Butter Mixture
While your lobster tails are prepped, melt that cup of butter. I do this in a small saucepan on the stove over low heat so it doesn’t splatter. Once melted, pour it into a medium bowl. Now, the fun begins! This is where you make the recipe your own. Add the paprika, a good pinch of salt, and a few cracks of white pepper. Then, raid your optional ingredients! This is when I almost always add the minced garlic, a pinch of cayenne, and that glorious lemon zest. Whisk it all together until it’s a beautiful, fragrant, orange-hued potion.
Step 3: The Main Event – Broiling!
Place your prepped lobster tails on a baking sheet. I like to line mine with aluminum foil for super easy cleanup. Now, using a pastry brush (or a spoon in a pinch!), generously baste each lobster tail with the seasoned butter. Get it into all the nooks and crannies of the meat. You want a good, solid coating. Now, slide that baking sheet under the preheated broiler. Set a timer for 5 minutes. Chef’s Hack: Don’t walk away! Broilers are powerful, and all ovens are different. Keep a close eye on them. You’re looking for the meat to become completely opaque (white, not translucent) and the top to get a light, golden-brown char. If they need a minute or two more, give it to them. For larger tails (8oz+), you might need 8-10 minutes.
Step 4: Serve Immediately!
The second those beauties are out of the oven, give them one more brush with the remaining warm butter. This adds an incredible gloss and an extra punch of flavor. They are best served piping hot, right off the baking sheet.
How to Plate Your Masterpiece
Presentation is part of the fun! I love to place each broiled lobster tail on a warm plate alongside your chosen sides. Drizzle any leftover butter from the pan right over the top. Sprinkle with a generous amount of freshly chopped parsley or chives for that gorgeous color contrast. Don’t forget the lemon wedges on the side—a big squeeze right before eating is essential. Serve immediately with small bowls of that extra warm butter for dipping every delicious morsel. This meal calls for a crisp white wine, some good crusty bread to sop up the butter, and lots of napkins!
Make It Your Own: Flavor Twists & Swaps
The fun doesn’t stop here! This recipe is a perfect canvas for your creativity.
- Herb Garden Delight: Swap the paprika for a tablespoon of finely chopped fresh tarragon, dill, or basil stirred into the butter. It’s a fresher, more botanical take.
- Spicy Sriracha-Lime: Add 2 tablespoons of sriracha and the zest of one lime to the butter. Garnish with cilantro for a zesty, spicy kick.
- Dairy-Free Delicious: No problem! Use a high-quality vegan butter (I love the olive oil or almond oil-based kinds). The method and timing remain exactly the same.
- Surf & Turf: Take dinner to the next level by serving these lobster tails alongside perfectly grilled filet mignon or a juicy ribeye steak. Share the butter sauce between them!
- Lobster Pasta: Once cooked, remove the meat from the shells, chop it, and toss it with cooked fettuccine, the remaining butter sauce, a splash of cream, and extra parsley for an incredibly decadent pasta dish.
Olivia’s Chef Notes & Kitchen Stories
This recipe has been my go-to for date nights, anniversary dinners, and “I-made-it-through-the-week” treats for years. It feels like it should be hard, but it’s honestly one of the easiest things I make. I’ve learned a few things along the way: First, do not overcrowd the baking sheet. Give each tail its own space so the heat can circulate properly and they broil instead of steam. Second, the type of baking sheet matters! A darker, heavy-gauge sheet will conduct heat more and might cook the bottoms faster. A lighter-colored sheet is a bit more forgiving. And my funniest kitchen story? The first time I made these, I was so excited I forgot to put the oven mitt back on before grabbing the sheet pan to rotate it. Let’s just say I finished dinner with a very stylish oven-mitt-shaped kitchen towel wrapped around my hand. Learn from my mistake—always protect those paws!
Your Questions, Answered!
Q: Can I use frozen lobster tails without thawing them first?
A: I really don’t recommend it. Thawing them slowly in the fridge overnight ensures they cook evenly. A frozen tail will likely be overcooked and rubbery on the outside before the inside is even warm. Plan ahead for the best results!
Q: My lobster meat is sticking to the shell. What did I do wrong?
A> This is super common and usually means the meat wasn’t fully loosened before lifting. Next time, after you make the cut, really get your fingers (gently!) underneath the meat and separate it from the shell membrane on both sides. A little patience here makes all the difference.
Q: How do I know when the lobster is perfectly cooked?
A> The best indicator is the color and texture. The meat will turn from translucent to completely opaque white. It will feel firm to the touch but still spring back slightly. An instant-read thermometer inserted into the thickest part should read 140°F (60°C). Remember, it will continue to cook a bit after you take it out of the oven (carryover cooking), so pull it just as it becomes opaque.
Q: My butter sauce is burning under the broiler! Help!
A> Ah, the power of the broiler! If you see the butter starting to smoke or blacken, your rack is likely too close to the element. Quickly move it down one rack level. A little browning is good for flavor, but burning is bitter. Using a light-colored baking sheet can also help prevent this.

Broiled Lobster Tails
- Total Time: 20 mins
Description
Crispy on top, juicy inside, and dripping with garlicky, lemony butter—these lobster tails look like a splurge but come together in 20 minutes flat. Broiling gives you that golden char without fuss, making this dish perfect for date nights, birthdays, or any dinner that deserves to feel like a celebration.
Ingredients
-
4 lobster tails (5–6 oz each, thawed)
-
1 cup unsalted butter, melted
-
1 tsp paprika (smoked optional)
-
Salt & white pepper, to taste
-
1 lemon, cut into wedges
Optional Flavor Boosts:
-
2 garlic cloves, minced
-
1 tsp lemon zest
-
Pinch cayenne or chili flakes
-
1 tbsp white wine or lemon juice
-
Fresh parsley or chives, chopped
Instructions
-
Prep Lobster – Set oven rack 5–7″ from broiler; preheat broiler. With kitchen shears, cut top shell down to tail fin. Loosen meat and lift on top of shell (“butterfly”). Pat dry.
-
Butter Mix – Stir butter with paprika, salt, pepper, and any optional add-ins (garlic, zest, cayenne).
-
Broil – Place tails on foil-lined sheet. Brush generously with butter. Broil 5–8 min (depending on size) until meat is opaque and lightly browned, 140°F internal temp.
-
Finish – Brush with extra butter, sprinkle herbs, and serve hot with lemon wedges and dipping butter.
- Prep Time: 10 mins
- Cook Time: 8–10 mins
Nutrition
- Calories: 320cal Per Serving
- Fat: 28g
- Saturated Fat: 18g
- Protein: 18g
Nutritional Information*
*Please note: This is an approximate estimate calculated using the base recipe without optional additions. Values can vary based on specific ingredients used.
Per Serving (1 tail): Calories: ~320 | Fat: 28g | Saturated Fat: 18g | Cholesterol: 145mg | Sodium: 480mg | Protein: 18g | Carbohydrates: 1g | Sugar: 0g
Final Thoughts: You Are the Chef of Your Own Celebration
And there you have it. In the time it takes to watch a sitcom, you’ve created something extraordinary. You’ve transformed a few simple ingredients into a moment of pure, unadulterated joy. You didn’t just cook dinner; you crafted an experience, a memory, and a story to tell.
Remember that initial hesitation? That feeling that lobster was meant for white-tablecloth restaurants and special-occasion splurges? I hope you now see that the real luxury isn’t on the plate—it’s in the act of treating yourself and your loved ones to something wonderful, any day of the week. You’ve mastered the method, but more importantly, you’ve embraced the spirit: that good food is about connection, a little bit of fun, and the incredible satisfaction of creating something beautiful with your own two hands.
So the next time you’re craving that feeling—the sizzle of butter, the smell that fills your home with promise, the look of delight on someone’s face—you know exactly what to do. You don’t need a reservation. You just need your kitchen, a few good ingredients, and the confidence to make your own occasion special.

Grilled Lobster Tails
Grilled Lobster Tails with Smoky Citrus Butter: Your New Favorite Celebration
Hey there, friend! Come on in, pull up a stool. Can you smell that? It’s the unmistakable, mouthwatering aroma of something incredible hitting a hot grill. It’s the scent of summer evenings, of special occasions, of treating yourself and your people to something truly spectacular. If your idea of a perfect meal involves succulent seafood, bold flavors, and that magical smoky char from the grill, then you and I are about to become best friends.
Today, we’re ditching the intimidation factor and diving headfirst into one of the most impressive (yet secretly simple) dishes you can master: Grilled Lobster Tails with Smoky Citrus Butter. This isn’t just any lobster recipe. This is my signature twist—a vibrant, zesty, and slightly spicy celebration on a plate. We’re infusing beautiful lobster tails with lemon, garlic, a kiss of smoked paprika, and a kick of cayenne, then serving them with a rich, garlic-lime butter for dipping that is absolutely to die for.
I see that look! Don’t you dare think this is reserved for fancy restaurants or expert chefs. Nope. This is a 25-minute, anyone-can-do-it kind of magic. My goal is to have you feeling like a backyard grill master, confidently serving a meal that will have everyone talking long after the last delicious bite is gone. So, tie on your favorite apron (the messy one with all the stories), and let’s turn dinner into an unforgettable event.
A Beachside Feast & The Birth of a Recipe
This recipe always takes me back to a specific, golden-hour evening on a rented patio overlooking the ocean. My best friends and I had decided to splurge on some gorgeous rock lobster tails for our last night of vacation. The goal was simple: create a feast worthy of the sunset.
We had the basics—lemon, butter, garlic—but I wanted to *wow* them. As I rummaged through the rental’s sadly sparse spice cabinet, I found my secret weapons: a nearly full tin of smoked paprika and a little jar of cayenne pepper. On a whim, I whisked them into our marinade. The result was nothing short of transformative. The smoke from the paprika played perfectly with the char from the grill, the citrus cut through the richness, and the cayenne left just the faintest, most delightful warmth. As we sat there, dipping succulent lobster meat into that garlicky butter, laughing with juice on our chins, I knew this accidental creation was a keeper. It was a powerful reminder that the best recipes aren’t just about the ingredients; they’re about the joy you cook them with and the people you share them with.
Gathering Your Flavor Arsenal
Here’s everything you’ll need to create this masterpiece. The beauty of this recipe is in the balance of flavors—smoky, citrusy, spicy, and rich. I’ve included some of my favorite chef insights and substitutions so you can make it your own!
For the Lobster & Marinade:
- 4 (10 oz) Rock Lobster Tails: Look for frozen tails that are firm and have a translucent color. Thaw them completely in the refrigerator overnight for the best texture. Chef’s Insight: Rock lobster tails are meatier and hold up beautifully on the grill, but Maine lobster tails work just as wonderfully!
- 1 cup Olive Oil: This forms the base of our marinade, helping the spices cling to the lobster and promoting that beautiful, even char. A good extra virgin olive oil adds a lovely fruitiness.
- 2 tbsp Lemon Juice: Freshly squeezed is non-negotiable here! It brings the bright, acidic punch that cuts through the richness of the lobster and butter.
- Zest of 1 Lime: This is part of our “twist”! The zest packs an intense, aromatic lime flavor without the added liquid, giving the marinade a more complex citrus profile.
- 2 tsp Smoked Paprika: The star of the show! This isn’t regular paprika. Smoked paprika adds a deep, woody, campfire-like smokiness that makes it taste like you’ve been grilling over hardwood for hours.
- 2 tsp Salt: Crucial for enhancing all the other flavors. I use kosher salt for better control.
- ¼ tsp Garlic Powder: While we use fresh garlic in the butter, the powder in the marinade distributes evenly and provides a consistent base flavor that doesn’t risk burning on the grill.
- ¼ tsp White Pepper: It has a slightly different, more earthy heat than black pepper and keeps our marinade looking clean without black specks. Black pepper works in a pinch!
- ¼ tsp Cayenne Pepper: This is our “kick”! It adds a gentle, building heat. Use a little less if you’re sensitive to spice, or a touch more if you’re a heat-seeker.
For the Garlic-Lime Butter Dipping Sauce:
- ½ cup Unsalted Butter, melted: Using unsalted butter lets you control the salt level perfectly. Melt it gently so it doesn’t separate.
- 2 Garlic Cloves, minced: Fresh is best! The gentle heat of the melted butter will lightly cook the garlic, mellowing its bite and releasing its amazing aroma.
- 1 tbsp Lime Juice: More fresh citrus to balance the rich butter. The combination of lime here and lemon in the marinade is *chef’s kiss*.
- Pinch of Sea Salt: A flaky sea salt like Maldon adds a wonderful final textural crunch and burst of salinity.
Optional Garnish:
- Fresh Chopped Parsley: For a pop of color and a fresh, herbal finish.
- Charred Lemon Halves: Don’t skip these! Grilling lemons caramelizes their natural sugars and makes their juice even sweeter and more complex. It’s a game-changer for squeezing over the lobster at the table.
Let’s Fire Up the Grill! Your Foolproof Guide
Ready? This process is so much fun and incredibly quick. Read through all the steps once before you start, and you’ll be a pro.
Step 1: Preheat Your Grill. Get that grill screaming hot! Aim for a medium-high heat (around 400-450°F). You want a good, solid sear. If you’re using a gas grill, turn on all the burners. For charcoal, let the coals get white-hot. Chef’s Hack: To create a two-zone fire, pile the coals on one side for direct high heat and leave the other side empty for indirect cooking. This gives you more control if things start cooking too fast!
Step 2: Make the Magic Marinade. In a medium bowl, simply whisk together the 1 cup olive oil, 2 tbsp lemon juice, zest of 1 lime, 2 tsp smoked paprika, 2 tsp salt, ¼ tsp white pepper, ¼ tsp garlic powder, and ¼ tsp cayenne pepper. Whisk until it’s completely emulsified and beautiful. Give it a taste—this is where you can adjust. Want more smoke? Add a pinch more paprika. More heat? A dash more cayenne. You’re the boss!
Step 3: Prepare the Lobster Tails. This is the only “technical” part, and it’s a breeze. Take your thawed lobster tails. Using a strong pair of kitchen shears, cut straight down the middle of the top shell, from the open end all the way to the tip of the tail. Stop at the tail fin; don’t cut through it. Now, here’s the pro move: use your fingers to gently pry the shell open and loosen the meat from the shell. Carefully lift the meat out, keeping it attached at the base of the fin, and rest it on top of the shell. It should look like a butterfly! This exposes the meat perfectly for even cooking and maximum marinade penetration. Pat them dry with a paper towel first so the marinade sticks.
Step 4: Marinate! Using a pastry brush, generously brush the marinade all over the exposed lobster meat. Get it into every nook and cranny. Don’t be shy! Let the tails sit for about 5 minutes while the grill finishes preheating. This lets the flavors start to mingle.
Step 5: Grill to Perfection. Place the lobster tails shell-side down directly over the heat. Listen to that sizzle! Close the lid and let them cook for 5-6 minutes. This cooks the meat through the shell, imparting amazing flavor. Now, here comes the color: carefully flip the tails so the meat is now directly on the grates. Grill for another 3-4 minutes with the lid open. You’re looking for the meat to become completely opaque and firm to the touch, with those gorgeous grill marks. Chef’s Tip: If you have them, throw your lemon halves cut-side down on the cooler side of the grill now to char while the lobster finishes.
Step 6: Make the Dipping Butter. While the lobster is grilling, melt the ½ cup of butter in a small saucepan over low heat. Once melted, turn off the heat and stir in the minced garlic, 1 tbsp lime juice, and a pinch of sea salt. The residual heat will cook the garlic just enough to remove its raw edge. Keep it warm on the side of the grill.
Step 7: Rest and Serve! The second the lobster is done, use tongs to move them to a clean platter. Let them rest for just 2-3 minutes. This allows the juices to redistribute throughout the meat, ensuring every bite is incredibly tender and moist.
Plating Your Masterpiece
Presentation is part of the fun! I love serving these family-style on a big, rustic wooden board or platter. Arrange the gorgeous, crimson grilled lobster tails down the center. Drizzle a little of the leftover marinade or some of the garlic-lime butter over the top for a glossy finish. Scatter over the fresh chopped parsley for that hit of green. Don’t forget those charred lemon halves—squeeze them over the lobster right at the table for an incredible burst of flavor. Finally, place a little bowl of the warm Garlic-Lime Butter for dipping right in the center. Serve immediately and watch the magic happen!
Make It Your Own: Delicious Twists & Swaps
The fun doesn’t stop here! This recipe is a fantastic canvas for your creativity.
- Herbaceous Heaven: Add 2 tablespoons of finely chopped fresh herbs like tarragon, chives, or dill to the melted butter sauce. Tarragon and seafood are a match made in heaven.
- Spicy Sriracha Kick: Whisk 1-2 teaspoons of sriracha into the marinade and a little into the butter sauce for a sweet-and-spicy vibe.
- Spanish Twist: Swap the smoked paprika for a heaping teaspoon of saffron threads (soaked in a tbsp of warm water) for a luxurious, aromatic flavor and stunning color.
- No Grill? No Problem! You can make these under the broiler in your oven! Place the prepared tails on a baking sheet and broil on high for the same amount of time, keeping a close eye on them.
- Dairy-Free Delight: For the dipping sauce, use a high-quality vegan butter substitute. The marinade is already dairy-free!
From My Kitchen to Yours: A Few Final Thoughts
This recipe has become my go-to for birthdays, anniversaries, and even those “just because” days that need a little sparkle. It’s evolved from that beachside experiment to a dish I’ve made dozens of times, and I’ve learned a few things along the way.
First, don’t stress about the butterfly technique. If the meat doesn’t lift out perfectly, it’s okay! Just cutting the shell open still allows the heat and flavor to penetrate. The most important thing is to have fun with it. I can’t tell you how many times I’ve gotten a little over-zealous with the brushing and ended up with marinade all over my arms, but that’s part of the memory!
Also, invest in good kitchen shears. They are the unsung hero of the seafood world, making tasks like this effortless. This dish truly proves that a few high-quality ingredients, treated with love and a bit of fire, can create pure magic. I hope it becomes a celebrated recipe in your home, too, creating stories and full bellies for years to come.
Your Questions, Answered!
Q: My lobster meat is sticking to the grill grates when I flip it. What did I do wrong?
A: This usually means the grates weren’t hot enough or clean enough! A hot, clean grill is naturally non-stick. Also, ensure you’ve brushed the meat itself with enough oil-based marinade, which acts as a barrier. If you’re nervous, you can grill them entirely shell-side down for 8-10 minutes without flipping. The meat will steam inside the shell and still be delicious, though you’ll miss the grill marks.
Q: How can I tell for sure that the lobster is cooked through?
A: The best way is to use an instant-read thermometer. Insert it into the thickest part of the meat; you’re looking for an internal temperature of 140-145°F. Visually, the meat will be completely white and opaque, not translucent, and the shells will be bright red. The meat will also feel firm to the touch, not soft or squishy.
Q: Can I make the marinade ahead of time?
A: Absolutely! You can whisk the marinade together, cover it, and store it in the refrigerator for up to 24 hours. This actually allows the flavors to meld even more. Just give it a good whisk again before using it.
Q: I accidentally bought frozen cooked lobster tails. Can I use this recipe?
A> You can, but be very careful! Since they are already cooked, you are essentially just warming them through and adding grill flavor. Thaw them completely, then follow the recipe but drastically reduce the grilling time. Grill shell-side down for 2-3 minutes to heat the shell, then flip and grill meat-side down for only 60-90 seconds, just until warmed and lightly marked. Any longer and they will become tough and rubbery.

Grilled Lobster Tails
- Total Time: 25 mins
Description
This recipe takes the intimidation out of cooking lobster and turns it into a celebration. The tails get a smoky paprika-citrus marinade, then kissed by the grill until tender and juicy. Served with garlic-lime butter and charred lemons, it’s a dish that feels indulgent yet comes together in just 25 minutes.
Ingredients
For Lobster & Marinade:
-
4 (10 oz) lobster tails (thawed)
-
1 cup olive oil
-
2 tbsp lemon juice
-
Zest of 1 lime
-
2 tsp smoked paprika
-
2 tsp kosher salt
-
¼ tsp garlic powder
-
¼ tsp white pepper (or black)
-
¼ tsp cayenne pepper
For Garlic-Lime Butter:
-
½ cup unsalted butter, melted
-
2 garlic cloves, minced
-
1 tbsp lime juice
-
Pinch of sea salt
Optional Garnish: fresh parsley, charred lemon halves
Instructions
-
Preheat Grill – Medium-high heat (400–450°F).
-
Make Marinade – Whisk oil, lemon juice, lime zest, paprika, salt, garlic powder, pepper, and cayenne.
-
Prep Lobster – Cut shells lengthwise with shears, loosen meat, and rest it on top for “butterfly” style. Pat dry.
-
Marinate – Brush lobster generously; let sit 5 mins.
-
Grill – Shell-side down, lid closed, 5–6 mins. Flip meat-side down, grill 3–4 mins until opaque and firm (140–145°F). Grill lemon halves at the same time.
-
Butter Sauce – Melt butter, stir in garlic, lime juice, and salt. Keep warm.
-
Serve – Plate lobster, drizzle with butter, garnish with parsley, and squeeze over charred lemon.
- Prep Time: 10 mins
- Cook Time: 12–15 mins
Nutrition
- Calories: 420cal Per Serving
- Fat: 34g
- Carbohydrates: 2g
- Protein: 30g
Nutritional Information*
Per Serving (1 lobster tail with butter sauce):
Calories: ~420 | Fat: 34g | Saturated Fat: 12g | Cholesterol: 145mg | Sodium: 1280mg | Carbohydrates: 2g | Fiber: 0g | Sugar: 0g | Protein: 30g
*Please note: This is an estimate provided by an online nutrition calculator. Actual values will vary based on specific ingredients used and portion sizes.
Prep Time: 15 min | Cook Time: 10 min | Total Time: 25 min
Final Thoughts: You’ve Got This!
Friend, if you take away one thing from this, let it be this: you are more than capable of creating this spectacular, restaurant-worthy meal right in your own backyard. This recipe is your invitation to play with fire, to get a little messy, and to turn an ordinary evening into a sparkling celebration.
It’s not about perfection. It’s about the sizzle on the grill, the laughter around the table, and the unforgettable joy of dipping that first, glorious bite into a pool of smoky citrus butter. This dish is a reminder that the best moments are often seasoned with a little adventure and shared with the people we love.
So, the next time you have a reason to celebrate—or even if you just need a reason—I hope you remember this recipe. Tie on that apron, fire up the grill, and create your own delicious memories. You’ve got all the tools, tips, and tricks you need right here.
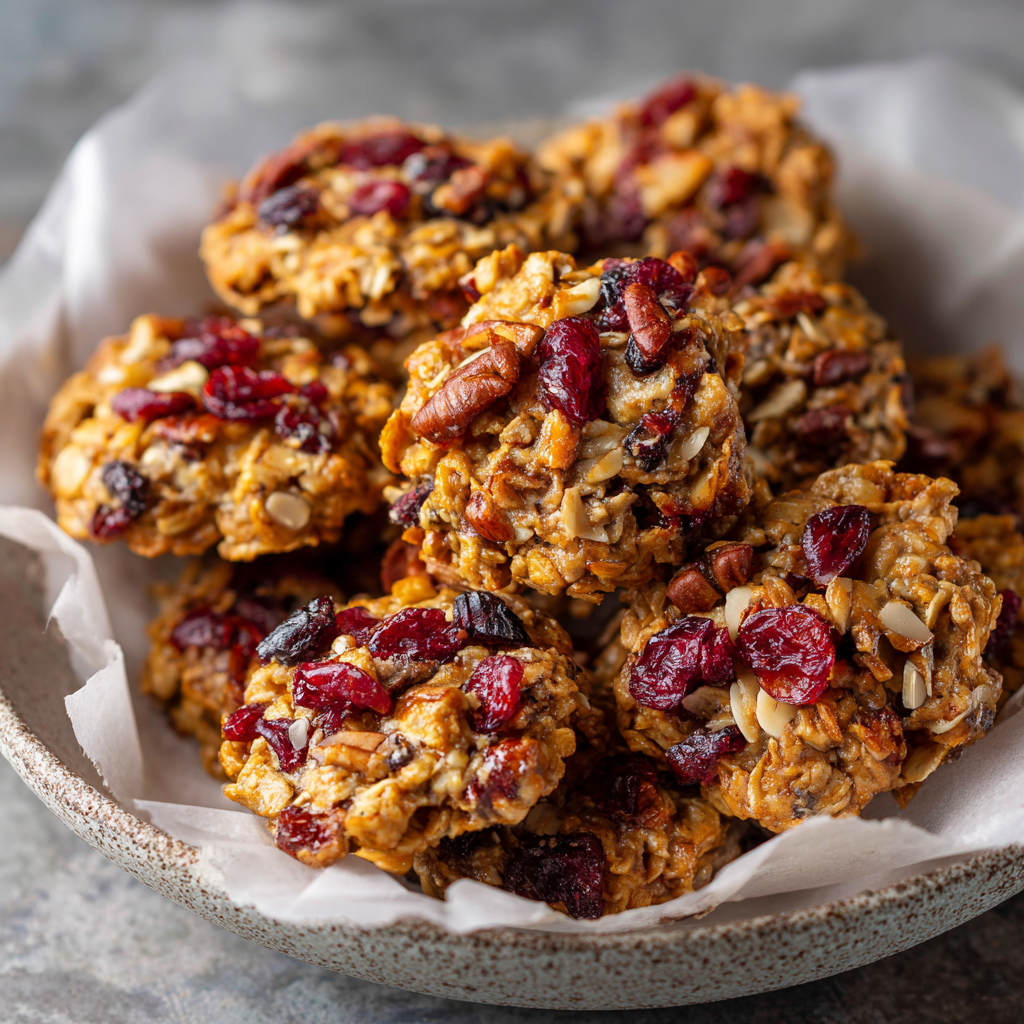
No-Bake Cranberry Pecan Praline Cookies (with a Twist!)
Your New Favorite No-Bake Cookie Just Walked In
Hey there, friend! Come on in, the (figurative) oven is off, but the kitchen is buzzing. Can you smell that? It’s the sweet, buttery scent of sugar melting into cream, the warm toastiness of pecans, and the bright, cheerful zing of orange zest. That, my friend, is the sound of a no-bake cookie miracle happening right on my stovetop.
If you’re like me, sometimes you get a wild craving for something homemade, something that feels like a hug from the inside, but the thought of preheating the oven, sifting flour, and waiting for a timer feels… well, like a lot. That’s where these glorious No-Bake Cranberry Pecan Praline Cookies swoop in to save the day. They are the ultimate quick-fix, maximum-reward treat. We’re talking chewy, sweet, tangy, crunchy, and impossibly delicious all in one perfect, little bite.
This isn’t just another recipe; it’s my go-to for holiday cookie trays that always, always get empty first. It’s my secret weapon for last-minute potlucks and my favorite thing to whip up with my niece because it’s practically foolproof. I’ve added a couple of my own twists—a dash of cinnamon and a pop of orange zest—to make them even more unforgettable. So, tie on your favorite apron (the messy one with all the character, obviously), and let’s make something magical together. No oven required.
The Cookie That Started It All
This recipe takes me right back to my grandma’s linoleum-floored kitchen, a place that always smelled like ginger and unconditional love. She wasn’t a fancy baker; she was a practical one. One sweltering summer afternoon when the idea of turning on the oven was simply out of the question, I was moping around, desperately craving something sweet.
With a twinkle in her eye, she pulled out a saucepan and said, “Olivia, honey, we don’t need an oven to make magic.” What unfolded was my first glimpse into the alchemy of no-bake cookies. She let me stir the bubbling, caramel-like pot and sprinkle in the oats and nuts. The best part was licking the spoon—a warm, gooey, praline-coated preview of heaven. My version is an homage to hers, but with the cranberries for a tangy kick she would have adored and that bit of orange zest that makes everything taste just a little more like sunshine. It’s more than a cookie; it’s a memory I get to recreate every single time I make them.
Gathering Your Cookie Crew: The Ingredients
Part of the beauty of this recipe is its simplicity. These are pantry staples that, when combined, become so much more than the sum of their parts. Here’s what you’ll need:
- 2 cups Sugar: This is the base of our praline magic. It caramelizes with the butter and cream to create that iconic chewy texture. I use regular granulated white sugar for the best results.
- 1 cup Unsalted Butter: Using unsalted lets us control the salt level ourselves. It adds incredible richness and helps the cookies set up perfectly. For a dairy-free version, a high-quality plant-based butter works surprisingly well!
- ½ cup Heavy Cream: This is key for a luscious, smooth praline base. It prevents the sugar from crystallizing and gives us that dreamy texture. Chef’s Insight: Don’t be tempted to swap for milk; the fat content in cream is non-negotiable for the right consistency.
- 2 tsp Vanilla Extract: The flavor backbone! It deepens all the other notes. Always use pure vanilla extract if you have it—it makes a world of difference.
- 1 cup Pecans, chopped: They provide that essential crunch and buttery, toasty flavor. Feel free to toast them lightly in a dry pan for a minute before adding for an even deeper nuttiness.
- 1 cup Dried Cranberries: Our tangy twist! They cut through the sweetness beautifully. If you’re not a cranberry fan, dried cherries or even chopped apricots would be fantastic.
- 4 cups Rolled Oats: Old-fashioned rolled oats are a must here. They give the cookies heartiness and chew. Quick oats will make them too mushy, and steel-cut are far too hard—so stick with rolled!
- 1 tsp Salt: Trust me, this is essential. It balances the intense sweetness and makes all the flavors pop. I use fine sea salt.
- 1 tsp Ground Cinnamon (the twist!): This is my little addition. It adds a warm, cozy layer that makes these cookies taste like the holidays, even in July.
- 1 tsp Orange Zest (the twist!): And here’s the sunshine! The citrus oil from the zest brightens the entire cookie and pairs phenomenally with the cranberries. It’s the secret weapon that makes people say, “Wow, what is that flavor?!”
Let’s Make Some Magic: Step-by-Step Instructions
Ready? This comes together fast, so have all your ingredients measured and ready to go (this is called mise en place—fancy chef talk for “everything in its place”). It makes the process smooth and stress-free.
Step 1: Prep Your Landing Zone
Line two large baking sheets with parchment paper. This is your number one priority! Once that sugar mixture is ready, you have to move quickly, and you don’t want to be scrambling for a place to put your cookies. No parchment? Wax paper is a okay substitute.
Step 2: The Praline Bubble
In a medium saucepan (not a small one—this mixture will bubble up!), melt the butter over medium heat. Once it’s melted, stir in the sugar and heavy cream. Now, here’s the important part: bring it to a gentle boil. You’re looking for a steady stream of bubbles across the entire surface, not a raging, volcanic boil. Let it cook like this for a full 2-3 minutes, stirring constantly with a wooden spoon or silicone spatula. This cooking time is crucial for dissolving the sugar and getting the right chewy, not gritty, texture. Chef’s Hack: Set a timer! It’s easy to lose track of time, and undercooking can lead to sticky cookies, while overcooking can make them hard.
Step 3: The Flavor Party
Remove the saucepan from the heat immediately after your timer goes off. Now, stir in the vanilla extract, salt, cinnamon, and orange zest. It will sizzle and smell absolutely incredible. This is the best part of my day, every single time.
Step 4: Bring in the Team
Immediately add the pecans, dried cranberries, and rolled oats to the hot mixture. Stir, stir, stir until every single oat and nut is beautifully coated in that glossy, caramel-like praline sauce. Work relatively quickly here, as the mixture will start to set as it cools.
Step 5: The Cookie Drop
Using two spoons (a cookie scoop works great too!), drop tablespoon-sized mounds of the mixture onto your prepared parchment paper. If you want neater, rounder cookies, you can quickly grease your hands with a little butter and gently shape them. But I kind of love the rustic, craggy look—it says “homemade with love.”
Step 6: The Patience Test
Now, walk away. Well, not too far. Let the cookies cool completely at room temperature. This usually takes about 20 minutes, but it can depend on the humidity. They’ll transform from shiny and soft to matte and perfectly firm. Don’t try to move them early, or they might fall apart! You can speed this up by popping the entire tray in the fridge for about 10 minutes if you’re in a serious pinch.
How to Serve These Little Bites of Joy
Once set, these cookies are ready for their debut! I love stacking them high on a vintage cake stand for a casual gathering. For the holidays, arrange them in a single layer on a festive platter alongside other cookies—they’re always the star. They pair wonderfully with a hot cup of coffee, a glass of cold milk, or even a sweet dessert wine. They’re also fantastic crumbled over a bowl of vanilla ice cream for an instant, decadent sundae. However you serve them, get ready for compliments!
Make It Your Own: Delicious Variations
The fun doesn’t stop here! This recipe is a fantastic canvas for your own creativity.
- Trail Mix Twist: Swap the pecans and cranberries for a cup of your favorite trail mix—just make sure it has some nuts and fruit in it!
- Tropical Escape: Use macadamia nuts instead of pecans and dried pineapple instead of cranberries. Skip the cinnamon and orange zest and add a ½ teaspoon of coconut extract with the vanilla.
- Double Chocolate Dream: Stir in ½ cup of mini chocolate chips along with the oats. You could even use dried cherries for a Black Forest vibe.
- Nut-Free Version: Simply omit the pecans and replace them with an extra ½ cup of oats and ½ cup of sunflower seeds for crunch.
- Superfood Boost: Add 2 tablespoons of chia seeds or ground flaxseed to the oat mixture for an extra nutritional punch.
From My Kitchen to Yours: Chef’s Notes
This recipe has evolved so much since my grandma first showed me the ropes. I’ve learned that a pinch of salt is good, but a full teaspoon is genius. I discovered the orange zest trick completely by accident one day when I was zesting an orange for a cake and some fell into the cookie pot—best happy accident ever!
One funny story: I once, in a major hurry, tried to double the recipe in the same medium saucepan. Reader, I created a volcanic eruption of bubbling sugar all over my stovetop. It was a sticky, hilarious disaster. So learn from my mistake—use a big pot! These cookies are forgiving, but physics is not. Now, making a double batch in a large Dutch oven is my standard procedure. They disappear that fast!
Your Questions, Answered!
Q: My cookies are too sticky and won’t set. What happened?
A: This usually means the sugar mixture wasn’t boiled for long enough. The 2-3 minute boil is critical for cooking the sugar to the soft-ball stage, which allows the cookies to firm up properly. If they’re still sticky after a long cooling period, you can try placing them in the fridge to set. They’ll still taste delicious!
Q: Can I use quick oats instead of rolled oats?
A: I don’t recommend it. Quick oats are cut smaller and absorb more moisture, which will leave you with a mushy, less textured cookie. Rolled (old-fashioned) oats provide the perfect chewy structure.
Q: How should I store these, and how long do they last?
A: Store them in an airtight container at room temperature for up to a week. They can also be layered between parchment paper to prevent sticking. For longer storage, they freeze beautifully for up to 3 months! Just thaw at room temperature for an hour before serving.
Q: My mixture became super thick and hard to stir as soon as I added the oats. Help!
A: This means the sugar mixture cooled down too much before you added the dry ingredients. Next time, make sure your add-ins are measured and ready to go right next to the stove so you can incorporate them the second you take the pot off the heat. For now, work quickly and use a sturdy spoon to mix!

No-Bake Cranberry Pecan Praline Cookies (with a Twist!)
- Total Time: 25 mins
Description
These cookies deliver praline richness without ever turning on the oven. Buttery caramel notes meet crunchy pecans, chewy oats, and tangy cranberries, all brightened with a kiss of cinnamon and orange zest. They’re foolproof, fast, and guaranteed to disappear from any cookie tray first.
Ingredients
-
2 cups sugar
-
1 cup unsalted butter
-
½ cup heavy cream
-
2 tsp vanilla extract
-
1 cup pecans, chopped
-
1 cup dried cranberries
-
4 cups rolled oats
-
1 tsp salt
-
1 tsp ground cinnamon
-
1 tsp orange zest
Instructions
-
Prep – Line 2 baking sheets with parchment.
-
Praline Base – In saucepan, melt butter. Stir in sugar + cream. Boil gently 2–3 mins, stirring constantly.
-
Flavor Boost – Remove from heat; stir in vanilla, salt, cinnamon, orange zest.
-
Mix-In Magic – Add pecans, cranberries, and oats. Stir until coated.
-
Drop Cookies – Scoop spoonfuls onto parchment. Shape if desired.
-
Set – Cool 20 mins (or chill 10 in fridge) until firm.
- Prep Time: 15 mins
- Cook Time: 5 mins
Nutrition
- Calories: 150cal Per Cookie
- Sugar: 12g
- Fat: 8g
- Carbohydrates: 20g
Quick Nutritional Info (Per Cookie)
Calories: 150 | Fat: 8g | Carbs: 20g | Sugar: 12g | Protein: 2g
Please note: This is an estimate provided by an online nutrition calculator. It will vary based on specific ingredients and portion sizes.
Prep Time: 20 min | Cook Time: 5 min | Total Time: 25 min | Makes: 24 cookies
Final Thoughts: Your New Kitchen Memory Awaits
And there you have it. In less time than it takes to preheat an oven, you’ve created something truly special. A cookie that’s chewy, crunchy, sweet, and tangy all at once. A treat that’s as perfect for a fancy holiday platter as it is for a quick 3 p.m. pick-me-up with a cup of coffee.
This recipe is more than just a list of ingredients and steps; it’s an invitation to create a little bit of magic, and a lot of memories, without any fuss. It’s the promise that something incredible can come from a single saucepan and a few simple staples.
So, the next time a craving for homemade comfort hits but your energy for baking is low, remember this recipe. Remember that the solution is just a boil and a stir away. I hope these No-Bake Cranberry Pecan Praline cookies find a spot in your recipe box, become a story in your kitchen, and earn the title of your new favorite cookie.
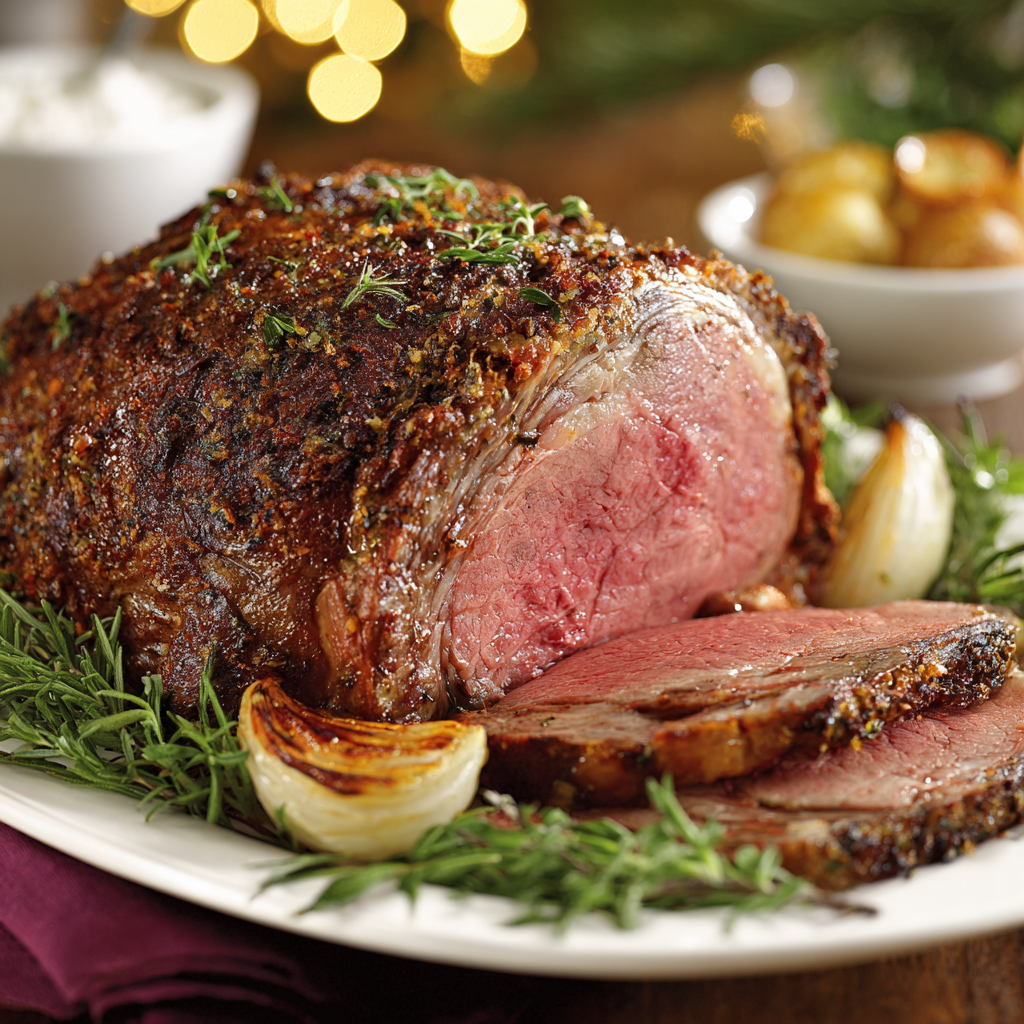
Perfect Prime Rib Roast (Oven Method)
Your Guide to the Most Unforgettable, Jaw-Droppingly Good Prime Rib Roast
Hey there, friend! Come on in, grab an apron, and let’s get ready to create some serious magic. Is there any smell more quintessentially celebratory than a prime rib roast slowly roasting in the oven? It’s the scent of holidays, of gathered loved ones, of pure, unadulterated joy. It’s the kind of meal that turns a regular Sunday into an event and a special occasion into a core memory. If the thought of cooking this beautiful cut of meat has ever made you feel a little nervous, I’m here to tell you: take a deep breath. You’ve got this.
I’m a firm believer that the best recipes aren’t about fancy techniques or a million obscure ingredients. They’re about confidence, a few key secrets, and a whole lot of heart. This oven-roasted prime rib is the ultimate example of that. It looks like a million bucks and tastes even better, but the process? Honestly, it’s surprisingly simple. We’re talking about a handful of pantry staples, a reliable meat thermometer, and a little bit of patience. The oven does almost all the work for us, transforming a magnificent roast into a tender, juicy, flavor-packed masterpiece with a crackling, savory crust that will have everyone begging for seconds.
So whether you’re hosting your first holiday dinner, planning an anniversary surprise, or just deciding to treat yourself and your people to something extraordinary, this is your recipe. This is the one you’ll come back to year after year. Let’s make a roast that’s not just dinner, but a show-stopping experience.
The Christmas We Almost Had Cereal for Dinner
I have to share a little story with you. Picture it: my third year hosting Christmas dinner for my entire, very opinionated, food-loving family. I was determined to prove myself. I went all out: the perfect prime rib, Yorkshire puddings, the works. I had read the recipes, I had my timings down, I felt unstoppable. I got the roast in, the high heat sear was going beautifully… and then the oven died. Just… quit. No warning, no flickering lights. Just a silent, cold box with my beautiful, half-cooked centerpiece inside.
Panic does not even begin to describe it. My dad, ever the pragmatic one, already had the cereal boxes lined up on the counter. But my mom, my wonderful mom, just laughed and started calling the neighbors. Twenty minutes later, our prime rib was finishing its journey in the oven of the lovely retired couple who lived three doors down, whom we’d never formally met until that day. We ended up sharing a glass of wine with them while the roast rested. That dinner, eaten around a crowded, joyful table, was one of the best we’ve ever had. It taught me that the best meals aren’t about perfection. They’re about the love you put in, the people you share it with, and the wild, unexpected stories you gather along the way. Now, every time I make this roast, I smile remembering the year we almost had Cheerios for Christmas.
Gathering Your Prime Rib Toolkit
Here’s the beautiful part: the ingredient list is short and sweet. This recipe is all about highlighting the incredible, natural flavor of the beef itself. Quality is key here!
- 1 (4–5 lb) bone-in or boneless prime rib roast: This is your star! A bone-in roast (often called a “standing rib roast”) will have more flavor and tends to cook more evenly, as the bones act as a natural heat conductor. But a boneless roast is easier to carve and still absolutely delicious. Look for one with a nice, solid cap of fat on top—that’s your flavor gold! Ask your butcher for the first cut (ribs 10-12) for the most tender and evenly shaped roast.
- 2 tbsp olive oil or softened butter: This acts as the glue for our seasoning and helps create that phenomenal, crispy crust. I love the rich flavor of butter, but olive oil works perfectly too. For a next-level option, use softened, herb-infused butter!
- 1 tbsp kosher salt: Do not use fine table salt here. Kosher salt has larger flakes, which allows for better coverage and seasoning without over-salting. It creates that perfect savory crust we’re after.
- 1 tbsp black pepper: Freshly cracked is always best! It gives a wonderful aromatic warmth.
- 2 tsp garlic powder: While I adore fresh garlic, powder gives us a more even, non-burning garlic flavor that permeates the entire crust beautifully.
- 1 tsp onion powder: This adds a subtle sweetness and depth to our simple seasoning blend.
- 1 tbsp fresh rosemary or thyme (optional): Highly recommended! Fresh herbs add a lovely aromatic layer. If you only have dried, use about 1 teaspoon.
- Optional: 4 cloves garlic, halved: For the garlic lovers! We can tuck these into little slits in the fat cap for roasty, mellow pockets of flavor.
- Optional: 1 onion, sliced for roasting bed: This isn’t just for flavor—it creates a natural rack if you don’t have one, lifting the roast out of its juices so the bottom doesn’t steam. Plus, you get deliciously caramelized onions as a bonus side!
Let’s Get Roasting: Your Foolproof Step-by-Step Guide
Ready? This is where the magic happens. Follow these steps, trust the process, and you are guaranteed a perfect result.
Step 1: The Patient Prep
This might be the hardest step because it requires patience, but it is non-negotiable! Take your roast out of the refrigerator at least 1-2 hours before you plan to cook it. Let it sit on the counter, unwrapped, to come to room temperature. Why? A cold roast going into a hot oven will cook extremely unevenly—you’ll end up with a overcooked outer layer and a cold, raw center. Letting it warm up ensures it cooks perfectly from edge to edge. Pat the entire roast completely dry with paper towels. A dry surface is the secret to a brown, crispy crust, not a steamy one!
Step 2: Season with Confidence
Preheat your oven to a blazing 450°F (230°C). While it heats up, get hands-on with your roast. Rub it all over with your olive oil or softened butter—this is the “glue.” Now, mix your kosher salt, black pepper, garlic powder, and onion powder (and dried herbs if using) in a small bowl. Sprinkle this seasoning mix over every single surface of the roast, and don’t be shy! Really massage it into the meat. This isn’t a gentle sprinkle; it’s a full-coverage crust mission. If you’re using the optional fresh garlic, use a small paring knife to make tiny slits in the fat cap and tuck a garlic half into each one.
Step 3: The Sizzling Start
Place your optional sliced onions in the bottom of a roasting pan to create a bed. Set a roasting rack on top of the onions. Place your seasoned roast on the rack, fat-side up. This is crucial! As the fat renders, it will baste the entire roast as it cooks, making it incredibly juicy. Slide the pan into your preheated 450°F oven and set a timer for 20 minutes. This initial blast of high heat is what sears the outside, creating that incredible, flavorful, crackling crust we all love.
Step 4: The Low & Slow Finish
After 20 minutes, without opening the oven door (keep that heat in!), reduce the oven temperature to 325°F (165°C). Now, we slow-roast the prime rib to perfection. The total cooking time from this point will vary based on the size of your roast and your desired doneness. This is where you become best friends with your meat thermometer. Do not guess. Do not rely on time alone. A thermometer is your key to perfect results every single time.
Insert your probe into the very center of the roast, making sure it’s not touching bone or fat. We’re aiming for these internal temperatures before resting:
- Rare: 120–125°F
- Medium-Rare (my recommended sweet spot!): 130°F
- Medium: 135–140°F
For a 4-5 lb roast, expect this low-temperature phase to take roughly 1 to 1.5 hours. Start checking about 45 minutes in.
Step 5: The Non-Negotiable Rest
Once your roast hits your target temperature, carefully take it out of the oven. Immediately transfer it from the roasting pan to a clean cutting board. Do not slice it! Tent it loosely with aluminum foil and walk away for a full 25-30 minutes. I know, the temptation is real! But this rest period is what makes the roast juicy. The muscle fibers relax, reabsorbing all those incredible juices. If you cut it open now, those juices will just run out all over your cutting board, leaving you with dry meat. Trust me, it’s worth the wait. The internal temperature will also continue to rise by about 5-10°F during this time (this is called carryover cooking).
Plating Your Masterpiece
After its long rest, your prime rib is ready for its grand debut! For the cleanest slices, use a long, sharp carving knife. If you have a bone-in roast, slice the bones away from the bottom first (save them for an incredible stock!), then turn the roast on its flat side and slice across the grain into beautiful, ½ to 1-inch thick slabs. Arrange the slices on a warm platter. Don’t forget to pour any of those precious juices that collected on the cutting board over the top of the sliced meat. Serve immediately to a very happy and impressed audience.
Make It Your Own: Delicious Twists & Swaps
The classic recipe is perfect, but it’s also a fantastic canvas for creativity! Here are a few of my favorite ways to mix it up:
- Coffee & Cocoa Rub: Add 1 tsp of finely ground coffee and ½ tsp of unsweetened cocoa powder to your seasoning mix. It sounds wild, but it adds an incredible, rich, smoky depth that pairs amazingly with beef.
- Herb Crust: Combine your oil with a hearty paste of fresh rosemary, thyme, parsley, and a few cloves of minced garlic. Smother the roast in this paste before seasoning.
- Reverse Sear: For ultimate edge-to-edge perfection, start in a low oven (250°F) until the roast hits about 115°F internally. Then, blast it in a 500°F oven for just 10-15 minutes to sear the crust at the very end.
- Horseradish Cream Sauce: A classic pairing! Whip together ½ cup sour cream, 2 tbsp prepared horseradish, 1 tbsp Dijon mustard, a squeeze of lemon, and salt & pepper. Serve on the side.
- Au Jus: While the roast rests, place your roasting pan (with the onions and drippings) on the stovetop. Add 1 cup of red wine or beef broth, bring to a simmer, and scrape up all the browned bits. Strain and serve as a simple, flavorful dipping juice.
Olivia’s Chef Notes & Kitchen Confessions
This recipe has been my holiday ride-or-die for over a decade, and it’s evolved in tiny ways. I used to be terrified of undercooking it, so I’d inevitably overcook it. The single biggest game-changer was investing in a good digital meat thermometer with a probe. It took all the guesswork and anxiety out of the process. Now I get perfect results with zero stress.
Another confession: I am the queen of making a mess with the seasoning. I inevitably get salt and pepper all over the floor and counter. My dog loves it because he hangs out hoping for a dropped onion slice. Embrace the mess! It’s a sign of a cook who isn’t afraid to get in there. The best meals often come from the messiest kitchens.
Finally, don’t save this roast just for holidays. A smaller, boneless roast is a spectacular way to turn an ordinary weekend into something special. Life’s too short for boring food!
Your Prime Rib Questions, Answered!
Q: My roast is bigger/smaller than the recipe. How do I adjust the cooking time?
A: Time is a guide, but temperature is your boss! The initial 20-minute sear at 450°F remains the same regardless of size. After that, the low-and-slow cooking time will vary. A good rule of thumb is to expect about 15-20 minutes per pound at 325°F for a medium-rare finish, but always, always use a meat thermometer to be sure. A 3lb roast will cook faster, a 7lb roast will take longer.
Q: Why did my temperature spike so fast/not move at all?
A: Oven temperatures can be notoriously inaccurate! I highly recommend using an independent oven thermometer to check your oven’s true temperature. A “slow” oven will make cooking take forever, and a “hot” oven will cook things much faster than recipes state. This is another reason the meat thermometer is your best friend—it tells you the truth about what’s happening inside the roast, not what your oven dial says.
Q: I forgot to take the roast out of the fridge early. Can I still cook it?
A: You can, but you’ll need to adjust. Add about 50% more time to the low-temperature roasting phase. The center will be much colder, so it will take longer to heat through. Check the temperature early and often to avoid overcooking the outside. The results won’t be quite as perfectly even, but it will still be delicious!
Q: The crust is getting very dark. Should I be worried?
A: A dark, deep brown crust is exactly what we want! However, if it’s starting to look like it’s burning, you can tent the roast loosely with foil for the remainder of the cooking time. This will slow down the browning on the outside while the inside continues to cook.
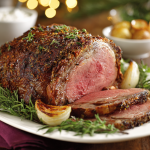
Perfect Prime Rib Roast (Oven Method)
- Total Time: 2.5 hrs
Description
Nothing says “celebration” quite like a perfectly roasted prime rib. Juicy, tender, and crowned with a savory crust, this recipe proves you don’t need a culinary degree to pull off restaurant-level magic. With just a handful of pantry staples, a good thermometer, and some patience, you’ll create a masterpiece that will have everyone talking long after the plates are cleared.
Ingredients
-
1 (4–5 lb) bone-in or boneless prime rib roast (ask for first cut, ribs 10–12)
-
2 tbsp olive oil or softened butter
-
1 tbsp kosher salt
-
1 tbsp freshly cracked black pepper
-
2 tsp garlic powder
-
1 tsp onion powder
-
1 tbsp fresh rosemary or thyme (optional)
-
Optional: 4 garlic cloves, halved | 1 onion, sliced for roasting bed
Instructions
-
Prep – Remove roast from fridge 1–2 hrs before cooking; pat dry.
-
Season – Rub with oil/butter, then coat with salt, pepper, garlic, onion powder, and herbs. Tuck garlic into slits if using.
-
Sear – Place on rack (fat-side up) over sliced onions. Roast at 450°F (230°C) for 20 mins.
-
Slow Roast – Lower oven to 325°F (165°C). Cook until internal temp reaches:
-
Rare: 120–125°F
-
Medium-Rare: 130°F (recommended)
-
Medium: 135–140°F
(Approx. 15–20 mins per lb. Use a thermometer!)
-
-
Rest – Transfer roast to a cutting board, tent with foil, and rest 25–30 mins.
-
Slice & Serve – Carve bones off (if bone-in), then slice across grain into ½–1 inch slabs. Pour resting juices over top.
- Prep Time: 15 mins + resting
- Cook Time: 1.5–2 hrs (for 4–5 lb roast)
Nutritional Information*
*This is an estimate for informational purposes only.
Per Serving (6 oz of cooked meat, trimmed):
Calories: ~400 | Protein: 30g | Fat: 32g | Carbohydrates: 0g | Fiber: 0g | Sugar: 0g
Final Thoughts: You Are Now a Prime Rib Legend
And there you have it. From a simple, beautiful cut of meat to a glorious, jaw-dropping centerpiece for your table. You walked in maybe feeling a little nervous, and now you’re walking out with all the secrets, the stories, and the sheer confidence to absolutely nail it.
Remember, this is more than just a recipe. It’s a promise of gathered laughter, of satisfied sighs around the table, and of creating a moment that your people will talk about for years to come. It’s about the year you made the most incredible prime rib they’d ever tasted.

Christmas Tree Macarons (Holiday Edition)
Your New Favorite Holiday Tradition: Christmas Tree Macarons
Hello, my friends, and welcome back to the kitchen! Can you smell it? That crisp, chilly air is finally starting to feel a little bit magical, isn’t it? For me, the holiday season truly begins not with the first snowfall, but with the first batch of festive baking. It’s that moment when my countertops disappear under a blizzard of powdered sugar, my kitchen smells like vanilla and warm butter, and my apron is… well, let’s just say it’s seen better days!
If you’ve ever scrolled through Pinterest or Instagram during the holidays and gasped at those impossibly perfect, adorable Christmas tree macarons, wondering if you could ever make something so beautiful, I’m here to tell you: you absolutely can. These aren’t just cookies; they’re tiny, edible works of art that spark joy. They’re chewy, delicate, and filled with the smoothest vanilla buttercream—a treat that’s as fun to make as it is to eat (and to gift!). So, put on your favorite holiday playlist, grab your piping bag, and let’s create some magic together. I promise to guide you through every step with all my best tips and tricks. This is going to be delicious.
A Kitchen Full of Memories (and a Few Lopsided Trees)
My love affair with macarons started not in a fancy Parisian patisserie, but in my Nana’s wonderfully chaotic kitchen. She was a fearless baker, the kind who’d eyeball a cup of flour and somehow produce the most incredible pastries. One particularly memorable Christmas Eve, she decided we were going to tackle macarons. Back then, they seemed like the Mount Everest of baking—intimidating and full of potential pitfalls. Our first batch? Let’s just say they were more like festive green puddles than trees. We laughed until we cried, scooped the “macaron spread” onto spoons, and declared it the world’s most expensive cookie batter.
But Nana never saw a kitchen failure, only a lesson learned. We tried again. And again. When that first tray of perfect, footed, vibrant green shells came out of the oven, we did a happy dance right there on her checkerboard linoleum floor. Now, every year when I pipe these little trees, I’m right back in her kitchen, surrounded by love, laughter, and the unwavering belief that you can create something wonderful with a little patience and a lot of heart. That’s the spirit I want to bring to your kitchen today.
Gathering Your festive Toolkit: The Ingredients
Here’s everything you’ll need to create these holiday showstoppers. Precision is key with macarons, so I highly recommend using a kitchen scale for the dry ingredients. It makes a world of difference!
For the Macaron Shells (Yields ~12 Christmas Trees / 24 Shells)
- 100g almond flour: The foundation of our macaron! You want super-fine flour for a smooth top. Give it a quick blitz in a food processor if it seems coarse, and always sift it.
- 100g powdered sugar (confectioners’ sugar): This sweetens the shells and contributes to their structure. Sift it with the almond flour to avoid any lumps.
- 75g egg whites, at room temperature: This is non-negotiable! Room temp egg whites whip up much higher and stronger. Separate your eggs a few hours ahead of time. For a pro tip, you can even “age” them by covering and leaving them in the fridge for 24 hours.
- 75g granulated sugar: This is what we’ll be adding to the egg whites to make our beautiful, stable meringue.
- Green gel food coloring: Use gel, not liquid! Liquid coloring can throw off your batter’s consistency. Gel gives you vibrant color without adding extra moisture.
- Optional: ½ tsp matcha powder or a few drops of pistachio extract: This is my little chef’s secret! A bit of matcha adds a lovely, subtle flavor and deep green color. Pistachio extract enhances that nutty, festive taste beautifully.
For the Vanilla Buttercream Filling
- 100g (about ½ cup) unsalted butter, softened: Softened to room temperature so it whips up light and fluffy. If it’s too cold, you’ll have a lumpy frosting; too melted, and it will be runny.
- 150g powdered sugar: Sifted! Unless you enjoy a dust cloud of sugar in your kitchen. Sifting ensures a silky-smooth buttercream.
- 1–2 tbsp heavy cream or whole milk: This loosens the frosting to the perfect piping consistency. Start with one tablespoon and add more as needed.
- 1 tsp pure vanilla extract: The classic flavor. For a holiday twist, you could use…
- Optional: ¼ tsp peppermint extract or ½ tsp pistachio flavoring: Peppermint is such a festive pairing with the sweet vanilla! Just a little goes a long way.
For the Dazzling Decorations
- Melted white chocolate or royal icing: Your “glue” for the sprinkles! White chocolate sets firm and adds a nice flavor. Royal icing dries hard and is great for intricate details.
- Assorted edible sprinkles: Think snowflakes, pearls, stars, and nonpareils. This is where you can really let your personality shine!
- Optional: Fondant for tiny bows, mini red candies (like M&Ms) for tree trunks, edible glitter: Go all out! A tiny fondant bow on top or a red candy at the base for a “trunk” is just adorable.
Let’s Get Baking: Step-by-Step Instructions
Take a deep breath. We’ve got this. Read through all the steps once before you begin. Organization is your best friend when making macarons!
Step 1: Prep Your Station. Line two baking sheets with parchment paper or silicone macaron mats. If you’re using parchment, you can even draw small Christmas tree templates on the other side to use as a guide for piping. Fit a piping bag with a small round tip (I like a #6 or #8). Have your green gel coloring ready to go.
Step 2: Sift, Sift, Sift! In a medium bowl, whisk together your almond flour and powdered sugar. Then, sift the mixture at least twice. Yes, twice! This is the most crucial step for getting those perfectly smooth, flawless macaron tops. Any large bits of almond left behind can be discarded.
Step 3: The Meringue Magic. In a very clean, completely grease-free bowl, pour in your room-temperature egg whites. Using a hand mixer or stand mixer with the whisk attachment, whip on medium speed until they become foamy and frothy. Now, gradually—a little at a time—add the granulated sugar. Once all the sugar is in, increase the speed to high and whip until you get stiff, glossy peaks. The meringue should stand straight up when you lift the whisk. This is when you add your green gel coloring and any optional flavor extracts. Whip for another 10-15 seconds to fully incorporate.
Step 4: The Macaronage. This is the fancy term for folding the dry ingredients into the meringue. Add about one-third of the almond flour mixture to the meringue and gently fold it in using a spatula. Once incorporated, add the rest. Now, you’re going to fold and press the batter against the side of the bowl. You’re looking for a lava-like consistency. Test it often: scoop up some batter with your spatula and let it drizzle back into the bowl. The ribbon of batter should hold its shape for a few seconds before melting back into the rest. Be careful not to overmix, or it will be too runny!
Step 5: Pipe Your Trees! Transfer your batter to your prepared piping bag. Hold the bag perpendicular to the baking sheet and pipe your tree shapes. I start with a wider base and pull up to a point for the top. If you drew templates, pipe right over them. Don’t worry if they’re not perfect—they have character! Once all trees are piped, firmly tap the baking sheets on your counter 3-4 times. This releases any trapped air bubbles and helps prevent cracked shells.
Step 6: The Patient Part: Resting. Let the piped macarons sit out at room temperature for 30-45 minutes. They are ready to bake when you can gently touch the surface and it feels dry and no batter sticks to your finger. This step is essential for forming the signature “foot” of the macaron.
Step 7: Bake to Perfection. While the macarons are resting, preheat your oven to 300°F (150°C). Bake one sheet at a time in the center of the oven for 14-16 minutes. They are done when they have a firm shell and don’t wiggle when you gently touch the top. Let them cool completely on the baking sheet before you even think about moving them. They are very delicate when warm!
Step 8: Make the Buttercream. While the shells are cooling, make your filling. In a bowl, beat the softened butter on medium speed until it’s completely smooth and pale. Gradually add the sifted powdered sugar on low speed until combined, then crank the speed back up to medium-high and beat for 2-3 minutes until fluffy. Add the vanilla and 1 tbsp of cream. Beat again. If it’s too thick, add the remaining cream a teaspoon at a time until it’s a pipeable consistency.
Step 9: Assemble & Decorate! Match your shell pairs by size. Pipe a small dollop of buttercream onto the flat side of one shell and gently sandwich it with its partner. Now for the fun part! Melt your white chocolate gently. Using a fork or a small piping bag, drizzle it over the assembled macarons to look like snow. Immediately add your sprinkles and decorations before the chocolate sets. Let them sit until the chocolate is firm.
How to Serve Your edible Evergreens
Presentation is everything with these cuties! Arrange them on a beautiful platter or a cake stand for your holiday dessert table. They look stunning nestled amongst some fresh rosemary sprigs—it looks like a mini forest and smells amazing! For gift-giving, place them in clear cellophane bags tied with a ribbon, or in a festive holiday cookie box lined with parchment paper. They’re a gift from the heart that anyone would be thrilled to receive.
Mix It Up! Fun Recipe Variations
Feel like playing? Here are a few ways to put your own spin on this classic:
- Chocolate Peppermint: Add 1 tbsp of cocoa powder to the buttercream and use peppermint extract instead of vanilla. Decorate with crushed candy canes!
- Pistachio Joy: Use pistachio extract in the shells and buttercream. For a gorgeous look, roll the sides of the filled macarons in finely chopped pistachios.
- Funfetti Fun: Fold a tablespoon of festive holiday sprinkles into the buttercream for a pop of color and crunch inside.
- Gingerbread Spice: Add a teaspoon of gingerbread spice blend to the dry ingredients for a warmly spiced shell.
- Dairy-Free/Vegan: Use aquafaba (the liquid from a can of chickpeas) in place of egg whites (reduce ¾ cup aquafaba down to 75g) and vegan butter for the frosting.
Olivia’s Chef Notes & Kitchen Confessions
I’ve made these more times than I can count, and my process is always evolving. One year, in a fit of over-enthusiasm, I added way too much green coloring. My macarons were a shockingly neon green, and the batter was so wet they never formed a skin. We called them The Grinch’s Revenge and they were still delicious, if not a little ugly! So, remember: gel coloring is your friend.
Another tip: don’t throw away your “failures!” Even lopsided or cracked shells can be saved. Crumble them up and use them as a topping for ice cream or hot chocolate—it’s a next-level dessert hack. The most important ingredient, always, is joy. If you’re having fun, it will show in your baking.
Macaron FAQs & Troubleshooting
Q: My macarons have no feet! What happened?
A: The “foot” is that cute ruffly edge. If it’s missing, the most common culprits are: 1) The batter was overmixed and became too runy, or 2) They didn’t rest long enough to form a proper skin before baking. Next time, make sure your batter is that perfect lava consistency and wait until the tops are completely dry to the touch.
Q: Why are my macaron shells hollow?
A: Hollows can be tricky! It’s often due to over-whipped meringue (making it too dry and unstable) or oven temperature that’s a bit too high. Try reducing your oven temperature by 5-10 degrees next time and make sure you’re whipping to stiff, but still glossy and smooth, peaks—not until it’s clumpy and dry.
Q: My shells are cracked on top. Help!
A: Cracks usually mean there were trapped air bubbles that couldn’t escape. This is why tapping the tray so firmly is so important! Really bang that tray on the counter. Also, ensure you’re not under-mixing your batter; if the dry ingredients aren’t fully incorporated, it can cause cracking too.
Q: Can I make these ahead of time?
A: Absolutely! In fact, macarons are often better the next day. This process, called “maturing,” allows the shells to absorb moisture from the filling, making them even more deliciously chewy. Store them in an airtight container in the fridge for up to 5 days. Let them come to room temperature for about 30 minutes before serving for the best texture and flavor.

Christmas Tree Macarons (Holiday Edition)
- Total Time: 1 hr 45 mins
Description
Delicate, chewy, and filled with silky vanilla buttercream, these little Christmas tree macarons are edible ornaments that bring sparkle to any holiday table. They look like a bakery masterpiece but are absolutely doable at home—with a little patience, precision, and holiday cheer. Decorated with sprinkles, chocolate “snow,” and edible glitter, they’re as fun to make as they are to share.
Ingredients
For the Shells (~24 shells / 12 macarons):
-
100g almond flour, sifted
-
100g powdered sugar
-
75g egg whites, room temp (aged if possible)
-
75g granulated sugar
-
Green gel food coloring
-
Optional: ½ tsp matcha or a few drops pistachio extract
For the Filling:
-
100g unsalted butter, softened
-
150g powdered sugar, sifted
-
1–2 tbsp heavy cream or milk
-
1 tsp vanilla extract
-
Optional: ¼ tsp peppermint or ½ tsp pistachio flavoring
For Decorating:
-
Melted white chocolate or royal icing
-
Assorted sprinkles (stars, pearls, snowflakes)
-
Optional: edible glitter, fondant bows, mini red candies
Instructions
-
Prep – Line baking sheets with parchment or macaron mats. Fit a piping bag with a small round tip.
-
Sift Dry Mix – Combine almond flour + powdered sugar. Sift twice for smooth shells.
-
Whip Meringue – Beat egg whites until foamy, then gradually add granulated sugar. Whip to stiff, glossy peaks. Tint with gel coloring.
-
Macaronage – Fold dry mix into meringue until batter flows like lava. It should ribbon and melt back in after a few seconds.
-
Pipe Trees – Pipe tree shapes onto sheets. Tap trays firmly to release air bubbles.
-
Rest – Let piped shells sit 30–45 min until a dry skin forms.
-
Bake – Bake at 300°F (150°C) for 14–16 min. Cool completely on trays.
-
Make Buttercream – Beat butter until smooth, add powdered sugar gradually, then cream + vanilla. Whip until fluffy.
-
Assemble – Pipe buttercream onto one shell, sandwich with another.
-
Decorate – Drizzle white chocolate, add sprinkles and glitter before it sets.
- Prep Time: 45 mins
- Cook Time: 15 mins/batch
Nutritional Information (Approximate, per Macaron)
Calories: 150kcal | Carbohydrates: 16g | Protein: 2g | Fat: 9g | Saturated Fat: 4g | Cholesterol: 15mg | Sodium: 10mg | Sugar: 14g
Final Thoughts: Your Holiday Masterpiece Awaits
And there you have it! From a hopeful bowl of meringue to a platter of dazzling, edible Christmas trees, you’ve created something truly special. Remember, my first batch was a puddle, and my Nana’s kitchen was a glorious mess—so if your trees are a little lopsided or your first attempt isn’t quite Pinterest-perfect, give yourself a huge pat on the back anyway. You took on a baking challenge and filled your home with the unmistakable scent of holiday spirit and warm butter.
These macarons are more than just a treat; they’re a conversation starter, a heartfelt gift, and a beautiful new tradition. They carry the magic of the season in every bite—a little bit of patience, a dash of whimsy, and a whole lot of love.
So light a candle, pour yourself a cup of cocoa, and admire your handiwork. You didn’t just bake cookies; you created joy. And that, my friends, is the sweetest success of all.
Chocolate Peppermint Cookies
The Cookie That Tastes Like a Cozy Holiday Hug: Chocolate Peppermint Cookies
Hello, my friends, and welcome back to the kitchen! Can you smell that? It’s officially that time of year—the air is crisp, the twinkle lights are going up, and my oven is permanently preheating to 350°F. There’s something magical about holiday baking, isn’t there? It’s not just about the treats themselves; it’s about the warmth that fills your home, the joy of sharing a plate with neighbors, and the simple, sweet act of creating something with your own two hands. If you’re looking for a recipe that embodies all that cozy, festive spirit, you’ve found it.
Today, we’re making my absolute favorite holiday cookie: Chocolate Peppermint Cookies. Imagine this: a deeply rich, almost brownie-like chocolate cookie that’s soft and fudgy in the center. It’s topped with a cloud of impossibly creamy peppermint frosting that’s cool and sweet without being overwhelming. And the grand finale? A cheerful crunch of crushed candy canes on top. It’s a symphony of textures and flavors—warm chocolate, cool peppermint, creamy, crunchy—that just sings of the holidays. This isn’t just a cookie; it’s an experience. And the best part? They’re surprisingly simple to make. So, tie on your favorite apron (the messy one with the stains of recipes past!), and let’s bake some memories together.
A Snowy Day & My Grandma’s Apron
This recipe always takes me right back to my grandma’s kitchen. I must have been about ten years old, and a huge snowstorm had cancelled school for the day. The world outside was a silent, white blanket, and inside, my grandma decided it was the perfect day for a baking project. She pulled out her old, wire-bound recipe box, her hands flour-dusted and capable, and let me choose what we’d make. I pointed to a recipe card simply titled “Chocolate Peppermint Dreams.”
I remember standing on a stool, carefully measuring the cocoa powder, making a huge mess but feeling like a world-class chef. She showed me how to test if the butter was properly “creamed,” letting me dip a finger in the sweet, fluffy mixture. The smell of chocolate and peppermint filling that warm kitchen is a core memory for me. When we finally iced the cooled cookies and sprinkled on the crushed candy canes, she let me have the first one. That first bite—the cool, creamy frosting against the rich, warm cookie—was pure magic. We packed most of them into tins to give to the neighbors, and that feeling of sharing something we made together was even sweeter than the cookies themselves. Every time I bake these now, I think of her, that snowy day, and the simple, powerful joy of sharing food made with love.
Gathering Your Cookie Crew: The Ingredients
Here’s everything you’ll need to create this winter wonderland in cookie form. Don’t be intimidated by the list—a lot of these are pantry staples, and I’ve included all my best tips and swaps to make it work for you!
For the Chocolate Cookie Dough:
- 2 cups unsalted butter, softened – Using unsalted lets you control the salt level. If you only have salted butter, that’s okay! Just omit the extra ½ tsp of salt later. Chef’s Insight: “Softened” means your finger should leave a slight indent. Don’t melt it! We want to cream it for a light texture.
- 1½ cups packed brown sugar – This adds a wonderful molasses-y moisture and chewiness to the cookies.
- ⅔ cup white granulated sugar – The white sugar helps the cookies spread slightly and gives them a crispier edge.
- 2 large eggs – Always best at room temperature! They incorporate into the butter and sugar much more smoothly.
- 4 tsp vanilla extract – Yes, four teaspoons! It seems like a lot, but trust me, it helps balance the deep chocolate flavor.
- 2 tbsp molasses (optional but highly recommended) – This is my secret weapon for depth of flavor. It makes the chocolate taste richer and more complex.
- 2 tbsp corn syrup (optional) – Another pro tip! A tiny bit of corn syrup keeps the cookies soft and fudgy for days. You won’t taste it, I promise.
- 3–3½ cups all-purpose flour – We’ll start with 3 cups and add more if needed. The dough should be slightly tacky but not sticky.
- 2 tsp baking soda – Our leavening agent for that perfect rise.
- 1 tsp baking powder – A little extra help for a nice, cakey texture.
- ½ tsp salt – Crucial! Salt makes all the other flavors pop. Omit if using salted butter.
- 1⅓ cups unsweetened cocoa powder – Use a good quality one! This is the star of the show, so make it count.
- 4 tsp espresso powder (optional but amazing) – Don’t worry, your cookies won’t taste like coffee! Espresso powder is a magic ingredient that magnifies the chocolate flavor, making it taste even more chocolaty.
For the Peppermint Frosting:
- 1 cup butter, softened – For the frosting, we want it nice and soft to get that creamy, dreamy texture.
- ½ cup shortening – This helps stabilize the frosting and keeps it from melting too easily. If you’re not a fan, you can substitute an additional ½ cup of butter, just know the frosting might be a bit softer.
- 6 cups powdered sugar – Also called confectioner’s sugar. We’ll sift it to avoid any lumps!
- 8 tbsp heavy cream – Heavy cream (or whipping cream) gives the frosting its luxurious, rich texture. You can use milk, but you’ll likely need less (start with 4 tbsp).
- 1 tsp vanilla extract – A flavor base for the frosting.
- 1 tsp peppermint extract – Start here! You can add a tiny bit more if you love a strong peppermint kick, but be careful—it’s potent stuff.
For the Topping:
- 2–3 crushed candy canes or peppermint candies – The festive crunch! Unwrap them and place them in a zip-top bag, then crush with a rolling pin. So therapeutic!
- Optional twists: A drizzle of melted white chocolate, a sprinkle of mini chocolate chips, or even a light dusting of extra cocoa powder for a pretty finish.
Let’s Get Baking: Step-by-Step Instructions
Okay, team! Let’s turn these ingredients into something spectacular. Read through all the steps first—it’s like reading the map before a road trip!
Step 1: Preheat and Prep. First things first, preheat your oven to 350°F (175°C). This gives it plenty of time to reach a steady, even temperature. Line your baking sheets with parchment paper or silicone baking mats. This prevents sticking and makes cleanup a dream. Chef’s Hack: If you don’t have either, you can grease the pans, but parchment paper is the MVP for perfect cookie bottoms.
Step 2: Cream the Butter & Sugars. In a large bowl of a stand mixer fitted with the paddle attachment (or using a hand mixer), beat the softened butter, brown sugar, and white sugar together on medium-high speed. We’re not just mixing them; we’re “creaming” them. Do this for a good 2-3 minutes, until the mixture becomes light in color and fluffy. This step incorporates air, which is key for a great texture. Scrape down the sides of the bowl with a spatula to ensure everything is mixed evenly.
Step 3: Add the Wet Ingredients. Reduce the mixer speed to medium and add the eggs one at a time, beating well after each addition. Now, add the vanilla extract, molasses, and corn syrup (if using). Mix until everything is beautifully combined and smooth. It might look a little curdled at first if your eggs were cold, but it will come together—promise!
Step 4: Whisk the Dry Ingredients. In a separate, large bowl, whisk together 3 cups of the flour, cocoa powder, espresso powder, baking soda, baking powder, and salt. Whisking is important here! It ensures all the leavening agents and cocoa are evenly distributed so you don’t get a bitter bite of baking soda in one cookie. Chef’s Hack: Sift your cocoa powder if it’s particularly lumpy for an ultra-smooth dough.
Step 5: Combine Wet & Dry. With the mixer on low speed, gradually add the dry ingredients to the wet ingredients. Mix until just combined. Please, I beg you, don’t overmix! Overmixing develops gluten and can lead to tough cookies. If the dough seems too sticky, you can add the remaining ¼ cup of flour, a tablespoon at a time. The dough will be thick and fudgy.
Step 6: Scoop & Slightly Flatten. Using a medium cookie scoop (about 1.5 tablespoons of dough), portion out the dough onto your prepared baking sheets, leaving about 2 inches between each cookie for spreading. Gently flatten each dough ball slightly with the palm of your hand. This helps them bake into a perfect cookie shape instead of staying too domed.
Step 7: Bake to Perfection. Bake for 9-11 minutes. The cookies will still look soft in the center, but the edges will be set. They will continue to cook on the hot baking sheet after you take them out. This is the secret to a fudgy center! Chef’s Hack: For perfectly round cookies, immediately after taking them out of the oven, take a round cookie cutter or a glass slightly larger than the cookie and swirl it around the cookie to “scoot” it into a perfect circle. Let them cool on the baking sheet for 5 minutes before transferring them to a wire rack to cool completely. They must be completely cool before frosting!
Step 8: Whip Up the Frosting. While the cookies cool, make the frosting. In a clean mixer bowl, beat the softened butter and shortening together until smooth and creamy. Gradually add the sifted powdered sugar, one cup at a time, on low speed (unless you want a powdered sugar snowstorm in your kitchen!). Once incorporated, add the heavy cream, vanilla, and peppermint extract. Increase the speed to medium-high and beat for 2-3 minutes until the frosting is light, fluffy, and wonderfully spreadable.
Step 9: Assemble the Magic! Once the cookies are completely cool, use a butter knife or an offset spatula to spread a generous dollop of frosting onto each cookie. Immediately sprinkle with the crushed candy canes so they stick. If you’re adding a drizzle, do that after the frosting has set a little.
How to Serve These Holiday Stars
Presentation is part of the fun! I love arranging these cookies on a large rustic wooden board or a festive holiday platter. Stack them high for a casual, abundant feel. For a more elegant touch, place each cookie in a mini cupcake liner before arranging them on a tiered stand. They pair beautifully with a glass of cold milk for the kids, a hot cup of coffee for the adults, or even a mug of rich hot chocolate for the ultimate chocolate-peppermint experience. These cookies are the star of any cookie swap, holiday party, or cozy night by the fire.
Get Creative: Recipe Variations
Feel free to make this recipe your own! Here are a few fun twists:
- Chocolate Mint Sandwich Cookies: Skip the frosting and crushed candy. Instead, spread frosting between two cooled cookies to create a decadent sandwich.
- Gluten-Free Swap: Use a 1:1 gluten-free all-purpose flour blend in place of the regular flour. I recommend one that includes xanthan gum.
- Dairy-Free Delight: Use plant-based butter and milk. For the frosting, use dairy-free butter and coconut cream instead of heavy cream.
- Dark Chocolate Lover: Use dark cocoa powder instead of regular unsweetened cocoa for an even deeper, more intense chocolate flavor.
- Peppermint Bark Cookie: After frosting, drizzle with melted dark chocolate instead of (or in addition to) the white chocolate.
Chef’s Notes: From My Kitchen to Yours
This recipe has evolved so much since that first snowy day with my grandma. I’ve tweaked it over countless holiday seasons, adding the espresso powder and molasses along the way to really make the chocolate flavor sing. One of my favorite kitchen fails was the year I was chatting with a friend and completely forgot to add the sugar to the frosting. I ended up with a bowl of… well, sweetened butter. We laughed so hard, and I had to start all over again! It’s a good reminder that even in the kitchen, it’s the mistakes and the laughter that make the best memories. These cookies freeze beautifully, too. I often make a double batch, freeze the baked (unfrosted) cookies, and then frost them the day I need them. It makes hectic holiday hosting so much easier!
Your Questions, Answered: FAQs & Troubleshooting
Q: My cookies spread too much and turned out flat. What happened?
A: This is usually caused by butter that is too warm or melted. Make sure your butter is just softened, not melted. Also, ensure your baking soda and powder are fresh, as old leavening agents lose their potency. Chilling the dough for 30 minutes can also help prevent overspreading if your kitchen is very warm.
Q: My frosting is too runny/thick. How can I fix it?
A: Frosting is easy to adjust! If it’s too runny, gradually beat in a little more sifted powdered sugar, a quarter cup at a time. If it’s too thick and difficult to spread, beat in a teaspoon of heavy cream or milk at a time until it reaches your desired consistency.
Q: Can I make the cookie dough ahead of time?
A: Absolutely! You can scoop the dough into balls, place them on a baking sheet, and freeze them solid. Then, transfer the frozen dough balls to a zip-top bag. You can bake them straight from the freezer; just add 1-2 minutes to the baking time.
Q: The peppermint extract taste is too strong. How can I tone it down?
A: Peppermint extract can vary in strength by brand. Always start with the recommended 1 tsp and then taste. If it’s already too strong for you, you can try to balance it by beating in a little more powdered sugar and butter to dilute it, but it’s tricky. Next time, start with ½ tsp and add from there!

Chocolate Peppermint Cookies
- Total Time: ~45 mins
Description
These cookies are everything the holidays should be—rich, fudgy chocolate, cool peppermint frosting, and a cheerful crunch of candy canes on top. They’re soft in the center, slightly crisp at the edges, and bursting with festive flavor. Perfect for cookie swaps, snowy afternoons, or simply sharing with someone you love.
Ingredients
For the Cookies:
-
2 cups unsalted butter, softened
-
1½ cups brown sugar, packed
-
⅔ cup white sugar
-
2 large eggs, room temperature
-
4 tsp vanilla extract
-
2 tbsp molasses (optional, deepens flavor)
-
2 tbsp corn syrup (optional, keeps cookies soft)
-
3–3½ cups all-purpose flour
-
1⅓ cups unsweetened cocoa powder
-
4 tsp espresso powder (optional, enhances chocolate)
-
2 tsp baking soda
-
1 tsp baking powder
-
½ tsp salt
For the Frosting:
-
1 cup butter, softened
-
½ cup shortening (or butter)
-
6 cups powdered sugar, sifted
-
8 tbsp heavy cream (or milk, less)
-
1 tsp vanilla extract
-
1 tsp peppermint extract
Topping:
-
2–3 candy canes, crushed
-
Optional: melted white or dark chocolate drizzle
Instructions
-
Prep – Preheat oven to 350°F (175°C). Line baking sheets with parchment.
-
Cream Butter & Sugars – Beat butter + sugars until light and fluffy (2–3 min).
-
Add Wet – Mix in eggs, vanilla, molasses, and corn syrup until smooth.
-
Dry Mix – Whisk flour, cocoa, espresso, baking soda, baking powder, and salt.
-
Combine – Slowly add dry mix to wet, mixing just until combined. Dough should be thick.
-
Scoop & Bake – Scoop 1.5 tbsp dough balls, flatten slightly. Bake 9–11 min, edges set, centers soft. Cool completely.
-
Frosting – Beat butter + shortening until creamy. Add powdered sugar gradually. Mix in cream, vanilla, and peppermint extract. Whip until fluffy.
-
Decorate – Spread frosting on cooled cookies, top with crushed candy canes. Add drizzle if desired.
- Prep Time: 25 mins
- Cook Time: 10 mins/batch
Nutritional Information (Approximate, per Frosted Cookie)
Calories: ~300 | Fat: ~16g | Saturated Fat: ~10g | Carbohydrates: ~35g | Sugar: ~25g | Protein: ~2g | Sodium:
Final Thoughts: A Batch of Love to Share
And there you have it, my friends. A cookie that’s so much more than just a sweet treat. It’s a warm, chocolatey hug, a blast of cool, festive peppermint, and a symphony of happy crunch—all rolled into one perfect bite.
But more than that, this recipe is a reminder. A reminder to slow down and savor the sweet, simple moments this season. To embrace the beautiful mess of flour on the counter, the laughter shared over a bowl of frosting, and the profound joy of handing someone a gift made with your own hands.
Whether you’re baking these to continue a beloved family tradition or to start a new one of your own, I hope these Chocolate Peppermint Cookies fill your kitchen with the same warmth and magic that they’ve brought to mine for so many years. So from my kitchen to yours, happy baking, happy sharing, and happy holidays.

Peanut Butter Cup Cream Pie
Your New Favorite Dessert: Peanut Butter Cup Cream Pie
Hey there, friend! Come on in, grab an apron, and let’s get ready to make something truly magical. If your heart does a little happy dance at the combination of rich peanut butter and smooth, creamy chocolate, you are absolutely in for a treat today. We’re whipping up not one, but two spectacularly decadent Peanut Butter Cup Cream Pies. Yes, you read that right—two! This is the kind of dessert that doesn’t just satisfy a sweet tooth; it throws it a full-blown party. Imagine a velvety, no-bake peanut butter filling that’s lighter than air, all nestled into a crispy, buttery graham cracker crust. Now, picture it loaded with chunks of everyone’s favorite chocolate-covered peanut butter candy and topped with a fluffy cloud of whipped topping. It’s cool, creamy, and packed with so much candy-shop charm, it’s guaranteed to be the star of any potluck, birthday, or “just because it’s Tuesday” celebration. The best part? You don’t need to turn on your oven. This is all about mixing, folding, and the hardest part: waiting for it to chill. So, let’s create some kitchen magic together!
A Slice of Nostalgia: My Love Affair with This Pie
This pie recipe isn’t just a list of ingredients to me; it’s a delicious slice of my childhood. I vividly remember being ten years old, perched on a stool at my grandma’s yellow Formica countertop, watching her make her famous “special occasion” pie. Her version was a simpler chocolate cream number, but the ritual was everything. She’d let me crush the graham crackers with a rolling pin (a mess I relished) and sneak me a spoonful of the sweet, fluffy filling before it ever saw the crust. When I got older and started developing my own recipes, I knew I had to create a pie that captured that same feeling of pure, unadulterated joy—but with my own obsessive peanut butter twist. I swapped the chocolate for peanut butter, folded in a whole army of chopped peanut butter cups, and voilà! This pie was born. It’s become my go-to for celebrating friends, comforting loved ones, and creating new memories around the table. Every time I make it, I’m right back in my grandma’s kitchen, and that’s a feeling I’m so thrilled to now share with you.
Gathering Your Dream Team: The Ingredients
This recipe is wonderfully simple, but each ingredient plays a key role in creating that perfect texture and flavor. Here’s what you’ll need and why it’s important:
- 2 (8 oz) packages cream cheese, softened: This is the structural heart of our filling, giving it a rich, tangy base that balances the sweetness. Chef’s Insight: MUST be softened to room temperature! This is non-negotiable for a smooth, lump-free filling. Take it out of the fridge at least an hour before you start.
- 1 cup creamy peanut butter: The star of the show! I prefer a standard creamy, shelf-stable peanut butter (like Jif or Skippy) for this recipe because its consistent texture and slight sweetness blend perfectly. Substitution Tip: You can use natural peanut butter, but make sure it’s well-stirred and note that the filling might be a bit oilier and less sweet.
- 1 cup confectioners’ sugar: Also known as powdered sugar, it dissolves instantly into our filling, providing sweetness without any graininess. It also helps thicken the mixture.
- 2 (16 oz) containers frozen whipped topping, thawed and divided: This is our secret weapon for incredible lightness. One container gets folded into the filling, and the other is used for the gorgeous topping. Chef’s Hack: Be sure it’s fully thawed in the fridge for a few hours. If it’s still icy, it can deflate and cause weepiness.
- 2 (9-inch) prepared graham cracker crusts: The perfect, no-fuss, crunchy foundation. I love the convenience of store-bought, but hey, if you’re feeling ambitious, a homemade crust is always amazing!
- 30 miniature chocolate-covered peanut butter cups, unwrapped and chopped: The “charm” in our candy-shop charm! Chopping them gives you that incredible peanut butter cup surprise in every single bite.
- Optional twist: Drizzle with melted chocolate and top with crushed pretzels or sea salt: This is where you become an artist! The salt from the pretzels or a flaky sea salt cuts through the richness beautifully, and a chocolate drizzle is just, well, gorgeous.
Let’s Build Some Magic: Step-by-Step Instructions
Ready to make the easiest, most impressive pies of your life? Let’s do this! I’ll walk you through every step with my favorite tips and hacks.
Step 1: The Creamy Base
In a large bowl, beat the softened cream cheese and peanut butter together with an electric mixer on medium speed until the mixture is completely smooth, creamy, and lump-free. This should take about 2-3 minutes. Chef’s Tip: Scrape down the sides and bottom of the bowl with a spatula halfway through to ensure everything is perfectly incorporated. This is the foundation, so let’s make it strong!
Step 2: Sweeten the Deal
Add the confectioners’ sugar to the peanut butter mixture. Start your mixer on low speed unless you want a sweet cloud all over your kitchen! Once the sugar is somewhat incorporated, bump the speed up to medium and beat for another minute until it’s fully blended and smooth.
Step 3: Lighten It Up
Now, here’s the key to that dreamy, cloud-like texture: gently fold in one entire container of the thawed whipped topping. Chef’s Hack: “Folding” is crucial! Use a spatula and cut through the center of the mixture, scoop around the edge, and fold over on top. Turn the bowl a quarter turn and repeat. This incorporates air and keeps the filling light and fluffy. Don’t stir or beat it, or you’ll deflate all that airiness.
Step 4: The Grand Finale (Mix-In!)
Time for the best part! Grab half of your chopped peanut butter cups and gently fold them into the filling until they’re evenly distributed. Those little pockets of peanut butter and chocolate are what make this pie so special.
Step 5: Divide and Conquer
Using your spatula, divide the delicious filling evenly between your two graham cracker crusts. Smooth the tops out nicely so they’re ready for their next layer.
Step 6: Top It Off
Spread the second container of thawed whipped topping over the two pies. You can make pretty peaks and swirls with the back of a spoon—get creative! Sprinkle the remaining chopped peanut butter cups over the top.
Step 7: The Optional (But Highly Recommended) Glam Squad
If you’re going for the optional twist, melt a little chocolate or caramel in the microwave (in 15-second bursts, stirring in between) and drizzle it artfully over the pies. A sprinkle of crushed pretzels or a pinch of flaky sea salt takes this from a 10 to an 11!
Step 8: The Test of Patience
Carefully place the pies in the refrigerator to chill for at least 4 hours, but overnight is truly best. Chef’s Secret: This waiting period is essential for the filling to firm up perfectly, making it sliceable and allowing all the flavors to meld together into pure bliss. I know it’s hard, but trust me, it’s worth the wait!
How to Serve This Masterpiece
When it’s finally time to serve, use a sharp knife that you’ve run under hot water and wiped dry. This will give you the cleanest, most beautiful slices. Slide a pie server underneath and lift out a perfect wedge. I love serving this on simple white plates to really let the pie be the showstopper. A little extra cup of hot coffee or a cold glass of milk on the side is the perfect companion to this rich, sweet treat. Get ready for the compliments to roll in!
Make It Your Own: Delicious Variations
The beauty of this recipe is its versatility! Here are a few fun ways to switch it up:
- Cookie Dough Twist: Fold in 1/2 cup of mini chocolate chips and 1/2 cup of undressed, heat-treated flour for a safe-to-eat cookie dough experience.
- Chocolate Lover’s Dream: Use a chocolate cookie crust (Oreo!) instead of graham cracker. You can also swap 1/4 cup of the peanut butter for chocolate syrup.
- Berry Bliss: After adding the whipped topping layer, top with a swirl of strawberry or raspberry dessert sauce for a PB&J vibe.
- Lighter Option: Use reduced-fat cream cheese and peanut butter, and swap the whipped topping for a light or sugar-free version. The texture will be slightly different but still delicious!
- Elvis Special: Top with sliced bananas and a drizzle of honey right before serving. Thank ya very much.
From My Kitchen to Yours: Chef’s Notes
This recipe has seen many iterations in my kitchen! The first time I made it, I got a little *too* excited and added the peanut butter cups while the mixer was still running. Let’s just say I ended up with more of a peanut butter cup dust than chunks—still tasty, but not the textural joy we’re going for! I’ve learned that gentle folding is everything. I’ve also found that letting the pies chill overnight, as agonizing as it is, makes a world of difference in the final set and flavor. It’s a forgiving recipe, so don’t stress. The most important ingredient is the joy you put into making it. So put on some music, unwrap those peanut butter cups (and maybe sneak a few for yourself), and have fun with it!
Your Questions, Answered: FAQs & Troubleshooting
Q: My filling is lumpy! What did I do wrong?
A: This almost always happens if the cream cheese wasn’t fully softened to room temperature before you started. You can try to press the filling through a fine-mesh sieve to salvage it, but it’s a bit of a pain. Prevention is key—plan ahead and let that cream cheese soften!
Q: Can I make this into one deep-dish pie instead of two regular ones?
A: Absolutely! You can absolutely pour all the filling into one deep 9-inch springform pan. You might need to adjust the chilling time, making it longer (closer to 6-8 hours or overnight) to ensure it sets firmly in the center.
Q: Why is my pie watery or weepy after chilling?
A: Weeping can happen for two main reasons: 1) The whipped topping wasn’t fully thawed, or 2) The cream cheese was over-beaten, causing it to break down and release water. Make sure your whipped topping is thawed in the fridge and mix just until everything is combined.
Q: How long will this pie keep in the fridge?
A: It’s best enjoyed within 2-3 days. The crust will start to get softer the longer it sits, but I doubt it will last that long anyway! You can also freeze the pies for up to a month. Thaw in the refrigerator for a few hours before serving.

Peanut Butter Cup Cream Pie
- Total Time: 4 hrs 20 mins
Description
This dessert is pure joy in a crust—silky peanut butter filling, light as a cloud, packed with chunks of peanut butter cups, and finished with a fluffy whipped topping. No oven needed, just a little mixing, folding, and patience while it chills. Perfect for potlucks, birthdays, or a Tuesday pick-me-up.
Ingredients
-
2 (8 oz) cream cheese blocks, softened
-
1 cup creamy peanut butter
-
1 cup powdered sugar
-
2 (16 oz) tubs whipped topping, thawed & divided
-
2 (9-inch) graham cracker crusts
-
30 mini peanut butter cups, chopped
-
Optional: melted chocolate, crushed pretzels, or flaky sea salt
Instructions
-
Blend Base – Beat cream cheese + peanut butter until smooth (2–3 min).
-
Sweeten – Mix in powdered sugar until fully combined.
-
Fold In Lightness – Gently fold in 1 tub of whipped topping.
-
Mix Magic – Stir in half the chopped peanut butter cups.
-
Fill & Smooth – Divide mixture between crusts, smooth tops.
-
Top It Off – Spread remaining whipped topping, sprinkle on the rest of the cups.
-
Optional Glam – Drizzle melted chocolate, add pretzels or sea salt.
-
Chill – Refrigerate at least 4 hours (overnight best).
✨ Pro tip: Use a hot knife for perfect, clean slices.
- Prep Time: 20 mins
Nutrition
- Calories: 380 cal Per Slice
- Fat: 24g
- Saturated Fat: 12g
- Carbohydrates: 35g
Nutritional Information
*Please note: This is an estimated nutritional breakdown provided for informational purposes only. Calculations will vary based on specific brands and ingredients used.*
Per Slice (based on 16 servings total, 1 slice from one pie):
Calories: 380 | Fat: 24g | Saturated Fat: 12g | Carbohydrates: 35g | Sugar: 27g | Protein: 6g | Sodium: 220mg
Final Thoughts: A Pie to Remember
So there you have it—the recipe for what is sure to become your new signature dessert. This Peanut Butter Cup Cream Pie is more than just a collection of ingredients; it’s a passport to joy, a guaranteed smile-maker, and a testament to the fact that the best things in life are often the simplest.
It’s the perfect dessert because it meets you where you are. Whether you’re a seasoned baker showing off or a nervous newbie looking for a surefire win, this pie has your back. It requires no special skills, just a little patience for that chilling time (which, I promise, makes all the difference).
Soup of the Week – Meal Prep Made Easy
Welcome to Soup Season, My Friends!
Is there anything better than coming home to the incredible, soul-warming aroma of soup simmering on the stove? That rich, savory scent that fills the entire house, promising a cozy, delicious meal is one of my absolute favorite things in the world. It’s a hug in a bowl, a comfort blanket for your taste buds, and the ultimate secret weapon for a stress-free week. If your busy schedule often leaves you staring into the fridge at 6 PM wondering what on earth to make, I’m here to let you in on a little secret: your salvation is waiting in a big, beautiful pot of soup.
This week, we’re ditching the last-minute scramble and embracing the power of make-ahead meals. I’m sharing three of my all-time favorite, foolproof soup recipes that are designed to make your life easier, healthier, and infinitely more delicious. We’re talking about a protein-packed Lentil Veggie Soup that’s vegan and high-fiber, a classic, comforting Chicken Noodle Soup that’s pure nostalgia in a spoon, and a luxuriously creamy Butternut Squash Soup that feels indulgent but is secretly good for you. These aren’t just recipes; they’re your ticket to a week of effortless lunches and dinners. Imagine popping open a mason jar of homemade soup at your desk, knowing you’re about to enjoy something wholesome and satisfying instead of something from a can. Let’s get your soup pot ready—your future self will thank you!
The Chicken Noodle Soup That Healed Everything
I’ll never forget the first time I truly understood the magic of chicken noodle soup. It wasn’t in a fancy restaurant or from a famous cookbook. It was in my tiny college apartment during a particularly brutal midterm season. A nasty cold had swept through our friend group, and my roommate, Sarah, was hit the hardest. We were both exhausted, stressed, and surviving on instant noodles. I decided we needed something more. I called my mom, scribbled down her simple recipe on a sticky note, and ventured out to the store for chicken, carrots, celery, and noodles.
As that soup simmered, our sad little apartment transformed. The steamy, savory fragrance seemed to push the sickness right out the window. When I handed Sarah a big, steaming bowl, she literally groaned with happiness. We sat on the couch, wrapped in blankets, slurping noodles and feeling human again. That’s when it clicked. This soup was more than food; it was care, comfort, and connection made tangible. It’s the feeling I try to pack into every single batch I make now, and it’s the feeling I hope you get to experience, too.
Gathering Your Soup Squad: The Ingredients
Here’s everything you’ll need to create these three soup superstars. Don’t be afraid to swap and customize based on what’s in your pantry!
Lentil Veggie Soup
- 1 tbsp olive oil: Our cooking fat of choice for building flavor from the very start.
- 1 large onion, diced: The aromatic base of so many great soups. No onion? A large shallot or even a leek can work in a pinch!
- 2 cloves garlic, minced: Non-negotiable for depth of flavor! Use pre-minced to save time, but fresh is always best.
- 2 carrots, diced: Adds a subtle sweetness and a pop of color.
- 2 celery stalks, diced: The classic partner to carrots and onion, building that essential flavor foundation.
- 1 cup brown lentils, rinsed: These little powerhouses are packed with protein and fiber and hold their shape beautifully. Don’t substitute with red lentils here—they’ll turn to mush!
- 1 (14.5 oz) can diced tomatoes: Adds a lovely acidity and body. Fire-roasted tomatoes are a fantastic upgrade for a smoky note.
- 6 cups vegetable broth: The soul of the soup. Use low-sodium so you can control the salt level yourself.
- 1 tsp cumin: Adds a warm, earthy, slightly smoky flavor that pairs perfectly with lentils.
- 1 tsp dried thyme: Herby and fragrant. If you have fresh, use 1 tablespoon.
- Salt and pepper to taste: Season in layers! A little at the beginning and more at the end is the chef’s secret.
Chicken Noodle Soup
- 1 tbsp olive oil or butter: Butter adds a richer, more classic flavor, but oil works great too.
- 1 large onion, diced: The sweet, savory start to our comfort soup.
- 2 cloves garlic, minced: Because every good soup needs garlic.
- 2 carrots, diced: For sweetness, color, and that classic chicken noodle soup feel.
- 2 celery stalks, diced: The other half of the dynamic duo with carrots.
- 6 cups chicken broth: Homemade is amazing, but a good quality store-bought broth is a perfect timesaver.
- 1 bay leaf: A subtle, background note of earthiness. Don’t forget to fish it out before serving!
- 2 cups shredded cooked chicken breast: My biggest hack? Use a rotisserie chicken! It’s the ultimate shortcut for flavor and ease.
- 2 cups wide egg noodles: The classic choice. They soak up the broth perfectly.
- 2 tbsp fresh parsley, chopped: A bright, fresh finish that makes all the difference.
Butternut Squash Soup
- 1 tbsp olive oil or coconut oil: Coconut oil will enhance the natural sweetness and play nicely with the coconut milk.
- 1 large onion, diced: We’re caramelizing these to bring out their natural sugar.
- 2 cloves garlic, minced: For a little savory punch against the sweet squash.
- 1 large butternut squash (about 3 lbs), peeled and cubed: The star of the show! Look for pre-cubed squash in the produce section to save serious time and effort.
- 4 cups vegetable broth: Enough to just cover the vegetables for perfect blending later.
- 1 (13.5 oz) can coconut milk: For incredible creaminess without any dairy. Use full-fat for the richest texture.
- ½ tsp cinnamon: Warm and cozy, a match made in heaven with squash.
- ¼ tsp nutmeg: Use fresh grated if you can—the flavor is incredible.
- Salt and pepper to taste: Crucial for balancing the sweetness.
Let’s Get Cooking: Your Soup Making Journey
Put on your favorite apron (the messy one is fine—it means you’re having fun!), and let’s turn these ingredients into liquid gold. Follow these steps for each soup, and remember, the best part about soup is that it’s very forgiving!
For the Lentil Veggie Soup:
- Sizzle your aromatics. In a large Dutch oven or heavy-bottomed pot, heat the olive oil over medium heat. Add the diced onion, carrots, and celery. Cook, stirring occasionally, for about 5-7 minutes, until the vegetables begin to soften and the onion becomes translucent. Chef’s Tip: This step—called sweating the vegetables—is where you build a ton of flavor. Don’t rush it!
- Bloom your spices. Add the minced garlic, cumin, and thyme. Stir constantly for about 1 minute until incredibly fragrant. This “blooms” the spices and wakes up their oils, making your entire soup more flavorful.
- Combine and simmer. Add the rinsed lentils, diced tomatoes (with their juices), and vegetable broth. Give everything a good stir, bring it to a boil, then immediately reduce the heat to low, cover, and let it simmer gently for 30-40 minutes. Chef’s Tip: You’ll know it’s done when the lentils are tender but not mushy.
- Season and serve. Season generously with salt and black pepper to taste. Remember, lentils can take a fair amount of seasoning!
For the Chicken Noodle Soup:
- Build your base. In your large pot, heat the oil or butter over medium heat. Add the onion, carrots, and celery and cook until softened, about 5-7 minutes. Add the garlic and cook for one more minute.
- Create your broth. Pour in the chicken broth, add the bay leaf, and bring the whole thing to a boil.
- Cook the noodles. Once boiling, add the egg noodles and cook according to the package directions, usually about 6-8 minutes. Chef’s Hack: To prevent your noodles from getting too soft and bloated if you’re meal prepping, you can cook them separately and add them to each bowl when you serve. This keeps them perfectly al dente!
- Finish it off. Reduce the heat to low. Stir in the shredded cooked chicken and let it heat through, about 2-3 minutes. Remove the bay leaf. Stir in the fresh parsley right before serving for that burst of fresh flavor.
For the Butternut Squash Soup:
- Caramelize for depth. Heat oil in your pot over medium heat. Add the diced onion and cook, stirring occasionally, for about 8-10 minutes until they become soft and start to turn a light golden brown. This caramelization adds a wonderful sweetness. Add the garlic and cook for one more minute.
- Simmer until tender. Add the cubed butternut squash and vegetable broth. The broth should just barely cover the squash. Bring to a boil, then reduce heat, cover, and simmer for 15-20 minutes, or until the squash is fork-tender.
- Blend until smooth. Carefully transfer the soup in batches to a blender, or use an immersion blender right in the pot. Safety First: If using a blender, only fill it halfway, remove the center cap from the lid, and cover with a towel to allow steam to escape. Blend until velvety smooth.
- Make it creamy. Return the smooth soup to the pot (if you used a blender). Stir in the coconut milk, cinnamon, nutmeg, and salt and pepper. Warm through over low heat. Taste and adjust seasoning—you might need a pinch more salt or spice.
Bowling It Up: How to Serve Your Masterpiece
Presentation is part of the fun! Ladle your beautiful soup into deep, warm bowls. For the Lentil Soup, a final drizzle of extra virgin olive oil and a sprinkle of fresh parsley or thyme leaves adds a lovely finish. The Chicken Noodle is perfect as-is, but a crack of black pepper on top makes it look chef-y. For the Butternut Squash, get fancy! Swirl a little extra coconut milk on top, add a sprinkle of pepitas (pumpkin seeds) for crunch, or a tiny dusting of cinnamon. Serve immediately with crusty bread for dipping, because that’s non-negotiable.
Make It Your Own: Delicious Variations
The best recipes are templates for creativity! Here’s how to mix things up:
- Lentil Veggie Twist: Add a handful of chopped kale or spinach in the last 5 minutes of cooking. For a smoky kick, add a pinch of smoked paprika with the cumin.
- Chicken Noodle Remix: Swap egg noodles for orzo pasta or even gluten-free noodles. Add a squeeze of fresh lemon juice at the end for a bright, uplifting zing.
- Butternut Squash Upgrade: Roast the squash cubes with the onions on a sheet pan before adding to the pot for an even deeper, caramelized flavor. For a spicy twist, add a tiny pinch of cayenne pepper with the spices.
- Global Inspirations: Add curry powder to the butternut squash soup for a Thai-inspired version. Or add Italian seasoning and a parmesan rind to the lentil soup while it simmers.
From My Kitchen to Yours: Chef’s Notes
I’ve made these soups more times than I can count, and they’ve evolved with me over the years. The lentil soup was once a sad, watery affair until I learned the power of “blooming” the spices. The chicken noodle soup permanently adopted the rotisserie chicken shortcut after I had my second kid and time became a precious commodity. And the butternut squash soup? I once tried to blend a hot batch in my blender without venting the steam… let’s just say my kitchen walls wore orange polka dots for a week. Learn from my mistakes! The beauty of soup is that it’s a living recipe. Taste as you go, adjust what you like, and make it yours. Don’t stress about precision. The goal is a delicious, nourishing meal that makes your life easier, not a perfect Michelin-starred presentation (unless you’re into that, then go for it!).
Your Soup Questions, Answered!
Q: My soup turned out too thick! How can I fix it?
A: No problem at all! This is an easy fix. Simply stir in a little more broth (or even water) until it reaches your desired consistency. Heat it through, and you’re good to go. Remember, you can always add more liquid, but you can’t take it out, so add gradually.
Q: Can I freeze the soup with the noodles in it?
A: You can, but be warned that the noodles may become very soft and absorb most of the broth upon thawing, making the soup very thick and the noodles a bit mushy. For the best texture, I highly recommend freezing the broth and vegetable/chicken base without the noodles. Then, when you reheat, cook a fresh batch of noodles and add them to the hot soup.
Q: Why does my butternut squash soup taste bland?
A: Nine times out of ten, the answer is underseasoning! Squash needs a good amount of salt to make its sweetness pop. The other culprit could be under-roasted or under-cooked squash, which doesn’t develop its full sweetness. Make sure you season in layers (a little salt when cooking the onions, and then again at the end) and taste, taste, taste! A splash of acid, like apple cider vinegar or lemon juice, at the end can also brighten everything up and fix a bland soup.
Q: How long will these soups really last in the fridge?
A: Properly stored in airtight containers, they will be perfect for 4-5 days. The key is to cool them down quickly before refrigerating. Don’t put a giant pot of hot soup directly in the fridge. Let it cool on the stove for a bit, then portion it into smaller containers. This keeps everything safe and delicious!

Soup of the Week – Meal Prep Made Easy
Description
Welcome to Soup Season: 3 Soul-Warming, Make-Ahead Recipes
Soup is more than a meal—it’s comfort, care, and convenience in a bowl. These three recipes will make your week easier, healthier, and infinitely more delicious:
-
Lentil Veggie Soup – vegan, high-fiber, protein-packed
-
Classic Chicken Noodle Soup – nostalgic and comforting
-
Creamy Butternut Squash Soup – indulgent yet healthy
Ingredients
Lentil Veggie Soup
-
1 tbsp olive oil
-
1 large onion, diced
-
2 cloves garlic, minced
-
2 carrots, diced
-
2 celery stalks, diced
-
1 cup brown lentils, rinsed
-
1 (14.5 oz) can diced tomatoes
-
6 cups vegetable broth
-
1 tsp cumin
-
1 tsp dried thyme
-
Salt and pepper to taste
Chicken Noodle Soup
-
1 tbsp olive oil or butter
-
1 large onion, diced
-
2 cloves garlic, minced
-
2 carrots, diced
-
2 celery stalks, diced
-
6 cups chicken broth
-
1 bay leaf
-
2 cups shredded cooked chicken (rotisserie works great)
-
2 cups wide egg noodles
-
2 tbsp fresh parsley, chopped
Butternut Squash Soup
-
1 tbsp olive or coconut oil
-
1 large onion, diced
-
2 cloves garlic, minced
-
1 large butternut squash (3 lbs), peeled & cubed
-
4 cups vegetable broth
-
1 (13.5 oz) can coconut milk
-
½ tsp cinnamon
-
¼ tsp nutmeg
-
Salt and pepper to taste
Instructions
Lentil Veggie Soup
-
Sauté aromatics: Heat oil over medium heat. Cook onion, carrots, celery 5-7 min until softened.
-
Bloom spices: Add garlic, cumin, thyme; stir 1 min until fragrant.
-
Simmer: Add lentils, diced tomatoes, broth. Boil, then reduce heat and simmer 30-40 min until lentils are tender.
-
Season: Salt and pepper to taste. Serve warm.
Chicken Noodle Soup
-
Cook base: Heat oil/butter. Sauté onion, carrots, celery 5-7 min; add garlic 1 min.
-
Add broth: Pour in chicken broth, add bay leaf, bring to boil.
-
Cook noodles: Add egg noodles; cook 6-8 min. (For meal prep, cook noodles separately.)
-
Finish: Stir in shredded chicken; heat 2-3 min. Remove bay leaf, add parsley before serving.
Butternut Squash Soup
-
Caramelize onions: Heat oil, cook onion 8-10 min until golden. Add garlic 1 min.
-
Simmer squash: Add squash and broth (just covered). Boil, then simmer 15-20 min until tender.
-
Blend: Use immersion blender or carefully blend in batches until smooth.
-
Add creaminess: Stir in coconut milk, cinnamon, nutmeg, salt & pepper. Warm through and adjust seasoning.
Notes
-
Taste and season in layers—especially squash soup.
-
Freeze without noodles for best texture; cook noodles fresh when reheating.
-
Cool soup before refrigerating. Lasts 4-5 days in airtight containers.
-
Soup is forgiving—adjust consistency with broth or water.
A Quick Note on Nutrition
These soups are designed to be as nourishing as they are delicious! The provided nutritional info is a estimate per 1.5 cup serving, calculated using online calculators. Values can vary based on specific brands and measurements used. They are all fantastic options for a balanced meal, packed with vitamins from the vegetables, fiber from the lentils and veggies, and protein from the lentils and chicken. They’re a wonderful way to fuel your body throughout the week!
Final Thoughts: Your Cozy, Effortless Week Awaits
There you have it, my friends—your passport to a week of warmth, nourishment, and beautiful simplicity. Making a big pot of soup isn’t just a cooking task; it’s an act of self-care and a gift to your future, busy self. It’s the promise of a healthy, homemade meal waiting for you at the end of a long day, no stress required.
As you ladle these soups into containers for the week, take a moment to appreciate what you’ve created. You’ve made nourishment. You’ve made comfort. You’ve made convenience. You’ve filled your home with incredible aromas and filled your fridge with ready-made love.
I hope these recipes become your trusted companions all season long. I hope the lentil soup fuels your busy days, the chicken noodle soup brings comfort when you need it most, and the butternut squash soup makes a regular Tuesday feel a little bit special.
Meal Prep Baked Chicken & Roasted Veggie Mix-Ins
Your Ticket to a Stress-Free, Flavor-Packed Week
Hey there, friend! Come on in, grab an apron, and let’s get something straight: meal prep doesn’t have to be a chore. It doesn’t have to mean eating the same bland chicken and steamed broccoli every single day until Friday. In fact, I think meal prep should be the exact opposite—it’s your secret weapon for a week filled with exciting, delicious, and healthy meals that you actually look forward to eating.
If you’ve ever opened your fridge at 6 p.m. on a Wednesday, felt that wave of dinner-time dread, and ended up ordering a pizza (no judgment here, I’ve been there!), this recipe is about to become your new best friend. We’re talking about my go-to, never-fail, endlessly customizable Meal Prep Baked Chicken & Roasted Veggie Mix-Ins. This isn’t just one meal; it’s a blank canvas for your culinary creativity. With a little upfront effort, you’ll have the foundation for a week of bowls, wraps, and salads that are anything but boring. The magic is in the mix-ins and the sauces—trust me, a little pesto or a drizzle of sriracha mayo can make Monday feel like a celebration.
So, if you’re ready to banish kitchen stress and fill your fridge with colorful, ready-to-go goodness, you’re in the right place. Let’s turn that dreaded “what’s for dinner?” question into the easiest part of your day.
The Roasted Veggie That Started It All
This whole meal prep obsession started, funny enough, with a near-disaster. It was my first year out of college, living in a tiny apartment with a comically small oven. I was determined to be a “real adult” who cooked and packed lunches. My mission: roasted Brussels sprouts. I’d heard they were delicious, but my only experience was with the sad, boiled ones of childhood. I tossed them haphazardly in oil, probably forgot the salt, and shoved them in the oven while I frantically seared a chicken breast.
Twenty minutes later, the smoke alarm was singing its high-pitched opera (a classic kitchen soundtrack, right?), but when I pulled those little charred cabbages out… magic. They were crispy, caramelized, and utterly transformative. That night, I threw them together with the chicken, some leftover quinoa, and a squeeze of lemon. It was a revelation. It wasn’t just “meal prep”; it was a genuinely fantastic dinner I felt proud of. That one pan of accidentally-perfect veggies taught me that with the right technique, simple ingredients can become something extraordinary. It sparked my love for the alchemy of roasting and the freedom that a well-stocked fridge brings. Now, I want to share that feeling with you.
Gathering Your Flavor Foundation
Here’s the beautiful part: this list is more of a guideline. Raid your fridge! This is what I’m using today, but your favorite veggies will work perfectly.
For the Chicken:
- 2 lbs boneless, skinless chicken breasts: The lean protein powerhouse. Chef’s Insight: For even more flavor and juiciness, try chicken thighs! They’re harder to overcook and packed with taste.
- 1 tbsp olive oil: Helps the seasoning stick and promotes a beautiful golden-brown surface.
- 2 cloves garlic, minced: The flavor cornerstone. Substitution Tip: No fresh garlic? ½ teaspoon of garlic powder works in a pinch!
- 1 tsp smoked paprika: This is the secret weapon! It adds a subtle, smoky depth that makes everything taste gourmet. Sweet paprika works too, but you’ll miss that smoky kiss.
- ½ tsp salt & ½ tsp black pepper: The essential enhancers. Don’t be shy here—seasoning is key!
- Juice of 1 lemon: The bright, acidic pop that cuts through the richness and tenderizes the chicken.
For the Veggies (Pick 2-3 of your favorites!):
- 2 cups broccoli florets: My sturdy green go-to. It roasts up with fantastic little crispy edges.
- 2 cups Brussels sprouts, halved: Don’t knock ‘em ‘til you try ‘em roasted! They become nutty, sweet, and crispy.
- 2 medium sweet potatoes, diced: For a touch of natural sweetness and hearty carbs to keep you full. Substitution Tip: Butternut squash or carrots are amazing swaps here.
- 2 tbsp olive oil: To coat the veggies for perfect caramelization.
- Salt & pepper, to taste: Again, season well!
Optional Sauce Ideas (The Real Game-Changers!):
- Pesto: Herby, garlicky, and perfect for a vibrant lift.
- Sriracha mayo: Just mix sriracha and mayo to your desired spice level. Creamy with a kick!
- Hummus: Thin it out with a little water or lemon juice for a creamy, protein-packed drizzle.
- Greek yogurt + lemon + herbs: A quick, healthy, and tangy ranch-like sauce.
- Tahini dressing: Whisk tahini with lemon juice, water, and a pinch of salt. So good!
Let’s Build Your Week of Wins!
Ready? This is where the magic happens. It’s so simple, I promise.
Step 1: Preheat and Prep
Preheat your oven to 400°F (200°C). This hot temperature is crucial for getting that gorgeous caramelization on our veggies and a nice sear on the chicken without drying it out. Line two baking sheets with parchment paper. Trust me, this little step makes cleanup an absolute dream. No scrubbing baked-on bits tonight!
Step 2: Season the Chicken
Place your chicken breasts on one of the prepared baking sheets. Drizzle them with the 1 tablespoon of olive oil and the juice of your lemon. Now, get hands-on! Rub the minced garlic, smoked paprika, salt, and pepper all over every inch of the chicken. Really massage those flavors in. Chef’s Hack: For supremely even cooking, try to pick chicken breasts that are all roughly the same size and thickness. If one end is really thin, you can gently pound it to an even thickness.
Step 3: Toss the Veggies
On your second baking sheet, toss your chosen, chopped veggies with the 2 tablespoons of olive oil and a generous pinch of salt and pepper. My pro tip? Don’t crowd the pan! Give them some space. If they’re all piled on top of each other, they’ll steam instead of roast. We want crispy and caramelized, not soft and soggy. If things look cramped, use a third sheet pan—it’s worth it.
Step 4: Bake to Perfection
Now, pop both sheets into your preheated oven.
- For the Chicken: Bake for 22-25 minutes. The only way to know for sure it’s done? Use a meat thermometer! Insert it into the thickest part of the breast—it should read 165°F (75°C). This prevents the tragedy of dry, overcooked chicken.
- For the Veggies: Bake for 25-30 minutes, but here’s the key: flip them halfway through! This ensures every side gets golden and delicious. They’re done when they’re tender enough to easily pierce with a fork and have those beautiful browned edges.
Step 5: Cool and Assemble
Once out of the oven, let everything cool for about 10 minutes. This allows the chicken juices to redistribute, making it incredibly moist. Then, slice your chicken against the grain into strips or bite-sized chunks. Now, the fun part: assembly! Divide the chicken and veggies evenly among your meal prep containers. Crucial Tip: Keep your sauces separate in little containers or jars. Add them just before you eat to keep everything fresh and prevent sogginess.
How to Serve Your Masterpiece
This is where your weekly variety comes from! Here’s how I love to serve my prepped ingredients:
- The Power Bowl: Start with a base of quinoa, brown rice, or mixed greens. Pile on the chicken and veggies, add a scoop of avocado, a sprinkle of nuts or seeds for crunch, and drown it in your sauce of choice.
- The Hearty Wrap: Warm a whole-wheat or spinach tortilla. Load it up with chicken, veggies, a dollop of hummus or Greek yogurt sauce, and some fresh spinach or arugula. Wrap it up tight and enjoy!
- The “Everything but the Kitchen Sink” Salad: Chop the chicken and veggies up a bit more and toss them into a big bed of greens with cherry tomatoes, cucumber, and any other fresh veggies you have. The roasted elements make it feel so much heartier than a standard salad.
Mix It Up! Endless Flavor Twists
Never get bored! Here are a few of my favorite ways to remix this formula:
- Mediterranean Magic: Season chicken with oregano, lemon zest, and garlic. Use veggies like zucchini, bell peppers, and red onion. Serve with tzatziki or tahini sauce and a side of couscous.
- Fajita Fiesta: Toss chicken and sliced bell peppers & onions with cumin, chili powder, and a pinch of cayenne. Serve in a bowl with cilantro, lime, and a scoop of salsa or guacamole.
- Italian Herb Delight: Use basil, thyme, and rosemary on the chicken. Roast cherry tomatoes and mushrooms with the other veggies. Finish with a generous spoonful of pesto.
- Curry In a Hurry: Coat chicken and veggies (cauliflower and sweet potato are perfect here) in curry powder and turmeric before roasting. Serve with a yogurt-based raita sauce.
Olivia’s Kitchen Confidential
This recipe has evolved so much since that first smoky Brussels sprout incident. I’ve learned that the real key to loving your meal prep is building in variety. That’s why I always make at least two different sauces—it completely changes the personality of the meal! I also used to be a strict chicken breast devotee, but branching out to thighs and even using this same method for firm tofu or chickpeas (for my veggie friends!) has kept things exciting.
One funny story: I once got a little too enthusiastic with the smoked paprika and accidentally turned a batch of chicken a very, very deep red. My husband took one look and said, “What in the world did you season this with, lava rocks?” It was… intense. But still delicious! The moral of the story: don’t be afraid to experiment, but maybe measure your paprika the first time around.
Your Questions, Answered!
Q: My chicken always turns out dry. What am I doing wrong?
A: The most common culprit is overcooking. A meat thermometer is your best friend here—it takes all the guesswork out! Pull the chicken at 165°F. Also, letting it rest for 5-10 minutes after baking is non-negotiable. It allows the juices to settle back into the meat instead of running out all over your cutting board.
Q: Can I freeze these meal prep containers?
A> You can, but with a caveat. The chicken will freeze beautifully for up to 3 months. The veggies, however, can become a bit soft and watery upon thawing because of their high water content. If you plan to freeze, I’d recommend freezing the chicken and veggies separately and maybe opting for sturdier veggies like sweet potatoes or carrots, which hold up better than broccoli or Brussels sprouts.
Q: My veggies are soggy, not crispy. Help!
A> This almost always comes down to overcrowding the pan. If the veggies are too close together, they steam in their own moisture. Give them plenty of room! Use two sheets if you need to. Also, make sure your oven is fully preheated to that nice hot 400°F before they go in.
Q: How do I reheat this without making it rubbery?
A> Gently is the way to go! Reheat in the microwave in 30-second intervals until just warmed through. You can also reheat it in a skillet over medium heat with a tiny splash of water or broth to keep things moist. I often just eat it cold, especially if I’m putting it on a salad!
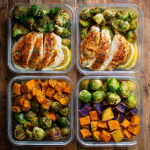
Meal Prep Baked Chicken & Roasted Veggie Mix-Ins
Description
Hey there! Meal prep doesn’t have to be boring. This recipe gives you a delicious, customizable base for bowls, wraps, and salads all week long. With simple ingredients and a few optional sauces, you can enjoy variety without the stress.
Ingredients
For the Chicken:
-
2 lbs boneless, skinless chicken breasts (or thighs for extra flavor)
-
1 tbsp olive oil
-
2 cloves garlic, minced (or ½ tsp garlic powder)
-
1 tsp smoked paprika (or sweet paprika)
-
½ tsp salt & ½ tsp black pepper
-
Juice of 1 lemon
For the Veggies (choose 2-3 favorites):
-
2 cups broccoli florets
-
2 cups Brussels sprouts, halved
-
2 medium sweet potatoes, diced (or butternut squash/carrots)
-
2 tbsp olive oil
-
Salt & pepper, to taste
Optional Sauce Ideas:
-
Pesto
-
Sriracha mayo (mix sriracha + mayo)
-
Hummus thinned with water or lemon
-
Greek yogurt + lemon + herbs
-
Tahini dressing (tahini + lemon + water + pinch of salt)
Instructions
Step 1: Preheat Oven
-
Preheat to 400°F (200°C).
-
Line two baking sheets with parchment paper for easy cleanup.
Step 2: Season the Chicken
-
Place chicken on a sheet pan. Drizzle with olive oil and lemon juice.
-
Rub in garlic, smoked paprika, salt, and pepper.
-
Optional: Pound chicken to even thickness for consistent cooking.
Step 3: Prep the Veggies
-
Toss chosen veggies with olive oil, salt, and pepper.
-
Spread on a separate sheet pan, leaving space between pieces for roasting.
Step 4: Bake
-
Chicken: 22-25 minutes, until internal temperature reaches 165°F (75°C).
-
Veggies: 25-30 minutes, flipping halfway through until golden and tender.
Step 5: Cool and Assemble
-
Let chicken rest 10 minutes, then slice.
-
Divide chicken and veggies into meal prep containers.
-
Keep sauces separate until serving.
Notes
-
Avoid overcrowding veggie pans—steam prevents caramelization.
-
Use a meat thermometer to prevent dry chicken.
-
Let chicken rest 5-10 minutes after baking.
-
Freeze chicken for up to 3 months; veggies freeze best if sturdier (sweet potatoes, carrots).
-
Reheat gently in the microwave or skillet; can be eaten cold on salads.
Nutritional Information*
*This is an estimate for 1 serving (one chicken breast and a mix of veggies), calculated with broccoli and sweet potato. It will vary based on your specific vegetable and sauce choices.
- Calories: ~380
- Protein: 35g
- Carbohydrates: 20g
- Fat: 18g
Prep Time: 15 mins | Cook Time: 25 mins | Total Time: ~40 mins
Final Thoughts: Your Week, Conquered.
And just like that, you’re armed and ready. You’ve got a fridge full of colorful, ready-to-go ingredients and a plan to turn them into a week’s worth of delicious, stress-free meals. Remember, you didn’t just meal prep; you built a flavor foundation. You gave yourself the ultimate gift: the gift of time and peace of mind.
The next time that 6 p.m. hunger panic starts to set in, you’ll simply open your fridge to a world of possibilities. A vibrant bowl, a hearty wrap, a deconstructed salad—it’s all there, waiting for you. You’ve officially made “what’s for dinner?” the easiest question you’ll answer all day.
This method is your blueprint. Use it, love it, and make it your own. Swap the spices, play with new sauces, and discover your own favorite veggie combinations. The goal isn’t perfection; it’s progress. It’s one less thing to worry about so you can focus on what truly matters.




