
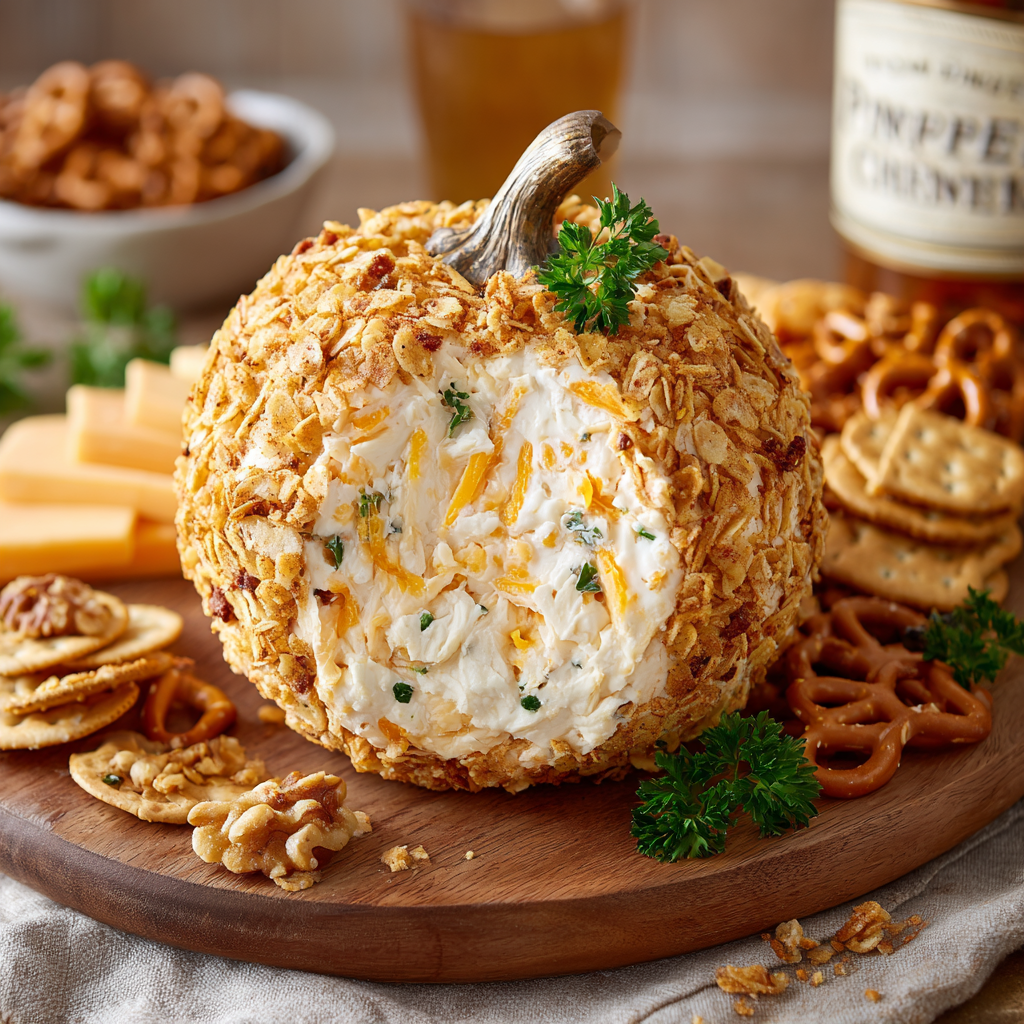
Pumpkin Cheese Ball
Your New Favorite Fall Party Trick: The Pumpkin Cheese Ball
Hey there, friend! Come on in, the kitchen’s warm, I’ve got a chai latte simmering, and I am just buzzing to share this recipe with you. Is there anything better than that first crisp, leafy-smelling day that truly signals the start of fall? It gets me so excited for all things cozy: chunky sweaters, flickering candles, and most importantly, the food that brings everyone together.
If you’ve ever scrolled through Pinterest or foodie Instagram in October and November, you’ve definitely seen them—those absolutely adorable, almost-too-pretty-to-eat pumpkin-shaped cheese balls. They look like they require a culinary degree and hours of painstaking work, right? I’m here to let you in on a little secret: they are one of the EASIEST, most foolproof showstoppers you will ever make.
This isn’t just a cheese ball, it’s a creamy, savory, slightly smoky centerpiece that will have your guests gasping (in the best way!) before they even take a bite. It’s the perfect blend of rich cream cheese, sharp cheddar, and warm spices, all hugged by a crunchy, flavorful coating. It’s the ultimate make-ahead appetizer for your Thanksgiving feast, Halloween party, or any cozy gathering where you want to spread a little edible joy. So, tie on your favorite apron (the messy one with stories to tell), and let’s make some magic!
A Cheese Ball and a Happy Little Accident
This recipe takes me right back to my very first Friendsgiving, years ago. I was so nervous to impress my new friend group, a vibrant mix of artists, writers, and—gulp—actual professional chefs. I wanted to make something that said, “I’m cool and put-together,” but my budget and time said, “I’m a recent grad who owns one mixing bowl.”
I decided on a classic cheese ball, but my nerves got the best of me. I over-softened the cream cheese, and when I went to roll it in the crushed pecans, it was a goopy, melty disaster. In a panic, I scooped the whole mess into some plastic wrap, bundled it up like a burrito, and shoved it in the freezer, praying for a miracle. An hour later, I pulled out a firm, oddly spherical lump. In a moment of pure, autumnal desperation, I grabbed a piece of celery from the fridge, stuck it on top, and used a knife to score some lines down the sides. I arrived at the party, plopped my “Pumpkin Cheese Ball” on the table, and held my breath. It was the first thing to disappear. They raved about it! That happy little accident taught me a huge lesson: cooking isn’t about perfection; it’s about heart, a little creativity, and sharing something delicious with people you love.
Gathering Your Pumpkin Patch: The Ingredients
Here’s the beautiful part: you probably have most of these ingredients in your kitchen right now. This is a simple, humble list that transforms into something spectacular. Let’s break it down:
- 16 oz cream cheese, softened – This is the creamy, tangy base of our cheese ball. Pro Tip: *Really* let it soften to room temperature. This is non-negotiable for a smooth, lump-free mixture! If you forget, you can microwave it for 15-20 seconds, but be careful—you don’t want it melted.
- 2 cups shredded sharp cheddar cheese – The flavor superstar! Sharp cheddar gives a fantastic tang that cuts through the richness of the cream cheese. For a next-level experience, shred your own from a block. Pre-shredded cheese is coated to prevent clumping, which can make your cheese ball less smooth.
- ½ cup sour cream – This is my secret weapon! It adds a wonderful tang and, more importantly, makes the texture incredibly light and spreadable.
- ½ tsp garlic powder – We’re using powder instead of fresh garlic here. Fresh garlic can be too pungent and overpowering in a cold cheese ball, and its flavor can intensify oddly as it sits.
- ½ tsp smoked paprika (plus extra for coating) – This is the flavor game-changer. Smoked paprika adds a warm, subtle smokiness that evokes all those cozy fall feelings. We’ll also use it for that beautiful orange “pumpkin” color later!
- ¼ tsp onion powder – This builds a savory, umami foundation that complements the garlic and paprika perfectly.
- Salt and pepper, to taste – Don’t skip this! Taste your mixture and season it well. The cheeses need a little help to truly sing.
- 1 cup crushed cheese crackers or finely chopped pecans (for coating) – The “skin” of our pumpkin! Crushed cheese crackers (like Cheez-Its or Goldfish) add a salty, cheesy crunch. Finely chopped pecans offer a richer, toastier flavor. You could also use pretzels for a salty crunch!
- 1 pretzel rod or bell pepper stem (for the “pumpkin stem”) – The final touch! A pretzel rod is my go-to for its salty crunch and sturdiness. A small piece of bell pepper stem is a great fresh, edible option.
- Fresh parsley leaves (optional, for garnish) – A few little leaves placed around the base make it look like a pumpkin freshly picked from the vine. So cute!
Let’s Build a Pumpkin: Step-by-Step Instructions
Ready to create your edible masterpiece? It’s so simple. Let’s do this together, step by step.
Step 1: The Creamy Base
In a large mixing bowl, combine your softened cream cheese, shredded cheddar, sour cream, garlic powder, smoked paprika, onion powder, salt, and pepper. Now, here’s my favorite method: use a hand mixer on medium speed for about 1-2 minutes. This ensures everything is perfectly smooth, well-combined, and slightly fluffy. You can absolutely do this by hand with a sturdy spatula and some elbow grease, but the mixer is a guaranteed no-lump hack! Scrape down the sides of the bowl once to make sure no lonely pockets of cream cheese are left behind.
Step 2: Shape and Chill (The Most Important Step!)
Lay a large piece of plastic wrap on your counter. Scoop the entire cheese mixture onto the center of the plastic. This is where we form our pumpkin shape. Bring the edges of the plastic wrap up and over the cheese, twisting the top to encase it completely. Now, gently shape the bundle into a sphere. It doesn’t have to be perfect! Once it’s a generally round shape, pop it into the refrigerator for at least 2 hours, or ideally, overnight. Do not skip this chilling time! This firms up the cheese ball, making it possible to roll in the coating and score the lines without it turning into a goopy mess. Trust me, I learned this the hard way!
Step 3: The Fun Part: Creating the Pumpkin
Once your cheese ball is firm and chilled, unwrap it. Place your coating (crushed crackers or nuts) in a shallow dish or plate. Gently roll the cheese ball in the coating, pressing lightly to make sure it adheres on all sides. Get it fully covered! Now, for the signature pumpkin look. Take 3-4 pieces of kitchen twine or even clean rubber bands and space them evenly around the cheese ball, pressing them gently into the sides to create ridges. Leave these on for just a minute to make an impression, then carefully remove them.
Step 4: The Final Flourish
Take your pretzel rod or bell pepper stem and gently press it into the top center of the cheese ball to create the stem. If you’re using a pretzel rod, you might want to break it to a shorter, stubbier length so it looks more like a stem. For a gorgeous finishing touch, place a few fresh parsley leaves around the base of the stem. And voila! You’ve just created a stunning, conversation-starting appetizer.
How to Serve Your Masterpiece
Place your beautiful pumpkin cheese ball on a serving platter or a cute wooden board. Surround it with an array of dippers so your guests have options! I love offering:
- Classic: Buttery crackers (like Ritz) or water crackers.
- Healthy: Crisp apple slices, carrot sticks, celery, and cucumber rounds.
- Salty/Crunchy: Pretzel chips, pita chips, or even sturdy tortilla chips.
Let it sit at room temperature for about 15-20 minutes before serving. This allows the flavors to bloom and the texture to become perfectly spreadable!
Make It Your Own: Delicious Variations
The beauty of this recipe is its versatility. Feel free to get creative and tailor it to your taste!
- Everything Bagel Twist: Swap the cheddar for 1.5 cups of everything bagel seasoning mixed right into the cheese, and use the remaining ½ cup for the coating. Savory, oniony, and incredible!
- Jalapeño Popper: Add 2-3 tablespoons of finely diced pickled jalapeños and ¼ cup of cooked, crumbled bacon to the mixture. Roll it in crushed bacon bits for the ultimate savory kick.
- Sweet & Savory: Use pepper jack cheese instead of cheddar and mix in ¼ cup of finely diced dried apricots. Roll it in crushed pistachios for a gorgeous color and flavor contrast.
- Festive Cranberry: After the first chill, make an indentation in the top and fill it with a layer of whole-berry cranberry sauce before adding the stem. A stunning Thanksgiving centerpiece!
From My Kitchen to Yours: Chef’s Notes
Over the years, this recipe has become my go-to for pretty much any fall event. It’s evolved from that first freezer-fiasco into something I can make with my eyes closed. One of my favorite memories is making it with my niece, who is now six. She’s in charge of “sprinkling the orange dust” (the paprika) and placing the parsley leaves. Her little face, so serious and proud as she creates her “baby pumpkin,” absolutely melts my heart. It’s a reminder that food is about so much more than eating; it’s about connection and making memories.
Another little hack I’ve picked up: if your cheese ball seems a little soft after its initial chill, don’t panic! Pop it in the freezer for 20-30 minutes to firm it up just enough to handle. It’s all about working with what you’ve got. No kitchen twine? Use uncooked spaghetti noodles to score the lines—they work surprisingly well!
Your Questions, Answered: FAQs & Troubleshooting
Q: Can I make this ahead of time?
A: Absolutely! This is the ultimate make-ahead appetizer. You can prepare the entire cheese ball, complete with coating and stem, wrap it tightly in plastic wrap, and store it in the refrigerator for up to 3 days. The flavors actually get better as they meld!
Q: My cheese ball is too soft to handle. What did I do wrong?
A> The two most common culprits are 1) The cream cheese wasn’t chilled long enough, or 2) The cream cheese was too warm to begin with. If it’s too soft after mixing, just chill the mixture in the bowl for 30 minutes before shaping it into a ball. If it’s too soft after the initial shape, just chill it longer! The freezer is your friend for a quick firm-up.
Q: Can I make a lighter version?
A> You can! Use reduced-fat or Neufchâtel cream cheese and reduced-fat sharp cheddar. The texture might be a *tiny* bit less rich, but the flavor will still be fantastic. I don’t recommend fat-free products, as they don’t set up as well and can alter the texture dramatically.
Q: The coating isn’t sticking! Help!
A> This usually happens if the cheese ball is too cold and hard on the outside. Let it sit on the counter for just 2-3 minutes to “sweat” slightly—this sticky surface will help the coating adhere. You can also very lightly mist the chilled ball with water or brush it with a tiny bit of mayo before rolling.

Pumpkin Cheese Ball
Description
This isn’t just an appetizer—it’s edible art that wows before the first bite. Creamy, smoky, and tangy with just the right crunch, this pumpkin-shaped cheese ball is the ultimate centerpiece for your fall gatherings. Whether you’re hosting a Halloween bash, Friendsgiving, or cozy night in, this make-ahead treat guarantees gasps, smiles, and lots of cracker-dipping action.
Ingredients
-
16 oz cream cheese, softened
-
2 cups sharp cheddar, shredded
-
½ cup sour cream
-
½ tsp garlic powder
-
½ tsp smoked paprika (+ extra for coating)
-
¼ tsp onion powder
-
Salt & pepper, to taste
-
1 cup crushed cheese crackers or finely chopped pecans (for coating)
-
1 pretzel rod or bell pepper stem (for pumpkin stem)
-
Fresh parsley leaves (optional garnish)
Instructions
-
Mix: Beat cream cheese, cheddar, sour cream, garlic powder, paprika, onion powder, salt, and pepper until smooth.
-
Shape & Chill: Scoop mixture onto plastic wrap, form into a ball, and chill at least 2 hours (overnight is best).
-
Coat: Roll chilled ball in crushed crackers or nuts until fully covered.
-
Shape Pumpkin: Use twine (or spaghetti noodles) to gently press ridges around the sides, then remove.
-
Add Stem: Insert pretzel rod or pepper stem on top. Garnish with parsley leaves.
-
Serve: Let sit 15–20 minutes at room temp before serving with crackers, pretzels, or crisp veggies.
Notes
-
Jalapeño Popper: Mix in jalapeños + bacon, coat with bacon bits.
-
Everything Bagel: Swap cheddar for everything bagel seasoning.
-
Sweet & Savory: Use pepper jack + dried apricots, coat with pistachios.
Nutrition
- Calories: 215 cal Per Serving
- Sugar: 1g
- Fat: 18g
- Carbohydrates: 4g
- Fiber: 1g
- Protein: 8g
Nutritional Information*
*This is an approximate calculation based on the specific ingredients listed and can vary greatly based on brands and substitutions used.
Prep time: 15 minutes | Chill time: 2 hours | Total time: 2 hours 15 minutes | Servings: 12
Per serving (approx.): Calories: 215 | Protein: 8g | Fat: 18g | Carbohydrates: 4g | Fiber: <1g | Sugar: 1g
Well, that’s it, my friend! I hope you feel inspired and empowered to whip up this adorable and incredibly delicious pumpkin cheese ball for your next gathering. It’s more than just a recipe; it’s a little bundle of joy meant to be shared. If you make it, I’d be absolutely thrilled to see your creation! Tag me on Instagram @OliviasCozyKitchen or leave a comment below. Happy cooking!
With love and a full heart (and a slightly messy apron),
Final Thoughts: Your New Party Trick Awaits
And there you have it! Your very own, impossibly charming pumpkin cheese ball. This recipe is proof that you don’t need fancy skills or complicated ingredients to create something truly magical and memorable. It’s a dish that embodies the very best of the season: warmth, creativity, and the joy of sharing.
So the next time you’re headed to a gathering, don’t just bring a dish—bring a conversation piece. Bring a centerpiece that whispers of crisp autumn air and cozy kitchens. Bring the effortless wow-factor.
Whip this up, share it with your favorite people, and watch it disappear. I have a feeling this little pumpkin will become a cherished part of your fall traditions, just as it has in mine.
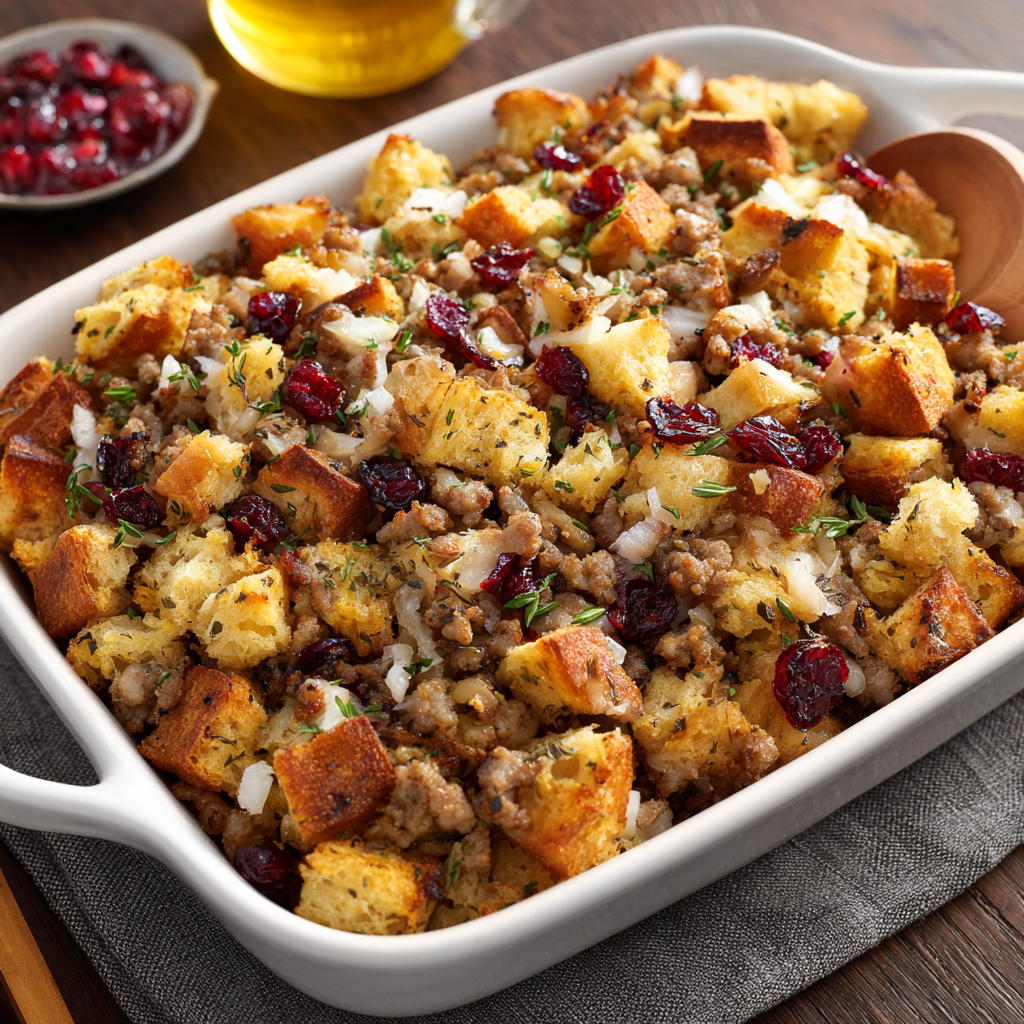
Savory Turkey Cranberry Stuffing Bake
Your New Go-To Holiday Comfort Food: Savory Turkey Cranberry Stuffing Bake
Hey there, friend! Come on in, grab an apron, and let’s get something wonderfully fragrant bubbling away in the oven. Is there anything that says “welcome home” quite like the smell of herbs, roasting turkey, and sweet cranberries wafting through the house? I think not. This right here—this Savory Turkey Cranberry Stuffing Bake—is the ultimate hug in a baking dish. It’s the star of our holiday table, the hero of our cozy Sunday suppers, and my absolute favorite dish to bring to a potluck because it never, ever fails to disappear.
If you’re dreaming of all the iconic flavors of a classic Thanksgiving feast but maybe don’t want to roast a whole bird and coordinate a dozen sides, this recipe is your dream come true. We’re talking juicy ground turkey, perfectly seasoned and browned, tossed with tender, herb-soaked bread cubes, pops of tart cranberry, and a golden, slightly crispy top that makes you go back for *just one more spoonful*. It’s hearty, satisfying, and built for sharing. Best of all? It’s incredibly straightforward. No fancy chef skills required—just a big bowl, a willing heart, and about an hour. So, preheat that oven; we’re about to make some magic.
The Stuffing That Stole My Heart (And a Few Thanksgiving Arguments)
This recipe has roots, let me tell you. It all started one slightly chaotic Thanksgiving at my Grandma Eleanor’s house. The turkey was perfect, the mashed potatoes were creamy, but the stuffing… oh, the stuffing was a point of serious, loving debate. My uncle was Team “Stuffing-In-The-Bird,” my dad was fiercely loyal to his family’s oyster stuffing, and my aunt had just gone vegan. It was a culinary standoff!
I decided to play peacemaker (and, okay, maybe show off a little). I created this bake as a compromise—a delicious, standalone dish that celebrated all the classic flavors but could be easily customized for everyone. It was a hit! The cranberries won over my tart-loving sister, the ground turkey made it feel like a main course, and baking it separately meant everyone got that coveted crispy top. It resolved the great stuffing debate of 2012 and has been a non-negotiable part of our holiday spread ever since. It’s more than a recipe; it’s a memory of bringing my crazy, wonderful family together over one irresistible dish.
Gathering Your Cast of Characters
Here’s everything you’ll need to create this masterpiece. I’ve included my favorite twists and substitutions because I believe every recipe should be a starting point for your own kitchen adventure!
- 2 lbs ground turkey: I prefer a 93/7 blend for a great balance of flavor without being too greasy. Feel free to use ground chicken, pork, or even a plant-based ground meat alternative for a fantastic vegetarian version!
- 8 cups dried bread cubes: This is our foundation! My chef’s twist is to use a mix of white and sourdough bread. The sourdough adds a wonderful tang and chewy texture that really elevates the whole dish. Stale bread is perfect here—it soaks up the broth like a dream.
- 1 cup dried cranberries: They provide little bursts of sweet and tart goodness. If you’re not a cranberry fan, chopped dried apricots or cherries are a fabulous swap.
- 1 cup finely chopped celery & 1 cup minced onion: The classic aromatic base, or “soffritto,” that builds a deep, savory flavor foundation. Don’t skip these!
- 1 cup chicken broth: The liquid that brings it all together and creates that moist, fluffy texture. Use a good-quality broth for the best flavor. My secret twist? Add ½ cup apple cider to the broth. It adds a subtle, sweet autumnal note that pairs magically with the turkey and cranberries.
- ½ cup unsalted butter, melted: Butter = flavor and richness. For a dairy-free option, a high-quality olive oil or vegan butter works beautifully.
- 2 large eggs, beaten: Our binding agent! They help hold the stuffing together so you can slice beautiful, clean squares.
- 2 tsp dried sage, ½ tsp dried thyme, 1 tsp garlic powder, ½ tsp salt, ½ tsp black pepper: The dream team of holiday herbs and spices. If you have fresh sage, absolutely use it! Triple the amount (so about 2 tbsp chopped fresh sage) for an incredible aromatic punch.
- ½ cup chopped pecans or walnuts (optional twist): I highly recommend this for a wonderful crunch and nutty depth. Toast them in a dry pan for a few minutes first to really maximize their flavor.
- ½ cup shredded Gruyère or mozzarella cheese (optional): Because everything is better with a little melted cheese on top, right? Gruyère is my top pick for its nutty, sophisticated flavor.
Let’s Build This Flavorful Bake, Step-by-Step!
Ready to create some kitchen magic? Follow these steps, and you’ll have a perfect stuffing bake in no time. I’ve sprinkled in all my best tips and hacks along the way!
Step 1: Preheat your oven to 375°F (190°C). This is our target temperature for golden-brown perfection. Take a 9×13-inch baking dish (or two 8×8 dishes if you want to freeze one!) and give it a light coating of butter, oil, or non-stick spray. Chef’s Hack: If you’re using cheese on top, a light spray will prevent any stubborn sticking and make cleanup a breeze.
Step 2: In a large skillet over medium heat, cook your ground turkey. Break it up with a wooden spoon as it cooks until it’s no longer pink. This usually takes about 8-10 minutes. If there’s a lot of excess liquid, you can drain it, but a little bit is okay—it adds flavor! Chef’s Tip: Season the turkey with a pinch of salt and pepper right in the pan. We’re building layers of flavor from the very beginning.
Step 3: In a very large mixing bowl—I’m talking the biggest one you own—combine the dried bread cubes, dried cranberries, chopped celery, minced onion, and the cooked turkey. If you’re using those glorious toasted nuts, add them in now! Toss everything together gently with your hands. This is the fun part—seeing all those beautiful colors and textures come together!
Step 4: In a separate medium bowl, whisk together your wet ingredients and seasonings. That’s the chicken broth, apple cider (if using), melted butter, beaten eggs, dried sage, thyme, garlic powder, salt, and pepper. Whisk it until it’s completely uniform. Chef’s Hack: Taste your broth mixture before you pour it! It should taste well-seasoned and delicious on its own. This is your last chance to adjust the salt or herbs.
Step 5: Now, pour the liquid mixture evenly over the bread and turkey mixture in the large bowl. Using a large spoon or, again, those clean hands, toss and gently fold everything together. You want every single bread cube to get kissed by that flavorful liquid. Let it sit for a minute or two to allow the bread to fully absorb the broth.
Step 6: Carefully transfer the moistened stuffing mixture into your prepared baking dish. Press it down gently into an even layer. If you’re adding cheese, now’s the time to sprinkle it generously over the top for that glorious, melty, golden crust.
Step 7: Cover the baking dish tightly with aluminum foil. This is crucial! It traps the steam and cooks the stuffing through without drying out the top. Bake covered for 25 minutes.
Step 8: After 25 minutes, remove the foil (hello, beautiful bake!). Return it to the oven, uncovered, for another 15-20 minutes. You’re waiting for that top to turn a gorgeous golden brown and for the edges to get a little crispy.
Step 9: This might be the hardest step: let it rest! Take the baking dish out of the oven and let it sit on the stovetop for at least 5 minutes. This allows the eggs to fully set, making it easier to cut into neat squares. It also lets the flavors settle and mingle one last time. Then, dig in!
How to Serve This Show-Stopping Dish
Presentation is part of the joy! I love serving this bake right from the dish at the table—it’s rustic and inviting. Use a large spoon or a square-serving spatula to plate it. For a truly festive touch, garnish with a few extra fresh cranberries and a sprinkle of chopped parsley or fresh sage leaves. It’s a complete meal on its own, but it also plays wonderfully with others! A simple arugula salad with a lemony vinaigrette cuts through the richness perfectly, and a dollop of garlicky mashed cauliflower or roasted sweet potatoes makes it a true feast.
Make It Your Own: Delicious Twists & Swaps
This recipe is a fantastic canvas for your creativity. Here are a few of my favorite ways to mix it up:
- Breakfast Stuffing Bake: Swap the ground turkey for cooked, crumbled breakfast sausage. Add a cup of shredded sharp cheddar cheese into the mix, and serve it for a holiday brunch with a side of scrambled eggs.
- Apple & sausage: Replace the turkey with mild Italian sausage and swap the cranberries for 1 cup of finely chopped, peeled apples. The sweet and savory combo is incredible.
- Gluten-Free & Vegan: Easily done! Use your favorite gluten-free bread cubes and a flax egg (1 tbsp ground flaxseed mixed with 3 tbsp water, let sit 5 mins) instead of regular eggs. Swap the turkey for lentils and use vegetable broth and vegan butter.
- Super Seedy & Nutty: Add ¼ cup each of sunflower seeds and pumpkin seeds (pepitas) for an extra layer of texture, protein, and crunch.
Chef’s Notes: From My Messy Apron to Yours
This recipe has evolved so much over the years. The first time I made it, I was so worried about it being dry that I overcompensated with broth and ended up with a delicious, but slightly soupy, stuffing situation! The key is in the bread—truly dry, stale bread makes all the difference. If your bread is too fresh, spread the cubes on a baking sheet and toast them in that 375°F oven for 10 minutes first to dry them out.
I also learned that the “let it rest” rule is not a suggestion. I’ve burned my tongue more than once in my eagerness to taste it, and it truly does hold together so much better after a short rest. This dish also freezes like a dream. Assemble it completely, cover tightly, and freeze before baking. When you’re ready, bake it from frozen, adding about 15-20 extra minutes to the covered baking time. It’s a lifesaver during the busy holiday season!
Your Stuffing Bake Questions, Answered!
Q: My stuffing turned out a bit dry. What happened?
A: The most common culprit is the bread! If your bread cubes weren’t sufficiently dry or stale, they might not have absorbed all the liquid properly. Next time, make sure your bread is very dry. Also, all ovens vary, so if yours runs hot, you may have baked it a minute too long. The foil-off time is key—just look for that golden brown color, not dark brown. You can always add a touch more broth to the mixture before baking if it seems too dry during mixing.
Q: Can I make this ahead of time?
A> Absolutely! This is a fantastic make-ahead dish. You have two options: 1) Assemble the entire bake, cover, and refrigerate for up to 24 hours before baking. You may need to add 5-10 minutes to the baking time since it’s going in cold. Or 2) Bake it completely, let it cool, cover, and refrigerate. Reheat individual portions in the microwave or the entire dish, covered with foil, in a 350°F oven until warmed through.
Q: The bottom seems soggy. How can I prevent that?
A> A soggy bottom usually means there was a bit too much liquid for the bread to absorb. Ensure your bread is very dry. Also, make sure your skillet-cooked turkey has had a chance to cool slightly and isn’t bringing a lot of extra hot liquid into the mix. Finally, the right size pan is important—a 9×13-inch dish is perfect. If your dish is too small, the stuffing will be too deep and steam instead of bake, leading to sogginess.
Q: Is it necessary to use eggs?
A> The eggs act as a binder to help the stuffing hold its shape when sliced. If you need to omit them, the flavor will still be great, but the texture will be more loose and crumbly (still delicious!). For an egg-free binder, you can try a “flax egg” as mentioned in the variations.
Savory Turkey Cranberry Stuffing Bake
- Total Time: 1 hour 5 minutes
Description
Nothing says holiday comfort like this bubbling, golden bake. It’s everything you love about Thanksgiving—juicy turkey, herb-soaked bread, and tart-sweet cranberries—all baked into one cozy dish. With its crispy top and tender, flavorful middle, this recipe is the definition of a “hug in a casserole dish.” Whether it’s the star of your holiday table or a make-ahead lifesaver for busy nights, this bake brings warmth, nostalgia, and second helpings every time.
Ingredients
-
2 lbs ground turkey (93/7 blend works best)
-
8 cups dried bread cubes (mix of white & sourdough)
-
1 cup dried cranberries (or dried apricots/cherries)
-
1 cup celery, finely chopped
-
1 cup onion, minced
-
1 cup chicken broth + ½ cup apple cider (optional, for depth)
-
½ cup unsalted butter, melted
-
2 large eggs, beaten
-
2 tsp dried sage
-
½ tsp dried thyme
-
1 tsp garlic powder
-
½ tsp salt
-
½ tsp black pepper
-
½ cup toasted pecans or walnuts (optional)
-
½ cup shredded Gruyère or mozzarella (optional topping)
Instructions
-
Preheat oven to 375°F (190°C). Grease a 9×13-inch dish.
-
Cook turkey in skillet 8–10 minutes until browned. Season lightly.
-
Combine bread cubes, cranberries, celery, onion, turkey, and nuts (if using) in a large bowl.
-
Whisk broth, cider, butter, eggs, and seasonings. Taste and adjust.
-
Pour liquid mix over bread mixture; toss until evenly moistened. Rest 2 minutes.
-
Transfer to dish. Press gently into an even layer. Top with cheese if desired.
-
Bake covered with foil for 25 minutes.
-
Uncover & bake another 15–20 minutes until golden brown and slightly crisp.
-
Rest 5 minutes before serving for best texture.
Notes
-
Use sausage + apples for a sweet-savory variation.
-
Make it vegetarian with lentils, veggie broth, and flax “eggs.”
-
Assemble ahead and refrigerate—bake right before serving.
-
Dry your bread cubes well for the perfect fluffy (not soggy!) texture.
- Prep Time: 20 minutes
- Cook Time: 45 minutes
Nutritional Information*
Prep time: 20 minutes | Cook time: 45 minutes | Total time: 1 hour 5 minutes | Servings: 14
*This is an estimate for 1 serving, calculated without optional nuts and cheese.
- Calories: 310
- Protein: 17g
- Fat: 13g
- Carbohydrates: 32g
- Fiber: 3g
- Sugar: 8g
I truly hope this recipe becomes a cherished favorite in your home, just like it is in mine. Happy cooking!
With love and a full oven,
Final Thoughts: More Than Just a Meal
So there you have it—my heartwarming, family-tested, argument-solving Savory Turkey Cranberry Stuffing Bake. It’s more than just a list of ingredients and steps; it’s an invitation to create your own cozy moments and new traditions.
Whether you’re navigating dietary needs, craving the taste of Thanksgiving without the fuss, or simply needing a reliable, crowd-pleasing dish to share, this bake is your answer. It’s forgiving, flexible, and full of the kind of comfort that turns a simple supper into a special occasion.
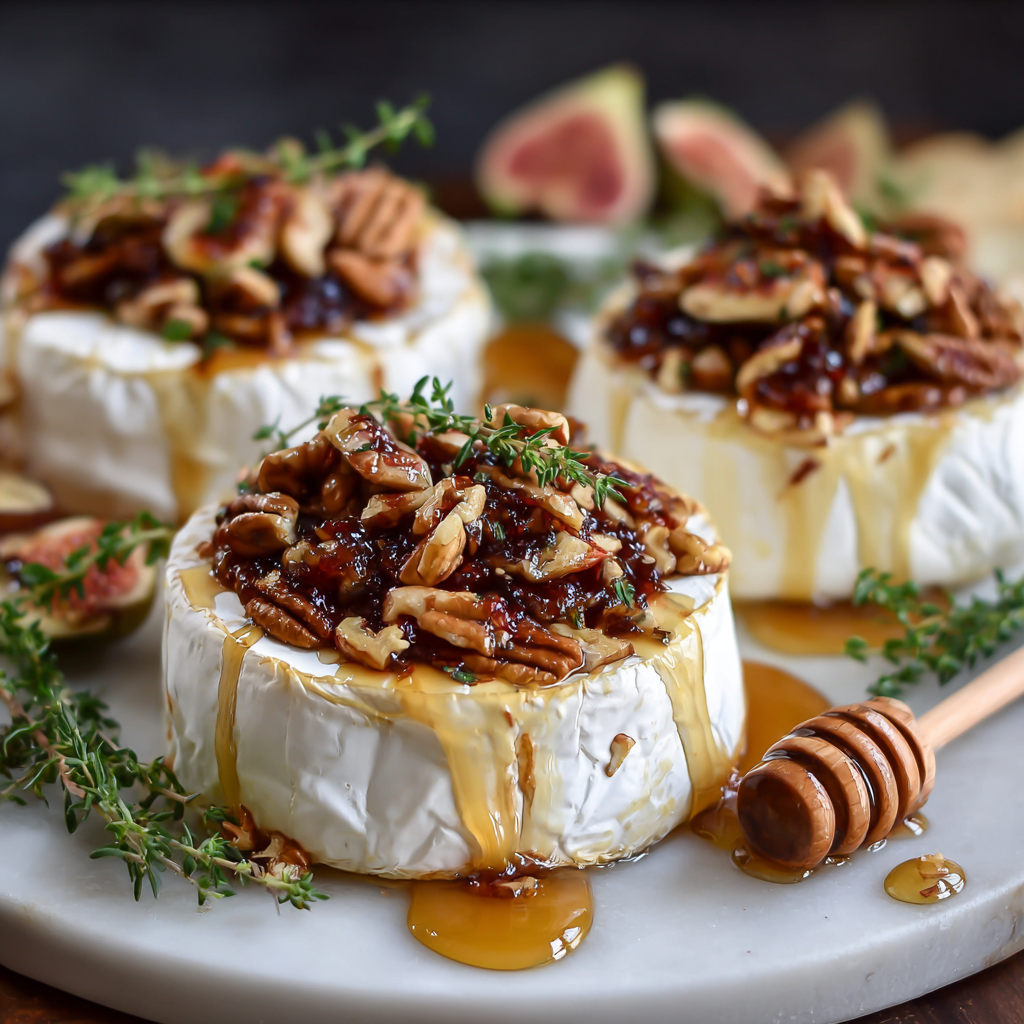
Baked Brie with Fig Jam and Pecans
Your New Go-To Party Starter: Baked Brie with Fig Jam & Pecans
Hey there, friend! Come on in, grab an apron, and let’s get something bubbling in the oven. Is there anything better than that moment when your doorbell starts ringing, your home fills with the warm buzz of conversation, and you pull a show-stopping appetizer out of the oven that makes everyone’s eyes light up? If you’re nodding along, then you and I are kindred spirits. I live for those little moments of culinary magic—the ones that look like you spent all day but are secretly a breeze to pull together.
Today, we’re making my absolute, hands-down, never-fail crowd-pleaser: Baked Brie with Fig Jam and Pecans. Imagine this: a wheel of rich, creamy brie, warmed until it’s just about to ooze out onto the plate. On top, a glossy layer of sweet, jammy fig, a generous crunch of buttery toasted pecans, and a final drizzle of golden honey. It’s a symphony of textures and flavors—salty, sweet, creamy, crunchy—all in one unforgettable bite. The best part? It takes less than 30 minutes from fridge to table. This isn’t just an appetizer; it’s a conversation starter, a centerpiece, and a guaranteed way to make your guests feel incredibly loved. So, let’s preheat that oven and create some magic together!
A Little Story Behind the Cheese
This recipe takes me right back to my first-ever “grown-up” holiday party I hosted. I was fresh out of college, living in my first apartment that was about the size of a postage stamp, and I was determined to throw a sophisticated soiree. I spent hours stressing over a complicated menu, and let’s just say… things were not going well. A gravy disaster was imminent, and my timeline was completely out the window. In a panic, I remembered my mom always saying, “When in doubt, add cheese.”
I raced to the store, grabbed a wheel of brie, the only fancy jam I could find (fig!), and some nuts. I threw it all together, crossed my fingers, and popped it in the oven. That warm, cheesy, sweet aroma instantly filled my tiny kitchen and calmed my nerves. When I brought it out, still bubbling, the entire party gravitated towards it. It was the first thing to disappear. That humble baked brie saved the night and taught me a priceless lesson: the best recipes aren’t about being the most complex; they’re about being the most shared. It’s been my secret weapon ever since.
Gathering Your Co-Conspirators: The Ingredients
Part of the beauty of this dish is its simplicity. You only need a handful of high-quality ingredients to create something truly spectacular. I’m doubling the recipe here because, trust me, you’ll want plenty to go around!
- 2 wheels of Brie cheese (8–10 oz each): This is our star! Don’t stress about removing the rind; it’s completely edible and helps hold the beautiful, melty cheese together. Look for a wheel that feels firm but gives slightly when pressed. Chef’s Insight: If you’re feeling adventurous, a triple-cream brie will be even more decadently gooey!
- ½ cup fig jam: This is the sweet, jammy heart of the topping. It provides a beautiful caramelized flavor that pairs perfectly with the creamy cheese. Substitution Tip: No fig jam? Apricot preserves, cherry jam, or even a good-quality raspberry jam work wonderfully here.
- 2 tbsp orange marmalade (The Secret Twist!): This is my not-so-secret weapon! Mixing a little orange marmalade into the fig jam adds a bright, citrusy kick that cuts through the richness and makes the flavor profile sing. Chef’s Insight: If you don’t have marmalade, a teaspoon of fresh orange zest will do the trick!
- ½ cup chopped pecans or walnuts, toasted: We’re adding crucial crunch and a nutty, toasty depth. Pro-Tip: Please, please toast your nuts! It takes an extra five minutes but unlocks their full flavor. Just toss them in a dry pan over medium heat for 3-5 minutes until fragrant. Walnuts are a fantastic alternative if that’s what you have on hand.
- 2 tbsp honey (optional): For a final touch of natural sweetness and a gorgeous glossy finish. A good drizzle right at the end takes it over the top. Substitution Tip: Maple syrup is a delicious vegan-friendly alternative.
- 2 tsp fresh thyme leaves: The herbal, slightly earthy note from fresh thyme balances all the sweetness beautifully. Substitution Tip: Fresh rosemary, finely chopped, is a powerful and festive alternative. A little goes a long way!
- Crackers, sliced baguette, or apple/pear slices for serving: Your delicious vehicles! I love offering a variety for different textures and tastes. The crisp, fresh fruit is a lovely, refreshing contrast to the warm cheese.
Let’s Get Cooking: The Step-by-Step Guide
Okay, team! Let’s transform these simple ingredients into a masterpiece. Follow these steps, and you’ll have a perfect baked brie every single time.
Step 1: Preheat and Prep
Preheat your oven to 375°F (190°C). This is the sweet spot—hot enough to get the brie wonderfully melty quickly without risking the rind bursting prematurely. While it’s heating, line a small baking sheet with parchment paper. This isn’t just for easy cleanup (though that’s a huge bonus!); it also makes transferring the delicate, molten cheese to a serving platter infinitely easier. Little Chef Hack: If you don’t have parchment, you can bake the brie directly in a small, pretty oven-safe dish or cast-iron skillet. It goes right from oven to table!
Step 2: Position the Stars of the Show
Place both wheels of brie on the prepared baking sheet, leaving a little space between them. You can place them rind-side down, which is standard, or for an extra-gooey experience, you can carefully slice the top rind off one of the wheels before baking. This creates a more direct cheesy surface for the toppings to sink into. I usually leave it on for ease and structure!
Step 3: Create the Flavor Topping
In a small bowl, mix together your ½ cup of fig jam and the 2 tablespoons of orange marmalade. Give it a good stir until they’re combined. This is where the magic starts! Taste it—isn’t that citrusy brightness amazing? Now, take this mixture and spread it evenly over the top of each brie wheel. Get it all the way to the edges. Don’t be shy!
Step 4: Add the Crunch
Generously sprinkle your toasted, chopped pecans over the jam layer, pressing down gently so they adhere. The toasting is key here—it makes them extra fragrant and prevents them from getting soggy in the oven. Now, if you’re using it, drizzle the honey over everything. This will caramelize slightly in the heat and create the most beautiful glaze.
Step 5: Bake to Bubbly Perfection
Slide that beautiful creation into your preheated oven and bake for 12-15 minutes. You’re looking for the cheese to be visibly soft when you gently press the side with a spoon, and the jam should be bubbling actively around the edges. Watch closely near the end! All ovens vary. You want it soft and gooey, not a complete puddle. It will continue to soften for a minute after it comes out.
Step 6: The Grand Finale
Carefully remove the baking sheet from the oven. It will be hot and liquidy—this is a good sign! Immediately sprinkle the fresh thyme leaves over the top. The residual heat will wake up the herbs and make them incredibly aromatic. Let it sit for just 2-3 minutes to settle. Then, using a large spatula, gently transfer each wheel to your serving platter. Pro-Tip: Serve it on a platter with a slight lip to catch any delicious, escaped cheese or jam!
Step 7: Serve Immediately!
Gather your guests and dive in! This is a dish that waits for no one. Place your crackers, baguette slices, and fresh fruit around the brie and watch it disappear. The joy is in that first scoop through the warm cheese, gathering jam and nuts onto a crispy cracker. Pure bliss.
How to Serve Your Masterpiece
Presentation is part of the fun! I love using a beautiful wooden board or a sleek slate platter. Arrange your brie wheels side-by-side. Pile an assortment of crackers and breads around them—I like a mix of plain water crackers, seeded crisps, and thin, toasted baguette slices. Then, add a handful of fresh, thin apple and pear slices (a quick squeeze of lemon juice on them prevents browning) for a fresh, crisp option. Finally, place a few small cheese knives or spreaders nearby so people can dig in. It’s a feast for the eyes before it even hits the taste buds!
Mix It Up! Delicious Variations
The fun doesn’t stop here! This recipe is a perfect canvas for your creativity. Here are a few of my favorite twists:
- Savory & Smoky: Swap the fig jam for whole-grain mustard and top with cooked, crumbled bacon and chopped chives. Unbelievably good!
- Festive Cranberry: Use cranberry sauce (the whole-berry kind) instead of fig jam, and top with pistachios and a drizzle of balsamic glaze for a holiday showstopper.
- Spiced Pear: Sauté thin pear slices with a tablespoon of butter and a pinch of cinnamon until soft. Use this instead of jam and top with candied pecans.
- Everything Bagel: For a seriously savory take, top the brie with everything bagel seasoning and a drizzle of garlic-infused olive oil. Serve with pretzel crisps!
- Vegan-Friendly: Use a high-quality vegan brie alternative (they’re getting so good!), maple syrup instead of honey, and ensure your jam is vegan.
From My Kitchen to Yours: Chef’s Notes
This recipe has evolved so much since that first panicked party! I’ve learned a few things along the way. Once, in a fit of enthusiasm, I decided to wrap one of the wheels in puff pastry before adding the toppings. It was glorious, but it also turned into a cheese volcano that erupted all over my oven. Delicious, but a mess! So now I stick to the simple, elegant open-faced method. It’s foolproof.
Another time, I didn’t have quite enough fig jam, so I stretched it with the orange marmalade, and it was a happy accident that became a permanent part of the recipe. That’s the beauty of cooking—sometimes the best ideas come from what you have in the fridge. Don’t be afraid to play and make it your own. This brie has been at my table for birthdays, book clubs, random Tuesdays, and even a “I-need-cheese-after-that-day” solo treat. It’s a little bite of joy, and I’m so excited to share it with you.
Your Questions, Answered!
Q: Can I make this ahead of time?
A: You can do some prep! You can toast the nuts and mix the jam and marmalade up to two days ahead. Keep them stored separately in the fridge. Bring the jam mix to room temperature before assembling. I highly recommend assembling and baking the brie right before serving for the best texture and that incredible “wow” factor.
Q: My brie didn’t get very melty. What happened?
A: This usually means it needed a few more minutes in the oven. Oven temperatures can vary. Next time, give it a gentle poke with your finger (carefully!) or the back of a spoon. If it doesn’t feel very soft and jiggly overall, pop it back in for 3-5 minute increments. Also, ensure your brie is at room temperature before baking—take it out of the fridge 30-60 minutes beforehand for more even melting.
Q: The rind is tough to cut through when serving. Any tips?
A: The rind is edible but can be sturdy. The key is to use a good, sharp cheese knife or a small, sharp knife to make the initial cut through the rind. Once that’s done, the soft cheese should scoop out easily. You can also pre-score the top rind in a cross-hatch pattern before adding toppings if you like, which makes it easier for guests to break through.
Q: Can I use a different type of cheese?
A: Brie is ideal because of its creamy, meltable texture and mild edible rind. Camembert is a direct substitute and works exactly the same way! I wouldn’t recommend a harder cheese like cheddar or a blue cheese for this specific method, as they won’t melt the same way.
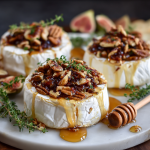
Baked Brie with Fig Jam and Pecans
- Total Time: 25 mins
Description
Looking for the appetizer that makes people gather around the table before you even call them? This Baked Brie with Fig Jam & Pecans is your golden ticket. Warm, creamy brie topped with glossy fig jam, crunchy toasted pecans, a hint of citrus, and a drizzle of honey—it’s indulgence made simple. From fridge to table in under 30 minutes, it’s the party starter you’ll come back to again and again.
Ingredients
-
2 wheels brie cheese (8–10 oz each)
-
½ cup fig jam
-
2 tbsp orange marmalade (or 1 tsp orange zest)
-
½ cup chopped pecans or walnuts, toasted
-
2 tbsp honey (optional)
-
2 tsp fresh thyme leaves (or rosemary)
-
Crackers, sliced baguette, or apple/pear slices for serving
Instructions
-
Preheat oven to 375°F (190°C). Line a baking sheet with parchment.
-
Place brie wheels on sheet. (Optional: slice off the top rind for extra gooeyness.)
-
Mix topping: Stir together fig jam and orange marmalade. Spread evenly over brie.
-
Add crunch: Sprinkle toasted pecans on top. Drizzle with honey if using.
-
Bake for 12–15 minutes, until cheese is soft and jam is bubbling.
-
Finish with fresh thyme. Rest 2–3 minutes, then transfer carefully to a platter.
-
Serve hot with crackers, bread, or fruit slices.
Notes
-
Try cranberry sauce + pistachios for a festive holiday spin.
-
Use Camembert as a substitute for brie.
-
For a savory option, swap jam for mustard and add bacon & chives.
- Prep Time: 10 minutes
- Cook Time: 15 minutes
Nutritional Information*
*Please note: This is an estimated nutritional breakdown for one serving (based on 16 servings) and should be considered an approximation, as ingredient brands can vary significantly.
- Calories: 220
- Protein: 9g
- Fat: 15g
- Carbohydrates: 12g
- Fiber: 1g
- Sugar: 8g
Prep time: 10 minutes | Cook time: 15 minutes | Total time: 25 minutes | Servings: 16
Save This Recipe For Later!
If you loved this recipe (and I know you will!), be sure to save it to your favorite Pinterest board so you can easily find it for your next gathering. It’s the perfect pin to keep your party planning inspired!
Final Thoughts: More Than Just an Appetizer
So there you have it—your new secret weapon for effortless, unforgettable entertaining. This Baked Brie with Fig Jam and Pecans is more than just a recipe; it’s a reminder that the food we share is about connection, not perfection. It’s about the warm, gooey, joyful moments we create around the table.
You don’t need a gourmet kitchen or a chef’s expertise to make your guests feel special. You just need a wheel of cheese, a few pantry staples, and the desire to share something made with love. This dish proves that the most impressive creations are often the simplest.
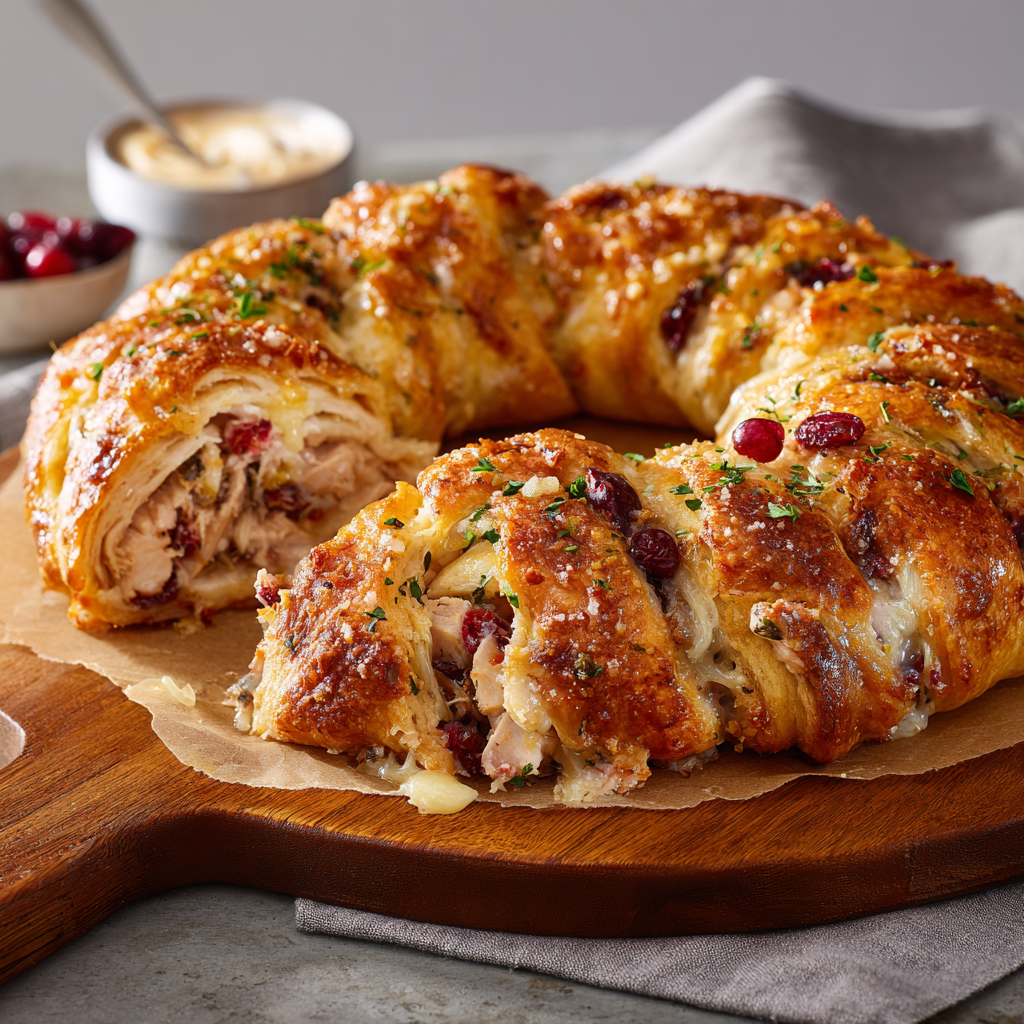
Turkey Cranberry Crescent Ring
Your New Go-To Holiday Showstopper: The Turkey Cranberry Crescent Ring
Hey there, friend! Olivia here, waving from a kitchen that currently smells like heaven—buttery pastry, savory herbs, and that sweet-tart cranberry scent that just screams celebration. If you’re looking for a recipe that’s equal parts stunning, delicious, and surprisingly easy to pull off, you’ve absolutely come to the right place. Today, we’re making my legendary Turkey Cranberry Crescent Ring, and trust me, this isn’t just a recipe; it’s a guaranteed crowd-pleaser, a conversation starter, and the answer to your “what do I do with all that leftover turkey?” dilemma.
Picture this: flaky, golden-brown crescent dough, woven into a beautiful wreath, hiding a heart of tender, seasoned turkey, melty cheese, and a glorious burst of tangy cranberry. It’s warm, comforting, and feels incredibly fancy without any of the fuss. I’ve doubled the recipe here because one ring is never enough—this version makes two, perfect for feeding a hungry crowd or ensuring you have plenty for seconds (and maybe a sneaky midnight snack). So, tie on your favorite apron, put on some festive tunes, and let’s create some magic together. This is the kind of cozy, homemade dish that turns a simple meal into a memory.
A Ring Full of Memories
This recipe always takes me right back to my first “hosting” attempt for my now-husband’s family. I was a ball of nerves, wanting everything to be perfect. The turkey was dry, the gravy was lumpy… it was a bit of a kitchen comedy. But then, I remembered this crescent ring concept my mom used to make with chicken salad. In a moment of “what have I got to lose?” inspiration, I threw together our leftover turkey with cranberry sauce from a jar, some cheese, and that trusty tube of crescent rolls. I arranged it into a ring, crossed my fingers, and popped it in the oven.
The moment I brought it to the table, the “oohs” and “aahs” started. It was golden, puffed, and beautiful. That first bite—the flaky crust giving way to the savory-sweet filling—saved the day. It’s been our mandatory day-after-Thanksgiving tradition ever since. It’s a reminder that the best dishes aren’t about perfection; they’re about joy, creativity, and sharing something delicious with the people you love.
Gathering Your Ingredients (Let’s Chat About Them!)
Here’s everything you’ll need for our double-batch of deliciousness. Don’t just think of this as a shopping list; think of it as your flavor roadmap! I’ve included all my favorite little tips and swaps to make this recipe truly your own.
- 4 packages (8 oz each) refrigerated crescent roll dough: The hero of our show! This is our shortcut to a gorgeous, flaky crust without making pastry from scratch. Keep it chilled until the very last second for the easiest handling.
- 4 cups cooked turkey, shredded or chopped: This is the perfect way to use up holiday leftovers! A rotisserie chicken works beautifully here, too, if that’s what you have.
- 1 cup cranberry sauce: I love the tangy sweetness it brings. Chef’s Twist: For a next-level flavor, try using ½ cup cranberry sauce and ½ cup orange marmalade. The citrus kick is incredible!
- 2 cups shredded mozzarella or Swiss cheese: Mozzarella gives you that fantastic stretch, while Swiss adds a lovely nutty flavor. Chef’s Upgrade: If you’re feeling fancy, use Gruyère. Its rich, creamy, and slightly salty profile is absolute perfection here.
- ½ cup mayonnaise or cream cheese: This is our binding agent! It adds creaminess and richness, ensuring the filling isn’t dry. Mayo will give you a more savory note, while cream cheese makes it extra luscious and tangy.
- 2 tsp Dijon mustard: Don’t skip this! It’s not for heat, but for depth of flavor. It cuts through the richness and adds a subtle complexity that makes the whole dish pop.
- 1 tsp garlic powder, 1 tsp salt, ½ tsp black pepper: Our simple but essential seasoning trio. Garlic powder distributes flavor more evenly than fresh garlic here. Always taste your filling and adjust the salt and pepper to your liking!
- 2 tbsp fresh parsley, chopped (for garnish): A pop of fresh green color and a hint of freshness to balance the rich flavors. Chives or thyme would also be lovely.
- 1 tbsp melted butter (optional, for brushing): The secret to that deep, golden-brown, glossy finish. It’s optional, but highly recommended for maximum visual appeal.
- 1 tbsp poppy seeds or sesame seeds (optional, for topping): Adds a lovely little crunch and makes it look professionally finished.
Let’s Build This Beautiful Ring! (Step-by-Step)
Okay, team! Let’s get our hands (a little) dirty. This process is so much fun—it’s like edible arts and crafts. Read through all the steps first, and you’ll be a pro.
Step 1: Preheat your oven to 375°F (190°C). This is the perfect temperature to cook the crescent dough through without burning it before the inside is hot. Line two baking sheets with parchment paper. Trust me, this non-stick miracle will make cleanup an absolute breeze.
Step 2: In a large mixing bowl, combine your turkey, cranberry sauce, cheese, mayonnaise (or cream cheese), Dijon mustard, garlic powder, salt, and pepper. Mix it all together until it’s beautifully combined. Don’t be afraid to get in there with your hands (clean ones, of course!) to make sure everything is evenly distributed. Chef’s Hack: Give the mixture a little taste. This is your chance to adjust the seasoning. Want more pepper? More tang? Add a little more Dijon! Make it yours.
Step 3: Now for the architecture! Unroll one package of crescent dough. You’ll see it’s perforated into triangles. On your prepared baking sheet, arrange the triangles in a circle with the wide ends overlapping in the center and the points facing outward like a sun. It should look like a star. Repeat with the second package on the same sheet, connecting it to the first to form one large ring. Gently press the overlapping wide ends together to seal the center circle—this is your foundation! Repeat with the remaining two packages of dough on your second baking sheet.
Step 4: Take your delicious turkey filling and spoon it evenly around each ring, mounding it carefully onto the wide, sealed inner circle. Try to keep it away from the pointed ends; we need those to fold over!
Step 5: Here’s the magic moment! Take each pointed end of the dough and fold it up and over the filling, then tuck the point under the inner rim of the wide part of the dough. This seals everything in and creates that gorgeous wreath shape. If a little filling peeks out, don’t stress—it’s homemade charm!
Step 6: If you’re using it, lightly brush the tops of both rings with the melted butter. This is what gives it that gorgeous, bakery-worthy color and shine. Then, sprinkle with poppy seeds or sesame seeds for that final chef’s touch.
Step 7: Bake for 20-25 minutes, or until the dough is a deep, glorious golden brown and the filling is bubbly. Rotate the pans halfway through for even baking. Your kitchen will smell absolutely incredible.
Step 8: This is the hardest part: let it cool for at least 5-10 minutes before slicing. This allows the filling to set slightly, so when you cut into it, it doesn’t all come spilling out. Then, garnish with that fresh, chopped parsley for a beautiful color contrast. Slice between the seams and serve!
How to Serve Your Masterpiece
Presentation is part of the fun! Place the whole ring on a large wooden board or a beautiful platter. I like to fill the center of the ring with a little extra cranberry sauce or a small bowl of gravy for dipping. It looks stunning and is so practical. This is a self-serve, hand-held kind of feast, perfect for a holiday buffet or a casual gathering. Pair it with a simple arugula salad with a lemony vinaigrette to cut through the richness, or some roasted honey-glazed carrots and green beans for a full, festive spread.
Make It Your Own: Delicious Variations
The beauty of this recipe is its versatility. Don’t be afraid to play!
- Thanksgiving Leftover Style: Stir in ½ cup of chopped cooked stuffing and a handful of dried cranberries into the filling mixture.
- Buffalo Chicken Swap: Use shredded chicken instead of turkey. Replace the cranberry sauce with ¾ cup of Buffalo sauce and use a blue cheese or ranch dressing instead of mayo. Top with blue cheese crumbles after baking!
- Vegetarian Delight: Sauté mushrooms, spinach, and onions until soft and use them instead of turkey. A creamy goat cheese would be amazing here.
- Ham & Swiss Classic: Substitute diced ham for the turkey and whole-grain mustard for the Dijon. A classic flavor combo that never fails.
Chef Olivia’s Notes
This recipe has evolved so much in my kitchen over the years. I once, in a pre-coffee haze, accidentally used cinnamon rolls instead of crescent dough. (Don’t ask how, it was a wild morning!). While a sweet and savory turkey ring wasn’t what I was going for, my nephew declared it the “best thing ever,” so maybe there’s something there! My biggest tip is to embrace the mess. The first time you make it, the ring might look a little… abstract. But I promise, once it bakes up golden and puffy, it will be beautiful. The flavor is always a 10/10. It’s become my signature “I-brought-appetizers!” dish for parties, and I love hearing how everyone puts their own spin on it. Cooking is about joy, not perfection. Now, go forth and bake!
FAQs & Troubleshooting
Q: My crescent dough got really soft and hard to work with. What did I do wrong?
A: This is the most common issue! The dough is easiest to handle when it’s cold. Keep it in the fridge until the very moment you’re ready to unroll and shape it. If your kitchen is warm, work quickly. If it does get too soft, you can pop the entire assembled ring into the fridge for 10 minutes before baking to firm it up.
Q: Can I make this ahead of time?
A: Absolutely! You have two great options. 1) Assemble completely: Assemble the rings right on the parchment-lined baking sheets, cover tightly with plastic wrap, and refrigerate for up to 8 hours. Bake straight from the fridge, adding maybe 2-3 minutes to the baking time. 2) Prep the filling: You can mix the filling up to 2 days in advance and keep it in an airtight container in the fridge. When you’re ready, just assemble and bake!
Q: My filling is leaking out during baking. How can I prevent this?
A> A little leakage is normal and tasty! But to minimize it, make sure you are tucking the points firmly under the inner base of the ring to create a good seal. Also, avoid overfilling—spoon the mixture evenly but don’t mound it too high.
Q: Can I freeze a baked or unbaked ring?
A: You can! For unbaked: Assemble the ring and freeze it solid on the baking sheet. Then, wrap it tightly in a few layers of plastic wrap and foil. Bake from frozen, adding 10-15 minutes to the bake time, until golden brown. For baked: Let it cool completely, wrap well, and freeze. Reheat in a 350°F (175°C) oven until warm throughout.

Turkey Cranberry Crescent Ring
- Total Time: 45 mins
Description
A holiday showstopper that’s golden, flaky, savory, and just the right touch of sweet! This Turkey Cranberry Crescent Ring transforms humble leftovers into something stunning. Perfect for gatherings, buffets, or cozy family nights, it’s a dish that feels festive without the stress. One bite of buttery pastry wrapped around tender turkey, melty cheese, and tangy cranberry, and you’ll see why this recipe becomes a tradition. Ready to create magic? Let’s bake!
Ingredients
-
4 packages (8 oz each) refrigerated crescent roll dough
-
4 cups cooked turkey, shredded or chopped
-
1 cup cranberry sauce (or half cranberry + half orange marmalade)
-
2 cups shredded mozzarella or Swiss cheese
-
½ cup mayonnaise or cream cheese
-
2 tsp Dijon mustard
-
1 tsp garlic powder
-
1 tsp salt
-
½ tsp black pepper
-
2 tbsp fresh parsley, chopped (for garnish)
-
1 tbsp melted butter (optional, for brushing)
-
1 tbsp poppy seeds or sesame seeds (optional, for topping)
Instructions
-
Prep: Heat oven to 375°F (190°C). Line 2 baking sheets with parchment paper.
-
Mix: In a large bowl, combine turkey, cranberry sauce, cheese, mayo (or cream cheese), Dijon, garlic powder, salt, and pepper. Taste and adjust seasoning.
-
Shape Dough: Unroll crescent dough. Arrange triangles in a circle on the sheet with wide ends overlapping in the center, points outward. Press seams to seal. Repeat for the second sheet.
-
Fill: Spoon turkey mixture around the inner circle. Keep filling away from the points.
-
Fold: Pull dough tips over filling and tuck under to form a wreath.
-
Finish: Brush with butter, sprinkle with seeds if using.
-
Bake: 20–25 minutes until golden and bubbling. Cool 5–10 minutes, garnish with parsley, slice, and serve.
Notes
-
Swap turkey for rotisserie chicken.
-
Add leftover stuffing or veggies to the mix.
-
Try ham & Swiss for a classic twist, or go veggie with sautéed mushrooms and spinach.
This dish isn’t just food—it’s a centerpiece, a conversation starter, and a cozy tradition waiting to happen.
- Prep Time: 20 minutes
- Cook Time: 25 minutes
Nutritional Information (Per Serving)
Please note: This is an approximate estimate based on the ingredients listed and may vary depending on specific brands and substitutions used.
Servings: 16 | Calories: 310 | Protein: 15g | Carbohydrates: 25g | Fiber: 1g | Sugar: 5g | Fat: 17g
Final Thoughts: More Than Just a Recipe
So there you have it—the story, the secrets, and the step-by-step guide to creating a dish that’s sure to become a cherished part of your own holiday traditions. The Turkey Cranberry Crescent Ring is proof that the most memorable meals aren’t about flawless technique or the most expensive ingredients; they’re about the joy of creating something beautiful and delicious to share.
This ring is a celebration of simplicity, a masterpiece of convenience, and a testament to the magic that happens when we cook with heart. It’s the perfect bridge between the grandeur of a holiday feast and the cozy comfort of leftovers. So whether you’re using up Thanksgiving turkey, impressing guests at a potluck, or simply treating your family to a special weeknight dinner, this recipe is your ticket to a stress-free, show-stopping success.
I hope this ring finds its way to your table and brings you as much laughter, joy, and satisfied sighs as it has brought to mine. Now, go enjoy the applause—you’ve earned it!
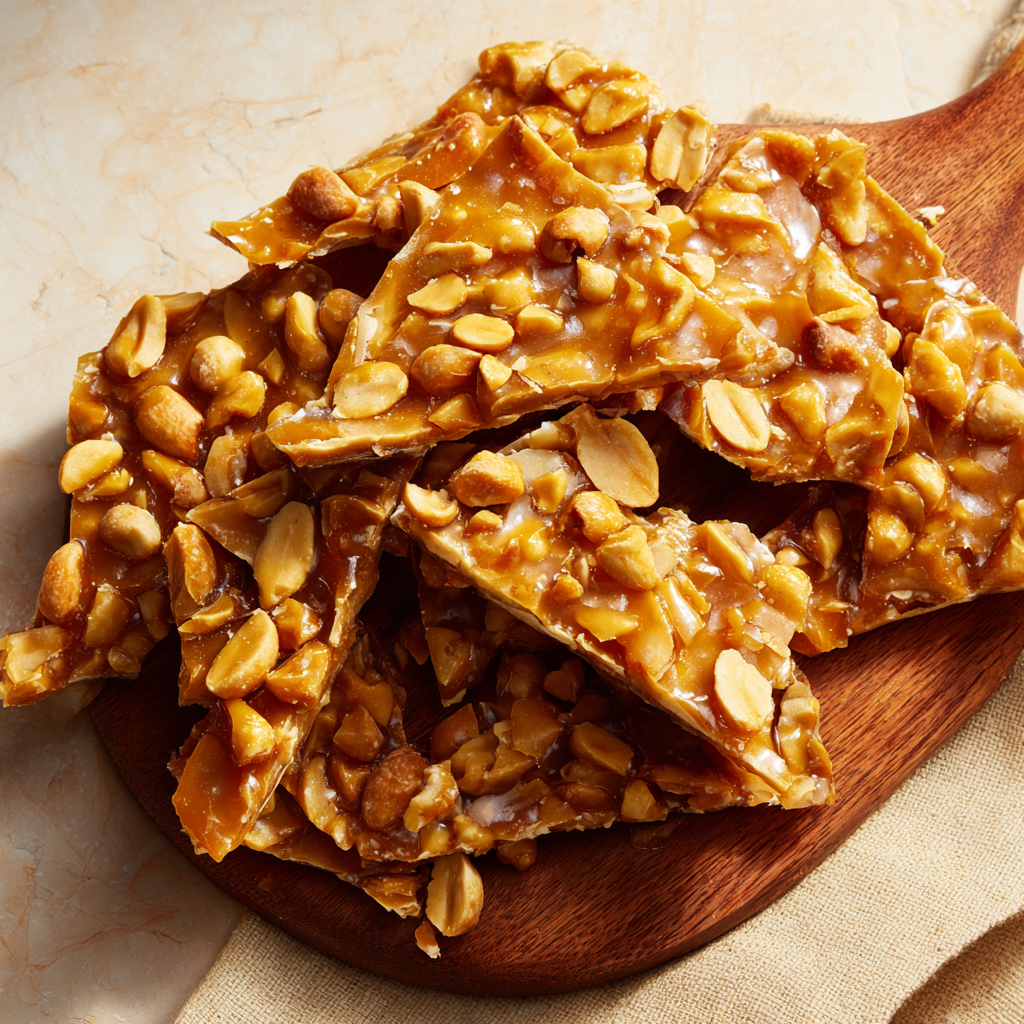
Peanut Brittle
Welcome to My Kitchen: Let’s Make Some Magic (and a Little Noise!)
Hey there, friend! Come on in, grab an apron, and get ready to fill your kitchen with the most incredible smell: the warm, buttery, nutty aroma of homemade peanut brittle. Is there anything more wonderfully nostalgic? That satisfying CRACK as you break into a piece, the perfect balance of sweet and salty, the way it just makes you feel… happy. If you’ve ever walked past a candy counter and dreamed of making that kind of magic at home, I’m here to tell you—you absolutely can.
I know candy-making can sound a little intimidating. Words like “hard crack stage” might make you want to run for the hills, but I promise you, with a good thermometer and a dash of courage, this is one of the most rewarding and fun recipes you’ll ever try. This isn’t about fancy techniques; it’s about following your senses and having a blast. This peanut brittle recipe is my go-to for holiday gifts, party platters, or just a sweet treat to have stashed away for when that 3 pm sugar craving hits. It’s crisp, it’s loaded with crunchy roasted peanuts, and it has that classic, unforgettable flavor that takes you right back to your grandma’s kitchen. So, let’s preheat that confidence and get cooking! This is going to be a delicious adventure.
The Christmas We Almost Burned the Kitchen Down (A Love Story)
My love affair with peanut brittle started not with a perfect batch, but with a spectacularly failed one. I was about ten years old, “helping” my grandmother in her wonderfully chaotic kitchen during Christmas break. She was a woman who measured nothing and everything by intuition. We were making her famous brittle, and I was in charge of stirring. Well, I got distracted by the dog chasing his tail (a truly captivating spectacle, I assure you), and I stopped stirring. The sugar seized, the mixture turned a terrifying shade of dark amber, and before we knew it, the entire pot was a smoky, burnt mess.
But instead of getting upset, my grandma just laughed. A deep, hearty laugh that filled the whole room. She said, “Well, Olivia, looks like we made caramelized coal this year! Santa might appreciate it.” We started over, and that second batch was perfect. That moment taught me two things: first, always keep stirring. Second, and more importantly, the best memories in the kitchen aren’t about perfection; they’re about the joy of the attempt, the laughter in the mess, and the love you stir into every single bite. Every time I make this brittle, I think of her and that smoky kitchen, and it makes me smile. Now, let’s make some memories (and hopefully, less smoke) of our own!
Gathering Your Candy-Making Crew: The Ingredients
One of the best things about this recipe is its beautiful simplicity. You only need a handful of pantry staples to create something truly special. Here’s the lineup and my little chef insights for each one:
- 1 cup granulated sugar: This is the foundation of our candy, providing that classic, clear, glass-like sweetness. It’s what gives the brittle its structure and satisfying snap. For best results, don’t try to substitute with brown sugar here—it contains molasses, which will change the texture and flavor profile completely.
- ½ cup light corn syrup: I know some folks like to avoid corn syrup, but in candy-making, it’s a superstar. It’s an “interfering agent” (fancy term, right?) that prevents the sucrose molecules in the granulated sugar from recrystallizing. In simple terms: it keeps your brittle smooth and glassy, not grainy and sugary. If you must, you can substitute it with golden syrup or honey, but know that it will impart a distinct flavor and may make the brittle a bit chewier.
- ¼ cup water: This helps the sugar dissolve evenly at the beginning of the cooking process, setting us up for success. It will all cook off, I promise!
- 1 cup roasted, salted peanuts: The star of the show! Using salted peanuts is my secret weapon—that hit of saltiness against the sweet candy is everything. I prefer standard roasted peanuts for their classic flavor, but feel free to use dry-roasted if that’s what you have. Just avoid raw or unsalted peanuts; they won’t give you that iconic salty-sweet punch.
- 2 tbsp unsalted butter: Added right at the end, the butter gives the brittle a richer flavor and a more tender, less tooth-shattering bite. Using unsalted lets you control the salt level perfectly. Plus, it makes the mixture foam up dramatically when you add the baking soda—it’s the best part!
- 1 tsp baking soda: This is the magic ingredient! When stirred in at the end, it creates millions of tiny air bubbles in the candy. This makes the brittle lighter, more porous, and easier to bite into. Without it, you’d have a very hard, dense slab of candy. It’s non-negotiable for the perfect texture.
- 1 tsp vanilla extract: A flavor enhancer that adds a warm, aromatic depth to the background. It complements the peanuts beautifully. For a fun twist, you could use almond extract instead!
- Pinch of salt: Even with salted peanuts, a little extra pinch at the end ensures every single bite is perfectly seasoned. Trust me on this.
Let’s Get Cooking: The Step-by-Step Symphony
Okay, team! This is where the fun begins. Read through all the steps once before you start. Have all your ingredients measured out and sitting right next to the stove (this is called mise en place—fancy French for “get your stuff together,” and it’s a lifesaver in candy-making).
Step 1: Line a baking sheet with parchment paper or a silicone mat. Do this first! Once the sugar is at temperature, you will have zero time to fumble around. I lightly grease the parchment paper with a tiny bit of butter or non-stick spray for extra insurance, but it’s not always necessary. Have this sheet ready and waiting.
Step 2: In a heavy-bottomed saucepan over medium heat, combine sugar, corn syrup, and water. Stir until the sugar dissolves. Use a saucepan that’s larger than you think you need. The mixture will foam up later, and you don’t want a boil-over! A heavy-bottomed pot (like a Dutch oven) distributes heat evenly, preventing hot spots that can burn the sugar. Stir gently but consistently with a wooden spoon or heatproof spatula until the mixture goes from looking cloudy to perfectly clear. This means the sugar has fully dissolved.
Step 3: Attach your candy thermometer to the side of the pan and add the peanuts. Continue to cook, stirring constantly, until the mixture reaches 300°F (the hard crack stage). This is the most crucial step. Clip the thermometer to the side of the pan, making sure the tip is immersed in the syrup but not touching the bottom of the pan. Add the peanuts—they’ll sink at first, but that’s okay. Now, stir constantly. I mean it! This prevents the peanuts from burning on the bottom. You’ll watch the temperature climb. Be patient. It might hover around 250°F for a bit, then it will start to climb more quickly. The goal is 300°F. At this stage, if you drop a bit of the syrup into a glass of cold water, it will form hard, brittle threads that snap when you bend them. Hence the name!
Step 4: Remove from heat and immediately stir in butter, vanilla, baking soda, and salt. The mixture will foam up dramatically—this is good! Stir quickly to incorporate everything. As soon as that thermometer hits 300°F, yank that pot off the heat! Working quickly but carefully (it’s crazy hot), add the butter and vanilla. They’ll sizzle and melt. Then, dump in the baking soda and salt. Get ready for the magic! The mixture will puff up, double in volume, and turn a lovely pale, golden color. This is the baking soda doing its thing. Stir vigorously for just a few seconds until it’s all combined. Don’t over-stir once the soda is in, or you’ll deflate those beautiful bubbles.
Step 5: Immediately pour the mixture onto your prepared baking sheet. Using two forks or a heatproof spatula, spread and stretch it to your desired thickness. Pour quickly—it starts setting up fast. Don’t worry about it being perfectly even; rustic is charming! If you like a thinner brittle, use the forks to gently pull and stretch the candy outward. Work fast, as it becomes unworkable within a minute or two.
Step 6: Let it cool completely. I mean it—walk away! This will take about 30 minutes. Do not touch it. Do not try to break a piece off early. You must let the candy cool and the structure set completely. This is a great test of your willpower! You’ll know it’s ready when it’s firm to the touch and makes a hollow sound when you tap it.
Step 7: Once completely cool, break it into pieces. The best part! Use your hands to crack it into rustic, irregular pieces. For more uniform pieces, you can place the slab in a zip-top bag and gently tap it with the bottom of a heavy pan or a rolling pin.
Sharing the Sweetness: How to Serve Your Masterpiece
Now for the fun part: enjoying your homemade creation! Pile the pieces high in a beautiful ceramic bowl or a rustic wooden tray for a party. For gifting, nothing beats a classic cellophane bag tied with a pretty ribbon or a festive holiday tin. It’s the most thoughtful (and delicious) gift. I love serving peanut brittle alongside a cheese board for a sweet and salty contrast, or crumbling it over a scoop of high-quality vanilla bean ice cream for an incredible dessert. However you choose to serve it, do it with pride. You just made candy from scratch!
Get Creative! Flavor Twists & Dietary Swaps
Once you’ve mastered the classic, the world of brittle is your oyster! Here are a few of my favorite ways to mix it up:
- Spicy Kick: Add ½ teaspoon of cayenne pepper or a dash of hot sauce with the baking soda for a sweet-and-heat combination that will wow everyone.
- Chocolate-Dipped: Melt some dark or milk chocolate and dip half of each piece of cooled brittle into it. Place on parchment paper to let the chocolate set. Absolutely divine.
- Nutty Variations: Swap the peanuts for an equal amount of almonds, pecans, or cashews. You can even use a mix!
- Sea Salt & Vanilla Bean: Use vanilla bean paste instead of extract for those beautiful little specks, and after pouring, immediately sprinkle the top with a few flakes of fancy flaky sea salt.
- Vegan-Friendly: Use a plant-based butter stick (like Miyoko’s or Earth Balance) and ensure your corn syrup is vegan (most are). It works like a charm!
Olivia’s Chef Notes & Kitchen Confessions
Over the years, this recipe has become a trusted friend in my kitchen. I’ve learned a few things: First, a good candy thermometer is worth its weight in gold. I finally invested in a digital one, and it was a game-changer for my candy-making confidence. Second, don’t be afraid of the foam! That initial panic when the baking soda hits is real, but it’s a sign you’re on the right track. Just keep stirring!
One time, I was filming a reel for Instagram and was so focused on looking at the camera that I poured the entire batch of 300°F candy directly onto my silicone mat… which was sitting on my plastic countertop. Let’s just say I now have a permanent reminder of that batch melted into my kitchen counter. The moral of the story? Always put the baking sheet on a heatproof trivet or your stovetop before pouring! We live and we learn (and sometimes we melt things).
Your Questions, Answered: Peanut Brittle FAQ
Q: My brittle turned out chewy and sticky, not hard and crisp. What happened?
A: This almost always means the sugar syrup didn’t get hot enough. The most likely culprit is an inaccurate candy thermometer. Test your thermometer by placing it in a pot of boiling water; it should read 212°F (100°C). If it’s off by more than a degree or two, you’ll need to adjust your target temperature accordingly, or better yet, get a new one. Undercooking is the number one cause of sticky brittle.
Q: Why is my brittle grainy and sugary?
A: Graininess is caused by sugar crystals forming during the cooking process. This can happen if you didn’t fully dissolve the sugar at the beginning, if sugar crystals splashed up on the sides of the pan, or if you stirred too vigorously after the sugar dissolved. To prevent this, after the initial stir to dissolve the sugar, you can use a wet pastry brush to wash down any sugar crystals on the sides of the pan. Once it’s boiling, avoid stirring until you add the peanuts.
Q: The brittle is too hard to bite! Did I overcook it?
A: You might have cooked it just a tad too long. 300°F is the perfect spot, but if your thermometer is old or you let it creep up to 305°F or higher, the candy can become darker and more difficult to bite. It will still be delicious, but just be careful with your teeth! The butter and baking soda are there to prevent it from becoming a jawbreaker, so if you followed the recipe, this shouldn’t be an issue.
Q: How do I store it, and how long will it last?
A: The enemy of peanut brittle is moisture. Store it in an airtight container at room temperature. I like to layer it between sheets of parchment or wax paper. Properly stored, it will stay perfectly crisp and delicious for up to 3 weeks… if it lasts that long!
Peanut Brittle
Description
Crisp, nutty, and loaded with roasted peanuts, this peanut brittle is a nostalgic treat that brings the magic of candy-making straight into your kitchen. Perfect for holiday gifts, party platters, or a sweet snack anytime. With a candy thermometer and a bit of patience, you’ll create candy that cracks perfectly and melts hearts.
Ingredients
-
1 cup granulated sugar
-
½ cup light corn syrup (or golden syrup/honey)
-
¼ cup water
-
1 cup roasted, salted peanuts
-
2 tbsp unsalted butter
-
1 tsp baking soda
-
1 tsp vanilla extract
-
Pinch of salt
Instructions
-
Prep: Line a baking sheet with parchment or a silicone mat. Lightly grease if desired.
-
Cook Sugar Syrup: In a heavy-bottomed saucepan over medium heat, combine sugar, corn syrup, and water. Stir gently until sugar dissolves and syrup is clear.
-
Add Peanuts & Boil: Attach a candy thermometer. Stir in peanuts and continue cooking, stirring constantly, until the mixture reaches 300°F (hard crack stage).
-
Finish & Foam: Remove from heat. Quickly stir in butter, vanilla, baking soda, and salt. The mixture will foam and lighten in color—this creates that perfect brittle texture. Stir just a few seconds to combine.
-
Spread: Immediately pour onto prepared baking sheet. Using forks or a heatproof spatula, spread to desired thickness. Work fast before it sets.
-
Cool: Let candy cool completely, about 30 minutes.
-
Break & Serve: Once firm, break into rustic pieces or gently tap with a rolling pin for more uniform shapes.
Notes
-
Spicy Kick: Add ½ tsp cayenne or a dash of hot sauce with baking soda.
-
Chocolate-Dipped: Dip cooled pieces in melted chocolate and let set.
-
Nut Swaps: Try almonds, pecans, cashews, or a mix.
-
Sea Salt & Vanilla Bean: Use vanilla bean paste and sprinkle flaky sea salt on top.
-
Vegan-Friendly: Use plant-based butter and vegan corn syrup.
Nutritional Information*
*Please note: these are estimates based on the ingredients used and will vary slightly depending on the exact size of your pieces.
Per Piece (approx. 1/25th of recipe):
Calories: 150 | Fat: 7g | Saturated Fat: 2g | Carbohydrates: 19g | Sugar: 16g | Protein: 2g | Sodium: 60mg
Yield: ~25 pieces | Prep Time: 10 mins | Cook Time: 20 mins | Cool Time: 30 mins | Total Time: ~1 hour
Final Thoughts: You’re a Candy Maker Now!
Look at what you just did! You took sugar, peanuts, and a little bit of courage and transformed them into something truly magical. That satisfying SNAP you hear when you break a piece? That’s the sound of your success. You conquered the candy thermometer, you weathered the foamy fury of the baking soda, and you created a treat that’s bursting with love and nostalgia.
I hope this recipe showed you that candy-making isn’t some mysterious, unattainable art form. It’s a science, yes, but it’s also an experience—one filled with the warmth of the stove, the sweet smell of toasting sugar, and the joy of creating something with your own hands. You didn’t just make peanut brittle; you made a memory. Whether it’s a gift from the heart, a centerpiece for your holiday table, or just a sweet secret stashed in the cupboard, you’ve made something special.
So the next time you’re craving that perfect combination of salty and sweet, that incredible crunch, you don’t have to wonder if you can make it. You know you can. You’ve got the recipe, you’ve learned the tricks, and you’ve officially earned your candy-making stripes.
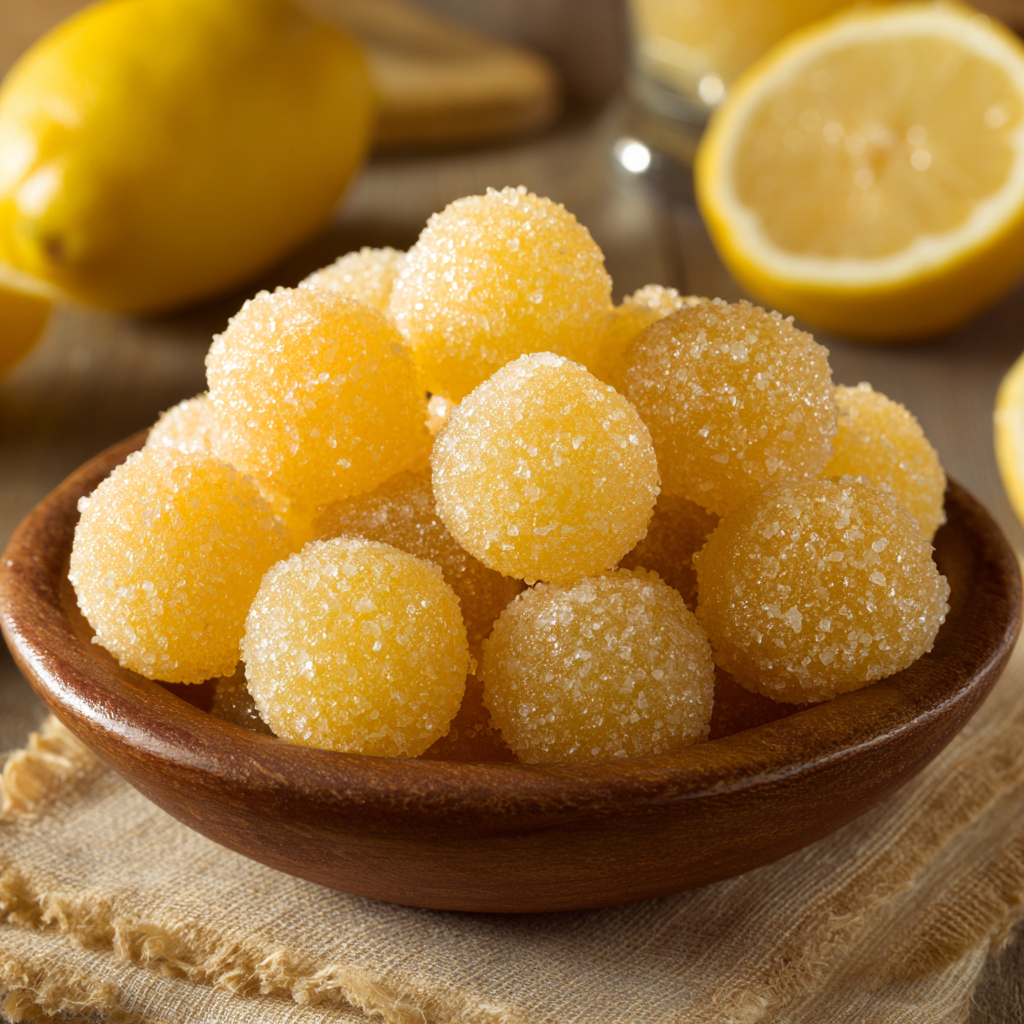
Lemon Drops
Sunshine in a Candy Jar: My Homemade Lemon Drops
Hey there, my fellow flavor-lover! There’s something magical about that moment you open a candy bowl, isn’t there? Your eyes scan the options, and then—bam!—you spot that one vibrant, sugar-dusted gem that promises a jolt of pure, unadulterated joy. For me, that gem has always been the lemon drop. It’s not just a candy; it’s a tiny, edible sunbeam. That first sharp, tangy zing followed by the sweet, crystalline sugar coating is a sensation that instantly brightens my mood, no matter how grey the day might be outside my kitchen window.
While I adore a rich chocolate truffle or a chewy caramel as much as the next person, there’s a special place in my heart (and my candy jar) for treats that offer a refreshing contrast. These homemade lemon drops are exactly that. They cut through the richness of holiday feasts, cleanse the palate after a big meal, and bring a cheery pop of citrusy sunshine to any gathering. And the best part? They are so much easier to make than you might think. Forget the fancy candy-making equipment and intimidating techniques. Today, we’re making magic with just a few simple ingredients and a whole lot of love. So, tie on your favorite apron (the messy ones are the most loved!), and let’s create something wonderfully zingy together.
A Jar Full of Sunshine Memories
My love affair with lemon drops didn’t start in a fancy candy shop; it started in my grandmother’s bustling, always-warm kitchen. My Nana was the queen of “pantry magic,” conjuring up incredible treats from what seemed like thin air. But her lemon drops were something she made with deliberate, joyful care, usually in the deep of winter when we all needed a reminder that spring was on its way.
I can still vividly remember the sound—the gentle *clink-clink* of the glass jars as she’d pull them down from the cupboard. I’d pull a chair right up to the stove (under strict instructions not to touch a thing!), mesmerized as the clear, bubbling syrup transformed into golden, fragrant candy. The air would fill with the most incredible scent of sharp, sweet lemons, a smell that felt like pure happiness. She’d let me be the official “sugar roller,” a job I took with the utmost seriousness, ensuring every single drop was perfectly coated. To this day, the taste of a real, homemade lemon drop instantly transports me back to that warm kitchen, filled with laughter and the promise of a sweet treat made with love. It’s that feeling I want to share with you today.
Gathering Your Sunshine: The Ingredients
One of the beautiful things about this recipe is its beautiful simplicity. Each ingredient plays a specific role in creating that perfect balance of hard crackle, intense flavor, and sugary coating. Here’s what you’ll need:
- 2 cups granulated sugar: This is the foundation of our candy. It creates the structure and the sweet base that makes the tart lemon flavor pop. I use regular white granulated sugar for the cleanest, purest candy base.
- ½ cup light corn syrup: Don’t let this ingredient scare you! Its job is crucial—it prevents the sugar from recrystallizing, ensuring our lemon drops are gloriously smooth and glassy, not grainy and cloudy. For a potential swap, you could try golden syrup, though it will impart a very slight, but lovely, buttery note.
- ⅓ cup water: This is just enough to dissolve the sugar without making the cooking process take forever. It all evaporates out as the sugar syrup cooks.
- 1 tbsp fresh lemon juice: This is where the powerful, authentic tang comes from! Always, always use fresh juice. The bottled stuff just doesn’t have the same bright, vibrant kick. Chef’s insight: roll your lemons on the counter firmly before juicing to get the most liquid out of them.
- 1 tsp lemon zest: This is the secret weapon! The zest is packed with potent lemon oils that give an incredible aroma and a deeper, more complex citrus flavor than juice alone. It makes all the difference.
- ½ tsp lemon extract: While the fresh juice and zest do the heavy lifting, a tiny bit of extract amplifies that lemon flavor and ensures it stays powerful even after the candy has cooled and hardened.
- Yellow food coloring (optional): This is purely for fun and visual appeal! A drop or two of gel food coloring gives them that classic, sunny yellow hue. I like to use it, but they are just as delicious without it for a more natural, translucent look.
- Additional granulated sugar, for coating: This creates that classic, crunchy, sweet exterior we all love. It’s the perfect textural contrast to the smooth, hard candy interior.
Let’s Make Some Magic: Step-by-Step Instructions
Ready to create some candy kitchen alchemy? Let’s do this! Read through all the steps once before you begin. Candy-making is fast-paced, so having a game plan is key.
Step 1: Prep Your Station. First things first, line a baking sheet with parchment paper and give it a very light dusting of sugar. This prevents the hot candy drops from sticking and makes your life much easier later. Also, have everything measured and ready to go right next to the stove (this is called your mise en place). Once the sugar hits temperature, you have to work quickly, so no time for measuring lemon juice then!
Step 2: Dissolve the Sugar. In a medium-sized, heavy-bottomed saucepan, combine the 2 cups of sugar, corn syrup, and water. Cook this over medium heat, stirring gently but consistently with a wooden spoon or heatproof spatula, just until the sugar granules have completely dissolved. This usually takes 3-4 minutes. Chef’s Hack: To test if the sugar is dissolved, dip a spoon in and feel the liquid between your fingers. If it feels gritty, keep stirring. You should feel no granules at all.
Step 3: Cook to Hard Crack. Now, stop stirring! This is important. Once the sugar is dissolved, stop stirring entirely. You can gently swirl the pan once or twice if you see spots cooking faster than others, but no more stirring. Attach your candy thermometer to the side of the pan, making sure the tip is submerged in the syrup but not touching the bottom of the pan. Let the syrup boil away until it reaches 300°F (150°C), also known as the hard crack stage. This is the stage where a drop of syrup in cold water will form hard, brittle threads that break when bent. This process can take 10-15 minutes. Be patient!
Step 4: The Flavor Frenzy! As soon as the thermometer hits 300°F, immediately remove the pan from the heat. Working quickly but carefully (the syrup is extremely hot!), stir in the fresh lemon juice, lemon zest, lemon extract, and food coloring (if using). The mixture will bubble and sizzle violently—this is normal! Just keep stirring until everything is fully incorporated. The aroma that hits you at this moment is pure heaven.
Step 5: Form the Drops. Working swiftly (the candy starts to set fast!), carefully spoon small, round drops of the hot syrup onto your prepared baking sheet. I use a teaspoon, but a small cookie scoop also works wonders for uniform size. Pro Tip: If the syrup in the pan starts to thicken and harden before you’re done, you can place it back over very low heat for just 20-30 seconds to loosen it up again.
Step 6: The Sugar Shower. Let the drops cool for just a minute or two—you want them to be firm enough to handle but still very warm. Place your extra sugar in a shallow bowl. Once they’re cool enough to touch, roll each lemon drop in the sugar until it’s completely coated. This warm coating helps the sugar stick perfectly.
Step 7: Cool Completely. Let the sugar-coated lemon drops cool completely on the baking sheet until they are hard and shiny. This usually takes about 20-30 minutes. Once cool, they’re ready to eat or store!
How to Serve Your Sunny Creations
Presentation is part of the fun! I love piling these sunny little gems into a beautiful glass jar or a vintage ceramic bowl. The clear glass lets that beautiful yellow color shine through and makes them look incredibly inviting. They are the perfect finishing touch on a dessert table, a wonderful little gift tied up in a cellophane bag with a ribbon, or just a happy treat to keep by the coffee maker for a quick sweet bite. They’re fantastic alongside a cup of hot tea or as a palate-cleanser after a rich, savory meal.
Get Creative: Lemon Drop Variations
Once you’ve mastered the classic, feel free to play with the flavors! Here are a few of my favorite twists:
- Lemon-Lavender: Add ½ teaspoon of culinary-grade dried lavender buds with the lemon zest. It adds a beautiful, floral sophistication.
- Lemon-Raspberry: Add a few drops of raspberry extract and a tiny drop of red food coloring for a beautiful pink-and-yellow swirled effect (don’t over-mix!) and a berry-lemon flavor.
- Sparkling Sugar Coat: For a fancy finish, roll the warm drops in sparkling sugar or sanding sugar instead of granulated sugar for extra crunch and sparkle.
- Meyer Lemon: Use juice and zest from sweeter, less acidic Meyer lemons for a more floral, complex lemon flavor.
- Spicy Ginger-Lemon: Add ¼ teaspoon of ground ginger or a very small amount of finely minced crystallized ginger for a warm, spicy kick.
Olivia’s Chef Notes & Kitchen Stories
This recipe has evolved so much from watching my Nana. She never used a thermometer! She used the cold water test, which is a fantastic skill to have if your thermometer ever breaks. I’ve added the extract over the years for that extra flavor punch, and I’m a firm believer in the power of fresh zest.
I’ll never forget the first time I made these on my own. I was so nervous I’d burn the sugar, I hovered over that pot like a hawk. I misread the thermometer and took it off the heat too early. Let’s just say I ended up with a pan of delicious but *very* chewy lemon taffy instead of hard candy! It was a delicious, sticky failure that taught me the importance of patience and trusting the process (and the thermometer!). So if your first batch isn’t perfect, don’t worry. It’s still probably delicious, and you’ve learned something for next time. That’s what cooking is all about!
Your Lemon Drop Questions, Answered!
Q: My candy turned out cloudy and grainy. What happened?
A: This is almost always caused by sugar crystallization. The most common culprit is stirring the syrup after the sugar has dissolved. Remember, once it comes to a boil, don’t stir! Also, make sure you wash down the sides of the pan with a wet pastry brush in the initial dissolving stage to remove any sugar crystals. Using corn syrup helps prevent this, as it’s an invert sugar that interferes with crystal formation.
Q: My lemon drops are sticky and won’t harden. Why?
A: This means the syrup didn’t quite reach the hard crack stage (300°F). The sugar needs to cook long enough for almost all the water to evaporate. The most likely reason is your thermometer might be off! It’s a good idea to test your candy thermometer’s accuracy by seeing if it reads 212°F (100°C) in boiling water. If it doesn’t, you’ll know to adjust your target temperature accordingly.
Q: Can I use bottled lemon juice?
A: You *can*, but I really don’t recommend it for the best flavor. Fresh lemon juice has a brighter, sharper, more vibrant taste. Bottled juice often has a flat, slightly metallic taste that will come through in the final candy. For that true “wow” factor, fresh is best!
Q: How do I store these, and how long do they last?
A: Store your completely cooled lemon drops in an airtight container at room temperature. Putting a small packet of food-safe silica gel in the container can help keep them dry and prevent them from getting sticky in humid environments. Properly stored, they should stay perfect for 2-3 weeks… if they last that long!

Lemon Drops
Description
Bright, tangy, and wonderfully sweet, these lemon drops are little edible sunbeams that instantly lift the spirits. Perfect for candy jars, gifts, or a cheerful treat anytime, they combine a hard, glossy candy shell with a sugary coating and a burst of citrus flavor. No fancy equipment needed—just a candy thermometer and a little patience!
Ingredients
-
2 cups granulated sugar
-
½ cup light corn syrup (or golden syrup)
-
⅓ cup water
-
1 tbsp fresh lemon juice
-
1 tsp lemon zest
-
½ tsp lemon extract
-
Yellow food coloring (optional)
-
Additional granulated sugar, for coating
Instructions
-
Prep Your Station: Line a baking sheet with parchment and lightly dust with sugar. Measure all ingredients and have them ready.
-
Dissolve Sugar: In a medium, heavy-bottomed saucepan, combine sugar, corn syrup, and water. Cook over medium heat, stirring gently until sugar dissolves (3–4 minutes).
-
Cook to Hard Crack: Stop stirring. Attach a candy thermometer. Boil syrup until it reaches 300°F (150°C), the hard crack stage (10–15 minutes).
-
Add Flavor: Remove from heat. Stir in lemon juice, zest, extract, and food coloring (if using). The mixture will bubble—this is normal!
-
Form Drops: Quickly spoon small drops onto the prepared baking sheet. If syrup hardens in the pan, gently reheat for 20–30 seconds.
-
Sugar Coating: Once slightly cooled, roll drops in additional granulated sugar to coat.
-
Cool Completely: Let candy harden at room temperature for 20–30 minutes before storing or serving.
Notes
-
Lemon-Lavender: Add ½ tsp dried culinary lavender with zest.
-
Lemon-Raspberry: Add a few drops raspberry extract + a tiny drop of red coloring for a swirled effect.
-
Sparkling Sugar Coat: Use sanding sugar for extra sparkle.
-
Meyer Lemon: Substitute juice/zest for a sweeter, floral twist.
-
Spicy Ginger-Lemon: Add ¼ tsp ground or finely minced crystallized ginger.
Nutrition
- Calories: 45 kcal Per Serving
- Sugar: 10 g
- Fat: 0 g
- Carbohydrates: 11 g
- Protein: 0 g
Nutritional Information*
*This is an estimate provided for informational purposes only. I am not a nutritionist.
Per Lemon Drop: Calories: 45 | Fat: 0g | Carbohydrates: 11g | Sugar: 10g | Protein: 0g | Sodium: 0mg
Prep Time: 10 mins | Cook Time: 15 mins | Cool Time: 30 mins | Total Time: 55 min | Yield: ~40 lemon drops
Final Thoughts: A Little Jar of Sunshine
Well, my friend, there you have it—your very own kitchen-conjured jar of sunshine. I hope this recipe has shown you that the magic of candy-making isn’t reserved for fancy confectioners. It’s found in the simple, joyful act of transforming a few basic ingredients into something that sparks pure delight.
These lemon drops are more than just a sweet treat; they’re a connection. A connection to memories of my Nana’s kitchen, and now, I hope, a connection to new memories you’ll create in yours. Whether you’re making them for a holiday party, a thoughtful homemade gift, or just a quiet moment of personal indulgence, I hope they bring a little burst of brightness to your day.
So, don’t be intimidated by the candy thermometer. Embrace the sizzle, learn from any sticky mishaps (they’re still delicious!), and most importantly, have fun with it. You’ve just unlocked a wonderful, zingy little secret.
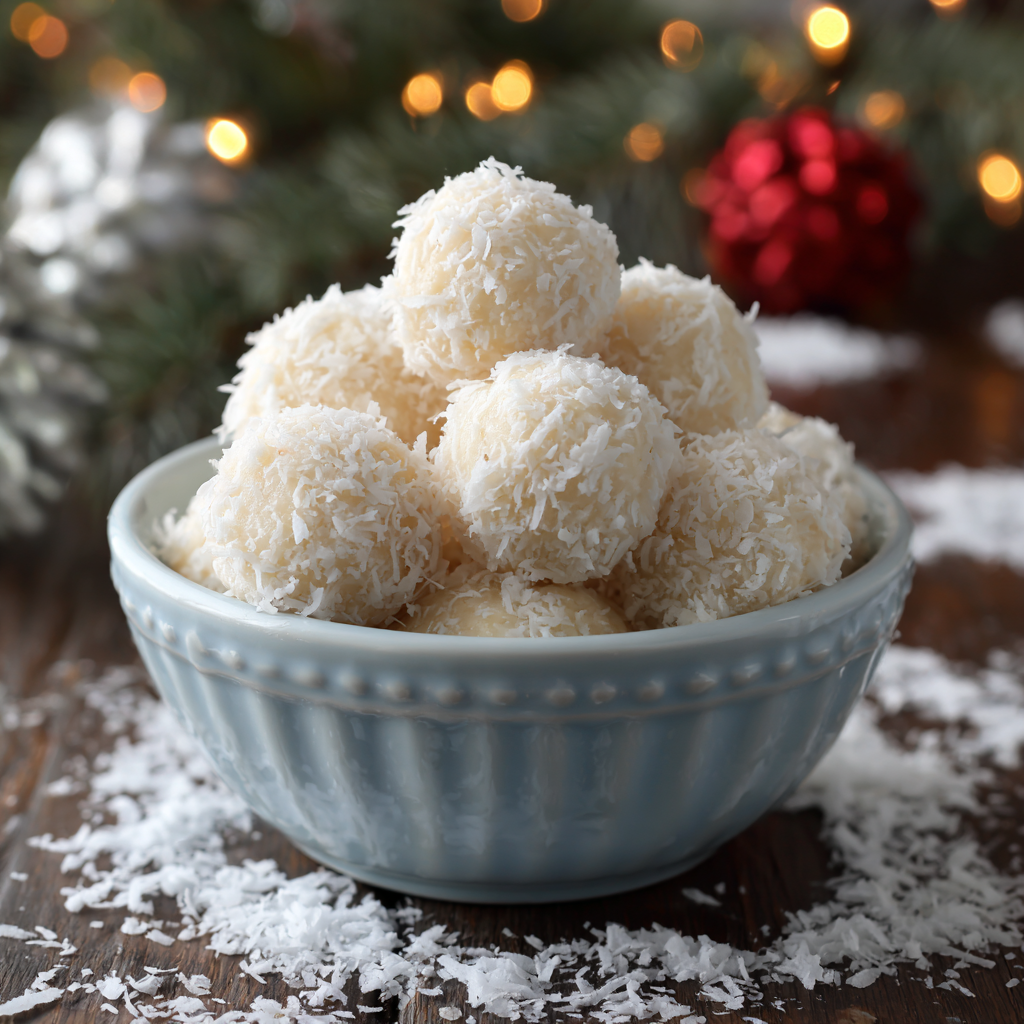
Coconut Balls
Let’s Make Some Snowy, Sweet Coconut Magic!
Hello, my fellow flavor-lovers! Olivia here, welcoming you back to my cozy kitchen corner. Is there anything better than the smell of toasting coconut? It instantly whisks me away to a sun-drenched beach, even if I’m watching snowflakes fall outside my window. Today, we’re whipping up a treat that’s incredibly close to my heart: my famously easy, no-bake Coconut Balls.
These little bites of joy are the ultimate crowd-pleaser. They’re sweet, they’re chewy, they’re bursting with tropical flavor, and they require exactly zero oven time. I’m talking about a recipe you can decide to make and have finished, cleaned up, and be enjoying with a cup of tea in just over an hour. They’re my secret weapon for last-minute holiday gifting, a potluck savior, or just a sweet little “I love you” for my family on a random Tuesday.
If you’ve ever felt intimidated by candy-making or complicated desserts, this is your gateway recipe. It’s pure, simple, hands-on fun. We’re using just a handful of pantry staples to create something that feels truly special. So, tie on your favorite (probably messy) apron, put on some good music, and let’s get our hands a little sticky. I promise, the result is so worth it!
A Bowl Full of Memories
This recipe takes me right back to my grandmother’s linoleum-floored kitchen. She wasn’t a fancy baker; she was a “get your hands in the bowl” kind of cook. Every December, the counter would be covered in tins, and we’d spend a whole weekend making every no-bake cookie and bar known to man. But these coconut balls were always my favorite station to work at.
I was her official “ball roller,” a title I wore with immense pride. She’d mix the dough in her big yellow bowl, and I’d stand on a step stool, meticulously scooping and rolling, trying to make each one a perfect sphere. She’d tell me stories, and I’d inevitably get more coconut on my face and in my hair than in the bowl. The best part was always the “quality control” taste test of the first one, still warm from my hands. That combination of sweet, creamy coconut and the love poured into making them… that’s the real flavor I try to capture every time I make them now. It’s more than a recipe; it’s a little edible hug from the past.
Gathering Your Coconut Crew
Part of the beauty of this recipe is its simplicity. You likely have most of this in your pantry right now! Here’s what you’ll need:
- 2 cups shredded sweetened coconut: This is the star of the show! The sweetened variety gives us that classic, moist, and flavorful base. Chef’s Insight: For a deeper flavor, you can toast about half a cup of it in a dry skillet over medium heat until golden brown before adding it to the mix. Let it cool completely first!
- 1 cup powdered sugar: Also known as confectioner’s sugar, it dissolves beautifully and gives our balls their melt-in-your-mouth texture, unlike granulated sugar which would be grainy. Substitution Tip: You can make a decent DIY version by blending 1 cup of granulated sugar with 1 tablespoon of cornstarch in a high-speed blender until it’s a fine powder.
- ½ cup sweetened condensed milk: This is our magical binder. It adds richness, creaminess, and sweetness all at once. Substitution Tip: For a dairy-free version, canned coconut cream (the thick part, not the liquid) works wonderfully. You may need a touch less, so add it slowly.
- 1 tsp vanilla extract: A must for enhancing all the other flavors. Always use pure vanilla extract if you can—it makes a world of difference! For a fun twist, try coconut extract instead.
- Pinch of salt: Don’t you dare skip this! Salt is the secret weapon that makes the sweet flavors pop and prevents the candy from being one-dimensional.
- 8 oz white or dark chocolate (optional, for dipping): This is the fancy upgrade. White chocolate leans into the creamy sweetness, while dark chocolate provides a gorgeous, sophisticated bitter contrast. Chef’s Hack: For easy dipping, use chocolate melting wafers instead of chocolate bars. They’re designed to melt smoothly and set with a perfect snap.
Let’s Get Rolling: Your Foolproof Steps to Coconut Bliss
Ready? This is the fun part. I’ll walk you through each step, sharing all my little kitchen hacks to ensure your coconut balls are absolutely perfect.
Step 1: The Big Mix
Grab your largest mixing bowl. Seriously, go bigger than you think you need. It gives you room to really fold everything together without making a mess. Dump in the 2 cups of shredded coconut, 1 cup of powdered sugar, and that all-important pinch of salt. Give these dry ingredients a good whisk. This distributes the salt and sugar evenly so every single bite is perfectly balanced. Now, pour in your ½ cup of sweetened condensed milk and 1 teaspoon of vanilla. Time to get your hands in there! The best tool for this job is your own two hands. Squish, fold, and mix until no dry spots remain. You’ll know it’s ready when you can press a bit together and it holds its shape like a very sticky, soft dough.
Step 2: The Texture Test
This is the most common place where things can go slightly awry, but it’s an easy fix! If your mixture seems too dry and crumbly and won’t hold together, it means your coconut was particularly dry or you measured your condensed milk a little shy. No worries! Just add more condensed milk, a teaspoon at a time, mixing thoroughly after each addition, until it reaches that perfect, pliable consistency. If it’s too wet and gloopy (rare, but can happen), add a touch more powdered sugar or shredded coconut until it’s manageable.
Step 3: Roll Call!
Line a baking sheet with parchment paper or a silicone baking mat. This prevents sticking and makes cleanup a dream. Now, for rolling. I like to use a small cookie scoop (about 2 teaspoons) to ensure all my balls are the same size. It’s faster and neater! Scoop up some mixture and roll it firmly between your palms into a smooth, 1-inch ball. If the mixture starts sticking to your hands, a super helpful hack is to very lightly dampen your palms with water. It creates a thin barrier that lets you roll smoothly without the dough sticking to you. Place each finished ball on your prepared tray.
Step 4: The Chill Out
Once all your balls are rolled, pop the entire tray into the refrigerator for at least 30 minutes. This is a non-negotiable step, friends! This firming-up time is crucial. It makes them much easier to handle for dipping (if you’re doing that), and it gives the flavors a chance to meld together beautifully.
Step 5: The Chocolate Dip (Optional, but Highly Recommended)
If you’re going for the chocolate-coated glory, now’s the time! Melt your chocolate slowly and gently. You can do this in a double boiler, or my favorite lazy method: in a microwave-safe bowl in 20-second bursts, stirring vigorously between each burst. Don’t overheat it! Take one chilled ball and dip it halfway into the melted chocolate. Use a fork or a dipping tool to lift it out, gently tapping off the excess chocolate. Place it back on the parchment-lined tray. If you’re feeling fancy, sprinkle a little extra shredded coconut on top before the chocolate sets!
Step 6: The Final Set
Once all your balls are dipped (or if you’re skipping the dip), return the tray to the fridge for another 20 minutes, or until the chocolate is completely firm and shiny.
How to Serve These Little Bits of Sunshine
Presentation is part of the joy! For a casual family treat, just pile them high on a cute plate or in a rustic bowl. If you’re gifting them or serving them at a party, I love placing them in mini paper candy cups—it makes them look professional and keeps them from sticking together. They are fantastic alongside a plate of other Christmas cookies, but they also shine all on their own with a hot coffee, a cold glass of milk, or even a glass of dessert wine. Their tropical vibe also makes them a surprising and delightful addition to a summer BBQ dessert spread!
Get Creative! Flavor Twists & Dietary Swaps
The basic recipe is a perfect canvas for your creativity. Here are a few of my favorite ways to mix it up:
- Almond Joy: Before rolling, press a whole almond into the center of each ball. Dip in dark chocolate for that classic candy bar flavor.
- Key Lime Pie: Add 2 tablespoons of key lime juice and 1 teaspoon of lime zest to the mixture. You might need a touch more powdered sugar to compensate for the extra liquid. Dip in white chocolate.
- Mocha Madness: Add 1-2 tablespoons of instant espresso powder to the dry ingredients. Dip in dark chocolate for a coffee-chocolate-coconut trifecta.
- Dairy-Free Delight: Use full-fat canned coconut cream instead of condensed milk and ensure your chocolate is dairy-free. It works like a charm!
- Rolled & Coated: Instead of dipping in chocolate, roll the finished balls in extra coconut, crushed nuts, or even colorful sprinkles for a festive look.
Olivia’s Chef Notes & Kitchen Stories
This recipe has evolved so much since my grandma’s days. She used a recipe she’d clipped from a newspaper, and it was perfect in its simplicity. Over the years, I’ve added the salt (a game-changer!), played with toasting the coconut, and embraced the chocolate dip. I once tried to make a giant “coconut ball cake” for a birthday. It was… a structural disaster that we had to eat with spoons, but it was delicious! The moral of the story: don’t be afraid to play with your food.
These also freeze incredibly well. I always make a double batch, freeze them on a tray, and then toss them in a freezer bag. Then, I have a ready-made homemade dessert or gift for up to three months! Just thaw in the fridge for an hour or two. They are my little secret stash of happiness for busy days or unexpected guests.
Your Coconut Ball Questions, Answered!
Q: My mixture is too sticky to roll! What did I do wrong?
A: This usually means you might have added a bit too much condensed milk, or your coconut wasn’t as absorbent. Don’t panic! Just pop the whole mixture into the fridge for 15-20 minutes. This will firm up the fats and make it much easier to handle. You can also lightly dust your hands with powdered sugar to prevent sticking.
Q: Can I use unsweetened coconut instead?
A: You can, but be aware that it will significantly change the final product. The balls will be much less sweet and the texture will be a bit drier. If you use unsweetened coconut, I’d recommend increasing the condensed milk by a tablespoon or two and tasting the mixture before rolling to see if you’d like to add a bit more sugar.
Q: Why did my chocolate coating turn thick and clumpy?
A: That means your chocolate likely “seized,” which usually happens if a tiny bit of moisture got into it while melting. Even a drop of water or steam can do it! Always make sure your bowls and tools are completely dry. To fix seized chocolate, you can try stirring in a teaspoon of neutral oil (like vegetable or coconut oil) at a time until it becomes smooth again.
Q: How long will these keep fresh?
A: Stored in an airtight container in the refrigerator, they will stay perfectly fresh and delicious for up to 2 weeks. They also freeze beautifully for up to 3 months!
Coconut Balls
Description
Hello, flavor-lovers! These little bites are chewy, sweet, and packed with tropical coconut goodness—no oven required! Perfect for last-minute holiday gifts, potlucks, or a simple treat with tea or coffee. Quick to make, fun to roll, and deliciously nostalgic, they’ll transport you to a sunny beach even on snowy days.
Ingredients
-
2 cups shredded sweetened coconut (reserve ½ cup to toast for extra flavor)
-
1 cup powdered sugar
-
½ cup sweetened condensed milk (or full-fat coconut cream for dairy-free)
-
1 tsp vanilla extract (or coconut extract)
-
Pinch of salt
-
8 oz white or dark chocolate (optional, for dipping)
Instructions
-
Mix the Base: In a large bowl, combine coconut, powdered sugar, and salt. Stir in condensed milk and vanilla. Mix by hand until the mixture sticks together like soft dough.
-
Adjust Texture: If too dry, add condensed milk 1 tsp at a time. If too wet, add powdered sugar or coconut until manageable.
-
Shape the Balls: Line a baking sheet with parchment paper. Use a small scoop or your hands to roll 1-inch balls. Lightly dampen palms to prevent sticking.
-
Chill: Refrigerate for at least 30 minutes to firm up.
-
Optional Chocolate Dip: Melt chocolate slowly (double boiler or microwave in 20-second bursts). Dip chilled balls halfway, letting excess drip off. Place on parchment and sprinkle with extra coconut if desired.
-
Final Chill: Refrigerate for 20 more minutes until chocolate is firm.
Notes
-
Almond Joy: Press a whole almond into each ball before dipping in dark chocolate.
-
Key Lime Pie: Add 2 tbsp lime juice + 1 tsp lime zest; dip in white chocolate.
-
Mocha Madness: Mix in 1–2 tsp instant espresso powder; dip in dark chocolate.
-
Roll & Coat: Skip chocolate; roll in extra coconut, crushed nuts, or sprinkles.
Nutritional Information
*Please note: This is an estimate per coconut ball (without chocolate coating) generated by a nutrition calculator and should be used for informational purposes only.*
- Calories: 100kcal
- Fat: 5g
- Saturated Fat: 4g
- Carbohydrates: 13g
- Sugar: 11g
- Protein: 1g
- Sodium: 15mg
Prep Time: 15 mins | Chill Time: 50 mins | Total Time: 1 hour 5 mins | Yield: ~25 balls
Final Thoughts: A Little Bit of Sweetness to Hold Onto
And just like that, you’ve done it. You’ve created a batch of pure, uncomplicated joy. These little coconut balls are more than just a treat; they’re a testament to the fact that the most delicious things in life don’t have to be complicated. They’re proof that a few simple ingredients and your own two hands can create something truly magical.
I hope this recipe becomes a staple in your kitchen, your own secret weapon for spreading a little sweetness. I hope you make them for someone you love, or better yet, make them with someone you love, getting coconut everywhere and laughing while you do it. Because that’s what this is really about—creating those small, sticky, happy moments that turn into the best memories.
So, whether you’re hiding a few in the freezer for yourself or boxing them up as a gift from the heart, I hope every bite reminds you of sunshine, simplicity, and the sweet satisfaction of making something wonderful.
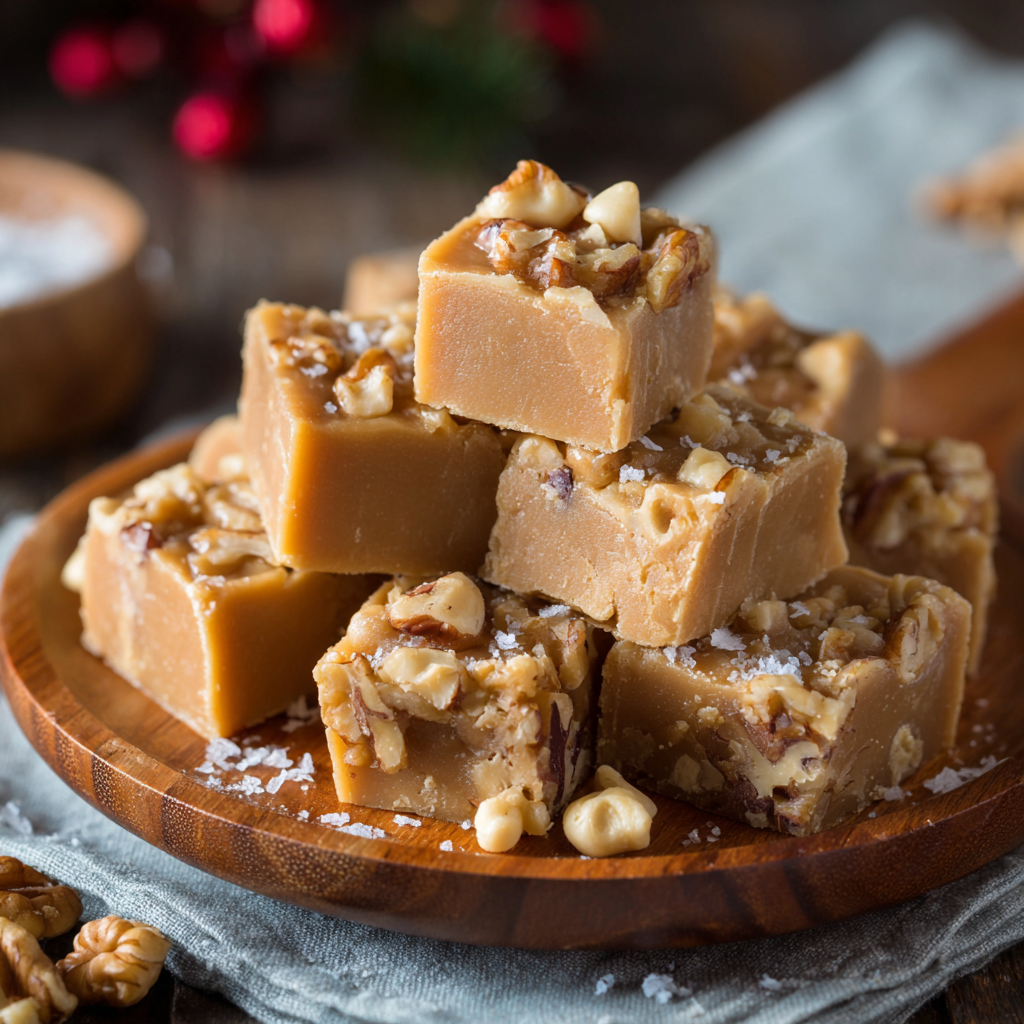
Maple Nut Fudge
Your New Favorite Holiday Treat is Just a Stir Away
Hey there, friend! Come on in, the kitchen’s warm, and I’ve got something simmering on the stove that smells like pure, unadulterated joy. If you’ve ever walked through a festive market, caught a whiff of something sweet and nutty, and instantly felt that cozy, holiday spirit wrap around you like a favorite sweater—then you, my friend, know the magic of maple. And today, we’re bottling that magic (no fancy equipment required) into the creamiest, dreamiest, most melt-in-your-mouth Maple Nut Fudge you’ll ever taste.
I’m a firm believer that the best recipes are the ones that bring immense happiness without causing a ton of stress. This fudge is exactly that. We’re skipping the finicky candy thermometers and the frantic panics over ‘soft-ball stages.’ Nope. This is a stir, melt, pour, and chill situation. It’s virtually foolproof, incredibly forgiving, and the payoff is huge. Imagine rich, velvety white chocolate, the deep, warm embrace of pure maple, and the satisfying, toasty crunch of walnuts, all coming together in one perfect, bite-sized square. This isn’t just a candy; it’s a memory maker, the star of your cookie tray, and the most heartfelt homemade gift you can give. So, tie on your apron (it’s okay if it’s a little messy, mine always is!), and let’s make something unforgettable together.
A Sweet Slice of Vermont Winter
This recipe always takes me right back to a specific, snowy weekend in Vermont. My husband and I were visiting friends, and we’d spent the entire day out in the cold, sledding and building a truly pathetic-looking snowman. We finally tumbled back inside, cheeks flushed and fingers numb, and were immediately greeted by the most incredible aroma. Our friend’s grandmother, a tiny, formidable woman named Mabel who ruled her kitchen with a gentle iron fist, was pulling a pan of her famous maple fudge from the fridge.
She handed us each a square, still cool from setting. That first bite was a revelation. It wasn’t cloyingly sweet; it was deep and complex, with the maple flavor singing front and center. The nuts provided this wonderful textural contrast to the impossibly smooth, creamy base. We sat by the fire, silently savoring our treats, the warmth finally returning to our bones. It was a moment of pure, simple, delicious contentment. That’s the feeling I try to bake into every batch of this fudge I make. It’s more than a dessert; it’s a little square of warmth and comfort.
Gathering Your Cozy Ingredients
The beauty of this recipe is in its simplicity. You only need a handful of pantry staples to create something truly spectacular. Here’s what you’ll need:
- 3 cups white chocolate chips: This forms the creamy base of our fudge. I recommend a good-quality brand like Ghirardelli or Guittard for the smoothest melt and best flavor. Chef’s Insight: White chocolate can be a bit temperamental. Make sure you’re using real white chocolate chips, not vanilla or white baking morsels, which have a different fat content and won’t set as well.
- 1 (14 oz) can sweetened condensed milk: This is the magic ingredient that gives the fudge its classic, soft-yet-firm texture and delightful sweetness. There’s no real substitute here—evaporated milk will not work!
- 2 tbsp unsalted butter: Added for extra richness and a beautiful, glossy sheen. Using unsalted allows us to control the salt level ourselves. If you only have salted, that’s okay! Just omit the pinch of salt later.
- 1½ tsp maple extract: This is key for that powerful, authentic maple flavor. While you can use pure maple syrup, extract delivers a more potent punch without adding extra liquid. Substitution Tip: In a pinch, you can use 2 tablespoons of pure maple syrup, but be aware your fudge might be slightly softer. For the best flavor, use the extract!
- 1 cup chopped walnuts or pecans: I’m team walnut all the way for that classic flavor and crunch, but pecans are a deliciously buttery alternative. Chef’s Insight: Toasting your nuts beforehand is a GAME-CHANGER. Just pop them on a baking sheet at 350°F for 5-7 minutes until fragrant. It deepens their flavor immensely!
- Pinch of salt: Don’t skip this! Salt is the flavor enhancer that makes the sweet maple and rich chocolate pop. It balances everything out perfectly.
Let’s Make Some Magic: Step-by-Step
Ready? This is so easy, you’re going to be amazed. Let’s walk through it together.
- Prep Your Pan: First things first, line an 8×8-inch baking pan with parchment paper. I like to cut two strips—one for the length and one for the width—leaving a little overhang on each side. This isn’t just for easy cleanup; it’s your golden ticket to effortlessly lifting the entire slab of fudge out of the pan later for pristine, crumb-free cutting. Lightly grease the paper with a dab of butter or cooking spray to ensure nothing sticks.
- The Gentle Melt: In a medium-sized, heavy-bottomed saucepan, combine your white chocolate chips, the entire can of sweetened condensed milk, and the butter. Now, here’s the most important step: use LOW heat. I’m talking medium-low at most. White chocolate is delicate and can scorch or seize (turn into a grainy mess) if you rush it. Stir constantly and patiently with a rubber spatula or wooden spoon. You’re not just preventing sticking; you’re encouraging everything to melt together into one gloriously smooth, homogeneous mixture. This should take about 5-7 minutes. You’ll know it’s ready when you can’t see any individual chip remnants and the mixture is perfectly smooth.
- Off the Heat & Flavor Time: As soon as your mixture is silky smooth, immediately remove the pan from the heat. Stir in the maple extract and that all-important pinch of salt. Give it a good stir to combine. Now, fold in your chopped nuts. I like to reserve a small handful to sprinkle on top for a pretty finish, but that’s totally optional!
- Into the Pan: Pour your beautiful fudge mixture into your prepared pan. Use your spatula to spread it into an even layer, pushing it gently into the corners. If you saved some nuts, sprinkle them evenly over the top now and press them down lightly so they adhere.
- The Patient Chill: This is the hardest part—waiting! Carefully transfer the pan to your refrigerator. You need to let it chill, uncovered, for at least 2-3 hours, or until it’s completely firm to the touch. Don’t try to rush this by putting it in the freezer! While it might set faster, it can cause the fudge to become overly hard and can sometimes create condensation, making the top slightly sticky.
- The Grand Finale: Cutting! Once fully set, use the parchment paper overhang to lift the fudge block out of the pan and onto a cutting board. Using a large, sharp knife, slice it into squares. Pro-Tip: For super clean cuts, wipe your knife blade with a hot, damp cloth between each slice. It makes all the difference!
How to Serve Your Masterpiece
This fudge is a star all on its own! For serving, I love to arrange the squares on a beautiful ceramic platter or a rustic wooden board. Let it sit out for about 10 minutes before serving to take the deep chill off—this allows the flavors to bloom and the texture to become perfectly soft and creamy. It pairs wonderfully with a hot cup of coffee, a glass of cold milk, or even a sweet dessert wine. If you’re gifting it, stack a few pieces in a clear cellophane bag tied with a pretty ribbon, or layer them in a festive tin between sheets of parchment paper.
Get Creative: Fun Flavor Twists!
Once you’ve mastered the classic, feel free to play with the formula! Here are a few of my favorite riffs:
- Maple Bacon Bliss: Add ½ cup of finely chopped, cooked crispy bacon along with the nuts. The sweet-salty-smoky combo is incredible.
- Double Chocolate Maple: Swap out 1 cup of the white chocolate chips for semi-sweet or dark chocolate chips. You’ll get a swirled, marbled effect and a richer flavor.
- “Everything but the Kitchen Sink” Maple: Fold in a mix of toasted nuts, dried cranberries, and even a handful of toffee bits for a fun texture explosion.
- Vegan Maple Fudge: Use dairy-free white chocolate chips, vegan sweetened condensed coconut milk, and vegan butter. It works like a charm!
- Maple Espresso Crunch: Stir in 1-2 teaspoons of instant espresso powder with the maple extract for a sophisticated coffee kick.
Olivia’s Chef Notes & Kitchen Stories
This recipe has become my go-to for last-minute hostess gifts and holiday potlucks. It’s saved my bacon more than once! I remember one year, I signed up to bring three dozen cookies to a school bake sale and completely forgot until the night before. Panic mode! I whipped up a double batch of this fudge, cut it into tiny one-bite squares, and packaged them up. They were the first thing to sell out, and I got so many requests for the recipe. The lesson? Simple, heartfelt food always wins.
Over the years, I’ve learned that the quality of your maple extract really matters. Splurge on the good stuff—it makes a world of difference. And don’t be afraid to make this fudge your own. Recipes are just guidelines; your kitchen, your rules! The best dishes are the ones filled with a little bit of your own spirit.
Your Maple Fudge Questions, Answered!
Q: My fudge turned out grainy. What happened?
A: Graininess is almost always caused by the white chocolate seizing. This happens if the heat was too high or if a tiny bit of steam or water got into the mixture while melting. Always make sure your pot and tools are completely dry, and melt over low, gentle heat, stirring constantly.
Q: Can I use pure maple syrup instead of extract?
A: You can, but I don’t always recommend it for beginners. Syrup adds extra liquid, which can prevent the fudge from setting up as firmly. If you want to try, use 2-3 tablespoons of real maple syrup and reduce the sweetened condensed milk by 2 tablespoons. The maple flavor will be more subtle.
Q: How long does this fudge keep? And how should I store it?
A: Stored in an airtight container in the refrigerator, this fudge will stay fresh and delicious for up to 2 weeks! You can also freeze it for up to 3 months. Just separate layers with parchment paper and thaw in the fridge overnight.
Q: My fudge is too soft and won’t set. Help!
A: First, make sure you gave it enough time to chill—sometimes it needs a full 3-4 hours. If it’s still too soft, it’s likely due to inaccurate measuring or a brand of chocolate that has a lower cocoa butter content. You can pop it back in the fridge for longer, or you can re-melt it and add a bit more chocolate chips to help it firm up.
Maple Nut Fudge
- Total Time: 3 hours 10 minutes
Description
Hey there, friend! Imagine walking into a cozy kitchen filled with the warm, sweet aroma of maple and chocolate. That’s exactly what this fudge brings—a rich, creamy, melt-in-your-mouth treat that’s perfect for holiday gatherings, gift-giving, or just a cozy snack by the fire. The combination of velvety white chocolate, warm maple flavor, and toasty nuts makes this fudge utterly irresistible, and best of all—it’s easy to make, even if you’ve never made candy before!
Ingredients
-
3 cups white chocolate chips (use a good-quality brand for best results)
-
1 (14 oz) can sweetened condensed milk
-
2 tbsp unsalted butter
-
1½ tsp maple extract (or 2 tbsp pure maple syrup as a substitute)
-
1 cup chopped walnuts or pecans (toasted for extra flavor)
-
Pinch of salt
Instructions
-
Prep Your Pan: Line an 8×8-inch baking pan with parchment paper, leaving a bit of overhang on each side. Lightly grease the paper with butter or cooking spray.
-
Melt the Base: In a medium saucepan over low heat, combine white chocolate chips, sweetened condensed milk, and butter. Stir constantly until smooth (about 5–7 minutes). Avoid high heat to prevent scorching.
-
Add Flavor: Remove from heat and stir in maple extract (or syrup) and a pinch of salt. Fold in the chopped nuts, reserving a few for topping if desired.
-
Pour & Chill: Pour the mixture into the prepared pan and spread evenly. Sprinkle reserved nuts on top. Refrigerate for 2–3 hours, until firm.
-
Cut & Serve: Use the parchment overhang to lift the fudge from the pan. Slice into squares with a sharp knife (wipe the blade between cuts for clean edges).
Notes
-
Toast the Nuts: Baking nuts at 350°F for 5–7 minutes intensifies their flavor.
-
Avoid Grainy Fudge: Always melt chocolate over low heat and ensure no water touches the mixture.
-
Flavor Variations: Add crumbled bacon, espresso powder, or dried cranberries for creative twists.
-
Storage: Keep in an airtight container in the fridge for up to 2 weeks, or freeze for up to 3 months.
- Prep Time: 10 minutes
Nutrition
- Calories: 160 cal Per Serving
- Sugar: 16g
- Fat: 9g
- Saturated Fat: 4g
- Carbohydrates: 18g
- Protein: 2g
Nutritional Information*
*Please note: This is an estimate provided for informational purposes only. Calculations will vary based on your specific ingredients and brands.
Per Square (based on 25 squares): Calories: 160 | Fat: 9g | Saturated Fat: 4g | Carbohydrates: 18g | Sugar: 16g | Protein: 2g | Sodium: 35mg
Prep Time: 10 minutes | Chill Time: 3 hours | Total Time: 3 hours 10 minutes | Yield: 25 squares
Final Thoughts: A Little Jar of Holiday Comfort
And just like that, you’ve done it. You’ve created more than just a treat; you’ve bottled the very essence of the season—the warmth, the comfort, the joy of sharing something made entirely by hand.
This fudge is a reminder that the most magical moments often come from the simplest recipes. It doesn’t demand perfection, just a little bit of patience and a whole lot of heart. It’s the perfect gift for the neighbor who shovels your walk, the sweet surprise for your book club, or the secret weapon you stash in the fridge for when you need a moment of quiet, maple-y bliss with a cup of tea.
So, as you package up your beautiful squares or arrange them on a platter, remember my friend Mabel in Vermont. Remember that the true magic isn’t just in the perfect, creamy texture or the rich flavor—it’s in the love you stirred into the pot. It’s in the memories you’ll create and the smiles you’ll inspire with every single bite.
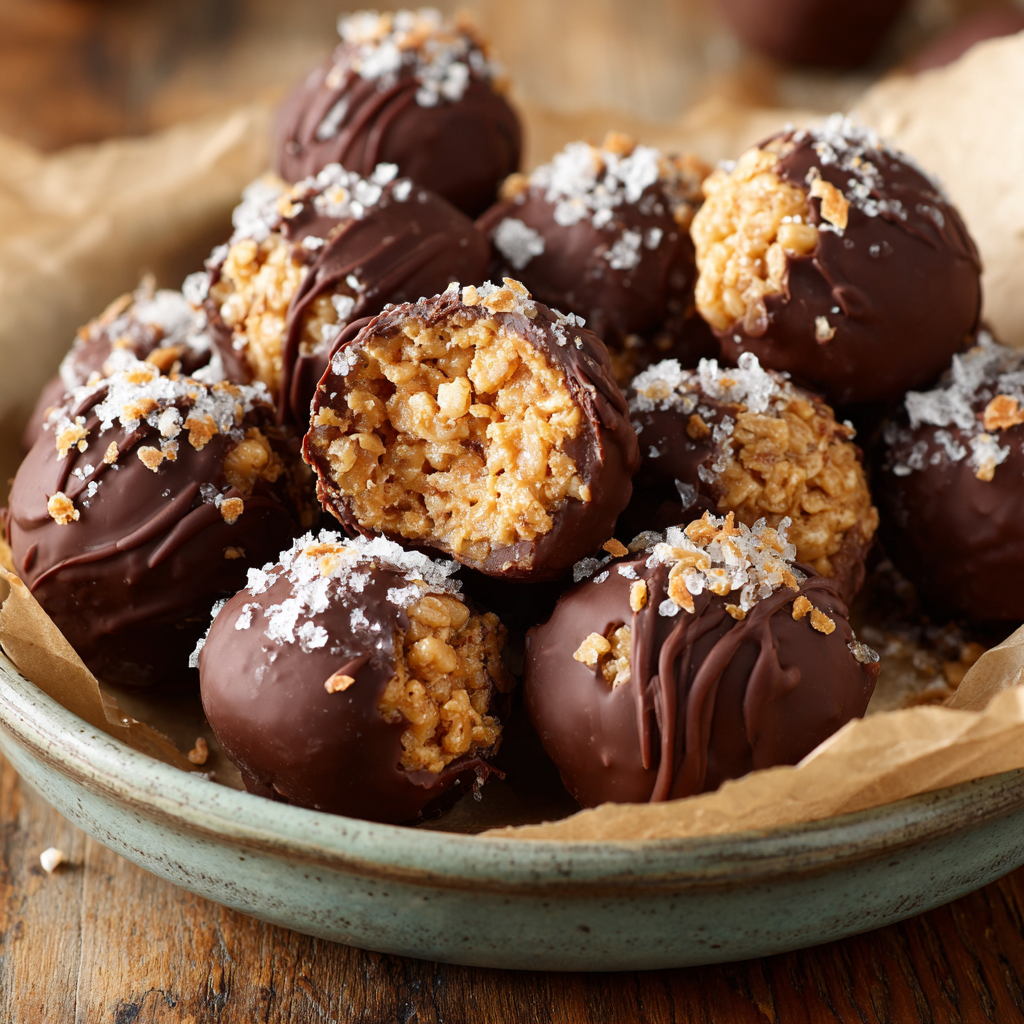
Peanut Butter Balls with Rice Krispies
Welcome to My Kitchen: Let’s Make Some Magic!
Hello, my fellow flavor-seeker! Can you smell that? It’s the unmistakable, soul-warming aroma of melted chocolate and rich peanut butter wafting through the air. It’s a smell that instantly transports me back to my grandmother’s kitchen, a place of flour-dusted counters and endless laughter. If you’re anything like me, you believe some of the best memories are made right next to the mixing bowl, and today, we’re creating a classic that’s bursting with nostalgia and joy.
We’re whipping up a batch of Peanut Butter Balls with Rice Krispies. Oh, you know the ones! That perfect, no-bake treat that combines creamy, crunchy, and sweet into one irresistible, bite-sized piece of heaven. They’re the star of every holiday cookie tin, the secret weapon for last-minute potlucks, and the ultimate reward for a job well done (even if that job was just making it through a Tuesday).
The best part? You absolutely do not need to be a pastry chef to master these. This recipe is all about heart, a little bit of mess, and a whole lot of fun. So, tie on your favorite apron (the one with the questionable stains that tell a thousand stories), grab a big bowl, and let’s create something unforgettable together. Get ready to make your kitchen the coziest, most delicious place in the house!
A Christmas Eve Tradition: The Great Peanut Butter Ball Roll-Off
I can’t talk about these peanut butter balls without thinking of my family’s Christmas Eve tradition. After the dinner dishes were cleared, my mom would clear the massive wooden table and lay out sheets of wax paper. The big metal mixing bowl, the one that seemed impossibly huge to my child-sized hands, would emerge, filled with that glorious peanut butter mixture.
My sister and I would be tasked with rolling the balls. But it was never just a task; it was a full-blown competition. The “Great Roll-Off,” we called it. Who could roll the most perfect, most spherical balls? Who could do it the fastest without getting peanut butter in their hair? (Spoiler: we both always did). We’d have powdered sugar dust on our noses and the radio tuned to cheesy holiday music. It was messy, it was chaotic, and it was pure magic. To this day, the taste of one of these treats isn’t just a taste—it’s a time machine straight back to that table, surrounded by love, laughter, and the excited anticipation of Christmas morning.
Gathering Your Ingredients: A Little Chef’s Insight
Part of the beauty of this recipe is its simplicity. You likely have most of these ingredients in your pantry right now! Here’s what you’ll need and why each one plays a crucial role:
- 1 cup creamy peanut butter – This is the star of the show! I recommend using a standard, shelf-stable brand like Jif or Skippy for the best texture and consistency. The oil in natural peanut butter can separate and make the mixture too greasy and difficult to hold its shape.
- ¼ cup unsalted butter, softened – The butter adds richness and helps firm up the mixture when chilled, making it dippable. Chef’s Tip: Let your butter sit on the counter for 30-60 minutes before you start. It should be soft to the touch but not melted. This makes creaming it with the peanut butter a breeze!
- 1½ cups powdered sugar – Also known as confectioner’s sugar, this sweetens the deal and absorbs the oils, giving the mixture its perfect, rollable texture. It also creates that subtly crumbly, melt-in-your-mouth center.
- 1½ cups Rice Krispies cereal – The secret weapon for that iconic CRUNCH! It provides a fantastic textural contrast to the creamy peanut butter and smooth chocolate. Don’t substitute with puffed rice; you want that specific snap, crackle, and pop.
- 10 oz semi-sweet chocolate chips – The luxurious coating that brings it all home. I prefer the flavor balance of semi-sweet with the sweet peanut butter center, but feel free to use milk chocolate or dark chocolate if that’s your preference!
- 1 tbsp coconut oil or shortening (optional) – This is my little professional hack for a perfectly smooth, glossy, and thin chocolate shell. It helps thin the melted chocolate just enough for easy dipping and creates a beautiful snap when you bite into it.
Let’s Get Rolling: Your Step-by-Step Guide to Perfection
Ready to get your hands a little dirty? Let’s do this! I’ll walk you through each step with all my favorite tips and tricks to ensure your peanut butter balls are absolutely flawless.
Step 1: The Creamy Base
In a large bowl, combine the softened butter and creamy peanut butter. Use a hand mixer or a sturdy spatula to beat them together until they are completely smooth and well-incorporated. This should only take a minute or two. You’ll know it’s ready when you can’t see any streaks of yellow butter anymore. Chef’s Hack: If your butter isn’t quite soft enough, you can cut it into small chunks first to help it blend in faster.
Step 2: Sweeten the Deal
Now, gradually add in the powdered sugar. I like to add it in half-cup increments, mixing well after each addition. This prevents a giant cloud of sugar from exploding all over you and your kitchen (though a little snowstorm can be part of the fun!). Mix until the powdered sugar is fully absorbed and the mixture is thick, slightly crumbly, but holds together when you press it between your fingers.
Step 3: The Crunch Factor
Here’s where the magic happens! Add the Rice Krispies cereal. Now, be gentle. Use a folding motion with your spatula to incorporate them. You want to distribute them evenly without crushing all the lovely airy bubbles in the cereal. We’re going for maximum crunch, not crumbs!
Step 4: Roll Call!
Line a baking sheet with parchment paper or a silicone baking mat. Using a small cookie scoop (about 1 tablespoon in size) or a spoon, portion out the mixture. Then, get rolling! Roll each portion between the palms of your hands to form a neat, one-inch ball. Place each ball on the prepared tray. Pro Tip: If the mixture is too sticky, you can lightly dust your hands with powdered sugar. This batch should make about 30 perfect little orbs.
Step 5: The Essential Chill
This step is non-negotiable! Pop the entire tray into the refrigerator for at least 30 minutes. This firms up the balls, making them much easier to dip in the chocolate without falling apart. A firm, cold center is the key to a smooth coating process.
Step 6: Chocolate Dip Station
When the balls are almost chilled, it’s time to melt the chocolate. Place the chocolate chips and your tablespoon of coconut oil (or shortening) in a microwave-safe bowl. Heat in 30-second intervals on medium power, stirring vigorously between each interval. Stop when just a few small lumps remain—the residual heat will melt them as you stir. You can also use a double boiler on the stove for more control. The goal is smooth, fluid, and glossy melted chocolate.
Step 7: The Grand Finale: Dipping!
Remove the peanut butter balls from the fridge. Using a fork, a dipping tool, or even two spoons, submerge each ball into the melted chocolate. Gently tap the fork on the side of the bowl to allow the excess chocolate to drip off. This gives you a beautiful, thin, even coating. Carefully place it back on the parchment-lined tray. Repeat with all balls! Chef’s Hack: For a decorative touch, you can drizzle a little extra melted chocolate over the top with a fork before the chocolate sets, or sprinkle them with a tiny bit of flaky sea salt.
Step 8: Set It and Forget It
Once all balls are beautifully enrobed, return the tray to the refrigerator for another 20 minutes, or until the chocolate coating is completely firm and has a satisfying snap when you break one open.
How to Serve These Little Bites of Joy
Presentation is part of the fun! For a casual family treat, simply pile them high on a cute plate or in a rustic wooden bowl. If you’re gifting them, they look absolutely gorgeous stacked in a clear cellophane bag tied with a ribbon or arranged in a festive holiday tin between layers of wax paper. They’re the perfect sweet ending to a big meal, a wonderful addition to a brunch spread, or just the thing to have hiding in the fridge for a 3 pm pick-me-up with a cup of coffee. However you serve them, serve them with a smile!
Get Creative! Fun Flavor Twists & Swaps
Once you’ve mastered the classic, the playground is yours! Here are a few of my favorite ways to mix things up:
- Elvis Special: Add 3-4 tablespoons of mashed ripe banana to the peanut butter mixture and use milk chocolate for coating. A tribute to The King!
- Salty Sweet Supreme: Mix ½ cup of crushed pretzel pieces in with the Rice Krispies for a double crunch and a fantastic salty-sweet contrast.
- Nutty Buddy: Roll the finished chocolate-dipped balls in finely chopped peanuts, pecans, or toasted coconut before the chocolate sets for an extra layer of flavor and texture.
- Different Cereal, Different Vibe: Swap the Rice Krispies for an equal amount of crushed cornflakes for a slightly different crunch, or use Cocoa Krispies for a double chocolate version!
- Dietary Swap: To make gluten-free, ensure your Rice Krispies (or similar crisp rice cereal) are a certified gluten-free brand. For a dairy-free version, use vegan butter and ensure your chocolate chips are dairy-free.
Olivia’s Chef Notes & Kitchen Confessions
This recipe has been with me for over two decades, and it’s evolved in the best ways. I vividly remember the first time I made them on my own as a teenager—I was so proud, but I made the classic mistake of not chilling the balls long enough. Let’s just say I ended up with chocolate-covered peanut butter blobs instead of balls! A delicious mess, but a mess nonetheless. So learn from my mistake: patience is key.
Over the years, I’ve added the coconut oil trick after a pastry chef friend shared it with me, and it was a total game-changer. I’ve also learned that the quality of your chocolate chips really does matter. A good brand melts smoother and tastes infinitely better. Most of all, this recipe has taught me that the best cooking isn’t about perfection; it’s about the laughter when a ball slips off the fork, the joy of seeing someone’s face light up when they take the first bite, and the love that gets mixed into every single step.
Your Questions, Answered!
Q: My mixture is too dry and crumbly and won’t hold together when I try to roll it. What did I do wrong?
A: This usually means your peanut butter was a bit too thick to begin with, or you packed your powdered sugar. Don’t worry! The fix is easy. Add more moisture. Add another tablespoon of softened butter OR a tiny splash of milk or honey. Mix it in and test again. Add liquid very gradually until it just comes together.
Q: My chocolate is seizing up/getting clumpy when I try to melt it. Help!
A> Ah, the dreaded seized chocolate! This happens if even a single drop of water gets into the melting chocolate. Make sure your bowl and tools are completely dry. If it’s already happened, you can sometimes save it by immediately stirring in a teaspoon of coconut oil or vegetable shortening—this can help bring it back to a smooth state.
Q: Can I freeze these peanut butter balls?
A: Absolutely! They freeze beautifully. After the chocolate has fully set, place them in a single layer in an airtight container separated by layers of parchment paper. They will keep for up to 2 months. Thaw in the refrigerator for a few hours before serving.
Q: Why do you use coconut oil in the chocolate?
A: The coconut oil (or shortening) acts as a thinning agent. It makes the melted chocolate more fluid, which means a thinner, smoother, more professional-looking coating. It also helps the chocolate set with a beautiful glossy finish and a satisfying snap.

Peanut Butter Balls with Rice Krispies
Description
These no-bake gems combine creamy peanut butter, sweet crunch, and rich chocolate into one irresistible bite. Easy, fun, and guaranteed to bring smiles (and a little kitchen mess) to the table.
Ingredients
-
1 cup creamy peanut butter (Jif/Skippy recommended)
-
¼ cup unsalted butter, softened
-
1½ cups powdered sugar
-
1½ cups Rice Krispies cereal
-
10 oz semi-sweet chocolate chips (or milk/dark if preferred)
-
1 tbsp coconut oil or shortening (optional, for smooth coating)
Instructions
-
Mix Base – Cream peanut butter + butter until smooth.
-
Sweeten – Gradually add powdered sugar; mix until thick but rollable.
-
Add Crunch – Fold in Rice Krispies gently.
-
Roll – Scoop ~1 tbsp portions; roll into 1-inch balls. Place on parchment-lined tray.
-
Chill – Refrigerate for 30 mins to firm up.
-
Melt Chocolate – Microwave chocolate + coconut oil in 30-sec bursts, stirring until smooth.
-
Dip & Set – Coat each ball in chocolate, let excess drip off, return to tray. Chill again for 20 mins until firm.
Notes
-
Elvis Special: Add mashed banana + use milk chocolate.
-
Salty Sweet Supreme: Mix in crushed pretzels.
-
Nutty Buddy: Roll in chopped nuts or toasted coconut before chocolate sets.
-
Cocoa Twist: Swap Rice Krispies for Cocoa Krispies for double chocolate.
Nutrition
- Calories: 130 cal Per ball
- Sugar: 10g
- Fat: 8g
- Saturated Fat: 3g
Nutritional Information*
*Please note: This is an estimate provided for informational purposes only. Calculations will vary based on specific ingredients used.
Per ball (approx. 30 per recipe): Calories: 130 | Fat: 8g | Saturated Fat: 3g | Carbohydrates: 13g | Sugar: 10g | Protein: 2g | Sodium: 45mg
Final Thoughts: More Than Just a Treat
And just like that, you’ve done it! You’ve created a batch of pure, unadulterated joy. As you look at that tray of perfectly dipped peanut butter balls, I hope you feel an immense sense of pride. You didn’t just follow a recipe; you kept a wonderful tradition alive and maybe even started a new one of your own.
These little bites are a reminder that the best things in life are often the simplest. They don’t require a fancy oven or complicated techniques—just a few good ingredients and a willingness to get your hands a little messy. They’re a testament to the power of food to connect us: to past memories in a grandmother’s kitchen, to present moments of laughter with family, and to future gatherings where you’ll be the one sharing this beloved recipe.
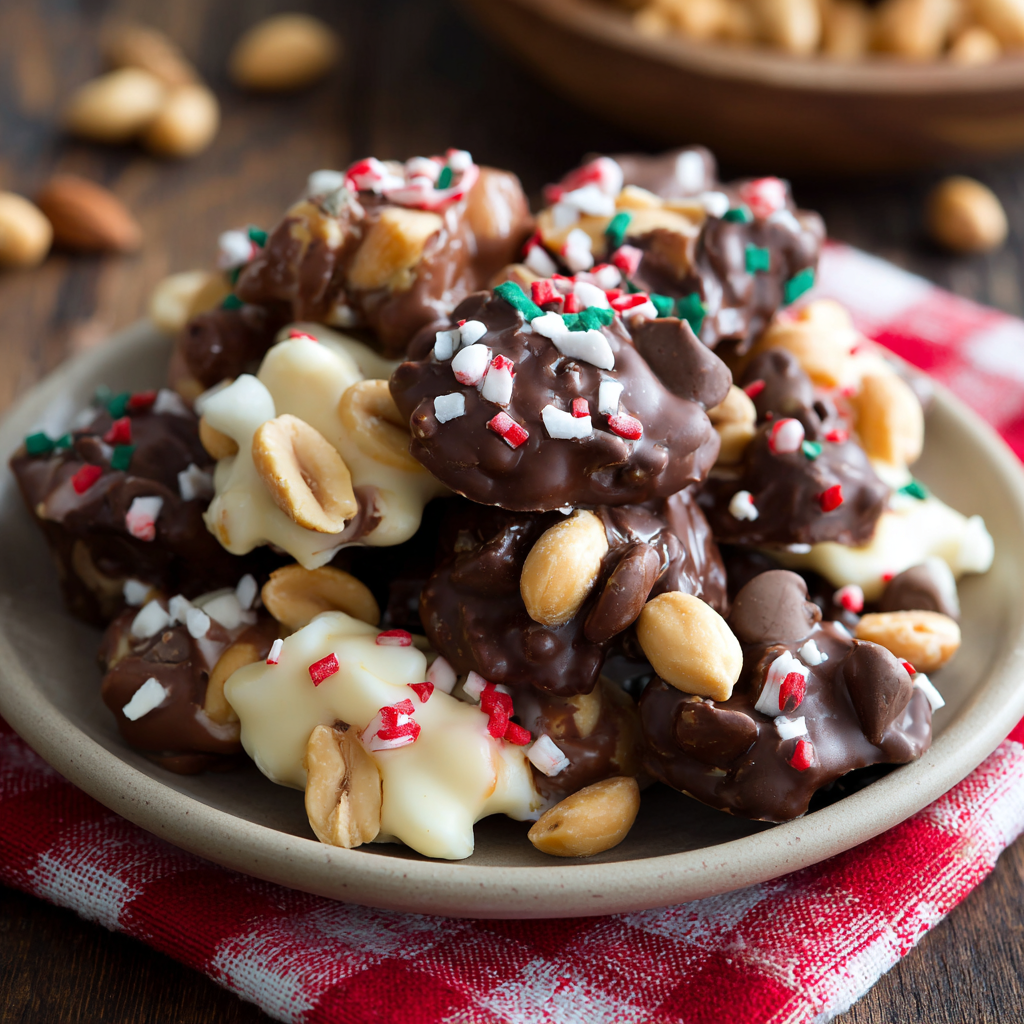
Crockpot Christmas Candy
Your New Favorite Holiday Tradition: Crockpot Christmas Candy
Hey there, friend! Can you smell that? It’s the scent of pine needles, a crackling fireplace, and… is that chocolate? Oh yes, it absolutely is. Welcome to the coziest corner of my kitchen, where we’re about to make some serious holiday magic with almost zero effort. I’m talking about my legendary Crockpot Christmas Candy, and if you’re looking for a treat that’s equal parts delicious, festive, and downright easy, you’ve just hit the jackpot.
Imagine this: you’re wrapping presents, your favorite holiday movie is on in the background, and your slow cooker is quietly whipping up a batch of the most incredible sweet-and-salty candy clusters you’ve ever tasted. No babysitting a temperamental double boiler, no frantic stirring, no kitchen mess. Just you, the joyful chaos of the season, and the incredible knowledge that you’re creating something truly special to share (or, you know, hide in the pantry for yourself—I won’t judge!).
This recipe is the ultimate crowd-pleaser. It’s the perfect last-minute edible gift for neighbors, the star of your cookie swap, or that secret weapon you bring to a party that has everyone asking, “How did you make this?!” So, tie on your favorite festive apron, grab your slow cooker, and let’s make some memories. This is holiday cooking at its most joyful and stress-free.
A Sweet, Slow-Cooked Memory
This recipe will always hold a special place in my heart because it’s tied to one of my all-time favorite holiday memories. A few years back, my best friend, Sarah, and I decided to have a “Gift-Wrapping & Glühwein” night. Our mission: conquer the mountain of presents for our families. Our reality? We got about three gifts in before we decided what we really needed was a kitchen project.
We rummaged through my pantry, found a bag of chocolate chips and some peanuts, and I remembered a vague recipe my aunt once described for slow cooker candy. We threw everything in, set it on low, and went back to our (very unsuccessful) wrapping. Hours later, the entire house smelled like a chocolate factory. We spent the rest of the night scooping clusters onto parchment paper, laughing, drinking wine, and sampling maybe a few too many. Those imperfect, lumpy clusters were the hit of every holiday gathering that year. Now, it’s not Christmas in my house without the warm, melty smell of this candy filling the air. It’s a reminder that the best moments aren’t perfect; they’re spontaneous, messy, and shared with good friends.
Gathering Your Holiday Magic: The Ingredients
The beauty of this recipe is in its simplicity. You likely have most of these ingredients in your pantry already! Here’s what you’ll need and why each one plays a starring role.
- 1½ lbs Roasted Salted Peanuts: This is the backbone of our candy! The saltiness cuts through the rich chocolate perfectly. Chef’s Insight: Using salted peanuts is key here. Don’t reach for the unsalted ones; that salty-sweet contrast is what makes these clusters so addictive. If you have a peanut allergy, see my variations below for easy swaps!
- 1 (12 oz) bag Semi-Sweet Chocolate Chips: This provides a deep, rich chocolate flavor that balances the sweetness of the other components.
- 1 (12 oz) bag Milk Chocolate Chips: The classic, crowd-pleasing chocolate flavor. It creates a smoother, creamier base.
- 1 (12 oz) bag White Chocolate Chips: White chocolate adds a wonderful vanilla note and helps to sweeten and lighten the overall mix. Substitution Tip: Not a fan of white chocolate? Swap it out for an extra bag of milk or dark chocolate chips. Easy peasy.
- 1 (24 oz) block Almond Bark, chopped: This is our secret weapon for the perfect set. Almond bark (which is vanilla-flavored) is a confectionery coating that melts smoothly and hardens beautifully, giving our clusters that satisfying “snap” without needing to temper chocolate. Chef’s Hack: Use a sharp knife to chop the block into smaller chunks—it will melt much more evenly!
- Optional Toppings: Sprinkles, Flaky Sea Salt, Crushed Candy Canes: This is where you get to have fun and make it your own! A sprinkle of flaky sea salt elevates the flavors to gourmet status. Holiday sprinkles or crushed candy canes make them instantly festive.
Let’s Get Cooking: The Foolproof Steps
I promise, this is the easiest “cooking” you’ll do all season. The slow cooker does 95% of the work for you. Let’s walk through it.
Step 1: The Layering Act. This is the most important step, but it’s also the easiest. Dump everything into your crockpot in this order: peanuts first, then all your chocolate chips, and finally, the chopped almond bark on top. Do not stir. I repeat, walk away from the spoon! This layering allows the ingredients to melt from the bottom up without scorching. The peanuts on the bottom act as a buffer, the chocolates in the middle melt beautifully, and the almond bark on top slowly sinks and melts into the party. It’s a thing of beauty.
Step 2: Practice Patience. Pop the lid on your crockpot and set it to LOW. Set a timer for 2 hours and walk away. Read a book, build a snowman, have a dance party to Mariah Carey—you’ve earned it. Chef’s Tip: Resist the urge to lift the lid! Every time you do, you let out precious heat and it will take longer to melt. Trust the process.
Step 3: The Big Reveal (& Stir!). After 2 hours, take a peek. The almond bark on top should look glossy and softened. Give it a gentle stir. If it’s not fully melted and combined, put the lid back on and check every 20 minutes. It usually takes my crockpot a full 3 hours on low. Once everything is melted and smooth, grab a sturdy spoon or spatula and stir it all together until it’s one glorious, unified pool of chocolate-peanut goodness. Chef’s Hack: If you’re short on time, you can use the WARM setting for an additional 30-60 minutes, but low and slow is always best to avoid any chance of the chocolate seizing.
Step 4: Scoop & Decorate! Line a few baking sheets with parchment paper (wax paper can work in a pinch, but parchment is non-stick king). Using two spoons or a small cookie scoop, drop tablespoon-sized mounds onto the prepared sheets. Work relatively quickly, as the chocolate will start to set. Now, the fun part: immediately add your toppings! A light shower of festive sprinkles, a delicate pinch of flaky sea salt, or a dusting of crushed candy cane. This is the time to do it, before the clusters start to firm up.
Step 5: The (Hardest Part) Waiting Game. You can let the clusters set at room temperature, which will take about 1-2 hours. If you’re impatient like me, pop the entire baking sheet into the refrigerator for 20-30 minutes to speed things up. They will firm up into perfect, bite-sized pieces of heaven.
How to Serve Your Holiday Masterpiece
Presentation is part of the fun! For a casual family treat, simply pile them high in a big, beautiful holiday bowl. For gift-giving, place them in clear cellophane bags tied with a rustic ribbon—they make incredible homemade gifts that people truly appreciate. If you’re putting together a dessert charcuterie board or cookie tray, scatter these clusters throughout. Their rustic, homemade look is incredibly charming next to more polished cookies. They pair wonderfully with a cold glass of milk, a hot coffee, or even a rich dessert wine.
Make It Your Own: Delicious Variations
The base recipe is a blank canvas for your creativity! Here are a few of my favorite twists:
- The Nutty Professor: Swap the peanuts for a mix of pecans, almonds, and cashews for a sophisticated nut blend.
- Peanut Butter Lover’s: Stir in 1 cup of peanut butter chips along with the chocolate chips for an extra PB punch.
- Minty Wonderland: Use dark chocolate chips instead of milk chocolate and top with crushed peppermint candies for a cool, refreshing kick.
- Pretzel Power: Replace half of the peanuts with broken-up pretzel pieces for an epic sweet-salty-crunchy situation.
- Nut-Free Celebration: Use roasted sunflower seeds or pumpkin seeds (pepitas) instead of nuts for an allergy-friendly version that’s just as delicious!
Olivia’s Chef Notes & Kitchen Stories
This recipe has evolved from that first experimental night with Sarah. I’ve learned that every crockpot runs a little differently—some are hotter, some are cooler. The first time you make this, just keep an eye on it after the 2-hour mark to learn your appliance’s rhythm. Also, a little confession: I once tried to hurry the process by using the HIGH setting. Big mistake. The chocolate on the bottom scorched before the top even melted. Low and slow is the only way to go! It’s a lesson in patience, which is maybe what we all need a little more of during the holidays anyway.
This recipe is also famously forgiving. I’ve accidentally used white almond bark instead of vanilla and it was fine. I’ve mixed up the ratios of chocolates. It always, always works out. So don’t stress. Pour yourself a cup of cheer, and enjoy the process. That’s what homemade holiday magic is all about.
Your Questions, Answered!
Q: My chocolate looks oily or has separated. What happened and can I fix it?
A: This is usually caused by getting a little water or steam into the chocolate (often from condensation on the lid). To fix it, try adding a teaspoon of solid vegetable shortening (like Crisco) and stir vigorously. This can often bring it back together. To prevent it, always make sure your lid is wiped dry before placing it on the crockpot.
Q: Can I use high heat to melt it faster?
A> I don’t recommend it! Chocolate is delicate and scorches easily. High heat will likely burn the bottom layer before the top has even begun to melt. Trust the low-and-slow method for perfectly smooth, unburnt candy every time.
Q: How should I store these, and how long do they last?
A: Store them in an airtight container at room temperature for up to 2 weeks (if they last that long!). You can layer them between sheets of parchment paper so they don’t stick together. They can also be refrigerated, but bring them to room temperature before serving for the best texture and flavor.
Q: Can I double this recipe?
A: Absolutely! Just make sure you’re using a large 6-quart or bigger slow cooker so everything has room to melt evenly. The melting time might need to be extended by 30-60 minutes if you double it.
Nutritional Information*
*Please note: this is an estimate per cluster based on the provided ingredients and a yield of approximately 50 clusters. Actual values will vary based on specific brands and ingredient sizes used.
Per Serving (1 cluster): Calories: 140 | Fat: 9g | Saturated Fat: 4.5g | Carbohydrates: 12g | Sugar: 10g | Protein: 3g | Sodium: 80mg
Final Thoughts: The Gift of Effortless Joy
And that’s it, my friend! You’ve just unlocked the secret to the easiest, most satisfying holiday treat on the planet. This Crockpot Christmas Candy is more than just a recipe; it’s a ticket to a stress-free, joy-filled kitchen experience.
In a season that can often feel rushed and hectic, this recipe is a gentle reminder to slow down and savor the simple pleasures. It’s about filling your home with the irresistible aroma of melting chocolate, sharing laughter with loved ones while you scoop, and experiencing the profound joy of giving a gift made with your own hands (and a very helpful appliance!).
So whether you’re whipping up a batch for your family, your friends, or just for yourself, I hope this recipe brings a little bit of magic and a whole lot of deliciousness to your holiday season. It’s not about perfection; it’s about the love you stir in.
From my cozy kitchen to yours, happy holidays, happy slow cooking, and happy eating!




