
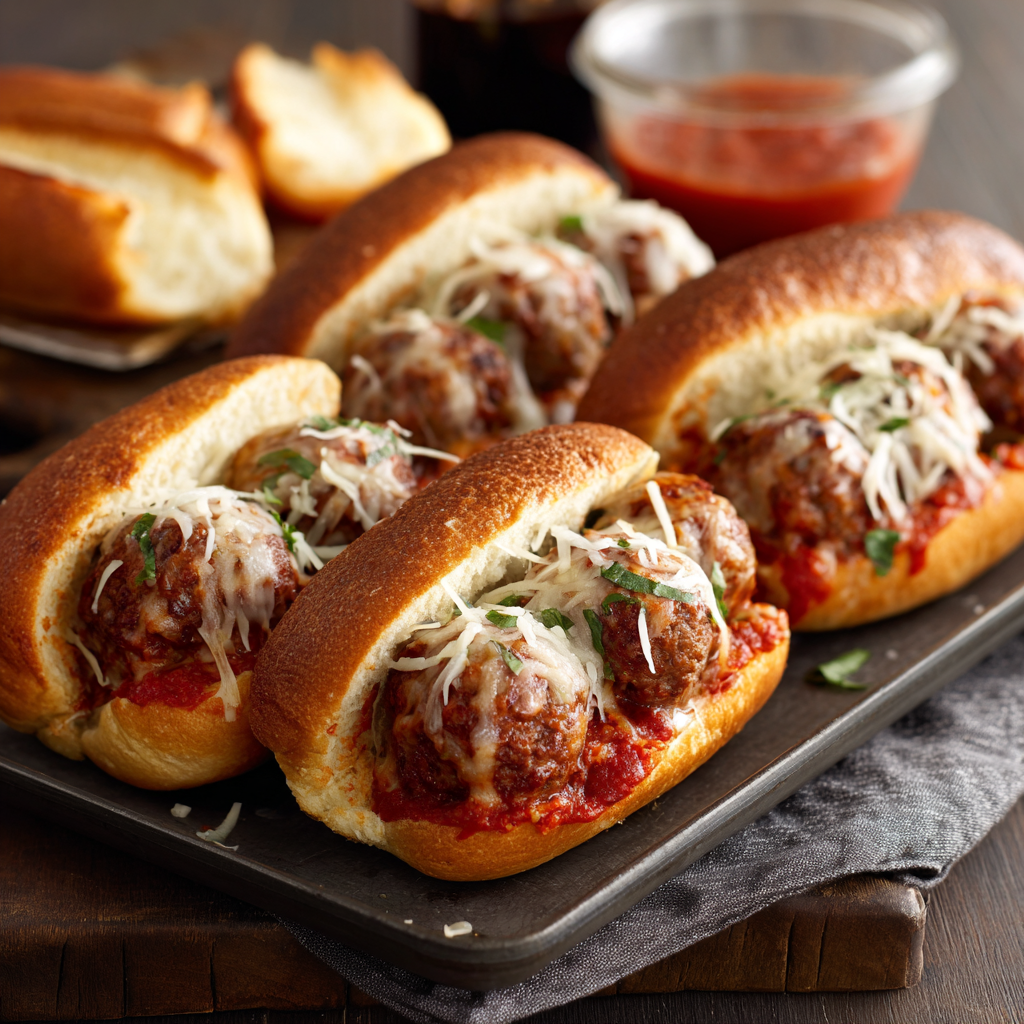
Mini Italian Meatball Subs (All-Beef Version)
Your New Favorite Party Hero: Mini Italian Meatball Subs
Hey there, friend! Come on in, grab an apron, and let’s get something sizzling. Is there anything in the world that smells more like pure, unadulterated joy than garlic, herbs, and tomatoes simmering away on the stove? I’m Olivia, and if you’ve been here before, you know my kitchen is rarely clean but my heart is always full—usually because I’m feeding someone I love. Today, we’re whipping up something that is an absolute guaranteed crowd-pleaser, the kind of food that disappears from the platter before you’ve even had a chance to put the oven mitts away: Mini Italian Meatball Subs.
Imagine this: juicy, herb-kissed all-beef meatballs, nestled in a soft, pillowy dinner roll, smothered in a rich, vibrant marinara sauce, and blanketed with a layer of mozzarella cheese so perfectly melted it creates those irresistible golden strings. They’re the ultimate hand-held comfort food, perfect for game day, a fun family dinner, or your next gathering where you want to be the person who brought the dish everyone talks about for weeks. The best part? They are shockingly simple to make. You don’t need any fancy skills, just a love for good food and about 30 minutes. So, let’s roll up our sleeves and turn these simple ingredients into something absolutely unforgettable.
The Meatball That Started It All
This recipe takes me right back to my Nonna’s crowded, loud, and incredibly warm kitchen on Sunday afternoons. The entire extended family would pile in, and the centerpiece was always her massive pot of Sunday gravy, simmering for hours with pork, beef, and, of course, dozens of perfect, tender meatballs. Us kids would hover like little vultures, not for the pasta, but to sneak those meatballs straight from the pot, burning our fingers but not caring one bit.
One year, for my little cousin’s birthday, we had a house full of hungry, running, screaming kids. The idea of sitting them all down for a formal plate of spaghetti was laughable. In a moment of pure genius (or desperation!), my aunt started slicing open dinner rolls, stuffing them with a couple of leftover meatballs and some cheese, and popping them in the oven. They were an instant, monumental hit. They were fun, mess-controlled (ish!), and every single child ate happily. That’s the spirit I’ve tried to capture here—that feeling of improvisational, shareable, from-the-heart joy. It’s a family memory baked right into every bite.
Gathering Your Flavor Arsenal
Here’s everything you’ll need to create these mini masterpieces. I’ve included some of my favorite tips and swaps because I believe cooking should be flexible and fun, not rigid!
For the All-Beef Meatballs:
- 2 lbs ground beef (80/20 blend): The fat is flavor, friend! An 80% lean/20% fat ratio gives you the most juicy, succulent meatballs without being greasy. If you’re using a leaner blend, just know they might be a tad drier.
- 2 large eggs: Our binder! They hold the meatball mixture together so they don’t fall apart in the sauce.
- ½ cup Panko breadcrumbs: I love Panko for its light, airy crunch that doesn’t make the meatballs dense. In a pinch, regular breadcrumbs or even crushed saltine crackers work!
- ½ cup grated Parmesan cheese: The salty, umami kick that is non-negotiable for me. Use the good stuff you grate yourself—it melts and incorporates so much better than the pre-shaken kind.
- ½ tsp garlic powder & ½ tsp onion powder: These provide a consistent, well-distributed flavor base without the risk of biting into a raw, pungent piece of garlic or onion.
- ½ tsp allspice & a pinch of nutmeg: “Wait, what?” Trust me on this. This is my little secret weapon, a tiny nod to the complex spicing in some Italian-American recipes. It adds a warm, mysterious depth that people will taste but not be able to identify. It’s magic!
- Salt & freshly ground black pepper: Season with confidence! Don’t be shy here.
- 2 tbsp olive oil: For browning and building that beautiful, flavorful crust on our meatballs.
For Assembling the Subs:
- 4 cups marinara sauce: Use your favorite jarred sauce to save time (no judgment ever in this kitchen!) or your own homemade. I’m a fan of a robust, garlic-forward sauce for this.
- 12 small dinner rolls: Hawaiian sweet rolls are my absolute top choice—their slight sweetness is a perfect counterpoint to the savory meatballs. But any soft, slider-sized roll will work beautifully.
- 3 cups shredded low-moisture mozzarella: This melts into that iconic, stretchy blanket we all dream of. Pre-shredded is convenient, but block cheese you shred yourself melts smoother and doesn’t have anti-caking agents.
- ½ cup grated Parmesan: For that final, salty, golden-brown finish on top.
Let’s Get Cooking: Building Your Mini Masterpieces
Okay, team! Let’s fire up the oven and get our hands a little messy. This is the fun part.
- Make the Meatball Mixture: In a large bowl, gently combine the ground beef, eggs, Panko, ½ cup Parmesan, garlic powder, onion powder, allspice, nutmeg, and a generous amount of salt and pepper. Here’s my biggest chef hack: use your hands! It’s the best tool for the job, but be gentle. Overmixing is the enemy of tender meatballs. Mix just until everything is combined.
- Roll ‘Em Up: Now, let’s portion them. I use a small cookie scoop (about 1.5 tablespoons) to keep them uniform, but a tablespoon works too. You’re aiming for about 24 meatballs, roughly 1 to 1.5 inches in diameter. Roll them gently between your palms. Pro tip: lightly wet your hands with water to prevent the mixture from sticking to you!
- Brown to Perfection: Heat the olive oil in a large skillet over medium-high heat. Working in batches to avoid crowding the pan (which steams them instead of browning them), add the meatballs. Brown them on all sides, turning carefully with tongs. They don’t need to be cooked through—just get that gorgeous, caramelized color on the outside. This step is crucial for flavor, so don’t skip it! Remove them to a plate as they finish.
- The Simmer: Pour your marinara sauce into the same skillet. (All those browned bits left behind are liquid gold! Scrape them up.) Bring the sauce to a gentle simmer, then carefully nestle all the meatballs back into the sauce. Let them simmer away for about 15 minutes. This finishes cooking them through and lets all the flavors marry into one big, happy family.
- Preheat and Prep: While they simmer, preheat your oven to 375°F (190°C). Take your dinner rolls and slice them almost all the way through, creating a little pocket for the goodness. Arrange them snugly in a 9×13 baking dish or on a sheet pan.
- Stuff Those Rolls: Now for the assembly line! Open each roll and place two meatballs inside. Spoon a little extra sauce over the top of the meatballs—be generous! Then, pile on that glorious mozzarella cheese, and finish with a sprinkle of the remaining Parmesan.
- Bake to Melty Bliss: Pop the whole tray into the oven and bake for 10-12 minutes, just until the cheese is fully melted and the rolls are warm and slightly toasted on the edges.
- The Grand Finale (Broil!): For that picture-perfect, bubbly, golden-brown cheese top, switch your oven to broil for the last 1-2 minutes. WATCH THEM CLOSELY! The line between perfectly golden and tragically charred is very, very thin under a broiler.
How to Serve These Little Beauties
Pull that tray out of the oven and listen to the chorus of “oohs” and “aahs.” Let them cool for just a minute—that cheese is molten lava! Transfer them to a serving platter, maybe garnish with a little fresh chopped basil or parsley for a pop of color. I like to serve them with a big bowl of extra warm marinara sauce on the side for dipping, because more sauce is always the answer. They’re perfect just as they are, but a simple side salad or a bowl of crispy potato chips completes the meal perfectly.
Make It Your Own: Delicious Variations
The beauty of this recipe is its versatility. Play around and make it suit your taste!
- Cheese Swap: Swap the mozzarella for provolone for a sharper, smokier flavor, or use a Italian cheese blend.
- Garlic Butter Bliss: Before baking, brush the tops of the rolls with melted garlic butter. It adds an incredible flavor and makes them extra golden.
- Spicy Kick: Add a pinch of red pepper flakes to the meatball mixture or use a spicy arrabbiata sauce.
- Turkey Twist: For a lighter option, use ground turkey or chicken instead of beef. Just add an extra tablespoon of olive oil to the mixture to keep them moist.
- The “Supreme”: Add finely diced sautéed bell peppers and onions into the rolls with the meatballs for a Philly-cheesesteak-meets-meatball-sub experience.
Olivia’s Chef Notes & Kitchen Stories
This recipe has evolved so much from those first makeshift subs at my cousin’s party. I’ve tested the spice blend endlessly—the allspice and nutmeg were a happy accident one day when I was out of Italian seasoning and started raiding the back of the spice cabinet. It’s now the thing people comment on the most!
A funny story: I once catered a friend’s party and quadrupled this recipe. I was so proud, pulling out four huge trays from the oven. I turned my back for literally 30 seconds to grab the extra sauce, and when I turned around, half of one tray was already gone. A group of guys had just… helped themselves. I should have been mad, but I was secretly thrilled. They were just too good to wait! So, consider yourself warned: make extra. They will vanish.
Your Questions, Answered!
Q: Can I make the meatballs ahead of time?
A: Absolutely! You can brown the meatballs and let them cool, then store them in an airtight container in the fridge for up to 2 days. When you’re ready, just warm them in the sauce and assemble. You can also fully assemble the subs a few hours ahead, cover them, and keep them in the fridge until you’re ready to bake. You might need to add 2-3 minutes to the baking time since they’ll be cold.
Q: My meatballs are falling apart! What did I do wrong?
A: Don’t worry, it happens! The most common culprit is overmixing. You want to mix the ingredients just until combined—overworking the meat makes it tough and crumbly. Also, ensure your eggs and breadcrumbs are evenly distributed, as they are the key binders. Chilling the mixture for 15-20 minutes before rolling can also help them hold their shape.
Q: Can I freeze these?
A: You sure can. After assembling, place the unbaked subs on a baking sheet and flash freeze until solid. Then, transfer them to a freezer-safe bag or container. They’ll keep for up to 3 months. Bake from frozen, adding about 10-15 extra minutes to the baking time, until heated through and the cheese is bubbly.
Q: The bottom of my rolls got a bit soggy. How can I prevent that?
A: Great question! This can happen if the meatballs and sauce are very hot when you assemble. Let the meatball/sauce mixture cool for about 5-10 minutes before stuffing the rolls. You can also lightly toast the halved rolls in the oven for 3-4 minutes before assembling to create a protective barrier.

Mini Italian Meatball Subs (All-Beef Version)
Description
Juicy, herb-kissed meatballs nestled in soft rolls, smothered in rich marinara and gooey mozzarella—these mini subs are a guaranteed crowd-pleaser. Perfect for game day, family dinners, or any party where you want to impress with comfort food made simple.
Ingredients
For the Meatballs:
-
2 lbs ground beef (80/20 blend)
-
2 large eggs
-
½ cup Panko breadcrumbs (or regular breadcrumbs)
-
½ cup grated Parmesan cheese
-
½ tsp garlic powder
-
½ tsp onion powder
-
½ tsp allspice
-
Pinch of nutmeg
-
Salt and freshly ground black pepper, to taste
-
2 tbsp olive oil
For Assembling the Subs:
-
4 cups marinara sauce (jarred or homemade)
-
12 small dinner rolls (Hawaiian sweet rolls or slider rolls)
-
3 cups shredded low-moisture mozzarella
-
½ cup grated Parmesan
-
Optional garnish: fresh basil or parsley
Instructions
1. Make the Meatballs
-
In a large bowl, gently combine ground beef, eggs, Panko, ½ cup Parmesan, garlic powder, onion powder, allspice, nutmeg, salt, and pepper.
-
Mix lightly with your hands until just combined—overmixing makes meatballs tough.
2. Shape the Meatballs
-
Portion into 24 meatballs, about 1–1.5 inches in diameter.
-
Lightly wet your hands to prevent sticking, then roll gently.
3. Brown the Meatballs
-
Heat olive oil in a skillet over medium-high heat.
-
Working in batches, brown meatballs on all sides (they don’t need to be cooked through).
-
Remove meatballs to a plate.
4. Simmer in Sauce
-
Pour marinara into the skillet, scraping up browned bits.
-
Nestle meatballs into sauce and simmer for 15 minutes until cooked through.
5. Prep the Rolls
-
Preheat oven to 375°F (190°C).
-
Slice rolls almost all the way through to create a pocket and arrange in a 9×13 baking dish.
6. Assemble the Subs
-
Place 2 meatballs in each roll.
-
Spoon extra sauce over meatballs.
-
Top with mozzarella and remaining Parmesan.
7. Bake to Perfection
-
Bake 10–12 minutes until cheese is melted and rolls are warm.
-
Optional: Broil 1–2 minutes for a golden, bubbly top—watch carefully!
8. Serve
-
Garnish with fresh basil or parsley, and serve with extra marinara for dipping.
Notes
-
-
Meatballs: Brown and refrigerate up to 2 days before using.
-
Assembled Subs: Assemble a few hours ahead, cover, and refrigerate. Add 2–3 extra minutes to bake.
-
Freezing: Flash freeze unbaked subs on a tray, then transfer to a freezer-safe container. Bake from frozen, adding 10–15 minutes.
-
Nutrition
- Calories: ~365 cal Per Serving
- Fat: 21g
- Carbohydrates: 18g
- Protein: 26g
Nutritional Information (Per Serving)
Please note: This is an estimate provided for informational purposes only. Calculations will vary based on your specific ingredients.
- Calories: ~365
- Protein: 26g
- Fat: 21g
- Carbohydrates: 18g
- Fiber: 1g
- Sugar: 4g
- Sodium: 520mg
There you have it! The ultimate mini meatball sub that’s big on flavor and fun. I can’t wait for you to make them and create your own kitchen memories. Tag me on social media if you do—I love seeing your creations! Now, go forth and bake something wonderful.
With love and a full plate,
Final Thoughts: The Ultimate Shareable Joy
In the end, these Mini Italian Meatball Subs are more than just a clever party trick or a quick dinner solution. They are a tangible piece of comfort, a bite-sized hug that brings people together. They capture the soul-warming essence of a long-simmered Sunday gravy but deliver it in a fun, accessible, and utterly irresistible package.
They prove that the best food isn’t always the most complicated. It’s food made with heart, designed for sharing, and meant to be enjoyed with laughter and maybe a little bit of cheese on your chin. This recipe is my love letter to those chaotic, joyful family gatherings where the best memories are made around the food.
So the next time you need a guaranteed win—whether it’s for a big game, a busy weeknight, or just because—I hope you remember these little heroes. Whip up a batch, watch them disappear, and bask in the glory of being the person who brought the dish. You’ve earned it.
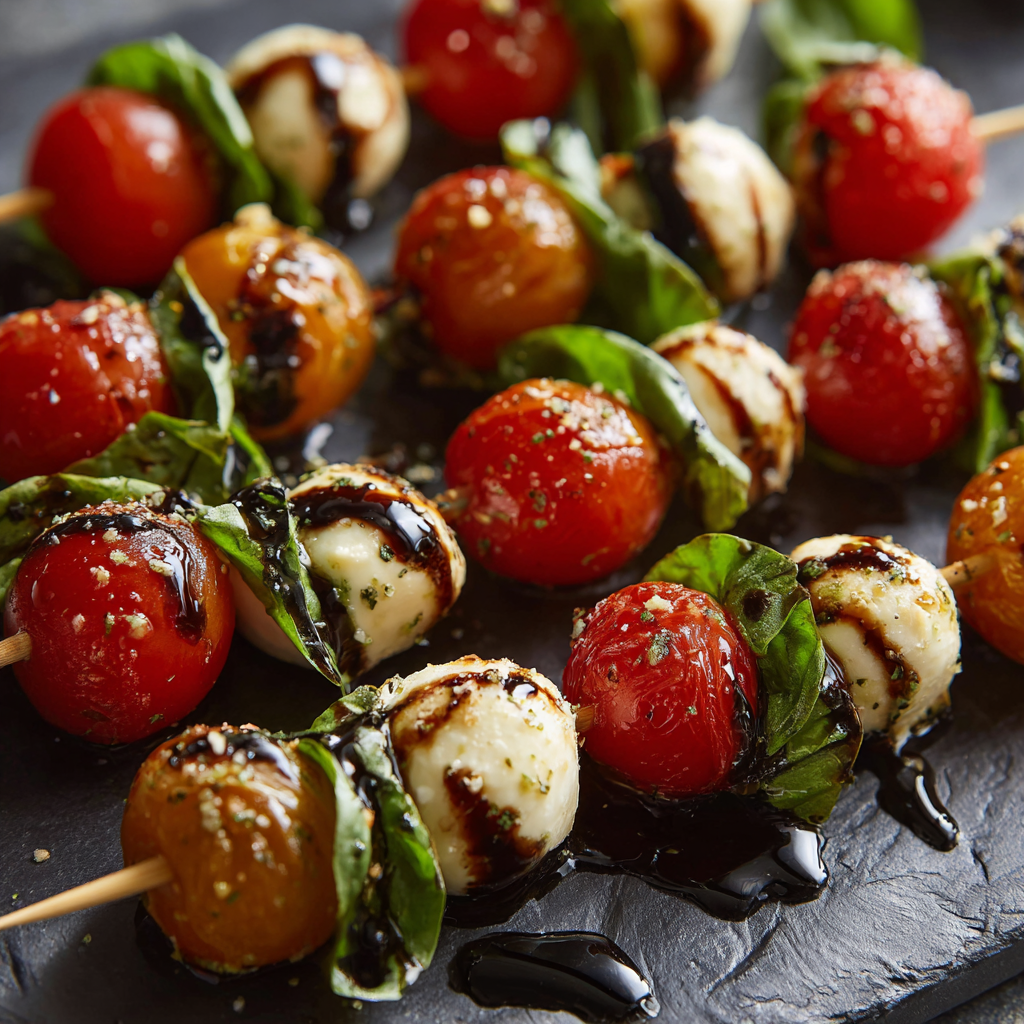
Mini Caprese Bites (Twist on a Classic)
Your New Go-To Party Appetizer: Mini Caprese Bites
Hey there, friend! Come on in, pull up a stool. Can you smell that? It’s the scent of fresh basil, sweet tomatoes, and a little something bubbling away on the stove. That, my friend, is the sound of a good time about to happen. If you’ve ever found yourself staring into the fridge, wondering what on earth to whip up for last-minute guests, or if you just need a guaranteed crowd-pleaser for your next gathering, you’ve landed in the perfect spot.
Today, we’re taking a classic—the beloved, no-cook Italian Caprese salad—and turning it into the most adorable, pop-able, and absolutely irresistible party appetizer: Mini Caprese Bites. Imagine all the vibrant flavors of a summer garden party, all skewered onto a cute little stick. They’re fresh, they’re elegant, and I promise you, they will be the first thing to vanish from your platter. The best part? We’re talking 15 minutes of effortless assembly. No fancy skills required, just a love for good food and good company. So, grab your favorite cutting board and let’s create some magic together!
A Taste of Sunshine: My First Bite of Caprese
I’ll never forget the first time I had a true, authentic Caprese salad. I was about sixteen, on a family trip to Italy that felt like it took a lifetime of saving loose change to make happen. We were sitting at a tiny, wobbly table at a cliffside restaurant on the Amalfi Coast, the Mediterranean Sea sparkling like a sheet of blue glass below us. The heat was intense, the kind that makes you move slowly and dream of gelato.
Our waiter, a man with a magnificent mustache and a kind smile, brought out a plate that looked like a piece of art. It wasn’t fussy or complicated. It was just thick slices of the reddest tomato I’d ever seen, creamy white mozzarella di bufala, and giant green basil leaves, all drizzled with golden oil. I took a bite and my entire concept of “simple food” changed forever. It was cool, juicy, creamy, and herbaceous all at once. It tasted like sunshine and happiness. It tasted like Italy. These Mini Caprese Bites are my way of capturing that feeling and sharing it, one delicious, bite-sized skewer at a time.
Gathering Your Sunshine: The Ingredients
One of the beautiful things about this recipe is its simplicity. With so few ingredients, each one truly gets to shine. This is where quality makes all the difference! Here’s what you’ll need:
- 24 cherry or grape tomatoes: Look for tomatoes that are firm, deeply colored, and smell sweet at the stem. They are the juicy, sweet burst in every bite. Chef’s Tip: If your tomatoes are a bit lackluster, a tiny pinch of sugar can help wake up their natural sweetness.
- 24 small mozzarella balls (bocconcini or ciliegine), drained: The creamy, dreamy heart of the bite! “Bocconcini” means “little mouthfuls” in Italian, which is just perfect. You’ll find them in the cheese section of most grocery stores, usually packed in water. Substitution Tip: In a pinch, you can use a large ball of fresh mozzarella and cut it into 24 small, cherry tomato-sized cubes.
- 24 fresh basil leaves: This is non-negotiable! Fresh basil provides that incredible, fragrant aroma that makes Caprese, well, Caprese. Chef’s Insight: Gently smacking the basil leaves between your palms before skewering them helps to release their essential oils and maximize their flavor.
- 6 tbsp balsamic glaze: This is different from regular balsamic vinegar! Glaze is reduced, thick, and syrupy, so it clings beautifully to the bites instead of making everything soggy. You can find it near the vinegar or in the salad dressing aisle. Pro Hack: You can make your own by simmering 1 cup of good balsamic vinegar with a tablespoon of honey or brown sugar until it reduces by half and coats the back of a spoon. Let it cool before using!
- 4 tbsp extra virgin olive oil: Use the good stuff here! A fruity, high-quality olive oil adds a luxurious finish. It’s the final flavor layer that brings everything together.
- Salt and black pepper to taste: A flaky sea salt (like Maldon) and freshly cracked black pepper will elevate these bites from great to “can I have the recipe?!” status.
- 24 toothpicks or mini skewers: The fun delivery system! I love using the little wooden skewers with a frilly top for a touch of whimsy.
Let’s Get Skewering: Step-by-Step Instructions
Ready to assemble? This is the easiest—and most fun—part. Let’s do this!
Step 1: The Prep Station. First things first, let’s get organized. Rinse your tomatoes and basil leaves and pat them thoroughly dry with a clean kitchen towel or paper towels. This is a crucial step! Water is the enemy of good dressing and will dilute your beautiful olive oil and balsamic glaze. Drain your mozzarella balls and let them sit on a paper towel for a minute to absorb any excess moisture. Lay out all your components in an assembly line: tomatoes, basil, mozzarella, skewers, and a large platter. Mise en place (having everything in its place) is a chef’s best friend and makes the process fly by!
Step 2: The Art of the Skewer. Now for the main event! Take a skewer and carefully thread on one tomato. Next, take a basil leaf. If it’s large, you can gently fold it into a little green bundle. If it’s a perfect, small leaf, just slide it on. Finally, add one mozzarella ball. I like to push the skewer through the center of each component so everything stays secure and looks balanced. Repeat this process 23 more times. I promise, it goes quickly! Pop on some music and think of all the happy people who will get to enjoy these.
Step 3: The Grand Arrangement. As you finish each skewer, place it on your serving platter. I like to arrange them in a circular pattern or in neat rows—whatever looks appealing to you! Try to keep them in a single layer so each one is easy to grab.
Step 4: The Flavor Finish. Just before you’re ready to serve, it’s time for the grand finale. Drizzle the entire platter with your gorgeous extra virgin olive oil. Follow it up with the balsamic glaze—you can zig-zag it artistically or just drizzle it over everything. The contrast of the dark glaze against the red, white, and green is just stunning. Finally, give the whole platter a light but confident sprinkle of flaky sea salt and a few grinds of fresh black pepper.
Step 5: Serve with Love! That’s it! You’ve just created a masterpiece. These are best served immediately after assembling so the basil stays perky and vibrant. Place them right in the center of the party and watch them disappear.
How to Serve These Little Beauties
Presentation is part of the fun! I love using a simple white or slate platter to really make the colors of the Caprese bites pop. For a real “wow” factor, arrange them in a stunning sunburst pattern. If you’re serving these as part of a larger spread, they pair beautifully with a charcuterie board, some crusty bread, and a crisp white wine. They’re the perfect finger food for a bridal shower, a summer BBQ, a holiday party, or just a cozy night in with a great movie. Honestly, any occasion is made better with a platter of these.
Mix It Up! Delicious Recipe Variations
Feel like playing with your food? I totally support that. Here are a few fun twists on the classic:
- The Prosciutto Twist: Wrap a thin slice of prosciutto or salami around the mozzarella ball before skewering for a delicious, savory, salty punch.
- The Nutty Crunch: Right after drizzling, sprinkle the whole platter with finely chopped toasted pistachios or pine nuts for an incredible textural contrast.
- The Gourmet Glaze: Swap the classic balsamic glaze for a flavored one, like fig, pomegranate, or even a citrus-infused balsamic for a unique sweet-and-tangy kick.
- The Herbaceous Aroma: For an next-level aromatic experience, use small, sturdy rosemary sprigs as your skewers! The scent will infuse into the bites as they sit.
- The Vegan Delight: Easily make this vegan by swapping the mozzarella for a plant-based version (many are surprisingly good now!) or using small, marinated artichoke hearts.
Olivia’s Chef Notes & Kitchen Stories
This recipe has been my party-saving superhero for years. I once volunteered to bring an appetizer to a friend’s potluck and completely forgot until I was halfway there. I made a panic-induced U-turn to the grocery store, threw these together in the passenger seat of my car (true story!), and arrived only slightly flustered. They were such a hit that now I’m expected to bring them every time! The recipe has evolved—I used to just stack them on a plate, but the skewers make them so much easier to eat while mingling. My biggest lesson? Don’t dress them too early. I learned the hard way that soggy basil is a sad sight. Now, I transport the undressed skewers in a container and the dressings in little jars, and I assemble on-site for maximum freshness and crunch.
Your Questions, Answered! FAQs & Troubleshooting
Q: Can I make these Mini Caprese Bites ahead of time?
A: You can absolutely prep ahead! Assemble the skewers (without any dressing) up to 4 hours in advance. Lay them on a platter, cover tightly with plastic wrap, and keep them in the fridge. The key is to bring them out about 15-20 minutes before serving to take the chill off, and then drizzle with the oil, glaze, salt, and pepper right before they hit the party.
Q: My balsamic glaze is super thick and won’t drizzle nicely. What can I do?
A: Great question! This happens sometimes. You can gently warm the glaze for a few seconds in the microwave (in a microwave-safe bowl) or place the bottle in a bowl of warm water for a few minutes. This will loosen it up perfectly for drizzling. Just let it cool back down if it gets too hot.
Q: The tomatoes keep sliding off my skewers. Help!
A: Ah, the slippery tomato dilemma! Two fixes: 1) Make sure you are using a sharp toothpick or skewer and pierce the tomato firmly through its core (the firmest part). 2) You can slightly score a tiny “x” on the bottom of each tomato with a paring knife to give the skewer a better entry point.
Q: I can’t find small mozzarella balls. What are my options?
A: No problem! A large ball of fresh mozzarella is a perfect substitute. Just pat it dry with paper towels and use a sharp knife to carefully cut it into 24 small, bite-sized cubes. They might not be perfectly round, but they’ll taste just as amazing!
Mini Caprese Bites (Twist on a Classic)
Description
Bright, fresh, and irresistibly pop-able—these Mini Caprese Bites take the classic Italian salad and turn it into a perfect, no-cook party snack. Juicy tomatoes, creamy mozzarella, and fragrant basil are skewered and drizzled with balsamic glaze and olive oil. Ready in just 15 minutes, they’re guaranteed to disappear fast!
Ingredients
-
24 cherry or grape tomatoes, firm and sweet
-
24 small mozzarella balls (bocconcini or ciliegine), drained
-
24 fresh basil leaves
-
6 tbsp balsamic glaze
-
4 tbsp extra virgin olive oil
-
Salt and freshly cracked black pepper, to taste
-
24 toothpicks or mini skewers
Chef Tips:
-
Slightly smacking basil between your palms releases more flavor.
-
If tomatoes are bland, a tiny pinch of sugar enhances sweetness.
-
Drain mozzarella well to avoid soggy bites.
Instructions
Rinse tomatoes and basil; pat dry. Drain mozzarella and blot excess moisture. Lay everything out in assembly line style for easy skewering.
Thread one tomato, one basil leaf, and one mozzarella ball onto each toothpick or skewer. For large basil leaves, gently fold them. Repeat until all 24 bites are assembled.
Place skewers in neat rows or a circular pattern for a visually appealing presentation. Keep them in a single layer for easy grabbing.
Just before serving, drizzle olive oil and balsamic glaze over the bites. Sprinkle lightly with salt and pepper.
Enjoy fresh for best flavor and crisp basil.
Notes
-
Assemble skewers (without dressing) up to 4 hours in advance. Cover and refrigerate.
-
Bring to room temperature 15–20 minutes before serving, then drizzle olive oil and balsamic glaze.
Nutrition
- Calories: 55 kcal Per Serving
- Sugar: 1g
- Fat: 4g
- Carbohydrates: 2g
- Protein: 3g
Nutritional Information*
*This is an estimated nutritional breakdown per bite, provided for informational purposes only. Actual values may vary based on specific ingredients used.
- Calories: ~55 kcal
- Protein: 3g
- Fat: 4g
- Carbohydrates: 2g
- Sugar: 1g
- Sodium: 90mg
Prep Time: 15 minutes | Total Time: 15 minutes | Servings: 24 bites
There you have it! Your complete guide to the easiest, most impressive appetizer in your future. I hope you and your loved ones enjoy making and eating these as much as I do. If you make them, I’d love to see your creations! Tag me on social with #OliviasKitchen. Happy cooking!
With love and a full platter,
Final Thoughts: Your New Party Superstar
And just like that, you’re armed with the secret to the easiest, most elegant appetizer in your repertoire. These Mini Caprese Bites are more than just food; they’re a experience. They’re a burst of sunshine on a platter, a conversation starter, and a guaranteed way to make any gathering feel a little more special.
They prove that you don’t need complicated techniques or hours in the kitchen to create something truly memorable. All it takes is a few quality ingredients, a few minutes of assembly, and a whole lot of love. This is the kind of recipe that people will ask you for again and again, the one that becomes your signature dish.
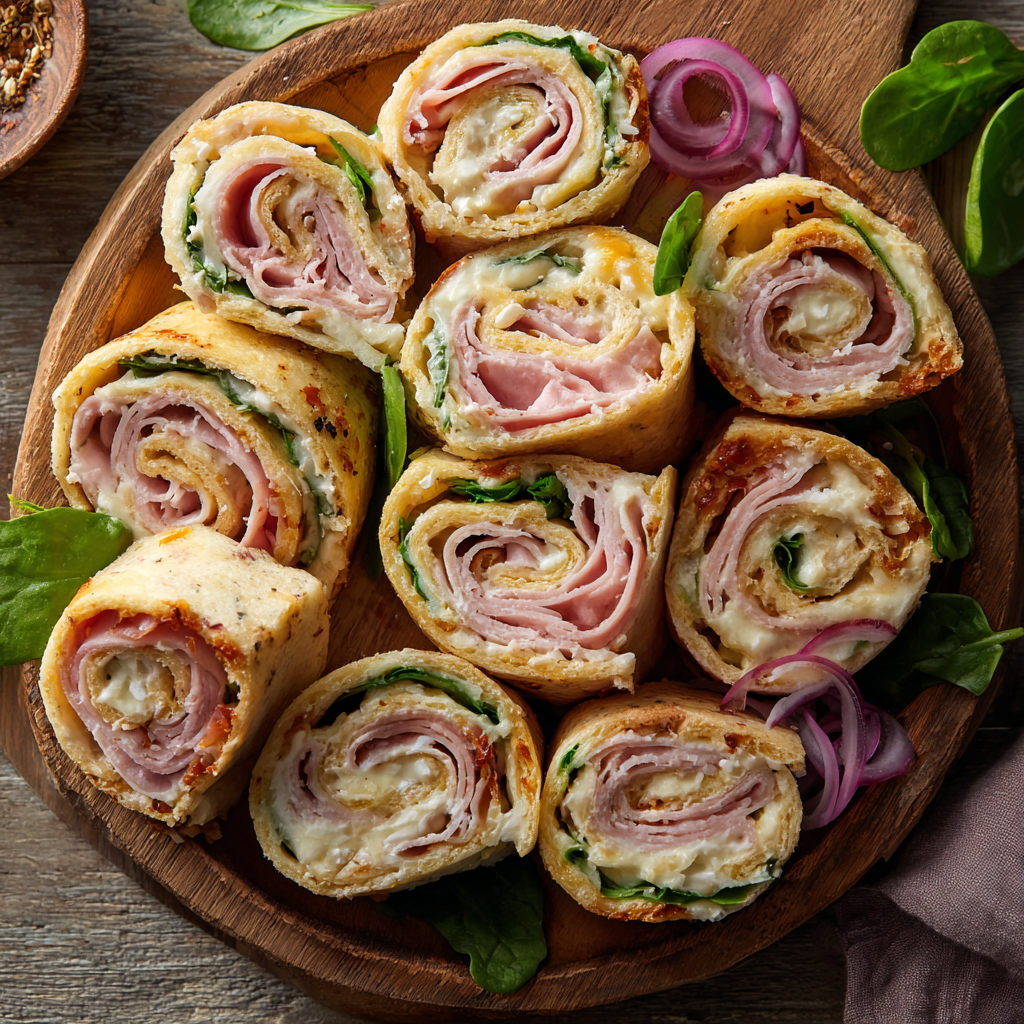
Ham and Turkey Pinwheels (Classic with a Twist)
Let’s Roll Up Something Amazing: Ham & Turkey Pinwheels!
Hey there, friend! Come on in, pull up a stool. Can you smell that? It’s the cozy, welcoming scent of something delicious coming together. No, it’s not a fancy, five-course meal simmering for hours—it’s something even better in its own wonderfully simple way. We’re talking about the ultimate party hero, the lunchbox champion, the no-fuss snack that always, always disappears first from the platter: Ham and Turkey Pinwheels.
Now, I know what you might be thinking. “Olivia, pinwheels? Really?” But hear me out. These aren’t just any pinwheels. This is my classic recipe with a little twist that makes all the difference. We’re taking the best parts of your favorite deli sandwich—the savory ham, the lean turkey, the creamy, tangy spread—and rolling it all up into one irresistible, easy-to-eat bite. They’re the perfect project for a lazy Sunday afternoon, a lifesaver when you need to feed a crowd, and a guaranteed way to make a weekday lunch feel special. You don’t need any fancy skills, just a hungry heart and about 15 minutes of active time. So, let’s get our aprons on (messy ones are welcome here!) and create something that’s not just food, but a little bundle of joy.
The Pinwheel That Started It All
My love affair with these pinwheels started not in a fancy kitchen, but in my best friend Sarah’s bustling, laughter-filled home before a big football game. I was tasked with bringing an appetizer, and I wanted something that felt homemade but wouldn’t keep me chained to the stove. I remembered my mom making a simpler version for my school lunches, and I thought, “How can I make these grown-up good?”
I started playing. I swapped plain mayo for a honey mustard kick, added a layer of baby spinach for a fresh crunch, and chose a flavored sun-dried tomato tortilla for a burst of color and flavor. I was nervous, slicing them up and arranging them on my trusty wooden board. But from the moment I set them down on that crowded counter, they were gone. I mean, gone. People weren’t just eating them; they were raving about them, asking for the recipe between bites. That was the moment I realized that the simplest dishes, made with a little love and creativity, are often the ones that bring the most people together. These pinwheels became my signature “party trick,” and today, I’m so excited to share that magic with you.
Gathering Your Cast of Characters
The beauty of this recipe is in its simplicity and flexibility. Here’s what you’ll need to create these delightful rolls. Don’t be afraid to swap things out based on what you have or what you love!
- 16 oz Cream Cheese, softened – This is the creamy, luxurious base of our spread. **Chef’s Insight:** Full-fat cream cheese gives the richest texture and best flavor, but reduced-fat works in a pinch. The key is to let it soften at room temperature for at least 30 minutes. This makes it so much easier to mix and spread without tearing your tortillas! If you forget, you can pop it in the microwave for 15-20 seconds, but be careful—you don’t want it melted, just soft.
- ½ cup Honey Mustard – This is my “twist”! It adds a perfect sweet and tangy note that cuts through the richness of the cream cheese. **Substitution Tip:** If you prefer a sharper, more savory kick, Dijon mustard is a fantastic swap. Or, use whole grain mustard for a different texture and flavor profile. This is your chance to make it your own!
- 12 slices Deli Ham – I prefer a good-quality black forest or honey ham for its flavor. Ask the deli counter to slice it thin, but not shaved. You want it to be sturdy enough to hold its own in the roll.
- 12 slices Deli Turkey – Oven-roasted turkey is my go-to for its classic flavor. **Chef’s Insight: Pat your ham and turkey slices dry with a paper towel if they seem watery. This helps the cream cheese adhere better and prevents a soggy tortilla.
- 8 large Flour Tortillas – The vessel for all our goodness! **Fun Swap: Don’t be afraid to use flavored wraps! Spinach tortillas add a gorgeous green hue and a subtle earthiness, while tomato basil wraps are a game-changer with the ham and turkey. For a lower-carb option, you can try large coconut or almond flour wraps, just know they might be a bit more fragile to roll.
- 1 cup Baby Spinach (optional) – I highly recommend this! It adds a pop of color, a fresh flavor, and a lovely little crunch. If you’re not a spinach person, thinly sliced romaine lettuce or even arugula (for a peppery punch) works great.
- 4 slices Swiss or Cheddar Cheese (optional) – For my cheese lovers out there! This adds an extra layer of richness and helps hold everything together. I’m a Swiss cheese fanatic with ham, but sharp cheddar is also a winner.
- Optional: ¼ cup thinly sliced Red Onion or Pickles – If you’re like me and love a bit of tang and crunch, this is for you. The quick-pickled red onions from my last blog post would be divine here!
Let’s Get Rolling: Your Foolproof Guide
Ready to assemble? This process is so simple and almost meditative. Put on some good music, and let’s create!
Step 1: Make the Magical Spread
In a medium-sized bowl, combine your beautifully softened cream cheese and the honey mustard. Using a hand mixer or a sturdy spatula and some elbow grease, beat it together until it’s completely smooth, creamy, and well-blended. No streaks of yellow or white! **Chef’s Hack: If you want to get fancy, add a pinch of garlic powder, some dried dill, or a crack of black pepper to the spread at this stage. It adds another dimension of flavor that people will notice but won’t be able to pinpoint!
Step 2: The Art of Assembly
Lay your first tortilla flat on a clean cutting board. Take a generous scoop of your cream cheese mixture and, using an offset spatula or the back of a spoon, spread it evenly over the entire surface of the tortilla, all the way to the edges. This “glue” is crucial for holding our pinwheel together! **Pro Tip: Leave about a half-inch border on the side farthest from you clean. This will be the end of your roll, and the filling will naturally push forward to seal it.
Step 3: Layer It Up!
Now for the fun part! Layer on your meats. I typically use 3 slices of ham and 3 slices of turkey per tortilla, folding or overlapping them to cover most of the surface. Next, if you’re using them, add your cheese slices, then a small handful of spinach, and finally, any of those optional tangy extras like red onion. **Chef’s Hack: Try to distribute the ingredients evenly, avoiding a huge pile in the center, which can make rolling tricky.
Step 4: The Tight Roll
This is the most important step! Starting from the side closest to you, begin rolling the tortilla away from you. Tuck the ingredients in tightly as you start the roll. Keep rolling firmly and evenly until you reach the other end. You should have a nice, tight log. Place it seam-side down on a plate or tray. Repeat the process with all your tortillas. **Chef’s Hack: If a tortilla cracks a little, don’t panic! The cream cheese will act as a sealant, and once it’s chilled, it will hold together just fine.
Step 5: The Patient Chill
This is the step you cannot skip! Wrap each log tightly in plastic wrap. Then, pop them in the refrigerator for at least 30 minutes, but ideally for 1-2 hours. This chills the cream cheese, firms up the log, and makes slicing clean, beautiful pinwheels an absolute breeze. It’s the secret to getting that perfect spiral!
Step 6: The Grand Finale – Slicing!
Unwrap your chilled logs. Using a sharp serrated knife—this is key!—gently saw through each log, creating slices that are about ½ to 1 inch thick. Wipe your knife clean between slices for the prettiest presentation. Arrange your beautiful pinwheels on a platter, and watch them disappear.
How to Serve These Beautiful Bites
Presentation is part of the fun! I love arranging these pinwheels on a large wooden cutting board or a simple white platter to really make their colors pop. You can lay them out flat to show off the spiral or stand them on their sides for a different look. For a party, garnish the platter with little bowls of extra honey mustard for dipping, some fresh herbs like parsley or dill, and maybe some olives or cornichons. For a lunchbox, simply pack a few in a container—they’re perfectly portable and won’t make a mess!
Make It Your Own: Endless Variations
The fun doesn’t stop here! This recipe is a blank canvas. Here are a few of my favorite twists:
- The Clubhouse: Swap the honey mustard for ranch seasoning mixed into the cream cheese. Use turkey, bacon bits, cheddar cheese, and romaine lettuce.
- The Italian Job: Use sundried tomato tortillas. Mix basil pesto into the cream cheese instead of mustard. Layer with salami, provolone cheese, and roasted red peppers.
- The Garden Veggie (Vegetarian): Omit the meats. Spread with veggie cream cheese. Load up with thinly sliced cucumbers, shredded carrots, bell peppers, and sprouts.
- The Everything Bagel: Mix everything bagel seasoning into the cream cheese base. Use smoked turkey and a little thinly sliced red onion. After slicing, roll the outer edge of each pinwheel in more everything seasoning for a stunning look and extra crunch.
From My Kitchen to Yours: A Few Final Thoughts
This recipe has evolved so much from those first nervous batches I made for game day. I’ve learned that the tighter you roll, the better they hold. I’ve discovered that the chill time is non-negotiable (I learned that the hard way after a batch of “pinwheel blobs” for a baby shower!). And most importantly, I’ve learned that the best ingredient you can add is a sense of play. Don’t be afraid to experiment with flavors you love. The worst thing that can happen is you have a slightly less-perfect-looking roll that still tastes absolutely incredible. Some of my best kitchen “mistakes” have turned into new family favorites. So have fun with it! This recipe is meant to be shared, adapted, and enjoyed.
Your Pinwheel Questions, Answered!
Q: Can I make these pinwheels ahead of time?
A: Absolutely! They are the perfect make-ahead appetizer. You can prepare the rolls, wrap them tightly in plastic wrap, and store them in the refrigerator for up to 24 hours before slicing and serving. You can also slice them and store them in a single layer in an airtight container for about a day, though the tortilla edges might dry out just a tiny bit.
Q: My tortilla cracked while I was rolling it! What did I do wrong?
A: This usually happens for one of two reasons: 1) The tortillas are too cold and not pliable. Let them sit at room temperature for 10-15 minutes before assembling. 2) You over-filled it. It’s tempting to load them up, but a thinner, even layer of ingredients is easier to roll. A small crack is okay—the chilling process will help seal it.
Q: Why did my pinwheels get soggy?
A: Sogginess is almost always due to moisture. Make sure your deli meats are patted dry if they seem wet. Also, if you’re using veggies like tomatoes or cucumbers, which have high water content, pat them dry thoroughly and consider placing them in the center of the roll, surrounded by the meat and cheese, to act as a barrier for the tortilla.
Q: What’s the best way to slice them without squishing them?
A: A sharp serrated knife is your best friend here! Use a gentle sawing motion instead of pressing straight down. Also, ensuring they are fully chilled is the number one trick to clean slices. For the very best results, you can even pop them in the freezer for 15 minutes before slicing.
Ham and Turkey Pinwheels (Classic with a Twist)
Description
Hey there! Pull up a stool and grab an apron—today we’re making a snack that’s cozy, simple, and guaranteed to disappear fast: Ham & Turkey Pinwheels. Imagine all the flavors of your favorite deli sandwich—savory ham, lean turkey, creamy spread—rolled up into one bite-sized treat. Perfect for parties, lunchboxes, or a no-fuss snack.
Ingredients
-
16 oz cream cheese, softened
-
½ cup honey mustard (or Dijon/whole grain mustard)
-
12 slices deli ham (black forest or honey ham recommended)
-
12 slices deli turkey (oven-roasted is best)
-
8 large flour tortillas (or spinach/tomato basil wraps)
-
1 cup baby spinach (optional)
-
4 slices Swiss or cheddar cheese (optional)
-
Optional: ¼ cup thinly sliced red onion or pickles
Instructions
1. Make the Spread
In a medium bowl, beat together cream cheese and honey mustard until smooth. Optional: add a pinch of garlic powder, dill, or black pepper for extra flavor.
2. Assemble the Pinwheels
Lay a tortilla flat. Spread ¼ cup of the cream cheese mixture evenly, leaving about ½ inch border on the far edge.
3. Layer the Ingredients
-
3 slices ham
-
3 slices turkey
-
Optional cheese slices
-
Optional spinach and red onion/pickles
Distribute ingredients evenly to make rolling easier.
4. Roll Tightly
Starting from the near edge, roll the tortilla away from you, tucking ingredients in. Place seam-side down. Repeat with all tortillas.
5. Chill
Wrap logs tightly in plastic wrap. Refrigerate at least 30 minutes (1–2 hours is ideal) to firm up the spread and make slicing clean.
6. Slice and Serve
Using a sharp serrated knife, cut logs into ½–1 inch pinwheels. Wipe the knife between cuts for neat spirals. Arrange on a platter and watch them disappear!
Notes
-
Soft Cream Cheese: Room temperature is key—cold cream cheese is hard to spread.
-
Prevent Sogginess: Pat meats and veggies dry before rolling. Skip high-water veggies if making ahead.
-
Tortilla Cracks: Let wraps sit at room temp, and avoid overfilling.
-
Make-Ahead: Assemble and wrap rolls up to 24 hours in advance; slice before serving.
-
Low-Carb Option: Use large lettuce leaves or low-carb tortillas.
Nutritional Information*
*This is an estimate per serving (3 pinwheels) based on the ingredients listed and may vary depending on specific brands and substitutions used.
Calories: ~200 kcal
Protein: 9g
Fat: 14g
Carbohydrates: 6g
Sugar: 2g
Sodium: 420mg
Ham and Turkey Pinwheels (Classic with a Twist)
Prep Time: 15 minutes | Chill Time: 30 minutes | Total Time: 45 minutes | Servings: 16 (approx. 48 pinwheels)
Final Thoughts: Your New Go-To Recipe Awaits
And just like that, you’re armed with the knowledge to create the most delightful, crowd-pleasing pinwheels around. This isn’t just a recipe; it’s a starting point for your own culinary adventures, a trusty tool for your entertaining toolkit, and a surefire way to make any moment—from a frantic party prep to a quiet lunch—feel a little more special.
I hope these pinwheels bring as much laughter and connection to your table as they have to mine. Remember, the best dishes aren’t about perfection; they’re about the joy of creating and sharing something delicious. So don’t stress over a cracked tortilla or a slightly messy roll. I promise, once they’re sliced and arranged, no one will see anything but pure, irresistible deliciousness.
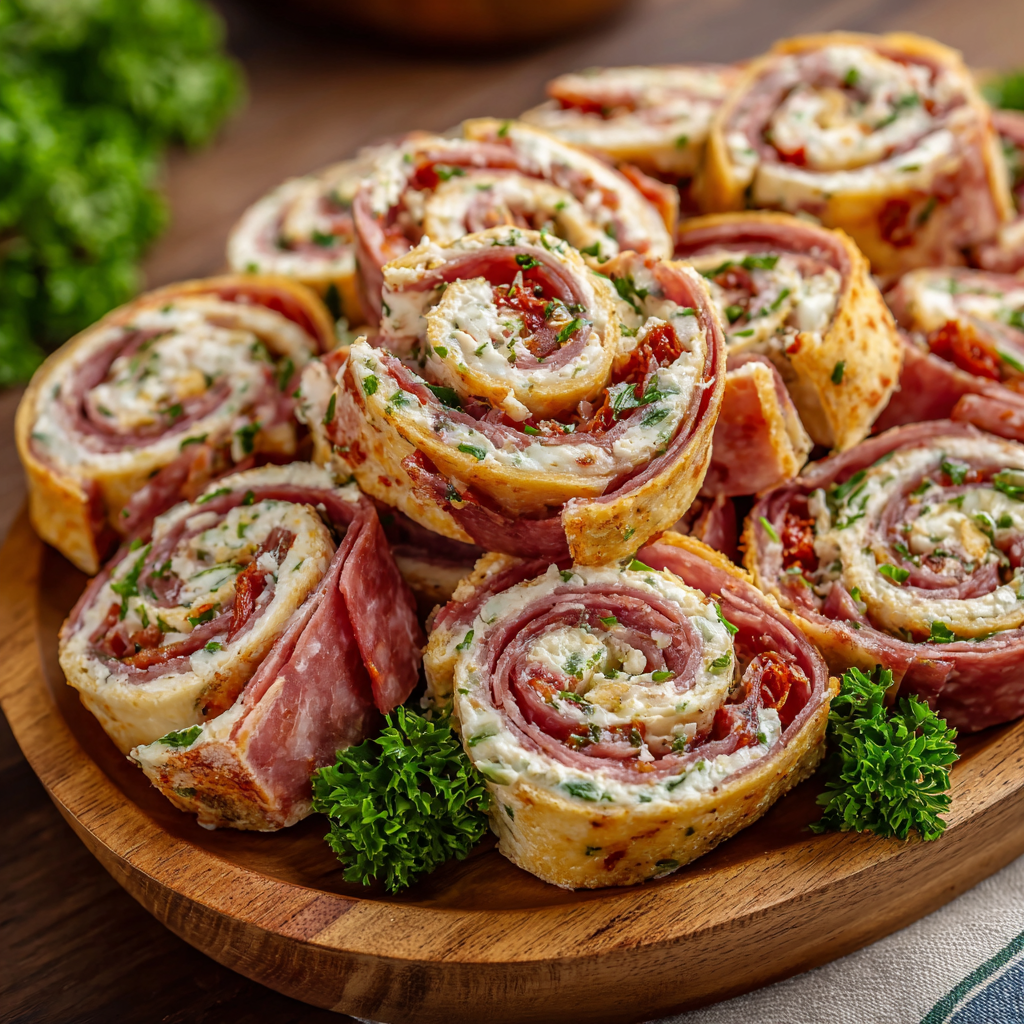
Italian Pinwheels (Deli-Style Party Favorite)
Your New Go-To Party Hit: Italian Pinwheels!
Hey there, friend! Come on in, grab an apron, and let’s get ready to make the easiest, most crowd-pleasing appetizer that will ever grace your kitchen counter. I’m talking about Italian Pinwheels—those gorgeous, swirly, flavor-packed bites that disappear from the platter faster than you can say “more please!” If you’ve ever been to a party, a potluck, or a game day gathering, you’ve definitely seen these. There’s a reason they’re a classic: they’re absolutely irresistible.
Imagine this: a soft tortilla spread with a creamy, zesty cheese mixture, layered with savory Italian meats, melty provolone, and just a hint of sweet roasted pepper for balance. Then, it’s all rolled up into a neat little log and sliced into perfect pinwheels that reveal a stunning spiral of deliciousness. They’re cool, they’re creamy, they’re savory, and they have just the right amount of zip. The best part? You don’t need to be a professional chef to make them look and taste incredible. They are the ultimate make-ahead, no-fuss party hero, and I’m so excited to share my favorite way to make them with you today. Let’s create some magic!
The Pinwheel That Started It All
My love affair with these pinwheels started not in a fancy kitchen, but in my best friend Sarah’s bustling, chaotic, and incredibly warm home during a Super Bowl party years ago. I, the aspiring “foodie,” had spent two days laboring over an intricate dip that required seventeen different ingredients and a degree in chemistry to assemble. I placed it on the table with a flourish, right next to Sarah’s simple platter of… rolled-up tortilla slices.
I’ll give you one guess which dish was completely demolished by halftime. (Spoiler: it wasn’t mine!). I watched in awe as everyone, from the kids to the grandpas, kept circling back to her platter. I finally grabbed one and my eyes went wide. It was so simple, yet so genius! The creaminess, the saltiness, the crunch—it was absolute perfection. I sidled up to Sarah and begged for the recipe. She laughed and said, “Liv, it’s just cream cheese, dressing, and lunch meat from the fridge drawer! You’re overthinking it!” She was right. That day, I learned that the best recipes aren’t about being complicated; they’re about being shared, enjoyed, and loved. Now, I make them for every single gathering, and they always, always bring me right back to that fun, laughter-filled day.
Gathering Your Flavor Brigade
Here’s everything you’ll need to create these irresistible pinwheels. The beauty of this recipe is its flexibility—think of this list as a fantastic starting point for your own creations!
- 16 oz cream cheese, softened – This is the creamy, lush base that holds everything together. Chef’s Tip: Please, please let it come to room temperature! Trying to mix cold cream cheese is an arm workout nobody signed up for and will leave you with a lumpy spread. If you forget, you can microwave it for 15-20 seconds to soften it slightly.
- ½ cup Italian dressing – This is the flavor bomb! It adds tang, herbs, and a little acidity that cuts through the richness. I’m a huge fan of a zesty Italian for an extra kick. For a truly next-level experience, try a homemade dressing!
- 24 slices salami – The classic Italian MVP. Its garlicky, peppery flavor is essential. Feel free to mix in some pepperoni for a spicier twist!
- 12 slices provolone cheese – Provolone is my go-to for its excellent melting quality and mild, buttery flavor that doesn’t overpower. If you want something even milder, mozzarella works beautifully.
- 8 large tortillas – The canvas for our masterpiece! Large burrito-sized tortillas are perfect. For a gorgeous pop of color and subtle flavor, try tomato basil or spinach wraps.
- 1 cup shredded lettuce (optional) – I add this for a fresh, crisp crunch. Iceberg or romaine work best because they hold up well. Pro Tip: If you’re making these more than a few hours ahead, skip the lettuce as it can release water and make the tortillas soggy.
- ½ cup roasted red peppers, chopped (optional) – My secret weapon! They add a touch of sweetness and a beautiful color contrast. The jarred kind are perfectly convenient.
- ¼ tsp garlic powder or Italian seasoning – A little extra boost of flavor never hurt anybody! I often add both.
Optional Boosters:
- 8 slices deli ham or turkey – Want to make it even meatier? A layer of ham adds a wonderful sweetness, and turkey is a great lighter option.
- ¼ cup sliced pepperoncini or banana peppers – For my friends who love a tangy, spicy punch! Chop them finely so they don’t make rolling difficult.
Let’s Roll! Your Step-by-Step Guide to Perfect Pinwheels
Don’t let the fancy look fool you—this process is incredibly simple. Follow these steps, and you’ll be a pinwheel pro in no time.
- Mix the Spread: In a medium bowl, combine your beautifully softened cream cheese, Italian dressing, and any additional seasonings (garlic powder, Italian seasoning). Use a hand mixer or a sturdy spatula to beat it all together until it’s completely smooth and creamy. You shouldn’t see any lumps of cream cheese. Chef’s Hack: Taste it! This is your chance to adjust the flavor. Want more zip? Add a splash more dressing. Need more herb flavor? Sprinkle in more seasoning. You’re the boss!
- Assemble the Pinwheels: Lay one tortilla flat on a clean cutting board. Using an offset spatula or the back of a spoon, spread a thin, even layer of the cream cheese mixture over the entire surface of the tortilla, all the way to the edges. This “glue” is crucial for holding the roll together! Pro Tip: Don’t overdo it! A thick layer will ooze out when you roll. A scant ¼ cup per tortilla is usually perfect.
- Layer the Goodness: Now for the fun part—building the layers! Arrange 3-4 slices of salami (and ham/turkey if using) in a single layer over the cream cheese. Next, place 1.5 slices of provolone cheese (it’s okay to tear a slice to cover the whole surface). Sprinkle a small handful of chopped roasted red peppers and a light layer of shredded lettuce (if using) over the top. Remember, we’re rolling this up, so keep the toppings relatively even and avoid over-piling in the center.
- Roll Tightly: Here’s the key to pretty pinwheels: a tight roll. Starting from the bottom, firmly but gently roll the tortilla up away from you, keeping the ingredients tucked in as you go. Try to roll it as tightly as possible without squeezing the fillings out the ends. You should end up with a neat, firm log. Place it seam-side down on a plate or tray. Repeat with the remaining tortillas and fillings.
- Chill to Firm Up: This is the most important step for clean slices! Cover the rolled logs tightly with plastic wrap and refrigerate for at least 30 minutes, or ideally up to 2 hours. This chillin’ session firms up the cream cheese, making the logs much easier to slice without everything squishing out.
- Slice and Serve: Unwrap your chilled logs and place them on a cutting board. Using a sharp serrated knife, gently saw off the messy ends (chef’s snack time!). Then, slice the remaining log into ½-inch to 1-inch thick pinwheels. Wipe your knife clean between cuts for the prettiest slices. Arrange them on a platter, show off their beautiful spirals, and watch them disappear!
Plating Your Masterpiece
Presentation is part of the fun! You can simply arrange these flavorful pinwheels on a large platter or wooden board. For a real “wow” factor, garnish the platter with little cups of extra Italian dressing for dipping, some fresh basil or parsley leaves, and a few extra pepperoncini on the side. If you’re bringing these to a party, line your container with parchment paper to keep them from sliding around. They are the perfect finger food for a buffet and pair wonderfully with other appetizers like meatballs, veggies, and dip!
Make It Your Own! Creative Twists
The basic formula is your playground. Here are a few of my favorite ways to mix it up:
- The Pizza Lover: Use a tomato-based wrap. Swap the Italian dressing for ¼ cup of pizza sauce mixed into the cream cheese. Use all pepperoni and mozzarella cheese. Add a sprinkle of dried oregano.
- The Garden Veggie: Perfect for vegetarians! Omit the meats. Load up with thinly sliced cucumbers, shredded carrots, spinach, and a sprinkle of sunflower seeds for crunch. A ranch dressing mix-in works great here.
- The Spicy ‘Nduja: For a serious kick, mix 2 tablespoons of ‘nduja (spicy, spreadable Italian sausage) or chopped calabrian chili paste into the cream cheese mixture. So good!
- The Everything Bagel: Swap the Italian seasonings for 2 tablespoons of everything bagel seasoning in the cream cheese. Use smoked turkey and Havarti cheese. Roll the finished log in more everything seasoning before slicing for an incredible look and texture.
Olivia’s Chef Notes & Kitchen Stories
This recipe has evolved so much in my kitchen over the years. I used to be terrified of rolling them too tight, always ending up with loose, falling-apart pinwheels. My husband still laughs about the “pinwheel fail of 2018” where I used a weird gluten-free wrap that cracked, and we ended up with what we called “Italian Nachos”—all the ingredients scooped up with chips! It was still delicious, but not exactly pretty.
The biggest lesson? The chill time is non-negotiable. I once tried to shortcut it for a last-minute guest and ended up with a creamy, delicious mess. Now, I almost always make these the morning of a party. They hold up beautifully in the fridge for up to 8 hours before slicing. In fact, I think they taste even better because the flavors have more time to mingle and get to know each other. It’s a recipe that truly gets better with a little rest.
Your Pinwheel Questions, Answered!
Q: Can I make these pinwheels ahead of time?
A: Absolutely! They are the ultimate make-ahead appetizer. You can prepare the logs, wrap them tightly in plastic wrap, and store them in the refrigerator for up to 24 hours before slicing. I recommend waiting to slice them until just before serving for the freshest look. You can also slice them and store them in a single layer in an airtight container, separated by parchment paper, for several hours.
Q: My tortilla cracked when I tried to roll it. What did I do wrong?
A: This usually happens for one of two reasons: 1) The tortilla was too cold or stale. Tortillas are most pliable when they are fresh and at room temperature. If yours are stiff, you can quickly warm them for a few seconds in the microwave between two damp paper towels to make them soft and flexible. 2) You overfilled it. Too much filling creates a bulky roll that’s hard to manage and can cause the tortilla to split. Go for a thin, even layer!
Q: The cream cheese mixture is oozing out when I slice them. Help!
A: This almost always means the logs didn’t chill long enough. The cream cheese needs that time to firm up so it acts like a glue holding the spiral together. Pop them back in the fridge for another 30 minutes! Also, ensure you’re using a sharp knife and using a gentle sawing motion rather than pressing straight down.
Q: Are there any low-carb options?
A: Yes! You can use low-carb tortillas or even large leaves of lettuce, like butter lettuce or romaine, as a wrap. For a lettuce wrap, you’ll assemble it like a roll and slice it carefully, or simply make them into lettuce cups instead of pinwheels.

Italian Pinwheels (Deli-Style Party Favorite)
Description
Hey there, friend! Ready to wow your guests without breaking a sweat? These Italian Pinwheels are your ultimate crowd-pleaser—soft tortillas rolled with creamy, zesty cheese, savory Italian meats, melty provolone, and a touch of sweet roasted red peppers. They’re simple, make-ahead, and utterly irresistible. Perfect for parties, game days, or casual get-togethers!
Ingredients
-
16 oz cream cheese, softened
-
½ cup Italian dressing
-
24 slices salami
-
12 slices provolone cheese
-
8 large tortillas (burrito size)
-
1 cup shredded lettuce (optional)
-
½ cup roasted red peppers, chopped (optional)
-
¼ tsp garlic powder or Italian seasoning
Optional Add-Ins:
-
8 slices deli ham or turkey
-
¼ cup sliced pepperoncini or banana peppers
Instructions
-
Mix the Spread:
In a medium bowl, combine cream cheese, Italian dressing, and seasonings. Mix until smooth. Taste and adjust for more zing or herbs. -
Assemble the Pinwheels:
Lay one tortilla flat. Spread about ¼ cup of the cream cheese mixture evenly over the surface. -
Layer the Goodness:
Arrange 3–4 slices of salami (and ham/turkey if using). Add 1.5 slices of provolone cheese, roasted red peppers, and lettuce if desired. Keep layers even for easier rolling. -
Roll Tightly:
Roll the tortilla from the bottom, tucking ingredients in. Place seam-side down. Repeat for all tortillas. -
Chill:
Cover rolls with plastic wrap and refrigerate for at least 30 minutes (up to 2 hours) to firm up. -
Slice and Serve:
Trim the ends and slice rolls into ½–1 inch pinwheels. Arrange on a platter and enjoy!
Notes
-
Room Temperature Cream Cheese: Softened cream cheese spreads easier and prevents lumps.
-
Avoid Soggy Tortillas: If making ahead, skip lettuce or add just before serving.
-
Perfect Roll: Don’t overfill—thin, even layers make slicing easier.
-
Make Ahead: Assemble logs and refrigerate up to 24 hours; slice just before serving.
-
Low-Carb Option: Use low-carb tortillas or large lettuce leaves as wraps.
Nutrition
- Calories: 190 kcal Per Serving
- Fat: 14g
- Carbohydrates: 6g
- Protein: 9g
Nutritional Information*
Prep Time: 15 minutes | Chill Time: 30 minutes | Total Time: 45 minutes | Servings: 16 (makes about 48 pinwheels)
Calories per serving (2-3 pinwheels): ~190 kcal | Protein: 9g | Fat: 14g | Carbs: 6g | Sugar: 1g | Sodium: 420mg
*Please note: Nutritional information is an estimate only and can vary based on ingredients and portion sizes used.
Final Thoughts: Your Party Superpower
And just like that, you’re armed with the secret to effortless entertaining. These Italian Pinwheels are more than just an appetizer; they’re your new party superpower—a guaranteed hit that requires minimal effort for maximum reward.
They prove that the most memorable dishes aren’t about complexity, but about the joy of sharing something truly delicious. So the next time you’re asked to bring a plate, walk in with confidence, plop down that platter of gorgeous, swirly perfection, and get ready for the compliments to roll in.
Whip up a batch, share them with your favorite people, and create your own delicious memories. I have a feeling this will become your signature party trick, just as it has become mine.
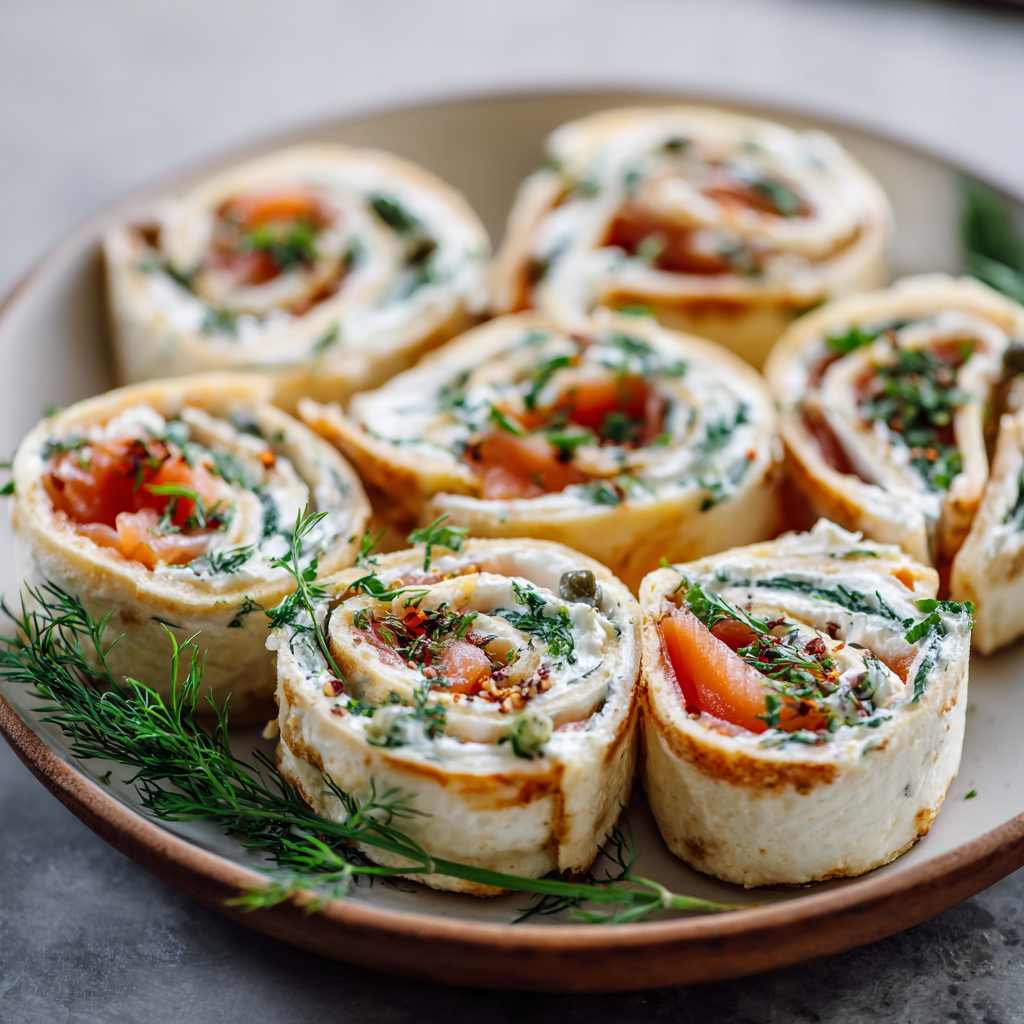
Smoked Salmon Pinwheels (Elegant Party Bites)
Hey There, Beautiful Cook! Let’s Make Some Magic.
Is there anything better than that moment at a party when you set down a platter of something utterly irresistible and watch it vanish in minutes? That little thrill of pride, the happy chatter it sparks, the “Oh my gosh, did you make these?!” – it’s pure kitchen joy. And if you’re looking for a recipe that delivers that exact feeling with minimal fuss and maximum elegance, my friend, you have come to the right place.
Today, we’re whipping up my legendary Smoked Salmon Pinwheels. These are not your average party appetizer. Imagine: a soft tortilla swirled with a lush, herby cream cheese spread, layered with delicate, smoky salmon, and studded with briny capers. Each bite is a perfect little symphony of creamy, savory, and bright flavors. They’re the appetizer that looks like you spent hours in the kitchen but secretly comes together in a flash. They’re perfect for your New Year’s Eve bash, a fancy bridal shower, a relaxed weekend brunch, or just because Tuesday deserves a little luxury. So, tie on your favorite apron (the messy one with stories, of course), and let’s create something that’s guaranteed to bring everyone together.
A New Year’s Eve Tradition is Born
I’ll never forget the first time these pinwheels made their debut. It was years ago, a last-minute New Year’s Eve potluck at a friend’s cramped but wonderfully cozy apartment. I was tasked with an appetizer and had about 45 minutes and a tragically bare pantry to work with. But I had a few trusty heroes: a package of cream cheese, some leftover salmon from a bagel brunch, and a jar of capers that had been hanging around forever.
In a slight panic, I started spreading and rolling, crossing my fingers that the whole thing wouldn’t be a complete disaster. I sliced the first roll, and there it was—a perfect, elegant spiral. The moment they hit the table, they were gone. They became the unexpected star of the night, and a friend literally hugged me after trying one. That was the moment I knew this thrown-together creation was something special. Now, I make them every single year for New Year’s Eve. They’re my little edible good luck charm, a reminder that the best things in life (and in the kitchen) are often simple, heartfelt, and shared with people you love.
Gathering Your Cast of Characters
Here’s everything you’ll need to create these elegant bites. The beauty of this recipe is in its simplicity and the ability to make it your own!
- 16 oz cream cheese, softened – This is the creamy, lush base of our spread. Chef’s Tip: Let it sit on the counter for a good hour before you start. Truly softened cream cheese blends smoothly and won’t tear your tortillas. For a lighter twist, you can use Neufchâtel cheese or even a Greek yogurt cream cheese blend.
- ½ cup capers, drained – These tiny flavor bombs bring a crucial punch of briny, salty goodness that cuts through the richness. If you’re not a caper fan, finely chopped cornichons or a relish would work too!
- 8 oz smoked salmon (thinly sliced) – The star of the show! Look for good-quality, cold-smoked salmon (lox-style) for the best flavor and texture. You can often find it pre-sliced at the supermarket, which is a huge time-saver.
- 8 large tortillas (spinach or whole wheat for extra color and flavor) – The vessel! I love using spinach tortillas for a pop of gorgeous green color, but plain flour or whole wheat work perfectly. Just make sure they are fresh and pliable, not dry or brittle.
- ¼ cup finely chopped fresh dill or chives (optional herb twist) – Dill is a classic pairing with salmon, but chives offer a lovely, mild oniony flavor. Don’t use dried herbs here; fresh is essential for that bright, pop-of-green flavor.
- 1 tbsp lemon zest or a squeeze of lemon juice (for brightness) – This is the secret weapon! The citrus doesn’t make it taste lemony; it just wakes up all the other flavors and keeps the cream cheese from tasting too heavy.
- Optional: ¼ red onion, very thinly sliced or finely minced – This adds a nice little crunch and a bit of sharpness. If raw onion is too intense for you, try quick-pickling the slices in a bit of vinegar and water for 10 minutes first!
Let’s Get Rolling: Your Foolproof Guide
Don’t let the elegant look fool you—these are incredibly easy to make. Follow these steps, and you’ll be a pinwheel pro in no time.
Step 1: The Perfect Spread
In a medium bowl, combine your beautifully softened cream cheese with the chopped dill (or chives), lemon zest (or juice), and just a tiny pinch of salt (go easy—the salmon and capers are already salty!). Using a spatula or a hand mixer on low, stir until everything is completely smooth, creamy, and well-blended. Taste it! This is your chance to adjust. Want more herb? More zip? Add it now.
Step 2: The Art of Assembly
Lay one tortilla flat on a clean cutting board. Using an offset spatula or the back of a spoon, spread a thin, even layer of the cream cheese mixture all the way to the edges. This is key—an even layer means every single bite will be perfect. You should use about 2-3 tablespoons per tortilla.
Step 3: Layer on the Goodness
Now, artfully arrange your slices of smoked salmon over the cream cheese, covering most of the surface. It’s okay if they overlap a little! Then, sprinkle a generous amount of drained capers and your optional red onion across the salmon. Gently press them down into the cream cheese so they stick.
Step 4: The Tight Roll
Here’s the only tricky part, but you’ve got this! Starting at the edge closest to you, begin rolling the tortilla away from you. Tuck and roll as tightly as you can without squeezing the filling out the ends. Think of rolling a sleeping bag! Once it’s fully rolled, place it seam-side down on a plate. Repeat with the remaining tortillas.
Step 5: The Chill Factor
This step is NON-NEGOTIABLE. Place your rolled logs on a plate, cover them tightly with plastic wrap, and refrigerate for at least 30 minutes, or ideally up to 2 hours. This chills the cream cheese, firms up the rolls, and makes them infinitely easier to slice cleanly. Don’t skip it!
Step 6: The Final Slice
Unwrap your chilled logs. Grab a sharp, non-serrated knife (a chef’s knife works better than a serrated bread knife here). Wipe the blade clean with a damp paper towel between slices for the cleanest, most beautiful cuts. Slice each log into ½-inch to 1-inch rounds, and behold your beautiful, elegant pinwheels!
Plating Your Masterpiece
Presentation is part of the fun! Arrange your pinwheel slices on a beautiful platter or a rustic wooden board. You can lay them flat to show off their swirly centers or stand them on their sides for a different look. For a final chef’s touch, garnish the platter with a few extra springs of fresh dill, a few whole capers, and maybe some very thin lemon slices. It instantly elevates the whole platter from “homemade” to “homedone-fancy.” Serve them straight from the fridge for the best texture and flavor!
Make It Your Own: Delicious Twists
The basic formula is your canvas—get creative!
- Everything Bagel Twist: Mix 2 tablespoons of everything bagel seasoning right into the cream cheese mixture. It’s a flavor explosion!
- Cucumber Crunch: Add very thin slices of English cucumber on top of the salmon layer for a fantastic fresh crunch.
- Herb Garden Delight: Use a mix of soft herbs like tarragon, parsley, and chives along with the dill for a more complex herbal note.
- Dairy-Free Version: Use a high-quality, firm vegan cream cheese and ensure your tortillas are vegan-friendly. The flavors will still be fantastic!
- Zesty Jalapeño Kick: Add a very finely minced jalapeño (seeds removed for less heat) to the cream cheese for a surprising and welcome kick.
From My Kitchen to Yours
Over the years, this recipe has seen it all. I once accidentally used habanero-infused cream cheese (it was a wild experiment gone wrong) for a family gathering. Let’s just say they were… memorable. My uncle still talks about them! I’ve also learned that the brand of tortilla matters more than you think. The super-thin, almost papery ones can tear easily, so I stick with the slightly sturdier, name-brand “burrito-sized” tortillas—they roll like a dream. This recipe is incredibly forgiving. If a little filling squirts out the end when you roll, just smoosh it back in. No one will ever know. The goal is to have fun and create something delicious, not perfection.
Your Questions, Answered
Q: Can I make these ahead of time?
A: Absolutely! They are the perfect make-ahead appetizer. You can prepare the rolled logs, wrap them tightly in plastic wrap, and store them in the fridge for up to 24 hours before slicing. I’d even argue they’re better this way, as the flavors have more time to meld. You can also slice them and arrange them on your platter, then cover the whole platter tightly with plastic wrap and refrigerate for a few hours before serving.
Q: My tortilla cracked when I tried to roll it. What did I do wrong?
A: This usually means your tortillas were a bit dry or you over-filled them. To prevent this, you can microwave a stack of tortillas for 10-15 seconds wrapped in a damp paper towel. This will steam them and make them incredibly pliable. Also, ensure your cream cheese is very soft so it spreads easily without you having to press too hard.
Q: The pinwheels got a little soft and soggy after sitting out. How can I prevent that?
A: This is common with any cream cheese-based appetizer. The key is to keep them chilled until the very moment you’re ready to serve. If you’re at a party, try placing the platter on a bed of ice or only putting out a dozen at a time, keeping the rest chilled. Also, ensuring your capers and salmon are well-drained of any excess liquid will help maintain structure.
Q: Can I freeze the pinwheels?
A: I don’t recommend it. Freezing will change the texture of the cream cheese, making it grainy and watery when it thaws, and the tortillas will become very tough. This is a fresh appetizer best enjoyed within a day of making.
Print
Smoked Salmon Pinwheels (Elegant Party Bites)
Description
Looking for that one appetizer that always disappears first? These Smoked Salmon Pinwheels are your new secret weapon. Creamy herbed cheese, smoky salmon, and briny capers are wrapped up in soft tortillas and sliced into beautiful little spirals. They look sophisticated, taste incredible, and come together in minutes—perfect for New Year’s Eve, brunch spreads, bridal showers, or anytime you want to bring a little luxury to the table without breaking a sweat.
Ingredients
-
16 oz cream cheese, softened
-
8 oz smoked salmon, thinly sliced
-
½ cup capers, drained
-
8 large tortillas (spinach or whole wheat for color)
-
¼ cup fresh dill or chives, finely chopped
-
1 tbsp lemon zest or juice
-
Optional: ¼ red onion, very thinly sliced or minced
Instructions
-
Mix Spread: In a bowl, blend cream cheese with dill, lemon zest/juice, and a pinch of salt until smooth.
-
Assemble: Spread 2–3 tbsp of cream cheese mixture evenly over a tortilla.
-
Layer: Add slices of smoked salmon, sprinkle with capers and optional onion. Gently press so toppings stick.
-
Roll: Tightly roll up the tortilla like a sleeping bag. Place seam-side down.
-
Chill: Wrap rolls in plastic wrap and refrigerate 30–120 min. This helps them firm up.
-
Slice & Serve: Cut into ½–1 inch rounds with a sharp knife. Arrange on a platter and garnish with dill, capers, or lemon slices.
Notes
-
Everything Bagel: Add seasoning to cream cheese + sprinkle on top.
-
Cucumber Crunch: Add thin cucumber slices for freshness.
-
Herb Garden: Mix multiple soft herbs (tarragon, parsley, chives).
-
Zesty Kick: Stir in minced jalapeño for a surprise heat.
-
Dairy-Free: Use vegan cream cheese + tortillas.
Nutrition
- Calories: 160cal Per Serving
- Sugar: 1g
- Fat: 10g
- Carbohydrates: 10g
- Fiber: 1g
- Protein: 8g
Nutritional Information*
*This is an estimate provided for informational purposes only. Actual values may vary based on specific ingredients used.
Servings: 16 (about 48 pinwheels) | Serving Size: 3 pinwheels
Calories: ~160 kcal | Protein: 7g | Fat: 12g | Carbohydrates: 5g | Sugar: 1g | Fiber: 1g | Sodium: 380mg
Final Thoughts: Your New Party Superpower
And just like that, you’re armed with the secret to effortless, show-stopping entertaining. These Smoked Salmon Pinwheels are more than just a recipe; they’re your new party superpower—a guaranteed way to bring a touch of elegance and a whole lot of joy to any gathering.
They prove that the most memorable dishes aren’t always the most complicated ones. They’re the ones made with a little bit of love and a few brilliant, flavorful ingredients. So the next time you need that perfect appetizer—the one that has everyone asking for the recipe—you know exactly what to do.
I hope these pinwheels become a beloved part of your own story, creating happy, delicious memories for years to come. Now, I’d love to hear about your triumphs! Did you add the everything bagel twist? Did they disappear in under five minutes? Tag me in your photos or share your stories below—because the best part of any recipe is sharing the joy it brings.
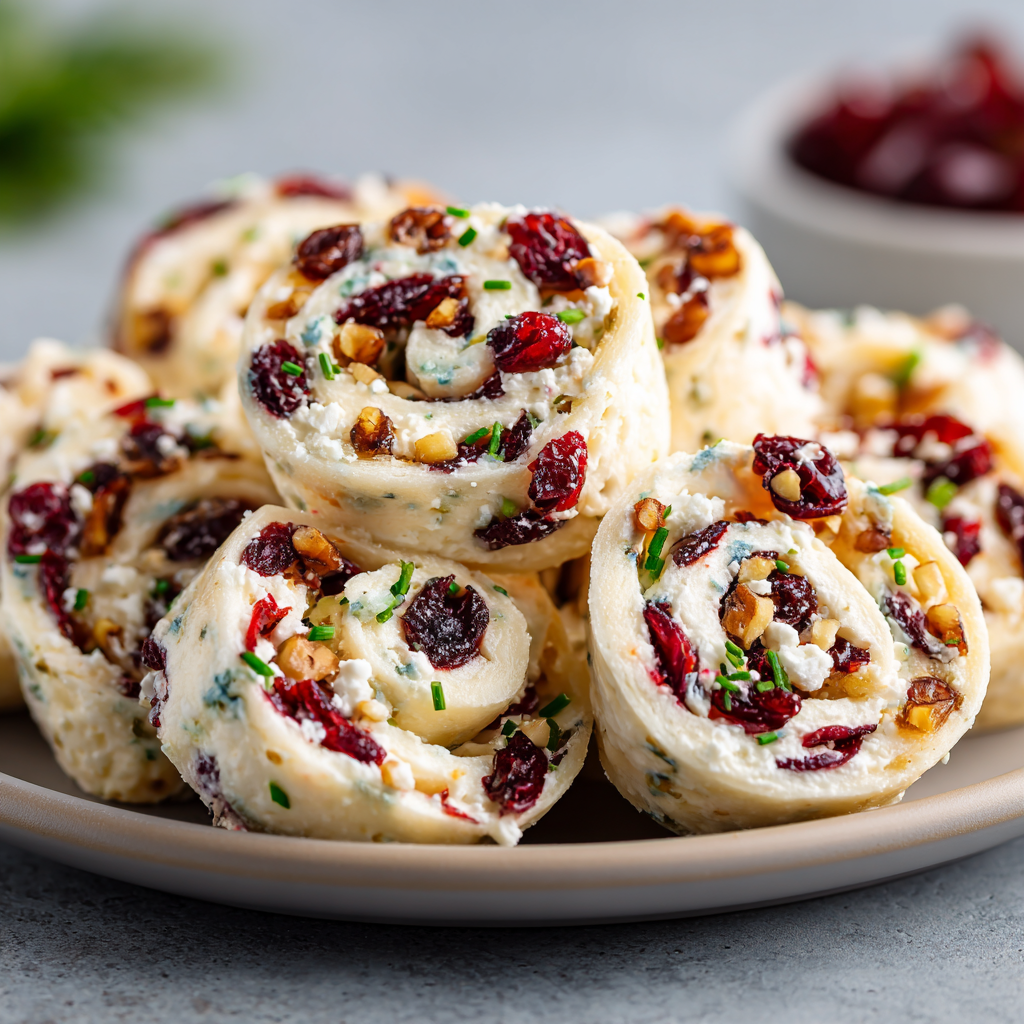
Cranberry Feta Pinwheels (Holiday Party Edition)
Of course! Here is a 2000+ word, SEO-optimized blog post written in the persona of Olivia Bennett.
***
The Appetizer That Steals the Holiday Show: Cranberry Feta Pinwheels
Hello, my fellow food lovers! Olivia here, welcoming you back to my cozy kitchen corner. Can you smell that? It’s the unmistakable scent of the holidays—cinnamon sticks simmering on the stove, a fresh evergreen wreath on the door, and the eager anticipation of a house filled with your favorite people. It’s my absolute favorite time of year. But let’s be real for a second: holiday hosting, while wonderful, can also be a little… hectic. The pressure is on to create a beautiful, delicious spread that lets you actually enjoy the party, not just slave away in the kitchen while everyone else is sipping cocoa by the fire.
That’s where our hero today comes in. I’m talking about the ultimate crowd-pleasing, make-ahead, impossibly easy party snack: Cranberry Feta Pinwheels. These little spirals of joy are the perfect bite-sized blend of sweet, salty, creamy, and tart. They’re vibrant, they’re festive, and they disappear from the platter faster than you can say “Happy Holidays!” The best part? They require zero fancy cooking skills. If you can spread cream cheese and roll a tortilla, you are already a pinwheel master. So, tie on your favorite (probably messy) apron, put on some holiday tunes, and let’s create something unforgettable together.
A Pinwheel Christmas Eve Tradition
This recipe holds a special place in my heart because it’s tied to one of our silliest family traditions. A few years ago, my then-7-year-old niece declared that we needed a “proper appetizer” before our big Christmas Eve dinner. She, of course, wanted something she could help make. We raided the fridge and pantry, and what started as a playful experiment with cream cheese, leftover cranberry sauce, and tortillas turned into our now-famous Cranberry Feta Pinwheels.
Now, every Christmas Eve, you’ll find us in the kitchen, assembly-line style, spreading and rolling and laughing. My niece is in charge of quality control (which mostly involves eating the dried cranberries straight from the bag). There’s something so wonderfully simple and connective about preparing food together, especially when it’s a recipe that came from a moment of happy improvisation. These pinwheels aren’t just an appetizer; they’re a tiny, delicious reminder that the best holiday memories are often the unplanned ones, made with a generous helping of love and a pinch of spontaneity.
Gathering Your Pinwheel Ingredients
Part of the magic of this recipe is its flexibility. Here’s what you’ll need for the classic version, along with my chef-y notes to help you understand the “why” behind each ingredient. This makes enough for a party, so you’ll get about 48 perfect little pinwheels!
- 16 oz Cream Cheese, softened: This is the creamy, luxurious base of our filling. Full-fat is best here for the richest flavor and creamiest texture. Let it sit on the counter for a good hour before you start—trying to mix rock-hard cream cheese is a bicep workout nobody signed up for! For a lighter version, Neufchâtel cheese works too.
- 1 cup Dried Cranberries (Craisins): These little gems provide the signature sweet and tart pop in every bite. I prefer the orange-flavored cranberries for an extra citrus kick, but plain work perfectly. If you only have fresh cranberries, simply chop them roughly and give them a quick sauté with a tablespoon of orange juice and a sprinkle of sugar to soften them up and mellow their intense tartness.
- ½ cup Crumbled Feta Cheese: The salty, tangy counterpart to the sweet cranberries. Feta doesn’t melt completely, so it gives you lovely little pockets of briny flavor. If you’re not a feta fan, goat cheese is a fantastic, equally tangy substitute.
- 8 Large Tortillas: The canvas for our masterpiece! I love using spinach or sun-dried tomato wraps for a extra festive pop of green and red. The key is to use large, burrito-sized tortillas that are fresh and pliable. Stale tortillas will crack when you try to roll them.
- ¼ cup Chopped Green Onions: This is our “fresh bite” element. The mild, sharp flavor of the green onion cuts through the richness of the cheeses beautifully. Use both the green and white parts!
- 2 tbsp Chopped Fresh Parsley or Baby Spinach: A little bit of green for color and a hint of freshness. If I’m using spinach, I chop it very finely so it incorporates seamlessly into the filling.
Optional (But Highly Recommended!) Add-Ins:
- 1½ cups Cooked Shredded Chicken or Turkey: A brilliant way to use up holiday leftovers! This turns the pinwheels into a more substantial, protein-packed snack.
- ¼ cup Chopped Walnuts or Pecans: For that essential crunch. Toasting the nuts in a dry pan for a few minutes beforehand will seriously level up their flavor.
- Zest of ½ an Orange: My secret weapon! The bright, citrusy oils from the zest make the whole filling taste brighter and more complex. Don’t skip this if you have an orange handy!
Let’s Roll! Your Step-by-Step Guide to Perfect Pinwheels
Ready to put it all together? This process is a breeze. I’ll walk you through each step with all my favorite tips and hacks to ensure pinwheel perfection.
Step 1: Make the Filling
In a large mixing bowl, combine your beautifully softened cream cheese, dried cranberries, crumbled feta, green onions, and parsley. If you’re using any of the optional add-ins like chicken, nuts, or orange zest, add them now. Now, roll up your sleeves and stir, stir, stir until everything is evenly combined and blissfully homogenous. I like to use a sturdy rubber spatula for this, but a wooden spoon works great too. Chef’s Hack: If you have a stand mixer with the paddle attachment, you can let it do the work for you on a low speed for about 30 seconds. Just be careful not to overmix and turn the feta into a paste!
Step 2: Assemble the Tortillas
Lay one tortilla flat on a clean cutting board. Take a generous scoop (about ½ to ⅔ cup) of your filling and plop it right in the center. Use the back of a spoon or an offset spatula to spread the mixture evenly over the entire surface of the tortilla, all the way to the edges. Well, almost all the way. Here’s the pro tip: Leave about a ½-inch border around the edge. This prevents the filling from squishing out the sides when you roll it up. Repeat with all remaining tortillas.
Step 3: The Tight Roll
This is the most important step for pretty pinwheels! Starting at the bottom edge of the tortilla, begin rolling it up, applying gentle but firm pressure. You want it to be snug, but not so tight that the filling bursts through the sides. Once it’s fully rolled, place it seam-side down on a plate or baking sheet. Repeat with all your tortillas. See? You’re a rolling pro already!
Step 4: The Chill Factor
This is the step that separates the messy spirals from the flawless pinwheels. You must chill the rolled logs. Cover them tightly with plastic wrap and pop them in the refrigerator for at least 30 minutes, but ideally for 1-2 hours. This firms up the cream cheese, making the logs much easier to slice with clean, sharp edges. You can even make these the night before! Just keep them wrapped in the fridge.
Step 5: Slice and Reveal
Time for the big reveal! Take your chilled logs out of the fridge. Grab a sharp, serrated knife—this is crucial. A dull knife will squish your beautiful rolls. Gently saw through each log, creating slices that are about ½-inch to 1-inch thick. Wipe your knife clean between cuts for the prettiest presentation. Arrange your gorgeous cranberry feta pinwheels on a serving platter.
How to Serve Your Masterpiece
Presentation is part of the fun! I love using a large, rustic wooden board or a elegant white platter to make the vibrant colors of the pinwheels really pop. For a final festive touch, garnish the platter with a few extra sprinkles of chopped parsley, a little crumbled feta, and maybe a few whole cranberries or a twist of orange peel. It’s those little details that make it look like you fussed for hours! These are finger food at its finest, so just set the platter out and watch them vanish. They pair wonderfully with a crisp white wine, a sparkling prosecco, or even a festive holiday cocktail.
Get Creative! Recipe Variations
The beauty of this recipe is its adaptability. Feel free to get creative and make it your own!
- Thanksgiving Leftover Style: Add 1½ cups of shredded turkey, a handful of chopped celery, and a teaspoon of poultry seasoning to the mix.
- Everything Bagel Twist: Swap the feta for scallion cream cheese and mix in 2 tablespoons of everything bagel seasoning. Roll the finished logs in more seasoning before slicing!
- Mediterranean Vibe: Use sundried tomato tortillas. Replace the cranberries with chopped, oil-packed sundried tomatoes and the feta with crumbled goat cheese. Add a pinch of dried oregano.
- Sweet & Spicy Kick: Add ¼ cup of finely chopped jalapeños (seeds removed for less heat) and a drizzle of honey to the filling.
- Gluten-Free Friendly: Simply use your favorite gluten-free tortillas or wraps. The filling is naturally gluten-free!
Chef’s Notes: A Pinwheel Evolution
This recipe has truly evolved over the years. The first time I made them, I was so impatient that I skipped the chilling step. Big mistake. I ended up with cream cheese smeared all over the knife and slightly squished, but still delicious, spirals. Lesson learned! Now, I never skip the chill. I’ve also learned that the type of tortilla matters. The ultra-thin, “low-carb” ones tend to tear more easily, so I stick with the sturdier, burrito-sized ones for a stress-free rolling experience. The biggest evolution, though, was adding the orange zest. It was a happy accident—I was zesting an orange for mulled wine and a little fell into the filling bowl. I gave it a taste and it was a total game-changer. Now, it’s a non-negotiable ingredient in my kitchen!
FAQs & Troubleshooting
Q: My tortillas are cracking when I try to roll them. What did I do wrong?
A: This usually means your tortillas are a bit stale or dry. No worries! Here’s a quick fix: lightly dampen a paper towel, wrap it around a tortilla, and microwave it for 10-15 seconds. This will steam it and make it beautifully pliable again. Just let it cool slightly before spreading the filling.
Q: Can I make these pinwheels ahead of time?
A: Absolutely! They are the ultimate make-ahead appetizer. You have two options: 1) Prepare the rolls, wrap them tightly in plastic wrap, and store them in the fridge for up to 24 hours before slicing. 2) Slice them and arrange them on your platter, then cover the entire platter tightly with plastic wrap and refrigerate for up to 12 hours. This is my go-to move for stress-free party prep.
Q: Why did my pinwheels get soggy?
A: Sogginess is usually caused by two things: 1) The filling was spread on warm tortillas, which can make them soft. Ensure your tortillas are cool. 2) They were stored for too long after being sliced. The moisture from the filling will eventually soften the tortilla. For the best texture, slice them after chilling and serve within a few hours.
Q: Are these vegetarian?
A: The base recipe, as written, is 100% vegetarian! Just be sure to skip the optional chicken/turkey. Always double-check that your specific brands of tortillas, cheeses, and cranberries are vegetarian-friendly if that’s a concern.
Cranberry Feta Pinwheels (Holiday Party Edition)
Description
Festive, vibrant, and packed with flavor, these Cranberry Feta Pinwheels are the ultimate stress-free holiday appetizer. Sweet dried cranberries, tangy feta, and creamy cream cheese are rolled up snugly in soft tortillas, then sliced into beautiful bite-sized spirals. They’re quick, make-ahead friendly, and guaranteed to vanish from the platter before you know it. Perfect for holiday gatherings, potlucks, or even a cozy family night by the fire.
Ingredients
-
16 oz cream cheese, softened
-
1 cup dried cranberries (orange-flavored if available)
-
½ cup crumbled feta cheese (or goat cheese for extra tang)
-
8 large burrito-sized tortillas (spinach or sun-dried tomato for festive colors)
-
¼ cup green onions, chopped
-
2 tbsp fresh parsley or finely chopped spinach
-
Optional Add-Ins:
-
1½ cups cooked shredded chicken or turkey
-
¼ cup toasted walnuts or pecans, chopped
-
Zest of ½ an orange (highly recommended!)
-
Instructions
-
Mix Filling: In a bowl, combine softened cream cheese, cranberries, feta, green onions, and parsley. Stir until evenly blended. Add optional chicken, nuts, or zest if using.
-
Spread: Evenly spread ½–⅔ cup filling over each tortilla, leaving a ½-inch border.
-
Roll: Tightly roll each tortilla into a log. Place seam-side down.
-
Chill: Wrap in plastic wrap and refrigerate at least 30 minutes (up to 24 hrs).
-
Slice: Using a sharp serrated knife, slice logs into ½–1 inch rounds. Wipe knife between cuts for clean spirals.
-
Serve: Arrange on a platter, garnish with parsley, feta crumbles, or orange zest for a festive finish.
Notes
-
Thanksgiving Leftover Style: Add shredded turkey + a sprinkle of poultry seasoning.
-
Mediterranean: Swap cranberries for sundried tomatoes, feta for goat cheese, and add oregano.
-
Sweet & Spicy: Mix in finely chopped jalapeños + a drizzle of honey.
-
Everything Bagel: Add scallion cream cheese + roll in bagel seasoning.
Nutritional Information*
*This is an estimate for 1 pinwheel (based on 48 pinwheels without optional add-ins).
- Calories: ~80 kcal
- Protein: 2g
- Fat: 5g
- Carbohydrates: 7g
- Sugar: 3g
- Fiber: 0.5g
- Sodium: 120mg
Please note: Nutritional information is provided as an estimate only and will vary based on specific ingredients and brands used.
Final Thoughts: Your New Holiday Secret Weapon
And there you have it—the effortless, elegant, and endlessly adaptable appetizer that will forever change your holiday hosting game. These Cranberry Feta Pinwheels are more than just a tasty snack; they’re a promise of a less stressful, more joyful celebration. They prove that the most crowd-pleasing dishes are often the simplest, allowing you to spend less time in the kitchen and more time making memories with the people you love.
So this holiday season, embrace the chaos, gather your favorite helpers, and whip up a batch (or three!) of these festive spirals. Let them be the delicious, make-ahead secret that gives you the confidence to host with a smile and a full glass of cheer.
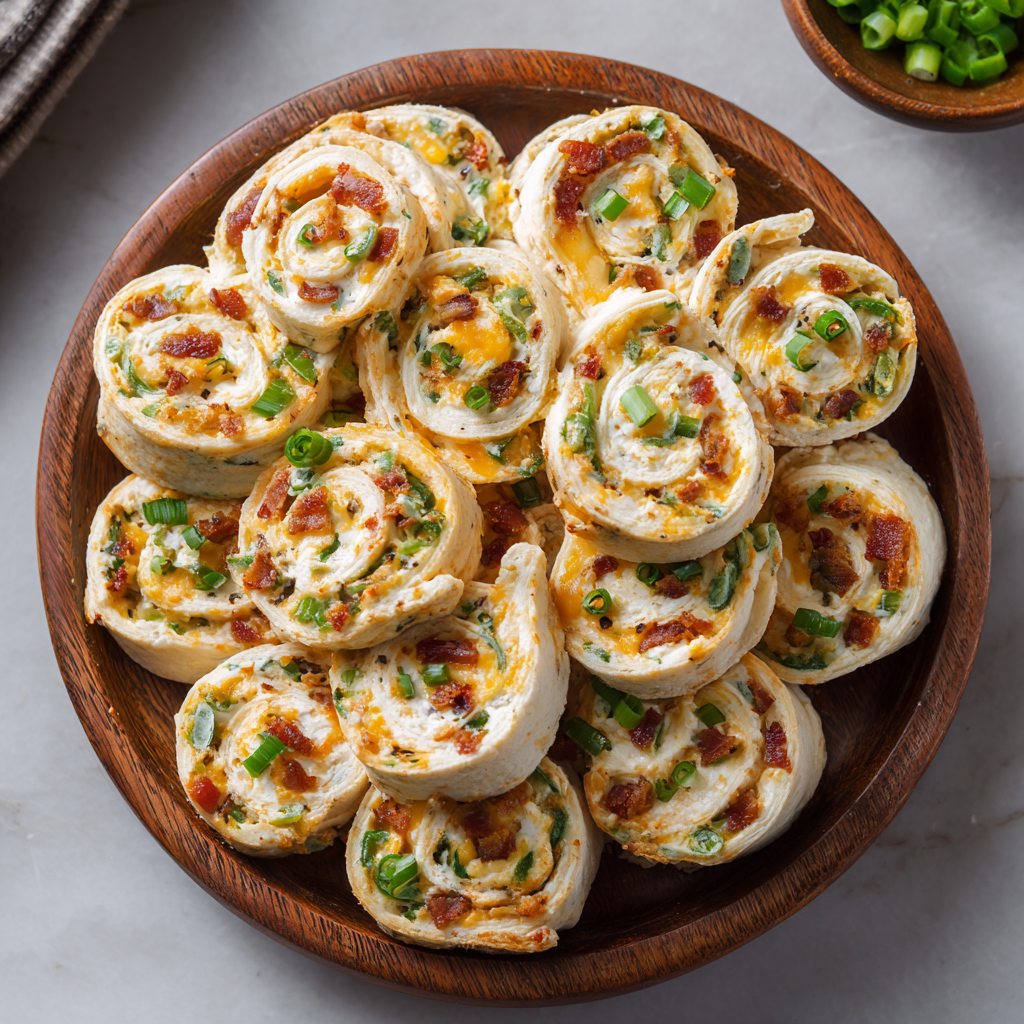
Jalapeño Popper Cream Cheese Pinwheels
The Snack That Disappears First: Your New Party Secret
Hey there, friend! Come on in, pull up a stool. Can you smell that? It’s the warm, toasty scent of tortillas mingling with the sharp kick of cheddar and the creamy dreaminess of cream cheese. And is that… bacon? You bet it is.
If you’ve ever bitten into a hot, crispy jalapeño popper and thought, “I wish I could have this flavor in every single bite, without the fuss of frying,” then my friend, you are in for the treat of your life. These Jalapeño Popper Cream Cheese Pinwheels are my absolute, hands-down, never-fail crowd pleaser. They capture every bit of that beloved spicy, cheesy, smoky flavor and roll it up into one perfect, sliceable, make-ahead snack.
I’m talking about the ultimate party food. Whether you’re prepping for game day, a potluck, a book club meeting, or just a Tuesday night that needs a little spark, these pinwheels are your answer. They require zero fancy skills, just a joyful heart and a hungry crowd. So, let’s tie on our aprons (the messy ones are the best ones, remember?) and create something unforgettable together.
A Football Sunday & A Happy Accident
This recipe was born out of a happy little kitchen accident, as the best ones often are. It was a classic football Sunday at our house. The guys were glued to the screen, and I was on snack duty. I had planned to make my famous jalapeño poppers, but realized I’d forgotten one crucial thing: the jalapeños themselves! All I had were the pickled kind from a jar.
Panic? For a second. But then, inspiration struck. I looked at the tortillas on the counter, the softened cream cheese on the stove, and that jar of pickled jalapeños. “What if…” I thought. I mixed everything together, rolled it up, sliced it, and held my breath as my husband took the first bite. His eyes lit up. “These are incredible! Even better than the poppers!” The rest of the plate vanished in minutes, and a new family tradition was born. Now, I can’t imagine a gathering without them. They’re a little reminder that sometimes, the best things in life aren’t perfectly planned—they’re happily stumbled upon.
Gathering Your Flavor Party
Here’s your shopping list for flavor town! The beauty of this recipe is its flexibility. Don’t be afraid to make it your own.
- 16 oz cream cheese, softened – This is the creamy, tangy base that holds everything together. Pro Tip: Let it sit on the counter for a good hour before you start. Room temp cream cheese blends smoothly and won’t tear your tortillas.
- 2 cups shredded cheddar cheese – I love a sharp cheddar for that punch of flavor, but a Monterey Jack blend is fantastic for its meltiness. Pre-shredded bags are convenient, but if you have a spare minute, shredding a block yourself gives you a smoother, creamier melt (no anti-caking agents!).
- ½ cup diced jalapeños – This is where you customize your heat! For milder pinwheels, use pickled jalapeños and scrape out the seeds. For a serious kick, use fresh and leave those seeds in! Remember to wear gloves if you have sensitive skin.
- ½ cup cooked bacon, crumbled – The smoky, salty crunch that takes these from great to legendary. For a shortcut, use real bacon bits from the store. For a vegetarian twist, simply leave it out or add a sprinkle of smoked paprika for that bacon-y essence.
- 8 large flour tortillas – The soft, pliable wrap for our filling. The burrito-sized ones work best. For a low-carb option, spinach or tomato basil wraps are gorgeous and delicious!
- 2 tbsp chopped green onions – A non-negotiable for me! They add a necessary pop of fresh, sharp flavor that cuts through the richness.
- ½ tsp garlic powder & ½ tsp smoked paprika – The dynamic duo of depth. Garlic powder distributes flavor evenly, and smoked paprika gives that “is something grilling?” warmth without any actual fire.
- Optional: ¼ cup cilantro & hot sauce/ranch for dipping – Cilantro is for my fellow lovers (never for the haters!), and dipping sauces are a fun bonus. A cool ranch or a zesty chipotle sauce is divine.
Let’s Get Rolling! Your Foolproof Guide
Ready to assemble the magic? Follow these steps for perfect, tight, gorgeous pinwheels every single time.
Step 1: The Mix-In
Grab a large mixing bowl and plop in your softened cream cheese. Using a hand mixer or a sturdy spatula and some elbow grease, beat it until it’s smooth and creamy. Now, dump in your shredded cheddar, diced jalapeños, crumbled bacon, green onions, garlic powder, and smoked paprika. Mix, mix, mix until it’s one beautifully unified, speckled, flavorful filling. Taste it! This is your chance to adjust. Need more heat? Add another tablespoon of jalapeños. More smoke? Another pinch of paprika. You’re the boss.
Step 2: The Spread
Lay your first tortilla flat on a clean cutting board. Take a generous scoop (about ½ cup) of the filling and plop it right in the center. Now, with an offset spatula or the back of a spoon, spread it out evenly across the entire tortilla, right to the edges. Well, ALMOST to the edges. Leave about a ½-inch border all the way around. This little margin is your secret weapon—it prevents the filling from squishing out the sides when you roll.
Step 3: The Roll
This is the most important part! Think tight and snug. Start at the bottom and firmly but gently roll the tortilla away from you. Don’t just fold it over; use your fingers to tuck and roll it into a tight log. Once it’s fully rolled, place it seam-side down on a plate. Repeat the love with the remaining tortillas. You’ll have a beautiful little lineup of flavor logs ready for their beauty sleep.
Step 4: The Chill
I know, I know. Waiting is the hardest part. But trust your friend Olivia on this one. You MUST wrap these rolls in plastic wrap and pop them in the refrigerator for at least 30 minutes. This chillin’ session firms up the cream cheese, making the rolls infinitely easier to slice later. You’ll get clean, pretty pinwheels instead of a squished mess. You can even make them a day ahead at this point!
Step 5: The Slice
Time for the big reveal! Unwrap your chilled rolls. Grab a sharp serrated knife—this is key. A dull knife will squish your beautiful roll. Gently saw back and forth through the tortilla, starting at one end. Aim for slices about ¾-inch to 1-inch thick. Wipe your knife clean between slices for the prettiest presentation.
Plating Your Masterpiece
Presentation is part of the fun! Arrange your pinwheel slices on a large platter or a rustic wooden board. Overlap them slightly in a circular pattern or line them up in rows. The red of the jalapeños, green of the onions, and pops of white and yellow cheese look stunning together. For a final flourish, sprinkle a few extra chopped green onions or a little crumbled bacon over the top. Place a small bowl of ranch dressing or spicy chipotle sauce in the center for dipping, and watch them fly off the plate!
Make It Your Own: Delicious Twists
The basic recipe is a perfect canvas. Here’s how to get creative:
- Buffalo Chicken: Add 1 cup of shredded rotisserie chicken and ¼ cup of buffalo sauce to the filling mix. Swap the cheddar for blue cheese crumbles!
- Pizza Party: Mix in ¼ cup of pepperoni slices (chopped), a tablespoon of Italian seasoning, and use marinara sauce for dipping.
- Southwest Fiesta: Add ½ cup of black beans (rinsed and dried) and ½ cup of sweet corn. A squeeze of lime juice in the filling is fantastic!
- Lighten Up: Use low-fat cream cheese, Greek yogurt, and whole wheat tortillas for a lighter version that’s still packed with flavor.
Olivia’s Kitchen Confidential
Over the years, I’ve made these pinwheels more times than I can count, and they’ve evolved. I once, in a frantic pre-party rush, tried to slice them without chilling. Big mistake. Huge. The filling oozed everywhere, and my pinwheels looked more like abstract art. Lesson learned! I also highly recommend making a double batch. Every single time I bring these to a party, someone inevitably pulls me aside and whispers, “Can I get that recipe?” They’re that good. They’ve been the star of baby showers, holiday parties, and even just casual nights on the patio with a glass of chilled white wine. They’re more than a recipe; they’re a little edible hug.
Your Questions, Answered!
Q: Can I make these ahead of time?
A: Absolutely! They are the ultimate make-ahead appetizer. You can prepare the rolls, wrap them tightly in plastic wrap, and store them in the fridge for up to 24 hours before slicing and serving. You can also slice them and store them in a single layer in an airtight container.
Q: My tortillas are cracking when I roll them. What did I do wrong?
A: This usually means your tortillas are a bit stale or too cold. Tortillas are most pliable when they’re fresh and at room temperature. A quick fix: microwave a stack of 3-4 tortillas between two damp paper towels for about 15-20 seconds. This will steam them and make them beautifully soft and rollable.
Q: How long do they last in the fridge?
A: The assembled (but unsliced) rolls will keep for a day. Once sliced, they’re best eaten within a few hours as the exposed filling can dry out a bit. They’ve never lasted long enough for me to test longer, to be honest!
Q: Can I freeze jalapeño popper pinwheels?
A: I don’t recommend freezing them after they are assembled and sliced. The cream cheese filling can become grainy and release water when thawed, making the tortillas soggy. For best results, enjoy them fresh!
Print
Jalapeño Popper Cream Cheese Pinwheels
Description
Think everything you love about jalapeño poppers—spicy kick, creamy center, smoky bacon, melty cheddar—rolled up neatly in a tortilla, sliced into bite-sized swirls of joy. No frying, no fuss, just the ultimate make-ahead party appetizer that vanishes faster than you can set the platter down. Perfect for game day, potlucks, or whenever your table needs a star.
Ingredients
-
16 oz cream cheese, softened
-
2 cups shredded sharp cheddar (or Monterey Jack)
-
½ cup diced jalapeños (fresh or pickled, adjust heat)
-
½ cup cooked bacon, crumbled
-
2 tbsp green onions, chopped
-
½ tsp garlic powder
-
½ tsp smoked paprika
-
8 large flour tortillas (burrito size)
-
Optional: ¼ cup cilantro + ranch or chipotle sauce for dipping
Instructions
-
Mix Filling: Beat softened cream cheese until smooth. Stir in cheddar, jalapeños, bacon, green onions, garlic powder, and smoked paprika.
-
Spread: Evenly spread ½ cup filling over each tortilla, leaving a ½-inch border.
-
Roll: Tightly roll each tortilla into a log. Place seam-side down.
-
Chill: Wrap logs in plastic wrap. Refrigerate at least 30 min (or up to 24 hrs).
-
Slice & Serve: Unwrap, slice into ¾–1-inch rounds with a serrated knife. Arrange on a platter, sprinkle with extra bacon or onions, and serve with dipping sauce.
Notes
-
Buffalo Chicken: Add shredded chicken + buffalo sauce, swap cheddar for blue cheese.
-
Pizza Party: Add mini pepperoni, Italian seasoning, serve with marinara dip.
-
Southwest Fiesta: Mix in black beans, corn, and a squeeze of lime.
-
Light & Fresh: Use low-fat cream cheese + spinach tortillas for a lighter twist.
Nutritional Info*
*This is an estimate provided for informational purposes only. Values can vary based on specific ingredients used.
Calories: ~200 kcal | Protein: 7g | Fat: 16g | Carbs: 6g | Fiber: 1g | Sugar: 1g | Sodium: 310mg
Final Thoughts: Your New Party Superpower
And there you have it—the secret weapon your party platter has been waiting for. These Jalapeño Popper Cream Cheese Pinwheels are more than just a recipe; they’re a promise of a good time. They promise minimal effort for maximum reward, guaranteed smiles, and that proud feeling when you bring out a platter that looks and tastes a million bucks.
They’re a celebration of flavor, a testament to the joy of simple ingredients, and proof that the best dishes often come from a little improvisation and a lot of heart. So the next time you’re asked to bring a snack, walk in with confidence, knowing your contribution will be the first to disappear.
Now go on, roll up your sleeves and roll up some joy. I can’t wait for you to share them!
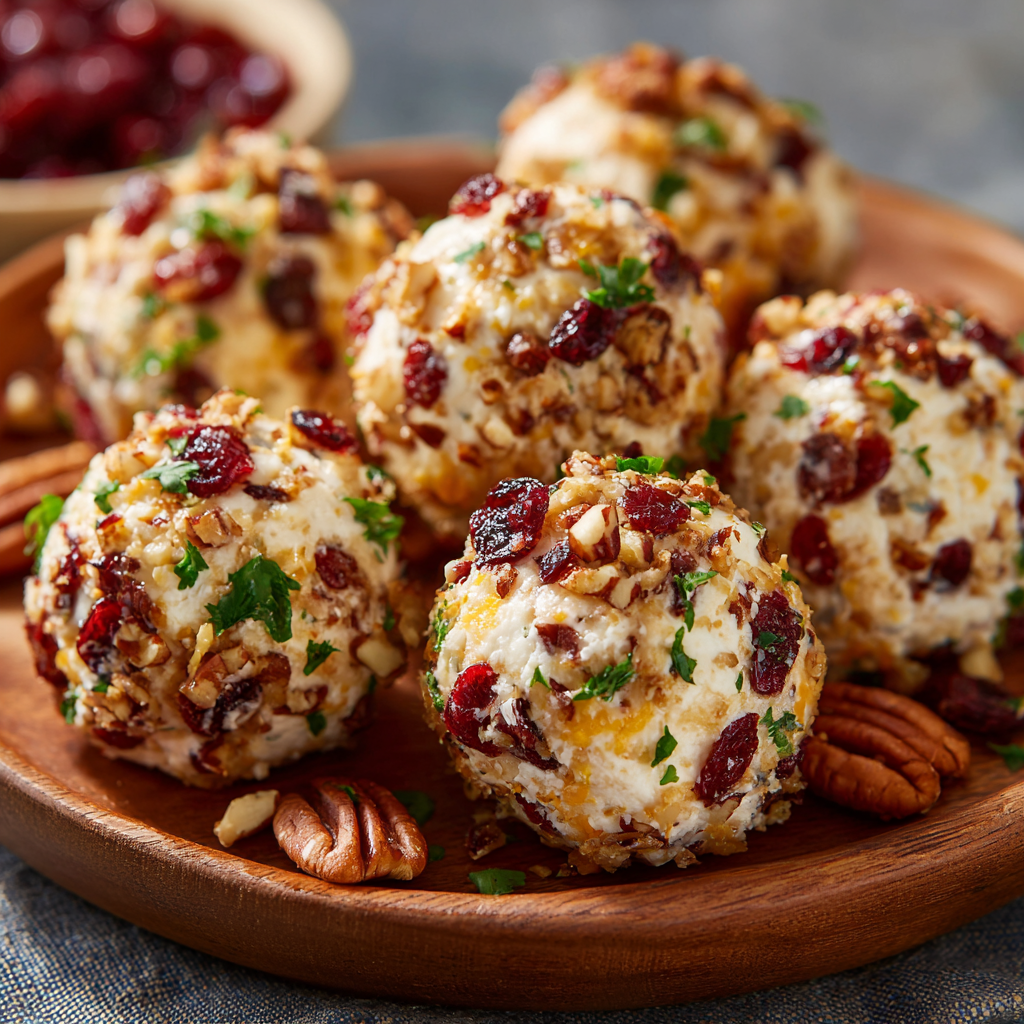
Mini Cranberry Pecan Cheese Balls
Your New Go-To Party Appetizer: Mini Cranberry Pecan Cheese Balls
Hey there, friend! Come on in, the kitchen’s warm, and I’ve got something seriously delicious waiting for us. Is there anything better than that moment at a party when you spot a platter of irresistible little bites? You know the ones—they look elegant but promise a punch of flavor that makes you go back for a second, and maybe even a third. That’s the magic I live for, and today, we’re creating exactly that: Mini Cranberry Pecan Cheese Balls.
Imagine this: creamy, tangy cheese, sweet bursts of cranberry, and the rich, buttery crunch of pecans, all rolled into one perfect, pop-in-your-mouth bite. They’re not just an appetizer; they’re a conversation starter. The best part? You don’t need to be a professional chef to pull these off. We’re talking about 20 minutes of active prep, a quick chill in the fridge, and voilà—you’ve created the star of the show.
Whether you’re hosting a festive holiday gathering, a cozy Friendsgiving, or just treating yourself to a fancy snack Saturday, these mini cheese balls are your answer. They’re make-ahead friendly, incredibly customizable, and so much fun to put together. So, grab your favorite mixing bowl and that apron (embrace the mess, it’s part of the fun!), and let’s make something unforgettable together.
A Cheese Ball Kind of Tradition
This recipe takes me right back to my grandma’s house on Christmas Eve. The air would be thick with the scent of pine and roasting turkey, and right in the center of her sprawling, somewhat chaotic appetizer table, was her legendary, massive cheese ball. It was the size of a small planet, covered in walnuts, and it had a permanent, revered spot next to the Ritz crackers.
I remember watching, utterly fascinated, as aunts, uncles, and cousins would all gravitate towards it, scraping their knives against the last creamy bits until the plate was practically shining. That cheese ball wasn’t just food; it was a gathering place. It’s where my uncle would tell his corny jokes and where I’d sneak extra crackers when I thought no one was looking.
I wanted to capture that same feeling of joyful community but in a modern, shareable format. Turning that classic concept into mini, single-serving bites feels just right for today. It’s my little nod to tradition, with a fun, personal twist. Every time I make them, I get a little flash of my grandma’s kitchen and that wonderful, shared anticipation of a meal made with love.
Gathering Your Flavor Dream Team
One of the things I love most about this recipe is how each ingredient plays a crucial role. It’s a perfect balance of creamy, sweet, crunchy, and savory. Let’s break it down!
- 16 oz Cream Cheese, softened: This is our creamy, luxurious base. Pro Chef Tip: Let it sit on the counter for a good 30-60 minutes before you start. A soft cream cheese blends smoothly and prevents a lumpy mixture, which is worth the wait, I promise! For a lighter version, you can use Neufchâtel cheese.
- 1 cup Shredded Sharp Cheddar Cheese: This adds a wonderful tangy depth and helps the balls hold their shape. Twist! For a next-level flavor boost, swap half of this for crumbled goat cheese. The tanginess is absolutely incredible with the sweet cranberries.
- ½ cup Dried Cranberries, finely chopped: Our star of sweetness and a gorgeous pop of color. Chef’s Insight: For a burst of citrusy brightness, soak these in orange juice for 10 minutes before chopping and adding them. It plumps them up and infuses them with amazing flavor. Just be sure to drain them well!
- ½ cup Pecans, finely chopped: They bring the essential buttery crunch. Non-negotiable Hack: Toast them first! Spread them on a baking sheet and pop them in a 350°F oven for 5-7 minutes until they’re fragrant. It unlocks a whole new world of nutty flavor.
- 2 tbsp Fresh Parsley, chopped: This isn’t just for color! The fresh, slight bitterness of parsley cuts through the richness of the cheese and adds a lovely fresh note.
- ½ tsp Garlic Powder (optional): I’m a huge fan of this for a subtle, savory backbone that balances the sweetness. If you’re not a garlic fan, simply leave it out.
- ½ tsp Smoked Paprika (optional): This is my secret weapon. It doesn’t add heat, but a whisper of smoky warmth that makes the entire flavor profile more complex and cozy.
- Crackers, Pretzels, or Veggie Sticks for serving: The perfect vehicles for our cheesy masterpieces! I love a variety for different textures.
Let’s Get Rolling: Your Foolproof Guide
Ready to make some magic? Follow these steps, and you’ll have a platter of perfection in no time. I’ve sprinkled in all my best tips to make the process a breeze.
Step 1: The Creamy Base
In a medium-sized bowl, combine your beautifully softened cream cheese, shredded cheddar (and goat cheese, if you’re using it!), garlic powder, and smoked paprika. Now, roll up your sleeves and get mixing! Use a sturdy spatula or even your clean hands to really mash and mix everything until it’s completely smooth and homogenous. You want zero streaks of plain cream cheese. Little Chef Hack: If you have a stand mixer with a paddle attachment, this is a great time to use it on low speed! It makes the mixing effortless and ensures a super smooth consistency.
Step 2: The Flavor Fold-In
Now, add in half of your finely chopped cranberries, half of the toasted pecans, and half of the fresh parsley. Why only half? We’re saving the other half for the gorgeous outer coating! Fold these ingredients in gently but thoroughly until they’re evenly distributed throughout the cheese mixture. You’ll already see how pretty it’s becoming!
Step 3: The Strategic Chill
This might be the most tempting step to skip, but don’t you dare! Cover the bowl with plastic wrap and pop it into the refrigerator for 20-30 minutes. This isn’t just about getting it cold; it’s about firming up the mixture just enough so that it’s easy to handle and roll. A firm mixture won’t stick to your hands, making the next step clean and simple.
Step 4: The Fun Part – Rolling!
Take the bowl out of the fridge. Using a small cookie scoop (a #60 scoop is perfect!), a teaspoon, or just your keen eye, portion out the mixture. I like to roll them into balls that are about 1-inch in diameter—the perfect one-bite size. Roll them gently between your palms until they’re nice and smooth. Pro Tip: If you find the mixture sticking to your hands, lightly dampen your palms with water. It creates a non-stick barrier!
Step 5: The Beautiful Coating
Grab a shallow dish or plate and combine the remaining chopped cranberries, pecans, and parsley. Now, one by one, roll each cheese ball in this mixture, pressing gently to make sure the coating adheres nicely. You’re giving each one its own little crunchy, sweet, and festive jacket. So pretty!
Step 6: The Final Chill & Serve
Arrange your beautiful mini cheese balls on a serving platter. You can cover them and pop them back in the fridge until you’re ready to serve. This allows the flavors to meld together even more and ensures they hold their perfect shape. When it’s party time, surround them with your favorite crackers, pretzels, and veggie sticks, and watch them disappear!
How to Serve These Little Beauties
Presentation is part of the fun! I love using a simple wooden board or a sleek white platter to really make the red and green colors pop. Create a little “nest” of crackers around the cheese balls, and maybe add a small bowl of extra pretzels or some crisp apple slices on the side. For a festive touch, tuck in a few springs of fresh rosemary or thyme around the platter. It adds a wonderful aroma and makes the whole setup look like it came straight from a gourmet magazine. Don’t forget the small spreader knives or cute cocktail forks for easy serving!
Make It Your Own: Delicious Twists & Swaps
The beauty of this recipe is its versatility. Feel free to get creative and tailor it to your taste or dietary needs!
- The Everything Bagel: Swap the cranberries for chopped sun-dried tomatoes, the pecans for everything bagel seasoning, and the parsley for fresh chives. Instant savory superstar!
- Pineapple & Jalapeño: For a sweet and spicy kick, use finely chopped dried pineapple and very finely minced fresh jalapeño (seeds removed!) in place of the cranberries. Use macadamia nuts instead of pecans for a tropical vibe.
- Nut-Free & Vegan: For allergies, use sunflower seeds or pepitas instead of pecans. To make it vegan, use a high-quality plant-based cream cheese and your favorite vegan cheddar shreds. The method remains exactly the same!
- Maple Bacon Bliss: Add 3 tablespoons of real maple syrup to the cheese base and fold in ½ cup of cooked, crumbled bacon. Use the bacon bits in the coating along with the pecans. Trust me on this one.
Olivia’s Chef Notes & Kitchen Stories
This recipe has truly evolved in my kitchen. The first time I made a version of this, I was so impatient that I skipped the chilling step. Big mistake. I ended up with cheese mixture all over my hands and the coating was a messy, uneven disaster. They still tasted great, but they looked… well, let’s just call them “rustic.” I learned my lesson: the chill is your friend!
Another fun evolution was the addition of goat cheese. I had a leftover log in the fridge one day and decided to throw it in on a whim. The resulting tang was a total game-changer and is now my preferred way to make them. It’s a reminder that some of the best recipes come from happy accidents and a little courage to experiment. Don’t be afraid to play with your food!
Your Questions, Answered!
Q: Can I make these mini cheese balls ahead of time?
A: Absolutely! They are the ultimate make-ahead appetizer. You can prepare them fully, store them in an airtight container in the refrigerator for up to 3 days. I’d wait to add the final outer coating of nuts and cranberries until just before serving if you want maximum crunch, but it’s not strictly necessary. They hold up beautifully.
Q: My cheese mixture is too soft to roll, even after chilling. What happened?
A: This usually means the cream cheese was a bit too warm to begin with, or your fridge is packed and the air isn’t circulating well. No worries! Pop the whole bowl back into the fridge for another 15-20 minutes. If you’re in a real time crunch, you can even put the mixture in the freezer for about 10 minutes to flash-chill it. Just keep an eye on it so it doesn’t start to freeze solid.
Q: Can I freeze these cheese balls?
A: You can, but with a caveat. The texture of the cream cheese can become slightly grainy upon thawing. If you do freeze them, place the uncoated balls on a parchment-lined baking sheet until solid, then transfer to a freezer bag for up to a month. Thaw overnight in the fridge and then roll them in the cranberry-pecan coating right before serving.
Q: What’s the best way to chop the cranberries and pecans without making a huge mess?
A: I like to pile them together on my cutting board and use a large chef’s knife to chop them. The stickiness of the cranberries helps “grab” the pecans, and they get chopped evenly together. You can also pulse them a few times in a food processor, but be careful not to turn them into powder!
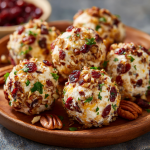
Mini Cranberry Pecan Cheese Balls
Description
Bite-sized, festive, and bursting with flavor—these mini cheese balls are creamy, tangy, sweet, and crunchy all at once. They’re the modern spin on grandma’s classic party cheese ball, but in perfectly portioned bites that disappear the second you set them out. With just 20 minutes of prep and a quick chill, you’ll have the kind of appetizer that sparks conversation and keeps everyone coming back for more.
Ingredients
-
16 oz cream cheese, softened
-
1 cup sharp cheddar cheese, shredded (or half cheddar, half goat cheese)
-
½ cup dried cranberries, finely chopped (soaked in OJ for extra brightness, optional)
-
½ cup pecans, toasted & finely chopped
-
2 tbsp fresh parsley, chopped
-
½ tsp garlic powder (optional)
-
½ tsp smoked paprika (optional)
-
Crackers, pretzels, or veggie sticks, for serving
Instructions
-
Mix Base: Combine cream cheese, cheddar (and goat cheese if using), garlic powder, and smoked paprika until smooth.
-
Fold In Flavor: Stir in half of the cranberries, pecans, and parsley. Save the rest for coating.
-
Chill: Cover and refrigerate 20–30 min to firm up.
-
Roll: Scoop 1-inch portions and roll into smooth balls.
-
Coat: Roll each ball in remaining cranberries, pecans, and parsley until fully covered.
-
Serve: Arrange on a platter with crackers or veggies. Keep chilled until party time.
Notes
-
Everything Bagel: Swap pecans for bagel seasoning + add chives.
-
Pineapple Jalapeño: Sub cranberries with dried pineapple + minced jalapeño.
-
Maple Bacon: Fold in crumbled bacon + drizzle maple syrup into the base.
-
Nut-Free: Use sunflower seeds or pepitas instead of pecans.
Nutrition
- Calories: 95 cal Per Serving
- Fat: 8g
- Carbohydrates: 3g
- Protein: 3g
Nutritional Information*
*This is an estimated nutritional breakdown per mini cheese ball, without crackers or dippers. It is provided as a courtesy and should be considered an estimate, as values can vary based on specific ingredients used.
- Calories: 95 kcal
- Protein: 3g
- Fat: 8g
- Carbohydrates: 3g
- Fiber: <1g
- Sugar: 2g
Prep Time: 20 minutes | Chill Time: 20 minutes | Total Time: 40 minutes | Servings: 20 mini cheese balls
Final Thoughts: More Than Just an Appetizer
In the end, these Mini Cranberry Pecan Cheese Balls are so much more than a simple recipe. They are a bite-sized invitation to connect, to celebrate, and to create new traditions around the simple joy of good food.
They prove that you don’t need complicated techniques or a dozen fancy ingredients to make something truly special. With a handful of quality components and a little bit of love, you can create the kind of magic that turns a regular gathering into a memorable occasion—the kind where people linger by the platter, laughing and chatting, just waiting for the next tray to come out of the kitchen.
So whether you’re honoring a cherished family memory or starting a brand-new one of your own, I hope this recipe finds a place in your kitchen and your heart. Whip up a batch, share them with your favorite people, and savor not just the delicious flavor, but the wonderful moments they help create.
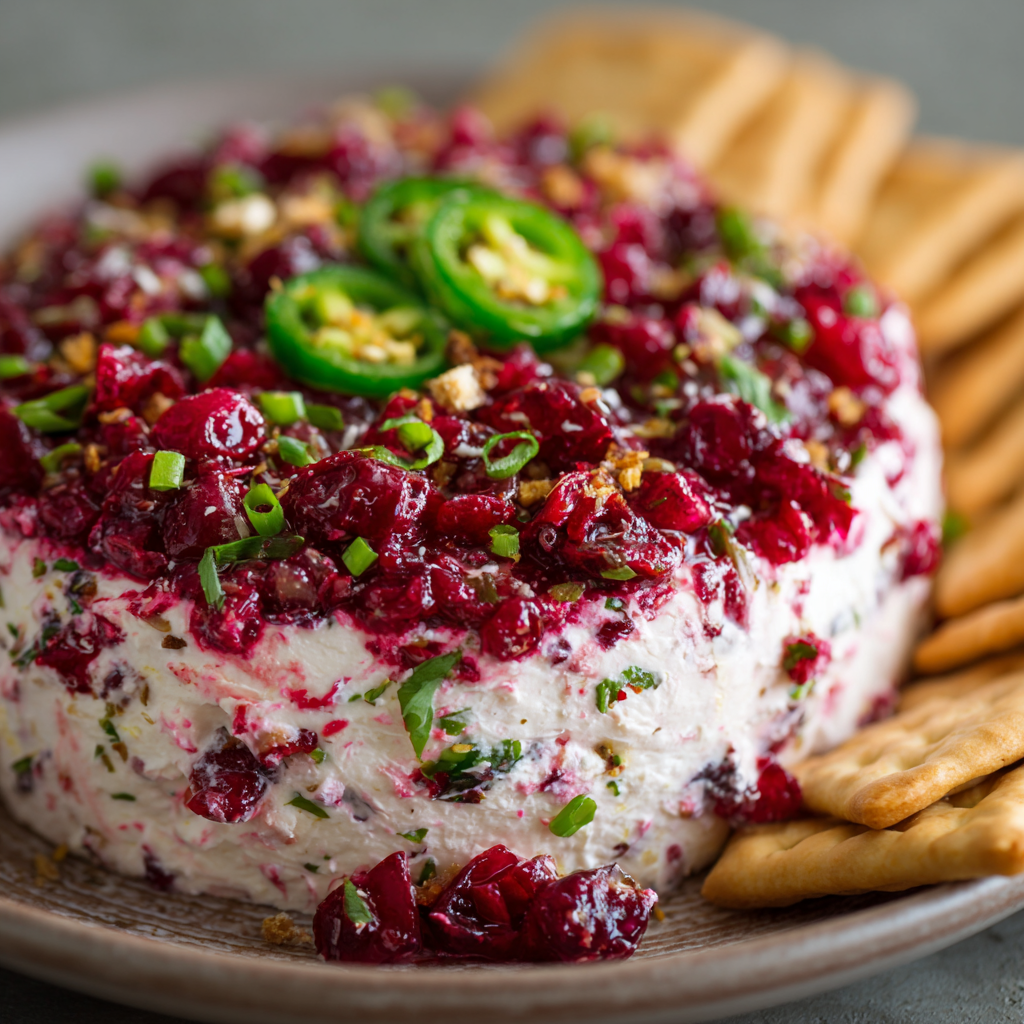
Cranberry Jalapeño Dip
Your New Party Superstar: Cranberry Jalapeño Dip
Hey there, friend! Come on in, pull up a stool, and let’s talk about the star of the show, the conversation starter, the “can-I-get-that-recipe-NOW” appetizer that’s about to become your go-to for every gathering from here on out. I’m talking about my legendary Cranberry Jalapeño Dip. If you’ve never experienced the pure magic that happens when sweet, tart cranberries meet the gentle kick of jalapeño, all swirled into a cool, creamy, cheesy base… well, you are in for the most delicious treat.
This isn’t just another dip. It’s a symphony of flavors and textures. It’s the stunning ruby-red flecks against the snowy white cream cheese. It’s the crunch of a pita chip giving way to something simultaneously refreshing and comforting. It’s the dip that disappears from the table faster than I can refill the chip bowl, every single time. The best part? It’s unbelievably easy to make. We’re talking 15 minutes of active prep for a dish that looks and tastes like you spent all day in the kitchen. So, whether you’re prepping for a cozy holiday party, a game day spread, or just a Tuesday night that needs a little jazzing up, this recipe is your secret weapon. Let’s make it together!
The Accidental Party Hit
This recipe has a fun little origin story, as the best ones often do. It was my first time hosting Friendsgiving years ago, and I was a ball of nervous energy. I wanted everything to be perfect. I had the turkey (slightly overdone), the mashed potatoes (lumpy, but full of love), and the green bean casserole (a classic). But I felt my appetizer spread was missing something… vibrant. Something that could cut through all the rich, savory flavors.
Rummaging through my fridge, I found a bag of fresh cranberries I’d bought for a sauce I never got around to making and a few lonely jalapeños. In a moment of “what’s the worst that could happen?” inspiration, I decided to chop them up, sweeten them slightly, and fold them into the block of cream cheese and tub of sour cream I had on standby. I crossed my fingers, garnished it with some green onions, and put it out with a prayer. To my absolute shock, it was the first thing gone. My friends were huddled around the bowl, scraping the sides, demanding the recipe. That happy accident, born from pantry desperation, is now a non-negotiable part of every single party I throw. It’s a reminder that some of the best creations come from a little improvisation and a lot of heart.
Gathering Your Flavor Crew
Here’s your shopping list for this flavor-packed dip. I’m giving you the double batch because, trust me, you’ll want it. It’s party-ready and makes plenty for a crowd (or for you to have some secret leftovers). I’ve also included my favorite insights and swaps for each ingredient because I believe every recipe should be your own.
- 2 cups fresh cranberries: The tart, ruby-red heart of the dip. Chef’s Insight: Please use fresh, not frozen and thawed, for the best texture and to avoid excess water. Their natural pectin also helps the mixture set up nicely.
- 1 cup jalapeños, seeded and finely chopped: This gives us that wonderful, warm kick. Substitution Tip: For a milder dip, use only ½ cup of jalapeño or include the seeds of just one pepper. For more heat, leave in some seeds! Remember, you can always add more heat, but you can’t take it out.
- ½ cup granulated sugar: Balances the intense tartness of the cranberries. Substitution Tip: You can easily use honey, maple syrup, or even a sugar substitute like monk fruit for a natural twist. The flavor will be slightly different but still delicious.
- ½ a red bell pepper, chopped (my secret twist!): This is my not-so-secret weapon. It adds a beautiful sweetness and a pop of color that makes the dip look even more incredible.
- 1 cup cream cheese, softened: The rich, creamy base. Chef’s Insight: FULL FAT. I’m just putting that out there. For the creamiest, dreamiest texture, full-fat cream cheese is the way to go. Let it sit on the counter for a good 30-60 minutes before you start.
- ½ cup sour cream: Adds a delightful tang and loosens the cream cheese to a perfectly dippable consistency.
- 1 cup shredded sharp cheddar cheese: Brings a salty, savory depth. Chef’s Insight: Shred it yourself! Pre-shredded cheese is coated in anti-caking agents that can make your dip a bit grainy and less melty.
- ½ cup shredded pepper jack cheese (my spicy twist!): This is where we add that extra layer of warmth and complexity. If you’re sensitive to spice, just use more cheddar.
- 2 tbsp green onions, chopped: For a fresh, sharp garnish right at the end.
- 2 tbsp fresh cilantro, chopped (optional): If you’re a cilantro lover (I know it’s divisive!), it adds a fantastic burst of freshness. If you’re not, flat-leaf parsley is a great substitute.
Let’s Make Some Magic: Step-by-Step
Okay, apron on! Let’s do this. It’s so simple, you’ll have it memorized after making it just once.
Step 1: The Vibrant Relish
Grab your food processor (a blender on pulse will work in a pinch, but be careful not to purée it!). Toss in the fresh cranberries, chopped jalapeños, the ½ red bell pepper, and the sugar. Now, pulse it! I mean short, quick pulses—about 10 to 15 of them. You’re aiming for a finely chopped, relish-like consistency, not a smoothie. You want little bursts of flavor, not a homogenous paste. Once it’s perfect, scrape it into a bowl and let it sit on the counter for about 15 minutes. This waiting period is NOT optional! It allows the sugar to dissolve and the cranberries to release their incredible juices, letting all those flavors get to know each other and become best friends.
Step 2: The Creamy Dream Base
While your relish is mingling, take your beautifully softened cream cheese and plop it into a large mixing bowl. Add the sour cream. Now, with a hand mixer or a sturdy whisk and some elbow grease, beat them together until they are completely smooth, creamy, and lump-free. This is the foundation, so make it silky! Once smooth, fold in your freshly shredded cheddar and pepper jack cheeses with a spatula until they are evenly distributed.
Step 3: The Grand Union
Back to your cranberry-jalapeño relish. You’ll notice it’s a bit liquidy now. This is good! But we don’t want all that liquid in our dip, or it will make it runny. Take a fine-mesh strainer, place it over the sink or a bowl, and pour the relish in. Gently press down with the back of a spoon to encourage the juices to drain out. You want the relish to still be moist, but not swimming. Now, take this drained, flavor-packed relish and gently fold it into your creamy cheese base. Don’t overmix! You want beautiful red and green swirls throughout the white base.
Step 4: The Chill Factor
Transfer your masterpiece to a beautiful serving bowl. Sprinkle the top with those gorgeous chopped green onions and cilantro (if using). Now, walk away. I know it’s hard, but you must cover it with plastic wrap and let it chill in the refrigerator for at least 30 minutes. This chilling time is crucial for the flavors to fully marry and for the dip to firm up to the perfect scoopable texture. Overnight is even better if you have the time!
How to Serve This Masterpiece
Presentation is part of the fun! I love serving this dip in a wide, shallow bowl so everyone can see those beautiful flecks of red and green. Place it right in the center of your snack spread with an array of dippers around it. My absolute favorites are sturdy, salty pita chips, buttery crackers like Ritz, or thin, crispy crostini. For a healthier option, it’s also fantastic with endive leaves, cucumber rounds, or sturdy carrot and celery sticks. The cool, creamy dip on a crisp vegetable is a match made in heaven.
Make It Your Own: Fun Variations
The beauty of this recipe is its versatility. Play with it!
- Citrus Zing: Add the zest of one lime or orange to the cranberry mixture before pulsing for a bright, sunny note.
- Herb Garden: Fold a tablespoon of fresh chopped thyme or rosemary into the cream cheese base for a cozy, savory twist perfect for the holidays.
- Smoky & Spicy: Substitute one of the jalapeños with a chipotle pepper in adobo sauce (minced). It adds a incredible smoky depth.
- Nutty Crunch: Right before serving, sprinkle the top with toasted pecans or pepitas for an amazing crunch.
- Lighter Swap: Use Neufchâtel cheese, light sour cream, and reduced-fat cheese for a slightly lighter version that’s still packed with flavor.
Chef Olivia’s Notebook
Over the years, this recipe has evolved from that frantic Friendsgiving experiment into my most-requested dish. I’ve learned a few things: First, the quality of your cream cheese really does matter. Splurge on the good stuff! Second, I once made the mistake of not seeding the jalapeños at all for a particularly brave group of friends. Let’s just say it was a *very* memorable dip and we went through two gallons of milk. Know your audience! And finally, this dip actually gets better the next day, so making it ahead is not just a convenience—it’s a strategic flavor move. I always make a double batch and hide a little container in the back of the fridge for myself. No regrets.
Your Questions, Answered!
Q: Can I make this dip ahead of time?
A: Absolutely! In fact, I highly recommend it. You can make this dip up to 2 days in advance. Keep it covered in the fridge. The flavors will meld and deepen, making it even more incredible. Just give it a quick stir before serving and re-garnish with fresh greens.
Q: My dip turned out a bit runny. What happened?
A: The most common culprit is not draining the cranberry-jalapeño mixture well enough. There’s a lot of natural juice in those fruits and peppers! Really press it in that strainer. Another reason could be if your cream cheese wasn’t full-fat or was too cold when mixed, preventing it from forming a sturdy base.
Q: I’m not a fan of spicy food. Is this dip too hot?
A: Not at all! When you meticulously remove the seeds and membranes from the jalapeños, you take away most of the heat. What’s left is a gentle, warm flavor that complements the sweet and tart notes. You can always start with just half a cup of jalapeño to be safe.
Q: Can I use canned cranberry sauce instead?
A: I don’t recommend it for this particular recipe. The fresh, crisp texture of the pulsed cranberries is a key component. Canned sauce would make the dip far too sweet and homogenous, losing that fantastic relish-like quality.
Cranberry Jalapeño Dip
Description
Sweet, tart cranberries meet a gentle jalapeño kick, all swirled into a creamy, cheesy base. This dip isn’t just delicious—it’s a showstopper that looks as stunning as it tastes. With ruby-red flecks and a smooth, savory backdrop, it’s the dish guests hover around until the bowl is scraped clean. Best part? It takes just 15 minutes of prep and a little chill time to achieve appetizer legend status.
Ingredients
-
2 cups fresh cranberries
-
1 cup jalapeños, seeded & finely chopped
-
½ cup granulated sugar (or honey/maple/monk fruit)
-
½ red bell pepper, chopped
-
1 cup cream cheese, softened (full-fat for best texture)
-
½ cup sour cream
-
1 cup shredded sharp cheddar cheese
-
½ cup shredded pepper jack cheese
-
2 tbsp green onions, chopped
-
2 tbsp fresh cilantro, chopped (optional)
Instructions
-
Make Relish: Pulse cranberries, jalapeños, bell pepper, and sugar in a food processor until relish-like. Let sit 15 min.
-
Creamy Base: Beat softened cream cheese + sour cream until smooth. Fold in cheddar and pepper jack.
-
Drain & Combine: Strain excess liquid from cranberry relish. Gently fold into the cheese base for red-and-green swirls.
-
Chill: Transfer to a serving bowl, cover, and refrigerate at least 30 min (overnight is even better).
-
Garnish & Serve: Sprinkle with green onions and cilantro. Serve with pita chips, crackers, crostini, or fresh veggie sticks.
Notes
-
Citrus Zing: Add lime or orange zest to the cranberry mix.
-
Smoky & Spicy: Swap a jalapeño for chipotle in adobo.
-
Nutty Crunch: Sprinkle toasted pecans or pepitas before serving.
-
Lighter Option: Use Neufchâtel cheese + light sour cream.
Nutrition
- Calories: 95 cal Per Serving
- Fat: 7g
- Carbohydrates: 6g
- Protein: 3g
Nutritional Information*
Prep time: 15 minutes | Chill time: 30 minutes | Total time: 45 minutes | Servings: 16 (approx. 2 tbsp per serving)
*This is an estimate provided by an online nutrition calculator. Values may vary based on your specific ingredients and portions.
Per Serving: Calories: 95 | Protein: 3g | Fat: 7g | Carbohydrates: 6g | Fiber: 1g | Sugar: 4g
Final Thoughts: Your New Signature Dish
So there you have it—the story, the secrets, and the simple steps behind the dip that never fails to steal the spotlight. This Cranberry Jalapeño Dip is more than just a recipe; it’s a testament to the magic that happens when bold flavors collide and a reminder that the best dishes often come from a place of joyful experimentation.
It’s the stunning centerpiece that looks like you fussed for hours, but the delicious little secret that only you will know is how effortlessly it comes together. It’s the perfect balance of sweet, spicy, creamy, and crunchy—a bite that keeps people coming back for just one more scoop.
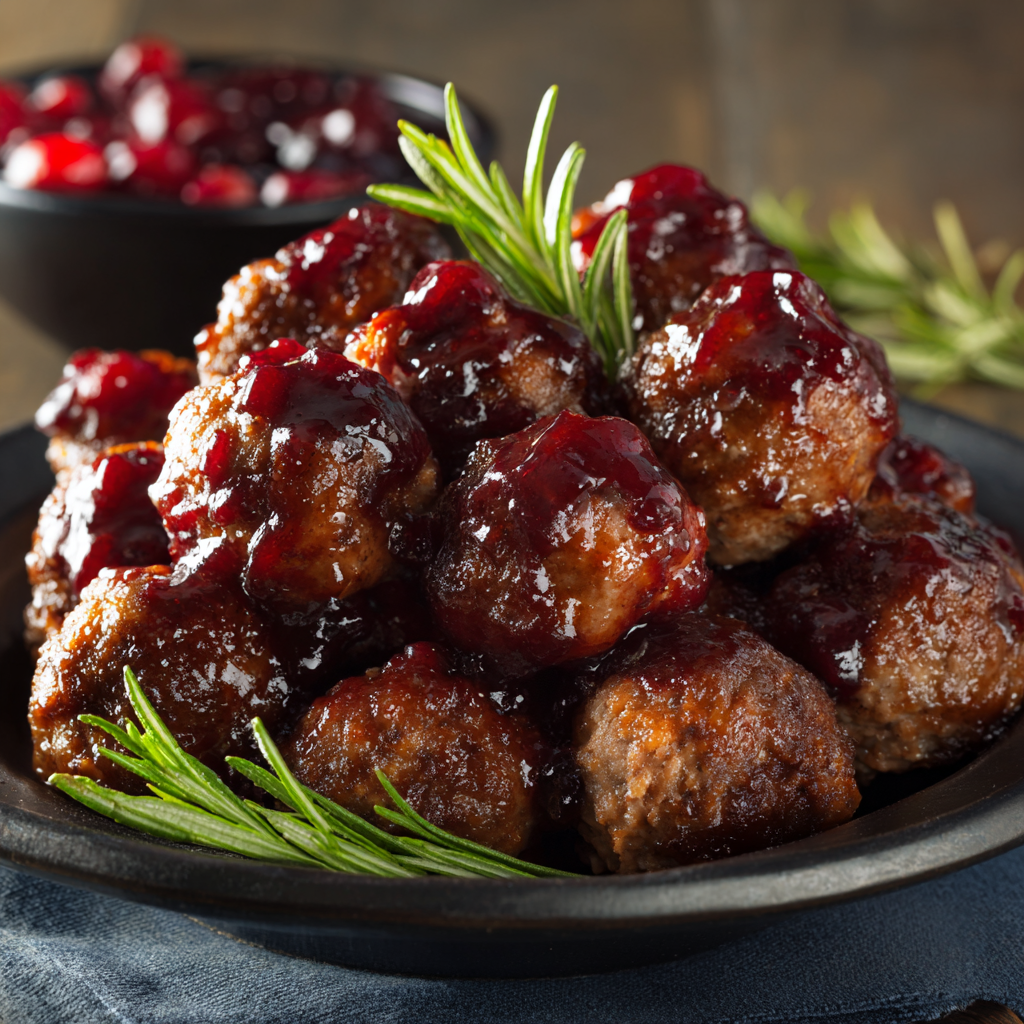
Cranberry Meatballs
Your New Favorite Party Hero: Cranberry Meatballs
Hello, my fellow flavor-chasers! Olivia here, welcoming you back to my cozy kitchen corner. Is there anything better than that moment at a gathering when a plate of something warm, saucy, and utterly irresistible makes its way around the room? The conversation pauses, eyes light up, and you just know whoever brought that dish is about to be swarmed with recipe requests. Well, my friend, today we are making sure that person is you.
We’re talking about Cranberry Meatballs. But not just any cranberry meatballs. We’re creating juicy, herb-kissed orbs of joy, baked to tender perfection, and then swirled in a glossy, sweet-tangy-spicy cranberry glaze that will have people hovering around the slow cooker (or your stovetop) until the very last one is gone. This dish is the ultimate crowd-pleaser, the perfect potluck partner, and honestly, a pretty fantastic excuse to make a fancy dinner for yourself on a random Tuesday.
The best part? This recipe is designed to be foolproof and flexible. We’re doubling everything because, trust me, you’ll want leftovers. But whether you’re a seasoned meatball maestro or a first-time roller, I’m right here with you, sharing all my favorite kitchen hacks and stories. So, tie on your favorite apron (the messy one with stories to tell!), and let’s create some magic together.
The Holiday Mishap That Started It All
This recipe will always hold a special place in my heart because it literally saved my dignity at my very first “grown-up” Friendsgiving. I was so nervous, wanting to impress my new friend group with something incredibly sophisticated. I spent days on a complicated, five-layer torte that was, to put it mildly, a structural disaster of epic proportions. It was 5 PM, I was covered in chocolate, and I had nothing to bring but my tears.
In a panic, I called my Aunt Clara. She didn’t miss a beat. “Open your pantry, Liv,” she said calmly. “Ground beef? Breadcrumbs? A can of jellied cranberry sauce and a bottle of BBQ sauce? Perfect. You’re making my famous party meatballs. They’ve never failed me.” In under an hour, I had a bubbling pot of the most gorgeous, glazed meatballs. I walked into that party, held my head high, and placed them on the table. They were the first dish to disappear. My chocolate puddle-of-a-torte was laughed off as a “deconstructed mousse,” but those meatballs? They made me a legend. They taught me that the best recipes aren’t about being fancy; they’re about being full of heart (and a really good sauce).
Gathering Your Flavor All-Stars
Here’s everything you’ll need to create this double-batch of deliciousness. Don’t be afraid to mix and match based on what’s in your fridge—I’ve included all my favorite swaps and chef secrets!
For the Meatballs:
- 2 lbs ground beef or turkey (or a mix!) – I often use one pound of each. Beef brings rich, savory flavor, while turkey keeps things a bit lighter. For maximum juiciness, don’t go super lean—85/15 is perfect.
- 1 cup breadcrumbs – My twist? Panko breadcrumbs give an fantastically light, airy texture. For a gluten-free or low-carb option, almond flour works beautifully and adds a subtle nuttiness.
- 2 large eggs – Our trusty binder! They hold everything together so your meatballs don’t fall apart on you.
- ½ cup onion, finely chopped – Please, for me, take the extra minute to chop this finely. You want little bursts of sweet flavor, not big crunchy chunks in your tender meatballs.
- 1 tsp garlic powder – Yes, powder! While I adore fresh garlic, the powder distributes flavor evenly throughout the mix without risking any bitter, burnt garlic bits.
- 1 tsp salt – Essential for waking up all those other flavors.
- ½ tsp black pepper – Freshly cracked is always best!
- ½ tsp smoked paprika (optional but highly recommended) – This is my secret weapon! It doesn’t add heat, just a gorgeous, smoky depth that makes the meatballs taste like they’ve been slow-smoking for hours.
For That Irresistible Cranberry Glaze:
- 2 cups cranberry sauce – Homemade is lovely, but a 14-ounce can of jellied or whole-berry cranberry sauce works perfectly. Jellied gives a smoother, glossier glaze, while whole-berry offers lovely pops of fruit.
- 1 cup BBQ sauce – This is where you can get creative! A standard sweet and smoky BBQ is great, but for extra flair, try a chipotle BBQ for a kick or a honey BBQ for more sweetness.
- 2 tbsp orange juice + 1 tsp zest – The brightness hero! The zest, in particular, adds a fantastic pop of citrus oil that cuts through the richness. No fresh oranges? Use 3 tbsp of juice and skip the zest.
- 1 tbsp Worcestershire sauce (optional) – This is our “umami bomb.” It adds a complex, savory backbone that balances the sweet and tangy notes beautifully.
- Pinch of red pepper flakes (optional) – I almost always add this. It doesn’t make the sauce “spicy,” just gives it a gentle, warm hum in the background that keeps people going back for “just one more.”
Let’s Get Rolling: Your Foolproof Guide to Perfect Meatballs
Ready? Let’s do this! Active voice, happy heart. We’re not just making food; we’re creating memories.
- Preheat and Prep: Fire up your oven to 400°F (200°C). This hot oven is key for getting a nice, light browning on the outside while keeping the insides juicy. Line a large baking sheet with parchment paper – this is for easy cleanup, and I am ALL about that life. Chef’s Hack: Give the parchment a very light spritz of cooking spray to guarantee zero sticking.
- The Mix: In a large bowl, add your ground meat, breadcrumbs, eggs, finely chopped onion, garlic powder, salt, pepper, and that wonderful smoked paprika. Now, here’s the most important tip: use your hands! Yes, it’s messy, but it’s the only way to combine the ingredients evenly without overmixing. Gently mix until everything is just incorporated. Overworking the meat will make your meatballs tough and dense. We want tender!
- The Roll: Time to form the meatballs. I like to use a small cookie scoop (about 1.5 tablespoons) to keep them all uniform. This isn’t just for looks; it means they’ll all cook at the same rate. Roll the scooped portions gently between your palms to form smooth balls. If your hands are getting sticky, dampen them with a little water. Arrange them on your prepared baking sheet about an inch apart.
- The Bake: Slide that sheet into your preheated oven and bake for 18-20 minutes. You’re looking for them to be cooked through, firm to the touch, and have a light golden-brown color. Baking is my preferred method as it’s hands-off and renders out a bit of the fat, making them less greasy than pan-frying. Chef’s Hack: For extra browning, you can flip them halfway through, but it’s not strictly necessary.
- The Glaze: While the meatballs are working their magic in the oven, let’s make that glorious sauce. In a medium saucepan, combine the cranberry sauce, BBQ sauce, orange juice, orange zest, Worcestershire sauce, and red pepper flakes. Whisk it all together over medium heat. Once it starts to bubble, reduce the heat to low and let it simmer for about 5 minutes, whisking occasionally. You’ll see it transform from a lumpy mess into a smooth, glossy, deep-red glaze. It will thicken slightly as it cools.
- The Grand Finale: Once the meatballs are out of the oven, gently add them to the saucepan with the glaze. Use a spoon to toss them carefully until every single meatball is luxuriously coated. Alternatively, you can combine everything in a slow cooker set to “Warm” to keep them perfectly heated for your party!
How to Serve These Saucy Beauties
Presentation is part of the fun! For a party, transfer them to a beautiful serving bowl, stick a handful of toothpicks on the side, and watch them vanish. If I’m serving them as a main dish, I love to pile them over a big bowl of creamy mashed potatoes or fluffy jasmine rice—the sauce makes the most incredible gravy. A simple side of roasted green beans or a crisp winter salad balances the richness perfectly. Don’t forget a final sprinkle of fresh orange zest or chopped parsley on top for a pop of color and freshness!
Make It Your Own: Delicious Twists & Swaps
The beauty of this recipe is its versatility. Here are a few ways to play with it:
- Asian-Inspired: Swap the BBQ sauce for hoisin sauce and add a tablespoon of grated fresh ginger to the glaze. Garnish with sliced green onions and sesame seeds.
- Slow Cooker Simplicity: Use pre-cooked frozen meatballs! Combine all sauce ingredients in your slow cooker, stir in the frozen meatballs, and cook on low for 4-5 hours. The easiest party trick ever.
- Spicy Kick: Love heat? Add a tablespoon of sriracha or a finely chopped jalapeño (seeds and all!) to the glaze.
- Pork Lovers: Use ground pork instead of beef/turkey for a slightly sweeter, richer flavor profile that pairs amazingly with the cranberry.
- Tangier Twist: Add a tablespoon of apple cider vinegar to the glaze to really make the tangy flavors sing.
Olivia’s Chef Notes & Kitchen Confessions
This recipe has evolved so much since that frantic Friendsgiving. I’ve learned that the smoked paprika is non-negotiable in my house—it’s the thing people can’t quite pinpoint but absolutely love. I also used to painstakingly pan-fry each meatball, thinking it was the only way to get flavor. Then I discovered the high-heat bake method and never looked back—it’s easier, healthier, and just as delicious.
One of my favorite kitchen stories involves these meatballs and my then-3-year-old nephew. He saw the vibrant red glaze and declared they were “Christmas ladybugs.” He then proceeded to meticulously eat every single one, announcing “Yum, a ladybug!” with each bite. It was the cutest review I’ve ever received. So now, in our family, these are officially known as Christmas Ladybug Meatballs. Don’t be afraid to get creative and make your own traditions!
Your Questions, Answered!
Q: Can I make these cranberry meatballs ahead of time?
A: Absolutely! They are the perfect make-ahead dish. You have two options: 1) Assemble the raw meatballs and keep them covered in the fridge for up to 24 hours before baking. 2) Cook the meatballs and make the sauce separately. Store them in the fridge for up to 3 days. When you’re ready, warm the sauce, add the meatballs, and simmer until heated through. You can also freeze the cooked, sauced meatballs for up to 3 months.
Q: My sauce is too thick! How can I thin it out?
A: No problem! This happens. Simply whisk in a tablespoon of orange juice, water, or even a little chicken broth at a time until it reaches your desired consistency. Easy fix!
Q: My meatballs are falling apart! What did I do wrong?
A: This usually means the mixture needed more binder. Next time, try adding one more egg or an extra handful of breadcrumbs. Also, ensure you’re not over-handling the mixture, as that can break down the proteins. Chilling the formed meatballs for 15-20 minutes before baking can also help them firm up.
Q: Can I use fresh cranberries instead of cranberry sauce?
A: You can, but it’s a different process. Simmer 12 oz of fresh cranberries with 1 cup of sugar and 1 cup of water or orange juice until they burst and thicken. Then, use that homemade sauce as your base, though you may need to adjust the amount of other liquids (like BBQ sauce) to account for the different consistency.
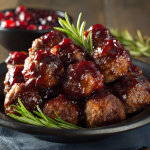
Cranberry Meatballs
Description
Warm, saucy, and irresistible—these Cranberry Meatballs are the dish that disappears first at every gathering. Juicy, tender meatballs baked to perfection get tossed in a glossy, tangy-sweet cranberry glaze with a hint of spice. Whether you’re serving them at a holiday potluck, a game day spread, or a cozy dinner at home, this recipe guarantees you’ll be the one everyone’s asking for seconds (and the recipe!).
Ingredients
For the Meatballs:
-
2 lbs ground beef or turkey (or mix)
-
1 cup breadcrumbs (Panko preferred)
-
2 large eggs
-
½ cup onion, finely chopped
-
1 tsp garlic powder
-
1 tsp salt
-
½ tsp black pepper
-
½ tsp smoked paprika (optional)
For the Cranberry Glaze:
-
2 cups cranberry sauce (canned or homemade)
-
1 cup BBQ sauce (sweet & smoky, chipotle, or honey BBQ)
-
2 tbsp orange juice + 1 tsp zest
-
1 tbsp Worcestershire sauce (optional)
-
Pinch red pepper flakes (optional)
Notes
-
Asian-Inspired: Swap BBQ for hoisin + add fresh ginger.
-
Spicy Kick: Stir sriracha or jalapeños into the glaze.
-
Slow Cooker Easy: Use frozen meatballs + sauce ingredients, cook 4–5 hrs on low.
Nutrition
- Calories: 290 cal Per Serving 3–4 meatballs
- Fat: 14g
- Carbohydrates: 22g
- Protein: 18g
Nutritional Information*
*This is an estimate for 3-4 meatballs per serving, using 90/10 ground beef and standard ingredients. Values will vary based on your specific choices.
- Calories: 290
- Protein: 18g
- Fat: 14g
- Carbohydrates: 22g
- Fiber: 1g
- Sugar: 12g
Prep Time: 20 mins | Cook Time: 25 mins | Total Time: 45 mins | Servings: 12
Final Thoughts: More Than Just a Recipe
So there you have it—your new secret weapon, your guaranteed crowd-pleaser, your story-in-the-making. These Cranberry Meatballs are so much more than just a list of ingredients; they’re a reminder that the most memorable dishes are often the simplest ones, made with a dash of love and a pinch of practicality.
They’ve been there for me in moments of panic and celebration, and I have a feeling they’ll do the same for you. Whether they’re the star of your holiday spread, the talk of the potluck, or your “Christmas Ladybugs” on a random Tuesday, I hope this recipe finds a place in your kitchen and in your story.




