
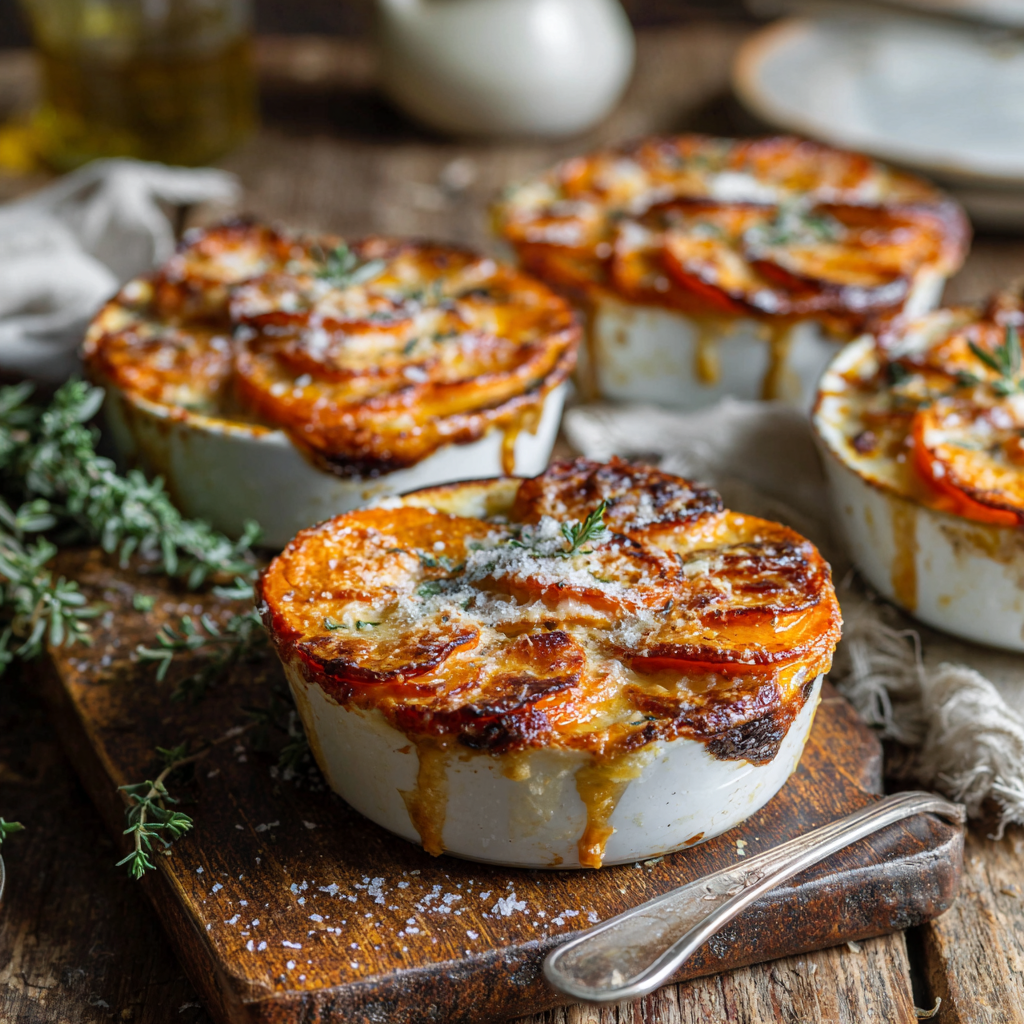
Sweet Potato Gratins
Sweet Potato Gratins: Your New Favorite Cozy Side Dish
Hey there, friend! Come on in, the kitchen’s warm, and I’ve got something absolutely divine baking in the oven. If you’ve ever wondered how to turn a simple sweet potato into a show-stopping side dish that has everyone asking for the recipe, you’re about to fall head over heels. I’m talking about these Individual Sweet Potato Gratins. Imagine this: impossibly thin, tender slices of sweet potato, baked slow and low in a bath of rich, garlicky cream, all topped with a crispy, golden-brown crust of bubbling Gruyère cheese. It’s the kind of dish that fills your home with the most incredible, comforting aroma.
Now, I know the word “gratin” can sound a little fancy, maybe even a bit intimidating. But trust me, this is one of those recipes that’s secretly simple. We’re not aiming for perfect, identical slices here—we’re aiming for flavor, comfort, and that wonderful feeling of creating something special with your own two hands. Whether you’re prepping for a big holiday feast, hosting a cozy dinner party, or just want to make a Tuesday night feel a little more celebratory, these individual gratins are your answer. They’re elegant enough for your best china yet comforting enough to eat straight from the ramekin while curled up on the couch. So, grab your favorite apron (the messy one with all the stories), and let’s make some magic happen.
A Gratin for Every Gathering: My Thanksgiving Triumph
This recipe holds a special place in my heart, and it all goes back to one particularly chaotic but wonderful Thanksgiving a few years ago. I had volunteered to bring a side dish, and I wanted to create something that felt classic but with a modern, personal twist. The traditional potato gratin was a given, but my heart was with the sweet, vibrant flavor of sweet potatoes. I decided to take a risk and develop this recipe.
The day of, my kitchen was a whirlwind of peeling, slicing, and simmering cream. I was nervous—would my family miss the standard marshmallow-topped casserole? I arranged the sweet potato slices in individual ramekins, loving how each one felt like a personal gift for my guests. When I pulled them out of the oven, the tops were a gorgeous, speckled gold, and the cream was bubbling around the edges like a little lava lake of deliciousness. The moment of truth came when my usually-skeptical uncle took his first bite. His eyes widened, he gave me a silent thumbs-up, and then immediately went in for a second spoonful. That was it. The entire batch disappeared in minutes, and this gratin has been a non-negotiable part of our family gatherings ever since. It taught me that the best recipes are the ones that create a moment of shared, happy silence around the table.
Gathering Your Ingredients: A Symphony of Simple Flavors
The beauty of this dish is in its simplicity. Each ingredient plays a crucial role in building layers of flavor and texture. Here’s what you’ll need and why each one matters:
- 2 lbs sweet potatoes, peeled and thinly sliced: This is our star! Look for firm, smooth-skinned potatoes. The thin slicing is key for that tender, melt-in-your-mouth texture. A mandoline slicer is your best friend here for evenness, but a sharp knife and a steady hand work perfectly too.
- 1½ cups heavy cream: This creates the luxurious, rich base that the potatoes bake in. It’s what makes a gratin a gratin! For a slightly lighter version, you can use half-and-half, but the final result won’t be quite as decadent.
- 2 cloves garlic, minced: This infuses the cream with a warm, savory backbone that balances the sweetness of the potatoes beautifully. Don’t be shy with it!
- ½ teaspoon salt & ¼ teaspoon black pepper: Essential for seasoning every layer. Taste your cream mixture before pouring—it should taste well-seasoned.
- ¼ teaspoon ground nutmeg (optional): My little chef’s secret! Nutmeg has a warm, nutty flavor that is a classic pairing with creamy dishes and complements sweet potato like a dream. Just a pinch makes a world of difference.
- 1 cup shredded Gruyère cheese: This cheese is a flavor powerhouse—slightly nutty, wonderfully salty, and it melts like a dream. If you can’t find Gruyère, a sharp white cheddar is a fantastic substitute.
- 2 tablespoons grated Parmesan cheese: We’ll sprinkle this on top for an extra layer of salty, umami flavor and that perfect, crisp golden crust.
- Butter, for greasing: A simple but crucial step to prevent sticking and add a hint of rich, buttery flavor to the edges.
- Optional twist: a few fresh thyme leaves or chopped rosemary: Fresh herbs take this from great to extraordinary. Thyme adds an earthy, floral note, while rosemary gives it a more robust, piney flavor. Choose your adventure!
Let’s Get Cooking: Building Your Beautiful Gratins
Ready to layer up some comfort? Follow these steps, and you’ll have perfect gratins in no time. I’ve sprinkled in all my favorite tips and hacks along the way!
Step 1: Preheat and Prep. First things first, get that oven preheating to 375°F (190°C). While it’s warming up, generously grease your ramekins or baking dish with butter. Don’t just swipe the bottom—get those sides nice and buttery too! This creates those delicious, crispy edges everyone fights over.
Step 2: Infuse the Cream. In a small saucepan, combine the heavy cream, minced garlic, salt, pepper, and that optional-but-highly-recommended nutmeg. Heat this over medium-low heat until it’s just warm to the touch and you can smell the garlic. You are *not* bringing it to a boil—we’re just warming it to help the flavors meld. This simple step is a game-changer for depth of flavor.
Step 3: The Art of Layering. Now for the fun, meditative part! Take your thinly sliced sweet potatoes and start layering them into your prepared dishes. Overlap them like shingles on a roof. This isn’t about being perfect; it’s about creating little pockets for the cream to settle into. After your first layer, sprinkle a small handful of the Gruyère cheese. Repeat this process—potatoes, a little cheese, potatoes, a little cheese—until you’ve used all your slices, finishing with a final layer of potatoes. Leave a little room at the top so the cream doesn’t bubble over.
Step 4: The Creamy Bath and Cheesy Topper. Slowly and carefully, pour the warm cream mixture over the layered potatoes. I like to use a ladle for control. You want the cream to seep down through the layers until the potatoes are just covered. Now, for the grand finale: sprinkle the remaining Gruyère and all of the Parmesan over the top. This is where you add those fresh herbs if you’re using them. The Parmesan is the secret weapon for that irresistible, crackly crust.
Step 5: Bake to Perfection. Place your gratins on a baking sheet (this makes them easier to handle and catches any drips). Cover them loosely with foil and bake for 30 minutes. This covered time is when the magic happens—the potatoes steam and become tender in the creamy sauce. Then, remove the foil, crank the heat up to 400°F (200°C) if things aren’t browning, and bake for another 15-20 minutes, until the top is gloriously golden brown and bubbly.
Step 6: The Most Important Step—Rest! I know, it’s tempting to dig right in! But please, let the gratins rest for 5-10 minutes after pulling them from the oven. This allows the cream sauce to thicken up slightly and settle, so when you serve it, it’s beautifully cohesive and not runny. Patience is a virtue, especially in the kitchen!
How to Serve Your Masterpiece
These individual gratins are a dream to serve! Place each ramekin right on the dinner plate—they look so charming and intentional. If you’ve made one large gratin, use a sharp spatula to scoop out generous portions, making sure to get all those beautiful layers. I love serving these alongside a simple roast chicken, a juicy pork tenderloin, or a hearty holiday ham. For a vegetarian feast, they’re incredible with a lentil loaf or some crispy roasted Brussels sprouts. The rich, creamy sweetness pairs wonderfully with savory main courses.
Get Creative! Flavor Twists & Swaps
Once you’ve mastered the classic, feel free to play around! Here are a few of my favorite variations:
- Apple & Sage: Add a layer of very thinly sliced apple (like Granny Smith) between the potato layers and use fresh sage instead of thyme.
- Smoky & Spicy: Swap the Gruyère for smoked Gouda and add a pinch of cayenne pepper or smoked paprika to the cream.
- Dairy-Free Delight: Use full-fat canned coconut milk instead of heavy cream and a vegan cheese that melts well. The coconut flavor is surprisingly fantastic with sweet potato!
- Root Vegetable Medley: Use a mix of sweet potatoes, parsnips, and Yukon Gold potatoes for a complex, earthy flavor profile.
Chef’s Notes: From My Kitchen to Yours
This recipe has evolved so much since that first Thanksgiving! I initially tried slicing the potatoes way too thick, resulting in a… let’s call it a “al dente” gratin. Not ideal. The mandoline slicer was the real turning point. I also learned that the type of cheese matters immensely. I once tried pre-shredded bagged cheese in a pinch, and it just didn’t melt as smoothly because of the anti-caking agents. Now, I always, always shred my own cheese—it’s a small extra step that makes a huge difference in texture.
The biggest lesson, though, has been to embrace the imperfections. Sometimes the slices aren’t even. Sometimes a little cream bubbles over and makes a mess in the oven. But you know what? It always tastes incredible. Cooking is about the love you put in, not about achieving magazine-level perfection. So have fun with it!
FAQs & Troubleshooting: Your Questions, Answered!
Q: Can I make this ahead of time?
A: Absolutely! You can assemble the gratins completely (through step 4) up to a day in advance. Cover them tightly with plastic wrap and store them in the refrigerator. When you’re ready to bake, let them sit on the counter for 20-30 minutes to take the chill off, then bake as directed. You may need to add a few extra minutes to the baking time since they’ll be starting from cold.
Q: My gratin is still a bit liquidy after baking. What happened?
A> This usually means the potatoes needed a bit more time. All potatoes have slightly different starch and water contents. Next time, try baking covered for 10-15 minutes longer before removing the foil. Also, that resting period is non-negotiable—it allows the sauce to thicken as it cools slightly. If it’s still too loose, it will still taste amazing!
Q: I don’t have individual ramekins. Can I still make this?
A: Of course! A standard 2-quart baking dish (like an 8×11 or 9×9 inch) works perfectly. The baking time might be slightly longer for one large dish, so just keep an eye on it. The gratin is done when the top is golden and the potatoes are tender when pierced with a knife.
Q: Why warm the cream? Can’t I just use it cold?
A: You can, but warming it does two important things: 1) It infuses the cream with the garlic flavor more effectively, and 2) It helps the gratin start cooking faster, leading to a more even and tender result. It’s a small step with a big payoff!
Sweet Potato Gratins
Description
Golden, cheesy, and bubbling with creamy comfort—these individual sweet potato gratins are pure magic in a ramekin. Thinly sliced sweet potatoes are bathed in garlicky cream, layered with nutty Gruyère, and finished with a crisp Parmesan crust. Elegant enough for holidays yet simple enough for weeknights, this dish transforms humble sweet potatoes into a show-stopping side everyone will crave.
Ingredients
-
2 lbs sweet potatoes, peeled & thinly sliced
-
1½ cups heavy cream
-
2 cloves garlic, minced
-
½ tsp salt
-
¼ tsp black pepper
-
¼ tsp nutmeg (optional)
-
1 cup shredded Gruyère cheese (or sharp white cheddar)
-
2 tbsp grated Parmesan cheese
-
Butter, for greasing ramekins
-
Optional: fresh thyme or rosemary
Instructions
-
Prep: Preheat oven to 375°F (190°C). Butter ramekins generously.
-
Infuse Cream: Warm cream with garlic, salt, pepper, and nutmeg until fragrant (do not boil).
-
Layer: Arrange potato slices in ramekins, overlapping like shingles. Sprinkle Gruyère between layers.
-
Pour & Top: Ladle warm cream over potatoes until just covered. Top with remaining Gruyère, Parmesan, and herbs if using.
-
Bake: Cover loosely with foil; bake 30 min. Remove foil, increase heat to 400°F (200°C), and bake 15–20 min more, until golden and bubbling.
-
Rest: Let gratins sit 5–10 min before serving for a creamy, set texture.
Notes
-
Apple & Sage: Add thin apple slices and use sage instead of thyme.
-
Smoky & Spicy: Use smoked Gouda + cayenne or paprika.
-
Dairy-Free: Sub full-fat coconut milk & vegan cheese.
-
Large Dish: Use a 2-qt baking dish if not using ramekins.
Nutrition
- Calories: 280 cal Per Serving
- Sugar: 5g
- Fat: 18g
- Carbohydrates: 22g
- Fiber: 3g
Nutritional Information*
*This is an approximate calculation and may vary based on specific ingredients used.
Per Serving (based on 8 servings):
Calories: ~280 | Fat: 18g | Saturated Fat: 11g | Carbohydrates: 22g | Fiber: 3g | Sugar: 5g | Protein: 7g
Final Thoughts: A Dish to Come Home To
And there you have it—the secret to turning humble sweet potatoes into a side dish that feels like a celebration. These Individual Sweet Potato Gratins are more than just a recipe; they’re a lesson in slowing down, layering flavors with love, and creating something that truly nourishes, both body and soul.
I hope this recipe finds its way into your kitchen for quiet weeknights and festive gatherings alike. May it become a part of your own family’s traditions, creating moments of happy, comfortable silence around your table. Don’t be afraid to make it your own—add a new herb, try a different cheese, or simply enjoy the classic version in all its creamy, garlicky glory.
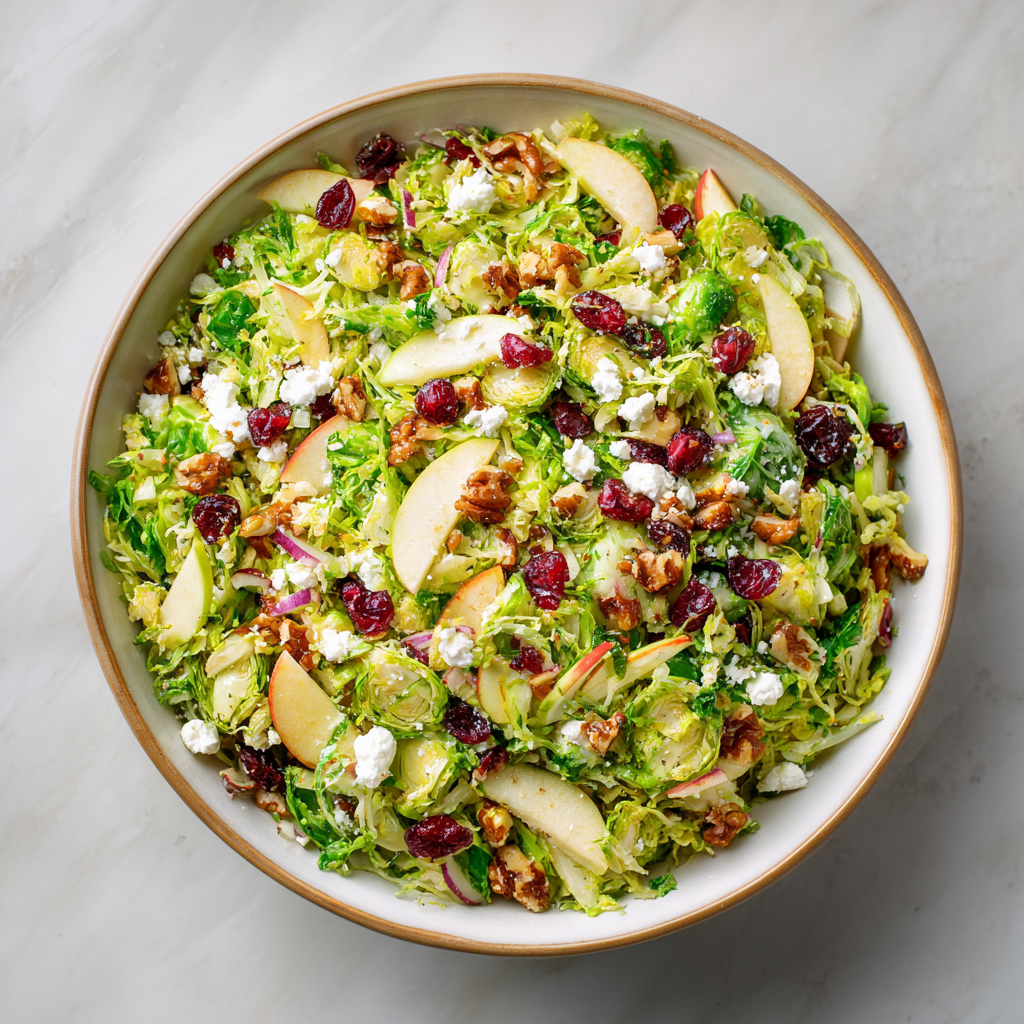
Shredded Brussels Sprouts Salad
Forget Everything You Thought You Knew About Brussels Sprouts
Hey there, friend! Come on in, pull up a stool. Can you smell that? It’s not the warm, cozy scent of something baking in the oven today. Nope. Today, we’re celebrating something bright, crisp, and utterly refreshing. I’m talking about a salad that’s not just a side dish but a total showstopper. This is the Shredded Brussels Sprouts Salad that will make you see this humble little veggie in a whole new, glorious light.
If your only memory of Brussels sprouts involves being forced to eat mushy, boiled versions as a kid, I’m here to give you a delicious, life-altering do-over. This salad is the opposite of mushy. It’s a vibrant symphony of textures and flavors: thinly shredded, crunchy sprouts, sweet and juicy fruit, toasty nuts, creamy cheese, and a zippy vinaigrette that ties it all together. It’s the kind of side dish that people actually get excited about—the one they sneak second helpings of and always ask for the recipe.
Whether you’re looking for the perfect make-ahead dish for a potluck, a stunning addition to your holiday table, or just a way to get more gorgeous greens into your week, this recipe is your new best friend. It comes together in about 15 minutes, requires zero cooking, and is packed with so much goodness you’ll feel amazing after eating it. So, grab your favorite sharp knife and a big bowl, and let’s create some crunchy magic together!
The Potluck That Started It All
I have to tell you about the first time this salad truly saved the day. It was a few years ago, and I was signed up to bring a side dish to my friend’s massive Thanksgiving potluck. You know the scene: a table groaning with heavy casseroles, rich mashed potatoes, and decadent pies. I wanted to bring something that would cut through all that richness, something bright and lively.
I’d been playing with a shredded Brussels sprouts idea, and this felt like the moment. I assembled it in a hurry that morning, tossing everything together while sipping my coffee. But here’s the secret I learned that day: this salad gets *better* as it sits. By the time I arrived, the vinaigrette had worked its magic, gently wilting the sprouts just enough to make them tender-crisp and allowing all the flavors to mingle and dance. I placed it on the table, a little unsure if it would stand out amongst the classics.
To my absolute delight, it was one of the first dishes to disappear. People were raving about the crunch, the balance of sweet and savory, the surprise of the creamy cheese. It was the underdog hero of the feast! Now, it’s my non-negotiable go-to for any gathering. It’s a reminder that sometimes, the simplest dishes, made with fresh, honest ingredients, make the biggest impact.
Gathering Your Crunchy Crew: The Ingredients
This salad is all about the quality and combination of ingredients. Each one plays a specific role in creating that perfect bite. Here’s what you’ll need and why each component is so special.
- 1 lb Brussels Sprouts, trimmed and finely shredded: These are the star of the show! Look for firm, bright green sprouts with tightly packed leaves. Chef’s Insight: Shredding them thinly is key—it transforms their texture from potentially tough to delightfully slaw-like. A sharp knife or the shredding disc on your food processor makes this a breeze.
- 1 Apple or Pear, thinly sliced or julienned (Honeycrisp or Bosc work well): This adds a crucial pop of juicy sweetness. Substitution Tip: Use a firm apple like Honeycrisp or Fuji so it holds its crunch. A ripe but firm pear is a lovely, delicate alternative. If you’re prepping ahead, a quick toss of the sliced fruit in a bit of lemon juice will prevent browning.
- ½ cup Dried Cranberries or Cherries: These little gems provide chewy texture and a tangy sweetness. Chef’s Insight: They also soak up a bit of the vinaigrette, becoming plump and even more flavorful.
- ½ cup Toasted Pecans or Walnuts, roughly chopped: Toasting the nuts is non-negotiable! It unlocks their deep, nutty flavor and adds an incredible crunch. Substitution Tip: Almonds or pistachios would be fantastic here, too.
- ⅓ cup Crumbled Goat Cheese, Feta, or Blue Cheese: The creamy, tangy element that brings everything together. Chef’s Insight: Goat cheese is my personal favorite for its mild tang, but feta adds a salty bite, and blue cheese brings a bold, complex flavor for those who love it.
- Optional: ¼ cup Pomegranate Seeds: For a gorgeous burst of color and a juicy, ruby-red crunch. If they’re in season, don’t skip them!
For the Zesty Vinaigrette:
- ¼ cup Extra Virgin Olive Oil: The base of our dressing. Use a good-quality one you love the taste of!
- 2 tablespoons Apple Cider Vinegar or Lemon Juice: The “zing” factor. Apple cider vinegar has a fruity acidity, while lemon juice is brighter and fresher. Both are excellent.
- 1 tablespoon Dijon Mustard: This is our emulsifier—it helps the oil and vinegar blend into a smooth, creamy dressing and adds a subtle sharpness.
- 1 tablespoon Honey or Maple Syrup: A touch of sweetness to balance the acidity. Substitution Tip: Maple syrup keeps it vegan and adds a lovely depth.
- Salt and Pepper to taste: The essential seasonings that make all the other flavors pop.
Let’s Get Building: Your Step-by-Step Guide
Ready to make some magic? This process is simple, but a few little tricks will take your salad from good to “can-I-get-this-recipe?” incredible. Let’s do this!
Step 1: Prep Your Sprouts. First, wash your Brussels sprouts and pat them dry. Trim off the tough stem end. Now, for the shredding! You have two great options. Chef’s Hack #1: The Fastest Way: Use the shredding disk attachment on your food processor. Feed the sprouts through the tube and you’ll have perfectly shredded sprouts in seconds. Chef’s Hack #2: The Knife Method: If you don’t have a processor, no worries! Slice each sprout in half from top to bottom, place the flat side down on your cutting board for stability, and then use a sharp knife to slice them as thinly as possible, creating lovely little ribbons. Add all your beautiful shredded sprouts to a large mixing bowl.
Step 2: Toast Those Nuts! Please, please do not skip toasting your nuts. It makes a world of difference. Place your pecans or walnuts in a dry skillet over medium heat. Cook for 3-5 minutes, shaking the pan frequently, until they become fragrant and slightly darker in color. Chef’s Tip: Watch them like a hawk! They can go from perfectly toasted to burnt in a flash. Once done, transfer them to a plate to cool completely before chopping. This prevents them from getting soggy in the salad.
Step 3: Combine the Salad Components. To the bowl with the shredded sprouts, add your thinly sliced apple or pear, the dried cranberries, the cooled, chopped toasted nuts, and your crumbled cheese of choice. If you’re using pomegranate seeds, hold off on those for now—we’ll use them as a gorgeous garnish at the end. Gently toss everything together with your hands or a couple of spoons. See how pretty it is already?
Step 4: Whisk Up the Vinaigrette. In a small bowl or a jar with a tight-fitting lid, combine the olive oil, apple cider vinegar, Dijon mustard, honey, a good pinch of salt, and a few grinds of black pepper. Whisk vigorously until the dressing is smooth and emulsified, or if using a jar, screw the lid on tightly and shake it like a polaroid picture until it’s well combined. Chef’s Tip: Taste it! Dip a piece of Brussels sprout in and see if it needs more salt, pepper, honey, or vinegar. Adjust it to your liking—you’re the boss of your dressing!
Step 5: The Magic Marry-Time. Pour the dressing over the salad and toss everything thoroughly until every single shred is lightly coated. This is the most important step: let the salad sit for at least 10-15 minutes before serving. This “marry-time” is crucial. It allows the acidic dressing to gently soften the raw Brussels sprouts, making them more tender and palatable while allowing the flavors to meld beautifully together.
Step 6: The Final Flourish. Just before serving, give the salad one final toss. Transfer it to a beautiful serving platter and scatter the vibrant pomegranate seeds and maybe an extra sprinkle of cheese over the top. This adds a final layer of texture, color, and freshness that will make everyone’s eyes light up.
How to Serve This Stunning Salad
This salad is incredibly versatile! For a family dinner, I love serving it directly from the big wooden bowl we tossed it in—it feels rustic and inviting. For a more elegant presentation, like a holiday meal or dinner party, spread it out on a wide, shallow platter so all the colorful ingredients are visible. It’s the perfect partner for roasted chicken, a juicy pork tenderloin, or even piled on top of a bowl of hearty soup. It holds up so well that it’s also my top choice for picnics and potlucks—just keep the dressing separate and toss it on site for the ultimate freshness.
Make It Your Own: Delicious Variations
One of the best things about this recipe is how easily it adapts! Feel free to get creative based on what you have or what you’re craving.
- Protein Power-Up: Add grilled shrimp, shredded rotisserie chicken, or chickpeas to turn this side into a satisfying main course.
- Winter Citrus Twist: In the winter, swap the apple for segments of sweet orange or grapefruit. Their bright acidity is phenomenal.
- Sweet & Smoky: Add a few slices of cooked, crumbled bacon and swap the vinegar in the dressing for a tablespoon of balsamic glaze.
- Vegan Delight: Simply omit the cheese or use a vegan feta alternative, and use maple syrup instead of honey.
- Curried Version: Whisk ½ teaspoon of curry powder into the vinaigrette for a warm, spiced flavor profile that’s unexpectedly delicious.
Olivia’s Chef Notes & Kitchen Confessions
This recipe has been a living, evolving thing in my kitchen. The first time I made it, I was so nervous about the raw sprouts that I almost blanched them. I’m so glad I didn’t! The crunchy texture is what makes it special. Over the years, I’ve learned that the salad is incredibly forgiving. No pecans? Use almonds. No goat cheese? Feta it is! It’s a fantastic “clean out the fridge” recipe.
I also have a funny confession: I once brought this to a party and a friend spent five minutes trying to identify the “unique green” before realizing they were Brussels sprouts! They were convinced it was some exotic kale. It just goes to show how transformative shredding can be. This salad has taught me to never underestimate a vegetable, and to always give things a second chance—especially Brussels sprouts!
Your Questions, Answered!
Q: Can I make this salad ahead of time?
A: Absolutely! In fact, I highly recommend it. You can prep all the components up to a day in advance. Store the shredded sprouts, chopped fruit (tossed in a little lemon juice), nuts, cheese, and dressing separately in the fridge. About 15-30 minutes before serving, combine everything and toss with the dressing. It holds up beautifully for hours, unlike a delicate lettuce salad.
Q: My salad turned out a bit bitter. What happened?
A> Raw Brussels sprouts can have a slight natural bitterness. A few things can help: 1) The Marry-Time: Letting it sit with the dressing is essential to mellow that flavor. 2) Balance your Dressing: Make sure your vinaigrette has enough sweetness (honey/maple) to counter the bitterness. 3) Ingredient Balance: Don’t be shy with the sweet elements like the fruit and dried cranberries. They are there for balance!
Q: What’s the best way to shred Brussels sprouts without a food processor?
A> A sharp chef’s knife is your best friend. After trimming the stem, slice the sprout in half from top to bottom. Place the flat side down on your cutting board to create a stable base. Then, simply use a rocking motion to slice them as thinly as possible into shreds. It’s a little more work, but it’s totally doable and almost meditative!
Q: The salad got a little soggy after a day. Can I save the leftovers?
A> The salad is best eaten within a day, as the sprouts will continue to soften. If you have leftovers, they’re still perfectly edible and tasty! I sometimes wilfully make extra to have for lunch the next day—it’s a different, but still delicious, softer texture. It’s not great for a crisp salad experience on day two, but it’s far from wasted.
Shredded Brussels Sprouts Salad
Description
Crisp, crunchy, colorful—this salad is a total game-changer. Thinly shredded sprouts meet sweet fruit, chewy cranberries, toasted nuts, creamy cheese, and a zesty vinaigrette. It’s bright, fresh, and the perfect counterbalance to heavier dishes. No mushy sprouts here—just a stunning salad that steals the spotlight at potlucks, holidays, or weeknight dinners.
Ingredients
-
Salad Base
-
1 lb Brussels sprouts, finely shredded
-
1 apple or pear, thinly sliced or julienned
-
½ cup dried cranberries or cherries
-
½ cup toasted pecans or walnuts, chopped
-
⅓ cup goat cheese, feta, or blue cheese, crumbled
-
¼ cup pomegranate seeds (optional)
-
-
Zesty Vinaigrette
-
¼ cup extra virgin olive oil
-
2 tbsp apple cider vinegar or lemon juice
-
1 tbsp Dijon mustard
-
1 tbsp honey or maple syrup
-
Salt & black pepper, to taste
-
Instructions
-
Shred sprouts using a food processor or sharp knife; add to a large bowl.
-
Toast nuts in a dry skillet 3–5 min until fragrant, then cool and chop.
-
Combine sprouts, fruit, cranberries, nuts, and cheese. Toss gently.
-
Whisk dressing ingredients until emulsified. Taste and adjust.
-
Dress & Rest: Pour vinaigrette over salad, toss, and let sit 10–15 min to soften sprouts and meld flavors.
-
Garnish & Serve with pomegranate seeds and extra cheese, if desired.
Notes
-
Protein Power-Up: Add grilled chicken, shrimp, or chickpeas.
-
Winter Citrus: Swap apple for orange or grapefruit.
-
Sweet & Smoky: Add crumbled bacon and balsamic glaze.
-
Vegan: Skip cheese, use maple syrup.
Quick Nutrition Note
This salad is not just a flavor powerhouse; it’s packed with nutrients! Brussels sprouts are loaded with Vitamin K, Vitamin C, and fiber. The nuts provide healthy fats, and the fruit adds vitamins and antioxidants. It’s a side dish you can feel really good about.
Approximate Nutrition per Serving: Calories: ~190, Fat: 13g, Carbs: 14g, Sugar: 9g, Fiber: 4g, Protein: 4g (Note: These are estimates and can vary based on specific ingredients used.)
Final Thoughts
Well, friend, there you have it—the ultimate guide to turning the most misunderstood veggie into the star of the show. This salad is more than just a recipe; it’s a invitation to see ingredients in a new way and to trust your own taste buds.
So, the next time you see those little green orbs at the market, don’t think of them as the boiled ghosts of dinners past. See them as the key to a crunchy, bright, and utterly delicious future. I hope this salad becomes your new potluck secret, your holiday hero, and your go-to for a healthy dose of crunchy joy.
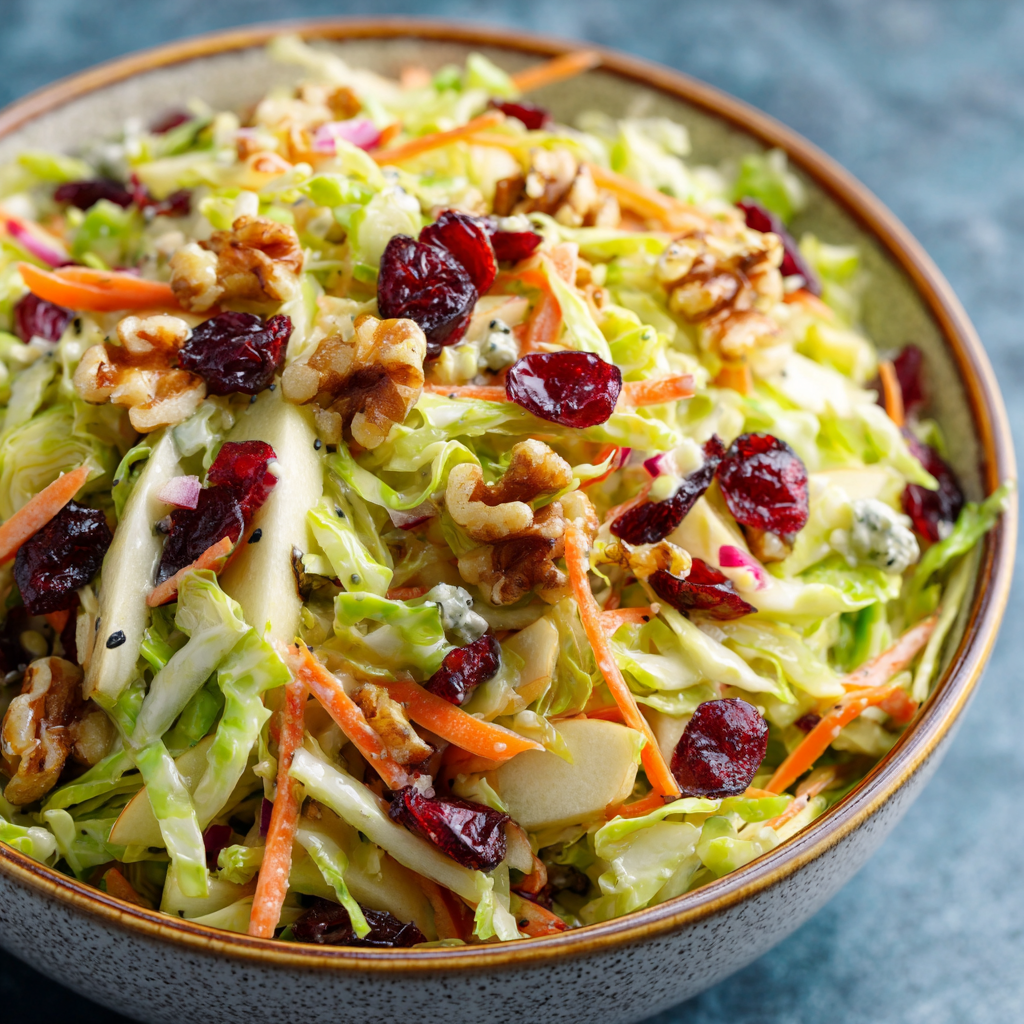
Brussels Sprouts Coleslaw
Brussels Sprouts Coleslaw: The Crispy, Creamy Side Dish That Steals the Show
Hey there, friend! Come on in, the kitchen’s warm and there’s a bowl of something truly special waiting for us. If you’re like me, you probably have a go-to coleslaw recipe. Maybe it’s the classic creamy kind for summer barbecues or a tangy vinegar-based one for pulled pork sandwiches. But today, I want to introduce you to the coleslaw that completely changed my mind about what a slaw can be: my Brussels Sprouts Coleslaw.
Picture this: instead of the sometimes-soggy cabbage we’re used to, we’re using thinly sliced, crisp Brussels sprouts and green cabbage. They hold their crunch like absolute champions. Then, we’re tossing them with sweet-tart dried cranberries, toasty walnuts, a pop of juicy apple, and a creamy, slightly sweet poppy seed dressing that clings to every single shred. It’s a symphony of textures and flavors – sweet, tangy, nutty, and creamy all at once.
This isn’t just a side dish; it’s a vibrant, colorful celebration of fall flavors that can hold its own on any table. It’s the perfect companion to your holiday turkey, a brilliant bring-along for potlucks (it travels like a dream!), and a refreshingly light counterpoint to all the rich, heavy dishes of the season. So, grab your favorite knife and a big bowl, and let’s make something unforgettable together.
The Potluck That Started It All
I have to confess, this recipe was born out of a slight kitchen panic. A few years back, I was signed up to bring a salad to a Friendsgiving potluck. I wanted something different, something that would stand out from the sea of green bean casseroles and mashed potatoes. I had a giant bag of Brussels sprouts in the fridge, destined for roasting, but inspiration struck at the last minute.
What if I treated them like cabbage? I pulled out my mandoline (carefully, with the guard on – safety first!) and started shredding. The kitchen filled with this fresh, almost peppery scent. I threw in what I had on hand: a lonely apple, some leftover cranberries from a baking project, and the last of the walnuts from the pantry. The dressing was a happy experiment – a little mayo, a little sour cream, and a generous pinch of poppy seeds for that delightful little crunch.
The result? This slaw was the surprise hit of the party! People who normally turned their noses up at Brussels sprouts were going back for seconds. They couldn’t get over the crunch and the incredible balance of flavors. That’s the beauty of cooking, isn’t it? Sometimes the best recipes come from a little bit of chaos and a whole lot of heart.
Gathering Your Ingredients: A Chef’s Guide
Here’s everything you’ll need to create this masterpiece. I’ve included some of my favorite insights and swaps so you can make it your own!
- 1 whole head green cabbage, thinly sliced (about 10 cups): This is our slaw’s sturdy base. Look for a firm, heavy head with crisp outer leaves. Chef’s Tip: If you’re short on time, many grocery stores sell pre-shredded coleslaw mix. A couple of bags will do the trick!
- 1 pound Brussels sprouts, shredded or thinly sliced: The star of the show! They bring a wonderful, hearty crunch and a slightly nutty flavor. Chef’s Insight: To save time (and your fingers), use the shredding disk on your food processor. It’s a total game-changer.
- 2 carrots, peeled and shredded: For a touch of natural sweetness and beautiful color.
- 1 large red bell pepper, diced: Adds a lovely sweetness and a brilliant pop of red.
- 1 cup red onion, diced: Provides a sharp, pungent kick that cuts through the creaminess of the dressing. Substitution Tip: If raw onion is too strong for you, try soaking the diced onion in cold water for 10 minutes before adding it. This mellows the flavor significantly!
- ⅔ cup dried cranberries: Little bursts of chewy, tart sweetness. Golden raisins or chopped dried apricots would also be delicious.
- ⅔ cup chopped walnuts: For that essential nutty, toasty crunch. Chef’s Must-Do: Please, please toast your walnuts! Just pop them in a dry skillet over medium heat for 3-5 minutes until fragrant. It elevates the entire salad.
- ⅔ cup crumbled blue cheese (optional but recommended): This is our “secret” ingredient. It adds a salty, tangy, complex flavor that is simply incredible. If you’re not a blue cheese fan, feta or goat cheese are great alternatives, or you can simply leave it out.
- Optional twist: 1 crisp apple, julienned: I highly recommend this! A crisp apple like Honeycrisp or Fuji adds a fresh, juicy crunch and a hint of sweetness. Add it right before serving to prevent browning.
For the Creamy Poppy Seed Dressing:
- ½ cup mayonnaise: The base of our creamy dressing. Use your favorite brand, or even try avocado oil mayo for a different flavor profile.
- ½ cup sour cream (light or regular): Adds a delightful tang and helps thin the dressing to the perfect consistency. Plain Greek yogurt is a fantastic, protein-packed substitute.
- ¼ cup granulated sugar: Balances the acidity. You can adjust this to your taste, or use honey or maple syrup for a more natural sweetness.
- 4 teaspoons apple cider vinegar: Provides the necessary tang. Fresh lemon juice also works beautifully.
- 2 teaspoons Dijon mustard: A flavor powerhouse! It adds depth and helps emulsify the dressing.
- 2 teaspoons poppy seeds: For that classic, tiny crunch and visual appeal.
- ½ teaspoon salt & Fresh ground black pepper, to taste: Essential for making all the flavors pop. Don’t skip the salt!
- Optional twist: 1 tablespoon maple syrup: I love adding this for a warm, autumnal sweetness that pairs perfectly with the Brussels sprouts and walnuts.
Let’s Get Chopping: Your Step-by-Step Guide
Okay, now for the fun part! Let’s transform these beautiful ingredients into the most amazing coleslaw you’ve ever tasted.
- Prep Your Veggies: First, let’s tackle the cabbage. Cut it into quarters and remove the core. Then, using a sharp knife or a mandoline (use that guard!), thinly slice the cabbage. You want nice, fine shreds. Place it all in a very large bowl – I’m talking the biggest one you own. This recipe makes a lot, and you need room to toss! Next, prepare your Brussels sprouts. Trim off the tough ends and remove any discolored outer leaves. Shred them using the shredding disk on your food processor, a mandoline, or by carefully slicing them thinly with a knife. Add them to the bowl with the cabbage. Now, shred the carrots, dice the bell pepper and red onion, and add them all to the giant bowl. Chef’s Hack: If you’re prepping this a few hours ahead, you can combine all the veggies (except the apple) and store them in the fridge. They’ll stay crisp and cold!
- Toast Those Nuts! While your veggies are prepped, let’s toast the walnuts. Place them in a dry skillet over medium heat. Shake the pan occasionally, and toast for 3-5 minutes until they become fragrant and take on a slightly darker color. Watch them closely – they can burn in a heartbeat! Once toasted, remove them from the pan immediately to stop the cooking process. Let them cool slightly.
- Whisk the Dressing: In a separate medium-sized bowl, combine the mayonnaise, sour cream, sugar, apple cider vinegar, Dijon mustard, poppy seeds, salt, pepper, and the optional maple syrup. Whisk everything together until it’s completely smooth and creamy. Give it a taste! This is your moment to adjust the seasoning. Want it tangier? Add a splash more vinegar. Sweeter? A bit more sugar or maple syrup. Make it yours!
- The Grand Toss: Now, for the magic. Add the dried cranberries, the cooled toasted walnuts, and the crumbled blue cheese (if using) to the giant bowl of vegetables. Pour the creamy poppy seed dressing over the top. Using a pair of large salad tongs or two big spoons, start tossing everything together. Really get in there and make sure every single shred of cabbage and sprout is lovingly coated in that delicious dressing.
- The Patience Part (Chill Time!): I know it’s tempting to dig right in, but trust me on this one. Cover the bowl with plastic wrap and pop it into the refrigerator for at least 30 minutes. This chill time is non-negotiable! It allows the flavors to meld together beautifully and the vegetables to soften just slightly, achieving the perfect slaw texture. If you’re adding the optional apple, stir it in right before serving to keep it crisp and prevent browning.
- Serve and Savor: Just before serving, give the slaw one final good toss. This redistributes the dressing that may have settled at the bottom. Transfer it to a beautiful serving bowl, and get ready for the compliments to roll in!
How to Serve This Beautiful Slaw
This Brussels Sprouts Coleslaw is incredibly versatile. I love serving it in a wide, shallow bowl to show off all its colorful ingredients. It’s the perfect sidekick for a cozy weeknight dinner like roasted chicken or pork chops. For holidays, it’s a stunning addition to the table next to your roast turkey or baked ham, offering a bright, crunchy contrast to all the rich dishes. And if you’re taking it to a potluck, it’s a guaranteed crowd-pleaser that looks as good as it tastes.
Make It Your Own: Delicious Variations
Feel free to get creative! Here are a few of my favorite twists:
- Apple Cider Vinaigrette Version: For a lighter slaw, swap the creamy dressing for a simple vinaigrette made with ½ cup olive oil, ¼ cup apple cider vinegar, 1 tablespoon Dijon mustard, 1 tablespoon maple syrup, and salt and pepper.
- Protein Power-Up: Turn this side into a main dish by adding shredded rotisserie chicken, chickpeas, or crispy bacon bits.
- Nut-Free & Cheese-Free: Perfect for allergies! Swap the walnuts for toasted sunflower seeds or pepitas, and simply omit the blue cheese. It’s still packed with flavor.
- Winter Citrus Twist: In the winter, add segments of orange or grapefruit and swap the cranberries for pomegranate arils for a festive touch.
Olivia’s Chef Notes & Kitchen Stories
This recipe has truly evolved over the years. The first time I made it, I was so worried about the raw Brussels sprouts being too bitter. But the magic is in the dressing and the mix-ins—they balance everything perfectly. The blue cheese was a later addition, inspired by a salad I had at a restaurant, and it was a total “aha!” moment.
A funny story: I once brought this to a picnic and a friend spent five minutes trying to identify the “secret green.” She was convinced it was a special kind of cabbage! When I told her it was Brussels sprouts, her jaw dropped. She’s been making it herself ever since. That’s my favorite kind of kitchen victory—changing someone’s mind about an ingredient they thought they didn’t like.
Your Questions, Answered!
Q: Can I make this Brussels sprouts coleslaw ahead of time?
A: Absolutely! In fact, it gets better. You can make it up to 24 hours in advance. The vegetables are sturdy and hold up beautifully. Just hold off on adding any fresh apple until right before you serve to keep it from getting brown and mushy. Store it covered in the refrigerator.
Q: My slaw seems a little dry/wet. What happened?
A: This can depend on the size of your cabbage and Brussels sprouts. If it’s dry, you may just need a bit more dressing. Whisk together another tablespoon or two of mayo and sour cream with a pinch of salt and stir it in. If it’s too wet, you might have had extra-moist veggies. Next time, you can salt the shredded cabbage and sprouts lightly, let them sit for 10 minutes, and then squeeze out any excess water before adding the other ingredients.
Q: I’m not a fan of blue cheese. What’s the best substitute?
A: No problem! Feta cheese is a brilliant substitute—it’s still tangy and salty but much less pungent. Creamy goat cheese (crumbled) is another winner. Or, you can simply leave the cheese out altogether; the slaw is still fantastic with the cranberries and walnuts.
Q: Is there a way to make this recipe dairy-free?
A: Yes, easily! For the dressing, use a dairy-free mayonnaise and substitute the sour cream with a plain, unsweetened dairy-free yogurt (like coconut or almond-based). Just omit the blue cheese, or look for a dairy-free alternative if you like.
Brussels Sprouts Coleslaw
Description
This isn’t your everyday slaw. Crisp Brussels sprouts and cabbage team up with crunchy walnuts, sweet-tart cranberries, and juicy apple, all tossed in a creamy poppy seed dressing. The result? A side dish that’s fresh, colorful, and loaded with flavor. Perfect for holidays, potlucks, or weeknight dinners, this slaw brings brightness and crunch to any table.
Ingredients
-
1 head green cabbage, thinly sliced (≈10 cups)
-
1 lb Brussels sprouts, shredded
-
2 carrots, shredded
-
1 red bell pepper, diced
-
1 cup red onion, diced
-
⅔ cup dried cranberries
-
⅔ cup toasted walnuts, chopped
-
⅔ cup blue cheese (or feta/goat cheese, optional)
-
1 crisp apple, julienned (optional, add before serving)
Creamy Poppy Seed Dressing
-
½ cup mayonnaise
-
½ cup sour cream (or Greek yogurt)
-
¼ cup sugar (or honey/maple syrup)
-
4 tsp apple cider vinegar
-
2 tsp Dijon mustard
-
2 tsp poppy seeds
-
Salt & black pepper, to taste
Instructions
-
Prep Veggies: Shred cabbage and Brussels sprouts. Add carrots, bell pepper, and onion to a large mixing bowl.
-
Toast Nuts: In a dry skillet, toast walnuts 3–5 minutes until fragrant. Let cool.
-
Make Dressing: Whisk mayo, sour cream, sugar, vinegar, Dijon, poppy seeds, salt, and pepper until smooth. Adjust seasoning.
-
Toss It Together: Add cranberries, toasted walnuts, cheese (if using), and dressing to the veggie mix. Toss well to coat.
-
Chill: Cover and refrigerate at least 30 minutes to let flavors meld. Add apple just before serving.
Notes
-
A fresh, crunchy contrast to roast turkey, ham, or chicken.
-
A vibrant potluck dish that travels beautifully.
-
Lighten it up with an apple cider vinaigrette or swap nuts for seeds for a nut-free version.
Nutrition
- Calories: 180 cal Per Serving
- Sugar: 9g
- Fat: 13g
- Carbohydrates: 14g
- Fiber: 3g
- Protein: 3g
Nutritional Information*
Prep Time: 20 minutes | Chill Time: 30 minutes | Total Time: 50 minutes | Servings: 16
*Please note: This is an approximate estimate based on the ingredients used and may vary with substitutions.
Approximate Nutrition per Serving: Calories: ~180, Fat: 13g, Carbohydrates: 14g, Sugar: 9g, Fiber: 3g, Protein: 3g
Final Thoughts
So there you have it—the slaw that turns skeptics into believers and potluck panic into pure pride. This Brussels Sprouts Coleslaw is more than just a recipe; it’s a reminder that the best dishes often come from a little improvisation and a lot of heart. With its unbeatable crunch, creamy dressing, and symphony of sweet and savory flavors, it’s guaranteed to become your new go-to for everything from weeknight dinners to holiday feasts. So go ahead, give those Brussels sprouts a chance to shine in a whole new way. Weave your own story into it, and get ready for it to steal the show.

Cheesy Hamburger Rice Casserole
Your New Favorite Weeknight Hero: Cheesy Hamburger Rice Casserole
Hey there, friend! Come on in, grab an apron, and get ready to make your kitchen smell absolutely incredible. If your idea of a perfect dinner involves minimal cleanup, maximum cheesiness, and the kind of hearty, comforting flavor that makes everyone ask for seconds, you are in for a treat. Today, we’re whipping up my legendary Cheesy Hamburger Rice Casserole. This isn’t just a recipe; it’s a one-dish wonder that solves the eternal “what’s for dinner?” question with a resounding, delicious answer. Imagine savory ground beef and tender rice, all swirled together in a creamy, dreamy sauce and baked under a blanket of perfectly melted cheddar cheese. It’s the ultimate hug in a baking dish—simple, satisfying, and straight from the heart. Whether you’re a busy parent, a new cook, or just someone who appreciates a seriously good comfort food moment, this casserole is about to become your weeknight bestie. Let’s get cooking!
The Casserole That Built a Thousand Memories
This recipe takes me right back to my grandma’s linoleum-floored kitchen, where the oven was always on and a casserole was almost always bubbling away inside. She called it her “Hamburger Hot Dish,” and it was her secret weapon for feeding a crowd of rowdy grandkids after a long day of playing outside. I can still see her, not even measuring, just pouring and stirring with a knowing smile. The best part? The agonizing few minutes we had to wait after it came out of the oven, the cheese still sizzling, before she’d finally cut into it. That first bite—steamy, cheesy, and packed with flavor—was pure magic. It taught me that the best recipes aren’t about fancy techniques; they’re about bringing people together over food made with love. This is my slightly updated version of her classic, and every time I make it, I feel that same warm, cozy feeling. I hope it creates those same happy, full-bellied memories for you and your crew.
Gathering Your Casserole Dream Team
Here’s everything you’ll need to create this masterpiece. The beauty of a casserole is its flexibility, so I’ve included my favorite chef insights and swaps to make it your own!
- 1 lb ground beef (80/20 blend is perfect): This is our flavor foundation! The little bit of fat adds so much richness. Chef’s Insight: For a lighter option, ground turkey or chicken works beautifully. For a plant-based twist, my favorite beefy crumbles hold up great!
- 1 small onion, diced: It melts right into the sauce, adding a sweet, savory depth. No fresh onion? A tablespoon of onion powder is a fine pinch-hitter.
- 2 cloves garlic, minced: Non-negotiable for me! It gives that essential aromatic punch. Feel free to add an extra clove if you’re a garlic fiend like me.
- 1 cup uncooked long-grain white rice: I use standard long-grain because it holds its texture well. Important Note: Do NOT use instant or pre-cooked rice! It will turn to mush. We’re cooking it from raw right in the sauce—that’s the magic!
- 2 cups beef broth: This cooks the rice and infuses it with deep, savory flavor. Chef’s Swap: Chicken or vegetable broth are totally fine if that’s what you have on hand.
- 1 can (10.5 oz) cream of mushroom soup: The secret to the creamy, luscious sauce! It’s the classic binder for a reason. Allergy-friendly? A can of cream of chicken or celery soup works, or you can make a simple white sauce from scratch.
- 1 cup shredded sharp cheddar cheese (plus extra for topping): I prefer to shred my own from a block! Pre-shredded cheese contains anti-caking agents that can make it less melty. Sharp cheddar has the best flavor, but any good melting cheese like Colby Jack or a Mexican blend is fantastic.
- 1/2 teaspoon paprika: This little addition adds a subtle warmth and a gorgeous color. Smoked paprika would add a wonderful, smoky hint!
- Salt and black pepper, to taste: Season as you go! Taste the mixture before it goes in the oven and adjust. Remember, the broth and soup have salt, so you may not need much.
- Optional: chopped fresh parsley for garnish: A little sprinkle of green at the end makes it pretty and adds a fresh note, but it’s 100% optional. No stress!
Let’s Build This Beautiful Casserole!
Ready to see how easily this all comes together? Follow these steps for casserole perfection.
- Preheat and Prep: Preheat your oven to 375°F (190°C). Grease a 9×13-inch baking dish with a little butter or non-stick spray. Chef’s Hack: Doing this first means it’s ready to go the second your filling is mixed. No last-minute scrambling!
- Brown the Beef: In a large skillet over medium-high heat, cook the ground beef with the diced onion and minced garlic. Break it up with your spoon as it cooks until it’s nicely browned and the onions are soft and translucent. This is where we build our base flavor, so let that beef get a little color! Once cooked, drain off any excess fat. Pro Tip: I like to leave a tiny bit of fat for extra flavor, but draining most of it prevents a greasy final dish.
- The Big Mix: Reduce the heat to low. To the same skillet with the beef, add the uncooked white rice, beef broth, cream of mushroom soup, paprika, and a good pinch of salt and pepper. Give it all a really good stir until everything is combined and the soup is fully incorporated into the broth. It will look a bit loose and saucy—that’s perfect! The rice will drink up all that liquid as it bakes.
- Cheese Please: Now, stir in that one cup of shredded cheddar cheese. Mix until the cheese starts to melt into the warm mixture, creating an even creamier base.
- Bake to Perfection: Carefully pour the entire mixture into your prepared baking dish and spread it out into an even layer. Now, cover the dish tightly with aluminum foil. This step is crucial! The foil traps the steam, which is what cooks the rice to tender, fluffy perfection. Pop it in the preheated oven and bake for 45-50 minutes.
- The Grand Finale: After 45 minutes, carefully remove the dish from the oven (steam is hot!) and take off the foil. The rice should be tender and most of the liquid absorbed. Now, sprinkle the top generously with more shredded cheese. Return the dish to the oven, uncovered, for another 5-10 minutes, or until that cheese is beautifully melted, bubbly, and maybe even a little golden around the edges.
- The Hardest Part: Wait! I know, I know. It’s tempting to dive right in. But trust me on this one—let the casserole rest for about 5-10 minutes after pulling it out of the oven. This allows the sauce to thicken up slightly and makes it much easier to serve nice, clean squares. Garnish with a little parsley if you’re feeling fancy, and dig in!
How to Serve Up This Comfort Food Classic
This casserole is a complete meal all on its own, but I love to round it out with a simple, fresh side to cut through the richness. I like to serve it right from the dish at the table for that family-style, help-yourself vibe. Use a big spoon to scoop out hearty portions. It pairs wonderfully with a simple green salad with a tangy vinaigrette, some steamed green beans or broccoli, or even some garlic bread for mopping up every last cheesy bit. It’s the ultimate crowd-pleaser!
Make It Your Own! Creative Twists & Swaps
This recipe is a fantastic canvas for your creativity. Here are a few of my favorite ways to mix it up:
- Southwestern Fiesta: Add a can of drained Rotel (diced tomatoes with green chilies) and swap the cheddar for a pepper Jack blend. A sprinkle of cumin and chili powder takes it south of the border!
- Mushroom Lover’s Dream: Sauté 8 oz of sliced cremini mushrooms with the onions and garlic for an extra earthy, umami-packed version.
- “Clean Out the Fridge” Version: Add a cup of frozen peas and carrots or corn right into the mix before baking. It’s a great way to add veggies and color!
- Extra Creamy: Stir in 4 oz of softened cream cheese along with the soup for an ultra-rich and decadent sauce.
- Gluten-Free Friendly: Use a certified gluten-free cream of mushroom soup (or make your own) and ensure your broth is gluten-free. The rest of the ingredients are naturally GF!
Olivia’s Chef Notes & Kitchen Stories
This recipe has evolved so much from my grandma’s original! She used whatever was in the pantry, and I’ve adopted that spirit. I’ve learned a few things along the way: first, that resting time is non-negotiable unless you want cheesy soup (which, honestly, isn’t the worst thing). Second, the type of rice matters—I once made the mistake of using parboiled rice and let’s just say we had a very… al dente… casserole. And my favorite kitchen memory with this dish? The time my nephew, who claimed to hate “mixed-up food,” devoured two helpings and then asked if we could have it again the next day. That’s the power of a good casserole—it wins over even the toughest critics. Don’t be afraid to make it your own and add your own story to it!
Your Casserole Questions, Answered!
Q: My rice is still hard after 50 minutes. What happened?
A: Oh no! This usually means either the dish wasn’t covered tightly enough (the steam escaped), your oven runs cool (an oven thermometer is a chef’s best friend!), or the rice was older. If this happens, simply recover it with foil and pop it back in the oven for another 10-15 minutes, checking until the rice is tender.
Q: Can I make this cheesy hamburger rice casserole ahead of time?
A: Absolutely! You can assemble the entire casserole, cover it tightly, and refrigerate it for up to 24 hours before baking. When you’re ready, you may need to add 5-10 minutes to the baking time since it will be going into the oven cold.
Q: I don’t have cream of mushroom soup. What can I use instead?
A> No problem! You can substitute cream of chicken, cream of celery, or even a golden mushroom soup. To make a quick homemade version, melt 3 tbsp butter, whisk in 3 tbsp flour, cook for 1 minute, then slowly whisk in 1 cup of broth and 1/4 cup of milk or cream until thickened. Season with salt, pepper, and a pinch of thyme.
Q: Can I freeze this casserole?
A: You can! Bake it completely, let it cool entirely, then wrap it tightly in both plastic wrap and foil. Freeze for up to 3 months. Thaw overnight in the fridge and reheat, covered, in a 350°F oven until heated through. You may want to add a little fresh cheese on top after reheating.

Cheesy Hamburger Rice Casserole
Description
When the craving for comfort food strikes, this one-pan wonder delivers big flavor with minimal effort. Savory ground beef, tender rice, and a creamy sauce come together under a bubbling blanket of melted cheddar cheese. It’s hearty, cheesy, and guaranteed to win over even the pickiest eaters. This is the kind of recipe that turns busy weeknights into cozy family dinners.
Ingredients
-
1 lb ground beef (80/20 blend)
-
1 small onion, diced
-
2 cloves garlic, minced
-
1 cup uncooked long-grain white rice
-
2 cups beef broth
-
1 can (10.5 oz) cream of mushroom soup
-
1 cup shredded sharp cheddar cheese (plus extra for topping)
-
½ tsp paprika
-
Salt & black pepper, to taste
-
Optional: chopped parsley for garnish
Instructions
-
Prep: Preheat oven to 375°F (190°C). Grease a 9×13-inch baking dish.
-
Brown: In a skillet, cook ground beef, onion, and garlic until beef is browned and onions are tender. Drain excess fat.
-
Mix: Stir in uncooked rice, broth, soup, paprika, salt, and pepper. Add 1 cup cheddar and stir until combined.
-
Bake: Transfer mixture to prepared dish, cover tightly with foil, and bake 45–50 minutes until rice is tender.
-
Cheese Finish: Remove foil, top with extra cheese, and bake uncovered 5–10 minutes until bubbly.
-
Rest & Serve: Let rest 5–10 minutes before serving. Garnish with parsley if desired.
Nutrition
- Calories: 450cal Per serving
- Fat: 25g
- Saturated Fat: 11g
- Carbohydrates: 30g
- Protein: 25g
Nutrition Information
Please note: This is an estimate provided for informational purposes only. Calculations will vary based on specific ingredients used.
Per Serving (1/6th of recipe): Calories: ~450 | Protein: 25g | Carbohydrates: 30g | Fat: 25g | Saturated Fat: 11g | Cholesterol: 85mg | Sodium: 900mg | Fiber: 1g | Sugar: 2g
Final Thoughts: More Than Just a Meal
So there you have it—your new secret weapon for a stress-free, soul-satisfying dinner. This Cheesy Hamburger Rice Casserole is more than just a list of ingredients; it’s a promise of a cozy home, a happy family, and one less thing to worry about at the end of a long day. It’s the kind of recipe that asks for so little but gives back so much: creamy, cheesy comfort and the kind of simple, delicious goodness that truly feeds the soul. We’d love to hear how it turns out for you! Tag us on social media or leave a comment below with your own twists and kitchen stories. Happy cooking!
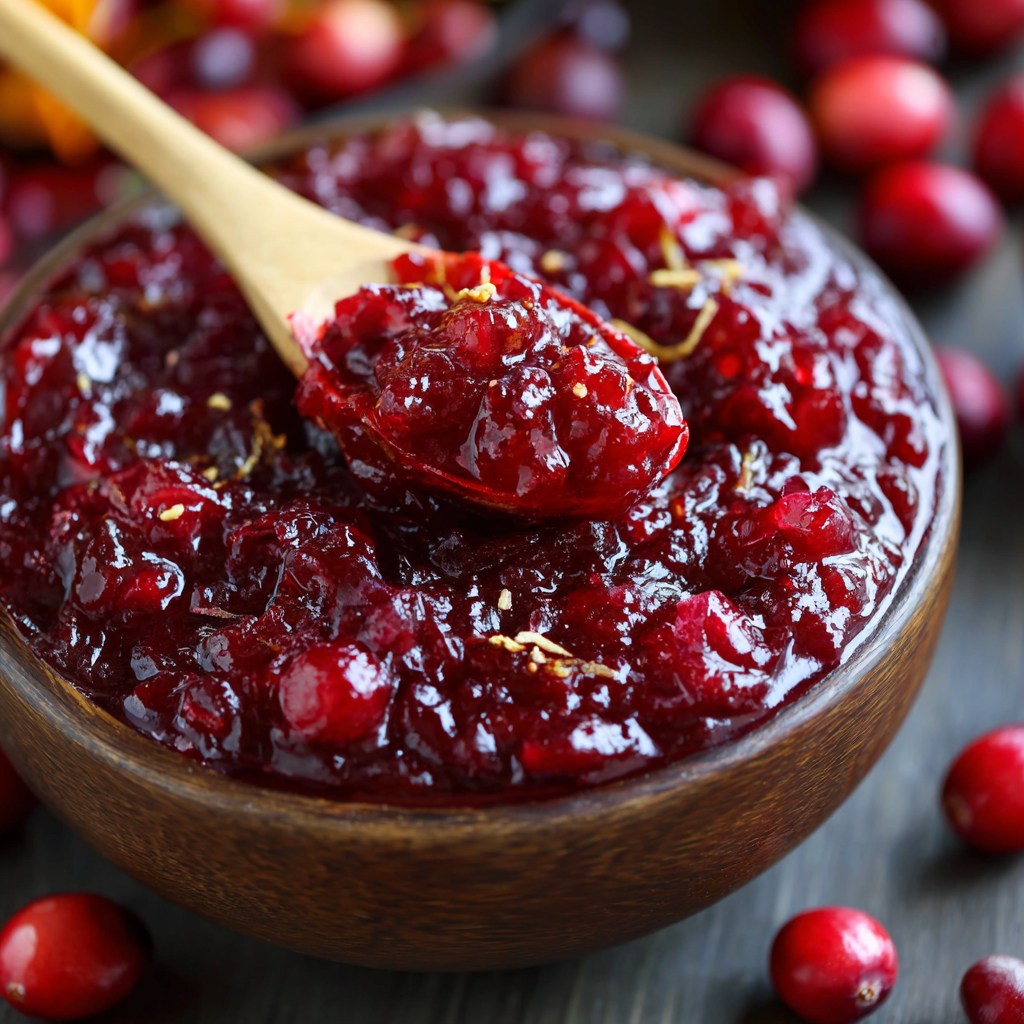
Classic Cranberry Sauce
Your New Holiday Staple: Homemade Classic Cranberry Sauce
Hello, my friends, and welcome back to the kitchen! Can you smell it? That crisp, chilly air, the scent of pine, and the unmistakable aroma of a feast coming together. It’s that magical time of year again, and I don’t know about you, but my heart does a little happy dance thinking about a table groaning with delicious food, surrounded by my favorite people. And right there, in a little dish off to the side, is the unsung hero of the holiday spread: a gorgeous, glistening, ruby-red cranberry sauce.
Now, I see you. Maybe you’ve always reached for the canned stuff. It’s familiar, it’s jiggly, it has those… ridges. But let me let you in on a little secret: making your own classic cranberry sauce is quite literally one of the easiest, most rewarding things you can do for your holiday meal. We’re talking about 5 minutes of active prep, one saucepan, and a handful of simple ingredients transforming into something spectacular. This isn’t just a condiment; it’s a burst of sweet, tangy, festive joy that will have your guests asking for the recipe. It’s the perfect bright counterpoint to rich, savory turkey and buttery mashed potatoes. So, tie on your favorite apron (the messy one is always the best!), and let’s make a memory together. This homemade cranberry sauce is about to become your new non-negotiable holiday tradition.
A Sauce of Firsts and Family
My relationship with cranberry sauce started, like many great food stories do, in my grandma’s warm, always-bustling kitchen. I was probably seven or eight, deemed just tall enough to see over the edge of the big enamel pot without tipping over on my tiptoes. My job was the most important one: Stirring. Grandma would combine the berries, sugar, and water, and as soon as they came to a boil, she’d hand me the wooden spoon with a serious but smiling face. “Now, Olivia,” she’d say, “you listen for the pops. That’s how you know the magic is happening.”
I remember the sheer wonder of it—the quiet simmer turning into a symphony of soft *pop… pop-pop-pop* as the cranberries burst open, releasing their vibrant color and tart perfume into the air. It felt like a science experiment and a piece of art all at once. That year, I proudly told everyone at the kids’ table that *I* had made the cranberry sauce. And you know what? I kind of had. That simple act of stirring and listening made me feel like a real cook, part of a tradition much bigger than myself. To this day, that sound of popping cranberries transports me right back to her linoleum floor, filled with the warmth of family and the exhilarating feeling of creating something wonderful.
Gathering Your Simple, Shining Stars
The beauty of this recipe is in its simplicity. Each ingredient plays a crucial role, and with a few smart swaps, you can make it perfectly your own. Here’s what you’ll need:
- 12 oz (1 bag) fresh or frozen cranberries: This is our superstar! Don’t stress if you can only find frozen—they work absolutely perfectly and are often picked at their peak. Just don’t thaw them first; toss them in straight from the freezer. You’ll just add a minute or two to the cooking time.
- 1 cup granulated sugar: This is our sweet balance to the cranberries’ natural pucker-power. The amount is a classic ratio, but feel free to adjust to your taste. If you prefer a tarter sauce, start with ¾ cup and add more after it’s cooked. Chef’s Insight: The sugar doesn’t just sweeten; it works with the natural pectin in the berries to help the sauce thicken beautifully as it cools.
- 1 cup water: This is the liquid that helps everything dissolve and meld together into a saucy consistency. Simple as that!
- Zest of 1 orange (Optional): This is my personal must-add. The bright, citrusy oils in the zest add a incredible layer of fragrance and complexity that cuts through the richness of the holiday meal. It makes the sauce taste… brighter.
- ¼ teaspoon cinnamon (Optional): A tiny pinch adds a subtle, warm, and cozy spice that feels inherently festive. It’s a whisper, not a shout, and it pairs dreamily with the turkey.
Let’s Make Some Magic: Step-by-Step
Ready? This is where the fun begins. Let’s turn these simple ingredients into your new favorite condiment.
Step 1: The Combine. Grab a medium-sized saucepan—something with a heavier bottom is ideal for even heating. Pour in your cranberries (again, frozen is A-OK!), the sugar, and the water. Give it a quick stir to roughly combine. Don’t worry if the sugar is just sitting on top; it will dissolve as it heats up. Chef’s Hack: Running your fingers under the tap and flicking a few droplets of water around the top edge of the saucepan (a “wet brush”) can help prevent any sugary syrup from crystallizing on the sides.
Step 2: The Boil. Place your pot over medium-high heat. Now, walk away for a minute. Seriously! Let it come to a full, rolling boil undisturbed. You’ll see the sugar dissolve completely and the liquid become clear. This usually takes about 3-5 minutes. Once it’s boiling vigorously, give it a good stir. You’re on your way!
Step 3: The Simmer & The Pop! This is the best part. Reduce the heat to medium-low to maintain a gentle simmer. Now, you don’t have to stand there constantly stirring, but do give it a stir every few minutes. After about 5-7 minutes, you’ll start to hear it: the music. The soft, satisfying *pop* *pop* *pop* of the cranberries bursting open. It’s so gratifying! Keep simmering and stirring occasionally for another 5-8 minutes (10-15 minutes total simmer time). The sauce will thicken noticeably. How do you know it’s done? Drag your spoon across the bottom of the pot; it should leave a clean path that fills in slowly. It will thicken more as it cools, so you want it a bit looser than your desired final consistency.
Step 4: The Flavor Finish. Remove the pot from the heat immediately. Now is the time to stir in your optional flavor boosters—the bright orange zest or the warm cinnamon, or both! Stir them through so their flavors can infuse the entire sauce as it cools.
Step 5: The Patient Wait. This might be the hardest step! Pour your beautiful, ruby-red sauce into a heatproof bowl or serving dish. Let it cool to room temperature on the counter. Critical Tip: Do NOT cover it with plastic wrap while it’s hot, unless you want a soupy lid and diluted sauce! Once it’s room temp, then you can cover it and transfer it to the fridge. It will continue to thicken into that perfect, spoonable consistency as it chills.
How to Serve Your Masterpiece
While it’s classic served chilled or at room temperature in a beautiful bowl next to the turkey, let’s think outside the box! For a truly beautiful presentation, spoon it into a vintage glass compote dish or a small white ceramic bowl to let that stunning color really shine. It’s not just for Thanksgiving day, either! This sauce is a fantastic make-ahead item—it keeps beautifully in the fridge for up to a week, its flavor deepening over time.
Make It Your Own: Delicious Variations
Once you’ve mastered the classic, the world is your oyster… or cranberry! Here are a few of my favorite twists:
- Citrus Sparkle: Swap the water for fresh orange juice and add the zest. For a more complex twist, use a mix of orange and a tablespoon of fresh lemon juice.
- Spiced & Nice: Add a whole cinnamon stick, a few star anise pods, or a couple of cloves to the pot while simmering. Remember to remove them before serving!
- Boozy Berry: Replace ¼ cup of the water with a nice bourbon, orange liqueur like Cointreau, or even a dry red wine for a sophisticated, adult-only version.
- Lower Sugar Option: You can reduce the sugar to ¾ cup for a tarter profile, or substitute with pure maple syrup or honey (though this will slightly alter the flavor and color).
- Savory Herb: Infuse the water by gently heating it with a spring of fresh rosemary or thyme before adding the cranberries and sugar. Strain it out after cooking for a subtle, savory undertone.
Olivia’s Chef Notes
This recipe has been my holiday constant for years, but it’s had its adventures! One year, in a pre-coffee haze, I accidentally used salt instead of sugar. Let me tell you, that was a… memorable… batch that went straight into the compost. A valuable (and hilarious-in-retrospect) lesson in always tasting your ingredients first! Another time, I was chatting so much I let it reduce a bit too much, and it turned into the most incredible cranberry jam—which we then gifted in little jars to neighbors. A happy accident! The point is, don’t be afraid of it. This sauce is incredibly forgiving. It’s a living recipe in my kitchen, and I encourage you to make it yours, too. Listen to the pops, trust your instincts, and most importantly, have fun with it.
Your Cranberry Sauce Questions, Answered!
Q: My sauce is too thin! What did I do wrong?
A: Don’t panic! First, remember it thickens SIGNIFICantly as it cools. Please, please let it cool completely in the fridge before you pass judgment. If it’s still too thin after a few hours, you can simmer it again for another 5-10 minutes to reduce it further. Alternatively, mix a teaspoon of cornstarch with a tablespoon of cold water to create a slurry, whisk it into the warm (not boiling) sauce, and then bring it to a brief simmer to activate the cornstarch and thicken it up.
Q: My sauce is too thick, almost like jam. How can I fix it?
A> Easy fix! Just whisk in a tablespoon of warm water or orange juice at a time until it reaches your desired consistency. It might have just reduced a little too long, but a little liquid will bring it right back.
Q: Can I make this ahead of time?
A: Absolutely! In fact, I highly recommend it. Making it 1-3 days ahead allows the flavors to meld and deepen beautifully. Just store it covered in the refrigerator. Let it sit out for about 30 minutes before serving to take the chill off, or serve it cold—your choice!
Q: Why is my cranberry sauce so bitter?
A: Bitterness usually comes from overcooking. If you simmer the sauce for too long after the berries have burst, the natural pectin can break down and the seeds can release bitter tannins. Stick to the 10-15 minute simmer time after the boil for the perfect balance.
Classic Cranberry Sauce
Description
Ruby-red, glossy, and bursting with sweet-tart flavor—this cranberry sauce is the unsung hero of any holiday table. With just a handful of ingredients and about 15 minutes of simmering magic, you’ll transform humble berries into a jewel-toned condiment that outshines the can by miles. It’s festive, make-ahead friendly, and guaranteed to earn you rave reviews.
Ingredients
-
12 oz fresh or frozen cranberries
-
1 cup granulated sugar (adjust to taste)
-
1 cup water
-
Zest of 1 orange (optional)
-
¼ tsp ground cinnamon (optional)
Instructions
-
Combine: In a medium saucepan, stir together cranberries, sugar, and water.
-
Boil: Bring to a rolling boil over medium-high heat, stirring occasionally.
-
Simmer: Reduce heat to medium-low. Cook 10–15 minutes, stirring occasionally, until berries burst (listen for the pops!). Sauce should coat the back of a spoon.
-
Flavor Boost: Remove from heat. Stir in orange zest and/or cinnamon, if using.
-
Cool: Transfer to a bowl. Let cool completely at room temp, then refrigerate until ready to serve.
Notes
-
Citrus Sparkle: Replace water with orange juice for extra brightness.
-
Spiced Up: Add a cinnamon stick, cloves, or star anise while simmering (remove before serving).
-
Boozy Twist: Swap ¼ cup of water for bourbon, red wine, or orange liqueur.
-
Savory Touch: Infuse with rosemary or thyme for a subtle herbal note.
Nutritional Information*
*This is an estimate for informational purposes only.
Per ¼ cup serving: Calories: ~100 | Carbohydrates: 26g | Sugar: 24g | Fat: 0g | Fiber: 2g
Prep Time: 5 minutes | Cook Time: 15 minutes | Servings: About 8
Final Thoughts: More Than a Sauce, It’s a Tradition
So, there you have it. In the time it takes to set the table, you can create something truly special—a homemade cranberry sauce that will elevate your holiday feast from wonderful to unforgettable. But this recipe is about so much more than just a condiment.
It’s about the simple joy of creating. It’s about the sound of popping berries that connects us to memories of grandmas’ kitchens and the excitement of new traditions. It’s about the confidence that comes from mastering a classic, and the fun of making it your own with a splash of citrus or a warm hint of spice.
This year, I invite you to skip the can. Embrace the ease, the aroma, and the sheer, vibrant joy of making it yourself. Let this glistening, ruby-red sauce be your delicious contribution to the table, a little dish filled with love and the unmistakable taste of the holidays.
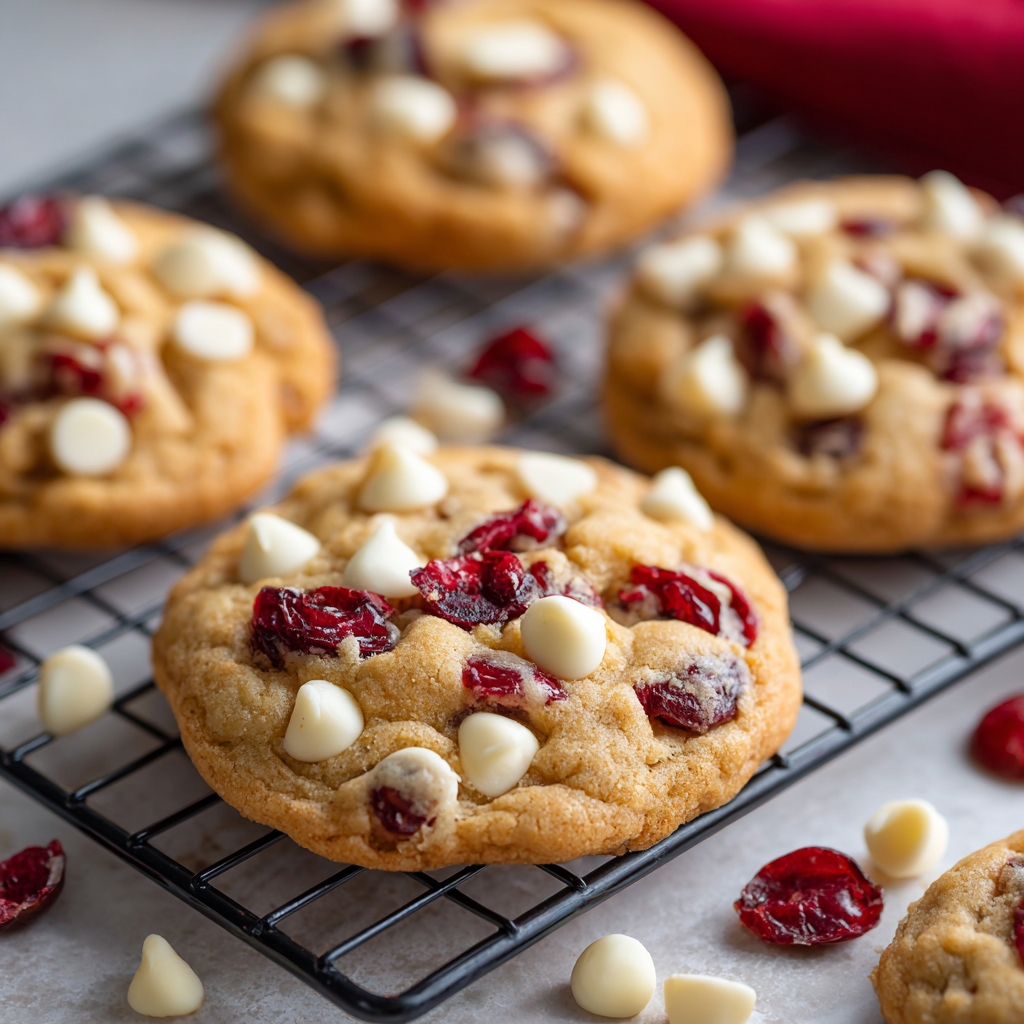
White Chocolate Cranberry Cookies
Your New Favorite Cookie Is Here: White Chocolate Cranberry Bliss!
Hey there, friend! Come on in, grab an apron, and let’s get something straight: life is just better with a warm cookie in hand. And not just any cookie. I’m talking about that perfect, just-out-of-the-oven moment where the chocolate is still a little melty, the edges are gently golden, and the smell of vanilla and butter has taken over your entire home. *That* feeling. That’s the magic we’re making today. If you’ve been searching for a cookie recipe that’s equal parts cozy, festive, and downright irresistible, you’ve just found your holy grail. These Soft-Batch White Chocolate Cranberry Cookies are the stuff of legends in my kitchen. They’re the cookie I bring to every potluck, package up for friends having a tough week, and secretly stash in the freezer for my own 3 pm pick-me-up. They strike the most incredible balance—the rich, creamy sweetness of white chocolate paired with the bright, tangy punch of chewy cranberries, all wrapped up in a soft, buttery, and impossibly chewy cookie base. They’re a hug in dessert form, and I am so incredibly excited to share them with you. So, preheat that oven, because we’re about to bake a whole lot of happiness.
The Cookie That Started It All
I’ll never forget the first time I truly fell in love with this flavor combo. It was my first Thanksgiving hosting for my then-boyfriend’s (now husband’s!) family. I was a ball of nerves, wanting everything to be perfect. The turkey was brining, the pies were prepped, but I felt like I needed one more “wow” factor—a little homemade something for folks to nibble on with their coffee after the feast. I spotted a bag of white chocolate chips and some dried cranberries in the pantry, and a little lightbulb went off. I whipped up a batch of these cookies, still warm and gooey, just as everyone was settling into the living room. The moment that platter hit the table, the room went quiet except for the sounds of happy munching. My future mother-in-law took one bite, her eyes lit up, and she said, “Olivia, these are absolute perfection. You have to give me the recipe.” That was the moment I stopped being nervous and started just being… me. In my kitchen. Sharing food I love with people I love. That’s the power of a good cookie, my friend. It’s not just dessert; it’s a memory maker.
Gathering Your Cookie Crew: The Ingredients
One of the best things about this recipe is that you probably have most of these ingredients in your pantry right now! Here’s what you’ll need and why each one is a superstar:
- 1/2 cup unsalted butter, softened – This is the foundation of our rich, buttery flavor. Using unsalted lets us control the salt level perfectly. Chef’s Tip: “Softened” means cool to the touch but your finger can leave a gentle indent. Don’t melt it! If you forget to take it out, cut it into chunks and it will soften faster.
- 1/2 cup brown sugar & 1/4 cup granulated sugar – The dynamic duo! Brown sugar brings molasses-y moisture and chew, while granulated sugar helps with spread and that lovely crisp edge.
- 1 large egg – Our binding agent, bringing everything together and adding structure. Make sure it’s at room temperature to blend seamlessly with the butter.
- 1 teaspoon vanilla extract – The flavor enhancer! Don’t skimp. A good quality vanilla makes a world of difference.
- 1 1/2 cups all-purpose flour – The main structure of our cookie. For a slightly more tender cookie, you can swap 1/4 cup with cornstarch (aka a “cake flour” hack!).
- 1/2 teaspoon baking soda – Our leavening agent. It helps the cookies rise and become nice and puffy. Make sure yours is fresh for the best lift!
- 1/4 teaspoon salt – The secret weapon! Salt balances the sweetness and makes all the other flavors pop. If you only have salted butter, just reduce this to a tiny pinch.
- 3/4 cup white chocolate chips – Go for good quality here! I love the chunks from a chopped white chocolate bar for extra pools of goodness, but chips work beautifully too.
- 3/4 cup dried cranberries – The tangy counterpart to the sweet chocolate. For an extra burst of flavor, try plumping them up by soaking in hot orange juice for 10 minutes before draining and adding to the dough!
Let’s Bake! Your Foolproof Step-by-Step Guide
Ready to make some magic? Follow these steps, and you’ll be a cookie pro in no time. I’ve packed this section with all my favorite kitchen hacks!
Step 1: Preheat and Prep. Preheat your oven to 350°F (175°C). Line your baking sheets with parchment paper. This is non-negotiable for me! It prevents sticking, makes cleanup a dream, and ensures an even, golden-brown bottom on every cookie. Silicone mats work great too!
Step 2: Cream the Butter & Sugars. In a large bowl, use a hand mixer or stand mixer fitted with the paddle attachment to cream together the softened butter, brown sugar, and granulated sugar. Now, listen up! This isn’t just about mixing; it’s about incorporating air. Beat it on medium-high speed for a good 2-3 minutes until the mixture is light, pale, and fluffy. This is the first secret to a perfectly textured cookie.
Step 3: Add the Egg & Vanilla. Beat in the egg and vanilla extract until they are fully combined and the mixture looks smooth and creamy. Scrape down the sides of the bowl with a spatula to make sure everything is getting to know each other.
Step 4: Whisk the Dry Ingredients. In a separate, medium-sized bowl, whisk together the flour, baking soda, and salt. Whisking is key here—it evenly distributes the baking soda so you don’t get any bitter bites, and it aerates the flour a little, making for a softer cookie.
Step 5: Combine Wet & Dry. Gradually add the dry ingredients to the wet ingredients, mixing on low speed just until the flour disappears. DO NOT OVERMIX! This is the second biggest secret. Overmixing develops gluten, which leads to tough, cakey cookies. A few streaks of flour are okay; we’ll finish mixing in the next step.
Step 6: The Fun Part: Fold-Ins! Switch to a sturdy spatula. Dump in your white chocolate chips and dried cranberries. Now, gently fold them into the dough until they are evenly distributed. This gentle motion prevents overmixing.
Step 7: Scoop & Space. Use a tablespoon or a small cookie scoop (my #1 kitchen tool for even baking!) to portion the dough into roughly 1-inch balls. Place them on your prepared baking sheet, spacing them about 2 inches apart. They need room to spread and become the gorgeous cookies they’re destined to be.
Step 8: Bake to Perfection. Bake for 9-11 minutes. The cookies will still look very soft in the center, and the edges will be just set and lightly golden. This is exactly what we want! They continue to cook on the hot pan. For a chewier cookie, lean towards 9 minutes. For a crisper edge, go for 11.
Step 9: The Most Important Step: PATIENCE. Once out of the oven, let the cookies cool on the hot baking sheet for at least 5 minutes. I know it’s hard, but this allows them to set up properly. If you try to move them too soon, they might fall apart. After 5 minutes, you can transfer them to a wire rack to cool completely… or, you know, eat one immediately with a glass of cold milk.
How to Serve These Beauties
These cookies are stars all on their own, but presentation is part of the fun! For a casual family treat, pile them high on a simple rustic wooden board. If you’re gifting them, stack them in a clear cellophane bag tied with a pretty ribbon—they make the most heartfelt gift. For a party, I love to plate them on a beautiful cake stand. They pair wonderfully with a hot cup of coffee, a cold glass of milk, or even a sweet dessert wine. However you serve them, get ready for compliments!
Mix It Up! Delicious Recipe Variations
Once you’ve mastered the base, the flavor world is your oyster! Here are a few of my favorite twists:
- Orange Zest Delight: Add the zest of one large orange to the butter-sugar mixture. The citrus aroma is incredible and complements the cranberries perfectly.
- Nutty Professor: Fold in 1/2 cup of chopped pecans or walnuts for a delightful crunch and toasty flavor.
- Dark Chocolate Swap: Not a white chocolate fan? Use dark chocolate or semi-sweet chips instead for a deeper, richer flavor profile.
- Oatmeal Cookie Vibe: Replace 1/2 cup of the all-purpose flour with 3/4 cup of old-fashioned oats for a heartier, chewier texture.
- Gluten-Free Friendly: Use a 1:1 gluten-free all-purpose flour blend. I’ve had great success with Bob’s Red Mill and King Arthur brands.
From My Kitchen to Yours: Chef’s Notes
This recipe has been a living, evolving thing in my kitchen for years. I once, in a frantic pre-holiday baking marathon, accidentally used a whole cup of butter instead of a half. The result? Incredibly flat, buttery, lace-like cookies that were somehow still delicious. (We called them “cranberry crisps” and ate them all anyway!). My biggest evolution was learning the power of patience—not overmixing, and letting them cool on the pan. It truly makes all the difference between a good cookie and a *great* one. And a little secret? I almost always double the batch and freeze half the dough. That way, I can have warm, fresh cookies anytime a craving (or a last-minute guest!) strikes. Just scoop the dough balls onto a sheet, freeze them solid, then toss them into a zip-top bag. Bake from frozen, adding just a minute or two to the baking time. You’re welcome!
Your Questions, Answered!
Q: My cookies always come out flat. What am I doing wrong?
A: Flat cookies are usually a temperature issue! The most common culprits are: 1) Your butter was too warm or melted. It should be softened but still cool. 2) Your baking sheet was too warm. Always use a cool sheet for each new batch. 3) Your oven might be running cold. An oven thermometer is a cheap and game-changing tool to check!
Q: Can I use frozen or fresh cranberries instead of dried?
A: I don’t recommend it for this particular recipe. Fresh or frozen cranberries contain a lot of water, which will release during baking and make the cookies soggy and prevent them from setting properly. Dried cranberries provide that perfect chewy, tangy bite without altering the dough’s moisture balance.
Q: Why are my cookies cakey and puffy instead of flat and chewy?
A: This usually points to either too much flour or overmixing. Next time, try fluffing your flour with a spoon before gently scooping it into your measuring cup and leveling it off. And remember, mix just until the ingredients combine!
Q: How do I store these cookies to keep them soft?
A: The best way to keep them soft and chewy is in an airtight container at room temperature. I like to throw a single piece of bread in the container with them—the cookies will absorb the moisture from the bread and stay soft for days! (Just remember to change the bread if it gets hard).
Nutritional Information
(Approximate, per cookie, based on a yield of 24 cookies)
- Calories: ~140
- Protein: 1g
- Carbohydrates: 18g
- Fat: 7g
- Fiber: 0.5g
Prep Time: 10 minutes | Cook Time: 10 minutes | Servings: 24 cookies
Final Thoughts: Your New Signature Cookie Awaits
And there you have it! From a nervous Thanksgiving host to your trusted kitchen guide, I’ve shared my ultimate cookie secret with you. These White Chocolate Cranberry Bliss Cookies are more than just a recipe; they’re an invitation to create your own moments of joy. Whether you’re baking for a celebration, a quiet afternoon, or someone who needs a little pick-me-up, this recipe is your ticket to something truly special.
So don’t just save this for the holidays. Whip up a batch anytime you need a reminder that life’s simplest pleasures—butter, sugar, and a little bit of love—are often the sweetest. I have a feeling this recipe is about to become a beloved staple in your home, just as it is in mine.
Now, I’d love to hear from you! Did you add a twist with orange zest or nuts? Tag me on social media @[Your Blog Name] so I can see your beautiful creations. Happy baking!
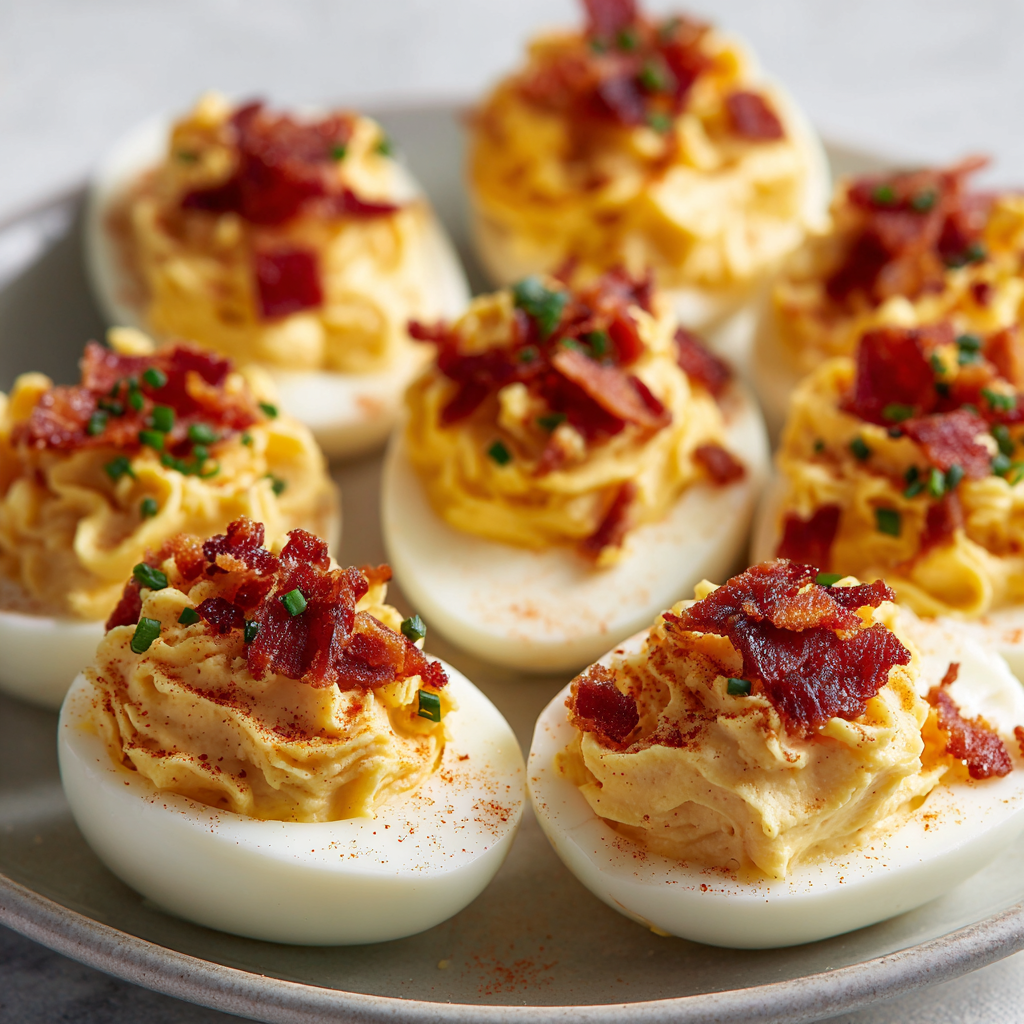
Bacon Cheddar Deviled Eggs
Bacon Cheddar Deviled Eggs: Your New Party Superstar
Hey there, friend! Come on in, grab an apron, and let’s get something delicious started. Is there anything more universally loved, more instantly inviting, than a platter of deviled eggs sitting proudly in the middle of a table? That creamy, dreamy filling, the satisfying coolness of the egg white… it’s pure, unadulterated comfort food. But what if I told you we could take that classic and crank it up to an eleven? What if we could make it… irresistible?
Today, we’re making my absolute go-to crowd-pleaser: Bacon Cheddar Deviled Eggs. This isn’t just a recipe; it’s a flavor explosion. We’re talking creamy yolks whipped with a touch of tangy Dijon, folded together with the sharp, salty punch of good cheddar and the smoky, crispy magic of bacon. It’s the ultimate savory upgrade that turns a humble appetizer into the main event. Every time I bring these to a gathering, they vanish in minutes, and I’m always asked for the recipe. They’re perfect for potlucks, holiday parties, game day spreads, or even just a fancy-ish snack because, well, you deserve it. So, let’s roll up our sleeves and create some bite-sized magic together!
The Picnic That Started It All
This recipe has a special place in my heart because it was born from a happy kitchen accident. A few summers ago, my family planned a big, sprawling picnic in the park. My assigned duty, as always, was the deviled eggs. My classic recipe is a hit, but that day, I was running late, the kitchen was a whirlwind, and in my rush, I knocked over a bowl of pre-shredded cheddar I’d set aside for a pasta salad. A good handful of it tumbled right into my bowl of waiting egg yolks.
I gasped, my heart sank for a second, and I almost started over. But then I thought, “Well, cheese makes everything better, right?” I decided to lean into it. I mashed it all together, added a little extra mayo to balance it out, and then, feeling bold, I crumbled in the last few slices of bacon from the breakfast plate. What emerged from that chaotic moment was nothing short of legendary. They were the first thing to disappear at the picnic, and my uncle famously said, “Olivia, you can’t ever make the regular kind again.” A happy accident, indeed, and one I’m so grateful for every time I make them.
Gathering Your Flavor All-Stars
One of the best things about this recipe is its simplicity. You only need a handful of ingredients, but using the best you can find makes a world of difference. Here’s what you’ll need:
- 6 large eggs – The foundation! I find large eggs are the perfect size for a hearty appetizer. For the easiest peeling, try to use eggs that are a week or two old rather than super fresh ones.
- 1/4 cup mayonnaise – This is our creamy base. Use a good-quality, full-fat mayo for the richest flavor and texture. For a tangier twist, you could swap in half mayo and half Greek yogurt!
- 1 teaspoon Dijon mustard – This is our secret weapon! Dijon adds a complex, sharp tang that cuts through the richness without being overpowering like yellow mustard can sometimes be.
- 1/4 cup shredded sharp cheddar cheese – Please, for me, shred your own cheese from a block! Pre-shredded cheese is coated in anti-caking agents that can make your filling a bit grainy. The flavor of a good, aged sharp cheddar is unbeatable here.
- 3 slices bacon, cooked crisp and crumbled – The star of the show! Cook it until it’s super crispy so it adds a wonderful crunch. Reserve a tablespoon or two for a gorgeous garnish on top.
- Salt and pepper, to taste – Season as you go! The bacon and cheese are salty, so I always taste before adding more salt at the end.
- Optional: chives or paprika for garnish – A sprinkle of fresh chopped chives adds a lovely pop of color and a mild onion flavor. A dusting of paprika (smoked paprika is incredible here!) gives a classic look and a hint of warmth.
Let’s Make Some Magic: Step-by-Step
Don’t let anyone tell you deviled eggs are difficult. They’re wonderfully simple, and with a few chef-y hacks, they’ll be perfect every single time.
Step 1: The Perfect Hard-Boiled Eggs
Place your eggs in a single layer in a saucepan. Cover them with cold water by about an inch. This is key—starting with cold water helps ensure even cooking and prevents cracked shells. Bring the pot to a rolling boil over high heat. The moment it hits a full boil, immediately remove it from the heat, cover with a tight-fitting lid, and set your timer for 10 minutes (for a perfectly set yolk with no gray ring). While they’re resting, prepare an ice bath—a large bowl filled with ice and cold water.
Step 2: The Ice Bath & The Peel
After 10 minutes, use a slotted spoon to immediately transfer the hot eggs to the ice bath. Let them chill out for at least 5 minutes. This shock stops the cooking process and, most importantly, contracts the egg inside the shell, making it a million times easier to peel. To peel, gently tap each egg on the counter to crackle the shell all over, then roll it gently between your hands. Start peeling from the wider end, where there’s usually a small air pocket, under a tiny trickle of running water to help the shell slide right off.
Step 3: The Assembly Line
Slice each cooled, peeled egg in half lengthwise. Gently pop the yolks out into a medium-sized bowl. Arrange your beautiful, empty egg white halves on your serving platter. See? You’re already more than halfway there!
Step 4: The Filling (The Best Part!)
Now, take your bowl of yolks and mash them well with a fork until they’re fine and crumbly. Add in the mayonnaise, Dijon mustard, shredded cheddar, and most of your crumbled bacon (remember to save some for the top!). Season with a pinch of salt and pepper. Now, get in there and mix it all together until it’s gloriously smooth and well-combined. Taste it! This is the moment of truth. Does it need more salt? More pepper? A tiny bit more mayo? Adjust to your heart’s content.
Step 5: Fill & Garnish Like a Pro
You can simply spoon the filling back into the egg white cavities, but for a truly fancy look, spoon the mixture into a zip-top bag, snip off one corner, and pipe it in. It’s so easy and looks like it came from a professional bakery. Once all your eggs are filled, garnish them with the remaining crispy bacon, a sprinkle of fresh chives, or a elegant dusting of paprika.
How to Serve These Beauties
Presentation is part of the fun! I love using a dedicated deviled egg platter—those little grooves keep them from sliding around. If you don’t have one, a simple serving plate works perfectly. Scatter a few extra pieces of crumbled bacon and chives around the platter for a gorgeous, bountiful look. Serve them immediately for the best texture, or you can chill them for a bit to let the flavors mingle even more. Pair them with other party favorites like a fresh veggie platter, some spicy meatballs, or a crisp, cold beer!
Get Creative: Fun Flavor Twists!
The beauty of this recipe is how adaptable it is. Feel free to play around and make it your own!
- Southwestern Style: Add a teaspoon of taco seasoning to the yolk mix and garnish with a tiny slice of jalapeño and a cilantro leaf.
- Everything Bagel: Swap the cheddar for a tablespoon of everything bagel seasoning mixed into the filling, and garnish with more seasoning and extra chives.
- Buffalo Chicken: Fold in 1/4 cup of finely shredded cooked chicken and a tablespoon of buffalo sauce. Garnish with a drizzle of blue cheese dressing.
- Guacamole Style: Replace the mayo with mashed avocado and a squeeze of lime juice for a fresher, California-inspired twist.
- Keto-Friendly: This recipe is already naturally low-carb! Just ensure your bacon and mayo are sugar-free.
Olivia’s Chef Notes & Kitchen Stories
Over the years, this recipe has become my culinary security blanket. I’ve made it so many times I could probably do it in my sleep! One of my favorite kitchen memories is teaching my niece how to pipe the filling. She was so focused, her little tongue stuck out in concentration, and she was so proud of the “fancy eggs” she helped make. It just goes to show that cooking is about so much more than food—it’s about connection and making memories.
One pro-tip I’ve learned: if you’re making these for a big party, you can absolutely hard-boil and peel the eggs the day before. Just keep them sealed in a container in the fridge. You can also make the filling a few hours ahead, store it in a bag or container, and then just pipe it into the whites right before your guests arrive. Easy peasy!
Your Questions, Answered!
Q: My eggs are always impossible to peel! What’s the secret?
A: I feel your pain! The two biggest tricks are: 1) Don’t use super fresh eggs. Slightly older eggs peel much easier. 2) The ice bath is non-negotiable. Shocking the eggs in ice water immediately after cooking is the single best way to ensure easy peeling. Also, peeling them under a light stream of cool water can help wash away any stubborn shell bits.
Q: Can I make these ahead of time?
A: Absolutely! You can hard-boil and peel the eggs up to 2 days in advance. Store them in a sealed container in the fridge. You can also make the filling 1 day ahead and keep it in a separate container. I recommend waiting to fill the egg whites until no more than a few hours before serving to prevent them from getting soggy.
Q: My filling is a little runny. How can I thicken it up?
A> This can happen if your yolks are still a bit warm or if you added a touch too much mayo. Pop the filling into the refrigerator for 20-30 minutes to firm up before piping. You can also add a tiny pinch of extra shredded cheese to help absorb any excess moisture.
Q: I don’t have a piping bag. What can I use instead?
A: No problem! A simple zip-top bag is my go-to hack. Just spoon the filling into the bag, push it down to one corner, seal the bag, and snip about a 1/2-inch off that corner with scissors. Instant, disposable piping bag! You can also use two small spoons to neatly dollop the filling in.

Bacon Cheddar Deviled Eggs
Description
This isn’t your grandma’s deviled egg recipe—it’s a bold, savory twist that steals the spotlight every time. Creamy yolks whipped with Dijon and mayo meet sharp cheddar and crispy bacon for the ultimate bite-sized indulgence. Perfect for holidays, game day, or backyard picnics, these deviled eggs vanish fast and always earn rave reviews.
Ingredients
-
6 large eggs
-
¼ cup mayonnaise (or half mayo, half Greek yogurt)
-
1 tsp Dijon mustard
-
¼ cup sharp cheddar cheese, shredded
-
3 slices bacon, cooked crisp & crumbled
-
Salt & pepper, to taste
-
Optional: chopped chives or smoked paprika for garnish
Instructions
-
Cook eggs: Place eggs in a saucepan, cover with cold water, and bring to a boil. Once boiling, cover, remove from heat, and let sit for 10 minutes.
-
Ice bath: Transfer eggs to ice water for 5 minutes, then peel.
-
Prepare filling: Slice eggs lengthwise, remove yolks, and mash them in a bowl. Mix with mayo, Dijon, cheddar, most of the bacon, and seasoning.
-
Fill: Spoon or pipe the mixture back into egg whites.
-
Garnish: Top with remaining bacon, chives, or paprika for color and flavor.
Notes
-
Everything Bagel: Swap cheddar for seasoning mix.
-
Buffalo Style: Add shredded chicken + buffalo sauce.
-
Guacamole Twist: Replace mayo with avocado & lime.
Nutrition
- Calories: 180 cal Per 2 halves
- Fat: 15g
- Carbohydrates: 1g
- Protein: 9g
Nutritional Information*
*This is an estimated nutritional breakdown for two deviled egg halves (one full egg), provided for informational purposes only. Calculations may vary based on specific ingredients used.
- Calories: ~180
- Protein: 9g
- Carbohydrates: 1g
- Fat: 15g
- Fiber: 0g
Prep Time: 10 minutes | Cook Time: 12 minutes | Servings: 6
Final Thoughts
So there you have it—the story, the secrets, and the simple steps to creating the most talked-about appetizer at your next gathering. These Bacon Cheddar Deviled Eggs are more than just a recipe; they’re a testament to the fact that the best dishes often come from a little bit of love and a happy accident. They’re the perfect bridge between comforting tradition and exciting, bold flavor.
I hope this recipe brings as much joy to your table as it has to mine. So go ahead, give it a try, and get ready to accept your compliments. You’ve earned your title as party superstar!
Happy cooking,
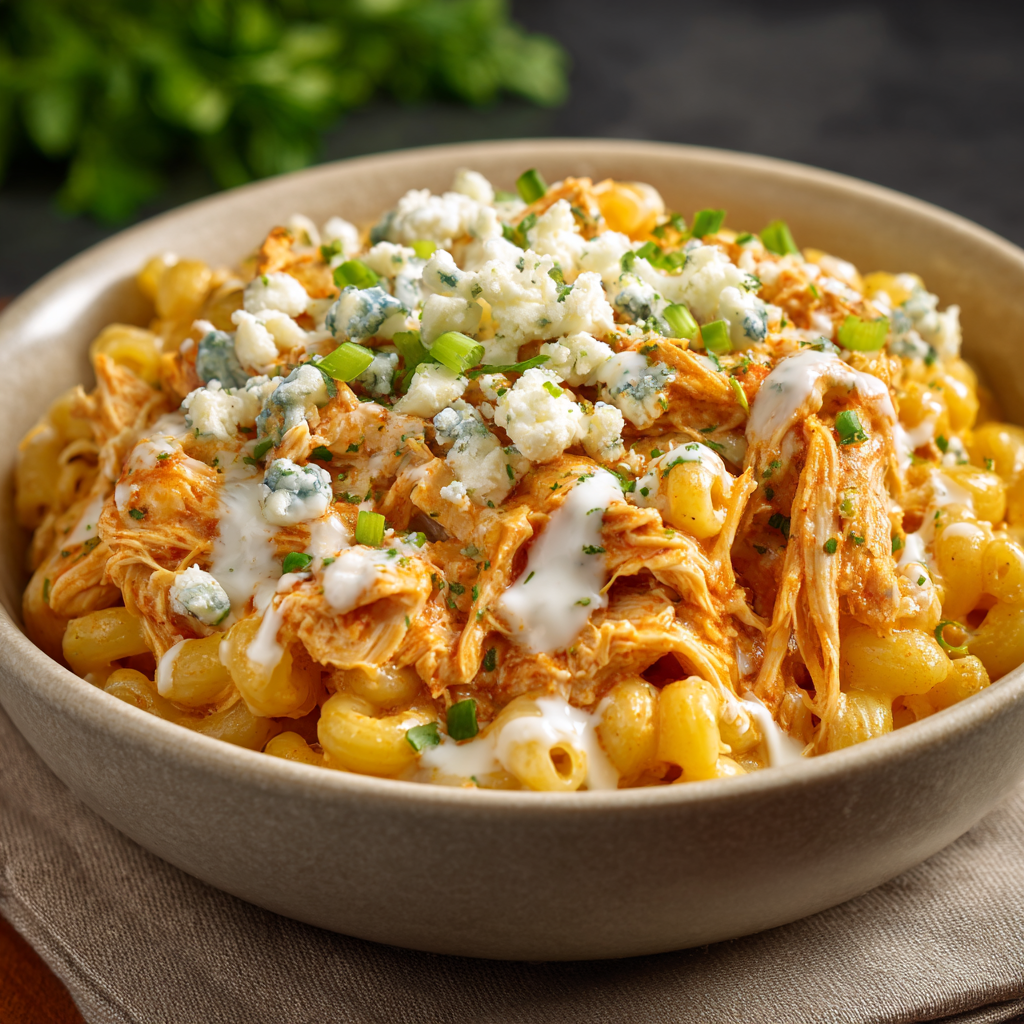
Buffalo Chicken Mac & Cheese
Your New Favorite Comfort Food Is Here: Buffalo Chicken Mac & Cheese
Hey there, friend! Come on in, pull up a stool, and let’s get something simmering on the stove. If your idea of a perfect night involves a big, cozy bowl of something cheesy, a side of good conversation, and the kind of meal that just makes everyone at the table happy, then you are officially in the right kitchen.
Today, we’re taking two of the greatest comfort foods of all time—spicy, tangy buffalo wings and gloriously gooey mac and cheese—and smashing them together into one unforgettable, show-stopping dish. This Buffalo Chicken Mac & Cheese is the ultimate crowd-pleaser. It’s the dish you make for game day when you want to be the hero of the party. It’s the dinner you whip up on a Wednesday because, well, you deserve it. It’s creamy, it’s bold, it’s got just the right amount of kick, and it’s layered with flavors that sing in perfect harmony.
I promise you, this isn’t a complicated, fussy recipe. It’s all about that from-the-heart, no-stress cooking I love so much. We’re using simple ingredients to create something truly magical. So, grab your favorite apron (the messy one with all the stories!), and let’s make a memory together. This is more than just mac and cheese; it’s a big, warm, cheesy hug with a spicy little kick.
The Night We Redefined Game Day
This recipe was born out of a happy accident, as the best ones often are. Picture it: my tiny apartment, years ago, during the biggest football game of the year. My friends were over, and I’d made a huge platter of buffalo wings and a giant pot of mac and cheese. Midway through the third quarter, chaos ensued. A rogue elbow (we’ll blame Steve) sent a few perfectly good wings tumbling right into the pot of mac!
Instead of mourning the loss, we all looked at each other, shrugged, and decided to mix it all together. The result was pure, unadulterated magic. The creamy cheese sauce clung to the spicy chicken, and the cool drizzle of ranch cut through the heat perfectly. It was an instant legend in our friend group. That messy, spontaneous mashup became a requested staple, and I’ve spent years refining it into the foolproof, baked-to-perfection recipe I’m sharing with you today. It’s a dish that reminds me that the best moments in life—and in the kitchen—are often the unplanned ones.
Gathering Your Flavor Dream Team
Here’s everything you’ll need to create this masterpiece. Don’t stress if you’re missing an item or two—I’ve included my favorite swaps and chef secrets right alongside each ingredient.
- 2 cups elbow macaroni, cooked and drained: The classic choice! Its small shape and curves are perfect for holding onto all that creamy, cheesy sauce. Feel free to use cavatappi, shells, or any short pasta you love. Pro tip: Cook it just to al dente! It will continue to cook a bit in the oven, and we don’t want mushy pasta.
- 1 1/2 cups shredded cooked chicken: This is your shortcut to a quick and easy win. A rotisserie chicken is your best friend here—it’s flavorful and ready to go. Leftover grilled or baked chicken works wonderfully, too. For a vegetarian twist, try chickpeas! They hold up great to the bold buffalo flavor.
- 1/2 cup buffalo sauce (like Frank’s RedHot): The star of the show! Frank’s is my go-to because it has that perfect balance of heat and tangy vinegar flavor. If you’re sensitive to spice, start with 1/3 cup and add more to taste. For a sweeter heat, try a buffalo-style barbecue sauce.
- 2 tablespoons butter: The rich, creamy base of our cheese sauce. Unsalted is best so you can control the seasoning, but salted will work in a pinch.
- 2 tablespoons all-purpose flour: This combines with the butter to make a roux, which is the magic thickener for our sauce. For a gluten-free version, a 1:1 gluten-free flour blend works perfectly.
- 2 cups milk: Whole milk will give you the richest, creamiest sauce, but 2% works just fine. For an extra-luxurious texture, sub in half-and-half or even a little heavy cream.
- 1 1/2 cups shredded cheddar cheese: I prefer sharp cheddar for its bold flavor that stands up to the buffalo sauce. Always, always shred your own cheese! Pre-shredded bags contain anti-caking agents that can make your sauce grainy and less smooth.
- 1/2 cup mozzarella or Monterey Jack cheese: These cheeses are the masters of meltiness, creating that incredible, stretchy, gooey texture we all crave. A blend is even better!
- Salt and pepper, to taste: Season as you go! Taste your sauce before adding the pasta and chicken, and adjust accordingly. Remember, the buffalo sauce and cheese will already add saltiness.
- Ranch or blue cheese dressing, for drizzling: The essential cool, creamy finish. I’m team ranch all the way, but if you’re a blue cheese purist, lean into it! This isn’t just a garnish—it’s a crucial flavor component.
- Optional: chopped green onions or crumbled blue cheese for topping: A little fresh green onion adds a pop of color and a fresh bite. Extra blue cheese crumbles are for the true enthusiasts.
Let’s Build Some Deliciousness: Step-by-Step
Okay, team! Let’s fire up the stove and get cooking. Follow these steps, and you’ll have a perfect, restaurant-quality dish right from your own kitchen.
Step 1: Prep Like a Pro. First, preheat your oven to 375°F (190°C). This is our insurance policy for getting that gorgeous, bubbly, golden-brown top later. Go ahead and cook your pasta according to the package directions for al dente. Once it’s done, drain it and set it aside. While that’s happening, toss your shredded chicken with the buffalo sauce in a separate bowl until every piece is beautifully coated. This little step ensures every single bite is packed with flavor.
Step 2: Master the Roux. In a medium saucepan, melt your 2 tablespoons of butter over medium heat. Once it’s foamy, sprinkle in the 2 tablespoons of flour. Now, whisk constantly for a full 1-2 minutes. You’re not just making paste; you’re toasting the flour and cooking out that raw taste. It should smell a little nutty and look like a smooth, pale paste. This is the foundation of your luxurious sauce!
Step 3: Create the Creamy Base. Here’s the key to a lump-free sauce: slowly add your milk, just a big splash at a time, whisking vigorously after each addition until it’s completely smooth before adding more. Once all the milk is incorporated, keep whisking occasionally until the mixture thickens enough to coat the back of a spoon. This should take about 5-7 minutes. Don’t rush it! Patience here makes all the difference.
Step 4: Get Cheesy! Turn the heat down to low. Now, gradually add your shredded cheddar and mozzarella (or Monterey Jack) cheeses, handful by handful, stirring with a wooden spoon until each addition is fully melted and incorporated before adding the next. This gradual method creates a smooth, emulsified sauce instead of a clumpy, broken one. Season with a pinch of salt and pepper, but remember to taste it first!
Step 5: Bring It All Together. In a large mixing bowl, combine your cooked pasta, the buffalo-coated chicken, and all that glorious cheese sauce. Gently fold everything together until every single piece of pasta is smothered in cheesy, spicy goodness.
Step 6: Bake to Perfection (Optional but Recommended!). Transfer the entire mixture into a greased 2-quart baking dish. Pop it into your preheated oven for 15-20 minutes, or until the edges are bubbling and the top is just starting to turn a lovely light golden brown. If you’re in a huge hurry, you can absolutely skip the bake and serve it right from the stove—it will still be delicious. But that bake gives it that extra layer of cozy, baked casserole texture that I absolutely adore.
Step 7: The Grand Finale. Take it out of the oven (carefully, it’s hot!) and let it sit for just 5 minutes. This helps the sauce set a little so it’s not super runny when you serve it. Right before serving, drizzle generously with ranch or blue cheese dressing and sprinkle with those fresh green onions or extra blue cheese crumbles. This is the moment!
How to Serve This Masterpiece
Presentation is part of the fun! I love serving this family-style, right from the baking dish in the middle of the table with the dressing and garnishes on the side so everyone can customize their bowl. For a full “wing night” experience, pair it with crisp celery sticks and carrot sticks—their cool, fresh crunch is the perfect contrast to the rich, hot pasta. It’s a complete meal in itself, but a simple side salad with a sharp vinaigrette can also help balance the richness beautifully.
Make It Your Own: Delicious Variations
The beauty of this recipe is how easily you can adapt it! Here are a few of my favorite twists:
- Extra Veggie Boost: Sauté some diced celery and carrots along with the roux for a hidden veggie crunch that nods to classic wing accompaniments.
- Bacon Bliss: Because bacon makes everything better. Fold in 1/2 cup of cooked, crumbled bacon with the chicken for a smoky, salty punch.
- “Buffalo Ranch” Everything: Stir 2 tablespoons of dry ranch seasoning mix into the cheese sauce for an even bigger flavor explosion.
- Lighten It Up: Use low-fat milk, reduce the cheese slightly, and add extra chicken for a higher-protein, slightly lighter version. It’s still incredibly satisfying.
- “Buffalo Cauli” Mac (Veggie!): Replace the chicken with roasted cauliflower florets. Toss them in buffalo sauce just like you would the chicken for a fantastic vegetarian alternative.
Chef Olivia’s Notebook
This recipe has been on quite a journey from that fateful game night spill to the dish it is today. I’ve learned a few things along the way! First, the type of cheese matters. I once tried to use all pre-shredded bagged cheese in a hurry, and the sauce was grainy and refused to melt smoothly. I learned my lesson—a few extra minutes spent shredding is always worth it.
Also, don’t be afraid of the buffalo sauce! The creaminess of the cheese and the cool dressing really tame the heat. It’s all about balance. And finally, this dish makes fantastic leftovers. The flavors meld together even more overnight. Reheat it gently in the microwave with a splash of milk to bring the sauce back to life.
Your Questions, Answered!
Q: My cheese sauce turned out grainy. What happened?
A: This is usually caused by two things: too high heat or pre-shredded cheese. Cheese sauces are delicate and prefer low, gentle heat. Also, pre-shredded cheese is coated in starches to prevent clumping, which can interfere with a smooth melt. For a foolproof sauce, shred your own cheese and add it off the heat or over very low heat.
Q: Can I make this ahead of time?
A: Absolutely! Assemble the entire dish (through step 5) up to a day in advance. Cover it tightly and store it in the fridge. When you’re ready, you may need to add a few minutes to the baking time since it will be cold from the fridge. You can also freeze it before baking for up to 2 months. Thaw in the fridge overnight before baking.
Q: It’s too spicy for my family! How can I tone it down?
A: No problem! Buffalo sauce potency can vary. Start by tossing the chicken with only 1/3 cup of sauce. You can always add more at the end. Another great trick is to use a milder wing sauce or even mix the buffalo sauce with a little barbecue sauce to sweeten it up.
Q: My sauce is too thick/thin. How can I fix it?
A: If your sauce is too thick after adding the cheese, simply whisk in a little more warm milk, a tablespoon at a time, until it reaches your desired consistency. If it’s too thin, let it simmer for a few more minutes to reduce and thicken, or make a quick slurry by mixing 1 teaspoon of cornstarch with 1 tablespoon of cold milk and whisking it into the simmering sauce.

Buffalo Chicken Mac & Cheese
Description
This dish is what happens when two comfort food legends—buffalo wings and mac & cheese—collide in the most delicious way. Creamy, cheesy pasta meets spicy buffalo chicken, cooled down with a drizzle of ranch or blue cheese. It’s bold, cozy, and guaranteed to win hearts, whether it’s game day or a simple Wednesday night.
Ingredients
-
2 cups elbow macaroni, cooked al dente
-
1 ½ cups shredded cooked chicken (rotisserie works great)
-
½ cup buffalo sauce (like Frank’s RedHot)
-
2 tbsp butter
-
2 tbsp all-purpose flour
-
2 cups milk (whole preferred)
-
1 ½ cups sharp cheddar, shredded
-
½ cup mozzarella or Monterey Jack, shredded
-
Salt & black pepper, to taste
-
Ranch or blue cheese dressing, for drizzling
-
Optional: chopped green onions or blue cheese crumbles for topping
Instructions
-
Prep pasta & chicken: Cook macaroni until al dente. Toss shredded chicken with buffalo sauce.
-
Make roux: Melt butter in a saucepan, whisk in flour, and cook 1–2 minutes until golden.
-
Add milk: Slowly whisk in milk, simmer until thickened.
-
Get cheesy: Reduce heat to low. Stir in cheeses, a handful at a time, until smooth. Season with salt & pepper.
-
Combine: Fold in pasta and buffalo chicken until fully coated.
-
Bake (optional): Transfer to greased dish and bake at 375°F (190°C) for 15–20 minutes until bubbly and golden.
-
Finish: Let rest 5 minutes. Drizzle with ranch or blue cheese, and top with green onions or extra cheese.
Notes
-
Swap chicken for roasted cauliflower for a vegetarian twist.
-
Add bacon crumbles for smoky richness.
-
Mix in dry ranch seasoning for extra flavor.
-
Use mild wing sauce or blend with BBQ for less heat.
Nutrition
- Calories: 510 cal Per Serving
- Fat: 28g
- Carbohydrates: 34g
- Fiber: 1g
- Protein: 28g
Nutritional Information*
Prep Time: 15 minutes | Cook Time: 20 minutes | Servings: 6
Calories: ~510 | Protein: 28g | Carbohydrates: 34g | Fat: 28g | Fiber: 1g
*Please note: This is an estimate based on the ingredients used and may vary depending on specific brands and substitutions.
Final Thoughts: More Than Just a Meal
So there you have it—the story, the secrets, and the steps to creating a dish that’s guaranteed to become a new favorite. This Buffalo Chicken Mac & Cheese is more than just a recipe; it’s an invitation to create your own happy accidents and cherished memories around the table. It’s proof that the most beloved dishes are often the ones made with a little bit of spontaneity and a whole lot of heart.
Don’t be afraid to make it your own. tweak the spice, load up the toppings, and share it with people who make you laugh. I hope this recipe finds its way into your regular rotation, bringing warmth, comfort, and a whole lot of flavor to your kitchen. Now, go grab that spoon and dig in. You’ve earned it.
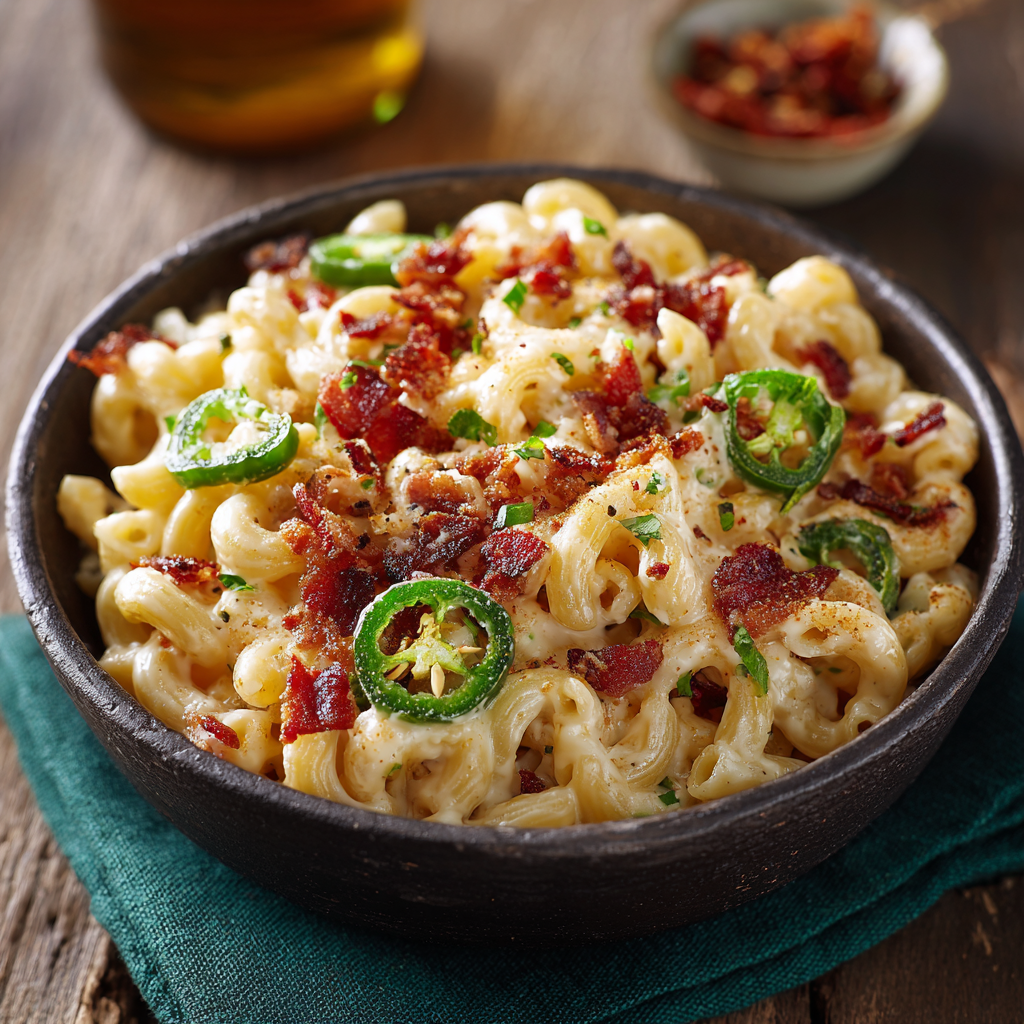
Bacon Jalapeño Mac & Cheese
Bacon Jalapeño Mac & Cheese: The Ultimate Comfort Food with a Kick
Hey there, friend! Come on in, pull up a stool, and let’s get something incredible bubbling on the stove. Is there anything in the world that smells more like home than mac and cheese? That rich, cheesy, oh-so-comforting aroma has a way of pulling everyone into the kitchen, noses first, with hopeful smiles. It’s the edible equivalent of a warm hug.
But what if we took that classic hug and gave it a little joyful nudge? What if we added a crispy, smoky crunch and a spicy, fresh zing that makes every single bite a tiny adventure? That’s exactly what we’re doing today with my all-time favorite twist: Bacon Jalapeño Mac & Cheese.
This isn’t just a side dish; it’s the main event. It’s the star of potlucks, the hero of game day spreads, and the secret weapon for those “I need something gloriously indulgent” weeknights. We’re talking tender pasta swirled in the creamiest, cheesiest sauce you’ve ever made, punctuated with crispy bacon bits and slices of jalapeño that offer just the right amount of heat. It’s bold, it’s comforting, and I promise, it’s going to become a regular in your recipe rotation. Let’s make a memory (and a fantastic mess) together!
The Game Day That Started It All
This recipe was born out of a happy accident, as the best ones often are. It was a chilly Sunday years ago, and my friends were coming over to watch the game. I had planned to make my standard, beloved mac and cheese—a recipe passed down from my grandma. But as I was prepping, I saw it: a leftover package of bacon from breakfast and a few bright green jalapeños winking at me from the veggie drawer.
On a whim, I decided to chop them up and throw them in. Why not, right? The result was nothing short of magical. The second that pan hit the table, the usual polite serving spoons were abandoned. It was a full-on fork fight for the last bite! The combination of the smoky, salty bacon with the fresh, spicy kick of the peppers against the creamy cheese base was a revelation. It was no longer just my grandma’s mac and cheese; it was our mac and cheese. Now, I can’t imagine making it any other way. It’s a dish that’s seen more victory dances than I can count, and it’s always a winner, no matter what the scoreboard says.
Gathering Your Flavor Dream Team
Here’s everything you’ll need to create this masterpiece. The beauty of this recipe is in its simplicity and the power of each ingredient. I’ve included my favorite tips and swaps so you can make it your own!
- 2 cups elbow macaroni, cooked and drained: The classic choice! Its small shape and hollow center are perfect for trapping all that cheesy goodness. Feel free to use cavatappi, shells, or any short pasta you love. Pro tip: Cook it just to al dente—it will soften a bit more when we bake it, and we don’t want mushy pasta!
- 6 slices bacon, chopped: This is our smoky, salty, crispy superstar. I use a good, thick-cut bacon for the best texture. For a twist, try smoked applewood bacon or even a peppered bacon. If you don’t eat pork, turkey bacon works, but for a vegetarian option, a teaspoon of smoked paprika added to the sauce will give you that smoky vibe.
- 2–3 fresh jalapeños, sliced (seeds removed for less heat): Don’t be scared! Removing the seeds and white membranes tames the heat significantly, leaving you with amazing flavor. For more fire, leave some seeds in. Always, always wash your hands thoroughly after handling them!
- 2 cups sharp cheddar cheese, shredded: Please, I beg you, shred your own cheese! Pre-shredded bags contain anti-caking agents that can make your sauce grainy and less smooth. Sharp cheddar gives us that classic, tangy base flavor we all crave.
- 1 cup pepper jack cheese, shredded: This is our secret weapon for a little built-in spice and incredible meltability. Its monterey jack base is so creamy. If you’re sensitive to spice, swap it for more cheddar or a creamy gouda.
- 2 tablespoons butter & 2 tablespoons all-purpose flour: This dynamic duo is our roux—the simple paste that will thicken our sauce into lush, velvety perfection. It’s the foundation of any great cheese sauce.
- 2 cups whole milk: Whole milk makes the sauce richest and creamiest. You can use 2% in a pinch, but I wouldn’t go lower. For extra decadence, substitute one cup of the milk with heavy cream!
- Salt and pepper, to taste: Season as you go! The bacon and cheese are already salty, so taste before you add more salt at the end.
Let’s Build the Creamy, Cheesy Magic
Ready to create something unforgettable? Follow these steps, and you’ll have a perfect pan of mac and cheese in no time. I’m right here with you, sharing all my little kitchen hacks!
- Prep Your Pasta & Preheat: First, get a large pot of well-salted water boiling and cook your elbow macaroni according to the package directions until it’s al dente. Drain it and set it aside. This is also a great time to preheat your broiler if you plan on giving the top a gorgeous, crispy finish later!
- Crispy Bacon & Jalapeño Tango: While the pasta cooks, let’s work on our flavor boosters. Grab a large skillet and cook your chopped bacon over medium heat until it’s beautifully crispy. Use a slotted spoon to remove the bacon and let it drain on a paper towel. Now, here’s a chef’s hack: leave about a tablespoon of that glorious bacon grease in the skillet. Toss your sliced jalapeños into the hot grease and sauté them for just 1-2 minutes until they’re slightly softened and fragrant. This quick cook tames their raw bite and infuses them with smoky bacon flavor. Transfer them to the plate with the bacon.
- Master the Roux: In a medium-sized saucepan, melt your 2 tablespoons of butter over medium heat. Once it’s melted and foamy, sprinkle in the 2 tablespoons of flour. Immediately start whisking! Cook this roux for a full 1-2 minutes. You’ll know it’s ready when it smells a bit nutty and takes on a very pale golden color. This step cooks out the raw flour taste and is key for a flawless sauce.
- Create the Velvety Base: Now, slowly pour in the milk, whisking constantly. I mean it—don’t stop whisking! This prevents any lumps from forming. Keep whisking as the mixture comes to a gentle simmer. It will slowly start to thicken. You’re looking for a consistency that nicely coats the back of a spoon. This is your béchamel sauce! Chef high-five! 👋
- The Big Cheese Melt: Reduce the heat to low. Now, gradually add your shredded cheeses, one handful at a time, whisking until each addition is fully melted and incorporated before adding the next. This patience rewards you with a smooth, emulsified sauce instead of a greasy, broken one. Once all the cheese is melted in, season with a pinch of black pepper. Hold off on the salt until the end because of the bacon.
- The Grand Finale: Take the sauce off the heat. Add your drained pasta, crispy bacon, and sautéed jalapeños to the cheesy sauce. Gently fold everything together until every single piece of pasta is gleaming with cheesy love. Taste it now and add salt only if you think it needs it.
- Optional (But Highly Recommended) Crispy Top: Pour the entire mixture into a buttered baking dish. Sprinkle a little extra cheese on top if you’re feeling fancy. Pop it under the broiler for just 2-3 minutes—watch it like a hawk!—until the top is bubbly and speckled with golden-brown spots. This adds an incredible textural contrast.
How to Serve This Masterpiece
This Bacon Jalapeño Mac & Cheese is a hearty star all on its own, but I love to serve it straight from the skillet or baking dish for that rustic, family-style feel. Let everyone dig in and serve themselves! To cut through the richness, a simple, crisp side salad with a tangy vinaigrette is absolute perfection. For a true comfort food feast, pair it with some juicy grilled chicken or piled-high pulled pork sandwiches. And don’t forget a cold beer, a chilled glass of white wine, or even a fizzy limeade—something to cool down that spicy kick!
Make It Your Own: Delicious Twists & Swaps
The fun doesn’t stop here! This recipe is a fantastic canvas for your creativity.
- Buffalo Chicken Style: Stir in 1-2 cups of shredded rotisserie chicken and ¼ cup of buffalo sauce along with the bacon and jalapeños. Top with crumbled blue cheese before broiling. Game day heaven!
- BBQ Bliss: Swap the jalapeños for ½ cup of chopped roasted poblano peppers. Fold in the bacon and peppers as usual, but also swirl in ⅓ cup of your favorite BBQ sauce for a sweet and smoky twist.
- Lobster Luxe: Feeling fancy? Replace the bacon with 1 cup of cooked, chopped lobster meat. Use a blend of white cheddar and gruyere cheese. The jalapeño adds a surprising and delicious contrast to the sweet lobster.
- Green Chile Swap: Not a jalapeño fan? Use a 4-ounce can of mild diced green chiles instead. You’ll get all the flavor with zero heat.
- Gluten-Free & Lighter: Use your favorite gluten-free pasta and swap the all-purpose flour for a 1:1 gluten-free flour blend. For a lighter version, use turkey bacon, low-fat milk, and reduce the cheese by about ¼ cup (it will still be delicious!).
Olivia’s Chef Notes & Kitchen Stories
This recipe has evolved so much from that first game day experiment. I’ve learned that shredding your own cheese is non-negotiable for the creamiest sauce. I’ve also learned the hard way to NEVER walk away from the broiler—R.I.P. to the slightly charred batch of 2018. We don’t talk about that one.
One of my favorite things about this dish is how it brings people together. It’s sparked more conversations and recipe swaps at my dinner table than almost any other meal. It’s a dish that says “let’s relax and enjoy each other’s company.” So have fun with it! Don’t stress about perfection. The little bits of bacon stuck to the pan? The cheese sauce that might seem too thick? It’s all part of the process. Cooking is about love and joy, not perfection. Now, go forth and create your own kitchen story with this recipe!
Your Questions, Answered!
Q: My cheese sauce turned out grainy/oily. What happened?
A: This usually happens if the heat is too high when melting the cheese or if you use pre-shredded cheese. Cheese melts best over low, gentle heat. Adding it all at once can also shock the sauce and cause it to break. Always add cheese off the heat or on the lowest possible setting, one handful at a time. Pre-shredded cheese contains starches that can seize up and make the sauce grainy.
Q: How can I make this ahead of time?
A: You can assemble the entire dish (through step 6) up to a day in advance. Cover it tightly and store it in the fridge. When you’re ready to bake, let it sit on the counter for 20-30 minutes to take the chill off, then bake at 350°F (175°C) for 20-25 minutes, until heated through, before finishing with the broiler.
Q: Can I freeze Bacon Jalapeño Mac & Cheese?
A: You can, but be warned that dairy-based sauces can sometimes separate a bit upon thawing and reheating. It will still taste good, but the texture might be slightly less creamy. Thaw overnight in the fridge and reheat in the oven, covered, at 350°F until hot.
Q: It’s too spicy for my family! How can I tone down the heat?
A> No problem! The heat primarily comes from the jalapeño seeds and membranes. Be sure to remove all of them before slicing. You can also swap the jalapeños for a small bell pepper for color with zero heat, or use the canned green chiles as mentioned in the variations.

Bacon Jalapeño Mac & Cheese
Description
Mac and cheese is already a hug in a bowl—but this version? It’s got personality. Smoky bacon, spicy jalapeños, and the creamiest cheese sauce come together to make every bite bold, comforting, and unforgettable. Perfect for game day, potlucks, or just a night when you need a little joy baked into your dinner.
Ingredients
-
2 cups elbow macaroni, cooked al dente
-
6 slices thick-cut bacon, chopped
-
2–3 fresh jalapeños, sliced (seeds removed for less heat)
-
2 cups sharp cheddar, shredded
-
1 cup pepper jack cheese, shredded
-
2 tbsp butter
-
2 tbsp all-purpose flour
-
2 cups whole milk (or 1 cup milk + 1 cup heavy cream for richness)
-
Salt & black pepper, to taste
Instructions
-
Cook pasta: Boil macaroni in salted water until al dente. Drain and set aside.
-
Crisp bacon: Fry bacon until crispy. Remove and set aside, keeping 1 tbsp of bacon fat in the skillet.
-
Sauté jalapeños: Add sliced jalapeños to bacon fat and sauté 1–2 minutes until fragrant. Remove and set aside.
-
Make roux: Melt butter in a saucepan, whisk in flour, and cook 1–2 minutes until golden.
-
Build sauce: Slowly whisk in milk. Simmer until thickened. Reduce heat and add cheeses one handful at a time, stirring until smooth. Season with pepper (salt if needed).
-
Combine: Fold in pasta, bacon, and jalapeños until evenly coated.
-
Optional bake: Transfer to a buttered dish, sprinkle with extra cheese, and broil 2–3 minutes until bubbly and golden.
Notes
-
Remove jalapeño seeds for mild heat—or swap for bell peppers.
-
Add shredded chicken + buffalo sauce for game-day flair.
-
Use poblano peppers + BBQ sauce for a smoky-sweet twist.
-
Make it vegetarian: skip bacon and add smoked paprika for flavor.
Nutrition
- Calories: 480 cal Per Serving
- Fat: 32g
- Carbohydrates: 30g
- Fiber: 1g
- Protein: 20g
Nutritional Information*
Per Serving (based on 6 servings):
Calories: ~480 | Protein: 20g | Carbohydrates: 30g | Fat: 32g | Fiber: 1g
*Please note: This is an approximate estimate based on the specific ingredients used. Values can vary significantly based on brands and portion sizes.
Prep Time: 15 minutes | Cook Time: 20 minutes | Servings: 4-6
Final Thoughts
So there you have it—the story, the secrets, and the step-by-step guide to creating a dish that’s so much more than the sum of its parts. This Bacon Jalapeño Mac & Cheese is a testament to the magic that happens when we take a beloved classic and fearlessly make it our own.
It’s a recipe built for sharing, for celebrating the small victories, and for turning an ordinary weeknight into something special. I hope it finds its way to your table and becomes a part of your own story, creating memories as warm and comforting as that first, perfect cheesy bite.
Now, I’d love to hear from you! Did your family do a happy dance? Did you add your own special twist? Share your kitchen adventures with me in the comments below. Happy cooking!
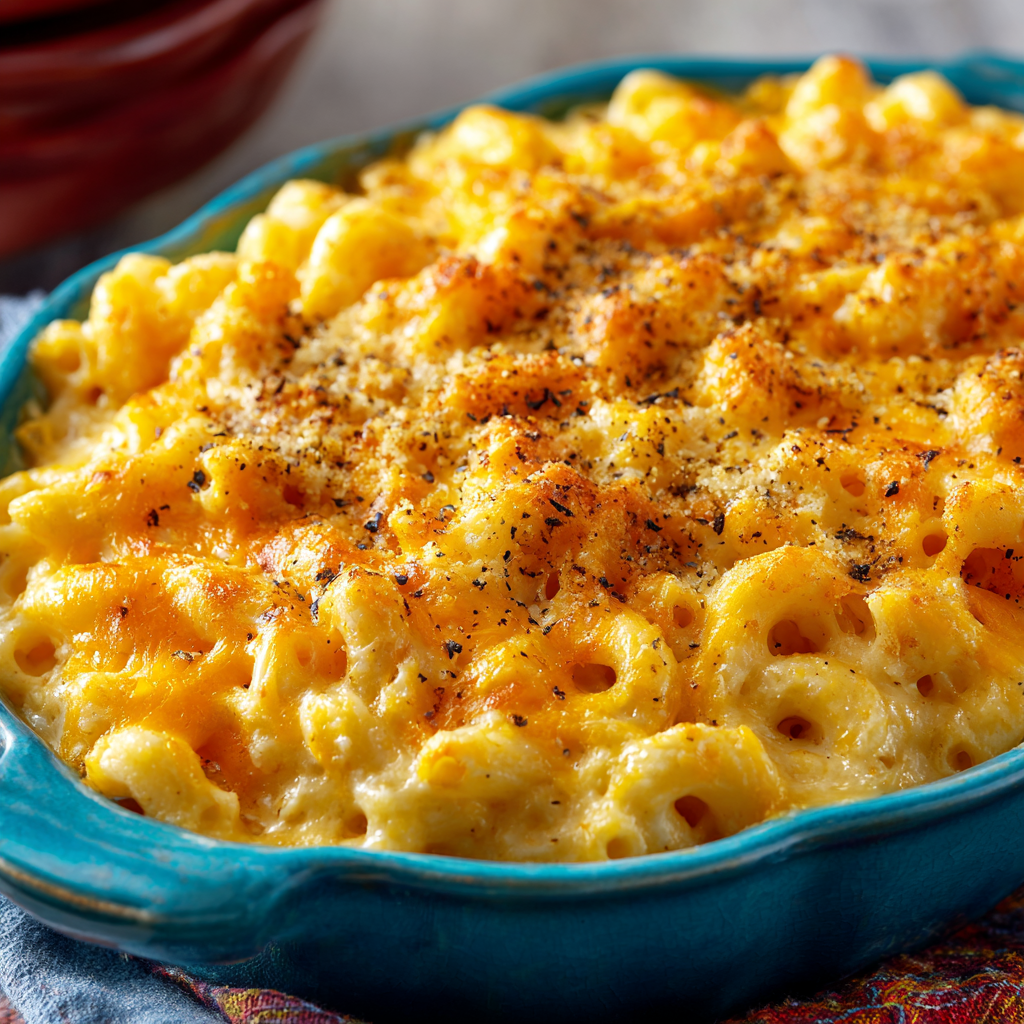
Southern-Style Mac & Cheese
Welcome to the Coziest Comfort Food on Earth
Hey there, friend! Come on in, pull up a stool, and let’s get something straight: mac and cheese is a love language. It’s a hug in a bowl, a celebration on a Tuesday, and the undisputed champion of the potluck table. But not all mac and cheese is created equal. Today, we’re not just making mac and cheese; we’re crafting a Southern-style masterpiece. This is the kind of dish that doesn’t just sit softly on your spoon—it stands up tall, golden-browned and proud, with a firm, sliceable texture that holds a secret: a rich, custardy, outrageously cheesy interior that will absolutely ruin you for any other version.
This recipe is a departure from the flour-based roux many of us know. Instead, we’re using a magical combination of eggs and evaporated milk to create a silky, set custard that envelops every single piece of pasta. It’s decadent without being overly heavy, complex in flavor yet stunningly simple to make. Whether you’re prepping for a holiday feast, need a show-stopping side for your next grill-out, or are simply answering the call for a serious comfort food night, this Southern-Style Mac & Cheese is your answer. So, tie on your favorite apron (the messy one with all the character), and let’s make some magic together.
The Recipe That Built a Family Tradition
This recipe isn’t just a list of ingredients to me; it’s a living, breathing scrapbook of my family’s story. I first had it at my husband’s grandmother’s house, a formidable and wonderful woman we all called Nana. She was a true Southern matriarch, and her kitchen was her throne room. I remember the first Thanksgiving I spent with them, nervous and wanting to impress. I offered to help in the kitchen, and Nana handed me a block of cheddar and a grater with a sly smile. “You grate, I’ll narrate,” she said.
As we worked, she didn’t just tell me measurements; she told me stories. She told me about making this for church suppers, about how her own mother swore by evaporated milk because during the war, fresh milk was a luxury. She showed me the exact golden hue to look for on top and imitated the sound the spoon should make when it taps that perfectly set surface. That day, I didn’t just learn a recipe; I was handed down a legacy. Now, every time I pull my own bubbling dish out of the oven, I think of Nana, and I feel that beautiful, unbroken thread of family, warmth, and shared love woven right into the cheese. It’s my honor to pass that feeling on to you.
Gathering Your Cheesy Arsenal
Simple ingredients, incredible results! Here’s what you’ll need and why each one is a superstar:
- 2 cups elbow macaroni, cooked and drained: The classic choice! Its small curves are perfect for trapping all that cheesy goodness. Chef’s Insight: Cook it just to al dente—it will continue to cook in the oven, and we don’t want mushy pasta! For a fun twist, try cavatappi or small shells.
- 2 cups sharp cheddar cheese, shredded (plus extra for topping): This is your flavor powerhouse. Sharp cheddar brings that tangy, robust depth that defines this dish. Pro Tip: Always shred your own cheese! Pre-shredded bags contain anti-caking agents that can make your sauce grainy and less smooth.
- 1 cup mild cheddar or Monterey Jack, shredded: This is our melting maestro. It provides a creamy, buttery base that balances the sharpness of the other cheddar. Monterey Jack is my go-to for its superb meltability.
- 1 can (12 oz) evaporated milk: The secret weapon! It’s rich, concentrated, and ultra-creamy, giving the custard its lush body without the fuss of a roux. Substitution: In a pinch, you can use whole milk, but the texture won’t be *quite* as rich or set.
- 2 large eggs: The backbone of our custard. They bind everything together and give the mac and cheese its signature firm, sliceable texture.
- 2 tablespoons butter, melted: For that unmistakable, rich flavor and to help achieve a gorgeous golden top.
- Salt and black pepper to taste: Essential for making all those beautiful flavors pop! Don’t be shy.
- Pinch of paprika (optional, for topping): This isn’t just for color! A little paprika adds a subtle, smoky warmth that complements the cheese beautifully.
Let’s Build the Magic, Step-by-Step
Ready? Let’s do this! Follow these steps for a foolproof, absolutely perfect result.
Step 1: Preheat your oven to 350°F (175°C). Grease a 2-quart baking dish (like an 8×8 or 9×9 square dish) with a little butter or non-stick spray. This is our cozy home for the mac and cheese, and we want to make sure every delicious bit comes out easily!
Step 2: In a large bowl, whisk together your eggs and evaporated milk until they are completely homogenous and pale yellow. You want to beat them really well—no stray egg whites floating around! This is the foundation of our custard. Chef’s Hack: Whisk in your salt and black pepper directly into this liquid mixture. This ensures the seasoning is evenly distributed throughout the entire dish, so every bite is perfectly seasoned.
Step 3: Stir in the melted butter. Now, it’s time for the main event! Fold in the cooked, drained macaroni and all of your shredded cheeses. Use a sturdy spatula and mix gently but thoroughly until every single piece of pasta is gleaming and coated in the creamy, cheesy mixture. It will look a little loose and wet—that’s exactly what we want! Trust the process.
Step 4: Pour this glorious mixture into your prepared baking dish and spread it out into an even layer. Now, for the pièce de résistance: top it with that extra handful of shredded sharp cheddar. This is what creates that incredible, crispy, cheesy “lid” we all fight over. Sprinkle just a whisper of paprika over the top for that beautiful color and hint of flavor.
Step 5: Bake uncovered for 30-35 minutes. You’re looking for the edges to be actively bubbling and the center to be set, not jiggly. The top should be a deep, golden brown. If you want more browning, you can pop it under the broiler for the last minute—but watch it like a hawk!
Step 6: This is the hardest but most important step: LET IT REST. Take the dish out of the oven and place it on a wire rack. Walk away for at least 10 minutes. I’m serious! This allows the custard to fully set, making it sliceable and giving it that iconic Southern texture. Cutting into it too soon will make it seem runny.
How to Serve This Masterpiece
This mac and cheese is a star no matter how you serve it! For a classic family-style presentation, bring the whole baking dish straight to the table and let everyone scoop out their own portion—it’s a beautiful, comforting sight. If you’re plating for a dinner party, use a large spoon or a small square-shaped server to get a perfect, clean slice. Place it beside some saucy BBQ ribs, a juicy fried chicken breast, or a pile of simple roasted green beans. It’s rich, so a bright, tangy side salad with a vinaigrette is the perfect contrast to all that cheesy goodness.
Make It Your Own! Delicious Variations
The beauty of this base recipe is how adaptable it is! Here are a few of my favorite ways to mix it up:
- The “Kitchen Sink”: Stir in ½ cup of cooked, crumbled bacon and ¼ cup of finely diced onion sautéed until soft.
- Lobster Luxe: Fold in 1 cup of chopped cooked lobster meat and swap the Monterey Jack for a creamy Gruyère for an incredibly decadent twist.
- Spicy Southwest: Add a 4oz can of diced green chiles (drained) and swap 1 cup of the cheese for a pepper jack blend. Top with crushed tortilla chips for crunch!
- Gluten-Free: Use your favorite gluten-free elbow macaroni and ensure all other ingredients are certified GF. The recipe works perfectly!
- Vegetable Boost: Add 1 cup of steamed, finely chopped broccoli florets or cauliflower for a hidden veggie boost the kids will never notice.
Chef’s Notes: A Few More Secrets
Over the years, I’ve made this recipe more times than I can count, and it’s evolved in tiny, delicious ways. I once, in a frantic pre-Thanksgiving hurry, forgot to mix the cheese into the custard and just layered it with the pasta. I poured the egg mixture over the top, crossed my fingers, and baked it. It worked! It was a bit more layered and cheesy, and now I sometimes do it on purpose for a different texture. Don’t be afraid to make mistakes—they often lead to happy accidents.
The single biggest game-changer for this recipe, and for any cheese sauce in your life, is to shred your own cheese. I know it’s an extra step, but I promise you, the incredibly smooth, velvety melt is worth every second of grating. It’s the difference between good mac and cheese and legendary mac and cheese. This dish also holds a special place in my heart because it was the first recipe my now-teenage nephew ever “cooked” with me (his job was sprinkling the paprika). Food is memory, my friends. Now go make some.
Your Questions, Answered!
Q: My mac and cheese turned out a bit dry. What happened?
A: The most common culprit is overbaking. Ovens can vary, so start checking at the 25-minute mark. The center should be set, but the very middle might still have a tiny, subtle jiggle—it will continue to set as it rests. Also, ensure you’re using the correct size baking dish; a dish that’s too large will cause a thinner layer that bakes faster and can dry out.
Q: Can I make this ahead of time?
A: Absolutely! You can assemble the entire dish up to a day in advance. Cover it tightly with plastic wrap and store it in the refrigerator. When you’re ready to bake, let it sit on the counter for 20-30 minutes to take the chill off, then bake as directed. You may need to add 5-10 minutes to the baking time since it’s starting from cold.
Q: Why did my cheese get oily or grainy?
A> This is almost always because of pre-shredded cheese. Those anti-caking agents (like potato starch) don’t melt well and can seize up, causing a grainy or oily texture. Shredding your own cheese from a block is the #1 way to prevent this and achieve that dreamy, smooth melt.
Q: I’m nervous about the eggs. Will it taste eggy?
A> Not at all! When baked properly, the eggs simply act as a binder and create the luxurious custard texture. You won’t taste “scrambled eggs” at all—just rich, creamy, cheesy perfection. The key is to whisk them very thoroughly into the evaporated milk so they are fully incorporated.

Southern-Style Mac & Cheese
- Total Time: 50 minutes
Description
Mac and cheese is comfort food at its finest—a dish that warms your soul and gathers everyone around the table. This Southern-style version skips the roux and leans on eggs and evaporated milk for a creamy, custardy center with a golden, sliceable top. It’s rich, nostalgic, and endlessly adaptable. Tie on your apron, grab your grater, and get ready to bake a dish that will be the star of any dinner table.
Ingredients
-
2 cups elbow macaroni, cooked al dente
-
2 cups sharp cheddar, shredded (plus extra for topping)
-
1 cup mild cheddar or Monterey Jack, shredded
-
1 can (12 oz) evaporated milk
-
2 large eggs
-
2 tbsp butter, melted
-
Salt & black pepper, to taste
-
Pinch of paprika (optional, for topping)
Instructions
-
Prep: Preheat oven to 350°F (175°C). Grease a 2-quart baking dish.
-
Mix custard: Whisk eggs and evaporated milk until smooth. Season with salt and pepper.
-
Combine: Stir in melted butter, cooked macaroni, and shredded cheeses. Mix well.
-
Assemble: Pour into dish. Top with extra cheddar and a sprinkle of paprika.
-
Bake: 30–35 minutes until bubbly and golden. The center should be set.
-
Rest: Let cool at least 10 minutes before serving for that perfect sliceable texture.
Notes
-
Use freshly shredded cheese for the creamiest melt.
-
Add crumbled bacon, sautéed onions, or broccoli for extra flavor.
-
For a luxe twist, swap in Gruyère or add lobster.
- Prep Time: 15 min
- Cook Time: 35 min
Nutrition
- Calories: 420cal Per Serving
- Fat: 25g
- Carbohydrates: 28g
- Fiber: 1g
- Protein: 18g
Nutrition Facts (per serving)
Calories: ~420 | Protein: 18g | Carbohydrates: 28g | Fat: 25g | Fiber: 1g
Prep Time: 15 minutes | Cook Time: 35 minutes | Servings: 6
Final Thoughts
So there you have it—more than just a recipe, but a piece of my family’s story and a testament to the power of a simple, well-made dish. This Southern-Style Mac & Cheese is a legacy of love, a lesson from Nana’s kitchen, and a promise of pure comfort. It’s forgiving enough for a weeknight but special enough for the holiday table. Remember, the secret isn’t just in the evaporated milk or the custard base; it’s in the joy of making it and the people you share it with. So go on, create your own memories around this dish. I have a feeling it’s going to become a legend in your home, too. Now, dig in!




