
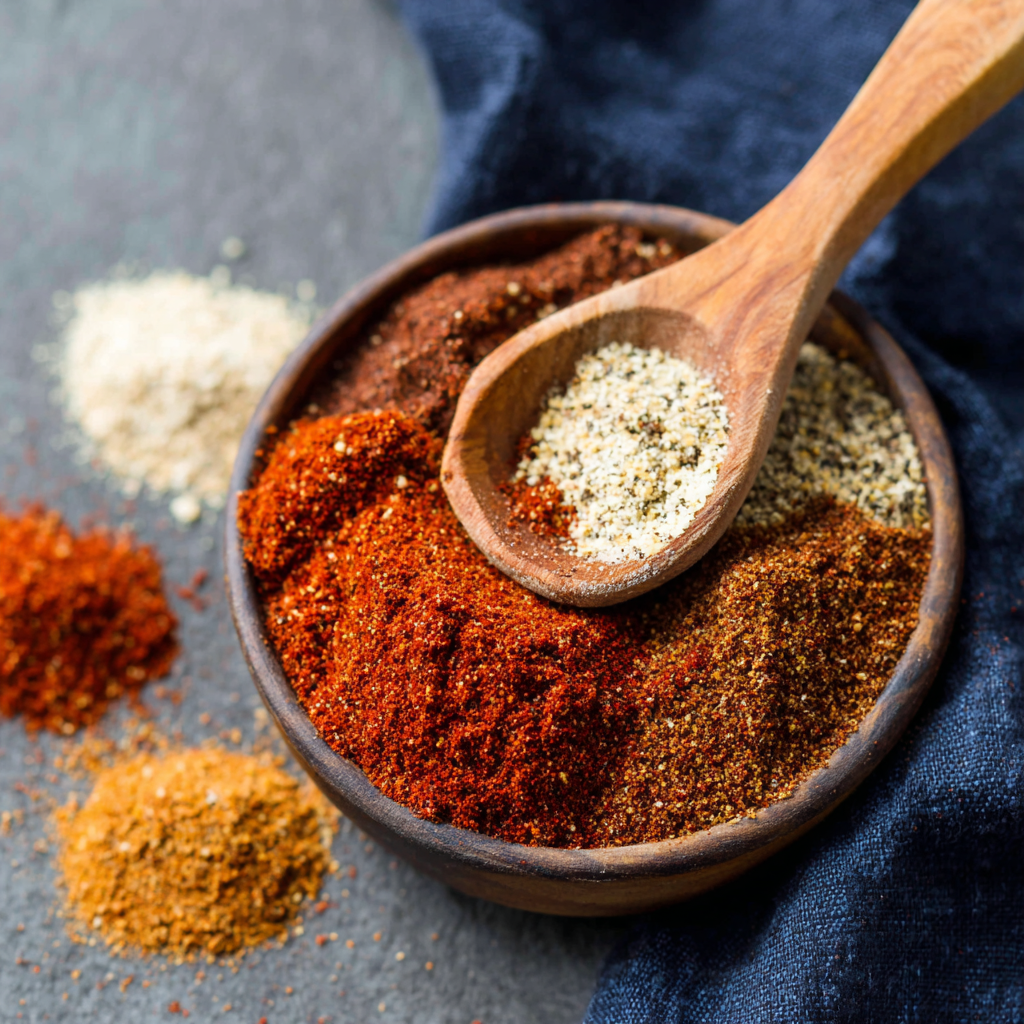
Best Chili Seasoning Mix Recipe
The Secret Weapon in Your Spice Cabinet: Why This Chili Seasoning Mix Wins Every Time
Hey there, friend! Can you smell it? That rich, smoky, soul-warming aroma that seems to hug the whole house? It’s the smell of a big, bubbling pot of chili on the stove. It’s the promise of a cozy night in, of game day high-fives, of a meal that somehow tastes even better the next day. For me, that feeling—that pure, uncomplicated joy—is one of the biggest reasons I love to cook.
But here’s a little secret I’ve learned over years of chili-making: the difference between a *good* chili and a truly *unforgettable* one doesn’t come from a mysterious ingredient or a complicated technique. Nope. It all comes down to one simple thing: the seasoning.
I know what you might be thinking. “Olivia, the store-bought packets are just so easy!” And you’re not wrong. But trust me on this: taking five minutes to whip up this homemade chili seasoning mix is a game-changer. We’re talking about a flavor that’s deeper, richer, and completely customizable to your taste buds. This isn’t just a blend of spices; it’s a carefully balanced symphony of smoky, spicy, and savory notes that will make your chili the star of the show every single time. So, let’s roll up our sleeves, get our aprons a little dusty (it’s a sign of a good time, I promise!), and create your new secret weapon.
A Chili Memory: More Than Just a Bowl of Beans
This recipe takes me right back to my first tiny apartment after college. My kitchen was about the size of a postage stamp, but it was *mine*. I decided to throw my very first “grown-up” dinner party, a casual affair with a few close friends. The menu? Chili, cornbread, and a whole lot of nervous excitement.
I’d only ever made chili with my mom, following her lead, and I realized I didn’t actually have her recipe written down. I called her in a panic. She laughed her wonderful, warm laugh and said, “Honey, I don’t have a recipe. I just add spices until it *tastes* like love.” While beautifully poetic, it wasn’t exactly helpful for my anxious, 22-year-old self! So, I started experimenting. I toasting cumin seeds in my little dry skillet, grinding them with a mortar and pestle (the fanciest thing I owned!), and mixing them with paprika and chili powder. The apartment filled with this incredible fragrance, and my nerves melted away. That chili was a hit. It wasn’t perfect, but it was *us*—a little messy, full of flavor, and made with so much heart. It taught me that the best recipes aren’t just about measurements; they’re about the stories and the confidence we build along the way.
Gathering Your Flavor Arsenal: The Ingredients
Okay, let’s talk spices! This is where the magic happens. I like to think of each ingredient as a member of a fantastic band—they’re all great on their own, but when they play together, they create something spectacular. Here’s what you’ll need to make enough seasoning for one large, glorious pot of chili (serving 6-8 hungry people).
- 3 tbsp Chili Powder: This is the lead singer of our band! It provides the foundational, earthy heat and that classic brick-red color. Not all chili powders are created equal—some are milder, some are spicier. I prefer a basic, well-rounded ancho chili powder for a deep, fruity base heat. Chef’s Insight: If you’re sensitive to spice, you can reduce this slightly, but it’s more about flavor than blistering heat.
- 2 tbsp Ground Cumin: The rhythm section! Cumin brings a warm, nutty, slightly smoky flavor that is absolutely essential to chili. It’s the soul of the dish. Substitution Tip: In a pinch, you could use ground coriander for a different, citrusy note, but it won’t be the same. Cumin is non-negotiable for me!
- 1 tbsp Smoked Paprika: This is the secret weapon that adds a incredible depth of smoky flavor without any actual smoke. It’s what makes people say, “Wow, did you smoke this for hours?!” Chef’s Insight: If you only have sweet paprika, your chili will still be delicious, but it will lack that smoky backbone. Smoked paprika is worth its weight in gold!
- 1 tbsp Garlic Powder & 1 tbsp Onion Powder: Think of these two as the backup vocalists, providing a savory, sweet foundation that rounds out all the other flavors. They blend seamlessly into the chili, ensuring every bite is packed with flavor. Substitution Tip: You can use granulated garlic or onion if that’s what you have—it’s very similar!
- 1 tsp Dried Oregano: A subtle, earthy herbaceous note that keeps the spice blend from being one-dimensional. It adds a little complexity in the background. Chef’s Insight: Rub the oregano between your palms as you add it to wake up the oils and release more flavor!
- 1 tsp Chipotle Chili Powder (or Cayenne): This is your controllable heat! Chipotle powder adds a smoky heat, while cayenne is a purer, sharper spice. Substitution Tip: Start with ½ a teaspoon if you’re heat-shy! You can always add more later. This is where you make the chili truly yours.
- 1 tsp Salt (½ tsp Black Pepper): The unsung heroes! Salt doesn’t just make things salty; it unlocks and enhances all the other flavors. Don’t skip it! The black pepper adds a tiny, pleasant sharpness.
- Optional Twist: 1 tsp Cocoa Powder: My favorite “secret” ingredient! Just a teaspoon of unsweetened cocoa powder doesn’t make the chili taste like chocolate. Instead, it adds a rich, earthy depth that makes the flavor incredibly complex and satisfying. Think of it like adding a pinch of coffee to a chocolate cake—it just makes it better.
Let’s Make Magic: Mixing Your Seasoning
This is the easiest part of your entire cooking day, I promise. We’re simply combining everything. But even here, I have a few little tricks to make it even better.
- Gather Your Tools. You’ll need a small to medium-sized bowl and a whisk or a fork. Even easier? A small glass jar with a tight-fitting lid. I save all my empty spice jars and pickle jars for moments like this! Chef’s Hack: If you’re using a jar, you can add all the ingredients, screw the lid on tightly, and give it a vigorous shake. No mess, no fuss!
- Combine All Spices. Add all of your measured spices—the chili powder, cumin, smoked paprika, garlic powder, onion powder, oregano, chipotle powder, salt, pepper, and that magical cocoa powder if you’re using it—directly into the bowl or jar. Chef’s Commentary: I love this moment. Seeing all those beautiful, vibrant colors come together is like watching a sunset in a bowl. It’s already starting to smell amazing, right?
- Mix (or Shake!) Until Fully Blended. If you’re using a bowl, take your whisk or fork and stir, stir, stir until every spice is evenly distributed. You shouldn’t see any clumps of a single color. If you’re using a jar, channel your inner bartender and shake it for a good 30 seconds. The goal is a uniform, deep reddish-brown color. Chef’s Tip: Give it a little smell. That right there is the smell of victory. It’s bold, smoky, and inviting. This is your homemade chili seasoning mix! You did it!
- Store or Use Immediately. This batch is perfectly sized for one large pot of chili (about 2 pounds of meat plus your beans, tomatoes, etc.). You can add it all at once when you brown your meat, or you can store the extra for later. Chef’s Hack: I always, always double or triple this recipe. Having a ready-to-go jar of this mix in my pantry is a weeknight lifesaver.
Bowls of Comfort: How to Serve Your Masterpiece
Chili is the ultimate casual food, so have fun with it! Ladle it into big, wide bowls so you have plenty of room for toppings. I’m a firm believer that the toppings are what make chili a personalized experience. Set up a little “chili bar” with bowls of shredded sharp cheddar cheese, a big dollop of cool sour cream or Greek yogurt, sliced jalapeños for the brave, a handful of crunchy tortilla chips or Fritos, and a generous sprinkle of fresh chopped cilantro or green onions. Don’t forget a side of warm cornbread or a fluffy baked potato to soak up every last bit of that incredible sauce.
Make It Your Own: Delicious Recipe Variations
This blend is incredibly versatile. Once you’ve mastered the base, try one of these fun twists!
- Texas-Style: Omit the oregano and use only 1 tbsp of chili powder. Add 2 tsp of ground coffee for an intense, robust flavor that pairs perfectly with beef.
- Sweet & Smoky: Add 1 tbsp of brown sugar to the mix for a sweet contrast to the heat, perfect for a Cincinnati-style chili.
- White Chicken Chili: Swap the chili powder for 2 tbsp of ground coriander and add 1 tsp of dried sage. It creates a completely different, but equally delicious, flavor profile for a white bean and chicken chili.
- Kickin’ Hot: Double the chipotle chili powder and add ½ tsp of red pepper flakes for those who like to sweat a little.
- Salt-Free Version: Simply omit the salt. It’s perfect for those watching sodium intake, and you can add salt to taste at the table.
Olivia’s Chef Notes: A Few Parting Thoughts
This recipe has been a living, evolving thing in my kitchen. The cocoa powder addition was a complete accident—I was making brownies and chili at the same time, and a little cocoa accidentally found its way into the spice bowl. Best mistake ever! I’ve learned that the best way to use this mix is to trust your palate. I always give my chili a taste about halfway through cooking and adjust. Sometimes it needs another pinch of salt, sometimes a dash more cumin. You are the boss of your pot!
And a funny story: I once brought a jar of this to a friend’s potluck. She, being the wonderful over-preparer she is, had already made her chili… with three store-bought packets. It was… salty. I discreetly added about two tablespoons of my mix to the pot and gave it a stir. An hour later, people were raving about how her chili was “the best they’d ever had.” We still laugh about it. The power of a good blend!
Your Chili Seasoning Questions, Answered!
Q: How long does this homemade chili seasoning last?
A: Because all the spices are already dried and ground, this mix will stay fresh and potent for up to 6 months if stored in an airtight container in a cool, dark place (not right next to the stove!). The flavors will be brightest in the first 3 months.
Q: My chili tastes a little flat. What did I do wrong?
A: This is common! The most likely culprit is not enough salt. Salt is a flavor enhancer. Try adding another ½ teaspoon of salt to the pot and letting it simmer for 10 more minutes. If it’s still flat, it might need a hit of acidity—a tablespoon of lime juice or apple cider vinegar can work wonders to brighten everything up.
Q: Can I make this with whole spices?
A: Absolutely, and it will be incredible! Toast whole cumin seeds, dried chilies (like ancho or guajillo), and peppercorns in a dry skillet until fragrant. Let them cool, then grind them in a spice grinder with the garlic and onion powder (which you’d still use pre-ground). The flavor will be phenomenally fresh and vibrant.
Q: It’s too spicy! How can I fix it?
A: Don’t worry, we can fix it! The best way to counter heat is with fat and sweetness. Stir in a tablespoon of brown sugar or a extra dollop of sour cream directly into the pot. This will help balance the spice level for everyone.
Print
Best Chili Seasoning Mix Recipe
Description
The Secret Weapon in Your Spice Cabinet: Homemade Chili Seasoning Mix
A good chili starts with great seasoning. This homemade blend is smoky, spicy, savory, and completely customizable. Forget the store-bought packets—this mix turns any pot of chili into a crowd-pleaser.
Ingredients
-
3 tbsp chili powder
-
2 tbsp ground cumin
-
1 tbsp smoked paprika
-
1 tbsp garlic powder
-
1 tbsp onion powder
-
1 tsp dried oregano
-
1 tsp chipotle chili powder (or cayenne)
-
1 tsp salt
-
½ tsp black pepper
-
Optional: 1 tsp unsweetened cocoa powder (adds depth without sweetness)
Instructions
-
Gather Your Tools
-
Small bowl and whisk, fork, or a jar with a tight lid.
-
-
Combine All Spices
-
Add all measured spices into your bowl or jar.
-
-
Mix or Shake
-
Stir thoroughly until evenly blended or shake the jar vigorously for 30 seconds. Look for a uniform deep reddish-brown color.
-
-
Store or Use
-
Use immediately in chili or store in an airtight container in a cool, dark place for up to 6 months. Best flavor in the first 3 months.
-
Optional: Double or triple the batch for a ready-to-go pantry staple.
-
Notes
-
Salt & Brightness: If chili tastes flat, add more salt or a splash of lime juice/apple cider vinegar.
-
Heat Adjustment: Reduce chipotle/cayenne if sensitive to spice; counter excess heat with a bit of brown sugar or sour cream.
-
Whole Spices: Toast whole cumin seeds, dried chilies, and peppercorns for extra fresh flavor, then grind with garlic/onion powders.
-
Secret Ingredient: Cocoa powder adds earthy depth, making flavors richer without tasting like chocolate.
Nutrition
- Calories: 20 cal Per Serving
- Fat: 1g
- Carbohydrates: 4g
- Protein: 1g
Nutritional Information*
*This is an approximate estimate for one tablespoon of the dry seasoning mix. Values will vary based on specific ingredient brands.
Per Tablespoon (approx.): Calories: 20 | Fat: 1g | Carbohydrates: 4g | Protein: 1g
There you have it! Your guide to a chili seasoning mix that will become a staple in your kitchen. I can’t wait for you to try it and make it your own. Tag me on social media with your creations—I love seeing your cozy kitchen moments!
With love and a pinch of spice,
Final Thoughts
So, there you have it. Your journey to the most flavorful, soul-satisfying chili you’ve ever made doesn’t start with a special cut of meat or a slow cooker—it starts right there in your spice cabinet. This little jar of homemade magic is more than a convenience; it’s an invitation to be the architect of your own flavor, to create something that truly tastes like home. So go ahead, give it a try. Whip up a batch, breathe in that incredible aroma, and get ready for the compliments to roll in. You’ve just unlocked a secret that will make every pot of chili a reason to celebrate. Happy cooking!
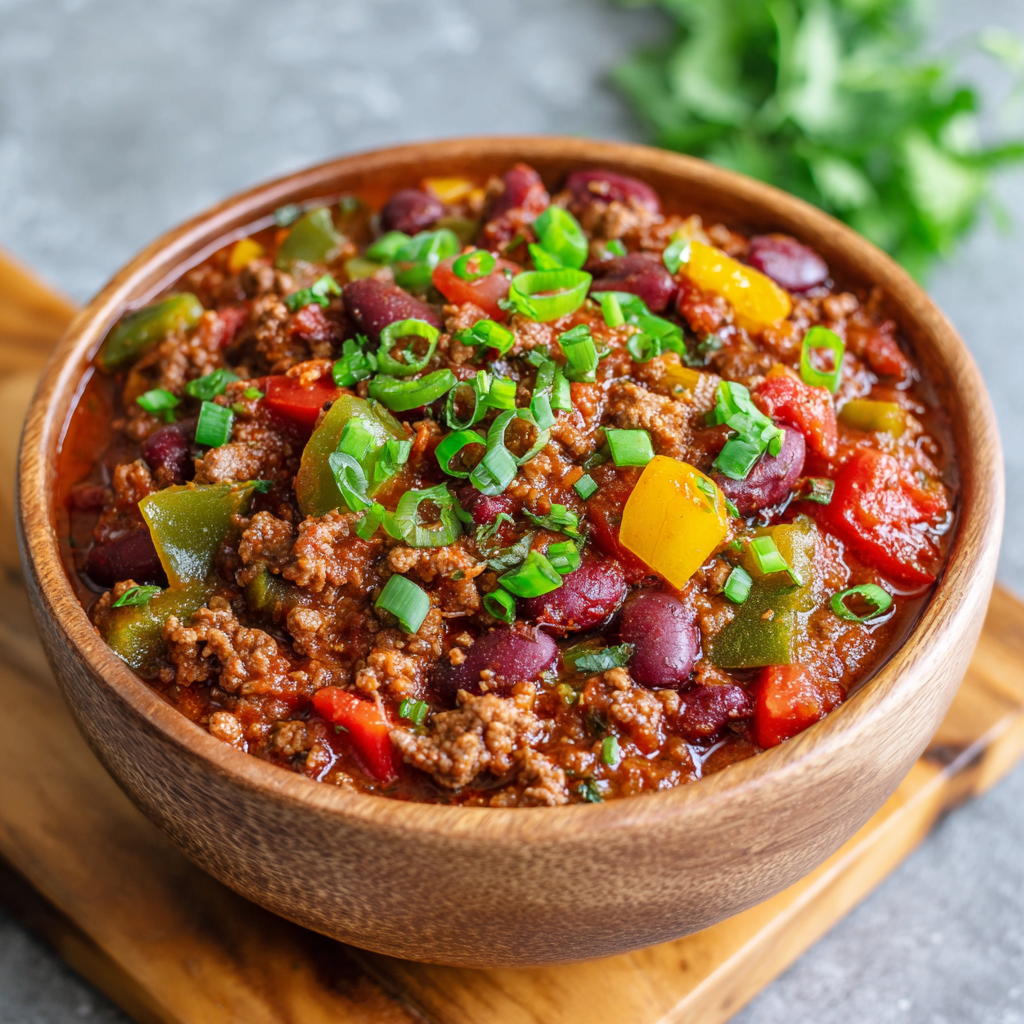
The Best Hearty Chili
The Ultimate Cozy Bowl: My Best Hearty Chili Recipe
Hey there, friend! Come on in, grab a wooden spoon, and get ready to fill your kitchen with the most incredible aroma. Is there anything more comforting than a big, bubbling pot of chili on the stove? It’s the edible equivalent of a warm hug—a promise of good food and even better company. Whether you’re prepping for a rowdy game day crowd, a quiet family dinner, or stocking your freezer with ready-made meals, this recipe is your new secret weapon.
This isn’t just any chili recipe. This is my Best Hearty Chili—a bold, beautiful, and deeply satisfying take on an old-fashioned classic. We’re talking about deep, smoky spices, a touch of sweetness to perfectly balance the heat, and a richness that comes from a few surprise ingredients you might not expect. I’ve doubled the batch because, let’s be real, leftovers are the best part! This chili is a labor of love that actually gets better as the flavors mingle overnight. My goal is to make you feel like a chili champion, no fancy skills required. So, tie on your favorite apron (the messy one tells the best stories), and let’s make some magic happen.
The Chili That Started It All: A Football Sunday Memory
This particular chili recipe holds a special place in my heart because it’s tied to one of my favorite kitchen memories. Years ago, when my husband and I first moved into our house, we decided to host our first big Football Sunday. I was determined to make the perfect chili—a massive pot that would feed all our friends and make our new house feel like a home. I remember the nervous excitement, the sound of the game on in the background, and the intense focus as I tasted and adjusted the spices.
The moment of truth came when our first friend took a bite. His eyes went wide, and he immediately asked for the recipe. Then another friend did the same. That pot of chili was gone by halftime, and the empty bowls were the best compliment I could have asked for. It wasn’t just about the food; it was about the laughter, the camaraderie, and the feeling of bringing people together over something I created with my own two hands. That’s the power of a great chili recipe. It’s more than a meal; it’s a memory maker.
Gathering Your Chili Dream Team: The Ingredients
Here’s everything you’ll need to create this flavor masterpiece. Don’t be intimidated by the list—a lot of these are pantry staples! I’ve included some chef insights and substitutions so you can make this recipe your own.
- 4 lbs ground beef or turkey (or a mix): I often use a 50/50 mix for a lighter but still hearty result. For a richer flavor, try ground chuck. Chef’s Insight: Don’t skip draining the excess fat after browning—it prevents the chili from being greasy.
- 4 small green peppers (about 4 cups diced): They add a fresh, slightly bitter counterpoint to the rich tomatoes. Feel free to use a mix of colors for visual pop!
- 2 medium yellow onions (about 3 cups diced): The sweet, savory foundation of our flavor base. Yellow onions are perfect for long cooking times.
- 4 cans (15 oz each) diced tomatoes: Use the kind with their juices—that liquid is flavor gold! Fire-roasted diced tomatoes are a fantastic upgrade for extra smokiness.
- 2 cans (15 oz each) tomato sauce & 2 cans (6 oz each) tomato paste: This trio of tomato products creates the perfect texture and depth. The paste is crucial for thickening and adding concentrated tomato flavor.
- 30 oz water (about 2 cans): Simple, but necessary to bring it all together. You can also use beef broth for an even richer base.
- 4 cans (15 oz each) kidney beans, drained and rinsed: The classic chili bean! Rinsing them removes the excess sodium and that starchy can liquid. Substitution Tip: Pinto beans or black beans work wonderfully too.
The Flavor Powerhouse (The Spice Blend)
- 6 tbsp chili powder: The main event! This blend of spices is the soul of the dish.
- 6 tbsp cumin: My favorite spice—it adds that warm, earthy, quintessential chili flavor.
- 4 tbsp garlic powder & 4 tbsp onion powder: These provide a consistent, all-over savory flavor that complements the fresh aromatics.
- 2 tbsp paprika: For color and a gentle, sweet pepper flavor.
- 2 tsp chipotle powder & 1 tsp cayenne pepper: This is where the heat and smoke come in! Start with less if you’re sensitive to spice—you can always add more later. The chipotle powder is a non-negotiable for that smoky note.
- 1 tbsp salt & 2 tsp white pepper: Salt is essential for making all the other flavors pop. White pepper has a sharper, more direct heat than black pepper.
Secret Weapon Twists for More Flavor
- 2 roasted red peppers, diced: They add a incredible smoky sweetness. I use the jarred kind for ease!
- 1 tbsp cocoa powder or a square of dark chocolate: Don’t knock it ’til you’ve tried it! This is my favorite trick. It doesn’t make the chili taste like chocolate; it adds a deep, rich, almost mole-like complexity that balances the acidity of the tomatoes.
- 2 tbsp apple cider vinegar: Added at the end, this little splash brightens everything up and cuts through the richness.
- 1 cup frozen corn: Tossed in during the last 5 minutes, it adds a pop of sweetness and great texture.
- Fresh cilantro & shredded cheddar cheese (for topping): The fresh, cool, and creamy finish that makes each bowl perfect.
Let’s Get Cooking: Your Step-by-Step Guide
Okay, now for the fun part! Let’s walk through this together. I’ll be with you every step of the way with my best tips and hacks.
- Cook the Meat: In your largest stockpot or Dutch oven, brown the ground beef or turkey over medium heat. Use your spoon to break it up into crumbles as it cooks. Once it’s no longer pink, carefully drain off the excess fat. This is a key step for a chili that’s hearty, not greasy! Chef’s Hack: If you’re using a particularly lean meat and don’t have much fat to drain, add a tablespoon of olive oil to the pot before you start to help the browning process.
- Soften the Veggies: Add your diced onions and green peppers right into the pot with the meat. Cook them together for about 5-7 minutes, stirring occasionally, until the onions become translucent and the peppers start to soften. You’re building your flavor foundation here!
- Wake Up the Spices: This is the most important step for depth of flavor! Add all of your spices—chili powder, cumin, paprika, chipotle, cayenne, garlic powder, onion powder, salt, and white pepper—directly onto the meat and veggie mixture. Stir constantly for about 1 minute until you can really smell the spices. Toasting them like this unlocks their essential oils and makes the flavor infinitely richer.
- Build the Base: Now, pour in the diced tomatoes (with their juices), tomato sauce, and tomato paste. Add the water (or broth) and give everything a really good stir, making sure to scrape up any tasty browned bits from the bottom of the pot. Those bits are pure flavor!
- Bring It All Together: Stir in the drained kidney beans, your diced roasted red peppers, and the secret weapon—the cocoa powder or dark chocolate. If you’re using the optional baking soda (which is a great trick if tomatoes sometimes bother your stomach), add it now. Bring the pot to a lively boil.
- The Simmering Magic: Once boiling, immediately reduce the heat to low, cover the pot, and let it simmer gently for 30-40 minutes. Stir it occasionally to prevent sticking. This slow simmer is where the magic happens, allowing all the flavors to marry and deepen. If you’re adding corn, stir it in during the last 5 minutes of cooking so it stays bright and crisp.
- The Final Touch: Right before serving, stir in the apple cider vinegar. This last-minute addition adds a necessary brightness that lifts the entire dish. Taste and adjust seasoning—maybe it needs another pinch of salt? Now, ladle that beautiful, steaming chili into bowls and load up with your favorite toppings!
How to Serve Your Masterpiece
Presentation is part of the fun! I love serving this chili in deep, wide bowls. The perfect bowl starts with a ladleful (or two!) of chili, then gets topped with a generous handful of shredded sharp cheddar cheese, a big dollop of cool sour cream or Greek yogurt, a sprinkle of fresh chopped cilantro, and maybe a few slices of fresh jalapeño for those who like it extra spicy. Don’t forget the sides! A slice of crusty cornbread, a handful of tortilla chips for scooping, or a simple side salad are all perfect companions.
Make It Your Own: Delicious Recipe Variations
This recipe is a fantastic canvas. Get creative and try one of these twists!
- Smoky BBQ Twist: Swap one can of tomato sauce for 1 ½ cups of your favorite BBQ sauce. It adds a sweet and tangy kick that’s always a crowd-pleaser.
- Pumpkin Power (Fall Favorite): Stir in one cup of pure pumpkin puree along with the tomatoes. It adds a subtle sweetness, velvety texture, and a boost of nutrients.
- White Chicken Chili: For a completely different vibe, use shredded rotisserie chicken, great northern beans, and green chiles instead of tomatoes. Use chicken broth and season with cumin and oregano.
- Vegetarian/Vegan Delight: Skip the meat and use a mix of lentils and extra beans (like black and pinto). Use vegetable broth and top with vegan cheese and avocado.
- Three-Bean Extravaganza: Use one can each of kidney beans, black beans, and pinto beans for a beautiful and textured mix.
Chef’s Notes: A Few Parting Thoughts
This recipe has evolved so much over the years. The cocoa powder was a happy accident one day when I was out of brown sugar and grabbed the nearest sweet-looking powder. The apple cider vinegar was a tip from my grandma, who swore by a splash of acid in all her stews. The best part about cooking is making a recipe your own. Don’t be afraid to taste as you go and adjust the spices to suit your palate. I promise, the longer this chili sits (in the pot or in the fridge), the better it gets. The flavors have a party overnight, and the result is even more incredible the next day. It freezes beautifully for up to 3 months, making it my go-to meal prep hero. I hope this recipe finds its way into your regular rotation and creates many happy memories around your table, just like it has around mine.
Your Chili Questions, Answered!
Here are answers to some common questions to ensure your chili success.
- Q: My chili is too thin! How can I thicken it?
A: No problem! The easiest way is to let it simmer uncovered for an additional 10-15 minutes, which will allow some of the liquid to evaporate. You can also create a quick slurry by mixing 2 tablespoons of cornstarch with ¼ cup of cold water until smooth. Stir this into the simmering chili, and it will thicken up in just a few minutes. - Q: I accidentally made it too spicy. How can I tone down the heat?
A: It happens to the best of us! The fastest fix is to add a bit of sweetness to balance the heat. Stir in a tablespoon of brown sugar, maple syrup, or even a teaspoon of honey. Adding a can of drained, plain black beans or a extra can of diced tomatoes will also dilute the spiciness. - Q: Can I make this in a slow cooker or Instant Pot?
A: Absolutely! For the Slow Cooker: Follow steps 1-3 in a skillet on the stove (browning meat, softening veggies, toasting spices). Then, transfer everything to your slow cooker, add the remaining ingredients (except vinegar and corn), and cook on LOW for 6-8 hours or HIGH for 3-4 hours. Stir in vinegar and corn at the end. For the Instant Pot: Use the Sauté function for steps 1-3. Add everything else (except vinegar and corn), secure the lid, and cook on High Pressure for 15 minutes. Let the pressure release naturally for 10 minutes, then do a quick release. Stir in the final touches. - Q: Why add baking soda?
A: This is an optional trick for those who find tomatoes too acidic. A small amount of baking soda neutralizes some of the acidity, resulting in a smoother, mellower flavor. You won’t taste the baking soda itself.
The Best Hearty Chili
- Total Time: 55 min
Description
Nothing says comfort like a big, bubbling pot of chili. This hearty, smoky, slightly sweet chili is perfect for family dinners, game days, or freezing for later. Leftovers taste even better the next day, and it’s freezer-friendly for up to 3 months.
Ingredients
Meat & Veggies:
-
4 lbs ground beef, turkey, or a 50/50 mix
-
4 small green peppers, diced (~4 cups)
-
2 medium yellow onions, diced (~3 cups)
Tomato Base:
-
4 cans (15 oz each) diced tomatoes (with juice)
-
2 cans (15 oz each) tomato sauce
-
2 cans (6 oz each) tomato paste
-
30 oz water (or beef broth for richer flavor)
Beans:
-
4 cans (15 oz each) kidney beans, drained and rinsed
Optional substitutions: Pinto or black beans
Spice Blend:
-
6 tbsp chili powder
-
6 tbsp cumin
-
4 tbsp garlic powder
-
4 tbsp onion powder
-
2 tbsp paprika
-
2 tsp chipotle powder
-
1 tsp cayenne pepper (adjust to taste)
-
1 tbsp salt
-
2 tsp white pepper
Secret Flavor Boosters:
-
2 roasted red peppers, diced (jarred is fine)
-
1 tbsp cocoa powder or 1 square dark chocolate
-
2 tbsp apple cider vinegar (added at the end)
-
1 cup frozen corn (added last 5 minutes)
Optional Toppings:
-
Shredded cheddar cheese
-
Sour cream or Greek yogurt
-
Fresh cilantro
-
Sliced jalapeños
Instructions
1. Cook the Meat
-
In a large stockpot or Dutch oven, brown the ground meat over medium heat.
-
Break it into crumbles and drain excess fat.
2. Soften the Veggies
-
Add diced onions and green peppers to the pot.
-
Cook 5–7 minutes until onions are translucent and peppers soften.
3. Toast the Spices
-
Sprinkle in all spices (chili powder, cumin, paprika, chipotle, cayenne, garlic powder, onion powder, salt, white pepper).
-
Stir 1 minute until fragrant.
4. Build the Base
-
Add diced tomatoes, tomato sauce, tomato paste, and water/broth.
-
Stir, scraping browned bits from the bottom.
5. Add Beans & Secret Ingredients
-
Stir in drained beans, roasted red peppers, and cocoa/dark chocolate.
-
Optional: Add ¼ tsp baking soda to reduce acidity.
-
Bring to a boil.
6. Simmer & Develop Flavor
-
Reduce heat to low, cover, and simmer 30–40 minutes, stirring occasionally.
-
Add corn in the last 5 minutes.
7. Final Touch
-
Stir in apple cider vinegar.
-
Taste and adjust seasoning.
Notes
-
Too Thin: Simmer uncovered 10–15 minutes or add a cornstarch slurry (2 tbsp cornstarch + ¼ cup water).
-
Too Spicy: Add a touch of sweetness (brown sugar, maple syrup, honey) or extra beans/tomatoes.
-
Slow Cooker: Brown meat, soften veggies, toast spices on stove. Transfer to slow cooker; cook LOW 6–8 hours or HIGH 3–4 hours. Add vinegar and corn at the end.
-
Instant Pot: Sauté meat, veggies, spices. Add remaining ingredients except vinegar/corn. Pressure cook 15 min, natural release 10 min. Stir in final touches.
- Prep Time: 15 min
- Cook Time: 40 min
Nutritional Information (Approximate per serving)
Servings: 16 | Prep Time: 15 mins | Cook Time: 40 mins | Total Time: 55 mins
Per serving (approx.): 360 calories | 18g fat | 25g carbs | 26g protein
Final Thoughts: More Than Just a Meal
And there you have it! Your kitchen is now filled with the incredible, soul-warming scent of a meal made with love. This chili is so much more than a list of ingredients—it’s a blank canvas for your own memories, a reason to gather, and a promise of comfort in a bowl.
I hope this recipe becomes a trusted friend in your kitchen, just like it is in mine. Whether it’s the star of a game day spread, the centerpiece of a quiet family dinner, or a ready-made lunch that makes your coworkers jealous, it’s designed to bring people together. Don’t forget, the leftovers are a gift to your future self!
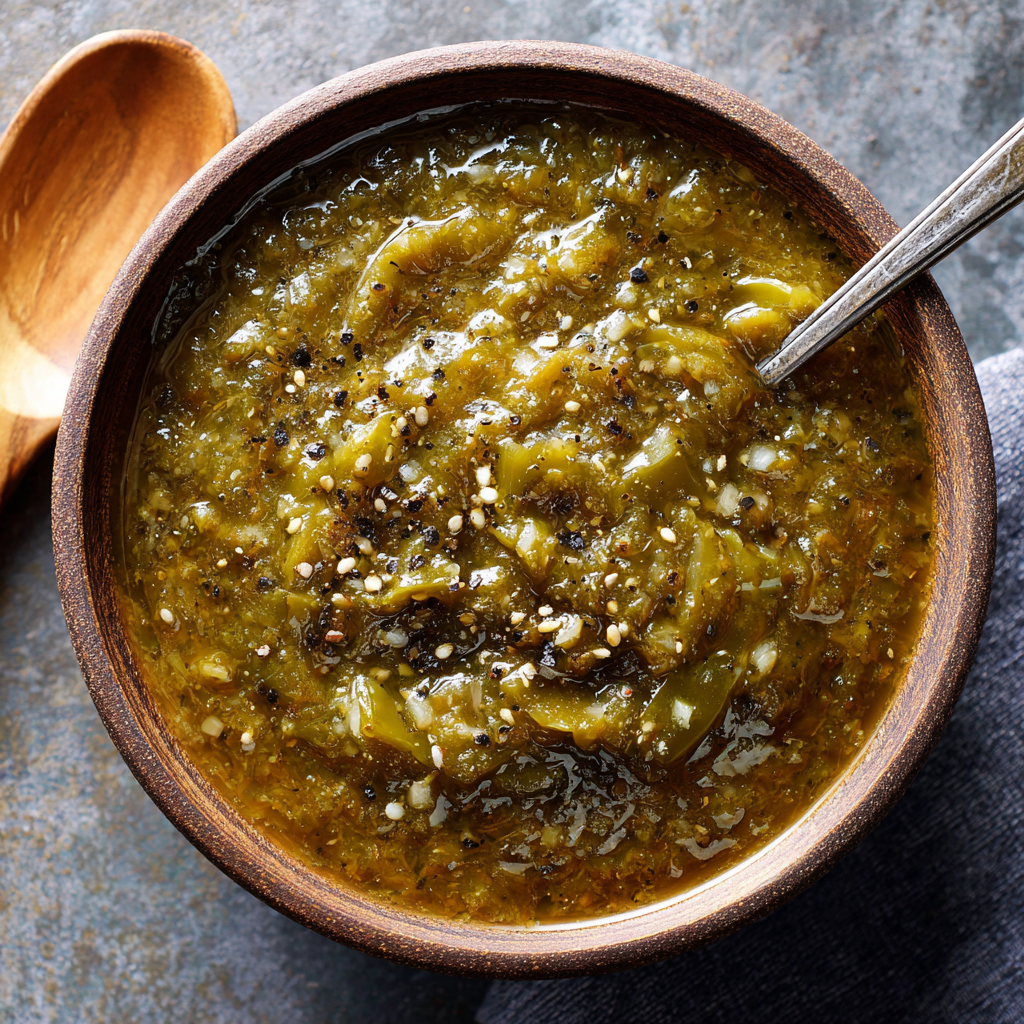
Homemade New Mexico Green Chile Sauce
The Magic Potion: My Homemade New Mexico Green Chile Sauce
Hey friends, Olivia here! Can we talk about something that smells like pure happiness? I’m talking about that incredible, smoky aroma that fills your kitchen when fresh chiles hit a hot surface. It’s the scent of anticipation, of a meal that’s about to become legendary. If you’ve ever been to the Southwest, you know exactly what I mean. It’s the smell of roadside stands in late summer, of bustling family kitchens, and of a sauce so versatile, it deserves a permanent spot in your fridge.
Today, we’re diving headfirst into making my absolute favorite: Homemade New Mexico Green Chile Sauce. This isn’t just a condiment; it’s a liquid gold, a flavor bomb, the secret weapon that can turn simple scrambled eggs into a fiesta, a humble burrito into a masterpiece, and a piece of grilled chicken into something you’ll dream about for days. The best part? It’s deceptively simple. If you can chop an onion and stir a pot, you are more than capable of creating this iconic sauce.
I know some of you might be thinking, “But Olivia, I can’t get Hatch chiles where I live!” Don’t you worry. We’re going to talk substitutions and workarounds because everyone deserves to experience this magic. So, tie on your favorite apron (the messy one with all the stains tells the best stories), and let’s make some kitchen magic together. This sauce is about to become your new best friend.
A Hatch Chile Memory: More Than Just Heat
My love affair with this sauce started not in a fancy restaurant, but in the passenger seat of my best friend’s beat-up pickup truck during a sweltering August in New Mexico. We were on a road trip, windows down, radio blasting, when we saw them: endless rows of bright green chiles roasting in giant, mesquite-fired drums right there on the side of the road. The air was thick with this incredible smoky perfume. We pulled over, bought a bushel bag still warm from the roaster, and drove straight to her abuela’s house.
I’ll never forget walking into that kitchen. Abuela Elena, a tiny woman with a formidable presence and the warmest smile, took one look at our prized chiles, nodded approvingly, and put me to work peeling them while my fingers tingled slightly from the capsaicin. No recipe card, no measuring cups—just instinct, tradition, and laughter. As the sauce simmered on the stove, filling the entire house with its promise, she told me stories of her own childhood, of family gatherings that always, always featured a pot of green chile. That sauce wasn’t just food; it was a thread connecting generations. Every time I make this recipe, I’m transported back to that warm, fragrant kitchen, and I remember that the best meals are the ones seasoned with love and shared with people who matter.
Gathering Your Green Chile Dream Team
Here’s everything you’ll need to create about 4 cups of pure bliss. Remember, great ingredients make a great sauce, so let’s get to know them a little better!
- 2 lbs fresh Hatch green chiles: This is the star of the show! Hatch chiles have a unique, earthy sweetness and a variable heat level (from mild to hot) that’s perfect for sauce. Chef’s Insight: When in season (late July through September), buy extra, roast them, and freeze them flat in bags for year-round goodness. Substitution: No Hatch? Use a combination of poblano peppers (for flavor) and jalapeños or serranos (for heat). Anaheim peppers are also a good stand-in.
- 2 tbsp olive oil or butter: Your cooking fat. Oil gives a cleaner flavor, while butter adds a touch of rich, velvety sweetness. I often use one tablespoon of each for the best of both worlds!
- 1 medium onion, finely chopped: We’re building a flavor base, and the onion is the foundation. Yellow onions are perfect for their balance of sweetness and sharpness.
- 4 cloves garlic, minced: Because is there any savory dish that isn’t made better by garlic? I think not.
- 2 tbsp all-purpose flour: This is our thickening agent, creating a light roux that gives the sauce body. Gluten-Free Swap: An equal amount of almond flour, masa harina, or even a cornstarch slurry (mix 1 tbsp cornstarch with 2 tbsp cold water and add at the end of cooking) works perfectly.
- 2 cups chicken or vegetable broth: The liquid base. Use a good-quality broth, as it contributes significantly to the depth of flavor. Vegetable broth keeps it vegetarian-friendly!
- 1 tsp ground cumin: Adds a warm, earthy, slightly smoky note that complements the chiles beautifully.
- 1 tsp dried oregano: I highly recommend seeking out Mexican oregano if you can find it. It has a more citrusy, robust flavor compared to its Mediterranean cousin.
- Salt & pepper, to taste: Essential for making all the other flavors pop. Season in steps—a little when you cook the onions, and then again at the end.
- Juice of 1 lime: The secret weapon! A splash of fresh lime juice at the very end brightens everything up and balances the richness.
Let’s Get Cooking: Your Step-by-Step Guide
Okay, team, it’s go time! This process is simple, but each step builds layers of flavor. Read through once, then let’s get our hands (metaphorically) dirty.
Step 1: Roast Those Chiles! (Skip this step if using pre-roasted chiles.)
If you’re starting with fresh chiles, we need to blister and blacken the skins to make them easy to peel and to develop that incredible smoky flavor. You can do this a few ways: under your oven’s broiler (place them on a baking sheet, turn every 5-7 minutes), directly over the flame of a gas stove (using tongs!), or on a hot grill. We want them charred and blistered all over. Once they’re nicely blackened, immediately transfer them to a bowl and cover it tightly with plastic wrap, or pop them into a paper bag and fold it closed. Let them steam for 10-15 minutes. This sweating process loosens the skin. After they’ve cooled enough to handle, the skins will rub right off! Then, slice them open, scrape out the seeds and inner membranes (this is where a lot of the heat lives, so adjust to your preference), and give them a rough chop. Chef’s Hack: Wear disposable gloves for this part if you have sensitive skin, and whatever you do, don’t touch your eyes!
Step 2: Build Your Flavor Foundation.
Place a medium-sized saucepan or Dutch oven over medium heat. Add your olive oil or butter. Once it’s shimmering (for oil) or melted and foamy (for butter), toss in your chopped onion. We’re not looking for color here, just softness. Sauté those onions, stirring occasionally, until they become translucent and fragrant, about 5-7 minutes. Now, add the minced garlic and cook for just one more minute. You’ll smell the garlic’s perfume—that’s your cue to move on. We don’t want to burn the garlic, as it will turn bitter.
Step 3: Create the Roux.
Sprinkle the 2 tablespoons of flour over the onion and garlic mixture. Immediately start stirring with a wooden spoon or whisk. Cook this paste, which is called a roux, for about a minute. This cooks out the raw flour taste and ensures our sauce thickens nicely without being gritty.
Step 4: Whisk, Simmer, and Infuse.
Now, here’s the key to a lump-free sauce: slowly add the broth while whisking constantly. I mean it—pour in a steady, thin stream and whisk like your sauce depends on it (because it does!). Once all the broth is incorporated, you’ll have a smooth, thin liquid. Now, stir in your star ingredient: the chopped, roasted Hatch chiles. Add the cumin, oregano, a good pinch of salt, and a few grinds of black pepper. Bring the whole glorious mixture to a gentle simmer, then reduce the heat to low. Let it bubble away happily for 15-20 minutes, stirring occasionally. You’ll see it slowly thicken and the flavors meld into something truly special.
Step 5: The Final, Flavor-Boosting Touch.
Turn off the heat. Now, stir in the fresh lime juice. Taste it! This is the most important step. Does it need more salt? A bit more pepper? Adjust the seasoning until it makes your taste buds sing. Now, decide on your texture. I love a sauce with a bit of chunkiness, so I often leave it as is. But if you prefer a smoother, more pourable sauce, this is the time to use an immersion blender right in the pot, pulsing a few times until it reaches your desired consistency. You can also carefully transfer it to a regular blender, but be sure to leave the lid’s center plug out and cover it with a towel to avoid steam explosions!
How to Serve Your Liquid Gold
The possibilities are endless, but here are a few of my favorite ways to use this sauce. For a classic New Mexico dish, make Green Chile Enchiladas: smother corn tortillas filled with cheese and onion in the sauce, top with more cheese, and bake until bubbly. It’s absolute heaven drizzled over huevos rancheros or folded into scrambled eggs. Take your burgers, fries, or baked potatoes to the next level. My personal favorite? A simple bowl of pinto beans and rice becomes a celebratory meal with a generous ladleful of this sauce on top. Don’t be shy—get creative!
Make It Your Own: Delicious Twists & Swaps
This recipe is a fantastic canvas. Feel free to play!
- Porky Goodness: Add ½ lb of ground pork or diced pork shoulder to the pot after cooking the onions. Brown the pork before adding the garlic for a heartier, meaty sauce.
- Creamy Green Chile: Stir in ½ cup of Mexican crema, sour cream, or even heavy cream at the very end (after turning off the heat) for a richer, milder, and creamier version.
- Tomato Twist: Add one 14.5-oz can of diced fire-roasted tomatoes (undrained) along with the broth for a “Green Chile Salsa Verde” hybrid.
- Smokier & Spicier: Add a pinch of chipotle powder or a single canned chipotle in adobo (minced) for a deeper, smokier heat.
- Vegan/Vegetarian: It’s already vegetarian if you use veggie broth! For vegan, just stick with olive oil instead of butter.
Olivia’s Chef Notes & Kitchen Stories
This recipe has evolved so much since that first day in Abuela Elena’s kitchen. I’ve made it for countless potlucks, poured it over Thanksgiving turkey leftovers (trust me, it works), and even shipped frozen containers to homesick friends. One of my favorite kitchen fails involved me, in a hurry, forgetting to wear gloves while peeling a huge batch of extra-hot chiles. Let’s just say my hands felt like they were vibrating for hours, and I learned my lesson the hard way! The beauty of this sauce is its forgiving nature. A little more onion, a little less cumin—it will still be delicious. It also freezes like a dream. I let it cool completely, then pour it into freezer-safe jars or zip-top bags (lay them flat to save space!). It will keep for up to 6 months, ready to bring a taste of summer to any dreary winter day.
Your Green Chile Questions, Answered!
Q: My sauce is too thin! How can I thicken it?
A: No worries! The easiest fix is to let it simmer uncovered for a bit longer, which will allow excess liquid to evaporate. If you’re in a rush, you can create a quick slurry: mix 1 tablespoon of cornstarch with 2 tablespoons of cold water until smooth. Whisk this into the simmering sauce, and it should thicken up within a minute or two.
Q: My sauce is too spicy! How can I tame the heat?
A: It happens to the best of us! The capsaicin (the compound that creates heat) is oil-soluble. Stirring in a bit of fat can help mellow it out. Try adding a tablespoon of butter, a splash of heavy cream, or even a pinch of sugar. Serving it with cooling ingredients like sour cream, avocado, or a creamy cheese (like queso fresco) on your final dish will also balance the spice.
Q: Can I use canned green chiles?
A: You can, in a pinch! One 28-ounce can of diced green chiles (drained) is roughly equivalent to 2 lbs of fresh. The flavor won’t have the same depth and smokiness as using freshly roasted chiles, but it will still be tasty. I’d recommend sautéing the canned chiles with the onions for a minute to wake up their flavor before proceeding.
Q: Why does my sauce taste a little bitter?
A: Bitterness can come from a couple of places. The most common culprit is accidentally burning the garlic or flour. Remember, we’re just toasting them lightly, not browning them. Another potential cause is the white pith (the inner membrane) of the chiles, which can be bitter. Be sure to scrape it out thoroughly when you’re seeding them.
Print
Homemade New Mexico Green Chile Sauce
- Total Time: 45 min
Description
There’s a reason this sauce is liquid gold: smoky roasted chiles, garlic, onions, and just the right spices come together to transform eggs, burritos, chicken, or even beans and rice into something unforgettable. This versatile sauce will quickly become your go-to flavor booster.
Ingredients
Main Ingredients:
-
2 lbs fresh Hatch green chiles (or poblano + jalapeño/serrano blend)
-
2 tbsp olive oil or butter (or 1 tbsp each)
-
1 medium onion, finely chopped
-
4 cloves garlic, minced
-
2 tbsp all-purpose flour (or almond flour / masa harina / cornstarch slurry for GF)
-
2 cups chicken or vegetable broth
-
1 tsp ground cumin
-
1 tsp dried oregano (Mexican oregano preferred)
-
Salt & pepper, to taste
-
Juice of 1 lime
Instructions
1. Roast the Chiles (Skip if using pre-roasted)
-
Char chiles under a broiler, on a grill, or over a gas flame until blackened and blistered.
-
Steam in a covered bowl or paper bag for 10–15 min.
-
Peel off skins, remove seeds/membranes, and roughly chop. Tip: Wear gloves to avoid capsaicin burns!
2. Build the Flavor Base
-
Heat oil/butter in a saucepan over medium heat.
-
Sauté onion until translucent (~5–7 min).
-
Add garlic; cook 1 more minute, until fragrant.
3. Create the Roux
-
Sprinkle flour over the onions and garlic.
-
Stir constantly for ~1 minute to remove raw flour taste.
4. Whisk in Broth & Chiles
-
Slowly pour in broth while whisking to prevent lumps.
-
Stir in roasted chiles, cumin, oregano, salt, and pepper.
-
Simmer gently 15–20 min, stirring occasionally, until thickened.
5. Final Touch
-
Turn off heat and stir in lime juice.
-
Adjust seasoning as needed.
-
Optional: Use an immersion blender for a smoother sauce.
Notes
-
Too Thin: Simmer longer uncovered, or whisk in a cornstarch slurry (1 tbsp cornstarch + 2 tbsp water).
-
Too Spicy: Add fat (butter, cream), a pinch of sugar, or serve with sour cream/avocado.
-
Canned Chiles: 28-oz can ≈ 2 lbs fresh. Sauté briefly to boost flavor.
-
Bitterness: Avoid burnt garlic/flour and remove white pith from chiles.
- Prep Time: 20 min
- Cook Time: 25 min
Nutrition
- Calories: 40 cal Per Serving
- Fat: 2g
- Carbohydrates: 4g
Nutritional Information*
Prep time: 20 minutes | Cook time: 25 minutes | Total time: 45 minutes | Yield: ~4 cups
*Please note: This is an estimate provided for informational purposes only. Exact values can vary based on specific ingredients used.
Per ¼ cup serving (approx.):
40 calories | 2g fat | 4g carbs | 1g protein
Final Thoughts: A Sauce to Savor and Share
And there you have it! What was once a humble bag of chiles is now a vibrant, simmering pot of pure Southwestern soul. This sauce is more than just a recipe; it’s a keeper of memories, a builder of new ones, and a testament to the fact that the most powerful ingredients are often the simplest ones.
As you ladle this liquid gold into a jar, you’re not just stocking your fridge—you’re arming yourself with the power to transform the ordinary into the extraordinary. You’ve created something real, something filled with the warmth of tradition and the spark of your own effort.
So go ahead, drizzle it, dunk it, smother it. Share it with friends and watch their eyes light up. Make a double batch and stash one in the freezer for a day when you need a quick taste of sunshine. This Homemade New Mexico Green Chile Sauce is your secret now. Use it well, make it your own, and most importantly, enjoy every single delicious bite.

Colorado Green Chili
Colorado Green Chili: Your New Favorite Bowl of Comfort
Hey there, friend! Come on in, pull up a stool. Can you smell that? It’s the kind of aroma that fills every corner of the house, promising something seriously good is about to happen. We’re talking about the legendary, the soul-warming, the downright irresistible Colorado Green Chili. This isn’t just any chili; it’s a big, cozy hug in a bowl, a flavor-packed celebration that turns simple ingredients into pure magic.
If you’ve never experienced this Rocky Mountain classic, you are in for a treat. Imagine tender, fall-apart pork simmered for hours in a rich, savory broth with the smoky, slightly spicy kick of roasted green chilies. It’s hearty but not heavy, complex but incredibly approachable. This is the dish you make on a crisp autumn weekend, the one you proudly serve to a crowd during game day, or the one you lovingly spoon over a pile of cheesy burritos for the most epic smothered meal of your life.
I know the words “simmer for hours” can sound a little intimidating, but trust me, this is one of the easiest, most forgiving recipes in my arsenal. It’s mostly hands-off time, letting the pot do all the work while you relax. My goal today is to walk you through every single step, sharing all my little kitchen secrets, so you feel like a green chili pro by the time we’re done. So, grab your favorite Dutch oven, and let’s make some memories together!
A Bowl Full of Mountain Memories
This recipe takes me straight back to my first autumn living in Colorado. A new friend invited me over for a “chili party,” and I, a Midwesterner used to tomato-based ground beef chili, had no idea what to expect. I walked into her kitchen and was hit by this incredible, smoky, savory scent that was completely foreign but instantly inviting.
She handed me a bowl, not of a thick, red paste, but of this beautiful, brothy, green-hued stew with big chunks of pork. I took one bite, and my culinary world tilted on its axis. It was spicy, but in a flavorful way that built slowly. It was rich, but the lime juice cut through it perfectly. We spent the entire evening gathered around her table, bowls in hand, laughing and passing around toppings. It was more than a meal; it was an experience of warmth and welcome. That night, I knew I had to learn how to make this magic myself. This recipe is my homage to that feeling of discovery and community—a taste of the Rockies, no matter where you are.
Gathering Your Green Chili Dream Team
Great flavor starts with great ingredients! Here’s everything you’ll need. Don’t stress if you can’t find something exact—I’ve included plenty of swaps and chef-y insights to guide you.
- 3 lbs pork shoulder or pork butt, cut into 1-inch cubes: This is our star! Pork shoulder has the perfect amount of fat that renders down during the long simmer, making the meat incredibly tender and flavorful. Chef’s Insight: Don’t use pork loin or tenderloin—they’re too lean and will become dry and tough.
- 2 tbsp olive oil: For searing that pork to golden-brown perfection.
- 1 large onion, diced: The sweet, aromatic base of our chili. Yellow or white onion works best here.
- 4 cloves garlic, minced: Because what’s a cozy dish without garlic? Fresh is always best!
- 2 cups roasted green chilies, chopped (Hatch or Anaheim preferred): The heart and soul of the dish! Hatch chilies from New Mexico are the gold standard for their unique flavor, but Anaheims are a fantastic and widely available alternative. You can find them canned or frozen in many grocery stores. Substitution Tip: In a real pinch, you can use canned diced green chilies (like Ortega), but seek out the “fire-roasted” kind for a deeper flavor.
- 2 jalapeños, seeded and chopped (optional for extra heat): This is your heat control! Leave the seeds in if you like a bigger kick, or omit them entirely for a milder chili.
- 2 cups chicken broth: Forms our delicious, savory broth. Use low-sodium so you can control the salt level yourself.
- 1 (14 oz) can diced tomatoes: Adds a touch of acidity and body. I prefer fire-roasted diced tomatoes for an extra layer of smokiness.
- 1 tbsp tomato paste: Our secret weapon for adding depth and richness to the base.
- 1 tsp ground cumin: Brings that essential warm, earthy flavor.
- 1 tsp dried oregano: A classic Mexican oregano would be authentic, but Mediterranean oregano works just fine.
- 1 tsp smoked paprika: This is key! It gives a subtle smokiness that complements the roasted chilies beautifully.
- ½ tsp ground coriander: Adds a slight citrusy, floral note that brightens the whole dish.
- Salt & black pepper, to taste: Season as you go! You’ll add more at the end.
- Juice of 1 lime: The final, crucial touch! A squeeze of fresh lime juice right before serving lifts all the flavors and balances the richness.
- Fresh cilantro, for garnish: For a pop of fresh, herbal color.
- Optional toppings: shredded cheese, sour cream, avocado, warm tortillas: The fun part! Let everyone customize their bowl.
Let’s Get Cooking: Building Flavor, Layer by Layer
Okay, now for the fun part! We’re going to build this chili like we’re building a flavor skyscraper—one solid layer at a time. Read through the steps once before you start, and you’ll be a pro.
Step 1: Sear the Pork. Pat your pork cubes completely dry with paper towels—this is the #1 secret to getting a good sear, not a steam! Heat the olive oil in a large Dutch oven or heavy-bottomed pot over medium-high heat. Working in batches to avoid crowding the pot, add the pork and sear until it’s beautifully browned on all sides. This isn’t just for color; those browned bits at the bottom of the pot (the “fond”) are pure flavor gold! Remove the pork and set it aside on a plate. Chef’s Hack: Don’t rush this step. Good browning = deep flavor.
Step 2: Cook the Aromatics. In that same glorious pot, with all the pork drippings, add the diced onion. Sauté for about 5-7 minutes, until it becomes soft and translucent. Now, add the minced garlic and cook for just one more minute until it’s fragrant. You’ll know it’s ready when your kitchen smells amazing. Be careful not to burn the garlic!
Step 3: Build the Flavor Base. Push the onions and garlic to the side and add the tomato paste right onto the hot surface of the pot. Let it cook for about 30 seconds—you’ll see it darken slightly and smell a richer, sweeter aroma. This quick cook removes the raw tinny taste. Now, sprinkle in all your ground spices—the cumin, oregano, smoked paprika, and coriander. Stir everything together with the onions and garlic for another 30 seconds. This “blooms” the spices, waking up their essential oils and making their flavor more pronounced.
Step 4: The Grand Simmer. It’s time to bring it all together! Return the seared pork (and any accumulated juices) to the pot. Add the chopped green chilies, jalapeños, diced tomatoes, and chicken broth. Give it a good stir, scraping up all those delicious browned bits from the bottom of the pot. Bring the whole thing to a lively boil, then immediately reduce the heat to low. Cover the pot with a lid and let it simmer gently for 1 ½ to 2 hours. You’ll know it’s done when the pork is so tender you can cut it with a spoon. Chef’s Tip: Resist the urge to boil it! A gentle simmer is what makes the meat tender.
Step 5: The Final Touch. Once the pork is melt-in-your-mouth tender, turn off the heat. Stir in the fresh lime juice. This is non-negotiable—it brightens the entire dish! Now, taste your masterpiece. This is when you adjust the seasoning with salt and pepper. It will likely need a good pinch of both.
How to Serve Your Green Chili Masterpiece
This is where the party starts! Ladle the steaming hot chili into deep bowls. I love a big, rustic bowl for this. Garnish generously with a handful of fresh, chopped cilantro. Now, set up a topping bar! Offer bowls of shredded Monterey Jack or cheddar cheese, a dollop of cool sour cream or Mexican crema, creamy slices of avocado, and a stack of warm flour or corn tortillas on the side. For the ultimate Colorado experience, spoon it over a couple of hot, cheesy burritos for “smothered” burritos—it’s a game-changer!
Make It Your Own: Delicious Twists & Swaps
Love this recipe? Try these fun variations!
- Chicken Green Chili: Swap the pork for 2 lbs of boneless, skinless chicken thighs. Reduce simmer time to 45-60 minutes, or until chicken shreds easily.
- Vegetarian/Vegan Delight: Omit the pork. Use vegetable broth and add 2 cans of drained and rinsed white beans (like cannellini or great northern) when you would add the tomatoes. You’ll still get a hearty, flavorful chili!
- White Green Chili: For a lighter version, omit the diced tomatoes and tomato paste. Use a little extra chicken broth. It’s a different but equally delicious take!
- Spice Level Control: For mild, use only mild green chilies and omit jalapeños. For extra hot, use hot Hatch chilies, leave the seeds in the jalapeños, or add a diced serrano pepper.
- Colorado Pork & Bean: Purists might gasp, but adding a can of drained pinto beans during the last 30 minutes of cooking makes it even heartier.
Olivia’s Chef Notes & Kitchen Stories
This recipe has evolved so much in my kitchen over the years. The first time I made it, I was so nervous about the spice level that I used one single, tiny Anaheim pepper. Let’s just say it was… very savory. My husband, bless him, smiled and said, “This is a great pork stew!” Now I’m not afraid to really go for it with the chilies.
My other favorite kitchen memory involves my Dutch oven. I was so proud of it, but I didn’t realize the lid wasn’t on quite right. I came back after an hour to check on the chili and found it had simmered so vigorously it painted my stovetop with little green polka dots. A delicious mess! The moral of the story? Make sure your lid is snug, and if you’re unsure, peek more often. Cooking is an adventure, and a little mess just means you’re having fun.
Your Green Chili Questions, Answered!
Q: My chili is too thin! How can I thicken it?
A: No problem! Here are two easy fixes: 1) The Simmer: Uncover the pot and let it simmer for an additional 15-20 minutes to reduce and concentrate the liquid. 2) The Slurry: Mix 1 tablespoon of cornstarch with 2 tablespoons of cold water until smooth. Stir this into the simmering chili and cook for 2-3 minutes until thickened.
Q: Can I make this in a slow cooker or Instant Pot?
A: Absolutely! Slow Cooker: Follow steps 1-3 in a skillet, then transfer everything to the slow cooker. Cook on LOW for 6-8 hours or HIGH for 3-4 hours. Instant Pot: Use the Sauté function for steps 1-3. Add all other ingredients, secure the lid, and cook on High Pressure for 35 minutes, followed by a natural pressure release for 10 minutes.
Q: How long does it last, and can I freeze it?
A: This chili is even better the next day! Store it in an airtight container in the fridge for up to 4 days. It freezes beautifully for up to 3 months. Let it cool completely before freezing. Thaw overnight in the fridge and reheat gently on the stovetop.
Q: It’s not spicy enough for me. How can I add more heat?
A: Easy fixes! Stir in a few dashes of your favorite hot sauce at the end, add a pinch of cayenne pepper with the other spices, or serve with sliced fresh jalapeños or serranos on the side for people to add themselves.

Colorado Green Chili
Description
Step into your kitchen and breathe in the aroma: tender, fall-apart pork simmering in a smoky, savory green chili broth. This Colorado classic isn’t just a meal—it’s a hug in a bowl. Hearty but not heavy, spicy yet balanced, it’s perfect for crisp autumn weekends, game-day gatherings, or smothering your favorite burritos.
Ingredients
Main Ingredients:
-
3 lbs pork shoulder or pork butt, cut into 1-inch cubes
-
2 tbsp olive oil
-
1 large onion, diced
-
4 cloves garlic, minced
-
2 cups roasted green chilies, chopped (Hatch or Anaheim)
-
2 jalapeños, seeded and chopped (optional for heat)
-
2 cups chicken broth (low-sodium)
-
1 (14 oz) can diced tomatoes (fire-roasted preferred)
-
1 tbsp tomato paste
-
1 tsp ground cumin
-
1 tsp dried oregano
-
1 tsp smoked paprika
-
½ tsp ground coriander
-
Salt & black pepper, to taste
-
Juice of 1 lime
-
Fresh cilantro, for garnish
Optional Toppings:
Shredded cheese, sour cream, avocado, warm tortillas
Instructions
Pat pork cubes dry. Heat olive oil in a Dutch oven or heavy pot over medium-high heat. Sear pork in batches until golden brown on all sides. Remove and set aside.
In the same pot, sauté onion for 5–7 minutes until translucent. Add garlic and cook 1 minute more until fragrant.
Add tomato paste directly to the hot pot; cook 30 seconds to deepen flavor. Stir in cumin, oregano, smoked paprika, and coriander for another 30 seconds to bloom the spices.
Return pork to the pot. Add green chilies, jalapeños, diced tomatoes, and chicken broth. Stir, scrape up browned bits, bring to a boil, then reduce to a gentle simmer. Cover and cook 1½–2 hours, until pork is tender.
Stir in fresh lime juice. Adjust seasoning with salt and pepper.
Notes
-
Too Thin? Simmer uncovered 15–20 minutes or stir in 1 tbsp cornstarch mixed with 2 tbsp water.
-
Slow Cooker/Instant Pot: Sear pork and aromatics, then transfer. Slow Cooker: LOW 6–8 hrs or HIGH 3–4 hrs. Instant Pot: High Pressure 35 min, natural release 10 min.
-
Storage: Refrigerate up to 4 days, freeze up to 3 months.
Nutritional Information*
*This is an estimate provided for informational purposes only. Values can vary based on specific ingredients used.
Per serving (approx., based on 8 servings): 370 calories | 22g fat | 8g carbs | 34g protein
Final Thoughts
So there you have it—your passport to a bowl of pure Colorado comfort. This green chili is more than just a recipe; it’s a story in a pot, a dish that’s meant to be shared with good friends and loud laughter. Don’t be intimidated by the simmer time; that’s just the magic working. It’s a forgiving, flexible recipe that welcomes your own personal touch.
I hope this chili finds a place in your own kitchen story, creating memories as warm and comforting as the first spoonful. Now, go grab that Dutch oven and get cooking! Your new favorite bowl of comfort is waiting.
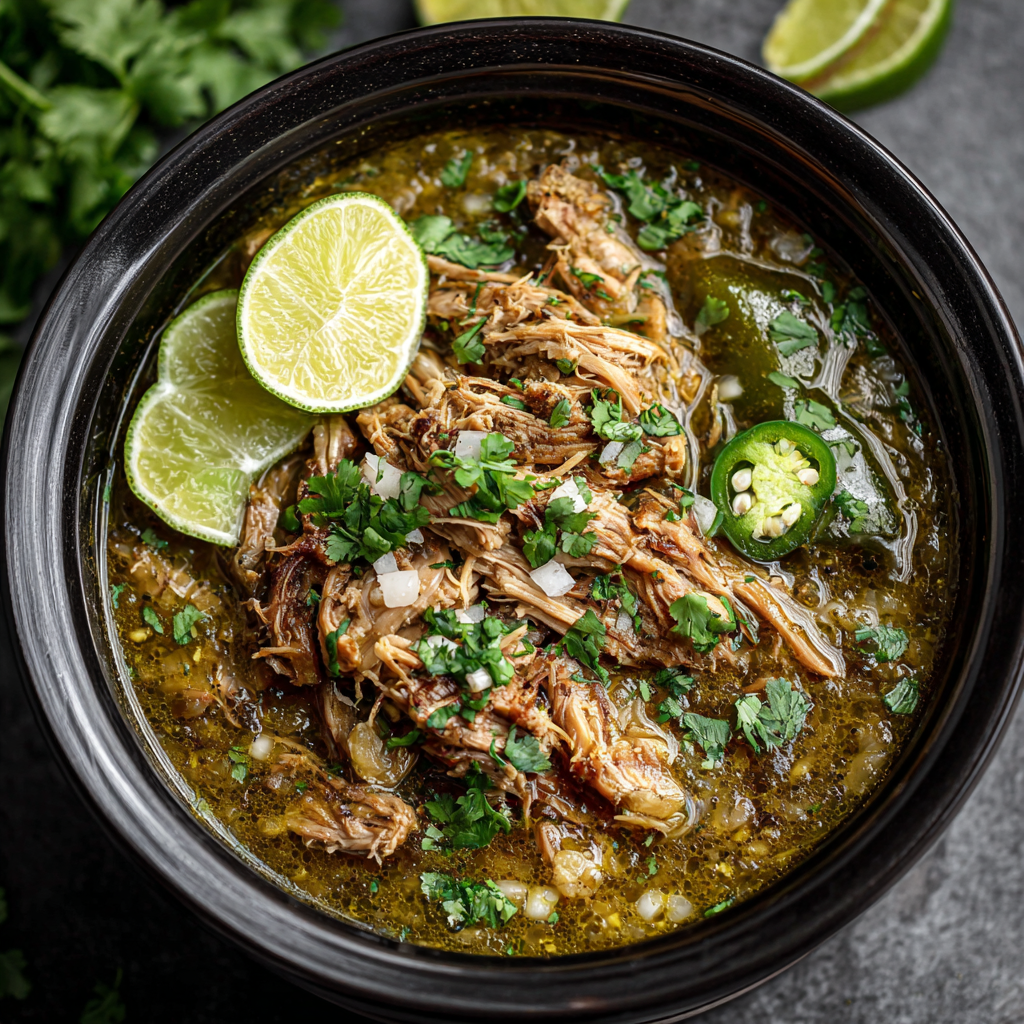
Slow Cooker Chile Verde
Your New Favorite Dinner is Waiting in the Slow Cooker
Hey there, friend! Can you smell that? It’s the intoxicating, savory-sweet aroma of tomatillos and pork shoulder slowly mingling together, filling your home with a promise of a seriously delicious meal. That’s the magic of this Slow Cooker Chile Verde, and let me tell you, it’s a game-changer. If you’ve ever craved a meal that’s hearty, flavorful, and basically cooks itself while you go about your day, you’ve come to the absolute right place.
This isn’t just another slow cooker recipe; this is a big, warm hug in a bowl. It’s the kind of dish that turns a simple Tuesday into a mini-celebration. Imagine tender, melt-in-your-mouth pork swimming in a tangy, slightly spicy green sauce that’s so good, you’ll want to drink it with a spoon. The best part? Your slow cooker does about 95% of the work. We’re talking 20 minutes of active prep in the morning, and by dinnertime, you’re a hero. Whether you pile it into warm tortillas for the best tacos of your life, spoon it over cilantro-lime rice for a burrito bowl, or just enjoy it straight up with your favorite toppings, this Chile Verde is all about maximum flavor with minimal fuss. So, grab your favorite apron (the messy one with all the character!), and let’s make something unforgettable together.
The Chile Verde That Won Over My Heart (and My Family)
This recipe holds a special place in my heart because it’s tied to one of my favorite kitchen memories. Years ago, my now-husband (let’s call him Mark) invited me over for a “gourmet” dinner he was proudly cooking himself. I was expecting something… well, let’s just say I was prepared to be politely enthusiastic. But when I walked in, the air was thick with the most incredible scent—earthy, tangy, and warm. He was nervously hovering over a slow cooker, and he served me a bowl of the most tender pork Chile Verde I’d ever tasted.
Turns out, it was his abuela’s recipe, and it was his ultimate comfort food. That meal was more than just dinner; it was a story, a piece of his history, and it completely won me over. I’ve been tweaking and making it my own ever since, but the soul of the dish—the way it brings people together and tells a story—remains the same. Every time I make it, I think of that night and smile. Food really is the best love language, isn’t it?
Gathering Your Flavor Power Team
Here’s everything you’ll need to create this masterpiece. Don’t be intimidated by the list—it’s mostly fresh, simple ingredients that come together to create something truly magical. I’ve included some of my favorite tips and swaps to make it work for you!
- 3–4 lbs pork shoulder (boneless, cut into large chunks): This is our star! Pork shoulder (also called Boston butt) is marbled with fat, which melts during the long, slow cook, resulting in incredible tenderness. Chef’s Insight: Don’t trim off too much fat! That’s where the flavor and moisture live. If you can’t find pork shoulder, pork loin is a leaner substitute, but be careful not to overcook it as it can dry out.
- 1 ½ lbs tomatillos, husked and rinsed: These look like little green tomatoes with a papery husk. They’re the base of our sauce and bring a wonderful tangy, citrusy flavor. Sub Tip: In a pinch, you can use two 11-oz cans of drained, canned tomatillos.
- 2 poblano peppers, seeded and chopped: Poblanos offer a mild, earthy heat that adds depth without overwhelming spice. Chef’s Insight: Can’t find poblanos? Two green bell peppers will work for zero heat, or an extra jalapeño for more kick.
- 2 jalapeños, seeded (leave seeds for extra heat): These control the spice level! I usually seed them for a mild-medium Verde, but if you love heat, leave those seeds in! Sub Tip: For a smoky flavor, use one canned chipotle pepper in adobo sauce instead of a jalapeño.
- 1 large onion, chopped: A yellow or white onion is perfect here for sweetness and foundation.
- 4 cloves garlic, minced: Because is there any dish that isn’t made better with garlic? I think not.
- 1 cup fresh cilantro, chopped: This adds a burst of fresh, herbal flavor at the end. If you’re one of those people who thinks cilantro tastes like soap (I feel for you!), you can substitute with fresh parsley or even a bit of fresh oregano.
- 2 tsp ground cumin: For that warm, earthy, quintessential Mexican flavor.
- 1 tsp dried oregano: Preferably Mexican oregano if you have it, but standard Mediterranean oregano works great too.
- 1 tsp smoked paprika: This is my little secret weapon! It adds a subtle smokiness that makes the sauce taste like it simmered for days over a wood fire.
- 1 ½ cups chicken broth: This helps create the perfect saucy consistency. Use low-sodium so you can control the salt level.
- 2 tbsp olive oil: For searing our pork to golden-brown perfection.
- Juice of 1 lime: A bright, acidic finish that wakes up all the other flavors. Don’t skip this!
- Salt & pepper, to taste: Season generously at every stage!
Let’s Get Cooking: Your Foolproof Guide
Ready to layer in all that flavor? Follow these steps, and you’ll be a Chile Verde pro in no time. I’ve packed this section with all my favorite kitchen hacks to ensure your success.
Step 1: Char Those Veggies for Maximum Flavor! Preheat your broiler to high. Line a baking sheet with foil for easy cleanup. Arrange the husked and rinsed tomatillos, chopped poblanos, jalapeños, and onion on the sheet. Broil for 8-10 minutes, turning halfway through, until the veggies are nicely charred and blistered in spots. Chef’s Hack: This step is non-negotiable for me! Charring caramelizes the natural sugars in the vegetables and gives the sauce an incredible depth of flavor you just can’t get from boiling them. If you have a gas stove, you can also char them directly over the flame for a more authentic touch.
Step 2: Blend Your Flavor Bomb Sauce. Carefully transfer the charred vegetables to a blender. Add the minced garlic, fresh cilantro, cumin, oregano, smoked paprika, and chicken broth. Blend until you have a beautifully smooth, vibrant green sauce. Chef’s Tip: Let the veggies cool for a few minutes before blending to avoid a steam explosion! And don’t be shy—blend it really well. A smooth sauce clings to the pork perfectly.
Step 3: The Golden Rule – Sear That Pork! While the veggies are broiling, pat your pork chunks completely dry with paper towels. This is the secret to a good sear! Heat the olive oil in a large skillet over medium-high heat. Season the pork generously with salt and pepper. Working in batches to avoid crowding the pan, sear the pork on all sides until you have a beautiful golden-brown crust. Chef’s Hack: I know it’s tempting to skip this step to save time, but PLEASE don’t! Searing locks in the juices and creates fond (those delicious browned bits on the bottom of the pan) that adds a ton of rich, meaty flavor to the whole dish.
Step 4: The Easy Part – Let the Slow Cooker Work Its Magic. Place the seared pork chunks into your slow cooker. Pour the vibrant green sauce right over the top, making sure all the pork is submerged. Give it a gentle stir. Cover and cook on LOW for 7-8 hours or on HIGH for 4-5 hours. Chef’s Insight: Low and slow is always my preference for tough cuts like pork shoulder. It gives the connective tissues more time to break down, resulting in the most fork-tender meat imaginable.
Step 5: The Grand Finale – Shred and Brighten. Once the cooking time is up, the pork should be so tender that it falls apart when you poke it with a fork. Use two forks to shred the pork directly in the slow cooker. Now, stir in the fresh lime juice. Chef’s Tip: That hit of lime juice at the very end is like turning on a light in the room. It brightens all the deep, savory flavors and makes everything pop. Taste and adjust the seasoning with more salt and pepper if needed.
How to Serve Your Masterpiece
Now for the fun part! This Chile Verde is incredibly versatile. For a cozy, no-fuss dinner, ladle it into deep bowls and top with a dollop of cool sour cream, creamy avocado slices, a sprinkle of shredded cheese, and a handful of fresh chopped onions and cilantro. If you’re feeding a crowd, set up a “Chile Verde Bar” with warm corn or flour tortillas for tacos, a big pot of cilantro-lime rice for burrito bowls, and all the toppings so everyone can build their own perfect plate. It’s also amazing spooned over nachos or tucked into cheesy quesadillas!
Make It Your Own: Delicious Twists & Swaps
Love the base recipe? Try one of these fun variations next time!
- Chicken Chile Verde: Swap the pork for 3-4 lbs of boneless, skinless chicken thighs. They stay incredibly moist and flavorful. Reduce cook time to 6-7 hours on low or 3-4 on high.
- Spicy Pineapple Twist: Add 1 cup of fresh or canned crushed pineapple to the blender with the sauce ingredients. The sweet and spicy combo is absolutely addictive.
- White Bean & Pork Version: For a heartier, fiber-packed meal, stir in two cans of rinsed and drained cannellini or great northern beans during the last 30 minutes of cooking.
- Instant Pot Method: Use the sauté function to sear the pork. Add the sauce, seal the lid, and cook on high pressure for 45 minutes. Allow for a natural pressure release for 15 minutes.
A Few More Thoughts From My Kitchen to Yours
This recipe has evolved so much since that first time Mark made it for me. I’ve learned that the best cooking is about intuition. Sometimes I add a pinch of cinnamon for warmth, or I’ll throw in a few sprigs of fresh oregano from my garden if it’s looking particularly happy. The beauty of a dish like this is its flexibility. Don’t be afraid to taste and adjust as you go! One funny kitchen fail I had early on? I once forgot to husk the tomatillos. I just rinsed them and threw them in. Let’s just say the papery husks do NOT blend well, and we had to order pizza that night. Lesson learned! Now, I always double-check. It’s these little stories and lessons that make a recipe truly yours.
Your Chile Verde Questions, Answered!
Q: My sauce is too thin. How can I thicken it?
A: No problem! This happens sometimes. You have a few options. The easiest is to take the lid off the slow cooker, turn it to HIGH, and let it simmer uncovered for 30-45 minutes to reduce and thicken. Alternatively, you can mix 1 tablespoon of cornstarch with 2 tablespoons of cold water to make a slurry. Stir this into the Chile Verde and let it cook for another 15-20 minutes until thickened.
Q: Can I make this ahead of time?
A: Absolutely! In fact, I think it tastes even better the next day after the flavors have had more time to meld. Let it cool completely, then store it in an airtight container in the refrigerator for up to 4 days. You can also freeze it for up to 3 months. Just thaw overnight in the fridge and reheat gently on the stove or in the microwave.
Q: Is there a way to make it less spicy?
A> Of course! The main sources of heat are the jalapeños and poblanos. For a very mild version, be sure to remove all the seeds and membranes from both. You can also replace the jalapeños with an additional poblano or even a green bell pepper. Always taste your sauce before adding it to the pork—you can adjust the heat level then.
Q: My pork isn’t tender after 8 hours. What went wrong?
A> This usually means your pork shoulder was still partially frozen or the chunks were cut too large. Make sure your meat is fully thawed and cut into uniform 2-inch chunks. If it’s still not tender, just let it cook longer! It may need an extra hour or two. Slow cookers can vary in temperature, so “fork-tender” is the goal, not the clock.

Slow Cooker Chile Verde
Description
Imagine walking into your kitchen after a busy day to the irresistible aroma of tender pork simmering in a tangy, slightly spicy green sauce. That’s the magic of this Slow Cooker Chile Verde—a hearty, flavorful meal that basically cooks itself while you go about your day. Perfect for tacos, burrito bowls, or straight up in a bowl with your favorite toppings, this dish is a warm hug on a plate and a total crowd-pleaser.
Ingredients
-
3–4 lbs pork shoulder (boneless, cut into large chunks)
-
1½ lbs tomatillos, husked and rinsed (or two 11-oz cans, drained)
-
2 poblano peppers, seeded and chopped (or 2 green bell peppers for mild)
-
2 jalapeños, seeded (leave seeds for extra heat)
-
1 large onion, chopped
-
4 cloves garlic, minced
-
1 cup fresh cilantro, chopped (or parsley/oregano if preferred)
-
2 tsp ground cumin
-
1 tsp dried oregano
-
1 tsp smoked paprika
-
1½ cups chicken broth (low-sodium recommended)
-
2 tbsp olive oil
-
Juice of 1 lime
-
Salt & pepper, to taste
Instructions
-
Char the Vegetables: Preheat your broiler to high. Arrange tomatillos, poblanos, jalapeños, and onion on a foil-lined baking sheet. Broil 8–10 minutes, turning halfway, until charred.
-
Blend the Sauce: Transfer the charred veggies to a blender. Add garlic, cilantro, cumin, oregano, smoked paprika, and chicken broth. Blend until smooth.
-
Sear the Pork: Pat pork chunks dry. Heat olive oil in a skillet over medium-high heat. Season pork with salt and pepper, then sear all sides until golden brown.
-
Slow Cook: Place pork in the slow cooker. Pour sauce over pork, stir gently, cover, and cook on LOW for 7–8 hours or HIGH for 4–5 hours.
-
Shred & Brighten: Shred the pork directly in the slow cooker. Stir in lime juice and adjust salt/pepper to taste.
Notes
-
-
Thickening the Sauce: Simmer uncovered on HIGH for 30–45 minutes or stir in 1 tbsp cornstarch mixed with 2 tbsp water.
-
Make Ahead: Refrigerate for up to 4 days or freeze for up to 3 months.
-
Mild Version: Remove seeds/membranes from jalapeños and poblanos, or swap jalapeños for bell peppers.
-
Chicken Chile Verde: Substitute chicken thighs (6–7 hours on LOW, 3–4 hours on HIGH).
-
Add Sweetness: Blend 1 cup crushed pineapple with the sauce for a sweet-spicy variation.
-
Add Beans: Stir in two cans of rinsed cannellini or great northern beans for a heartier meal.
-
Nutrition
- Calories: 390 cal Per Serving
- Sugar: 4g
- Fat: 24g
- Saturated Fat: 8g
- Fiber: 2g
- Protein: 34g
Nutritional Information (Approximate)
Per serving (based on 8 servings):
Calories: 390 | Fat: 24g | Saturated Fat: 8g | Carbohydrates: 7g | Fiber: 2g | Sugar: 4g | Protein: 34g | Sodium: 350mg
Final Thoughts: Your New Favorite Dinner Awaits
And there you have it! From a memory that won my heart to a recipe that’s become a staple in my own home, this Slow Cooker Chile Verde is so much more than just a meal. It’s a testament to how a handful of simple ingredients, a little bit of patience, and a trusty slow cooker can create pure magic.
I hope this recipe brings as much joy and comfort to your table as it has to mine. It’s forgiving, flexible, and always, always satisfying. So the next time you’re looking for a dinner that feels like a celebration without the fuss, remember this pot of green goodness is waiting for you.
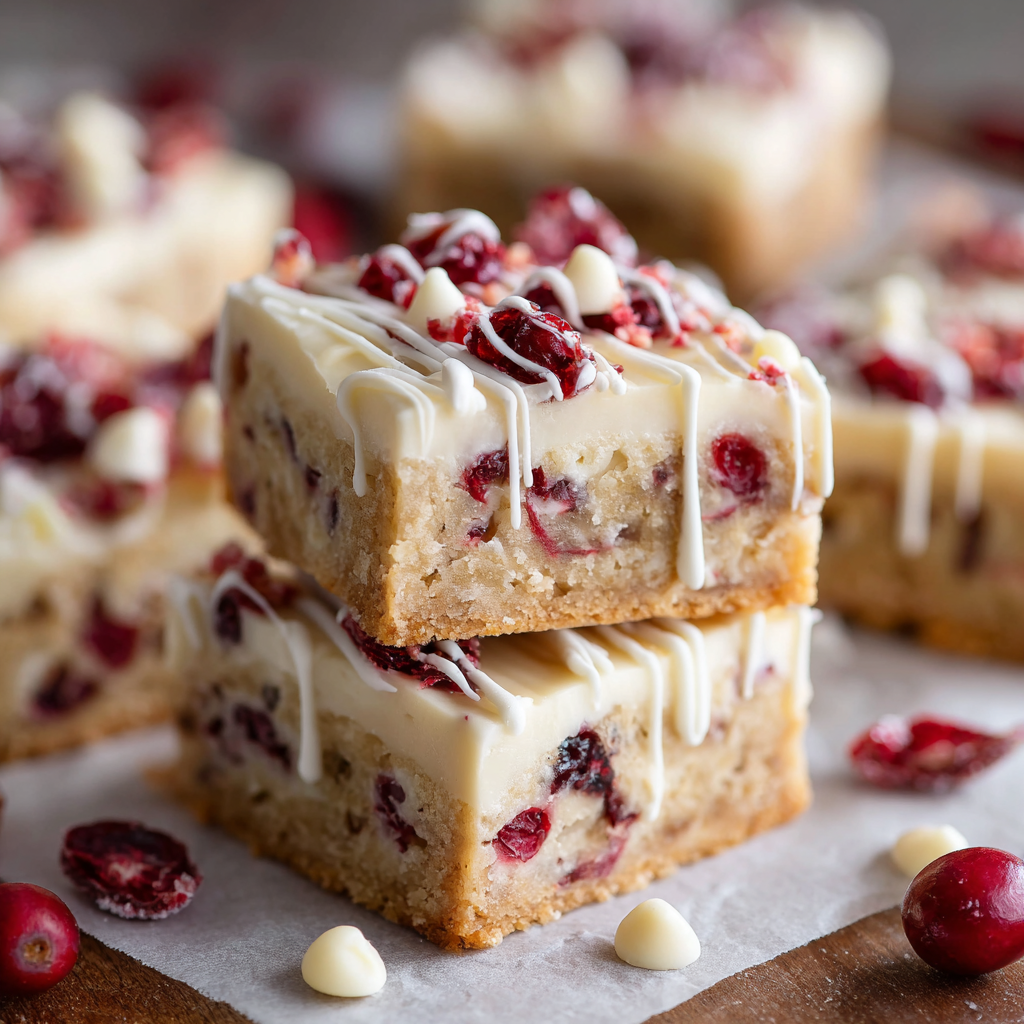
Cranberry Bliss Bars
Your New Favorite Holiday Treat: Homemade Cranberry Bliss Bars
Hey there, friend! Can you smell it? That magical, cozy aroma of brown sugar, cinnamon, and orange zest wafting from the oven? It’s officially the season for baking, and I can’t think of a better way to kick it off than with a batch of my all-time favorite, copycat Cranberry Bliss Bars.
If you’ve ever stood in line at a certain coffee shop during the holidays, mesmerized by those gorgeous, frosted triangle bars studded with red cranberries, you know exactly what I’m talking about. They’re a seasonal icon for a reason! But let me let you in on a little secret: the homemade version? It’s about a thousand times better. We’re talking a buttery, chewy blondie base that’s perfectly spiced, loaded with sweet white chocolate and tart dried cranberries, and then slathered with a tangy cream cheese frosting that just sends everything over the top.
I’m a firm believer that the best holiday treats are the ones that feel like a hug from the inside. They should be festive, yes, but more importantly, they should be shareable, giftable, and absolutely irresistible. These bars check every single box. They look stunning on a platter, they make your kitchen smell like a winter wonderland, and they have this incredible balance of flavors and textures that just makes people’s eyes light up. So, tie on your favorite apron (the messy one with all the stories!), and let’s bake some magic together. I promise, this is one recipe that’s going to become a yearly tradition in your home, just like it is in mine.
A Sweet Slice of Memory
My love affair with these bars started long before I ever tried to bake them myself. Every December, my best friend, Sarah, and I had a tradition. We’d brave the holiday mall crowds, not for the shopping, but for the ritual. Our mission: secure the last two Cranberry Bliss Bars from the coffee kiosk, find a semi-quiet corner, and dissect our entire year between decadent bites. We’d talk about school, dreams, and which one of us was definitely going to marry a Backstreet Boy (it was a tight race). That frosted, cranberry-topped triangle became more than a treat; it was a symbol of our friendship, a sweet, once-a-year indulgence that marked the start of the holidays.
The year we graduated college, Sarah moved across the country. That December felt a little quieter, a little less sparkly. I missed our tradition. So, I decided if the Cranberry Bliss Bar couldn’t come to us, I would bring it to us—from my kitchen. I spent a weekend tweaking and testing, determined to capture that exact feeling in a recipe. When I finally nailed it, I packed up a whole batch and shipped it to her. The text I got? “Tastes even better than the original. Our tradition lives on!” Now, baking these bars is my way of sending a little piece of home, a little piece of my heart, to the people I love. And I’m so excited to share that feeling with you.
Gathering Your Ingredients
Part of the joy of baking from scratch is getting to know your ingredients. Here’s everything you’ll need, along with a few of my chef-y insights to help you understand the “why” behind the “what.”
For the Bars:
- 1 cup (2 sticks) unsalted butter, softened – Using unsalted butter lets you control the salt level perfectly. “Softened” is key here! You should be able to press your finger into it easily. If it’s too cold, your batter will be lumpy; if it’s melted, the texture of the bars will be greasy.
- 1½ cups brown sugar, packed – Brown sugar is non-negotiable for that deep, molasses-y flavor and chewy texture. Pack it firmly into your measuring cup for accuracy.
- 2 large eggs – Always use large eggs for baking. They should be at room temperature to emulsify beautifully with the butter and sugar, creating a smooth, light batter.
- 1 teaspoon vanilla extract – The flavor foundation. Use pure vanilla extract if you can—it makes a difference!
- 1 tablespoon orange zest – This is the secret weapon! The bright, citrusy oil from the zest cuts through the sweetness and makes the cranberry flavor pop. Use a microplane for the finest zest.
- 2 cups all-purpose flour – The structure of our bars. For a lighter texture, fluff your flour with a spoon before scooping and leveling it off with a knife.
- 1½ teaspoons ground cinnamon – Warm, cozy, and essential for that holiday spice vibe.
- ½ teaspoon baking powder – Our leavening agent, giving the bars a little lift.
- ½ teaspoon salt – Balances all the sweetness and enhances every other flavor. Trust me, don’t skip it.
- ¾ cup dried cranberries – The star of the show! Their tartness is a perfect contrast to the sweet white chocolate.
- ¾ cup white chocolate chips – Look for a good quality brand. You can also chop up a bar of white chocolate for more irregular, melty pockets.
For the Frosting & Topping:
- 8 oz cream cheese, softened – Full-fat cream cheese will give you the creamiest, most stable frosting. Again, softening is crucial for a lump-free spread.
- 1 cup powdered sugar – Sift it! This one little step prevents a gritty frosting.
- ½ teaspoon vanilla extract – A little extra flavor for the frosting.
- Optional: 1–2 teaspoons orange juice or zest – For an extra citrus kick in the frosting. I highly recommend it!
- ½ cup dried cranberries, chopped – For a beautiful, festive topping.
- ½ cup white chocolate chips, melted – For that gorgeous, professional-looking drizzle.
Let’s Bake! Step-by-Step Instructions
Ready to create some magic? Follow these steps, and don’t skip my little commentary—it’s where all the best kitchen hacks live!
Step 1: Preheat and Prep. Start by preheating your oven to 350°F (175°C). This is Baking 101, but it’s so important! An oven that’s fully up to temperature ensures your bars bake evenly. While it heats, line a 9×13-inch baking pan with parchment paper, leaving a little overhang on two sides. This is my #1 pro-tip for easy removal! You can also lightly grease the pan if you don’t have parchment, but the parchment is a game-changer for clean slices.
Step 2: Cream the Butter and Sugar. In a large bowl, use an electric mixer (or some serious elbow grease with a wooden spoon) to cream together the softened butter and packed brown sugar. Beat it for a good 2-3 minutes, until the mixture is pale, fluffy, and well-combined. This step isn’t just about mixing; it’s about incorporating air into the batter, which helps create a lighter texture. Don’t rush it!
Step 3: Add the Wet Ingredients. Crack in the eggs one at a time, beating well after each addition so they fully incorporate. Then, mix in the vanilla extract and that glorious tablespoon of orange zest. At this point, your batter should be smooth, fragrant, and look absolutely dreamy.
Step 4: Whisk the Dry Ingredients. In a separate, medium-sized bowl, whisk together the flour, cinnamon, baking powder, and salt. Why whisk? It evenly distributes the baking powder and salt so you don’t get any bitter pockets in your finished bars.
Step 5: Combine Wet and Dry. Gradually add the dry flour mixture to the wet butter mixture. Mix on low speed just until the flour disappears. The key word here is *gradually*—it prevents a flour cloud from erupting in your kitchen! And once it’s combined, STOP MIXING. Overmixing is the enemy of tender bars.
Step 6: Fold in the Goodies. Switch to a spatula for this part. Gently fold in the ¾ cup of dried cranberries and ¾ cup of white chocolate chips. Folding, rather than beating, ensures they are evenly distributed without crushing them or overworking the batter.
Step 7: Bake to Perfection. Spread the thick batter evenly into your prepared pan. I like to use an offset spatula for this, but the back of a spoon works just fine. Pop it into the preheated oven and bake for 22-25 minutes. You’ll know it’s done when the edges are golden brown and the center is just set. It might look a tiny bit soft in the middle—that’s perfect! It will continue to set as it cools. Overbaking is the number one mistake here; we want chewy, not cakey or dry.
Step 8: The All-Important Cool Down. This is critical! Place the pan on a wire rack and let the bars cool completely. I mean, completely-completely. If you spread warm frosting on a warm base, you’ll have a delicious but soupy mess. Patience, my friend!
Step 9: Whip Up the Frosting. Once the bars are cool, beat the softened cream cheese, sifted powdered sugar, and vanilla (and optional orange juice/zest) together until smooth and creamy. Taste it. Go on, you deserve it. Isn’t it heavenly?
Step 10: Frost and Decorate. Spread the frosting evenly over the cooled bars. Now, for the finishing touches! Sprinkle the chopped dried cranberries all over the top. Then, melt the remaining ½ cup of white chocolate chips (do this in 15-second bursts in the microwave, stirring in between) and use a fork or a piping bag to drizzle it back and forth over the cranberries. It’s what makes them look so professional!
Step 11: Chill and Slice. For the cleanest cuts, pop the whole pan into the refrigerator for at least an hour. This sets the frosting and makes slicing a breeze. When you’re ready, use a sharp knife to cut the large rectangle into smaller squares, and then cut each square diagonally to create those signature triangles.
How to Serve Your Masterpiece
Presentation is part of the fun! These bars are rich, so I like to cut them into smaller triangles. Arrange them on a beautiful wooden board or a festive platter. They are the ultimate holiday cookie exchange star, the perfect treat to bring to a potluck, or a gorgeous addition to a brunch spread next to some scones and fruit. I love packaging them in clear cellophane bags tied with a ribbon for the most delicious homemade gifts. Pair them with a cup of coffee, a glass of cold milk, or even a sweet dessert wine. However you serve them, get ready for the compliments to roll in!
Get Creative! Recipe Variations
Feel free to make these bars your own! Here are a few of my favorite twists:
- Lemon Bliss: Swap the orange zest for lemon zest and add a teaspoon of poppy seeds to the batter for a bright, sunny variation.
- Nutty Delight: Add ½ cup of chopped pecans or walnuts to the batter along with the cranberries for a delightful crunch.
- Ginger Spice: Add 1 teaspoon of ground ginger and ¼ teaspoon of ground cloves to the dry ingredients for a deeper, spicier flavor profile.
- Dark Chocolate Twist: Not a white chocolate fan? Use dark or semi-sweet chocolate chips instead for a more intense chocolate flavor.
- Gluten-Free: Substitute the all-purpose flour with a 1:1 gluten-free baking blend. I’ve had great success with this swap!
Chef’s Notes: From My Kitchen to Yours
This recipe has evolved so much since that first batch I shipped to Sarah. I initially thought more spice was better, but I learned that the cinnamon should be a warm background note, not the main event. And the orange zest? That was a happy accident after I zested an orange for a cocktail and decided to throw it in. It was a revelation! The biggest lesson, though, is to not stress. Baking is supposed to be joyful. So what if your drizzle is a little messy? That’s called “rustic charm.” Did you forget to sift the powdered sugar? The frosting will still taste amazing. The real secret ingredient in these bars, and in all my recipes, is the love and fun you pour into them. So put on some holiday music, pour yourself a drink, and enjoy the process. That’s what homemade is all about.
FAQs & Troubleshooting
Q: My bars came out really cakey and dry. What happened?
A: The most common culprit here is overbaking or overmixing. Remember, you want to take the bars out when the center is *just* set and might even look a tiny bit underdone. They continue to cook from residual heat as they cool. Also, once you add the flour, mix only until it’s combined. Overmixing develops the gluten in the flour, leading to a tougher, more cake-like texture.
Q: Can I make these bars ahead of time?
A: Absolutely! They are fantastic make-ahead treats. You can bake and frost the bars, then cover the pan tightly with plastic wrap and store them in the refrigerator for up to 3 days. I actually think the flavors get even better after a day! You can also freeze them (without the frosting) for up to 2 months. Thaw overnight in the fridge and then frost before serving.
Q: My frosting is too runny. How can I fix it?
A: A runny frosting usually means the cream cheese was too warm or you added a bit too much liquid (like orange juice). The easiest fix is to pop the bowl of frosting into the refrigerator for 20-30 minutes to firm up. If it’s still too soft, you can gently beat in a little more sifted powdered sugar, a tablespoon at a time, until it reaches a spreadable consistency.
Q: Why is it so important for the butter, eggs, and cream cheese to be softened?
A> Great question! Room-temperature ingredients emulsify much more easily, creating a smooth, homogenous batter and frosting. If your butter is too cold, you’ll have lumps; if your cream cheese is cold, your frosting will be grainy. To soften quickly, you can place sticks of butter or blocks of cream cheese on a plate for 30-60 minutes. For eggs, place them in a bowl of warm water for 5-10 minutes. Never use a microwave for softening, as it can easily melt them unevenly.

Cranberry Bliss Bars
Description
There’s something about the holidays that makes kitchens feel magical. The scent of brown sugar, cinnamon, and citrus filling the air, warm mugs in hand, laughter echoing from every corner—these are the moments worth savoring. And what better way to kick off the festive season than with Cranberry Bliss Bars? Inspired by those iconic coffee shop treats, this homemade version takes the classic flavors—chewy blondie, tart cranberries, sweet white chocolate, and tangy cream cheese frosting—to the next level. They’re perfect for sharing, gifting, or simply enjoying a cozy bite by the fire.
Ingredients
For the Bars:
-
1 cup (2 sticks) unsalted butter, softened
-
1½ cups packed brown sugar
-
2 large eggs, room temperature
-
1 teaspoon vanilla extract
-
1 tablespoon orange zest
-
2 cups all-purpose flour
-
1½ teaspoons ground cinnamon
-
½ teaspoon baking powder
-
½ teaspoon salt
-
¾ cup dried cranberries
-
¾ cup white chocolate chips
For the Frosting & Topping:
-
8 oz cream cheese, softened
-
1 cup powdered sugar, sifted
-
½ teaspoon vanilla extract
-
Optional: 1–2 teaspoons orange juice or zest
-
½ cup dried cranberries, chopped
-
½ cup white chocolate chips, melted
Instructions
-
Preheat & Prep: Preheat oven to 350°F (175°C). Line a 9×13-inch baking pan with parchment paper, leaving overhang for easy removal.
-
Cream Butter & Sugar: Beat the softened butter and brown sugar for 2–3 minutes until pale and fluffy.
-
Add Wet Ingredients: Beat in eggs, one at a time, followed by vanilla and orange zest.
-
Mix Dry Ingredients: In a separate bowl, whisk flour, cinnamon, baking powder, and salt.
-
Combine Wet & Dry: Gradually mix dry ingredients into wet until just combined. Avoid overmixing.
-
Fold in Cranberries & Chocolate: Gently fold in dried cranberries and white chocolate chips.
-
Bake: Spread batter in prepared pan. Bake 22–25 minutes, until edges are golden and center is just set. Let cool completely.
-
Make Frosting: Beat cream cheese, powdered sugar, vanilla, and optional orange juice/zest until smooth.
-
Frost & Decorate: Spread frosting over cooled bars. Sprinkle chopped cranberries and drizzle melted white chocolate over top.
-
Chill & Slice: Refrigerate for at least 1 hour. Cut into squares, then diagonally into triangles.
Notes
-
Softened Ingredients: Make sure butter, eggs, and cream cheese are at room temperature for smooth mixing.
-
Don’t Overbake: The bars should be slightly soft in the center when you remove them—they’ll firm up as they cool.
-
Storage: Store in the fridge for up to 3 days or freeze unfrosted bars for up to 2 months. Frost after thawing.
-
Nutrition
- Calories: 280 cal per bar
- Sugar: 26g
- Fat: 14g
- Carbohydrates: 36g
- Protein: 3g
Nutritional Information
Please note: This is an approximate calculation and can vary based on specific ingredients used.
Servings: 20 bars
Approximate Nutrition per Bar: Calories: ~280, Fat: 14g, Carbohydrates: 36g, Sugar: 26g, Protein: 3g
Final Thoughts
Baking these Cranberry Bliss Bars is an experience—a chance to slow down, create something beautiful, and share a piece of your heart. This recipe proves that the best holiday magic often comes from our own kitchens. So tie on that apron, embrace the process, and get ready to make someone’s day a little sweeter. You’ve got this! Now, go forth and bake some bliss.
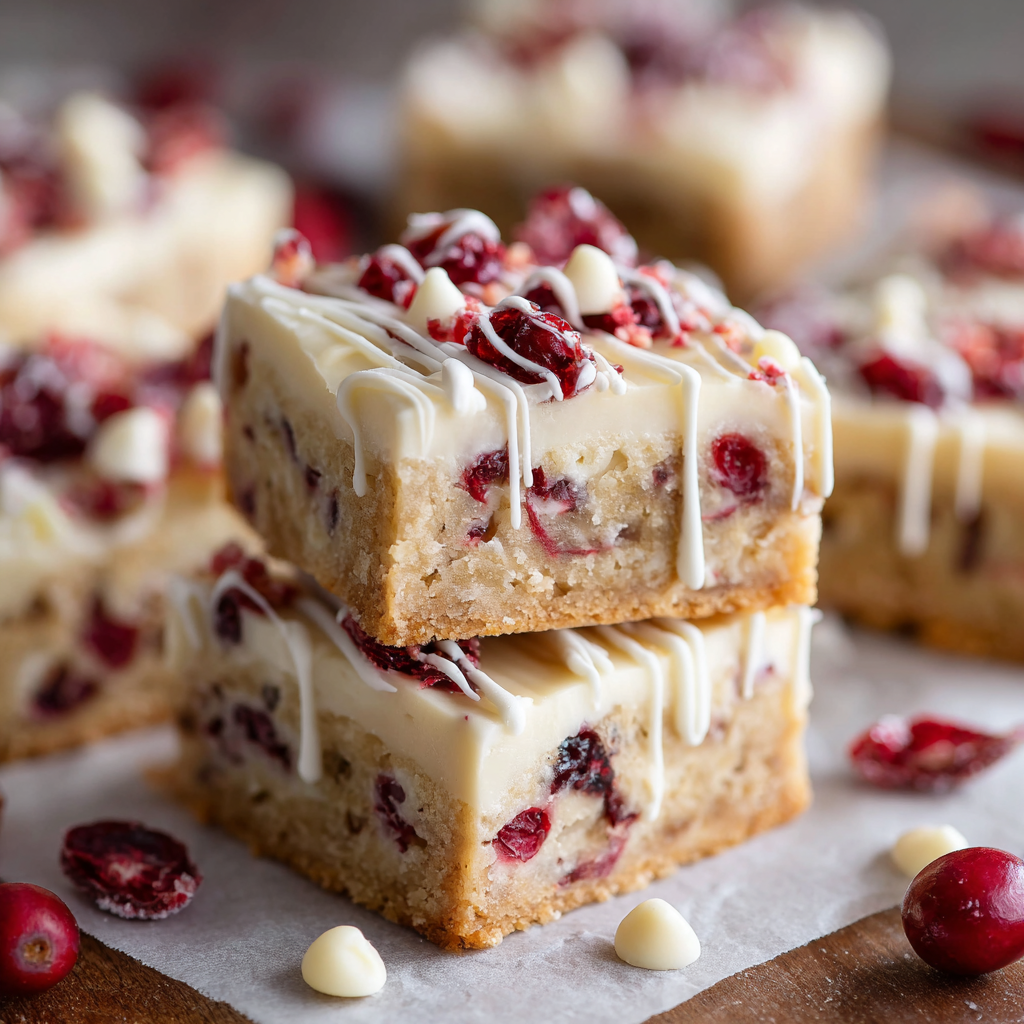
Cranberry Bliss Bars
Your New Favorite Treat: Homemade Cranberry Bliss Bars
Hey there, friend! Can you smell it? That warm, buttery scent of something magical baking in the oven, mingling with the bright, tangy aroma of cranberries and the sweet promise of white chocolate. If your kitchen could hug you, this is what it would smell like. Welcome to my favorite time of year—the season of cozy sweaters, twinkling lights, and baking up a storm to share with everyone you love. And at the top of my must-bake list? These legendary Cranberry Bliss Bars.
You know the ones I’m talking about. That famous coffee shop treat that makes a grand appearance every holiday season and disappears just as quickly. The one that has you sneaking a second (or third) piece when you think no one’s looking. Well, I’m here to let you in on a little secret: the homemade version is about a thousand times better. We’re talking a soft, chewy, blondie-like base, packed with tart dried cranberries and creamy white chocolate chips, all spiced with a hint of cozy cinnamon. Then, it’s topped with a luscious layer of tangy cream cheese frosting, more cranberries, and an artful drizzle of melted white chocolate. It’s a symphony of flavors and textures in every single bite.
But the best part? You don’t need any fancy pastry chef skills to pull these off. This recipe is all about joy, not stress. It’s about creating something beautiful and delicious that will make your friends and family feel truly special. So, tie on your favorite apron (the messy one with all the stories), preheat that oven, and let’s bake up some pure, unadulterated bliss together.
A Sweet Slice of Holiday Magic
My love affair with these bars started years ago, not in a fancy bakery, but in my best friend’s bustling kitchen during our annual holiday cookie swap. Picture this: it’s a chilly December evening, and the kitchen is warm and steamy, filled with the laughter of a dozen women, all armed with their signature recipes. My friend Sarah, the hostess with the mostess, always brought out a platter of these stunning triangular bars she’d picked up from the coffee shop. They were the star of the show, disappearing within minutes.
One year, I decided I was going to crack the code. I wanted to recreate that magic, but make it even more personal. I spent a whole weekend testing batches, tweaking the spice level, playing with the orange zest, and perfecting the cream cheese frosting ratio. The final batch? I brought them to the cookie swap, nestled on my grandmother’s cake stand. The moment Sarah took a bite, her eyes lit up. “Olivia,” she said, “these are even better than the original! They taste like… home.” That’s when I knew this recipe was a keeper. It wasn’t just about copying a treat; it was about capturing a feeling—the warmth of friendship, the joy of sharing, and the magic of the season. Now, baking these bars is one of my own cherished holiday traditions.
Gathering Your Blissful Ingredients
Before we start, let’s get our mise en place ready—that’s just a fancy chef term for having everything measured and prepped. It makes the baking process so smooth and enjoyable! Here’s what you’ll need. I’ve included some of my favorite tips and substitutions for each ingredient.
For the Bars:
- 1 cup (2 sticks) unsalted butter, softened – Using unsalted butter lets you control the salt level. “Softened” is key here! It should be cool to the touch but leave a slight indent when you press it. Pro tip: if you forgot to take it out of the fridge, cut it into tablespoons and microwave for 5-second bursts until perfect.
- 1½ cups brown sugar, packed – The molasses in brown sugar gives these bars their signature chewiness and deep, caramel-like flavor. Pack it firmly into your measuring cup!
- 2 large eggs – Always best at room temperature for a smoother, more emulsified batter. To quickly bring eggs to room temp, place them in a bowl of warm water for 5-10 minutes.
- 1 teaspoon vanilla extract – The backbone of flavor in so many baked goods. Use pure vanilla extract for the best taste.
- 1 tablespoon orange zest – This is the secret weapon! The bright, citrusy oil from the zest cuts through the sweetness and makes the cranberry flavor pop. Use a microplane for the finest zest.
- 2 cups all-purpose flour – The foundation of our bars. For a slightly lighter texture, you can swap in 1 cup of all-purpose and 1 cup of cake flour.
- 1½ teaspoons ground cinnamon – This adds a wonderful, warm spice that screams “holidays.” Don’t be shy with it!
- ½ teaspoon baking powder – Our leavening agent, giving the bars a little lift so they’re not too dense.
- ½ teaspoon salt – Crucial for balancing all the sweet flavors. If you only have salted butter, reduce this to ¼ teaspoon.
- ¾ cup dried cranberries – Look for “fruit juice-sweetened” ones if you prefer a less sugary option. Their tartness is essential!
- ¾ cup white chocolate chips – I like using chips because they hold their shape a bit, but you can also chop up a high-quality white chocolate bar for even better flavor.
For the Frosting & Topping:
- 8 oz cream cheese, softened – Full-fat cream cheese will give you the creamiest, most stable frosting. Make sure it’s truly soft for a lump-free experience.
- 1 cup powdered sugar – Also called confectioner’s sugar. It dissolves easily into the cream cheese for a silky texture.
- ½ teaspoon vanilla extract – A little extra vanilla in the frosting ties everything together beautifully.
- Optional: 1–2 teaspoons orange juice or zest – For an extra citrus kick in the frosting! I highly recommend it.
- ½ cup dried cranberries, chopped – For a pretty garnish on top.
- ½ cup white chocolate chips, melted for drizzling – The finishing touch that makes these bars look professionally baked.
Let’s Bake! Step-by-Step Instructions
Okay, team! Now for the fun part. Follow these steps, and you’ll be a Cranberry Bliss Bar hero in no time. I’ve sprinkled in all my favorite chef hacks to ensure your success.
- Preheat and Prep. Preheat your oven to 350°F (175°C). Line a 9×13-inch baking pan with parchment paper, leaving a little overhang on two opposite sides. This is my #1 baking hack—it creates a “sling” that lets you lift the entire batch of bars out of the pan for super easy frosting and slicing! If you don’t have parchment, just lightly grease the pan.
- Cream the Butter and Sugar. In a large bowl, use an electric mixer (or a stand mixer with the paddle attachment) to cream together the softened butter and brown sugar. Beat it on medium-high speed for 2-3 minutes, until the mixture is light, pale, and fluffy. This step is not just mixing; it’s incorporating air into the batter, which is what gives the bars a tender texture. Don’t rush it!
- Add the Wet Ingredients. Scrape down the sides of the bowl with a spatula. Add the eggs, one at a time, beating well after each addition until fully incorporated. Then, beat in the vanilla extract and that glorious tablespoon of orange zest. Your kitchen should already be smelling amazing.
- Whisk the Dry Ingredients. In a separate, medium-sized bowl, whisk together the flour, cinnamon, baking powder, and salt. Whisking ensures the leavening and salt are evenly distributed throughout the flour, so you get a consistent bake.
- Combine Wet and Dry. With your mixer on low speed, gradually add the dry ingredients to the wet ingredients. Mix just until the flour streaks disappear. A little undermixing is better than overmixing here, which can lead to tough bars.
- Fold in the Goodies. Switch to a sturdy spatula. Gently fold in the ¾ cup of dried cranberries and ¾ cup of white chocolate chips. This ensures they’re evenly distributed without overworking the batter.
- Bake to Perfection. Spread the batter evenly into your prepared pan. I like to use an offset spatula for this to get a perfectly smooth, even layer. Pop it into the preheated oven and bake for 22-25 minutes. You’ll know it’s done when the edges are lightly golden brown and the center is just set. It might still look a tiny bit soft in the middle—that’s perfect! It will continue to set as it cools. Overbaking is the enemy of a chewy bar.
- Cool Completely. This is the hardest part: patience! Let the bars cool completely in the pan on a wire rack. I mean it—completely. If you spread warm frosting on a warm base, you’ll have a melty, delicious mess (which still tastes good, but isn’t as pretty).
- Make the Frosting. While the bars are cooling, make the frosting. In a clean bowl, beat the softened cream cheese until it’s smooth and creamy. Add the powdered sugar and vanilla (and optional orange juice/zest) and beat on low speed at first (to avoid a sugar cloud!), then medium-high until the frosting is silky and lump-free.
- Frost and Garnish. Once the bars are 100% cool, spread the cream cheese frosting evenly over the top. Sprinkle with the chopped dried cranberries. Then, melt the remaining ½ cup of white chocolate chips (I do this in 20-second bursts in the microwave, stirring between each) and drizzle it over everything. You can use a fork or a small piping bag for this.
- Chill and Slice. For the cleanest slices, pop the pan into the refrigerator for at least an hour to let the frosting set. Then, use the parchment paper sling to lift the whole slab onto a cutting board. Use a sharp knife to slice into triangles (the classic shape!) or squares. Wipe the knife clean between cuts for gorgeous, professional-looking edges.
How to Serve These Beautiful Bars
Presentation is part of the fun! These bars are a showstopper all on their own. For a casual gathering, I love arranging them on a simple wooden cutting board or a festive platter. If you’re gifting them, stack them in a clear cellophane bag tied with a pretty ribbon, or place them in a holiday-themed tin box. They’re the perfect treat to bring to a potluck, serve with coffee at a brunch, or package up as edible gifts for neighbors, teachers, and friends. Honestly, they rarely last long enough to worry about storage, but they do keep beautifully in the fridge for up to a week!
Get Creative! Recipe Variations
Feel like mixing it up? This recipe is wonderfully adaptable. Here are a few of my favorite twists:
- Lemon Bliss Bars: Swap the orange zest for lemon zest and add a teaspoon of lemon juice to the frosting. It’s a brighter, tangier variation that’s fantastic year-round.
- Gingerbread Bliss: Add ½ teaspoon of ground ginger and ¼ teaspoon of ground nutmeg to the dry ingredients. Fold in some chopped crystallized ginger along with the cranberries for a spicy kick.
- Nutty Delight: Add ½ cup of chopped pecans or walnuts to the batter for a delightful crunch.
- Dark Chocolate Twist: Not a white chocolate fan? Use dark chocolate chips instead for a richer, deeper flavor contrast with the cranberries.
- Gluten-Free Option: Substitute the all-purpose flour with a 1:1 gluten-free baking blend. I’ve had great success with this swap!
Chef’s Notes: From My Kitchen to Yours
This recipe has seen many iterations in my kitchen over the years. The first time I made it, I was so impatient that I frosted the bars while they were still warm. Let’s just say I ended up with “Cranberry Swirl Bars” instead of bliss bars! It was delicious, but not exactly the elegant treat I was going for. Lesson learned: patience is a virtue in baking.
I’ve also learned that the quality of your white chocolate makes a huge difference in the drizzle. A good quality baking bar will melt more smoothly and taste less sweet than standard chips. And don’t be afraid to really lean into the orange zest—it’s that subtle background note that makes people say, “Wow, what is that flavor?!” It’s the secret handshake of this recipe. Most of all, have fun with it! Baking is about love and creativity, so make these bars your own.
FAQs & Troubleshooting
Q: My bars came out really cakey and puffy, not dense and chewy. What happened?
A: This usually means you over-mixed the batter after adding the flour, or you measured the flour by scooping directly from the bag with the measuring cup. This packs in too much flour. The best way to measure flour is to spoon it into your measuring cup and level it off with a knife. Also, remember to mix just until the flour is incorporated!
Q: Can I freeze Cranberry Bliss Bars?
A> Absolutely! They freeze beautifully. I recommend freezing them without the frosting for the best texture. Wrap the cooled, unfrosted bar slab tightly in plastic wrap and then aluminum foil. Freeze for up to 3 months. Thaw overnight in the fridge, then frost and decorate as directed. You can also freeze individual frosted bars; just know the frosting might be a little softer upon thawing.
Q: My frosting is too runny. How can I fix it?
A> This can happen if the cream cheese was too warm or if you added too much liquid (like orange juice). The easiest fix is to chill the frosting in the refrigerator for 20-30 minutes to firm up before spreading. You can also add a little more powdered sugar, a tablespoon at a time, until it reaches a spreadable consistency.
Q: Why did my white chocolate drizzle seize up and get clumpy?
A> White chocolate is very sensitive to heat and moisture. If even a drop of water gets into it while melting, it can “seize” and become grainy. Always make sure your bowl and utensils are completely dry. Melt it gently in short bursts in the microwave, stirring frequently, or use a double boiler. If it does seize, you can sometimes save it by stirring in a teaspoon of vegetable oil or shortening until it smooths out again.

Cranberry Bliss Bars
Description
Soft, chewy, blondie-like bars packed with tart cranberries and creamy white chocolate, topped with tangy cream cheese frosting, more cranberries, and a white chocolate drizzle. The ultimate holiday treat—easy to make, impossible to resist.
Ingredients
For the Bars:
-
1 cup (2 sticks) unsalted butter, softened
-
1½ cups brown sugar, packed
-
2 large eggs, room temperature
-
1 tsp vanilla extract
-
1 tbsp orange zest
-
2 cups all-purpose flour (or 1 cup all-purpose + 1 cup cake flour)
-
1½ tsp ground cinnamon
-
½ tsp baking powder
-
½ tsp salt
-
¾ cup dried cranberries
-
¾ cup white chocolate chips or chopped white chocolate
For the Frosting & Topping:
-
8 oz cream cheese, softened
-
1 cup powdered sugar
-
½ tsp vanilla extract
-
Optional: 1–2 tsp orange juice or zest
-
½ cup dried cranberries, chopped (for garnish)
-
½ cup white chocolate chips, melted (for drizzle)
Instructions
-
Preheat & Prep: Preheat oven to 350°F (175°C). Line a 9×13-inch pan with parchment paper, leaving overhang for easy removal.
-
Cream Butter & Sugar: Beat butter and brown sugar on medium-high for 2–3 minutes until pale and fluffy.
-
Add Eggs & Flavorings: Beat in eggs one at a time, then vanilla and orange zest.
-
Mix Dry Ingredients: Whisk together flour, cinnamon, baking powder, and salt in a separate bowl.
-
Combine Wet & Dry: Gradually add dry ingredients to wet, mixing until just combined. Avoid overmixing.
-
Fold in Add-ins: Gently fold in dried cranberries and white chocolate.
-
Bake: Spread batter evenly in prepared pan. Bake 22–25 minutes, edges lightly golden and center set. Let cool completely.
-
Prepare Frosting: Beat cream cheese until smooth. Add powdered sugar, vanilla, and optional orange. Beat until creamy and lump-free.
-
Frost & Garnish: Spread frosting over cooled bars. Sprinkle with chopped cranberries and drizzle melted white chocolate.
-
Chill & Slice: Chill at least 1 hour for clean slicing. Cut into squares or triangles using a sharp knife.
Notes
-
Chewy Texture: Avoid overmixing after adding flour.
-
Crisp Drizzle: Ensure bowls and utensils are completely dry when melting white chocolate.
-
Storage: Refrigerate up to 1 week. Freeze unfrosted bars up to 3 months; frost after thawing for best results.
Nutrition
- Calories: 280 cal Per bar
- Sugar: 26 g
- Fat: 14 g
- Carbohydrates: 36 g
- Protein: 3g
Nutritional Information*
*This is an approximate calculation and may vary based on specific ingredients used.
Prep Time: 20 minutes | Bake Time: 25 minutes | Total Time: 45 minutes + cooling | Servings: 20 bars
Approximate Nutrition per Bar: Calories: ~280, Fat: 14g, Carbohydrates: 36g, Sugar: 26g, Protein: 3g
Final Thoughts: A Recipe for Connection
And there you have it—the secret to bringing a little coffee shop magic right into your own kitchen. But these bars are so much more than a copycat recipe; they’re an invitation to create your own moments of joy. Whether you’re baking them for a festive party, wrapping them as a gift from the heart, or simply treating yourself with a hot cup of tea on a quiet afternoon, they carry the true spirit of the season: warmth, generosity, and pure bliss. We can’t wait to see your creations! Share your photos and stories with us. Happy baking, and may your holidays be sweet!
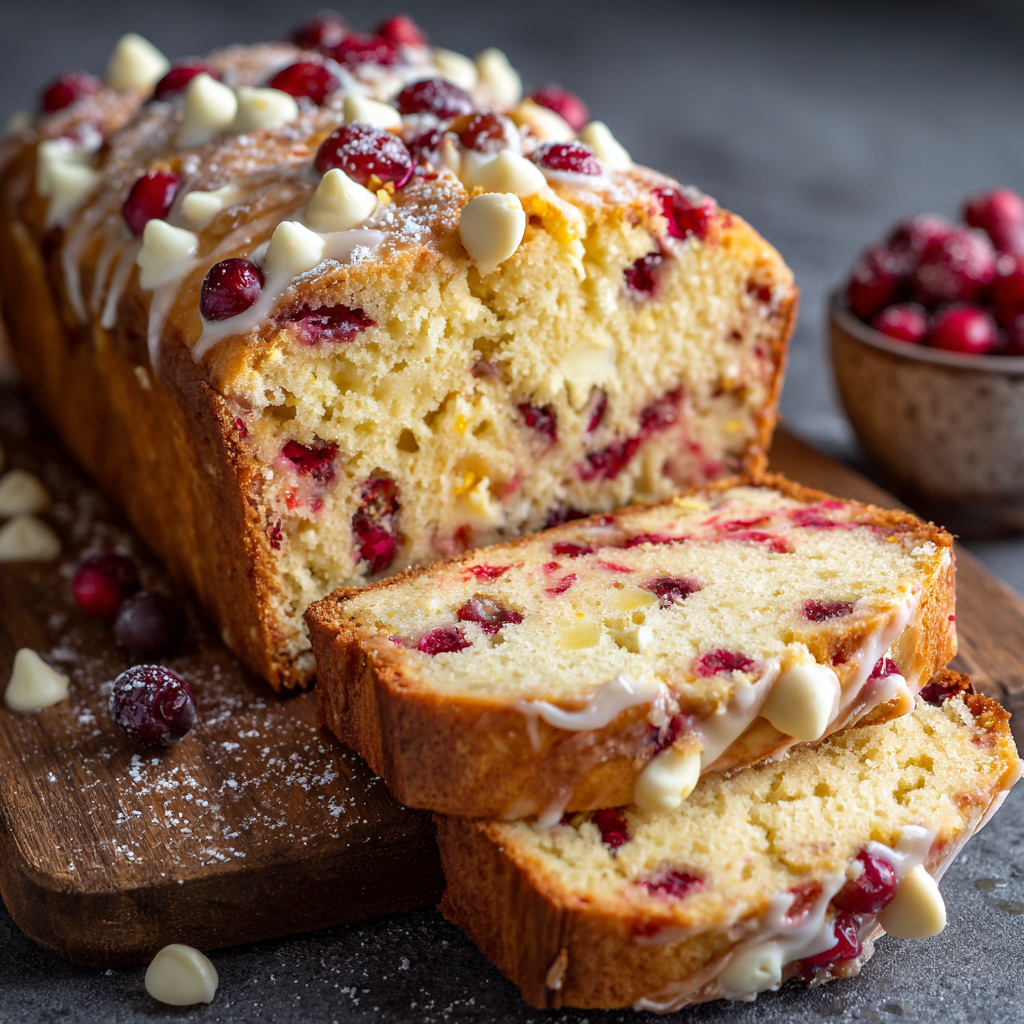
Cranberry Orange White Chocolate Chip Bread
The Ultimate Holiday Slice: Cranberry Orange White Chocolate Chip Bread
Hello, my friend! Come on in, the oven’s just about preheated, and the scent of zesty orange is already starting to fill the kitchen. Is there anything better than the promise of a warm, homemade loaf of bread cooling on the counter? Especially one that tastes like a holiday party in every single slice.
Today, we’re making my Cranberry Orange White Chocolate Chip Bread. This isn’t just any quick bread; this is the one recipe that my friends and family start requesting the moment the air gets a little crisp. It’s the perfect balance of sweet, tart, and cozy. The bright, cheerful pop of cranberry cuts through the rich, creamy pockets of melted white chocolate, while the fresh orange zest weaves it all together with a sunshiney glow. It’s a quick bread, which means no yeast, no waiting for dough to rise—just straightforward, joyful baking that delivers something truly spectacular.
Whether you’re looking for the star of your holiday brunch table, a heartfelt homemade gift for a neighbor, or just a little moment of sweetness with your afternoon coffee, this loaf is your answer. So, tie on your favorite apron (the one that’s probably seen a few baking adventures), and let’s create something unforgettable together. I promise, this recipe is as fun and easy to make as it is delicious to eat.
A Loaf Full of Memories
This recipe always takes me right back to my first apartment after college. I was broke, but desperately wanted to contribute something impressive to my friendgroup’s “Friendsgiving.” The grocery budget was tight, but I had a bag of fresh cranberries, a lone orange, and some white chocolate chips leftover from a previous baking experiment. Throwing caution to the wind, I decided to invent a bread.
I remember my tiny kitchen, barely big enough for two people to stand in, flour absolutely everywhere. I was so nervous, convinced I was going to present my friends with a brick. But when I pulled that golden, crackly-topped loaf out of the oven, the whole apartment smelled like a dream. The moment we sliced into it and saw the vibrant red cranberries and melted chocolate, I knew it was a hit. That loaf was gone in minutes, and it’s been a staple in my life ever since. It’s a reminder that the best creations often come from a place of love (and a well-stocked pantry) rather than a fancy budget.
Gathering Your Ingredients
Here’s everything you’ll need to create this magic. The beauty of this recipe is in its simplicity, and I’ve included some of my favorite chef insights and swaps to make it your own.
- 2 cups all-purpose flour: This is the trusty foundation of our loaf. For a slightly denser, nuttier flavor, you can swap in 1 cup of whole wheat flour, but I love the soft, tender crumb that all-purpose gives us.
- ¾ cup granulated sugar: This is the perfect amount of sweetness to balance the tart cranberries. If you prefer a deeper, more caramel-like flavor, light brown sugar works beautifully here.
- 1½ teaspoons baking powder & ½ teaspoon baking soda: Our dynamic leavening duo! The baking powder gives the initial lift, and the baking soda reacts with the acidic orange juice to ensure our bread rises up light and fluffy. Make sure they’re fresh for the best rise.
- ½ teaspoon salt: Never, ever skip the salt! It’s the secret weapon that makes all the other flavors pop and balances the sweetness.
- 1 tablespoon orange zest: This is where the real magic lives! The zest is packed with fragrant orange oils that give an incredible burst of flavor. Use a microplane if you have one—it’s a game-changer.
- ¾ cup fresh orange juice: Freshly squeezed is fantastic for the brightest flavor, but store-bought 100% orange juice works in a pinch. The acid also helps tenderize the gluten in the flour.
- 1⁄3 cup neutral oil (canola or vegetable): Oil keeps this bread incredibly moist for days, much more so than butter. Melted and cooled coconut oil is a delicious substitution if you want a subtle tropical hint.
- 1 large egg: Our binding agent, bringing everything together and adding richness. For a vegan version, a flax egg (1 tbsp ground flax + 3 tbsp water, let sit 5 mins) works wonderfully.
- 1 cup fresh or frozen cranberries, halved: I highly recommend taking the 2 minutes to halve them! It prevents them from sinking and distributes their tart juice more evenly. Frozen cranberries work perfectly—no need to thaw.
- ¾ cup white chocolate chips or chunks: I’m a fan of using chopped white chocolate bars for bigger, meltier pockets, but chips are convenient and great. High-quality chocolate makes a difference!
- Optional: ½ teaspoon vanilla or almond extract: A little splash of vanilla is my go-to for warmth, but almond extract paired with orange is a heavenly, nostalgic combination. Your choice!
Let’s Get Baking: Step-by-Step Instructions
Ready? Let’s turn these simple ingredients into something spectacular. Follow these steps, and you’ll be a quick bread pro in no time.
- Preheat and Prep: First things first, preheat your oven to 350°F (175°C). This is non-negotiable for even baking! While it heats up, grease your 9×5-inch loaf pan thoroughly with butter or non-stick spray. For ultimate easy removal, I like to line it with a parchment paper sling, leaving some overhang on the two long sides. Chef’s Hack: A light dusting of flour over the greased pan (after the butter) will ensure your bread never, ever sticks.
- The Dry Team: In a large bowl, whisk together your flour, sugar, baking powder, baking soda, and salt. Now, here’s a pro tip: add the orange zest to the dry ingredients. Rubbing the zest into the sugar with your fingertips for a moment will release even more of those incredible citrus oils, perfuming the entire flour mixture. It smells like sunshine!
- The Wet Team: In a separate medium bowl, whisk together the orange juice, neutral oil, egg, and your extract of choice (if using). Whisk it until it’s completely smooth and emulsified. Chef’s Insight: Having your wet ingredients at room temperature helps them incorporate more smoothly into the dry ingredients, leading to a more uniform crumb.
- The Grand Union: Pour the wet ingredients into the dry ingredients. Now, this is the most crucial step for a tender loaf: DO NOT OVERMIX! Use a spatula and gently fold the batter together. It’s okay if there are a few streaks of flour remaining. Overmixing develops gluten and leads to a tough, dense bread. We want light and tender!
- The Fun Part – Folding: Once the batter is *almost* combined, scatter your halved cranberries and white chocolate chips over the top. Gently fold them in until they’re just distributed and no dry flour remains. Chef’s Hack: Tossing your berries and chips in a tablespoon of the measured flour before folding them in helps prevent them from sinking to the bottom of the loaf during baking.
- Into the Pan: Scrape the beautiful, speckled batter into your prepared loaf pan. Use your spatula to smooth the top into an even layer. For a professional touch, you can sprinkle a few extra cranberries and chocolate chips on top before baking.
- Bake to Golden Perfection: Place the pan in the center of your preheated oven and bake for 50-60 minutes. Ovens vary, so start checking at the 50-minute mark. The bread is done when the top is a beautiful golden brown, the edges are pulling away from the pan slightly, and a toothpick or cake tester inserted into the center comes out clean or with a few moist crumbs (but no wet batter). Chef’s Note: If the top is browning too quickly, tent it loosely with a piece of aluminum foil for the last 10-15 minutes of baking.
- The Patience Test: This is the hardest part! Let the loaf cool in the pan on a wire rack for at least 10-15 minutes. This allows it to set up. Then, using the parchment paper sling or a knife around the edges, carefully lift it out of the pan and let it cool completely on the wire rack. I know it’s tempting, but slicing into a warm loaf can make it gummy. Trust me, it’s worth the wait!
How to Serve This Beautiful Loaf
Once your bread is completely cool (or mostly cool, I won’t tell!), it’s time for the grand finale. For a simple, everyday treat, a thick slice alongside a hot cup of coffee or tea is pure bliss. If you’re feeling fancy, toast a slice lightly and spread it with a little salted butter or cream cheese—the way the butter melts into the warm pockets of chocolate is a religious experience. For a holiday brunch, slice it a bit thinner and arrange it on a beautiful wooden board with other breakfast pastries. It’s a showstopper no matter how you serve it!
Get Creative: Recipe Variations
This recipe is a fantastic canvas for your creativity! Here are a few of my favorite twists:
- Nutty Crunch: Fold in ½ cup of chopped pecans or walnuts for a wonderful textural contrast.
- Orange Glaze Drizzle: Whisk together 1 cup of powdered sugar with 2-3 tablespoons of fresh orange juice and a teaspoon of zest. Drizzle over the completely cooled loaf for an extra burst of sweetness.
- Ginger Spice: Add 1 teaspoon of ground ginger or 2 tablespoons of finely chopped crystallized ginger to the dry ingredients for a warm, spicy kick.
- Dark Chocolate Swap: Not a white chocolate fan? Use dark or semi-sweet chocolate chips for a deeper, richer flavor profile.
- Muffin Method: Turn these into easy-to-share muffins! Divide the batter into a lined muffin tin and bake for 18-22 minutes. Perfect for on-the-go breakfasts.
Chef’s Notes: From My Kitchen to Yours
This recipe has been my faithful companion for years, and it’s evolved in little ways. I used to use dried cranberries, but switching to fresh (or frozen) was a total game-changer for that bright, tart burst. I also learned the hard way about overmixing—my first few loaves were decidedly… sturdy. Live and learn!
One of my favorite kitchen stories involves this bread and my then-boyfriend (now husband). I made a loaf for a picnic, and we were so eager to eat it that we tried to slice it while it was still piping hot. It basically fell apart into a delicious, crumbly mess. We ended up eating it with our hands, laughing, and declaring it “deconstructed cranberry orange bread.” Sometimes the imperfect moments are the sweetest. Don’t be afraid to have fun and make a little mess. That’s where the memories are made.
Your Questions, Answered: FAQs & Troubleshooting
Q: My bread is browning on top but still raw in the middle. What happened?
A: This usually means your oven is running too hot! Oven temperatures can be notoriously inaccurate. I highly recommend using an oven thermometer. If the top is getting too dark, tent it with foil as mentioned. Also, ensure your rack is in the center of the oven for even heat distribution.
Q: Can I use dried cranberries instead of fresh?
A: You can, but the result will be different. Soak the dried cranberries in hot orange juice for 10-15 minutes first to plump them up. The flavor will be sweeter and less tart, and the texture will be chewier. I prefer the pop of fresh, but it’s still delicious!
Q: Why did my chocolate chips all sink to the bottom?
A: This is a common issue! The best prevention is to toss your chips (and cranberries) in that tablespoon of flour before folding them in. This light coating helps them “float” in the batter. Also, make sure your batter isn’t too thin; if it is, the heavier add-ins will sink.
Q: How should I store this bread, and can I freeze it?
A> This bread stays wonderfully moist! Once completely cool, store it in an airtight container or wrapped tightly in plastic wrap at room temperature for up to 3 days. For longer storage, it freezes perfectly. Wrap the whole loaf or individual slices tightly in plastic wrap and then in foil. Freeze for up to 3 months. Thaw at room temperature.

Cranberry Orange White Chocolate Chip Bread
Description
Bright, tart cranberries, creamy pockets of white chocolate, and fragrant orange zest make this quick bread a festive favorite. No yeast, no waiting—just straightforward, joyful baking that delivers a tender, golden loaf perfect for brunch, gifting, or a sweet afternoon treat.
Ingredients
Dry Ingredients
-
2 cups all-purpose flour (or swap 1 cup for whole wheat)
-
¾ cup granulated sugar (or light brown sugar)
-
1½ tsp baking powder
-
½ tsp baking soda
-
½ tsp salt
-
1 tbsp orange zest
-
Optional: 1 tsp vanilla or almond extract
Wet Ingredients
-
¾ cup fresh orange juice
-
⅓ cup neutral oil (canola, vegetable, or melted coconut oil)
-
1 large egg (or 1 flax egg for vegan version)
Add-ins
-
1 cup fresh or frozen cranberries, halved
-
¾ cup white chocolate chips or chopped chunks
Instructions
-
Preheat & Prep: Preheat oven to 350°F (175°C). Grease a 9×5-inch loaf pan and optionally line with parchment paper overhang for easy removal.
-
Mix Dry Ingredients: In a large bowl, whisk together flour, sugar, baking powder, baking soda, salt, and orange zest. Optional: add vanilla or almond extract.
-
Combine Wet Ingredients: In a medium bowl, whisk orange juice, oil, and egg until smooth.
-
Fold Wet into Dry: Gently fold wet ingredients into dry using a spatula. Stop as soon as flour is incorporated—some lumps are fine.
-
Add Cranberries & Chocolate: Toss cranberries and white chocolate in 1 tbsp flour, then fold into batter to prevent sinking.
-
Transfer to Pan: Pour batter into prepared pan, smooth the top, and optionally sprinkle extra cranberries and chocolate on top.
-
Bake: Bake 50–60 minutes, until golden brown and a toothpick comes out clean or with a few moist crumbs. Tent with foil if top browns too quickly.
-
Cool: Let cool in pan 10–15 minutes, then remove to wire rack to cool completely.
Notes
-
Prevent Sinking: Toss add-ins in flour before folding.
-
Check Doneness: Toothpick should come out mostly clean; slight crumbs are fine.
-
Storage: Store wrapped at room temp up to 3 days or freeze up to 3 months.
-
Serving Suggestion: Warm slices, with butter or cream cheese, or a drizzle of orange glaze.
Nutritional Information*
*This is an approximate estimate calculated using an online tool and will vary based on specific ingredients used.
Per Slice (based on 12 slices): Calories: ~260, Fat: 11g, Carbohydrates: 36g, Sugar: 19g, Protein: 3g
Final Thoughts: A Loaf That Warms the Heart
And there you have it—a loaf that’s so much more than the sum of its parts. It’s the perfect blend of festive and cozy, impressive and incredibly simple. This Cranberry Orange White Chocolate Chip Bread is more than just a recipe; it’s a little edible hug, a tangible piece of holiday warmth you can share with everyone you love.
I hope this bread becomes a staple in your kitchen, just as it has in mine. I hope it fills your home with the most incredible aroma and gives you that proud, happy feeling of pulling something beautiful from the oven. Most of all, I hope it creates its own wonderful memories for you and your loved ones, whether it’s shared over a leisurely brunch, packaged as a heartfelt gift, or simply enjoyed in a quiet moment with a good book and a hot drink.
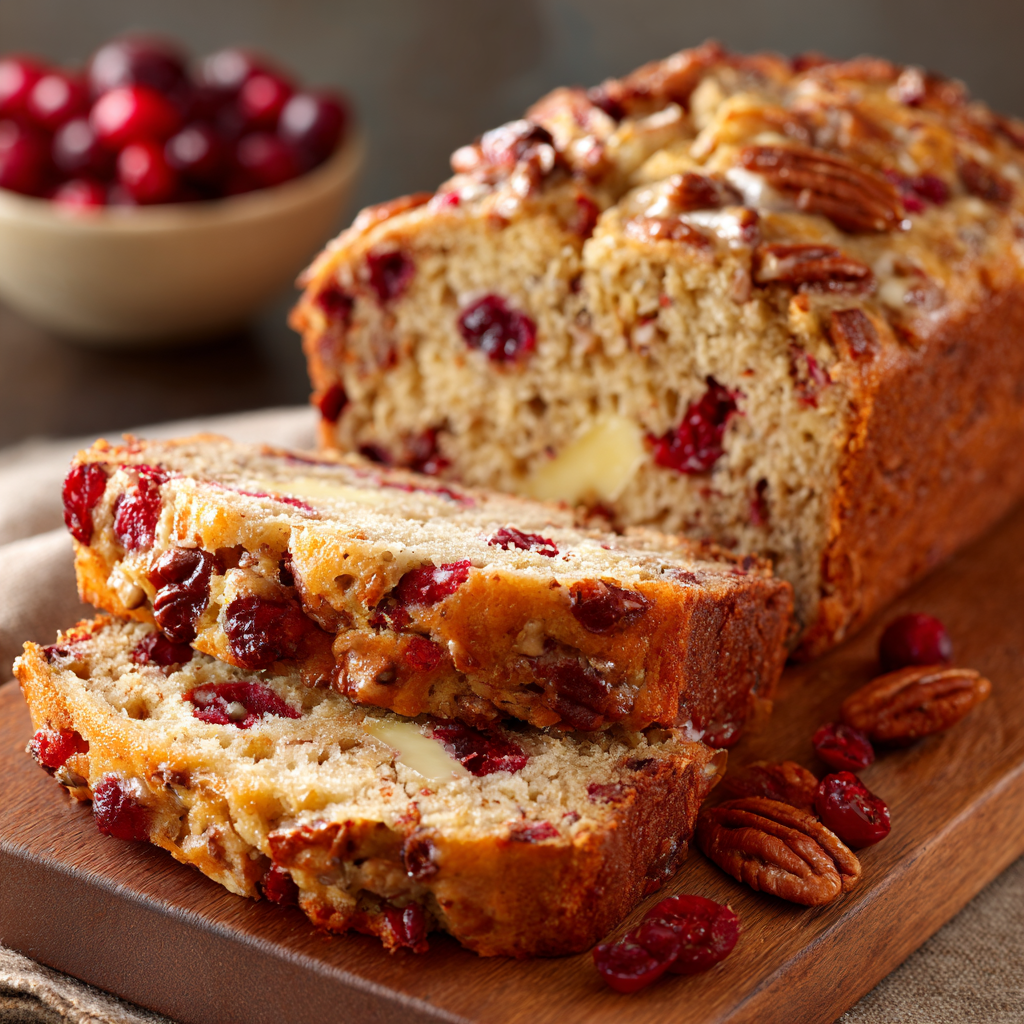
Cranberry Orange Pecan Bread
A Slice of Sunshine: My Cozy Cranberry Orange Pecan Bread
Hey there, friend! Come on in, the kettle’s just about to whistle. Can you smell that? It’s the scent of cozy afternoons and happy kitchens: warm cinnamon, sweet citrus, and the gentle hum of the oven working its magic. If you’re looking for a recipe that feels like a hug in loaf form, you’ve absolutely found it. This Cranberry Orange Pecan Bread is my go-to for turning a regular day into something a little more special.
I’m a firm believer that the best recipes aren’t just about taste—they’re about feeling. This bread is pure joy. The vibrant, tart pop of cranberries plays perfectly against the sunny sweetness of orange, while toasted pecans add a buttery crunch that just feels… right. It’s tender, warmly spiced, and just sweet enough to feel like a treat without being overwhelming. Whether you’re slicing a thick piece for a slow Saturday breakfast, wrapping a loaf for a neighbor who needs cheering up, or enjoying a sliver with your afternoon tea, this bread has a way of making moments feel intentional and warm.
And the best part? This is a quick bread, which means no yeast, no kneading, and no waiting around for hours. It’s all about simple ingredients coming together in one bowl (well, almost one bowl!) to create something truly unforgettable. So, tie on your favorite apron—the one that’s seen a few flour fights—and let’s bake up some happiness together.
The Holiday Heist & The Birth of a Tradition
This recipe always takes me right back to my grandma’s kitchen, specifically to a chilly December morning when I was about ten. My grandma was the queen of holiday baking, and her countertops would be covered in tins of cookies, frosted cakes, and always, always, a few loaves of her famous cranberry bread. One particular year, she had just pulled a gorgeous, crackly-topped loaf from the oven and set it on the wire rack to cool. The aroma was intoxicating—a cloud of orange and spice that filled the entire house.
She warned me, “Olivia, don’t you touch that bread! It needs to cool completely before we slice it.” But the temptation was too great. I devised a plan: I’d wait until she was on the phone with my aunt, and I’d sneak into the kitchen and just… break off a tiny corner. Just a taste. Well, my “tiny corner” turned into a rather significant chunk, and I tried to hide the evidence by carefully rotating the loaf. Of course, Grandma noticed immediately. Instead of being mad, she just laughed, shook her head, and said, “A bread that good is worth getting caught for.” She then sliced us both a warm piece, slathered it with butter, and we enjoyed our stolen treat together. From that day on, we always “accidentally” damaged the first loaf just enough to justify eating it warm. It became our silly, secret tradition.
Gathering Your Ingredients: A Little Chef’s Insight
Great baking starts with great ingredients. Here’s everything you’ll need. I’ve included some of my favorite tips and substitutions to make this recipe your own!
- 2 cups all-purpose flour: The sturdy backbone of our bread. For a slightly denser, nuttier flavor, you can swap in 1 cup of whole wheat flour for one of the all-purpose cups.
- ¾ cup granulated sugar: This gives us the perfect level of sweetness. If you prefer a deeper, more caramel-like flavor, light brown sugar works beautifully here.
- 1½ teaspoons baking powder & ½ teaspoon baking soda: Our dynamic leavening duo! The baking powder provides the main lift, while the baking soda reacts with the acidic orange juice to create a tender crumb.
- ½ teaspoon salt: Crucial for balancing the sweetness and making all the other flavors pop. Don’t skip it!
- 1 teaspoon ground cinnamon & ¼ teaspoon ground nutmeg (optional): This is the “cozy” in our cozy bread. The nutmeg is optional, but it adds a wonderful, warm depth. A pinch of cardamom is also a lovely addition.
- 1 tablespoon orange zest: This is where the magic lives! The zest is packed with fragrant oils that give an incredible burst of citrus flavor. Use a microplane to get the zest without the bitter white pith.
- ¾ cup orange juice: Freshly squeezed is fantastic, but from a carton works just fine in a pinch. It provides moisture and a tangy sweetness.
- 1⁄3 cup neutral oil (like canola or vegetable): Oil keeps this bread incredibly moist for days. Melted and cooled butter can be used for a richer flavor, but I love the reliable tenderness oil provides.
- 1 large egg: Binds everything together and adds structure. For a vegan version, a flax egg (1 tbsp ground flax + 3 tbsp water, let sit 5 mins) works well.
- 1 cup fresh or frozen cranberries (halved if large): The star of the show! I love using fresh cranberries in the fall and winter, but frozen work perfectly—no need to thaw. Halving larger berries prevents them from sinking and ensures a bit of tartness in every bite.
- ¾ cup toasted pecans, chopped: Toasting the pecans is a non-negotiable step for me. It unlocks their rich, buttery flavor and adds an incredible crunch. If you’re not a pecan person, walnuts are a fantastic substitute.
Let’s Get Baking: Your Step-by-Step Guide
Ready? Let’s turn these beautiful ingredients into something spectacular. Follow these steps, and you’ll have a perfect loaf every single time.
- Preheat and Prepare. First things first, preheat your oven to 350°F (175°C). This is so important for even baking! While it’s heating up, grease a 9×5-inch loaf pan well with butter or non-stick spray. For ultimate ease, I love lining the pan with a sheet of parchment paper that overhangs on the two long sides—it creates a sling that makes removing the baked bread an absolute breeze.
- Combine the Dry Ingredients. In a large mixing bowl, whisk together the 2 cups of flour, ¾ cup sugar, baking powder, baking soda, salt, cinnamon, and nutmeg. Now, here’s a little chef’s hack: add the orange zest to the dry ingredients. Rubbing the zest into the sugar and flour with your fingertips helps to release even more of those incredible citrus oils, perfuming the entire mixture. Your kitchen will already start to smell amazing.
- Whisk the Wet Ingredients. In a separate medium bowl, whisk together the ¾ cup orange juice, 1/3 cup oil, and the egg until they are completely smooth and emulsified. This ensures the moisture is evenly distributed throughout the batter.
- The Big Merge (Don’t Overmix!). Pour the wet ingredients into the dry ingredients. Now, this is the most critical step: use a spatula to gently fold the two together. Stir just until the last streaks of flour disappear. A few lumps are totally fine! Overmixing is the enemy of a tender quick bread, as it develops the gluten in the flour and can lead to a tough, dense loaf. Remember, we’re folding, not beating.
- Fold in the Goodies. Once the batter is just combined, gently fold in the cranberries and toasted pecans. I like to toss my berries in a tablespoon of flour first—this little trick helps prevent them from sinking to the bottom of the loaf during baking.
- Into the Pan and Smooth the Top. Scrape the batter into your prepared loaf pan and use the spatula to smooth the top into an even layer. For a pretty, professional touch, I like to press a few extra cranberry halves and pecan pieces onto the top of the batter before baking.
- Bake to Golden Perfection. Place the pan in the center of your preheated oven and bake for 50-60 minutes. Ovens can vary, so start checking at the 50-minute mark. The bread is done when it’s golden brown on top and a toothpick or cake tester inserted into the center comes out clean, maybe with a few moist crumbs attached, but no wet batter.
- The Patience Test (The Hardest Part!). Once it’s out of the oven, let the bread cool in the pan on a wire rack for exactly 10 minutes. This allows the structure to set. Then, run a knife around the edges and carefully lift it out (using your parchment sling if you made one) to cool completely on the wire rack. I know, I know… waiting is torture. But slicing into a warm loaf can make it gummy. However, if you simply can’t wait (and I often can’t), just know that a slightly crumbly, warm slice with melting butter is a divine experience Grandma would fully endorse.
How to Serve This Beautiful Loaf
This bread is wonderfully versatile. For a simple, everyday treat, a slice all on its own is perfect. But to really elevate it, serve it slightly warmed. A quick 15-second zap in the microwave or a minute in the toaster oven brings all the flavors back to life. Slather it with a generous pat of good salted butter—watching it melt into the nooks and crannies is part of the joy. For a special brunch, a dollop of Greek yogurt or a drizzle of honey alongside a cup of strong coffee is pure bliss. It also makes for a stunning dessert à la mode with a scoop of vanilla bean ice cream.
Make It Your Own: Delicious Recipe Variations
Feel like playing? Here are a few of my favorite twists on this classic:
- White Chocolate Bliss: Fold in ½ cup of white chocolate chips along with the cranberries. The sweetness of the chocolate is a dream paired with the tart cranberries.
- Lemon Blueberry Swap: Replace the orange zest and juice with lemon, and swap the cranberries for fresh or frozen blueberries. A lemon glaze drizzled on top is heavenly.
- Vegan & Dairy-Free: Use a flax egg and your favorite plant-based milk mixed with a tablespoon of vinegar instead of the orange juice (to maintain acidity for the baking soda).
- Ginger Spice: Add 2 tablespoons of finely chopped crystallized ginger for a warm, spicy kick that’s perfect for the holidays.
- Gluten-Free Version: Use a 1:1 gluten-free all-purpose flour blend with xanthan gum already included. The results are fantastic!
Chef’s Notes: From My Kitchen to Yours
This recipe has been a constant in my life for years, and it’s evolved in little ways. I used to be afraid of the tartness of cranberries, so I’d use a full cup of sugar. Over time, I’ve come to love that bright, puckery contrast, so I’ve dialed the sugar back. That’s the beauty of cooking—you make it suit your own palate. One of my favorite kitchen fails involved this bread: I once, in a pre-coffee haze, accidentally used chili powder instead of cinnamon. Let me tell you, that was a… surprising… bite! My husband, ever the trooper, said it had “potential,” but we both agreed it was best to stick to the classic spices. The loaf now lives on in infamy as my “Spicy Surprise” batch. The moral of the story? Always double-check your spice jars! But also, don’t be afraid of happy accidents in the kitchen. They make for the best stories.
Your Questions, Answered: FAQs & Troubleshooting
Q: My bread is browning too quickly on top, but the center isn’t done. What should I do?
A: This is a common oven quirk! Simply tent a loose piece of aluminum foil over the top of the loaf pan for the last 15-20 minutes of baking. This will shield the top from direct heat and allow the center to cook through without burning the crust.
Q: Can I use dried cranberries instead of fresh?
A: You can, but the result will be different. Dried cranberries (like Craisins) are much sweeter and chewier. If you use them, I recommend reducing the sugar in the recipe by 2 tablespoons and plumping the dried cranberries in hot orange juice for 10 minutes before adding them to the batter. This will prevent them from drying out the bread.
Q: Why is my bread dense and gummy in the middle?
A: The most likely culprit is overmixing the batter. Remember, mix just until combined! The second possibility is that the bread needed a few more minutes in the oven. Ovens can run cool, so trust the toothpick test more than the timer. A third reason could be slicing it while it’s still piping hot, which steam the interior.
Q: How should I store this bread, and can I freeze it?
A> Once completely cool, store the bread wrapped tightly in plastic wrap or in an airtight container at room temperature for up to 3 days. For longer storage, it freezes beautifully! Wrap the whole loaf or individual slices tightly in plastic wrap and then in foil. Freeze for up to 3 months. Thaw at room temperature.
Cranberry Orange Pecan Bread
Description
Cozy afternoons, warm kitchens, and the gentle hum of the oven—this Cranberry Orange Pecan Bread is like a hug in loaf form. Tart cranberries, bright orange, and toasted pecans come together in a tender, lightly spiced quick bread that’s perfect for breakfast, brunch, or an afternoon treat. No yeast, no kneading, just simple ingredients creating something magical.
Ingredients
Dry Ingredients
-
2 cups all-purpose flour (or swap 1 cup for whole wheat for nuttier flavor)
-
¾ cup granulated sugar (or light brown sugar)
-
1½ tsp baking powder
-
½ tsp baking soda
-
½ tsp salt
-
1 tsp ground cinnamon
-
¼ tsp ground nutmeg (optional)
-
1 tbsp orange zest
Wet Ingredients
-
¾ cup orange juice (fresh or store-bought)
-
⅓ cup neutral oil (canola, vegetable, or melted butter)
-
1 large egg (or 1 flax egg for vegan version)
Add-ins
-
1 cup fresh or frozen cranberries (halved if large)
-
¾ cup toasted pecans, chopped
Instructions
-
Preheat & Prep: Preheat oven to 350°F (175°C). Grease a 9×5-inch loaf pan or line with parchment paper overhang.
-
Mix Dry Ingredients: In a large bowl, whisk together flour, sugar, baking powder, baking soda, salt, cinnamon, nutmeg, and orange zest.
-
Combine Wet Ingredients: In a medium bowl, whisk orange juice, oil, and egg until smooth.
-
Fold Wet into Dry: Gently fold wet ingredients into dry with a spatula until just combined. A few lumps are fine—do not overmix.
-
Add Cranberries & Pecans: Toss cranberries in a tablespoon of flour, then fold in with toasted pecans.
-
Transfer to Pan: Pour batter into prepared loaf pan and smooth the top. Press a few cranberries and pecans on top for visual appeal.
-
Bake: Bake 50–60 minutes, until golden and a toothpick inserted comes out clean or with a few moist crumbs. Tent with foil if browning too fast.
-
Cool: Let bread cool in pan 10 minutes, then transfer to a wire rack to cool completely before slicing.
Notes
-
Prevent Sinking: Toss cranberries in a little flour before folding.
-
Check Doneness: Toothpick should come out mostly clean; slight crumbs are fine.
-
Storage: Wrap cooled bread tightly; keep at room temp 3 days or freeze up to 3 months.
-
Serving Suggestion: Warm slices, slathered with butter, honey, or a dollop of yogurt, are pure bliss.
Nutrition
- Calories: 240 cal Per Slice
- Sugar: 16 g
- Fat: 10 g
- Carbohydrates: 34 g
- Protein: 4 g
Nutritional Information*
*This is an approximate estimate calculated using an online tool and will vary based on specific ingredients used.
Per Slice (based on 12 slices): Calories: ~240 | Fat: 10g | Carbohydrates: 34g | Sugar: 16g | Protein: 4g | Fiber: 2g
Final Thoughts: A Loaf Full of Love
And there you have it—the recipe for my favorite slice of sunshine. This Cranberry Orange Pecan Bread is more than just a list of ingredients; it’s a story waiting to be continued in your kitchen. It’s the promise of a cozy morning, the joy of sharing, and the simple, profound comfort of a warm slice of something made by hand.
I hope this bread becomes a tradition for you, just like it is for me. May it be there for your quiet reflections, your joyful gatherings, and maybe even a little harmless “holiday heist” of your own. The best recipes are the ones that create memories, and I have a feeling this one is ready to make some beautiful ones with you.

Cranberry Orange Cream Cheese Swirl Bread
Your New Favorite Reason to Wake Up: Cranberry Orange Cream Cheese Swirl Bread
Is there anything better than the smell of something sweet and yeasty baking in the oven on a quiet morning? That warm, comforting aroma that fills the entire house, promising something truly special is just moments away from your plate. If you’re like me, that feeling is pure magic. It’s the reason I fell in love with baking in the first place. And today, my friend, we are creating a loaf of pure, unadulterated magic: my Cranberry Orange Cream Cheese Swirl Bread.
Imagine this: a soft, feather-light bread dough, gently sweetened and perfumed with sunny orange zest. It’s rolled up with a layer of lush, tangy sweet cream cheese and a vibrant, jewel-toned swirl of tart cranberries. When you slice into it, you reveal these stunning ribbons of red and white that look like they came straight from a professional bakery. But I promise you, they came straight from your kitchen! This bread is the superstar of holiday brunches, the perfect hostess gift, and the ultimate treat for a cozy weekend with a hot cup of coffee. It’s a beautiful balance of rich, bright, and sweet, and it’s about to become your new baking obsession. So, tie on your favorite apron—the messy one with all the character—and let’s bake something unforgettable together.
A Slice of Holiday Memory
This recipe always takes me right back to my grandmother’s kitchen during the holidays. Her house was the epicenter of our family gatherings, and the countertops were always covered in baking projects. One year, when I was about ten, I decided I was going to be her “official baking assistant.” My first major task? Zesting an orange for a cranberry relish. I was so determined to do a good job that I zed right past the zest and into the pith, getting a face full of bitter orange spray. Instead of being upset, my grandma just laughed, wiped my cheek with her flour-dusted apron, and said, “Well, now you smell like sunshine, Livvy! That’s a baker’s perfume.”
We ended up improvising, mixing the cranberries with a little of the messed-up orange and a heap of sugar, and it turned into this incredible, tangy compote. That messy, happy accident was the inspiration for the cranberry swirl in this bread. Every time I zest an orange for this recipe, I smile, remembering that it’s not about perfection—it’s about the joy you stir into the bowl. This bread captures that spirit: a little imperfect, bursting with flavor, and made with a whole lot of heart.
Gathering Your Ingredients
This recipe uses simple, straightforward ingredients, but each one plays a crucial role. Here’s your shopping list, complete with a few of my favorite chef insights and substitution tips to make this recipe your own.
For the Dough
- 3 cups all-purpose flour: The backbone of our bread. I like to fluff the flour in the bag before scooping and leveling it off with a knife for the most accurate measurement. For a slightly more tender crumb, you can swap one cup for bread flour.
- ¼ cup granulated sugar: Just the right amount to lightly sweeten the dough and give the yeast a little boost to do its thing.
- 2¼ tsp active dry yeast (1 packet): Our little miracle worker! Make sure your yeast is fresh. The warm milk should be between 105-115°F (40-46°C) – warm to the touch, not hot, or you’ll send the yeast to an early retirement.
- ½ tsp salt: Never forget the salt! It’s essential for balancing the flavor and strengthening the gluten structure.
- ¾ cup warm milk: Whole milk will give you the richest, softest texture, but 2% or even a plain, unsweetened non-dairy milk like almond or oat will work beautifully.
- ¼ cup unsalted butter, melted: For that irresistible tenderness and rich flavor. Using unsalted lets us control the salt level perfectly.
- 1 large egg: This adds richness, color, and helps bind everything together. Bring it to room temperature for a smoother dough.
- 1 tbsp orange zest: The secret weapon! This is where the bright, sunny orange flavor really shines. Use a microplane if you have one—it’s a game-changer for zesting.
For the Cream Cheese Filling
- 8 oz cream cheese, softened: Full-fat brick-style cream cheese is key here for a lush, non-runny filling. Let it sit on the counter for at least 30 minutes before you start. Low-fat versions can make the filling too watery.
- ¼ cup granulated sugar: Sweetens the cream cheese perfectly. You can also use confectioners’ sugar for an even smoother texture.
- 1 tsp vanilla extract: A classic flavor that complements the orange and cranberry beautifully. Try using the seeds from a vanilla bean for an extra special touch!
For the Cranberry Swirl
- 1½ cups fresh or frozen cranberries: No need to thaw if using frozen! I love the tart punch of fresh cranberries. In a pinch, you could use a high-quality, thick cranberry sauce, but homemade is so easy and flavorful.
- ¼ cup orange juice: Use the juice from the orange you zested! It deepens the citrus flavor and helps the cranberries break down into a saucy consistency.
- ⅓ cup sugar: Adjust this to your taste. If you love a tangier swirl, use a little less. If you have a serious sweet tooth, add a tablespoon more.
- Optional: pinch of cinnamon: Just a tiny hint adds a warm, cozy depth that’s especially wonderful during the holidays.
Let’s Get Baking: The Step-by-Step Guide
Don’t let the swirling intimidate you! I’ll walk you through every step. Read through the instructions once before you begin—it’s my best tip for a smooth, stress-free baking experience.
Step 1: Wake Up the Yeast & Make the Dough
In the bowl of a stand mixer fitted with a dough hook (or a large mixing bowl if you’re kneading by hand), whisk together the flour, sugar, yeast, and salt. In a separate jug or bowl, combine the warm milk, melted butter, egg, and orange zest. Give it a quick whisk. Now, with the mixer on low speed, slowly pour the wet ingredients into the dry. Chef’s Hack: I like to leave the mixer running for a minute to let the flour hydrate before increasing the speed. Once a shaggy dough forms, increase the speed to medium and knead for 5-7 minutes, until the dough is smooth, elastic, and slightly tacky but not sticky. If it’s sticking to the sides of the bowl, add a tablespoon of flour at a time until it pulls away cleanly.
Step 2: The First Rise (Let it Rest!)
Shape the dough into a smooth ball. Lightly grease the mixing bowl (no need to wash it!) with a little butter or oil, place the dough ball back in, and turn it over to coat. Cover the bowl tightly with plastic wrap or a damp kitchen towel. Find a warm, draft-free spot for it to rise. My favorite trick? Turn your oven on to the lowest setting for one minute, then turn it OFF. Place the covered bowl in the warm (not hot!) oven. Let it rise for about 1 hour, or until doubled in size. Don’t rush this—patience makes for a light and airy bread!
Step 3: Create the Cranberry Magic
While the dough is rising, make your cranberry filling. In a small saucepan, combine the cranberries, orange juice, sugar, and that optional pinch of cinnamon. Bring it to a simmer over medium heat, then reduce the heat to medium-low. Cook for 10-15 minutes, stirring occasionally, until the cranberries have burst and the mixture has thickened to a jam-like consistency. It will thicken more as it cools, so don’t worry if it seems a bit loose. Spread it out on a plate or shallow bowl to cool completely. This is crucial! A hot filling will melt the cream cheese and make a mess.
Step 4: Whip Up the Cream Cheese Filling
In a medium bowl, beat the softened cream cheese, sugar, and vanilla extract with a hand mixer (or a vigorous whisk) until it’s completely smooth and lump-free. Set this aside at room temperature.
Step 5: The Fun Part – Assembly!
Punch down the risen dough to release the air. Turn it out onto a lightly floured surface. Using a rolling pin, roll the dough into a rectangle about 12×16 inches. Chef’s Tip: Try to keep the thickness as even as possible for a uniform swirl. Now, spread the cream cheese mixture evenly over the entire surface, leaving a ½-inch border around the edges. Next, carefully dollop and spread the cooled cranberry sauce over the cream cheese layer.
Step 6: Roll it Tight
Starting from one of the shorter ends, tightly roll the dough into a log, like a jelly roll. Pinch the seam and the ends closed to seal in all that delicious filling. Grease a 9×5 inch loaf pan with butter or non-stick spray. Carefully place the log, seam-side down, into the prepared pan.
Step 7: The Second Rise
Cover the loaf pan with a clean kitchen towel and let the dough rise again in a warm place for 30-45 minutes. It won’t quite double, but it should rise just above the rim of the pan and look nice and puffy.
Step 8: Bake to Golden Perfection
While the dough is on its second rise, preheat your oven to 350°F (175°C). Once risen, place the loaf pan on the center rack and bake for 35-40 minutes. The top will be a deep, golden brown, and the bread will sound hollow if you gently tap the top. My foolproof test: An instant-read thermometer inserted into the center of the bread (avoiding the filling) should read 190°F (88°C).
Step 9: The Hardest Part – Cooling!
Remove the bread from the oven and let it cool in the pan for about 10 minutes. Then, run a knife around the edges and gently turn it out onto a wire rack to cool completely. I know, I know… the wait is agony! But slicing into warm bread will cause the filling to gush out. Letting it cool ensures you get those picture-perfect, clean slices.
How to Serve This Beautiful Loaf
This bread is a star all on its own! For the ultimate experience, slice it thick with a sharp serrated knife. I love serving it simply on a wooden board, maybe with a little pat of softened butter for those who want extra indulgence. It’s the perfect centerpiece for a brunch spread alongside scrambled eggs and crispy bacon. For a truly decadent dessert, try toasting a slice and serving it with a scoop of vanilla bean ice cream. And of course, a hot mug of coffee or a glass of cold milk is its perfect partner.
Get Creative: Recipe Variations
This recipe is a fantastic canvas for your creativity! Here are a few of my favorite twists:
- Lemon Blueberry Bliss: Swap the orange zest and juice for lemon, and the cranberries for fresh or frozen blueberries. The flavor is sunshine in a loaf!
- Apple Cinnamon Spice: Replace the cranberry swirl with a cup of finely chopped apples sautéed with butter, brown sugar, and a teaspoon of cinnamon.
- Dark Chocolate & Cherry: Omit the cranberry and orange. Mix ½ cup of chopped dark chocolate and ½ cup of dried tart cherries into the cream cheese filling.
- Pistachio & Raspberry: Use seedless raspberry jam for the swirl and sprinkle ¼ cup of chopped pistachios over the cream cheese before rolling.
- Savory Twist: Skip the sugar in the dough. Fill with herbed goat cheese and a layer of sun-dried tomatoes and fresh basil.
Olivia’s Chef Notes
This recipe has evolved so much since my first attempt. The first time I made it, I was so excited that I piled on WAY too much filling. When I rolled it, the filling squirted out both ends like a pastry tube, and I ended up with a loaf pan full of delicious, but decidedly un-swirled, bread pudding! I’ve learned that a moderate hand with the filling is key to a beautiful swirl. Don’t be afraid if a little leaks out during baking—it just adds to the homemade charm. This bread also freezes beautifully. Wrap cooled slices tightly in plastic wrap and then foil, and freeze for up to 3 months. Just thaw at room temperature or pop it right in the toaster. It’s my secret for always having a special treat on hand for surprise guests (or a surprise treat for myself!).
Your Questions Answered: FAQs & Troubleshooting
Q: My dough didn’t rise. What went wrong?
A: The most common culprit is expired yeast or liquid that was too hot, which kills the yeast. Always check the expiration date on your yeast packet. Your liquid should be warm, around 110°F, like bath water. If it’s too hot to comfortably hold your finger in, it’s too hot for the yeast. Another reason could be a drafty or too-cool rising spot. The warm (turned-off) oven trick is my best friend for this!
Q: My filling oozed out a lot during baking. How can I prevent this?
A: A little oozing is normal and delicious! But to minimize it, make sure your cranberry filling is completely cool and thick (not runny) before assembling. Also, be sure to leave that ½-inch border around the edge of the dough when spreading the fillings, and pinch the seam and ends of the log very tightly to seal it well.
Q: Can I make this recipe by hand without a stand mixer?
A: Absolutely! I’ve made it both ways. Simply mix the ingredients in a large bowl with a wooden spoon until a shaggy dough forms. Then, turn it out onto a floured surface and knead by hand for 8-10 minutes. It’s a wonderful, therapeutic workout! The dough is ready when it’s smooth and elastic and springs back slowly when you poke it.
Q: My bread is browning too quickly on top. What should I do?
A: This happens! If the top is getting dark brown but the inside isn’t done yet, simply tent the loaf loosely with a piece of aluminum foil for the remainder of the baking time. This will slow down the browning while allowing the center to finish cooking.

Cranberry Orange Cream Cheese Swirl Bread
Description
There’s nothing like the warm, comforting aroma of freshly baked bread on a quiet morning. This Cranberry Orange Cream Cheese Swirl Bread is soft, slightly sweet, and packed with bright citrus flavor, tangy cream cheese, and vibrant cranberry ribbons. Perfect for holiday brunches, cozy weekends, or a special treat with coffee or tea, this bread is as beautiful as it is delicious.
Ingredients
For the Dough
-
3 cups all-purpose flour
-
¼ cup granulated sugar
-
2¼ tsp active dry yeast (1 packet)
-
½ tsp salt
-
¾ cup warm milk (105–115°F / 40–46°C)
-
¼ cup unsalted butter, melted
-
1 large egg, room temperature
-
1 tbsp orange zest
For the Cream Cheese Filling
-
8 oz cream cheese, softened
-
¼ cup granulated sugar
-
1 tsp vanilla extract
For the Cranberry Swirl
-
1½ cups fresh or frozen cranberries
-
¼ cup orange juice
-
⅓ cup sugar (adjust to taste)
-
Optional: pinch of cinnamon
Instructions
Step 1: Make the Dough
-
In a mixing bowl, combine flour, sugar, yeast, and salt.
-
In a separate bowl, whisk together warm milk, melted butter, egg, and orange zest.
-
Slowly add wet ingredients to dry ingredients and knead until a smooth, elastic dough forms (5–7 minutes by stand mixer, or 8–10 minutes by hand).
-
Shape into a ball and place in a greased bowl. Cover and let rise in a warm, draft-free spot for 1 hour, or until doubled in size.
Step 2: Prepare the Cranberry Filling
-
In a small saucepan, combine cranberries, orange juice, sugar, and cinnamon (if using).
-
Simmer over medium heat for 10–15 minutes, stirring occasionally, until thickened. Cool completely.
Step 3: Make the Cream Cheese Filling
-
Beat cream cheese, sugar, and vanilla extract until smooth. Set aside.
Step 4: Assemble the Bread
-
Punch down the risen dough and roll into a 12×16-inch rectangle on a floured surface.
-
Spread the cream cheese filling evenly, leaving a ½-inch border around the edges.
-
Spread the cooled cranberry mixture over the cream cheese.
-
Roll the dough from the short end into a tight log. Pinch the seam and ends to seal. Place seam-side down in a greased 9×5-inch loaf pan.
Step 5: Second Rise
-
Cover and let the dough rise 30–45 minutes until slightly above the pan’s edge.
Step 6: Bake
-
Preheat oven to 350°F (175°C).
-
Bake 35–40 minutes until golden brown. Tent with foil if browning too fast.
-
Cool in pan 10 minutes, then transfer to a wire rack to cool completely before slicing.
Notes
-
Yeast check: Make sure yeast is fresh and the liquid is warm, not hot.
-
Prevent oozing: Cool the cranberry filling completely and leave a ½-inch border around the dough edges.
-
Even swirl: Roll the dough evenly for uniform layers.
-
Freezing: Wrap cooled slices in plastic and foil; freeze up to 3 months. Thaw at room temperature or toast.
Nutritional Information*
*This is an approximate calculation and may vary based on specific ingredients used.
Per Slice (based on 12 slices): Calories: ~280, Fat: 11g, Carbohydrates: 38g, Sugar: 14g, Protein: 6g
Final Thoughts
There you have it—the secret to filling your home with that unforgettable, heartwarming aroma and treating yourself to a slice of pure, swirled bliss. This Cranberry Orange Cream Cheese Swirl Bread is more than just a recipe; it’s a baking project that feels like a hug. It’s a beautiful reminder that the most rewarding creations often require a little patience and a lot of love.
From my grandmother’s kitchen to yours, I hope this bread becomes a cherished part of your own traditions, whether for a holiday morning, a special brunch, or simply a quiet moment of well-deserved indulgence. So, preheat that oven, zest that orange, and get ready to bake something truly memorable. I can’t wait for you to experience that first magical slice.




