
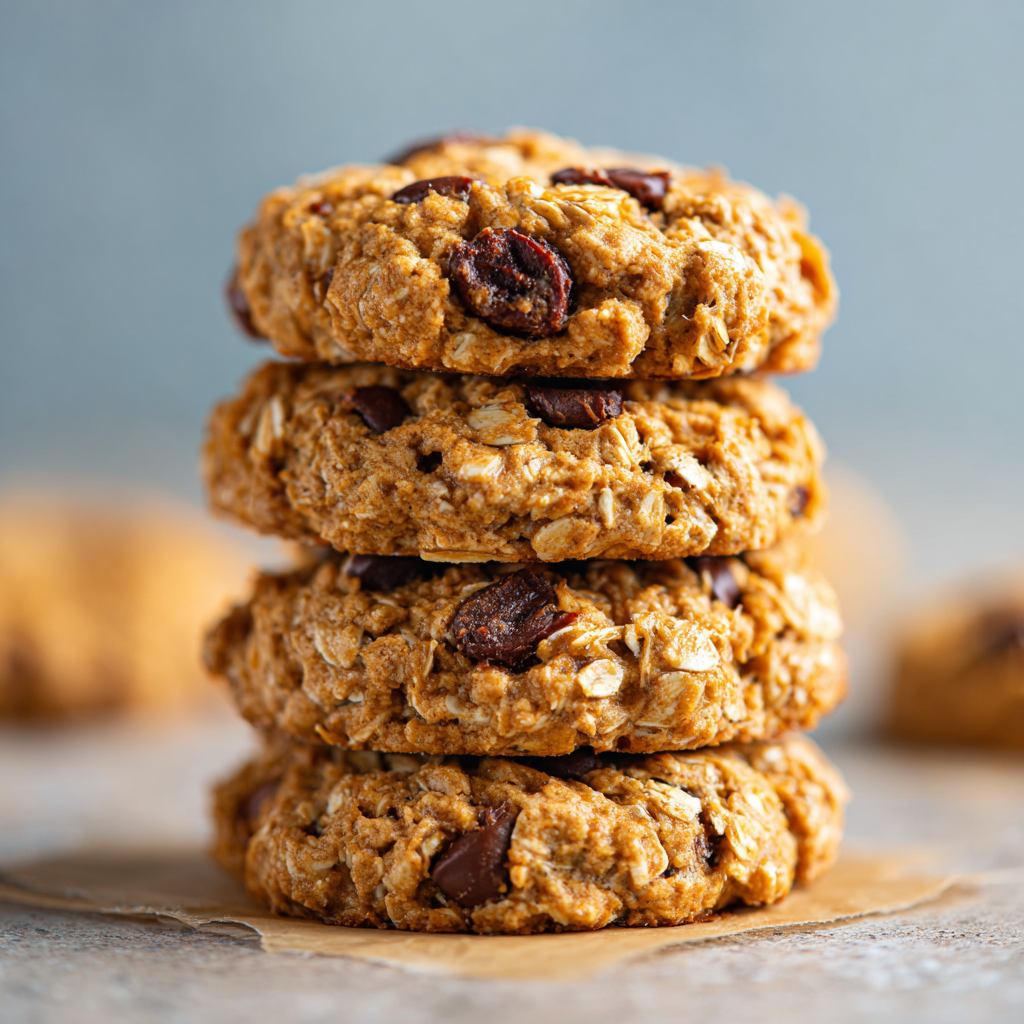
Easy Peanut Butter Protein Cookies – Family-Friendly, Grab-and-Go Goodness
Easy Peanut Butter Protein Cookies: Your New Favorite Grab-and-Go Goodness!
Hey there, friend! Come on in, pull up a stool, and let’s talk about one of life’s simple, delicious pleasures: the humble cookie. But not just any cookie. We’re talking about a cookie that’s secretly a superhero in disguise. A cookie you can happily munch on for breakfast, pack in a lunchbox for a midday boost, or enjoy as a post-workout treat without a single shred of guilt. Sound too good to be true? I promise you, it’s not.
I’m talking about my Easy Peanut Butter Protein Cookies. These little rounds of joy are soft, satisfyingly chewy, and packed with wholesome ingredients that love you back. They’re the answer to that 3 PM slump when you need something sweet but substantial. They’re the solution for busy mornings when you’re running out the door but know you need a proper fuel-up. And the best part? They come together in one bowl with just about 10 minutes of hands-on time. No fancy mixer, no complicated techniques—just simple, honest, feel-good food.
If you’ve ever stared longingly at a package of store-bought protein bars, wishing they tasted more like a homemade treat and less like a chalky brick, this recipe is your game-changer. We’re using the natural sweetness of ripe bananas and applesauce, the rich, creamy goodness of peanut butter, and the hearty texture of old-fashioned oats. A scoop of protein powder gives them serious staying power, making them a true grab-and-go powerhouse. So, tie on your favorite apron (the messy one with all the character is always my top choice), and let’s bake up a batch of happiness that your whole family will adore.
The Accidental Masterpiece: A Story of Ripe Bananas and Happy Chaos
This recipe, like so many of my favorites, was born out of a little bit of necessity and a whole lot of kitchen chaos. It was a classic Sunday evening. The weekend was winding down, the lunchboxes for the week were staring at me, empty and intimidating. On the counter, a bunch of bananas had reached that peak level of ripeness—speckled, soft, and begging to be baked into something wonderful. You know the ones; they’re almost too sweet to eat on their own but are absolute gold for baking.
My mission was simple: create something healthy, portable, and kid-approved. I started mashing bananas, pulled out the trusty jar of peanut butter, and decided to throw in some oats for heartiness. My husband, who had just gotten back from a run, peeked into the kitchen and said, “Ooh, cookies! Can you put some protein powder in them? Make ’em extra fuel-y.” It was a lightbulb moment. I scooped in the powder, stirred in some walnuts for crunch, and crossed my fingers.
The smell that wafted from the oven was pure magic—warm, nutty, and comforting. But the real victory came when my toughest critics, my kids, tried one. “These are the BEST cookies, Mom!” my daughter declared, her mouth full. They were a hit. They weren’t overly sweet, they were perfectly soft, and they kept everyone full and happy until lunch. That happy accident became a weekly staple in our house, and now, I’m so thrilled to share it with you.
Gathering Your Goodness: The Ingredient Lineup
One of the things I love most about this recipe is the flexibility of the ingredients. This isn’t a fussy, precise pastry dough; it’s a forgiving, mix-and-match kind of situation. Here’s what you’ll need and why each component is a rockstar.
- 4 ripe bananas, mashed: This is our natural sweetener and binder! The riper they are (black spots are a good thing!), the sweeter your cookies will be. Chef’s Insight: No ripe bananas? You can use 1 cup of canned pumpkin puree or sweet potato puree for a different, but equally delicious, flavor twist.
- 1⅓ cups unsweetened applesauce: This adds moisture and keeps the cookies incredibly soft without any added oil. Substitution Tip: If you don’t have applesauce, an equal amount of mashed avocado will work and add healthy fats, though it will change the color slightly.
- ⅔ cup natural peanut butter: Go for the kind where the only ingredients are peanuts and maybe salt. The oils in “natural” peanut butter help create a better texture. Chef’s Insight: If your peanut butter is very oily, give it a good stir before measuring. If it’s super thick, warming it for 15 seconds in the microwave will make it easier to mix in.
- 2 teaspoons vanilla extract: The flavor booster! It rounds out all the other flavors and makes everything taste more warm and homemade.
- 3 cups old-fashioned oats: Also called rolled oats, these give the cookies their wonderful, hearty texture and whole-grain goodness. Substitution Tip: Do not use instant oats, as they absorb liquid differently and can make the cookies gummy. If you need a gluten-free option, ensure your oats are certified gluten-free.
- ½ cup chopped walnuts (or almonds, pecans): For a lovely crunch and a dose of healthy fats. Chef’s Insight: Toasting the nuts in a dry skillet for a few minutes before chopping will deepen their flavor incredibly!
- 2 scoops protein powder (vanilla or unflavored): This is our protein powerhouse. Substitution Tip: If you don’t have protein powder, you can replace it with ½ cup of additional oats and a tablespoon of flour (any kind) to help with binding, but you’ll lose the protein boost.
Let’s Get Baking: Your Foolproof Steps to Cookie Bliss
Ready? This is where the fun begins. I’ll walk you through each step, sharing my little kitchen hacks to ensure your cookies turn out perfectly every single time.
Step 1: Preheat and Prep. First things first, get that oven heating to 350°F (175°C). This gives it plenty of time to come to the right temperature. While it’s warming up, line two baking sheets with parchment paper. Chef’s Hack: I’m a huge fan of parchment paper because it prevents sticking and makes cleanup an absolute dream. No parchment? A light coating of cooking spray will work in a pinch.
Step 2: The Wet Team Assembles. Grab a large mixing bowl—bigger than you think you’ll need! Peel your very ripe bananas and drop them in. Now, get mashing! A fork or a potato masher works perfectly. You want them to be relatively smooth, with just a few small lumps for character. Now, add the applesauce, peanut butter, and vanilla extract. Stir it all together until it’s a smooth, well-combined, tan-colored mixture. It might look a little strange now, but trust the process!
Step 3: Bring in the Dry Crew. Time to add the oats, protein powder, and chopped nuts. If you’re using any of the optional add-ins like chocolate chips or cinnamon, now is the time to toss them in too! Stir everything together with a sturdy spoon or spatula. Chef’s Tip: The dough will be thick and sticky—that’s exactly what we want! It shouldn’t be runny. If it seems a bit too wet, you can add another ¼ cup of oats to firm it up.
Step 4: Scoop and Shape. Using a spoon or a medium cookie scoop (about 1.5 tablespoons), drop mounds of dough onto your prepared baking sheets. Leave about an inch or two between them, as they won’t spread much, but they do need a little room for air to circulate. Now, here’s a key step for the perfect cookie shape: use the back of a fork or your fingers to gently flatten each mound slightly. Chef’s Hack: If the dough is sticking to your fork, dip it in a little water or oat flour between each cookie. This gives them that classic, rustic look and helps them bake evenly.
Step 5: Bake to Perfection. Pop those trays into your preheated oven and bake for 18-20 minutes. You’re looking for the tops to be set and the bottoms to be a light golden brown. They will still be soft to the touch, and that’s perfect! Chef’s Insight: Don’t overbake them thinking they need to be crisp. They firm up significantly as they cool. The magic happens during the cooling process!
Step 6: The Most Important Step—Patience! This is the hardest part, I know! Remove the baking sheets from the oven and let the cookies cool directly on the sheets for at least 15 minutes. This allows them to set up and become the delightfully chewy cookies we’re aiming for. For the absolute best texture, I highly recommend popping them in the fridge for an hour after they’ve cooled to room temperature. They become denser, chewier, and even more satisfying.
How to Serve Up These Smiles
These cookies are wonderfully versatile. For a quick breakfast, grab two with a piece of fruit or a hard-boiled egg. Pack them in a lunchbox—they travel like a dream. For a post-workout refuel, pair one with a glass of milk or a smoothie. My personal favorite way to enjoy them? Chilled straight from the fridge, with a hot cup of coffee in the afternoon. The contrast of the cool, chewy cookie and the hot coffee is pure bliss. They’re delicious at room temperature, but that chilled texture is next-level.
Make It Your Own: Delicious Recipe Variations
The fun doesn’t stop here! This recipe is a fantastic base for endless creativity. Here are a few of my favorite twists:
- Chocolate Lover’s Dream: Stir in ½ cup of dark chocolate chips and ½ cup of chopped pecans. It’s like a healthy turtle cookie!
- Tropical Escape: Swap the peanut butter for almond butter, and stir in ½ cup of shredded coconut and ½ cup of dried pineapple or mango bits.
- Sunflower Seed Power (Allergy-Friendly): Use sunflower seed butter instead of peanut butter and skip the nuts. Add sunflower seeds and vegan chocolate chips for a safe, school-friendly treat.
- Pumpkin Spice Bliss: Replace the applesauce with canned pumpkin puree and add 1 teaspoon of pumpkin pie spice along with the cinnamon. Perfect for fall!
- Double Berry Boost: Add ½ cup of dried cranberries or cherries and ¼ cup of hemp hearts for an extra antioxidant and omega-3 kick.
Olivia’s Chef’s Notes
Over the years, this recipe has seen many iterations. I once accidentally used sweetened applesauce because it was all I had, and the cookies were a bit too sweet for my taste, but the kids went wild for them! Another time, I added a tablespoon of espresso powder to the batter for a mocha vibe—highly recommended for my fellow coffee enthusiasts.
The biggest lesson I’ve learned is to embrace the stickiness of the dough. The first time I made these, I kept adding more and more oats because I was worried the dough was too wet, and I ended up with dry, crumbly hockey pucks. Don’t be like past Olivia! Trust the recipe. The sticky dough is what creates that amazing, soft, and chewy texture we all love. These cookies are a testament to the fact that the best things in life don’t have to be perfect—they just have to be made with love (and maybe a little peanut butter).
Your Questions, Answered: FAQs & Troubleshooting
Q: My cookies turned out really soft and mushy in the middle. What happened?
A: This usually means they needed a bit more baking time. Oven temperatures can vary, so if yours runs cool, you might need an extra 2-3 minutes. Also, make sure you’re using old-fashioned oats, not quick oats or instant oats, which can create a gummier texture. Finally, the cooling step is non-negotiable! They firm up dramatically as they cool on the pan.
Q: Can I make these without protein powder?
A: Absolutely! As mentioned in the ingredients, you can substitute the 2 scoops of protein powder with ½ cup of additional old-fashioned oats and 1 tablespoon of almond flour, oat flour, or all-purpose flour to help with binding. The texture will be slightly different, but they’ll still be delicious.
Q: How should I store these, and can I freeze them?
A: Yes, they are fantastic for freezing! Once completely cooled, store them in an airtight container in the refrigerator for up to a week. For longer storage, freeze them in a single layer on a baking sheet, then transfer the frozen cookies to a freezer bag. They’ll keep for up to 3 months. You can grab one straight from the freezer—it’ll be thawed and ready to eat in about 15 minutes.
Q: My dough was really dry and crumbly. How can I fix it?
A> This can happen if your bananas were on the smaller side or your peanut butter was particularly thick. The easy fix is to add a tablespoon or two of milk (any kind—dairy, almond, oat) or even a bit more applesauce until the dough comes together into a moist, sticky consistency.

Easy Peanut Butter Protein Cookies – Family-Friendly, Grab-and-Go Goodness
Description
Chewy, wholesome, and secretly packed with protein—these cookies are the snack that works as hard as you do. Perfect for breakfast on-the-go, an afternoon pick-me-up, or post-workout fuel, they’re sweetened naturally with bananas and applesauce, loaded with oats, and powered up with peanut butter + protein powder. No mixers, no fuss—just one bowl and a tray of goodness ready in under an hour.
Ingredients
-
4 ripe bananas, mashed
-
1⅓ cups unsweetened applesauce
-
⅔ cup natural peanut butter
-
2 tsp vanilla extract
-
3 cups old-fashioned oats
-
½ cup chopped walnuts (or nuts of choice)
-
2 scoops protein powder (vanilla or unflavored)
Optional add-ins: ½ cup chocolate chips, ½ tsp cinnamon, ½ cup dried fruit, or seeds
Instructions
-
Prep – Heat oven to 350°F (175°C). Line baking sheets with parchment.
-
Mash & Mix Wet – In a large bowl, mash bananas until mostly smooth. Stir in applesauce, peanut butter, and vanilla until well combined.
-
Add Dry – Mix in oats, protein powder, and nuts (plus any add-ins). Dough will be thick and sticky—perfect!
-
Scoop & Flatten – Drop ~1½ tbsp portions onto prepared sheets. Gently flatten with a fork or fingers.
-
Bake – 18–20 minutes, until set and lightly golden on bottoms.
-
Cool – Let cookies rest on baking sheet 15 minutes before moving. For best texture, chill 1 hour after cooling.
Notes
-
Chocolate Lover’s Dream – Add dark chocolate chips + pecans.
-
Tropical Twist – Almond butter + shredded coconut + dried mango.
-
Allergy-Friendly – Sunflower butter + seeds + vegan chocolate.
-
Pumpkin Spice – Swap applesauce for pumpkin puree + 1 tsp pumpkin spice.
Nutrition
- Calories: 120 cal Per Serving
- Fat: 5g
- Carbohydrates: 14g
- Protein: 6g
Nutritional Information*
*Please note: These values are approximate and can vary based on the specific brands and ingredients you use, especially the protein powder and peanut butter.
Per Cookie (Based on recipe yielding 30 cookies):
Calories: ~120 | Protein: ~6g | Carbohydrates: ~14g | Fat: ~5g | Fiber: ~2g
Prep Time: 10 minutes | Cook Time: 20 minutes | Cool Time: 15 minutes | Total Time: 45 minutes
Final Thoughts: Your Kitchen, Your Rules
So there you have it—the story, the secrets, and the simple steps to your new favorite healthy treat. These Easy Peanut Butter Protein Cookies are more than just a recipe; they’re an invitation to create something nourishing and delicious without stress. They prove that a little kitchen courage can lead to the most beloved staples.
Don’t be afraid to make them your own. Swap the nut butter, experiment with add-ins, and see what happy accidents you can create. This recipe is as flexible as you are busy. So, go ahead, whip up a batch, and savor the satisfaction of having a wholesome, grab-and-go bite ready whenever you need it. Happy baking!

Vegan Peppermint Cookies – Soft, Fluffy & Holiday-Perfect
Let’s Bake Some Holiday Magic!
Is there anything that whispers “holidays” quite like the scent of peppermint and vanilla dancing through a warm kitchen? If your heart does a little happy dance at the thought of a soft, fluffy cookie that melts in your mouth with a cool, festive kick, my friend, you have landed in the right place. Welcome to my kitchen—apron on, oven preheated, and a sprinkle of flour on my cheek, as usual. Today, we’re whipping up a batch of my absolute favorite Vegan Peppermint Cookies. These aren’t just any cookies. They’re the kind of cookies that disappear from the cooling rack in record time. The kind you pack into tins for neighbors, pile high on a platter for your holiday party, or sneak just one more of with a cup of hot cocoa after a long day. They’re soft, almost cake-like, and bursting with that perfect, cheerful peppermint flavor that feels like a holiday hug. And the best part? They’re incredibly simple to make. No fancy equipment, no hard-to-find ingredients—just pure, uncomplicated baking joy. This is a doubled recipe because, trust me, you’ll want plenty to share (and a secret stash for yourself). So, let’s preheat those ovens and create something unforgettable together!The Cookie That Started a Tradition
This recipe holds a special place in my heart, and it all started a few years back with a near-disaster that turned into our favorite tradition. I was hosting my first big Friendsgiving, determined to impress everyone with a sprawling dessert table. I had pies, tarts, and cakes, but I wanted one show-stopping cookie. I found a basic vegan sugar cookie recipe and decided to “Olivia-fy” it with a hefty dose of peppermint extract. Confident and maybe a little rushed, I misread the measurement and added a tablespoon instead of a teaspoon. The dough smelled… intense. Like, “clear-your-sinuses” intense. My heart sank. It was too late to start over. I crossed my fingers, baked them anyway, and hoped for the best. When my friends arrived, the first brave soul took a bite of the powerfully minty cookie and their eyes went wide. “Wow! That’s… amazing! It’s like Christmas exploded in my mouth!” she laughed. To my utter shock, those accidentally-overpowering peppermint cookies were the first platter to be emptied. Everyone loved the bold, festive punch. Now, every year, my friends demand “Olivia’s Polar Bear Cookies,” and I always think back to that happy little mistake that taught me to embrace the kitchen flops—they might just become your greatest hits.Gathering Your Cookie Crew: The Ingredients
One of the things I love most about this recipe is its flexibility. You likely have most of these ingredients in your pantry right now! Here’s what you’ll need and a little “chef’s insight” on each one to help you understand its role.- 3 cups white, spelt, or oat flour: This is the foundation of our cookie! All-purpose white flour gives the classic soft texture. I love using spelt flour for a slightly nutty, wholesome flavor, and oat flour makes them wonderfully tender (just make sure it’s certified gluten-free if needed). For a low-carb version, a 1:1 keto flour blend works beautifully.
- 1½ teaspoons baking soda + 1 teaspoon baking powder: Our dynamic leavening duo! This combination is my secret weapon for achieving that perfect, soft and pillowy rise. The baking soda reacts with the acidity in our sugar, while the baking powder gives an extra boost. Don’t skip either!
- 1 teaspoon salt: Never underestimate the power of salt! It’s not to make the cookies salty, but to balance the sweetness and enhance all the other flavors, making the peppermint and vanilla pop.
- 1 cup sugar: Sweetness and tenderness! Regular cane sugar is perfect. For a deeper, almost caramel-like flavor, I adore unrefined coconut sugar. For a sugar-free version, a granulated monk fruit or erythritol blend works like a charm.
- ¾ cup oil or melted vegan butter: This is our fat, which creates a wonderfully moist and tender crumb. I often use a neutral avocado or canola oil for ease. But if you want that rich, buttery flavor (without the butter!), melted vegan butter is fantastic.
- 3 tablespoons milk of choice: A little liquid to bring the dough together. Any unsweetened non-dairy milk works—almond, oat, and soy are my go-tos.
- 2 teaspoons pure vanilla extract + ½ teaspoon pure peppermint extract: The flavor stars! Use pure extracts for the best taste. The peppermint is potent, so a little goes a long way. This ratio gives a beautiful balance, but feel free to add an extra tiny drop if you love a stronger mint kick!
Let’s Get Baking: The Step-by-Step Guide
Ready to make some magic? This process is simple and joyful. I’ll walk you through each step with my favorite tips and tricks to ensure cookie perfection.- Preheat and Prep. First things first, preheat your oven to 350°F (175°C) and line two baking sheets with parchment paper. This isn’t just to prevent sticking; it also helps the cookies bake evenly and makes cleanup a dream. A little chef’s hack: if you don’t have parchment, a light spritz of cooking spray will do, but parchment is king for perfect bottoms.
- Whisk the Dry Team. In a large bowl, grab your whisk and vigorously whisk together the flour, baking soda, baking powder, and salt. Why whisk? We want to make sure those leavening agents are evenly distributed throughout the flour. No one wants a bite of baking soda! This little step is the secret to a consistent rise in every single cookie.
- Combine the Wet Crew. In a separate, medium-sized bowl, combine the sugar, oil (or melted vegan butter), non-dairy milk, vanilla extract, and peppermint extract. Whisk it until it’s smooth and beautifully combined. You’ll see the sugar start to dissolve into the liquids. This is where the flavor party begins!
- The Grand Union. Now, pour the wet ingredients into the dry ingredients. Grab a sturdy spatula or wooden spoon and gently mix them together. Don’t overmix! We just want to combine until no large streaks of flour remain. The dough will be soft and maybe a tad sticky—that’s perfect! If it feels too sticky to handle, pop the bowl into the fridge for 15-30 minutes. Chilling the dough makes it easier to scoop and helps prevent the cookies from spreading too much.
- Scoop with Love. Using a tablespoon-sized cookie scoop or a regular spoon, portion out the dough onto your prepared baking sheets. Leave about 2 inches between each cookie because they will spread and puff up as they bake. For a pretty, frosted look, you can roll each dough ball in a little extra sugar before placing it on the sheet.
- Bake to Perfection. Slide those sheets into your preheated oven and bake for 10-12 minutes. You’re looking for the edges to be just set and lightly golden. The centers might still look a tiny bit soft—that’s exactly what we want! This is the key to a soft, not crunchy, cookie. They will continue to set as they cool.
- The Patience Test. This is the hardest part! When the cookies come out of the oven, let them cool on the baking sheet for at least 5 minutes. They are too delicate to move right away. This allows them to firm up just enough so you can transfer them to a wire rack to cool completely without breaking. Trust me on this one!
How to Serve These Festive Gems
Presentation is part of the fun! For a simple, elegant look, arrange these snowy-white cookies on a rustic wooden board or a vibrant red platter. They are incredible still slightly warm from the oven, with the cool peppermint flavor shining through. For the ultimate holiday experience, serve them alongside a mug of rich vegan hot chocolate or a glass of chilled oat milk. They also make the most thoughtful homemade gift—stack them in a cellophane bag tied with a ribbon or layer them carefully in a festive tin for a present that truly comes from the heart.Make Them Your Own! Delicious Variations
The beauty of this base recipe is that it’s a blank canvas for your creativity! Here are a few of my favorite ways to mix it up:- Peppermint Crunch: Gently stir in ¾ cup of crushed vegan peppermint candies or sugar-free candy canes into the dough right before scooping. The colorful crunch is so festive!
- Chocolate-Mint Bliss: Add 1 cup of vegan chocolate chips (dark chocolate is perfect) or white chocolate chunks. Peppermint and chocolate are a match made in heaven.
- Drizzly Glaze: Whisk together 1 cup of powdered sugar with 1-2 tablespoons of non-dairy milk and a drop of peppermint extract. Drizzle this simple glaze over the cooled cookies for a pretty, sweet finish.
- Peppermint Patty Thumbprints: Before baking, press your thumb into the center of each dough ball. After baking and cooling, fill the indentations with a simple chocolate ganache (melted chocolate + non-dairy cream).
Olivia’s Chef’s Notes
This recipe has evolved so much since that first peppermint-packed batch! I’ve learned that the type of flour can change the texture slightly—oat flour makes them a bit more delicate, while spelt gives a heartier chew. My biggest tip? Have fun with it! Baking is an experiment. I once accidentally used mint extract instead of peppermint (they are different!) and created a cookie that tasted like a vegan Thin Mint. My friends declared it a brilliant success. I also always, always make a double batch and freeze half the dough. Just scoop the dough balls onto a parchment-lined sheet, freeze them solid, and then toss them into a freezer bag. Then, whenever a cookie craving strikes (in July, why not?), you can bake off a few straight from the freezer, adding a minute or two to the baking time. It’s my little secret to having fresh, homemade cookies anytime the mood strikes.Your Questions, Answered!
Let’s tackle some common questions to make sure your baking experience is smooth and successful. Q: My dough is really sticky. What did I do wrong? A: You likely did nothing wrong! Different flours and even the humidity in your kitchen can affect the dough’s consistency. This is totally normal. The easiest fix is to chill the dough for 15-30 minutes, which will make it much easier to handle. You can also lightly oil your hands before rolling the dough balls. Q: My cookies spread too much and came out flat. How can I prevent this? A> This usually happens if the dough is too warm or if your baking soda/powder is old. First, make sure your leavening agents are fresh (they lose potency over time). Secondly, always chill your dough if it feels overly soft or if your kitchen is warm. Using a cooler dough is the number one trick to preventing excessive spreading. Q: Can I make this recipe gluten-free? A: Absolutely! I’ve had great success using a 1:1 gluten-free all-purpose flour blend (like Bob’s Red Mill or King Arthur). Just make sure the blend contains xanthan gum, which helps bind the ingredients together like gluten would. The texture might be a tad more crumbly, but still delicious. Q: The peppermint flavor is too strong/too weak for my taste. How can I adjust it? A: Peppermint extract potency can vary by brand, and personal preference is key! I recommend starting with the 1/2 teaspoon. After mixing the dough, you can cook a tiny piece in the microwave for 10 seconds to taste-test it. If you want more mint, add another 1/8 or 1/4 teaspoon. Remember, you can always add more, but you can’t take it out! Print
Vegan Peppermint Cookies – Soft, Fluffy & Holiday-Perfect
Description
Soft, fluffy, and full of holiday cheer—these peppermint cookies are the festive treat you’ll want on repeat all season long. They’re melt-in-your-mouth tender, bursting with cool minty flavor, and come together with simple pantry staples. Perfect for holiday cookie swaps, gifting, or cozy nights with a mug of hot cocoa.
Ingredients
-
3 cups flour (all-purpose, spelt, or oat; GF 1:1 blend works too)
-
1½ tsp baking soda
-
1 tsp baking powder
-
1 tsp salt
-
1 cup sugar (or coconut sugar / granulated monk fruit)
-
¾ cup neutral oil or melted vegan butter
-
3 tbsp non-dairy milk
-
2 tsp vanilla extract
-
½ tsp peppermint extract
Instructions
-
Preheat & Prep – Heat oven to 350°F (175°C). Line baking sheets with parchment.
-
Mix Dry – In a large bowl, whisk flour, baking soda, baking powder, and salt.
-
Mix Wet – In another bowl, whisk sugar, oil/butter, milk, vanilla, and peppermint until smooth.
-
Combine – Stir wet into dry until just combined. Dough will be soft. Chill 15–30 min if sticky.
-
Scoop & Roll – Scoop tablespoon portions onto baking sheets, 2 inches apart. Optional: roll in sugar.
-
Bake – 10–12 minutes, until edges are set and lightly golden. Centers should look slightly soft.
-
Cool – Rest on baking sheet 5 minutes before transferring to a rack.
Notes
-
If dough is sticky → chill before scooping.
-
If cookies spread too much → ensure baking soda/powder are fresh + dough isn’t too warm.
-
For stronger mint → taste dough (microwave-test a piece) and add a touch more extract.
Nutrition
- Calories: 110 cal Per cookie
- Sugar: 5g
- Fat: 6g
- Carbohydrates: 12g
- Protein: 1g
Nutritional Information*
*Please note: This is an approximate estimate calculated using an online tool and standard ingredients. Values will change if you make substitutions. Per Cookie (based on 36 cookies): Calories: ~110 | Carbohydrates: ~12g | Fat: ~6g | Sugar: ~5g | Protein: ~1g Prep Time: 10 minutes | Cook Time: 11 minutes | Total Time: 21 minutesFinal Thoughts: Share the Sweetness
And there you have it! What started as a happy little kitchen accident has now become your new secret weapon for spreading holiday cheer. As you pull those soft, fragrant cookies from the oven, remember that you’ve baked more than just a treat—you’ve created a moment. A moment of warmth, of generosity, and of pure, simple joy.
Whether you’re keeping the whole batch for cozy nights in, gifting them to loved ones, or watching them vanish from the party platter, these Vegan Peppermint Cookies are a testament to the magic that happens when we embrace imperfection and cook with heart.
So from my flour-dusted kitchen to yours, I wish you a holiday season filled with laughter, love, and of course, incredible food. Happy baking!
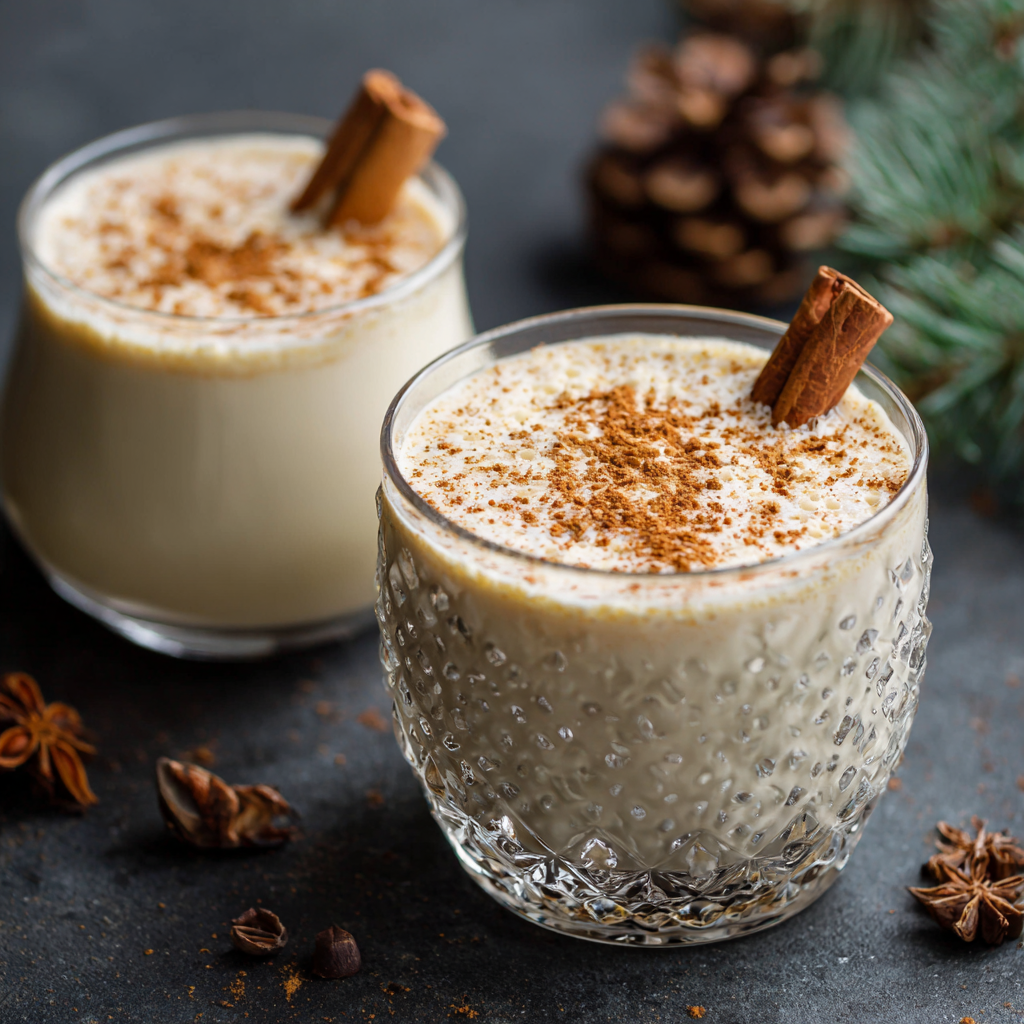
Creamy Vegan Eggnog – Dairy-Free, Festive & Totally Sippable
The Coziest Holiday Sip is Here (And It’s Happily Vegan!)
Hey there, friend! Can you smell it? That magical, spiced-sweet aroma that seems to weave its way through the house from late November straight through to the New Year? For me, the holidays truly begin not with the first snowfall or the untangling of lights, but with the first creamy, dreamy sip of eggnog. It’s the taste of warmth, celebration, and togetherness in a glass. But for the longest time, I thought my eggnog days were over when I started leaning into more plant-based living. Store-bought vegan options were okay, but they never quite captured that rich, homemade heartiness I craved.
Well, I’m here to tell you that the search is over. After more kitchen experiments than I can count (my blender and I have become *very* close), I’ve cracked the code. This Creamy Vegan Eggnog is everything you dream of: luxuriously smooth, perfectly spiced with cinnamon and nutmeg, and so satisfyingly rich you won’t believe it’s dairy-free and egg-free. The secret? A surprisingly simple powerhouse ingredient that creates the most incredible silky base. And the best part? It whips up in just five minutes. No cooking, no tempering eggs, just pure, blend-and-sip joy. So, whether you’re hosting a festive bash, having a quiet night by the tree, or simply treating yourself, this recipe is your new go-to for a holiday hug in a mug. Let’s get blending!
My Grandfather’s “Nog” and a New Tradition
I have this vivid, wonderful memory of my grandfather every holiday season. He was a man of few words, but his actions spoke volumes. His annual tradition was making a huge batch of his “famous” eggnog from a recipe his own father had passed down. It was an event. He’d carefully separate dozens of eggs, whisk in cream, and add a “generous glug” of brandy that made my grandmother raise an eyebrow. The house would smell incredible. As kids, my cousins and I would get a special, non-alcoholic version, and we felt so grown-up sipping from little crystal cups. It was more than a drink; it was a symbol of being together.
When he passed, that recipe felt like a tangible piece of him we’d lost. A few years ago, as our family grew and dietary needs shifted (lactose intolerance, veganism, you name it!), I felt a pang of sadness that we couldn’t share that same tradition. So, I made it my mission to create a version that honored his memory but welcomed everyone to the table. The first time I made this vegan version and watched my entire family—from my dairy-free niece to my brandy-loving uncle—raise a glass together, I knew we had started a beautiful new tradition. It turns out, the magic wasn’t in the eggs or cream; it was in the sharing.
Gather Your Ingredients: A Quick Peek into the Magic
Here’s the beautiful part: you probably have most of these ingredients in your pantry right now. Let’s take a quick tour of what’s going into our magical concoction and why each one plays a starring role.
- 2 cups plant-based milk: This is our base! Oat milk is my top pick for its natural creaminess and neutral flavor. Almond milk keeps it light, soy milk adds a protein boost, and cashew milk is decadently rich. Use what you love!
- 1 cup silken tofu (the secret weapon!): I know, it sounds wild, but trust me! Silken tofu is the key to that thick, custard-like body without any “beany” taste. It blends into utter silkiness and adds a protein punch. Chef’s Insight: For a nut-based version, swap with ¾ cup of raw cashews soaked in hot water for 30 minutes (then drained). For a nut-free, soy-free option, use a full cup of canned coconut cream.
- 1 teaspoon pure vanilla extract: The warm, aromatic backbone that makes everything taste like a baked good. Don’t skip it!
- 4 tablespoons sweetener of choice: I adore the caramel-like depth of maple syrup. Agave nectar works perfectly, and if you’re watching carbs, monk fruit sweetener is a great option. Start with 3 tablespoons and add more to taste!
- The Spice Squadron (1 tsp cinnamon, ½ tsp nutmeg, ½ tsp ginger, ¼ tsp salt, pinch of cloves): This is the soul of the nog! The salt is crucial—it’s not for saltiness, but for making all the other flavors pop and balancing the sweetness. Freshly grated nutmeg is a game-changer if you have it!
- Optional: 2 tbsp brandy, dark rum, or bourbon: For the adults! A splash of spirits adds a wonderful warmth and complexity. My heart belongs to a good dark rum, but brandy is the classic choice.
Let’s Make It! Your 5-Minute Path to Nog Nirvana
Ready? This is seriously the easiest process ever. Get your blender ready—we’re about to create some magic.
- Combine Everything. Seriously, that’s it for prep! Dump the plant milk, silken tofu (no need to press it!), vanilla, sweetener, and all the spices directly into your blender pitcher. Chef’s Hack: If you’re using the optional alcohol, add it now. Blending it in ensures it’s perfectly incorporated and mellows the sharpness just a bit.
- Blend Until Silky Smooth. Now, put the lid on securely (this is important—we don’t want a festive blender explosion!). Start on a low speed and gradually increase to high. Let it blend for a good 45-60 seconds. You’re looking for a completely homogenous, frothy, and creamy liquid. Pro Tip: If you’re using the cashew substitution, you may need to blend for a full 2 minutes to get them perfectly smooth.
- The All-Important Taste Test. Stop the blender, grab a spoon, and have a taste. This is your moment to make it *yours*. Want more spice? Add a pinch more cinnamon or nutmeg. Want it sweeter? Drizzle in another tablespoon of maple syrup. Remember, flavors will meld and deepen if you chill it, so it’s okay if it tastes a tiny bit strong now. Chef’s Note: If it’s thicker than you’d like, simply blend in another ¼ to ½ cup of plant milk until it reaches your perfect sipping consistency.
- Serve It Up! You have options here, and they’re all delicious. For a classic chilled nog, pour it over ice into your favorite glasses. For the ultimate cozy experience, gently warm it in a saucepan over medium-low heat, stirring frequently, until it’s steaming but not boiling. This makes your kitchen smell like holiday heaven!
- Garnish with Love. The finishing touch! A little grated nutmeg on top is non-negotiable for me. A cinnamon stick stirrer, a dollop of vegan whipped cream, or even a star anise pod makes it feel extra special.
How to Serve Your Masterpiece
Presentation is part of the fun! I love serving this nog in little vintage punch cups or sturdy mason jars for a rustic feel. For a party, set up a “nog bar” with a pitcher of the eggnog, small bowls of garnishes (grated nutmeg, cinnamon sticks, whipped cream), and bottles of brandy and rum so guests can spike their own. If you’re serving it warm, use heatproof mugs and offer a plate of ginger snap cookies or shortbread on the side for dipping. Pure bliss!
Get Creative! Flavor Twists & Swaps
Once you’ve mastered the base, the world is your oyster (or, well, your nog!). Here are a few of my favorite riffs:
- Chai-Spiced Nog: Replace the cinnamon, nutmeg, and ginger with 2 teaspoons of homemade or store-bought chai spice blend.
- Chocolate Eggnog: Blend in 2 tablespoons of unsweetened cocoa powder and an extra tablespoon of sweetener for a decadent treat.
- Pumpkin Spice Nog: Add 3 tablespoons of pumpkin puree and a teaspoon of pumpkin pie spice. Hello, autumn in a glass!
- Coffee Nog: Perfect for a brunch cocktail! Replace ½ cup of the plant milk with strongly brewed cold brew coffee.
- Sugar-Free Version: Use your favorite sugar-free sweetener like monk fruit or erythritol, and opt for an unsweetened plant milk.
Olivia’s Chef Notes & Kitchen Confessions
This recipe has evolved so much from my first attempt, which was… not great. I think I used a grainy tofu and not enough sweetener, and let’s just say it was more “savory spiced beverage” than “festive treat.” But that’s the joy of cooking! The silken tofu discovery was a true “Aha!” moment that changed everything. It creates such a perfect, neutral canvas for the spices.
A funny story: the first time I served this to my very traditional uncle, he raved about how it was the creamiest, best eggnog he’d had in years. The look on his face when I told him it was made with tofu was absolutely priceless! He now requests it every year. It just goes to show that the best recipes are the ones that bring people together, no matter what’s in them. This nog keeps beautifully in a sealed jar in the fridge for 3-4 days. Just give it a good shake before serving, as it might separate a tiny bit. The flavors get even better the next day!
Your Eggnog Questions, Answered!
Q: My eggnog turned out a bit thin. How can I thicken it?
A: No worries! This is an easy fix. The simplest way is to add more of your creamy base. Blend in another ¼ to ½ cup of silken tofu or a couple of tablespoons of coconut cream. If you’re not serving it immediately, chilling it for a few hours will also help it thicken up slightly.
Q: Can I make this nut-free?
A> Absolutely! First, be sure to use a nut-free plant milk like oat milk or soy milk. Second, use silken tofu or coconut cream as your creamy base (instead of the cashew substitution). That’ll make it completely nut-free and safe for everyone to enjoy.
Q: Why is there salt in a sweet drink?
A> Great question! Salt is a flavor enhancer. In small amounts, it doesn’t make things taste salty; instead, it rounds out the sweetness and makes the spices taste more vibrant and complex. It’s the secret trick that makes store-bought recipes taste “flat” in comparison to homemade!
Q: How long will this keep in the fridge?
A> It will stay fresh and delicious in an airtight container for 3-4 days. You might notice some separation—that’s totally normal! Just give it a vigorous shake or a quick re-blend before serving.

Creamy Vegan Eggnog – Dairy-Free, Festive & Totally Sippable
Description
Cozy up this holiday season with a plant-based twist on a timeless classic! This egg-free, dairy-free nog is luxuriously smooth, perfectly spiced with cinnamon and nutmeg, and made with simple pantry staples. Thanks to the magic of silken tofu (or cashews/coconut cream), you’ll get that rich, creamy body without the heaviness—ready in just 5 minutes. Whether served chilled over ice or gently warmed with a cinnamon stick, it’s the holiday hug in a mug you’ll crave all season long.
Ingredients
-
2 cups plant-based milk (oat, almond, soy, or cashew)
-
1 cup silken tofu (or ¾ cup soaked cashews / 1 cup coconut cream)
-
1 tsp vanilla extract
-
4 tbsp maple syrup (or sweetener of choice)
-
1 tsp cinnamon
-
½ tsp nutmeg
-
½ tsp ginger
-
Pinch of cloves
-
¼ tsp salt
-
Optional: 2 tbsp brandy, dark rum, or bourbon
Instructions
-
Blend – Add all ingredients to a blender (including alcohol if using).
-
Whip until creamy – Blend 45–60 seconds until silky and frothy. For cashew version, blend up to 2 minutes.
-
Taste & adjust – Add more spice or sweetener as desired. If too thick, blend in a splash more milk.
-
Serve – Pour over ice or gently heat on the stove until steaming (don’t boil).
-
Garnish – Sprinkle with fresh nutmeg, add a cinnamon stick, or top with vegan whipped cream.
Notes
-
Chai-Spiced Nog: Swap spices for 2 tsp chai blend.
-
Pumpkin Spice Nog: Add 3 tbsp pumpkin purée + 1 tsp pumpkin pie spice.
-
Chocolate Nog: Blend in 2 tbsp cocoa powder.
-
Coffee Nog: Replace ½ cup milk with cold brew.
-
Sugar-Free: Use monk fruit or erythritol.
Nutrition
- Calories: 140 cal Per Serving
- Fat: 8g
- Carbohydrates: 12g
- Protein: 6g
Nutritional Information (Approximate, Per Serving)
Please note: This is an estimate and can vary based on specific ingredients used, especially the type of plant milk and sweetener.
- Calories: ~140
- Protein: ~6g
- Carbohydrates: ~12g
- Fat: ~8g
- Fiber: ~1g
Prep Time: 5 minutes | Total Time: 5 minutes
Final Thoughts: A Toast to New Traditions
So there you have it—a recipe that’s more than just a drink. It’s a testament to the fact that the heart of our holiday traditions doesn’t lie in rigid ingredients, but in the spirit of adaptation, inclusion, and shared joy. This creamy, dreamy vegan eggnog is my love letter to the past and a warm welcome to the future. It proves that you can honor cherished memories while creating new ones that welcome everyone to the table.
I hope this recipe becomes a part of your holiday story, filling your mug and your home with coziness. From my kitchen to yours, happy blending, and cheers to the coziest sips of the season!
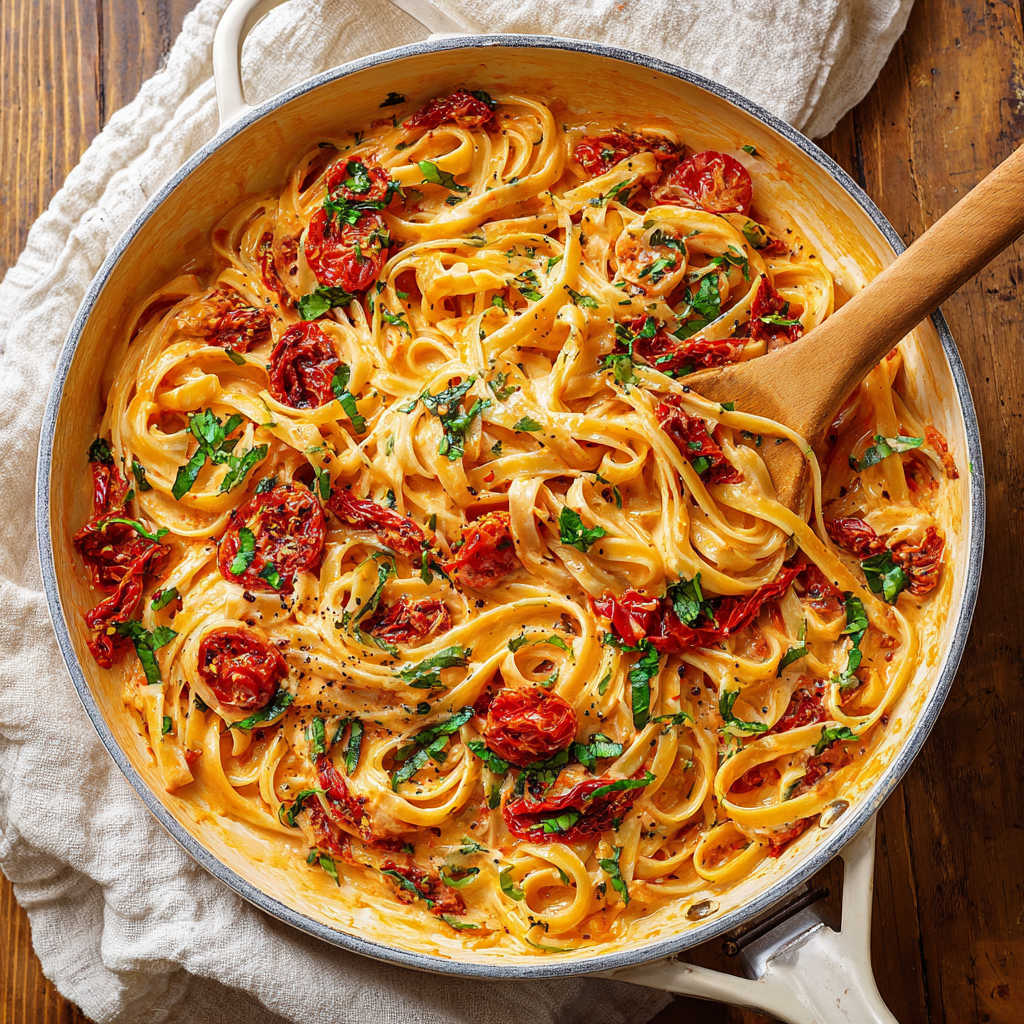
Creamy Tomato Garlic Pasta
Creamy Tomato Garlic Pasta: Your New Go-To Comfort Food
Hey there, friend! Can you smell that? It’s the sizzle of garlic hitting warm olive oil, the sweet, bubbling scent of tomatoes breaking down, and the rich, comforting aroma of cream and Parmesan coming together in a skillet. That, my friends, is the soundtrack to a seriously happy kitchen, and it’s all leading up to one glorious dish: my Creamy Tomato Garlic Pasta.
If you’re looking for a recipe that feels like a warm hug but tastes like it came from a fancy little Italian trattoria, you have absolutely found your match. This isn’t just any pasta dish. We’re taking classic comfort and turning up the volume with fresh, vibrant flavors. Imagine silky fettuccine coated in a luxuriously creamy sauce that’s bursting with sweet, ripe tomatoes and the bold, unmistakable punch of garlic. And because we’re all about maximum satisfaction here, I’ve given this version a little upgrade: sun-dried tomatoes for a chewy, intense sweetness and a pinch of red pepper flakes for a subtle, warm kick that dances on your tongue.
The best part? This stunning meal comes together in about 30 minutes, using mostly pantry staples. You don’t need any fancy chef skills—just a hungry heart and a willingness to create something truly special. So, tie on your favorite apron (the messy ones are always the most loved), fill a pot with water, and let’s make some magic happen. This is the kind of meal that turns a regular Tuesday into a mini-celebration.
The Pasta That Started It All
This recipe takes me right back to my first tiny apartment after college. My kitchen was barely bigger than a closet, but it was my sanctuary. I had one pot, one skillet, and a fierce determination to learn how to cook something other than instant ramen. One rainy evening, feeling a little homesick, I decided to throw caution to the wind and attempt a “fancy” pasta dish with the few ingredients I had: a pint of cherry tomatoes, a head of garlic, and some cream I’d bought for coffee.
I remember the nervous excitement as I minced the garlic (probably too clumsily), the way the tomatoes popped and sizzled in the pan, filling my little studio with the most incredible smell. When I tossed it all together with the pasta, I held my breath. That first bite was a revelation. It was creamy, tangy, and so much more than the sum of its parts. It was the first meal I ever made that truly felt like me—a little rustic, full of flavor, and made with a whole lot of heart. It’s been my go-to “wow” dish ever since, and I’m so thrilled to finally share my perfected version with you.
Gathering Your Ingredients
Here’s your shopping list! The beauty of this recipe is its flexibility, so I’ve included some of my favorite swaps and chef insights for each ingredient. This is where you can really make it your own.
- 16 oz Fettuccine Pasta: Fettuccine’s wide, flat surface is perfect for clinging to every bit of that creamy sauce. Chef’s Insight: No fettuccine? No problem! Tagliatelle, pappardelle, or even a sturdy rigatoni will work beautifully.
- 4 cups Diced Fresh Tomatoes: This is our star! Use ripe Roma or plum tomatoes for the best flavor and less watery seeds. Substitution Tip: In the winter, a 28-oz can of high-quality crushed San Marzano tomatoes is an incredible substitute—it actually makes the sauce even richer and deeper.
- 6 cloves Garlic, minced: Don’t be shy! Fresh is best here. The garlic forms the aromatic backbone of the entire dish. Chef’s Hack: Use a microplane to grate the garlic directly into the pan for a finer, more integrated flavor that won’t leave large chunks.
- 1 cup Sun-Dried Tomatoes, chopped (optional twist): This is my secret weapon! They add a chewy texture and an intense, sweet-tangy flavor that complements the fresh tomatoes perfectly. Insight: If yours are packed in oil, use that oil instead of regular olive oil for the first step—it’s liquid gold!
- 2 cups Heavy Cream: This creates the luxurious, silky base of our sauce. Substitution Tip: For a lighter version, half-and-half can work, but be careful not to boil it vigorously or it might separate. For a dairy-free option, full-fat coconut milk is a surprisingly delicious swap.
- 1 cup Grated Parmesan Cheese: Freshly grated is KEY! Pre-shredded cheese contains anti-caking agents that can make your sauce grainy. Chef’s Plea: Grab a wedge and grate it yourself—I promise, the difference is night and day.
- 4 tbsp Olive Oil: A good, fruity extra-virgin olive oil adds another layer of flavor. We’re using it to sauté, so no need to break out the super expensive bottle, but use one you enjoy the taste of.
- ½ cup Fresh Basil, chopped: The fresh herb finish is non-negotiable for that bright, aromatic lift. Stir most of it in at the end, and save some for a gorgeous garnish.
- Salt and Black Pepper to taste: Season in layers! Salt your pasta water, season your tomatoes, and taste the final sauce before serving.
- Pinch of Red Pepper Flakes (optional): This is my favorite “optional” ingredient. It doesn’t make the pasta spicy, just adds a gentle warmth that balances the richness of the cream. Highly recommended!
Let’s Get Cooking: Your Step-by-Step Guide
Okay, the fun part! Let’s walk through this together. I’ll be right here with you, sharing all my little tips and tricks to ensure pasta perfection.
Step 1: Cook the Pasta. Bring a large pot of water to a rolling boil. Once it’s bubbling away, salt it generously—it should taste like the sea! This is your one and only chance to season the pasta itself from the inside out. Add the fettuccine and cook according to the package directions until it’s al dente, which means “to the tooth” (it should have a slight bite to it). Chef’s Critical Hack: Before you drain the pasta, scoop out about ½ cup of that starchy, salty pasta water. This liquid magic is the key to bringing your sauce together and helping it cling to the noodles. Drain the pasta, but do NOT rinse it—we want that starch!
Step 2: Sauté the Aromatics. While the pasta is cooking, place your large skillet over medium heat. Add the olive oil. Once the oil shimmers (you can test it by adding a tiny piece of garlic—if it sizzles, you’re good to go!), add the minced garlic and the chopped sun-dried tomatoes. Sauté for just 1-2 minutes. Watch closely! We want the garlic to become fragrant and golden, not brown and bitter. This step builds the flavor foundation.
Step 3: Cook the Fresh Tomatoes. Now, add your beautiful diced fresh tomatoes to the skillet. Let them cook for 5-7 minutes, stirring occasionally. You’ll hear them sizzle and pop as they start to break down and release their natural juices. This creates a fresh, vibrant tomato base for our sauce. Season them with a pinch of salt and pepper here to help draw out their flavor.
Step 4: Create the Creamy Sauce. Lower the heat to medium-low. Pour in the heavy cream and add the grated Parmesan cheese. Stir constantly until the cheese has melted into the cream, creating a smooth, homogenous sauce. Let it simmer gently for 3-4 minutes—it will thicken slightly. Chef’s Tip: Avoid a rapid boil once the cream is in, as it can sometimes cause the sauce to separate. A gentle simmer is your friend. Now is also the time to add that pinch of red pepper flakes if you’re using them, along with more black pepper.
Step 5: The Grand Finale – Combine! This is the best part. Add the drained, cooked fettuccine directly into the skillet with the sauce. Using a pair of tongs, toss everything together, ensuring every strand of pasta is lovingly coated. The sauce might seem a bit thick at first. This is where that reserved pasta water comes in! Add a splash or two and continue tossing. You’ll see the sauce transform, becoming silky and perfectly clinging to the pasta. Finally, turn off the heat and stir in most of your fresh basil, saving a little for garnish.
How to Serve It Up in Style
Presentation is part of the joy! I love serving this family-style, right out of the warm skillet placed in the middle of the table for everyone to dig into. Use tongs to twirl generous portions into shallow bowls. For that final, restaurant-worthy touch, garnish with an extra sprinkle of freshly grated Parmesan, a few leaves of the remaining basil, and a light drizzle of high-quality olive oil. A simple side salad with a sharp vinaigrette or some garlic bread to sop up every last drop of sauce is all you need for a perfect, cozy meal.
Make It Your Own: Delicious Variations
This recipe is a fantastic canvas! Here are a few ways to play with it:
- Protein Power: Add 1 lb of cooked Italian sausage, shredded rotisserie chicken, or large sautéed shrimp in the last step to make it a heartier main course.
- Veggie Delight: Stir in a couple of handfuls of fresh spinach or baby arugula right at the end—it will wilt perfectly from the heat of the pasta.
- Herb Swap: While basil is classic, try using fresh oregano or thyme for a different aromatic profile.
- Vodka Sauce Twist: For a fun twist, deglaze the pan with ¼ cup of vodka after cooking the tomatoes and let it reduce for a minute before adding the cream. It adds a unique depth of flavor!
- Lighter Version: Use half-and-half instead of heavy cream and add a tablespoon of tomato paste for extra body without all the fat.
Olivia’s Chef Notes
This recipe has been my faithful companion for years, and it’s evolved so much from that first clumsy attempt in my apartment kitchen. I’ve learned that the simplest dishes are often the best, but the little details—the salty pasta water, the freshly grated cheese—are what elevate them from good to “can I have the recipe?!” status.
One of my favorite kitchen memories involving this dish was the time I was making it for a date and got a little over-enthusiastic with the garlic. Let’s just say we *both* had garlic breath for days, and he still married me! So, don’t be afraid to make it your own. Cooking is about joy, experimentation, and sharing love through food. This pasta is forgiving, flexible, and always, always delicious.
Your Questions, Answered!
Q: My sauce turned out a bit watery. What happened?
A: This can happen if the tomatoes release a lot of liquid. No worries! The easiest fix is to let the sauce simmer for a few more minutes without the pasta to reduce and thicken. You can also create a quick slurry by mixing a teaspoon of cornstarch with a tablespoon of cold water and stirring it into the simmering sauce. And remember, adding the starchy pasta water will also help thicken it as you toss.
Q: Can I make this ahead of time?
A> You can prep the sauce ahead of time! Let it cool completely, then store it in an airtight container in the fridge for up to 2 days. When you’re ready, gently reheat the sauce in a skillet while you cook your pasta fresh. I don’t recommend cooking and storing the pasta in the sauce, as it will continue to absorb the liquid and become mushy.
Q: Is there a way to make this recipe dairy-free?
A> Absolutely! For the cream, use a can of full-fat coconut milk—it provides a similar richness and a subtle, lovely flavor that pairs surprisingly well with the tomatoes. For the Parmesan, there are some great vegan Parmesan alternatives available, or you can use a tablespoon of nutritional yeast for a cheesy, savory flavor.
Q: My sauce separated and looks a bit curdled. Can I save it?
A> This can occur if the heat was too high when you added the cream. Don’t panic! Remove the pan from the heat immediately and vigorously whisk in a tablespoon of cold water or cream. This can often bring it back together. If that doesn’t work, you can carefully blend it with an immersion blender for a few seconds to re-emulsify it.

Creamy Tomato Garlic Pasta
Description
Turn any weeknight into a celebration with this creamy, dreamy pasta that feels like a warm hug and tastes like it came straight from an Italian trattoria. Ripe tomatoes, plenty of garlic, a splash of cream, and a shower of Parmesan come together to coat tender fettuccine in a sauce that’s equal parts fresh, rich, and irresistible. With just 30 minutes and a handful of pantry staples, you’ll have a dish that’s comforting enough for cozy nights in and elegant enough for dinner with friends.
Ingredients
-
16 oz fettuccine pasta (or tagliatelle, pappardelle, rigatoni)
-
4 cups diced fresh tomatoes (or 1 can crushed San Marzano)
-
6 garlic cloves, minced
-
1 cup sun-dried tomatoes, chopped (optional)
-
2 cups heavy cream (or half-and-half/coconut milk for variations)
-
1 cup freshly grated Parmesan cheese
-
4 tbsp olive oil (use sun-dried tomato oil for extra flavor!)
-
½ cup fresh basil, chopped
-
Salt & black pepper to taste
-
Pinch of red pepper flakes (optional)
Instructions
-
Cook pasta – Boil in salted water until al dente. Reserve ½ cup pasta water before draining.
-
Sauté aromatics – Heat olive oil, cook garlic and sun-dried tomatoes for 1–2 minutes until fragrant.
-
Cook tomatoes – Add fresh tomatoes, season, and let them break down for 5–7 minutes.
-
Make sauce – Reduce heat, stir in cream and Parmesan, and simmer gently until smooth and slightly thickened. Add pepper flakes if desired.
-
Combine – Toss in pasta, adding splashes of pasta water until the sauce is silky and clings to every strand. Stir in most of the basil, saving some for garnish.
-
Serve – Top with extra Parmesan, fresh basil, and a drizzle of good olive oil.
Notes
-
Protein boost: Add cooked shrimp, chicken, or sausage.
-
Veggie version: Wilt in spinach or arugula at the end.
-
Herb swap: Try thyme or oregano instead of basil.
-
Vodka twist: Deglaze tomatoes with ¼ cup vodka before adding cream.
-
Dairy-free: Use coconut milk + vegan Parmesan or nutritional yeast.
Nutrition
- Calories: 480 cal Per Serving
- Fat: 28g
- Carbohydrates: 45g
- Protein: 15g
Nutritional Information*
Per Serving (approximate): Calories: 480 | Protein: 15g | Carbohydrates: 45g | Fat: 28g
*Please note: This is an approximate estimate generated from an online calculator. For precise nutritional information, please calculate based on the specific brands and ingredients you use.
Final Thoughts: More Than Just a Meal
So there you have it—my heart-on-a-plate, my ultimate comfort food, the pasta that turned my tiny kitchen into a place of discovery. I hope this recipe brings as much joy to your table as it has to mine over the years.
Remember, this Creamy Tomato Garlic Pasta isn’t just about following a list of ingredients; it’s about creating a moment. It’s about the sizzle, the smell, and the satisfaction of making something truly wonderful with your own two hands. Don’t stress about perfection. Whether you use every ingredient to the letter or throw in your own creative twist, the goal is to fill your home with warmth and your belly with goodness.
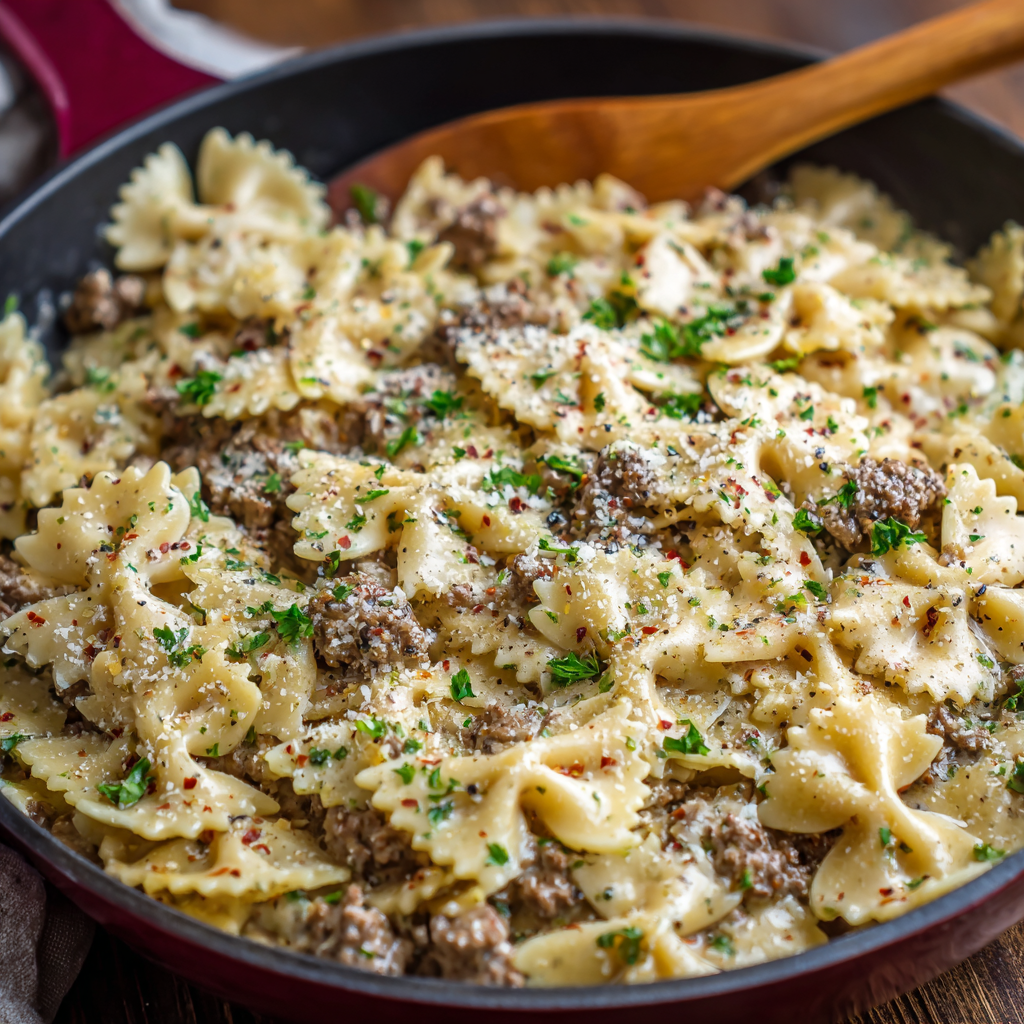
Creamy Parmesan Garlic Beef Bowtie Pasta
Your New Favorite Dinner is Just 25 Minutes Away
Hey there, friend! Can you smell that? It’s the incredible aroma of sizzling garlic, savory beef, and nutty Parmesan cheese starting to dance together in a skillet. That, my friend, is the sound of a seriously good dinner about to happen. And the best part? You’re only about 25 minutes away from sitting down to a plate of pure, unapologetic comfort.
I’m talking about my Creamy Parmesan Garlic Beef Bowtie Pasta. This isn’t just another pasta recipe; it’s a hug in a bowl. It’s the dish you whip up on a Wednesday when you’re short on time but desperately in need of something that feels special. It’s the meal you make for a casual dinner with friends that has everyone asking for the recipe before they’ve even finished their first helping. We’re combining tender ground beef, a luxurious (yet incredibly simple) cream sauce, and fun, sauce-catching bowtie pasta. It’s fancy enough to feel like a treat but easy enough to become a regular in your weekly rotation. So, grab your favorite skillet, and let’s make some magic together.
The Recipe That Started It All
This recipe holds a seriously special place in my heart. It was one of the very first “real” dinners I ever felt confident making entirely on my own, way back in my first tiny apartment with a kitchen the size of a postage stamp. I had a couple of friends coming over, my budget was tight, and I was determined to impress without stressing.
I remember the feeling so clearly: the nervous excitement, the garlic sizzling a little too loudly in my cheap skillet, and the absolute triumph I felt when I stirred the pasta into that creamy, cheesy sauce and it just… worked. My friends’ faces lit up, and we spent the entire evening crowded around my small table, laughing, eating second helpings, and just enjoying the simple joy of a homemade meal. That night taught me a powerful lesson: you don’t need a gourmet kitchen or complicated techniques to create something wonderful. You just need good ingredients, a little bit of heart, and a recipe you can trust. This is that recipe for me, and I’m so excited to share it with you.
Gathering Your Ingredients
One of the best things about this dish is its beautiful simplicity. You probably have most of these ingredients in your kitchen right now! Here’s what you’ll need to serve four happy people (or two very hungry people with maybe some leftovers for lunch – my favorite!).
- 8 oz Bowtie Pasta (Farfalle): I love bowties here because their ruffled edges and nooks are perfect for grabbing all that creamy sauce. Chef’s Insight: No bowties? Penne, rigatoni, or even fettuccine work wonderfully!
- 1 lb Ground Beef: I typically use an 80/20 blend for the best flavor, but leaner beef works too – just watch it doesn’t dry out. Substitution Tip: Ground turkey, chicken, or even Italian sausage are fantastic swaps.
- 1 tablespoon Olive Oil: Just a splash to get our beef browning nicely.
- 4 cloves Garlic, minced: Don’t be shy! Freshly minced garlic is non-negotiable for that bold, aromatic flavor. Chef’s Hack: Use a microplane to grate the garlic – it almost melts into the sauce.
- 1 cup Heavy Cream: This is the base of our luxurious sauce. For a slightly lighter version, half-and-half can work, but the sauce will be thinner.
- ½ cup grated Parmesan Cheese: Please, I beg you, grate it yourself from a block! The pre-grated stuff often contains anti-caking agents that can make your sauce grainy. Freshly grated Parmesan melts like a dream.
- Salt & Black Pepper to taste: Season as you go! Taste, taste, taste.
- Optional: Red Pepper Flakes, Chopped Parsley: A pinch of flakes adds a lovely warmth, and fresh parsley gives a pop of color and freshness right at the end.
Let’s Get Cooking: Your Step-by-Step Guide
Ready? Let’s fire up the stove. I’ll walk you through each step, sharing all my little kitchen hacks to ensure your pasta is absolutely perfect.
Step 1: Cook the Pasta. Bring a large pot of well-salted water to a rolling boil. Add your bowtie pasta and cook according to the package directions until it’s al dente – that means it should still have a slight bite to it. Why? Because it’s going to hang out in the hot sauce for a minute later, and we don’t want it to get mushy! Before you drain it, reserve about a half cup of that starchy pasta water. This is liquid gold for adjusting the sauce consistency later. Drain the pasta and set it aside.
Step 2: Brown the Beef. While the pasta is cooking, heat the olive oil in a large skillet over medium-high heat. Add the ground beef, breaking it up with a spoon or spatula. Cook until it’s nicely browned and no pink remains. If you’re using a higher-fat beef, you can drain off the excess fat now. I usually leave a tablespoon or two for extra flavor!
Step 3: Sauté the Garlic. Reduce the heat to medium. Now, add your minced garlic to the beef in the skillet. This is where the magic starts! Cook for just 1-2 minutes, stirring constantly, until the garlic is incredibly fragrant. Watch it closely! Burnt garlic tastes bitter, and we want sweet, aromatic goodness.
Step 4: Create the Creamy Sauce. Pour in the heavy cream and add the grated Parmesan cheese. Give it a good stir to combine everything. Let it simmer gently for 3-5 minutes. You’ll see the sauce slowly thicken and coat the back of a spoon. This is the perfect time to season with salt and a good crack of black pepper. Taste it! Does it need more salt? More pepper? Make it yours.
Step 5: The Grand Finale – Combine & Serve! Add the cooked, drained bowtie pasta directly into the skillet with the sauce. Using tongs or a large spoon, toss everything together until every single piece of pasta is gloriously coated in that creamy, garlicky, beefy sauce. If the sauce seems a little too thick, add a splash of that reserved pasta water you saved earlier – it works wonders to loosen it up and help the sauce cling to the pasta. Give it one final taste for seasoning, then serve immediately!
How to Serve It Up in Style
Presentation is part of the fun! I like to dish this pasta up into warm, shallow bowls. The final flourish is key: a little extra sprinkle of fresh Parmesan cheese, a scattering of chopped parsley for a fresh contrast, and maybe a light dusting of red pepper flakes for those who like a kick. This is a rich, satisfying dish, so I often serve it with a simple side salad with a sharp vinaigrette to cut through the creaminess, or some crusty garlic bread to swipe up every last bit of sauce. No judgment here if you eat it straight from the skillet, though – I’ve been there!
5 Delicious Ways to Mix It Up
This recipe is a fantastic canvas for your creativity! Here are a few of my favorite twists:
- Sun-Dried Tomato & Spinach: Stir in ½ cup of chopped sun-dried tomatoes and a couple of large handfuls of fresh spinach when you add the cream. The tomatoes add a sweet-tangy punch, and the spinach wilts down beautifully.
- Mushroom Lover’s Dream: Sauté 8 oz of sliced cremini mushrooms with the ground beef. Their earthy flavor is incredible with the garlic and Parmesan.
- Lighter Version: Use ground turkey and swap the heavy cream for half-and-half or even whole milk mixed with a tablespoon of flour to help it thicken.
- Spicy Arrabbiata Twist: Add a tablespoon of tomato paste with the garlic, and use ¾ cup cream and ¼ cup of your favorite jarred marinara sauce for a rosé-style sauce. Kick up the red pepper flakes!
- White Cheddar & Herb: Swap the Parmesan for a sharp white cheddar and stir in a tablespoon of fresh thyme leaves for a different, equally cozy flavor profile.
From My Kitchen to Yours: A Few Final Thoughts
Over the years, this recipe has seen many iterations. I’ve made it for potlucks, for new parents, and for myself on more than one “need comfort food STAT” kind of night. The version I’m sharing with you today is the one I keep coming back to – it’s just right. One funny kitchen story? I once was so excited to make this for a date that I accidentally used powdered sugar instead of flour (in a different, thickener-required version!) while trying to multitask. Let’s just say… it was a sweet, but very confusing, dinner. We ordered pizza and laughed about it. The moral of the story? Even kitchen fails make for good memories, but maybe keep your similar-looking containers far, far apart.
Your Questions, Answered!
Q: My sauce turned out a bit grainy. What happened?
A: This is almost always due to the cheese! Pre-grated Parmesan cheese contains cellulose to prevent clumping, which doesn’t melt smoothly. For a perfectly silky sauce, always grate your Parmesan fresh from a block. Also, make sure you’re adding the cheese to a sauce that is just simmering, not boiling vigorously, as high heat can cause the proteins to seize up.
Q: Can I make this ahead of time?
A: You can certainly prep the components! Brown the beef and mix the sauce ingredients separately, and cook the pasta. Store them separately in the fridge. When ready to eat, reheat the beef and sauce gently in a skillet, then toss with the pasta, adding a splash of cream or water to loosen it up. The pasta will be softer, but it will still taste great!
Q: The sauce is too thin. How can I thicken it?
A: Let it simmer for a few more minutes to reduce. If it’s still too thin, make a quick slurry by mixing 1 teaspoon of cornstarch with 1 tablespoon of cold water. Stir this into the simmering sauce – it should thicken up almost instantly.
Q: Can I freeze leftovers?
A: I don’t recommend it, unfortunately. Cream-based sauces tend to separate and become watery when thawed. This dish is truly best enjoyed fresh!

Creamy Parmesan Garlic Beef Bowtie Pasta
Description
Bring comfort to your table in just 25 minutes with this rich, flavorful pasta that feels like a warm hug in every bite. Tender ground beef, velvety cream sauce, and perfectly sauce-catching bowtie pasta come together for a weeknight meal that tastes like a special occasion. It’s quick, cozy, and guaranteed to become a new favorite.
Ingredients
-
8 oz bowtie pasta (or penne, rigatoni, fettuccine)
-
1 lb ground beef (80/20 blend recommended)
-
1 tbsp olive oil
-
4 garlic cloves, minced
-
1 cup heavy cream (or half-and-half for lighter version)
-
½ cup freshly grated Parmesan cheese
-
Salt & black pepper to taste
-
Optional: red pepper flakes, chopped parsley
Instructions
-
Cook pasta – Boil in salted water until al dente. Reserve ½ cup pasta water before draining.
-
Brown beef – Heat oil in skillet, cook beef until browned, drain excess fat if needed.
-
Sauté garlic – Add garlic, cook 1–2 minutes until fragrant (don’t burn!).
-
Make sauce – Stir in cream and Parmesan. Simmer 3–5 minutes until creamy. Season with salt and pepper.
-
Combine – Toss pasta into skillet, adding reserved pasta water if needed to loosen.
-
Serve – Top with extra Parmesan, parsley, and a pinch of red pepper flakes.
Notes
-
Add spinach and sun-dried tomatoes for freshness.
-
Swap beef with turkey, chicken, or sausage.
-
For extra depth, sauté mushrooms with the beef.
-
Want a spicy kick? Stir in tomato paste and chili flakes.
Nutrition
- Calories: 540cal Per Serving
- Fat: 30g
- Carbohydrates: 38g
- Protein: 30g
Nutritional Information*
Per Serving (approximate): Calories: 540 | Protein: 30g | Carbohydrates: 38g | Fat: 30g
*Please note: This is an approximate calculation based on the ingredients used and will vary depending on specific products and portion sizes. It’s always best to calculate using your exact ingredients for precise information.
Warm and Encouraging (Highly Recommended)
So there you have it. In about the time it takes to watch half of your favorite sitcom, you can transform simple ingredients into a meal that feels like a celebration. This Creamy Parmesan Garlic Beef Bowtie Pasta is more than just a recipe; it’s your new secret weapon for busy nights, impromptu gatherings, and those moments when only a bowl of pure comfort will do.
I hope this recipe finds its way into your kitchen and becomes a trusted friend, just like it has been in mine. Don’t be afraid to make it your own—add your favorite veggies, play with the protein, or kick up the spice. The goal isn’t perfection; it’s a delicious dinner that brings you joy.
Now, I’d love to hear from you! Did you add a special twist? Did it become an instant family favorite? Share your creations and stories with me. Happy cooking!
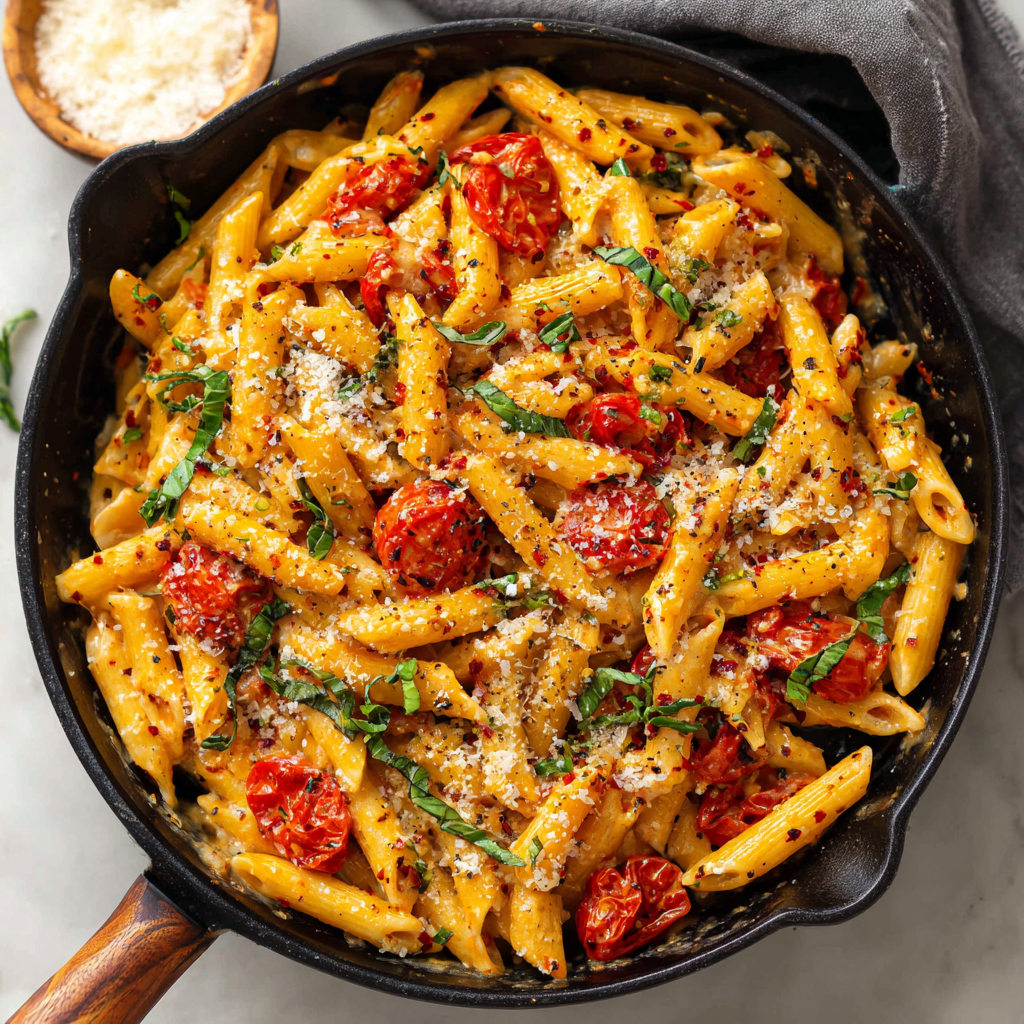
The Best Creamy Garlic Tomato Pasta – Done in Under 30 Minutes
The Best Creamy Garlic Tomato Pasta – Your New Weeknight Hero
Hey friends, Olivia here! Tell me if this sounds familiar: it’s been a long day, your energy is at an all-time low, but that little voice in your head (you know, the one that sounds a lot like a rumbling stomach) is begging for something truly comforting. You want a meal that feels like a warm hug, but the thought of a sink full of dishes or a recipe with a million steps is just… not happening.
Well, my friend, you have just stumbled upon your new kitchen soulmate. This isn’t just any pasta dish. This is The One. We’re talking about a creamy, dreamy, garlicky tomato sauce that clings to every noodle like it was made for it. It’s rich without being heavy, elegant enough for a casual date night, and so incredibly simple that you’ll have it on the table in less time than it takes to decide on and order takeout.
This recipe is the embodiment of everything I believe in: that incredible food doesn’t have to be complicated. We’re using humble, pantry-staple ingredients and transforming them into something magical. It’s the kind of meal that makes everyone at the table lean in a little closer, asking for “just one more bite.” So, tie on your favorite apron – the one that’s seen some good times – and let’s make some weeknight magic together.
A Sauce Born from a Happy Accident
This recipe holds a special place in my heart because it was born from a classic “kitchen improv” moment. It was a rainy Tuesday during my first year in my own apartment. A dear friend was coming over for a much-needed catch-up, and I had grand plans for a fancy, from-scratch marinara. But as fate would have it, I realized I’d barely touched the open carton of heavy cream leftover from the weekend’s coffee.
There was no time to run to the store. So, with a “what’s the worst that could happen?” shrug, I did it. I poured that glorious cream right into my simmering, garlicky tomatoes. The sauce transformed before my eyes, turning from a bright, acidic red to a soft, blushing coral. It thickened into the most luxurious, velvety texture. The aroma alone was a game-changer. My friend walked in, took one deep breath, and said, “Whatever you’re making, I need it immediately.” We sat at my tiny kitchen table, twirling pasta onto our forks, and I knew I’d stumbled onto something special. It’s a reminder that some of the best creations come from a little spontaneity and a willingness to play with your food.
Gathering Your Flavor All-Stars
Here’s everything you’ll need to create this masterpiece. The beauty is in its simplicity, but I’ve included some of my favorite chef insights and swaps to make it your own.
- 8 oz Pasta (like penne or fettuccine): I love penne because the little tubes trap the sauce so well, and fettuccine offers a wonderful, luxurious surface for the cream to cling to. Chef’s Insight: Don’t overcook it! We’re taking it out when it’s al dente (firm to the bite) because it will continue to cook a bit in the sauce. This prevents mushy pasta, which is the enemy of a good time.
- 1 Tablespoon Olive Oil: Our cooking fat and flavor base. A good extra virgin olive oil adds a fruity depth. Substitution Tip: If you’re out, butter works beautifully for a richer, more decadent start.
- 4 Cloves Garlic, minced: Don’t be shy! Garlic is the star of the show here. Freshly minced is best—it has a brighter, more potent flavor than the pre-minced stuff. Chef’s Insight: The key is to sauté it just until it’s fragrant. We’re toasting it, not burning it! Burnt garlic turns bitter, and we want sweet, aromatic goodness.
- 1 (14.5 oz) Can Crushed or Diced Tomatoes: Crushed tomatoes give you a smoother sauce right away, while diced will have more texture. I often use fire-roasted diced tomatoes for an extra layer of smoky flavor. Substitution Tip: In a pinch, a good-quality jarred marinara sauce can be a huge time-saver. Just simmer it for a few minutes to concentrate the flavor before adding the cream.
- ½ Cup Heavy Cream: This is what creates that irresistible, silky texture. Substitution Tip: For a lighter version, half-and-half will work, but the sauce won’t be quite as thick and luxurious. For a dairy-free option, full-fat canned coconut cream is a fantastic substitute that adds a subtle sweetness.
- ¼ Cup Grated Parmesan Cheese: Salty, nutty, and umami-packed. It acts as a thickener and a flavor booster. Chef’s Insight: Please, for the love of all that is cheesy, grate it yourself from a block! Pre-grated cheese often contains anti-caking agents that can make your sauce a bit grainy.
- Salt and Black Pepper to taste: Your essential seasonings. Taste as you go!
- Optional Garnishes: A pinch of red pepper flakes for a gentle kick, fresh basil ribbons for a pop of color and freshness, or a handful of baby spinach stirred in at the end for a veggie boost.
Let’s Get Cooking: Your Step-by-Step Guide to Pasta Perfection
Okay, team! Let’s walk through this together. I’m right here with you, sharing all my little hacks to ensure your pasta is absolutely flawless.
- Cook the Pasta: Bring a large pot of well-salted water to a rolling boil. You want the water to taste like the sea – this is your one chance to season the pasta from the inside out! Add your pasta and cook according to the package directions for al dente. Now, here’s a PRO TIP: Before you drain the pasta, use a mug or a liquid measuring cup to scoop out about ½ cup of the starchy, salty pasta water. This liquid gold is the secret weapon for making your sauce silky and helping it cling to the noodles. Drain the pasta and set it aside.
- Sauté the Garlic: While the pasta is cooking, place a large skillet over medium heat. Add the olive oil. Once the oil shimmers (you can test it by adding a tiny piece of garlic – if it sizzles gently, you’re good to go!), add your minced garlic. Now, stand right there and don’t walk away! We’re only cooking it for about 1-2 minutes, just until it becomes incredibly fragrant. You should smell that gorgeous, toasty garlic aroma. If it starts to brown quickly, your heat is too high – no worries, just pull the pan off the heat for a second.
- Build the Sauce: Pour in the canned tomatoes. They’ll sizzle and sputter a bit – that’s the good stuff! Season with a good pinch of salt and black pepper. Let this simmer for about 5 minutes. This step is crucial because it cooks the raw tomato flavor out and allows the sauce to reduce and concentrate. You’ll see it thicken slightly.
- Make it Creamy: Reduce the heat to low. This is important! If the pan is too hot when you add the cream, it might separate or curdle. Stir in the heavy cream and the grated Parmesan cheese. Keep stirring until the cheese has melted and the sauce is a beautiful, uniform pale orange color. Let it bubble gently for 2-3 more minutes. You’ll see it thicken up nicely.
- The Grand Finale: Toss it All Together! Add the drained, cooked pasta directly into the skillet with the sauce. Using tongs or a spoon, toss the pasta thoroughly, ensuring every inch is coated in that creamy goodness. Now, remember that reserved pasta water? Add a splash or two and toss again. Watch how the sauce loosens up and becomes glossy, wrapping around the pasta perfectly. The starch in the water acts as an emulsifier, creating a restaurant-quality finish. Add just enough until the sauce is at your desired consistency.
- Finish & Serve: Take the skillet off the heat. Taste it! Does it need more salt? A crack of black pepper? Now is the time to adjust. Stir in your optional add-ins like spinach until it wilts, or tear fresh basil over the top. Serve immediately, with an extra sprinkle of Parmesan and a pinch of red pepper flakes for those who like a little heat.
How to Serve Your Masterpiece
Presentation is part of the joy! I love serving this pasta family-style, right out of the warm skillet I cooked it in (it makes for fewer dishes and looks so rustic and inviting). Pile it high into a large, shallow bowl. The final flourish is key: a fresh shower of basil, a final dusting of Parmesan, and a drizzle of high-quality olive oil right at the end adds a beautiful sheen and a burst of flavor. This pasta is a whole meal in itself, but it’s fantastic with a simple side salad with a sharp vinaigrette to cut through the richness, and a slice of crusty, warm bread for mopping up every last bit of sauce.
Get Creative: 5 Fun Twists on the Classic
Once you’ve mastered the base recipe, have fun with it! Here are some of my favorite variations:
- Protein Power: Stir in 1 cup of shredded rotisserie chicken, ½ lb of cooked Italian sausage, or a handful of cooked shrimp during the final toss.
- Veggie Delight: Sauté 1 cup of sliced mushrooms or a diced bell pepper with the garlic. Or, stir in a couple of large handfuls of fresh spinach or kale right at the end until wilted.
- Spicy Arrabbiata-Style: Add ½ to 1 teaspoon of red pepper flakes when you sauté the garlic to infuse the oil with heat.
- Herbaceous Dream: Add a teaspoon of dried oregano or Italian seasoning with the tomatoes. Finish with a mix of fresh parsley, basil, and chives.
- Dairy-Free Delight: Use full-fat coconut milk instead of heavy cream and a tablespoon of nutritional yeast or a vegan Parmesan alternative instead of dairy Parmesan.
Olivia’s Chef Notes & Kitchen Confessions
This recipe has been my trusty sidekick for years, and it’s evolved with me. I’ve made it for nervous first dates (it’s a charm, by the way), for potlucks where I needed a guaranteed crowd-pleaser, and for those nights when I just needed a big bowl of comfort. I’ve learned a few things along the way. First, the “cream curdling” fear is real, but as long as you lower the heat before adding it, you’re golden. Second, my husband now knows that if he sees me reaching for the red pepper flakes, it’s been “one of those days,” and the pasta will have an extra kick! The best part? This recipe is incredibly forgiving. It welcomes your own touches and becomes a part of your story, too. Don’t be afraid to make it your own.
Your Questions, Answered!
Q: My sauce seems a bit thin. How can I thicken it up?
A: No problem! The easiest fix is to let it simmer for a few more minutes over low heat, stirring frequently. The excess liquid will evaporate. Alternatively, you can create a quick slurry by mixing a teaspoon of cornstarch with a tablespoon of cold water and stirring it into the sauce. Let it bubble for a minute, and it will thicken right up.
Q: Can I make this ahead of time?
A> You can absolutely prep the sauce ahead of time! Make the sauce through step 4, then let it cool and store it in an airtight container in the fridge for up to 3 days. When you’re ready to eat, gently reheat the sauce in a skillet while you cook your pasta fresh. Toss it all together with a splash of pasta water, and it will taste just-made. I don’t recommend cooking and storing the pasta in the sauce, as it will continue to absorb liquid and become soft.
Q: Why did my cream sauce curdle or separate?
A> This usually happens if the heat is too high when you add the cream or if there’s a big temperature difference between the sauce and the cream. Always lower the heat to low before adding the cream. If it does separate, don’t panic! Remove the pan from the heat and vigorously whisk in a tablespoon or two of hot pasta water. This can often bring it back together.
Q: Can I use milk instead of heavy cream?
A> I don’t recommend it. Milk has a much lower fat content and is prone to curdling when heated with acidic ingredients like tomatoes. The result will be a much thinner, less rich sauce and you risk a grainy texture. If you need a lighter option, half-and-half is a better bet, though the sauce won’t be as luxuriously thick.
The Best Creamy Garlic Tomato Pasta – Done in Under 30 Minutes
Description
The Best Creamy Garlic Tomato Pasta – Your New Weeknight Hero
Hey friends! This is your go-to recipe for a quick, cozy, and ultra-flavorful pasta dinner. Creamy, garlicky, and tomato-forward, it’s simple enough for a weeknight yet impressive enough for a casual date night. Ready in under 30 minutes, this pasta is comfort food magic.
Ingredients
Pasta & Base
-
8 oz pasta (penne, fettuccine, or your favorite shape)
-
1 tbsp olive oil
Garlic & Tomato Sauce
-
4 cloves garlic, minced
-
1 (14.5 oz) can crushed or diced tomatoes (fire-roasted for extra flavor)
-
½ cup heavy cream (or half-and-half for lighter, coconut cream for dairy-free)
-
¼ cup freshly grated Parmesan cheese
-
Salt & black pepper, to taste
Optional Garnishes
-
Red pepper flakes for heat
-
Fresh basil ribbons for color and freshness
-
Baby spinach for a veggie boost
Chef Insights:
-
Don’t overcook the pasta—al dente is perfect because it continues cooking in the sauce.
-
Toast garlic until fragrant, not brown, to avoid bitterness.
-
Freshly grated Parmesan melts more smoothly and adds better flavor than pre-grated.
Instructions
Bring a large pot of salted water to a rolling boil. Cook pasta until al dente. Pro tip: Reserve ½ cup of starchy pasta water before draining—it helps the sauce cling beautifully. Drain and set aside.
Heat olive oil in a skillet over medium heat. Add minced garlic and sauté 1–2 minutes until fragrant. Keep a close eye—it should smell sweet, not burnt.
Add canned tomatoes to the skillet, season with salt and pepper, and simmer 5 minutes to reduce slightly and concentrate flavors.
Lower the heat to low. Stir in heavy cream and Parmesan until the sauce is uniform and smooth. Simmer 2–3 minutes, allowing it to thicken slightly. Avoid high heat to prevent curdling.
Add cooked pasta to the skillet. Toss thoroughly to coat, adding reserved pasta water a splash at a time for a glossy, perfect consistency. Taste and adjust salt and pepper.
Remove from heat. Stir in optional spinach or basil. Serve immediately with extra Parmesan and a pinch of red pepper flakes for heat.
Notes
-
Lower the heat before adding cream to avoid curdling.
-
Adjust spice to your mood—red pepper flakes are your friend!
-
This recipe is forgiving and flexible; make it your own.
Nutrition
- Calories: 420 cal Per Serving
- Sugar: 6g
- Fat: 20g
- Carbohydrates: 48g
- Protein: 12g
Nutritional Information (Approximate, per serving)
Calories: 420 | Protein: 12g | Carbohydrates: 48g | Fat: 20g | Saturated Fat: 9g | Cholesterol: 45mg | Sodium: 350mg | Fiber: 3g | Sugar: 6g
Please note: This is an estimate based on the specific ingredients listed. Values can vary based on the brands you use.
Final Thoughts: Your New Go-To Comfort Food
And just like that, in less time than it takes for a pizza to be delivered, you’ve created a restaurant-quality meal right in your own kitchen. See? I told you it was simple. This pasta is proof that you don’t need a pantry full of exotic ingredients to make something truly special. All you need is a few staples, a trusty skillet, and the confidence to create.
This recipe is more than just a dish; it’s a reliable solution for those busy weeknights, a surefire way to impress a friend, and a warm, creamy bowl of comfort that just makes everything feel better. It’s the kind of recipe that will quietly become a part of your regular rotation, the one you’ll scribble down for a friend who asks for the secret.
So, the next time that little voice in your stomach starts rumbling for something truly satisfying, you know exactly what to do. Skip the takeout menu, and give this creamy garlic tomato pasta a chance to be your weeknight hero. I have a feeling it’s going to become a fast favorite.
Happy cooking!

Creamy Cajun Chicken Pasta: Comfort Meets Spice
Creamy Cajun Chicken Pasta: When Your Soul Needs a Hug and Your Taste Buds Want a Party
Hey there, friend! Come on in, pull up a stool. Can you smell that? It’s the smell of garlic sizzling in a pan, the warm, earthy aroma of Cajun spices hitting hot oil, and the promise of something seriously delicious about to happen. If your day needs a reset button, or if you’re just craving a meal that feels like a warm, flavorful hug, you’ve landed on the right recipe.
Today, we’re making my Creamy Cajun Chicken Pasta. This is the dish I turn to when I want to impress without the stress. It’s the culinary equivalent of your favorite cozy sweater but with a surprising, delightful kick. In one bowl, you get it all: tender, juicy chicken coated in a bold spice blend, a luxuriously creamy sauce that clings to every groove of the pasta, and those little bites of sweet bell pepper that just make everything sing.
The best part? This isn’t a fussy, hours-long project. This is 30-minute magic. It’s weeknight-easy but absolutely dinner-party-worthy. Whether you’re cooking for a crowd or just treating yourself after a long day, this pasta delivers big, bold flavor without demanding a fancy degree or a perfectly clean kitchen (mine is currently… well-lived-in, let’s say). So, grab your favorite skillet, and let’s create some comfort with a side of spice together!
The Dinner That Started It All: A Tale of Spice and Sunshine
This recipe will always hold a special place in my heart because it reminds me of one of my first “successful” dinner parties. I was fresh out of college, living in a tiny apartment with a kitchen the size of a postage stamp. I wanted to cook a meal for my new friends that felt sophisticated and warm, but my budget and skills were, let’s say, “humble.” I was terrified of undercooking chicken and overwhelming everyone with bland flavors.
I stumbled upon the idea of a creamy Cajun pasta. It felt adventurous yet approachable. That night, my kitchen was a whirlwind of spice jars, boiling water, and laughter. The moment I added the cream to the pan with the toasted spices and garlic, the most incredible aroma filled the entire apartment. The nervousness melted away. We crammed around my little table, bowls piled high, and the conversation flowed as easily as the sauce. It was messy, it was loud, and it was perfect. It taught me that the best meals aren’t about perfection; they’re about the joy of sharing something made with heart. This dish has been my go-to confidence booster ever since.
Gathering Your Flavor Dream Team
Here’s everything you’ll need to bring this Cajun masterpiece to life. Don’t stress if you’re missing an item or two—I’ve included my favorite swaps and chef insights to make this recipe your own!
- 2 large chicken breasts, sliced thin: Slicing them thin is our first chef hack! It ensures quick, even cooking and gives us more surface area for that delicious Cajun crust. Chef’s Insight: For even more tender chicken, you can lightly pound the breasts before slicing.
- 2 tablespoons Cajun seasoning: The star of the show! This blend of paprika, garlic powder, onion powder, cayenne, and oregano is what gives the dish its signature warmth and kick. Substitution Tip: No pre-made blend? Mix 1 tbsp paprika, 1 tsp each of garlic powder, onion powder, and oregano, and ½ tsp of cayenne (adjust for heat!).
- 2 tablespoons olive oil: Our trusty cooking fat for searing that chicken to golden-brown perfection.
- 3 cloves garlic, minced: Because what’s a cozy pasta without the soulful fragrance of garlic? Fresh is best here!
- 1 bell pepper, sliced: I love using a red or yellow pepper for a pop of color and sweetness that balances the spice. Chef’s Insight: Feel free to add a sliced onion here too for extra flavor!
- 1 cup heavy cream: This is the base of our luxurious, velvety sauce. Substitution Tip: For a lighter version, half-and-half can work, but the sauce will be thinner. For a dairy-free option, full-fat coconut milk is a fantastic substitute that adds a subtle tropical note.
- ½ cup chicken broth: This loosens up the sauce just enough and adds a savory depth. Low-sodium is best so you can control the salt level.
- ½ cup grated parmesan: The salty, nutty flavor of parmesan makes the sauce incredibly rich and helps it thicken. Chef’s Insight: Please, for the love of flavor, grate it yourself! Pre-grated cheese often has anti-caking agents that can make your sauce grainy.
- 8 oz penne or fettuccine: I love penne because the sauce pools inside the tubes, but fettuccine is a classic for creamy sauces. Use your favorite short or long pasta!
- Salt & pepper to taste: Always season as you go! Remember, the Cajun seasoning and parmesan are salty, so taste before adding more salt at the end.
- Optional: chopped parsley, red pepper flakes: A sprinkle of fresh green parsley adds a fresh finish, and extra red pepper flakes are for my heat-seeking friends!
Let’s Get Cooking: Your Step-by-Step Guide to Pasta Perfection
Okay, team! Aprons on, music playing, let’s do this. Follow these steps, and you’ll have a restaurant-quality meal on the table in no time. I’ve packed each step with my best tips to ensure your success.
- Cook the Pasta: Bring a large pot of well-salted water to a rolling boil. Add your pasta and cook according to package directions until al dente (that means it still has a slight bite to it). Chef’s Hack: Before you drain the pasta, reserve about a ½ cup of the starchy pasta water! This magical liquid is gold for adjusting the consistency of your sauce later. Drain the pasta and set it aside.
- Season the Chicken: While the pasta water is heating up, slice your chicken breasts into thin, even strips. Place them in a bowl and toss them thoroughly with the 2 tablespoons of Cajun seasoning. You want every piece to be well-coated and looking vibrant. Chef’s Tip: Doing this step first allows the spices to start melding with the chicken, resulting in deeper flavor.
- Sear the Chicken: Heat 1 tablespoon of olive oil in a large skillet over medium-high heat. Once the oil is shimmering (a drop of water should sizzle), add the chicken in a single layer. Don’t crowd the pan—cook in batches if needed! Let it cook undisturbed for 3-4 minutes per side until you get a beautiful, golden-brown sear and the chicken is cooked through. Chef’s Hack: Resist the urge to constantly move the chicken around! Letting it sit creates that delicious crust. Transfer the cooked chicken to a clean plate.
- Sauté the Veggies: Reduce the heat to medium. Add the remaining tablespoon of olive oil to the same skillet. Now, add your minced garlic and sliced bell pepper. Sauté for 2-3 minutes, just until the garlic is fragrant and the peppers have softened slightly. Chef’s Tip: We’re using the same pan without washing it because all those browned bits from the chicken (the “fond”) are packed with flavor and will melt into our sauce!
- Create the Velvety Sauce: This is the magic moment! Pour in the heavy cream and chicken broth. Use your spoon to scrape up all those delicious browned bits from the bottom of the pan. Let it come to a gentle simmer (little bubbles around the edges). Now, whisk in the grated parmesan cheese until it’s completely melted and the sauce is smooth. Let it simmer for 2-3 minutes until it thickens slightly. It should coat the back of a spoon.
- The Grand Finale – Combine! Return the cooked chicken and any accumulated juices back to the skillet. Add the drained pasta. Toss everything together until every strand of pasta and every piece of chicken is gloriously coated in that creamy Cajun sauce. If the sauce seems a bit thick, add a splash of that reserved pasta water to loosen it up perfectly. Heat everything through for a final minute.
Plating Up: How to Serve Your Masterpiece
Presentation is part of the fun! I love serving this family-style, right in the warm skillet at the center of the table for a real “dig in” vibe. For individual plates, use tongs to twirl a generous portion of pasta into a warm bowl. Top with an extra sprinkle of fresh parmesan, a shower of chopped parsley for a pop of color, and if you’re feeling feisty, a pinch of red pepper flakes. This pasta is rich, so a simple side like a crisp green salad with a sharp vinaigrette or some garlic bread for mopping up every last drop of sauce is absolutely perfect.
Make It Your Own: Delicious Twists & Swaps
This recipe is a fantastic canvas for your creativity! Here are a few of my favorite ways to mix it up:
- Seafood Sensation: Swap the chicken for peeled shrimp or scallops. Cook them quickly in the pan after the veggies, then set aside and follow the recipe as written.
- Veggie Lover’s Dream: Omit the chicken and add more veggies! Sliced mushrooms, zucchini, and onions are wonderful additions. Sauté them all until tender before making the sauce.
- Smoky & Spicy: Add ½ teaspoon of smoked paprika to the Cajun seasoning for a deep, smoky flavor that’s absolutely irresistible.
- Sun-Dried Tomato Bliss: Chop up ¼ cup of oil-packed sun-dried tomatoes and add them with the cream. Their tangy sweetness is a fantastic contrast to the spice.
- Lighter Version: Use half-and-half instead of heavy cream and add a tablespoon of flour to the chicken when seasoning to help thicken the sauce.
Olivia’s Chef Notes: A Few Parting Thoughts
This recipe has evolved so much since that first apartment dinner party. I’ve learned that the key is to taste as you go! Is it spicy enough for you? Add more Cajun seasoning or a dash of hot sauce. Need more tang? A squeeze of fresh lemon juice at the end can brighten the whole dish beautifully.
One funny kitchen story: I once, in a hurry, grabbed the cinnamon instead of the paprika. Let me tell you, Creamy Cajun Chicken Pasta should NOT taste like a chai latte! It was… an interesting experiment. So now, I always, always smell my spices before adding them. A little lesson in mindfulness among the chaos! The beauty of cooking is that even the “mistakes” can lead to new discoveries. So don’t be afraid to play and make this recipe yours.
Your Questions, Answered: FAQs & Troubleshooting
Q: My sauce turned out too thin. How can I fix it?
A: No worries! This happens sometimes. The easiest fix is to let it simmer for a few more minutes to reduce and thicken. If you’re still in a pinch, make a quick slurry by mixing 1 teaspoon of cornstarch with 1 tablespoon of cold water. Whisk this into the simmering sauce, and it should thicken up in about a minute.
Q: My sauce broke/curdled! What did I do wrong?
A: This usually happens if the heat is too high when you add the cream or cheese, causing the fat to separate. To prevent it, keep the heat at a gentle simmer. If it happens, remove the pan from the heat immediately and whisk in a tablespoon of cold cream or broth. This can often bring it back together.
Q: The dish is too spicy for my family. How can I tone it down?
A: Great question! The heat primarily comes from the cayenne in the Cajun seasoning. You can use a mild Cajun blend or make your own with less cayenne. If you’ve already made it and it’s too hot, stir in a couple more tablespoons of heavy cream or a dollop of sour cream to mellow it out. Serving it with a side of garlic bread or a cool, creamy salad also helps balance the heat.
Q: Can I make this ahead of time?
A: You can prep the components ahead! Cook the chicken and veggies, and make the sauce, but store them separately in the fridge. The pasta will absorb the sauce as it sits, so it’s best cooked fresh. When ready to serve, gently reheat the chicken and sauce, cook your pasta, and combine!

Creamy Cajun Chicken Pasta: Comfort Meets Spice
Description
Creamy Cajun Chicken Pasta: When Your Soul Needs a Hug and Your Taste Buds Want a Party
There’s nothing like the aroma of garlic sizzling, Cajun spices hitting hot oil, and the promise of a meal that’s rich, cozy, and bursting with flavor. This Creamy Cajun Chicken Pasta is your ticket to comfort food with a kick. Tender chicken, creamy sauce, and sweet bell peppers—all ready in 30 minutes. Weeknight-easy but dinner-party-worthy, this dish is the perfect blend of cozy and bold.
Ingredients
Protein & Veggies
-
2 large chicken breasts, thinly sliced
-
1 bell pepper, sliced (red or yellow for sweetness and color)
-
3 cloves garlic, minced
Seasoning & Fats
-
2 tbsp Cajun seasoning (store-bought or homemade; see tip below)
-
2 tbsp olive oil
Sauce
-
1 cup heavy cream (or half-and-half for a lighter version; full-fat coconut milk for dairy-free)
-
½ cup chicken broth (low-sodium recommended)
-
½ cup grated parmesan cheese (freshly grated for best flavor)
Pasta
-
8 oz penne or fettuccine
-
Salt & pepper, to taste
Optional Garnishes
-
Chopped parsley
-
Red pepper flakes
Chef’s Tips:
-
Homemade Cajun seasoning: 1 tbsp paprika, 1 tsp garlic powder, 1 tsp onion powder, 1 tsp dried oregano, ½ tsp cayenne. Adjust for heat preference.
-
Thinly slicing or lightly pounding the chicken ensures even cooking and maximum flavor absorption.
Instructions
Bring a large pot of salted water to a boil. Cook pasta until al dente. Reserve ½ cup of pasta water before draining—it’s perfect for adjusting sauce consistency later.
Toss sliced chicken with Cajun seasoning until evenly coated. Let it sit briefly to enhance flavor.
Heat 1 tbsp olive oil in a large skillet over medium-high heat. Cook chicken in a single layer, 3–4 minutes per side, until golden and cooked through. Don’t overcrowd the pan—cook in batches if necessary. Transfer to a plate.
Reduce heat to medium. Add remaining 1 tbsp olive oil, garlic, and bell pepper. Sauté 2–3 minutes until fragrant and slightly softened. Leave browned bits (fond) from chicken in the pan—they add amazing flavor!
Pour in heavy cream and chicken broth, scraping up the fond. Bring to a gentle simmer, then whisk in parmesan until smooth. Simmer 2–3 minutes until slightly thickened.
Return chicken (and any accumulated juices) to the pan. Add pasta and toss until everything is coated. If needed, loosen with reserved pasta water. Heat through for 1 minute.
Notes
-
Taste as you go: add more Cajun seasoning, hot sauce, or a squeeze of lemon to brighten the dish.
-
A funny kitchen story: once cinnamon was accidentally used instead of paprika—lesson learned! Always smell your spices first.
-
This recipe is forgiving and flexible—play with it and make it yours.
Nutrition
- Calories: 530 cal Per Serving
- Fat: 26g
- Carbohydrates: 38g
- Protein: 36g
Nutritional Information*
Per Serving (approximate): Calories: 530 | Protein: 36g | Carbohydrates: 38g | Fat: 26g
*Please note: This is an approximate calculation based on the ingredients used and can vary significantly with specific brands, substitutions, and portion sizes.
Love this recipe? Save it for later!
Final Thoughts
And there you have it—a bowl of pure, unapologetic joy. This Creamy Cajun Chicken Pasta is proof that you don’t need a special occasion to create something extraordinary. It’s a celebration of flavor that’s as fun to make as it is to eat, turning a simple weeknight into a mini-feast.
So the next time your soul needs a hug and your taste buds are begging for a party, you know exactly what to do. This recipe is your reminder that a little bit of spice, a whole lot of cream, and 30 minutes are all you need to turn the day around. Now, go forth and twirl those forks! I hope this dish brings as much warmth and happiness to your table as it has to mine.
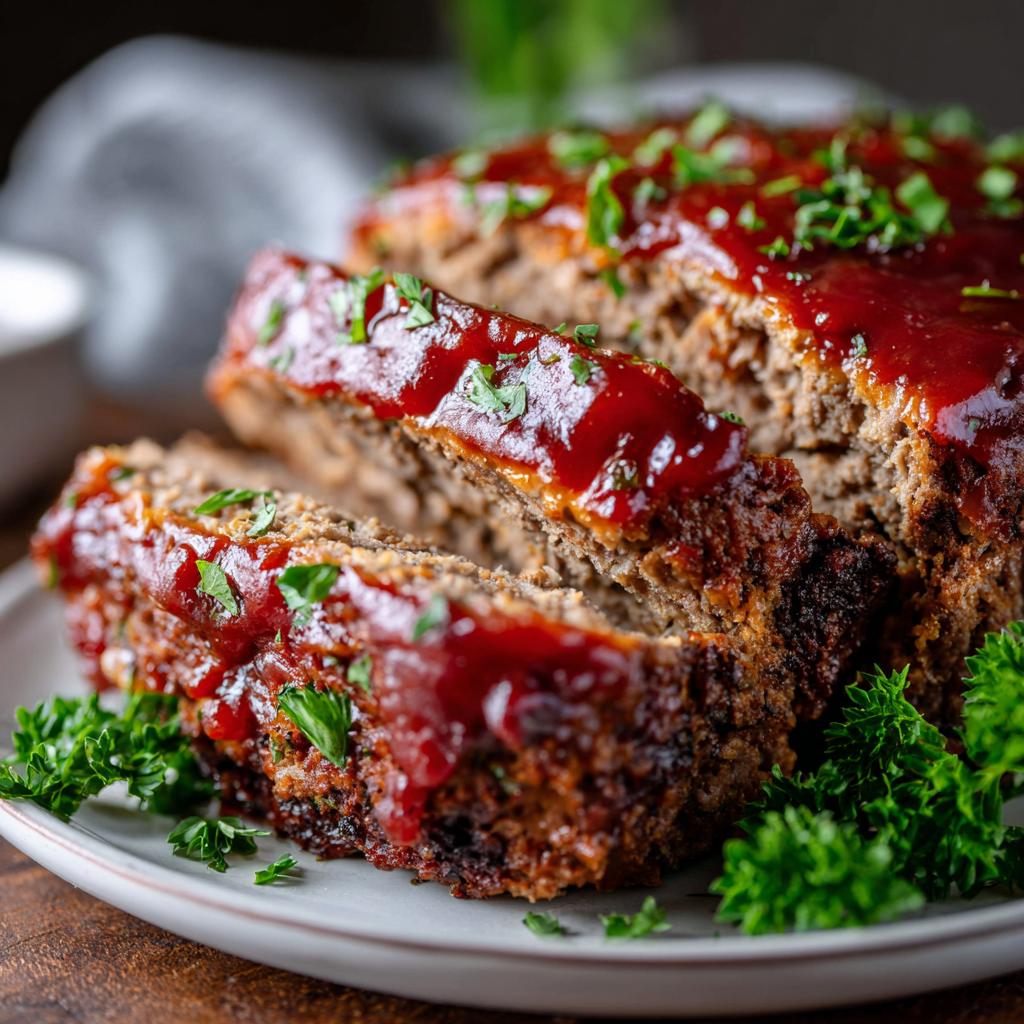
Easy Meatloaf with the BEST Glaze
The Ultimate Comfort Food: Easy Meatloaf with the BEST Glaze
Hey there, friend! Come on in, grab an apron, and let’s get something seriously comforting cooking. Is there anything quite like the smell of meatloaf wafting through the house? It’s a hug in culinary form—warm, hearty, and promising a meal that feels like home. If you’ve ever been intimidated by the idea of making the *perfect* meatloaf, or if you’ve had a dry, bland one in the past that left you disappointed, I’m here to change the game for you.
Today, we’re making my go-to Easy Meatloaf with a glaze that is, and I don’t say this lightly, absolutely legendary. This isn’t just a brick of ground beef; this is a tender, juicy, flavor-packed masterpiece. The secret isn’t one magical ingredient, but a few simple chef-approved tricks that ensure it’s moist every single time. And that glaze? A sweet, tangy, sticky blanket that caramelizes into a gorgeous, glossy crust. It’s the kind of dish that makes everyone at the table ask for seconds and leaves you with the best leftovers imaginable.
This recipe is your new weeknight superhero. It’s unpretentious, incredibly satisfying, and proof that the best meals don’t have to be complicated. So, preheat that oven, and let’s create some magic together. I promise, this will become a recipe you turn to again and again.
Meatloaf Memories: More Than Just a Meal
This recipe takes me right back to my grandma’s kitchen table. It was always a little chaotic in the best way—pots bubbling, the radio playing oldies, and us kids sneaking bits of cookie dough when she wasn’t looking. But Sunday nights were for meatloaf. It was non-negotiable. Hers was a simple, no-fuss recipe, much like this one, but she had one rule: you had to get your hands in there to mix it.
I can still see her, sleeves rolled up, gently combining everything with her fingers. “Olivia,” she’d say, “you have to feel it. A spoon will make it tough.” She’d let me squish the cool, soft mixture between my fingers, teaching me to stop the second everything was just combined. The real magic moment, though, was when she’d pull it out of the oven halfway through to paint on her signature ketchup and brown sugar glaze. The sizzle, the smell… it was pure anticipation. That meatloaf wasn’t just dinner; it was the centerpiece of our family Sunday, a ritual that said the weekend was ending, but we were all together. That’s the feeling I try to capture every time I make this recipe—the warmth, the love, and the simple, unbeatable joy of a meal made with heart.
Gathering Your Ingredients: A Chef’s Insights
Here’s everything you’ll need to create this cozy masterpiece. I’ve included some notes on why each ingredient matters and how you can switch things up if needed. Remember, great cooking is about understanding the *why* behind the *what*!
For the Meatloaf:
- 2 lbs ground beef: I like to use an 80/20 blend (80% lean, 20% fat). The fat is your friend here—it keeps the meatloaf incredibly moist and flavorful. If you use a super-lean blend like 90/10, it can turn out a bit dry.
- 1 cup breadcrumbs: These are our “panade” (a fancy word for a starch-and-liquid paste) base. They absorb the milk and create a tender texture by preventing the meat proteins from tightening up too much. Chef’s Tip: Plain, unseasoned breadcrumbs are perfect. If you only have seasoned, that’s okay, just taste before adding the full amount of salt.
- 1 cup milk: The liquid for our panade! It adds moisture and richness. Whole milk is great, but 2% works well too.
- 2 large eggs: These are the binding agents that hold our meatloaf together. Make sure they’re at room temperature for easier mixing!
- 1 medium onion, finely chopped: Sweetness and texture! Finely chopping is key so you don’t get big, crunchy pieces. Sautéing them first is a game-changer for deeper flavor (see the instructions!).
- 3 cloves garlic, minced: Because what’s a savory dish without garlic? Freshly minced is always best for the most vibrant flavor.
- 2 tbsp Worcestershire sauce: This is our flavor powerhouse! It adds a deep, savory, umami richness that makes the meatloaf taste complex and wonderful.
- 1½ tsp salt: Essential for enhancing all the other flavors. Don’t be shy!
- 1 tsp black pepper: Freshly ground black pepper adds a little warmth and spice.
For the Glaze (The Star of the Show!):
- ½ cup ketchup: The sweet, tangy base. You can substitute with tomato sauce and add a bit more sugar, but ketchup gives it that classic, nostalgic flavor.
- ¼ cup brown sugar: This caramelizes beautifully with the ketchup, creating that sticky, glossy perfection. Light or dark brown sugar works—dark will give a slightly deeper molasses flavor.
- 1 tbsp yellow or Dijon mustard: A little tangy zip to balance the sweetness. Yellow mustard is classic, but I love the slight sharpness of Dijon.
Let’s Get Cooking: Your Step-by-Step Guide
Okay, team, it’s go-time! Follow these steps for a foolproof, incredibly delicious meatloaf. I’m sharing all my little hacks along the way.
- Preheat & Prep: First things first, preheat your oven to 350°F (175°C). This ensures it’s perfectly hot and ready when your loaf is shaped. Now, line a baking sheet with parchment paper or foil. Wait, a baking sheet? Not a loaf pan? This is my #1 chef hack! Baking the meatloaf free-form on a sheet pan allows the heat to circulate all around it, caramelizing the outside and preventing it from steaming in its own juices. This equals better browning and a nicer texture all over. If you prefer a more traditional shape, a loaf pan is fine, but I highly recommend the sheet pan method!
- Sauté the Aromatics: Here’s another pro-move for maximum flavor. Instead of adding raw onion and garlic to the mix, give them a quick sauté in a little olive oil over medium heat for about 5-7 minutes, until they’re soft and translucent. This tames the sharp bite of the onion and brings out its natural sweetness, and it mellows the garlic so it doesn’t taste pungent. Let them cool slightly before adding to the mix.
- Create the Panade: In the bottom of a large mixing bowl, combine the breadcrumbs and milk. Let it sit for a few minutes. You’ll see it turn into a thick, paste-like consistency. This is the secret to a tender meatloaf! It acts as a cushion for the meat fibers.
- Combine Gently: To the bowl with your panade, add the eggs, sautéed onion and garlic, Worcestershire sauce, salt, and pepper. Give this a good stir with a fork until it’s well combined. Now, add the ground beef. Here’s the crucial part: use your hands! Gently mix everything together until the ingredients are *just* incorporated. Overmixing is the enemy of a tender meatloaf—it makes it dense and tough. Think of it as bringing the team together, not forcing them into submission.
- Shape the Loaf: Transfer the meat mixture to your prepared baking sheet. Gently form it into a loaf shape, about 9 inches long by 5 inches wide. Smooth the top and sides. I like to make mine a little flatter on top so there’s more surface area for that glorious glaze.
- The First Bake: Pop it into the preheated oven and bake for 40 minutes. This initial bake cooks the loaf through and sets its structure before we add the glaze.
- Make the Glaze: While the meatloaf is baking, whisk together the ketchup, brown sugar, and mustard in a small bowl. It should be smooth and spoonable.
- Glaze and Finish: After 40 minutes, carefully remove the meatloaf from the oven. It will have released some juices and started to brown. Using a spoon or a pastry brush, generously spread the glaze all over the top and sides. This is where it gets beautiful! Return it to the oven for another 20-25 minutes. The glaze will bubble and caramelize. The meatloaf is done when the internal temperature reaches 160°F on an instant-read thermometer. Don’t skip the thermometer! It’s the only surefire way to know it’s perfectly cooked and still juicy.
- Rest is Best: This might be the hardest step—be patient! Transfer the meatloaf to a cutting board and let it rest for at least 10 minutes before slicing. This allows the juices to redistribute throughout the loaf. If you slice it right away, all those wonderful juices will run out, leaving you with a drier meatloaf. Trust me on this!
How to Serve Your Masterpiece
Now for the fun part! I love slicing my meatloaf into thick, hearty slabs. Plate it up with classic comfort food sides. A big scoop of creamy mashed potatoes is non-negotiable in my house—the perfect vehicle for that extra glaze. Buttered green beans or roasted broccoli add a fresh, crisp contrast. And honestly, you can’t go wrong with a simple side salad or some buttery cornbread. The goal is a plate that’s colorful, comforting, and guaranteed to make everyone smile.
Get Creative: Recipe Variations
Once you’ve mastered the classic, feel free to play around! Here are a few of my favorite twists:
- BBQ Twist: Swap the ketchup in the glaze for your favorite BBQ sauce and add a teaspoon of smoked paprika to the meat mixture.
- Italian Style: Use Italian-seasoned breadcrumbs, swap the Worcestershire for 2 tablespoons of grated Parmesan cheese and 1 tablespoon of tomato paste, and add a teaspoon of dried oregano.
- Turkey Meatloaf: Substitute ground turkey for the beef. To keep it moist, add an extra tablespoon of olive oil or an extra egg yolk to the mixture.
- Spicy Kick: Add 1-2 teaspoons of your favorite hot sauce to the meat mixture and a pinch of cayenne pepper to the glaze.
- Gluten-Free: Simply use certified gluten-free breadcrumbs or rolled oats pulsed in a food processor.
Olivia’s Chef Notes
This recipe has been my faithful companion for years, and it’s evolved with me. I started out baking it in a loaf pan, like my grandma did, but one busy night I didn’t have a clean one and used a sheet pan instead. It was a happy accident that completely changed the texture for the better! I also used to be afraid of “over-seasoning,” but I’ve learned that a good amount of salt is what makes the flavors pop. Don’t be scared to taste a tiny bit of the raw mixture (then wash your hands thoroughly!) to check the seasoning. The funniest kitchen fail? I once forgot to add the eggs entirely. Let’s just say I ended up with a very delicious, but very crumbly, “meat pile.” We still ate it, but it was a great reminder that those binders are there for a reason! The beauty of this recipe is its flexibility and forgiving nature. Make it yours.
Meatloaf FAQs & Troubleshooting
Q: Why is my meatloaf dry and crumbly?
A: This usually happens for one of three reasons: 1) The meat was too lean. Remember, fat equals flavor and moisture. 2) It was overmixed. Be gentle! 3) It was overcooked. An instant-read thermometer is your best friend—pull it at 160°F.
Q: Can I make meatloaf ahead of time?
A: Absolutely! You can assemble the entire meatloaf (without baking), cover it tightly, and refrigerate it for up to 24 hours. When you’re ready, just pop it in the oven. You may need to add a few extra minutes to the baking time since it’s going in cold.
Q: My glaze is burning before the meatloaf is cooked. What do I do?
A: If the glaze is getting too dark too fast, simply lay a loose piece of foil over the top of the meatloaf for the remainder of the baking time. This will shield it from direct heat while the inside continues to cook.
Q: How long do leftovers last, and what’s the best way to reheat them?
A: Leftovers will keep in an airtight container in the fridge for 3-4 days. The best way to reheat is gently—either in the microwave at a reduced power level or in a 300°F oven until warmed through. This prevents it from drying out. And don’t forget: meatloaf sandwiches on toasted bread with a little mayo and lettuce are a life-changing leftover experience!
Easy Meatloaf with the BEST Glaze
Description
The Ultimate Comfort Food: Easy Meatloaf with the BEST Glaze
There’s nothing quite like the smell of meatloaf wafting through the house. It’s warm, hearty, and the very definition of comfort food. This isn’t just a brick of ground beef; it’s a tender, juicy, flavor-packed masterpiece. The secret? A few simple tricks that guarantee moistness every time, plus a sweet, tangy glaze that caramelizes into a glossy, irresistible crust.
Ingredients
For the Meatloaf
-
2 lbs ground beef (80/20 blend recommended for juiciness)
-
1 cup breadcrumbs (plain or seasoned)
-
1 cup milk (whole or 2%)
-
2 large eggs (room temperature)
-
1 medium onion, finely chopped
-
3 cloves garlic, minced
-
2 tbsp Worcestershire sauce
-
1½ tsp salt
-
1 tsp black pepper
For the Glaze
-
½ cup ketchup
-
¼ cup brown sugar (light or dark)
-
1 tbsp yellow or Dijon mustard
Instructions
Preheat oven to 350°F (175°C). Line a baking sheet with parchment or foil. Free-form baking on a sheet pan allows heat to circulate, giving better browning and caramelization than a loaf pan.
In a small skillet over medium heat, sauté onion and garlic in olive oil for 5–7 minutes until soft and translucent. Let cool slightly.
In a large mixing bowl, combine breadcrumbs and milk. Let it sit for a few minutes to form a thick, paste-like consistency. This keeps the meatloaf tender.
Add eggs, sautéed onion and garlic, Worcestershire sauce, salt, and pepper to the panade. Gently mix in the ground beef using your hands—just until combined. Overmixing makes meatloaf dense.
Form the mixture into a loaf on your prepared baking sheet, about 9×5 inches. Flatten the top slightly for better glaze coverage.
Bake for 40 minutes.
While the meatloaf bakes, whisk together ketchup, brown sugar, and mustard in a small bowl.
After 40 minutes, spread the glaze evenly over the top and sides. Return to oven for 20–25 minutes, until internal temperature reaches 160°F. If glaze darkens too quickly, cover loosely with foil.
Let the meatloaf rest for at least 10 minutes. This allows juices to redistribute, keeping it moist.
Notes
-
Fat is your friend—80/20 beef keeps it juicy.
-
Overmixing = dense meatloaf. Handle gently.
-
Taste the mixture (then wash hands!) to check seasoning before baking.
-
Chill leftovers for sandwiches—they’re even better the next day.
Nutritional Information (Approximate)
Per Serving (based on 8 servings): Calories: 350 | Protein: 25g | Fat: 18g | Carbohydrates: 20g
Please note: This is an estimate provided by an online nutrition calculator. It will vary based on the specific ingredients you use.
Final Thoughts: More Than Just a Meal
And there you have it! From a cherished memory at my grandma’s table to a recipe I’ve made my own, this meatloaf is the very definition of comfort. It’s proof that with a few simple techniques and a little bit of love, you can turn humble ingredients into a meal that feels like a celebration.
I hope this recipe finds its way into your regular rotation, becoming a source of warmth and satisfaction for your own family. It’s dependable, delicious, and always there to make a tough day a little bit better. So the next time you’re craving something truly comforting, remember that this ultimate meatloaf is just an oven preheat away.
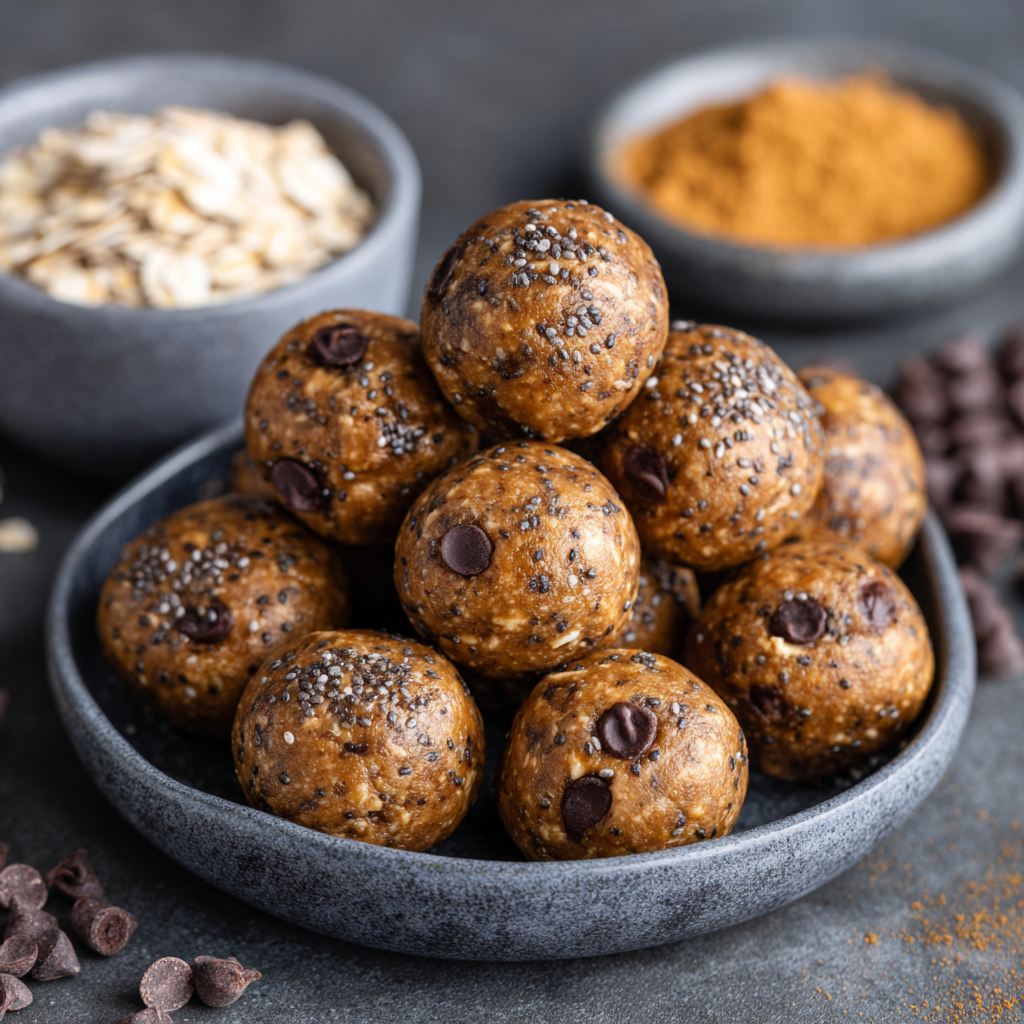
Chocolate Peanut Butter Protein Balls
The Snack That Changed Everything: My Chocolate Peanut Butter Protein Balls
Hey there, friend! Olivia here. Can I tell you a secret? I have a major weakness for the classic flavor combo of chocolate and peanut butter. It’s a love affair that started in childhood and shows no signs of slowing down. But as much as I adore a classic Reese’s cup, my adult self also craves something that doesn’t leave me crashing an hour later with a sugar headache. Sound familiar?
That’s exactly why I created these little powerhouses of joy: my No-Bake Chocolate Peanut Butter Protein Balls. We’re talking about a snack that feels like a treat but acts like fuel. They’re the answer to that 3 PM slump, the perfect pre-workout bite, the “I-need-something-sweet-but-don’t-want-to-ruin-my-dinner” solution, and the ultimate healthy grab-and-go breakfast for those mornings when you’re running out the door.
The best part? You don’t need to be a kitchen whiz to make them. We’re talking one bowl, one spoon, and about five minutes of active time. No baking required! I’ve made this recipe countless times, tweaking and perfecting it until it reached what I truly believe is snack perfection. We’ve got a double batch here (because they disappear fast!), a secret splash of water for the perfect texture, and my special twist: a sprinkle of chopped peanuts and a pinch of flaky sea salt to take that sweet-and-salty situation to a whole new level. So, grab your favorite mixing bowl and let’s make something deliciously satisfying together!
A Messy Apron and a Happy Discovery
This recipe brings me right back to my college days. Picture this: a tiny shared kitchen, textbooks piled on the table, and a desperate need for a study snack that wasn’t another packet of instant noodles. I was experimenting in the kitchen (a great form of procrastination, by the way) and threw together some oats, peanut butter, and honey. They were… okay. A bit bland, a bit gluey, but they did the job.
The real “aha!” moment came years later, when I was training for my first half-marathon. My early morning runs demanded real fuel, and my post-run hunger was a force to be reckoned with. I remembered those simple oat balls and thought, “How can I make these better? More powerful? More… me?” I started adding a scoop of my chocolate protein powder, a handful of chocolate chips for pure joy, and that magical pinch of salt. The first time I made this new version, I knew it was a game-changer. They became my secret weapon, the thing I’d pack for my friends after a long hike or bring to a potluck to share the love. It’s a recipe born from necessity and perfected with passion, and that’s always the best kind.
Gathering Your Dream Team: The Ingredients
Here’s everything you’ll need to make about 32 perfectly portioned protein balls. The beauty of this recipe is its flexibility, so I’ve included my favorite tips and substitutions for each ingredient. Don’t be afraid to make it your own!
- 2 cups Rolled Oats (Old-Fashioned Oats): This is the hearty, wholesome base that gives our balls structure and a lovely chewy texture. Chef’s Insight: I don’t recommend using quick oats if you can avoid it—they can make the mixture a bit pasty. Gluten-free? Just make sure your oats are certified GF!
- ⅔ cup Chocolate Protein Powder: This is our protein powerhouse! It adds flavor and helps bind everything together. Substitution Tip: Vanilla or even a plain/unflavored protein powder works great too. If you use unflavored, you might want to add an extra tablespoon of honey or a dash of vanilla extract.
- ½ cup Mini Chocolate Chips: Because life is better with chocolate! The mini chips distribute the chocolatey goodness perfectly in every single bite. Chef’s Insight: I like using semi-sweet, but dark chocolate chips are a fantastic, slightly less sweet option.
- 1 heaping cup Peanut Butter: The star of the show! This provides healthy fats, flavor, and acts as the main “glue.” CRUCIAL TIP: Please use a natural, drippy peanut butter where the only ingredients are peanuts and maybe salt. Avoid the shelf-stable, hydrogenated kinds (like Jif or Skippy) as they make the mixture too stiff and dry.
- 6 tablespoons Honey: Our natural sweetener that adds a touch of floral sweetness and perfect stickiness. Substitution Tip: Pure maple syrup or agave nectar are excellent vegan-friendly swaps.
- 6 teaspoons Water: This is my secret weapon! A little water helps bring the dough together without making it too wet. It’s the key to a rollable, not-too-sticky texture.
- ¼ cup Chopped Roasted Peanuts (Optional Twist): I love the extra crunch and nutty flavor this adds! It breaks up the texture and makes them feel a bit more gourmet.
- Pinch of Flaky Sea Salt (Optional): Don’t you dare skip this! A pinch of salt balances the sweetness and makes the chocolate and peanut butter flavors pop in a incredible way.
Let’s Get Rolling! Your Foolproof Steps
Ready? This is where the magic happens. It’s so simple, but I’ll walk you through each step with my best tips to ensure perfect results every single time.
- The Big Mix. Grab your largest mixing bowl. Seriously, bigger than you think you need—it gives you room to stir without spilling! Dump in the rolled oats, chocolate protein powder, mini chocolate chips, chopped peanuts (if using), and that all-important pinch of sea salt. Give these dry ingredients a good stir with a sturdy spoon or spatula until they’re fully combined. This ensures the protein powder is evenly distributed so every ball gets its fair share of protein power.
- Bring in the Wet Team. Now, plop in the heaping cup of peanut butter and pour in the honey and water. Here’s a little chef hack: if your peanut butter is cold and hard to measure, pop the closed jar in a bowl of warm water for a few minutes to loosen it up. Also, to get every last drop of honey out of the measuring spoon, give it a quick spritz of cooking spray before you measure—the honey will slide right out!
- Mix Until Magic Happens. Now, roll up your sleeves and start mixing! It might seem dry at first, but keep going. Use a cutting and pressing motion with your spoon or spatula. After a minute or two, the mixture will transform into a thick, slightly sticky dough that holds together when you pinch it. If it seems *too* dry and crumbly, add another teaspoon of water, one at a time, until it comes together.
- The Roll-Up. Line a baking sheet or large plate with parchment paper. Using a tablespoon-sized cookie scoop (my favorite tool for uniformity!) or a regular spoon, scoop up a portion of the dough. Roll it between your palms for a few seconds until it forms a smooth ball. If the mixture is too sticky to handle, here’s your pro-tip: just pop the whole bowl into the fridge for 10-15 minutes. This firms up the peanut butter and makes rolling a breeze.
- The Final Chill. Place each ball on the prepared parchment paper. Once they’re all rolled, slide the tray into the refrigerator for at least 20 minutes. This final chill is non-negotiable—it firms them up, sets the shape, and makes them perfectly chewy.
- Store and Enjoy! After the chill time, transfer your beautiful protein balls to an airtight container. They’ll keep happily in the fridge for up to a week, or in the freezer for up to 3 months for a ready-when-you-are snack!
How to Serve & Savor
These protein balls are the ultimate no-fuss food, but that doesn’t mean we can’t make them look pretty! For a simple snack, just pile them high in a rustic ceramic bowl on the counter for everyone to grab. For a more elegant touch at a brunch or party, arrange them on a platter and give them a light dusting of extra cocoa powder or a drizzle of melted peanut butter. My favorite way to eat them? Straight from the fridge, slightly chilled, with a hot cup of coffee for the ultimate afternoon pick-me-up.
Get Creative! 5 Fun Flavor Twists
Once you’ve mastered the classic, the fun really begins. This recipe is a fantastic canvas for your creativity! Here are a few of my favorite variations:
- Coconut Dream: Replace ½ cup of the oats with unsweetened shredded coconut, and use vanilla protein powder for a tropical vibe.
- Monster Cookie Style: Swap the chocolate chips for butterscotch chips and add a few colorful sprinkles to the mix—kids (and kids-at-heart) adore this one!
- Nut-Free Delight: Use sunflower seed butter instead of peanut butter and omit the chopped peanuts. Perfect for school lunches!
- Double Chocolate Espresso: Add 1-2 teaspoons of instant espresso powder to the dry ingredients for a mocha kick that’s amazing for breakfast.
- Peanut Butter & Jelly: After rolling the balls, use your thumb to make a small indent in the top and fill it with a tiny dollop of your favorite jam or jelly.
Chef’s Notes: From My Kitchen to Yours
This recipe has truly evolved with me. I remember one time, early on, I was so excited to make a triple batch for a big family camping trip. I was rushing and accidentally used sweetened, toasted oat cereal instead of plain rolled oats. It was a happy accident! They were a bit sweeter and had a different texture, but everyone loved them. It just goes to show that sometimes the best recipes come from a little kitchen chaos.
Over the years, I’ve learned that the brand of protein powder can slightly change the texture. If you find your mixture is too wet, add a couple more tablespoons of oats. If it’s too dry, add more water, a teaspoon at a time. Trust your instincts! You’ve got this. The most important ingredient is the joy you put into making them.
Your Questions, Answered!
Q: My mixture is too dry and crumbly. It won’t stick together when I roll it. What did I do wrong?
A: This is the most common issue, and it’s an easy fix! It usually happens if the peanut butter was particularly thick or if the protein powder absorbed more liquid than usual. Simply add more liquid. Add one teaspoon of water (or honey/maple syrup) at a time, mixing thoroughly after each addition, until the dough holds together when pinched.
Q: Can I make these vegan?
A: Absolutely! This recipe is super easy to veganize. Just use a plant-based chocolate protein powder (many great options exist!), swap the honey for pure maple syrup or agave nectar, and ensure your chocolate chips are vegan-friendly (check the label for milk products).
Q: Why do I have to chill them? Can’t I eat them right away?
A> You can sneak one right away (I always do!), but the chill time is crucial for the final texture. It allows the oats to soften slightly and absorb the moisture, and it firms up the fats from the peanut butter. This transforms them from a sticky dough into a firm, chewy, perfect snack.
Q: Help! My mixture is way too sticky and messy to roll. What now?
A: No worries! This can happen if your peanut butter was very oily or if your kitchen is warm. The easiest solution is to chill the entire mixture in the bowl for 10-15 minutes in the refrigerator. This will firm up the fats and make rolling clean and easy. You can also lightly wet or oil your hands to prevent sticking.

Chocolate Peanut Butter Protein Balls
Description
The Snack That Changed Everything: Chocolate Peanut Butter Protein Balls
If you love chocolate and peanut butter, these little powerhouses are your new best friend. No-bake, quick, and perfectly balanced for a sweet yet satisfying snack, they’re ideal for a pre-workout boost, a mid-afternoon pick-me-up, or a healthy grab-and-go breakfast.
Ingredients
-
2 cups rolled oats (old-fashioned, gluten-free if needed)
-
⅔ cup chocolate protein powder (or vanilla/unflavored)
-
½ cup mini chocolate chips
-
1 heaping cup natural peanut butter (softened if needed)
-
6 tbsp honey (or maple syrup/agave)
-
6 tsp water (secret trick for perfect texture)
-
¼ cup chopped roasted peanuts (optional, for crunch)
-
Pinch of flaky sea salt (optional, but highly recommended)
Instructions
1. Mix the Dry Ingredients
-
In a large mixing bowl, combine oats, protein powder, chocolate chips, chopped peanuts (if using), and sea salt.
-
Stir until everything is evenly distributed.
2. Add the Wet Ingredients
-
Add peanut butter, honey, and water to the bowl.
-
Mix thoroughly using a cutting and pressing motion with a spoon or spatula until a thick, slightly sticky dough forms.
-
If too dry, add more water, 1 tsp at a time; if too wet, add a little more oats.
3. Roll the Balls
-
Line a baking sheet or plate with parchment paper.
-
Use a tablespoon or cookie scoop to portion the dough, then roll between your palms until smooth.
-
If sticky, chill the mixture in the fridge for 10–15 minutes before rolling.
4. Chill and Set
-
Place the rolled balls on the parchment-lined tray and refrigerate for at least 20 minutes.
-
This firms them up and creates the perfect chewy texture.
5. Store and Enjoy
-
Keep in an airtight container in the fridge for up to a week.
-
Freeze for up to 3 months, layering parchment paper between portions.
Notes
-
Peanut butter type matters! Use natural peanut butter for the right texture.
-
Protein powder brands vary—adjust oats or water as needed to achieve a rollable dough.
-
Chill time is key for firm, chewy texture, but sneaky tasters are always allowed.
Nutrition
- Calories: 120 cal per ball
- Fat: 6g
- Carbohydrates: 11g
- Fiber: 2g
Nutritional Information*
*Please note: This is an approximate estimate based on the specific ingredients I used and can vary greatly depending on your choices, especially the brand of protein powder and peanut butter.
Per Ball (approx.): 120 calories | 6g protein | 11g carbohydrates | 2g fiber | 6g fat | 7g sugar
Final Thoughts: Your New Secret Weapon
So there you have it—the snack that truly changed the game for me. These No-Bake Chocolate Peanut Butter Protein Balls are proof that you don’t have to choose between what’s delicious and what’s good for you. They’re your ticket to conquering the 3 PM slump, fueling your adventures, and satisfying those cravings without the crash.
Whip up a batch, stash them in the fridge, and get ready to feel like you’ve unlocked a new level of easy, healthy living. This is more than a recipe; it’s your new secret weapon. Now, go fuel your awesome!
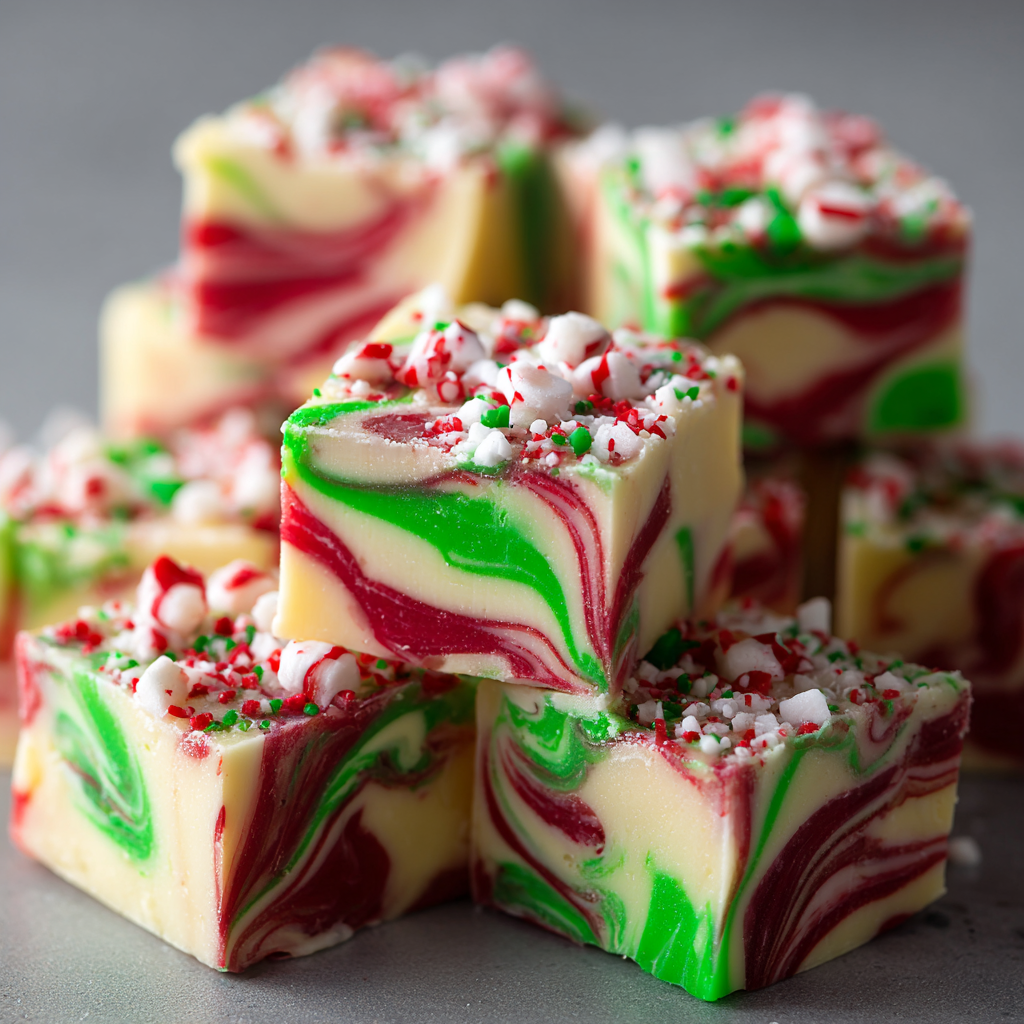
Christmas Swirl Fudge
Your New Favorite Holiday Tradition: Christmas Swirl Fudge
Is there anything more magical than the smell of the holidays? That cozy blend of pine, cinnamon, and something sweet baking in the oven. But what if I told you that you can capture that festive joy in a treat that requires zero baking, minimal fuss, and delivers maximum wow-factor? Friends, welcome to the glorious world of Christmas Swirl Fudge.
This isn’t just any fudge. This is the kind of confection that stops a party in its tracks. It’s the treat that makes your holiday cookie trays the talk of the neighborhood. With its merry swirls of red, white, and green, it looks like you spent hours crafting a masterpiece. But here’s our little secret: it’s almost unbelievably simple. We’re talking about a handful of ingredients and about 15 minutes of active kitchen time. That’s it!
Whether you’re a seasoned baker or someone who considers ordering takeout a form of “cooking,” this recipe is for you. It’s my go-to for last-minute hostess gifts, teacher appreciation presents, and stocking the fridge for those surprise holiday visitors. It’s creamy, sweet, and that hint of peppermint just sings “Christmas.” So, tie on your favorite festive apron (the messy one with the candy cane print is highly encouraged), and let’s make some memories—and some seriously delicious fudge.
The Fudge That Started It All
I have to confess, my love affair with this fudge began with a near-disaster. Picture it: my first-ever holiday party in my own apartment. I was 22, armed with ambition and a kitchen the size of a postage stamp. I decided to make a complicated, candy-thermometer-required fudge from my grandmother’s handwritten recipe book. Four hours, two burned fingers, and one grainy, seized mess of chocolate later, I was in tears. The party was in an hour, and I had nothing to serve.
In a panic, I called my mom. She listened patiently and then laughed her wonderful, warm laugh. “Honey,” she said, “you’re trying to run a marathon before you can walk. Let me give you the *real* secret weapon.” She dictated this very recipe over the phone. Twenty minutes later, I had a gorgeous pan of swirled fudge setting in the fridge. It was a triumph! That fudge didn’t just save the party; it taught me a valuable lesson that shapes this blog to this day: the best recipes aren’t about being complicated. They’re about being reliable, joyful, and bringing people together. Every time I make this fudge, I remember that feeling of panic turning into pure pride.
Gathering Your Fudge-Making Magic
The beauty of this recipe is in its simplicity. You only need a few key players to create something spectacular. Here’s what you’ll need:
- 44 oz white chocolate chips (four 11-oz bags): This is the foundation of our fudge! I recommend using a good-quality brand you trust. The better the chocolate, the creamier the result. Chef’s Insight: White chocolate can be a bit finicky to melt. Be patient and use low, gentle heat to avoid seizing.
- 3 ½ cups vanilla frosting: Yes, you read that right! This is the secret hack that gives the fudge its perfect, creamy texture without any fuss. You can use store-bought frosting from a tub for ultimate ease, or if you’re feeling fancy, a batch of your favorite homemade buttercream. Substitution Tip: Cream cheese frosting works beautifully here for a slightly tangy twist!
- 2 tsp red gel food coloring & 2 tsp green gel food coloring: Gel food coloring is your best friend for this project. Unlike liquid food coloring, it adds vibrant color without thinning out the fudge mixture. Pro Tip: Start with a little less—you can always add more to reach your desired holiday hue!
- 1 tsp peppermint extract (optional): This is what gives the fudge that classic, festive flavor. If you’re not a peppermint fan, you can leave it out or swap it for a teaspoon of vanilla or almond extract for a different flavor profile.
- ½ cup crushed candy canes or Christmas sprinkles: This is the festive crown on our creation! The crunch of the candy cane against the creamy fudge is pure heaven. Chef’s Insight: To easily crush candy canes, place them in a zip-top bag and use a rolling pin to gently smash them.
Let’s Make Some Swirly Magic: Step-by-Step
Ready? This is where the fun begins. I’ll walk you through each step, with all my favorite tips and tricks to ensure fudge perfection.
- Prep Your Pan: First things first, line a 9×13-inch baking dish with parchment paper. Here’s a little hack: take a small dab of butter or a bit of non-stick spray and lightly grease the pan first. This will help the parchment paper stick to the sides, making it much easier to line. Leave a few inches of overhang on the two long sides—these will be your “handles” to lift the entire slab of fudge out later. Trust me, this is a game-changer!
- Melt the Base: Now, grab a large, heatproof bowl (glass is perfect) and pour in all four bags of white chocolate chips. We’re going to melt these gently in the microwave. The key word is *gently*! Microwave on high for 30 seconds, then stop and stir. Even if it doesn’t look melted, stir. Repeat this process in 30-second bursts until the chocolate is mostly melted. Then, switch to 15-second bursts, stirring vigorously each time, until it’s completely smooth. Watchpoint: Do not overheat! White chocolate holds its shape even when warm, so stirring is crucial to see how melted it truly is. Once smooth, quickly stir in the entire tub of vanilla frosting and the peppermint extract (if using). You’ll have a gloriously smooth, thick, and creamy base.
- Divide and Color: Now for the festive part! Divide the fudge mixture evenly into three separate bowls. I like to use a kitchen scale for precision, but eyeballing it works just fine. Leave one bowl plain—this is our beautiful white. To the second bowl, add the red gel food coloring, and to the third, the green. Stir each one until the color is fully and evenly incorporated. Don’t be shy! Get those colors nice and vibrant.
- Layer and Swirl: This is the artistic step! Using three separate spoons, start dropping random spoonfuls of the three colored mixtures into your prepared pan. Alternate the colors—a dollop of red, then white, then green, and so on—until you’ve used up all the batter. Now, take a knife, a skewer, or even the tip of a spoon, and gently drag it through the colored dollops in a zig-zag or figure-eight pattern. Pro Tip: Less is more! Just a few gentle swirls will create a beautiful marbled effect. If you over-swirl, the colors will start to blend into one muddy color.
- Top It Off: Immediately after swirling, generously sprinkle the top with your crushed candy canes or festive sprinkles. Doing this while the fudge is still soft ensures that the toppings will stick perfectly once it sets.
- Chill Until Firm: Carefully transfer the pan to the refrigerator. Let it chill for at least 1 hour, or until the fudge is completely firm to the touch. This is the hardest part—waiting!
- Slice and Serve: Once firm, use the parchment paper handles to lift the entire slab of fudge out of the pan and onto a cutting board. Using a large, sharp knife, wipe the blade with a hot, damp cloth between cuts for super clean edges. Cut into 1-inch squares. Admire your beautiful work! You just made holiday magic.
How to Serve Your Festive Masterpiece
Presentation is part of the fun! I love piling these fudge squares high on a vintage cake stand or a simple white platter to really let the colors pop. For gifting, line a festive tin or a cardboard gift box with waxed or parchment paper and layer the fudge squares inside. They make the most thoughtful, homemade gift. These little squares are perfect with a cup of hot coffee after dinner, as a sweet treat on a holiday cookie tray, or set out for Santa on Christmas Eve (along with the carrots for the reindeer, of course!).
Get Creative: Fun Flavor Twists!
The basic recipe is a classic, but don’t be afraid to play with it! Here are a few of my favorite variations:
- Chocolate Peppermint Swirl: Replace the white chocolate chips with semi-sweet or dark chocolate chips for a rich, decadent twist.
- Funfetti Birthday Fudge: Omit the peppermint extract and food coloring. Instead, stir rainbow sprinkles directly into the white base mixture for a birthday-celebration fudge!
- Almond Joy Variation: Add 1 cup of shredded coconut and ½ cup of chopped almonds to the base mixture before dividing. Use just a drop of green food coloring for a subtle hint.
- Dairy-Free Delight: Use a high-quality dairy-free white chocolate and a vegan vanilla frosting to make this treat allergy-friendly.
- Orange Cranberry: Swap the peppermint extract for orange extract and fold in ½ cup of dried cranberries. Use only red food coloring for a beautiful cranberry-red hue.
Olivia’s Chef Notes & Kitchen Stories
This recipe has been my holiday sidekick for over a decade now, and it’s evolved in little ways. One year, I was out of gel coloring and used liquid—the fudge was still delicious, but the colors were much more pastel than vibrant. Another time, my nephew wanted to help, and his “swirling” technique was so enthusiastic that we ended up with a solid pink slab of fudge! We called it “Reindeer Blush” and it was a hit anyway. The moral of the story? Don’t stress. This fudge is incredibly forgiving.
I also highly recommend doubling the batch. It takes almost no extra effort, and having a second pan ready to go for unexpected guests or a last-minute gift is a lifesaver. It freezes beautifully, too! Just layer the squares between parchment paper in an airtight container and freeze for up to 3 months. Thaw in the fridge overnight.
Your Fudge Questions, Answered!
Q: My white chocolate seized and became grainy. What happened? Can I fix it?
A: This usually means the chocolate got too hot. White chocolate is very sensitive. If it seizes, it’s tricky to fix, but you can try this rescue method: stir in a tablespoon of solid vegetable shortening (like Crisco) and microwave for 10 more seconds, then stir vigorously. This can sometimes bring it back. Prevention is key: low heat and frequent stirring!
Q: Can I use milk chocolate chips instead?
A: Absolutely! The flavor will be richer and less sweet. Just note that the red and green colors won’t show up as vibrantly against the brown chocolate. It will still be delicious, just more of a marbled brown effect.
Q: How long does this fudge keep, and how should I store it?
A: Store the fudge in an airtight container in the refrigerator for up to 2 weeks. It can also be stored at cool room temperature for a few days, but I find the texture holds up best when chilled.
Q: My fudge is very soft, even after chilling. Why?
A: This could be due to a few things. First, make sure you chilled it for a full hour (or even two if your fridge is packed). Second, check the brands you used; different frostings and chocolates have different fat and sugar contents, which can affect firmness. If it’s still too soft, it will still taste amazing—just serve it with a spoon as a “fudge dip” for fruit!

Christmas Swirl Fudge
Description
Your New Favorite Holiday Tradition: Christmas Swirl Fudge
Capture the magic of the holidays in a treat that requires no baking, minimal fuss, and delivers maximum wow-factor. Vibrant red, green, and white swirls, creamy texture, and a hint of peppermint make this fudge a showstopper for cookie trays, hostess gifts, and last-minute holiday treats.
Ingredients
-
44 oz white chocolate chips (four 11-oz bags)
-
3 ½ cups vanilla frosting (store-bought or homemade)
-
2 tsp red gel food coloring
-
2 tsp green gel food coloring
-
1 tsp peppermint extract (optional)
-
½ cup crushed candy canes or festive sprinkles
Instructions
1. Prep Your Pan
-
Line a 9×13-inch baking dish with parchment paper, leaving a 2-inch overhang on the long sides for easy lifting.
-
Optional: Lightly grease the pan first to help parchment stick.
2. Melt the Base
-
Place white chocolate chips in a large, heatproof bowl. Microwave in 30-second intervals, stirring after each, until mostly melted.
-
Switch to 15-second intervals, stirring each time, until completely smooth.
-
Stir in vanilla frosting and peppermint extract.
3. Divide and Color
-
Divide the mixture into three bowls. Leave one plain (white), add red gel coloring to the second, and green to the third. Mix until fully incorporated.
4. Layer and Swirl
-
Drop spoonfuls of each color randomly into the prepared pan.
-
Using a knife or skewer, gently swirl the colors to create a marbled effect. Less is more to avoid muddying the colors.
5. Top It Off
-
Sprinkle crushed candy canes or festive sprinkles over the fudge while still soft.
6. Chill
-
Refrigerate at least 1 hour or until firm.
7. Slice and Serve
-
Lift fudge using parchment handles, cut into 1-inch squares. Wipe the knife with a hot, damp cloth between cuts for clean edges.
Notes
-
Prevent Seizing: Melt white chocolate slowly with frequent stirring. Add a small amount of vegetable shortening to rescue seized chocolate.
-
Soft Fudge Fix: Chill longer or accept as a “fudge dip”—still delicious.
-
Storage: Airtight container in the fridge for up to 2 weeks; freezes well for up to 3 months.
-
Coloring Hack: Gel food coloring keeps fudge thick; liquid coloring can thin the mixture.
Nutritional Information (Approximate)
Per Square (based on 80 pieces): 110 calories | 5g fat | 15g carbohydrates | 1g protein
Please note: This is an estimate generated from an online calculator and will vary based on the specific ingredients and brands you use.
Final Thoughts: More Than Just a Treat
As you place that final square of swirled fudge on a platter or tuck a gift box into a friend’s hands, take a moment to appreciate what you’ve created. This Christmas Swirl Fudge is more than just a delicious confection; it’s a little edible piece of holiday magic. It’s proof that the most memorable traditions aren’t born from stress and complexity, but from simplicity, joy, and the warmth of sharing something made with love.
This recipe has been my holiday anchor for years—the one I can always count on to deliver smiles without delivering a mountain of dishes. It’s a reminder that sometimes, the sweetest moments come from the simplest recipes. So whether this becomes your new signature holiday gift or a fun afternoon in the kitchen with your family, I hope it brings you as much happiness as it has brought me.




