
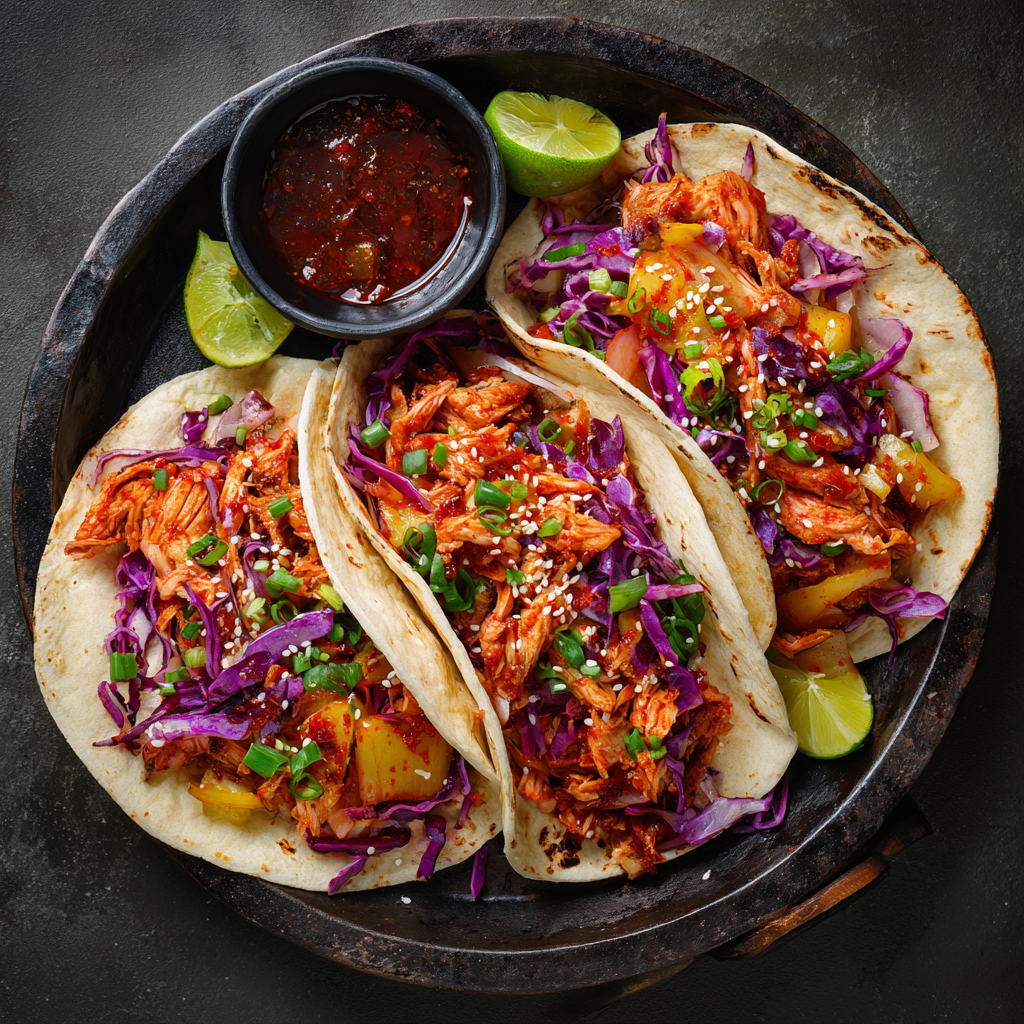
Korean BBQ Chicken Fajitas with Kimchi Slaw : Bold Fusion with a Kick
Spice Up Your Life: Korean BBQ Chicken Fajitas Are Here!
Hey there, friend! Come on in, grab an apron, and get ready for a flavor adventure. If your taco Tuesday or fajita Friday is feeling a little… predictable, I have the most exciting, crowd-pleasing, and downright delicious solution for you. We’re taking a classic weeknight hero and giving it a bold, global glow-up. Get ready to fall in love with my Korean BBQ Chicken Fajitas with a zingy Kimchi Slaw!
Imagine this: tender, juicy chicken strips, marinated in a sticky, savory, and slightly spicy sauce of gochujang, soy, and sesame. They sizzle in a hot pan until they’re beautifully charred and caramelized. Then, we tuck them into a warm, soft tortilla and top them with a crunchy, tangy, quick kimchi slaw that adds the most incredible crunch and punch of flavor. A sprinkle of scallions, a dash of sesame seeds, and a generous squeeze of fresh lime… are you drooling yet?
This recipe is the beautiful, happy marriage of Tex-Mex comfort and the bold, umami-rich flavors of Korean BBQ. It’s a fusion that just makes sense. The best part? It comes together in about 30 minutes, and it’s virtually impossible to mess up. Whether you’re cooking for a fun family dinner or impressing guests at a casual get-together, this dish is guaranteed to spark conversation and have everyone asking for seconds. Let’s make some kitchen magic!
The Happy Accident That Started It All
I have to confess, this recipe was born from a classic “kitchen clean-out” situation. It was a Wednesday, the fridge was looking sparse, and my cravings were all over the map. I had a pack of chicken thighs, a half-head of cabbage, and a near-empty jar of my favorite gochujang. My initial plan was a deconstructed stir-fry bowl, but then I spotted a forgotten pack of tortillas hiding in the bread drawer.
In a moment of “what if?” inspiration, I whipped up a quick marinade, shredded the cabbage with some kimchi, and decided to roll the dice. The moment I took that first bite, my eyes went wide. The smoky-sweet chicken against the cool, tangy slaw, all wrapped up in a warm tortilla… it was a revelation! My husband, who is usually a traditionalist when it comes to fajitas, took one bite and declared it an instant classic. It just goes to show that some of the best creations come from a little chaos and a willingness to play with your food!
Gathering Your Flavor Powerhouse Ingredients
Don’t let the “fusion” label intimidate you! The ingredient list is straightforward, and I’ve got plenty of swaps and tips to make it work for you. This is all about building layers of flavor.
For the Gochujang Chicken:
- 1.5 lbs boneless, skinless chicken thighs or breasts: I highly recommend thighs for this! They stay incredibly juicy and have more flavor, which stands up beautifully to the bold marinade. But breasts work perfectly fine if it’s what you have!
- 2 tablespoons gochujang (Korean chili paste): This is the star! It’s not just spicy; it’s complex, slightly sweet, and deeply savory. Find it in the Asian aisle of most grocery stores. Chef’s Insight: If you’re sensitive to heat, start with 1 tablespoon and taste.
- 2 tablespoons soy sauce: Our salty, umami base. For a gluten-free version, simply use tamari or coconut aminos.
- 1 tablespoon sesame oil: This is for flavor, not for cooking! Its nutty aroma is essential. Don’t substitute with a neutral oil here.
- 1 tablespoon honey: A touch of sweetness to balance the heat and saltiness. Maple syrup or agave work great too.
- 2 cloves garlic, minced & 1 teaspoon grated ginger: The dynamic duo of flavor! Fresh is best here, but ½ teaspoon of dried ginger or garlic powder can work in a pinch.
For the Quick Kimchi Slaw:
- 2 cups shredded cabbage: Green cabbage is great, but a bag of pre-shredded coleslaw mix is a fantastic time-saver.
- 1/2 cup kimchi, chopped: This brings the funk and the crunch! It’s packed with probiotics and a lively tang. Substitution Tip: If you don’t have kimchi, you can just make a simple slaw with cabbage, rice vinegar, and a pinch of red pepper flakes.
- 1 tablespoon rice vinegar: Adds a clean, mild acidity. Apple cider vinegar or white wine vinegar are good backups.
- 1 teaspoon sesame oil & 1/2 teaspoon sugar (optional): These round out the slaw’s flavor. The sugar just helps balance the vinegar’s sharpness.
- Pinch of salt: To help the cabbage soften and release its juices slightly.
For Serving & Toppings:
- 8 small flour or corn tortillas: Warm them up! It makes all the difference.
- Sliced scallions, toasted sesame seeds, lime wedges: Non-negotiable for that fresh, finishing flair.
- Optional: sriracha mayo or pickled radish: For the over-achievers! A drizzle of creamy sriracha mayo or some quick-pickled radishes add even more texture and zing.
Let’s Get Cooking: Your Step-by-Step Guide to Fajita Bliss
Ready to create some sizzle? Follow these simple steps for a foolproof, flavor-packed meal. I’m sharing all my little chef hacks along the way!
- Create the Flavor Bomb Marinade. In a medium-sized bowl, grab a whisk and combine your gochujang, soy sauce, sesame oil, honey, minced garlic, and grated ginger. Whisk it until it’s a smooth, gorgeous, deep red sauce. Chef’s Hack: If your honey is too thick, pop the bowl in the microwave for 10 seconds to loosen everything up for easier mixing. Taste it! This is your chance to adjust—want more heat? A little more gochujang. More sweetness? A drizzle more honey.
- Marinate the Chicken. Add your sliced chicken strips to the bowl with the marinade. Use your hands (my favorite tool!) or a spoon to toss and coat every single piece thoroughly. Let it marinate for at least 30 minutes at room temperature. If you have more time, cover the bowl and let it hang out in the fridge for up to 4 hours. Chef’s Insight: Marinating is where the magic happens—it tenderizes the chicken and infuses it with so much flavor. Don’t skip this step!
- Whip Up the Quick Kimchi Slaw. While the chicken is marinating, let’s make the slaw. In another bowl, toss together your shredded cabbage, chopped kimchi, rice vinegar, sesame oil, and that pinch of salt. Give it a good mix, then pop it in the fridge to chill. The resting time allows the flavors to meld and the cabbage to soften just slightly, making it the perfect crunchy counterpart to the warm chicken.
- Cook the Chicken to Perfection. Heat a large skillet or cast-iron pan over medium-high heat. You want it nice and hot! No need to add oil—the marinade has enough. Add the chicken strips in a single layer, being careful not to crowd the pan (you may need to cook in two batches). Let them cook undisturbed for 3-4 minutes to get a beautiful, caramelized sear. Then, flip and cook for another 3-4 minutes until the chicken is cooked through and has those gorgeous, slightly charred bits. Chef’s Hack: Don’t constantly stir the chicken! Letting it sit is the secret to getting that restaurant-quality char.
- Warm Your Tortillas. While the chicken is cooking, warm your tortillas. You can do this directly over a low gas flame for a few seconds each side (watch them closely!), in a dry skillet, or wrapped in a damp paper towel in the microwave for 30 seconds. Warming them makes them pliable and tastier!
- Assemble and Devour! Now for the fun part! Set up a fajita bar with the warm tortillas, the sizzling hot chicken, the chilled kimchi slaw, and all your toppings. Let everyone build their own perfect fajita. My perfect build? A warm tortilla, a generous scoop of chicken, a big handful of slaw, a sprinkle of scallions and sesame seeds, and a huge squeeze of fresh lime juice. Absolute heaven in a wrap.
How to Serve These Fusion Fajitas
Presentation is part of the fun! I love serving this family-style. Pile the sizzling chicken on a platter right from the skillet, place the bowl of vibrant pink-and-green kimchi slaw next to it, and scatter all the toppings in little bowls. It’s interactive, colorful, and gets everyone excited to dig in. For a complete meal, pair it with simple sides like steamed jasmine rice, edamame sprinkled with sea salt, or even classic Mexican black beans. The fusion doesn’t stop at the fajita!
Make It Your Own: Delicious Recipe Variations
This recipe is a fantastic canvas for your own creativity! Here are a few ways to mix it up:
- Spicy Pork or Beef: Swap the chicken for thinly sliced pork shoulder or flank steak. The marinade works beautifully with all of them!
- Go Vegetarian: Use thick slices of portobello mushrooms or extra-firm tofu (pressed and cubed). You’ll get that same amazing, meaty texture.
- Make It Creamy: Whip up a quick sriracha mayo by mixing ¼ cup mayo with 1-2 tablespoons of sriracha and a squeeze of lime. Drizzle it over the top for a cool, creamy contrast.
- Low-Carb/Veggie Wrap: Ditch the tortillas and serve everything in a bowl over lettuce, cauliflower rice, or quinoa for a lighter, gluten-free meal.
- Extra Veggie Power: Sauté some sliced bell peppers and onions right in the same pan after you cook the chicken for a more classic fajita vibe.
Chef’s Notes: From My Kitchen to Yours
This recipe has become a staple in our home, and it’s evolved in fun ways. I remember the first time I made it for my friend who claimed to “hate cabbage.” She was so skeptical of the slaw, but after one tentative bite, she polished off three fajitas and asked for the recipe on the spot! It’s that kind of dish—it wins over even the toughest critics.
Over time, I’ve learned that the longer you can marinate the chicken, the better. I’ve even done it overnight, and the flavor penetration is incredible. Also, don’t be afraid of a little char on the chicken! Those dark, crispy bits are packed with the most amazing smoky-sweet flavor. Embrace the mess, have fun with it, and know that you’re creating a new classic. This recipe is a testament to the joy of mixing culinary traditions and finding delicious common ground.
FAQs & Troubleshooting: Your Questions, Answered!
Q: I can’t find gochujang. What can I use as a substitute?
A: This is a common one! While the flavor is unique, you can make a decent stand-in. Mix together 1 tablespoon of miso paste, 1 tablespoon of a milder chili paste (like sambal oelek), ½ teaspoon of sugar, and a splash of water to thin it out. It won’t be identical, but it will give you that savory-spicy profile.
Q: My marinade is burning in the pan. What am I doing wrong?
A: Great question! This usually means your heat is too high. The honey and gochujang can burn if the pan is scorching hot. Make sure you’re at a solid medium-high, not a raging high heat. If you see it starting to blacken too quickly, just reduce the heat a touch. A little caramelization is good, but we don’t want bitter, burnt flavors.
Q: Can I make this ahead of time?
A> Absolutely! You can be a total meal-prep hero with this. Marinate the chicken and make the slaw up to 24 hours in advance. Keep them separate in airtight containers in the fridge. When you’re ready, just cook the chicken and warm the tortillas. The slaw actually gets better as it sits!
Q: Is kimchi slaw really spicy?
A> It has a kick, but it’s not overwhelmingly hot. The cabbage and the rice vinegar really help balance the spice from the kimchi. If you’re very sensitive to heat, you can use a “mild” kimchi, or simply use less of it in your slaw mix. You can always add more, but you can’t take it out!

Korean BBQ Chicken Fajitas with Kimchi Slaw : Bold Fusion with a Kick
Description
Korean BBQ Chicken Fajitas with Kimchi Slaw
Prep Time: 20 minutes
Cook Time: 10 minutes
Marinate: 30 minutes
Total Time: ~1 hour
Ingredients
For the Korean BBQ Chicken
-
1.5 lbs chicken thighs or breasts, cut into thin strips
-
2 tbsp gochujang
-
2 tbsp soy sauce (or tamari/coconut aminos)
-
1 tbsp sesame oil
-
1 tbsp honey (or maple/agave)
-
2 cloves garlic, minced
-
1 tsp fresh ginger, grated
For the Kimchi Slaw
-
2 cups shredded cabbage (or bagged coleslaw mix)
-
½ cup kimchi, chopped
-
1 tbsp rice vinegar
-
1 tsp sesame oil
-
½ tsp sugar (optional)
-
Pinch of salt
For Serving
-
8 small tortillas (corn or flour), warmed
-
Sliced scallions
-
Toasted sesame seeds
-
Lime wedges
-
Optional: sriracha mayo, pickled radish
Instructions
1. Make the Marinade
In a bowl, whisk together:
gochujang, soy sauce, sesame oil, honey, garlic, and ginger.
2. Marinate the Chicken
Add chicken strips to the marinade and coat well.
Marinate 30 minutes at room temp or up to 4 hours refrigerated.
3. Prepare the Kimchi Slaw
In a separate bowl, combine cabbage, chopped kimchi, rice vinegar, sesame oil, sugar (optional), and salt.
Mix well and refrigerate until ready to serve.
4. Cook the Chicken
-
Heat a large skillet over medium-high heat.
-
Add chicken in a single layer (cook in batches if needed).
-
Cook 3–4 minutes per side until caramelized and fully cooked.
-
Avoid stirring too much — let it char slightly.
5. Warm the Tortillas
Warm in a dry skillet, microwave, or directly over a low gas flame.
6. Assemble the Fajitas
Add cooked chicken to each tortilla.
Top with kimchi slaw, scallions, sesame seeds, and a squeeze of lime.
Add sriracha mayo if desired.
Notes
What if I can’t find gochujang?
Mix: 1 tbsp miso + 1 tbsp sambal oelek + ½ tsp sugar + splash of water.
Why is my marinade burning?
Heat is too high — use medium-high to avoid burning honey/gochujang.
Can I meal prep this?
Yes! Marinate chicken and make slaw up to 24 hours ahead.
Is the slaw spicy?
Mild to medium. Use less kimchi if sensitive.
Nutrition
- Calories: 480 cal Per Serving
- Fat: 20g
- Carbohydrates: 38g
- Protein: 36g
Nutritional Information (Per 2 Fajitas)
Please note: This is an estimate and can vary based on specific ingredients and portion sizes.
- Calories: ~480
- Protein: 36g
- Fat: 20g
- Carbohydrates: 38g
- Sodium: 870mg
Final Thoughts: Your New Go-To Recipe Awaits
So, there you have it! From a happy fridge-cleaning accident to a recipe that’s now a regular in our home, these Korean BBQ Chicken Fajitas are more than just a meal—they’re a proof that the best flavors happen when we’re willing to break the rules and have a little fun in the kitchen.
This dish is the perfect answer to the dreaded “what’s for dinner?” slump. It’s a vibrant, interactive, and incredibly satisfying experience that manages to feel both exciting and comforting at the same time. The sizzle of the gochujang chicken hitting the hot pan, the bright crunch of the kimchi slaw, and the warmth of a soft tortilla… it’s a symphony of textures and tastes that will wake up your palate and leave you feeling like a culinary rockstar.
Don’t just take my word for it. The real magic happens when you make it your own. Tweak the heat, play with the toppings, or try a different protein. This recipe is a welcoming starting point, not a rigid set of rules. It’s designed for you to succeed and to ignite your own spark of creativity.
So, the next time your Taco Tuesday needs a rescue or you’re simply craving something joyfully different, remember this recipe. Gather your ingredients, embrace the fusion, and get ready for the compliments to roll in. You’re not just making dinner; you’re creating a delicious memory

Christmas Chicken Fajita Wreath : A Festive, Flavor-Packed Holiday Appetizer
Your New Favorite Holiday Showstopper is Here!
Hey there, friend! Come on in—can you smell that? It’s the cozy, inviting scent of something magical baking in the oven. If your holiday season is anything like mine, it’s a beautiful, chaotic, and delicious whirlwind. You’re juggling gift wrapping, decorating, and the most important task of all: figuring out what incredible food to serve that will have everyone gathering around the table (or, let’s be real, hovering by the platter).
We all want that one dish that makes people’s eyes light up. The one that looks like you fussed for hours but secretly came together with a smile and a little bit of cleverness. Well, my foodie friend, I’m so excited to share this one with you. Get ready for the Christmas Chicken Fajita Wreath!
Imagine all the sizzling, bold flavors of your favorite fajitas—tender chicken, sweet bell peppers, and savory onions—all wrapped up in a fluffy, golden crescent roll dough and baked into a stunning wreath shape. We’re talking about a festive, shareable centerpiece that’s as fun to make as it is to eat. Garnished with fresh cilantro to look like holly, this isn’t just an appetizer; it’s a conversation starter. It’s the dish that will have your guests asking for the recipe before they’ve even finished their first slice. So, tie on that apron, and let’s create some holiday magic together!
A Fiesta of Festive Memories
This recipe always takes me right back to my first “Friendsmas” party. I was a newlywed, determined to impress our friends with a sophisticated, multi-course meal. I had a timeline, a mountain of fancy ingredients, and… absolutely everything went wrong. The soup was too salty, the main course was late, and I was this close to a meltdown. In a last-minute panic, I threw together the only things I had in the fridge: leftover fajita chicken, some sad-looking peppers, and a can of crescent rolls. I shaped it into a circle, crossed my fingers, and popped it in the oven.
You can probably guess what happened. That humble, thrown-together wreath was the absolute star of the night! It was the first platter to be completely devoured, and my friends still talk about it years later. It taught me a lesson I carry into my kitchen every day: the best food isn’t about being perfect or fancy. It’s about joy, flavor, and sharing something delicious with the people you love. This wreath is now my non-negotiable holiday hero, and I have a feeling it’s about to become yours, too.
Gathering Your Fiesta Flavors
This is where the magic starts! Let’s break down our cast of characters. I love giving you a little insight into each ingredient because knowing the “why” makes you a more confident cook.
- 2 cups cooked chicken breast, sliced or shredded: This is our superstar protein! Using pre-cooked chicken is the ultimate time-saver. I often use a store-bought rotisserie chicken for maximum ease and flavor, but leftover grilled or baked chicken works beautifully. Chef’s Insight: Shredding the chicken gives it more surface area to cling to all that delicious fajita seasoning.
- 1 red bell pepper & 1 green bell pepper, sliced thin: These bring the crunch, color, and a touch of sweetness. The red and green are just so perfectly festive! Substitution Tip: Feel free to use orange or yellow peppers for a different color scheme. For a milder dish, you can even use poblano peppers.
- 1 small onion, thinly sliced: The humble onion is the flavor foundation, caramelizing beautifully and adding a savory depth. I love using a yellow or white onion here for its robust flavor.
- 1 tbsp olive oil: Just enough to get our veggies sizzling and prevent sticking. Avocado oil is a great high-heat alternative.
- 1 packet fajita seasoning (or 2 tbsp homemade): This is the flavor powerhouse! The pre-made packets are super convenient. Chef’s Hack: If you want to control the salt or make your own, mix 1 tsp chili powder, 1 tsp cumin, ½ tsp paprika, ½ tsp garlic powder, ½ tsp onion powder, ¼ tsp oregano, and a pinch of cayenne.
- 1 cup shredded pepper jack or cheddar cheese: Hello, cheesy, gooey goodness! Pepper jack gives it a lovely kick, while cheddar is a classic, crowd-pleasing option. Insider Tip: Always shred your own cheese if you can! Pre-shredded cheese is coated to prevent clumping, which can make it less melty.
- 2 cans crescent roll dough: Our flaky, buttery, golden vessel. This is the shortcut that makes this recipe so accessible and fun. Keep it refrigerated until the very last second for the easiest handling.
- Fresh cilantro for garnish: This is our “holly” and it adds a wonderful fresh, herbal note that cuts through the richness.
- Optional: sliced jalapeños or cherry tomatoes: These are our edible “ornaments”! Jalapeños add heat, while cherry tomatoes (cut in half) add a sweet, juicy pop of color.
Let’s Build Our Edible Wreath!
Okay, ready for the fun part? Don’t be intimidated by the wreath shape—it’s much easier than it looks, and I’ll guide you through every step. We’re creating something truly special here!
- Sizzle Your Fajita Filling: Grab a large skillet and heat your olive oil over medium-high heat. Toss in your thinly sliced peppers and onions. We’re going to cook these for about 5-7 minutes, until they just start to soften and get those lovely little charred spots. Now, add your cooked chicken and sprinkle the fajita seasoning over everything. Give it a good stir and cook for another 2-3 minutes until the chicken is heated through and coated in all that spicy, smoky flavor. Pro-Tip: Once it’s done, take the filling off the heat and let it cool for a few minutes. A hot filling will make the crescent dough greasy and hard to work with. Patience is our friend here!
- Create Your Wreath Base: Preheat your oven to a cozy 375°F (190°C). Line a large baking sheet with parchment paper—this is non-negotiable for easy cleanup! Now, open your cans of crescent roll dough. You’ll see the dough is perforated into triangles. Arrange these triangles on the parchment paper in a circle, with the wide ends overlapping in the center and the pointy ends facing outwards. It should look like a beautiful, buttery sun with a hole in the middle. Don’t worry if it’s not perfect; it’s homemade charm!
- The Fill & Fold: This is the satisfying part! Spoon your slightly cooled fajita filling in a continuous ring along the wide, overlapped part of the dough circle. Leave about an inch of dough clear on the inside and outside. Now, sprinkle your glorious shredded cheese all over that filling. Chef’s Secret: I like to reserve a small handful of cheese to sprinkle on top at the very end for an extra cheesy, golden finish. Now, take each pointy tip of dough and fold it up and over the filling, tucking the very tip under the inner ring of dough. It will look a little messy, and that’s okay! It’s supposed to be rustic and beautiful.
- Bake to Golden Perfection: Carefully slide your masterpiece into the preheated oven. Bake for 20-25 minutes. You’re looking for a deep, golden-brown color on the dough and you should be able to hear the filling bubbling away happily. Little Hack: If you notice the outer points browning too quickly, you can loosely tent the wreath with a piece of foil for the last 5-10 minutes of baking.
- The Grand Finale: Garnish! Once it’s gorgeously golden, take it out of the oven and let it rest on the baking sheet for about 5-10 minutes. This allows the cheese to set slightly so it doesn’t all ooze out when you cut it. Now, for the festive flair! Take your fresh cilantro sprigs and tuck them in little clusters around the wreath to look like holly leaves. If you’re using jalapeño slices or cherry tomato halves, place those around like little red berries. It instantly transforms it into a holiday centerpiece!
How to Serve This Holiday Star
Presentation is part of the fun! I love placing the entire wreath, still on the parchment paper, right onto a large wooden board or a big festive platter. Put a small bowl of cool, creamy sour cream or a zesty avocado crema (just blend an avocado with lime juice, cilantro, and a splash of water!) in the center of the wreath. This not only looks adorable but makes dipping a breeze. Provide a pizza cutter or a sharp knife for guests to easily slice their own pieces. Watch it disappear!
Make It Your Own! Creative Twists
The beauty of this recipe is its versatility. Feel free to play and adapt it to your taste or dietary needs!
- Breakfast Wreath: Swap the fajita filling for scrambled eggs, cooked breakfast sausage, and cheddar cheese. Perfect for Christmas morning!
- Buffalo Chicken: Use shredded chicken tossed in buffalo sauce (and a little ranch dressing powder in the mix), with blue cheese or mozzarella.
- Vegetarian Delight: Skip the chicken and use black beans and corn for a hearty, meat-free version.
- Spicy Santa Fe: Use a spicy cheese blend and add a can of diced green chiles to the filling.
- Pizza Wreath: Fill with pepperoni, marinara sauce, and mozzarella cheese for the pizza lover in your life.
Olivia’s Kitchen Notes & Stories
This recipe has been on quite a journey with me! The first time I made it, I was so nervous about the shape that I measured the circle with a string. My husband still laughs about it. These days, I just go for it with a confident (if slightly messy) hand, and it always turns out wonderfully. The “rustic” look is part of its charm, I promise!
One of my favorite evolutions was the addition of the cherry tomato “berries.” That came from a time I was completely out of jalapeños and had to improvise. It was a happy accident that looked so cheerful, it stuck! This recipe is a living thing in my kitchen, and I encourage you to make it your own. The most important ingredient is always the love and joy you pour into it.
Your Questions, Answered!
I’ve gotten so many wonderful questions about this wreath over the years. Here are the most common ones to help you nail it on the first try!
Q: My wreath dough got really soft and hard to handle. What happened?
A: This usually happens for two reasons: the filling was too warm when you added it, or the dough itself got too warm from your hands. The key is to let the filling cool completely and work relatively quickly with cool hands. If the dough does get soft, just do your best—it will still taste incredible once baked!
Q: Can I make this ahead of time?
A: Absolutely! You have two great options. 1) You can prepare the filling a day ahead and store it in the fridge. 2) You can assemble the entire wreath, cover it tightly with plastic wrap, and keep it in the fridge for up to 8 hours before baking. You might need to add 2-3 extra minutes to the baking time since it will be going into the oven cold.
Q: The bottom of my wreath was a bit soggy. How can I prevent that?
A> A soggy bottom is a common pastry plight! First, make sure your filling isn’t too wet. If your peppers released a lot of liquid in the skillet, drain the mixture before cooling. Secondly, the parchment paper is a must—it helps the bottom crisp up evenly. Finally, make sure your oven is fully preheated before the wreath goes in.
Q: Can I use a different dough?
A> You can! Two cans of refrigerated crescent dough are my favorite, but one 13.8 oz can of pizza dough will also work. Roll it out into a large circle, place your filling in the center, make cuts around the edges, and braid it over the filling. It’s a different look but just as delicious!

Christmas Chicken Fajita Wreath : A Festive, Flavor-Packed Holiday Appetizer
Description
Christmas Chicken Fajita Wreath – Easy Holiday Appetizer
Ingredients
Fajita Filling
-
2 cups cooked chicken breast, shredded or sliced
-
1 red bell pepper, thinly sliced
-
1 green bell pepper, thinly sliced
-
1 small onion, thinly sliced
-
1 tbsp olive oil
-
1 packet fajita seasoning (or 2 tbsp homemade mix)
-
1 cup shredded pepper jack or cheddar cheese
Dough & Garnish
-
2 cans crescent roll dough
-
Fresh cilantro (for “holly” garnish)
-
Optional: sliced jalapeños or cherry tomatoes (“berries”)
Instructions
1. Make the Fajita Filling
-
Heat olive oil in a large skillet over medium-high heat.
-
Add sliced peppers and onion; cook 5–7 minutes until softened with light char.
-
Add cooked chicken and sprinkle fajita seasoning over everything.
-
Stir and cook 2–3 minutes until heated through.
-
Remove from heat and let the filling cool completely (important!).
2. Prepare the Wreath Base
-
Preheat oven to 375°F (190°C).
-
Line a large baking sheet with parchment paper.
-
Open crescent roll cans.
-
Arrange triangles in a circle on the parchment with the wide ends overlapping in the center and the points facing outward — forming a sun shape.
3. Fill & Fold
-
Spoon cooled fajita mixture around the wide inner ring of the dough.
-
Sprinkle cheese generously over the filling.
-
Fold each dough point over the filling and tuck the end underneath the center ring.
-
(Optional) sprinkle a little extra cheese on top.
4. Bake
-
Bake 20–25 minutes or until the dough is deep golden brown.
-
If the outer tips brown too fast, tent loosely with foil the last 5 minutes.
-
Let rest 5–10 minutes before slicing.
5. Garnish & Serve
-
Decorate with fresh cilantro sprigs (like holly leaves).
-
Add jalapeño slices or cherry tomatoes for “berries.”
-
Serve with sour cream or avocado crema in the center.
Nutritional Information*
*Please note: This is an estimated nutritional breakdown based on the ingredients used. Values can vary significantly based on specific brands and ingredient choices.
- Prep Time: 20 minutes
- Cook Time: 25 minutes
- Servings: 8-10 slices
- Calories per serving: ~320
- Protein: 18g
- Carbohydrates: 24g
- Fat: 18g
- Sodium: ~640mg
Final Thoughts: A Bowl Full of Joy
And just like that, you’ve created more than a side dish—you’ve made a bowl of pure, unadulterated joy. This Orange Fluff Salad is a testament to the fact that the most beloved recipes are often the simplest ones, woven with threads of nostalgia and shared with love.
As you scoop that bright, creamy sunshine into bowls, take a moment to appreciate the magic you’ve made. You’ve taken a handful of humble ingredients and transformed them into the dish that will have everyone asking, “Can I get the recipe?” It’s the taste of laughter, of family gathered around, and of sweet, simple pleasures.
So, whether it’s stealing a spoonful straight from the fridge at midnight or serving it with pride at your next big gathering, I hope this recipe brings as much light and happiness to your table as it has to mine for all these years.
Now, go on and enjoy your sunshine.
With love and a spoonful of fluff,
Don’t Forget to Pin This Recipe!
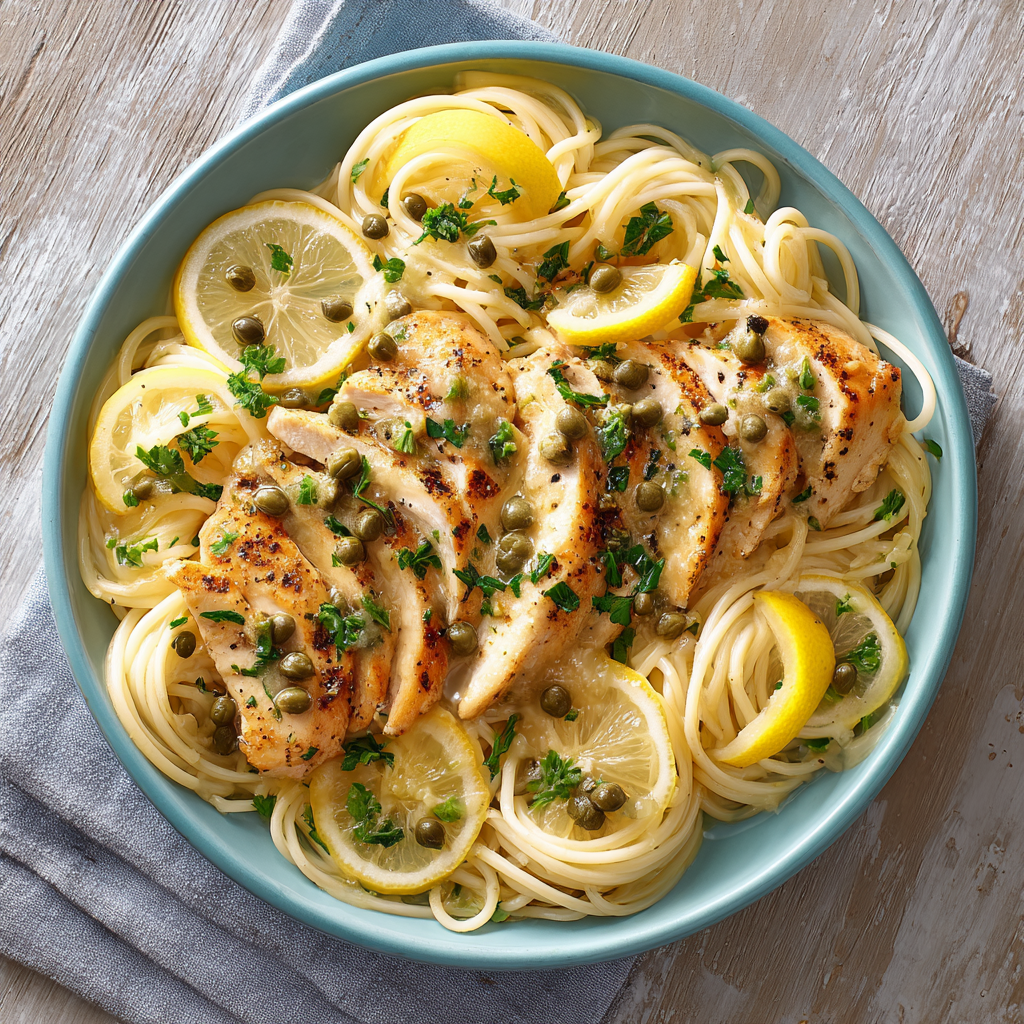
Healthy Chicken Piccata Pasta : Bright, Light, and Comforting
Healthy Chicken Piccata Pasta: Your New Favorite Bright & Cozy Dinner
Hey there, friend! Come on in, pull up a stool, and let’s get something incredible simmering on the stove. There’s a special kind of magic that happens in the kitchen when you combine a few simple, fresh ingredients and end up with a meal that feels like a warm hug and a burst of sunshine all at once. That’s exactly the vibe we’re going for today with this Healthy Chicken Piccata Pasta.
If you’ve ever tasted classic Chicken Piccata, you know it’s a superstar of flavor—tender chicken in a pan sauce that’s tangy, briny, and rich. But sometimes, the traditional version can feel a little… heavy. I’ve taken everything we adore about that Italian-American classic—the punch of lemon, the salty pop of capers, the savory pan sauce—and given it a fresh, light, and utterly comforting makeover. We’re skipping the heavy flour-dredging and loads of butter, and instead, letting those brilliant, bright flavors shine through.
This is the kind of dish that proves healthy eating doesn’t have to be boring or restrictive. It’s a vibrant, satisfying meal that comes together in about 25 minutes, making it a perfect hero for busy weeknights. But don’t let its speed fool you—it’s absolutely elegant enough to serve to guests. So, tie on your favorite apron (the messy one with all the stories is always my go-to), and let’s create something unforgettable together.
A Taste of Sunshine on a Rainy Day
This recipe always takes me back to a slightly chaotic, but wonderfully happy, evening I spent with my best friend, Sophie. It was one of those gloomy, endless winter days where the sky couldn’t decide between rain and sleet, and we were both feeling a little down. We’d planned a fancy dinner out, but the weather had other ideas. So, we raided my kitchen, determined to create our own sunshine.
We found some chicken tenderloins, a lone lemon rolling around the crisper, and a jar of capers I’d bought for a recipe I’d long forgotten. With a pot of water boiling for pasta, we started throwing things together, laughing as we splattered lemon juice and debated the perfect amount of garlic (the answer is always more). The moment we took that first bite—the bright, lemony sauce clinging to the tender pasta and chicken—the gray day just melted away. It was more than a meal; it was a mood-lifter, a memory-maker. That’s the power of this dish, and it’s a story I hope it creates in your kitchen, too.
Gathering Your Sunshine-In-A-Bowl Ingredients
One of the best things about this recipe is its simplicity. We’re using wholesome, real ingredients that pack a massive flavor punch. Here’s what you’ll need:
- 8 oz Angel Hair Pasta or Protein Spaghetti: I love angel hair here because it’s delicate and soaks up the light sauce beautifully. Using a protein pasta (like chickpea or lentil) is my little secret for an extra nutritious boost—you genuinely can’t tell the difference once it’s coated in that zesty sauce!
- 1 lb Chicken Tenderloins: Tenderloins are a weeknight win because they cook so quickly and evenly. No pounding required! If you only have chicken breasts, just slice them into thin cutlets.
- Salt and Black Pepper to taste: The foundation of flavor. Don’t be shy—season that chicken well!
- 2 tbsp Olive Oil: We’ll use a good quality extra virgin olive oil. It adds a fruity depth that butter just doesn’t have. We’re dividing it to control the fat without sacrificing flavor.
- 3 Garlic Cloves, minced: Fresh is best here! That pungent, aromatic kick is non-negotiable for a truly great piccata sauce.
- Juice and Zest of 1 Lemon: This is the star! The zest is packed with fragrant oils, and the juice gives us that signature tang. Pro-tip: Zest your lemon before you juice it. It’s much easier!
- 2 tbsp Capers: These little flower buds are the “piccata” in chicken piccata! They add a brilliant, salty, briny pop. If you’re not a caper fan, chopped green olives can work in a pinch.
- ¾ cup Low-Sodium Chicken Broth: This forms the base of our light sauce. Using low-sodium lets you control the salt level perfectly.
- 2 tbsp Chopped Fresh Parsley: The fresh, green finish that makes the whole dish look and taste vibrant. In a real bind, 2 teaspoons of dried parsley will do, but fresh is highly recommended.
- Optional: 2 cups Baby Spinach or Roasted Asparagus: I almost always toss in a handful of spinach at the end for a gorgeous color and easy veggie boost. Roasted asparagus spears are a fabulous addition if you have a few extra minutes.
Let’s Get Cooking: Your Step-by-Step Guide to Perfection
Ready to see how this beautiful dish comes together? Follow these steps, and you’ll have a restaurant-quality meal on the table in no time. I’ve packed this section with all my favorite chef hacks to ensure your success!
Step 1: The Pasta Prep
Cook your pasta according to the package directions, but here’s the most important part: before you drain it, reserve ½ cup of that starchy, salty pasta water! This liquid gold is our secret weapon for making the sauce silky and helping it cling to every strand of pasta. Drain the pasta and set it aside. Chef’s Hack: A coffee mug is the perfect tool for scooping out the pasta water before you drain the pot!
Step 2: Golden Brown Chicken
While the pasta cooks, pat your chicken tenderloins dry with a paper towel—this is key for getting a beautiful sear, not a steam. Season them generously on both sides with salt and pepper. Heat 1 tablespoon of olive oil in a large skillet over medium heat. Once the oil is shimmering, add the chicken in a single layer. Cook for 3-4 minutes per side, until they’re golden brown and cooked through. Remove them to a plate and let them rest. Chef’s Insight: Don’t crowd the pan! If you need to, cook the chicken in two batches. Overcrowding creates steam and you’ll lose that gorgeous color.
Step 3: Building the Flavor Bomb (The Sauce!)
In the same skillet, add the remaining 1 tablespoon of olive oil. Toss in the minced garlic and sauté for just 30 seconds—you want it fragrant, not burnt! Now, add the capers, lemon juice, lemon zest, and chicken broth. Give it all a good stir, scraping up all those delicious browned bits from the bottom of the pan. Those bits are pure flavor! Let the sauce simmer for 3-4 minutes to reduce slightly and concentrate the taste.
Step 4: The Grand Finale – Bringing It All Together
Now for the fun part! Slice your rested chicken into bite-sized pieces. Return the chicken to the skillet, and add your cooked pasta and any optional veggies (like that handful of spinach). Toss everything together gently but thoroughly. If the sauce seems a little too tight, add a splash of that reserved pasta water, a tablespoon at a time, until it reaches a lovely, glazy consistency that coats everything perfectly. The starch in the water will work its magic. Chef’s Tip: Use tongs for this! They’re the best tool for gently lifting and twisting the pasta, ensuring every single strand gets dressed in that glorious sauce.
Step 5: The Finishing Touch
Take the skillet off the heat and stir in the chopped fresh parsley. This little burst of green freshness is the final flourish that makes the dish sing.
Plating Your Masterpiece
I love serving this family-style, right out of the skillet I cooked it in—it feels so rustic and welcoming. Use a pair of tongs to twirl a nice nest of pasta onto each plate, then artfully arrange the chicken pieces on top or nestled within. Spoon any extra sauce from the pan over everything. A final squeeze of fresh lemon juice and an extra sprinkle of parsley or even a few more capers on top makes it look stunning. For a complete meal, serve it with a simple arugula salad with a light vinaigrette and a slice of crusty, warm bread to soak up every last drop of that incredible sauce.
Make It Your Own! Delicious Recipe Variations
The beauty of this recipe is its flexibility! Don’t be afraid to play and adapt it to your tastes or what you have on hand.
- Go Creamy (But Still Light): For a slightly richer, creamier sauce, stir in ¼ cup of plain Greek yogurt or a splash of half-and-half at the very end, off the heat.
- Plant-Based Power: Make it vegan! Use your favorite plant-based chicken strips and swap the chicken broth for vegetable broth. It works like a dream.
- Piccata with a Kick: Add a pinch of red pepper flakes when you’re sautéing the garlic for a subtle, warming heat that plays so nicely with the lemon.
- Mushroom Lover’s Dream: Sauté 8 oz of sliced cremini mushrooms with the garlic. They add a wonderful, earthy, umami depth to the sauce.
- Herb Garden Twist: Swap the parsley for fresh basil, dill, or chives for a completely different aromatic profile.
Chef’s Notes: A Few More Kitchen Confessions
This recipe has been a staple in my kitchen for years, and it’s evolved in the best ways. I used to be so careful about measuring the lemon juice, but now I just use the juice of a whole, generous-sized lemon. Taste as you go! That’s the real secret. Love lemon? Add more zest. Crazy for capers? Throw in an extra tablespoon. This dish is incredibly forgiving.
One of my funniest kitchen fails involved this very recipe. I was chatting away with a friend, totally distracted, and I added the lemon juice to the hot pan without any other liquid. The sharp, acidic steam made us both cough and our eyes water! We laughed until we cried (which didn’t help the stinging eyes). I learned my lesson: always have your broth ready to go to deglaze the pan and calm everything down. Cooking should be fun, even with the occasional hilarious mishap!
Your Questions, Answered! (FAQs & Troubleshooting)
Q: My sauce turned out a bit too tart/lemony. How can I fix it?
A: No worries, this is a common one! The acidity of lemons can vary. The easiest fix is to balance it with a tiny pinch of sugar or a drizzle of honey or maple syrup. Start with ¼ teaspoon, whisk it in, and taste. This won’t make it sweet, it will just round out the sharp edges of the lemon beautifully.
Q: Can I make this Healthy Chicken Piccata Pasta ahead of time?
A: You can prep the components! Cook the chicken and make the sauce, storing them separately in the fridge for up to 2 days. I’d recommend cooking the pasta fresh when you’re ready to serve, as it can get a bit mushy. When it’s dinner time, gently reheat the chicken and sauce, cook your pasta, and combine everything as directed.
Q: My sauce is too thin/watery. What did I do wrong?
A: This usually happens if the sauce didn’t have enough time to reduce, or if you added too much broth. The best fix is to let it simmer for a few more minutes to evaporate the excess liquid. If you’re really in a hurry, create a quick slurry by mixing 1 teaspoon of cornstarch with 1 tablespoon of cold water, then whisk it into the simmering sauce. It will thicken up almost instantly!
Q: I can’t find capers. Is there a good substitute?
A> Absolutely! While capers are traditional, you can use chopped green olives for a similar briny, salty note. Even a tablespoon of chopped dill pickle or a splash of the brine can work in a pinch to provide that necessary tangy counterpoint to the lemon.

Healthy Chicken Piccata Pasta : Bright, Light, and Comforting
Description
A bright, lemony, protein-packed pasta that’s light, fresh, and ready in about 25 minutes. All the classic piccata flavors with a healthier twist.
Ingredients
Pasta & Chicken
-
8 oz angel hair pasta (or protein spaghetti/chickpea/lentil pasta)
-
1 lb chicken tenderloins (or thinly sliced chicken breasts)
-
Salt & black pepper, to taste
-
2 tbsp olive oil, divided
For the Sauce
-
3 garlic cloves, minced
-
Juice + zest of 1 lemon
-
2 tbsp capers (or chopped green olives)
-
¾ cup low-sodium chicken broth
-
½ cup reserved pasta water (you may not need it all)
Finish
-
2 tbsp chopped fresh parsley
-
Optional veggies: 2 cups baby spinach or roasted asparagus
Instructions
1. Cook the Pasta
-
Cook pasta according to package directions.
-
Reserve ½ cup pasta water, then drain and set aside.
2. Cook the Chicken
-
Pat chicken dry; season generously with salt and pepper.
-
Heat 1 tbsp olive oil in a skillet over medium heat.
-
Sear chicken 3–4 min per side until golden and cooked through.
-
Transfer to a plate and slice into bite-size pieces.
3. Make the Piccata Sauce
-
Add remaining 1 tbsp olive oil to the skillet.
-
Add garlic; sauté 30 seconds.
-
Add capers, lemon juice, lemon zest, and chicken broth.
-
Scrape up brown bits.
-
Simmer 3–4 minutes to reduce slightly.
4. Combine
-
Add sliced chicken, pasta, and optional spinach to the skillet.
-
Toss well.
-
Add reserved pasta water 1 tbsp at a time until the sauce is glossy and clings to the noodles.
5. Finish
Stir in fresh parsley. Taste and adjust seasoning (more lemon, salt, or pepper as needed).
Notes
-
If the sauce is too tart: add a tiny pinch of sugar or honey.
-
Too thick: thin with a splash of pasta water.
-
Too thin: simmer longer or add a cornstarch slurry (1 tsp cornstarch + 1 tbsp water).
-
For best texture, don’t overcrowd the pan when browning chicken.
Nutrition
- Calories: 400 cal Per Serving
- Fat: 14g
- Carbohydrates: 35g
- Protein: 36g
Nutritional Information*
This is a general estimate per serving (based on 4 servings), and will vary based on specific ingredients used, especially the type of pasta.
- Calories: ~400
- Protein: 36g
- Carbohydrates: 35g
- Fat: 14g
Final Thoughts: More Than Just a Meal
So, there you have it. In the time it takes to watch half of your favorite sitcom, you can create a dinner that feels like a celebration. This Healthy Chicken Piccata Pasta isn’t just a recipe; it’s a reminder that the most satisfying meals are often the simplest ones, built on bold, honest flavors that make you feel good from the inside out.
It’s the answer to that eternal weeknight question, “What’s for dinner?” when you want something that feels a little special without any of the fuss. It’s proof that “healthy” doesn’t mean bland steamed vegetables and plain chicken breast, but can be a vibrant, zesty, and deeply comforting dish that brings everyone to the table with a smile.
I hope this recipe becomes a trusted, go-to in your kitchen—the one you whip up on busy nights, the one you make for a friend who needs a pick-me-up, and the one that creates its own sunny memories for you and your loved ones.
Now, I’d love to hear from you! Did you add a personal twist? Did it brighten up a gloomy day? Share your creations and stories with me by tagging me on social media. Happy cooking
*This information is provided as a courtesy and is an estimate only. For precise nutritional information, we recommend using a dedicated calculator with the exact brands and quantities you use.
“`
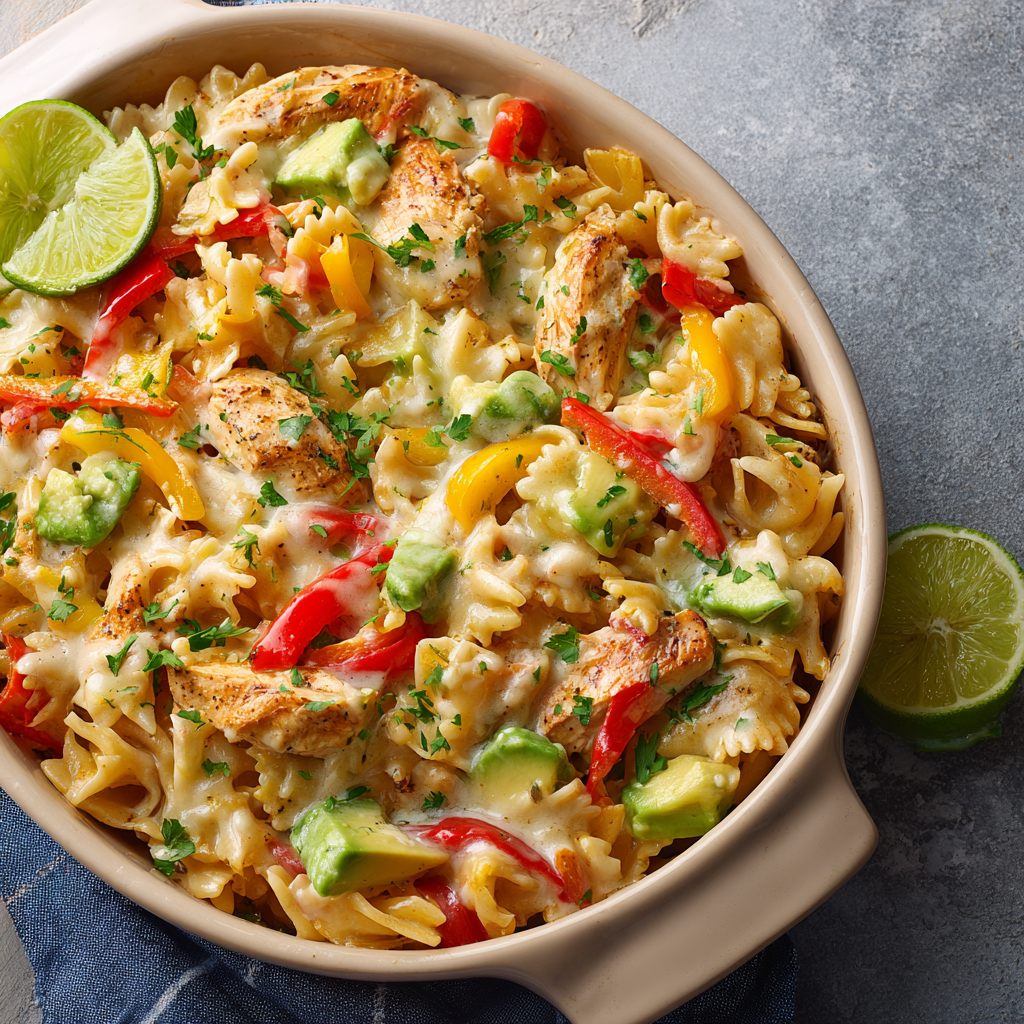
Creamy Avocado Chicken Fajita Pasta Bake : Tex-Mex Comfort with a Twist
Your New Favorite Comfort Food is Here!
Hey there, friend! Come on in, pull up a stool, and let’s get something incredible simmering. You know those nights when you’re craving something cozy and familiar, like a big, cheesy pasta bake, but your taste buds are begging for a little more excitement? Maybe you’re dreaming of sizzling fajitas, all those juicy peppers and onions, but you want the comfort of a meal you can eat with a fork. I’ve been there more times than I can count, usually while staring into the fridge after a long day.
Well, my fellow flavor-seeker, I have the absolute perfect solution for you. Get ready to meet the dinner that will rock your world: my Creamy Avocado Chicken Fajita Pasta Bake. This is the glorious love child of a Tex-Mex fiesta and the coziest, most comforting pasta bake you’ve ever sunk a fork into. We’re talking tender pasta, perfectly spiced chicken, and a rainbow of sautéed bell peppers and onions, all smothered in a sauce that’s pure magic—a zesty, incredibly creamy avocado cream sauce that bakes up into gooey, cheesy perfection.
This isn’t just a meal; it’s a mood. It’s the vibrant, colorful, and utterly delicious answer to your “what’s for dinner?” dilemma. It’s a guaranteed crowd-pleaser that’s perfect for a busy weeknight but special enough for a casual weekend gathering with your favorite people. So, tie on your apron (messy ones are welcome here!), and let’s create some kitchen magic together.
The Day My Two Food Worlds Collided
This recipe was born out of a happy accident, one of those “throw everything in and hope for the best” kind of nights that sometimes turn into pure gold. It was a chilly Tuesday, and I was hosting my family’s weekly dinner. My sister was craving my famous chicken fajitas, my dad was hinting heavily at my “baked mac and cheese situation,” and I had two perfectly ripe avocados on the counter begging to be used.
Instead of choosing, I decided to throw a party and invite all the flavors. I remember the moment I pulled the baking dish out of the oven—the cheese was bubbling, the aroma was insane, and the vibrant green of the avocado sauce peeking through made the whole thing look so alive. The first bite was met with a chorus of “Oh, wow” and “What is this?!” It was a fusion triumph! Now, it’s not just a recipe in my kitchen; it’s a story of a Tuesday that turned into a new family tradition. It reminds me that the best dishes often come from a little bit of chaos and a whole lot of heart.
Gathering Your Flavor All-Stars
Here’s your grocery list for this flavor fiesta! Don’t be intimidated; a lot of these are pantry staples, and I’ve got plenty of substitution tips to make it work with what you have.
- 12 oz Pasta (Penne or Rotini): These shapes are my go-to because their nooks and crannies trap all that amazing sauce. Feel free to use any short pasta you love! Gluten-free? Your favorite GF pasta works perfectly here.
- 2 Chicken Breasts, cooked and sliced: I often use a store-bought rotisserie chicken to save time—it’s a brilliant hack! You could also use thigh meat for more flavor. Just shred or cube it before adding.
- 1 tablespoon Olive Oil: For sautéing our beautiful veggies to tender, sweet perfection.
- 1 Red, 1 Yellow, & 1 Green Bell Pepper, sliced: The rainbow trio! Using all three colors isn’t just pretty; it gives a more complex, sweet flavor. If you only have one or two, no worries, it’ll still be delicious.
- 1 small Onion, sliced: The classic fajita companion. Yellow or white onion works best here.
- 1 tsp Chili Powder & 1 tsp Cumin: The dynamic duo of Tex-Mex flavor! Toasting them slightly in the pan with the veggies will wake up their oils and make your kitchen smell incredible.
- Salt and Pepper, to taste: The essential flavor boosters.
For the Show-Stopping Avocado Cream Sauce:
- 2 ripe Avocados: They should be slightly soft to the touch. This is the base of our creamy, dreamy sauce and gives it that beautiful green color.
- 3/4 cup Sour Cream or Greek Yogurt: Sour cream gives you that classic, rich tang, while Greek yogurt is a fantastic lighter alternative that still provides creaminess and a protein boost.
- 1/2 cup Chicken Broth: This thins the sauce to the perfect, pourable consistency. Vegetable broth works too!
- Juice of 1 Lime: CRUCIAL! The acid not only adds zing but also helps keep the avocado sauce a vibrant green. Fresh is always best here.
- 2 cloves Garlic: Because what’s a good sauce without garlic? For a milder flavor, you can roast the garlic first.
- 1/2 tsp Paprika: Adds a subtle smokiness and a touch of color.
- Salt, to taste: Don’t be shy—avocados need a good amount of salt to truly sing.
To Finish & Garnish:
- 1 cup shredded Monterey Jack or Mexican blend Cheese: For that irresistible, golden, bubbly top. A pepper jack cheese would be amazing if you like a little heat!
- Optional: Chopped Cilantro, Jalapeños, Lime Wedges: These are your “make it pretty and personalized” toppings. I highly recommend the fresh cilantro for a burst of flavor.
Let’s Build Your Masterpiece, Step-by-Step
Ready to cook? This comes together so quickly. Let’s do this!
- Preheat & Pasta Prep: First things first, get your oven preheating to 375°F (190°C). This ensures it’s perfectly hot and ready when your bake is assembled. Now, cook your pasta in a large pot of well-salted water. Chef’s Hack: Cook it just until al dente (meaning it still has a slight bite). It’s going to continue cooking in the oven, and we don’t want mushy pasta! Drain it and set it aside.
- Sizzle Those Veggies: While the pasta cooks, let’s work on our fajita base. Heat the olive oil in a large skillet over medium-high heat. Add your beautiful rainbow of sliced peppers and onions. Sauté them for 6-8 minutes, until they’ve softened and have those lovely little charred spots. Now, sprinkle in the chili powder, cumin, salt, and pepper. Give it all a good stir and cook for another minute until fragrant. You’ll know it’s ready when your entire kitchen smells like a Mexican restaurant. So good!
- Blend the Magic Sauce: This is the secret weapon! In your blender, combine the avocados, sour cream (or Greek yogurt), chicken broth, lime juice, garlic, paprika, and salt. Now, blend until it’s completely smooth and creamy. Little Chef Insight: Taste it! This is your chance to adjust the seasoning. Want more lime? More salt? A pinch of cayenne for heat? Now’s the time. The sauce should be vibrant and flavorful on its own.
- The Big Toss: In a large bowl (I mean LARGE—mixing is fun, but not when it’s overflowing!), combine the drained al dente pasta, the cooked chicken, the sautéed fajita veggies, and that gorgeous green avocado sauce. Use a big spoon or spatula and toss, toss, toss until every single piece of pasta, chicken, and vegetable is coated in that creamy, green goodness.
- Assemble for Baking: Lightly grease a 9×13-inch baking dish. Pour the entire pasta mixture into the dish and spread it out into an even layer. Now, for the grand finale: sprinkle that shredded cheese evenly over the top. Don’t hold back! This is what creates that golden, irresistible crust.
- Bake to Bubbly Perfection: Place the baking dish in your preheated oven and bake, uncovered, for 15-20 minutes. You’re looking for the cheese to be completely melted, bubbly, and maybe even just starting to get a few golden-brown spots. The sauce around the edges should be bubbling happily.
- The Finishing Touches: Carefully remove your masterpiece from the oven. Let it sit for about 5 minutes—this helps it set a little and prevents everyone from burning their tongues! Then, scatter the chopped cilantro and sliced jalapeños over the top, and serve with lime wedges on the side for that extra squeeze of fresh zing.
How to Serve This Stunning Dish
Presentation is part of the fun! I love serving this right from the baking dish at the table—it’s rustic, inviting, and gets everyone excited. Use a large spoon to scoop out generous portions. For a real restaurant-style touch, add those fresh garnishes. A sprinkle of cilantro, a few thin jalapeño slices, and a lime wedge on the side not only make it look gorgeous but let everyone customize their bite. This dish is a complete meal in one, but a simple side of a crisp green salad with a lime vinaigrette or some warm, crusty bread for dipping into any saucy remnants on the plate is always a welcome addition.
Make It Your Own: Delicious Twists & Swaps
One of the best things about this recipe is how adaptable it is! Don’t be afraid to play.
- Spice Lover’s Dream: Add a diced jalapeño (seeds and all) to the peppers when you sauté them. Use a pepper jack cheese for the topping and add a 1/4 teaspoon of cayenne pepper to the avocado sauce.
- “Green Goddess” Vegetarian Version: Simply omit the chicken! You can add a can of drained and rinsed black beans or pinto beans for plant-based protein. It’s just as satisfying.
- Seafood Swap: Not in the mood for chicken? Substitute with about a pound of large, peeled shrimp. Add them to the skillet for the last 2-3 minutes of cooking the veggies, just until they turn pink.
- Extra Creamy & Cheesy: Stir an extra 1/2 cup of shredded cheese right into the pasta mixture before topping it with the rest. Because, cheese.
Olivia’s Kitchen Notes & Stories
This recipe has become such a staple in my home that it’s evolved a bit over time. The first time I made it, I was so worried the avocado sauce would brown in the oven. The lime juice is the key hero here—it works its acidic magic and keeps the color vibrant even after baking. I’ve also learned that this is a fantastic “clean out the fridge” meal. Have a zucchini that’s looking lonely? Dice it up and sauté it with the peppers. A handful of corn kernels? Toss ’em in! It’s very forgiving.
One of my favorite kitchen memories is of my niece, who is a notoriously picky eater, devouring two helpings and asking if we could have it every week. That’s the power of a cozy, cheesy pasta bake—it wins over everyone, from the foodies to the fussy eaters. It truly is a hug in a baking dish.
Your Questions, Answered!
Q: Can I make this creamy avocado chicken fajita pasta bake ahead of time?
A: You can! Assemble the entire dish right up to the point of baking (including the cheese on top), cover it tightly with plastic wrap or foil, and refrigerate for up to 24 hours. When you’re ready, bake it straight from the fridge. You may need to add 5-10 extra minutes to the baking time since it will be cold. I don’t recommend freezing it, as the avocado sauce and the pasta can become a bit watery and mushy upon thawing.
Q: My sauce turned out a bit watery. What happened?
A> A few things can cause this: 1) Your avocados might have been overripe. 2) Your pasta was *too* cooked before baking. Remember, al dente is key! 3) The veggies released a lot of liquid. Next time, you can pat the cooked veggies dry with a paper towel before adding them to the mix. If it happens, don’t panic! Let the bake rest for 10 minutes after it comes out of the oven; it will thicken up as it sits.
Q: How do I keep the avocado sauce from browning?
A> The lime juice is your best friend here—it’s a natural antioxidant. Make sure your sauce is well-blended and smooth, and get the assembled dish into the oven promptly. Once baked, any leftovers will have a slight color change (that’s natural oxidation), but it will still taste fantastic.
Q: Can I use something other than avocado for the sauce?
A> While the avocado is what makes this dish unique, you can create a different creamy sauce. A simple sauce of 1 cup of sour cream or Greek yogurt mixed with the same fajita spices and a little lime juice would work. You’ll lose the avocado flavor and color, but it will still be a tasty creamy pasta bake!

Creamy Avocado Chicken Fajita Pasta Bake : Tex-Mex Comfort with a Twist
Description
If you’re craving something cozy, cheesy, and packed with bright Tex-Mex flavor, this dish is going to become your new weeknight hero. It combines tender chicken, sautéed fajita veggies, and pasta tossed in a creamy avocado sauce, then baked under melted cheese. It’s simple, hearty, and unbelievably delicious — a total crowd-pleaser every single time.
Ingredients
For the Pasta Bake
-
12 oz pasta (penne or rotini)
-
2 cooked chicken breasts, sliced or shredded (rotisserie works great!)
-
1 tbsp olive oil
-
1 red, 1 yellow, and 1 green bell pepper, sliced
-
1 small onion, sliced
-
1 tsp chili powder
-
1 tsp ground cumin
-
Salt & pepper, to taste
For the Avocado Cream Sauce
-
2 ripe avocados
-
¾ cup sour cream or Greek yogurt
-
½ cup chicken broth
-
Juice of 1 lime
-
2 garlic cloves
-
½ tsp paprika
-
Salt, to taste
For Topping
-
1 cup shredded Monterey Jack or Mexican blend cheese
-
Optional: fresh cilantro, jalapeño slices, lime wedges
Instructions
1. Prep the Oven & Pasta
Preheat your oven to 375°F (190°C).
Cook the pasta in salted water until al dente, drain, and set aside.
2. Cook the Fajita Veggies
Heat olive oil in a large skillet over medium-high heat.
Add peppers and onions; sauté 6–8 minutes until softened and slightly charred.
Stir in chili powder, cumin, salt, and pepper; cook 1 more minute.
3. Make the Avocado Sauce
In a blender, combine:
-
avocados
-
sour cream or yogurt
-
broth
-
lime juice
-
garlic
-
paprika
-
salt
Blend until smooth and creamy. Adjust seasoning if needed.
4. Combine Everything
In a large bowl, mix:
-
cooked pasta
-
chicken
-
sautéed veggies
-
avocado sauce
Stir until fully coated.
5. Assemble & Bake
Pour the mixture into a greased 9×13-inch baking dish.
Top with shredded cheese.
Bake 15–20 minutes, until melted and bubbly.
6. Finish & Serve
Let rest 5 minutes before serving.
Garnish with cilantro, jalapeños, and lime wedges if desired.
Notes
-
Don’t overcook the pasta — it will soften more in the oven.
-
Use fresh lime to keep the avocado sauce bright and green.
-
Rotisserie chicken saves time and adds great flavor.
-
If your veggies release a lot of liquid, pat them dry before mixing.
-
Want a kick? Use pepper jack cheese and add a pinch of cayenne.
Nutritional Information*
Per Serving (Serves 6):
Calories: ~540 | Fat: 28g | Carbohydrates: 42g | Fiber: 6g | Protein: 32g | Sodium: 560mg
*Please note: Nutritional information is an estimate and can vary based on the specific brands of ingredients you use and any substitutions made.
Final Thoughts: Your New Go-To Dinner Awaits
So, there you have it—the story, the method, and the magic behind a dish that’s truly greater than the sum of its parts. This Creamy Avocado Chicken Fajita Pasta Bake is more than just a recipe; it’s a testament to the joy of experimenting in the kitchen. It proves that you don’t have to choose between your cravings and that the most beloved family recipes often start with a simple “what if?”
It’s hearty enough for the hungriest appetites, vibrant enough to brighten a dreary day, and impressive enough to serve to guests. It’s the ultimate solution for when “what’s for dinner?” feels like a daunting question. This bake is a warm, cheesy, flavor-packed hug that promises to become a regular in your rotation.
I have a feeling that once you try it, you’ll start creating your own stories around it. Maybe it’ll be the dish you make for a potluck that has everyone asking for the recipe, or the cozy meal you whip up on a Sunday to set the tone for a great week ahead.
Now, I’d love to hear from you! Did your family go crazy for it? Did you add your own special twist? Share your creations and stories with me by tagging me on social @[YourHandleHere] or leaving a comment below. Happy cooking, and enjoy every last bite
Don’t forget to save this recipe for later! Pin it to your favorite board.
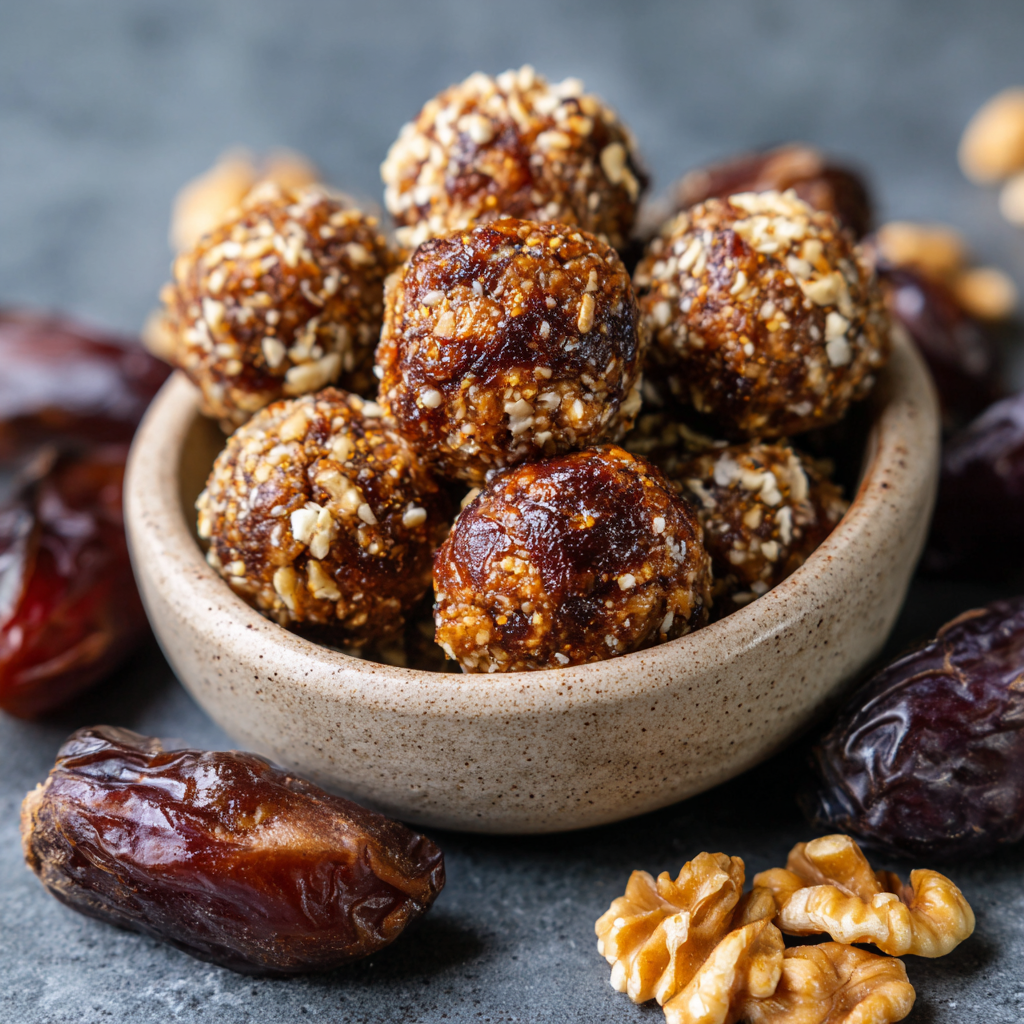
Sticky Toffee Date & Walnut Protein Balls : Sweet, Nutty & Naturally Energizing
Your New Favorite Healthy Snack is Here!
Hey there, friend! Can you smell that? It’s the warm, buttery, caramel-kissed scent of sticky toffee pudding wafting through a cozy kitchen. It’s the kind of dessert that feels like a hug, the one you order at a pub and dream about for days. But let’s be real—we can’t always be whipping up a steamed pudding on a Tuesday afternoon, right? And sometimes, we want that incredible flavor without the sugar crash that follows.
That exact craving is what sparked the creation of these little powerhouses. I’m so excited to introduce you to my Sticky Toffee Date & Walnut Protein Balls! Imagine all the magic of that beloved dessert—the deep, caramel-like sweetness of dates, the toasty crunch of walnuts, that hint of vanilla and salt—all rolled into a guilt-free, grab-and-go bite. They’re chewy, ridiculously satisfying, and packed with natural energy to power you through your day, your workout, or that inevitable 3 PM slump.
This isn’t just a recipe; it’s your secret weapon for feeling fueled and fabulous. You don’t need any fancy skills, just a food processor and about ten minutes of active time. So, tie on your apron (messy ones are welcome here!), and let’s turn those simple, wholesome ingredients into something truly unforgettable.
A Taste of Cozy Memories
This recipe takes me straight back to a tiny, rain-streaked window in a countryside inn in the Cotswolds. My husband and I were on a trip, and after a long, damp day of hiking, we stumbled into this place that felt like it was straight out of a storybook. The fire was crackling, and the special that night was, of course, sticky toffee pudding. We ordered one to share, and when that warm, steaming cake with its pool of glossy toffee sauce arrived, I think we both fell a little bit in love.
It was more than dessert; it was comfort, warmth, and pure joy on a spoon. I’ve tried to recreate that feeling at home ever since. But as much as I adore the original, my everyday life needs something a little more… portable and energizing. I started playing with the core flavors in my kitchen, and after a few happy accidents (we don’t talk about the “date paste incident of 2021”), these protein balls were born. They capture that soul-warming essence in a form that fits our busy, vibrant lives. Every time I make a batch, I get a little taste of that cozy English inn, and it makes me smile.
Gathering Your Happy Ingredients
This is where the magic starts! The beauty of this recipe is in its simplicity and the powerhouse quality of each ingredient. Here’s everything you’ll need and why each one is a rockstar.
- 1 cup Medjool dates, pitted: These are the undisputed stars of the show! Medjool dates are naturally rich, caramel-like, and incredibly sweet, acting as both the sweetener and the “glue” that holds our balls together. Chef’s Insight: If your dates seem a little dry or firm, don’t panic! A quick soak in warm water for 5-10 minutes will plump them right back up to sticky perfection. Just be sure to drain them well!
- ½ cup toasted walnuts: Toasting is non-negotiable here, friends! It unlocks a deep, nutty flavor that is essential for that classic sticky toffee pudding vibe. They also add a wonderful texture and healthy fats. Substitution Tip: Not a walnut fan? Pecans are a fabulous substitute and bring their own buttery notes to the party.
- ½ cup vanilla protein powder: This is our protein powerhouse, giving these bites their sustaining energy. The vanilla flavor complements the dates beautifully. Substitution Tip: For a plant-based version, ensure you’re using a vegan protein powder. If you don’t have vanilla, a plain or even a caramel-flavored one would work wonderfully!
- 2 tbsp almond butter: This adds a subtle nutty depth and helps create that perfect, fudgy texture. It also adds a bit more healthy fat and protein. Substitution Tip: Any nut or seed butter you love will work. Cashew butter would be super creamy, and tahini would add a fascinating, slightly savory twist!
- 1 tsp vanilla extract: The supporting actor that makes all the other flavors sing! A good quality vanilla extract enhances the sweetness and adds a layer of warmth.
- Pinch of sea salt: This might seem small, but it’s a game-changer! Salt balances the sweetness and makes the caramel flavor of the dates pop. I like using a flaky sea salt for little bursts of flavor.
- 1–2 tbsp water (if needed): This is your texture-adjusting lifesaver. Depending on how moist your dates are, you might need a splash of water to bring the dough together into a pliable, roll-able consistency.
Let’s Make Some Magic: The Step-by-Step
Ready to get your hands a little sticky? This process is so simple and satisfying. Let’s walk through it together, with all my favorite chef hacks along the way.
- Prep Your Dates. First things first, pop open those dates and remove the pits. Give them a quick check—if they feel at all dry or tough, place them in a bowl and cover with warm water for 5-10 minutes. This little soak transforms them into sticky-sweet perfection and makes blending a breeze. Once they’re soft, drain them thoroughly. Chef’s Hack: Press the drained dates between a few paper towels to remove any excess water. We want sticky, not soggy!
- Toast Those Walnuts! While your dates are soaking, let’s toast the walnuts. Spread them in a single layer on a baking sheet and toast them in a 350°F (175°C) oven for 5-8 minutes, or until they’re fragrant and slightly darkened. You can also do this in a dry skillet over medium heat, shaking the pan frequently. Little Chef Tip: Toasting nuts is the secret to unlocking their deepest, richest flavor. Don’t skip this step—it makes all the difference!
- Create the Base. Now, for the main event! Add your soft, pitted dates and the almond butter to the bowl of a food processor. Pulse and then blend until they form a relatively smooth, thick paste. You might need to stop and scrape down the sides a few times. This date-and-nut-butter base is the foundation of our delicious dough.
- Bring in the Team. Next, add the toasted walnuts, vanilla protein powder, vanilla extract, and that all-important pinch of sea salt right on top of the date paste. Chef’s Hack: I like to pulse the processor a few times first to break up the walnuts a bit before letting it run. This gives you more control over the texture, ensuring you get some nice little nutty chunks in every bite. Blend until everything is well combined and the mixture starts to clump together on the side of the bowl.
- Check the Texture. Stop the processor and pinch a bit of the mixture between your fingers. It should hold together easily. If it seems too dry and crumbly, this is your moment! With the processor running, add the water one tablespoon at a time through the feed tube until the dough comes together. Be patient—you can always add more water, but you can’t take it out!
- Roll with It! Time for the fun part! Scoop out heaping tablespoons of the mixture. I like to use a small cookie scoop for perfectly uniform balls, but a spoon works just fine. Roll each portion between your palms to form a smooth, one-inch ball. If the mixture is sticking to your hands, a little tip: lightly dampen your palms with water. It works like a charm! Place each finished ball on a plate or baking sheet lined with parchment paper.
- The Big Chill. Once all your balls are rolled, pop the whole tray into the refrigerator for at least 30 minutes. This chilling time is crucial—it allows them to firm up, making them less sticky and giving them that perfect, satisfying chewy texture. Patience, my friend!
How to Serve & Savor
After the (agonizing) wait, your Sticky Toffee Protein Balls are ready to enjoy! I love storing them in a beautiful glass jar in the fridge—it makes for a happy little sight every time I open the door. They are the ultimate grab-and-go snack, but you can also plate them up fancy for guests. Arrange a few on a small platter with a dusting of extra protein powder or a tiny sprinkle of crushed walnuts for a pretty presentation. They pair wonderfully with a hot cup of coffee in the morning or a calming herbal tea in the evening.
Get Creative! Fun Flavor Twists
Once you’ve mastered the classic, feel free to get playful and make this recipe your own! Here are a few of my favorite variations:
- Chocolate Drizzle: Melt a few tablespoons of dark chocolate with a teaspoon of coconut oil and drizzle it over the chilled balls for a decadent finish.
- Espresso Kick: Add 1-2 teaspoons of instant espresso powder to the food processor for a delicious mocha twist.
- Ginger Spice: Mix in ¼ teaspoon of ground ginger or even some very finely chopped crystallized ginger for a warm, zesty flavor.
- “Cookie Dough” Version: Use a chocolate-flavored protein powder and a handful of mini dark chocolate chips for a healthy cookie dough ball experience.
- Nut-Free: Substitute the walnuts with toasted sunflower seeds and use sunflower seed butter instead of almond butter.
Olivia’s Chef Notes & Kitchen Stories
This recipe has truly evolved in my kitchen. The first time I made them, I was a little too enthusiastic with the water and ended up with a… let’s call it a “sticky toffee paste” that was better suited for eating with a spoon than rolling into balls! It was still delicious, but it taught me the importance of adding liquid slowly. Don’t be afraid if your first batch isn’t perfect; cooking is all about learning and having fun.
Over time, I’ve found that these balls taste even better the next day, after the flavors have had a chance to really mingle and get to know each other in the fridge. I almost always double the batch now because they disappear so quickly—my husband has been known to “test” them straight from the tray before they even make it to the fridge! They’ve become a non-negotiable staple in our home, and I hope they bring as much joy to your kitchen as they have to mine.
Your Questions, Answered!
I’ve gotten so many wonderful questions about this recipe over time. Here are the most common ones to help you succeed!
- My mixture is too wet and sticky. What did I do wrong? No worries, this happens! The moisture content in dates can vary. If your dough is too sticky to roll, try adding a bit more protein powder, one tablespoon at a time, until it’s more manageable. Also, ensuring your dates are well-drained after soaking is key. Chilling the whole mixture in the fridge for 15-20 minutes before rolling can also make it easier to handle.
- Can I use a different type of date? Medjool dates are ideal because they’re large, soft, and incredibly sweet. If you use a drier variety like Deglet Noor, you will almost certainly need to soak them for longer, and the final texture might be less fudgy. I highly recommend sticking with Medjools for the best results.
- I don’t have a food processor. Can I make these? You can, but it requires a bit more muscle! You’ll need to chop the dates and walnuts as finely as possible by hand. Then, in a large bowl, you’ll have to mash the dates and almond butter together with a fork until it forms a paste, and then knead in the rest of the ingredients by hand. It’s a bit of a workout, but it’s absolutely doable!
- How long do these last, and can I freeze them? These protein balls keep beautifully! Store them in an airtight container in the refrigerator for up to 2 weeks. For longer storage, they freeze perfectly for up to 3 months. Just place them in a single layer on a parchment-lined tray to freeze solid, then transfer to a freezer bag. Thaw in the fridge or at room temperature for a bit before eating.

Sticky Toffee Date & Walnut Protein Balls : Sweet, Nutty & Naturally Energizing
Description
Chewy, naturally sweet, and full of flavor—these little bites capture all the magic of sticky toffee pudding without the sugar crash. Perfect for a snack, post-workout boost, or afternoon pick-me-up.
Ingredients
-
1 cup Medjool dates, pitted (soak 5–10 min if dry)
-
½ cup toasted walnuts (or pecans)
-
½ cup vanilla protein powder (use vegan if preferred)
-
2 tbsp almond butter (or any nut/seed butter)
-
1 tsp vanilla extract
-
Pinch of sea salt
-
1–2 tbsp water, as needed
Instructions
-
Prep the dates: Pit and soak if needed. Drain thoroughly and press between paper towels to remove excess moisture.
-
Toast the walnuts: Spread in a single layer on a baking sheet and toast at 350°F (175°C) for 5–8 minutes, or toast in a dry skillet until fragrant.
-
Make the base: In a food processor, combine dates and almond butter. Pulse until a thick paste forms. Scrape down the sides as needed.
-
Add the rest: Add toasted walnuts, protein powder, vanilla extract, and sea salt. Pulse to combine, leaving some walnut chunks for texture.
-
Adjust consistency: If the mixture is too dry, add 1 tbsp water at a time. If too sticky, add a bit more protein powder.
-
Form balls: Scoop heaping tablespoons and roll into 1-inch balls. Lightly dampen hands if needed to prevent sticking.
-
Chill: Place on parchment-lined tray and refrigerate at least 30 minutes to firm up.
Storage:
-
Refrigerate in an airtight container up to 2 weeks.
-
Freeze for up to 3 months (freeze in a single layer first, then transfer to a bag).
Notes
-
Chocolate Drizzle: Melt dark chocolate with a bit of coconut oil and drizzle over chilled balls.
-
Espresso Kick: Add 1–2 tsp instant espresso powder for a mocha twist.
-
Ginger Spice: Mix in ¼ tsp ground ginger or finely chopped crystallized ginger.
-
Cookie Dough Version: Use chocolate protein powder + mini dark chocolate chips.
-
Nut-Free: Use sunflower seeds and sunflower seed butter instead of walnuts and almond butter.
Nutrition
- Calories: 125 cal Per Serving
- Fat: 6g
- Carbohydrates: 13g
- Protein: 5g
Quick Nutritional Info
(Please note: This is an estimate and can vary based on the specific brands of ingredients you use.)
Servings: 12 balls | Calories per ball: ~125 kcal | Protein: 5g | Carbs: 13g | Fat: 6g
Prep Time: 10 mins | Chill Time: 30 mins | Total Time: 40 mins
Final Thoughts: Your Go-To Happy Bite
And there you have it—a little ball of pure, uncomplicated joy. These Sticky Toffee Date & Walnut Protein Balls are proof that the most satisfying treats don’t require hours in the kitchen or a long list of complicated ingredients. They’re a celebration of simplicity, flavor, and feeling good from the inside out.
Whether you’re packing them for a hike, stashing them in your desk for a midday boost, or simply satisfying a sweet tooth without the guilt, these bites are here to deliver. They’re a reminder that healthy eating can be decadent, that a little bit of prep can set you up for a successful week, and that the cozy comfort of a classic dessert can be reinvented in the most delightful, energizing way.
I hope this recipe becomes a trusted friend in your kitchen, just like it is in mine. Make a batch, share them with someone you love, and savor every delicious, chewy, nourishing bite.
Happy snacking!
Love,
Olivia
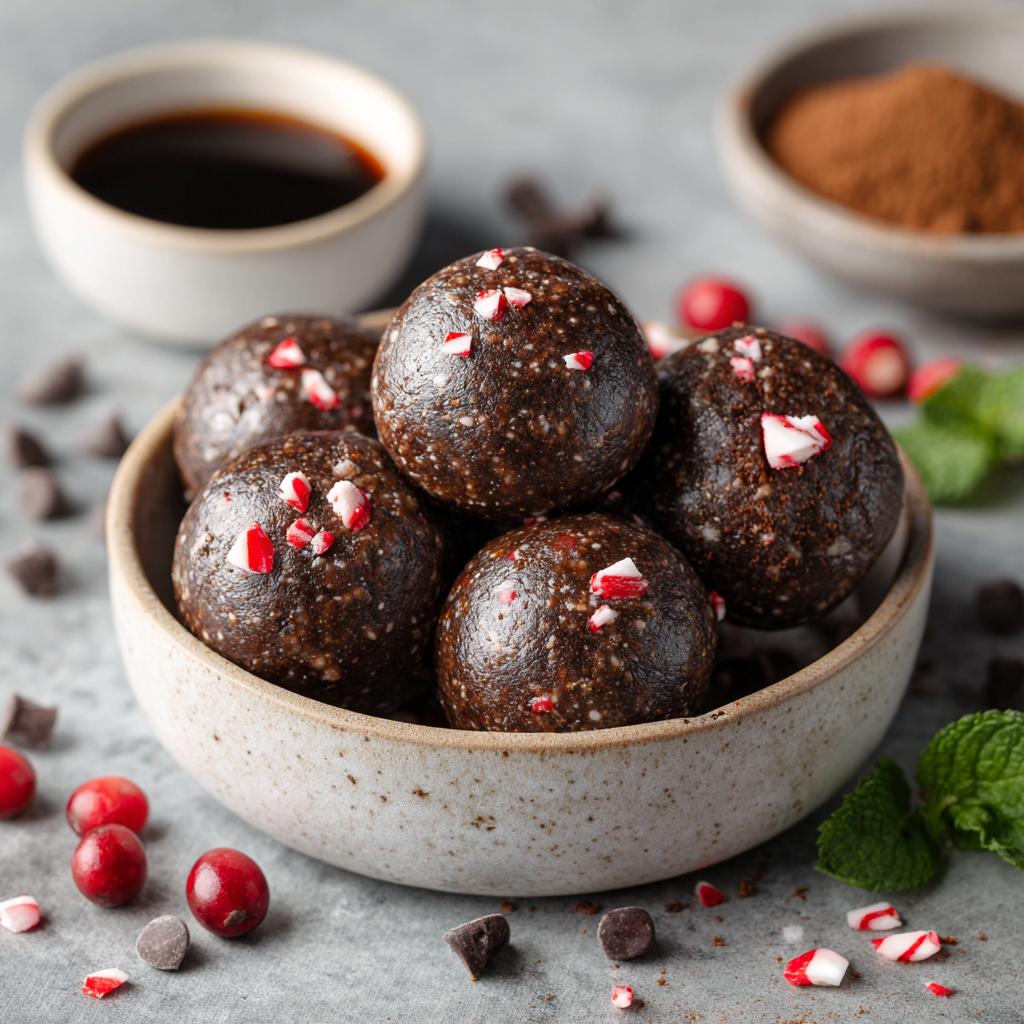
Dark Chocolate Peppermint Mocha Energy Bites : All the Holiday Vibes, None of the Crash
Dark Chocolate Peppermint Mocha Energy Bites – No-Bake Holiday Snack with Protein
Your New Favorite Festive Fuel
Hey there, friend! Can you smell that? It’s the unmistakable scent of the holidays—freshly brewed coffee swirling with rich chocolate and a cool, refreshing hint of peppermint. It’s the flavor of cozy mornings, twinkling lights, and that little jolt of joy we all need this time of year. But what if I told you you could capture all that magic in a simple, no-bake, bite-sized treat that actually fuels your day instead of leaving you in a sugar coma?
Enter my Dark Chocolate Peppermint Mocha Energy Bites. These little powerhouses are my absolute go-to during the bustling holiday season. They’re the answer to that 3 p.m. slump when you’re wrapping presents, the perfect pre-gift-shopping fuel, and a seriously satisfying post-workout snack that actually tastes like a celebration. We’re talking fudgy, chewy, minty, and chocolatey all at once, with a subtle coffee kick that comes from real espresso powder. The best part? They come together in one bowl in about 10 minutes flat. No baking, no fuss, just pure, unadulterated holiday spirit you can hold in your hand. Let’s make your kitchen the coziest, most delicious place to be.
A Holiday Tradition is Born
This recipe was born out of a little bit of chaos and a whole lot of love. A few years back, I was hosting my family for the holidays. My kitchen was a whirlwind of roasting pans, cookie sheets, and simmering sauces. In the middle of it all, my sister—who was juggling two toddlers at the time—looked at me and sighed, “I’d kill for a peppermint mocha, but I don’t have the time or the energy to stand in that crazy coffee shop line.” It was a lightbulb moment. I looked at my messy counter, filled with oats, nut butters, and the cocoa powder I’d been using for a cake, and I thought, “Why can’t we have that flavor, but as a grab-and-go snack?” I started throwing things into a bowl, tasting and tweaking until we had these perfect little bites. We stood there in the middle of the kitchen chaos, popping them into our mouths and feeling that instant boost. It became our little secret weapon that holiday, and it’s been a non-negotiable tradition ever since.
Gathering Your Cozy Ingredients
This is the fun part! These energy bites are a masterpiece of simple, wholesome ingredients working in perfect harmony. Here’s what you’ll need and why each one is a star player.
- 1 cup rolled oats: This is our base, providing heartiness and fiber to keep you full and satisfied. Chef’s Insight: Be sure to use old-fashioned rolled oats, not quick oats or steel-cut. They have the perfect texture for absorbing the other flavors without getting mushy.
- ½ cup almond butter or cashew butter: This is our “glue” and our source of healthy fats. It creates that wonderfully fudgy texture. Substitution Tip: Any nut or seed butter works wonderfully here! Peanut butter will give a stronger, more dominant flavor, while sunflower seed butter is a fantastic nut-free option.
- ¼ cup unsweetened cocoa powder: For that deep, rich, dark chocolate flavor we’re dreaming of. Using unsweetened is key so we can control the sweetness ourselves.
- ¼ cup chocolate protein powder: This is our secret weapon for that protein punch! It makes these bites legitimately energizing. Substitution Tip: If you don’t have protein powder, you can replace it with an additional ¼ cup of oats and a tablespoon of extra honey or maple syrup.
- 2 tablespoons honey or maple syrup: This is just enough natural sweetness to bring everything together. Chef’s Insight: I love the floral notes of honey, but pure maple syrup keeps this recipe completely vegan!
- 1 teaspoon espresso powder: This is what gives our “mocha” its signature coffee kick! It deepens the chocolate flavor beautifully. Substitution Tip: In a pinch, you can use 1-2 tablespoons of very strongly brewed and cooled coffee, but you may need to add a few extra oats to compensate for the added liquid.
- ½ teaspoon peppermint extract: The star of the show! It brings that cool, festive flavor. Chef’s Insight: A little goes a long way! Start with ½ teaspoon and add more if you want a stronger minty punch. Be sure to use extract, not peppermint oil, which is much more potent.
- Pinch of salt: Never, ever skip the salt! It balances the sweetness and makes all the other flavors pop.
- ¼ cup mini dark chocolate chips (optional): Because life is better with melty pockets of chocolate! The mini chips distribute perfectly. Substitution Tip: Chopped nuts, dried cranberries, or cacao nibs would also be delicious here for a different texture.
- 1–2 tablespoons water, as needed: This is our texture lifesaver. Depending on your nut butter, the mixture can be a bit dry, and a splash of water brings it to the perfect, rollable consistency.
Let’s Make Some Magic: The Simple Steps
Ready to get your hands a little messy? This is the easiest “cooking” you’ll do all season. I’ll walk you through every step with my favorite little hacks to ensure perfection.
- The Dry Team Assembles. Grab a medium-sized mixing bowl—no need for a fancy stand mixer here! Dump in your rolled oats, unsweetened cocoa powder, chocolate protein powder, espresso powder, and that all-important pinch of salt. Give this a good whisk. Chef’s Hack: Whisking the dry ingredients first ensures that the espresso powder and salt are evenly distributed, so you don’t get a bitter, salty bite later. It’s a tiny step that makes a huge difference!
- Welcome the Wet Ingredients. Now, plop in your almond butter, honey (or maple syrup), and the peppermint extract. This is where the fun begins. Grab a sturdy spatula or just use your hands (my preferred method!) and start mixing. It will seem thick and a bit crumbly at first—that’s totally normal. Keep folding and pressing until a thick, fudgy dough starts to form. Chef’s Hack: If your nut butter is straight from the fridge, microwave it for 15-20 seconds to make it easier to mix.
- Check the Texture & Fold in the Goodies. Now, pinch a small bit of the mixture and try to roll it between your palms. If it holds together easily, you’re golden! If it’s too dry and crumbly, this is where the water comes in. Add one tablespoon of water and mix thoroughly. You’ll be amazed at how it transforms the texture. Only add the second tablespoon if it’s still too dry. Once the texture is perfect, fold in your mini chocolate chips, if you’re using them.
- The Roll-Up. Line a baking sheet or a plate with a little parchment paper. Using a tablespoon or a small cookie scoop, portion out the dough. Then, get rolling! Scoop, then roll firmly between your palms to create smooth, one-inch balls. Chef’s Hack: If the mixture is sticking to your hands, lightly dampen your palms with water. It creates a non-stick barrier and makes the process super clean.
- The Chill Out. Place all your beautifully rolled bites on the prepared tray and pop them into the fridge for at least 20-30 minutes. This chilling step is non-negotiable—it allows the oats to soften slightly and the fats in the nut butter to firm up, giving you that perfect, firm-yet-chewy texture we’re after.
How to Serve & Savor
Once they’re chilled and firm, the fun really begins! I love storing these in a beautiful airtight container in the fridge. They make the perfect grab-and-go snack straight from the jar. For a festive touch, you can dust them with a little extra cocoa powder or even drizzle them with melted dark chocolate and a sprinkle of crushed candy canes before chilling. They’re fantastic with a hot cup of coffee (obviously!) or a cold glass of almond milk. Package them in a cute little box tied with a ribbon, and you’ve got the most thoughtful, homemade holiday gift for neighbors, teachers, or friends.
Get Creative! Fun Flavor Twists
Love this base recipe? It’s a fantastic canvas for creativity! Here are a few of my favorite ways to mix it up:
- Double Chocolate Cherry: Swap the peppermint extract for ½ teaspoon of almond extract and replace the chocolate chips with ¼ cup of dried tart cherries.
- Gingerbread Spice: Omit the peppermint and espresso. Add 1 teaspoon of ground ginger, ½ teaspoon of cinnamon, and a pinch of nutmeg and cloves to the dry ingredients.
- Protein Powerhouse: Add 2 tablespoons of ground flaxseed or chia seeds to the dry mix for an extra boost of fiber and omega-3s.
- White Chocolate Wonderland: Use vanilla protein powder instead of chocolate and fold in white chocolate chips and crushed peppermint candies.
From My Kitchen to Yours: Chef’s Notes
This recipe has truly evolved over the years, and I love how forgiving it is. The first batch I ever made was a little… aggressive on the peppermint front. Let’s just say my sister’s eyes watered a bit! We’ve since found that ½ teaspoon is the sweet spot. I’ve also learned that the type of nut butter you use is everything. A runny, natural almond butter will give you a softer, fudgier bite, while a thicker, commercial brand might require that extra splash of water. Don’t be afraid to get in there and feel the dough—cooking is about intuition! These bites have seen me through holiday marathons, late-night writing sessions, and everything in between. I hope they become a cherished, easy tradition in your home, too.
Your Questions, Answered!
I’ve made these countless times and have helped many friends make them, too. Here are the most common questions that come up.
- My mixture is too wet and sticky! What did I do wrong? No worries, this is an easy fix! This usually happens if your nut butter was particularly oily or if you added a bit too much liquid. Simply add a couple more tablespoons of rolled oats or protein powder to the mixture until it firms up to a rollable consistency. Let it sit for a few minutes to absorb the excess moisture before you try rolling again.
- Can I make these without protein powder? Absolutely! As I mentioned in the ingredients, you can simply replace the ¼ cup of protein powder with an additional ¼ cup of rolled oats. The texture will be slightly different, but they’ll still be delicious and energizing. You may want to add an extra tablespoon of honey or maple syrup to compensate for the slight sweetness the protein powder often provides.
- How long will these keep, and can I freeze them? These energy bites are fantastic for meal prep! Stored in an airtight container in the fridge, they will stay fresh and delicious for up to 2 weeks. They are also freezer-friendly! Layer them in a container between sheets of parchment paper and freeze for up to 3 months. Just let them thaw at room temperature for 10-15 minutes before enjoying.
- I can’t find espresso powder. Is it essential? While the espresso powder really amplifies the “mocha” flavor and deepens the chocolate notes, the recipe will still work without it. You’ll have a delicious chocolate peppermint bite instead! If you have instant coffee granules, you can try grinding them into a fine powder in a spice grinder or with a mortar and pestle.

Dark Chocolate Peppermint Mocha Energy Bites : All the Holiday Vibes, None of the Crash
Description
A fudgy, chocolatey, pepperminty energy bite with a subtle coffee kick—perfect for grab-and-go fuel, holiday treats, or post-workout snacks.
Ingredients
-
1 cup rolled oats (old-fashioned)
-
½ cup almond butter or cashew butter (any nut/seed butter works)
-
¼ cup unsweetened cocoa powder
-
¼ cup chocolate protein powder (or extra oats if skipping)
-
2 tbsp honey or maple syrup
-
1 tsp espresso powder (or 1–2 tbsp strong brewed coffee, cooled)
-
½ tsp peppermint extract
-
Pinch of salt
-
¼ cup mini dark chocolate chips (optional)
-
1–2 tbsp water, as needed
Instructions
-
Mix dry ingredients: In a medium bowl, whisk together oats, cocoa powder, protein powder, espresso powder, and salt.
-
Add wet ingredients: Add almond butter, honey (or maple syrup), and peppermint extract. Mix with a spatula or hands until thick and fudgy.
-
Adjust texture: Test a small portion—if it’s too dry, add 1 tbsp water at a time; if too sticky, add extra oats or protein powder.
-
Fold in chocolate chips: If using, gently fold them in once dough reaches perfect consistency.
-
Shape bites: Line a tray or plate with parchment paper. Use a tablespoon or small cookie scoop to portion dough and roll into 1-inch balls. Wet hands slightly if dough sticks.
-
Chill: Refrigerate 20–30 minutes until firm and chewy.
Serving & Storage:
-
Store in an airtight container in the fridge up to 2 weeks.
-
Freeze for up to 3 months, separated by parchment paper. Thaw 10–15 minutes before eating.
-
Optional: drizzle with melted dark chocolate or sprinkle crushed candy canes for extra festive flair.
Flavor Variations:
-
Double Chocolate Cherry: Replace peppermint with ½ tsp almond extract, fold in ¼ cup dried tart cherries instead of chocolate chips.
-
Gingerbread Spice: Replace peppermint and espresso with 1 tsp ground ginger, ½ tsp cinnamon, and a pinch each of nutmeg & cloves.
-
Protein Boost: Add 2 tbsp ground flaxseed or chia seeds to the dry mix.
-
White Chocolate Wonderland: Use vanilla protein powder and fold in white chocolate chips + crushed peppermint.
Notes
-
If dough is too wet, let it sit 2–3 minutes to absorb moisture before rolling.
-
Espresso powder is optional but enhances the mocha flavor.
Nutritional Information*
*Please note: This is an estimate and can vary based on the specific brands and ingredients you use.
Prep Time: 10 minutes | Chill Time: 20 minutes | Total Time: 30 minutes | Makes: About 14 bites
Estimated per bite: Calories: 120 | Fat: 7g | Carbs: 11g | Protein: 5g | Sugar: 5g
Final Thoughts: Your Holiday Cozy, In a Bite
And just like that, you’ve captured the essence of a cozy holiday coffee break in a simple, powerful little bite. These Dark Chocolate Peppermint Mocha Energy Bites are more than just a snack; they’re a pocket-sized piece of holiday cheer that actually fuels your spirit and your schedule. They’re proof that taking a moment for yourself during the busy season doesn’t have to be complicated—it can be as simple as mixing a few ingredients and rolling up a batch of joy.
I hope this recipe becomes your trusted ally against the holiday hustle, your secret weapon for sweet, healthy sustenance, and maybe even a new tradition that fills your kitchen with the irresistible scent of chocolate and peppermint. They’re the perfect reminder that the best treats are the ones that make you feel as good as they taste.
Now, I’d love to see your creations! Did you make them with the kids? Gift them to a friend? Share your photos and tag me so I can see how you’re enjoying this festive fuel.
Wishing you a season filled with delicious, energizing moments and plenty of cozy magic. Happy snacking
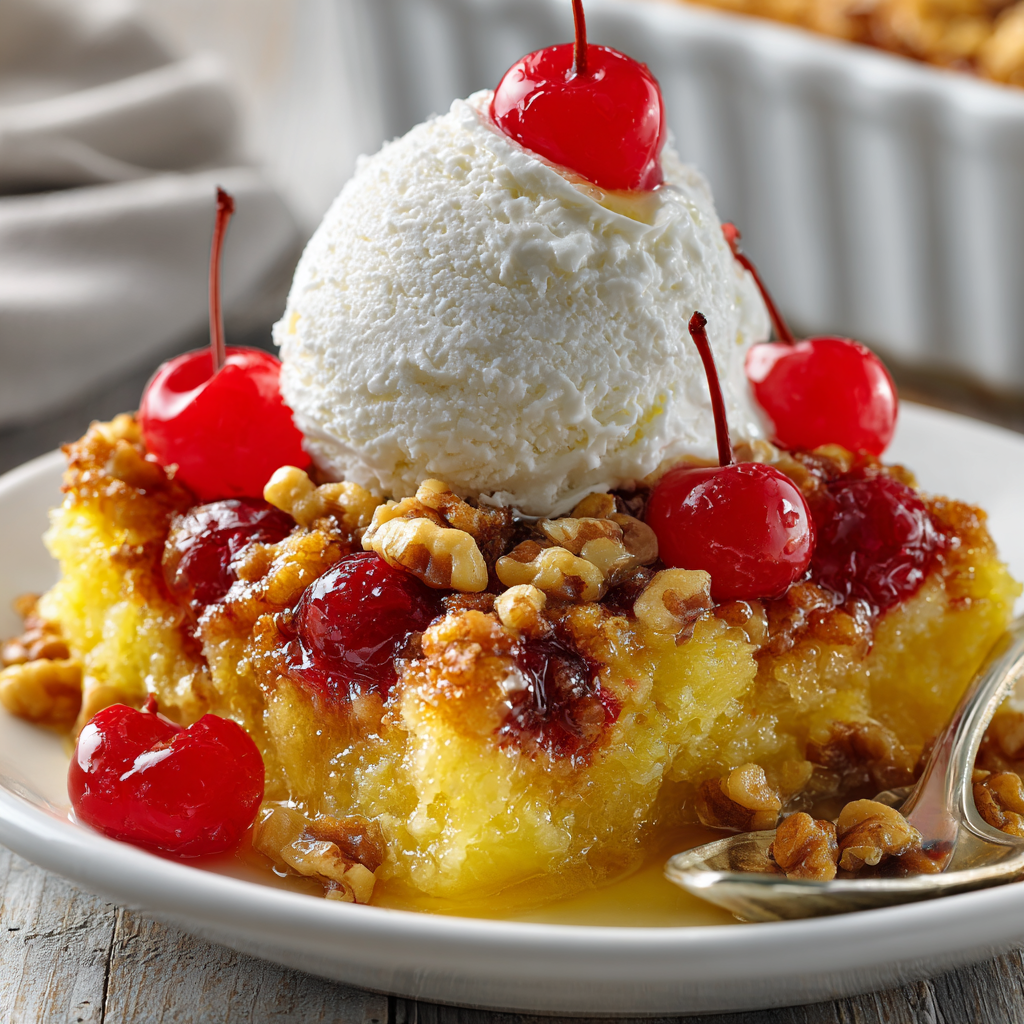
herry Pineapple Dump Cake : Effortless Indulgence in Every Bite
Effortless Indulgence: Welcome to Cherry Pineapple Dump Cake Heaven!
Hello, my friend, and welcome to the coziest corner of the internet! Come on in, tie on an apron (don’t worry, mine’s already a little flour-dusted), and get ready for a treat that feels like a warm hug. If you’ve ever stared into your pantry, dreaming of something sweet, comforting, and miraculously easy, you’ve just hit the jackpot.
Today, we’re making magic. We’re talking about my legendary Cherry Pineapple Dump Cake with a Walnut Crunch. The name might make you chuckle—it’s not the most elegant, I’ll admit—but one bite of this golden, bubbling, fruity masterpiece, and you’ll be a believer. This is the dessert that has saved countless of my potlucks, soothed bad days, and become the most-requested recipe by my friends and family. It’s the beautiful chaos of cherry pie filling and juicy crushed pineapple, all snuggled under a blanket of buttery yellow cake mix and toasted walnuts that bake into the most irresistible crunchy topping.
The best part? You are literally minutes away from dessert nirvana. No mixer, no fancy techniques, no stress. Just a little dumping, a little pouring, and a whole lot of anticipation as your kitchen fills with the most incredible aroma. This recipe is proof that you don’t need to be a pastry chef to create pure, unadulterated joy. So, let’s make a mess, let’s make memories, and let’s make a dessert that will have everyone begging for the recipe.
A Sweet Slice of Nostalgia
This recipe takes me right back to my Grandma Eleanor’s linoleum-floored kitchen. She was the queen of “making do” and creating feasts from what seemed like thin air. The first time I saw her make this, I was about ten years old, and my eyes were as wide as dinner plates. She pulled out these simple cans from her well-stocked pantry, and with a series of confident, messy dumps and sprinkles, she created what I was sure was a wizard’s dessert. The sound of the oven door closing was a promise of the goodness to come.
When she finally pulled it out, the top was a glorious, craggy landscape of golden brown, with deep red and bright yellow fruit bubbling up around the edges like lava. She’d always serve it to me scalding hot with a giant scoop of vanilla ice cream that would melt into a creamy river through the cracks. We’d sit at her formica table, not saying a word, just sharing smiles and spoonfuls of pure comfort. That’s the power of this cake. It’s not just a recipe; it’s a vehicle for connection, for memory, and for the simple, profound joy of sharing something delicious.
Gathering Your Cozy Ingredients
Here’s the beautiful lineup for our masterpiece. I love how simple this is! A quick note: using the specific types I mention here makes a big difference in the final texture and flavor.
- 2 (21 oz) cans Cherry Pie Filling: This is the lush, deep, fruity base of our cake. I don’t recommend substituting with plain canned cherries, as the pie filling has that perfect thick, glossy consistency that holds up beautifully during baking. It’s the sweet, vibrant heart of the dish.
- 4 (8 oz) cans Crushed Pineapple in 100% Juice (undrained): Do not drain these! The juice is crucial—it adds natural sweetness and, most importantly, the moisture needed to “cook” the cake mix from below. Using pineapple packed in juice instead of heavy syrup keeps the dessert from being overly sweet. The bright, tropical tang of the pineapple is the perfect counterpoint to the rich cherry.
- 2 boxes (15.25 oz each) Yellow Cake Mix: Yes, the entire box, dry! This is our magical topping. The mix bakes with the butter and fruit juices to create a crumbly, cobbler-like crust. Chef’s Insight: I always use a standard “butter recipe” yellow cake mix if I can find it—it adds an extra layer of rich flavor.
- 4 cups Chopped Walnuts: This is where we get our incredible CRUNCH! Toasting happens in the oven, transforming the walnuts into a nutty, buttery, crispy crown. For a variation, pecans are a fabulous southern-style swap.
- 1 ½ cups Unsalted Butter, melted: The golden glue that holds our crunchy topping together. Melting the butter allows it to seep into every nook and cranny of the dry cake mix and nuts, creating those irresistible buttery, crispy bits. Using unsalted lets you control the sodium level.
- Optional twist: 1 tsp Ground Cinnamon + ½ tsp Nutmeg: My little secret for a “spiced warmth” version. Just sprinkle this right over the dry cake mix before you add the butter. It adds a cozy, holiday-like aroma that is absolutely divine.
- Optional Topping: Whipped Cream or Vanilla Ice Cream: This is non-negotiable for the full experience! The cool, creamy contrast against the warm, bubbling cake is what dreams are made of.
Let’s Bake! Your Foolproof Step-by-Step Guide
Ready? This is the easiest, most satisfying process. Let’s do this together, step by step.
- Preheat and Prep: First things first, get that oven roaring to a cozy 350°F (175°C). While it’s heating up, grab your baking dish(es). I typically use two 9×13-inch pans because it makes serving a crowd super easy, but one large, deep roasting pan works perfectly too! Give it a quick greasing with butter or a spritz of baking spray. Chef’s Hack: A light coating ensures those sticky, bubbly fruit edges don’t cement themselves to the pan, making cleanup a dream.
- The Fruity Foundation: Now for the fun part—the dump! Open your cans of cherry pie filling and crushed pineapple (juice and all!) and pour them directly into your prepared pan. Take a spatula or a large spoon and give it a gentle, loving stir just to swirl the cherries and pineapple together. You’re not mixing it vigorously, just creating a beautiful, marbled fruit base. Seeing those bright reds and yellows combine is already a mood-lifter!
- The Blanket of Cake: Here’s the key step—open both boxes of yellow cake mix and sprinkle the powder evenly, like a soft, golden snowfall, all over the fruit layer. Important Chef’s Note: Do NOT stir it in! I know it’s tempting, but resist! The dry mix needs to sit on top to create that signature textured topping. If you mix it, you’ll lose the wonderful contrast between the soft fruit and the crunchy cake.
- The Nutty Crown: Now, shower the top with all those gorgeous chopped walnuts. Spread them out as evenly as you can. They’re going to toast up in the oven and become the most flavorful, crunchy component. This is also the stage where I’d add my optional cinnamon and nutmeg if I’m feeling that cozy vibe.
- The Golden Drizzle: Take your melted, unsalted butter and slowly, deliberately drizzle it all over the entire surface. I like to use a spoon or a liquid measuring cup for control. You want to try and hit as much of the dry cake mix and nuts as possible. This butter is what transforms the dry powder into a rich, crumbly, cobbler-like crust. Watching it pool and glisten is pure kitchen therapy.
- Bake to Perfection: Carefully place your creation in the preheated oven. Now, the hardest part: waiting! Bake for 35-45 minutes, but start watching at the 30-minute mark. You’re looking for a deep golden-brown topping, with the walnuts looking nicely toasted, and the fruit visibly bubbling and simmering around the edges like a little fruit volcano. That bubbling is your sign that everything is hot, happy, and cooked through.
- The Final Touch (Patience!): Once it’s out of the oven, let it cool on a rack for at least 15-20 minutes. Chef’s Truth Bomb: I know it’s hard, but this resting time is essential. It allows the molten fruit lava to settle and thicken slightly, so you get perfect, scoopable servings instead of a soupy mess. It’s worth the wait, I promise!
How to Serve This Masterpiece
Presentation is everything, even for our rustic, homespun dump cake! I love serving it right from the baking dish at the table—it feels so communal and inviting. Use a large spoon or pie server to scoop down to the bottom, making sure you get all the layers in one glorious bite. Pile it into bowls, and immediately crown it with a generous dollop of freshly whipped cream or, my personal favorite, a melting scoop of high-quality vanilla ice cream. The contrast of the warm, crunchy cake with the cold, creamy ice cream is nothing short of magical. Serve it with a big smile—you’ve just made something amazing.
Get Creative! Fun Flavor Twists
The beauty of this recipe is its versatility! Once you master the classic, try one of these delicious variations:
- Peach Pecan Dream: Swap the cherry for peach pie filling and the walnuts for pecans. It’s a Southern classic that tastes like sunshine.
- Apple Spice Delight: Use apple pie filling and add a tablespoon of apple pie spice to the dry cake mix. It’s like fall in a dish!
- Tropical Escape: Use pineapple pie filling and stir a cup of sweetened shredded coconut into the dry cake mix before sprinkling. Top with macadamia nuts for the ultimate vacation vibe.
- Berry Medley: Use blueberry or mixed berry pie filling for a vibrant, antioxidant-rich twist.
- Chocolate Cherry Bomb: For the chocoholics, use a devil’s food cake mix instead of yellow cake. The combination of chocolate and cherry is a timeless winner.
From My Kitchen to Yours: A Few Parting Thoughts
This recipe has been with me through so many chapters of life. It was the first dessert I ever made for my now-husband (he still says it’s what sealed the deal). I’ve doubled it for church suppers, halved it for a cozy night in, and I even once made it in a disposable pan over a campfire (wrapped tightly in foil—it worked surprisingly well!). It has evolved from my grandma’s simple version to my spiced-up, extra-crunchy rendition, and I love that you can make it your own, too.
The one constant? It always brings people together. There’s something about its unpretentious, hearty beauty that gets everyone talking, laughing, and reaching for a second helping. Don’t be afraid of the mess, embrace the “dump” philosophy, and most importantly, share it with someone you love. That’s where the real magic happens.
Your Questions, Answered!
Over the years, I’ve gotten a few repeat questions about this cake. Here’s the scoop to ensure your baking success!
Q: My topping is still powdery in spots after baking. What happened?
A: Ah, the classic “butter drizzle” dilemma! This usually means the butter didn’t quite reach every bit of dry mix. Next time, take an extra minute to drizzle slowly and methodically, moving in a back-and-forth motion across the entire pan. You can also take a fork and gently poke the powdery areas to help the butter seep down. Don’t stir, just a little nudging!
Q: Can I make this dump cake gluten-free or with a sugar-free option?
A> You absolutely can! I’ve had great success using a gluten-free yellow cake mix. The result is just as delicious. For a lower-sugar version, look for no-sugar-added pie fillings and crushed pineapple, and use a sugar-free cake mix. The texture will be slightly different, but it still makes a wonderful dessert.
Q: Why is my cake soggy on the bottom?
A> A soggy bottom usually points to two things: not using a deep enough pan (causing the fruit to steam too densely) or not letting it rest after baking. That 15-20 minute cooling period is not a suggestion—it’s a crucial step for the filling to set! Also, make sure your oven is fully preheated so the topping starts cooking immediately.
Q: Can I prepare this dump cake ahead of time?
A> For the best texture, I recommend baking it fresh. However, you can be a prep superstar by combining the fruit in the baking dish, covering it, and refrigerating it up to a day ahead. When you’re ready to bake, just continue with the cake mix, nuts, and butter steps. Don’t let the dry mix sit on the fruit in the fridge for hours, as it can start to get gummy.

herry Pineapple Dump Cake : Effortless Indulgence in Every Bite
Description
A cozy, no-fuss dessert that’s warm, bubbly, and loaded with fruit, cake mix, and nuts. Perfect for potlucks, family dinners, or any time you want a comfort dessert.
Ingredients
Fruit Base:
-
2 (21 oz) cans cherry pie filling
-
4 (8 oz) cans crushed pineapple in 100% juice (undrained)
Topping:
-
2 boxes (15.25 oz each) yellow cake mix
-
4 cups chopped walnuts
-
1½ cups unsalted butter, melted
Optional:
-
1 tsp ground cinnamon + ½ tsp nutmeg (for a warm, spiced flavor)
-
Whipped cream or vanilla ice cream for serving
Instructions
-
Preheat oven: 350°F (175°C). Grease two 9×13-inch pans (or one large deep pan) with butter or nonstick spray.
-
Layer fruit: Pour cherry pie filling and crushed pineapple (with juice) into the prepared pan. Gently swirl with a spatula to combine.
-
Add cake mix: Sprinkle the dry yellow cake mix evenly over the fruit. Do not stir.
-
Add nuts & spices: Spread chopped walnuts evenly over the cake mix. Sprinkle optional cinnamon and nutmeg if desired.
-
Drizzle butter: Pour melted butter evenly over the top, making sure it reaches all areas of the dry mix.
-
Bake: 35–45 minutes, until topping is golden brown and walnuts are toasted, and fruit is bubbling around the edges. Check at 30 minutes to ensure even browning.
-
Cool: Let the cake rest 15–20 minutes before serving to allow the fruit juices to thicken slightly.
Serving Suggestions:
-
Serve warm straight from the pan for a rustic feel.
-
Top with whipped cream or a scoop of vanilla ice cream for the ultimate comfort dessert.
Variations:
-
Peach Pecan: Swap cherries for peach pie filling and walnuts for pecans.
-
Apple Spice: Use apple pie filling and add 1 tbsp apple pie spice to the cake mix.
-
Tropical: Use pineapple pie filling and mix 1 cup sweetened shredded coconut into the cake mix; top with macadamia nuts.
-
Berry Medley: Substitute blueberry or mixed berry pie filling.
-
Chocolate Cherry: Use devil’s food cake mix instead of yellow cake for a chocolatey twist.
Notes
-
If topping is powdery, drizzle butter more slowly and gently poke dry spots with a fork.
-
For gluten-free or sugar-free versions, use suitable cake mixes and pie fillings.
-
Avoid a soggy bottom by using a deep enough pan and allowing it to rest after baking.
-
You can prep fruit a day ahead, but add cake mix, nuts, and butter just before baking.
Nutrition
- Calories: 370 cal Per Serving
- Fat: 20g
- Carbohydrates: 43g
Nutritional Information (Approximate)
Per Serving (1/24th of the recipe): Calories: 370 | Carbohydrates: 43g | Fat: 20g | Protein: 3g
Please note: This is an estimate generated from the ingredients used and can vary based on specific brands and any substitutions you make.
Final Thoughts: Your New Go-To Joy
And just like that, with a few simple dumps and a drizzle, you’ve created a dessert that feels like a celebration in a dish. This Cherry Pineapple Dump Cake is more than just a recipe—it’s a promise of simplicity, a guarantee of comfort, and an open invitation to create your own sweet memories.
It’s the dessert you can always count on, whether life calls for a last-minute potluck savior or a quiet Tuesday night treat. It proves that the most beloved dishes aren’t about perfection; they’re about the warmth they bring to the table and the smiles they bring to faces. From my Grandma Eleanor’s linoleum kitchen to yours, this cake is a legacy of love, laughter, and the beautiful truth that sometimes, the best things in life are the easiest.
So, the next time a sweet craving hits, don’t overcomplicate it. Embrace the beautiful chaos, trust the process, and dive headfirst into dump cake heaven. I hope this recipe becomes a well-loved, often-requested staple in your home, just as it is in mine.
Now, grab a spoon, scoop yourself a generous helping, and taste the simple, unadulterated joy.
Happy Baking!
Olivia

Butterfinger Pie
The No-Bake Marvel That Will Steal Your Heart: Butterfinger Pie
Hey there, friend! Come on in, grab an apron, and let’s get one thing straight: life is just too short for boring desserts. I’m Olivia, and if you’ve spent any time in my kitchen, you know my philosophy is that the best treats are the ones that bring a little bit of magic without a whole lot of stress. You know the feeling—that moment when you take a bite of something so perfectly creamy, so delightfully crunchy, so utterly *moreish* that you just have to close your eyes for a second and savor it. That, my friend, is the magic we’re making today.
We’re talking about my legendary, no-bake, crowd-pleasing Butterfinger Pie. This isn’t just a recipe; it’s your new secret weapon. It’s the pie you bring to the potluck that has everyone asking for the recipe. It’s the dessert you whip up on a weeknight because you deserve a little celebration. It’s the glorious union of a candy bar and a pie, and it requires exactly zero oven time. With a creamy peanut butter base, a cloud of whipped topping, and a symphony of crushed Butterfinger bits in every single bite, this pie is pure, unadulterated joy on a plate. So, let’s skip the fuss and dive straight into the fun part. Get ready to make something spectacular!
A Slice of Sweet Nostalgia
This pie recipe is so much more than a list of ingredients to me; it’s a direct line back to my Grandma June’s linoleum-floored kitchen. Grandma June was the queen of “semi-homemade” before it was even a term. She believed in maximum flavor with minimum fuss, and her dessert table was always the main event at any family gathering. I can still picture her, with a twinkle in her eye, pulling this very pie out of her avocado-green refrigerator. The air would be thick with the scent of roasted turkey and conversation, but all us kids could focus on was that pie.
We’d watch, hypnotized, as she’d slide her pie server through the creamy filling, the crunch of the candy bar giving way with the most satisfying sound. That first bite was a revelation—cold, creamy, sweet, salty, and crunchy all at once. It felt like a secret handshake, a special treat made just for us. Making this pie today still brings back that warm, fuzzy feeling of being in her kitchen, surrounded by love and laughter. It’s a reminder that the best recipes aren’t just about feeding people; they’re about creating moments that stick to your ribs—and your heart—long after the last crumb is gone.
Gathering Your Pie-Making Posse
One of the best things about this recipe is its beautiful simplicity. You only need a handful of key players, and I bet you have a few of them in your pantry right now! Here’s the lowdown on what you’ll need and why each ingredient is a rockstar in this dessert symphony.
- 225g (8 oz) Cream Cheese, softened: This is the rich, tangy backbone of our filling. Chef’s Insight: Please, please let your cream cheese come to room temperature! Trying to beat cold brick-hard cream cheese is a one-way ticket to lumpy-town. If you forget, you can microwave it on low power for 15-second intervals, but patience is your best friend here.
- 1/2 Cup (about 135g) Creamy Peanut Butter: This brings that iconic nutty, salty flavor that pairs so perfectly with Butterfinger. Substitution Tip: You can use crunchy peanut butter for an extra textural punch, or if you have a nut allergy, SunButter (made from sunflower seeds) works surprisingly well as a substitute!
- 1 1/2 Cups (about 180g) Crushed Butterfinger Candy Bars: The star of the show! Chef’s Hack: The easiest way to crush these is to place them in a zip-top bag and use a rolling pin to go to town. You want a mix of fine crumbs and some larger, pea-sized pieces for that signature crunch. Don’t forget to reserve a small handful for the gorgeous topping!
- 1 (8 oz) Container of Whipped Topping (like Cool Whip): This is what gives our pie its dreamy, cloud-like lightness. Substitution Tip: If you’re a from-scratch purist, you can absolutely substitute an equal amount of freshly whipped heavy cream sweetened with a tablespoon or two of powdered sugar. It’s divine!
- 1 Prepared Pie Crust: The trusty vessel for our incredible filling. Chef’s Insight: I’m a huge fan of a classic graham cracker crust for this, as its honeyed sweetness is a perfect match. But a chocolate cookie crust (like Oreo) takes it to a whole new level of decadence. Store-bought is a lifesaver, but a homemade crust is always a lovely touch.
Let’s Build the Magic: Step-by-Step
Ready to create some dessert wizardry? This process is so simple and satisfying. I’ll walk you through each step with my favorite little kitchen hacks to ensure your pie is absolutely perfect.
- The Creamy Base: In a large mixing bowl, beat the softened cream cheese and peanut butter together with a hand mixer (or a stand mixer with the paddle attachment) on medium speed until the mixture is completely smooth, creamy, and lump-free. Chef’s Tip: Scrape down the sides and bottom of the bowl halfway through to make sure everything is perfectly incorporated. This is the foundation, so we want it silky smooth!
- Introduce the Fluff: Now, it’s time to gently fold in the whipped topping. Key word: FOLD. Switch to a spatula for this part. Instead of stirring vigorously (which would deflate all the airy goodness), use a gentle, sweeping motion, turning the bowl as you go. You’re looking for a light and uniform, pale beige mixture. No white streaks should remain.
- The Crunchy Finale: Sprinkle in the majority of your crushed Butterfingers (remember to save that handful for the top!). Gently stir them in until they’re evenly distributed throughout the creamy filling. Chef’s Hack: Don’t over-mix here! We want to preserve as much of that wonderful candy bar crunch as possible.
- The Grand Assembly: Spoon this glorious filling into your waiting pie crust. Use the back of your spoon or an offset spatula to smooth the top into beautiful, swoopy peaks. This isn’t just about looks; those peaks will give our topping something to cling to.
- The Crown Jewel: Take your reserved crushed Butterfingers and sprinkle them artfully over the entire surface. Be generous! This gives the pie a fantastic textural contrast and lets everyone know exactly what deliciousness awaits them.
- The Test of Patience: This is the hardest part, I promise! Carefully transfer the pie to your refrigerator. It needs to chill for at least 2-4 hours, but honestly, overnight is even better. Chef’s Secret: This chilling time is non-negotiable. It allows the flavors to meld and the filling to firm up perfectly, so you get clean, beautiful slices.
How to Serve Your Masterpiece
The moment of truth has arrived! Pull that beautiful pie out of the fridge. For the cleanest slices, dip your sharp knife in hot water and wipe it dry between each cut. Serve up generous wedges on their own for pure, unadulterated bliss. For a little extra pizzazz, a dollop of freshly whipped cream and a tiny extra sprinkle of Butterfinger crumbs on the plate makes it feel extra special. This pie is rich, so a little goes a long way—though I’ve never seen anyone turn down a second sliver!
Make It Your Own: Delicious Twists & Swaps
The beauty of this recipe is its adaptability! Feel free to play around and create your own signature version.
- Chocolate Lover’s Dream: Use a chocolate cookie crust and fold in 1/2 cup of mini chocolate chips along with the Butterfingers.
- Cookie Butter Bliss: Swap the peanut butter for an equal amount of speculoos cookie butter for a warm, spiced flavor that is utterly addictive.
- The “Snickers” Variation: Add a layer of homemade or store-bought caramel sauce at the bottom of the crust before adding the filling. It’s a game-changer!
- Lighter Option: Use Neufchâtel cheese (the lighter cousin of cream cheese), reduced-fat peanut butter, and a light whipped topping. It still tastes incredibly indulgent.
- Mini Pie Party: Instead of one big pie, divide the filling among individual mini graham cracker crusts for adorable, single-serving treats.
From My Kitchen to Yours: A Few Final Thoughts
This recipe has been a part of my life for so long, it’s practically evolved on its own. I remember one time, early in my blogging days, I was filming a video for this very pie and I was so busy chatting to the camera that I completely forgot to add the peanut butter! I just mixed the cream cheese and Cool Whip, poured it in the crust, and was about to top it when I saw the lonely jar of peanut butter sitting on the counter. We had a good laugh, scraped it all back into the bowl, and started over. It was a great reminder that even the “easiest” recipes can have their moments, and it’s always okay to laugh at yourself in the kitchen!
Over the years, I’ve found that using a higher-quality, natural peanut butter (the kind you have to stir) gives it a more intense peanut flavor, but the classic shelf-stable stuff works beautifully and holds its texture a bit better. This pie is a testament to the fact that you don’t need fancy techniques or a dozen obscure ingredients to create something truly memorable. It’s about heart, a little bit of crunch, and a whole lot of yum.
Your Butterfinger Pie Questions, Answered!
I’ve gotten thousands of comments and questions on this recipe over the years, so I’ve gathered the most common ones here to help you out!
Q: My filling is a bit runny. What did I do wrong?
A: This usually happens for one of three reasons: 1) The cream cheese wasn’t fully softened, leading to a less-than-smooth mix. 2) We were a little too vigorous when folding in the whipped topping and deflated it. 3) It just needs more time! The pie absolutely must chill for the full 4 hours, preferably overnight, to set up properly. If it’s still soft, don’t worry—it will still taste amazing, just serve it with a spoon!
Q: Can I freeze Butterfinger Pie?
A: You can! Wrap it tightly in a couple layers of plastic wrap and it will keep for 1-2 months. The texture will be a bit firmer, more like ice cream, when frozen. Let it sit on the counter for 10-15 minutes before slicing for the best texture. The crushed Butterfingers may lose a *little* of their crunch after thawing, but it’s still delicious.
Q: What’s the best way to crush the Butterfingers without making a huge mess?
A: The zip-top bag and rolling pin method is my go-to. For an even easier, less arm-intensive method, you can pulse them a few times in a food processor! Just be careful not to turn them into complete dust—a few pulses is all you need.
Q: Can I make this recipe ahead of time?
A: Absolutely! This pie is the *perfect* make-ahead dessert. It needs that long chill time anyway, so making it the day before you plan to serve it is actually ideal. It allows the flavors to fully develop and makes your party day so much less stressful.

Butterfinger Pie
Description
A creamy, crunchy, peanut-buttery pie that requires no baking—perfect for weeknights, potlucks, or any time you want a dessert that wows!
Ingredients
Filling:
-
225g (8 oz) cream cheese, softened
-
½ cup (135g) creamy peanut butter
-
1½ cups (180g) crushed Butterfinger bars, plus a small handful for topping
-
1 (8 oz) container whipped topping (like Cool Whip)
Crust:
-
1 prepared pie crust (graham cracker or chocolate cookie crust works best)
Instructions
-
Mix cream cheese & peanut butter: Beat together in a large bowl until smooth and lump-free. Scrape the sides of the bowl halfway through.
-
Fold in whipped topping: Use a spatula and gently fold until uniform and airy.
-
Add Butterfinger pieces: Stir in most of the crushed candy, leaving some for garnish. Be gentle to preserve crunch.
-
Assemble pie: Spoon filling into the pie crust and smooth the top. Sprinkle reserved Butterfinger pieces over the surface.
-
Chill: Refrigerate for at least 2–4 hours (overnight is best) to let flavors meld and filling firm up.
-
Serve: Slice with a knife dipped in hot water for clean edges. Optional: add extra whipped topping or a few Butterfinger crumbs per slice.
Tips & Variations:
-
Chocolate Lover: Use a chocolate cookie crust and fold in ½ cup mini chocolate chips.
-
Cookie Butter Swap: Replace peanut butter with speculoos cookie butter.
-
Caramel Layer: Spread caramel sauce on the crust before adding the filling.
-
Mini Pies: Use individual mini crusts for single servings.
-
Lighter Option: Use Neufchâtel cheese, reduced-fat peanut butter, and light whipped topping.
Make-Ahead & Storage:
-
Can be made a day ahead—perfect for stress-free entertaining.
-
Freezes 1–2 months wrapped tightly; let sit 10–15 minutes at room temp before slicing.
Estimated Nutrition (per slice):
Calories: ~480 | Carbs: 47g | Fat: 31g | Protein: 9g
Nutritional Information*
*Please note: This is an estimated nutritional breakdown for one slice, based on the specific ingredients listed. Values can vary based on brands and specific quantities used.
- Calories: ~480 kcal
- Carbohydrates: ~47g
- Fat: ~31g
- Protein: ~9g
Final Thoughts: A Slice of Simple Joy
And there you have it—the secret to a dessert that feels like a hug in pie form. This Butterfinger Pie is more than just a no-bake marvel; it’s a celebration of simplicity, nostalgia, and the pure, uncomplicated joy of a truly delicious treat.
It proves that you don’t need a chef’s expertise or a whole day in the kitchen to create something magical. All you need is a few simple ingredients, a willingness to get a little messy, and the patience to let the fridge do its work. This pie is a love letter to busy weeknights, last-minute gatherings, and those moments when you just deserve something sweet.
I hope this recipe finds its way into your regular rotation, creating its own stories and becoming a requested favorite among your friends and family. May your slices be creamy, your crunch be plentiful, and your kitchen be filled with the same happy, loving energy that this pie has always brought to mine.
Now, go forth and enjoy every last crumb!
With love and a sweet tooth,
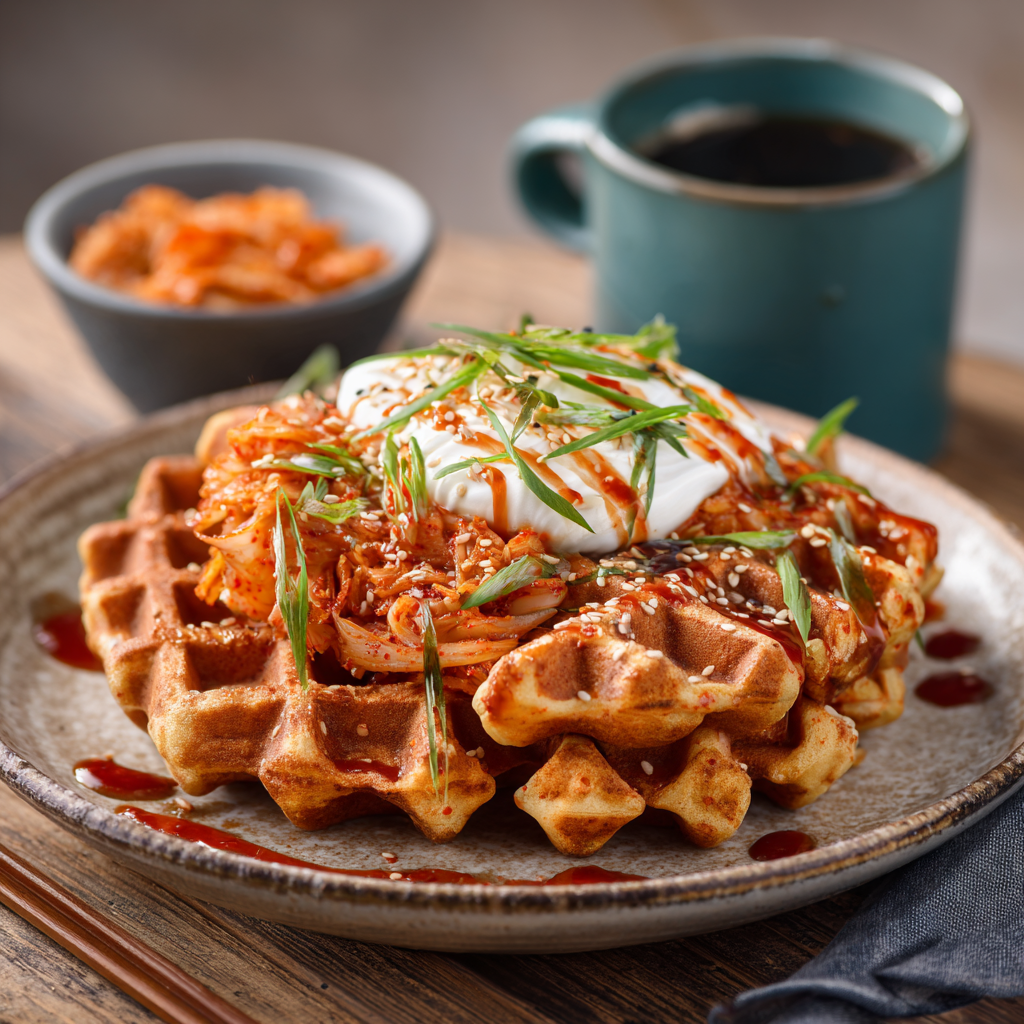
Korean-Style Kimchi Waffles with Sesame Aioli : Crispy, Tangy, Bold Brunch Goals
Brunch Just Got a Major Upgrade: Say Hello to Kimchi Waffles!
Hey there, friend! Can we talk about brunch for a second? I mean really talk about it. We all love a classic stack of fluffy pancakes or a perfectly golden Belgian waffle, right? But sometimes, your soul—and your taste buds—are craving something a little more… adventurous. Something that breaks the mold and turns your weekend morning into a full-blown culinary event.
Well, pull up a chair and get ready to have your mind (and your waffle iron) completely blown. I’m about to introduce you to your new brunch obsession: Korean-Style Kimchi Waffles with Sesame Aioli. Imagine this: a waffle that’s irresistibly crispy on the outside, tender and savory on the inside, packed with the tangy, spicy, umami-packed punch of fermented kimchi. Each bite is a flavor explosion that wakes up your palate and gets your senses buzzing.
And then, we bring it all home with a drizzle of the most addictive sesame aioli you’ll ever taste. It’s creamy, nutty, with a hint of spice and acidity that cuts through the richness of the waffle perfectly. This isn’t just a dish; it’s an experience. It’s for the brunch rebels, the flavor adventurers, and anyone who believes that the best meals are the ones that surprise and delight you. So, let’s ditch the ordinary and create some kitchen magic together. Your waffle maker is about to become your favorite fusion tool!
The Happy Accident That Started It All
This recipe was born from one of those gloriously messy, “what-do-I-have-in-the-fridge?” Sunday mornings. I had a serious craving for something savory for brunch, but I also had my heart set on using my beloved, slightly dusty waffle iron. A half-empty jar of homemade kimchi was staring back at me from the fridge shelf, next to some lonely green onions. In a moment of “what’s the worst that could happen?” inspiration, I chopped up the kimchi, folded it into my standard waffle batter, and crossed my fingers.
The smell that wafted through my kitchen as it cooked was pure magic—savory, tangy, with that unmistakable fermented kick. When I pulled that first golden, speckled waffle out of the iron, I knew I was onto something special. I whipped up a quick aioli with sesame oil and sriracha, drizzled it over the top, and took a bite. My eyes literally widened. It was a perfect harmony of textures and flavors I didn’t know I needed. It was a happy little accident that instantly became a staple, a story I love sharing almost as much as I love sharing the recipe itself.
Gathering Your Flavor Power Players
Here’s everything you’ll need to create this masterpiece. Don’t worry, it’s all simple stuff! I’ve included some of my favorite chef insights and substitutions so you can make it your own.
For the Kimchi Waffles:
- 1½ cups all-purpose flour: The trusty foundation of our waffle. It gives that perfect structure for a crispy exterior. For a gluten-free version, a 1:1 GF baking blend works wonderfully!
- 1 tablespoon sugar: Just a touch! It’s not for sweetness, but to help with browning and to balance the tangy kimchi.
- 1 teaspoon baking powder & ½ teaspoon baking soda: Our dynamic leavening duo! They work together to create a beautifully light and airy interior with lots of little pockets for the flavors to nestle into.
- ½ teaspoon salt: Essential for enhancing all the other flavors. Don’t skip it!
- 1 cup buttermilk: The secret to a tender crumb and a subtle tang. No buttermilk? No problem! Make a quick “soured milk” by adding 1 tablespoon of lemon juice or white vinegar to a cup of regular milk and let it sit for 5 minutes.
- 2 large eggs: They bind everything together and add richness. Let them come to room temperature for a more even mix.
- ¼ cup neutral oil or melted butter: I love the flavor of butter, but a neutral oil like avocado or grapeseed guarantees an ultra-crispy waffle. Your choice!
- ¾ cup chopped fermented kimchi, drained: The star of the show! Make sure your kimchi is well-fermented for that signature tangy flavor. Give it a rough chop and a light squeeze to remove excess liquid—this is the key to maximum crispiness.
- 1 green onion, thinly sliced: A fresh, sharp counterpoint to the rich, fermented kimchi.
- Optional: ½ teaspoon gochugaru (Korean chili flakes): For my heat-seekers! This adds a beautiful, smoky heat and a vibrant red color. If you don’t have it, a pinch of cayenne will do in a pinch.
For the Sesame Aioli:
- ½ cup mayonnaise: The creamy, luxurious base of our aioli. Use your favorite brand, or go for Kewpie mayo for an extra umami boost!
- 1 tablespoon toasted sesame oil: This is non-negotiable for that deep, nutty flavor. Make sure it’s toasted sesame oil—it makes all the difference.
- 1 teaspoon rice vinegar: A little acidity to cut through the richness and brighten everything up.
- 1 teaspoon sriracha (or to taste): Adds a garlicky kick. Adjust this to your preferred spice level—you do you!
- Pinch of salt: Just a tiny pinch to bring all the aioli flavors into harmony.
Let’s Make Some Magic: Your Step-by-Step Guide
Ready to cook? Follow these steps, and you’ll be a kimchi waffle pro in no time. I’ve packed this section with all my favorite little hacks to ensure your success.
- Preheat Your Waffle Iron. Go ahead and get it nice and hot! A properly preheated iron is the #1 secret to a crispy, non-stick waffle. I usually set mine to a medium-high setting. Chef’s Hack: While it’s heating, this is the perfect time to chop your kimchi and green onions and get your mise en place ready. A little prep makes the process so smooth!
- Combine Your Dry Ingredients. In a large bowl, grab a whisk and vigorously whisk together the flour, sugar, baking powder, baking soda, and salt. Why the vigor? We want to make sure those leaveners are evenly distributed throughout the flour for a perfectly even rise. No one wants a baking soda pocket!
- Whisk Together Your Wet Ingredients. In a separate, medium-sized bowl, whisk the buttermilk, eggs, and oil (or melted butter) until they are beautifully smooth and emulsified. You’ll see the mixture turn a pale, creamy yellow. Chef’s Insight: Using a spouted measuring cup or bowl for your wet ingredients makes pouring into the dry mix a breeze and minimizes mess.
- Marry the Wet and Dry. Pour your wet ingredients into the bowl with the dry ingredients. Now, here’s the most important tip: mix until *just* combined. A few lumps are totally fine—I promise! Overmixing is the enemy of tender waffles, as it develops the gluten and can make them tough.
- Fold in the Flavor. Now for the fun part! Gently fold in the chopped kimchi, sliced green onions, and the optional gochugaru. Use a spatula and a light hand—you just want to distribute them evenly without overworking the batter.
- Cook to Perfection. Lightly grease your preheated waffle iron with a brush of oil or a spritz of cooking spray. Pour enough batter to cover the center of the iron (about ¾ cup for a standard round iron, but check your maker’s instructions!). Close the lid and let it work its magic. Resist the urge to peek too early! Wait until the steam significantly subsides, then check for a deep, golden brown color. Chef’s Hack: To keep cooked waffles crisp while you finish the batch, place them in a single layer on a wire rack in a low (200°F/95°C) oven. This prevents them from getting steamy and soft.
- Whip Up the Aioli. While the waffles are cooking, make your aioli. Simply combine the mayonnaise, toasted sesame oil, rice vinegar, sriracha, and salt in a small bowl. Whisk until it’s smooth, creamy, and dreamy. Give it a taste and adjust the seasoning to your liking—maybe a squeeze more sriracha?
How to Serve These Savory Wonders
Presentation is part of the fun! I love serving these waffles hot from the iron, stacked high on a warm plate. Drizzle that gorgeous sesame aioli generously over the top—don’t be shy! For the ultimate brunch experience, crown your stack with a perfectly fried egg with a runny yolk. The rich yolk acts as a second, incredible sauce. Finish with a final sprinkle of thinly sliced green onions and maybe a few extra kimchi pieces for a vibrant, colorful pop. Serve immediately and watch faces light up!
Get Creative: Fun Twists on the Classic
Once you’ve mastered the base recipe, the world is your oyster (or should I say, your kimchi waffle?). Here are a few of my favorite ways to mix it up:
- Cheesy Kimchi Waffle: Fold in ½ cup of shredded sharp cheddar or mozzarella cheese into the batter for an extra gooey, indulgent treat.
- Pork Belly & Kimchi Waffle: Top your finished waffle with slices of crispy, pan-fried pork belly for the ultimate Korean-inspired flavor bomb.
- Seafood Lover’s Version: Add ½ cup of chopped cooked shrimp or squid to the batter for a delicious brunch-for-dinner option.
- Vegan Kimchi Waffle: Use a flax egg (1 tbsp ground flax + 3 tbsp water per egg), plant-based milk + vinegar for the buttermilk, and vegan mayo for the aioli. Just make sure your kimchi is vegan-friendly!
- Spicy Gochujang Aioli: Swap the sriracha in the aioli for a teaspoon of gochujang (Korean chili paste) for a deeper, fermented, and complex heat.
Olivia’s Kitchen Notes & Stories
This recipe has evolved so much since that first experimental batch! I’ve learned that squeezing the kimchi juice out is non-negotiable for crispiness, but I’ve also started saving that precious liquid. I sometimes add a teaspoon of it to the batter for an even more intense kimchi flavor, or I’ll use it to marinate proteins—it’s a fantastic waste-not-want-not trick.
One of my favorite kitchen memories involves these waffles. I was hosting a brunch for my most skeptical friend, who insisted that “fruit belongs in waffles, period.” I served her one of these, and after one silent, contemplative bite, she just looked at me and said, “Okay, you win. I was wrong.” It’s now the dish she requests every time she visits. It just goes to show that the best recipes are the ones that create a little bit of joy and a whole lot of delicious conversation.
Your Questions, Answered!
Here are answers to some common questions to make sure your kimchi waffle journey is flawless.
Q: My waffles are coming out soft and not crispy. What am I doing wrong?
A: The most common culprits are a under-preheated waffle iron and excess moisture. Make sure your iron is piping hot before you add the batter, and don’t forget to drain and squeeze the kimchi well. Also, avoid stacking waffles directly on a plate—use a wire rack in a warm oven to keep them crisp.
Q: Can I make the batter ahead of time?
A: I don’t recommend it. The baking powder and soda start working as soon as they hit the liquid, and letting the batter sit will result in less rise and denser waffles. For the best texture, mix and cook immediately!
Q: My kimchi isn’t very spicy. Will these waffles be bland?
A: Not at all! The flavor comes from the tangy, fermented taste of the kimchi itself, not just the heat. If you want more kick, that’s where the optional gochugaru or an extra dash of sriracha in the aioli comes in. You can always add heat, but you can’t take it away!
Q: Can I freeze these waffles for later?
A> Absolutely! Let the cooked waffles cool completely on a wire rack. Then, place them in a single layer on a baking sheet to “flash freeze” for about an hour. Once frozen solid, transfer them to a freezer bag. They’ll keep for up to 3 months. Reheat them straight from the freezer in a toaster or oven for a quick and delicious meal anytime.

Korean-Style Kimchi Waffles with Sesame Aioli : Crispy, Tangy, Bold Brunch Goals
Description
Turn brunch into an adventure with these crispy, savory waffles packed with tangy kimchi and green onions. Top with a drizzle of creamy sesame aioli for a flavor-packed, irresistible meal.
Ingredients
Waffles:
-
1½ cups all-purpose flour
-
1 tbsp sugar
-
1 tsp baking powder
-
½ tsp baking soda
-
½ tsp salt
-
1 cup buttermilk (or milk + 1 tsp lemon juice)
-
2 large eggs
-
¼ cup neutral oil or melted butter
-
¾ cup chopped kimchi, drained
-
1 green onion, thinly sliced
-
Optional: ½ tsp gochugaru or pinch of cayenne
Sesame Aioli:
-
½ cup mayonnaise
-
1 tbsp toasted sesame oil
-
1 tsp rice vinegar
-
1 tsp sriracha (or to taste)
-
Pinch of salt
Instructions
-
Preheat waffle iron to medium-high and lightly grease.
-
Mix dry ingredients: In a large bowl, whisk flour, sugar, baking powder, baking soda, and salt.
-
Mix wet ingredients: In another bowl, whisk buttermilk, eggs, and oil/butter.
-
Combine: Pour wet into dry and stir just until combined. A few lumps are fine.
-
Fold in kimchi and green onion (and gochugaru if using).
-
Cook waffles: Pour batter into preheated waffle iron (about ¾ cup per waffle). Cook until golden and crisp. Keep cooked waffles warm on a wire rack in a 200°F (95°C) oven.
-
Make aioli: Whisk together mayonnaise, sesame oil, rice vinegar, sriracha, and salt until smooth.
-
Serve: Top waffles with sesame aioli and extra kimchi or green onion if desired. Add a fried egg for extra indulgence.
Notes
-
Keep waffles crisp: Place on a wire rack instead of stacking.
-
Make pancakes instead: Cook on a greased skillet if no waffle iron.
-
Cheesy version: Add ½ cup shredded cheese to the batter.
-
Protein boost: Add cooked shrimp, squid, or crispy pork belly.
-
Vegan: Use flax eggs, plant-based milk, and vegan mayo.
Nutrition
- Calories: 420 cal Per Serving
- Carbohydrates: 28g
- Fiber: 30g
- Protein: 10g
Nutritional Information*
*Please note: This is an estimated nutritional breakdown for one serving (one waffle with a portion of aioli). Values may vary based on specific ingredients used.
- Calories: 420
- Protein: 10g
- Carbohydrates: 28g
- Fat: 30g
- Fiber: 2g
- Sugar: 3g
- Sodium: 480mg
Final Thoughts: Your Brunch Game, Forever Changed
And just like that, you’re armed and ready to launch a full-scale assault on boring brunches everywhere. These Kimchi Waffles are more than just a recipe; they’re a declaration that morning meals can be bold, exciting, and packed with personality. They prove that your waffle iron isn’t just for sweet treats—it’s a portal to a world of savory, umami-packed possibilities.
I hope this recipe brings as much joy and lively conversation to your table as it has to mine. It’s a celebration of happy accidents, fusion flavors, and the simple thrill of trying something wonderfully new.
So, go ahead, break the mold, drizzle that aioli with abandon, and take that first, life-changing bite. Your inner brunch rebel will thank you.
I am so excited to see your creations! Tag me on social media @OliviasKitchen and use the hashtag #KimchiWaffleRevolution so I can share in the crispy, savory, glorious fun.
Happy brunching!
Love,
Olivia
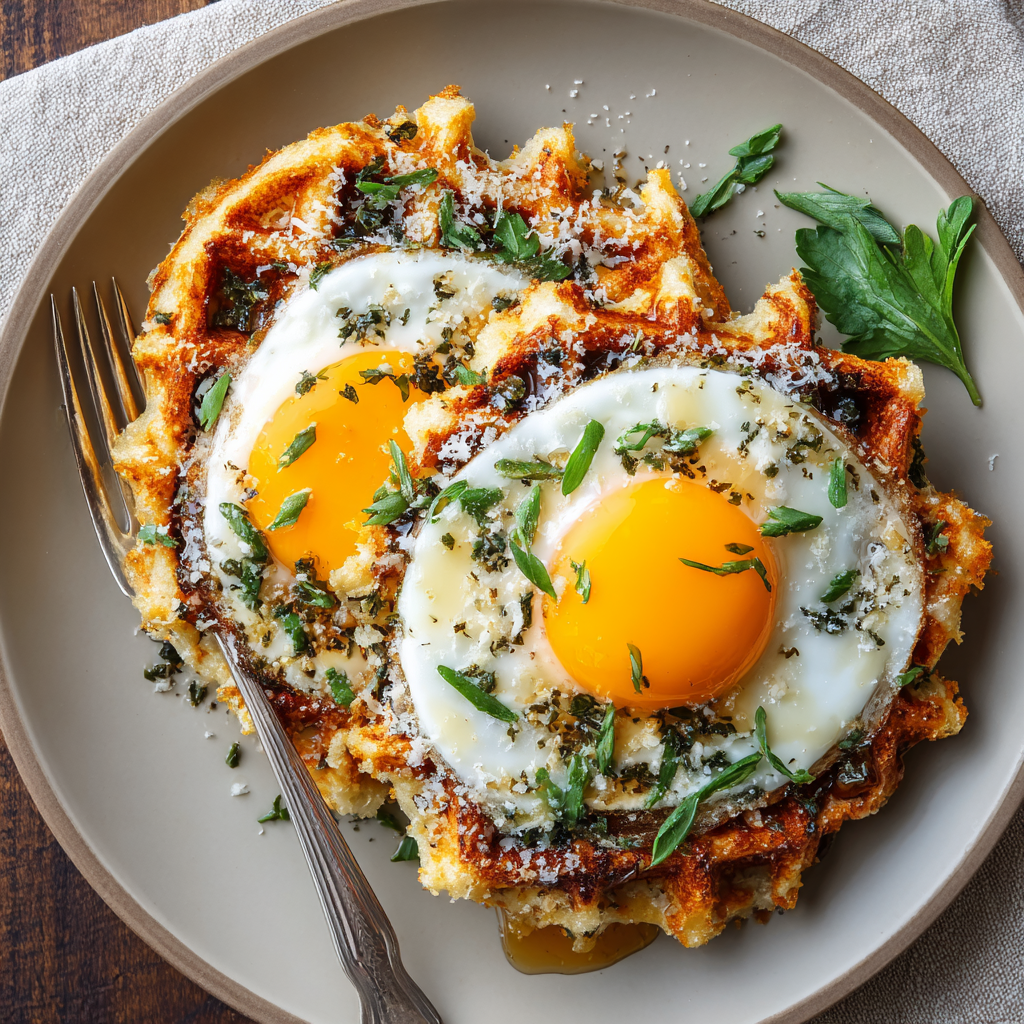
Savory Herbed Parmesan Waffles with Fried Egg & Hot Honey : Brunch with Bite
Brunch Just Got a Major Upgrade: Say Hello to Savory Waffles!
Hey there, friend! Come on in, grab an apron, and get ready to fall in love with your waffle iron all over again. If your idea of waffles starts and ends with maple syrup and whipped cream, I have the most delicious, life-changing surprise for you. We’re taking a hard left from sweet and diving headfirst into a world of savory, cheesy, herby perfection. Welcome to the glorious universe of Savory Herbed Parmesan Waffles.
Picture this: a waffle that’s incredibly crispy on the outside, thanks to a hot iron and a generous amount of Parmesan cheese. Now, imagine that same waffle, fluffy and tender on the inside, infused with the gentle kick of garlic powder and the fresh, vibrant flavor of chopped chives and parsley. Are you with me so far? Now, we crown this masterpiece with a perfectly fried egg, its golden yolk just begging to be broken, and finish it all with a drizzle of spicy-sweet hot honey. This, my friends, is brunch with bite. It’s comfort food that’s dressed to impress, a meal that’s equally perfect for a lazy Saturday morning or for showing off to your brunch squad.
This recipe is my love letter to breaking the rules and having fun in the kitchen. You don’t need any fancy skills, just a willingness to try something new and a hunger for incredible flavor. So, let’s preheat that iron and make some magic happen!
The Happy Accident That Started It All
I have to confess, the creation of these waffles was a classic “kitchen sink” moment. It was a sleepy Sunday, and I was craving something hearty for brunch. My fridge was a landscape of half-used ingredients: a nub of Parmesan, a handful of herbs wilting in their packet, and a carton of eggs. My original plan for sweet, blueberry-studded waffles just wasn’t calling to me.
I looked at that Parmesan, then at my waffle iron, and a little lightbulb went off. *What if?* I whisked the cheese and herbs right into my standard batter, crossed my fingers, and poured it in. The smell that wafted out was pure magic—savory, cheesy, and utterly intoxicating. I topped the first crispy wedge with a fried egg I’d just made, and on a whim, I drizzled it with the hot honey I keep on hand for pizza. One bite, and I was a goner. My husband, drawn into the kitchen by the aroma, took one bite and declared it my best brunch creation yet. It was one of those beautiful, unplanned moments that reminds me the best recipes aren’t always planned—they’re discovered with a little curiosity and a well-stocked fridge.
Gathering Your Flavor All-Stars
Here’s everything you’ll need to create this symphony of savory goodness. I’ve included some of my favorite chef insights and substitutions so you can make this recipe your own!
For the Savory Herbed Parmesan Waffles:
- 1½ cups all-purpose flour: This is our reliable base, giving the waffles structure. For a lighter, fluffier texture, you can swap in ½ cup of cake flour, but all-purpose works beautifully.
- 1 tablespoon baking powder: Our leavening hero! This is what gives the waffles their signature lift and fluffy interior. Make sure yours is fresh for the best rise.
- ½ teaspoon salt & ½ teaspoon black pepper: Don’t be shy with these! Salt enhances all the other flavors, and the black pepper adds a subtle, warm background note that pairs wonderfully with the cheese.
- 1 teaspoon garlic powder: This is my little secret for an instant depth of flavor. It distributes more evenly than fresh garlic in the batter, giving every single bite a cozy, savory undertone.
- 1 cup milk: The liquid that brings it all together. Any kind works—whole milk for richness, or even buttermilk for a delightful tang that complements the Parmesan.
- 2 large eggs: They bind our batter and contribute to that wonderful, tender crumb. Let them come to room temperature for a smoother, more cohesive batter.
- ¼ cup melted butter: This is the key to a rich flavor and a crispy, golden-brown exterior. For a nuttier note, try browning the butter first—it’s a game-changer!
- 1 cup freshly grated Parmesan cheese: This is non-negotiable, friends! Please, please grate your own from a block. The pre-shredded stuff contains anti-caking agents that can make it grainy and less melty. Freshly grated Parmesan will give you the best flavor and texture.
- 2 tablespoons chopped chives & 1 tablespoon chopped parsley: These fresh herbs bring a pop of color and a bright, fresh flavor that cuts through the richness. No chives? Thinly sliced green onions are a fantastic stand-in.
For the Toppings:
- 4 eggs, for frying: Sunny-side up is my go-to for that gorgeous, runny yolk sauce, but cook them to your liking!
- Hot honey: You can use a store-bought version, or easily make your own by warming ¼ cup honey with ½ tsp of red chili flakes. Let it steep for 10 minutes for the heat to infuse.
- Extra herbs and Parmesan for garnish: Because we eat with our eyes first! A little extra sprinkle makes the whole plate look restaurant-worthy.
Let’s Make Some Waffle Magic: Your Step-by-Step Guide
Ready to cook? Follow these steps, and you’ll be a savory waffle pro in no time. I’ve packed this section with all my favorite tips and hacks to ensure your success.
- Preheat Your Waffle Iron. This is step one for a reason! A properly heated iron is the secret to getting those waffles crispy from the very first second they hit the surface. If your iron has temperature settings, aim for a medium-high heat. Chef’s Hack: While it’s heating, I like to get all my ingredients measured and ready to go (this is called *mise en place*). It makes the process so smooth and relaxing.
- Combine Your Dry Ingredients. In a large bowl, whisk together the 1½ cups of flour, 1 tablespoon of baking powder, ½ teaspoon salt, ½ teaspoon black pepper, and 1 teaspoon of garlic powder. Whisking, instead of stirring, is key here—it aerates the flour and ensures the baking powder is evenly distributed, which means a consistent, fluffy rise in every waffle.
- Whisk Together Your Wet Ingredients. In a separate medium bowl, whisk the 1 cup of milk, 2 eggs, and ¼ cup of melted butter until they are perfectly combined and slightly frothy. Chef’s Tip: Make sure your melted butter has cooled slightly so it doesn’t accidentally cook the eggs when you mix them together!
- Bring the Batter Together. Pour the wet ingredients into the dry ingredients. Now, here’s the most important tip for tender waffles: mix until *just* combined. A few lumps are totally fine! Overmixing develops the gluten in the flour and will lead to tough, chewy waffles. We want fluffy, not tough.
- Fold in the Good Stuff. Gently fold in the 1 cup of freshly grated Parmesan and the chopped herbs (2 tbsp chives, 1 tbsp parsley). You’re just distributing them evenly, not beating the batter. Chef’s Insight: See that gorgeous, speckled batter? That’s the promise of flavor in every single bite.
- Cook to Golden, Crispy Perfection. Lightly grease your preheated waffle iron with a little butter or a spritz of cooking spray. Pour in the recommended amount of batter for your iron (usually about ½ to ¾ cup) and close the lid. Don’t peek for at least 3-4 minutes! Let the steam and heat do their work. The waffles are done when the steam has significantly slowed and they are a deep, golden brown and crisp. Chef’s Hack: To keep finished waffles warm and crisp, place them in a single layer on a wire rack in a 200°F (95°C) oven. This prevents them from getting soggy.
- Fry Those Eggs. While the last of the waffles are cooking, heat a non-stick skillet over medium heat with a little butter or oil. Crack in your eggs and fry them to your desired doneness. For me, sunny-side up with a runny yolk is the ultimate goal for this dish.
- Assemble Your Masterpiece! This is the fun part. Place a warm, crispy waffle on each plate. Carefully slide a fried egg on top. Drizzle everything generously with that spicy-hot honey. Finish with a final sprinkle of fresh herbs and a little extra Parmesan. You’ve just created brunch royalty.
How to Serve & Savor
Presentation is part of the fun! I love serving these waffles right away on warm plates. The contrast of textures and colors is everything. Place that golden waffle down, let the fried egg be the sunny centerpiece, and let the hot honey drizzle artfully over everything. A simple side of mixed greens with a sharp vinaigrette or some crispy roasted potatoes turns this into a full, unforgettable meal. And don’t forget the coffee or a fun brunch cocktail!
Make It Your Own: Delicious Twists & Swaps
The beauty of this recipe is its versatility. Feel free to play around!
- Bacon & Cheddar: Swap the Parmesan for sharp cheddar and fold in ½ cup of cooked, crumbled bacon for the ultimate comfort food version.
- Everything Bagel Style: Add 2 tablespoons of everything bagel seasoning to the dry ingredients for a familiar, savory, onion-y flavor bomb.
- Green Goddess: Stir in ½ cup of finely chopped spinach and swap the parsley for fresh dill for a brighter, garden-fresh take.
- Gluten-Free: No problem! Use a 1:1 gluten-free all-purpose flour blend. The results are just as crispy and delicious.
- Spicy ‘Nduja: For the adventurous, fold 2-3 tablespoons of softened ‘nduja (a spreadable spicy Italian sausage) into the batter. It’s incredible.
From My Kitchen to Yours: A Few Final Thoughts
This recipe has become a staple in our home, and it’s evolved in so many fun ways. I’ve been known to make a double batch and freeze the leftover waffles. They reheat *beautifully* in the toaster for a quick, gourmet breakfast on a busy weekday. It’s my little secret for feeling like I have my life together, even on chaotic mornings.
I also have a funny memory of the first time I served these to my niece. She looked at the savory waffle with a fried egg on top with deep suspicion, having only ever known the sweet, syrupy kind. After one tentative bite, her eyes went wide, and she promptly demanded a second one. It just goes to show you, sometimes the most surprising combinations are the most beloved. Don’t be afraid to break the mold!
Your Questions, Answered!
I’ve gotten a lot of questions about this recipe over the years. Here are the most common ones to help you out.
Q: My waffles are coming out soft and not crispy. What am I doing wrong?
A: The number one culprit for soft waffles is steam! Make sure your waffle iron is fully preheated and don’t open it too early. Also, the fat content is key—the butter and Parmesan are your friends here. Finally, placing cooked waffles directly on a wire rack (instead of a plate) in a warm oven will keep them crisp while you finish the batch.
Q: Can I make the batter ahead of time?
A: I don’t recommend it for the fluffiest results. The baking powder starts working as soon as it hits the liquid, so letting the batter sit can result in denser, less risen waffles. For a shortcut, you *can* mix the dry ingredients and the wet ingredients separately the night before, then just combine them in the morning.
Q: What’s the best way to clean a waffle iron with cheesy batter stuck on it?
A: Prevention is the best medicine! Make sure you grease the iron well. Once you’re done, unplug it and let it cool completely. The stuck-on bits will often harden and can be brushed away. For a deeper clean, wipe the plates with a damp cloth (never submerge it!). If needed, a soft-bristled brush (like a clean toothbrush) can help dislodge stubborn cheese.
Q: I don’t have a waffle iron. Can I make these as pancakes?
A> Absolutely! The flavor will be just as delicious. Simply cook the batter on a buttered griddle or non-stick skillet over medium heat, flipping once bubbles form on the surface and the edges look set. You’ll miss the crispy nooks and crannies, but you’ll still have a phenomenal savory pancake.

Savory Herbed Parmesan Waffles with Fried Egg & Hot Honey : Brunch with Bite
Description
Upgrade your brunch with these crispy-on-the-outside, fluffy-on-the-inside waffles loaded with Parmesan and fresh herbs. Top with a fried egg and a drizzle of hot honey for the ultimate savory breakfast.
Ingredients
-
1½ cups all-purpose flour
-
1 tbsp baking powder
-
½ tsp salt
-
½ tsp black pepper
-
1 tsp garlic powder
-
1 cup milk
-
2 large eggs
-
¼ cup melted butter
-
1 cup freshly grated Parmesan
-
2 tbsp chopped chives
-
1 tbsp chopped parsley
Toppings:
-
4 eggs, fried (sunny-side up recommended)
-
Hot honey (store-bought or homemade: ¼ cup honey + ½ tsp red chili flakes)
-
Extra herbs and Parmesan for garnish
Instructions
-
Preheat waffle iron to medium-high and lightly grease.
-
Mix dry ingredients: In a large bowl, whisk flour, baking powder, salt, pepper, and garlic powder.
-
Mix wet ingredients: In another bowl, whisk milk, eggs, and melted butter.
-
Combine: Pour wet into dry and stir just until combined. Lumps are okay.
-
Fold in Parmesan and herbs gently.
-
Cook waffles: Pour batter into preheated waffle iron (½–¾ cup per waffle). Cook until golden brown and crisp (steam should slow).
-
Fry eggs in a skillet to your liking.
-
Assemble: Place waffle on a plate, top with fried egg, drizzle with hot honey, and garnish with extra herbs and Parmesan.
Tips & Variations:
-
Keep waffles crisp: Place finished waffles on a wire rack in a 200°F (95°C) oven while cooking the rest.
-
Pancake option: Cook on a greased skillet if no waffle iron is available.
-
Flavor variations: Add bacon, cheddar, spinach, or everything bagel seasoning.
-
Gluten-free: Use a 1:1 gluten-free flour blend.
Nutrition
- Calories: 480 cal Per Serving
- Fat: 28g
- Carbohydrates: 36g
- Protein: 19g
Nutritional Information (Per Serving – Estimated)
This is a rough estimate and can vary based on specific ingredients and toppings used.
Calories: 480 | Fat: 28g | Carbs: 36g | Protein: 19g | Fiber: 2g
Final Thoughts: Your New Brunch Awaits
And just like that, you’ve done it. You’ve unlocked a whole new level of brunch brilliance and given your waffle iron a thrilling new purpose. As you sit down to that beautiful plate—the crisp, cheesy waffle, the glorious runny yolk, the spicy-sweet drizzle of honey—I hope you take a moment to savor not just the incredible flavor, but the joy of creating something truly special.
These Savory Herbed Parmesan Waffles are more than just a recipe; they’re an invitation to be a little adventurous, to break the breakfast rules, and to turn an ordinary morning into a memorable occasion. They prove that the most satisfying meals often come from a simple, happy accident and a willingness to try something new.
I hope this recipe becomes a cornerstone in your brunch repertoire, a dish you make for yourself on a quiet morning and for the people you love on celebratory days. It’s a reminder that the best moments are often shared around the table, over food that’s made with a dash of creativity and a whole lot of heart.
So, here’s to crispy edges, runny yolks, and brunch that’s anything but boring. You’ve got this.
Happy cooking!
With love from my kitchen to yours,
Olivia




