

Crockpot Cilantro Lime Chicken Tacos
🌮 Crockpot Cilantro Lime Chicken Tacos: Your New Taco Night BFF 🥑
Hey there, fellow foodie! Let’s talk about taco night. You know the drill: ground beef, seasoning packets, the same old toppings… yawn. But what if I told you there’s a way to keep that taco night magic alive without the weekday hassle? Enter these Crockpot Cilantro Lime Chicken Tacos—your new meal prep hero and flavor game-changer. 🎉
Picture this: juicy chicken thighs (or breasts, no judgment here) slow-cooked in a zesty bath of lime, garlic, and warm spices until they’re fall-apart tender. Shred ’em up, toss in a handful of fresh cilantro, and pile it all into a warm tortilla with a confetti of sweet corn salsa and a drizzle of creamy avocado crema. It’s like a fiesta in your mouth, and your slow cooker does 90% of the work. 🌶️✨
This recipe isn’t just dinner—it’s a lifestyle upgrade. Perfect for chaotic weeknights, lazy Sundays, or even feeding a hangry crowd. Plus, leftovers? They’re basically gold. Stuff ’em into quesadillas, top a salad, or eat straight from the fridge at 2 a.m. (we’ve all been there). Let’s get cooking!
🔥 The Taco Disaster That Started It All
Okay, story time. Years ago, I hosted a “Taco Tuesday” for my college buddies. Ambitious? Yes. Prepared? Not even close. I tried grilling fancy marinated steak, but my tiny apartment kitchen turned into a smoke bomb. Fire alarm blaring, tacos charred, and my ego… well, let’s just say it was extra crispy. 🙃
That’s when I vowed to create a foolproof taco recipe—something even my smoke-detector-phobic self could nail. Enter the slow cooker. I tossed in chicken, lime, whatever spices I had, and crossed my fingers. Four hours later? Tender, tangy, melt-in-your-mouth goodness. My friends devoured it, and I’ve tweaked this recipe ever since. Moral of the story: sometimes kitchen fails lead to legendary wins. 💪
📝 What You’ll Need (And Why It All Matters)
- 2 lbs chicken breasts or thighs – Thighs = extra juicy, breasts = leaner. Your call! (Pro tip: Use both for texture contrast!)
- Juice of 2 limes – Fresh is best, but bottled works in a pinch. No limes? Lemon + orange zest adds a fun twist. 🍊
- 3 garlic cloves, minced – Pre-minced jarred garlic? I won’t tell. (But fresh packs a bigger punch.)
- 1 tsp cumin – The earthy backbone of the spice mix. Smoked cumin? Even better.
- 1/2 tsp chili powder – Adjust to your heat tolerance. Ancho chili powder = next-level depth.
- 1/4 cup chopped fresh cilantro – Hate cilantro? Swap in parsley or omit. (But really, try it—it’s a game-changer!)
For the Corn Salsa:
- 1 cup corn – Fresh-off-the-cob, frozen, or canned. Char it in a pan for smokiness! 🔥
- 1/4 cup diced red onion – Soak in ice water for 10 mins to mellow the bite.
For the Avocado Crema:
- 1 ripe avocado – Squeeze the stem end—if it gives slightly, it’s ready. Rock-hard? RIP guac dreams. 🥑
- 1/4 cup sour cream or Greek yogurt – Yogurt adds tang; sour cream = richness. Vegan? Coconut cream works!
👩🍳 Let’s Get Cooking: Slow Cooker Sorcery
- Prep the Chicken:Dump the chicken into your Crockpot (no need to sear—we’re keeping it lazy). Add lime juice, garlic, cumin, chili powder, onion powder, salt, and pepper. Pour in 1/4 cup water or broth to keep things saucy. Give it a lazy stir. ✅
Chef’s Hack: Throw in the lime rinds for extra citrusy vibes. Just fish ’em out later!
- Slow Cook to Perfection:Cook on LOW for 6–7 hours or HIGH for 3–4. Chicken’s done when it shreds easily with a fork. (Poke it at 5 hours—no peeking before!)
Pro Tip: If you’re home, give it a stir halfway. If not? No stress. The slow cooker’s got your back. ⏰
- Shred & Season:Remove chicken, shred with two forks (or slap it in a stand mixer with the paddle attachment—genius hack!). Mix in chopped cilantro. Taste. Need more lime? Salt? Now’s the time! 🌿
- Make the Salsa & Crema:While the chicken cooks, toss corn salsa ingredients together. For the crema, blend avocado, sour cream, lime juice, and salt until smooth. (Add a splash of water if too thick.)
- Assemble & Devour:Char your tortillas on the stove for 20 seconds each side. Layer chicken, salsa, crema, and extra cilantro. Squeeze lime. Cue the mariachi music! 🎶
🍽️ How to Serve Like a Pro
Presentation matters, amigos! Grab a platter and let those colors pop. Warm tortillas in a cloth-lined basket, pile the chicken high in a bowl, and serve salsa + crema in cute little jars. Add lime wedges and extra cilantro for garnish. For sides? Keep it simple: black beans, chips + guac, or a crisp cucumber salad. Margaritas optional (but highly encouraged). 🍹
🔄 Mix It Up: 5 Delicious Twists
- Pulled Pork Edition: Swap chicken for pork shoulder. Cook low + slow for 8 hours. Boom—Cuban-inspired tacos!
- Vegan Vibes: Use jackfruit + veggie broth. Skip crema or use cashew cream. 🌱
- Spicy AF: Add diced jalapeños to the Crockpot or a dash of hot sauce to the crema.
- Breakfast Tacos: Top with fried eggs and pickled onions. Brunch = sorted.
- Sheet Pan Nachos: Spread chips, load with chicken + cheese, broil. Dip into crema. 💥
👨🍳 Chef’s Notes: Taco Tales & Truths
Fun fact: This recipe started as a “clean out the fridge” experiment. No cilantro? Used basil once (weird, but oddly good). Forgot lime juice? Subbed orange juice + vinegar. The lesson? Tacos are forgiving. 😅
Over the years, I’ve learned:
- Don’t skip the corn salsa—it adds crunch and sweetness that balances the spice.
- Avocado crema > regular guac. It’s creamier and clings to the taco better.
- Leftover chicken freezes like a dream. Portion it into bags for future you!
❓ FAQs: Taco Troubles, Solved
Q: My chicken turned out dry. Help!
A: You might’ve overcooked it. Stick to 6 hours on LOW. Thighs are more forgiving than breasts. Also, keep the liquid—don’t drain it after cooking!
Q: Can I make this ahead?
A: Absolutely! Cook the chicken 3 days ahead. Store salsa + crema separately. Assemble day-of.
Q: My avocado crema turned brown. 😭
A: Press plastic wrap directly onto the surface to limit air exposure. A squeeze of lime helps too!
Q: Not a slow cooker fan. Can I use an Instant Pot?
A: Yes! High pressure for 15 mins, natural release. Shred, then sauté with juices to thicken.
🌿 The Flavor Alchemy: Why This Combo Works So Well
The magic of these tacos lies in how the ingredients work together at a chemical level. Let’s break down the science behind this flavor powerhouse:
1. Citrus + Chicken = Tenderness
-
The acid in lime juice (pH ~2.0) gently breaks down chicken proteins, resulting in that perfect pull-apart texture
-
Marinating in lime for hours creates deeper flavor penetration than quick marinades
-
Pro Tip: Adding lime zest boosts aromatic oils without extra liquid
2. Cilantro’s Love-Hate Chemistry
-
For the 80% who taste cilantro’s bright freshness: aldehydes like decenal create that signature “herbal lime” flavor
-
The 20% who taste soap? Blame genetics (OR6A2 gene variants) – swap in parsley or basil
3. Spice Synergy
-
Cumin’s cuminaldehyde compounds pair perfectly with lime’s limonene
-
Chili powder’s capsaicin balances citrus acidity with gentle heat
-
Garlic’s allicin forms new flavor compounds during slow cooking
Texture Playbook:
-
Shredded chicken (surface area) holds more sauce than chunks
-
Corn salsa adds juicy crunch against creamy avocado
-
Charred tortillas provide smoky contrast
⏲️ Time-Saving Hacks for Maximum Flavor
This recipe is already easy, but these pro tricks make it foolproof:
1. The Overnight Shortcut
-
Dump all chicken ingredients in crockpot insert the night before
-
Refrigerate (saves 10 mins in the AM)
-
Cook time stays the same – no food safety issues!
2. 15-Minute Corn Salsa Upgrades
-
Smoky: Toss corn in 1/2 tsp smoked paprika before mixing
-
Tropical: Add diced mango or pineapple
-
Crunchy: Stir in jicama or diced cucumber last minute
3. Avocado Crema That Won’t Brown
-
Blend in 1 tsp lime juice + store in airtight container with plastic wrap touching the surface
-
OR use 1/2 avocado + 1/2 frozen peas (same creaminess, stays green for days)
4. Freezer-to-Feast Options
-
Frozen chicken? Add 1 extra hour on LOW
-
Pre-mixed spice packets? Combine:
-
2 tsp cumin
-
1 tsp chili powder
-
1 tsp garlic powder
-
1/2 tsp salt
-
5. Leftover Reinventions
-
Taco Salad: Layer over greens with tortilla strips
-
Quesadillas: Add cheese and crisp in skillet
-
Pasta Sauce: Thin with broth over noodles
🌮 Taco Bar 101: Building the Ultimate Spread
Turn taco night into an interactive feast with these pro hosting tips:
The Tortilla Matrix
| Type | Best For | Prep Trick |
|---|---|---|
| Corn | Authentic crunch | Double-layer to prevent tearing |
| Flour | Picky eaters | Brush with butter + garlic powder before warming |
| Lettuce | Low-carb | Use butter lettuce cups for structure |
Topping Stations
-
Crunch Zone:
-
Radish slices
-
Toasted pepitas
-
Crushed tortilla chips
-
-
Creamy Corner:
-
Avocado crema
-
Cotija cheese
-
Lime crema (sour cream + zest)
-
-
Heat Ladder:
-
Mild: Pickled jalapeños
-
Medium: Chipotle hot sauce
-
Extreme: Habanero salsa
-
Drink Pairings
-
Classic: Margaritas with tajín rims
-
Kid-Friendly: Agua fresca (blend watermelon + lime)
-
Beer: Crisp Mexican lager
Pro Host Move:
-
Set up ingredients in order: tortillas → protein → toppings
-
Label spicy items clearly
-
Provide both forks and extra napkins (it’ll get messy!)
Fun Fact: The average American eats 154 tacos per year – this recipe might bump your stats!
Print
Crockpot Cilantro Lime Chicken Tacos
- Total Time: 35 minute
Description
Born from a smoky kitchen mishap and a college hunger pang, these tacos are everything taco night should be—easy, exciting, and endlessly customizable. Juicy chicken slow-cooked in lime and garlic, topped with sweet corn salsa and a creamy avocado drizzle… this isn’t just dinner, it’s your new weeknight ritual. Whether it’s Tuesday or just a craving, this one’s got your back (and your taste buds).
Ingredients
For the Chicken:
-
2 lbs chicken breasts or thighs (or both!)
-
Juice of 2 limes
-
3 garlic cloves, minced
-
1 tsp cumin
-
½ tsp chili powder
-
½ tsp onion powder
-
Salt & pepper to taste
-
¼ cup water or broth
-
¼ cup chopped fresh cilantro
For the Corn Salsa:
-
1 cup corn (fresh, frozen, or canned)
-
¼ cup red onion, diced (soaked in ice water)
For the Avocado Crema:
-
1 ripe avocado
-
¼ cup sour cream or Greek yogurt
-
Juice of ½ lime
-
Salt to taste
Instructions
-
Load Up the Crockpot
Add chicken, lime juice, garlic, spices, and liquid. Stir gently. Optional: toss in used lime rinds for extra citrus aroma. -
Cook Until Tender
Set on LOW for 6–7 hrs or HIGH for 3–4 hrs. Check at the 5-hour mark to avoid overcooking. -
Shred & Finish
Shred chicken with forks (or mixer paddle!). Stir in cilantro. Adjust lime and salt as needed. -
Make the Sides
Mix corn and onion for salsa. Blend avocado, sour cream, lime juice, and salt for crema. -
Assemble & Serve
Char tortillas, layer with chicken, salsa, and crema. Add extra cilantro and a lime wedge. Fiesta time!
Notes
-
Add jalapeños or tajin to salsa for a spicy punch.
-
Use lettuce wraps for a low-carb version.
-
Leftovers? Make nachos, bowls, or quesadillas.
-
Vegan? Use jackfruit and coconut yogurt.
- Prep Time: 15 mins
- Cook Time: 6–7 hrs (low) or 3–4 hrs (high)
Nutrition
- Calories: 350 per taco
- Fat: 18g
- Carbohydrates: 12g
- Fiber: 4g
- Protein: 27g
📊 Nutrition (Per Taco):
Calories: 340 | Protein: 25g | Carbs: 18g | Fat: 20g | Fiber: 4g
Note: Stats vary based on toppings and tortilla type. Go light on crema for fewer cals!
There you have it, amigos—taco night saved, one slow cooker at a time. Now go forth and feast! 🌮✨
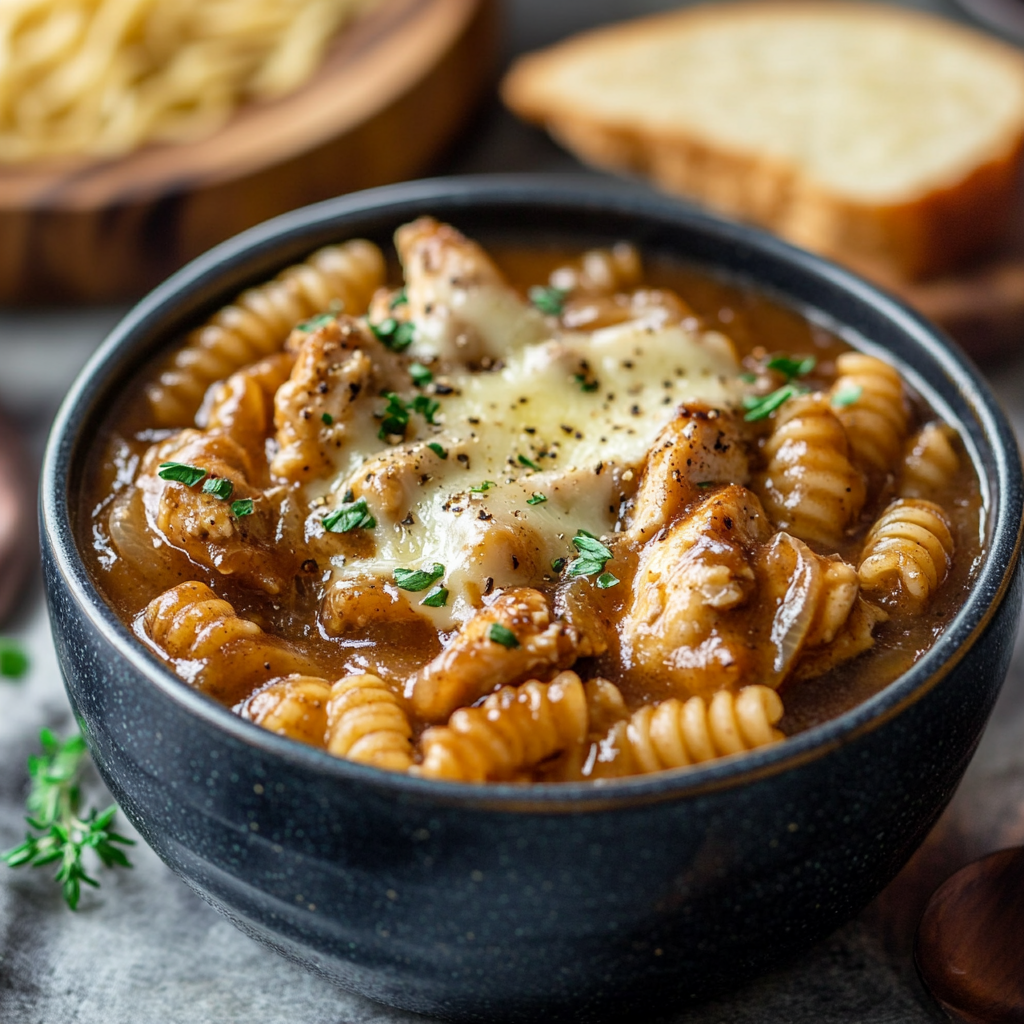
Slow Cooker French Onion Chicken Pasta
When Summer Meets Cozy: French Onion Chicken Pasta (No Sweat, All Flavor) 🌞🧅
Hey, friend! Chef Jamie here, ready to drop a recipe that’s about to become your warm-weather hero. Picture this: It’s 85 degrees outside, your AC’s working overtime, and you’re craving something that tastes like a hug but won’t turn your kitchen into a sauna. Enter: Slow Cooker French Onion Chicken Pasta. 🎉
This dish is my love letter to lazy summer evenings where you want to feel fancy without the fuss. We’re talking tender chicken slow-cooked in a broth that’s basically liquid gold—sweet caramelized onions, a splash of balsamic for tang, and that unmistakable French onion soup vibe. Toss it with pasta and a mountain of melty Gruyère? *Chef’s kiss.* It’s like your favorite sweater, but edible and totally seasonally appropriate. 😉
And the best part? Your slow cooker does 90% of the work. No babysitting onions on the stove (we’ve all cried enough tears over those), no oven blasting heat, and no judgment if you eat it straight from the pot. (Your secret’s safe with me.) Let’s turn that “I’m too hot to cook” energy into “I’m a culinary genius” confidence. Ready? Aprons optional, enthusiasm required. 🔥
The Time I (Almost) Burned Down My Dorm… For French Onion Soup
Let me take you back to my college days. Picture a 19-year-old me, armed with a $10 thrift-store slow cooker and a desperate craving for French onion soup. My dorm’s “kitchen” was a microwave and a hot plate, but I was determined. I caramelized onions in that wobbly pan like my life depended on it—until the fire alarm went off. 🚨
Turns out, “low and slow” doesn’t mix with “impatient hungover roommates.” But when that smoky, sweet broth finally hit my tongue? Magic. Fast-forward 15 years, and this pasta is my redemption arc. All the soul-warming flavor of that soup, minus the fire department’s phone number on speed dial. Pro tip: Always unplug your hot plate *before* sprinting outside in pajama pants. Trust me. 😂
What You’ll Need (And Why It Works)
- 1.5 lbs boneless, skinless chicken breasts or thighs → Thighs = richer flavor, breasts = leaner. No wrong answers here! (Psst: Frozen works in a pinch—just add 30 mins to cook time.)
- 2 large yellow onions, thinly sliced → Their natural sugars caramelize in the slow cooker—no babysitting! Swap in red onions for a bolder bite.
- 3 cups low-sodium beef or chicken broth → Beef = deeper “French onion” vibes. Chicken keeps it lighter. Need it veggie? Mushroom broth slays.
- 2 tbsp balsamic vinegar → Secret weapon! Adds tangy depth. No balsamic? 1 tbsp Worcestershire + 1 tsp sugar works.
- 1 tsp garlic powder → Fresh garlic can bitter during long cooks. Powder stays mellow and sweet.
- 8 oz short pasta → Rotini’s ridges trap sauce. Penne’s chic. Shells? Adorable. Cook al dente—they’ll soak up broth later!
- 1 cup shredded Gruyère or Swiss → Gruyère’s nutty, Swiss’s milder. Both melt like a dream. Dairy-free? Violife’s plant-based Gruyère is shockingly good.
Let’s Build Flavor Town (Population: You)
- Layer It & Forget It: Dump onions, broth, balsamic, garlic powder, thyme, and chicken into your slow cooker. Season chicken generously with salt and pepper. Chef Hack: No time to slice onions? Grab pre-sliced from the salad bar! (I won’t tell.)
- Slow Cooker Sorcery: Cook on LOW 6-7 hrs or HIGH 3-4 hrs. Chicken’s done when it shreds easily with a fork. Pro Tip: If your slow cooker runs hot, check at 5 hrs. Overcooked chicken = sad, dry chicken.
- Shred & Stir: Use two forks to shred chicken right in the pot. Stir to let those oniony juices coat every strand. Taste! Need more salt? A pinch of red pepper flakes? Make it yours.
- Pasta Party: Cook pasta separately to al dente (it’ll finish in the broth). Drain, then add to the slow cooker with shredded cheese. Stir until gooey and glorious. Chef Hack: Reserve ½ cup pasta water to adjust creaminess!
Plating: Easy Elegance
Scoop into shallow bowls. Top with extra cheese (duh), fresh thyme, and cracked black pepper. Garlic bread? Essential for sauce-swiping. For ✨bougie brunch vibes✨, fry an egg per bowl—runny yolk + cheesy pasta = life-changing. Pair with a crisp green salad dressed in lemon to cut the richness. 🥗
Mix It Up! 5 Delicious Twists
- Mushroom Lovers: Add 8 oz sliced creminis with the onions. Umami explosion!
- Protein Swap: Use shredded rotisserie chicken (add last 30 mins) or chickpeas for vegetarian.
- Spicy Kick: Stir in 1 tbsp sriracha + garnish with pickled jalapeños.
- Creamy Dreamy: Mix ¼ cup Greek yogurt or coconut milk into the cheese.
- Low-Carb: Swap pasta for zucchini noodles (add raw at the end).
Confessions of a Cheese Addict
True story: The first time I tested this, I used so much Gruyère it could’ve doubled as a fondue. My spouse walked in, saw the cheese mountain, and said, “Are we…okay?” 😅 Lesson learned: Cheese quantity is a personal journey. Start with 1 cup, then add more if your soul demands it. Also, this recipe evolved from a soup—add extra broth if you miss the slurp!
Your Questions, My Answers
Q: Can I make this ahead?
A: Absolutely! Cook the chicken/onion mix, refrigerate for 3 days, then add pasta/cheese when reheating. Freeze (without pasta) for up to 3 months.
Q: Why’s my pasta mushy?
A: Overcooked pasta + slow cooker heat = sad noodles. Cook pasta al dente, and add it just before serving. If it thickens too much, stir in broth or milk.
Q: Can I use fresh thyme?
A: Yes! Use 1 tbsp fresh instead of dried. Add half at the start, half at the end for bright herbiness.
🧅 The Science of Slow-Cooked Onions: Why This Dish Works
Caramelizing onions in a slow cooker might sound like witchcraft, but it’s pure food science. Here’s why this method delivers better flavor than stovetop:
1. The Maillard Reaction (Without the Work)
Onions contain natural sugars that caramelize at 230°F–a temperature your slow cooker maintains perfectly. Over 6+ hours:
-
Enzymes break down starches into maltose (hello, sweetness!)
-
Sulfur compounds mellow into rich, savory notes
-
No risk of burning = no bitter aftertaste
2. Chicken’s Two-Stage Transformation
-
First 3 hours: Connective tissue (collagen) dissolves into gelatin, basting the meat from within
-
Final hours: Muscle fibers relax, absorbing the onion-infused broth like a sponge
3. Pasta’s Perfect Finish
Cooking noodles separately prevents:
-
Starch overload (which turns broth gluey)
-
Mushy texture (slow cookers can’t control pasta doneness)
-
Pro Tip: Stirring in cheese off heat prevents clumping and keeps it silky
Flavor Hack: Add 1 tbsp tomato paste with the onions—its glutamates amplify umami without tasting “tomato-y.”
🍝 Texture Masterclass: How to Build the Perfect Bite
This dish thrives on contrasts. Here’s how to nail every element:
The Chicken
-
Shredding Technique: Use two forks to pull with the grain first, then against for tender strands
-
Juice Lock-In: Let chicken rest 10 minutes post-shredding to reabsorb juices
The Onions
-
Slice Thickness: ¼” rings hold shape but melt into sauce
-
Doneness Test: They should ribbon off a spoon like jam (if too firm, cook 1 more hour)
The Pasta
-
Al Dente Rule: Cook 2 minutes less than package says—it’ll finish in the hot broth
-
Shape Matters:
-
Cavatappi: Spirals trap cheese
-
Pappardelle: Wide ribbons feel luxurious
-
Orzo: Kid-friendly and spoonable
-
The Cheese
-
Grater Tip: Freeze Gruyère for 20 minutes first—it shreds cleaner
-
Layering: Mix half into pasta, reserve half for topping to create gooey pockets
Pro Move: Add ½ cup reserved pasta water + 1 tsp cornstarch for a glossy, clingy sauce.
⏳ Meal Prep Magic: 5 Ways to Reinvent Leftovers
This recipe makes brilliant next-day transformations:
1. French Onion Strata
-
Layer leftovers with beaten eggs and bread cubes
-
Bake at 375°F for 25 mins = savory bread pudding
2. Stuffed Peppers
-
Fill bell peppers with mixture + extra cheese
-
Roast at 400°F for 20 mins
3. Creamy Pasta Bake
-
Mix with ¼ cup cream, top with panko
-
Broil 5 mins for crispy crust
4. Soup Remix
-
Add 2 cups broth + splash of sherry
-
Simmer 10 mins = French onion soup 2.0
5. Breakfast Hash
-
Sauté with diced potatoes
-
Top with fried eggs = brunch hero
Storage Pro Tips:
-
Fridge: Lasts 4 days in airtight containers
-
Freezer: Portion into bags (sans pasta), freeze 3 months
-
Reheating: Add splash of broth when microwaving to revive creaminess
Time-Saving Hacks:
-
Use pre-sliced onions (they caramelize just fine!)
-
Batch-cook chicken and freeze in broth
-
Keep powdered balsamic vinegar for quick flavor boosts
Fun Fact: The pasta absorbs 30% more flavor overnight—making day-two portions even better!
Print
Slow Cooker French Onion Chicken Pasta
- Total Time: 30 minute
Description
Some dishes just feel like a warm hug—this is one of them. Born from a failed college soup experiment and perfected with time (and fewer fire alarms), this French Onion Chicken Pasta is everything: savory, cheesy, tangy, and melt-in-your-mouth tender. It’s summer comfort in a bowl, with zero oven time and all the soul. Let your slow cooker work the magic while you kick back—this one’s as easy as it is elegant.
Ingredients
-
1.5 lbs chicken breasts or thighs (boneless, skinless)
-
2 large yellow onions, thinly sliced
-
3 cups low-sodium beef or chicken broth
-
2 tbsp balsamic vinegar
-
1 tsp garlic powder
-
1 tsp dried thyme
-
Salt & pepper to taste
-
8 oz short pasta (rotini, penne, or shells)
-
1 cup shredded Gruyère or Swiss cheese
Instructions
-
Layer & Cook
Add onions, broth, vinegar, garlic powder, thyme, and chicken to your slow cooker. Season generously. Cook on LOW 6–7 hrs or HIGH 3–4 hrs. -
Shred the Chicken
Once tender, shred chicken right in the cooker. Stir well to coat with oniony broth. -
Add Pasta & Cheese
Cook pasta separately until just al dente. Drain and stir into the pot with shredded cheese until melty and glossy. -
Serve It Up
Spoon into bowls, top with more cheese, thyme, and pepper. Garlic bread = mandatory.
Notes
-
Beef broth = deeper flavor, chicken broth = lighter.
-
Add mushrooms with onions for umami magic.
-
For spice, toss in sriracha or jalapeños.
-
Want it creamier? Stir in Greek yogurt or coconut milk.
-
Low-carb? Use zucchini noodles—add raw at the end.
- Prep Time: 10 mins
- Cook Time: 6–7 hrs (low) or 3–4 hrs (high)
Nutrition
- Calories: ~410 per serving
- Fat: 19g
- Carbohydrates: 28g
- Fiber: 2g
- Protein: 32g
Nutrition (Per Serving):
Calories: 460 | Protein: 30g | Carbs: 35g | Fat: 22g | Fiber: 3g
Note: Stats include Gruyère. Reduce cheese or use low-fat for lighter versions.

Crockpot Dill Pickle Chicken Sandwiches
🥒 The Pickle-Lover’s Dream Sandwich You’ll Obsess Over 🥪
Hey, fellow foodies! Chef Jamie here, back with another recipe that’s equal parts quirky and delicious. Today, we’re talking about a sandwich that’s been blowing up my DMs ever since I posted a sneak peek on Instagram: Crockpot Dill Pickle Chicken Sandwiches. Imagine tender, juicy chicken soaked in tangy pickle juice and ranch seasoning, piled high on a toasted bun with cool, crunchy coleslaw and those iconic pickle chips we all hoard in our fridge. It’s the kind of meal that’ll make you text your friends: “Why didn’t we think of this sooner?!”
Now, I know what you’re thinking: “Pickle juice… in a sandwich?!” Trust me, I was skeptical too—until I took that first bite. The briny, garlicky, herb-infused chicken melts in your mouth, while the coleslaw adds a refreshing contrast. And let’s be real: the extra pickles on top? Non-negotiable. They’re like the confetti at this flavor party.
This recipe is perfect for busy days, pickle obsessives, or anyone who wants to jazz up their slow cooker game. Plus, it’s a guaranteed conversation starter. (Pro tip: Double the batch if you’re feeding a crowd. These disappear FAST.) Let’s dive in!
🍗 How a Pickle Jar Sparked a Kitchen Revolution 🌟
Picture this: It’s 3 AM during my college days, and I’m raiding the fridge after a late shift at the campus diner. All I’ve got left? A sad-looking chicken breast, half a jar of pickles, and a packet of ranch seasoning from a pizza delivery. Desperation (and hunger) led me to toss them all into my $5 thrift-store crockpot. Fast-forward eight hours… and BAM. The most gloriously tangy, pull-apart chicken I’d ever tasted.
That Frankenstein experiment became my secret hangover cure, study fuel, and eventually, my go-to potluck dish. Friends would beg me to bring “that weird pickle chicken thing.” Years later, after adding coleslaw and toasting the buns? *Chef’s kiss*. It’s proof that kitchen magic often starts with a “What the heck, let’s try it” moment.
📝 What You’ll Need (+ Pro Swaps!)
- 2 lbs boneless chicken breasts or thighs – Thighs = extra juicy, breasts = leaner. No chicken? Try turkey or cauliflower for a veggie twist!
- 1 cup dill pickle juice – That leftover brine in your jar? Liquid gold. No pickles? Use ½ cup vinegar + ½ cup water + 1 tbsp salt + dill.
- 1 packet ranch seasoning – DIY hack: 2 tbsp dried buttermilk powder + 1 tsp each garlic powder, onion powder, dill, parsley, chives, salt, pepper.
- 2 cloves garlic, minced – Fresh is best, but ½ tsp garlic powder works in a pinch.
- ½ tsp dried dill – Double this if you’re using fresh dill!
- Salt & pepper – Go easy—pickle juice and ranch pack salt already.
- Toasted buns – Brioche for richness, whole grain for crunch, or lettuce wraps for low-carb.
- Coleslaw – Store-bought saves time, but my quick fix: shredded cabbage + mayo + apple cider vinegar + honey.
- Dill pickle chips – The more, the merrier. Bread-and-butter pickles add sweetness if you’re into that!
👩🍳 Let’s Get Cooking: Slow Cooker Sorcery 🧙♂️
- Prep Your Chicken: Pat chicken dry (better sear isn’t needed here—we’re keeping it lazy!). Place in crockpot. Chef’s hack: No need to thaw frozen chicken—just add 1 extra hour of cook time.
- Mix the Briny Goodness: Pour pickle juice over chicken. Sprinkle ranch seasoning, garlic, dill, pepper. Pro tip: Want more heat? Add red pepper flakes or a dash of hot sauce!
- Slow Cook to Perfection: Cook on LOW 6-7 hrs or HIGH 3-4 hrs. Chicken should shred easily with forks. Watchpoint: Don’t overcook, or it’ll dry out—check at 6 hrs!
- Shred & Soak: Use two forks to shred chicken right in the crockpot. Stir to coat in juices. Let it sit 15 mins—this is where flavor gets next-level.
- Toast Those Buns: Butter buns and toast in a skillet until golden. Game-changer: Rub with a garlic clove for extra zing!
- Build Your Masterpiece: Pile chicken on buns, top with coleslaw and pickles. Pro move: Add a drizzle of ranch or sriracha mayo if you’re feeling fancy.
🌟 How to Serve: Crunch is Key! 🌟
Presentation matters, friends! Layer that chicken high, let the coleslaw peek out the sides, and fan pickle chips on top like edible confetti. Serve with:
- 🥒 Extra pickles (duh)
- 🍟 Crispy fries or kettle chips
- 🍺 An ice-cold lager or sparkling lemonade
🔄 Mix It Up: 5 Flavor Twists 🔄
- Spicy Pickle Passion: Use spicy dill pickles + add jalapeños to the slaw.
- BBQ Ranch Fusion: Mix ¼ cup BBQ sauce into shredded chicken.
- Greek Style: Swap ranch for Greek seasoning + add feta and tzatziki.
- Gluten-Free: Use GF ranch seasoning + gluten-free buns.
- Keto-Friendly: Skip the bun, serve over lettuce with avocado.
👨🍳 Chef Jamie’s Final Thoughts 👩🍳
This recipe has come a long way from my dorm-room days! My biggest lesson? Embrace the brine. I once tried “healthifying” it with low-sodium pickles—big mistake. The salt is essential for tenderizing the chicken! Another fail? Forgetting to buy buns and serving it on stale hot dog rolls. (We’ve all been there.)
Now, it’s my most-requested dish for game days and picnics. My buddy Dave claims he’s eaten it weekly since 2019—true pickle dedication. Want to make it yours? Add bacon, swap the slaw for sauerkraut, or go wild with fried pickles on top. The kitchen’s your playground!
❓ FAQs: Your Questions, Answered ❓
Q: Can I use pickle juice that’s been sitting in my fridge for months?
A: If it’s cloudy or smells funky, toss it. Fresh brine (within 2 months) works best!
Q: My chicken turned out dry. Help!
A: You likely overcooked it. Next time, check at 6 hrs (low) or 3 hrs (high). Thighs are more forgiving!
Q: Can I make this vegetarian?
A: Yes! Use cauliflower florets or jackfruit. Cook time drops to 4 hrs on low.
Q: What if I don’t have a crockpot?
A: Instant Pot it! 25 mins on high pressure + 10 min natural release. Shred and enjoy!
The Science Behind Pickle-Brined Chicken: Why This Sandwich Works
Pickle juice isn’t just for hangover cures – it’s a culinary powerhouse that transforms ordinary chicken into something extraordinary. Here’s why this method delivers such incredible results:
1. The Brine Breakdown
Pickle juice is essentially a flavored brine containing water, vinegar, salt, and spices. When chicken soaks in this acidic environment for hours:
-
The salt denatures proteins, allowing them to retain more moisture during cooking
-
Vinegar tenderizes the meat at a molecular level
-
Garlic and dill flavors penetrate deep into the fibers
2. The Ranch Factor
That packet of ranch seasoning does triple duty:
-
Buttermilk powder adds subtle tanginess
-
Dehydrated garlic/onion create umami depth
-
Herbs provide aromatic complexity that complements the pickles
3. Texture Alchemy
The slow cooker method ensures:
-
Collagen breaks down into gelatin (that luscious mouthfeel)
-
Proteins coagulate gently without squeezing out moisture
-
Shredded meat soaks up flavorful juices like a sponge
Pro Tip: For even more tender chicken, use a 50/50 mix of pickle juice and chicken broth. The extra gelatin from bones enhances the texture!
� Building the Ultimate Flavor Experience: Layer by Layer
This sandwich is all about balanced contrasts. Here’s how each component plays a crucial role:
The Foundation: The Bun
-
Brioche: Buttery richness stands up to tangy chicken
-
Pretzel roll: Salt crust amplifies pickle flavors
-
Ciabatta: Chewy texture holds juices without getting soggy
The Star: The Chicken
Optimal shredding technique:
-
Use two forks back-to-back
-
Pull along the grain first
-
Then shred against the grain for perfect bite-sized pieces
The Crunch Factor: Coleslaw
The ideal slaw for this sandwich:
-
3 parts shredded cabbage
-
1 part shredded carrot
-
Dressing ratio: 2:1 mayo to apple cider vinegar
-
1 tsp honey to balance acidity
The Payoff: Pickle Chips
Arrange them like flavor landmines:
-
Layer some underneath the chicken
-
Place whole chips visibly on top
-
Dice some into the slaw for surprise bursts
Pro Move: Make a quick pickle mayo by blending 2 tbsp pickle juice into ½ cup mayo!
🕒 Meal Prep Magic: How This Recipe Saves Your Week
This isn’t just a sandwich – it’s a kitchen workhorse. Here’s how to maximize it:
Batch Cooking Guide
-
Cook 4 lbs chicken (double everything else)
-
Shred and store in 3 containers:
-
1 for immediate sandwiches
-
1 for fridge (lasts 4 days)
-
1 for freezer (lasts 3 months)
-
5 Next-Day Transformations
-
Pickle Chicken Tacos: Add cotija cheese and pickled onions
-
Loaded Fries: Top crispy fries with chicken, cheese, and ranch
-
Protein Bowl: Layer over greens with quinoa and avocado
-
Pasta Salad: Mix with cold pasta, peas, and extra dill
-
Breakfast Hash: Sauté with potatoes and top with fried eggs
Time-Saving Hacks
-
Use pre-shredded coleslaw mix
-
Keep individual ranch seasoning packets in your pantry
-
Save pickle juice in a mason jar (lasts 2 months refrigerated)
Pro Tip: The chicken actually tastes better on day 2 as flavors continue to meld!
Print
Crockpot Dill Pickle Chicken Sandwiches
- Total Time: 30 minute
Description
This sandwich started as a midnight fridge raid in my college days—just a chicken breast, leftover pickle juice, and a ranch packet. The result? A juicy, pull-apart pickle-infused chicken that became my ultimate comfort food. Fast-forward to today, and it’s a picnic favorite that brings people together. Tangy, creamy, crunchy, and crazy simple—this sandwich is proof that magic can come from what’s left in your fridge.
Ingredients
-
2 lbs boneless chicken (thighs = juicier, breasts = leaner)
-
1 cup dill pickle juice (brine from jar)
-
1 packet ranch seasoning (or homemade mix)
-
2 garlic cloves, minced
-
½ tsp dried dill
-
Salt & pepper (go easy—brine is salty!)
-
Toasted buns (brioche, whole grain, or lettuce wraps)
-
Coleslaw (store-bought or simple: cabbage + mayo + vinegar + honey)
-
Dill pickle chips (for topping)
Instructions
-
Load the Crockpot
Place chicken in slow cooker. Pour pickle juice over it. Sprinkle in ranch, garlic, dill, pepper. -
Slow Cook
Cook on LOW 6–7 hrs or HIGH 3–4 hrs. Check at 6 hrs—don’t overdo it! -
Shred & Soak
Shred chicken with forks in the pot. Let it sit 15 mins to absorb all that briny goodness. -
Toast & Build
Toast buttered buns until golden. Layer with shredded chicken, coleslaw, and plenty of pickle chips.
Notes
-
Boost flavor: Rub buns with garlic post-toast.
-
Spice it up: Add red pepper flakes or hot sauce to the crockpot.
-
Go wild: Add bacon, fried pickles, or sriracha mayo on top.
-
Low-carb tip: Skip the bun, serve over lettuce with avocado.
- Prep Time: 10 mins
- Cook Time: 6–7 hrs (low) / 3–4 hrs (high)
Nutrition
- Calories: 390
- Fat: 24g
- Carbohydrates: 4g
- Fiber: 1g
- Protein: 28g
📊 Nutrition (Per Sandwich, Without Bun)
- Calories: 390
- Protein: 28g
- Carbs: 4g
- Fat: 24g
- Fiber: 1g

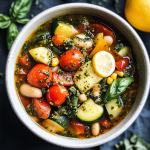
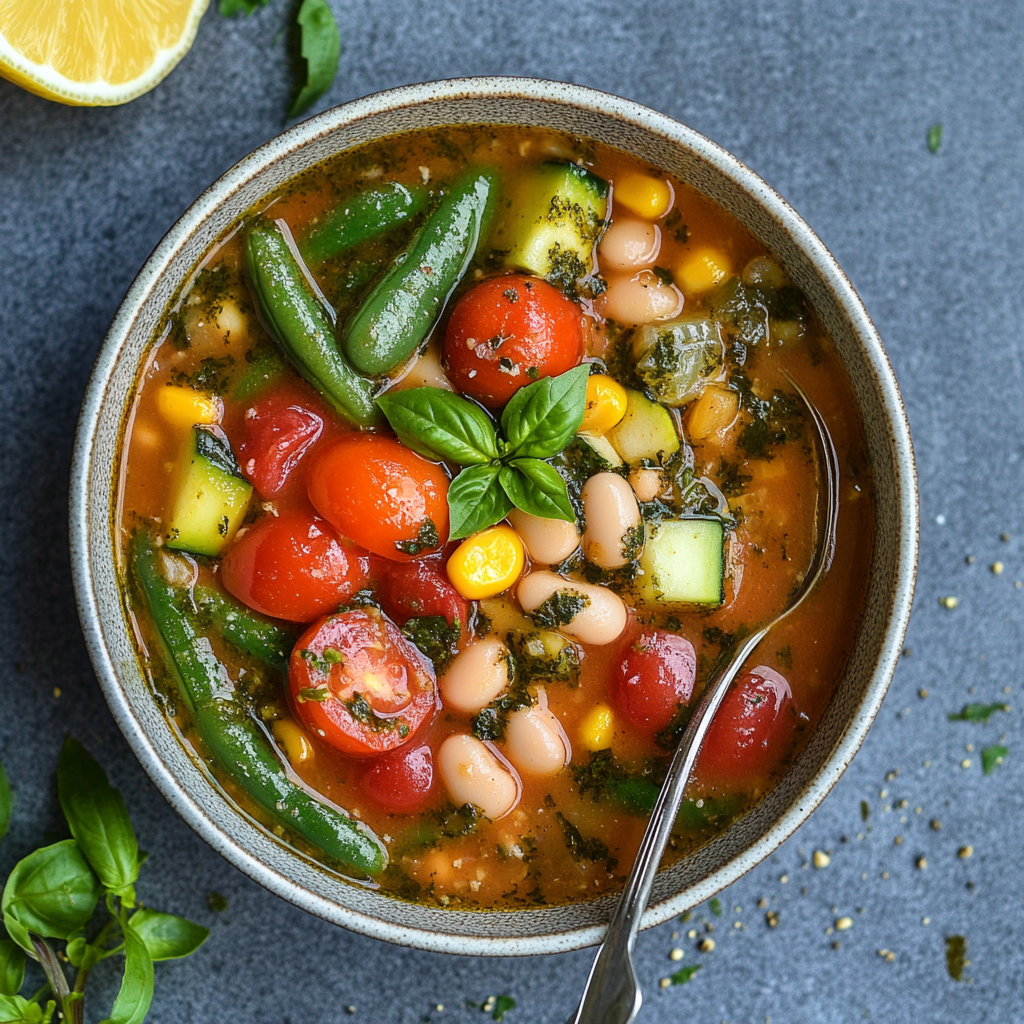
Summer Garden Veggie & White Bean Stew
🥣 Summer Garden Veggie & White Bean Stew: Your New Favorite Summer Bowl 🌿
Picture this: golden sunlight streaming through your kitchen window, a basket of just-picked veggies from the garden, and the lazy hum of a slow cooker working its magic. That’s the vibe we’re chasing with this Summer Garden Veggie & White Bean Stew. It’s not just a recipe—it’s a love letter to summer’s juiciest tomatoes, sweetest corn, and all those garden gems begging to be tossed into a pot.
As a chef, I live for dishes that do the heavy lifting for you. This stew simmers low and slow, letting the flavors mingle like old friends at a backyard BBQ. And the best part? You’ve got time to squeeze in a pool day or nap in a hammock while it cooks. Finish it with a bright swirl of pesto and lemon, and suddenly, you’ve turned humble veggies into a meal that’ll make your taste buds do a happy dance. Trust me—this bowl tastes like sunshine.
👩🍳 The Summer I Learned Veggies Could Be Cool
Let me take you back to my 12th summer, when my Nonna’s garden was my playground. I’d rather have been skateboarding than picking zucchini, but she’d bribe me with lemonade and stories of her childhood in Sicily. One sweltering afternoon, she handed me a wooden spoon and said, “Make something that tastes like August.”
What emerged was a chunky, over-salted mess… but also magic. We tossed in everything from sun-warmed cherry tomatoes to beans from a dusty pantry jar. When she floated pesto on top “like green confetti,” I realized veggies weren’t just sidekicks—they could be rockstars. Now, every time I make this stew, I taste that first fearless kitchen adventure. (And yes, Nonna still laughs about the “salt avalanche” incident.)
📝 What You’ll Need: Fresh, Flexible, & Full of Flavor
- Zucchinis (2 small): Summer’s MVP! Swap with yellow squash or eggplant if you’re feeling funky.
- Cherry tomatoes (1 cup): Burst-with-sunshine energy. No cherries? Dice any ripe tomato—juices are welcome here!
- Green beans (1 cup): Snappy texture queens. Haricot verts or asparagus work too.
- Corn kernels (1 cup): Sweetness bombs! Fresh-cut or frozen—no judgment.
- White beans (1 can): Creamy protein heroes. Cannellini or Great Northern beans are my ride-or-dies.
- Vegetable broth (4 cups): Flavor foundation. Use low-sodium to control the salt scene.
- Onion & garlic: The dynamic flavor duo. Yellow onion for sweetness, red for zing—your call.
- Italian seasoning (1 tsp): Lazy chef’s herb garden. No blend? Use ½ tsp oregano + ½ tsp thyme.
- Basil pesto (¼ cup): The grand finale! Store-bought is fine, but homemade? *Chef’s kiss*.
- Lemon juice (1 whole): Brightness booster. Lime works in a pinch!
🍅 Chef’s Tip: Got a sad bell pepper or wilted spinach? Toss ’em in! This stew is a veggie rehab center.
👩🍳 Let’s Get Simmering: Your No-Stress Roadmap
Step 1: Chop Party!
Dice zucchini into ½” chunks (no precision needed—rustic rules!). Halve tomatoes, snap green beans, and mince garlic. Pro tip: Use a corn holder to safely slice kernels off the cob. (Learned that the hard way after a 2019 ER trip…)
Step 2: Dump & Dream
Add all veggies, beans, broth, onion, garlic, and seasoning to your slow cooker. Stir just once—we’re not making pottery here. Set it on LOW for 6-7 hours (ideal for flavor melding) or HIGH for 3-4 hours (for hangry emergencies).
Step 3: The Big Finish
When veggies are fork-tender (but not mush!), stir in pesto and lemon juice. Taste! Need more zing? Add lemon zest. Too thin? Mash a few beans against the pot to thicken it up.
Step 4: Plate Like a Pro
Ladle into wide bowls—show off those colors! Drizzle extra pesto, crack black pepper, and add a lemon wedge for flair. Serve with garlic bread for dipping or a gooey grilled cheese on the side.
🌿 Serving Vibes: How to Make It Instagram-Worthy
Grab shallow bowls—this stew deserves to be seen! Layer a handful of arugula at the base for peppery contrast, then ladle stew over it. Top with microgreens, toasted pine nuts, and a basil leaf crown. For the ’gram? Place a crusty bread slice half-submerged like it’s lounging in a veggie Jacuzzi. #BowlGoals
✨ Mix It Up: 5 Twists to Keep Things Interesting
- Mediterranean: Add olives, artichokes, and feta. Swap pesto for tapenade.
- Spicy Southwest: Stir in chipotle powder, top with avocado, and use lime juice.
- Protein Power: Add shredded rotisserie chicken or crispy tofu cubes.
- Vegan Magic: Use vegan pesto and a sprinkle of nutritional yeast.
- Pasta Lover: Stir in 1 cup cooked orzo or ditalini pre-serving.
👩🍳 Notes from My Kitchen (and Heart)
This recipe evolved from my “clean out the fridge” desperation in 2018. I once accidentally used cinnamon instead of Italian seasoning—shockingly, it wasn’t terrible! These days, I make it weekly during tomato season. My partner insists on adding a Parmesan rind to the broth (do it—it’s genius). Pro tip: Double the batch and freeze portions for winter—it’s like eating June in January.
❓ Reader Q&A: Stew Secrets Revealed
Q: Can I make this faster on the stove?
A: Absolutely! Sauté onions/garlic first, add broth and veggies, simmer 25-30 mins. Add beans last 10 mins.
Q: My stew’s too watery—help!
A: Two fixes: 1) Remove lid last 30 mins to evaporate liquid. 2) Blend ½ cup stew, then stir back in.
Q: Can I use dried beans?
A: Yes! Soak 1 cup dried beans overnight, then add 1 extra cup broth. Cook time remains the same.
🌿 The Story Behind the Stew: A Chef’s Summer Love Affair
There’s something alchemical about summer produce—the way a sun-ripened tomato bursts with juice, or how zucchini transforms from bland to buttery when cooked low and slow. This stew isn’t just a recipe; it’s a celebration of that magic. As a chef, I’ve spent years chasing the perfect balance of brightness and depth in vegetarian dishes, and this one hits all the notes: sweet corn, earthy beans, and the herbaceous punch of pesto.
The inspiration came from my summers in Italy, where ribollita (a Tuscan white bean stew) was a staple. But I wanted something lighter, brighter—a dish that tasted like a farmer’s market in peak season. The key? Layering textures and flavors. Cherry tomatoes dissolve into the broth, creating a subtle sweetness, while green beans stay crisp-tender for contrast. The white beans? They’re the silent heroes, thickening the stew naturally and adding a protein boost.
Why This Stew Works for Summer:
-
No Oven Required: Slow cooker-friendly means no heating up the kitchen.
-
Flexible Ingredients: Forgotten veggies in the fridge? Toss them in.
-
Make-Ahead Magic: Flavors deepen overnight, making it perfect for meal prep.
A tip I learned from a Sicilian nonna: Add a Parmesan rind to the pot (remove it before serving). It infuses the broth with umami richness without overpowering the veggies. And that pesto swirl? It’s not just garnish—the fat in the olive oil carries flavors to your taste buds like a tiny flavor ferry.
Fun fact: The first time I tested this recipe, I accidentally used coconut milk instead of broth (sleep-deprived chef life). Surprisingly, it worked! The tropical twist was delicious, but I’ll save that version for another day.
🥄 The Ultimate Guide to Customizing Your Stew
This recipe is a canvas—here’s how to make it your own:
Veggie Swaps & Add-Ins
-
Zucchini Alternatives: Try yellow squash, diced eggplant, or even spiralized carrots for color.
-
Tomato Tricks: No cherries? Use heirloom tomatoes or 1 tbsp tomato paste for depth.
-
Greens Galore: Stir in chopped kale or spinach 10 minutes before serving for a nutrient boost.
Protein Power-Ups
-
For Omnivores: Shredded rotisserie chicken or crispy pancetta add savory depth.
-
Plant-Based: Crispy tofu or tempeh crumbles mimic meaty texture.
-
Legume Love: Swap white beans for chickpeas or lentils (adjust cooking time).
Global Flavor Twists
-
Mexican Fiesta: Add cumin, smoked paprika, and top with avocado.
-
Thai-Inspired: Swap pesto for coconut milk and red curry paste.
-
French Twist: Herbes de Provence + a dollop of Dijon mustard.
Texture Play
-
Crunchy Toppings: Toasted breadcrumbs, pumpkin seeds, or fried shallets.
-
Creamy Elements: A swirl of Greek yogurt or cashew cream.
Pro Tip: If you’re short on time, use frozen veggies (except tomatoes—they get mushy). The stew will still taste fresh thanks to the bright finishing touches.
❤️ Why This Stew Will Become Your Summer Staple
Beyond the flavors, this stew solves real-life problems:
-
Heat Wave Hero: No standing over a stove—set it and forget it.
-
Garden Glut Solution: Overwhelmed by zucchini? This stew devours them.
-
Crowd-Pleaser: Vegan? Gluten-free? Check and check.
A Note on Leftovers:
-
Store in the fridge for up to 4 days. The beans will absorb more broth, so add a splash of water when reheating.
-
Freeze for 3 months. Thaw overnight and revive with fresh lemon juice.
Summer Garden Veggie & White Bean Stew
- Total Time: 35 minute
Description
One golden summer, my Nonna taught me that vegetables could be more than sidekicks—they could steal the show. This stew was born from a garden brimming with fresh picks and a kitchen filled with love. Toss in what’s fresh, simmer slowly, and finish with a swirl of pesto. It’s simple, nourishing, and tastes like sunshine in a bowl. Let it simmer while you enjoy summer’s best moments—this one’s got soul.
Ingredients
-
2 small zucchinis, diced
-
1 cup cherry tomatoes (or any ripe tomato)
-
1 cup green beans, trimmed
-
1 cup corn kernels (fresh or frozen)
-
1 can white beans (cannellini or Great Northern), drained
-
4 cups vegetable broth (low-sodium preferred)
-
1 small onion, diced
-
2 garlic cloves, minced
-
1 tsp Italian seasoning (or ½ tsp each oregano & thyme)
-
¼ cup basil pesto
-
Juice of 1 lemon
-
Salt & pepper to taste
Instructions
-
Prep the Goods
Chop all your vegetables and garlic. No need for perfection—chunky and rustic works! -
Slow Cooker Magic
Add everything except pesto and lemon to a slow cooker. Stir gently. Cook on LOW for 6–7 hrs or HIGH for 3–4 hrs. -
The Finishing Touch
Stir in pesto and lemon juice. Taste and adjust seasoning. Mash a few beans in the pot to thicken if needed. -
Serve & Savor
Spoon into bowls, top with extra pesto, cracked pepper, and a lemon wedge. Great with garlic bread or a grilled cheese!
Notes
1. Layered Flavor Tip:
Sauté the onion and garlic in a little olive oil before adding to the slow cooker for a richer, caramelized flavor.
2. Bean Boost:
If using canned beans, rinse them to reduce sodium. Want extra creaminess? Mash half the beans before adding them in.
3. Texture Hack:
Add zucchini and green beans halfway through cooking if you like them firmer. This prevents them from going too soft.
4. Brightness Tip:
Add a pinch of lemon zest with the juice for an extra citrus pop that brightens the whole dish.
5. Pesto Upgrade:
Mix pesto with a little olive oil before drizzling to help it float more beautifully on the stew.
6. Freezer Friendly:
Cool stew completely before freezing. Portion into airtight containers. It reheats beautifully—just add a splash of broth when warming.
7. Herb Freshness:
Top with fresh basil or parsley just before serving. It adds color and an extra hit of garden-fresh aroma.
- Prep Time: 15 mins
- Cook Time: 6–7 hrs (low) or 3–4 hrs (high)
Nutrition
- Calories: 280 per serving
- Fat: 10g
- Carbohydrates: 36g
- Fiber: 9g
- Protein: 11g
Final Chef’s Secret: Serve it at room temperature on scorching days—it’s just as delicious, and the flavors pop even more. Pair with a crisp rosé or sparkling lemonade for the ultimate summer meal.
📊 Nutrition Per Serving (Because Knowledge is Power)
Calories: 280 | Protein: 10g | Carbs: 35g | Fat: 10g | Fiber: 7g
*Note: Stats include pesto. Vegan? Use oil-based pesto and subtract 20 calories.
Summer Garden Veggie & White Bean Stew
🌞 Summer Garden Veggie & White Bean Stew: Cozy Vibes, Sunshine Flavors
Picture this: It’s late August, and your garden is basically throwing zucchini at you like it’s auditioning for a MLB team. Tomatoes are blushing red faster than you can say “caprese salad,” and your countertop looks like a farmers’ market exploded. That’s exactly when this Summer Garden Veggie & White Bean Stew struts into your kitchen like a rockstar. 🎸
This isn’t just another “clean out the fridge” recipe—it’s a love letter to summer’s peak. We’re talking tender zucchini, snappy green beans, sweet corn, and juicy tomatoes all slow-dancing in a light broth with creamy white beans. And just when you think it can’t get better? BAM—a bright swirl of pesto and lemon juice turns the whole thing into a symphony. 🍋
Perfect for those days when you’d rather be sipping iced tea on the porch than babysitting a stove. Throw everything in the crockpot, go live your best summer life, and come home to a kitchen that smells like a Tuscan farmhouse. Let’s make those veggies shine!
👵 Grandma’s Porch & The Stew That Started It All
This recipe takes me straight back to my Grandma Rosa’s screened porch in ’98. I was 12, “Spice World” was on repeat, and her garden was so overgrown it looked like Jack’s beanstalk had a midlife crisis. One sweltering afternoon, she handed me a colander and said, “Mija, we’re making magic.”
We picked zucchini bigger than my forearm, beans dangling like emerald earrings, and tomatoes still warm from the sun. As the crockpot bubbled away, she told stories about making this stew during her honeymoon in a tiny Sicilian village. Turns out, “magic” tasted like basil pesto stirred in with her wooden spoon and lemon juice squeezed straight from the tree. 🍋 That day, I learned two things: 1) Vegetables taste better when you’re covered in garden dirt, and 2) The best recipes aren’t written—they’re stolen from feisty Italian grandmothers.
📝 Your Veggie Dream Team (Plus Swaps!)
- Zucchini x2: Summer’s MVP! Swap with yellow squash or eggplant.
- Cherry tomatoes (1 cup): Bursting with umami. No fresh? Use ½ can fire-roasted tomatoes.
- Green beans (1 cup): Snap-tastic texture. Frozen work in a pinch!
- Corn (1 cup): Sweetness anchor. Fresh-cut kernels > frozen > canned.
- White beans (15oz): Creamy protein. Cannellini or Great Northern—your call!
- Onion + garlic: Flavor base. Shallots work for a gentler kick.
- Vegetable broth (4 cups): Use low-sodium to control salt levels.
- Italian seasoning (1 tsp): Oregano-basil-parsley mafia. Make your own blend!
- Pesto (¼ cup): The secret weapon! Vegan? Use nutritional yeast pesto.
- Lemon juice (1 whole): Brightness booster. Lime works in emergencies. ⚡
Chef’s Whisper: “This stew is the ultimate fridge clean-out—toss in that half-bell pepper or lonely carrot!”
👩🍳 Let’s Get Simmering! (Crockpot Sorcery Inside)
Step 1: Chop party!
Dice zucchini into ½” chunks—they’ll hold shape but get melt-y tender. Halve tomatoes (pro tip: place between lids and slice through the middle for speed!). Onion? Small dice unless you want big bites. Garlic? Smash with your knife—channel your inner chef rage. 😤
Step 2: Crockpot assembly line
Layer veggies EXCEPT pesto/lemon in the pot: zucchini → tomatoes → beans → corn → onion → garlic → broth. Why? Heartier veggies on bottom catch more heat. Sprinkle Italian seasoning like confetti!
Step 3: Let time work its magic
Low (6-7hrs) for depth, High (3-4hrs) if you’re hangry. Critical check: At 1hr left, test a zucchini—should yield but not mush. Too firm? Give it 30 more mins.
Step 4: The grand finale
Stir in pesto and lemon juice OFF HEAT. Why? High temps mute their bright flavors. Taste—needs zing? Add lemon zest. Too thin? Mash some beans against the pot to thicken.
🍴 Serving: Bowl Hugs Required
Ladle into wide bowls—you want those colors to shine! Top with extra pesto swirls, cracked pepper, and basil confetti. Serve with grilled cheese dippers (cheddar + sourdough = 🤤) or garlic-rubbed toast. For fancy nights, add parm crisps or a drizzle of chili oil. Pro move: Chill leftovers and blend into a garden gazpacho!
🔄 5 Ways to Remix Your Stew
- Protein Power: Add shredded rotisserie chicken or Italian sausage
- Spicy Sunset: Stir in harissa or red pepper flakes with pesto
- Vegan Vibes: Swap pesto for 2 tbsp miso + ¼ cup nutritional yeast
- Herb Garden: Swap Italian seasoning for herbes de Provence
- Creamy Dream: Stir in ½ cup coconut milk for curried flair
📖 Chef’s Notebook: Confessions & Lessons
True story: I once forgot the white beans. The horror! I ended up blending cannellinis into the broth, creating a velvety base that’s now my go-to. Moral? Mistakes make magic. Over the years, this stew’s been:
- Cooked in a dorm room microwave (not recommended)
- Served over polenta at my sister’s wedding
- Eaten straight from the pot while binge-watching The Bear
It’s evolved, but the soul remains—a big, veggie-packed hug.
❓ Reader Q&A: Stew-pid Questions, Smart Answers
Q: Can I make this faster?
A: Absolutely! Instant Pot version: Sauté onion/garlic 3 mins, add all except pesto/lemon. High pressure 8 mins, quick release.
Q: My stew’s too watery!
A: Two fixes: 1) Remove lid last 30 mins to evaporate liquid, or 2) Mix 1 tbsp cornstarch + 2 tbsp cold water, stir in.
Q: Pesto alternatives?
A: Try sun-dried tomato paste, chimichurri, or even a dollop of goat cheese!
Q: Freezer-friendly?
A: Yes! Freeze pre-pesto/lemon. Thaw, reheat, then add fresh citrus/herbs.
The Art of Layering Flavors – Why Order Matters in Slow Cooking
Ever wonder why grandma’s stew always tastes deeper than yours? It’s all about layering.
The Crockpot Hierarchy of Ingredients
-
Dense Veggies (Zucchini, Carrots, Potatoes) – Go on the bottom where heat concentrates.
-
Beans & Tomatoes – Middle layer to absorb surrounding flavors.
-
Delicate Veggies (Corn, Green Beans) – Top to prevent mushiness.
-
Aromatics (Onion, Garlic, Herbs) – Always on top—their volatile oils perfume the whole dish as steam rises.
Pro Tip: For Instant Pot version, reverse it—aromatics first (sautéed), then delicate veggies on top.
The Science of Brightness – How Acid & Fat Transform Stew
This stew’s magic lies in the last-minute additions:
Why Add Pesto & Lemon Juice AFTER Cooking?
-
Heat destroys fresh herbs’ vibrancy—basil turns brown, lemon juice turns bitter.
-
Fat-soluble flavors in pesto (garlic, pine nuts) “bloom” when stirred in warm broth, no cooking needed.
-
Acid (lemon) balances sweetness from corn/tomatoes—taste and adjust just before serving.
Chef’s Hack: No pesto? Swirl in 1 tbsp miso + ¼ cup olive oil for umami richness.
Texture Rescue Tactics – Fixing Soggy, Watery, or Mushy Stew
Problem: Too Watery?
-
Fix 1: Remove lid last 30 mins to evaporate liquid.
-
Fix 2: Mash ¼ of beans against the pot—their starch thickens naturally.
Problem: Veggies Too Soft?
-
Next time: Add delicate veggies (green beans) during the last hour of cooking.
Problem: Bland?
-
Boost with: A Parmesan rind while simmering, or finish with 1 tsp fish sauce (trust us).
5 Next-Level Variations to Try
1. Mediterranean Feast
-
Add 1 cup chopped artichokes + kalamata olives
-
Swap pesto for tapenade
2. Spicy Coconut Curry
-
Use coconut milk instead of broth
-
Stir in 1 tbsp red curry paste + lime juice
3. Italian Wedding Style
-
Add mini meatballs (or vegan “meat” balls)
-
Finish with grated Pecorino
4. Rusty’s Ribollita Remix
-
Stir in torn kale + day-old bread last 10 mins
-
Top with poached eggs
5. Smoky BBQ Twist
-
Add 1 tsp smoked paprika + 2 tbsp BBQ sauce
-
Garnish with pickled jalapeños

Summer Garden Veggie & White Bean Stew
- Total Time: ~7 hours
Description
Some recipes smell like home—this one feels like it. Packed with zucchini, tomatoes, green beans, corn, and creamy white beans, this slow-simmered stew is a tribute to late-summer abundance and the magic of Grandma Rosa’s garden. A swirl of pesto and lemon brightens each spoonful like a Sicilian breeze. Whether you’re cooking for family or feeding your soul, this one-pot wonder is the definition of comfort with color.
Ingredients
-
2 medium zucchinis, diced
-
1 cup cherry tomatoes (or ½ can fire-roasted)
-
1 cup green beans, chopped
-
1 cup corn (fresh, frozen, or canned)
-
1 can (15 oz) white beans, rinsed
-
1 small onion, diced
-
3 garlic cloves, smashed
-
4 cups low-sodium vegetable broth
-
1 tsp Italian seasoning
-
¼ cup pesto
-
Juice of 1 lemon
Instructions
-
Prep the veggies: Dice zucchini, halve tomatoes, chop beans, smash garlic.
-
Layer in crockpot: Add all veggies and broth (except pesto and lemon). Sprinkle with seasoning.
-
Cook: Low for 6–7 hrs or high for 3–4. Check zucchini in last hour—it should be tender.
-
Finish: Stir in pesto and lemon juice off heat. Adjust flavor with zest, salt, or mashed beans for thickness.
Notes
Ladle into wide bowls. Top with extra pesto, cracked pepper, and fresh herbs. Serve with grilled sourdough or cheesy toast. Bonus: chill leftovers for a garden gazpacho remix.
- Prep Time: 15 minutes
- Cook Time: 6–7 hours (low)
Nutrition
- Calories: 280 Per 1.5 cups
- Fat: 9g
- Carbohydrates: 34g
- Fiber: 7g
- Protein: 9g
Final Tip: The Leftover Makeover
Day 1: Classic stew
Day 2: Blend with broth for garden gazpacho
Day 3: Toss with pasta as primavera sauce
Remember: Great stews, like good friendships, get better with time. Now go forth and simmer with confidence!
📊 Nutrition (Because Knowledge Is Power)
Per serving (1.5 cups): 280 cals • 9g protein • 34g carbs • 9g fat • 7g fiber
Low sodium • Vegan adaptable • Gluten-free • High in vitamin C & iron
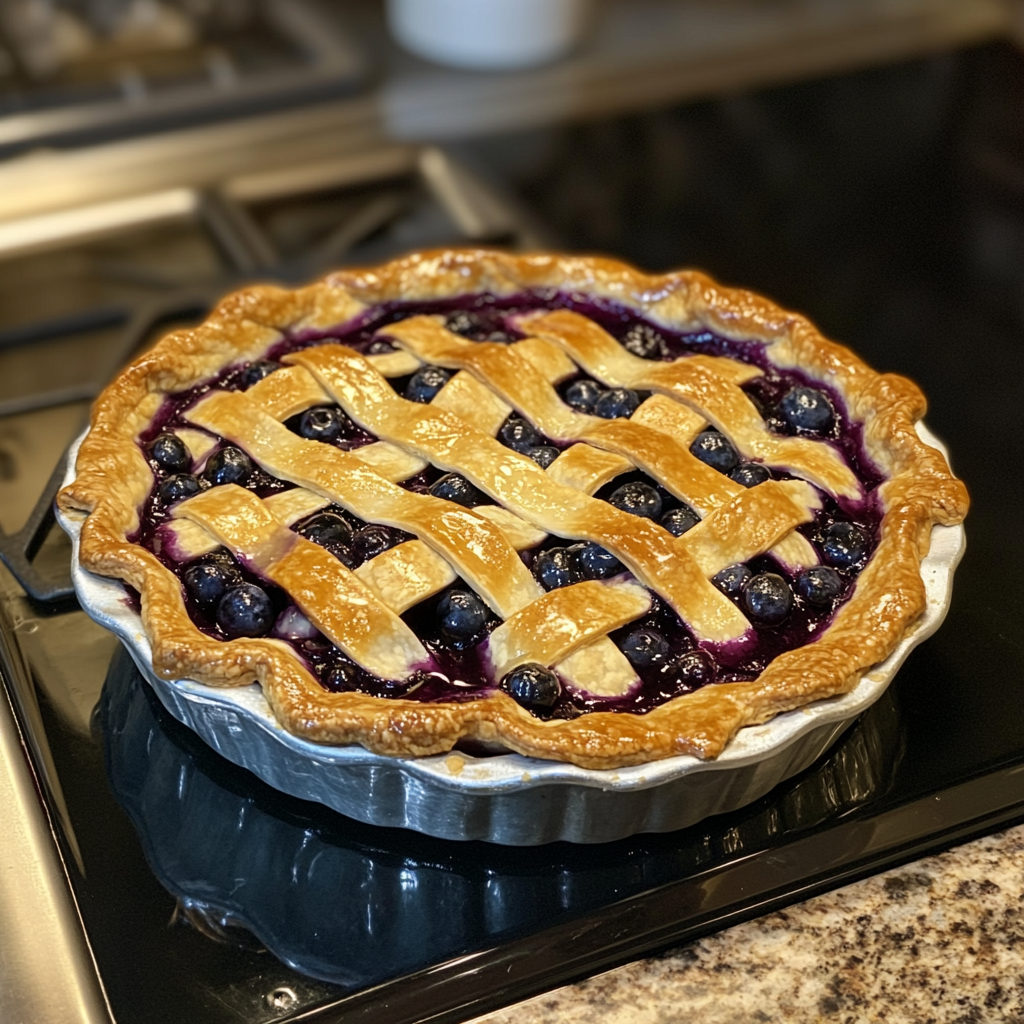
Blueberry Pie Recipe
🍁 The Ultimate Blueberry Pie Recipe: Summer’s Sweetest Hug in a Crust
Hey there, pie lovers! Chef Jamie here, ready to spill the secrets to my all-time favorite summer dessert: a juicy, jewel-toned blueberry pie that’s like biting into a sun-warmed berry straight from the farm. Picture this—a buttery, flaky crust hugging a filling so vibrant it practically hums with blueberry magic. Whether you’re a baking newbie or a pastry pro, this recipe is your ticket to becoming the MVP of picnics, potlucks, and “just because” dessert nights. Let’s turn those plump berries into a pie that’ll have everyone begging for seconds (and the recipe!).
👩🍳 Why This Pie Tastes Like Childhood Summers
Let me take you back to my 12th birthday. My grandma, queen of all things baked, handed me a bucket and said, “Pies aren’t made in kitchens—they start in berry patches.” We spent the morning at Miller’s Farm, staining our fingers purple and debating the perfect berry-to-sugar ratio. Fast-forward to present day: I still add an extra handful of berries “for luck” (and because I’ll never forget how Grandma winked when the juice bubbled up through the lattice crust). This recipe? It’s equal parts nostalgia and delicious science.
🛒 Your Pie-Building Toolkit: Ingredients & Pro Hacks
- 5 cups fresh blueberries – Look for firm berries with that dusty “bloom” coating (nature’s freshness seal!). Chef’s swap: Frozen work great—just thaw and pat dry!
- ¾ cup granulated sugar – Balances tartness without overpowering. Sweet tip: Reduce to ½ cup if your berries are super ripe!
- ¼ cup cornstarch – Our thickening MVP. Allergy alert: Swap with tapioca flour for clearer filling.
- 1 tbsp lemon juice + zest – Brightens flavors like sunshine through kitchen windows.
- Double pie crust – Homemade = bragging rights, store-bought = smart shortcut!
🥧 Pie-Making 101: Let’s Get Buttery
- Preheat to 400°F – Hot oven = flaky layers! Pro tip: Slide a baking sheet onto the lower rack to catch drips.
- Toss filling ingredients – Gently mix until berries glisten like violet marbles. Secret weapon: Let mixture sit 10 mins to draw out juices.
- Roll & dock bottom crust – Press into pie plate, then prick with fork to prevent “bubbly bottom syndrome.”
- Fill & top – Pour in berries, dot with butter (hello, richness!), then add lattice or full crust. Artistic flex: Use cookie cutters for steam vents!
- Egg wash & bake – Brush crust with beaten egg + 1 tsp water for golden shine. Bake until filling erupts like a berry volcano!
🎉 Serving Drama: How to Make Pie the Star
Serve slices slightly warm with a quenelle of vanilla ice cream slowly melting into the cracks. For brunch? Add lemon whipped cream and fresh mint. Bonus points: Use vintage pie servers and say things like “Shall we indulge?” with a cheeky grin.
🌀 Mix It Up: 5 Pie Personalities to Try
- Gluten-Free Glory: Use almond flour crust + 1 tbsp chia seeds as thickener
- Berry Remix: Swap 1 cup blueberries for raspberries or blackberries
- Crunch Top: Replace top crust with oat streusel (½ cup rolled oats + ¼ cup brown sugar + 3 tbsp butter)
👩🍳 Confessions of a Pie-Obsessed Chef
True story: I once forgot the cornstarch and created “Blueberry Soup in a Crust Bowl.” My solution? Serve it in mugs with spoons and call it deconstructed pie—total save! These days, I keep extras in the freezer because nothing says “I’ve got your back” like surprise pie.
🤔 Pie Panic Station: Your Questions, Answered
Q: Why’s my filling runny?
A: Let cool COMPLETELY (4+ hours)—cornstarch needs time to set! Still loose? Next time, up cornstarch by 1 tbsp.
Q: Soggy bottom crust?
A: Blind bake the bottom crust for 10 mins before adding filling. Or, sprinkle crust with 1 tbsp crushed graham crackers—they absorb moisture like a dream!
The Science of a Perfect Pie Crust – Flaky vs. Tender & How to Achieve Both
A great pie starts with the crust. But what makes it flaky versus tender? Let’s break it down:
Flaky Crust Secrets
-
Cold Butter – When cold butter melts in the oven, it creates steam pockets = flaky layers.
-
Minimal Handling – Overworking dough develops gluten, leading to toughness.
-
Vinegar or Vodka – Adding 1 tsp to the dough inhibits gluten formation while keeping it tender.
Tender Crust Secrets
-
Shortening or Lard – These fats create a more tender, less flaky texture.
-
Egg Yolk – Adds richness and tenderness (use 1 yolk + ice water in your dough).
Pro Tip: For the best of both worlds, use a mix of butter (for flavor/flakiness) and shortening (for tenderness).
Blueberry Filling Mastery – How to Avoid a Soggy or Gummy Mess
The filling can make or break your pie. Here’s how to get it juicy but not soupy, thick but not gluey:
Thickener Showdown
| Thickener | Best For | Pro Tip |
|---|---|---|
| Cornstarch | Clear, glossy filling | Mix with sugar first to prevent clumps |
| Tapioca Flour | More natural texture | Grind pearls into powder for smoother results |
| Instant ClearJel | No pre-cooking needed | Ideal for pies served warm |
Avoiding Common Filling Pitfalls
-
Too Runny? Let the pie cool completely (4+ hours). If still loose, add 1 tbsp more thickener next time.
-
Too Gummy? You over-thickened. Reduce cornstarch by 1 tsp or use tapioca instead.
-
Bland Flavor? Boost with a pinch of cinnamon or 1 tsp almond extract.
Chef’s Hack: Toss berries with sugar and let sit 15 minutes before adding thickener—this draws out juices for better consistency.
Next-Level Variations – From Gluten-Free to Savory-Sweet
Once you’ve mastered the classic, try these game-changing twists:
1. Gluten-Free Blueberry Pie
-
Crust: Use 1:1 gluten-free flour + 1 tsp xanthan gum.
-
Filling: Replace cornstarch with 1 tbsp chia seeds (soak in lemon juice first).
2. Blueberry-Basil Pie
-
Add ¼ cup chopped fresh basil to filling for an herbal twist.
-
Pair with black pepper whipped cream.
3. Dutch Crumb Top
-
Replace top crust with streusel (½ cup flour + ¼ cup brown sugar + 4 tbsp butter).
4. Bourbon-Blueberry Pie
-
Spike the filling with 2 tbsp bourbon.
-
Top with salted caramel drizzle.
5. Mini Hand Pies
-
Use biscuit cutters for small circles.
-
Fill, fold, crimp, and bake for portable perfection.
Final Tip: Embrace Imperfection
Even if your crust cracks or your filling bubbles over, own it. My first “perfect” pie looked like a berry volcano—but it tasted like heaven.
Print
Blueberry Pie Recipe
- Total Time: 5 hours 15 minutes
Description
This pie is a love letter to summer—plump, juicy blueberries wrapped in a golden, flaky crust. Inspired by berry-picking birthdays and my grandma’s pie wisdom (“add a few more for luck”), it’s the kind of dessert that turns any meal into a memory. Whether you’re a first-time baker or seasoned crust crusader, this blueberry pie is pure, nostalgic magic.
Ingredients
-
5 cups fresh or thawed blueberries
-
¾ cup granulated sugar (adjust to taste)
-
¼ cup cornstarch (or tapioca flour)
-
1 tbsp lemon juice
-
Zest of 1 lemon
-
2 tbsp butter, cut into small cubes
-
1 double pie crust (homemade or store-bought)
-
1 egg + 1 tsp water (for egg wash)
Instructions
-
Preheat oven to 400°F (200°C). Place a baking sheet on the lower rack to catch any berry overflow.
-
Mix filling: In a large bowl, gently toss blueberries, sugar, cornstarch, lemon juice, and zest. Let sit for 10 minutes.
-
Prepare bottom crust: Roll and press into a 9-inch pie plate. Prick the bottom with a fork to prevent bubbling.
-
Fill & top: Spoon the berry mixture into the crust. Dot with butter. Top with a lattice or full crust, sealing the edges.
-
Brush with egg wash, then bake for 45–55 minutes, until crust is golden and filling is bubbly.
-
Cool completely (at least 4 hours) to allow filling to set.
Notes
-
Frozen berries? Thaw and pat dry to avoid excess moisture.
-
Runny filling? Try 1 tbsp extra cornstarch next time or let cool longer.
-
For a crunchier twist, sprinkle the top with raw sugar before baking.
- Prep Time: 25 minutes
- Cook Time: 50 minutes
Nutrition
- Calories: 350 Per Slice
- Fat: 16g
- Carbohydrates: 50g
- Protein: 3g
📊 Nutrition (Per Slice)
Calories: 350 | Protein: 3g | Carbs: 50g | Fat: 16g
Note: Stats assume 8 slices. Add 50 calories per scoop of ice cream (worth it).
Pin Description: Master summer’s favorite dessert with this easy blueberry pie recipe! Discover pro tips for perfect lattice crust, juicy filling that sets beautifully, and clever shortcuts. Includes gluten-free and vegan variations, troubleshooting tips for soggy crusts, and genius serving ideas. Save this step-by-step guide for your next BBQ, potluck, or cozy night in. #BlueberryPie #SummerDesserts #HomemadePie #EasyBaking #FromScratchDesserts
SEO Meta Description: Bake the perfect blueberry pie with chef tips for flaky crust & juicy filling. Includes gluten-free swaps, pro hacks, and nostalgic stories!
Raspberry Cheesecake
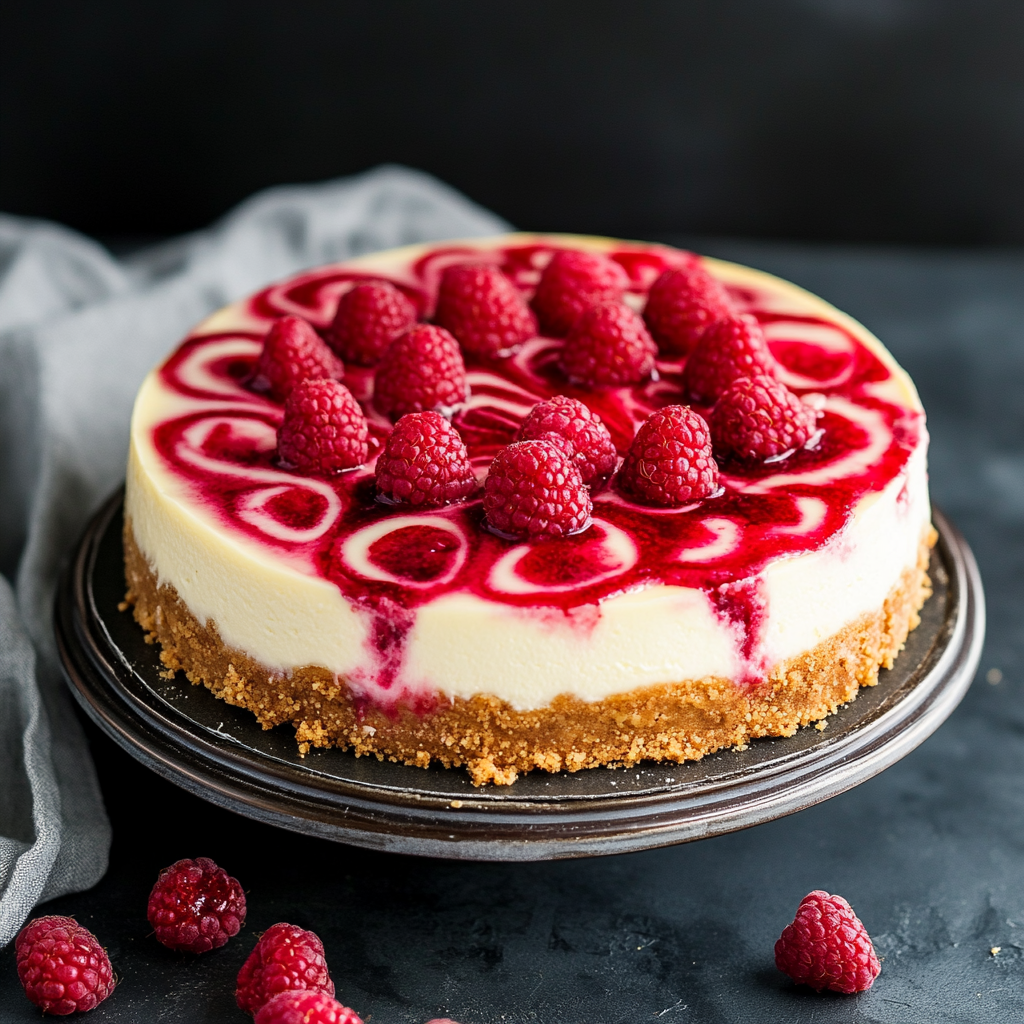
🍰 Raspberry Cheesecake: The Dessert That Stole My Heart (And My Party Guests’)
Hey there, fellow food lovers! Chef Jamie here, ready to spill the secrets behind my all-time favorite dessert: this showstopping raspberry cheesecake. Picture this: a buttery graham cracker crust hugging a cloud of tangy-sweet cream cheese filling, swirled with a ruby-red raspberry sauce that’s basically summer in a spoon. It’s the kind of dessert that makes people sneak second slices when they think you’re not looking – not that I’d ever judge. 😉
I’ll never forget the first time I made this beauty. It was my best friend’s 30th birthday, and I wanted to create something that screamed “celebration” without requiring a pastry degree. The result? A cheesecake so creamy it could rival your favorite latte art, with those vibrant raspberry swirls that make everyone’s phone cameras come out. Pro tip: Always make two. The first one will disappear before you can say “food coma.”
What makes this recipe special? We’re using real raspberry puree instead of jam – because life’s too short for artificial flavors. Plus, I’ve got all the chef hacks you need to prevent cracks (goodbye, water bath stress!), nail that perfect swirl, and make it your own with endless variations. Whether you’re a baking newbie or a dessert pro, this raspberry cheesecake is about to become your secret weapon.
❄️ The Great Cheesecake Caper: A Birthday to Remember
Let me take you back to Winter 2018. My buddy Alex was turning 30, and I’d promised a dessert that would “change his life.” Little did I know my kitchen would look like a powdered sugar bomb went off by the time I was done!
There I was, dancing to 90s hip-hop while prepping the crust, when I realized… I’d forgotten to buy graham crackers. Cue the panic! After raiding my pantry, I discovered a sleeve of ginger snaps and went full MacGyver. The result? A spicy-sweet crust that paired perfectly with the raspberry swirl. The real plot twist? Mid-bake, my oven decided to impersonate a sauna. I’ll never forget peering through the oven door, praying to the dessert gods as condensation dripped down the glass. Miraculously, it emerged flawless – no cracks, just pure creamy perfection.
When Alex took his first bite, he actually froze mid-chew. “This… is illegal,” he finally said, grabbing another slice. Now, it’s not a proper birthday in our crew without this cheesecake. Moral of the story? Even kitchen disasters can taste incredible. 😎
🛒 Your Raspberry Cheesecake Shopping List
Makes 12 slices of pure joy
For the Crust:
- 1 ½ cups graham cracker crumbs – The cozy sweater of crusts! No grahams? Digestives or gluten-free cookies work great.
- ¼ cup sugar – Just enough to make it sing.
- 6 tbsp melted butter – The glue holding our edible hug together. Vegan? Coconut oil works!
For the Filling:
- 3 (8 oz) packs cream cheese – Full-fat only! This isn’t salad. Room temp = smooth sailing.
- 1 cup sugar – We’re balancing tart raspberries here.
- 1 tsp vanilla extract – The Beyoncé of flavor enhancers.
- 3 large eggs – Gently incorporated = crack-free surface.
- ⅔ cup sour cream – Secret weapon for tang and texture.
- ⅓ cup heavy cream – Because luxury should be legal.
Raspberry Swirl:
- 1 cup raspberries – Fresh or frozen! Swap with blackberries in a pinch.
- 2 tbsp sugar – Let’s tame that tartness.
- 1 tsp lemon juice – Brightens the whole party.
👩🍳 Let’s Bake Magic: Step-by-Step Guide
1. Crust Game Strong
Preheat oven to 325°F (160°C). Blitz your grahams in a food processor or crush them in a ziplock with a rolling pin (stress relief bonus!). Mix crumbs with sugar and melted butter until it resembles wet sand. Press into a 9-inch springform pan using a glass to compact it evenly. Bake 10 minutes – it should smell like childhood. Cool while you make the filling.
Chef Hack: Run a spoon around the edges after baking – prevents sticking later!
2. Raspberry Rhapsody
In a saucepan, combine raspberries, sugar, and lemon juice. Cook over medium heat 5-7 minutes until they’re saucy and broken down. Blitz with a blender (or mash through a sieve) to remove seeds. Let cool – hot puree = runny swirls.
3. Filling Finesse
Beat cream cheese and sugar on medium until smooth AF – no lumps allowed! Scrape bowl constantly. Add vanilla. Crack eggs in one at a time, mixing just until combined. Overmixing = cracks! Fold in sour cream and heavy cream gently. The texture should be like barely set pudding.
4. Swirl Like a Boss
Pour filling over cooled crust. Dollop raspberry puree in circles using a spoon. Drag a knife through to create marbled patterns – less is more! Want Insta-worthy swirls? Use a toothpick for finer lines.
5. Bake It Beautiful
Bake 50-60 minutes. It’s done when the edges are set but the center still jiggles slightly (like Jell-O, not a waterbed). Turn off oven, crack the door open, and let it cool gradually for 1 hour. This prevents dramatic temperature changes (and cracks!). Chill for at least 4 hours – overnight is better!
🎉 Serving Your Masterpiece
Run a hot knife around the edge before releasing the springform. Top with fresh raspberries, mint sprigs, and a dusting of powdered sugar. Want extra flair? Serve with whipped cream dyed pink with leftover puree! For slice-perfect cuts, dip your knife in hot water between each slice.
✨ Mix It Up! Cheesecake Remixes
- Chocolate-Raspberry: Add ½ cup melted dark chocolate to the filling.
- Lemon Burst: Add 2 tbsp lemon zest to filling + lemon curd swirl.
- Vegan Vibes: Use cashew-based cream cheese, coconut cream, and flax eggs.
- Berry Medley: Swap raspberries for blackberries + blueberries.
- Boozy Twist: Add 1 tbsp Chambord to the puree!
📝 Chef Jamie’s Notebook
Over the years, this recipe has gone through more makeovers than my Instagram feed! The biggest game-changer? Straining the raspberry puree – no one likes seeds in their teeth. Once, I accidentally used salt instead of sugar in the crust… let’s just say my dog got a very fancy treat that night. 🐶
Fun fact: This cheesecake freezes amazingly! Wrap slices in parchment and freeze for up to 3 months. Thaw overnight in the fridge – perfect for sudden dessert emergencies.
❓ Cheesecake SOS: Your Questions Answered
Q: How do I prevent cracks?
A: Three golden rules: 1) Don’t overmix after adding eggs. 2) Cool gradually in the oven. 3) Embrace imperfections – cracks taste the same! 😉
Q: Can I use frozen raspberries?
A: Absolutely! Thaw first and drain excess liquid. Pro tip: Frozen berries often have more intense flavor.
Q: My cheesecake sank in the middle!
A: Likely underbaked. Next time, bake until the center is just set (it’ll firm up while chilling). Still tastes amazing!
Q: Can I make this gluten-free?
A: Yes! Use gluten-free grahams or almond flour (1 ½ cups almond flour + 3 tbsp melted butter).
The Science of a Perfect Cheesecake – How to Avoid Cracks, Sinking & Lumps
Let’s talk cheesecake physics—because that silky, crack-free surface isn’t just luck; it’s science.
Why Cheesecakes Crack (And How to Stop It)
-
Overmixing Eggs – Eggs incorporate air, which expands in the oven and collapses, leaving cracks. Fix: Mix just until combined after adding eggs.
-
Temperature Shock – Rapid cooling causes shrinkage. Fix: Let it cool gradually in the turned-off oven with the door cracked.
-
Overbaking – A cheesecake is done when the edges are set but the center jiggles slightly (like Jell-O). It firms up while chilling.
Pro Tip: For extra insurance, bake in a water bath (wrap the springform pan in foil to prevent leaks).
Room-Temperature Ingredients = Non-Negotiable
Cold cream cheese = lumpy filling. Cold eggs = uneven texture. Take them out 2 hours ahead!
Raspberry Swirl Mastery – How to Get Those Instagram-Worthy Layers
That vibrant, marbled swirl isn’t just pretty—it’s a flavor bomb in every bite. Here’s how to nail it:
The Perfect Raspberry Puree
-
Fresh or frozen raspberries work, but straining out seeds is key for smooth swirls.
-
Reduce the puree until thick (like jam)—too runny, and it’ll bleed into the filling.
Swirling Techniques
-
Dollop & Drag – Drop spoonfuls of puree onto the filling, then use a knife to swirl in figure-eights.
-
Toothpick Artistry – For delicate patterns, drag a toothpick through the puree in small circles.
-
Layered Look – Alternate cheesecake batter and puree in layers for a ribbon effect.
Pro Tip: Freeze the puree for 10 minutes before swirling—it holds its shape better!
Next-Level Variations – From Boozy to Vegan
Once you’ve mastered the classic, try these showstopping twists:
1. Chocolate-Raspberry Dream
-
Add ½ cup melted dark chocolate to the filling.
-
Drizzle with chocolate ganache after baking.
2. Lemon-Raspberry Burst
-
Add 2 tbsp lemon zest to the filling.
-
Swirl with lemon curd instead of raspberry puree.
3. Vegan Raspberry Cheesecake
-
Use cashew cream cheese and coconut cream.
-
Swap eggs for ¼ cup cornstarch + ½ cup almond milk.
4. Boozy Raspberry Chambord
-
Add 1 tbsp Chambord (raspberry liqueur) to the puree.
-
Top with whipped cream + fresh berries.
5. Berry Medley
-
Mix raspberries, blackberries & blueberries for the swirl.
-
Top with a mixed berry compote.
Final Tip: Cheesecake Improv
Even if your cheesecake cracks, cover it with whipped cream and berries—no one will know! And remember: The best desserts are the ones shared with people you love.
Print
Raspberry Cheesecake
- Total Time: 5½ hours
Description
There’s something magical about a dessert that makes everyone pause mid-bite and close their eyes. This raspberry cheesecake does exactly that. Born from a 30th birthday scramble and a graham cracker crisis, it’s now my most-requested party trick. With a golden crust, velvety filling, and a ruby-red swirl, it’s equal parts wow-factor and comfort food. Whether it’s your first cheesecake or your fiftieth, this one’s a keeper.
Ingredients
For the Crust:
-
1½ cups graham cracker crumbs
-
¼ cup sugar
-
6 tbsp melted butter
For the Filling:
-
3 (8 oz) blocks full-fat cream cheese, room temp
-
1 cup sugar
-
1 tsp vanilla extract
-
3 large eggs
-
⅔ cup sour cream
-
⅓ cup heavy cream
For the Raspberry Swirl:
-
1 cup raspberries (fresh or thawed frozen)
-
2 tbsp sugar
-
1 tsp lemon juice
Instructions
-
Crust Prep:
Preheat oven to 325°F (160°C). Mix crust ingredients until sandy. Press into a springform pan. Bake 10 mins, then cool. -
Raspberry Sauce:
Simmer raspberries, sugar, and lemon juice for 5–7 mins. Blend or strain for smoothness. Let cool. -
Make the Filling:
Beat cream cheese and sugar until smooth. Mix in vanilla, then eggs one at a time. Fold in sour cream and cream gently. -
Swirl & Bake:
Pour filling into crust. Add dollops of raspberry sauce and swirl with a knife or toothpick. Bake 50–60 mins. Let cool in the oven with the door cracked for 1 hour. Chill at least 4 hours, ideally overnight. -
Serve & Stun:
Run a warm knife around the edge before releasing. Garnish with fresh raspberries and powdered sugar.
Notes
-
Use a hot knife for clean slices.
-
Add lemon zest to the filling for brightness.
-
Sub ginger snaps for a spicier crust.
-
Freeze slices for up to 3 months.
- Prep Time: 30 minutes
- Cook Time: 60 minutes
Nutrition
- Calories: 410 Per Slice
- Fat: 28g
- Carbohydrates: 34g
- Protein: 6g
📊 Nutrition Per Slice
Calories: 410 | Protein: 6g | Carbs: 34g | Fat: 28g
Note: Values are estimates. For lighter options, try reduced-fat cream cheese and Greek yogurt instead of sour cream.

Coffee Crème Brûlée
☕ Coffee Crème Brûlée: The Dessert That’ll Make You Feel Like a French Pastry Pro
Hey there, fellow foodies! Let’s talk about a dessert that’s equal parts fancy and fun—Coffee Crème Brûlée. Imagine this: velvety custard infused with bold coffee flavor, hiding under a glass-like layer of caramelized sugar that shatters with the tap of a spoon. It’s the kind of dessert that makes you want to slow-clap for yourself after the first bite. And guess what? It’s *way* easier to make than you’d think.
I’ll let you in on a secret: the first time I made this, I was sweating bullets. Picture me, apron askew, frantically Googling “how to not ruin custard” while my friends sipped wine in the next room. But when I finally nailed that silky texture and heard that iconic *crack* as everyone dug in? Pure magic. Now, it’s my go-to when I want to wow guests without spending hours in the kitchen. Let’s get you there too—no sweat (or Google panic) required.
That Time I (Almost) Burned Down My Kitchen… For Love
Rewind to my early chef days: I’d just landed a gig cooking for a friend’s ultra-fancy engagement party. Naturally, I decided to debut a *completely* untested Coffee Crème Brûlée. Spoiler: Things got… dramatic.
Midway through torching the sugar tops, my dollar-store kitchen torch sputtered out. Cue me, in full panic mode, sliding ramekins under the broiler while yelling “IT’S PART OF THE SHOW, FOLKS!” Miraculously, they caramelized perfectly—crispy, golden, and *just* shy of burnt. The couple loved it so much, they asked me to cater their wedding. Moral of the story? Even kitchen fails can taste like victory. (But maybe test your equipment first.)
🍮 What You’ll Need (+ Why Each Ingredient Matters)
- Heavy cream (2 cups): The backbone of that luscious texture. Sub with half-and-half for a lighter version, but expect a slightly less creamy result.
- Whole milk (½ cup): Balances the cream’s richness. In a pinch, 2% works—just don’t tell the French pastry purists.
- Ground coffee or instant espresso (¼ cup or 2 tbsp): Chef’s tip! Freshly ground beans give floral notes; espresso powder packs a bolder punch. Cold brew concentrate? Swap ½ cup milk for it!
- Egg yolks (5 large): Your custard’s best friends. Save the whites for omelets or meringues!
- Granulated sugar (½ cup + extra for topping): Superfine sugar caramelizes faster, but regular works—just spread it thin.
- Vanilla extract (1 tsp): The secret harmonizer. Use the real stuff—your taste buds deserve it.
🔥 Step-by-Step: Let’s Build Some Custard Magic
- Heat the coffee-cream mix: Simmer cream, milk, and coffee until it *just* starts bubbling (don’t boil!). Steep 10 minutes, then strain. Why? Over-steeping = bitter. Set a timer!
- Whisk yolks + sugar: Go for pale yellow and ribbony—about 2 minutes. This aerates the custard, making it extra silky.
- Temper like a pro: Slowly drizzle the warm cream into the yolks while whisking. Too fast = scrambled eggs. Nobody wants that.
- Bake in a water bath: Place ramekins in a deep pan, pour hot water halfway up. Pro hack: Lay a kitchen towel under the ramekins to prevent sliding.
- Chill out: Cool to room temp, then refrigerate 4+ hours. Patience, Padawan—this sets the texture.
- Torch time! Sprinkle a thin, even sugar layer. Torch in circular motions until golden. No torch? Broil for 1-2 mins, but WATCH CLOSELY.
🎨 Serving: How to Make It Look *Almost* Too Pretty to Eat
Serve these beauties straight in their ramekins—rustic charm! Add a few coffee beans on top for a “chef’s kiss” moment. Pair with:
- A tiny espresso cup of dark chocolate ganache for dipping
- Fresh berries to cut through the richness
- A cheeky glass of bourbon or dessert wine
✨ Mix It Up: 5 Twists on the Classic
- Spiked: Add 1 tbsp Kahlúa or Baileys to the custard pre-bake.
- Chocolate-Coffee: Whisk 2 tbsp cocoa powder into the sugar mix.
- Vegan: Swap cream for coconut milk and use agar-agar (3 tsp) instead of eggs.
- Pumpkin Spice: Add ¼ cup pumpkin purée + 1 tsp spice blend to the custard.
- Mocha Crunch: Sprinkle crushed cocoa nibs under the sugar layer before torching.
👩🍳 Chef’s Confessions & Lessons Learned
Over the years, I’ve learned:
- Cheap kitchen torches are worth their weight in gold. (Looking at you, $10 Amazon special.)
- If your custard cracks, call it “artisanal” and serve it with pride.
- Always make extra—people will beg for seconds.
Fun fact: My dog once licked an entire sugar topping off a ramekin mid-dinner party. We served it as “deconstructed coffee custard” and got rave reviews. Improvise, adapt, overcome!
❓ Burning Questions (Pun Intended)
Q: Help! My custard’s still liquid after baking.
A: It needed more time. Bake until edges are set but center jiggles *slightly*—like Jell-O, not water.
Q: Can I use white sugar substitutes?
A: For the custard, yes (monk fruit works!). But the topping needs real sugar—it’s the only way to get that crack.
Q: Why strain the coffee grounds?
A: Unless you want gritty custard (you don’t), strain through a fine mesh sieve or cheesecloth.
Q: How long does it keep?
A: Up to 3 days refrigerated—but add the sugar topping RIGHT before serving.
The Science of Silky Custard – How to Avoid Curdling, Cracking & Kitchen Disasters
Let’s talk custard chemistry—because nailing that velvety texture is easier when you understand why things work.
The Egg Yolk Miracle
Egg yolks contain proteins and fats that thicken the custard when heated. But push them too hard, and they scramble. The key? Tempering—slowly introducing hot liquid to yolks to gently raise their temperature.
Pro Tempering Technique:
-
Whisk yolks and sugar until pale and ribbony (this dissolves sugar and prevents graininess).
-
Drizzle hot cream in a thin stream while whisking constantly.
-
Strain the mixture through a fine sieve to catch any rogue cooked bits.
Water Bath Wisdom
Baking custard directly in dry heat = cracked, rubbery mess. A water bath (bain-marie) provides:
-
Gentle, even heat (water can’t exceed 212°F/100°C).
-
Steam to prevent surface drying.
Hack: Place a folded kitchen towel under ramekins to stabilize them and prevent hot spots.
The Chill Factor
Refrigeration isn’t just for setting—it lets the custard’s structure relax. Skip it, and your texture might be grainy or loose.
Chef’s Rule: 4 hours minimum, overnight for best results.
Sugar Showdown – How to Get the Perfect Caramelized Crust (Without a Blowtorch)
That iconic crack is all about sugar science. Here’s how to master it with or without fancy tools.
Best Sugars for Torching
| Sugar Type | Pros | Cons |
|---|---|---|
| Granulated White | Classic, even caramelization | Can burn quickly |
| Superfine/Caster | Melts faster, smoother layer | Not always pantry-staple |
| Raw/Turbinado | Deeper flavor, crunchy texture | Uneven browning if layer too thick |
Torch vs. Broiler Method
🔥 Torch Technique:
-
Sprinkle 1 tsp sugar per ramekin in a thin, even layer.
-
Hold torch 4–6 inches away, moving in circles until golden amber.
♨️ Broiler Backup Plan:
-
Place ramekins on a baking sheet close to the broiler.
-
Broil 1–3 minutes, rotating for even color. Watch like a hawk—it goes from golden to burnt in seconds!
Pro Tip: For extra crunch, do two layers—torch, chill 2 minutes, then add another sprinkle and torch again.
Next-Level Flavor Twists – From Boozy to Vegan
Once you’ve mastered the classic, try these showstopping variations.
1. Spiked with Booze
-
Kahlúa or Baileys (1 tbsp): Mix into custard before baking.
-
Bourbon (2 tsp) + orange zest: Adds sophistication.
2. Chocolate-Coffee Hybrid
-
Whisk 2 tbsp cocoa powder into sugar-yolk mix.
-
Top with crushed espresso beans for crunch.
3. Vegan Hack
-
Replace dairy with full-fat coconut milk.
-
Swap eggs for 3 tsp agar-agar (dissolved in warm milk).
4. Seasonal Spin: Pumpkin Spice
-
Add ¼ cup pumpkin purée + 1 tsp spice blend to custard.
-
Garnish with candied pecans.
5. Mocha Crunch
-
Sprinkle cocoa nibs under the sugar layer before torching.
-
Drizzle with dark chocolate ganache post-caramelization.
Final Tip: Embrace Imperfection
Even if your custard cracks or your sugar burns, own it. My first “successful” crème brûlée had a charred edge, but my guests raved about the “smoky depth.”
Print
Coffee Crème Brûlée
- Total Time: 5 hours
Description
Velvety custard, bold coffee notes, and a sugar top that cracks like your favorite crime show plot twist—this Coffee Crème Brûlée is the kind of dessert that makes you feel like you’ve mastered Parisian patisserie in your own kitchen. Born from panic, perfected by torchlight, and beloved by dinner guests everywhere, this recipe is your golden ticket to dessert legend status. No drama, no pastry degree—just pure, sweet satisfaction.
Ingredients
-
2 cups heavy cream
-
½ cup whole milk
-
2 tbsp instant espresso or ¼ cup ground coffee
-
5 egg yolks
-
½ cup granulated sugar (plus extra for topping)
-
1 tsp vanilla extract
Instructions
-
Infuse the Cream: In a saucepan, heat cream, milk, and coffee until just simmering. Steep 10 mins, then strain to remove grounds.
-
Whisk Yolks + Sugar: Beat until pale and creamy, about 2 minutes.
-
Temper Carefully: Slowly add warm cream to egg mixture while whisking constantly.
-
Strain Again (Optional): For ultra-smooth custard, strain one more time before pouring.
-
Bake in Water Bath: Pour into ramekins. Place in a deep pan, add hot water halfway up sides. Bake at 325°F (160°C) for 30–35 mins until just set.
-
Cool & Chill: Cool to room temp, then refrigerate at least 4 hours or overnight.
-
Torch It: Sprinkle sugar over each custard and caramelize with a kitchen torch or under a broiler.
Notes
-
Use fresh egg yolks for the smoothest set.
-
Don’t skip the chilling—this firms up the custard to perfection.
-
Torch in a circular motion for even caramelization.
- Prep Time: 20 minutes
- Cook Time: 35 minutes
Nutrition
- Calories: 320 Per Serving
- Sugar: 19g
- Fat: 26g
- Carbohydrates: 21g
- Protein: 5g
📊 Nutrition Per Serving (Because Balance, Right?)
Calories: 320 | Protein: 4g | Carbs: 24g | Fat: 24g
Note: This is dessert. Live a little. 😉

Ham and Cheese Scones
Warm, Flaky, and Full of Flavor: Let’s Bake Ham and Cheese Scones Together!
Hey there, fellow food lover! Picture this: It’s a lazy Sunday morning. The coffee’s brewing, sunlight’s streaming through the kitchen window, and the scent of buttery pastry and melted cheddar is wafting through the air. That’s the magic of ham and cheese scones—a recipe that’s equal parts comfort and sophistication. Whether you’re a brunch enthusiast, a snack-time hero, or just someone who loves turning leftovers into legends (more on that later), these scones are about to become your new kitchen BFF.
Now, I know what you’re thinking: “Scones? Aren’t those dry British biscuits?” Not these bad boys! We’re talking tender, flaky layers hugging pockets of salty ham and gooey cheese—think croissant meets quiche, but easier to make. I first whipped these up during a “clean out the fridge” mission after a holiday feast, and let me tell you, my family went bananas. My niece even tried to hide the last one in her napkin—true story. Now, they’re my go-to for potlucks, cozy mornings, or whenever I need to bribe my neighbors into feeding my cats while I’m away.
What makes these scones special? It’s all about balance. The sharp cheddar brings the tang, the ham adds savory depth, and the buttermilk? Oh, it’s the secret weapon for that melt-in-your-mouth texture. Plus, they’re crazy versatile—swap ingredients, freeze the dough, or dress them up with fancy mustards. Ready to bake memories (and maybe start a few family arguments over who gets the biggest wedge)? Let’s roll up our sleeves!
The Day Leftovers Became Legendary
Let me take you back to Christmas 2019. My fridge looked like a deli exploded in there—half a spiral ham, three types of cheese, and enough dinner rolls to build a bread fort. Enter: my sister, who’d just flown in from Chicago and announced, “I’m staying for brunch tomorrow. Surprise me.” (No pressure, right?)
At 6 AM, I’m staring at that ham like it’s a puzzle piece. Then it hits me—savory scones! I swapped the usual berries for diced ham, folded in extra-sharp cheddar (because why not?), and glazed the tops with leftover eggnog instead of buttermilk. The result? Pure chaos. My niece declared them “better than Santa,” my sister demanded the recipe, and my brother-in-law—who “doesn’t do breakfast”—ate four. Now, these scones are our holiday tradition. We even pack them for road trips, wrapped in foil like edible treasure maps.
Moral of the story? Great recipes aren’t born in fancy kitchens—they’re born from happy accidents, hungry siblings, and the glorious art of fridge foraging.
🥓🧀 What You’ll Need (And Why It Matters)
- 2 cups all-purpose flour – The backbone! For lighter scones, fluff the flour with a fork before measuring.
- 1 tbsp baking powder – Not a typo! This ensures maximum rise. Check the expiry date—old baking powder = flat scones.
- ½ tsp salt + ½ tsp black pepper – Trust me, pepper is KEY here. For extra zing, try cracked rainbow peppercorns.
- 6 tbsp cold unsalted butter – Cube it, then freeze for 10 minutes. Cold butter = flaky layers. No compromises!
- 1 cup shredded sharp cheddar – Pre-shredded works, but block cheese melts better. Feeling wild? Swap in smoked gouda.
- ¾ cup diced cooked ham – Leftover holiday ham? Perfect! No ham? Crispy bacon or even prosciutto works.
- ¾ cup buttermilk – No buttermilk? Mix 2 tsp lemon juice into regular milk and let it sit for 5 minutes.
- 1 egg (optional) – An egg wash gives that golden shine, but buttermilk brushed on top works too!
👩🍳 Let’s Get Baking: Your Foolproof Roadmap
- Preheat that oven! Crank it to 400°F (200°C). Pro tip: Place your baking sheet in the oven as it preheats—a hot pan jumpstarts the scones’ rise.
- Mix dry ingredients: In a large bowl, whisk flour, baking powder, salt, and pepper. Fun fact: Sifting isn’t necessary, but whisking prevents bitter baking powder pockets.
- Cut in the butter: Use a pastry cutter, two forks, or your fingertips. Stop when it looks like lumpy sand with pea-sized butter bits. Those lumps = future flakiness!
- Fold in ham and cheese: Toss them in the flour mixture first—this coats them so they don’t sink to the bottom.
- Add buttermilk: Pour it in gradually. Mix JUST until the dough comes together. Overmixing = tough scones. Embrace the shaggy mess!
- Shape with confidence: Dump the dough onto a floured surface. Pat into a 1-inch-thick circle—no rolling pin needed! Use a sharp knife to cut 8 wedges (like a pizza).
- Bake to golden glory: Arrange wedges on the hot baking sheet. Brush with buttermilk or egg wash. Bake 18–22 minutes until tops are crisp and bottoms are lightly browned.
Chef’s Hack: Freeze unbaked scones on the tray for 30 minutes first. The cold butter takes longer to melt, creating extra flaky layers!
🍽️ How to Serve These Bad Boys
These scones are like the Swiss Army knife of baked goods—dress ’em up or keep it casual! For brunch: Split them warm, slather with honey butter, and pair with a zesty arugula salad. Packing a picnic? Wrap them in parchment paper with a side of grainy mustard for dipping. Feeling fancy? Top with a poached egg and hollandaise for a scone eggs Benedict situation. And hey, they’re stellar at room temperature too—toss a few in a basket at your next charcuterie board spread!
✨ Mix It Up: 5 Delicious Twists
- Everything Bagel Style: Add 1 tbsp everything seasoning to the dough + sprinkle on top before baking.
- Gluten-Free: Swap AP flour for a 1:1 GF blend. Add 1 tsp xanthan gum if your mix doesn’t include it.
- Spicy Southwest: Mix in ¼ cup diced jalapeños + swap cheddar for pepper jack. Serve with avocado crema!
- Vegetarian: Skip the ham, add ½ cup sun-dried tomatoes and 2 tbsp chopped fresh basil.
- Sweet & Savory: Add 2 tbsp maple syrup to the buttermilk + use applewood-smoked ham.
🥄 Behind the Recipe: Chef’s Secrets
Fun fact: The first time I made these, I accidentally used powdered sugar instead of flour while shaping the dough. Let’s just say my “savory donuts” were… an experience. Lesson learned: Label your containers, folks!
Over the years, I’ve tweaked this recipe based on reader feedback. One reader in Texas swears by adding a dash of hot sauce to the buttermilk (do it!), and a grandma in Minnesota shared her trick: replacing ¼ cup of flour with cornmeal for crunch. My favorite version? Adding caramelized onions—cook them low and slow until golden, then fold them in with the ham. Game. Changer.
The Science of Flakiness – Why Cold Butter is Your Secret Weapon
Let’s get one thing straight: The key to perfect scones isn’t just technique—it’s temperature.
I learned this the hard way during my first bakery job. My mentor, a no-nonsense Scottish baker named Fiona, watched me wrestle with a sticky dough disaster and said, “Lass, if your butter’s warm, you might as well make biscuits instead.” Turns out, scones rely on cold butter to create those irresistible flaky layers. Here’s why:
The Cold Butter Principle
When cold butter hits the hot oven, it melts slowly, releasing steam that puffs up the dough. Warm butter? It melts too fast, leaving you with dense, greasy hockey pucks.
Pro Tips for Butter Success:
-
Freeze & Grate: Stick your butter in the freezer for 20 minutes, then grate it like cheese. No pastry cutter? No problem.
-
Finger Discipline: Work quickly—if your hands are warm, run them under cold water before handling the dough.
-
Chill Before Baking: If your kitchen is warm, pop the shaped scones in the fridge for 10 minutes before baking.
The “Lumpy Dough” Mindset
Your dough should look shaggy, not smooth. Overmixing = tough scones. When you fold in the ham and cheese, some bits will peek out—that’s good! Those uneven pockets create texture and flavor bursts.
Baker’s Mantra: “If it looks messy, call it rustic.”
The Great Cheese Debate – Which Melts Best (And How to Prevent Leakage)
Cheese is the soul of these scones, but not all cheeses behave the same in the oven. Let’s break it down:
Best Cheeses for Scones
| Cheese Type | Pros | Cons |
|---|---|---|
| Sharp Cheddar | Bold flavor, melts well | Can leak if too finely shredded |
| Smoked Gouda | Adds depth, creamy melt | Slightly oily if overused |
| Gruyère | Nutty, holds shape | Expensive, but worth it |
| Pepper Jack | Spicy kick | Can make dough greasy |
How to Stop Cheese from Melting Everywhere
-
Freeze the Cheese – Toss shredded cheese in the freezer for 10 minutes before mixing.
-
Bigger Shreds – Use the large holes on your grater—small shreds melt too fast.
-
Press It In – After shaping the dough, press extra cheese on top—it’ll toast, not disappear.
Pro Tip: If your cheese does ooze out, don’t panic! Those crispy, caramelized edges are golden flavor bombs.
Beyond Breakfast – 5 Genius Ways to Serve Ham & Cheese Scones
These scones are versatile AF. Here’s how to make them shine for any occasion:
1. Brunch Hero
-
Serve with: Soft-scrambled eggs + spicy arugula salad.
-
Pro Move: Split scones warm, stuff with herb cream cheese and extra ham.
2. Soup’s Best Friend
-
Pair with: Tomato bisque or creamy potato leek soup.
-
Pro Move: Toast day-old scones and dunk like croutons.
3. Charcuterie Board Upgrade
-
Arrange with: Prosciutto, fig jam, and honeycomb.
-
Pro Move: Cut into smaller wedges for easy grabbing.
4. Freezer Hack for Busy Mornings
-
Freeze unbaked: Shape scones, freeze on a tray, then bag.
-
Bake from frozen: Add 2-3 extra minutes. Instant breakfast!
5. Next-Level Eggs Benedict
-
Swap English muffins with scone halves.
-
Top with: Poached eggs, hollandaise, and crispy pancetta.
Final Thought: Scones Should Be Fun (Not Fussy)
Repeat after me: There are no bad scones, only opportunities for improvisation. Lopsided? Call them “artisan.” Cheese explosion? “Flavor lava.” Burnt bottoms? Slice ’em off and serve upside-down.
At the end of the day, the best scones are the ones shared with people you love—preferably still warm, with butter dripping down your fingers. Now go forth and bake with confidence (and cold butter)!
❓ You Asked, I’m Answering!
Q: My scones are dense. What did I do wrong?
A: Two likely culprits: Overmixing the dough (handle it gently!) or expired baking powder. Test your BP by mixing 1 tsp with hot water—if it doesn’t bubble, replace it.
Q: Can I make these ahead?
A: Absolutely! Freeze unbaked scones for up to 3 months. Bake straight from frozen—just add 2–3 extra minutes.
Q: Help! My cheese melted everywhere.
A: No stress—that’s flavor confetti! For neater scones, freeze shredded cheese for 10 minutes before mixing.
Q: Can I use milk instead of buttermilk?
A: Yes, but the acidity in buttermilk tenderizes the gluten. Substitute by adding 1 tbsp lemon juice or vinegar to ¾ cup milk.

Ham and Cheese Scones
- Total Time: 35 minutes
Description
Lazy Sundays. Coffee brewing. Sunlight warming your kitchen. That’s the vibe behind these ham and cheese scones. Golden, tender, and packed with savory, cheesy comfort, they’re what happens when leftovers meet bakery dreams. Born from a fridge cleanout and now a beloved family tradition, these scones aren’t just baked goods—they’re little triangles of brunch happiness. Let’s make your kitchen smell like magic.
Ingredients
-
2 cups all-purpose flour
-
1 tbsp baking powder
-
½ tsp salt
-
½ tsp black pepper
-
6 tbsp cold unsalted butter, cubed
-
1 cup sharp cheddar, shredded
-
¾ cup diced cooked ham
-
¾ cup buttermilk
-
1 egg (optional, for brushing)
Instructions
-
Preheat oven to 400°F (200°C). Place baking sheet in the oven to heat.
-
Mix dry ingredients: Whisk flour, baking powder, salt, and pepper in a large bowl.
-
Cut in butter: Use a pastry cutter or your fingertips until the mix resembles coarse crumbs.
-
Add ham and cheese: Toss into the flour mixture so they’re coated.
-
Pour in buttermilk: Stir just until dough comes together—don’t overmix!
-
Shape: Pat dough into a 1-inch circle. Cut into 8 wedges.
-
Bake: Place on hot sheet. Brush tops with egg or buttermilk. Bake 18–22 mins, until golden.
Notes
Freeze scones 30 minutes before baking for ultra-flaky layers.
- Prep Time: 15 minutes
- Cook Time: 20 minutes
Nutrition
- Calories: 320 Per Scone
- Fat: 20g
- Carbohydrates: 25g
- Fiber: 1g
- Protein: 11g
📊 Nutrition Per Scone (Because Knowledge is Power)
Calories: 290 | Protein: 10g | Carbs: 24g | Fat: 17g | Sodium: 480mg
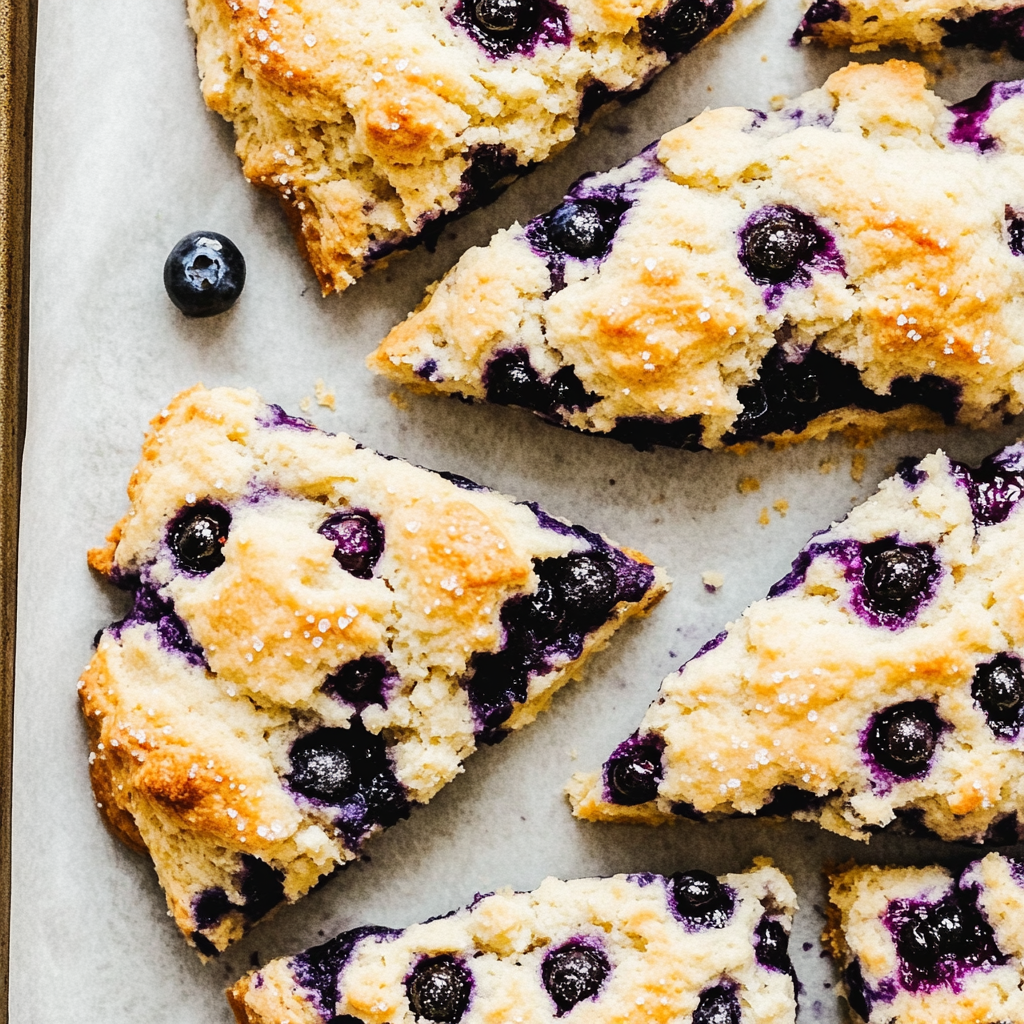
Classic Bakery-Style Blueberry Scones
Classic Bakery-Style Blueberry Scones: Your New Breakfast Obsession
Hey there, fellow food lovers! Chef Jamie here, ready to spill the tea (or should I say, spill the blueberries?) on my all-time favorite breakfast treat: Classic Bakery-Style Blueberry Scones. Picture this: a crisp morning, the smell of freshly brewed coffee, and a warm scone that’s golden on the outside, tender on the inside, and jam-packed with juicy blueberries that burst with every bite. That’s the magic we’re making today.
Now, I know what you’re thinking—*scones*? Aren’t those dry, crumbly things that require a PhD in pastry arts? Nope! Not these bad boys. My recipe is foolproof, forgiving, and designed for real humans who just want to feel like a fancy bakery owner for 30 minutes. Whether you’re a kitchen newbie or a seasoned pro, these scones will make you the MVP of breakfast (or afternoon tea, midnight snacks… no judgment here).
So grab your apron, crank up your favorite playlist, and let’s turn your kitchen into the cozy corner bakery of your dreams. Spoiler alert: There’s butter involved. A *lot* of butter. Let’s do this!
The Blueberry Scone That Stole My Heart (And a Few Aprons)
Let me take you back to my first summer working at a tiny seaside bakery in Maine. I was 19, covered in flour, and *obsessed* with the head baker’s blueberry scones. They were legendary—regulars would line up at 6 a.m. just to snag one before they sold out. One morning, during the pre-dawn rush, I accidentally knocked over a giant bucket of wild blueberries. Purple chaos everywhere! My boss just laughed, tossed me a mop, and said, “Better in your hair than wasted—now make yourself useful and bake a batch!”
That day, I learned the golden rule of scones: Embrace the mess. Those imperfect, blue-stained scones became my signature. Years later, whenever I bake them, I still smile at the memory of sticky fingers, that salty sea breeze, and the joy of sharing something simple but soul-warming. Now, let’s create *your* version of that magic.
Ingredients: Your Blueprint for Bakery Bliss
Here’s your grocery list for scone greatness. Pro tip: Measure everything *before* you start—trust me, cold butter waits for no one!
- 2 cups all-purpose flour – The backbone of our scones. For extra-tender results, swap in ½ cup cake flour!
- ⅓ cup sugar – Just enough sweetness to let the blueberries shine. Use raw sugar for a subtle crunch.
- 2 ½ tsp baking powder – Our rising hero! Make sure it’s fresh—expired powder = sad, flat scones.
- ½ tsp salt – Balances the sweetness. Sea salt fans? A flaky finish on top adds ✨pizzazz✨.
- ½ cup cold unsalted butter, cubed – Keep it chilly! Frozen butter grates beautifully for extra flakiness.
- 1 cup fresh or frozen blueberries – Fresh = juicy bursts; frozen = less mess (no thawing needed!).
- ½ cup heavy cream (plus extra for brushing) – The richer, the better. Dairy-free? Coconut cream works wonders.
- 1 large egg – Binds everything together. For vegan scones, a flax egg (1 tbsp flax + 3 tbsp water) does the trick.
- 1 tsp vanilla extract – Secret flavor booster! Almond extract adds a lovely twist too.
- Optional: coarse sugar for sprinkling – Because crunchy tops = instant bakery vibes.
Step-by-Step: Let’s Get Buttery
Ready to make magic? Follow these steps—and my chaotic-but-useful tips—for scone success!
- Preheat oven to 400°F (200°C). Line a baking sheet with parchment paper.
*Chef’s Hack:* No parchment? A light coat of butter + flour prevents sticking.
- In a large bowl, whisk flour, sugar, baking powder, and salt.
*Pro Tip:* Sift if you’re fancy; whisk aggressively if you’re channeling stress. Both work!
- Cut in cold butter until mixture resembles coarse crumbs.
*Chef’s Secret:* Use your fingertips or a pastry cutter. Want layers? Leave some pea-sized butter chunks!
- Gently fold in blueberries.
*Watch Out:* Frozen berries may tint the dough purple—embrace the galaxy scone aesthetic!
- In a small bowl, whisk cream, egg, and vanilla. Add to dry ingredients and stir just until dough comes together.
*Golden Rule:* Don’t overmix! Lumps = tender scones. Smooth dough = hockey pucks.
- Turn dough onto a floured surface and shape into a 1-inch thick circle. Cut into 8 wedges.
*Shape Tip:* Use a bench scraper for clean cuts. No perfection needed—rustic is charming!
- Transfer to baking sheet, brush tops with cream, and sprinkle with coarse sugar if desired.
*Pro Move:* Brush sides too for all-around crunch. Sugar = edible glitter. You’re welcome.
- Bake for 18–22 minutes, until golden brown. Cool slightly before serving.
*Don’t Rush:* Let them rest 5 minutes—they’re still cooking inside! Patience, grasshopper.
Serving Suggestions: Plate It Like a Pro
These scones are stars on their own, but why not go full bakery mode? Serve warm with:
- A dollop of clotted cream and lemon curd for British vibes
- Honey butter drizzled over the top
- A side of fresh berries and mint for Insta-worthy flair
Mix It Up: 5 Delicious Twists
- Lemon-Blueberry: Add 1 tbsp lemon zest + a lemon glaze
- Vegan Bliss: Use coconut oil + flax egg + plant-based cream
- Savory Spin: Swap blueberries for cheddar + chives (trust me!)
- Double Berry: Mix in raspberries or blackberries
- Gluten-Free: Substitute 1:1 GF flour + 1 tsp xanthan gum
The Secret to Perfect Scones – Butter, Cold Hands, and a Little Chaos
Let’s talk about the real key to bakery-worthy scones: cold butter and a fearless attitude.
I’ll never forget my first scone disaster. I was 22, working in a tiny café, and convinced I could “speed up” the process by using room-temperature butter. The result? Flat, greasy pucks that even the café’s resident seagulls side-eyed. My boss, a no-nonsense Scottish baker, took one look and said, “Lass, scones aren’t a race. Cold butter or go home.”
Why Cold Butter is Non-Negotiable
When cold butter hits the hot oven, it creates steam pockets—that’s what gives scones their signature flaky layers. Melted butter? You get sad, dense biscuits.
Pro Tips for Butter Success:
-
Freeze & Grate: Stick your butter in the freezer for 20 minutes, then grate it like cheese. No pastry cutter? No problem.
-
Finger Discipline: Work quickly so the butter stays cold. If your hands are warm, run them under cold water first.
-
Chill the Dough: If the kitchen is warm, pop the shaped scones in the fridge for 10 minutes before baking.
The Magic of Imperfection
Scone dough should look shaggy, not smooth. Overmixing develops gluten, which = toughness. When you fold in the blueberries, some will burst, and that’s good—those juicy streaks make every bite interesting.
Chaotic Baker Mantra: “If it looks messy, call it artisanal.”
Blueberry Showdown – Fresh vs. Frozen, and How to Avoid Purple Dough
Ah, blueberries—nature’s tiny flavor bombs. But which kind should you use? Let’s settle this once and for all.
Fresh Blueberries
-
Pros: Plump, juicy, and pretty (minimal dough staining).
-
Cons: Can get squished when folding, and off-season berries taste like disappointment.
Frozen Blueberries
-
Pros: Available year-round, hold shape better when mixing, and their icy state helps keep dough cold.
-
Cons: They will turn your dough lavender. Lean into it—call them “unicorn scones.”
How to Prevent Blueberry Bleeding
-
Toss Them in Flour – Coat berries in a spoonful of flour before folding in.
-
Fold Gently – Use a spatula, not a mixer.
-
Freeze Before Baking – 10 minutes in the freezer firms up the berries.
Pro Tip: Wild blueberries (the tiny ones) distribute more evenly and pack more flavor!
Beyond Breakfast – 5 Next-Level Ways to Serve Your Scones
Sure, scones are a breakfast classic, but why stop there? Here’s how to make them the star of any occasion.
1. The Ultimate Afternoon Tea Spread
-
Pair with: Earl Grey tea, clotted cream, and homemade lemon curd.
-
Presentation: Stack them on a vintage cake stand with mismatched china. Bonus points for a floral tablecloth.
2. Dessert Mode Activated
-
Drizzle with: Vanilla glaze (1 cup powdered sugar + 2 tbsp milk + 1 tsp vanilla).
-
Add-ons: Warm blueberry compote or a scoop of vanilla bean ice cream.
3. Savory Brunch Twist
-
Make it: Cheddar-blueberry scones (add ½ cup sharp cheddar to the dough).
-
Serve with: Honey butter and crispy bacon. Sweet + salty = brunch heaven.
4. Freezer-Friendly Future You Will Thank You For
-
Freeze unbaked: Shape scones, freeze on a tray, then transfer to a bag.
-
Bake straight from frozen: Add 2-3 extra minutes. Morning hero status achieved.
5. Scone Bread Pudding (Because Waste Not, Want Not)
-
Stale scone hack: Cube leftover scones, soak in custard (eggs + cream + cinnamon), and bake at 350°F until golden.
Final Thought: Scones Are Supposed to Be Fun
Repeat after me: There are no bad scones, only unique ones. Lopsided? Call it rustic. Dough too sticky? Add flour and pretend you meant to. Burnt bottoms? Slice them off and serve upside-down.
Chef’s Notes: Confessions of a Scone Addict
True story: I once tried to make heart-shaped scones for a date… they came out looking like bloated potatoes. Romantic? No. Delicious? Absolutely. Over the years, I’ve learned that scones are like people—imperfections make them interesting! This recipe has survived 3 kitchens, 2 broken ovens, and one very curious golden retriever (RIP, Mr. Butters). The key? Keep the butter cold, your hands quick, and your expectations flexible. Even “ugly” scones taste incredible with coffee.
FAQs: Your Scone SOS
Q: My dough is too sticky! Help!
A: Chill it—literally! Pop the dough in the fridge for 15 minutes. Add a sprinkle of flour if needed, but don’t go overboard.
Q: Can I freeze these?
A: Yes! Freeze unbaked scones on a tray, then bag them. Bake straight from frozen—add 2-3 extra minutes.
Q: Why are my scones dense?
A: Overmixing is the usual culprit. Stop stirring as soon as the dough comes together—it should look shaggy!
Q: Fresh vs. frozen blueberries?
A: Both work! Frozen berries bleed more color but won’t mush as easily when folding.

Classic Bakery-Style Blueberry Scones
- Total Time: 35 minutes
Description
Picture this: a crisp morning, hot coffee in hand, and the scent of fresh, buttery scones swirling from your oven. These blueberry beauties are golden, tender, and bursting with fruit—just like the ones from your favorite seaside bakery. Inspired by a summer job, a flour-covered apron, and a runaway bucket of berries, this recipe proves that scone magic is only a mixing bowl away. Let’s turn your kitchen into a cozy café, one delicious bite at a time.
Ingredients
-
2 cups all-purpose flour
-
⅓ cup sugar
-
2½ tsp baking powder
-
½ tsp salt
-
½ cup cold unsalted butter, cubed
-
1 cup blueberries (fresh or frozen)
-
½ cup heavy cream (plus extra for brushing)
-
1 large egg
-
1 tsp vanilla extract
-
Optional: coarse sugar for topping
Instructions
-
Preheat oven to 400°F (200°C). Line a baking sheet with parchment.
-
Whisk together flour, sugar, baking powder, and salt in a large bowl.
-
Cut in butter using fingers or a pastry cutter until the mixture looks like coarse crumbs.
-
Fold in blueberries gently.
-
In another bowl, whisk cream, egg, and vanilla. Add to dry ingredients and stir just until combined—don’t overmix!
-
Turn dough onto a floured surface. Pat into a 1-inch thick circle and cut into 8 wedges.
-
Transfer to baking sheet. Brush tops with cream and sprinkle with sugar.
-
Bake 18–22 minutes, until golden. Cool 5 minutes before serving.
Notes
-
Keep butter and cream cold for flakier texture.
-
Handle the dough lightly—less mixing = more tenderness.
-
For extra flair, add 1 tbsp lemon zest or a vanilla glaze drizzle.
- Prep Time: 15 minutes
- Cook Time: 20 minutes
Nutrition
- Calories: 280 Per Scone
- Sugar: 10g
- Fat: 14g
- Carbohydrates: 35g
- Protein: 4g
Nutritional Info (Because Balance is a Thing)
Per scone: 290 calories • 4g protein • 35g carbs • 15g fat
*Note: Values are approximate. For gluten-free/vegan versions, adjust accordingly!*
Happy baking, friends!
Recent Posts
- Moist Vegan Banana Bread : One-Bowl, No-Fail Classic
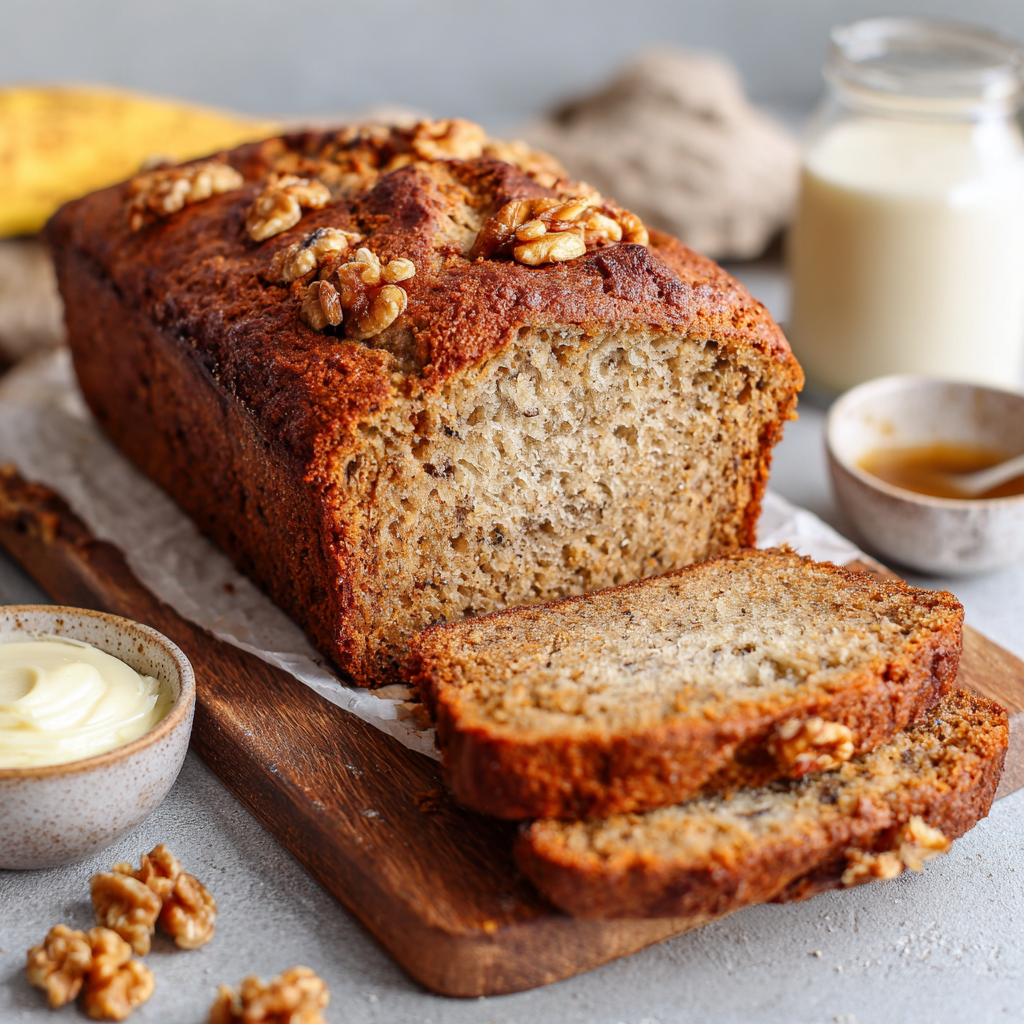
- Homemade Turkey Gravy : Rich, Silky, and Full of Flavor
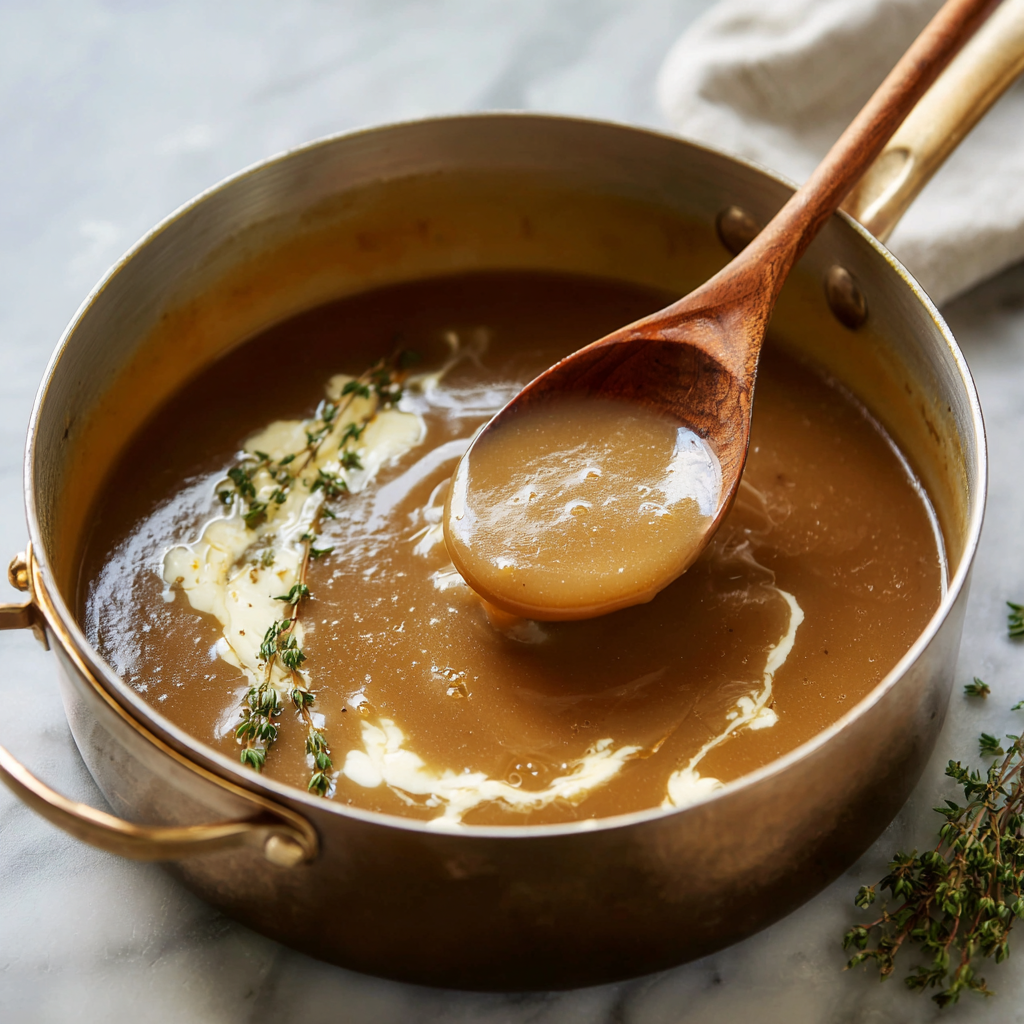
- Easy Keto Broccoli Salad : Low-Carb, Crunchy, and Totally Craveable
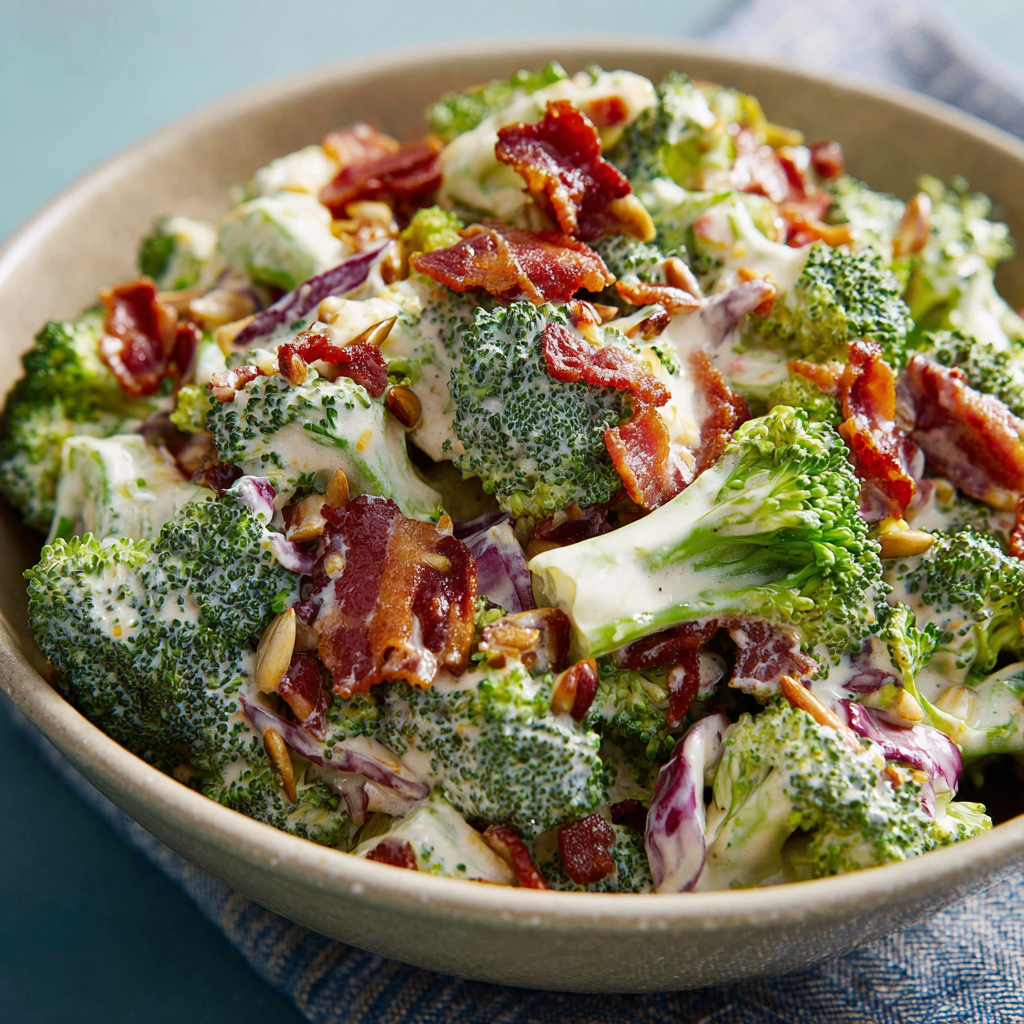
- Hearty Vegan Chili : One-Pot, Protein-Packed & Totally Comforting
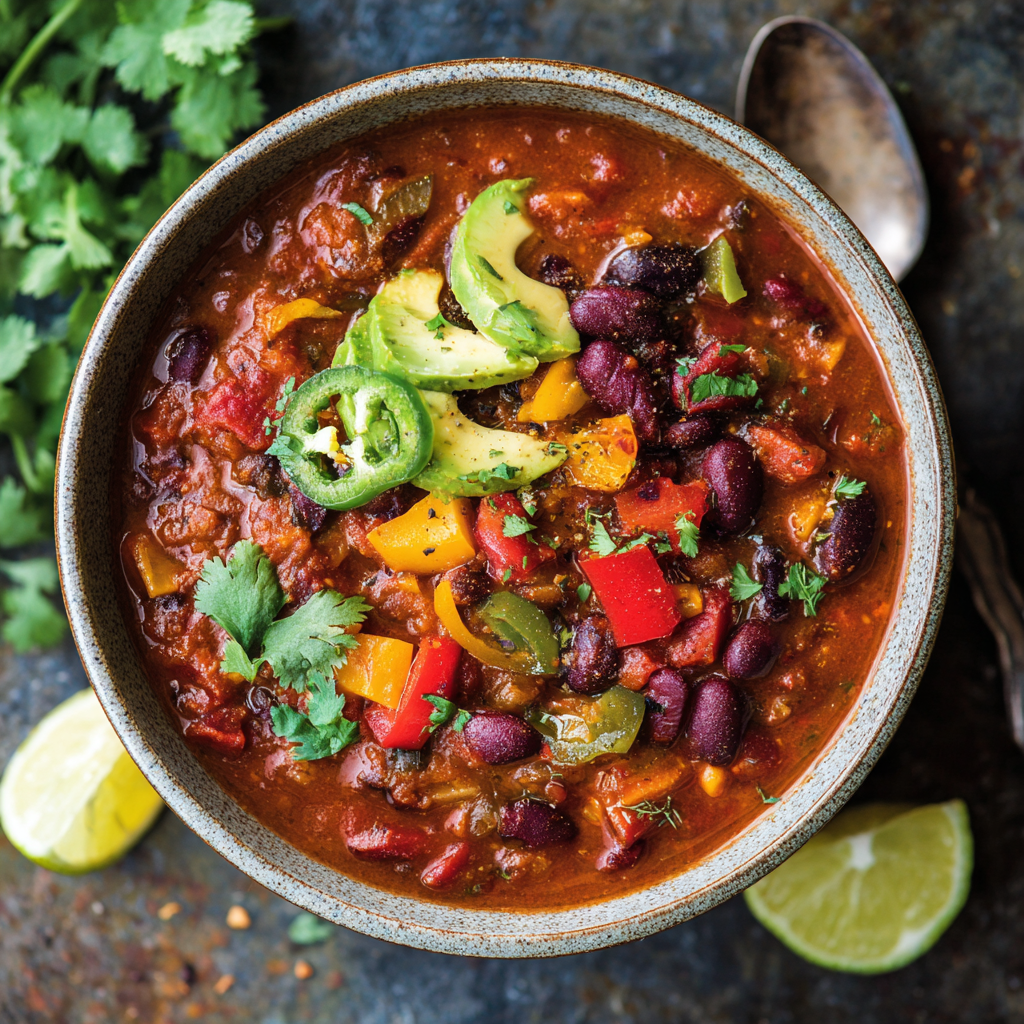
- The Best Crispy Baked Chicken Nuggets : Healthy, Easy & Kid-Approved
