
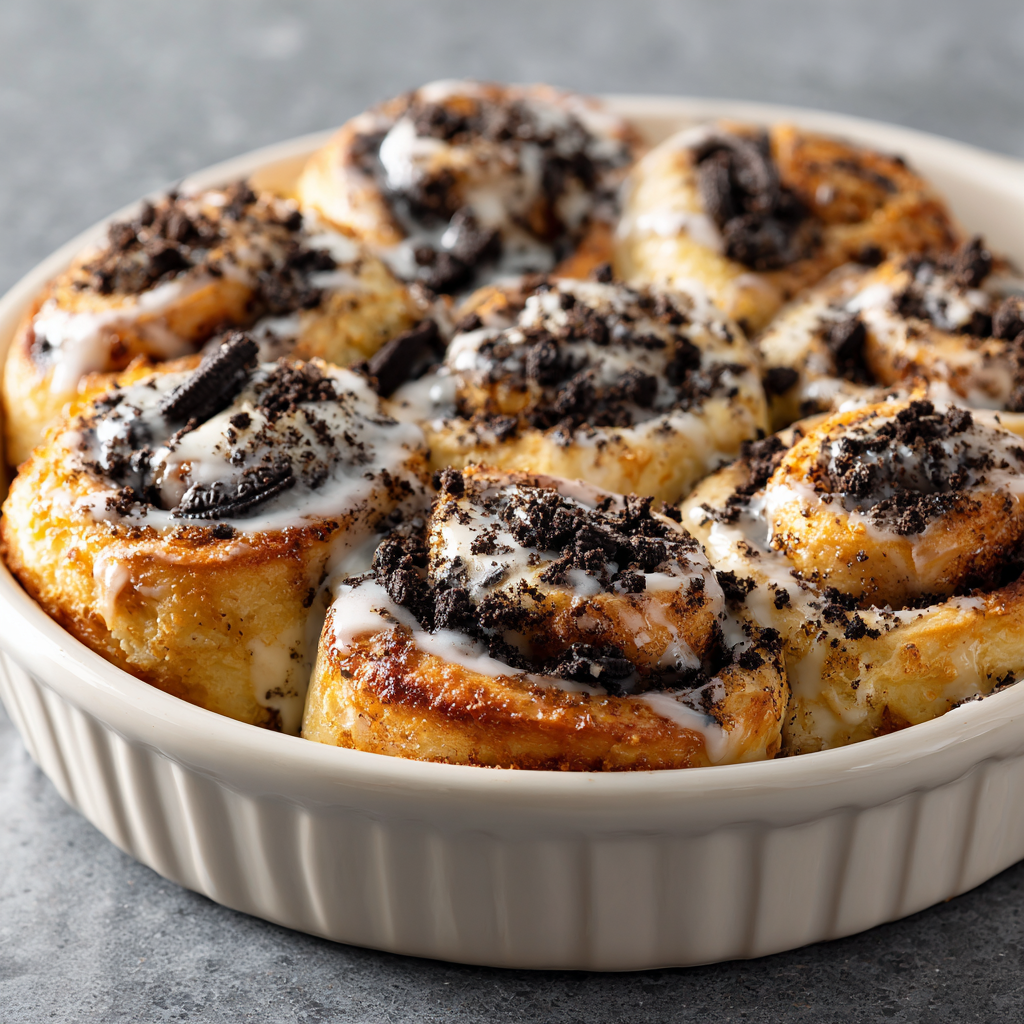
Easy Oreo Cinnamon Rolls : Gooey, Chocolatey, and Ready in Minutes
The Lazy Baker’s Dream: Oreo Cinnamon Rolls That Steal the Show
Hey friends! Olivia here, coming to you from my flour-dusted countertop. Can you smell that? It’s the magical scent of warm cinnamon, melting chocolate, and pure, unadulterated joy wafting from my oven. Today, we’re throwing the rulebook out the window and making something gloriously fun, sinfully easy, and guaranteed to make everyone at your table do a little happy dance. We’re taking the humble, store-bought cinnamon roll—that beacon of convenience and comfort—and turning it into a show-stopping, conversation-starting dessert mash-up: Easy Oreo Cinnamon Rolls.
I know what you’re thinking. “Olivia, from-scratch cinnamon rolls are a project.” And you’re right! Sometimes you want that Saturday morning kneading therapy. But other times? You want something spectacularly delicious on the table in under 30 minutes flat. You’ve got surprise guests, a house full of hungry kids, or you’re simply treating yourself to a cozy night in. That’s where this recipe shines. It’s for the days when you want maximum flavor payoff with minimal kitchen time. We’re combining the gooey, spiced warmth of a classic cinnamon roll with the crunchy, chocolatey delight of Oreos. It’s a match made in dessert heaven, and I can’t wait for you to try it. So grab that can of dough hiding in the fridge, let’s get a little messy, and create something unforgettable together.
The Midnight Snack That Started It All
This recipe was born from a classic case of the late-night munchies and a serious craving for innovation. Picture it: my college dorm, circa 2 a.m., studying for finals with my roommate. We were fueled by tea, determination, and a desperate need for sugar. The only things in our “pantry” (a glorified shelf) were a can of cinnamon rolls from a care package and a half-eaten sleeve of Oreos. Necessity, as they say, is the mother of invention.
In a stroke of sleep-deprived genius, we decided to combine our two greatest assets. We crushed those Oreos right in the bag with a textbook (very sanitary, I know), sprinkled the chunks over the unbaked rolls, and crossed our fingers. What emerged from our tiny, unreliable oven was nothing short of a miracle. The cookies softened into fudgy pockets, the cinnamon swirl hugged the chocolate bits, and the glaze made it all sing. It was more than a snack; it was a moment of pure, shared joy. That’s the spirit I want to bring to your kitchen today. No fuss, no stress, just clever little twists that turn the ordinary into pure magic.
Your Short & Sweet Shopping List
Here’s everything you need to create this magic. I’ve included my best tips for each ingredient so you can shop and bake like a pro!
- 1 can (typically 12.4 oz) refrigerated cinnamon rolls with icing – This is our brilliant shortcut! I usually grab the “Grands!” style for bigger, fluffier rolls. Chef’s Insight: Don’t stress about the brand. Any standard can (usually containing 5 or 8 rolls) will work perfectly. The icing included is your built-in glaze—how easy is that?
- 8–10 Oreo cookies, crushed – The star of the show! I use classic “Original” Oreos for that perfect chocolate flavor. Substitution Tip: Feel free to get creative! Mint Oreos would be amazing for a holiday twist, or Double Stuf for an extra creamy bite. For a nuttier flavor, try cookies and cream-style bars.
- ½ cup powdered sugar (optional, for extra glaze) – The icing from the can is great, but I’m a firm believer in more glaze. This is for my fellow drizzle enthusiasts. Chef’s Insight: Sift your powdered sugar! It prevents lumps and makes the smoothest, dreamiest glaze imaginable.
- 1–2 tablespoons milk – Just a splash to turn that powdered sugar into a pourable glaze. Any milk you have works—dairy, almond, oat, you name it.
- Non-stick cooking spray or butter for greasing – A little insurance policy to make sure your rolls pop right out with all their gorgeous, gooey bottoms intact.
Let’s Bake! Your Foolproof, Step-by-Step Guide
Follow these simple steps, and in less time than it takes to watch a sitcom, you’ll have a pan of warm, heavenly treats. I’ve packed each step with my favorite kitchen hacks to ensure your success.
Step 1: Preheat & Prep. Crank your oven to 350°F (175°C). This is the perfect temperature to get the rolls golden and cooked through without burning our precious Oreo addition. While it heats up, take a moment to lightly grease your baking dish—an 8-inch round cake pan or a small square dish works beautifully. This little act of kindness ensures easy serving later.
Step 2: Unleash the Dough & Crush the Cookies. Open that can of cinnamon rolls (the *pop* is so satisfying!). Separate them and set them on your work surface. Now, for the fun part: crushing the Oreos. You can do this in a zip-top bag with a rolling pin (great for stress relief!), pulse them a few times in a food processor, or even chop them roughly with a knife. You want a mix of fine crumbs and some pea-sized chunks for wonderful texture. Chef’s Hack: Don’t scrape out the filling! Crush the whole cookie. That creamy center melts into the most delicious fudgy bits.
Step 3: Assemble the Magic. Here’s where we transform the ordinary. Take each cinnamon roll and generously sprinkle a heaping tablespoon of crushed Oreos over the top of the dough. Don’t be shy! Then, simply roll them back up, tucking the cookies inside the spiral. The dough might feel a little fuller, and that’s perfect. Place each swirled roll into your prepared dish, spacing them slightly apart so they have room to puff and become neighbors as they bake.
Step 4: Bake to Golden Perfection. Slide your dish into the preheated oven and let the magic happen for 15-20 minutes. You’re looking for the tops to be a deep, golden brown and the centers to look set. A good sign is when you can smell that incredible cinnamon-chocolate aroma filling your kitchen. Pro Tip: Ovens can be sneaky. Start checking at 15 minutes. If the tops are browning too fast but the centers seem doughy, you can loosely tent the pan with aluminum foil for the last few minutes.
Step 5: Glaze While Warm. As soon as the rolls come out of the oven, it’s glaze time! Warm pastries absorb flavors and icing so much better. If you’re using the included icing, just squeeze it over the hot rolls right from the packet—the heat will make it melt and seep into all the nooks. If you made the extra glaze (whisk the powdered sugar and milk until smooth), drizzle it lavishly over the top. The warmth will create a beautiful, shiny finish.
Step 6: The Grand Finale. For maximum visual appeal and crunch, sprinkle the remaining crushed Oreos over the glazed rolls while the glaze is still wet. This adds a final hit of chocolate flavor and a fantastic textural contrast. Let them cool for just a minute or two—I know it’s hard to wait!—so the glaze can set slightly and you don’t burn your tongue on molten sugar. Then, dig in!
How to Serve These Chocolatey Spirals of Joy
Presentation is part of the fun! I love serving these right from the baking dish placed in the center of the table for that cozy, family-style feel. Use a big spoon or spatula to scoop them out, ensuring everyone gets plenty of the gooey bottom layer. Pair them with a big pot of strong coffee, ice-cold milk for the kids (and kids-at-heart), or even a scoop of vanilla ice cream on the side if you’re feeling truly decadent. The warm-cold contrast is a game-changer!
Mix It Up! 5 Delicious Twists on the Classic
Once you master the basic recipe, the flavor playground is open! Here are a few of my favorite riffs:
- Cookies & Cream Cheesecake: Mix 4 oz of softened cream cheese into your powdered sugar glaze. Drizzle over the rolls and top with white chocolate chips.
- S’mores Sensation: Add a handful of mini marshmallows to the pan for the last 3 minutes of baking. Finish with the glaze and a sprinkle of crushed graham crackers.
- Peanut Butter Paradise: Use Peanut Butter Oreos! Swirl a tablespoon of warm peanut butter into the glaze before drizzling.
- Mint Chocolate Refresh: Swap in Mint Oreos and add a drop of peppermint extract to the glaze. Perfect for the holidays!
- Fruity Fun: After baking, top with a handful of fresh raspberries or sliced strawberries. The tart fruit cuts through the sweetness beautifully.
Olivia’s Kitchen Notebook
This recipe has evolved from that messy dorm-room experiment into my go-to “hero dessert” for last-minute gatherings. I’ve learned a few things along the way! First, the type of cinnamon roll matters less than your enthusiasm. I once only had the “flaky” variety on hand, and they worked like a charm. Second, don’t skip the step of sprinkling extra Oreos on top after glazing—it makes them look bakery-level gorgeous with zero effort.
The funniest kitchen fail? I once was chatting so much with a friend that I completely forgot to add the *cinnamon rolls* to the crushed Oreos. I just put a pan of cookie crumbs in the oven. We still laugh about my “deconstructed Oreo cinnamon roll” phase. Moral of the story: even when things go hilariously wrong, you’re making memories. And usually, it still tastes pretty good.
Your Questions, Answered!
Q: Can I make these ahead of time?
A: You can prep them up to a point! Assemble the rolls (through Step 3) in the baking dish, cover tightly with plastic wrap, and refrigerate overnight. In the morning, let the dish sit on the counter while the oven preheats, then bake as directed, adding a minute or two if needed from cold. I don’t recommend freezing the unbaked rolls with the Oreos inside, as the cookies can get soggy.
Q: My glaze is too thick/too thin. Help!
A> No problem! This is an easy fix. Too thick? Add milk, just a teaspoon at a time, and whisk until it reaches a pourable consistency. Too thin? Add more sifted powdered sugar, a tablespoon at a time, until it thickens up. You want it to ribbon off your whisk.
Q: The Oreos on top sank into the glaze and got soggy. What happened?
A> This likely means the rolls or the glaze cooled too much before you added the final sprinkle. For the crunchiest topping, add the final Oreo crush immediately after drizzling the glaze, while everything is still very warm. The glaze will set around them, locking in some crunch.
Q: Can I use homemade cinnamon roll dough?
A> Absolutely! This is a fantastic way to elevate your favorite from-scratch recipe. Just follow your dough recipe as usual, sprinkling the crushed Oreos on the buttered and cinnamon-sugared rectangle before you roll it up. Proceed with proving and baking according to your recipe’s instructions.
Easy Oreo Cinnamon Rolls : Gooey, Chocolatey, and Ready in Minutes
Description
These Oreo Cinnamon Rolls are the ultimate shortcut dessert—warm, gooey cinnamon rolls packed with crunchy, chocolatey Oreo pieces and finished with a sweet glaze. Made with store-bought dough, they’re perfect for busy mornings, last-minute guests, or whenever you want something fun and comforting without spending hours in the kitchen.
Ingredients
-
1 can (about 12–13 oz) refrigerated cinnamon rolls with icing
-
8–10 Oreo cookies, crushed (cookies and filling)
-
Non-stick cooking spray or butter, for greasing
Optional Extra Glaze
-
½ cup powdered sugar
-
1–2 tablespoons milk (any kind)
Instructions
-
Preheat & Prepare
Preheat oven to 350°F (175°C). Lightly grease an 8-inch round or square baking dish. -
Crush the Oreos
Place Oreos in a zip-top bag and crush with a rolling pin, or pulse briefly in a food processor. Aim for a mix of crumbs and small chunks. -
Fill the Rolls
Separate the cinnamon rolls. Sprinkle about 1 tablespoon of crushed Oreos over each roll, then gently roll them back up. -
Arrange & Bake
Place rolls in the prepared dish. Bake for 15–20 minutes, until puffed and golden and centers are set. -
Glaze While Warm
Drizzle the included icing over hot rolls.
Optional: Whisk powdered sugar and milk until smooth and drizzle for extra glaze. -
Finish & Serve
Sprinkle a little extra crushed Oreo on top. Let cool 1–2 minutes, then enjoy warm.
Notes
-
Check early: Ovens vary—start checking at 15 minutes to avoid overbaking.
-
Crunch balance: Add the final Oreo sprinkle right after glazing so it sticks but keeps some texture.
-
Flavor swaps: Try Mint Oreos, Peanut Butter Oreos, or Double Stuf for a twist.
-
Make-ahead: Assemble the night before, cover, refrigerate, and bake in the morning (add 1–2 minutes if cold).
Nutritional Info (Because We’re All About Balance!)
Approximate values per roll (based on 8 rolls per batch, using included icing and 10 Oreos):
Calories: 290 | Protein: 4g | Carbohydrates: 40g | Fat: 13g | Sugar: 22g
Remember, friends, this is a treat recipe—a celebration in a pan! It’s all about savoring each gooey, chocolatey, joyful bite with the people you love. Enjoy every minute of it.
Final Thoughts: Your Shortcut to Sweet, Shared Joy
And there you have it—the easiest, most delightfully decadent upgrade to a classic comfort food. These Oreo Cinnamon Rolls are more than just a recipe; they’re a reminder that the most memorable moments in the kitchen often come from a little creativity, a dash of convenience, and a willingness to break the rules in the name of something delicious.
This isn’t about perfection. It’s about the fun of that pop of the can, the therapeutic crush of cookies, and the unbeatable aroma that fills your home. It’s about turning a regular Tuesday into a tiny celebration or impressing your friends without spending hours at the counter. That 2 a.m. dorm-room experiment taught me that the best dishes are often the ones that bring people together with simplicity and a whole lot of heart.
So the next time a sweet craving strikes or you need a guaranteed crowd-pleaser, remember this magical mash-up. Keep that can of dough and sleeve of Oreos in your pantry, and you’ll always be minutes away from a warm, gooey, chocolate-studded smile.
Happy baking, and enjoy every messy, delicious moment!
With love and a sprinkle of cookie crumbs,
Olivia 💕
Save This Recipe For Later!
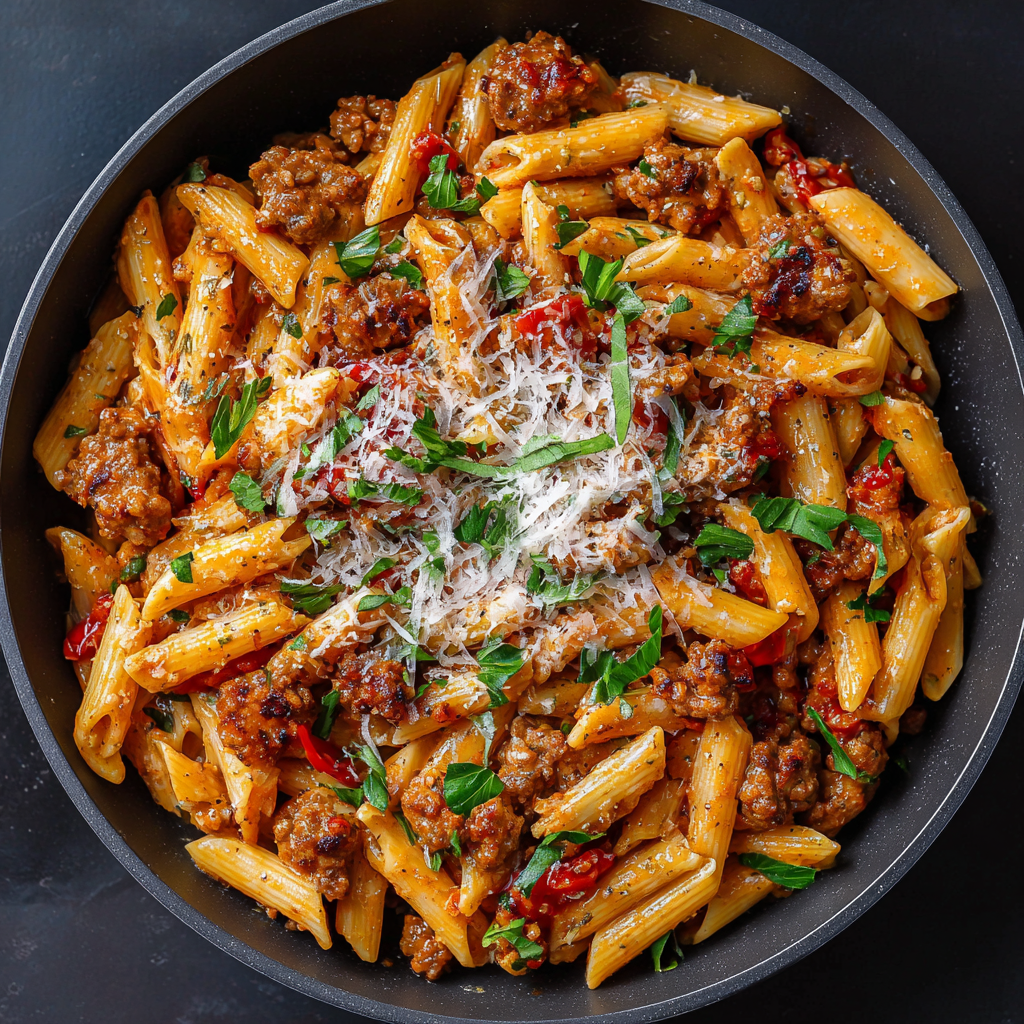
Spicy Sausage Pasta : Creamy, Bold & Ready in 25 Minutes
Welcome to the Easiest, Coziest Night In: Spicy Sausage Pasta
Hey there, friend! Come on in, grab an apron, and let’s get something simmering on the stove. You know those nights when you crave something deeply satisfying, something that feels like a hug from the inside, but you just don’t have the bandwidth for a culinary project? I’m right there with you. In the beautiful, beautiful chaos of everyday life, my go-to move is always a one-pan wonder that delivers maximum flavor with minimal fuss.
Today, we’re making my Spicy Sausage Pasta—a dish that’s become a legend in my own kitchen and with everyone I’ve ever shared it with. Imagine this: perfectly al dente pasta swirled in a luxuriously creamy, garlicky sauce, studded with crumbles of boldly spiced Italian sausage, and finished with just the right whisper of heat. It’s rich, it’s comforting, and it has this magical way of making a random Tuesday feel like a celebration. The best part? It all comes together in about 25 minutes, start to finish. This isn’t just a recipe; it’s your new secret weapon for deliciousness. So, let’s turn up some tunes, pour yourself a little something to sip, and create a bowl of pure, uncomplicated joy.
The Story Behind the Pot: A Happy Accident
This recipe has its roots in one of those “what on earth am I going to make for dinner” moments. It was a rainy Sunday, the grocery trip had been skipped, and my fridge was offering a cryptic puzzle of random ingredients. I had half a tube of spicy sausage left from pizza night, a lonely pint of cream, and a box of rigatoni. Desperation, as they say, is the mother of invention (and in my case, a very tasty invention).
I browned the sausage, breathed in that incredible fennel-and-garlic aroma, and decided to just go for it. A little garlic here, a pinch of red pepper flakes there, and a glug of cream. I tossed in the pasta with a splash of its starchy cooking water and gave it all a frantic stir. What emerged from the pan was nothing short of a miracle. It was creamy, spicy, hearty, and so much greater than the sum of its parts. My family descended on the kitchen, drawn by the smell, and the entire pot vanished in minutes. That happy, thrown-together meal instantly earned a permanent spot in our rotation. It reminds me that sometimes, the best dishes aren’t meticulously planned—they’re created with a little intuition and a lot of love for a good, quick dinner.
Gathering Your Flavor Squad: Ingredients & Insights
Here’s what you’ll need to create this flavor powerhouse. I’ve added my little chef notes for each—because knowing the *why* makes you a more confident cook!
- 8 oz (about 225g) Pasta (Penne, Rigatoni, or Shells work great). Chef’s Insight: Shape matters! We want a pasta that can trap the creamy sauce and sausage crumbles. Rigatoni’s tubes and penne’s ridges are perfect for the job. If you’re looking for a protein boost, a high-protein pasta variety blends right in.
- 1/2 lb (225g) Spicy Italian Sausage, casing removed. Chef’s Insight: This is the star! The sausage brings a built-in spice blend of fennel, garlic, and red pepper. If you can’t find spicy, use sweet Italian sausage and bump up the red pepper flakes. For a lighter take, try spicy chicken or turkey sausage.
- 2 Cloves Garlic, minced. Chef’s Insight: Fresh is best here. That quick sizzle in the sausage fat toasts it perfectly, mellowing the sharpness and creating an incredible base aroma. Don’t burn it!
- 1/2 tsp Red Pepper Flakes (adjust to taste). Chef’s Insight: This is your dial for heat. Start with 1/2 tsp for a warm background note. Love fire? Go for a full teaspoon. Toasting them for 30 seconds with the garlic unlocks a deeper, more complex heat.
- 1/2 Cup Heavy Cream or Half-and-Half. Substitution Tip: Heavy cream gives a luscious, restaurant-style richness. Half-and-half makes a slightly lighter but still creamy sauce. For a dairy-free version, full-fat canned coconut milk is a fantastic, subtly sweet alternative.
- 1/4 Cup Grated Parmesan Cheese. Chef’s Insight: Use the good stuff you grate yourself from a block if you can! The pre-grated kind often contains anti-caking agents that can make your sauce a bit grainy. This adds a salty, umami punch.
- 1/2 Cup Pasta Water (reserved). Chef’s Secret Weapon: This isn’t just water—it’s liquid gold! The starchy, salty water is the key to making a silky, emulsified sauce that clings to every noodle. Never, ever skip this step.
- Salt and Black Pepper to taste. Tip: Go easy on the salt initially, as the sausage and Parmesan are already salty. Always taste at the end!
- Optional: Chopped Fresh Parsley or Basil for garnish. This adds a pop of color and a fresh, herbal note that cuts through the richness beautifully.
Let’s Get Cooking: Your Foolproof Steps
Okay, team! Let’s turn these ingredients into dinner. I’ll walk you through each step with my favorite kitchen hacks.
- Cook the Pasta & Save That Water! Bring a large pot of well-salted water to a boil (it should taste like the sea!). Add your pasta and cook according to package directions for al dente—it should still have a slight bite. Just before draining, use a mug or ladle to scoop out at least 1/2 cup of the starchy pasta water. This is non-negotiable for our creamy sauce. Drain the pasta and set it aside. Chef’s Hack: Time your pasta to finish just as your sauce is ready, so you can add it hot from the pot. Hot pasta absorbs sauce better!
- Brown the Sausage to Perfection. While the pasta cooks, heat a large skillet or Dutch oven over medium-high heat. No need for extra oil—the sausage has plenty of fat. Add the sausage (casings removed) and use a wooden spoon to break it up into small, bite-sized crumbles. Cook for 5-7 minutes, letting it get a nice, brown sear. That browning equals big flavor, so don’t rush it! Tip: If there’s an excessive amount of fat (more than a couple tablespoons), you can drain a little off, but leave some—it’s flavor!
- Wake Up the Aromatics. Reduce the heat to medium. Push the sausage to the sides of the pan, creating a little well in the center. Add the minced garlic and red pepper flakes to that well. Let them sizzle for just about 45 seconds to 1 minute until incredibly fragrant. Don’t let the garlic brown! Then, stir everything together. Your kitchen should smell absolutely incredible right now.
- Create the Creamy Dream Sauce. Lower the heat to medium-low. Pour in the heavy cream and add the grated Parmesan. Add about 1/4 cup of your reserved pasta water. Give it a good stir. It might look a bit thin and separate at first—don’t panic! Let it simmer gently for 2-3 minutes. You’ll see it start to thicken slightly and come together into a cohesive, creamy sauce.
- The Grand Toss! Add the drained pasta directly into the skillet with the sauce. Using tongs, toss, toss, toss! Get every noodle coated in that creamy, spicy goodness. The sauce will tighten up as it coats the pasta. If it looks a bit too thick or dry, add more of the reserved pasta water, a tablespoon at a time, until you reach your perfect saucy consistency. Chef’s Hack: Finish tossing the pasta in the skillet over low heat for a final minute. This helps the pasta drink up the sauce.
- Taste and Triumph. This is the most important step! Taste your creation. Does it need a pinch more salt? A crack of black pepper? Maybe another sprinkle of Parmesan? Adjust to your heart’s content. Remove from heat.
- Serve it Up with Love. Dish the pasta into bowls immediately. Garnish with a little extra Parmesan, a sprinkle of fresh parsley or basil, and if you’re feeling extra, an extra pinch of red pepper flakes for color. Serve it hot and watch the happy faces.
How to Serve Your Masterpiece
This pasta is a complete, hearty meal in a bowl, but I love rounding it out for a truly special feel. Serve it in shallow bowls to show off that creamy sauce. On the side, a simple crisp green salad with a lemony vinaigrette is the perfect fresh contrast. A few slices of warm, crusty garlic bread are practically mandatory for scooping up every last drop. For a casual gathering, I’ll pop the whole skillet right in the middle of the table with a big serving spoon—it invites everyone to dig in and creates that wonderful, family-style connection we love.
Make It Your Own: Fun Variations
- Veggie-Packed Power: Sauté a diced bell pepper or a handful of spinach with the garlic. For a heartier veggie version, use plant-based spicy sausage crumbles.
- Sun-Dried Tomato & Kale: Add 1/3 cup chopped sun-dried tomatoes (oil-packed, drained) and a couple handfuls of chopped kale with the cream. Let the kale wilt into the sauce.
- Spicy Vodka Twist: After browning the sausage, deglaze the pan with 1/4 cup of vodka. Let it simmer for a minute before adding the cream for a classic, adult-depth flavor.
- Lemon & Herb Brightness: Stir in the zest of one lemon and a handful of fresh basil or oregano at the very end for a vibrant, fresh lift.
- Swap the Protein: Spicy ground chicken or turkey works beautifully. Just add a teaspoon of fennel seeds and a pinch more garlic powder to mimic the Italian sausage flavor profile.
From My Kitchen to Yours: Chef’s Notes
This recipe has evolved so much since that first rainy day! I’ve learned that the quality of sausage makes the biggest difference—I now seek out my local butcher’s house blend. One time, I was chatting so much with a friend that I completely forgot the pasta water. The sauce was thick, clumpy, and just sad. Lesson learned: keep that mug of gold right next to the stove as a visual reminder! I’ve also started adding the red pepper flakes with the garlic every single time; toasting them just unlocks something magical. Don’t be afraid to play with it. This recipe is a wonderfully forgiving canvas. The most important ingredient is always the joy you bring to the process. A little music, a good apron, and the intention to feed yourself or your people well—that’s the real secret.
Your Questions, Answered: FAQs & Troubleshooting
Q: How can I make this less spicy for my kids/sensitive eaters?
A: Absolutely! The heat comes from two places: the sausage and the red pepper flakes. First, use mild Italian sausage. Second, either omit the red pepper flakes entirely or add just a tiny pinch (1/8 tsp). You can always pass extra flakes at the table for the heat-lovers.
Q: My sauce looks oily or separated. What did I do wrong and how can I fix it?
A> This usually happens if the heat is too high when you add the cream, causing it to “break.” Don’t worry, we can save it! First, remove the pan from heat. Add a splash (2-3 tbsp) of your reserved pasta water and whisk vigorously. The starch in the water is an emulsifier and will help bring the sauce back together. If it’s still struggling, whisk in another tablespoon of cold cream.
Q: Can I make this ahead of time?
A> You can prep components! Brown the sausage and have your ingredients measured. The sauce is best made fresh, as pasta continues to absorb liquid. If you have leftovers, they’ll still be tasty! Reheat gently in a skillet with a splash of milk, water, or broth to loosen the sauce back up.
Q: Can I use milk instead of cream to make it lighter?
A> You can, but the sauce will be much thinner and less rich. For a better lighter option, I recommend half-and-half or even whole milk mixed with a teaspoon of flour or cornstarch (make a slurry first!) to help it thicken. The result won’t be as luxuriously creamy, but it will still be delicious.

Spicy Sausage Pasta : Creamy, Bold & Ready in 25 Minutes
Ingredients
-
8 oz (225 g) penne, rigatoni, or shells
-
½ lb (225 g) spicy Italian sausage, casing removed
-
2 cloves garlic, minced
-
½ tsp red pepper flakes (adjust to taste)
-
½ cup heavy cream or half-and-half
-
¼ cup freshly grated Parmesan cheese
-
½ cup reserved pasta water
-
Salt & black pepper, to taste
-
Fresh parsley or basil, chopped (optional garnish)
Instructions
-
-
Cook Pasta
Boil pasta in well-salted water until al dente.
Reserve ½ cup pasta water, then drain. -
Brown Sausage
Heat a large skillet over medium-high heat.
Add sausage and cook, breaking it up, until browned (5–7 minutes). -
Add Garlic & Heat
Lower heat to medium.
Add garlic and red pepper flakes; cook 30–60 seconds until fragrant. -
Make Sauce
Reduce heat to medium-low.
Stir in cream, Parmesan, and ¼ cup reserved pasta water.
Simmer gently 2–3 minutes until slightly thickened. -
Combine
Add pasta to skillet and toss to coat.
Add more pasta water as needed for desired consistency. -
Season & Serve
Taste and adjust with salt and pepper.
Garnish with herbs and extra Parmesan if desired.
-
Notes
-
Lower heat before adding cream to prevent curdling
-
Freshly grated Parmesan melts best
-
Add more red pepper flakes for extra heat
Nutritional Information (Per Serving, serves 4)
Approximate values provided for your convenience. Remember, ingredients and portion sizes may vary.
Calories: 480 | Protein: 25g | Fat: 26g | Carbohydrates: 38g | Fiber: 2g | Sugar: 3gµ
Final Thoughts
So there you have it—the story, the secrets, and the steps to a dish that’s as much about ease as it is about flavor. This Spicy Sausage Pasta isn’t just a recipe; it’s a reminder that a truly great meal doesn’t have to be complicated or time-consuming. In just about half an hour, with a handful of humble ingredients and one trusty pan, you can create something that feels like a celebration. It’s the kind of food that gathers people, slows down the clock, and turns an ordinary evening into a warm, shared memory.
Remember, the heart of this recipe lies in its flexibility. Make it your own—swap the protein, load it with veggies, or dial the heat up or down. Cooking, at its best, is an act of intuition and joy. So trust your taste, save that pasta water, and don’t be afraid to play. Whether you’re cooking for a crowd, a partner, or just your wonderful self, I hope this dish brings as much comfort and delight to your table as it has to mine.
Now, go forth and simmer, sizzle, and savor. You’ve got this. And when you take that first, creamy, spicy, utterly satisfying bite—know that you’ve just created more than dinner. You’ve created a little moment of cozy, delicious joy.
Happy cooking, friend.
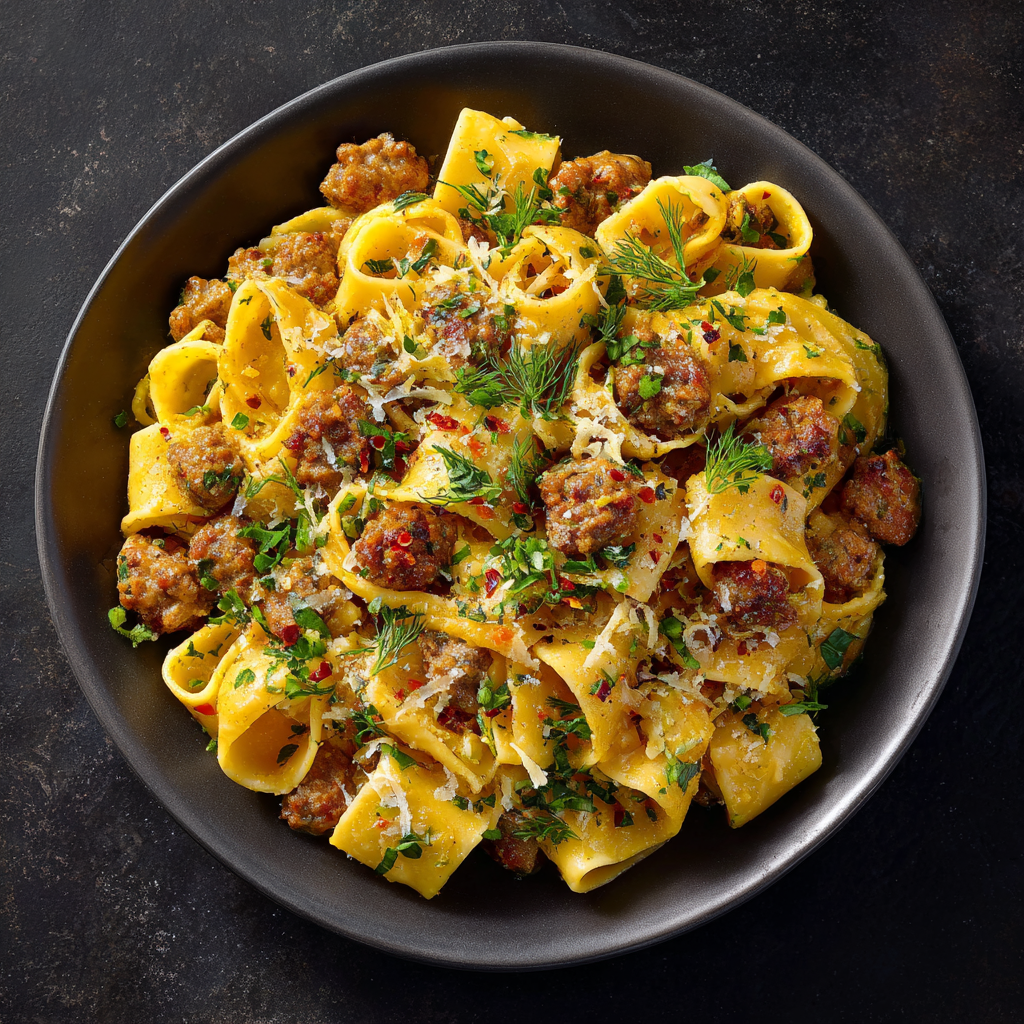
Spicy Sausage Pasta : Creamy, Bold & Ready in 30 Minutes
Spicy Sausage Pasta: Your New Favorite Weeknight Hero
Hey there, friend! Come on in, wipe your feet on the cute rug, and let’s get something simmering. You know those nights when you’re craving something that feels like a hug in a bowl, but your energy levels are hovering somewhere around “can barely open the fridge”? Yeah, I’ve been there more times than I’d like to admit. That’s exactly why this Spicy Sausage Pasta is my kitchen’s secret weapon—and today, I’m so excited to pass it on to you.
Imagine this: juicy, savory sausage with a gentle kick, swirled in a luxuriously creamy tomato sauce that clings to every nook and cranny of your favorite pasta. It’s rich, it’s comforting, and it has just the right amount of fiery personality to wake up your taste buds. The best part? We’re making it all in one skillet, and we’re doing it in about 30 minutes flat. No fancy techniques, no obscure ingredients hiding in the back of your pantry—just straightforward, soul-satisfying food that makes everyone at the table lean in for seconds.
This dish is the ultimate proof that “special” doesn’t have to mean “complicated.” It’s for the busy parent, the tired professional, the student on a budget, or anyone who believes that a great meal is the best way to turn a regular Tuesday into a little celebration. So, tie on your apron (embrace the mess, I always do!), grab your favorite big skillet, and let’s create some magic. This isn’t just dinner; it’s a flavor-packed getaway you can enjoy without leaving your kitchen.
The Story Behind the Sizzle
This recipe will always remind me of my early twenties, living in a tiny apartment with an even tinier kitchen. My friends and I had a standing “Broken Budget” dinner club, where the only rule was that the meal had to cost less than $20 total and feed at least four very hungry people. One chilly Thursday, I stared into my nearly empty fridge: a lone onion, half a carton of cream, and some pasta. My freezer yielded one precious link of spicy Italian sausage, a souvenir from a slightly more extravagant grocery trip.
With a “what’s the worst that could happen?” attitude, I threw it all together. The sizzle of the sausage hitting the hot pan, the way the garlic and onion started to smell like hope itself, the magical moment when the cream swirled into the tomatoes and created a sunset-pink sauce… it was a revelation. My friends arrived, shivering, and the second they walked in, their faces changed. “Something smells AMAZING.” We devoured it straight from the skillet, dipping crusty bread into the sauce, laughing and talking over each other. That meal, born from scraps and spontaneity, became our most requested dish. It taught me that the best recipes aren’t about perfection; they’re about connection, resourcefulness, and the sheer joy of sharing something delicious.
Gathering Your Flavor Arsenal
Here’s everything you’ll need to build this beautiful, bold dish. I’ve added a few notes and swaps because I want you to feel empowered, not restricted! Cooking is about playing, so make it your own.
- 12 oz pasta (penne or rigatoni): These tube-shaped pastas are my MVP here. Their hollow centers and ridges capture the creamy sauce, ensuring every bite is loaded. No penne? Fusilli or farfalle are fun alternatives!
- 1 tbsp olive oil: Just enough to coat the pan and get things sizzling. It adds a subtle fruity note that forms the foundation of our flavor.
- 1 lb spicy Italian sausage, casings removed: This is our flavor powerhouse! The fat renders into the sauce, making it incredibly rich. If you’re sensitive to heat, use mild Italian sausage. For a lighter twist, try ground turkey or chicken sausage—just add an extra pinch of red pepper flakes and fennel seeds to keep the spirit alive.
- 1 small onion, diced: Our aromatic base. It sweetens as it cooks, balancing the spice and richness. A shallot works beautifully here too for a more delicate flavor.
- 3 cloves garlic, minced: Non-negotiable for me! It adds that deep, savory backbone. Pro tip: smash the cloves with the flat of your knife first—the skins will practically fall off.
- ½ tsp red pepper flakes: This is where you control the fire! Start with ½ tsp for a gentle warmth. Love the burn? Go for a full teaspoon. Remember, you can always add more, but you can’t take it out!
- 1 (14 oz) can diced tomatoes: They bring bright, tangy acidity and texture. I prefer the “fire-roasted” kind for an extra smoky depth, but any good-quality diced tomatoes work.
- ½ cup tomato sauce or marinara: This smooths out the sauce and thickens it slightly. Using your favorite jarred marinara is a huge time-saver and adds another layer of herb flavor.
- ½ cup heavy cream or half & half: The creamy dream! Heavy cream gives you a luxuriously thick, restaurant-style sauce. Half & half makes a slightly lighter, but still luscious, version. For a dairy-free option, full-fat coconut milk is a surprisingly delicious swap.
- ½ cup grated Parmesan cheese: The salty, umami-rich finisher that makes the sauce cling. For the best flavor, grate it yourself from a block—it melts so much better than the pre-shredded kind, which has anti-caking agents.
- Salt & pepper to taste: Your final seasoning tools. Always taste before you season at the end!
- Fresh parsley or basil for garnish: This isn’t just for looks! A sprinkle of fresh green herbs adds a pop of color and a bright, fresh flavor that cuts through the richness perfectly.
Let’s Get Cooking: Your Step-by-Step Roadmap to Delicious
Ready? Let’s transform these simple ingredients into something spectacular. I’m right here with you, talking you through every step with my favorite little hacks.
- Pasta Prep with a Pro Move: Cook your pasta in a large pot of well-salted water (it should taste like the sea!) according to the package directions for al dente. Here’s the game-changer: RESERVE ABOUT ½ CUP OF THE PASTA WATER BEFORE YOU DRAIN. This starchy, salty liquid is liquid gold for sauces. It helps bind the sauce to the pasta and loosens everything up to the perfect consistency. Drain the pasta and set it aside.
- Brown That Beautiful Sausage: While the pasta cooks, heat the olive oil in a large, deep skillet or Dutch oven over medium-high heat. Add the sausage (casings removed), and use a wooden spoon or spatula to break it up into bite-sized crumbles. Let it cook without moving it too much at first—this is how we get those delicious, crispy, caramelized bits! Cook until it’s nicely browned, about 6-8 minutes.
- Build Your Flavor Base: Reduce the heat to medium. Add the diced onion to the sausage and cook, stirring occasionally, until it turns soft and translucent, about 4-5 minutes. Now, add the minced garlic and red pepper flakes. Stir constantly for just about 60 seconds—you’ll smell the garlic blooming! Don’t let it burn, or it’ll turn bitter.
- Create the Saucy Foundation: Pour in the can of diced tomatoes (with their juices) and the ½ cup of tomato sauce. Give it a good stir, scraping up any of those flavorful browned bits stuck to the bottom of the pan (that’s called fond, and it’s pure flavor!). Let the sauce simmer gently for about 5 minutes. This allows the tomatoes to break down a little and the flavors to marry.
- The Creamy Magic Moment: Lower the heat to medium-low. This is important so the cream doesn’t separate. Slowly pour in the heavy cream or half & half, stirring as you go. Watch as it swirls with the red tomato sauce and turns a gorgeous coral-pink color. Let it simmer gently for another 2-3 minutes to thicken slightly. Now, stir in the grated Parmesan cheese until it melts into a smooth, velvety sauce.
- The Grand Finale – Bring It All Together: Add the cooked and drained pasta directly into the skillet with the sauce. Using tongs, toss and stir until every piece of pasta is gloriously coated. Here’s where you use that reserved pasta water! Start by adding a splash (about ¼ cup) and toss again. The sauce will loosen, become glossier, and cling to the pasta perfectly. Add more if you like a saucier dish. Give it a taste—now’s the time to season with salt and freshly cracked black pepper.
- Serve with Love: Dish it up immediately into warm bowls. Finish with a generous sprinkle of fresh parsley or basil and an extra dusting of Parmesan if you’re feeling fancy. That’s it! You did it.
Serving Up the Cozy
This pasta is a star all on its own, but a few simple sides can turn it into a feast. I love serving it family-style, right in the skillet in the middle of the table (less dishes!). A big, crisp green salad with a sharp vinaigrette is the perfect fresh contrast. And please, please don’t forget a basket of warm, crusty bread or garlic knots for mopping up every last drop of that incredible sauce. For drinks, a chilled glass of Pinot Noir or a sparkling lemonade works beautifully.
Make It Your Own: Delicious Twists & Swaps
This recipe is wonderfully adaptable. Here are a few ways to play with it:
- Veggie-Packed: Add a chopped bell pepper or zucchini when you sauté the onion. Spinach or kale stirred in at the very end adds color and nutrients.
- White Wine Elegance: After browning the sausage, deglaze the pan with ¼ cup of dry white wine. Let it reduce by half before adding the tomatoes. It adds a fantastic layer of acidity and complexity.
- Spicy Arrabbiata Style: Omit the cream for a lighter, fiery tomato sauce. Use a full teaspoon (or more!) of red pepper flakes and finish with fresh basil.
- Cheese Lover’s Dream: Stir in ½ cup of shredded mozzarella or fontina with the Parmesan for an extra gooey, cheesy pull.
- Protein Swap: Not a sausage fan? Try ground beef, turkey, or even meatless crumbles. Just be sure to season them well with Italian herbs, fennel, and chili flakes.
Olivia’s Notebook: A Few Extra Sprinkles of Wisdom
This recipe has evolved with me over the years. In my tiny apartment, I used whatever cream was on sale and pre-grated cheese. Now, I might splurge on fresh Parmigiano-Reggiano. But you know what? Both versions were absolutely devoured and loved. That’s the real secret: the heart you put into it matters more than the price tag of the ingredients.
One funny fail I had early on? I once added the cream while the skillet was still screaming hot. It immediately curdled into little grainy bits. I was devastated for about 30 seconds before I decided to just roll with it, calling it my “rustic textured sauce.” My friends never knew! But now, I always lower the heat—a lesson learned in both cooking and grace. Don’t be afraid of a little kitchen mishap; it’s usually still tasty, and it’s always a good story.
Your Questions, Answered
Q: My sauce seems too thick/dry. What did I do wrong?
A: No worries—this is an easy fix! You might have simmered it a bit too long or your tomatoes were less juicy. Simply use more of your reserved pasta water, a splash at a time, and toss until it reaches your perfect sauciness. You can also add a touch more cream or even a little broth.
Q: Can I make this ahead of time?
A> You can absolutely prep components! Brown the sausage and make the sauce (up to adding the cream and cheese). Store it separately from the cooked pasta in the fridge for up to 2 days. When ready, gently reheat the sauce, stir in the cream and cheese, then add the pasta and a splash of water or milk to bring it back to life.
Q: The cream sauce split/curdled on me. How can I prevent this?
A> This usually happens if the heat is too high when you add the dairy. Always lower the heat to medium-low before adding the cream. Also, letting the cream come to room temperature for 15 minutes before using can help. If it does curdle, a vigorous whisking can sometimes bring it back, or you can blend it briefly with an immersion blender.
Q: Can I freeze leftovers?
A> Cream-based sauces can sometimes separate a bit when frozen and reheated, but the flavor will still be great. For best texture, freeze the sauce alone (before adding the pasta). Thaw in the fridge overnight and reheat gently, adding a splash of milk or cream while stirring. Then mix with freshly cooked pasta.
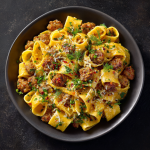
Spicy Sausage Pasta : Creamy, Bold & Ready in 30 Minutes
Ingredients
-
12 oz (340 g) penne or rigatoni pasta
-
1 tbsp olive oil
-
1 lb (450 g) spicy Italian sausage, casings removed
-
1 small onion, diced
-
3 cloves garlic, minced
-
½ tsp red pepper flakes (adjust to taste)
-
1 (14 oz / 400 g) can diced tomatoes
-
½ cup tomato sauce or marinara
-
½ cup heavy cream or half & half
-
½ cup freshly grated Parmesan cheese
-
Salt & black pepper, to taste
-
Fresh parsley or basil, chopped (for garnish)
Instructions
-
Cook the Pasta
Boil pasta in well-salted water until al dente.
Reserve ½ cup pasta water, then drain and set aside. -
Brown the Sausage
Heat olive oil in a large skillet over medium-high heat.
Add sausage and cook, breaking it apart, until browned (6–8 minutes). -
Add Aromatics
Reduce heat to medium.
Add onion and cook until soft (4–5 minutes).
Stir in garlic and red pepper flakes; cook 30–60 seconds. -
Make the Sauce
Add diced tomatoes and tomato sauce.
Simmer 5 minutes, scraping up browned bits. -
Creamy Finish
Lower heat to medium-low.
Stir in cream, then Parmesan cheese until smooth. -
Combine
Add pasta to the skillet and toss to coat.
Add reserved pasta water a little at a time if needed. -
Serve
Taste and adjust seasoning.
Garnish with parsley or basil and extra Parmesan.
Notes
-
Lower heat before adding cream to prevent curdling
-
Add more red pepper flakes for extra heat
Nutritional Information (Approximate)
Serves 4 | Prep & Cook Time: 30 mins
Per serving:
Calories: ~560 | Carbohydrates: 45g | Fat: 32g | Protein: 24g | Sodium: Varies based on sausage and cheese used.
Please note: This is an estimate generated using online calculators. For precise dietary needs, please calculate with your specific ingredients.
 Pin Title: Spicy Sausage Pasta | 30-Minute Creamy One-Pot Meal
Final Thoughts: More Than Just a Meal
So, there you have it. Your new weeknight hero, packed with flavor, memory, and simplicity. This Spicy Sausage Pasta is more than a recipe; it’s a reminder that the best moments often come from the most unassuming places—a nearly empty fridge, a tight budget, and the simple desire to share something good with people you care about.
It celebrates the beautiful truth that incredible food doesn’t require hours of labor or a laundry list of exotic ingredients. It requires a little heart, a trusty skillet, and the understanding that a great meal has the power to turn an ordinary evening into something warm, connected, and deeply satisfying.
Whether you stick to the script exactly or start riffing with your own twists, make this dish yours. Let it be the solution to your busy days, the centerpiece of your casual gatherings, and your own story in the making. Because the ultimate goal isn’t just to feed the body; it’s to nourish the soul. And this pasta, with its spicy sizzle, creamy embrace, and humble origins, does exactly that.
Now, go ahead. Make the mess, share the bread, soak up the sauce, and savor every bite. Your kitchen is waiting to be filled with its own delicious story.
Happy Cooking,
Olivia
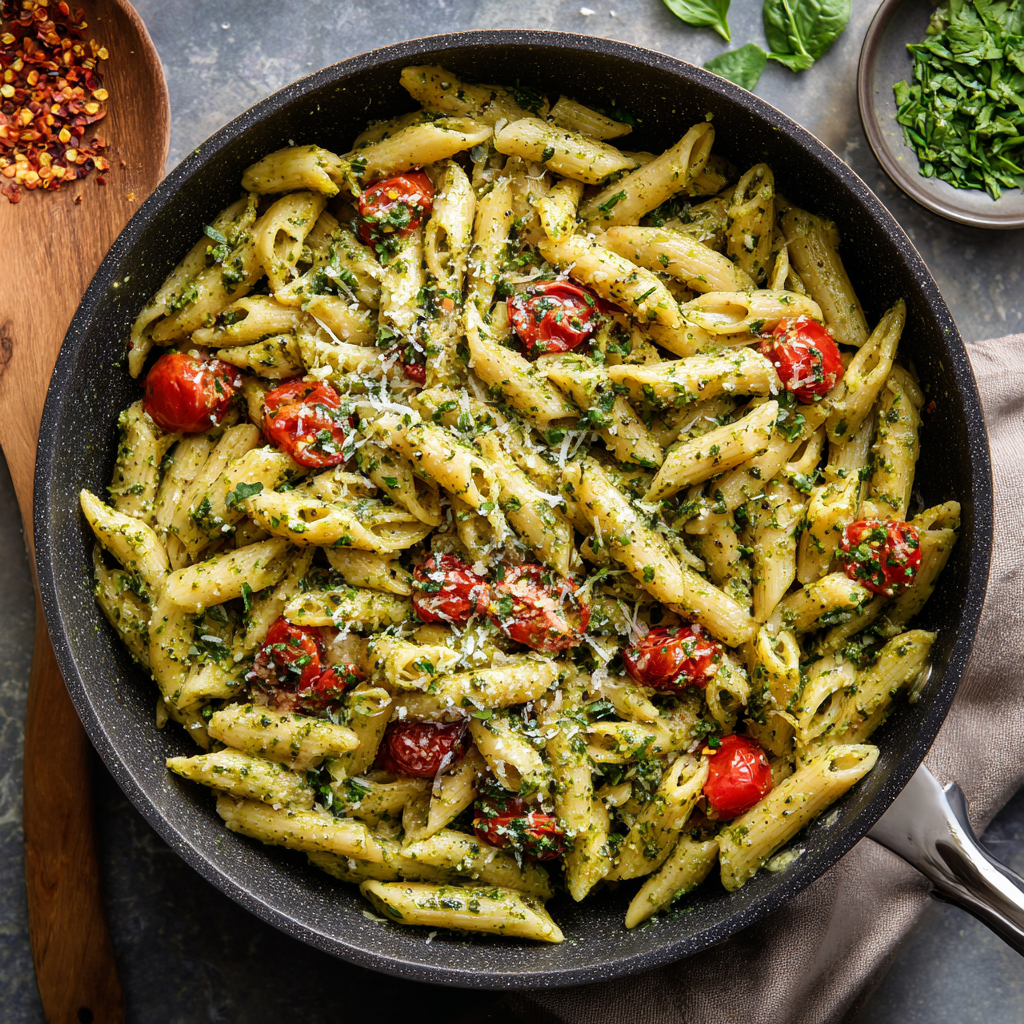
Creamy Chicken Penne Pasta : Comfort in Every Bite
Dinner Just Got Cozier: Your New Favorite Chicken Pasta Awaits
Hey there, friend! Olivia here, apron probably dusted with a little flour and a whole lot of excitement. Come on in, pull up a stool, and let’s talk about one of life’s greatest simple pleasures: a bowl of pasta that hugs you from the inside out. You know the kind I mean. It’s not about fussy techniques or a mountain of dishes; it’s about that magical moment when creamy sauce, tender pasta, and perfectly seasoned chicken come together in one glorious, satisfying forkful.
That’s exactly what this Creamy Chicken Penne Pasta is all about. It’s my go-to, my secret weapon, the recipe I make when I need something that feels like a warm blanket but fits into a busy Tuesday night. We’re talking juicy bites of chicken, penne pasta that holds onto every drop of that luscious sauce, and a garlic-Parmesan cream situation that is downright dreamy. It’s elegant enough to serve to guests but simple enough that you can make it on autopilot after a long day. My goal today isn’t just to give you a recipe; it’s to hand you the keys to a dish that will become a beloved part of your own kitchen story. So, let’s grab a skillet and make some magic!
The Pasta That Started It All: A Tale of Two Apartments
This recipe takes me back. Way back to my first real apartment after college—you know, the one with the quirky cabinet doors that never quite shut and a stove with exactly one reliable burner. My budget was tight, but my desire to host friends and create a cozy home was huge. This creamy chicken penne was one of the first “real” dishes I felt I truly mastered. I’d invite my best friend over, we’d split a cheap bottle of wine, and I’d proudly whip this up while we dissected our weeks.
The beauty was in its simplicity and its power to transform. With just a handful of affordable ingredients, my tiny kitchen smelled like an Italian trattoria. That sizzle of garlic hitting the pan, the rich aroma of Parmesan melting into warm cream… it felt sophisticated. It felt adult. But more than that, it felt like connection. We’d dig into big bowls, curled up on my second-hand couch, and for a moment, everything felt perfectly abundant. That’s the spirit I want you to bring to this recipe. It’s more than food; it’s a tool for making moments, for turning an ordinary evening into a little celebration.
Gathering Your Flavor Team: Ingredients & Insights
Great dishes start with great ingredients, but let’s not stress about “perfect.” Here’s what you’ll need, along with my little chef notes to guide you. This is your flavor dream team!
- 12 oz Penne Pasta: Penne is my MVP here—its tubes and ridges are designed to trap creamy sauce. No penne? Rigatoni or fusilli are fantastic stand-ins.
- 1 lb Chicken Breast or Thighs: Chef’s Insight: I adore thighs for their juiciness and forgiveness, but breasts work beautifully for a leaner option. Just don’t overcook them! Cutting them into even, bite-sized pieces is the key to quick, uniform cooking.
- Salt, Pepper, Garlic Powder: Our simple but mighty seasoning trio. The garlic powder on the chicken creates a flavor foundation that complements the fresh garlic later.
- 1 tbsp Olive Oil: For sautéing. A good extra virgin olive oil adds a lovely fruity note.
- 3 Cloves Garlic, Minced: Fresh is best here! That pungent, aromatic bite is the soul of the sauce. Don’t be shy.
- 1 cup Heavy Cream: This is what gives the sauce its luxurious, silky body. For a lighter version, half-and-half can work, but the sauce will be thinner. Pro Tip: Let it come to room temp for a minute to prevent curdling when you add it to the pan.
- ½ cup Chicken Broth: This balances the richness of the cream and adds savory depth. Low-sodium is my preference so I can control the salt.
- ½ cup Grated Parmesan Cheese: CRUCIAL NOTE: Please, for the love of all things creamy, use real, freshly grated Parmigiano-Reggiano or a good quality block Parmesan you grate yourself. The pre-grated stuff in bags often contains anti-caking agents that can make your sauce grainy and less smooth.
- 1 cup Baby Spinach or Sun-Dried Tomatoes (Optional): My little “boost of joy.” Spinach wilts beautifully for a pop of color and nutrition. Sun-dried tomatoes (oil-packed, chopped) add a sweet, tangy punch. Use one, both, or neither!
- Fresh Parsley for Garnish: A sprinkle of fresh green herb at the end isn’t just pretty; its bright flavor cuts through the richness perfectly.
Let’s Get Cooking: Your Foolproof, Flavor-Packed Steps
Ready? Tie on that apron, and let’s dance through these steps together. I’m right here with you, offering all my little hacks along the way.
Step 1: The Pasta Foundation. Cook your penne in a large pot of well-salted water according to the package directions for al dente. Chef’s Hack: Salt that water like the sea! It’s your one chance to season the pasta from within. Before you drain it, scoop out about a cup of that starchy pasta water and set it aside. This liquid gold is our secret weapon for adjusting the sauce consistency later. Drain the pasta and set it aside.
Step 2: Golden, Juicy Chicken. Pat your chicken pieces very dry with a paper towel—this is the secret to a good sear! Season them generously all over with salt, pepper, and garlic powder. Heat the olive oil in a large skillet or Dutch oven over medium-high heat. Add the chicken in a single layer (don’t crowd the pan; cook in batches if needed) and let it cook undisturbed for 4-5 minutes to get that beautiful golden crust. Flip and cook until cooked through. Remove to a plate. See those browned bits in the pan? That’s flavor. We’re building on that.
Step 3: The Aromatic Heart. In the same, now-empty skillet (keep those bits!), reduce the heat to medium. Add the minced garlic and sauté for about 60 seconds until incredibly fragrant. You want it golden, not brown, or it can turn bitter. The smell at this point is absolutely intoxicating.
Step 4: Building the Dreamy Sauce. Pour in the heavy cream and chicken broth. Give it a good whisk, scraping up all those delicious browned bits from the chicken from the bottom of the pan. This is called deglazing, and it’s where we capture all that built-up flavor. Bring the mixture to a gentle simmer—just a few bubbles breaking the surface.
Step 5: The Cheesy Embrace. Reduce the heat to low. Slowly sprinkle in the grated Parmesan cheese, stirring constantly with a wooden spoon or whisk until it’s completely melted and the sauce is smooth and creamy. Big Tip: Keep the heat low here. Boiling the sauce after adding the cheese can cause it to separate or become oily.
Step 6: The Grand Union. Add the cooked penne and chicken back into the skillet. Toss everything until every piece is lovingly coated in that glorious sauce. If you’re using spinach or sun-dried tomatoes, toss them in now. Let it all simmer together for just 2-3 minutes so the flavors marry. If the sauce seems a bit thick, splash in a little of that reserved pasta water, a tablespoon at a time, until it reaches your perfect consistency.
Step 7: Taste and Triumph. This is the most important step! Taste it. Does it need another pinch of salt? A crack of black pepper? Adjust to your heart’s content. You’re the chef!
Plating Up Your Masterpiece
I love serving this family-style right out of the skillet—it’s inviting and casual. Ladle generous portions into shallow bowls. The finishing touches make it sing: a final shower of freshly grated Parmesan, a vibrant sprinkle of chopped parsley, and if you’re feeling fancy, a little extra crack of black pepper. For the ultimate cozy night, pair it with a simple green salad dressed with a sharp vinaigrette (to balance the richness) and a slice of warm, crusty bread for mopping up every last drop of sauce. Perfection!
Make It Your Own: Delicious Twists & Swaps
The beauty of this recipe is its flexibility! Here are a few ways to play:
- Mushroom Lover’s Dream: Sauté 8 oz of sliced cremini mushrooms with the garlic for an earthy, umami-packed version.
- Sun-Dried Tomato & Basil Bliss: Use the sun-dried tomatoes and finish with a handful of fresh basil ribbons instead of parsley.
- Lemon Herb Brightness: Add the zest of one lemon to the sauce with the cheese, and finish with a squeeze of fresh lemon juice and chopped fresh thyme or dill.
- “Creamy” Dairy-Free: Use full-fat coconut milk instead of heavy cream and a vegan Parmesan alternative. The flavor profile shifts, but it’s still deliciously creamy!
- Bacon Boost: Cook 4-6 slices of chopped bacon first, remove, then cook the chicken in the bacon fat. Use the bacon as a garnish. Need I say more?
Olivia’s Kitchen Notes & Stories
This recipe has been on quite a journey with me! In my early days, I was terrified of the sauce breaking (separating), so I’d turn the heat off entirely before adding the cheese. It worked, but the sauce was never quite as velvety. I learned that low, gentle heat and constant stirring is the true key. One time, a friend called while I was cooking and I got distracted—the garlic got a little too toasty. I was devastated, but I pushed on. You know what? The slight bitterness actually added a nice, complex edge! It was a happy accident that taught me not to panic over minor imperfections. Food, like life, doesn’t have to be perfect to be wonderful and deeply satisfying.
Your Questions, Answered: FAQs & Fixes
Q: My sauce turned out a bit grainy/oily. What happened?
A: This usually happens if the heat was too high when you added the cheese, or if you used pre-grated Parmesan (which has cellulose). Don’t worry! Remove the pan from heat and vigorously whisk in a splash of hot pasta water or cream. It should smooth right back out. For next time, low heat and fresh-grated cheese are your best friends.
Q: Can I make this ahead of time?
A: You can prep components! Cook the chicken and pasta (toss the pasta with a tiny bit of oil to prevent sticking). Store separately in the fridge. When ready, make the sauce fresh, then stir in the pre-cooked chicken and pasta to heat through. The sauce is best fresh.
Q: My sauce is too thin! How can I thicken it?
A: Let it simmer for a few more minutes to reduce. You can also create a quick slurry: mix 1 tsp of cornstarch with 1 tbsp of cold water, then whisk it into the simmering sauce. It will thicken up in about a minute.
Q: Can I use milk instead of heavy cream?
A: You can, but the sauce will be much thinner and less rich. For a closer result, try half-and-half. To thicken a milk-based sauce, let it simmer longer or use the cornstarch slurry tip above.
Creamy Chicken Penne Pasta : Comfort in Every Bite
Ingredients
-
12 oz (340 g) penne pasta
-
1 lb (450 g) chicken breast or thighs, cut into bite-size pieces
-
Salt & black pepper, to taste
-
½ tsp garlic powder
-
1 tbsp olive oil
-
3 cloves garlic, minced
-
1 cup heavy cream
-
½ cup chicken broth (low sodium)
-
½ cup freshly grated Parmesan cheese
-
1 cup baby spinach or chopped sun-dried tomatoes (optional)
-
Fresh parsley, chopped (for garnish)
Instructions
-
Cook the Pasta
Cook penne in well-salted boiling water until al dente.
Reserve 1 cup of pasta water, then drain and set aside. -
Cook the Chicken
Season chicken with salt, pepper, and garlic powder.
Heat olive oil in a large skillet over medium-high heat.
Cook chicken 4–5 minutes per side until golden and cooked through.
Remove and set aside. -
Make the Sauce
Lower heat to medium. Add minced garlic and sauté 30–60 seconds until fragrant.
Pour in heavy cream and chicken broth, stirring to deglaze the pan.
Bring to a gentle simmer. -
Add Cheese
Reduce heat to low. Slowly stir in Parmesan until smooth and creamy. -
Combine
Add cooked pasta and chicken to the sauce.
Stir to coat evenly.
Add spinach or sun-dried tomatoes if using.
If sauce is too thick, add reserved pasta water a little at a time. -
Finish & Serve
Taste and adjust seasoning.
Garnish with parsley and extra Parmesan if desired.
Notes
-
Use freshly grated Parmesan for a smooth sauce
-
Keep heat low after adding cheese to prevent separation
-
Chicken thighs stay juicier, breasts are leaner—both work well
Nutritional Information*
Prep Time: 10 minutes | Cook Time: 20 minutes | Total Time: 30 minutes | Servings: 4
*Estimated per serving (calculated without optional add-ins):
Calories: ~520 | Fat: 24g | Carbohydrates: 40g | Protein: 35g
Please note: Nutritional information is an estimate provided by an online calculator. For precise dietary needs, please calculate using your specific ingredients and brands.
Final Thoughts: More Than Just a Meal
So, there you have it—not just a recipe, but a story, a strategy, and a surefire way to make your kitchen smell like heaven. This Creamy Chicken Penne Pasta is the definition of a culinary hug: simple in its execution, profound in its comfort, and endlessly adaptable to your taste and your moment.
Whether you’re cooking for one on a quiet night, whipping up a quick and impressive dinner for your family, or recreating that cozy feeling of sharing a meal with good friends, this dish is ready to rise to the occasion. It’s a testament to the magic that happens when humble ingredients are treated with care and combined with a generous pinch of joy.
Remember, the best meals aren’t about flawless technique or exotic components. They’re about the sizzle in the pan, the aroma that fills your home, and the satisfied silence that falls over the table. They’re about the stories that get shared over seconds and the memories you stir into every pot.
So go ahead. Grate that Parmesan fresh, listen for the sizzle of the garlic, and don’t be afraid to make it your own. Most of all, enjoy the process and the delicious reward.
Now, I’d love to hear your story. Did you add a twist? Did it become a new weeknight favorite? Share your creations and moments with me—because food tastes better when it’s connected to the people who make it and enjoy it.
Until next time, happy cooking, and may your bowls always be cozy!
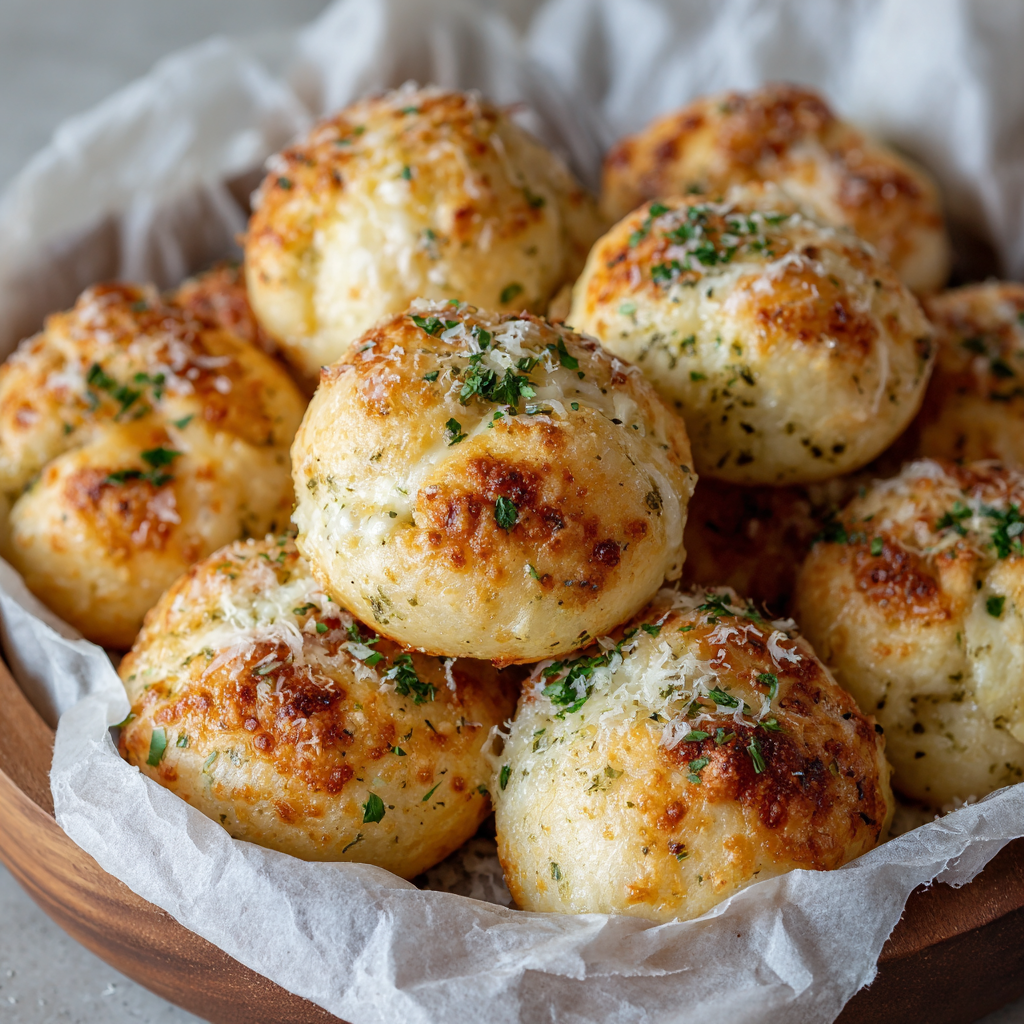
Pizza Bombs : Gooey, Cheesy & Bursting with Flavor
Welcome to Flavor Town: Let’s Make Pizza Bombs!
Hey there, friend! Come on in, pull up a stool. Can you smell that? It’s the magical, mouthwatering scent of garlic butter toasting, cheese bubbling, and dough turning golden—it’s the unofficial soundtrack of my happiest kitchen moments. Today, we’re ditching the delivery menu and skipping the long pizza dough rise to make something that delivers all the joy of a perfect pizza slice, but in a fun, poppable, shareable (or not-so-shareable, I won’t judge!) package. We’re making Pizza Bombs.
Imagine this: a fluffy, buttery biscuit dough hug, wrapped tightly around a hot, secret pocket of tangy marinara, melty mozzarella, and savory pepperoni. We’re then giving them a luxurious spa treatment in garlicky butter and a snowfall of Parmesan before baking them until they’re little golden-brown parcels of pure delight. They’re the ultimate crowd-pleaser for game day, the hero of movie night, and the secret weapon for when your kids’ friends descend upon your kitchen. The best part? They come together with laughable ease, using simple ingredients, and in about the time it takes to preheat your oven. So, tie on that apron—the messy ones are the most loved—and let’s turn simple ingredients into something unforgettable together.
The Little Dough Ball That Started It All
This recipe always takes me back to my Nana’s linoleum-floored kitchen. She wasn’t a “fancy” cook, but she was a feeder. Her mantra was that good food didn’t need to be complicated; it just needed to be made with the intention of making someone smile. One of my earliest kitchen memories is standing beside her, flour up to my elbows, as she’d let me pinch off pieces of her leftover biscuit dough. She’d hand me a tiny nub of cheese and a slice of pepperoni, and let me craft my own “pizza pocket.” They were misshapen, they often leaked, and they were absolutely perfect.
Those little creations were my first taste of kitchen autonomy—the magic of combining a few humble things and creating joy. These Pizza Bombs are the grown-up, slightly more polished (but only slightly!) version of that memory. They carry the same spirit: unpretentious, cheesy, deeply satisfying, and designed to be passed around a crowded table with lots of laughter. Every time I pull a tray of these golden puffs out of the oven, I think of her, and I’m reminded that the very best recipes are the ones that weave a little story and a lot of heart into every bite.
Gathering Your Flavor Arsenal
Here’s everything you’ll need to create these little miracles. I’ve included my favorite tips and swaps so you can make this recipe work with what you’ve got!
- 1 can (16.3 oz) refrigerated biscuit dough: The beautiful, time-saving foundation. Look for the “grands” style flaky biscuits—they give us the most dough to work with! Chef’s Insight: Don’t stress about making dough from scratch today. The canned stuff is our friend and bakes up beautifully soft and fluffy.
- 1 cup marinara sauce (plus extra for dipping): This is the flavor core. Use a good-quality jarred sauce you love, or your favorite homemade batch. Sub Tip: Pesto or a creamy Alfredo sauce make for incredible “white pizza bomb” variations!
- 1½ cups shredded mozzarella cheese: The glue of our gooey center. I prefer low-moisture, pre-shredded for convenience, but a block you shred yourself will melt even more luxuriously. Chef’s Insight: A mix of mozzarella and a sprinkle of provolone adds a fantastic depth of flavor.
- ½ cup pepperoni slices: Our salty, spicy kick. Use regular or mini slices. Sub Tip: Cooked Italian sausage crumbles, diced ham, or even sautéed mushrooms and onions for a veggie option work wonders here.
- ¼ cup butter, melted: For that irresistible, golden sheen.
- ½ tsp garlic powder: We’re mixing this right into the butter for an instant garlic butter wash. Chef’s Insight: If you’re feeling fancy, a minced fresh garlic clove sautéed in the butter for 30 seconds is divine.
- ¼ cup grated Parmesan cheese: The salty, umami-packed finishing touch that creates a delicious crust.
Let’s Build Some Flavor Bombs! (Step-by-Step)
Ready to get your hands a little doughy? Follow these steps for guaranteed, leak-free, cheesy success.
- Prep Your Stage: Preheat your oven to 375°F (190°C). This is crucial for the biscuits to cook through properly. Line a baking sheet with parchment paper—not only does it prevent sticking, but it makes cleanup an absolute dream. I never skip this step!
- Flatten & Form: Pop open that biscuit can (the most satisfying sound in cooking!). Separate the biscuits and place them on a clean surface. Using your fingers or the bottom of a glass, gently flatten and stretch each one into a circle about 4-5 inches across. Chef’s Hack: The edges can be a little thicker than the center—this helps when we gather and pinch them shut.
- The Art of the Fill: Now, the fun part! Spoon about 1 tablespoon of marinara into the center of each dough circle. Top with a generous pinch of mozzarella (about 1.5 tablespoons) and 2-3 pepperoni slices. Pro-Tip: Keep the filling in the center and leave a good ½-inch border of dough clear. This is your sealing margin and the key to preventing lava-like cheese eruptions in your oven!
- Seal the Deal: This is the most important step! Imagine you’re drawing up the edges of a purse. Gather the dough around the filling, pinching the edges together firmly to create a tight seal. Gently roll it between your palms to form a smooth ball and place it seam-side down on your prepared baking sheet. Give it a little pat to ensure it’s sitting flat. A good seal means all the melty goodness stays inside.
- Butter Bliss & Parmesan Snow: In a small bowl, mix your melted butter and garlic powder. Using a pastry brush (or the back of a spoon), generously brush this garlic butter all over the top and sides of each dough ball. This is what gives them that gorgeous color and flavor. Immediately sprinkle the grated Parmesan over the top—the butter helps it stick and form a delicious crust.
- Bake to Golden Perfection: Slide your tray into the preheated oven and bake for 15-18 minutes. You’re looking for a deep, golden brown top and a firm exterior. Don’t Underbake! The biscuit dough needs this time to cook through. When you peek in, you might see a little cheese trying to sneak out—that’s just a flavor beacon. Let them cool on the sheet for about 5 minutes before serving. They are molten-lava-hot inside straight from the oven!
How to Serve These Cheesy Wonders
Presentation is part of the fun! Pile these warm Pizza Bombs high on a rustic wooden board or in a big, cozy bowl. Place a small bowl of warmed extra marinara sauce right in the center for dipping. For a real trattoria touch, sprinkle with fresh chopped basil or parsley and a little extra Parmesan. They’re perfect as-is, but a simple side salad with a sharp vinaigrette cuts through the richness beautifully. Now, watch them disappear!
Mix It Up! Endless Pizza Bomb Possibilities
The basic formula is your canvas. Get creative with these twists:
- Breakfast Bombs: Fill with scrambled eggs, cooked breakfast sausage, and cheddar cheese. Brush with herb butter.
- Veggie Supreme: Swap pepperoni for sautéed bell peppers, onions, black olives, and spinach. Add a pinch of Italian seasoning to the cheese.
- Spicy Hawaiian: Use diced ham, a small piece of pineapple (pat it VERY dry), mozzarella, and a slice of jalapeño.
- BBQ Chicken: Fill with shredded cooked chicken tossed in BBQ sauce and a mix of cheddar and mozzarella. Brush with BBQ-butter mix.
- Gluten-Free/Dairy-Free: Use a certified GF biscuit dough (like Bob’s Red Mill mix), vegan cheese shreds, and dairy-free butter.
Olivia’s Kitchen Notes
This recipe has evolved from my Nana’s kitchen to countless potlucks and family nights. I once made a double batch for a big party and, in my haste, didn’t seal one tray properly. We ended up with a few “lava flow” bombs and a baking sheet with delicious, crispy cheese skirts around each one. My friends declared the cheesy “skirts” the best part! So, don’t fear a little imperfection—it often leads to delicious discoveries. I’ve also learned to make a triple batch and freeze the unbaked, assembled bombs on a tray before bagging them. You can bake them straight from frozen, just add 5-7 extra minutes. Having emergency pizza bombs in the freezer is a life policy I strongly recommend.
Your Questions, Answered!
Q: My pizza bombs burst open in the oven! What did I do wrong?
A: The number one culprit is overfilling or not leaving a good seal margin. Use a *scant* tablespoon of sauce, and really pinch that dough closed tightly, rolling it into a smooth ball. If sauce or cheese is touching the edges, it can prevent a good seal.
Q: Can I make these ahead of time?
A: Absolutely! Assemble them completely (through the sealing step), place them on a parchment-lined sheet, and freeze solid. Once frozen, transfer to a freezer bag. Bake from frozen, adding 5-7 minutes to the bake time. You can also refrigerate assembled bombs for up to 4 hours before baking.
Q: The dough is too sticky to work with. Help!
A> A light dusting of flour on your hands and work surface is your best friend. The dough can get sticky as it warms. If it becomes unmanageable, pop the whole tray in the fridge for 10 minutes to firm up.
Q: Can I use homemade pizza dough instead of biscuit dough?
A> You can, but it changes the texture and process. Homemade pizza dough is more elastic. You’ll need to let it rise, then portion and roll it out. The bake time may be slightly longer. Biscuit dough gives that specific, fluffy, buttery result we love here.

Pizza Bombs : Gooey, Cheesy & Bursting with Flavor
Description
If you love pizza but want something fun, fast, and perfect for sharing, these Pizza Bombs are about to become your new favorite recipe. They’re soft and fluffy on the outside, filled with melty cheese, savory pepperoni, and tangy marinara on the inside—then brushed with garlic butter and baked until golden. Easy enough for a weeknight, irresistible enough for parties.
Ingredients
-
1 can (16.3 oz) refrigerated biscuit dough
-
1 cup marinara sauce (plus extra for dipping)
-
1½ cups shredded mozzarella cheese
-
½ cup pepperoni slices (regular or mini)
-
¼ cup butter, melted
-
½ teaspoon garlic powder
-
¼ cup grated Parmesan cheese
Instructions
-
Preheat oven
Preheat to 375°F (190°C). Line a baking sheet with parchment paper. -
Prepare the dough
Separate biscuits and flatten each into a 4–5 inch circle. -
Fill
Spoon about 1 tablespoon marinara into the center. Add mozzarella and 2–3 slices of pepperoni. -
Seal
Pull dough edges up around the filling, pinch tightly to seal, and roll gently into a ball. Place seam-side down on the baking sheet. -
Butter & top
Mix melted butter with garlic powder. Brush over each dough ball and sprinkle with Parmesan. -
Bake
Bake 15–18 minutes, until golden brown and cooked through. -
Cool slightly & serve
Let cool 5 minutes before serving with warm marinara for dipping.
Notes
-
Don’t overfill: Too much sauce or cheese can cause leaks.
-
Seal well: Pinch firmly and roll smooth to keep the filling inside.
-
Extra flavor: Add Italian seasoning or red pepper flakes to the butter.
-
Make ahead: Assemble and freeze unbaked; bake from frozen with 5–7 extra minutes.
Quick Nutrition & Prep Facts
- Prep Time: 10 minutes
- Cook Time: 15-18 minutes
- Total Time: ~30 minutes
- Servings: 8-10 pizza bombs
Estimated per bomb: Calories: ~180 | Fat: 10g | Carbs: 16g | Protein: 7g
Final Thoughts: A Recipe for Connection
Pulling a tray of these golden, buttery Pizza Bombs from the oven is about so much more than a quick snack. It’s a moment of pure, uncomplicated joy. You’ve taken a handful of simple, humble ingredients and transformed them into something magical—a warm, gooey, shareable hug of flavor that has the power to turn an ordinary evening into a small celebration.
This recipe is a beautiful reminder that the heart of cooking isn’t perfection; it’s connection. It’s the laughter shared while sealing dough, the anticipation as the smell fills your kitchen, and the collective “mmm” that follows the first, deliciously messy bite. It carries the spirit of my Nana’s kitchen—where the goal was never to impress, but simply to gather and enjoy.
Whether you stick faithfully to the classic pepperoni or paint outside the lines with your own wild fillings, you’re not just making food. You’re making memories. You’re creating an edible invitation to slow down, to savor, and to be present with the people around you.
So, here’s to the imperfect, the cheesy, the buttery, and the utterly delightful. Here’s to recipes that are easy to make but rich with story. And here’s to your kitchen, filled with good smells and even better company.

High-Protein Egg Muffins 2.0 with Cottage Cheese and Turkey Bacon
The Smarter, Stronger Breakfast Muffin: High-Protein Egg Muffins 2.0
Hey there, kitchen friend! Come on in and pull up a stool. Can I pour you a coffee? Because today, we’re tackling the ultimate breakfast dilemma: how to eat something truly nourishing, delicious, and satisfying on those mornings when you’re running out the door, one shoe on, keys jangling, and your stomach is giving you the side-eye.
I’ve been there more times than I’d like to admit. And for years, my answer was the classic egg muffin. They were… fine. A little dry sometimes, sometimes a bit rubbery, but they did the job. Then, one brilliant (and slightly messy) morning, I had a revelation. What if we could make them better? What if we could take that good idea and transform it into a great one—something irresistibly fluffy, packed with stealthy protein, and bursting with flavor in every single bite?
Enter: Egg Muffins 2.0. Consider this the glow-up of your breakfast routine. We’re blending creamy cottage cheese right into the eggs for a protein punch and an unbelievably tender texture. We’re adding crispy, savory turkey bacon and a pop of green from fresh spinach. The result? A muffin that’s powerful enough to fuel your busiest day but feels like a cozy, homemade hug. They’re meal-prep magic, freezer-friendly gold, and proof that the best mornings start with a little foresight and a lot of flavor. Let’s make your new favorite breakfast together.
The Breakfast Epiphany That Started It All
My love for these muffins honestly started with a kitchen fail. Picture it: a few years ago, I was hosting my family for a long weekend. My sister, a dedicated early-bird gym-goer, needed a quick, high-protein breakfast she could grab before her workout. I, wanting to be the ultimate hostess, made a big batch of my standard egg muffins.
She ate them politely (bless her), but later confessed they were a bit… “earthy” (code for dry). The next morning, I watched her slyly crumble some of her plain cottage cheese into a leftover muffin. When I raised an eyebrow, she just said, “It needs creaminess, Liv! And more protein!” It was a total lightbulb moment. Why wasn’t I already putting the cottage cheese inside the muffin?
That weekend, we became kitchen scientists. We blended cottage cheese into the eggs, tweaked the ratios, and taste-tested more muffins than I can count. The final batch came out of the oven puffed up like little golden clouds, and the texture was a complete game-changer—moist, fluffy, and utterly satisfying. Now, these “2.0” muffins are a non-negotiable in my freezer and a story I love to share. Sometimes, the best recipes come from a little constructive criticism and a lot of sisterly collaboration!
Your Kitchen Lineup: Simple Ingredients, Big Impact
Here’s everything you’ll need. I’ve added my little chef notes because knowing the “why” behind an ingredient makes you a more confident cook!
- 8 large eggs: The superstar base. They provide structure, protein, and that beautiful golden color. For an even richer flavor, I sometimes use one or two duck eggs if I have them!
- ½ cup cottage cheese: This is the SECRET WEAPON. Blending it in makes the muffins incredibly moist and fluffy while adding a huge protein boost. Don’t skip it! Chef’s Insight: I use low-fat, but full-fat will give you an even richer, more decadent texture. If you’re dairy-free, blended silken tofu is a fantastic swap.
- ½ cup chopped cooked turkey bacon (about 4 slices): Savory, smoky, and crispy. It adds that “breakfast” flavor without the heaviness of regular bacon. Pro Tip: Cook it until it’s nice and crisp before chopping—it’ll stay flavorful in the muffin. For a vegetarian twist, sautéed mushrooms or diced sun-dried tomatoes are amazing.
- 1 cup chopped fresh spinach: A sneaky dose of greens! It wilts down perfectly in the bake. You can swap for kale (just remove the tough stems), chopped broccoli florets, or even shredded zucchini (squeeze out the excess water first!).
- ¼ cup shredded cheese (optional but recommended): A little extra cheesy goodness. I love sharp cheddar for punch, pepper jack for a kick, or mozzarella for its melty, mild flavor. This is your chance to personalize!
- Salt and black pepper to taste: Season as you go! I do a good pinch of kosher salt and a few cracks of fresh pepper in the egg mixture. Remember, the turkey bacon and cheese add saltiness too.
- Cooking spray or oil for greasing: Non-stick is our friend here. A quick spritz in each cup ensures your perfect muffins pop right out.
Let’s Build Some Breakfast Magic: Step-by-Step
This process is so simple and satisfying. Put on some good music, and let’s get to it!
- Preheat & Prep: First things first, get that oven humming. Preheat it to 375°F (190°C). Now, grab your standard 12-cup muffin tin. Give it a generous coating of cooking spray or brush it with a neutral oil. My Little Hack: For ultimate non-stick insurance (and easy cleanup!), you can use silicone muffin liners. No greasing needed, and they pop out like a dream.
- The Fluffy Foundation: Crack your 8 eggs into a large mixing bowl. Add that glorious ½ cup of cottage cheese. Now, take your whisk or a fork and go to town! You want to whisk until the mixture is smooth, creamy, and fully combined. You’ll still see tiny curds from the cottage cheese, and that’s perfect—they melt into pockets of creaminess. This is where you season. Add a good pinch of salt and several grinds of fresh black pepper. Whisk again to distribute.
- Fold in the Fun Stuff: Time for the add-ins! Add your chopped spinach, crispy turkey bacon, and shredded cheese (if using) to the bowl. Grab a spatula and gently fold everything together. Why fold? We don’t want to deflate the air we just whisked into the eggs. Just stir until the fillings are evenly distributed throughout the mixture.
- Portion with Care: Using a ladle, a measuring cup (a ¼ cup measure works perfectly), or even a large spouted measuring jug, carefully pour the egg mixture into your prepared muffin cups. Fill each one about ¾ of the way full. Don’t overfill! They need a little room to puff up as they bake. Giving them this space ensures a lovely rise and prevents overflow.
- Bake to Golden Perfection: Slide the tin into your preheated oven. Now, set a timer for 18 minutes. Ovens vary, so at the 18-minute mark, take a peek. They should look puffed and set around the edges. The true test? Give the tin a gentle wiggle. If the centers jiggle a lot, give them another 2-4 minutes. They’re done when the tops are lightly golden and a toothpick inserted in the center comes out clean. Total bake time is usually 18-22 minutes.
- The Cool Down (& The Big Plan): This part is crucial for texture! Let the muffins cool in the tin for about 5-10 minutes. They’ll deflate a little—that’s totally normal and means they’ll be tender, not tough. Then, run a butter knife around the edges to loosen and pop them out. Let them cool completely on a wire rack if you’re planning to freeze them. For the fridge, just pop them into an airtight container once they’re cool to the touch.
How to Serve Your Masterpiece
These muffins are the definition of versatile! For a hot breakfast, just give them a 30-second zap in the microwave. I love to serve two on a plate with a side of fresh fruit or a simple avocado slice for some healthy fats. They’re also incredible crumbled over a bed of greens for a power-packed lunch salad. And of course, they’re the ultimate grab-and-go hero—just wrap one in a napkin and head out the door, fueled and ready to conquer your day.
Make Them Your Own: Delicious Twists
The basic formula is your canvas! Here are a few of my favorite ways to play with flavors:
- Mediterranean: Swap turkey bacon for ¼ cup each of diced roasted red pepper, chopped Kalamata olives, and a tablespoon of chopped fresh oregano or dill. Feta cheese is a must here!
- Southwest Fiesta: Use ½ cup of black beans (rinsed and drained), ¼ cup of corn (fresh, frozen, or roasted), a diced jalapeño, and a handful of shredded pepper jack or cheddar cheese. Top with a sprinkle of cumin and chili powder.
- “Everything Bagel” Style: Omit the other fillings and stir in 2 tablespoons of everything bagel seasoning into the egg mixture. Add a couple tablespoons of finely diced red onion. So good with a schmear of cream cheese on the side!
- Dairy-Free/Paleo: Replace cottage cheese with ½ cup of full-fat coconut milk blended smooth, and use nutritional yeast (2 tbsp) instead of shredded cheese. Load up on more veggies and turkey bacon.
Olivia’s Chef Notes & Kitchen Stories
Over the hundreds of batches I’ve made, I’ve learned a thing or two! First, don’t stress about chopping the spinach super fine—it wilts down to nothing. Second, if you’re using a particularly wet veggie like mushrooms or zucchini, sauté them first to drive off the moisture. This prevents soggy muffins.
This recipe has evolved from my sister’s dry-muffin critique to a total staple. I once accidentally used ricotta instead of cottage cheese (similar container, very sleepy morning). The result was denser but still delicious—so feel empowered to experiment! The biggest laugh came when my nephew declared they were “green egg hamburgers.” Kids, right? But he ate three, so I’ll take it as a win. Remember, cooking is about joy and nourishment. If you make these your own, you’re doing it right.
Your Questions, Answered
Q: Can I make these without a muffin tin?
A: Absolutely! A well-greased oven-safe baking dish (like an 8×8 square) works great. Just pour the entire mixture in and bake for 25-30 minutes, or until set. You’ve got a protein-packed breakfast casserole—just slice and serve.
Q: Why are my muffins watery or soggy?
A: This usually comes from excess moisture in the veggies. Always squeeze out thawed frozen spinach until it’s very dry. For fresh veggies like mushrooms, zucchini, or peppers, give them a quick sauté in a pan to evaporate the water before adding them to the mix.
Q: How long do they really last, and what’s the best way to freeze them?
A: In the fridge, they’re perfect for 4-5 days. To freeze, let them cool completely, then place them in a single layer on a baking sheet to “flash freeze” for 1-2 hours. Once solid, transfer to a freezer bag or container. They’ll keep for 2-3 months. Reheat straight from frozen in the microwave for 60-90 seconds.
Q: Can I use regular bacon or sausage?
A: Of course! Cook and crumble 4-5 slices of regular bacon or ½ cup of cooked breakfast sausage. The fat content will be a bit higher, and the flavor will be more robust. It’s a delicious classic swap.

High-Protein Egg Muffins 2.0 with Cottage Cheese and Turkey Bacon
Description
Busy mornings need smart solutions. These High-Protein Egg Muffins 2.0 are a major upgrade from the classic version—extra fluffy, moist, and packed with protein thanks to a simple secret ingredient: cottage cheese. They’re easy to prep ahead, freezer-friendly, and perfect for grab-and-go mornings when you want real fuel, not just a quick bite.
Ingredients
-
8 large eggs
-
½ cup cottage cheese (low-fat or full-fat)
-
½ cup cooked turkey bacon, chopped
-
1 cup fresh spinach, chopped
-
¼ cup shredded cheese (cheddar, mozzarella, or pepper jack – optional)
-
Salt and black pepper, to taste
-
Cooking spray or oil (for greasing)
Instructions
-
Preheat oven
Preheat to 375°F (190°C). Grease a 12-cup muffin tin or use silicone liners. -
Mix the base
In a large bowl, whisk eggs and cottage cheese until smooth and well combined. Season with salt and pepper. -
Add fillings
Gently fold in spinach, turkey bacon, and shredded cheese (if using). -
Fill muffin tin
Pour mixture into muffin cups, filling each about ¾ full. -
Bake
Bake for 18–22 minutes, until set and lightly golden on top. A toothpick should come out clean. -
Cool & serve
Let muffins cool 5–10 minutes before removing from the tin.
Notes
-
Extra fluffy texture: Cottage cheese blended into the eggs keeps muffins tender and moist.
-
Avoid sogginess: If using watery vegetables (mushrooms, zucchini), sauté them first.
-
Meal prep win: Store in the fridge up to 5 days or freeze up to 3 months.
-
Reheat fast: Microwave 30 seconds from the fridge or 60–90 seconds from frozen.
Nutritional Information*
*This is an estimate per muffin, using low-fat cottage cheese and without optional shredded cheese. Values will vary based on your specific ingredients and brands.
- Calories: ~100
- Protein: 10g
- Carbohydrates: 2g
- Fat: 6g
- Fiber: 0g
Prep Time: 10 mins | Cook Time: 20 mins | Total Time: 30 mins | Servings: 12 muffins
Final Thoughts
So, there you have it—your breakfast routine, officially upgraded. What started as a humble, sometimes-dry egg muffin has transformed into a reliable, protein-packed powerhouse, all thanks to a little kitchen curiosity and a sister’s honest feedback.
These High-Protein Egg Muffins 2.0 are more than just a recipe; they’re a strategy. A strategy for eating well when life is busy. A strategy for starting your day with intention and flavor. And a strategy for making your future self a little happier and more nourished.
They prove that the smallest tweaks—like blending in cottage cheese for cloud-like texture—can make the biggest difference. They show how a handful of simple, whole ingredients can come together to create something truly sustaining. And they remind us that the best foods are often the most versatile, fitting seamlessly into your lunchbox, your salad, or your hurried morning dash.
Most of all, this recipe is an invitation. An invitation to make it your own, to play with flavors, and to build a habit of delicious preparedness. So whip up a batch, tuck some away in the freezer, and greet your next busy morning with confidence. You’ve got this—and now, you’ve got the perfect breakfast to match.
Buffalo Chicken Cauliflower Bowls (High Protein, Low Carb)
Spicy, Saucy, and So Damn Satisfying: Your New Favorite Bowl
Let’s talk cravings. That moment when you’re staring into the fridge, dreaming of something bold, tangy, and with a serious kick—but you also want to feel light, energized, and maybe even a little virtuous. For years, my answer to this was a heaping plate of Buffalo wings. Don’t get me wrong, I love them. But the aftermath? The sticky fingers, the heavy nap, the feeling that maybe I should have just eaten a salad… it started to lose its charm.
That’s exactly why I created these Buffalo Chicken Cauliflower Bowls. This recipe is my kitchen’s happy compromise, a standing ovation for flavor that doesn’t weigh you down. Imagine tender, caramelized roasted cauliflower taking the place of carb-heavy bases. Picture perfectly spicy shredded chicken, coated in that iconic, lip-tingling sauce. Now, top it all off with the cool, creamy crunch of celery and a shower of tangy blue cheese. It’s every single flavor and texture you love about game day, transformed into a bright, protein-packed, and seriously satisfying meal.
Whether you’re deep in a healthy-living groove, watching your carbs, or just want a dinner that comes together in a flash and cleans up even faster, this bowl is for you. It’s meal-prep magic, a stunningly easy weeknight win, and proof that eating well doesn’t mean sacrificing an ounce of joy. So, tie on that apron (messy is welcome here!), and let’s make something incredibly delicious.
The Sauce-Spilled Memory That Started It All
This recipe was born not from a grand plan, but from a happy, sauce-covered accident. Picture it: My college apartment, a cramped kitchen, and my three best friends crammed around a tiny table, devouring a mountain of takeout wings. We were celebrating nothing in particular—just the joy of being together. Laughter was loud, napkins were scarce, and at one point, my friend Jamie went for a particularly saucy drumette and sent a perfect arc of bright orange Buffalo sauce right onto my favorite white t-shirt.
Instead of being mad, we all howled with laughter. That shirt became a legendary relic, but the memory stuck with me: the unbeatable combination of spicy, creamy, and crunchy, shared with people I love. Years later, when I wanted to capture that same electric flavor in a healthier, less-messy package, the bowl concept clicked. Replacing the traditional base with roasted cauliflower felt like a revelation—it soaks up the sauce beautifully and adds a wonderful, hearty texture. Now, every time I make these bowls, I think of that night, that shirt, and the simple truth that the best food is often the food that brings us together, even if it leaves a little mark.
Gathering Your Flavor Players
Here’s what you’ll need to build these incredible bowls. Don’t just think of this as a shopping list—think of it as your flavor blueprint! I’ve added my best tips and swaps so you can make this recipe work with what you have.
- 1 lb cooked, shredded chicken breast: This is our protein powerhouse! Using pre-cooked chicken is the ultimate time-saver. I love using a store-bought rotisserie chicken (hello, flavor!), or you can quickly poach or bake two large breasts. Chef’s Insight: For maximum juiciness, shred the chicken while it’s still warm. Swap it: Canned, drained chickpeas or crispy baked tofu cubes make a fantastic vegetarian alternative.
- ½ cup buffalo sauce (or to taste): The heart and soul of the dish! I’m a loyalist to Frank’s RedHot Buffalo Sauce for that classic, balanced heat and tang. Chef’s Insight: Buffalo sauce is different from regular hot sauce—it’s a blend of hot sauce, vinegar, and butter (or oil), so it’s already emulsified and clingy. Control the Heat: Start with ⅓ cup and add more to your liking. For a milder version, mix the buffalo sauce with a little ranch or Greek yogurt before tossing with the chicken.
- 1 large head of cauliflower, cut into florets: Our low-carb hero! Roasting transforms cauliflower, bringing out a nutty sweetness that pairs perfectly with spicy buffalo. Pro Tip: Cut the florets into similar-sized pieces so they roast evenly. Don’t toss the core! Slice it thin and roast it too—it gets deliciously tender.
- 1 tbsp olive oil, ½ tsp garlic powder, Salt and pepper to taste: This simple trio is your cauliflower’s best friend. The oil helps it crisp, the garlic powder adds depth, and S&P are the essential flavor awakeners.
- ½ cup chopped celery: The CRUNCH factor and a classic Buffalo wing accompaniment. It provides a fresh, watery contrast that cuts through the richness. If you’re not a celery fan, try sliced radishes or jicama for a similar crisp bite.
- ¼ cup crumbled blue cheese or feta: The tangy, salty finish that makes everything sing. Blue cheese is the traditional pairing, but if its bold flavor isn’t your thing, feta or even goat cheese are glorious substitutes.
- Optional Toppers: This is where you make it your own! A drizzle of ranch or blue cheese dressing, a dollop of protein-rich Greek yogurt, sliced green onions for a fresh punch, or creamy avocado for healthy fats. Let your cravings guide you!
Let’s Get Cooking: Building Your Bowl, Step-by-Step
Ready to bring it all together? This process is simple, satisfying, and smells absolutely amazing. Follow these steps, and you’ll have restaurant-worthy bowls on your table in no time.
- Preheat and Prep: Fire up your oven to 425°F (220°C). This high heat is key for getting those gorgeous, caramelized edges on your cauliflower. While it heats, cut your cauliflower into bite-sized florets. My Little Hack: I toss everything right on the baking sheet to save a bowl! Drizzle the florets with the olive oil, then sprinkle evenly with garlic powder, salt, and pepper. Use your hands to toss and massage the seasoning onto every nook and cranny. Spread them out in a single layer—this ensures they roast instead of steam.
- Roast to Perfection: Slide that sheet pan into the hot oven and let the magic happen for about 20-25 minutes. You’re looking for tender-crisp insides and deep golden-brown spots on the outside. No need to stir halfway through if you spaced them well! That uninterrupted heat helps develop the best flavor. Chef’s Commentary: This is a great time to shred your chicken if you haven’t already, and chop your celery. Multi-tasking makes this meal so quick!
- Wake Up the Buffalo Chicken: While the cauliflower roasts, grab a medium skillet. Add your shredded chicken and buffalo sauce. Warm it over medium heat, stirring gently, for just 3-5 minutes until everything is heated through and beautifully coated. Pro Tip: If your chicken seems dry, add a tablespoon or two of water or chicken broth to the pan with the sauce to create a saucier, more luscious coating.
- The Grand Assembly: Here comes the fun part! Divide the gorgeous, roasted cauliflower among your bowls. This is your flavorful, low-carb base. Pile the saucy buffalo chicken right on top. Now, garnish with your chopped celery, a generous sprinkle of your chosen cheese, and any other toppings your heart desires. My Favorite Way: I always add a zigzag of cool ranch and a final scattering of green onions. The visual contrast is almost as good as the taste.
- Serve Immediately: These bowls are best enjoyed right away, while the cauliflower is still slightly crisp and the chicken is warm. The cool toppings will start to melt into the hot components, creating the most incredible sauce. Dig in and get ready for flavor fireworks!
How to Serve & Savor
Presentation is part of the pleasure! I like to serve these bowls family-style for a casual dinner, letting everyone build their own masterpiece. For meal prep, layer the components in airtight containers: cauliflower and chicken on the bottom, crunchy veggies and cheese on top, with dressing in a separate little container. When it’s time to eat, just shake it up! These bowls are a complete meal, but if you’re feeding a crowd or want extra greens, a simple side salad with a light vinaigrette is a perfect companion.
Make It Your Own: Delicious Twists & Swaps
- Buffalo “Riced” Cauliflower Bowl: Pulse the cauliflower in a food processor into rice-sized bits. Sauté it quickly in a pan with a little oil before adding the buffalo chicken and tossing everything together. It’s a different, equally delicious texture!
- Go Fish or Turkey: Swap the chicken for canned, drained tuna (for a pantry raid!) or for leftover shredded turkey—a fantastic way to use up holiday leftovers.
- Buffalo Ranch Everything: Whisk 2 tablespoons of dry ranch seasoning mix into the buffalo sauce before coating the chicken. Double down on flavor!
- Loaded Veggie Power Bowl: Add roasted broccoli, bell peppers, or chickpeas to the sheet pan with the cauliflower for an extra veggie boost.
- Dairy-Free & Paleo: Skip the cheese and use a dairy-free ranch or a simple drizzle of tahini mixed with lemon juice as your creamy element.
Olivia’s Kitchen Notes & Stories
This recipe has become a true workhorse in my kitchen. It’s evolved from a simple “what’s for dinner?” scramble into my most-requested meal prep recipe. I’ve learned a few things along the way: first, that my husband will always add more hot sauce, and second, that this dish is incredibly forgiving. Cauliflower a little overdone? It’s fine—it just gets more caramelized! Only have frozen cauliflower florets? Roast them straight from frozen, just add 5-10 extra minutes. One of my favorite kitchen fails turned win was the time I accidentally used chipotle hot sauce instead of Buffalo. It was smokier and spicier, and we loved it so much it inspired the “Buffalo Ranch” variation above. Don’t be afraid to play with your food—that’s where the magic happens!
Your Questions, Answered!
Q: My buffalo chicken mixture is too dry. What did I do wrong?
A: No worries! This usually happens if the pre-cooked chicken was very lean or a bit dry to begin with. The fix is easy: simply add a splash of liquid to the pan when you’re warming the chicken and sauce. Water, chicken broth, or even a touch of lemon juice works perfectly. Start with a tablespoon and add more until you get a nice, clingy sauce consistency.
Q: Can I make this ahead for meal prep? Will the cauliflower get soggy?
A: Absolutely, it’s a meal prep superstar! The key is storing components separately. Let the roasted cauliflower cool completely before placing it in an airtight container (this prevents steam from making it soggy). Keep the buffalo chicken, chopped veggies, and cheese/dressing in their own containers. When ready to eat, you can enjoy it cold, or reheat the cauliflower and chicken quickly in the microwave, then add the cold toppings.
Q: I’m not a fan of blue cheese. What’s the best substitute?
A: I totally get it—blue cheese is a strong flavor! My top picks are crumbled feta (salty and tangy, but milder), goat cheese (creamy and bright), or even a sharp shredded cheddar. For a dairy-free option, a sprinkle of nutritional yeast or toasted sunflower seeds adds a nice savory crunch.
Q: How can I make this spicier (or milder)?
A> You are the boss of the heat! For **more fire**, add a pinch of cayenne pepper to the cauliflower before roasting, use an extra-hot buffalo sauce, or garnish with sliced jalapeños. To **tone it down**, choose a “mild” buffalo sauce brand, or mix your regular buffalo sauce with an equal part of ranch dressing or Greek yogurt before tossing it with the chicken. It creates a creamy, spicy sauce that’s much gentler.

Buffalo Chicken Cauliflower Bowls (High Protein, Low Carb)
Description
Craving bold Buffalo flavor without the heaviness? These Buffalo Chicken Cauliflower Bowls deliver everything you love—heat, tang, crunch, and creaminess—in a nourishing, high-protein meal. Roasted cauliflower stands in for carb-heavy bases, while saucy chicken and cool toppings bring classic game-day vibes to an easy, feel-good bowl.
Ingredients
-
1 lb cooked, shredded chicken breast (rotisserie works great)
-
½ cup Buffalo sauce (adjust to taste)
-
1 large head cauliflower, cut into florets
-
1 tbsp olive oil
-
½ tsp garlic powder
-
Salt and black pepper, to taste
-
½ cup chopped celery
-
¼ cup crumbled blue cheese or feta
Optional toppings: ranch or blue cheese dressing, Greek yogurt, sliced green onions, avocado
Instructions
-
Roast the cauliflower
Preheat oven to 425°F (220°C). Toss cauliflower with olive oil, garlic powder, salt, and pepper. Spread in a single layer on a baking sheet. Roast 20–25 minutes until tender and golden. -
Warm the chicken
In a skillet over medium heat, add shredded chicken and Buffalo sauce. Heat 3–5 minutes, stirring until hot and evenly coated. Add a splash of water or broth if needed for extra sauce. -
Assemble the bowls
Divide roasted cauliflower between bowls. Top with Buffalo chicken, celery, and cheese. Add optional toppings as desired. -
Serve & enjoy
Best served warm so the cool toppings melt slightly into the spicy sauce.
Notes
-
Heat control: Start with less Buffalo sauce; add more after tasting.
-
Meal prep: Store components separately; assemble when ready to eat.
-
Swap it: Use chickpeas or baked tofu for a vegetarian version.
Nutritional Information (Per Serving)
Please note: The following is an estimate based on the primary ingredients and will vary with specific brands and optional toppings used.
Calories: ~320 | Protein: 34g | Carbohydrates: 10g | Net Carbs: 6g | Fiber: 4g | Fat: 16g
This bowl is a fantastic balance of high-quality protein, healthy fats, and fiber-rich vegetables, making it a nourishing and filling choice that aligns with low-carb and high-protein eating styles.
There you have it, friends! My complete love letter to the Buffalo Chicken Cauliflower Bowl. I hope this recipe finds its way into your regular rotation and brings as much joy (and far less mess) to your table as it has to mine. Now, I’d love to hear from you! Did you add a crazy topping? Try a wild variation? Tag me on social or drop a comment below—my favorite part of this blog is hearing your kitchen stories. Until next time, keep cooking with heart!
Final Thoughts
This Buffalo Chicken Cauliflower Bowl isn’t just a recipe—it’s a revelation. It takes the electric, nostalgic thrill of game-day wings and transforms it into something you can enjoy any night of the week, without the guilt or the grease. It’s proof that “healthy” doesn’t mean bland, and that satisfying a craving can leave you feeling light, energized, and truly nourished.
From its roots in a sauce-spilled, laughter-filled memory to its genius, versatile formula, this bowl is built for real life. It’s for the busy weeknights, the mindful meal preppers, the flavor seekers, and everyone in between. It welcomes your swaps, celebrates your experiments, and consistently delivers that magical balance of spicy, creamy, crunchy, and cool.
So here’s to less mess, more flavor, and meals that make you feel as good as they taste. Whip up these bowls, gather your people (or savor a moment for yourself), and taste just how good compromise can be. This might just be the start of a beautiful, buffalo-sauced tradition in your kitchen.
Happy cooking, and even happier eating!
High-Protein Egg White Veggie Scramble
Welcome to a Lighter, Brighter Breakfast!
Hey there, friend! Come on in, the coffee’s fresh and I’ve got a skillet warming on the stove. There’s something truly magical about the morning kitchen, isn’t there? That quiet promise of a new day, the sun streaming in, and the sizzle of something delicious coming to life. But let’s be real—sometimes we want that magic to feel light. We want energy, not lethargy. We want to fuel our bodies with something clean, bright, and packed with good-for-you ingredients, without spending an hour at the stove.
That’s exactly why I’m so head-over-apron for this High-Protein Egg White Veggie Scramble. This isn’t just a recipe; it’s my personal morning power-up. It’s the dish I make when I want to feel vibrant and satisfied, ready to tackle my day without that heavy, “I need a nap after breakfast” feeling. We’re talking clouds of fluffy, protein-packed egg whites cradling a confetti of crisp, colorful vegetables. It’s a flavor fiesta that happens to be incredibly good for you.
Whether you’re dashing out the door post-workout, setting up for a productive work-from-home day, or just craving a clean start, this scramble is your secret weapon. It’s proof that “healthy” doesn’t mean boring, and “quick” doesn’t mean bland. So, grab your favorite non-stick skillet and let’s turn simple ingredients into a breakfast that makes you feel absolutely fantastic. Let’s cook!
My “Aha!” Moment with the Humble Egg White
I’ll let you in on a little secret: I wasn’t always an egg white convert. For the longest time, I was a devout “whole egg or bust” kind of cook. The yolks were where the flavor lived! But then, a few years ago, I went through a phase of intense morning yoga sessions. I’d come home feeling amazing—stretched, centered, and then… ravenously hungry. I needed something substantial to refuel my muscles, but the thought of a heavy, greasy breakfast made me want to crawl right back into Savasana.
One Saturday, staring into the fridge, I saw a carton of egg whites left over from a baking project. Out of sheer desperation (and a serious lack of whole eggs), I poured them into a pan with whatever veggies were wilting in the crisper drawer. What happened next was a revelation. The scramble was incredibly light yet unbelievably filling. It didn’t sit in my stomach like a brick. Instead, it gave me this sustained, clean energy that lasted all morning. That was my “aha!” moment. This scramble became my post-yoga ritual, a quiet celebration of movement and nourishment. It reminded me that sometimes, the simplest swaps can lead to the most delicious discoveries—and a whole new way to enjoy the first meal of the day.
Gathering Your Colorful Cast of Characters
Here’s everything you’ll need to create this vibrant scramble. Think of this as your palette for a tasty, edible painting!
- 1 cup liquid egg whites (or from 6 large eggs): The superstar! Liquid egg whites are a fantastic time-saver and eliminate waste. If you’re separating whole eggs, save those glorious yolks for a rich pasta carbonara or homemade mayo later! Chef’s Insight: The key to a fluffy scramble is having your egg whites at room temperature for a minute if you can. They incorporate air more easily.
- ½ cup diced bell peppers (any color!): I’m a sucker for the red and yellow ones for their sweetness, but green add a lovely, slightly bitter crunch. This is your chance to use up those pepper halves lingering in the fridge.
- ¼ cup chopped fresh spinach: It wilts down to almost nothing, packing in a serious nutrient punch without overpowering. No spinach? Swap in kale (just remove the tough stems and chop finely) or arugula for a peppery kick.
- ¼ cup chopped onion (yellow, white, or red): The aromatic foundation. Yellow onions are my go-to for their all-purpose sweetness when cooked. Red onions will add a beautiful pink hue and a bit more bite if you prefer.
- ¼ cup diced tomato: We add these later to keep their fresh, juicy texture. Use plum/Roma tomatoes for less watery seeds, or sweet cherry tomatoes halved.
- Salt and freshly ground black pepper to taste: Essential! Season in layers. A pinch in the veggies, a pinch with the eggs. Freshly cracked pepper makes a world of difference.
- 1 tsp olive oil or cooking spray: Just enough to create a slick, non-stick surface. Avocado oil is a great high-heat alternative.
- Optional Toppings: Crumbled feta cheese, sliced avocado, a dash of hot sauce, chopped fresh herbs (chives, dill, or parsley). This is where you make it your own! Feta adds a salty tang, avocado brings creamy healthy fats, and hot sauce… well, hot sauce makes everything better.
Let’s Make the Magic Happen: Your Foolproof Steps
Ready? This comes together faster than you can toast bread. I’ll walk you through each step with all my favorite little hacks.
Step 1: The Veggie Sauté (Building the Flavor Base)
Heat your olive oil or spray in a quality non-stick skillet over medium heat. Why non-stick? Egg whites can be sticky little things, and this guarantees an easy cleanup. Add your diced peppers and onions. Now, here’s a chef-y tip: don’t stir them frantically! Let them sit for a minute to get a tiny bit of caramelization. That’s where deep, sweet flavor develops. After 2-3 minutes, when they’re just starting to soften, toss in the chopped spinach. It will wilt down dramatically in about 60 seconds. Your kitchen should smell amazing right now.
Step 2: Introducing the Egg Whites (The Fluff Factor)
Make sure your veggies are evenly distributed in the pan, then pour the egg whites right over the top. Here’s the crucial part: LET THEM SIT. Count to 30 in your head. Seriously. This allows the bottom layer to set and creates those lovely, soft curds. If you start scrambling immediately, you’ll end up with more of a… watery, choppy mess. After that 30-second rest, take a silicone spatula and gently push the set edges toward the center, tilting the pan to let the uncooked whites flow to the edges.
Step 3: The Grand Finale (Seasoning & Finishing Touches)
When the eggs are about 80% set—still slightly wet on top—it’s time for the tomatoes and seasoning. Sprinkle them over the top along with a good pinch of salt and a few cranks of black pepper. Gently fold everything together. The residual heat will finish cooking the eggs without drying them out. This is the secret to a moist, not rubbery, scramble! Cook for just another 30-60 seconds until there’s no more visible liquid egg. Immediately remove from the heat. The carryover cooking will do the rest.
Plating Your Perfect Scramble
Slide your gorgeous, colorful scramble onto a warm plate. I love to garnish it with a sprinkle of fresh herbs—chives are perfect here—for a pop of color and freshness. If you’re using the optional toppings, now’s the time! Crumble over some tangy feta, fan out a few slices of creamy avocado, or add a generous drizzle of your favorite hot sauce. Serve it immediately with a slice of whole-grain toast for scooping, or enjoy it straight from the pan (no judgment here, it’s a sacred kitchen ritual).
Make It Your Own: Endless Twists!
This recipe is a blank canvas. Here are a few of my favorite ways to play with it:
- The “Everything But The Kitchen Sink”: Add 2 tbsp of diced ham, turkey, or cooked chicken sausage with the onions for extra protein.
- Mediterranean Dream: Swap spinach for chopped kale, add a handful of chopped Kalamata olives with the tomatoes, and top with crumbled feta and a sprinkle of dried oregano.
- Southwest Fiesta: Use a blend of black beans and corn (well-drained) with the peppers. Season with a pinch of cumin and chili powder. Top with avocado, salsa, and a lime wedge.
- Cheesy & Herby: Stir in 2 tablespoons of low-fat ricotta or cottage cheese in the last minute of cooking for incredible creaminess, and finish with a handful of fresh basil or dill.
- Ultimate Low-Carb: Serve your scramble over a bed of fresh arugula or inside a low-carb wrap with a smear of mashed avocado.
A Few More Tidbits from My Kitchen
This recipe has evolved from that first desperate fridge forage into my most-reliable, feel-good meal. I’ve learned a few things along the way! First, if you’re using fresh tomatoes, seeding them (just cut in half and squeeze out the watery seed pulp) prevents your scramble from getting soggy. Second, I sometimes whisk a single whole egg into the egg whites—it adds a richer flavor and a beautiful pale yellow color without adding much fat. And my funniest kitchen fail with this? I once accidentally used cayenne pepper instead of paprika on the veggies. Let’s just say it was a very awakening breakfast! I drank about a gallon of milk and learned to always, always check the spice jar label. The beauty of this scramble is its forgiveness. Even if you over-cook it a touch or swap the veggies, it’s still going to be delicious and nourishing.
Your Questions, Answered!
Q: My egg whites always stick to the pan, even if it’s non-stick. What am I doing wrong?
A. Great question! Two likely culprits: heat and fat. First, make sure your pan is properly preheated over medium heat before adding oil and ingredients. A cold pan = sticky eggs. Second, even with non-stick, a tiny bit of fat (that teaspoon of oil or a good spray) is essential. Also, avoid using metal utensils which can scratch the non-stick coating over time. A silicone spatula is your best friend here.
Q: Can I make this ahead of time for meal prep?
A. You can, but with a caveat. Reheated egg whites can become a bit watery. For best results, cook the veggie mix ahead of time and store it separately. In the morning, just reheat the veggies quickly and pour in fresh egg whites. It’s nearly as fast! If you must reheat a full scramble, do it gently in a skillet over low heat with a lid, or for 30-45 seconds in the microwave, stirring halfway.
Q: How can I make my scramble fluffier?
A. I have two tricks! 1) As mentioned, let the eggs sit for that initial 30 seconds to set the bottom. 2) For ultra-fluff, you can whisk 1/8 teaspoon of cream of tartar into the liquid egg whites before pouring them into the pan. It stabilizes the proteins and adds amazing volume, just like when making a meringue!
Q: Is this recipe really filling with just egg whites?
A. The 20+ grams of protein is what makes it so satisfying! Protein is the most satiating macronutrient. To make it a complete, balanced meal, I always pair it with a complex carb (like whole-grain toast or a small sweet potato) and a healthy fat (avocado, or that sprinkle of cheese). That combo will keep you full for hours.

High-Protein Egg White Veggie Scramble
Description
Mornings feel better when breakfast is fresh, light, and nourishing. This High-Protein Egg White Veggie Scramble is perfect when you want clean energy without feeling heavy. It’s fluffy, full of colorful vegetables, and ready in minutes—proof that healthy breakfasts can still be delicious and comforting.
Ingredients
-
1 cup liquid egg whites (or whites from 6 large eggs)
-
½ cup diced bell peppers (any color)
-
¼ cup chopped onion
-
¼ cup chopped fresh spinach
-
¼ cup diced tomato
-
1 teaspoon olive oil or cooking spray
-
Salt and black pepper, to taste
Optional toppings: feta cheese, avocado slices, fresh herbs, or hot sauce
Instructions
-
Sauté the veggies
Heat olive oil in a non-stick skillet over medium heat. Add bell peppers and onion. Cook for 2–3 minutes until slightly soft. Add spinach and cook until wilted. -
Add egg whites
Pour egg whites over the vegetables. Let them sit undisturbed for about 30 seconds. -
Gently scramble
Using a spatula, gently push the eggs from the edges toward the center. Continue until mostly set. -
Finish & season
Add diced tomatoes, salt, and pepper. Cook for another 30–60 seconds until fully set but still soft. -
Serve immediately
Top with your favorite extras if desired and enjoy warm.
Notes
-
For fluffier eggs: Let egg whites come to room temperature for a minute before cooking.
-
Avoid dryness: Remove from heat while eggs are slightly moist—they’ll finish cooking on their own.
-
Switch it up: Use mushrooms, zucchini, or broccoli instead of peppers.
-
Make it a meal: Serve with whole-grain toast or avocado for balance.
Nutritional Information*
*For the base recipe (egg whites, veggies, 1 tsp olive oil), without optional toppings. Estimated using a nutrition calculator.
- Prep Time: 5 minutes
- Cook Time: 7 minutes
- Total Time: 12 minutes
- Servings: 1
Per Serving: Calories: ~130 | Protein: 20g | Carbohydrates: 5g | Fat: 3g | Fiber: 2g
Final Thoughts
This High-Protein Egg White Veggie Scramble is more than just a meal—it’s a morning ritual that sets the tone for a vibrant, energized day. It’s proof that eating well doesn’t have to be complicated, time-consuming, or bland. With just a handful of fresh ingredients and a few mindful steps, you can create something truly nourishing and delicious.
Remember, cooking is a conversation—between you, your ingredients, and your hunger. This recipe is your starting point, not a strict set of rules. Swap the veggies based on what’s in season or lingering in your fridge. Play with spices and toppings to match your mood. Make it yours.
Whether you’re fueling a busy day, refueling after a workout, or simply treating yourself to a light and bright breakfast, this scramble is here for you. It’s a humble dish that holds so much possibility—a little moment of care, packed onto a single plate.
Here’s to mornings that feel good, food that fuels you, and the simple joy of a skillet sizzling with promise. Now, go enjoy every fluffy, flavorful bite.
Strawberry Dessert Sushi Rolls : Sweet, Fun & Kid-Friendly
Strawberry Dessert Sushi Rolls: The Sweetest Little Bite of Magic
Hey there, welcome back to my cozy corner of the internet! Olivia here, apron on (and yes, it’s probably got a little powdered sugar on it already). Do you ever have one of those moments where you’re craving something sweet, but also something fun? Something that feels a little bit like a celebration, but doesn’t require a culinary degree or a whole afternoon to make? Well, my friend, pull up a stool, because today we’re diving into one of my absolute favorite kitchen creations: Strawberry Dessert Sushi Rolls.
Imagine the best parts of a sushi night—the anticipation of that perfect roll, the beautiful presentation, the interactive joy of dipping—but sweet, fruity, and utterly whimsical. This recipe is a delightful trick of the eye and a total party for your taste buds. We’re talking lusciously sticky, slightly sweet coconut rice hugging creamy, tangy cream cheese and juicy fresh strawberries, all rolled up and sliced into the cutest little bites you ever did see. And the piece de resistance? A little pot of chocolate “soy” sauce for dipping that adds the perfect finishing touch of decadence.
This is more than a dessert; it’s an experience. It’s perfect for making with curious kiddos, for bringing to a potluck where you want to be the “cool chef,” or for just turning an ordinary Tuesday into something a little more special. You don’t need a sushi mat (though it helps!), and you definitely don’t need any fancy skills. Just a love for good food and a willingness to play with your ingredients. So, are you ready to roll? Let’s get started.
The Night Sushi Went Sweet: A Happy Kitchen Accident
This recipe was born from a happy, slightly chaotic, family tradition. Every other Friday is “Sushi Night” in our house. It started as my attempt to master the perfect spicy tuna roll, but it quickly evolved into a free-for-all where my kids create, well, let’s call them “experimental” rolls. One night, after we’d cleaned up the last grains of savory rice, my youngest looked at me with those big, hopeful eyes and said, “But what about dessert sushi?”
My brain started whirring. We had leftover coconut milk from a curry, a pint of perfect strawberries on the counter, and a block of cream cheese in the fridge. Challenge accepted. What ensued was a flour-dusted, giggle-filled kitchen experiment. The first roll was… a mess. The rice was too warm, the cream cheese oozed out the ends, and our slices looked more like abstract art than sushi. But you know what? They tasted incredible. We dipped our messy masterpieces in melted chocolate, and it was pure magic. That night, we weren’t just making dessert; we were making a core memory. Now, these Strawberry Sushi Rolls are a non-negotiable part of our Sushi Night finale, a sweet little reminder that the best recipes often come from a bit of playfulness and a lot of love.
Gathering Your Sweet Sushi Toolkit
Here’s everything you’ll need to create these adorable rolls. I’ve added some of my favorite tips and swaps because I want you to feel empowered, not restricted! This recipe is wonderfully forgiving.
- 1 cup sushi rice – This is the star of our sticky show. Sushi rice (short-grain white rice) has a high starch content, which gives it that perfect, clingy texture. Chef’s Insight: Don’t substitute with long-grain rice like jasmine or basmati; it won’t stick together. If you’re in a pinch, Arborio rice (used for risotto) can work, but the texture will be a bit chewier.
- 1 cup coconut milk – This is our secret weapon for flavor! Using full-fat coconut milk (from a can, not the carton) infuses the rice with a subtle, tropical sweetness and incredible richness. Substitution Tip: You can use water or regular milk, but you’ll lose that dreamy coconut flavor. For a lighter version, “lite” coconut milk works too.
- 1/2 cup water – To help the rice cook through perfectly.
- 2 tbsp sugar – Just enough to sweeten the rice base without making it dessert-on-its-own sweet. I like granulated white sugar, but coconut sugar would be a lovely, deeper-flavored swap.
- Pinch of salt – Never forget the salt! It balances the sweetness and makes all the flavors pop.
- 6–8 fresh strawberries – Look for firm, ripe, and bright red berries. Slice them thinly so they roll neatly. Chef’s Insight: Pat your sliced strawberries dry with a paper towel to prevent extra moisture from making the roll soggy.
- 4 oz cream cheese, softened – This is our “spicy mayo” or “avocado” equivalent—the creamy, tangy layer that binds it all. Substitution Tip: For a dairy-free version, use a vegan cream cheese block (the spreadable tub kind can be too soft). For a lighter feel, mascarpone is a decadent alternative.
- 1/4 cup sweetened coconut flakes – Adds a little chew and a toasty flavor. I prefer the flakes over shredded coconut for better texture. Toast them in a dry pan for 2-3 minutes until golden for an even deeper flavor boost!
- 1/4 cup chocolate syrup – Our “soy sauce” base. Use a good-quality one you love. Chef’s Insight: You can also gently melt 1/4 cup of chocolate chips with a teaspoon of coconut oil for a richer, dip-able “ganache” sauce.
- 1 tsp soy sauce or a pinch of salt (optional) – Trust me on this! A tiny bit of soy sauce in the chocolate doesn’t make it taste like soy; it adds an incredible depth and complexity that cuts the sweetness, much like salt in caramel. If you’re hesitant, just use a tiny pinch of sea salt.
Let’s Roll! Your Step-by-Step Guide to Sweet Sushi Success
Ready to create? Follow these steps, and you’ll have picture-perfect dessert sushi in no time. I’m walking you through every little trick I’ve learned from my many (many) rolls.
Step 1: The Perfect Sweet Rice
First, give your sushi rice a good rinse in a fine-mesh strainer under cold water. Swirl it with your hands until the water runs mostly clear. This washes off excess starch so your rice is sticky, not gummy. Combine the rinsed rice, coconut milk, water, sugar, and salt in a medium saucepan. Bring it to a boil, then immediately reduce the heat to the lowest setting, cover tightly, and let it simmer for 15-18 minutes. No peeking! Let it steam off the heat, covered, for another 10 minutes. Then, fluff it gently with a fork and spread it out on a plate or baking sheet to cool completely. Chef’s Hack: Cooling is crucial! Warm rice is a nightmare to handle and will melt your cream cheese. Speed up the process by fanning it or popping it in the fridge for a bit.
Step 2: Set Up Your Rolling Station
While the rice cools, prep your fillings. Slice those strawberries thinly. Get your cream cheese super soft—it should spread like room-temperature butter. Have your coconut flakes and a sheet of plastic wrap (about 12 inches long) ready. If you have a bamboo sushi mat, wrap it tightly in plastic wrap. No mat? No panic! A flexible cutting board or even just the plastic wrap on your counter will work.
Step 3: The Art of Assembly
Lay your plastic wrap on the mat or counter. With slightly damp hands (this is the KEY to non-stick rice handling!), grab a handful of cooled rice and press it into a thin, even rectangle, about 8×6 inches. Aim for about 1/4-inch thickness. Don’t press too hard; you want it cohesive but not dense. Now, take small dollops of the softened cream cheese and gently smear it in a horizontal line across the center of the rice rectangle. Layer on your strawberry slices and a sprinkling of coconut flakes.
Step 4: The Roll-Up
This is the fun part! Using the plastic wrap to help you, lift the edge of the rice sheet closest to you and gently fold it over the fillings. Tuck it under slightly, then, using even pressure, roll forward, pulling the plastic wrap away from you as you go to prevent it from getting trapped inside. You want a nice, tight log. Once it’s fully rolled, give the whole log a firm but gentle squeeze along its length to seal everything together. Twist the ends of the plastic wrap like a candy wrapper to secure it.
Step 5: Chill & Slice
Pop the wrapped roll into the fridge for at least 15 minutes. This firms up the cream cheese and makes slicing a dream. When you’re ready, unwrap and place the roll on a cutting board. Have a small bowl of warm water nearby. Dip a very sharp knife into the water, wipe it clean, and slice the roll into 1-inch pieces, dipping and wiping the knife between each slice for perfectly clean cuts.
Step 6: The Final Dip
For the chocolate “soy” sauce, simply stir the optional soy sauce or salt into the chocolate syrup. Pour it into a small ramekin or sauce dish. That’s it!
Plating Your Sweet Masterpiece
Presentation is half the fun! Arrange your sliced dessert sushi rolls on a clean, rectangular platter or a wooden board, just like you would with real sushi. Place the bowl of chocolate “soy” sauce in the center. For an extra touch, garnish the platter with a few whole strawberries, a sprinkle of extra coconut flakes, or even some mint leaves. Serve with chopsticks for the full immersive experience (kids get a huge kick out of this) or just use your fingers—no judgment here! These are best enjoyed the day they’re made, while the rice is still soft and the strawberries are fresh.
Get Creative! Fun Flavor Twists & Swaps
The beauty of this recipe is its versatility. Once you master the basic roll, the flavor world is your oyster (pun intended)! Here are a few of my favorite riffs:
- Tropical Twist: Swap strawberries for thin slices of mango or kiwi. Add a sprinkle of mini chocolate chips with the coconut.
- Nutty Delight: Add a thin layer of peanut butter or almond butter under the cream cheese, and use banana slices instead of strawberries.
- Cookies & Cream: Mix a tablespoon of crushed Oreo cookies into the softened cream cheese. Use whole blackberries as your fruit.
- Vegan & Dairy-Free: Use vegan cream cheese and ensure your chocolate syrup is dairy-free. The coconut milk in the rice is already plant-based!
- Chocolate Lover’s: Mix a tablespoon of cocoa powder and an extra tsp of sugar into the rice with the coconut milk. Fill with raspberries and cream cheese.
Olivia’s Kitchen Notes & Stories
This recipe has truly evolved from that first messy experiment. I’ve learned that the damp-hands trick is a game-changer, and that toasting the coconut flakes elevates the whole roll from “yum” to “WOW.” One of my favorite kitchen memories is of my daughter, then five, solemnly arranging the slices on a plate and declaring it a “sushi flower.” She was right—it was beautiful in its imperfect, homemade way.
Don’t stress if your first roll isn’t magazine-perfect. Sometimes the ends are a bit ragged, or a strawberry pokes out. That’s okay! It’s homemade charm. The most important thing is the joy you put into making it and the smiles it brings when you share it. This recipe is a reminder that cooking should be fun, a little playful, and always, always shared with the people you love.
Your Questions, Answered!
Q: My rice is too sticky and messy to handle! Help!
A: This usually means the rice is still too warm, or your hands aren’t wet enough. Make sure the rice is completely cool—I mean, no warmth at all. And keep a small bowl of water next to you, dipping your fingers every time you touch the rice. It creates a non-stick barrier.
Q: Can I make these ahead of time?
A: You can prep the components ahead! Cook and cool the rice up to a day in advance, store it covered in the fridge. Slice the strawberries and keep them in a container. Assemble and slice the rolls up to 2-3 hours before serving, then keep them covered in the fridge. I don’t recommend making them more than a day ahead, as the rice can harden and the strawberries may weep.
Q: My roll won’t stay together when I slice it. What did I do wrong?
A: Two likely culprits: 1) The roll wasn’t tight enough. Really use that plastic wrap to help you squeeze it into a firm log. 2) The knife wasn’t wet and sharp. A dull, dry knife will squish the roll instead of slicing cleanly. Dip and wipe every single time!
Q: I don’t have a bamboo mat. Is this still possible?
A: Absolutely! The plastic wrap is doing most of the work. Lay the plastic wrap directly on your counter, assemble the rice and fillings on it, and use the plastic wrap to help you roll it up tightly, just like we described. You’ve got this.

Strawberry Dessert Sushi Rolls : Sweet, Fun & Kid-Friendly
Description
Sticky coconut “sushi rice” rolled with cream cheese and fresh strawberries, sliced into adorable little bites, with a chocolate “soy sauce” for dipping.
Ingredients
-
1 cup sushi rice (short-grain white rice)
-
1 cup full-fat coconut milk
-
½ cup water
-
2 tbsp sugar
-
Pinch of salt
-
6–8 fresh strawberries, thinly sliced
-
4 oz cream cheese, softened
-
¼ cup sweetened coconut flakes (toasted if desired)
-
¼ cup chocolate syrup
-
Optional: 1 tsp soy sauce or pinch of salt (for chocolate “soy” sauce)
-
Plastic wrap or bamboo sushi mat
Instructions
1. Cook the Sweet Rice
-
Rinse rice under cold water until water runs mostly clear.
-
Combine rice, coconut milk, water, sugar, and salt in a medium saucepan. Bring to a boil.
-
Reduce heat, cover, and simmer 15–18 minutes. Remove from heat and let steam, covered, 10 minutes.
-
Fluff with a fork and cool completely on a plate or baking sheet.
2. Prep for Rolling
-
Slice strawberries thinly and pat dry.
-
Soften cream cheese and have coconut flakes ready.
-
Lay plastic wrap on counter or bamboo mat.
3. Assemble Rolls
-
Wet your hands slightly to prevent sticking. Press cooled rice into a thin rectangle (~8×6 inches, ¼ inch thick) on the plastic wrap.
-
Spread cream cheese in a horizontal line across the center.
-
Layer on strawberry slices and sprinkle coconut flakes.
4. Roll It Up
-
Using the plastic wrap to help, fold the edge closest to you over the fillings, then roll forward into a tight log.
-
Twist the plastic wrap ends to secure.
5. Chill & Slice
-
Refrigerate roll at least 15 minutes.
-
Unwrap and place on cutting board. Dip a sharp knife in warm water, wipe, and slice into ~1-inch pieces. Repeat between each slice.
6. Make the Chocolate “Soy” Sauce
-
Stir a pinch of salt or soy sauce into chocolate syrup. Serve in a small dish for dipping.
Notes
-
Keep rice completely cool before rolling.
-
Wet hands prevent rice from sticking.
-
Toast coconut flakes for extra flavor.
-
Use a sharp, wet knife for clean slices.
Nutritional Info (Approximate)
Per serving (4 pieces, sauce not included): Calories: ~210 kcal | Carbohydrates: 30g | Protein: 3g | Fat: 9g | Sugar: 14g
Dietary Notes: This is a vegetarian, fun-food recipe. For gluten-free, ensure your soy sauce (if using) is a certified gluten-free brand like Tamari.
Final Thoughts
And there you have it—a little platter of pure, edible joy. These Strawberry Dessert Sushi Rolls are proof that the most delightful things in the kitchen often come from a place of play, a dash of curiosity, and the willingness to turn a question like “What about dessert sushi?” into a delicious answer.
This recipe is more than just a treat; it’s an invitation. An invitation to get your hands a little sticky, to laugh when a slice doesn’t go perfectly, and to watch faces light up when you present this sweet, whimsical creation. It bridges the gap between cooking and crafting, turning ingredients into an experience you can share.
So whether this becomes a quirky finale to your own family sushi night, a show-stopping treat for friends, or just a fun project for a rainy afternoon, I hope it brings you as much happiness as it has brought to my flour-dusted, giggle-filled kitchen. Remember, the real magic isn’t just in the coconut rice or the chocolate dip—it’s in the memories you roll up inside.
Now, go make something wonderfully, deliciously fun.
Happy rolling,
Olivia

Freeze-Dried Strawberry Cake Bark : Snackable, Sweet & Perfect for Gifting
Let’s Make Some Sweet, Shatterable Magic: Strawberry Cake Bark!
Hey there, friend! Come on in, grab an apron, and let’s make a mess. I mean, let’s make some seriously delightful, impossible-to-stop-eating, makes-everyone-ask-for-the-recipe magic. Today, we’re whipping up something that lives in the beautiful, delicious gray area between a snack and a dessert: Freeze-Dried Strawberry Cake Bark.
Picture this: a thin, soft sheet of vanilla cake, like the most tender cookie you’ve ever had. Now, imagine it draped with a drizzle of creamy, melted chocolate. On top of that, a generous sprinkling of tangy, crunchy, explosively flavorful freeze-dried strawberries that add a pop of color and a texture that’s just *chef’s kiss*. A little edible glitter for fun? Absolutely. Then, you just break it into wild, jagged pieces that look like they came from the most artistic candy shop in town.
This isn’t just a treat; it’s an experience. It’s the perfect thing to have on hand for movie nights, to pack into little bags as the most adorable (and edible) party favor, or to pile high on a platter when friends pop over. It requires zero fancy decorating skills, comes together in practically no time, and uses a simple cake mix as our trusty starting point. My goal today is to show you how a few simple ingredients can become something extraordinary. So, preheat that oven, and let’s create some sweet, shatterable joy together!
A Happy Accident & The Joy of Edible Gifts
This recipe was born from a happy kitchen “oops” that turned into a “wow, this is amazing.” A few years ago, I was testing a batch of thin cake layers for a different project. I over-poured, and the batter spread into a thin, large sheet. When it baked, it was more like a giant, soft cookie than a cake layer. My first thought was, “Well, that’s not what I intended.” My second thought, as I was staring at it, was to just drizzle it with some leftover melted chocolate and toss on the handful of freeze-dried strawberries I had on my counter from a smoothie project.
After it chilled, I broke off a piece. The CRUNCH from the strawberries against the soft cake and smooth chocolate was a revelation. I immediately packed some into a cute cellophane bag, tied it with a ribbon, and gave it to my cousin who was coming over. Her eyes lit up like a kid’s on Christmas morning. “You MADE this? It looks like it’s from a fancy bakery!” That moment sealed the deal. This wasn’t a mistake; it was a new tradition. Now, I make huge batches around the holidays, wrap them up in pretty boxes, and give the gift of homemade, shatterable happiness. It reminds me that sometimes the best creations come from a little improvisation and a lot of heart.
Gathering Your Sweet, Simple Supplies
Here’s everything you’ll need to create this masterpiece. I love this list because it’s short, sweet, and most items are pantry staples or easy finds!
- 1 box vanilla or strawberry cake mix (plus the eggs, oil, and water it calls for). Chef’s Insight: This is our brilliant shortcut! A vanilla mix gives you a perfect, neutral canvas that lets the strawberries shine. A strawberry mix doubles down on the berry flavor for true enthusiasts. Don’t worry, we’re transforming it completely!
- 1 cup white or dark chocolate chips, melted. Substitution Tip: Use whichever you love! White chocolate looks gorgeous and is super sweet, while dark chocolate adds a sophisticated, bittersweet contrast. You can also use candy melts or chopped baking chocolate. If you’re feeling wild, use half of each and swirl them together!
- 1/2 cup freeze-dried strawberries, lightly crushed. Chef’s Insight: This is the STAR. Freeze-dried fruit is a power ingredient. It’s intensely flavorful, adds incredible crunch, and doesn’t make the bark soggy. Find them in the snack aisle, near the dried fruit, or at bulk food stores. Crush them with your hands or give them a few pulses in a food processor for a mix of textures.
- Edible glitter or shimmer dust (optional). Chef’s Insight: This is the “party” in party favor! A little sparkle makes this bark feel extra special and gift-worthy. Just make sure it’s labeled “edible.” If you don’t have it, a tiny sprinkle of sanding sugar works too, or just leave it off—it’ll still be gorgeous.
- Parchment paper. Non-negotiable tip: This is key for easy removal and cleanup. Don’t skip it!
Let’s Build Our Bark: Step-by-Step
Ready? This is the fun part. We’re going to walk through each step with some of my favorite kitchen hacks to ensure perfect bark every single time.
Step 1: Prep & Preheat. First, get that oven humming. Preheat it to 350°F (175°C). Now, grab your largest rimmed baking sheet (a half-sheet pan, about 13×18 inches, is ideal). Line it completely with a sheet of parchment paper. No greasing needed—the parchment is our best friend here and will let us lift the whole thing out later.
Step 2: Mix & Spread. Prepare your cake batter exactly as the box directs. Now, here’s the secret to the perfect bark texture: spread it THIN. Pour the batter onto your parchment-lined pan. Use an offset spatula or the back of a spoon to spread it into a very thin, even layer, about 1/4-inch thick. It’s okay if it doesn’t reach every single corner—we’re going for rustic! A thin layer ensures it bakes quickly and has a slight bite, not a fluffy cake texture.
Step 3: Bake & Cool. Slide that pan into your preheated oven. Because it’s so thin, it bakes fast! Start checking at 10 minutes. You’re looking for the top to be set and just lightly golden at the edges. It might look a little soft in the middle, but that’s perfect—it will firm up as it cools. Chef’s Hack: Overbaking will make it dry and hard to break later. Once out of the oven, let it cool completely on the pan. I mean, completely. No warm spots! This is crucial so the melted chocolate doesn’t melt into a messy puddle.
Step 4: The Drizzle & Sprinkle (The Artistic Part!). Melt your chocolate chips in the microwave in 20-second bursts, stirring well between each, until smooth. Using a spoon or a fork, drizzle the melted chocolate all over the cooled cake layer in zig-zags, loops, or just a fun, random pattern. Act fast! While the chocolate is still wet, immediately shower the top with your crushed freeze-dried strawberries and a pinch of edible glitter if using. The wet chocolate acts as glue, so everything sticks perfectly.
Step 5: Chill & Set. Gently transfer the entire pan to your refrigerator. Let it chill for 15-20 minutes, or until the chocolate is fully set and firm to the touch. This step makes the bark easy to break and gives you that satisfying snap.
Step 6: Break & Revel! The finale! Take the pan out of the fridge. Use your hands to lift the entire giant sheet of bark off the parchment paper. Now, just start breaking it! There’s no wrong way. Break it over the counter for medium pieces, or use your hands to create smaller, jagged shards. The irregular shapes are part of its charm. Pile it into a bowl, pack it into bags, or just sneak a few pieces immediately (quality control, of course!).
How to Serve This Show-Stopper
Presentation is half the fun! For a casual get-together, I love piling the bark high on a vintage cake stand or a simple wooden board. For gifting, clear cellophane bags tied with a bright ribbon or bakers twine look absolutely professional. You can also layer pieces in a pretty glass jar with a tag that says “Strawberry Cake Bark.” For a bake sale, portion it into festive cupcake liners inside a box. However you serve it, just be ready for people to ask, “Wait, you MADE this?!”
Make It Your Own: Delicious Twists
Once you master the base, the flavor world is your oyster! Here are a few of my favorite spins:
- Cookies & Cream: Use chocolate cake mix. Drizzle with white chocolate and sprinkle with crushed Oreo pieces.
- Tropical Vibes: Use a coconut or pineapple cake mix. Drizzle with white chocolate and top with crushed freeze-dried mango and toasted coconut flakes.
- Salted Caramel Pretzel: Use vanilla cake mix. Drizzle with dark chocolate, then sprinkle with crushed pretzel pieces and a light flake of sea salt.
- Lemon Berry: Use lemon cake mix. Drizzle with white chocolate and top with crushed freeze-dried raspberries and a sprinkle of lemon zest.
- Funfetti Party: Use funfetti cake mix. Drizzle with pink or blue candy melts and add extra rainbow sprinkles on top!
Chef’s Notes: From My Kitchen to Yours
This recipe has truly evolved in my kitchen. I started by meticulously trying to cut it into perfect squares with a knife. It was a mess—the chocolate shattered everywhere! My husband walked in, watched me struggle for a minute, then just reached over, grabbed the sheet, and gave it a hearty whack over the edge of the counter. It broke into these perfectly imperfect pieces, and we both burst out laughing. That’s the spirit of this recipe: don’t overthink it! Let it be fun and a little messy. Over the years, I’ve learned that a slightly under-baked cake layer yields the most tender bite, and that crushing the strawberries with your fingers (instead of a processor) gives you those lovely big chunks. Most importantly, I’ve learned that food made with joy is the best food of all.
FAQs & Quick Fixes
Q: My cake layer stuck to the parchment! What happened?
A: Oh no! This usually means it was under-baked or torn while warm. Make sure it’s fully baked (set in the center) and cooled completely before adding toppings. Using a fresh sheet of parchment (not wax paper!) is also key.
Q: My bark turned out soggy or soft after a day.
A> This is almost always a moisture issue. First, ensure your freeze-dried strawberries are fully dry and crispy, not chewy. Second, make sure the bark is stored in an airtight container at room temperature or in the fridge. Humidity is the enemy! If it’s very humid where you live, storing it in the fridge is your best bet.
Q: Can I make this gluten-free or vegan?
A> Absolutely! For gluten-free, simply use your favorite gluten-free cake mix. For vegan, use a vegan cake mix (Duncan Hines has some great options), and check that your chocolate chips are dairy-free/vegan. The eggs and oil in the mix can be substituted according to the box’s vegan instructions.
Q: Can I use fresh strawberries instead?
A> I don’t recommend it for this recipe. Fresh fruit contains a lot of water, which will seep out and make the bark soggy and the chocolate wet. The intense, dry crunch of freeze-dried is what makes this work so well!

Freeze-Dried Strawberry Cake Bark : Snackable, Sweet & Perfect for Gifting
Description
A soft, thin vanilla cake layer drizzled with chocolate and topped with tangy freeze-dried strawberries. Perfect for snacking, gifting, or piling high on a dessert table!
Ingredients
-
1 box vanilla or strawberry cake mix (plus eggs, oil, water as directed)
-
1 cup chocolate chips (white, dark, or a mix), melted
-
½ cup freeze-dried strawberries, lightly crushed
-
Optional: edible glitter or shimmer dust
-
Parchment paper
Instructions
1. Prep & Preheat
-
Preheat oven to 350°F (175°C).
-
Line a rimmed baking sheet (about 13×18 inches) with parchment paper.
2. Mix & Spread Batter
-
Prepare the cake batter according to the box instructions.
-
Pour batter onto the parchment-lined pan and spread thinly (~¼ inch thick). Rustic edges are fine!
3. Bake & Cool
-
Bake 10–12 minutes. Watch carefully: the top should be set and lightly golden.
-
Cool completely on the pan before adding chocolate.
4. Drizzle & Sprinkle
-
Melt chocolate chips in 20-second bursts in the microwave, stirring in between.
-
Drizzle chocolate over the cooled cake in fun patterns.
-
Immediately sprinkle crushed freeze-dried strawberries and optional edible glitter.
5. Chill & Set
-
Refrigerate 15–20 minutes until chocolate is firm.
6. Break & Enjoy
-
Lift the sheet from parchment and break into jagged pieces.
-
Serve in a bowl, bag as gifts, or pile on a dessert board.
Notes
-
Thin batter = tender bark; don’t overbake.
-
Use freeze-dried strawberries for crunch; fresh berries will make it soggy.
-
Slightly under-baked cake gives a soft, chewy base.
-
Store in airtight containers at room temp or in the fridge to prevent humidity from softening the bark.
Nutritional Information*
*Estimated based on 12 servings using vanilla cake mix and semi-sweet chocolate chips. For precise info, calculate using your specific brand ingredients.
- Prep Time: 15 minutes
- Bake Time: 10-12 minutes
- Set Time: 15 minutes
- Total Time: ~40 minutes
- Calories per piece: ~180 kcal
- Carbs: 24g | Protein: 2g | Fat: 8g | Sugar: 14g
- Dietary Info: Snackable, Customizable, Kid-Friendly
Final Thoughts
This Strawberry Cake Bark is more than a recipe—it’s a little piece of kitchen alchemy. With a few simple ingredients and a playful spirit, you can turn a humble cake mix into something that feels celebratory, generous, and irresistibly fun to eat. It’s proof that the most memorable treats often come from embracing imperfection, breaking a few rules (and a little bark!), and sharing the sweet results with someone you care about.
Whether you’re making it for a party, a gift, or just a quiet moment of indulgence, remember: the mess is part of the magic, and the joy is in the making.
Now go ahead—break off a piece, savor that sweet crunch, and share the sparkle.
Happy creating,




