
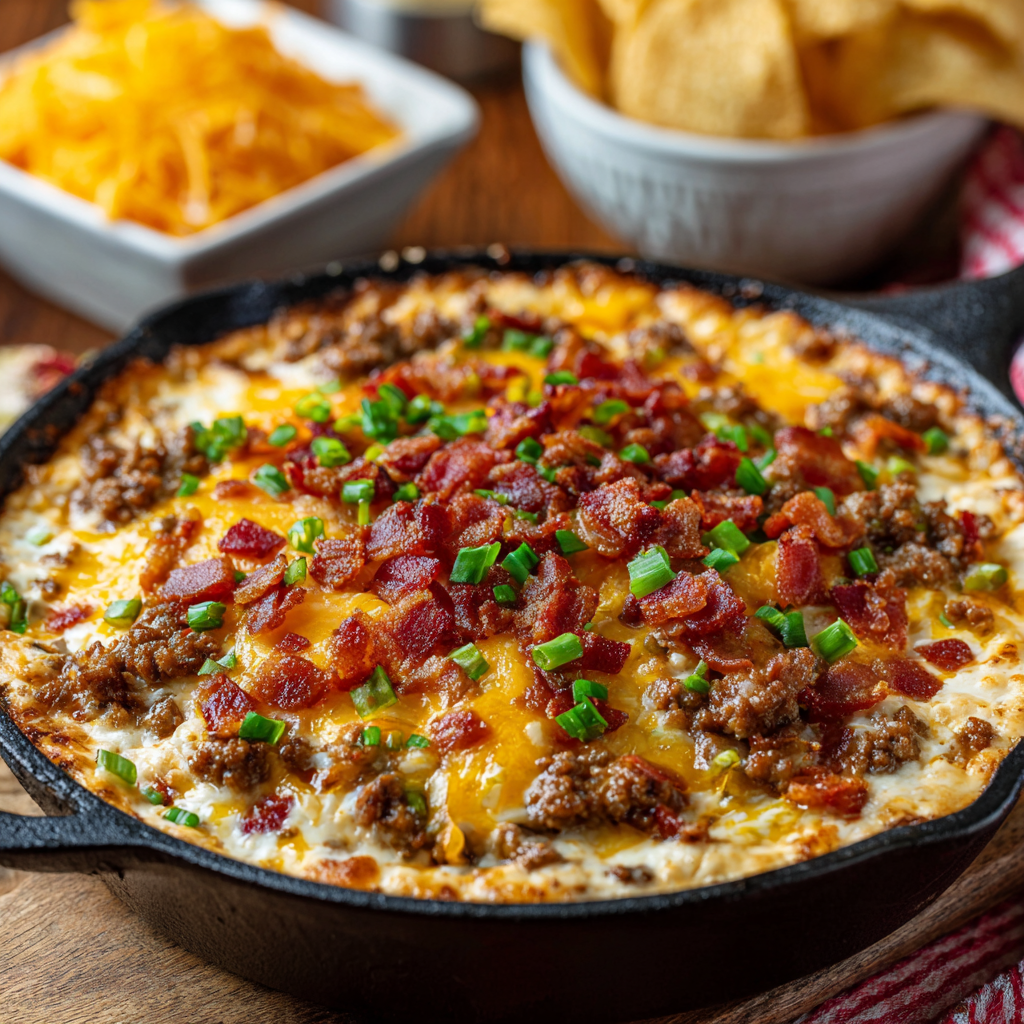
Creamy Skillet Bacon Cheeseburger Dip : Like a Gooey Burger in Every Bite
Creamy Skilla Bacon Cheeseburger Dip: Your New Party Hero
Hey friends! Olivia here. Can we just take a moment to appreciate the pure, unadulterated joy of a really good dip? It’s the social glue of any gathering, the first thing to disappear on a snack table, and honestly, a direct path to everyone’s heart. But what if we took that concept and cranked it up to eleven? What if we could capture the entire, glorious experience of biting into a juicy, loaded bacon cheeseburger… and turn it into something you can scoop with a chip?
That’s exactly the delicious daydream that led to this Creamy Skillet Bacon Cheeseburger Dip. Imagine: seasoned ground beef and crispy bacon, swimming in a luxuriously creamy, tangy, cheesy sauce, all baked until bubbly and golden. It’s warm, indulgent, and packed with all the familiar, comforting flavors you love. This isn’t just a dip; it’s a conversation starter, a crowd-pleaser, and the reason people will hover around your oven. The best part? It comes together in one skillet with minimal fuss. So, grab your favorite apron (the messy one is totally welcome here), and let’s make something unforgettable.
The Game Day Discovery
This recipe was born out of a happy accident during one of our epic, slightly chaotic family football Sundays. I was tasked with an appetizer, wanting something hearty that could stand as a meal for the fans glued to the TV. I had burger fixings out for sliders, but I also had a block of cream cheese and a serious craving for something dippable. In a moment of “what if?” I started browning the beef with onions, then just… stirred in the cream cheese and other burger toppings. The kitchen smelled insane. When I pulled that sizzling skillet out of the oven and we all dug in with toasted bread slices, there was a collective silence (a rare feat during a game!), followed by a chorus of “What IS this?!” and “You have to make this every time.” It was a messy, cheesy, triumphant win, way before the final whistle blew. Now, it’s my not-so-secret weapon for any gathering that needs a little extra cozy magic.
Gathering Your Burger-Inspired Ingredients
Here’s your shopping list for this flavor party! Remember, great ingredients make a great dip, but I’ve got plenty of swaps and chef secrets to make it work for you.
- 1 lb ground beef: I prefer an 80/20 blend for the best flavor—a little fat means a lot of taste. For a lighter version, ground turkey or chicken works beautifully, or even a plant-based ground “meat” crumble.
- ½ cup diced onion: Yellow or white onion is perfect here. They sweeten as they cook with the beef, building that essential savory base. No fresh onion? A teaspoon of onion powder in a pinch will do.
- 1 teaspoon garlic powder: It distributes flavor more evenly than fresh garlic in this creamy mix. Trust me on this one!
- Salt and pepper to taste: Season your beef well as it cooks. This is your foundation layer of flavor.
- 6 slices bacon, cooked and crumbled: The crispy, salty MVP. Bake it on a sheet pan for easy, mess-free cooking. For a shortcut, high-quality pre-cooked bacon bits can save the day.
- 1 cup shredded cheddar cheese: Sharp cheddar gives that classic burger bite. Chef Insight: Always shred your own cheese if you can! Pre-shredded bags have anti-caking agents that can make your sauce a bit grainy. Freshly shredded melts like a dream.
- ½ cup shredded mozzarella cheese: The secret to that epic, stretchy pull. It adds a mild, creamy meltiness that blends everything together.
- 8 oz cream cheese, softened: The creamy backbone. Let it sit on the counter for 30-60 minutes before you start. A soft block incorporates smoothly and prevents lumps.
- ½ cup sour cream: Adds tang and creaminess. Full-fat Greek yogurt is a great high-protein substitute.
- ¼ cup mayonnaise: This is part of our “burger sauce” magic, adding richness and helping to bind everything. Use your favorite brand!
- 2 tablespoons ketchup & 1 tablespoon yellow mustard: The dynamic duo! This is the soul of the burger flavor. Don’t skip them—they create that perfect tangy-sweet backdrop.
- Optional toppings: Chopped pickles (for that essential burger crunch!), sliced green onions (color and freshness), a sprinkle of sesame seeds (for the bun vibe!).
Let’s Build That Dip! Step-by-Step
Ready to create some magic? Follow these steps, and I’ll walk you through every tip and trick I’ve learned along the way.
- Preheat & Prep: First, get your oven heating to 375°F (190°C). This is the perfect temperature to get everything hot, bubbly, and beautifully golden on top without burning. While it heats, take a moment to dice your onion and measure everything out. A little “mise en place” (chef talk for having everything in its place) makes this process a breeze.
- Brown the Beef: Grab a large, oven-safe skillet (cast iron is my hero for this!). Over medium-high heat, add your ground beef and diced onion. Sprinkle with the garlic powder, salt, and pepper. Cook, breaking it up with a spoon, until the beef is no longer pink and the onions are soft. Here’s a key tip: Once it’s cooked, drain the excess grease. You want flavor, not a greasy dip. I just tilt the skillet and use a spoon to remove it, or pour it into a old jar.
- Create the Creamy Base: Reduce the heat to low. Add the softened cream cheese, sour cream, mayonnaise, ketchup, and mustard right into the warm beef. Now, stir, stir, stir! The residual heat will gently melt the cream cheese. Keep stirring until the mixture is completely smooth, creamy, and uniform. This is where the transformation happens! Chef Hack: If your cream cheese was a bit cold and you see a few small lumps, don’t panic. Just keep stirring over the low heat; they’ll melt away.
- Cheese, Please! Turn off the heat. Now, stir in half of your crumbled bacon and ALL of the shredded cheddar and mozzarella. The heat from the skillet and beef mixture will start melting the cheese into gooey perfection. Stir until every shred is incorporated into the creamy base. Your kitchen should smell absolutely incredible right now.
- Top & Bake: Smooth the dip into an even layer in the skillet. Sprinkle the remaining bacon over the top, and if you’re feeling extra (I always am), a little extra pinch of cheese. Carefully transfer the skillet to your preheated oven. Bake for 10-15 minutes. You’re looking for that satisfying bubble around the edges and a lightly golden, irresistible top.
- The Grand Finale: Always use oven mitts to remove the hot skillet! Place it on a trivet. Now, immediately garnish with those fresh toppings—a scattering of green onions, a handful of chopped pickles, a dash of sesame seeds. This adds color, texture, and that final “burger” touch. Let it cool for just 2-3 minutes before serving—it will be molten lava hot straight out of the oven!
How to Serve This Cheesy Masterpiece
Presentation is part of the fun! I love serving this dip right in the skillet—it’s rustic, keeps it warm, and makes for easy cleanup. Surround it with an arsenal of dippables: sturdy tortilla chips, crispy baguette slices, soft pretzel bites, or even warm mini slider buns for the ultimate burger experience. For a veggie boost, add sticks of bell pepper, cucumber, or celery on the side. Don’t forget small plates and lots of napkins; this is gloriously messy food!
Make It Your Own: Fun Variations
- Spicy Southwest: Add a can of diced green chiles and a teaspoon of cumin to the beef. Use pepper jack cheese instead of mozzarella and top with jalapeño slices.
- Breakfast Burger Dip: Swap the ground beef for cooked breakfast sausage. Use cheddar cheese and stir in a tablespoon of maple syrup with the sauces. Top with a fried egg if you’re feeling wild!
- Italian “Pizza Burger” Style: Use Italian sausage. Swap ketchup for pizza sauce and add a teaspoon of Italian seasoning. Use a blend of mozzarella and provolone. Top with fresh basil after baking.
- Lighter Version: Use 93% lean ground turkey, light cream cheese, and light sour cream. It’s still incredibly creamy and flavorful.
- Low-Carb/Keto: Serve with pork rinds, cheese crisps, or low-carb veggie sticks. Ensure your ketchup is sugar-free.
Olivia’s Kitchen Notes
This recipe has truly evolved from that first game-day experiment. I’ve learned that the type of skillet matters—a well-seasoned cast iron gives the best, even heat and a gorgeous presentation. I’ve also been known to double the bacon (because, why not?) on particularly indulgent days. One funny fail: I once tried to rush the softening of the cream cheese in the microwave and ended up with a hot, separated mess. Patience is key! Let it soften naturally. Over the years, this dip has been requested for birthdays, potlucks, and even a “just because” Tuesday. It’s proof that the best recipes aren’t about perfection; they’re about the joy you share when you put something made with love on the table.
Your Questions, Answered!
Q: Can I make this dip ahead of time?
A: Absolutely! You can complete all steps through mixing in the cheese (step 4). Cover the skillet tightly and refrigerate for up to 24 hours. When ready to bake, let it sit on the counter for 20-30 minutes while the oven preheats, then top with the reserved bacon and bake. You may need to add 5-10 minutes to the bake time since it’s starting cold.
Q: My dip seems a bit oily after baking. What happened?
A: This usually means there was a bit too much fat left in the beef after browning. Next time, be sure to drain the beef well after cooking. Using a leaner beef blend or ground turkey can also help. A little sheen is normal and delicious, but pooling oil means you can drain a bit more next time.
Q: I don’t have an oven-safe skillet. Can I still make this?
A> Of course! Simply transfer the mixed dip from your regular skillet into a greased baking dish (an 8×8 or 9-inch pie dish works great). Top and bake as directed. The presentation is still fantastic!
Q: What’s the best way to reheat leftovers?
A: The microwave works in a pinch (stir every 30 seconds), but for the best texture, reheat it slowly in a saucepan over low heat, stirring often. You can also reheat it in the oven at 350°F in a covered dish until warm, about 10-15 minutes.

Creamy Skillet Bacon Cheeseburger Dip : Like a Gooey Burger in Every Bite
Description
Creamy Skillet Bacon Cheeseburger Dip
Prep Time: 15 mins
Cook Time: 15 mins
Servings: 10–12
Ingredients
-
1 lb ground beef (80/20 blend preferred)
-
½ cup diced onion
-
1 tsp garlic powder
-
Salt & pepper, to taste
-
6 slices bacon, cooked and crumbled
-
1 cup shredded cheddar cheese
-
½ cup shredded mozzarella cheese
-
8 oz cream cheese, softened
-
½ cup sour cream
-
¼ cup mayonnaise
-
2 tbsp ketchup
-
1 tbsp yellow mustard
-
Optional toppings: chopped pickles, sliced green onions, sesame seeds
Instructions
-
Preheat oven: 375°F (190°C).
-
Brown beef & onions: In an oven-safe skillet, cook beef and onion over medium-high heat. Season with garlic powder, salt, and pepper. Drain excess grease.
-
Make creamy base: Reduce heat to low, stir in cream cheese, sour cream, mayonnaise, ketchup, and mustard until smooth.
-
Add cheese & bacon: Stir in cheddar, mozzarella, and half the bacon until melted and incorporated.
-
Top & bake: Smooth mixture, sprinkle remaining bacon on top, and bake 10–15 mins until bubbly and lightly golden. Garnish with optional toppings and serve warm.
Nutritional Information*
*This is an estimated nutritional breakdown for a ¼ cup serving. Values can vary based on specific ingredients and brands used.
- Calories: 210
- Fat: 18g
- Carbohydrates: 3g
- Protein: 10g
Prep Time: 15 minutes | Cook Time: 15 minutes | Servings: 10-12
Final Thoughts
Creamy Skillet Bacon Cheeseburger Dip isn’t just a recipe—it’s an experience. It’s the cozy, crowd-gathering, flavor-packed centerpiece that turns any occasion into a celebration. With its irresistible combination of savory beef, smoky bacon, and that creamy, tangy, cheesy sauce, every scoop delivers the nostalgic joy of a classic burger in shareable form. Whether it’s game day, a potluck, or a simple night in with friends, this dip is guaranteed to disappear fast and leave everyone asking for the recipe.
More than just a delicious dish, it’s a reminder that the best gatherings are built around food that brings people together—food that’s unpretentious, hearty, and made to be enjoyed with laughter and good company. It’s proof that a little creativity can transform familiar flavors into something new and exciting.
So, the next time you’re looking to be the hero of the snack table, remember: greatness is just one skillet away. Preheat that oven, gather your favorite dippers, and get ready to serve up a big, bubbly helping of happiness.
ecipe! All the flavors of a burger in one hot, cheesy, skillet appetizer. Easy, crowd-pleasing, & addictive.
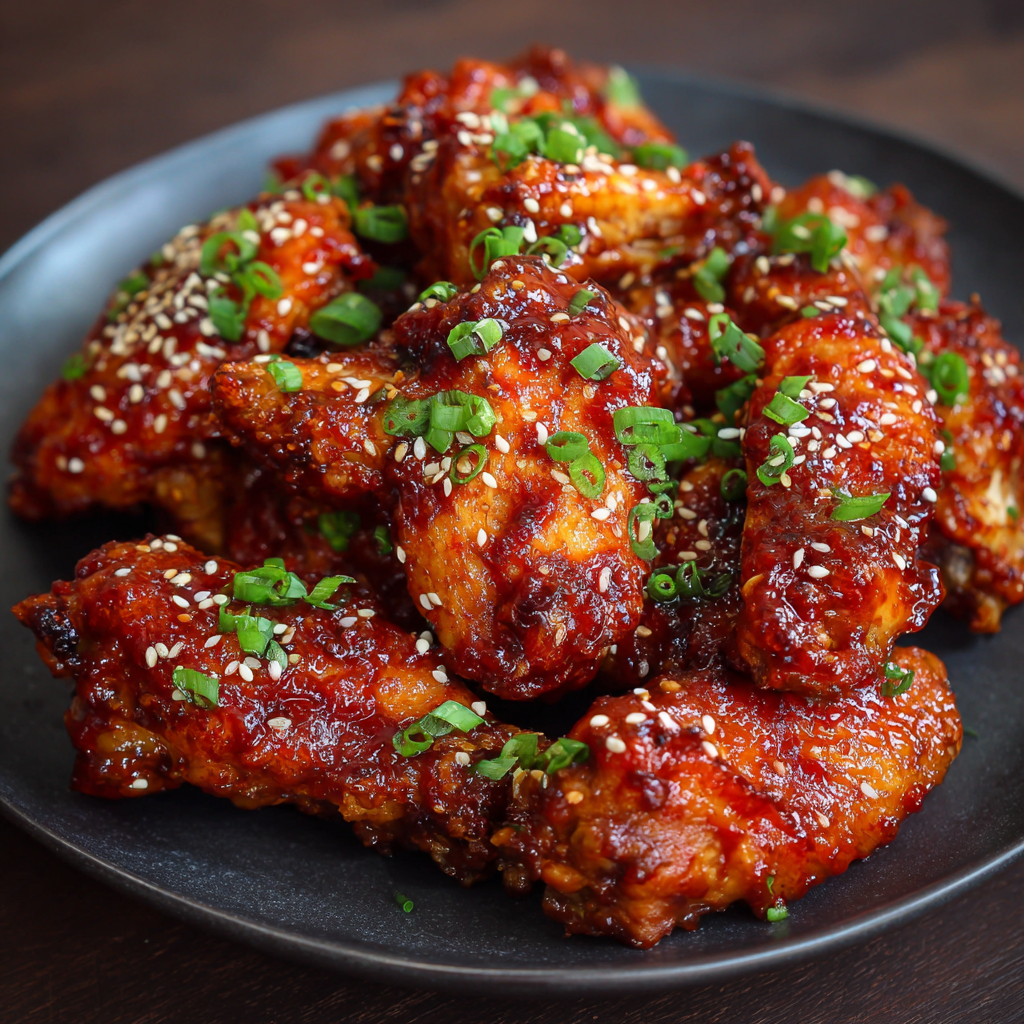
Easy Crockpot Sriracha Honey Chicken Wings (Fall-Off-the-Bone Flavor)
Easy Crockpot Sriracha Honey Chicken Wings: Your New Go-To Party Hero
Hey there, friend! Come on in, grab an apron, and let’s get something simmering. If your idea of a perfect weekend involves a house that smells incredible, a soundtrack of laughter in the background, and a plate of something so good it makes everyone go quiet for a second, you and I are on the same page. Today, we’re making magic with one of my all-time favorite, no-fuss, crowd-pleasing recipes: Easy Crockpot Sriracha Honey Chicken Wings.
I’m talking about wings so tender, the meat practically whispers “I’m ready” and slides right off the bone. They’re coated in a glaze that’s the ultimate flavor flirt—sweet honey, a punchy kick of sriracha, savory soy, and a hint of garlicky goodness. The best part? Your slow cooker does 95% of the work. Whether you’re prepping for the big game, hosting a casual Friday night hang, or just want to treat yourself to something special without being chained to the stove, this recipe is your secret weapon. It’s approachable, it’s forgiving, and it delivers restaurant-level flavor from the coziest corner of your kitchen. Let’s make a mess and a memory, shall we?
The Wing That Won Over a Crowd (And My Skeptical Uncle)
This recipe holds a special place in my heart because it was the silent star of what I now call “The Great Family Reunion of ’21.” Picture this: my backyard, a mix of cousins, aunts, uncles, and my very opinionated Uncle Frank, who believes true wings can only come fried and from a specific bar in Buffalo. I was nervous! I wanted to serve something I could prep ahead and enjoy the party, so into the crockpots these wings went.
Hours later, the smell of garlic, honey, and spice had worked its spell. I pulled them out, gave them a quick broil until they were sticky and glistening, and set them out. I watched, hiding behind the kitchen window, as Uncle Frank took one. Then another. He sought me out, licked his fingers, and said, “Kid, these aren’t wings. These are a religious experience.” That was the moment I knew this recipe was a keeper. It’s more than food; it’s a conversation starter, a crowd-uniter, and proof that sometimes, the easiest path leads to the most delicious destination.
Gathering Your Flavor All-Stars
Here’s what you’ll need to create this sweet, spicy, savory symphony. I’ve added my little chef notes next to each one—because knowing your ingredients is the first step to cooking with confidence!
- 2–3 lbs chicken wings – I like the whole wing, flats and drumettes together for variety. Pro tip: Pat them super dry with paper towels before they hit the crockpot. Less moisture at the start means a more concentrated, flavorful sauce later.
- 1/2 cup honey – The sweet balm that tames the heat. For a deeper, richer flavor, try using raw, local honey. If you’re out, pure maple syrup is a fantastic 1:1 swap.
- 1/3 cup sriracha sauce – The star of the spice show! This is where you customize. Love heat? Go for a full 1/2 cup. Want it milder? Start with 1/4 cup. The brand matters too—I find Huy Fong (the one with the rooster) has the perfect garlicky kick.
- 1/4 cup soy sauce – Our salty, umami backbone. For a gluten-free version, liquid aminos or tamari work beautifully. If you’re watching sodium, use a low-sodium soy sauce.
- 1 tbsp minced garlic – Fresh is best here! That punch of real garlic makes all the difference. In a pinch, 1 teaspoon of high-quality garlic powder will do.
- 1 tbsp rice vinegar or apple cider vinegar – This is the secret weapon! A splash of acidity brightens all the other flavors and keeps the sweetness from being one-dimensional. I slightly prefer rice vinegar for its milder tang.
- Optional: green onions & sesame seeds for garnish – Never skip the garnish, friends! The fresh, sharp bite of green onion and the nutty crunch of sesame seeds take the presentation and flavor from “great” to “WOW.”
Let’s Get Cooking: Your Foolproof Roadmap to Wing Heaven
Ready? This is where the fun happens. Follow these steps, and you’re guaranteed success. I’ve tucked my favorite kitchen hacks right into the instructions.
- Mix Your Magic Sauce. In a medium bowl, whisk together the honey, sriracha, soy sauce, minced garlic, and vinegar. Don’t just stir—whisk it vigorously until it’s completely smooth and emulsified. Give it a little taste on a spoon (it’ll be strong!) and adjust. Want more heat? Add a dash more sriracha. Chef’s Hack: Use the same measuring cup for your honey and oil-based sriracha in this order: honey first. The residual oil in the cup will help the honey slide right out.
- Prep & Place Your Wings. Remember that paper towel pat-down I mentioned? Do it! This is crucial. Place the dried wings in your crockpot. There’s no need to grease the pot. Pour that gorgeous, glossy sauce all over the wings. Now, get in there with clean hands or tongs and toss, toss, toss until every single wing is lovingly coated. Chef’s Commentary: This hands-on step is my favorite. It’s where you commit to the flavor!
- Slow Cook to Perfection. Cover the crockpot. Here’s your choice: LOW for 4-5 hours or HIGH for 2-3 hours. I am a devout member of Team Low & Slow. The extra time allows the collagen and fat to break down completely, giving you that legendary “fall-off-the-bone” texture. The wings are done when the meat is incredibly tender and pulls away from the bone easily.
- The Crispy, Sticky Finish (Non-Negotiable!). Preheat your broiler to HIGH and line a baking sheet with foil (for easy cleanup). Using tongs, carefully transfer the wings from the crockpot to the baking sheet. Don’t discard that liquid gold left in the pot! Pour it into a saucepan and simmer over medium heat for 10-15 minutes until it reduces and thickens into a luscious glaze. Brush this reduced sauce generously over the wings. Broil for 3-5 minutes, watching closely, until the edges are caramelized, sticky, and slightly charred. Chef’s Pro-Tip: This broiling step is what transforms them from “slow-cooked wings” to “insanely good, restaurant-style wings.” It adds texture and intensifies the flavor tenfold.
- Garnish & Serve Immediately! Transfer your glistening, sticky wings to a platter. Shower them with thinly sliced green onions and a sprinkle of sesame seeds. The contrast is everything. Serve them hot, with lots of napkins and a side of cool, creamy ranch or blue cheese for dipping.
How to Serve These Flavor Bombs
Presentation is part of the joy! I love using a big, rustic wooden board or a bright, colorful platter. Pile the wings high in the center, letting the garnishes fall all around. Place a big bowl of extra dipping sauce (that reduced glaze from the pot is perfect) right in the middle. For a full spread, I keep the sides simple: crunchy carrot and celery sticks, a big leafy salad to balance the richness, and maybe some buttery cornbread or rice to soak up any extra sauce. It’s casual, inviting, and says “dig in!”
Make It Your Own: 5 Delicious Twists
Once you’ve mastered the base, play with it! Here are some of my favorite riffs:
- Gochujang Kick: Swap half the sriracha for Korean gochujang paste. It adds a complex, fermented, slightly sweet heat that’s incredible.
- Citrus Zing: Add the zest and juice of one lime to the sauce and garnish with fresh cilantro instead of green onions for a brighter, zestier profile.
- Sticky Ginger-Soy: Add 1 tablespoon of freshly grated ginger to the sauce and substitute half the honey with brown sugar for a deeper, more caramel-like flavor.
- BBQ Fusion: Mix in 2 tablespoons of your favorite BBQ sauce with the honey-sriracha mix for a smoky, sweet, and spicy hybrid.
- Air Fryer Finish: Instead of broiling, pop the sauced wings in an air fryer at 400°F for 5-7 minutes for an ultra-crispy skin with less mess.
Olivia’s Kitchen Notes & Stories
This recipe has evolved from a simple “dump and go” crockpot meal into the more polished version you see today. The broiling step was a happy accident born from a desire for crispy skin one lazy Sunday. Now, I’d never skip it! I’ve also learned that doubling the sauce part of the recipe is never a bad idea—that reduced glaze is liquid gold on rice, roasted veggies, or even as a burger topping.
A funny story: I once accidentally used ghost pepper sauce instead of sriracha (similar bottle, very different outcome!). Let’s just say we had to order pizza that night, and my lips were numb for hours. The lesson? Always, always do a quick sniff test of your hot sauce bottle! These wings are forgiving, but they’re not miracle workers against accidental ghost peppers.
Your Questions, Answered!
Q: My sauce is too thin/watery after cooking. What happened?
A: No worries! This usually means the wings released more liquid than expected. Simply pour all the crockpot juices into a saucepan and simmer on the stove over medium heat. Let it bubble away for 10-15 minutes, stirring occasionally, until it reduces by about a third and coats the back of a spoon. It will thicken beautifully.
Q: Can I make these ahead of time?
A: Absolutely! You can cook the wings in the sauce in the crockpot, then store them (covered in sauce) in the fridge for up to 2 days. When you’re ready, proceed with reducing the sauce and broiling. The flavor actually deepens overnight!
Q: The wings are almost *too* tender and falling apart when I take them out. Help!
A> You’ve hit the peak of low-and-slow perfection! Just be extra gentle when transferring them to the baking sheet. A sturdy spatula or slotted spoon can help support them. They might look fragile, but once broiled, they’ll hold together just fine for serving.
Q: Is there a way to make the skin crispy without broiling?
A> The broiler is my top choice for convenience. However, you can also arrange the sauced wings on a wire rack set over a baking sheet and bake at 425°F (220°C) for 15-20 minutes, brushing with extra sauce halfway through.
Easy Crockpot Sriracha Honey Chicken Wings (Fall-Off-the-Bone Flavor)
Description
Easy Crockpot Sriracha Honey Chicken Wings
Prep Time: 10 mins
Cook Time: 4–5 hrs (LOW) / 2–3 hrs (HIGH)
Total Time: Up to 5 hrs 10 mins
Ingredients
-
2–3 lbs chicken wings (flats & drumettes)
-
½ cup honey
-
⅓ cup sriracha sauce (adjust to taste)
-
¼ cup soy sauce (or tamari for gluten-free)
-
1 tbsp minced garlic (or 1 tsp garlic powder)
-
1 tbsp rice vinegar or apple cider vinegar
-
Optional garnish: sliced green onions & sesame seeds
Instructions
-
Mix the sauce: In a medium bowl, whisk together honey, sriracha, soy sauce, garlic, and vinegar.
-
Prep the wings: Pat wings dry with paper towels. Place them in the crockpot. Pour the sauce over wings and toss to coat evenly.
-
Slow cook: Cover and cook on LOW for 4–5 hrs or HIGH for 2–3 hrs, until wings are tender and fall-off-the-bone.
-
Reduce the sauce: Preheat broiler to HIGH. Pour crockpot juices into a saucepan and simmer 10–15 mins until thickened.
-
Finish under broiler: Place wings on a foil-lined baking sheet, brush with reduced sauce, and broil 3–5 mins until sticky and slightly charred.
-
Garnish & serve: Sprinkle with green onions and sesame seeds. Serve immediately with extra dipping sauce if desired
Nutrition
- Calories: 320 Cal per serving
- Fat: 18g
- Carbohydrates: 14g
- Protein: 25g
Nutritional Information (Approximate, Per Serving)
Please note: This is an estimate for 1/6th of the recipe, based on the ingredients used. Values can vary significantly based on specific brands, portion sizes, and any modifications you make.
- Calories: ~320
- Protein: 25g
- Fat: 18g
- Carbohydrates: 14g
- Sugar: 12g
Prep Time: 10 mins | Cook Time: 4-5 hrs (low) / 2-3 hrs (high) | Total Time: Up to 5 hrs 10 mins | Servings: 4-6
Final Thoughts
For the Nights You Need a Crowd-Pleasing Hero (With Minimal Effort)
When you want the kind of food that turns a gathering into a celebration—where the scent alone makes people gather in the kitchen—these Easy Crockpot Sriracha Honey Chicken Wings are your secret weapon. They prove that incredible, restaurant-worthy flavor doesn’t require complicated techniques or constant attention. It just requires a little trust in your slow cooker and the magic of a well-balanced sauce.
This recipe is for the host who wants to enjoy their own party, for the busy home cook craving a special treat without the fuss, and for anyone who believes the best meals are the ones that bring people together. It’s forgiving, flexible, and guaranteed to earn you compliments.
So the next time you’re planning a game day, a casual get-together, or even just a family dinner that deserves a little extra shine, remember this recipe. Set it, forget it, and finish it with that glorious sticky broil. You’ll be rewarded with wings so good, they just might spark a new family tradition.
“`
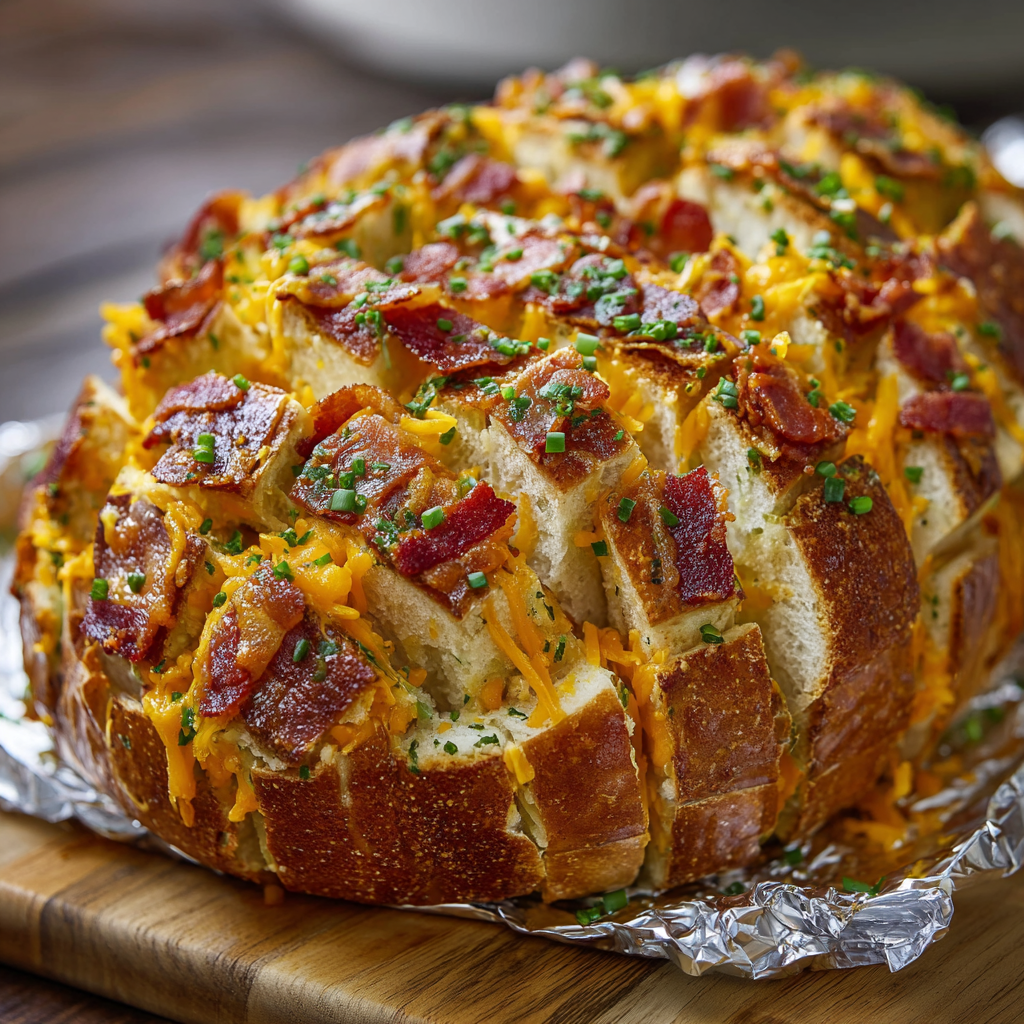
Bacon Cheddar Ranch Pull-Apart Bread : Cheesy, Buttery, Gone in Minutes
Bacon Cheddar Ranch Pull-Apart Bread: Your New Party Superstar
Hey there, friend! Come on in, grab an apron, and let’s get something incredibly delicious happening in your kitchen. If you’ve ever needed a recipe that guarantees smiles, eager fingers, and a chorus of “oh my gosh, you have to give me this recipe,” then you, my friend, have just hit the jackpot. Today, we’re making my legendary Bacon Cheddar Ranch Pull-Apart Bread, and trust me, it’s every bit as epic as it sounds.
Picture this: a gorgeous, crusty loaf of sourdough, transformed into a warm, buttery, cheesy masterpiece. Each piece pulls away with a gentle tug, revealing strings of melted cheddar, crispy bits of smoky bacon, and that unmistakable, herby tang of ranch. It’s the ultimate shareable appetizer, the game-day hero, the “I-brought-something-awesome” potluck contribution that makes you an instant legend. The best part? It’s embarrassingly easy. We’re talking 10 minutes of hands-on time. No fancy skills required, just a love for good food and good company. So, preheat that oven and let’s turn simple ingredients into pure, unadulterated magic.
The Pull-Apart Bread That Started It All
This recipe has a special place in my heart because it’s my ultimate “people pleaser,” born from a minor kitchen panic. Years ago, I was hosting my first big football watch party. The game was about to start, and I realized my planned snacks looked a little…sad. I had a loaf of bread, some leftover bacon from breakfast, and a block of cheddar staring at me. In a “nothing to lose” moment, I started slicing, stuffing, and baking.
The smell that wafted from the oven was pure sorcery. I placed that golden, cheesy, fragrant loaf on the coffee table, and what happened next was beautiful chaos. Conversation stopped. Everyone leaned in. The first brave soul pulled a piece, and a cascade of cheese followed. Within minutes, the entire loaf was gone, and I was getting recipe requests between cheers for the touchdown. It was the moment I realized the power of simple, cozy, incredibly tasty food to bring people together. This bread isn’t just an appetizer; it’s a memory maker.
Gathering Your Flavor Allies
Here’s everything you’ll need to create this masterpiece. I’ve included my little chef notes for each ingredient because knowing the “why” makes you a more confident cook!
- 1 round sourdough loaf (or crusty artisan bread): This is our edible bowl and the base for all the goodness. A sturdy, crusty loaf with a tight crumb (like sourdough or a good Italian boule) is key—it holds up to the butter and cheese without getting soggy. Chef’s Insight: If you can’t find a round loaf, a oval or rustic batard works perfectly!
- 1½ cups shredded cheddar cheese: I recommend shredding a block of sharp or medium cheddar yourself. Pre-shredded cheese often has anti-caking agents that can make the melt less smooth. Sub Tip: Swap in pepper jack for a kick, or a mix of gouda and mozzarella for a super-stretchy, mellow flavor.
- ½ cup cooked, crumbled bacon: The salty, smoky crunch is non-negotiable. Use thick-cut if you can! Chef’s Hack: Bake your bacon on a sheet pan at 400°F for 15-20 minutes for perfectly flat, easy-to-crumble strips. No splatter, all reward.
- ½ cup (1 stick) unsalted butter, melted: Unsalted lets you control the saltiness, especially since our ranch seasoning has salt. This butter is our flavor vehicle! Sub Tip: For a richer depth, use ¼ cup butter and ¼ cup bacon fat. You’re welcome.
- 1 tablespoon ranch seasoning mix: This is our flavor bomb! It adds herby, garlicky, tangy notes in one sprinkle. Chef’s Insight: If you have a homemade ranch blend or are avoiding MSG, feel free to use your favorite. The store-bought packet works like a charm, too.
- 2 tablespoons chopped green onions: They add a necessary pop of fresh, oniony brightness to cut through all the rich, savory goodness. Don’t skip them! Sub Tip: Fresh chives or a sprinkle of finely diced red onion work in a pinch.
- Optional garnish: extra cheese or parsley: A little flourish for the ‘gram and a final hit of color and flavor.
Let’s Build Some Deliciousness: Step-by-Step
Ready? Let’s do this. I’ll walk you through every step with my favorite tips to ensure cheesy, pull-apart perfection.
Step 1: Preheat & Prep. Fire up your oven to 375°F (190°C). Line a baking sheet with aluminum foil—this isn’t just for easy cleanup; it helps contain any rogue butter or cheese that might bubble out. Little Chef Hack: Give the foil a quick mist of cooking spray to prevent any potential sticking.
Step 2: The Art of the Crosshatch. Place your loaf on a cutting board. Using a sharp serrated bread knife, slice the bread diagonally in one direction, about 1-inch apart. Be careful NOT to slice all the way through the bottom crust. You want the loaf to stay intact, like a bread hedgehog. Now, rotate the loaf 90 degrees and slice diagonally again to create a diamond crosshatch pattern. Pro Tip: If you’re nervous about cutting through, place two wooden spoons or chopsticks along the long sides of the loaf as a depth guide for your knife.
Step 3: The Flavor Infusion. In a small bowl, whisk together the melted butter and that glorious ranch seasoning until fully combined. Take your time here—this seasoned butter is what makes every single bite sing. Now, the fun part: gently open up the cracks in your scored loaf and, using a spoon or a pastry brush, drizzle and paint that ranch butter into EVERY nook and cranny. Get it deep in there! This is what transforms the bread from the inside out.
Step 4: The Big Stuff. Now, take handfuls of your shredded cheese and crumbled bacon, and lovingly stuff them into all those buttered crevices. Don’t be shy! Push the filling down with your fingers or the handle of a spoon. Follow with the green onions, tucking them in amongst the cheese and bacon. Some will fall out—that’s okay, just pile it on top.
Step 5: Bake to Bubbly Perfection. Wrap the entire stuffed loaf snugly in the foil on your baking sheet. This initial covered bake steams the bread, making it tender and ensuring the cheese melts evenly. Bake for 15 minutes. Then, carefully open the foil (watch for steam!) and bake for another 10 minutes uncovered. This final blast crisps up the edges, toasts the top, and gives you that gorgeous, golden-brown finish.
Step 6: The Grand Reveal. Pull the loaf from the oven. It should be fragrant, golden, and the cheese should be completely melted and bubbly. Let it rest for just 2-3 minutes—this allows the cheese to set slightly so it pulls in glorious strings, not a molten lava flow. Garnish with extra green onions or parsley, place it on a board or platter, and get ready for the applause.
How to Serve & Savor
Presentation is part of the fun! I love placing the whole loaf right in the center of a big wooden board or a rustic platter. Tuck a small knife nearby for anyone who wants a more precise piece, but encourage everyone to just dig in with their hands. That’s the spirit of this dish! It’s perfect as-is, but for a next-level experience, offer small bowls of warm marinara sauce, cool ranch dressing, or even a zesty jalapeño aioli for dipping. Pair it with a crisp, green salad or a bowl of tomato soup for a full, comforting meal.
Make It Your Own: Delicious Twists
The beauty of this recipe is its versatility. Here are a few ways to play with the formula:
- Everything Bagel Style: Swap the ranch seasoning for 2 tbsp of everything bagel seasoning. Use a mix of cheddar and whipped cream cheese stuffed in the cracks.
- Italian Garden: Use garlic butter instead of ranch butter. Stuff with a mix of mozzarella, chopped sun-dried tomatoes, sliced pepperoni, and a sprinkle of Italian seasoning.
- Southwestern Fiesta: Mix taco seasoning into the butter. Stuff with pepper jack cheese, cooked chorizo or seasoned ground beef, and diced jalapeños.
- Garlic Herb Vegetarian: Omit the bacon. Use a mix of melted butter, minced garlic, and dried herbs like rosemary and thyme. Stuff with a blend of mozzarella, parmesan, and sautéed mushrooms or spinach.
- Break-for-Brunch: Use everything bagel or a simple garlic-herb butter. Stuff with a combo of cheddar and diced ham. Serve with scrambled eggs on the side!
Olivia’s Kitchen Notes
This recipe has evolved from my “kitchen sink” experiment into a tried-and-true favorite. One funny lesson learned: I once got overzealous with the butter and didn’t let it seep in, just poured it on top. The result? A delicious but slightly soggy top and dry interior. Now I’m militant about getting that butter deep into the cuts! I also love that it’s a “choose your own adventure” dish. My nephew is obsessed with a version I make with pizza sauce and mini pepperonis tucked inside—we call it Pizza Pull-Apart. Don’t be afraid to experiment with what’s in your fridge. The core technique is foolproof, and that’s the real magic.
Your Questions, Answered
Q: My bread turned out a bit soggy in the middle. What happened?
A: This usually means either 1) The bread wasn’t crusty/sturdy enough to begin with (a softer sandwich loaf will get mushy), or 2) There was too much butter or wet filling. Make sure you’re using a dense, crusty bread and that you’re stuffing with mainly cheese and bacon, not super-wet ingredients. Also, ensure you bake it uncovered for the full time to crisp up.
Q: Can I make this ahead of time?
A> Absolutely! You can assemble the entire loaf—score, butter, stuff—wrap it tightly in foil, and refrigerate for up to 24 hours. When ready, just pop it straight from the fridge into the preheated oven. You may need to add 3-5 extra minutes to the covered baking time since it’s starting cold.
Q: I don’t have/don’t like ranch seasoning. What can I use?
A> No problem! The world is your flavor oyster. Use 1 tablespoon of your favorite dry spice blend: everything bagel, Italian seasoning, taco seasoning, or even just a simple mix of garlic powder, onion powder, dried dill, and a pinch of salt.
Q: Can I use pre-shredded cheese?
A> You can, and it will still be delicious! For the absolute best, gooey-est, smoothest melt, I recommend shredding your own from a block. Pre-shredded cheese is coated to prevent clumping, which can sometimes make the melt a bit grainy or less stretchy.

Bacon Cheddar Ranch Pull-Apart Bread : Cheesy, Buttery, Gone in Minutes
Description
acon Cheddar Ranch Pull-Apart Bread
Prep Time: 10 minutes
Cook Time: 25 minutes
Total Time: 35 minutes
Ingredients
-
1 round sourdough or crusty artisan loaf
-
1½ cups shredded cheddar cheese
-
½ cup cooked bacon, crumbled
-
½ cup (1 stick) unsalted butter, melted
-
1 tablespoon ranch seasoning mix
-
2 tablespoons chopped green onions
-
Optional: extra cheese or parsley for garnish
Instructions
-
Preheat oven to 375°F (190°C). Line a baking sheet with foil.
-
Slice the bread in a crosshatch pattern, cutting about 1-inch apart without slicing through the bottom.
-
Mix butter & seasoning: In a small bowl, whisk melted butter and ranch seasoning together.
-
Season the loaf: Drizzle and brush the ranch butter deep into all the cuts.
-
Stuff it: Fill the cuts generously with shredded cheese, bacon, and green onions.
-
Bake covered: Wrap loaf loosely in foil and bake for 15 minutes.
-
Bake uncovered: Open foil and bake another 10 minutes, until cheese is melted and top is golden.
-
Rest & serve: Let cool 2–3 minutes. Garnish if desired and serve warm.
Nutritional Information (Per Serving, approx. 1/8 of loaf)
Calories: ~290 | Fat: 20g | Saturated Fat: 11g | Cholesterol: 55mg | Sodium: 480mg | Carbohydrates: 18g | Fiber: 1g | Sugar: 1g | Protein: 10g
Note: This is an estimate based on the specific ingredients used. Values can vary depending on brands and exact quantities.
Final Thoughts
Let’s be honest—this isn’t just a recipe; it’s an event. It’s the edible equivalent of a crowd gathering around a campfire: warm, inviting, and irresistibly communal. In a world of delicate canapés and complicated dishes, Bacon Cheddar Ranch Pull-Apart Bread is your deliciously unapologetic rebel. It doesn’t ask for a fork or a plate. It asks for hands, laughter, and the simple joy of sharing something truly wonderful.
Remember, the magic isn’t just in the melty cheese or the smoky bacon—it’s in the experience you create. It’s in the “oohs” as you pull it from the oven, the playful chaos of everyone reaching in, and the quiet satisfaction of seeing an empty board at the end of the night. This recipe proves that the most memorable food often comes not from precision, but from heart and a little bit of clever, buttery genius.
So, keep this in your back pocket for every gathering, big or small. Let it be your signature move. And don’t be afraid to make it your own—tweak the flavors, play with fillings, and make those memories around the table. Because great food isn’t just about feeding people; it’s about bringing them together.
“`
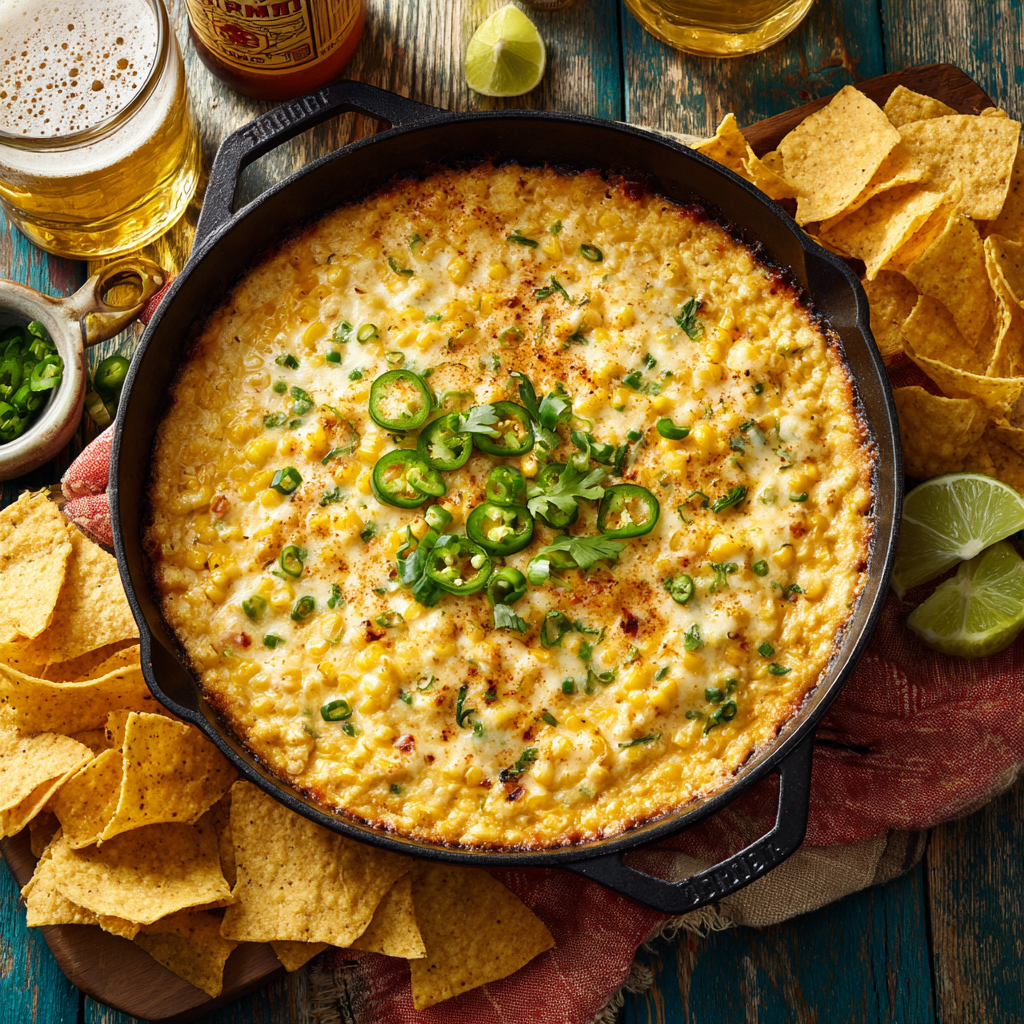
Cheesy Mexican Corn Dip (Irresistible Party Appetizer)
The Dip That Steals Every Party (And How to Make It Yours!)
Hey there, friend! If you’ve ever stood at a party, hovering over a dish that makes you genuinely consider forgoing all social etiquette just to get the last scoop, then we need to talk about this Cheesy Mexican Corn Dip. Seriously, I’ve seen it happen. It’s the culinary equivalent of a crowd magnet – a warm, bubbling, gloriously messy masterpiece that turns a simple bag of tortilla chips into a vehicle for pure joy.
It’s more than just a dip. It’s a conversation starter, a game-day MVP, and the star of every potluck I’ve ever brought it to. What I love most about it is its beautiful, unpretentious soul. It’s not about fancy techniques or hard-to-find ingredients. It’s about the magical alchemy that happens when sweet corn, creamy cheese, and a little kick of spice get together in a baking dish and become something so much greater than the sum of their parts. It’s the flavor of celebration, of gathering, of “just one more chip” that turns into ten.
So, tie on your favorite apron (the messy one tells the best stories, I swear), and let’s make a dish that will have people asking you for the recipe before they’ve even finished their first bite. Whether you’re feeding a hungry crowd for the big game or just treating yourself to a fabulous Friday night snack, this dip is your answer. Let’s get into it!
My First Bite: A Tailgate and a Revelation
My love affair with this dip started in a dusty college parking lot, of all places. Picture this: a crisp fall Saturday, the chaotic, joyful energy of a tailgate, and my friend’s mom, Linda, pulling a foil-covered dish from a cooler. She popped it into a portable oven, and within minutes, a smell began to weave through the air – savory, cheesy, with the sweet promise of corn. It cut right through the scent of grill smoke and autumn leaves.
When she finally lifted the foil, the sight was pure magic: golden, bubbly, speckled with green and red. That first scoop, cradled on a sturdy tortilla chip, was a revelation. The chip snapped, giving way to a creamy, warm, slightly spicy, and utterly comforting mouthful. It was instant community. Strangers became friends huddled around that dish. The game was almost an afterthought! That’s the power of truly great food – it connects. Ever since, this dip has been my not-so-secret weapon for bringing that same feeling of easy, delicious joy to every gathering I host. It’s my edible welcome hug.
Gathering Your Flavor Crew
Here’s what you’ll need to create this masterpiece. I’ve added my little chef insights because knowing the “why” makes you a more confident cook!
- 3 cups corn (frozen, canned, or fresh) – The sweet heart of the dip! Frozen corn is my year-round go-to—it’s frozen at peak freshness and super convenient. No need to thaw! Canned corn works in a pinch—just drain it well. If it’s summer and you have fresh corn, by all means, slice those kernels right off the cob! A quick char in a hot pan will add amazing smoky depth.
- 1 (8 oz) package cream cheese, softened – This is our creamy base. Softening it to room temp is NON-NEGOTIABLE for a smooth, lump-free dip. Leave it on the counter for a good hour before you start. For a lighter twist, you can use Neufchâtel.
- 1 cup shredded cheddar or Mexican blend cheese – The melty, glorious top layer and mixed throughout. I often use a sharp cheddar for punch, but a pre-shredded Mexican blend (with Monterey Jack, Asadero, etc.) is fantastic for convenience and flavor complexity.
- 1/2 cup sour cream or mayo – The tangy team player. Sour cream gives a brighter tang, while mayo (my personal favorite here) adds a richer, more savory depth and helps with browning. You can even do half and half! Greek yogurt is a decent tangy substitute if that’s what you have.
- 1/4 cup chopped green onions – They add a necessary fresh, oniony crunch. Don’t skip these! Use both the white and green parts.
- 1/4 cup diced jalapeños (fresh or pickled) – This is where you control the heat! Fresh jalapeños (seeds removed for milder, seeds in for hotter) give a bright, grassy heat. Pickled jalapeños are my usual choice—they add a tangy, slightly sweet heat that’s more integrated. Start with 1/4 cup and add more if you’re brave!
- 1/2 tsp chili powder – Not just “chili” powder, but the warm, earthy blend. It adds instant Southwestern soul. Smoked paprika is a great sub or addition for a smoky vibe.
- Salt & pepper to taste – Your flavor finishers. Always season in layers! Taste your mix before baking.
- Optional Garnish Avengers: A squeeze of fresh lime juice (brightens everything up!), chopped cilantro (love it or leave it, no judgment here), a drizzle of hot sauce, or a sprinkle of extra cheese and green onions.
Let’s Build Some Deliciousness: Step-by-Step
Follow these simple steps, and you’re guaranteed dip success. I’m chatting you through each one with my favorite kitchen hacks!
Step 1: Preheat & Prep. Fire up your oven to 375°F (190°C). This is the perfect temperature to get everything hot, bubbly, and beautifully golden without burning the cheese. While it heats, grab your favorite baking dish—an 8×8 inch square, a 9-inch pie plate, or a small oval baker all work perfectly. No need to grease it; the dip has enough fat to prevent sticking.
Step 2: Create the Creamy Base. In a large mixing bowl, plop in your softened cream cheese, sour cream (or mayo), chili powder, salt, and pepper. Now, get ready to mix! A sturdy spatula or a wooden spoon is your best friend here. Mix, mash, and stir until it’s completely smooth and all the spices are evenly distributed. Chef’s Tip: If your cream cheese is still a bit firm, a quick 15-second blast in the microwave can help, but don’t let it melt!
Step 3: The Big Mix-In. This is the fun part! Dump in the corn, shredded cheese, diced jalapeños, and chopped green onions. Reserve a small pinch of green onions for garnish if you’re feeling fancy. Now, fold everything together with that spatula. Don’t over-mix; just gently combine until every kernel of corn is dressed in that creamy, cheesy coating. Little Hack: Taste it now! This is your chance to adjust. Need more salt? More jalapeño? A pinch more chili powder? Now’s the time. Remember, flavors will intensify a bit as they bake.
Step 4: Bake to Golden Perfection. Transfer your glorious, chunky mixture to your baking dish and spread it into an even layer. Slide it into your preheated oven. Set your timer for 20 minutes. You’re looking for the edges to be actively bubbling and the top to have gorgeous golden-brown spots. If you want more color, you can pop it under the broiler for the last 1-2 minutes—but WATCH IT LIKE A HAWK. Broilers are powerful things!
Step 5: The Grand Finale (Garnish & Serve!). Carefully remove your masterpiece from the oven. It will be molten lava hot, so let it rest for just 5 minutes. This allows it to set slightly so your first chip dive isn’t a messy one. This is the moment to add your optional garnishes: a sprinkle of reserved green onions, fresh cilantro, or that extra squeeze of lime. Place it right in the center of the party with a big bowl of sturdy tortilla chips and watch the magic happen.
How to Serve It Up in Style
Presentation is part of the fun! I love serving this dip straight from the warm baking dish placed on a trivet or a pretty wooden board. Surround it with an abundant pile of sturdy restaurant-style tortilla chips (they need to hold up to the hearty dip!). For a colorful and fresh touch, add little bowls of sliced radishes, extra lime wedges, and more pickled jalapeños on the side for those who want to customize their heat level. Don’t forget a few small spoons for those who might want to dollop it on a plate! It’s also incredible as a topping for grilled chicken or nachos the next day.
Make It Your Own: Delicious Twists
The beauty of this recipe is its adaptability. Here are a few of my favorite riffs:
- “Elote” Style: After baking, brush the top with a mix of 1 tbsp mayo and 1 tbsp sour cream, then sprinkle with crumbled cotija cheese, a dusting of tajín, and lots of lime juice.
- Protein Power: Stir in 1 cup of cooked, crumbled chorizo or taco-seasoned ground beef for a heartier, meaty dip.
- Seafood Swap: Add 1 cup of lump crab meat or small cooked shrimp at the end of mixing for a luxurious coastal twist.
- Veggie-Packed: Add a drained can of Rotel (diced tomatoes & green chiles) or a finely diced red bell pepper for extra color and flavor.
- Slow Cooker Simplicity: Mix everything in your slow cooker and cook on LOW for 2-3 hours, stirring occasionally. Perfect for keeping it warm for hours!
Chef’s Notes & Kitchen Confessions
This recipe has evolved in my kitchen over the years. I used to be strictly a sour cream gal, until one fateful day when I was out and subbed mayo on a whim. The resulting depth of flavor and perfect browning made me a convert! I also used to painstakingly thaw frozen corn, until I realized that tossing it in frozen actually helps prevent the dairy from separating and keeps the corn’s texture perfect. A happy accident!
One funny story: I once brought this to a potluck where a guest, who shall remain nameless, was so engrossed in conversation while scooping that he missed the dip entirely and just ate a giant spoonful of it straight off the serving spoon. His wide-eyed “Oh my god, this is amazing” through a full mouth was the highest compliment. Moral of the story: provide adequate chip-to-dip transportation to avoid cutlery theft!
Your Dip Questions, Answered!
Q: My dip turned out a bit watery/oily. What happened?
A: This is usually due to the fat in the cheese and cream cheese separating. The most common culprits are: 1) Overbaking – stick to the 20-25 minute window until just bubbly and golden. 2) Using pre-shredded cheese with anti-caking agents – they can sometimes inhibit smooth melting. Shredding your own block of cheese can help, but honestly, I use pre-shredded all the time without issue if I don’t overbake. 3) Not using full-fat dairy – low-fat versions have more water and stabilizers that can separate when heated.
Q: Can I make this ahead of time?
A: Absolutely! This is a party lifesaver. You have two great options: 1) Assemble and refrigerate: Mix everything up, spread it in the dish, cover tightly, and refrigerate for up to 24 hours. Let it sit on the counter for 20-30 minutes before baking, then add 5-10 minutes to the bake time since it’s starting cold. 2) Bake and reheat: Bake it fully, let it cool, cover, and fridge. Reheat in a 350°F oven for 15-20 minutes until warmed through. It might be slightly less creamy but still delicious.
Q: How can I make it spicier/milder?
A> You are the master of your heat! For Milder: Use pickled jalapeños (they’re often milder than fresh), and be sure to remove ALL seeds and ribs from fresh jalapeños. You can also reduce the amount or omit them entirely. For Spicier: Keep the seeds in your fresh jalapeños, use a hotter pepper like serrano, add 1/4 tsp of cayenne pepper to the mix, or finish with a drizzle of habanero hot sauce.
Q: Can I make this on the stovetop instead?
A> Yes! It’s a great quick method. In a large skillet over medium heat, melt the cream cheese with the sour cream/mayo, stirring constantly. Once smooth, stir in all other ingredients except garnish. Cook, stirring, until the cheeses are fully melted and everything is heated through, about 8-10 minutes. It won’t have the same golden top, but the flavor is all there!

Cheesy Mexican Corn Dip (Irresistible Party Appetizer)
Description
Sweet corn, creamy cheese, and just the right amount of spice come together in a humble baking dish—and somehow turn tortilla chips into a full-time job. It’s easy, unfussy, and wildly addictive. Whether it’s game day, a potluck, or a cozy night in, this dip doesn’t just show up… it shows off.
Ingredients
-
3 cups corn (frozen, canned, or fresh)
-
8 oz cream cheese, softened
-
1 cup shredded cheddar or Mexican-blend cheese
-
½ cup sour cream or mayonnaise
-
¼ cup chopped green onions
-
¼ cup diced jalapeños (fresh or pickled)
-
½ tsp chili powder
-
Salt and black pepper, to taste
Optional Garnishes
-
Fresh lime juice
-
Chopped cilantro
-
Extra green onions
-
Hot sauce or Tajín
Instructions
-
Preheat the Oven
Preheat to 375°F (190°C). Choose an 8×8-inch baking dish, pie plate, or small casserole. -
Make the Creamy Base
In a large bowl, mix softened cream cheese, sour cream or mayo, chili powder, salt, and pepper until smooth. -
Add the Mix-Ins
Fold in corn, shredded cheese, jalapeños, and green onions until evenly combined.
Taste and adjust seasoning or heat. -
Bake
Spread mixture evenly in the baking dish.
Bake for 20–25 minutes, until bubbly and lightly golden on top. -
Garnish & Serve
Rest for 5 minutes, then finish with lime juice, cilantro, or extra toppings. Serve warm with sturdy tortilla chips.
Notes
-
Fully softened cream cheese = smooth, lump-free dip
-
Frozen corn can go in straight from the freezer
-
Mayo creates deeper flavor and better browning
-
Don’t overbake—just bubbly and golden is perfect
Quick Nutrition Snapshot*
*This is a rough estimate per serving (based on 8 servings) and will vary based on specific ingredients and brands used, especially your choice of sour cream vs. mayo and type of cheese.
- Calories: ~250
- Total Fat: 20g
- Carbohydrates: 10g
- Protein: 7g
Prep Time: 10 mins | Cook Time: 20-25 mins | Total Time: ~35 mins | Servings: 6-8
There you have it, my friend – the ultimate guide to the world’s most irresistible party dip. I hope this recipe becomes a cherished part of your own story, creating messy, happy, flavor-filled memories with the people you love. Now go forth, bake, and bask in the compliments! And remember, the best kitchens are the ones filled with laughter and a little bit of cheesy mess.
Final Thoughts: More Than a Dip, It’s a Memory Maker
So, there you have it—the not-so-secret formula to becoming a party legend. This Cheesy Mexican Corn Dip is more than just a recipe; it’s a testament to the magic that happens when simple, honest ingredients come together with a spirit of generosity and fun.
Remember, this dish isn’t about flawless execution. It’s about the laughter that erupts when someone gets the “perfect chip.” It’s about the shared “mmm” that ripples through a room. It’s about creating that same warm, tailgate-feeling in your own home, no matter the occasion. Whether you stick to the classic or make it your own with a fun twist, you’re not just serving a dip—you’re serving an experience.
So next time you’re asked to bring a dish, or you just want to treat your family to something special, remember this bubbling, golden treasure. Keep those core ingredients on hand, and you’ll always be ready to spark joy in under an hour.
Whip it up, set it down, and get ready for the compliments to roll in. You’ve got this.
Happy dipping, and may your chips always be sturdy!
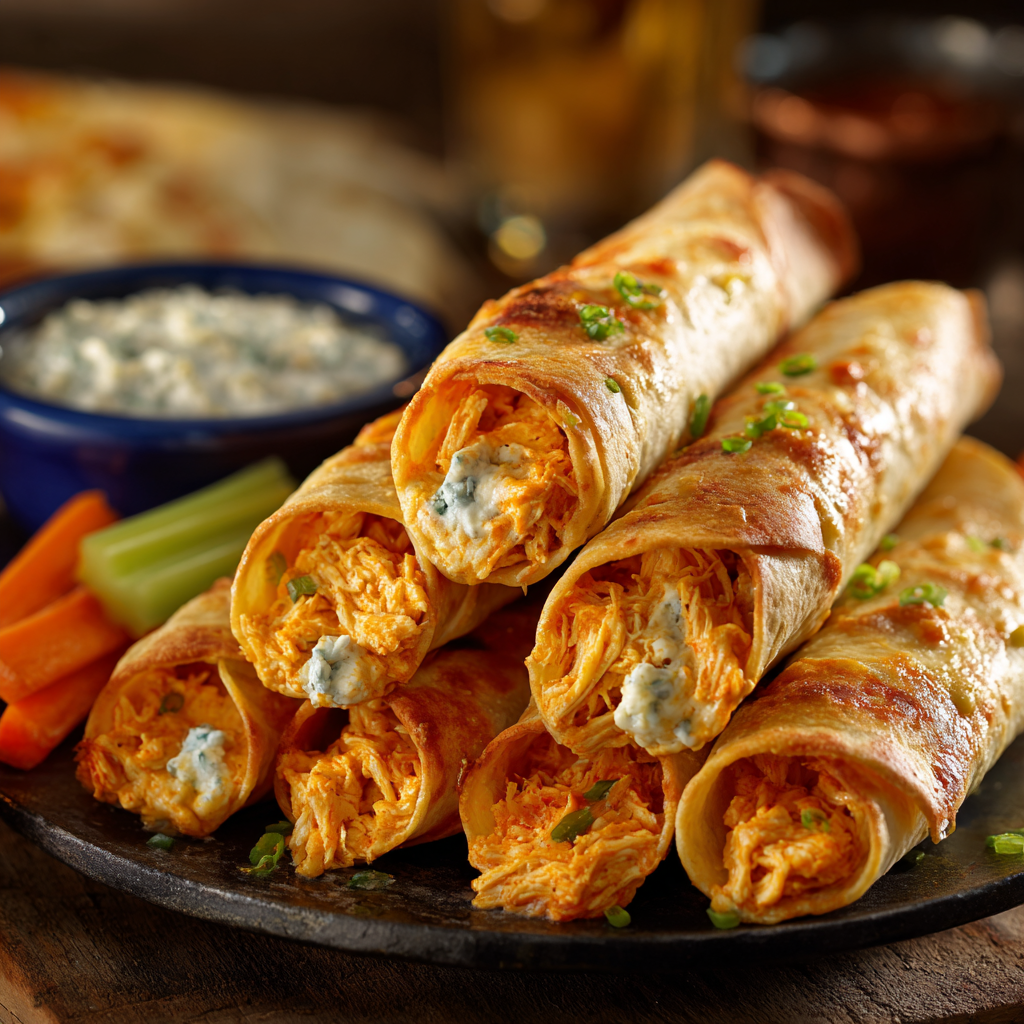
Buffalo Chicken Taquitos : Spicy, Cheesy, and Crowd-Approved
The Ultimate Game Day Snack: Buffalo Chicken Taquitos
Hey there, friend! Olivia here, with an apron dusted with flour and a kitchen that smells like heaven. Have you ever been to a party, spotted a bubbling dish of Buffalo Chicken Dip, and thought, “I wish I could just pick this up and eat it with my hands?” Well, my brilliant food-loving brain (and a serious craving during last season’s championship game) had the exact same thought. That’s how these Spicy, Cheesy, Buffalo Chicken Taquitos were born.
Imagine all the tangy, creamy, soul-warming goodness of that iconic dip, but wrapped up in a crispy, golden-brown tortilla shell. They’re handheld flavor bombs that are guaranteed to disappear from any platter in minutes. Whether you’re feeding a rowdy game-day crowd, need a killer appetizer for book club, or just want a fun and easy dinner that everyone will devour, these taquitos are your new secret weapon. The best part? We’re keeping it simple and baked, not fried, so you get that incredible crunch without the fuss. Grab your favorite buffalo sauce, and let’s make some magic together!
My Buffalo Wing Epiphany
My love affair with Buffalo flavor started, of all places, in a cramped college apartment. My roommate, Sarah, was from upstate New York, and she declared our store-bought wing sauce “an insult to the great state.” One Sunday, she commandeered our tiny kitchen, melting butter, pouring in a bottle of Frank’s, and whisking with the intensity of a chemist. The smell—that sharp, vinegary, spicy aroma—filled every corner and brought our other roommates wandering in like cartoon characters following a pie on a windowsill.
We didn’t have a deep fryer, so we baked the wings. They were messy, glorious, and we ate them straight off the baking sheet, laughing and licking our fingers. It wasn’t about fancy technique; it was about that bold, unapologetic flavor that makes you feel alive. These taquitos are my tribute to that feeling—all the messy joy, packed into a neat, dippable, shareable package. Every time I make them, I think of Sarah, that tiny kitchen, and the simple truth that the best food is the food that brings people together.
Gathering Your Flavor All-Stars
Here’s everything you’ll need to create these crispy delights. I’ve added my little chef insights and swaps so you can make this recipe work for you!
- 2 cups cooked, shredded chicken: The hearty base! I use a store-bought rotisserie chicken for ultimate ease—just shred it up. Leftover baked or grilled chicken works beautifully too. For a fun twist, try shredded turkey!
- 4 oz cream cheese, softened: Our creamy dream! Let it sit on the counter for 30 minutes. It creates the luscious, binding sauce. For a lighter version, Neufchâtel cheese works perfectly.
- ½ cup buffalo wing sauce: The star of the show! I love Frank’s RedHot for that classic taste. For a milder kick, use a “medium” sauce, or for extra heat, grab something with “ghost pepper” on the label (you brave soul, you!).
- 1 cup shredded cheddar or Monterey Jack cheese: Melty, gooey goodness. I often do a 50/50 blend for the best of both worlds. Pre-shredded is fine, but a block you shred yourself melts even creamier (it doesn’t have anti-caking agents).
- ¼ cup ranch or blue cheese dressing: The cool, creamy counterpoint. This is a fierce debate! I’m Team Ranch, but my husband swears by blue cheese. Use what you love. It adds incredible moisture and flavor to the filling.
- 10–12 small flour tortillas (6-inch size): Our crispy vessel. Warm them for 10 seconds in the microwave between damp paper towels—it makes them pliable and prevents cracking when you roll.
- Optional: 2 green onions, finely chopped: A pop of fresh color and a mild, oniony bite. Don’t skip it if you have them!
- Cooking spray or 2 tbsp melted butter: For that golden, crisp finish. Butter gives an incredible flavor, while cooking spray is a bit lighter. I usually go for butter—it’s worth it!
Let’s Get Rolling: Your Step-by-Step Guide
Don’t let the rolling intimidate you! It’s easier than folding a fitted sheet, I promise. Follow these steps, and you’ll be a taquito pro in no time.
Step 1: Preheat & Prep. Fire up your oven to 425°F (220°C). This high heat is the key to maximum crispiness! Line a large baking sheet with parchment paper—this is non-negotiable for easy cleanup and preventing any cheesy leaks from sticking.
Step 2: Create the Creamy Buffalo Filling. In a large mixing bowl, add your softened cream cheese, buffalo sauce, and ranch or blue cheese dressing. Use a sturdy spoon or spatula to mash and mix until it’s completely smooth and creamy. Chef’s Tip: If your cream cheese is still a bit cold, microwave the mixture for 15-second bursts, stirring in between, to help it combine smoothly. Now, stir in all that glorious shredded cheese and the green onions.
Step 3: Bring in the Chicken. Add your shredded chicken to the bowl. Now, fold everything together gently but thoroughly. You want every strand of chicken coated in that spicy, cheasy sauce. Taste it! This is your moment. Need more heat? Add another tablespoon of buffalo sauce. Perfect? Let’s move on.
Step 4: Warm, Fill, and Roll. Stack your tortillas and wrap them in a damp paper towel. Microwave for about 20-30 seconds until they are warm and soft. Place a tortilla on your work surface and spoon 2-3 tablespoons of filling in a line slightly below the center. Chef’s Hack: Don’t overfill! This is the #1 tip for success. Too much filling and they’ll burst open in the oven. Tightly roll the tortilla away from you, placing it seam-side down on your prepared baking sheet. Repeat, placing them close but not touching.
Step 5: The Crispy Finish. Lightly brush the tops of all the taquitos with melted butter or give them a generous mist of cooking spray. This will help them brown and crisp up into golden perfection. Sprinkle with a tiny pinch of salt if you like.
Step 6: Bake to Golden Glory. Slide the baking sheet into your hot oven. Bake for 15-18 minutes, or until the tortillas are crisp and the edges are a deep golden brown. You might see some cheesy filling bubbling out the ends—that’s a good sign! Let them cool on the sheet for just 5 minutes before serving. They are molten-lava hot inside!
How to Serve These Flavor Rockets
Presentation is part of the fun! I love piling these taquitos high on a big wooden board or a colorful platter. Serve them with small bowls of extra ranch or blue cheese dressing for dipping, and don’t forget some cool, crunchy celery sticks and carrot sticks on the side—the classic Buffalo wing accompaniment. For a full spread, add a big, simple green salad. Watch them vanish and bask in the compliments!
Make It Your Own: Delicious Twists
Love the base recipe? Here are some fun ways to switch it up:
- BBQ Swap: Use your favorite barbecue sauce instead of buffalo sauce, and swap the ranch for a honey mustard dressing. Instant BBQ Chicken Taquitos!
- Buffalo Chicken & Rice: Add ½ cup of cooked rice (white or brown) to the filling to stretch it further and add a nice texture.
- Blue Cheese Crumble: For blue cheese lovers, fold in ¼ cup of crumbled blue cheese into the filling for an extra pungent punch.
- Make it Vegetarian: Swap the chicken for 2 cups of rinsed and drained canned chickpeas, lightly mashed, or use pulled jackfruit.
- Spicy Ranch: Add a teaspoon of your favorite hot sauce or a pinch of cayenne pepper to the ranch dressing before mixing it in.
Olivia’s Kitchen Notes
This recipe is a living, breathing thing in my house! The first time I made them, I was so worried about the rolling that I underfilled them, and my husband joked they were “Buffalo Air-quitos.” Lesson learned! I’ve also found that letting the filled mixture sit in the fridge for an hour before rolling can make it even easier to handle, though it’s not necessary. The biggest evolution? The butter brush. I used to just spray them, but one day I used the butter left over from making the buffalo sauce base for wings, and wow—the flavor and color were next-level. Sometimes, the old-fashioned way is the best way.
Your Questions, Answered!
Q: Can I make these ahead of time?
A: Absolutely! You can assemble the taquitos up to a day ahead. Place them seam-side down on the baking sheet, cover tightly with plastic wrap, and refrigerate. When ready to bake, just brush with butter/spray and pop in the oven—you may need to add 2-3 extra minutes since they’re starting cold.
Q: My taquitos are splitting open in the oven! What did I do wrong?
A> This usually means one of two things: 1) The tortillas were too cold/dry. Always warm them first! 2) You overfilled them. It’s tempting, but stick to 2-3 tablespoons max. A tight roll is better than a bursting one.
Q: Can I freeze baked or unbaked taquitos?
A> Yes, they freeze wonderfully! For unbaked, assemble and freeze them solid on the baking sheet before transferring to a freezer bag. Bake from frozen, adding 5-10 minutes to the cook time. For baked, let them cool completely, freeze, and reheat in a 400°F oven until hot and crisp.
Q: Can I use corn tortillas?
A> You can, but they are more prone to cracking. For corn tortillas, you MUST warm them well—I like to heat them in a dry skillet until pliable—and often double them up (use two per taquito) for strength.

Buffalo Chicken Taquitos : Spicy, Cheesy, and Crowd-Approved
Description
They’re baked (not fried), easy to prep, and guaranteed to vanish faster than halftime snacks. Whether you’re hosting game day, feeding a crowd, or just craving something bold and comforting, these taquitos deliver big flavor with minimal effort.
Ingredients
-
2 cups cooked, shredded chicken (rotisserie works great)
-
4 oz cream cheese, softened
-
½ cup Buffalo wing sauce (Frank’s RedHot recommended)
-
1 cup shredded cheddar, Monterey Jack, or a blend
-
¼ cup ranch or blue cheese dressing
-
10–12 small (6-inch) flour tortillas
-
2 green onions, finely chopped (optional)
-
Cooking spray or 2 tbsp melted butter
For Serving
-
Extra ranch or blue cheese dressing
-
Celery and carrot sticks
Instructions
-
Preheat the Oven
Preheat oven to 425°F (220°C). Line a baking sheet with parchment paper. -
Make the Filling
In a large bowl, mix cream cheese, Buffalo sauce, and ranch or blue cheese dressing until smooth.
Stir in shredded cheese and green onions. -
Add Chicken
Fold in shredded chicken until evenly coated. Taste and adjust heat if needed. -
Warm & Roll
Warm tortillas in the microwave between damp paper towels for 20–30 seconds.
Spoon 2–3 tablespoons of filling in a line near the bottom of each tortilla.
Roll tightly and place seam-side down on the baking sheet. -
Brush & Bake
Brush with melted butter or spray lightly with cooking spray.
Bake for 15–18 minutes, until crisp and golden. -
Cool Slightly & Serve
Let cool for 5 minutes before serving—filling will be hot!
Notes
-
Don’t overfill—this prevents splitting
-
Warm tortillas are essential for clean rolling
-
Butter gives the best golden color, but spray works too
-
Bake on high heat for maximum crunch
Nutritional Info (Per Taquito, Approximate)
Calories: 180 | Total Fat: 10g | Saturated Fat: 5g | Cholesterol: 35mg | Sodium: 480mg | Total Carbohydrates: 13g | Dietary Fiber: 0g | Sugars: 1g | Protein: 11g
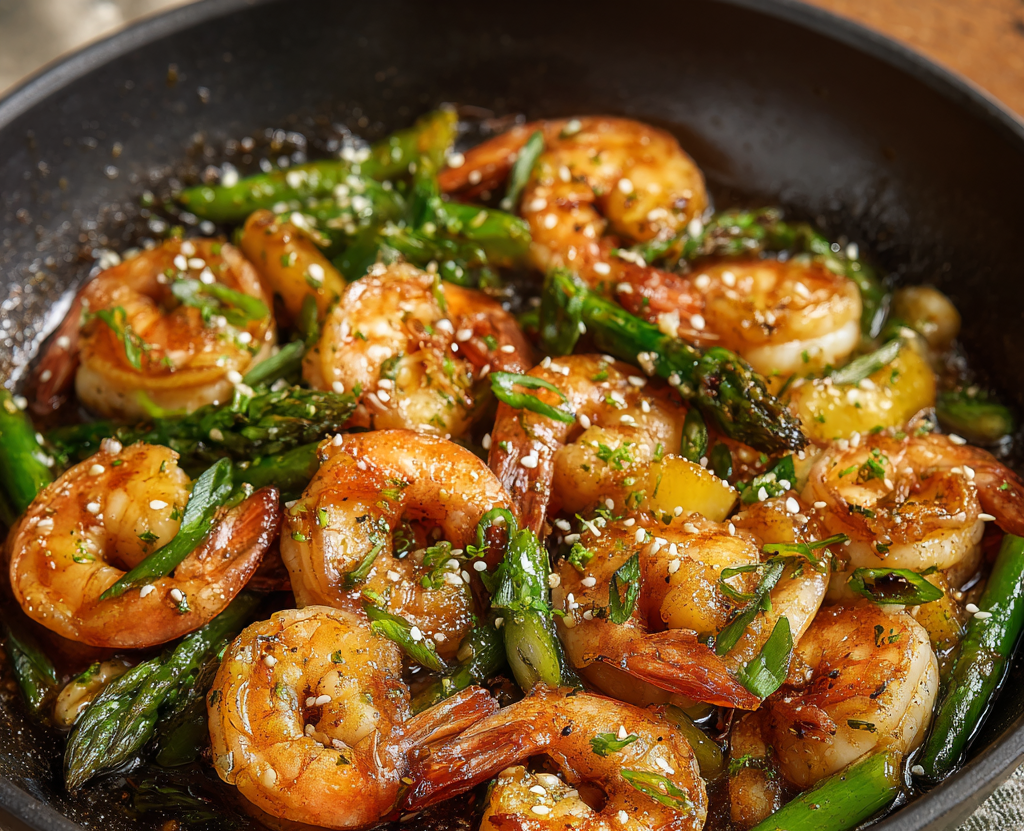
Hibachi Shrimp : Quick, Flavor-Packed, and Better Than Takeout
Welcome to the Weekend, Any Day of the Week: Hibachi Shrimp at Home!
Hey there, friend! Come on in, grab an apron, and let’s get something sizzling. Have you ever had one of those nights where you’re craving the fun, flavorful chaos of a hibachi grill but the thought of packing up the family, waiting for a table, and navigating a parking lot makes you want to just… order a sad, lukewarm pizza instead? Yeah, I’ve been there more times than I’d like to admit. There’s something magical about that theatrical cooking, the savory steam hitting your face, and that first bite of shrimp straight off the hot plate.
But what if I told you that you can capture every single bit of that magic right in your own kitchen, in about the time it takes to scroll through a delivery app? No fancy teppanyaki grill required, I promise. Just you, a trusty skillet, and a handful of simple ingredients that pack a universe of flavor.
This isn’t just another shrimp recipe. This is your 20-minute passport to a seriously delicious, feel-good dinner that’s faster, healthier, and honestly, more fun than waiting for a driver. We’re talking plump, juicy shrimp seared in a blistering hot pan, then swirled in a glossy, buttery garlic-soy glaze that’s so good, you’ll want to drink it with a spoon. It’s high-protein, low-fuss, and absolutely bursting with that iconic “hibachi” taste. So, let’s turn up the heat, create a little (controlled) kitchen drama, and make a meal that’s better than takeout. Trust me, your skillet is about to become the hottest table in town.
The Night We Brought the Hibachi Home
My love for this dish started on a rainy Tuesday that felt like it would never end. My husband and I had planned to go out for hibachi to celebrate a small win—a freelance project had finally wrapped up!—but the weather had other plans. Sheets of rain, thunder, the whole works. We stood at the window, stared at our cancelled reservation, and felt that specific brand of deflated disappointment.
But then, I had a “kitchen sink” moment. I peered into the fridge, saw some shrimp thawing, and thought, “How hard can it be?” I remember the sizzle when those shrimp hit the hot butter and oil was louder than the thunder outside. The smell of garlic and sesame oil that filled our tiny apartment was instant mood therapy. We ate it straight from the pan, perched on stools at the kitchen island, laughing at how something so simple could turn a grumpy, washed-out night into a spontaneous, memorable dinner party for two. That’s the power of a great recipe—it’s not just food, it’s a mood-lifter, a memory-maker. Now, every time I make it, it tastes like victory (and a little bit like that rainy Tuesday triumph).
Gathering Your Flavor Arsenal
Here’s the beautiful part: the ingredient list is short, sweet, and probably already in your pantry. This is where quality really shines, so let’s break it down.
- 1 lb raw shrimp, peeled and deveined – The star! I prefer large (21/25 or 26/30 count) for a meatier bite. Chef Insight: Keep those tails on or off—your call. Tails look pretty and make fun handles, but off is easier for eating. For the best texture, pat them bone-dry with paper towels before cooking. This is the secret to a perfect sear, not a steam!
- 1 tablespoon butter + 1 tablespoon olive oil – Our dynamic frying duo. The butter gives incredible, rich flavor and helps create that gorgeous sauce, while the olive oil has a higher smoke point to prevent the butter from burning. Sub Tip: Use all olive oil if you prefer, or swap the butter for ghee for a nuttier, burn-resistant option.
- 2 garlic cloves, minced – Non-negotiable for that aromatic punch. Please, for the love of flavor, use fresh garlic here! The jarred stuff just won’t give you the same bright, potent kick.
- 2 tablespoons soy sauce – The salty, umami backbone. Sub Tip: Easily use tamari for a gluten-free version, or coconut aminos for a slightly sweeter, soy-free alternative. They all work like a charm.
- 1 tablespoon lemon juice – The bright spark! This little bit of acid cuts through the richness and makes all the flavors pop. Freshly squeezed is ideal, but bottled works in a pinch.
- 1 teaspoon sesame oil – This is your flavor bomb. That deep, toasty, unmistakably “Asian” aroma comes from here. Use it as a finishing oil, not a cooking oil, for maximum impact. Don’t skip it!
- Salt and pepper to taste – We season the shrimp directly. Keep in mind your soy sauce is salty, so go easy with the salt shaker at first.
- Optional garnishes: sesame seeds, chopped parsley or green onion – This is the confetti! A sprinkle of white sesame seeds adds texture, and a flourish of green onion or parsley gives a fresh, colorful finish. Highly recommended for that “chef’s kiss” presentation.
Let’s Get Cooking: Your Step-by-Step Roadmap to Flavor Town
Ready? This moves fast, so have everything measured and within arm’s reach. We call this mise en place (everything in its place), and it’s the key to stress-free, quick-cooking success!
- Prep is Everything: First, ensure your shrimp are peeled, deveined, and thoroughly patted dry with paper towels. This is the most important step for getting a beautiful golden sear instead of a pale, watery simmer. Mince your garlic, juice your lemon, and have your sauces measured and ready to go. Cooking is so much more fun when you’re not frantically digging in the fridge mid-sizzle!
- Heat the Pan, Properly: Place a large skillet (stainless steel or cast iron works best for high heat) over medium-high heat and let it get genuinely hot for a minute. Add the olive oil and butter. The butter will foam up—that’s good! You want that pan hot enough so the shrimp sizzle the second they touch the surface. Chef Hack: To test if the pan is ready, flick a tiny drop of water into it. If it dances and evaporates instantly, you’re good to go!
- Sear the Shrimp: Add the shrimp in a single, beautiful layer. Don’t crowd the pan! If you pile them on top of each other, they’ll steam. We want sear. Give them a sprinkle of salt and pepper, then let them cook, undisturbed, for 1-2 minutes. You’ll see the edges turn pink and opaque. Peek underneath; when they have nice golden color, flip each one. Cook for just 1 more minute on the other side. They cook lightning fast! Remember, shrimp are done when they form a loose “C” shape. An “O” shape means they’re overcooked and getting rubbery.
- Create the Magic Sauce: Push the shrimp to the side of the pan or temporarily remove them to a plate if your pan is small. Add the minced garlic to the center and let it sizzle for just 15-20 seconds until fragrant—don’t let it burn! Now, pour in the soy sauce and lemon juice. It will bubble and steam up gloriously! This is the moment. Add the shrimp back in if you removed them, and drizzle that precious sesame oil over everything.
- The Grand Toss & Finish: Toss everything together vigorously for about 30 seconds to 1 minute. The sauce will reduce slightly, coating each shrimp in a sticky, glossy, irresistible glaze. As soon as the sauce clings to the shrimp, remove the pan from the heat. Overcooking now can make the shrimp tough. You’ve done it!
Plating Up Your Masterpiece
I’m a firm believer that we eat with our eyes first! For a classic hibachi-style plate, scoop a fluffy bed of steamed white or brown rice onto a warm plate or bowl. Arrange your glazed shrimp artfully over the top. Drizzle every last bit of that incredible garlic-soy butter sauce from the pan over everything—that’s liquid gold! Finish with a generous sprinkle of sesame seeds and a vibrant handful of chopped green onion. For a complete meal, add a side of simple steamed broccoli, zucchini, or a crisp Asian-inspired cabbage slaw. Serve immediately while everything is hot and sizzling with flavor!
Make It Your Own: Delicious Twists & Swaps
The beauty of this framework is how easily it adapts! Here are a few of my favorite ways to play:
- Spicy Yum Yum Style: Add 1-2 tablespoons of mayonnaise and 1 tablespoon of sriracha or chili-garlic sauce to the glaze at the end for a creamy, spicy, restaurant-style “yum yum” sauce coating.
- Ginger-Garlic Boost: Add 1 teaspoon of freshly grated ginger to the pan with the garlic for an extra layer of zingy warmth.
- Vegetable Hibachi Feast: Add 1 cup of sliced mushrooms, onions, and zucchini to the pan after searing the shrimp (you may need a touch more oil). Sauté until tender-crisp, then proceed with the sauce. Now it’s a full meal in one pan!
- Pineapple Sweet & Savory: Toss in ½ cup of fresh pineapple chunks when you add the sauce. The caramelized sweetness with the savory glaze is out of this world.
- Protein Swap: This method works brilliantly with thinly sliced chicken breast, scallops, or even firm tofu cubes. Just adjust the cooking time accordingly.
A Few Notes from My Kitchen to Yours
This recipe has become my ultimate weeknight lifeline, and it’s evolved in funny ways. I once, in a sleepy morning haze, accidentally used vanilla extract instead of sesame oil. Let me save you that trauma: they are NOT interchangeable! Another time, I was teaching my niece to cook and we doubled the garlic (because, why not?) and added a pinch of red pepper flakes—it was a revelation! So don’t be afraid to tweak it to your taste.
The biggest lesson? Don’t skimp on the heat. A hot pan is non-negotiable for that authentic “hibachi” char and texture. And that sauce in the bottom of the pan? I’ve been known to drag extra rice through it long after the shrimp are gone. No judgment here. This recipe is forgiving, fast, and built for real life. I hope it finds a spot in your regular rotation and creates some delicious memories of your own!
Your Questions, Answered!
Q: My shrimp turned out watery and didn’t brown. What went wrong?
A: This almost always comes down to moisture! Make absolutely sure you pat the raw shrimp completely dry with paper towels. Also, ensure your pan is fully preheated before adding them, and don’t overcrowd the skillet. Give them space to sear, not steam.
Q: Can I make this ahead of time?
A> Shrimp are best served immediately, but you can do the prep ahead! Have your shrimp dried and seasoned in a bowl in the fridge, and your sauce ingredients mixed in a small container. When you’re ready to eat, it’s a 5-minute cook time. Reheating cooked shrimp can make them rubbery.
Q: Is there a way to make this less salty?
A> Absolutely! Use a reduced-sodium soy sauce or tamari. You can also balance the saltiness by adding a tiny drizzle of honey (½ teaspoon) or a splash of orange juice to the sauce for a touch of sweetness.
Q: Can I use frozen shrimp?
A> Of course! Just thaw them completely overnight in the fridge or under cold running water. The key, say it with me, is to pat them extremely dry after thawing.
Hibachi Shrimp : Quick, Flavor-Packed, and Better Than Takeout
Description
Juicy shrimp are seared in a hot pan, then tossed in a glossy garlic-soy butter sauce finished with lemon and toasted sesame oil. It’s fast, high-protein, and incredibly satisfying—the kind of dinner that turns an ordinary night into something special.
Ingredients
-
1 lb large raw shrimp (21/25 or 26/30 count), peeled and deveined
-
Salt and black pepper, to taste
-
1 tbsp butter
-
1 tbsp olive oil
-
2 garlic cloves, minced
-
2 tbsp soy sauce (or tamari for gluten-free)
-
1 tbsp lemon juice
-
1 tsp sesame oil
Optional Garnishes
-
Sesame seeds
-
Chopped green onion or parsley
Instructions
-
Prep the Shrimp
Pat shrimp completely dry with paper towels. Season lightly with salt and pepper. -
Heat the Skillet
Place a large skillet over medium-high heat. Add olive oil and butter and allow the pan to get very hot. -
Sear the Shrimp
Add shrimp in a single layer. Cook undisturbed for 1–2 minutes until edges turn pink and bottoms are lightly golden. Flip and cook 1 more minute. -
Build the Sauce
Push shrimp aside. Add garlic to the center of the pan and sauté for 15–20 seconds until fragrant.
Pour in soy sauce and lemon juice. Add shrimp back if removed. -
Finish
Drizzle in sesame oil and toss everything together for 30–60 seconds, just until shrimp are coated and glossy. Remove from heat immediately.
Notes
-
Dry shrimp = good sear (don’t skip this step)
-
Don’t overcrowd the pan—cook in batches if needed
-
Sesame oil is a finishing oil, not a cooking oil
-
Shrimp cook fast—remove as soon as they form a loose
Nutritional Information*
*This is an estimate for 1 of 4 servings, using the base recipe without rice or extra sides.
Calories: 220 | Protein: 28g | Fat: 11g | Carbohydrates: 3g | Fiber: 0g | Sugar: 1g
Final Thoughts
And there you have it—a restaurant-worthy hibachi experience, no reservation required. This recipe is proof that a little heat, a handful of simple ingredients, and a willingness to embrace some kitchen sizzle can transform any ordinary evening into something special. It’s more than just shrimp in a pan; it’s a reminder that joy often lives in the small, savory moments we create for ourselves.
Whether you’re cooking for a crowd, making a quick solo dinner, or turning a rainy Tuesday into a celebration, this dish meets you where you are. It’s adaptable, forgiving, and consistently delicious—the kind of recipe that earns a permanent spot in your repertoire. So the next time that hibachi craving hits, don’t dread the logistics. Just grab your skillet, crank up the heat, and let the aroma of garlic, soy, and seared shrimp work its magic.
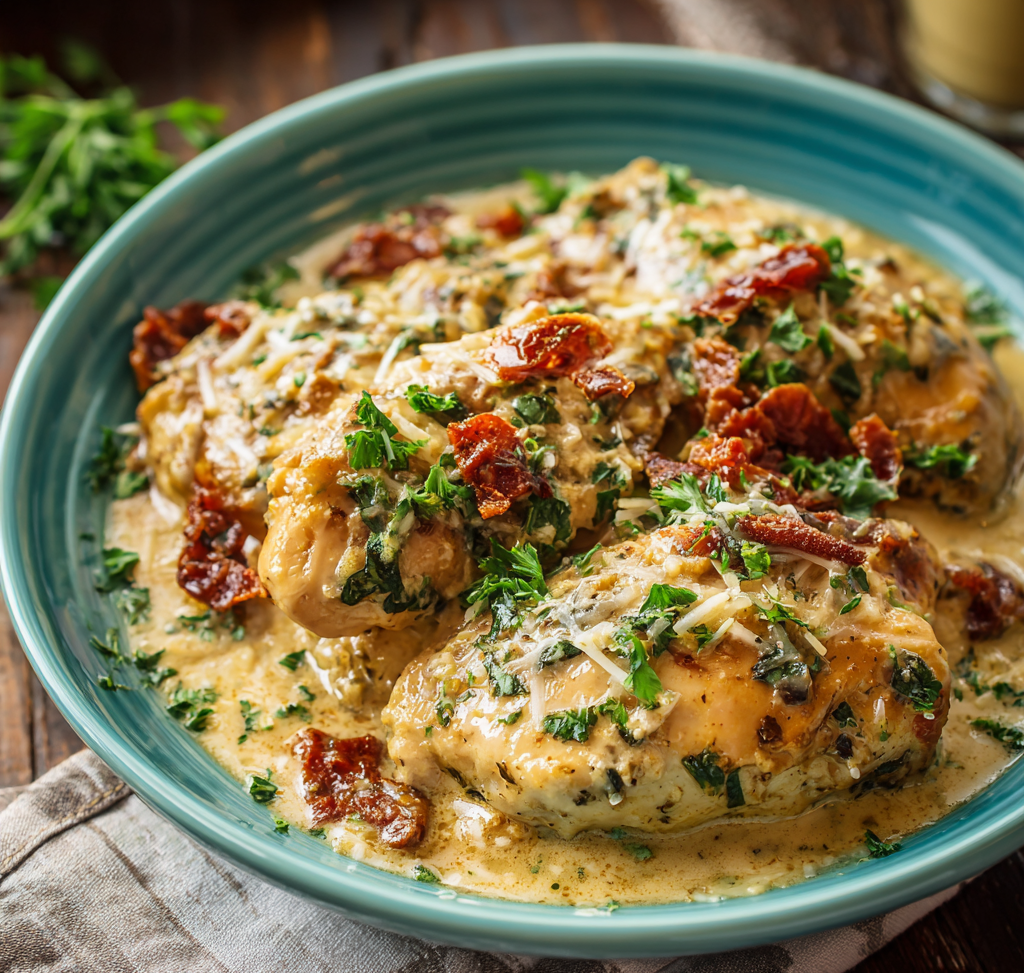
Crockpot Marry Me Chicken : Creamy, Dreamy, and Full of Flavor
So Good, It Might Just Earn You a Ring (Or at Least Endless Compliments!)
Hey there, friend! Olivia here, waving at you from my perpetually flour-dusted kitchen island. Is there anything more magical than walking into a house that smells like a dream you can almost taste? That’s the special kind of alchemy a slow cooker performs. It turns a few humble ingredients and a whisper of effort into a feast that feels like a warm hug. And let me tell you, the dish we’re diving into today is the ultimate slow-cooker sorcery: my Crockpot Marry Me Chicken.
You’ve probably seen the “Marry Me” chicken trend taking over the internet—and for fantastic reason. It’s a creamy, garlicky, sun-dried tomato masterpiece that’s so soul-satisfyingly delicious, the legend says it might just inspire a lifelong commitment. But sometimes, stovetop versions need a little babysitting. My version? We’re taking all that incredible flavor and making it the easiest, most hands-off dinner of your life. Just a few minutes of prep in the morning or afternoon, and your future self will be rewarded with the most tender chicken swimming in a rich, Parmesan-laced sauce that begs to be sopped up with crusty bread. It’s the dinner that says “I fussed over you,” without you actually having to fuss. Let’s make it!
The Night This Chicken Became a Permanent Guest at My Table
I have to share the little moment that cemented this recipe as a forever favorite. It was a few years back, during one of those chaotic weeks where work was bonkers and my energy for cooking was at an all-time low. A few close friends were coming over, and I’ll admit I was tempted to just order pizza. But then I remembered the chicken I’d tossed in the crockpot that morning, almost as an afterthought.
Fast forward to that evening. The moment I lifted the lid, a cloud of garlic, herbs, and sweet tomatoes filled the kitchen. My friends, who were chatting in the living room, literally stopped mid-sentence with a collective “What is THAT smell?!” We served it over a big pile of fettuccine, right out of the crockpot in the center of the table. The conversation faded into happy murmurs and the sound of forks scraping plates. One of them looked up and said, “Okay, if you ever open a restaurant, this is on the menu. I’d come every day.” It wasn’t about fancy technique or rare ingredients; it was about a dish that created a perfect, cozy, *connected* moment. That’s the real magic, and it’s why this recipe has a permanent spot in my rotation (and heart).
Gathering Your Flavor All-Stars
Here’s everything you’ll need to create this creamy dream. Don’t worry—it’s all simple, flavorful stuff. I’ve added my little chef notes next to each one to help you understand the “why” and offer swaps if you need them!
- 4 boneless, skinless chicken breasts: The main event! I prefer breasts here for their lean, tender result after slow cooking. For even more flavor, you can use chicken thighs—they’ll be incredibly juicy. Just cook them for the same amount of time.
- 1 cup low-sodium chicken broth: This forms the flavorful base of our sauce. Using low-sodium lets you control the final salt level. Chef Tip: For a deeper flavor, substitute with ½ broth and ½ dry white wine.
- ½ cup heavy cream: This is what gives the sauce its luxurious, silky body. For a lighter version, half-and-half will work, but the sauce will be a bit thinner. I don’t recommend milk.
- ½ cup grated Parmesan cheese: Please, please use freshly grated Parmigiano-Reggiano from a block if you can! The pre-grated stuff often contains anti-caking agents that can make your sauce grainy. It’s a game-changer for flavor and texture.
- ⅓ cup chopped sun-dried tomatoes (in oil, drained): The STAR flavor! Use the ones packed in oil—they’re softer and more potent than the dry kind. That little bit of oil clinging to them carries so much flavor. Don’t toss the jar! That oil is gold for salad dressings.
- 3 garlic cloves, minced: Fresh is best! It mellows beautifully as it slow cooks, leaving behind a sweet, aromatic base.
- 1 tsp Italian seasoning: Our convenient flavor hero. If you don’t have a blend, use ½ tsp dried oregano and ½ tsp dried basil.
- Salt and pepper, to taste: Season boldly! I do a good sprinkle on the chicken itself and another pinch in the sauce.
- 1 tbsp cornstarch + 2 tbsp water (optional, for thickening): A quick slurry to tighten up the sauce at the end if you like it extra luscious and clingy.
- Fresh basil or parsley, chopped (for garnish): The non-negotiable fresh finish! The bright green color and herbal pop cut through the richness perfectly.
Let’s Get Cooking: Your Foolproof Roadmap to Deliciousness
Ready for the easiest “cooking” session ever? Follow these steps, and you really can’t go wrong. I’ve sprinkled in all my best tips along the way.
Step 1: Prep Your Chicken & Crockpot. First, give your chicken breasts a quick pat dry with a paper towel. This helps the sauce cling better later. Then, simply lay them in a single layer in the bottom of your slow cooker. No need to grease it! Season the chicken lightly with a pinch of salt and pepper right in the pot. Little Chef Hack: If your chicken breasts are very large or thick, you can butterfly them (slice them horizontally almost all the way through and open them like a book) for more even cooking and better sauce coverage.
Step 2: Whisk Together the Dream Sauce. In a medium bowl, combine the chicken broth, heavy cream, grated Parmesan, chopped sun-dried tomatoes, minced garlic, Italian seasoning, and another good crack of black pepper. Whisk it all together until the Parmesan starts to meld into the liquid. It won’t be perfectly smooth, and that’s okay! It will all come together magically in the heat. Taste a tiny drop and adjust salt if needed (remember, the Parm is salty).
Step 3: The Big Pour & The Long Wait. Now, pour that gorgeous, flecked-with-red sauce evenly over the chicken breasts. Don’t stir! Just let it settle around the chicken. Place the lid on securely. Here’s the choice: Low for 4-5 hours or High for 2-3 hours. I am Team Low and Slow—it gives the flavors more time to marry and the chicken an impossibly tender texture. But if you’re in a pinch, high works great too. The chicken is done when it reaches 165°F internally and shreds easily with a fork.
Step 4 (Optional): Thicken to Perfection. If you love a thick, restaurant-style sauce that coats every noodle, this step is for you. Carefully remove the cooked chicken to a plate and tent it with foil to keep warm. Turn your crockpot to High (if it isn’t already). In a small dish, mix the cornstarch and cold water until completely smooth to make a “slurry.” Whisk this slurry into the hot sauce in the crockpot. Let it cook, uncovered, for about 15-20 minutes, until the sauce has thickened to your liking. Pro Tip: Don’t add cornstarch directly to the hot liquid—it will clump instantly. The slurry is key!
Step 5: Serve & Swoon. If you thickened the sauce, return the chicken to the pot and spoon the sauce over it. Otherwise, just grab your serving spoon! Garnish generously with that chopped fresh basil or parsley. The vibrant green against the creamy pink sauce is a feast for the eyes before you even take a bite.
How to Plate Up This Masterpiece
This chicken is incredibly versatile! For a classic, comforting meal, serve it over a bed of steamed fettuccine, pappardelle, or linguine. The wide, flat noodles are perfect for catching every drop of sauce. Want to keep it lower carb? It’s divine over creamy polenta, mashed cauliflower, or a pile of zucchini noodles. Don’t forget the all-important sidekick: a big, crusty loaf of garlic bread or focaccia for dipping is practically mandatory in my house. A simple green salad with a tangy vinaigrette on the side helps balance the richness beautifully.
Make It Your Own: Delicious Twists & Swaps
Love the base recipe? Here are some fun ways to play with it!
- Add Greens: Stir in a few big handfuls of fresh spinach or chopped kale during the last 30 minutes of cooking.
- Make it Spicy: Add ½ teaspoon of red pepper flakes to the sauce or garnish with sliced fresh jalapeño.
- Mushroom Lover’s Version: Sauté 8 oz of sliced cremini mushrooms and add them to the crockpot with the sauce.
- Gluten-Free & Keto: This recipe is naturally gluten-free! Just ensure your broth and seasonings are certified GF. For keto, serve over cauliflower mash or shirataki noodles.
- Dairy-Free Adaptation: Swap the heavy cream for full-fat canned coconut milk and use a vegan Parmesan alternative. The flavor profile changes but is still deliciously creamy.
Olivia’s Kitchen Corner: Extra Thoughts & Stories
Over the years, this recipe has seen a few fun experiments. Once, I was out of Italian seasoning and used a teaspoon of Herbes de Provence instead—it gave it a wonderfully floral, French-country twist! Another time, I accidentally used the entire jar of sun-dried tomatoes (whoops!) and you know what? It was even better, packed with that intense sweet-tart punch.
The beauty of this dish is its forgiving nature. It has saved me on busy days, impressed last-minute guests, and been my go-to “please bring a main dish” potluck contribution. It always disappears fast. My biggest tip? Don’t skip the fresh herb garnish. It seems like a small thing, but that burst of freshness truly completes the dish. Now, go make your kitchen smell amazing!
Your Questions, Answered!
Q: My sauce turned out a bit thin. What did I do wrong?
A: Don’t worry, this is common! First, sauces often thicken slightly upon standing. If it’s still too thin for your liking after the cook time, that’s what the cornstarch slurry is for (Step 4). Also, using half-and-half instead of heavy cream or having a particularly large/juicy batch of chicken can add more liquid. The slurry will fix you right up!
Q: Can I use frozen chicken breasts?
A: I don’t recommend it. Frozen chicken will release a lot of water as it cooks, seriously diluting your gorgeous sauce and potentially keeping the chicken in the “danger zone” temperature for too long. Thawing first is best for both safety and flavor.
Q: The Parmesan seems clumpy/grainy in the sauce. How do I prevent that?
A> This is almost always due to using pre-grated Parmesan cheese. Those bags often contain cellulose powder to prevent clumping, which doesn’t melt smoothly. For a velvety sauce, always grate your own Parmesan from a block. It makes a world of difference!
Q: Can I make this ahead of time?
A> Absolutely! You can assemble the chicken and sauce in the crockpot insert the night before, cover it, and store it in the fridge. In the morning, just place the cold insert into the base and start cooking. You may need to add 30-60 minutes to the cook time since you’re starting from cold.

Crockpot Marry Me Chicken : Creamy, Dreamy, and Full of Flavor
Description
If there’s one appliance that knows how to work kitchen magic, it’s the slow cooker. With just a few minutes of prep, it transforms everyday ingredients into something deeply comforting and completely irresistible. This Crockpot Marry Me Chicken is creamy, garlicky, rich with sun-dried tomatoes, and finished with Parmesan for a sauce that tastes like you spent hours babysitting the stove—when you absolutely didn’t.
Ingredients
-
4 boneless, skinless chicken breasts
-
Salt and black pepper, to taste
-
1 cup low-sodium chicken broth
-
½ cup heavy cream
-
½ cup freshly grated Parmesan cheese
-
⅓ cup sun-dried tomatoes in oil, drained and chopped
-
3 garlic cloves, minced
-
1 tsp Italian seasoning
Optional Thickener
-
1 tbsp cornstarch
-
2 tbsp cold water
For Garnish
-
Fresh basil or parsley, chopped
Instructions
-
Prepare the Chicken
Pat chicken breasts dry and place them in a single layer in the bottom of your slow cooker. Season lightly with salt and pepper. -
Make the Sauce
In a medium bowl, whisk together chicken broth, heavy cream, Parmesan cheese, sun-dried tomatoes, garlic, Italian seasoning, and a few cracks of black pepper. -
Cook
Pour the sauce over the chicken. Cover and cook:-
LOW: 4–5 hours (recommended)
-
HIGH: 2–3 hours
Chicken is done when it reaches 165°F (74°C) and is fork-tender.
-
-
Optional: Thicken the Sauce
Remove chicken and keep warm. Turn slow cooker to HIGH.
Stir together cornstarch and water, then whisk into the sauce. Cook uncovered for 15–20 minutes until thickened. Return chicken to the pot. -
Serve
Garnish generously with fresh herbs and serve warm.
Notes
-
Use freshly grated Parmesan for a smooth, creamy sauce
-
Chicken thighs can be substituted for extra juiciness
-
Avoid frozen chicken—it releases excess liquid and thins the sauce
-
A splash of white wine can replace part of the broth for deeper flavor
Nutritional Information*
*Please note: These are estimates generated from an online nutrition calculator and will vary based on specific brands and portion sizes used.
Per Serving (¼ of recipe, sauce included): Calories: 410 | Protein: 38g | Carbohydrates: 6g | Fiber: 1g | Sugar: 2g | Fat: 26g | Saturated Fat: 14g | Sodium: 480mg
Final Thoughts
So, there you have it—the recipe that turns a simple Tuesday into a memory and a slow cooker into your most reliable kitchen companion. My Crockpot Marry Me Chicken isn’t just about feeding people; it’s about creating those little moments of joy around the table. It’s the dish you make when you want to say, “I care,” without spending the whole day in the kitchen. Whether it leads to a marriage proposal or just a very happy family, I can’t promise… but the endless compliments? Those are guaranteed.
Remember, the real secret ingredient isn’t the Parmesan or the sun-dried tomatoes—it’s the confidence to make something wonderfully delicious, entirely on your own terms. So, go forth, gather your ingredients, and let that slow cooker work its gentle magic. Your future self—and anyone lucky enough to be at your table—will thank you.
Happy cooking, friends!
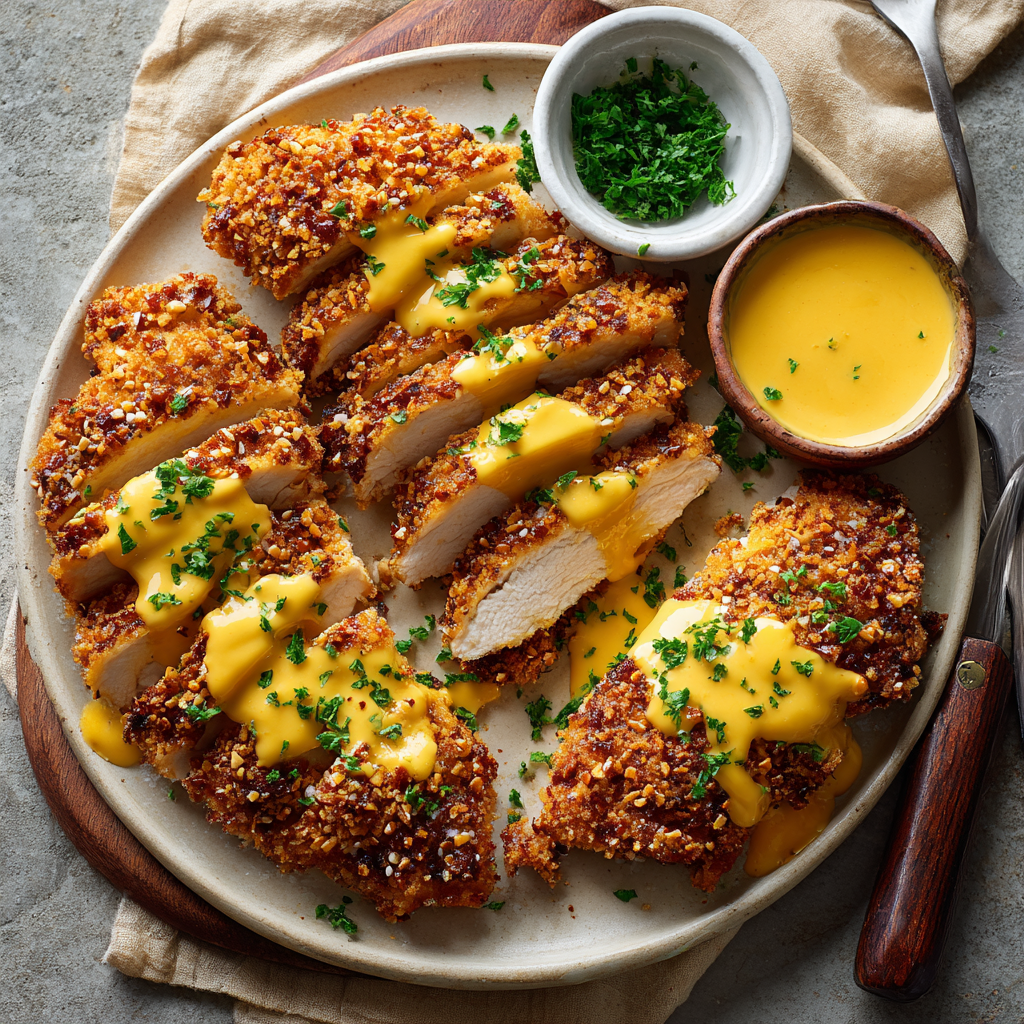
Pretzel Chicken with Mustard-Cheddar Sauce : Crunchy, Cheesy, and Family-Friendly
Pretzel Chicken with Mustard-Cheddar Sauce: The Crunchy, Cheesy Dinner of Your Dreams
Hey there, friend! Come on in, grab an apron, and let’s get something sizzling. If your idea of a perfect weeknight involves a dinner that’s equal parts comforting, a little bit fancy-feeling, and guaranteed to get a “wow” from everyone at the table, then you and I are on the exact same page. Today, we’re turning simple chicken breasts into a showstopping meal with a secret weapon you probably have in your pantry right now: pretzels.
That’s right! Our Pretzel Chicken with Mustard-Cheddar Sauce is about to become your new favorite kitchen hack. We’re taking juicy chicken, giving it an incredibly satisfying, salty-crunchy pretzel crust, and then drizzling it with a sauce that’s creamy, tangy, and packed with sharp cheddar flavor. It’s the kind of dish that looks like you spent hours on it, but honestly, it comes together in about 40 minutes flat. No fuss, no complicated techniques—just pure, delicious satisfaction.
This recipe is for anyone who’s ever stared into the fridge wondering what to make, for the parent seeking a meal kids will actually cheer for, and for the flavor enthusiast (that’s you!) who loves a clever twist on a classic. It’s cozy, it’s fun, and it absolutely sparks joy. So, let’s turn up some music, pour yourself a little something to sip on, and make a dinner that’s as enjoyable to cook as it is to eat. Ready? Let’s do this!
The Pretzel Epiphany: A Tale of Snacks and Salvation
This recipe was born from one of those beautifully chaotic “everything must go” fridge clean-outs before a big grocery trip. You know the scene: a lone pack of chicken breasts, a sad-looking bag of pretzel sticks, some ends of cheese blocks, and a whole lot of determination. I was craving something crunchy and hearty, but breadcrumbs felt too ordinary.
My gaze landed on those pretzels, and a lightbulb went off. I’d used them crushed on top of casseroles for texture, so why not as a coating? I gave it a shot, whipping up a quick cheese sauce with the last nub of cheddar and a good glug of mustard for punch. The moment that first crispy, cheesy bite hit my mouth, I did a little happy dance right there by the stove. It was a total “why haven’t I always been doing this?!” moment. It reminded me that sometimes, the best recipes aren’t planned—they’re discovered in the joyful, messy, creative act of just cooking with what you’ve got. Now, it’s a requested staple in our house, and I love that it started with a simple moment of kitchen improvisation.
Gathering Your Flavor Crew: Ingredients & Insights
Here’s your shopping list for crunchy, cheesy success. I’ve added my little chef notes next to each one because I love knowing the *why* behind an ingredient—it makes you a more confident cook!
For the Pretzel Chicken:
- 4 boneless, skinless chicken breasts: Look for ones that are similar in size so they cook evenly. If they’re very thick, you can gently pound them to an even ½-inch thickness between two pieces of plastic wrap. Chef’s Tip: For super tender chicken, you can brine them in 2 cups of water with 1 tablespoon of salt for 30 minutes before starting. Pat them completely dry after!
- 2 cups crushed pretzels: Classic salted pretzels are perfect here! I use the thin sticks or mini twists and crush them in a zip-top bag with a rolling pin. You want a mix of fine crumbs and some small pieces for maximum texture. Substitution: Gluten-free pretzels work great for a GF version!
- 2 eggs, beaten: Our glue! A quick whisk is all they need.
- ½ cup all-purpose flour: This is our first coating layer. It helps the egg stick, which helps the pretzels stick. It’s the crucial foundation for our crispy crust. Substitution: For a gluten-free option, use a 1:1 GF flour blend.
- Salt and black pepper: Season every layer! I like to season the chicken directly, and sometimes add a tiny pinch of pepper to the flour.
- Olive oil spray or 1-2 tbsp oil: A light spray or brush of oil is the magic trick for getting that pretzel crust golden brown and crunchy in the oven, without deep frying.
For the Mustard-Cheddar Sauce:
- 1 tablespoon butter: The flavorful start to our roux (that’s just a fancy word for a butter-flour paste that thickens the sauce).
- 1 tablespoon all-purpose flour: The other half of the roux. We cook it with the butter for a minute to get rid of the raw flour taste.
- ¾ cup milk: Whole milk will give you the creamiest, richest sauce, but 2% works perfectly well too. Warm it up for 30 seconds in the microwave before adding—it helps prevent lumps!
- 1 tablespoon Dijon mustard: My not-so-secret weapon. Dijon adds a wonderful tangy depth that cuts through the richness of the cheese. Chef’s Insight: If you only have yellow mustard, use it! The flavor will be brighter and more pungent, but still delicious.
- 1 cup shredded sharp cheddar cheese: Please, please shred your own cheese from a block. Pre-shredded cheese has anti-caking agents that can make your sauce grainy and less smooth. The extra minute of shredding makes a world of difference! Substitution: Gouda, Monterey Jack, or a pepper jack for a kick are all fantastic here.
- Salt and black pepper to taste: Always taste your sauce at the end. The cheese and mustard bring salt, so you might just need a crack of pepper.
Let’s Build Some Crunch: Your Step-by-Step Guide
Follow these steps, and you’ll have golden, crispy chicken and a velvety sauce ready at the same time. It’s like kitchen harmony!
- Preheat and Prep. Fire up your oven to 400°F (200°C). Line a baking sheet with parchment paper or foil (for easy clean-up—we love that) and give it a light spray or brush with oil. This is your “mise en place” moment: set up three shallow dishes—one with flour, one with the beaten eggs, and one with the crushed pretzels. Season the chicken breasts lightly on both sides with salt and pepper.
- The Coating Station Tango. Here’s the fun, slightly messy part! Take a chicken breast and dredge it in the flour, shaking off any excess. Next, dip it fully into the beaten egg, letting the excess drip back into the bowl. Finally, press it firmly into the crushed pretzels, coating all sides. Really press those pretzel pieces on—they’re your crown jewels of crunch! Place it on your prepared baking sheet and repeat with the remaining chicken. Chef’s Hack: Use one hand for the dry steps (flour and pretzels) and the other for the wet (egg). This keeps you from building “club hands” of coating!
- Bake to Golden Perfection. Give the tops of your coated chicken breasts a very light spray or brush with oil. This is the key to that gorgeous, deep golden color. Pop the sheet into your preheated oven and bake for 20-25 minutes. The chicken is done when the crust is deeply golden and the internal temperature reaches 165°F (74°C) on a meat thermometer. Tip: Don’t crowd the pan! Giving the chicken space ensures the heat circulates and the coating crisps up all over.
- While the Chicken Bakes, Make the Magic Sauce. About 10 minutes before the chicken is done, start your sauce. In a small saucepan over medium heat, melt the butter. Add the flour and whisk constantly for about 1 minute. It will look like a paste—that’s your roux! Slowly, and I mean slowly, start whisking in the milk. Go in small splashes at first, whisking until completely smooth after each addition. Once all the milk is in, keep whisking until the mixture thickens slightly, about 3-5 minutes. It should coat the back of a spoon.
- Cheese, Please! Turn the heat down to low. Whisk in the Dijon mustard. Now, add your shredded cheddar, a handful at a time, whisking until each addition is fully melted and smooth before adding the next. Once all the cheese is in and your sauce is gloriously creamy, take it off the heat. Give it a taste and season with a pinch of salt and pepper if it needs it. Chef’s Note: If the sauce seems too thick, whisk in a tablespoon of warm milk at a time until it’s your perfect drizzling consistency.
- The Grand Finale. Your kitchen should smell incredible right now. Pull that beautiful, crispy chicken out of the oven. Let it rest on the pan for just 2-3 minutes (this helps the juices settle). Then, transfer to plates, ladle that warm, tangy Mustard-Cheddar Sauce right over the top, and get ready for the applause.
Plating Up Your Masterpiece
This dish is a star, so let it shine! I love serving each crispy chicken breast on a simple, clean plate with a generous pour of that sauce right down the middle. For sides, think fresh and vibrant to balance the richness: a simple green salad with a bright vinaigrette, steamed green beans or broccoli, or some quick-pickled cucumbers. For the ultimate comfort food plate, creamy mashed potatoes or buttered egg noodles are absolutely divine for soaking up any extra sauce. Don’t forget a final sprinkle of fresh chopped chives or parsley for a pop of color!
Make It Your Own: Fun Twists & Swaps
- Spicy Kick: Add ½ teaspoon of smoked paprika or a pinch of cayenne to the pretzel crumbs. Use pepper jack cheese in the sauce.
- “Everything Bagel” Pretzel Chicken: Mix 1 tablespoon of everything bagel seasoning into your crushed pretzels. Heavenly!
- Air Fryer Method: For an extra-crispy finish, cook the coated chicken in a single layer in your air fryer basket at 375°F for 12-15 minutes, flipping halfway.
- Chicken Tenders: Perfect for kids! Just cut your chicken breasts into strips before coating. They’ll cook faster, about 15-18 minutes.
- Dairy-Free Delight: Use your favorite plant-based milk and cheese alternative for the sauce. The pretzel coating is naturally dairy-free!
Olivia’s Kitchen Notes & Stories
This recipe has seen some fun iterations in my kitchen! Once, during a “game day” experiment, I added a little crumbled cooked bacon to the pretzel crust—it was a mega hit. I’ve also learned that the type of pretzel matters. While classic salted are perfect, those honey wheat pretzels add a wonderful sweet-salty note. The biggest laugh came when my nephew decided the crushed pretzels looked like “chicken glitter” and demanded to help. Now, “making chicken glitter” is a permanent part of our cooking vocabulary. Don’t be afraid to play and make this dish yours. That’s where the real magic happens!
Your Questions, Answered
Q: My pretzel coating isn’t sticking well to the chicken. What did I do wrong?
A: The most common culprit is not shaking off the excess flour after the first dredge. Too much flour creates a barrier that the egg can’t penetrate. Make sure you give it a good tap! Also, ensure your egg is fully beaten—no stray globs of white.
Q: Can I make this ahead of time?
A: You can coat the chicken up to 4 hours ahead, place it on the baking sheet, cover loosely, and keep it in the fridge until ready to bake. The sauce is best made fresh, but you can gently reheat it on the stove with a splash of milk to loosen it up.
Q: My cheese sauce turned out grainy. Can I fix it?
A: Graininess usually happens if the heat is too high when you add the cheese, causing the proteins to tighten up. Next time, keep the heat on low. To fix it now, try blending it with an immersion blender or whisking in a teaspoon of lemon juice or cream.
Q: What’s the best way to crush the pretzels?
A: My go-to is a zip-top bag and a rolling pin—super satisfying! You can also pulse them a few times in a food processor, but be careful not to turn them into total dust. A mix of textures is great.
Pretzel Chicken with Mustard-Cheddar Sauce : Crunchy, Cheesy, and Family-Friendly
Description
This Pretzel Chicken with Mustard-Cheddar Sauce is the kind of dinner that feels indulgent but is still totally doable on a busy weeknight. Juicy chicken breasts are coated in a salty, ultra-crunchy pretzel crust, baked until golden, and finished with a creamy, tangy cheddar sauce that takes everything over the top. It’s cozy, fun, and guaranteed to impress—without complicated steps or fancy ingredients.
Ingredients
Pretzel Chicken
-
4 boneless, skinless chicken breasts
-
Salt and black pepper, to taste
-
½ cup all-purpose flour
-
2 eggs, beaten
-
2 cups crushed salted pretzels
-
Olive oil spray or 1–2 tbsp olive oil
Mustard-Cheddar Sauce
-
1 tbsp butter
-
1 tbsp all-purpose flour
-
¾ cup milk
-
1 tbsp Dijon mustard
-
1 cup shredded sharp cheddar cheese
-
Salt and black pepper, to taste
Instructions
-
Preheat & Prep
Preheat oven to 400°F (200°C). Line a baking sheet with parchment paper or foil and lightly grease. -
Set Up Coating Station
Place flour in one shallow bowl, beaten eggs in another, and crushed pretzels in a third. Season chicken lightly with salt and pepper. -
Coat the Chicken
Dredge each chicken breast in flour (shake off excess), dip into egg, then press firmly into crushed pretzels. Place on baking sheet. Lightly spray or brush tops with oil. -
Bake
Bake for 20–25 minutes, until pretzel crust is golden and chicken reaches an internal temperature of 165°F (74°C). -
Make the Sauce
While chicken bakes, melt butter in a saucepan over medium heat. Whisk in flour and cook 1 minute.
Slowly whisk in milk until smooth and slightly thickened (3–5 minutes).
Reduce heat to low, stir in Dijon mustard, then add cheddar cheese a handful at a time until melted and smooth. Season to taste. -
Serve
Spoon warm mustard-cheddar sauce over crispy chicken and serve immediately.
Notes
-
Crush smart: Aim for a mix of fine crumbs and small chunks for maximum crunch.
-
Golden crust: Don’t skip the oil spray—it helps the pretzels brown beautifully.
-
Sauce too thick? Whisk in a tablespoon of warm milk at a time until pourable.
-
Extra tender chicken: Pound breasts to even thickness or brine briefly before coating.
-
Air fryer option: Cook at 375°F (190°C) for 12–15 minutes, flipping halfway.
Nutritional Info (Per Serving, Serves 4)
Calories: 520 | Protein: 45g | Fat: 22g | Carbohydrates: 30g | Fiber: 1g | Sugar: 2g
Please note: This is an estimate generated using a standard nutrition calculator. Values can vary based on specific ingredients and portion sizes used.
Final Thoughts
Pretzel Chicken with Mustard-Cheddar Sauce is more than just a recipe—it’s a reminder of how joyful cooking can be. It’s proof that a little creativity and a handful of simple ingredients can turn an ordinary weeknight into something truly special. With its irresistible salty crunch, creamy tangy sauce, and crowd-pleasing appeal, this dish has all the elements of a future favorite: it’s approachable, versatile, and deeply satisfying.
Whether you’re cooking for a family dinner, impressing friends, or simply treating yourself, this meal delivers on every level. It’s hearty enough to feel like a celebration, yet straightforward enough to make any evening feel just a bit brighter. And that’s the real magic—recipes like this don’t just feed us; they connect us to the playful, inventive spirit of cooking itself.
So the next time you’re staring into the pantry wondering what to make, remember: greatness might just be hiding in a bag of pretzels. Trust the process, enjoy the journey, and savor every crispy, cheesy bite.
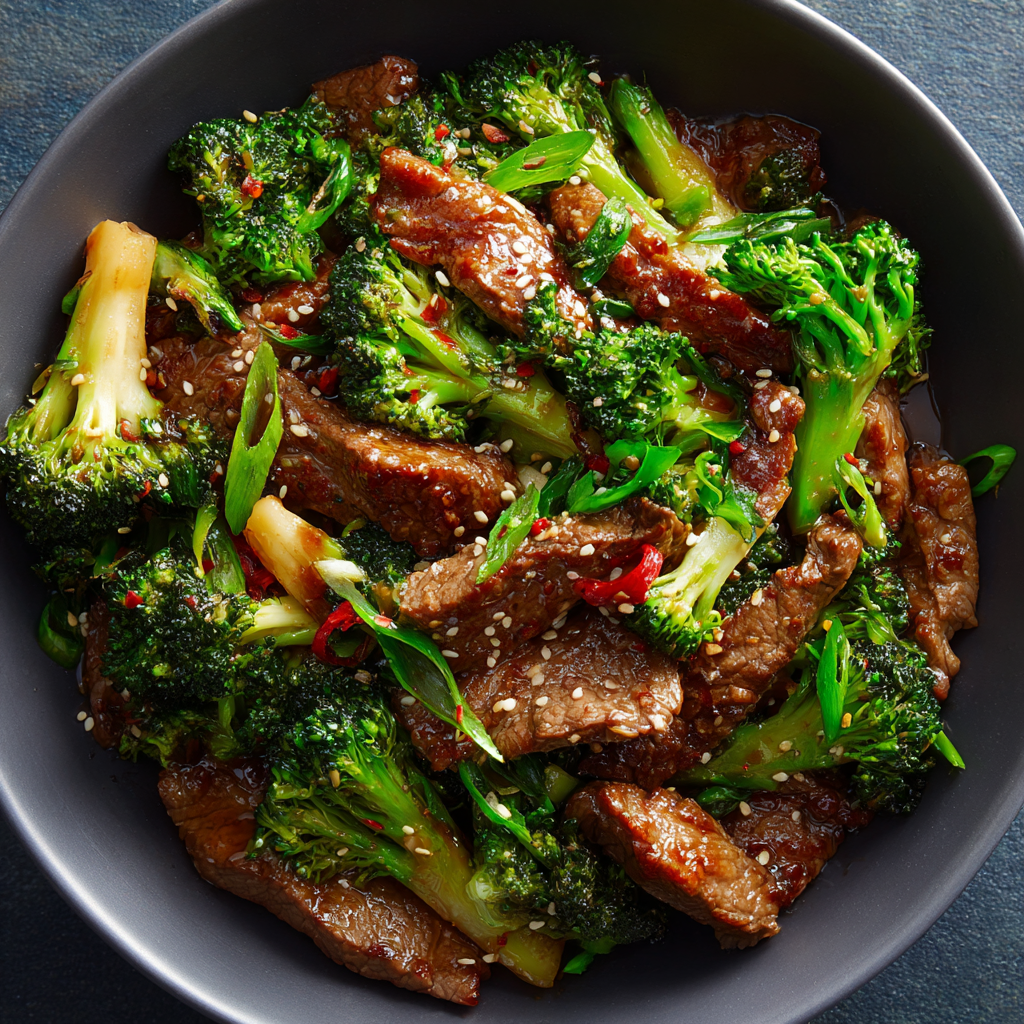
High-Protein Beef & Broccoli Stir Fry : Extra Steak, Extra Flavor
For the Nights You Need Something Seriously Satisfying (and Fast!)
Hey there, friend! Come on in, pull up a stool. Can you smell that? It’s the sizzle of steak hitting a blisteringly hot pan, the sharp, clean scent of fresh garlic and ginger getting friendly, and that deep, savory aroma that promises dinner is about to be absolutely incredible. That’s the sound and smell of my kitchen on a weeknight when I want something that feels like a hug but fuels my body like a champion.
We’ve all been there. You’re craving takeout—specifically that glossy, beefy, broccoli-laden goodness from your favorite spot. But then you remember the sticky containers, the mystery sauce, and the fact that your portion of steak is usually playing a heartbreaking game of hide-and-seek. What if I told you that in less time than it takes for delivery to arrive, you could be digging into a High-Protein Beef & Broccoli Stir Fry that’s BETTER? One where YOU control the ingredients, the salt, and—most importantly—the steak-to-everything-else ratio.
This recipe is my weeknight warrior, my post-workout victory meal, my answer to “what’s for dinner?” that never disappoints. It’s built for anyone who loves bold flavor but doesn’t want to spend hours creating it. We’re using a simple, powerhouse sauce, a quick-cooking cut of beef, and that gorgeous green crunch of broccoli. It’s fast, it’s filling, and it proves that eating well doesn’t have to be complicated. So, tie on your apron (messy is encouraged), and let’s make something unforgettable together.
My Love Letter to the Humble Stir-Fry
My obsession with this dish started long before I had a blog or even a decent wok. Picture a tiny college apartment kitchen, circa 2009. My roommate, Maya, and I were surviving on a steady diet of instant noodles and lofty dreams. One particularly brutal exam week, we pooled our meager grocery funds with one mission: to make a meal that felt like a real, grown-up dinner.
We grabbed the cheapest cut of beef we could find, a head of broccoli, and cobbled together a sauce from the condiment graveyard in our fridge door. We cranked the heat on our sad, electric stove and gave it a shot. The kitchen filled with smoke, we set off the fire alarm (much to our neighbors’ delight), and we ate it straight from the pan, perched on the floor. But in that chaotic, slightly smoky moment, I had a revelation. This was magic. It was the act of transforming a few simple things into a complete, delicious meal that made us feel capable and comforted all at once.
That messy, perfect experience is the heart of this recipe for me. It’s not about fancy techniques; it’s about the joy of creating something wildly flavorful from scratch. Every time I make this stir-fry now, I think of that kitchen, that friendship, and the powerful, simple truth that good food brings people together, no matter the circumstances.
Gathering Your Flavor Arsenal
Here’s everything you’ll need to build this flavor powerhouse. The beauty is in the simplicity—each ingredient has a job to do!
- 1.5 lbs flank steak or sirloin, thinly sliced against the grain: This is our star, and slicing against the grain is the non-negotiable secret to tender, melt-in-your-mouth beef. Think of the grain like lines on a piece of wood; cutting across them shortens the muscle fibers. Chef’s Insight: For ultimate tenderness, you can briefly marinate the sliced steak in 1 tbsp of the soy sauce and the cornstarch for 15 minutes before cooking.
- 4 cups broccoli florets: Fresh, crisp, and full of vibrancy. You want florets that are all roughly the same size for even cooking. No fresh broccoli? Frozen florets work in a pinch! Just thaw and pat them very dry to avoid a soggy stir-fry.
- 2 tablespoons avocado or sesame oil: Avocado oil has a high smoke point, perfect for our high-heat sear. Sesame oil adds a wonderful nutty flavor; I often do one tbsp of each for the best of both worlds.
- 3 garlic cloves, minced: Fresh is best here! That pungent, aromatic punch is irreplaceable.
- 1/4 cup low-sodium soy sauce: The salty, umami backbone of our sauce. Using low-sodium lets us control the final salt level. For a gluten-free version, tamari or coconut aminos are fantastic swaps.
- 1 tablespoon oyster sauce (optional but recommended): Don’t let the name scare you! This is the “chef’s secret” for deep, savory, restaurant-quality depth. It’s not fishy—it’s pure umami magic. Vegetarian? Mushroom stir-fry sauce is a great substitute.
- 1 tablespoon rice vinegar: Our bright note! It cuts through the richness and balances the sauce. A splash of lime juice works too.
- 1 tablespoon cornstarch mixed with 2 tablespoons water (slurry): This is what gives our sauce that gorgeous, clingy, glossy texture that coats every piece beautifully.
- 1 teaspoon fresh grated ginger: The zippy, warm cousin to garlic. I keep a knob of ginger in my freezer and grate it frozen—no peeling, no waste!
- Optional for topping: A sprinkle of sesame seeds, chopped green onions, or a pinch of chili flakes. These aren’t just pretty; they add texture, freshness, and heat!
Let’s Get Sizzling! Your Step-by-Step Guide
Ready to cook? This comes together fast, so have all your ingredients prepped and within arm’s reach. We call this mise en place—fancy chef talk for “having your stuff together,” and it’s a game-changer for stir-fries.
Step 1: The Big Sear. Heat 1 tablespoon of your oil in a large skillet or wok over high heat. You want it shimmering and hot—a drop of water should skitter and evaporate instantly. Add half of your thinly sliced steak in a single layer. Don’t crowd the pan! This is crucial. We’re not steaming, we’re searing. Let it sit, untouched, for about 90 seconds to develop a beautiful brown crust, then stir-fry for another minute until just cooked through. Transfer to a clean plate and repeat with the remaining steak. Chef’s Hack: Resisting the urge to constantly stir is the hardest part! Let the pan do its work to create those flavorful browned bits (fond) on the bottom—they’ll deglaze into our sauce later.
Step 2: Veggie Time. Add the remaining oil to the hot pan. Toss in your broccoli florets. Stir-fry them for 3-4 minutes. You’re looking for them to turn bright green and get tender-crisp. If you like softer broccoli, you can add a tablespoon of water and cover the pan for a minute to steam it slightly. Tip: For extra flavor, try tossing the broccoli in the pan for a minute before adding any oil—a quick dry “roast” in the hot wok adds amazing depth!
Step 3: Aroma Bomb. Push the broccoli to the sides of the pan, creating a well in the center. Add the minced garlic and grated ginger to that well. They’ll sizzle and become fragrant in about 30 seconds to 1 minute. Seriously, don’t walk away—burnt garlic is bitter. The moment you smell that incredible fragrance, stir it into the broccoli.
Step 4: The Grand Reunion. Return all that beautifully seared steak (and any accumulated juices) back to the pan. Give everything a big, happy stir to reintroduce the steak to the broccoli and aromatics.
Step 5: Sauce It Up. In a small bowl or measuring cup, quickly whisk together the low-sodium soy sauce, oyster sauce, rice vinegar, and that cornstarch slurry. Make sure the slurry is mixed well—no cornstarch lumps! Pour the sauce over everything in the pan. It will bubble and thicken almost immediately. Keep tossing for another 1-2 minutes until the sauce is glossy and coats every single piece of steak and broccoli like a delicious, shiny jacket.
Step 6: Serve Immediately! This dish is at its peak when it hits the plate hot from the pan. The broccoli will be crisp, the steak juicy, and the sauce perfectly clingy.
How to Plate Your Masterpiece
Presentation is part of the fun! I love serving this family-style in a big, shallow bowl. For a restaurant-worthy touch, spoon a base of fluffy white rice, cauliflower rice, or even quinoa into individual bowls. Pile the hot beef and broccoli right on top, letting the extra sauce drizzle down into the grains. Then, go to town with the toppings: a generous sprinkle of sliced green onions, a shake of white sesame seeds, and for my heat-seekers, a good pinch of red chili flakes or a drizzle of chili crisp. The contrast of colors and textures makes it look as amazing as it tastes!
Make It Your Own: 5 Delicious Twists
The basic formula is your canvas! Here are some of my favorite ways to play with it:
- Spicy Szechuan Style: Add 1-2 tsp Szechuan peppercorns (lightly crushed) and 1-2 dried red chilis with the garlic. Finish with a splash of chili oil.
- Mushroom Lover’s Dream: Swap half the broccoli for sliced shiitake or cremini mushrooms. Their meaty texture is incredible.
- Whole30/Paleo Friendly: Use coconut aminos instead of soy sauce, omit the oyster sauce (or use a compliant mushroom sauce), and use arrowroot powder instead of cornstarch for thickening.
- Extra Veggie Boost: Add a sliced bell pepper or a handful of snap peas in with the broccoli for more color and crunch.
- Teriyaki Twist: Add 1 tbsp of honey or maple syrup to the sauce mixture for a sweet & savory glaze.
From My Kitchen to Yours
This recipe has evolved more than my music taste since that first smoky college attempt. The biggest lesson? Don’t skimp on the heat. A truly hot pan is the difference between a steamed, soggy stir-fry and one with that iconic “wok hei” (breath of the wok) char. I’ve also learned to be patient with the steak sear and to always, always make a double batch of sauce—my husband has a habit of “quality testing” it straight from the pan with a piece of bread.
One funny fail I’ll share: I once tried to use frozen steak without thawing it properly, thinking I could save time. Friends, I created a beef-sicle stir-fry that steamed in its own icy melt. We ordered pizza that night. The moral? A little prep goes a long way. Now, I often slice a whole flank steak when I get home from the store and freeze it in recipe-sized portions. It thaws in minutes and makes this dish even faster on a busy night. It’s a little act of kindness for Future Olivia.
Your Questions, Answered!
Q: My steak turned out tough. What did I do wrong?
A: The two most common culprits are not slicing against the grain or overcrowding the pan. Slicing against the grain is non-negotiable for tender bites. Overcrowding lowers the pan temperature drastically, causing the steak to steam and seize up instead of searing quickly. Cook in batches—it’s worth the extra minute!
Q: My sauce didn’t thicken. Help!
A: First, ensure your cornstarch slurry is well-mixed right before adding it. If it sits, the cornstarch settles. Second, make sure the sauce comes to a full boil after adding the slurry; the boiling action is what activates the thickening power. If it’s still thin, mix another 1 tsp cornstarch with 1 tbsp cold water and stir it in while the dish is bubbling.
Q: Can I make this ahead of time?
A: You can prep the components: slice the steak, make the sauce, chop the broccoli. But for the best texture, cook it just before serving. Leftovers are still delicious! They reheat well in a skillet over medium heat with a tiny splash of water to loosen the sauce.
Q: What’s the best substitute for oyster sauce?
A: For a vegetarian option, mushroom stir-fry sauce is excellent. Alternatively, you can use an extra tablespoon of soy sauce plus a ½ teaspoon of brown sugar or hoisin sauce to mimic the sweetness and depth.
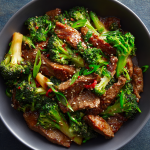
High-Protein Beef & Broccoli Stir Fry : Extra Steak, Extra Flavor
Description
When you need a dinner that feels comforting, bold, and filling—but don’t want to wait on delivery—this High-Protein Beef & Broccoli Stir-Fry is the answer. Tender, seared steak, crisp broccoli, and a glossy savory sauce come together in under 25 minutes. It’s quick, protein-packed, and completely customizable, making it perfect for busy weeknights or post-workout fuel.
Ingredients
-
1½ lb (680 g) flank steak or sirloin, thinly sliced against the grain
-
4 cups broccoli florets
-
2 tbsp avocado oil (or 1 tbsp avocado + 1 tbsp sesame oil)
-
3 garlic cloves, minced
-
1 tsp fresh ginger, grated
-
¼ cup low-sodium soy sauce (or tamari)
-
1 tbsp oyster sauce (optional but recommended)
-
1 tbsp rice vinegar
-
1 tbsp cornstarch + 2 tbsp water (slurry)
Optional Garnishes
Sesame seeds, sliced green onions, chili flakes
Instructions
-
Sear the Beef
Heat 1 tbsp oil in a large skillet or wok over high heat.
Add half the steak in a single layer. Sear 1–2 minutes per side until browned.
Remove to a plate and repeat with remaining steak. -
Cook the Broccoli
Add remaining oil to the pan. Stir-fry broccoli for 3–4 minutes until bright green and tender-crisp. -
Add Aromatics
Push broccoli aside. Add garlic and ginger to the center. Cook 30–60 seconds until fragrant, then stir together. -
Combine
Return steak (and juices) to the pan. -
Sauce & Thicken
Whisk soy sauce, oyster sauce, rice vinegar, and cornstarch slurry.
Pour into the pan and toss for 1–2 minutes until thick, glossy, and coated. -
Serve Hot
Garnish as desired and serve immediately.
Notes
-
Slice against the grain: This is the #1 secret to tender beef.
-
Don’t crowd the pan: Cook steak in batches so it sears, not steams.
-
Hot pan = better flavor: High heat creates that restaurant-style char.
-
Too thin sauce? Let it boil briefly or add 1 tsp more cornstarch mixed with water.
-
Meal prep smart: Slice steak and mix sauce ahead of time for a 10-minute cook.
Nutritional Information (Per Serving, serves 4)
This is an estimate provided for informational purposes. For precise dietary needs, consult a nutrition calculator with your specific brands and measurements.
Calories: 460 | Protein: 44g | Fat: 24g | Carbohydrates: 14g | Fiber: 3g | Sugar: 4g
Final Thoughts
For the Nights You Need Something Seriously Satisfying (and Fast!)
When you’re craving that deep, savory comfort only a great stir-fry can deliver, this High-Protein Beef & Broccoli is your answer. It’s more than just a quick meal—it’s a reminder that you can create something vibrant, nourishing, and deeply delicious on even the busiest weeknight. No need to compromise on flavor or quality, and no need to wait for delivery.
This recipe is built for real life: minimal ingredients, maximum satisfaction, and a cooking process that’s as rewarding as the first bite. It’s about taking a few simple, wholesome components and transforming them into a meal that feels like a celebration—of good food, of taking care of yourself, and of the simple joy of cooking something truly great.
So the next time that takeout craving hits, remember: you’ve got this. In less than 30 minutes, you can have a plateful of juicy steak, crisp-tender broccoli, and glossy, flavor-packed sauce—all made exactly the way you like it. Here’s to many delicious, sizzling dinners ahead.

High-Protein Pita Pizzas : Fast, Cheesy, and Macro-Friendly
Your Pizza Cravings, Meet Your Wellness Goals: Let’s Get Personal
Hey there, friend! Come on in, grab an apron, and let’s talk about something we all have in common: the undeniable, sometimes-weeknight-at-8 PM, gotta-have-it-now craving for pizza. I see you nodding. That crispy crust, that blanket of melty cheese, that glorious first bite… it’s pure joy. But then that little voice in your head (you know the one) starts whispering about goals, macros, or just wanting to feel good after eating. Suddenly, ordering a large pepperoni feels like a negotiation with your future self.
Well, what if I told you there’s no negotiation needed? What if you could have that hot, cheesy, deeply satisfying pizza experience and feel amazing about it? That’s where our kitchen magic comes in. Today, we’re making High-Protein Pita Pizzas—your new secret weapon for fast, delicious, and macro-friendly meals. This isn’t about deprivation; it’s about a brilliant, tasty upgrade. We’re using humble whole wheat pitas as our perfect personal-sized crust, piling them high with lean protein and smart cheese, and getting a restaurant-worthy result in about 15 minutes flat. It’s perfect for post-gym fuel, a busy family dinner where everyone customizes their own, or a meal prep lunch that you’ll actually look forward to. So, let’s turn that craving into a celebration of good, wholesome flavor. Your kitchen, and your pizza-loving heart, are about to become best friends.
The Night That Sparked a Pizza Revolution (In My Apartment, Anyway)
This recipe was born from a very specific, hilariously chaotic Tuesday night. My husband, Alex, had just gotten home from a long workday and a tough workout, ravenous and eyeing the takeout menus. I was staring into the fridge, willing inspiration to strike. We had leftover grilled chicken, a couple of pitas, and the usual pizza fixings. “What if…,” I thought, “we just put it all together and see what happens?”
Ten minutes later, we were standing at the kitchen island, devouring these crispy, cheesy, protein-packed pita creations. No delivery wait, no grease-heavy regret, just pure, immediate satisfaction. Alex dubbed them “Game-Changer Pizzas,” and they instantly became our weekly ritual. It reminded me that the best meals often aren’t the most complicated—they’re the clever, thrown-together-with-love solutions that fit real life. That’s the spirit I want to bring to your kitchen: fun, flexibility, and a guaranteed delicious outcome, no fancy skills required.
Gathering Your Flavor Building Blocks
Here’s everything you’ll need to create your masterpiece. Think of this list as a playlist—you’ve got the essential hits, and then some awesome optional features to make it your own!
- 2 whole wheat pita breads: This is our genius base! It’s sturdy enough to hold toppings, gets wonderfully crisp, and adds a nutty, wholesome fiber boost. Chef’s Insight: Look for pitas without pockets, or “pocket-less” pitas, for the best pizza-like surface. If you can’t find them, regular pita works—just be gentle when saucing!
- ½ cup marinara or pizza sauce: The flavor foundation. I love a simple, high-quality jarred marinara for ease. Pro Tip: Blot the sauce with a paper towel to remove excess liquid. This one trick prevents a soggy crust!
- 1 cup cooked lean protein: This is where the macro magic happens! Grilled chicken (my go-to), seasoned ground turkey, flaky tuna, or even sliced deli turkey all work beautifully. Substitution Tip: For a plant-based punch, try rinsed canned lentils, crumbled firm tofu, or chickpeas.
- ½ cup shredded part-skim mozzarella: For that essential, glorious cheese pull. Part-skim gives you all the meltiness with a bit less fat. Chef’s Insight: Always shred your own cheese if you can! Pre-shredded cheese is coated to prevent clumping, which also means it doesn’t melt as smoothly.
- ¼ cup low-fat ricotta or cottage cheese (optional): My secret for added creaminess and a serious protein bump! Little dollops create delicious pockets of flavor. Substitution Tip: If you’re dairy-free, a bit of blended silken tofu with a pinch of salt and nutritional yeast is a fantastic swap.
- 1 tsp Italian seasoning: The aromatic hug that ties it all together. If you don’t have a blend, a mix of dried oregano, basil, and a tiny pinch of red pepper flakes is perfect.
- Salt and pepper, to taste: Your flavor finishers. Always taste and season!
- Optional toppings: This is your playground! Baby spinach (it wilts perfectly), sliced mushrooms, olives, thin red onion rings, or a final sprinkle of crushed red pepper for heat. Go wild!
Let’s Build Some Pizza Magic: Step-by-Step
Ready? This is where the fun happens. I’ll walk you through each step with my favorite kitchen hacks to ensure crispy, cheesy success every single time.
- Preheat and Prep: Crank your oven to 220°C (425°F) and position a rack in the middle. Why so hot? We want that oven to be a blast furnace to crisp up the pita quickly without drying it out. While it heats, line a baking sheet with parchment paper—easy cleanup is a non-negotiable life upgrade!
- Base Camp: Place your pita breads on the prepared sheet. Now, for the sauce! Using the back of a spoon, spread a thin, even layer of marinara over each pita, leaving a small border around the edge for your “crust.” My Golden Rule: Less is more with sauce here. Too much = a soggy middle. Think of it as a flavor primer, not a swimming pool.
- The Protein Power-Up: Scatter your cooked, seasoned protein evenly over the sauce. Whether it’s chicken, turkey, or your choice, make sure it’s in bite-sized pieces so you get a bit in every mouthful. This is what makes it a meal!
- Cheese, Please! Sprinkle the shredded mozzarella generously over the protein. Then, take little teaspoonfuls of the ricotta or cottage cheese (if using) and dot them around like creamy little clouds. They’ll get golden and delicious in the oven.
- Flavor Finale: Rain down the Italian seasoning evenly over the cheese. Add a pinch of salt and a few grinds of black pepper. Now, add any of your optional veggie toppings. I love pressing spinach leaves lightly into the cheese so they don’t fly away when baking.
- Bake to Perfection: Slide your loaded pitas into the hot oven. Set that timer for 8 minutes, but do not walk away! Ovens vary, so at 8 minutes, peek in. You’re looking for the cheese to be fully melted, bubbly, and possibly just starting to get a few golden spots, and the edges of the pita to be crisp. It might need the full 10 minutes. Trust your eyes more than the timer!
- The Finishing Touch: Once out of the oven, let them rest on the sheet for just 60 seconds. This lets the cheese set a tiny bit so it doesn’t all slide off when you cut. Then, slice with a pizza cutter or sharp knife, and serve immediately. That first crispy, cheesy bite is your reward!
How to Plate Your Masterpiece
Presentation is part of the fun! I love serving these right on a big wooden board or a colorful plate. Slice them into quarters for easy grabbing. For a full meal vibe, pair a pita pizza with a simple side salad of arugula with a lemon vinaigrette—the peppery greens cut through the richness perfectly. If it’s a family dinner, let everyone build their own and bake them together. It turns dinner into a hands-on, joyful event. No fuss, just delicious, shareable food.
Make It Your Own: 5 Flavorful Twists
The beauty of this recipe is its adaptability. Here are a few of my favorite riffs:
- Greek Goddess: Use hummus instead of marinara. Top with cooked chicken, crumbled feta, chopped Kalamata olives, red onion, and a post-bake sprinkle of fresh dill.
- BBQ Chicken: Swap marinara for your favorite sugar-free BBQ sauce. Top with chicken, red onion, mozzarella, and a drizzle of extra BBQ sauce after baking.
- Everything Bagel: Spread with low-fat cream cheese, top with smoked salmon or turkey, red onion, capers, and everything bagel seasoning. Bake without cheese, or add a little mozzarella.
- Veggie Supreme (Plant-Powered): Skip the meat and load up with sautéed mushrooms, bell peppers, onions, spinach, and black olives. Add a sprinkle of nutritional yeast for a cheesy flavor if you’re dairy-free.
- Breakfast Pizza: Use a light smear of pesto. Top with scrambled egg whites, chopped turkey bacon, and a sprinkle of cheddar. Bake until the eggs are set.
From My Messy Apron to Yours: A Few Parting Thoughts
This recipe has evolved from that desperate Tuesday night into my most-requested “cheat code” meal. I’ve made these for my best friend after she had her baby (meal prep hero!), for my nephews who are notoriously picky eaters (they loved building their own), and for countless “I don’t feel like cooking” nights. The biggest lesson? Don’t overthink it. The pita is forgiving. The toppings are flexible. The goal is to get a delicious, satisfying meal on the table that makes you feel good. Sometimes I’ll make four at once, bake them, let them cool completely, and stash them in the fridge for lunches—they reheat beautifully in a toaster oven or air fryer. It’s a recipe that truly works for you, not the other way around. And that’s my favorite kind of cooking.
Your Questions, Answered!
Q: My pita got soggy in the middle. What did I do wrong?
A: The most common culprit is too much sauce! Remember, just a thin layer is plenty. Also, make sure your protein (like chicken) isn’t too wet—pat it dry before adding. And that preheating step is crucial; a hot oven seals the deal on crispiness.
Q: Can I make these in an air fryer?
A: Absolutely, and they come out extra crispy! Air fry at 190°C (375°F) for about 5-7 minutes. You might need to work in batches, and keep an eye on them as air fryers can cook very quickly.
Q: What’s the best way to meal prep these?
A: I prep the components, not the assembled pizzas. Cook and chop your protein, shred your cheese, and chop your veggies. Store them separately. When you’re ready to eat, it takes 2 minutes to assemble and 10 to bake for a fresh, hot meal.
Q: My cheese isn’t browning. Help!
A: No worries! For a more golden top, you can switch your oven to broil for the last 60-90 seconds. WATCH IT LIKE A HAWK—it can burn in a flash! Also, as mentioned, freshly shredded cheese browns better than pre-shredded.

High-Protein Pita Pizzas : Fast, Cheesy, and Macro-Friendly
Description
Craving pizza but still want to feel energized and satisfied? These High-Protein Pita Pizzas are the perfect solution. Using whole wheat pitas as a quick crust and topping them with lean protein and lighter cheese, you get all the comfort of pizza in about 15 minutes—no delivery, no guilt, just great flavor.
Ingredients
-
2 whole wheat pita breads
-
½ cup marinara or pizza sauce
-
1 cup cooked lean protein (grilled chicken, ground turkey, tuna, or chickpeas)
-
½ cup shredded part-skim mozzarella cheese
-
1 teaspoon Italian seasoning
-
Salt and pepper, to taste
Optional Add-Ons (for extra protein & flavor):
-
¼ cup low-fat ricotta or cottage cheese
-
Baby spinach, mushrooms, olives, red onion, or bell peppers
-
Crushed red pepper flakes
Instructions
-
Preheat Oven
Preheat to 425°F (220°C). Line a baking sheet with parchment paper. -
Assemble the Base
Place pitas on the baking sheet. Spread a thin layer of sauce on each, leaving a small border. -
Add Protein & Cheese
Evenly distribute the cooked protein over the sauce. Sprinkle with mozzarella and add small dollops of ricotta or cottage cheese if using. -
Season & Top
Sprinkle with Italian seasoning, salt, and pepper. Add any optional veggie toppings. -
Bake
Bake for 8–10 minutes, until cheese is melted and bubbly and pita edges are crisp. -
Serve
Let rest for 1 minute, slice, and enjoy hot.
Notes
-
Avoid soggy pitas: Use less sauce and pat protein dry before adding.
-
Extra crispy: Bake directly on the oven rack for the last 1–2 minutes (place foil below).
-
Air fryer option: Cook at 375°F (190°C) for 5–7 minutes.
-
Meal prep smart: Prep toppings ahead; assemble and bake fresh when ready to eat.
Nutritional Information*
*Per serving (1 pita pizza), calculated with grilled chicken, part-skim mozzarella, and without optional ricotta. This is an estimate and will vary based on your specific ingredients and brands.
- Calories: 390
- Protein: 35g
- Carbohydrates: 28g
- Fat: 16g
- Fiber: 4g
- Sugar: 5g
- Sodium: 540mg
Happy cooking, friends! I hope these pita pizzas bring as much ease and joy to your kitchen as they have to mine. Don’t forget to tag me on social if you make them—I love seeing your creations!
Final Thoughts
Here’s the beautiful truth: you don’t have to choose between joy and well-being in your food. That deep, soul-warming satisfaction of a perfect pizza bite and the empowered feeling of nourishing your body? They can be the same thing. This recipe is more than a set of instructions—it’s an invitation to play, to customize, to take back control of your cravings without a side of guilt.
Remember, the best kitchen moments aren’t about perfection. They’re about the click of a solution, like turning a humble pita into your personal pizza canvas. They’re about the laughter shared over a kitchen island while devouring a creation born from leftovers and inspiration. This is real-life cooking: flexible, forgiving, and fiercely delicious.
Keep this formula in your back pocket—the crispy base, the smart protein, the melty cheese—and return to it whenever that pizza craving calls. Let it be your quick post-workout fuel, your fun family dinner activity, or your reliable meal-prep hero. Most importantly, make it yours.
So, tie on that apron with confidence. You’ve got this. Here’s to many more happy, healthy, and downright delicious meals ahead.




