
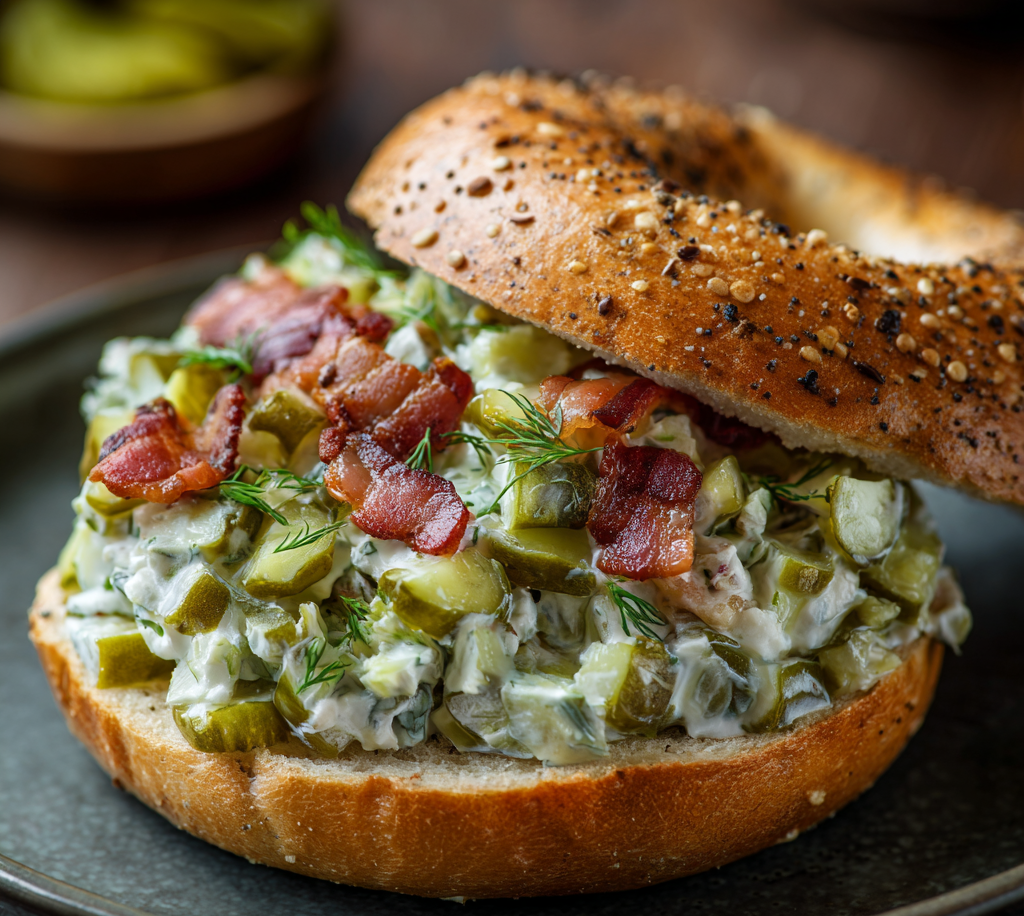
Pickle Bacon Chopped Bagel Sandwich : Creamy, Crunchy, and Full of Flavor
The Pickle Bacon Chopped Bagel: Your New Favorite Salty, Tangy, Crave-Worthy Bite
Hey there, friend! Come on in, grab an apron, and let’s talk about one of life’s simple, profound joys: the absolutely perfect sandwich. You know the one. It’s not about fancy techniques or rare ingredients. It’s about that magical combination of textures and flavors that makes you close your eyes and hum with happiness after the first bite. Today, I’m so excited to share a recipe that has become my ultimate go-to for exactly that feeling: The Pickle Bacon Chopped Bagel Sandwich.
Imagine this: a warm, chewy, everything bagel, toasted until it’s just shy of crunchy. Now, picture slathering it with a cool, creamy, incredibly savory spread that’s flecked with crunchy, tangy pickles and little salty-sweet bits of smoky bacon. Every single bite is a symphony—the creamy, the crunchy, the tangy, the salty, the savory. It’s a deli classic that decided to put on a party dress. It’s what happens when your favorite bacon-cheddar burger and a New York bagel shop have a delicious, beautiful baby.
This isn’t just a sandwich; it’s a mood. It’s for lazy Sunday mornings with a giant mug of coffee, for impressive-but-effortless brunch spreads that make your friends think you’re a genius, and for those “I need something spectacular and I need it in 10 minutes” lunches. Best of all? It requires zero fancy skills. If you can chop, stir, and toast, you are already a master of this dish. So, let’s make some magic happen. Trust me, once you try this creamy, crunchy, flavor-packed creation, your regular bagel routine will never be the same.
A Little Deli Magic & My “Aha!” Moment
This recipe has its roots in a very specific, very delicious memory. When I was a kid, my dad would sometimes take me to this ancient, no-frills deli near his office. The air was always thick with the scent of roasting meats, rye bread, and that unmistakable tang of brine from giant pickle barrels. Our order never changed: a hot pastrami on rye for him, and for me, a simple bagel with cream cheese. But not just cream cheese.
The counterman, a guy named Sal who had probably been there since the place opened, would always ask, “The usual, kiddo?” He’d then take my plain bagel and, with a magician’s flair, swipe on the cream cheese before grabbing a forkful of chopped pickles from a stainless-steel bin and pressing them right into the cheese. It was a simple act, but it transformed everything. That salty, crunchy punch against the cool cream cheese was my idea of culinary heaven.
Years later, staring at a package of bacon and a jar of pickles, Sal’s trick popped into my head. “What if…” I thought, “what if we made the cream cheese spread itself the star?” I chopped the pickles finer, tossed in some crispy bacon, a whisper of fresh dill, and gave it a good stir. The moment I spread it on a warm bagel and took a bite, I was instantly transported back to that sticky deli counter. It was my childhood favorite, all grown up and ready for its close-up. It’s my little homage to those unpretentious, flavor-first places that understand the power of a really, really good bite.
Gathering Your Flavor All-Stars
Here’s the beautiful part: you only need a handful of simple ingredients to create something extraordinary. Let’s break them down, because every single one plays a crucial role.
- 1 Everything or Plain Bagel: The foundation! I’m an everything bagel devotee—the sesame, poppy, garlic, and onion flakes add another dimension of savoriness that plays so nicely with the bacon. But a really good, fresh plain or sesame bagel is a flawless canvas if you prefer. Chef’s Insight: For the best texture, use a day-old bagel. It toasts up sturdier and won’t get soggy as quickly from the creamy spread.
- 1/3 cup Whipped Cream Cheese: The creamy, tangy glue that holds our dream team together. I specify whipped because it’s softer, fluffier, and mixes incredibly easily straight from the fridge. Substitution Tip: Full-fat block cream cheese works perfectly; just let it soften at room temperature for 30 minutes before mixing. For a lighter version, Neufchâtel cheese is great. Vegan? Your favorite plant-based cream cheese alternative works wonderfully here.
- 1/4 cup Finely Chopped Dill Pickles: The tangy, crunchy heart of the operation! You want a good, crisp dill pickle, not a sweet bread-and-butter style. Chop them small so they distribute evenly. Chef’s Insight: Don’t toss the pickle juice! A tiny teaspoon stirred into the cream cheese mixture can amplify that tangy flavor in the best way. Trust me on this.
- 2 Slices Crispy Cooked Bacon, Chopped: Our salty, smoky, umami bomb. Cook it until it’s very crispy. It needs to stand up to the moisture of the cream cheese and pickles without becoming limp. Substitution Tip: Turkey bacon works, or for a vegetarian twist, chopped sun-dried tomatoes (the kind packed in oil) add a fantastic chewy, salty-sweet element.
- 1 Tablespoon Chopped Fresh Dill (optional): This is the aromatic high note. Fresh dill and pickles are a match made in flavor heaven, adding a bright, almost grassy freshness. If you only have dried dill, use about 1 teaspoon.
- Cracked Black Pepper, to Taste: Don’t skip this! Freshly cracked pepper adds a gentle heat and aromatic complexity that pre-ground pepper just can’t match.
- Pickle Slices, for Serving (optional): Because more is more! A cool, crisp spear on the side is the perfect palate-cleanser between bites.
Let’s Build Some Bagel Brilliance: Your Step-by-Step Guide
Ready? This comes together faster than you can brew a cup of coffee. Let’s do it!
- Cook Your Bacon to Perfection. Lay your bacon slices in a cold skillet. Turn the heat to medium. Starting in a cold pan allows the fat to render slowly, leading to evenly crispy bacon without burning. Cook, flipping occasionally, until it’s deeply golden and crisp. Transfer to a paper towel-lined plate to drain and cool. Chef’s Hack: For easier chopping and less mess, use kitchen shears to snip the cooled bacon right into your mixing bowl!
- Chop & Assemble Your Spread. While the bacon cools, finely chop your dill pickles and fresh dill. Add them to a medium mixing bowl along with the whipped cream cheese. Chop (or snip!) your cooled bacon and add it in. Grind in a generous amount of black pepper. Little Tip: Remember that pickle juice trick? Add about a teaspoon now and give it a stir. It loosens the mixture just slightly and makes the pickle flavor sing.
- Mix with Love (and a Spatula). Using a flexible spatula, fold everything together until it’s beautifully combined. You’ll see those gorgeous flecks of green, pink, and tan all throughout the creamy white base. Taste it! This is the moment of truth. Need more pepper? More tang? Adjust to your heart’s content. Chef’s Note: Don’t over-mix aggressively; we want to keep some of those distinct bacon and pickle pieces intact for texture.
- Toast Your Bagel Like a Pro. Slice your bagel in half. For the ultimate texture experience, toast it in a dry skillet over medium heat, cut-side down, until golden brown. This gives it a fantastic, even crispness. Of course, a toaster works perfectly too! Key Tip: Toast it a shade darker than you normally would. The sturdy crunch is essential to support the creamy, hefty spread.
- Spread, Stack, and Devour. Place your toasted bagel halves cut-side up. Pile the creamy pickle-bacon mixture generously onto the bottom half. Don’t be shy! Gently place the top half over your masterpiece. For easier eating, I love slicing it in half diagonally—it just feels right. Plate it up with a couple of extra pickle slices on the side, and dive in immediately while that bagel is still warm and crispy.
How to Serve This Star of the Show
This sandwich is a complete meal in your hand, but presentation is half the fun! For a casual meal, serve it straight on a plate with those extra pickle spears and a giant napkin—it’s a delightfully messy affair. For a brunch or lunch spread, think like a deli: slice the whole sandwich into quarters or smaller pinwheels and arrange them on a wooden board with bowls of potato chips, olives, and some fresh fruit. It becomes an instant, shareable centerpiece that looks like you spent hours, when really, you spent minutes. Pair it with an iced coffee, a citrusy sparkling water, or a classic chocolate milk for the ultimate nostalgic vibe.
Get Creative! 5 Fun Twists on the Classic
Once you master the base recipe, the world is your oyster (or pickle barrel!). Here are a few of my favorite riffs:
- The “Everything But The” Bagel: Add a sprinkle of everything bagel seasoning into the cream cheese mixture for double the flavor impact.
- The Brunch Edition: Top your assembled sandwich with a perfectly fried egg. The runny yolk mixing with the creamy spread is a game-changer.
- The Veggie Lover: Swap the bacon for finely chopped, well-seasoned roasted mushrooms or marinated artichoke hearts.
- The Spicy Kick: Add a tablespoon of finely chopped jalapeños (pickled or fresh) or a dash of your favorite hot sauce to the mix.
- The “Smoked Salmon Plate” Remix: Replace the bacon with flaked hot-smoked salmon or trout and add a tiny bit of minced red onion. Incredible.
A Few Final Thoughts From My (Messy) Kitchen
This recipe has evolved from a simple “what if” experiment to something I make almost weekly. I’ve learned a few things along the way. First, this spread only gets better as it sits! Making it a few hours ahead (or even the night before) lets the flavors mingle and deepen beautifully. Just give it a good stir before using. Second, it’s a fantastic fridge-cleaner. A little leftover grilled chicken? Chop it up and toss it in. Some fresh chives or green onion? Perfect. It’s wonderfully forgiving.
And a funny story: I once brought a big bowl of this spread to a potluck, alongside a stack of bagels. A friend, who is a very serious foodie, took one bite, looked at me with wide eyes, and said, “Olivia. This tastes like joy.” That’s exactly what I want cooking to be. Not stressful, not perfect, but full of joy, flavor, and the simple pleasure of sharing something delicious. I hope this recipe brings a little bit of that joy to your kitchen, too.
Your Questions, Answered!
Q: Can I make this ahead of time?
A: Absolutely! The spread will keep beautifully in an airtight container in the fridge for 3-4 days. The flavors actually improve. I don’t recommend assembling the full sandwich ahead of time, as the bagel will get soggy. Store the spread and bagels separately, then toast and assemble when you’re ready to eat.
Q: My spread turned out a bit watery. What happened?
A> This usually comes from the pickles. To prevent it, be sure to pat your chopped pickles very dry with a paper towel before mixing them in. If you’re using fresh vegetables (like in the veggie variations), make sure they’re thoroughly drained and dried, too.
Q: What’s the best way to get my bacon super crispy for chopping?
A> My two favorite methods: 1) The cold-skillet start I mentioned above. 2) Baking it on a wire rack set over a sheet pan in a 400°F oven for 15-20 minutes. Baking is hands-off and yields perfectly flat, crisp strips ideal for chopping.
Q: Is this sandwich served cold or warm?
A> It’s the best of both worlds! You want a warm, toasted bagel with a cool, creamy spread. The contrast in temperatures is part of what makes it so delightful. The heat from the bagel slightly softens the spread just enough as you eat it.
Pickle Bacon Chopped Bagel Sandwich : Creamy, Crunchy, and Full of Flavor
Description
The Pickle Bacon Chopped Bagel lives firmly in the second category. A warm, toasted bagel piled high with a creamy, savory spread packed with crunchy dill pickles and crispy smoky bacon—it’s tangy, salty, rich, and wildly satisfying. Every bite hits that perfect balance of creamy and crunchy, cool and warm.
Ingredients
The Base
-
1 everything bagel (or plain, sesame, or poppy)
-
⅓ cup whipped cream cheese
The Flavor Boosters
-
¼ cup finely chopped dill pickles
-
2 slices crispy cooked bacon, chopped
-
1 tbsp fresh dill, chopped (optional)
-
Freshly cracked black pepper, to taste
Optional for Serving
-
Extra pickle slices or spears
Ingredient Notes & Smart Swaps
-
Everything bagel adds extra savory depth, but any fresh bagel works
-
Whipped cream cheese mixes easily straight from the fridge
-
Block cream cheese works too—just soften first
-
-
Dill pickles only (not sweet) for that classic tang
-
Vegetarian option: Swap bacon for chopped sun-dried tomatoes or roasted mushrooms
-
Vegan option: Use plant-based cream cheese and bacon alternative
Instructions
1. Cook the Bacon
Place bacon in a cold skillet over medium heat. Cook, flipping occasionally, until deeply golden and crisp.
Transfer to a paper towel-lined plate to cool, then chop.
Pro tip: Kitchen shears make chopping bacon fast and mess-free.
2. Make the Creamy Pickle-Bacon Spread
In a medium bowl, combine:
-
Whipped cream cheese
-
Chopped pickles
-
Chopped bacon
-
Fresh dill (if using)
-
Generous cracked black pepper
Fold gently until well combined.
Optional but amazing: Stir in 1 teaspoon pickle juice to amplify the tang.
Taste and adjust seasoning as needed.
3. Toast the Bagel
Slice the bagel in half and toast until golden and sturdy.
Tip: Toast it slightly darker than usual so it can support the creamy spread.
4. Assemble & Serve
Spread the pickle-bacon mixture generously onto the bottom half of the warm bagel.
Top with the other half, slice diagonally if desired, and serve immediately with extra pickles.
Notes
-
Everything on Everything: Add everything bagel seasoning to the spread
-
Brunch Upgrade: Top with a fried egg
-
Spicy Pickle: Add chopped jalapeños or a dash of hot sauce
-
Veggie Version: Swap bacon for roasted mushrooms or artichokes
-
Smoked Salmon Remix: Replace bacon with flaked smoked salmon + a pinch of red onion
Nutritional Information*
*Please note: This is an estimated nutritional breakdown for one complete sandwich using an everything bagel, full-fat whipped cream cheese, and standard bacon. Values can vary based on specific brands and ingredient choices.
Per Serving: Calories: ~425 | Protein: 12g | Carbohydrates: 35g | Fat: 25g | Saturated Fat: 11g | Cholesterol: 55mg | Sodium: 980mg | Fiber: 2g | Sugar: 5g
Final Thoughts: More Than Just a Sandwich
So, there you have it. What started as a cherished childhood memory—a simple bagel transformed by a deli counterman’s flourish—has become my ultimate expression of a perfect, no-fuss, flavor-packed meal. The Pickle Bacon Chopped Bagel Sandwich is a testament to a simple truth: the most satisfying food isn’t about complexity; it’s about harmony.
It’s the crunch of the toasted bagel giving way to the cool, creamy spread. It’s the salty, smoky bacon dancing with the bright, tangy pickles. It’s that moment of quiet satisfaction when all the elements sing together.
This recipe is a love letter to improvisation. It’s forgiving, flexible, and fiercely delicious. It’s proof that with just a few humble ingredients and about ten minutes, you can create something that feels like a celebration. Whether it’s the star of your solo lunch, the hit of your brunch table, or your new secret weapon for a spectacularly easy meal, it’s designed to bring a little bit of deli-counter magic into your everyday life.
Most importantly, I hope this recipe encourages you to play, to taste, and to find joy in the process. Cooking should be fun. It’s okay to get a little messy, to adapt it with what’s in your fridge, and to close your eyes and hum after that first perfect bite.
Thank you for letting me share one of my favorite kitchen creations with you. Now, go toast a bagel, stir up some joy, and make your own delicious memories.
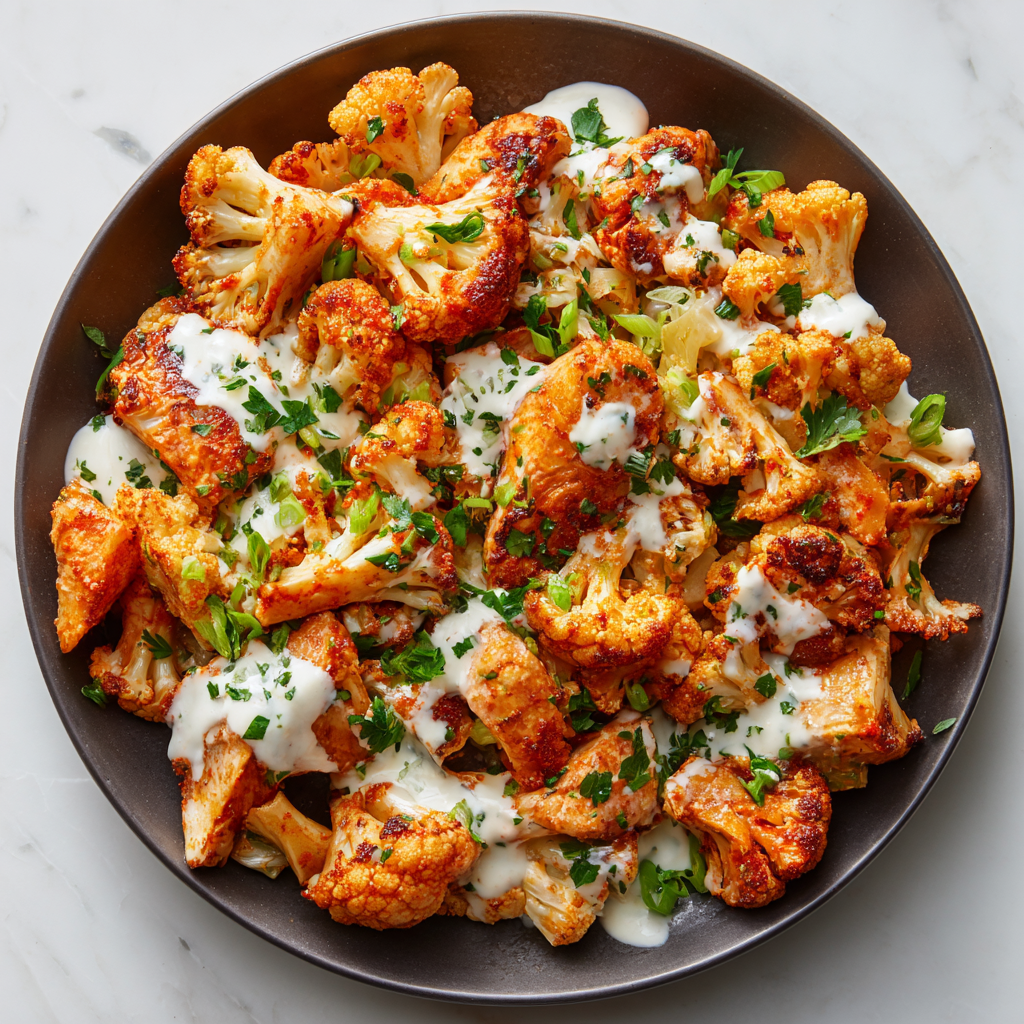
Buffalo Ranch Chicken & Cauliflower : Spicy, Saucy & Meal Prep Friendly
The Bold, Saucy Dinner That Solves Everything (Yes, Really!)
Hey there, friend! Come on in, the kitchen’s warm, and I’ve got something absolutely irresistible simmering in the oven. Have you ever had one of those days where you’re craving something with serious, punch-you-in-the-taste-buds flavor, but you also need it to be stupid-easy and maybe, just maybe, make tomorrow’s lunch too? You’re staring into the fridge, willing it to produce magic, and all you see is chicken and… a lonely head of cauliflower.
Let me tell you, that’s not a sad sight. That’s opportunity wearing an apron. What if I told you that in about 35 minutes, with just a handful of ingredients, you could transform that duo into a dish that’s spicy, creamy, wildly satisfying, and so meal-prep friendly it’ll make your week bow down in gratitude? Enter my Buffalo Ranch Chicken & Cauliflower.
This isn’t just a recipe; it’s my weeknight superhero, my game day MVP, and my secret weapon for eating deliciously without the daily dinner drama. We’re roasting everything to caramelized perfection on one sheet pan, tossing it in tangy, spicy buffalo sauce, and finishing it with a cool, creamy ranch drizzle. It’s the perfect balance of fire and cool, hearty and veggie-forward. So, tie on your apron (messy is welcome here!), and let’s make something incredibly tasty together.
The Game Day That Started It All
This recipe was born out of beautiful, chaotic necessity. Picture this: It’s a crisp fall Sunday, my tiny apartment is packed with friends for the big game, and I’m playing hostess, referee, and snack quarterback all at once. I had a mountain of classic buffalo wings ready, but I also had a few friends dodging fried food or just trying to eat more veggies. I wanted everyone to feel included in the spicy, saucy fun.
I spotted a head of cauliflower on the counter, a lightbulb went off, and I chopped it up, tossed it with some chicken chunks, and threw it all in the oven. When I pulled that sheet pan out and tossed everything in buffalo sauce, the smell was insane. The cauliflower became these tender, sauce-grabbing little flavor bombs that everyone, especially the wing purists, devoured. It was a total touchdown. That day taught me that the best recipes aren’t about perfection; they’re about sharing, adapting, and creating something that brings everyone together around good food. This dish has been a staple ever since!
Gathering Your Flavor All-Stars
Here’s what you’ll need. Simple, accessible ingredients that pack a huge punch. I’ve added my little chef notes next to each one because knowledge is power (and tastier dinners!).
- 1 lb boneless, skinless chicken breast or thighs, cut into 1-inch chunks
Chef’s Insight: Thighs are my personal favorite here! They stay incredibly juicy through the roasting and reheating process, making them perfect for meal prep. But breasts work great too—just don’t overcook them. The key is uniform chunks for even cooking. - 1 medium head cauliflower, cut into florets
Chef’s Insight: Don’t throw the core! Peel the tough outer skin with a knife and chop the tender inner part into chunks. It roasts up nicely and reduces waste. Aim for florets roughly the same size as your chicken pieces so they finish together. - 2 tablespoons olive oil
Sub Tip: Any high-heat oil works—avocado, grapeseed, or even a light spray of cooking oil. This is our tool for getting that gorgeous, crispy-edged roast on everything. - Salt and freshly ground black pepper
Chef’s Insight: This is your first layer of flavor. Season generously! I like to season the chicken and cauliflower in separate bowls to ensure every nook and cranny gets some love. - ½ cup buffalo wing sauce (I use Frank’s RedHot)
Chef’s Insight: Frank’s is the classic for a reason—that perfect vinegar-forward tang. For a milder kick, look for a “medium” buffalo sauce. Pro move: If you’re sensitive to heat, you can cut the sauce with a teaspoon of melted butter or honey after roasting. - For Serving: Ranch dressing, to drizzle
Chef’s Insight: Homemade is amazing, but a good store-bought bottle is a fantastic shortcut. The KEY is to add it after reheating your meal prep. This keeps it cool, creamy, and fresh-tasting instead of separating. - Optional toppings: Chopped green onions, crumbled blue cheese or feta
Sub Tip: Blue cheese is the traditional pairing, but feta offers a similar salty tang if you prefer. Green onions add a necessary fresh pop of color and flavor—highly recommended!
Let’s Get Cooking: Your Foolproof Roadmap to Deliciousness
Ready? This process is as easy as 1-2-3 (roast, toss, devour). I’ll walk you through each step with all my favorite tips to ensure you get perfect results every single time.
Step 1: Preheat & Prep (Your Foundation for Flavor)
Preheat your oven to 425°F (220°C). This high heat is non-negotiable—it’s what gives us those beautiful browned, caramelized edges without steaming our ingredients. While it heats, line a large, rimmed baking sheet with parchment paper or foil. Trust me, this simple step is your best friend for easy cleanup. Now, cut your chicken and cauliflower into those uniform, bite-sized pieces I mentioned. Place them in separate bowls.
Step 2: Season Like You Mean It
Drizzle a tablespoon of oil over the chicken, and another over the cauliflower. Sprinkle both generously with salt and pepper. Now, get your hands in there! Toss each bowl until every piece is glistening and evenly coated. Why separate bowls? Cauliflower needs more seasoning than chicken to taste great, and this gives you control. It’s a tiny extra step with a big flavor payoff.
Step 3: Roast to Golden Perfection
Spread the chicken and cauliflower out on your prepared baking sheet. Give them a little space! If you crowd the pan, they’ll steam instead of roast. We want heat circulating around each piece. Slide the pan into your hot oven and set a timer for 12 minutes. When it dings, pull the oven rack out and use a spatula to give everything a good, thorough toss. This promotes even browning. Pop it back in for another 10-13 minutes. You’ll know it’s done when the chicken is cooked through (no pink inside, juices run clear) and the cauliflower tips are toasty brown and tender.
Step 4: The Big Buffalo Toss
This is the fun part! Pull the sizzling sheet pan out of the oven. Immediately pour your ½ cup of buffalo sauce right over the hot chicken and cauliflower. Using your spatula, gently but quickly toss and fold everything together until it’s gloriously coated in that orange-red hue. The residual heat will help the sauce cling and slightly caramelize. The smell right now is absolutely divine.
Step 5: The All-Important Serve & Store Rule
If serving immediately: Transfer to plates or a platter. Now, drizzle with that cool ranch dressing and scatter over your green onions and blue cheese. Dive in!
If meal prepping: Let the buffalo-coated mixture cool slightly on the pan for about 10 minutes. Then, divide it evenly among your meal prep containers. DO NOT add the ranch dressing now. Seal the containers and store them in the fridge. When ready to eat, reheat in the microwave until hot, then add your ranch drizzle and toppings. This keeps the ranch perfectly creamy and fresh.
How to Serve It Up in Style
This dish is incredibly versatile! For a hearty, low-carb dinner, serve it over a bed of crisp romaine or fresh spinach for a deconstructed buffalo ranch salad. Craving carbs? It’s phenomenal stuffed into a warm pita or wrapped in a tortilla, or even piled on top of a baked potato or a mound of fluffy rice to soak up all that extra sauce. For game day, skip the plates entirely! Pile the buffalo-coated chicken and cauliflower into a big bowl with a side of ranch for dipping and toothpicks for spearing—it’s the ultimate crowd-pleasing snack.
Make It Your Own: Fun Flavor Twists
- Honey Sriracha Swap: Replace the buffalo sauce with a mix of ⅓ cup sriracha and 3 tablespoons of honey for a sweet-heat situation.
- Vegan/Vegetarian Power Bowl: Swap the chicken for a can of drained, extra-firm chickpeas (pat them dry first!). They get wonderfully crispy when roasted.
- Blue Cheese Crumble Bomb: For the true wing experience, toss the hot mixture with ¼ cup of crumbled blue cheese before storing, then add more and ranch when serving.
- “Everything” Seasoning Boost: Toss the cauliflower with a teaspoon of Everything Bagel seasoning along with the oil for an extra savory, sesame-kick.
- Air Fryer Method: Cook in batches in a 400°F air fryer for 12-15 minutes, shaking halfway. Faster and even crispier!
From My Kitchen to Yours: A Few Final Notes
This recipe has evolved from that frantic game day experiment into my most trusted, scribbled-on, sauce-splattered page in my recipe binder. The biggest lesson? Don’t skip the separate seasoning step. I tried dumping it all on the pan once when I was in a rush, and half the cauliflower was bland. Lesson learned!
I also have a funny story about the “ranch rule.” I once proudly prepped five gorgeous containers for the week, drizzling the ranch right in before storing. Come Tuesday, I opened my lunch to find a sad, separated, pink-tinged sauce pooling at the bottom. It was… not appetizing. Now I keep a little condiment cup of ranch in my lunchbox, and it’s a perfect drizzle every time. Sometimes the best kitchen hacks come from our little mistakes!
Your Questions, Answered
Q: My cauliflower is still firm after roasting. What happened?
A: This usually means your florets were too large or the pan was overcrowded. Next time, aim for smaller, uniform bites and make sure they’re in a single layer with a little breathing room. If it’s still happening, you can pop just the cauliflower back in the oven for another 5-7 minutes while the chicken rests.
Q: Can I use frozen cauliflower?
A: You can, but be prepared for a softer texture. Frozen cauliflower holds a lot of water. Thaw it completely and pat it extremely dry with paper towels before tossing with oil. Even then, it won’t get quite as caramelized and crisp as fresh, but it’ll still taste great!
Q: How long does this last in the fridge for meal prep?
A: Stored properly in airtight containers (without the ranch), it keeps beautifully for 3-4 days. The flavors actually meld and get even better! Reheat gently in the microwave until steaming hot.
Q: It’s a bit too spicy for my family. How can I tone it down?
A: Easy fixes! 1) Use a “mild” buffalo sauce. 2) Toss the finished dish with an extra tablespoon of melted butter or olive oil to mellow the heat. 3) Serve with extra ranch or even a dollop of cool, plain Greek yogurt on the side. The creaminess is the perfect counterbalance to the spice.
Print
Buffalo Ranch Chicken & Cauliflower : Spicy, Saucy & Meal Prep Friendly
Description
When you’re craving serious flavor—but need something fast, easy, and meal-prep friendly—this Buffalo Ranch Chicken & Cauliflower shows up like a weeknight superhero. Juicy roasted chicken, caramelized cauliflower, tossed in fiery buffalo sauce and finished with a cool ranch drizzle—it’s spicy, creamy, satisfying, and shockingly simple.
Ingredients
Main
-
1 lb boneless, skinless chicken breasts or thighs, cut into 1-inch chunks
-
1 medium head cauliflower, cut into florets
-
2 tbsp olive oil
-
Salt & freshly ground black pepper
Sauce & Finish
-
½ cup buffalo wing sauce (Frank’s RedHot recommended)
-
Ranch dressing, for drizzling
Optional Toppings
-
Chopped green onions
-
Crumbled blue cheese or feta
Ingredient Notes & Smart Swaps
-
Chicken thighs stay juicier and reheat better; breasts work great if not overcooked
-
Use the cauliflower core—peel and chop it to reduce waste
-
Mild heat option: Choose mild buffalo sauce or stir in 1 tsp melted butter or honey
-
No ranch? Plain Greek yogurt works in a pinch
Instructions
1. Preheat & Prep
Preheat oven to 425°F (220°C). Line a large rimmed baking sheet with parchment or foil.
Cut chicken and cauliflower into uniform, bite-sized pieces. Place them in separate bowls.
2. Season Generously
Drizzle 1 tbsp olive oil over the chicken and 1 tbsp over the cauliflower.
Season both generously with salt and pepper. Toss well.
Why separate bowls? Cauliflower needs more seasoning than chicken—this step makes a huge difference.
3. Roast to Golden Perfection
Spread everything out on the baking sheet in a single layer with space between pieces.
Roast for 12 minutes, remove pan, toss everything well, then return to oven for 10–13 minutes, until:
-
Chicken is fully cooked (165°F / 74°C)
-
Cauliflower is tender with browned, crispy edges
4. Toss with Buffalo Sauce
Remove pan from oven and immediately pour buffalo sauce over the hot chicken and cauliflower.
Toss gently until evenly coated. The heat helps the sauce cling and slightly caramelize.
5. Serve or Store (Important Ranch Rule!)
-
Serving now: Plate it up, drizzle with ranch, and add toppings
-
Meal prep: Let cool slightly, divide into containers without ranch
Notes
-
Honey Sriracha: ⅓ cup sriracha + 3 tbsp honey
-
Vegetarian: Swap chicken for drained, dry chickpeas
-
Extra Cheesy: Toss with blue cheese while hot
-
Everything Bagel Boost: Add 1 tsp Everything seasoning to cauliflower
Nutritional Information (Per Serving, Approximate)
Servings: 4 | Prep Time: 10 mins | Cook Time: 25 mins | Total Time: 35 mins
Calories: ~310 | Protein: 28g | Carbohydrates: 10g | Fiber: 3g | Fat: 18g
Note: Nutrition calculated using chicken breast and 2 tbsp of ranch
Final Thoughts
This Buffalo Ranch Chicken & Cauliflower isn’t just a recipe—it’s a reminder. A reminder that the most satisfying meals don’t require complexity or hours of effort. They just require a little creativity, a few bold flavors, and the understanding that good food is meant to be shared, adapted, and enjoyed without stress.
From that chaotic game day to your quiet Tuesday night, this dish has proven its worth. It’s the peace treaty between craving and convenience, between indulgence and balance. It’s proof that a humble head of cauliflower can be just as exciting as a chicken wing, and that a single sheet pan can solve a week’s worth of “what’s for dinner?”
So, the next time you’re staring into the fridge, feeling that familiar dinner dread, remember this: You are moments away from something incredibly delicious. You have permission to keep it simple. You have permission to make it saucy, messy, and exactly what you’re craving. Most importantly, you have permission to enjoy the process—and the results.
Tie on that apron. Crank up the oven. Let the scent of roasting spices fill your kitchen. And when you pull that pan from the oven, glistening and glorious, remember that you didn’t just make dinner. You made a memory, you made tomorrow’s lunch, and you made your taste buds very, very happy.
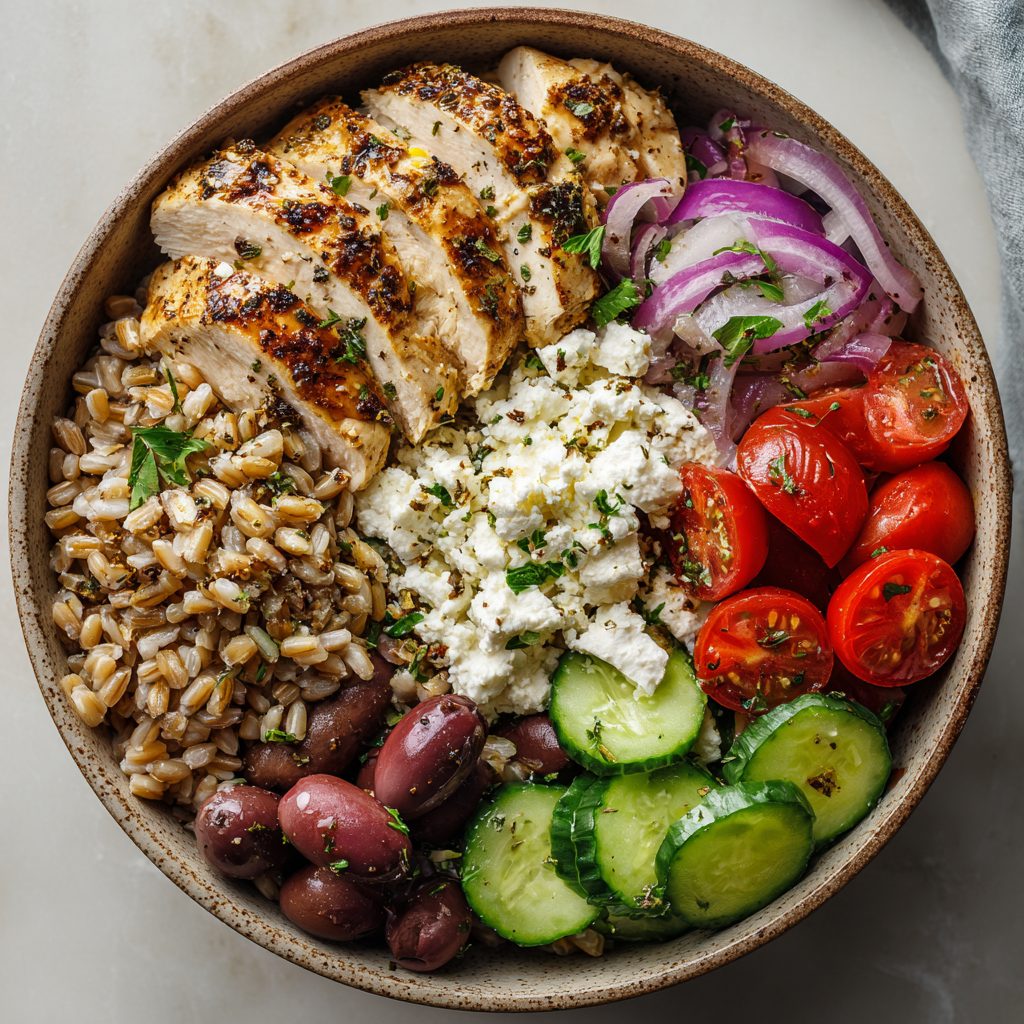
Greek Chicken Power Bowl : A Mediterranean Meal with Farro, Feta & Olives
Greek Chicken Power Bowl: Your Passport to a Sunny, Satisfying Meal
Hey there, friend! Come on in, grab an apron, and let’s get something straight: healthy eating should never, ever be boring. It shouldn’t taste like a chore or leave you staring into the fridge an hour later. It should be a celebration—a burst of color and flavor that makes you feel amazing from the inside out. That’s exactly the spirit behind this Greek Chicken Power Bowl.
Picture this: tender, herb-infused chicken resting on a bed of nutty, chewy farro. All around it, a confetti of crisp cucumbers, juicy tomatoes, and briny Kalamata olives. A generous snowfall of creamy feta cheese ties it all together, with a bright squeeze of lemon to make every single flavor sing. This isn’t just a salad; it’s a textural masterpiece, a protein-packed powerhouse, and your new favorite excuse to eat the rainbow.
Whether you’re a meal-prep pro looking for your next weekly hero, or you need a stunning, no-fuss dinner that’ll have everyone asking for seconds, this bowl is your answer. It’s flexible, forgiving, and overflowing with the sun-drenched tastes of the Mediterranean. So, let’s ditch the dull and build something beautiful together. I promise, with every forkful of this Greek Chicken Power Bowl, you’ll taste the sunshine.
The Memory That Seasoned This Bowl
This recipe didn’t start in a test kitchen; it started on a tiny, wobbly table overlooking the Aegean Sea. Years ago, I found myself in a family-run taverna on a Greek island, miles from any tourist spot. Lunch was a simple, shared affair: a platter of charcoal-grilled chicken, a mountain of horiatiki salad, a block of feta, and a basket of bread to soak up every last drop of oregano-infused oil.
What struck me wasn’t just the taste (which was incredible), but the feeling. It was food meant for sharing, for lingering over, for fueling long conversations and longer afternoons. No single element was complicated, but together, they were magic. I came home dreaming of how to capture that feeling in a single, satisfying bowl I could enjoy any day of the week. This Greek Chicken Power Bowl is my love letter to that memory—a way to pack all that communal joy, bright flavor, and wholesome fuel into one glorious, personal-sized feast. It’s my kitchen’s version of a sun-soaked Greek afternoon.
Your Mediterranean Toolkit: Ingredients & Insights
Great food starts with great ingredients, but don’t let that intimidate you! Here’s exactly what you need and why, plus my favorite swaps to make this bowl uniquely yours. Think of this as our pre-cooking chat over a cup of coffee.
For the Legendary Chicken:
- 1½ lbs boneless chicken breasts or thighs: Thighs are my personal favorite for guaranteed juiciness and richer flavor, but breasts are fantastic for a leaner option. Chef’s Tip: If using breasts, pound them to an even thickness for perfect, non-dry cooking.
- Juice of 1 lemon: Fresh is non-negotiable here! It tenderizes the chicken and gives it that essential Greek zing.
- 2 tbsp olive oil: The glue of our marinade. Use a good extra-virgin olive oil if you can—it adds fruitiness.
- 2 garlic cloves, minced: Flavor foundation. Feel free to add an extra clove if you’re a garlic enthusiast (I always am).
- 1 tsp dried oregano: The signature scent of Greek cuisine. Rub it between your palms before adding to wake up its oils.
- ½ tsp salt & ¼ tsp black pepper: The essential seasoners. Don’t be shy!
For the Bowl Foundation & Confetti:
- 1 cup farro: I adore farro for its hearty, nutty chew and great fiber content. Substitute Tip: Quinoa, brown rice, or even couscous work beautifully here.
- 2¼ cups water or broth: Cooking your farro in low-sodium chicken or vegetable broth instead of water adds a lovely layer of savory depth.
- ½ cup cherry tomatoes, halved: Look for the sweetest you can find! Heirlooms or sun golds add incredible color.
- ½ cup cucumber, chopped: For the best crunch, use an English or Persian cucumber so you don’t have to peel or seed it.
- ¼ cup red onion, thinly sliced: Soaking the slices in ice water for 10 minutes tames their sharpness and gives them a great crisp bite.
- ¼ cup Kalamata olives, halved: Their bold, briny flavor is key. No Kalamatas? Any good black olive will do in a pinch.
- ½ cup crumbled feta cheese: Seek out a block of Greek feta in brine and crumble it yourself—it’s creamier, tangier, and far superior to pre-crumbled.
Optional, But Highly Recommended Add-Ons:
- Tzatziki or hummus: A dollop on the side adds cool creaminess. My homemade tzatziki is a game-changer!
- Fresh dill or parsley: A handful of fresh herbs sprinkled on top makes the whole bowl look and taste garden-fresh.
- Lemon wedges: That final squeeze is like turning up the brightness on a photo. Don’t skip it!
Let’s Build the Magic: Step-by-Step
Ready? Let’s turn these gorgeous ingredients into your new favorite meal. I’ll walk you through each step with all my favorite kitchen hacks to ensure success.
Step 1: Marinate the Chicken (The Flavor Infusion)
In a bowl or large zip-top bag, combine the lemon juice, olive oil, minced garlic, oregano, salt, and pepper. Give it a good whisk or squish. Add your chicken, making sure every nook and cranny gets coated. Seal it up and let it hang out in the fridge for at least 30 minutes, or up to 2 hours. Chef’s Secret: If you’re in a rush, even 15 minutes will help! Just leave it at room temp during that short marinate to take the chill off, which helps it cook more evenly.
Step 2: Conquer the Farro (The Hearty Base)
While the chicken marinates, rinse your farro under cold water in a fine-mesh strainer. This removes any dust. Add it to a saucepan with your water or broth. Bring to a boil, then reduce the heat to a low simmer, cover, and let it cook for 25-30 minutes. You’re looking for it to be tender but still pleasantly chewy (al dente!). Drain any excess liquid and fluff it with a fork. Pro-Tip: Spread the cooked farro on a baking sheet to cool quickly if you’re assembling bowls right away—this prevents it from getting soggy.
Step 3: Cook the Chicken to Perfection (The Star of the Show)
Heat a grill pan, outdoor grill, or regular skillet over medium-high heat. Add a tiny drizzle of oil. Remove the chicken from the marinade (let the excess drip off!) and cook for about 6-7 minutes per side, or until deeply golden and cooked through (internal temp of 165°F). This is crucial: Once it’s done, transfer the chicken to a cutting board and LET IT REST for 5-7 minutes. This allows the juices to redistribute, guaranteeing every slice is succulent, not dry. Then, slice it against the grain into beautiful strips.
Step 4: The Grand Assembly (The Fun Part!)
Now for my favorite moment! In each bowl, start with a generous base of fluffy farro. Artfully arrange your sliced chicken, halved tomatoes, chopped cucumber, drained red onions, and halved olives over the top. The goal is a little bit of everything in each bite. Finally, crown your creation with a hearty handful of that glorious crumbled feta cheese.
Step 5: The Finishing Touches (Make it Shine)
Grab those optional add-ons. A big dollop of cool tzatziki, a sprinkle of fresh dill or parsley, and a lemon wedge on the side for squeezing. And just like that, you’ve created a restaurant-worthy masterpiece right in your own kitchen.
How to Serve Your Greek Masterpiece
Presentation is part of the joy! I love using wide, shallow bowls so all the colors can shine. Serve it immediately while the chicken is still warm and the farro is at room temp—that contrast is divine. This dish is a complete meal in a bowl, so you don’t need much else. Maybe just some warm pita bread for scooping and a crisp, cold glass of white wine or sparkling water with lemon. For a gathering, set up a “power bowl bar” with all the components in separate dishes and let everyone build their own—it’s a surefire hit!
Make It Your Own: Delicious Variations
The beauty of a bowl is its flexibility! Here are a few twists to keep things exciting:
- Lemon-Herb Shrimp: Swap the chicken for large shrimp marinated in lemon, garlic, and a pinch of red pepper flakes. Cook quickly for 2-3 minutes per side.
- Falafel Power Bowl (Vegan): Use crispy baked or pan-fried falafel in place of chicken. Swap the feta for a vegan alternative or extra olives and a drizzle of tahini sauce.
- Greek Steak Bowl: Use sliced grilled flank or skirt steak marinated in the same mix. It adds a rich, beefy dimension.
- “Everything But” Grain-Free Bowl: Skip the farro and use a big bed of chopped romaine lettuce or massaged kale as the base for a super-light version.
- Summer Veggie Delight: Add roasted red peppers, artichoke hearts, or grilled zucchini for even more Mediterranean veggie power.
From My Kitchen to Yours: Chef’s Notes
This recipe is a living, breathing thing in my house! It started as a simple lunch and has evolved into my most-requested meal prep recipe. I’ve made it in a tiny apartment kitchen with a single frying pan and in my current, slightly-less-messy kitchen for a crowd of friends. One time, I accidentally used mint instead of dill (the pots looked similar on my sunny windowsill!). It was a happy accident—the mint was surprisingly refreshing! The moral? Don’t stress. This bowl is forgiving. The core principle is the combination of savory protein, hearty grain, fresh crunch, briny pops, and creamy cheese. As long as you have those elements, you really can’t go wrong. It’s a recipe that builds confidence, and that’s my favorite kind to share.
Your Questions, Answered: FAQs & Troubleshooting
Can I make this ahead for meal prep?
Absolutely, and I highly recommend it! This is a meal prep superstar. Store each component separately in airtight containers in the fridge for up to 4 days. Keep the chicken whole and slice it just before assembling to keep it juicy. Assemble your bowls the morning you plan to eat them.
My farro turned out mushy. What happened?
This usually means it was cooked with too much liquid or for too long. Farro brands can vary, so start checking at the 20-minute mark. You want it tender but with a definite bite. Next time, try the “pasta method”: cook it in a large pot of boiling salted water until al dente, then drain.
The chicken is cooking too fast on the outside but is still raw inside.
Your heat is too high! Lower it to medium. Also, ensure your chicken is at an even thickness (pounding helps!). If it’s browning too quickly, you can finish cooking it in a 375°F oven for 5-10 minutes after searing.
I’m not a fan of raw onion. Any ideas?
Totally get it! Try quickly pickling them: soak the thin slices in a mix of equal parts red wine vinegar and warm water with a pinch of sugar and salt for 20 minutes. They become tangy, sweet, and much milder. Or, simply leave them out!
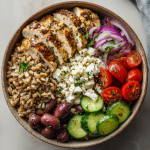
Greek Chicken Power Bowl : A Mediterranean Meal with Farro, Feta & Olives
Description
Healthy food should feel exciting—not like a compromise. This Greek Chicken Power Bowl delivers bold Mediterranean flavor, vibrant color, and serious staying power. Juicy lemon-oregano chicken, chewy farro, crisp vegetables, briny olives, and creamy feta come together in one nourishing, crave-worthy bowl.
Ingredients
Lemon-Oregano Chicken
-
1½ lb boneless chicken breasts or thighs
-
Juice of 1 lemon
-
2 tbsp extra-virgin olive oil
-
2 garlic cloves, minced
-
1 tsp dried oregano
-
½ tsp salt
-
¼ tsp black pepper
Power Bowl Base
-
1 cup farro (uncooked)
-
2¼ cups water or low-sodium broth
-
½ cup cherry tomatoes, halved
-
½ cup cucumber, chopped
-
¼ cup red onion, thinly sliced
-
¼ cup Kalamata olives, halved
-
½ cup feta cheese, crumbled
Optional (But Highly Recommended)
-
Tzatziki or hummus
-
Fresh dill or parsley
-
Lemon wedges
Instructions
In a bowl or zip-top bag, whisk together lemon juice, olive oil, garlic, oregano, salt, and pepper. Add chicken and coat well.
Marinate 30 minutes to 2 hours in the refrigerator.
Quick Tip: Short on time? Even 15 minutes helps—just let the chicken sit at room temperature for more even cooking.
Rinse farro under cold water. Add to a saucepan with water or broth.
Bring to a boil, reduce to a simmer, cover, and cook 25–30 minutes until tender but chewy.
Drain excess liquid and fluff with a fork.
Heat a grill pan or skillet over medium-high heat with a light drizzle of oil.
Cook chicken 6–7 minutes per side until golden and internal temperature reaches 165°F (74°C).
Rest 5 minutes, then slice against the grain.
Divide farro among bowls. Top with sliced chicken, tomatoes, cucumber, onion, olives, and feta.
Finish with tzatziki, fresh herbs, and a squeeze of lemon if desired.
Notes
-
Chicken thighs stay juicier; breasts are leaner—both work
-
Soak red onions in ice water for 10 minutes to mellow the bite
-
Cook farro in broth for extra depth
-
Don’t skip resting the chicken—it keeps it juicy
Nutritional Information (Per Serving)
Note: This is an estimate for 1 bowl (using chicken breast, water, and including all base ingredients).
- Calories: ~480
- Protein: 38g
- Carbohydrates: 35g
- Fat: 22g
- Fiber: 6g
This bowl is a fantastic balance of macronutrients, providing long-lasting energy and satisfaction thanks to the high protein and fiber content. It’s a meal that truly fuels you!
Final Thoughts: More Than a Bowl, a Feeling on a Plate
As we wrap up our journey through this Greek Chicken Power Bowl, I hope you see it for what it truly is: more than just a recipe. It’s a template for joy, a formula for feeling nourished and vibrant.
This bowl proves that eating well is an act of self-care, not sacrifice. It’s a reminder that the most satisfying meals are built on contrast: warm and cool, creamy and crunchy, savory and bright. Each component has a purpose, and together, they create something greater than the sum of its parts.
Whether you follow the recipe to the letter or embark on your own variation, remember the spirit it comes from: simplicity, freshness, and the shared pleasure of a meal made with intention. It’s designed to be forgiving, to fit into your busy life, and to deliver a burst of Mediterranean sunshine straight to your kitchen, no matter the weather outside.
So, here’s my final wish for you: Don’t just make this bowl. Own it. Let it be your canvas. Share it with someone you love, pack it for a great lunch, or savor it quietly after a long day. Let the process of building it be as enjoyable as eating it.
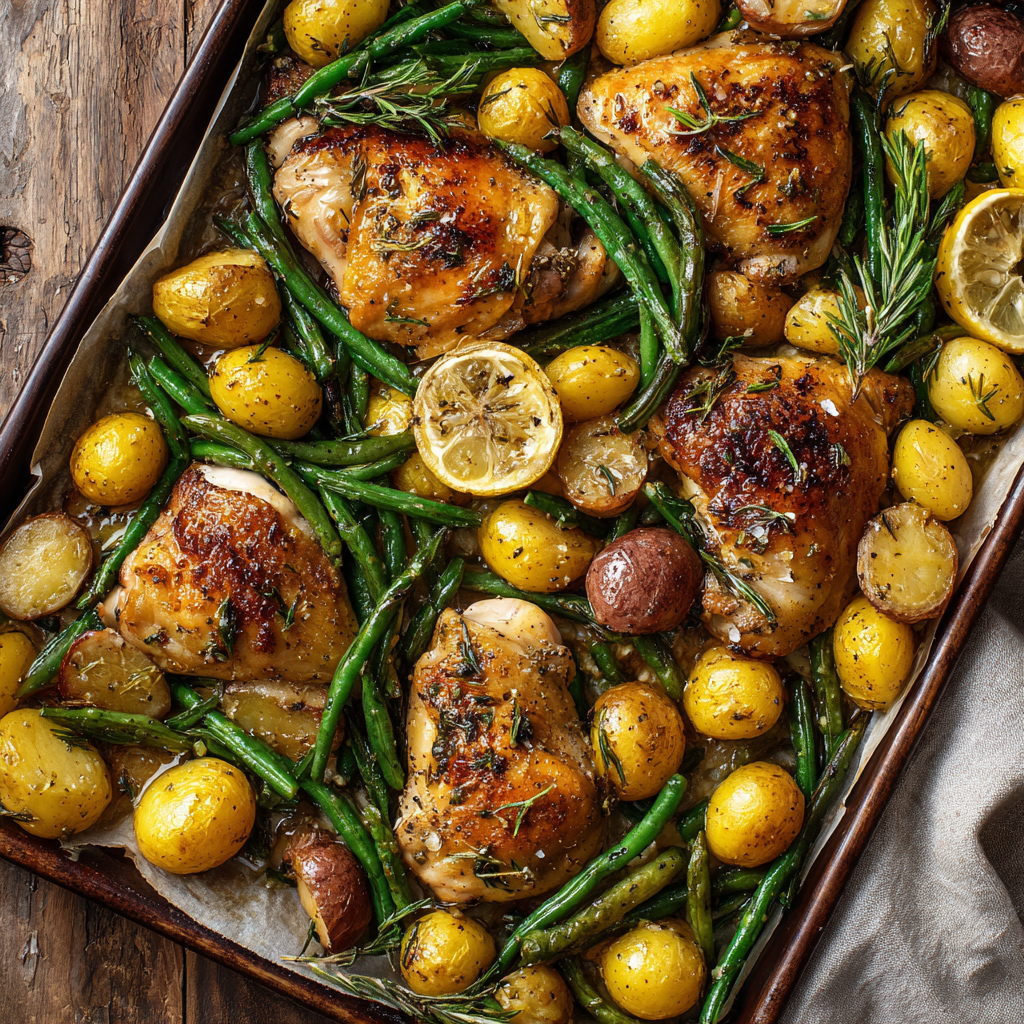
Sheet Pan Chicken, Potatoes & Green Beans : Garlic Butter or Dijon-Maple Glaze
Sheet Pan Chicken, Potatoes & Green Beans: Your New Favorite One-Pan Wonder
Hey there, friend! Come on in, grab an apron, and let’s get something delicious happening. You know those nights when you’re staring into the fridge, dreaming of a meal that’s equal parts comforting, flavorful, and actually doable without creating a mountain of dishes? Yeah, I have those nights too. All the time, actually. That’s exactly why this Sheet Pan Chicken, Potatoes & Green Beans recipe has become my ultimate kitchen sidekick.
This isn’t just about throwing things on a pan (though, let’s be honest, that’s a beautiful part of it). It’s about creating a symphony of textures and flavors that actually cook perfectly together. We’re talking juicy, herb-kissed chicken, potatoes with those irresistible crispy edges, and green beans that are tender but still have a snap. And the best part? You get to choose your own adventure: the rich, cozy embrace of Garlic Butter or the tangy, sweet kick of a Dijon-Maple Glaze. Both are incredible.
This recipe is for the busy parent, the tired professional, the new cook finding their way, or the seasoned pro who just wants a brilliant, no-fuss dinner. It’s proof that “simple” doesn’t have to mean “boring.” It’s about working smart in the kitchen so you can spend less time cleaning and more time enjoying that glorious smell filling your home. So, preheat that oven. Let’s turn a few humble ingredients into a meal that feels like a hug on a plate.
The Dinner That Saved My Sanity (More Than Once)
I have to tell you about the first time this recipe truly became a legend in my house. It was a chaotic Wednesday a few years back. My partner was working late, I’d just gotten home from a hectic day, and my then-toddler was… let’s say, enthusiastically demonstrating the “terrible twos.” The idea of chopping, stirring, and babysitting multiple pots felt utterly impossible. I had chicken thighs, a bag of baby potatoes, and some green beans that were politely suggesting I use them soon.
In a moment of desperation (and genius, I now realize), I just threw it all on a sheet pan. I whisked together some mustard and maple syrup because it sounded good, drizzled it over everything, and crossed my fingers. 35 minutes later, the oven timer dinged, and magic had happened. The kitchen smelled incredible, the food looked beautiful, and I had exactly one pan to wash. We sat down to a peaceful, delicious dinner, and just like that, the chaos of the day melted away. That meal became our reset button. It taught me that a great dinner doesn’t need complexity; it just needs heart, a few good ingredients, and a really good sheet pan.
Gathering Your Flavor Team
Here’s what you’ll need to feed about 4 happy people. The beauty is in the flexibility—I’ve added my favorite chef-y notes and swaps so you can make it your own!
- 4 boneless, skinless chicken thighs or breasts: Thighs are my go-to for guaranteed juiciness and more forgiving cook time, but breasts work perfectly if that’s your preference! Just keep an eye on them.
- 1 lb baby potatoes, halved: No peeling needed! Their thin skins get wonderfully crispy. Can’t find babies? Dice a couple of Yukon Golds or red potatoes into 1-inch chunks.
- 2 cups fresh green beans, trimmed: Look for beans that are bright green and snap when bent. If they’re very long, give them a quick snap in half. Frozen will work in a pinch, but add them later so they don’t get mushy.
- 2 tablespoons olive oil: Our basic coating for the veggies. Avocado oil works great here too for its high smoke point.
- Salt and pepper to taste: Don’t be shy! Seasoning every layer is the #1 secret to restaurant-quality food at home.
Choose Your Flavor Path:
For the Garlic Butter Option (Classic & Cozy):
- 3 tablespoons melted butter: Salted or unsalted is fine. For a dairy-free version, a high-quality olive oil or vegan butter works beautifully.
- 3 garlic cloves, minced: Fresh is best for that pungent, aromatic punch. In a real hurry? ½ teaspoon of garlic powder can sub in.
- 1 teaspoon Italian seasoning: A lovely herb blend. No blend? Use ½ tsp dried oregano and ½ tsp dried thyme.
For the Dijon-Maple Option (Tangy & Sweet):
- 2 tablespoons Dijon mustard: Adds a fantastic tangy depth. Grainy mustard is a fun textured swap!
- 2 tablespoons pure maple syrup: The real stuff, please! It makes all the difference. Honey is a great substitute.
- 1 tablespoon olive oil: Helps the glaze coat and carry the flavors.
- 1 teaspoon apple cider vinegar: A tiny bit of acid brightens up the whole dish. Lemon juice works too.
Let’s Build Your One-Pan Masterpiece
Ready? This is where the fun happens. I’ll walk you through every step with the little hacks I’ve learned over countless times making this.
- Preheat & Prep: Crank your oven to 400°F (200°C). This hot temperature is key for getting crispy potatoes and juicy chicken. Line your sheet pan with parchment paper or foil. (Parchment is my favorite—nothing sticks, and it makes cleanup a dream).Chef’s Tip: If you want EXTRA crispiness, skip the liner and toss your potatoes directly on a lightly oiled pan. More cleanup, but wow, those potato edges!
- Potato Head Start: In a bowl, toss your halved baby potatoes with the 2 tablespoons of olive oil, a good pinch of salt, and a few grinds of black pepper. Spread them out on one-third of your prepared sheet pan. Pop them in the oven for 10 minutes.Chef’s Tip: Giving the potatoes a solo bake head start is the game-changer! It ensures they get perfectly tender inside and crispy outside by the time everything else is done.
- Whisk Your Glaze: While the potatoes start roasting, mix your chosen sauce. In a small bowl, whisk together either all the Garlic Butter ingredients or all the Dijon-Maple ingredients until smooth and lovely.Chef’s Tip: Taste your glaze! Adjust it to your liking. Want more garlic? Add it! Prefer it sweeter? A tiny extra drizzle of maple syrup. This is your flavor profile—own it.
- Assemble the Pan: Carefully pull the hot pan with the par-cooked potatoes out of the oven. Push the potatoes to one side. Place your chicken pieces on the empty middle section of the pan. Brush or spoon a generous amount of your glaze over each piece of chicken. Finally, place your trimmed green beans on the remaining empty space. Drizzle any remaining glaze over the beans and chicken.Chef’s Hack: Try to keep everything in a single layer without overcrowding. If the pan looks packed, use two pans! Crowding steams the food instead of roasting it, and we want that beautiful caramelization.
- The Final Roast: Slide the loaded pan back into the oven. Roast for 20-25 minutes, or until the chicken is cooked through (internal temperature of 165°F) and the potatoes are fork-tender and golden.Chef’s Tip: No need to baste or flip! The high heat does the work. If you’re using chicken breasts, check them at 20 minutes to prevent dryness.
- Finish & Serve: For an extra flavor boost, spoon any pan juices over the chicken and veggies before serving. Let the chicken rest for 2-3 minutes on the pan—this lets the juices redistribute so every bite is moist.Final Touch: A fresh sprinkle of chopped parsley, a squeeze of lemon, or even a flaky sea salt finish takes this from “weeknight dinner” to “restaurant-worthy.”
How to Serve It Up in Style
You can absolutely serve this straight from the pan (my preferred method for maximum coziness), but if you want to plate it up, here’s how I love to do it. Use a big spatula to lift a portion of each element. Place a piece of chicken slightly off-center on a warm plate or shallow bowl. Artfully pile the crispy potatoes and green beans alongside. Drizzle any of those incredible golden pan juices left on the sheet over the top. That’s it! It’s a complete, balanced meal that looks like you spent hours, not 45 minutes.
Make It Your Own: 5 Delicious Twists
The basic formula is your canvas! Here are some of my favorite ways to play with it:
- Lemon-Herb Fancy: Use the garlic butter base, but add the zest of one lemon and swap Italian seasoning for herbes de Provence. Add lemon slices to the pan to roast alongside everything.
- Spicy Harissa & Honey: Mix 1 tbsp harissa paste with 2 tbsp honey and 1 tbsp olive oil. Brush it on for a smoky, sweet, and spicy kick.
- Everything Bagel: Toss the potatoes and green beans in oil and a generous coating of everything bagel seasoning before roasting. Brush chicken with a simple garlic-olive oil glaze.
- Vegan/Pescatarian Swap: Replace chicken with a block of extra-firm tofu (pressed and cubed) or thick fillets of salmon. For tofu, use the Dijon-maple glaze—it’s phenomenal!
- Seasonal Veggie Swap: Swap green beans for asparagus, broccoli florets, or sliced bell peppers. Just adjust roasting time if needed (broccoli cooks faster).
A Few More Thoughts From My Kitchen
This recipe has legs, I tell you! Over the years, I’ve made it for new parents, busy friends, and even as part of a big holiday spread. It scales up beautifully for a crowd—just use multiple sheet pans and rotate their positions in the oven halfway through.
One funny kitchen fail? I once tried to shortcut the potato par-cooking step and threw everything in at once. The chicken was done in 20 minutes, but the potatoes were still hard little rocks. Lesson painfully (and hungrily) learned: give the spuds their head start! Now, I use that 10-minute window to tidy the kitchen, set the table, or pour a glass of wine. It’s become my favorite little pocket of calm in the dinner-making hustle.
The best evolution has been seeing how my readers make it their own. Tag me on social when you make it! I love seeing your #onepanwonders.
Your Questions, Answered
Q: Can I use chicken drumsticks or bone-in thighs instead?
A: Absolutely! Bone-in, skin-on pieces are fantastic. You may need to add 5-10 minutes to the cook time. For extra-crispy skin, you can broil for the last 1-2 minutes (watch it closely!).
Q: My vegetables are burning before my chicken is done. What happened?
A: This usually means your pieces are cut too small or your oven runs hot. Next time, cut potatoes a bit larger (halved baby potatoes are perfect). You can also tent the chicken with a small piece of foil if the top is browning too fast, or move the pan to a lower rack.
Q: Can I prep this ahead of time?
A: For sure! You can chop the potatoes and beans, and make the glaze, storing them separately in the fridge up to a day ahead. When ready, let the potatoes come to room temp for 10 minutes, then start at Step 2. You can also assemble the whole raw pan, cover it tightly, and refrigerate for a few hours before roasting (add 2-3 minutes to the cook time if it goes in cold).
Q: Is the Dijon-Maple glaze kid-friendly?
A: In my experience, yes! The mustard mellows and sweetens as it roasts. My nephew, who is suspicious of all sauces, gobbles this up. If you’re unsure, you can brush a little less glaze on their piece or use half mustard, half mayo for a milder flavor.
Nutritional Information (Approximate, per serving)
This is a general estimate based on the Garlic Butter version with chicken thighs. Values will vary with ingredient choices and specific portions.
- Calories: ~400-450
- Protein: 32g
- Carbohydrates: 25g
- Fat: 18g
- Fiber: 4g
Remember: I’m a cook, not a registered dietitian. For precise dietary needs, use your favorite nutrition calculator with your exact ingredients.
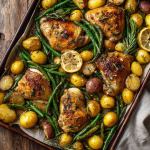
Sheet Pan Chicken, Potatoes & Green Beans : Garlic Butter or Dijon-Maple Glaze
Description
SSS
When dinner needs to be comforting, flavorful, and low-effort, this Sheet Pan Chicken, Potatoes & Green Beans is the answer. Everything roasts together on one pan, creating juicy chicken, crispy potatoes, and tender green beans—with almost no cleanup. Choose between a cozy Garlic Butter finish or a tangy-sweet Dijon Maple glaze. Either way, this is weeknight cooking at its best.
Ingredients
Main
-
4 boneless, skinless chicken thighs or breasts
-
1 lb baby potatoes, halved
-
2 cups fresh green beans, trimmed
-
2 tbsp olive oil
-
Salt & black pepper, to taste
Choose One Flavor Option
Garlic Butter
-
3 tbsp melted butter
-
3 cloves garlic, minced
-
1 tsp Italian seasoning
Dijon Maple
-
2 tbsp Dijon mustard
-
2 tbsp pure maple syrup (or honey)
-
1 tbsp olive oil
-
1 tsp apple cider vinegar or lemon juice
Instructions
-
Preheat Oven
Preheat to 400°F (200°C). Line a large sheet pan with parchment or foil. -
Start the Potatoes
Toss potatoes with olive oil, salt, and pepper. Spread on the pan and roast 10 minutes. -
Make the Glaze
While potatoes roast, whisk together your chosen sauce (Garlic Butter or Dijon Maple). -
Assemble the Pan
Remove pan from oven. Push potatoes to one side. Add chicken to the center and green beans to the other side. Spoon or brush glaze over chicken and beans. -
Roast
Return to oven and roast 20–25 minutes, until chicken reaches 165°F (74°C) and potatoes are golden and tender. -
Serve
Rest chicken 2–3 minutes. Spoon pan juices over everything and serve hot.
Notes
-
Give potatoes a head start so they finish crispy, not undercooked.
-
Use chicken thighs for extra juiciness and forgiving cook time.
-
Don’t overcrowd the pan—use two pans if needed for proper roasting.
-
Extra flavor boost: Finish with fresh parsley, lemon juice, or flaky salt.
-
Veggie swaps: Asparagus, broccoli, or bell peppers work great.
Final Thoughts
This sheet pan dinner isn’t just a recipe—it’s a reminder that good food doesn’t have to be complicated. It’s about reclaiming your evenings, nourishing your people, and sitting down to something truly satisfying without drowning in dishes.
What I love most is how it adapts to you. Tired? Go with the cozy garlic butter. Craving something bright? The Dijon-maple wakes up your taste buds. Clean out the veggie drawer? Toss in what you have. This recipe is a trusted friend that says, “I’ve got you,” on the days you need it most.
So here’s to simple, flavorful, one-pan magic. May your chicken be juicy, your potatoes crispy, and your evenings a little more peaceful because of it.
Now, go preheat that oven. Your new favorite dinner is waiting.
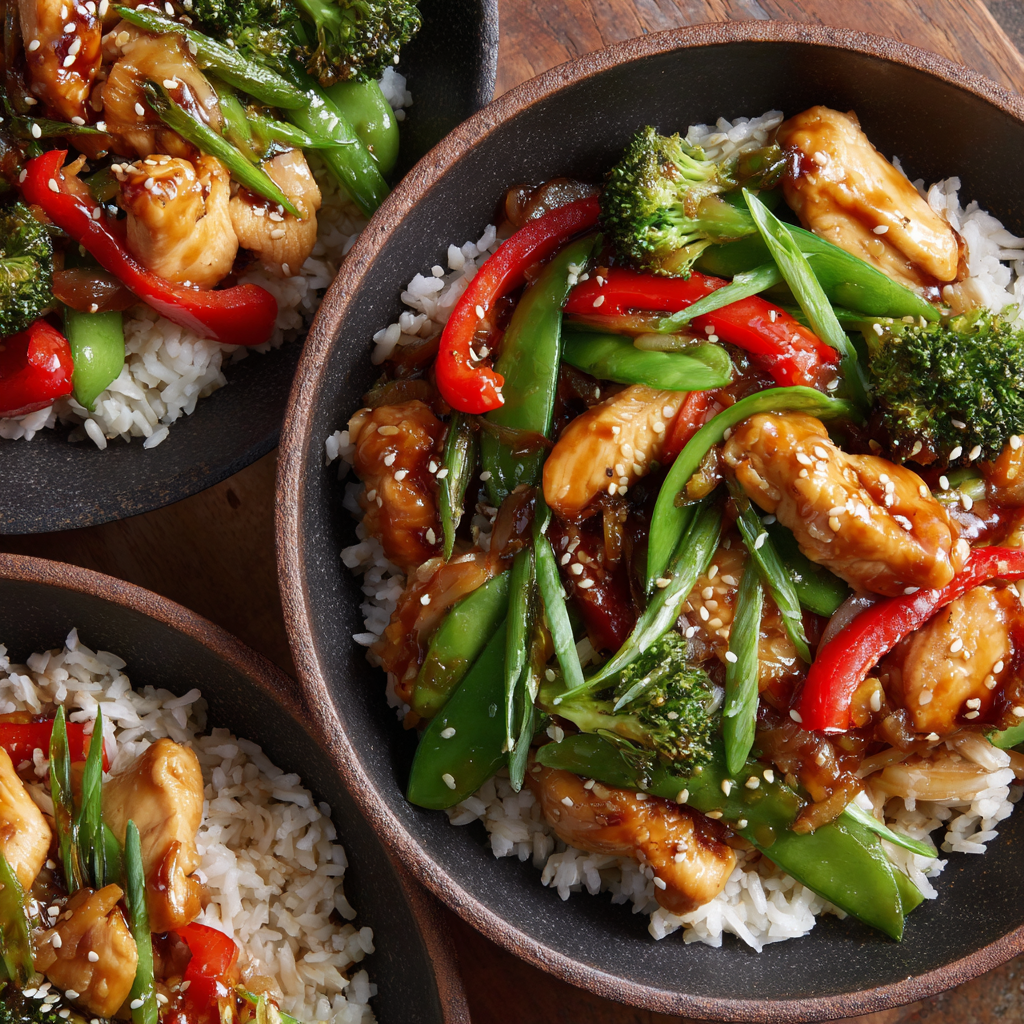
Teriyaki Chicken & Veggies Bowl : Bell Peppers, Snap Peas & Brown Rice
Skip the Takeout Menu & Turn Your Kitchen Into a Flavor Escape
Hey friends! Olivia here. Can we talk about that 5:30pm feeling for a second? You know the one—where you’re hungry, your people are hungry, and the thought of figuring out dinner feels like solving a complex puzzle. Your phone feels heavier than a cast-iron skillet as you thumb through delivery apps, wondering if that $35 teriyaki order will arrive lukewarm in 45 minutes… again.
I’ve been there more times than I care to admit. But here’s the secret I’ve discovered: the solution to that “takeout tug-of-war” is often faster, fresher, and more satisfying than waiting for a driver. It’s already in your kitchen. It’s about taking control of the flavor, knowing exactly what’s going into your food, and creating something vibrant that makes you feel amazing after eating it. And it can all happen in about the time it takes to watch a sitcom.
That’s why I’m SO excited to share this Teriyaki Chicken & Veggies Bowl with you today. This isn’t just another stir-fry recipe. This is your new weeknight MVP—a colorful, sticky-sweet, savory bowl of goodness that banishes boredom and delivers serious restaurant-quality flavor without the restaurant markup or mystery grease. We’re talking juicy chicken, crunchy snap peas, sweet bell peppers, all wrapped in a glossy, homemade teriyaki glaze that clings to every bite, served over a bed of nutty brown rice. It’s balanced, it’s beautiful, and I promise, it will make you feel like a weeknight kitchen hero. Let’s get cooking!
The Takeout Rebellion That Started in My Dorm Room
This recipe has roots in a tiny, terrible dorm kitchen. Picture this: a 19-year-old me, surviving mostly on cafeteria pizza and the one “fancy” teriyaki place down the street that drained my part-time job funds. I loved that sauce—the perfect balance of salty, sweet, and umami—but my wallet did not. One rainy Tuesday, fueled by a combination of hunger and stubbornness, I decided to crack the code.
My first attempt was… a learning experience. Let’s just say I learned that bottled soy sauce + a jar of apricot jam does not a teriyaki sauce make. It was a sticky, bizarrely fruity mess. But that failure sparked a mission. Over the next few years, through countless batches (some great, some dumped unceremoniously down the sink), I landed on this formula. It’s the culmination of all those experiments—simple, using pantry staples, and hitting every nostalgic note of that takeout favorite, but brighter and better. Now, every time I make it, I get a little thrill knowing I’ve won the takeout game. This bowl tastes like independence, flavor, and a whole lot of delicious victory.
Gathering Your Flavor Arsenal: Simple Ingredients, Big Impact
Here’s everything you’ll need to create magic for four hungry people. The beauty is in the simplicity—each ingredient plays a key role. Don’t stress if you need to swap something; I’ve got your back with tips!
- 1 lb boneless, skinless chicken breast, cut into bite-sized pieces – The protein star! Cutting it evenly is the chef’s secret to everything cooking at the same rate. Chef’s Swap: Thighs are fantastic here for even more juicy flavor. For a plant-based twist, extra-firm tofu or tempeh works wonders—just press it well first!
- 1 tablespoon olive oil or sesame oil – Our cooking fat. I love sesame oil for its deep, nutty aroma, but a good olive oil works perfectly. We’re using just enough to get a nice sear without deep-frying.
- 2 bell peppers (red, yellow, or orange), sliced – Color = flavor and nutrients! I use a mix for a rainbow bowl. The sweetness after a quick stir-fry is divine. Green peppers work too, but they have a sharper, less sweet taste.
- 1 cup sugar snap peas, trimmed – The crunch factor! Don’t skip trimming the tough string along the seam—it makes for a much more pleasant bite. No snap peas? Broccoli florets or asparagus cut into pieces are brilliant stand-ins.
- ¼ cup soy sauce – The salty, umami backbone of our sauce. Chef’s Note: For a gluten-free version, use tamari or a certified GF soy sauce. It works identically!
- 2 tablespoons honey or maple syrup – Our natural sweetener that creates that gorgeous glaze. Honey gives a floral note, maple syrup adds a warm, caramelly depth. Both are delicious.
- 1 tablespoon rice vinegar – The secret weapon! A little acidity balances the sweet and salty, making the whole flavor profile pop. In a pinch, apple cider vinegar or even a squeeze of fresh lime juice can save the day.
- 1 teaspoon sesame oil – Yes, more! This teaspoon goes in the sauce for fragrance. Toasted sesame oil is key here—it’s potent, so a little goes a very long way.
- 2 garlic cloves, minced & 1 teaspoon grated fresh ginger – The aromatic dream team. Fresh is non-negotiable for the brightest flavor! Keep a knob of ginger in your freezer—it grates like a dream straight from frozen.
- 1 teaspoon cornstarch + 1 tablespoon water (slurry) – Our thickening agent. Mixing the cornstarch with cold water first prevents clumps and gives us that glossy, restaurant-style sauce.
- 2 cups cooked brown rice & Optional: sesame seeds, sliced green onions – The base and the bling! Brown rice adds a nutty, chewy texture and extra fiber. The garnishes aren’t just pretty—a sprinkle of sesame seeds adds texture, and green onions give a fresh, oniony finish.
Let’s Cook! Your Foolproof, Flavor-Packed Guide
Ready to make it happen? Follow these steps, chat along with my tips, and you’ll have dinner on the table in a flash. We’re going to work efficiently, using just one pan for the main event. Apron on? Let’s go!
- Prep Like a Pro (Mise en Place). Before you even turn on the stove, cut your chicken into uniform 1-inch pieces and slice your peppers. Trim the snap peas. Whisk together all the sauce ingredients—the soy sauce, honey, rice vinegar, that 1 tsp sesame oil, garlic, and ginger—in a small bowl. In a separate tiny dish, mix the cornstarch and water into a smooth slurry. Having everything ready (the French call this mise en place) turns stir-frying from frantic to fun. Chef’s Hack: Use kitchen scissors to easily snip snap pea stems and trim any tough strings in one go!
- Sear the Chicken to Golden Perfection. Heat the 1 Tbsp oil in a large skillet or wok over medium-high heat. You want it nice and hot so the chicken sizzles on contact. Add the chicken in a single layer—don’t crowd the pan! We’re not steaming it; we’re getting a flavorful sear. Let it cook undisturbed for 2-3 minutes, then flip and cook for another 3-4 minutes until cooked through. Remove it to a clean plate. It will finish cooking later in the sauce, so don’t worry if it’s just shy of done. Tip: That golden-brown color = flavor. Don’t rush this step!
- Veggie Time – Quick & Crisp. In that same glorious pan (no need to wash it—all those browned bits are flavor!), add the peppers and snap peas. Stir-fry for 3-4 minutes. You want them vibrant and crisp-tender, not soggy. They should still have a happy snap! This high-heat, quick cook keeps their color and nutrients locked in.
- Bring the Family Together & Sauce It Up. Reduce the heat to medium. Add the cooked chicken back to the pan with the veggies. Give your pre-mixed sauce another quick whisk and pour it all over everything. Stir gently to coat. See how it immediately starts to bubble and smell incredible? That’s the magic happening.
- Create the Glaze. Give your cornstarch slurry one last stir (it settles) and drizzle it into the center of the pan. Stir continuously! Within 1-2 minutes, you’ll watch the sauce transform from thin and watery to luxuriously thick and glossy, coating every piece beautifully. Once it’s bubbling and thickened, you’re done! Chef’s Secret: If your sauce gets too thick, just add a tablespoon or two of water or chicken broth to thin it to your liking.
- Serve & Shine. Divide your fluffy brown rice among bowls. Spoon the glorious teriyaki chicken and veggies over the top. Drizzle with any extra sauce from the pan—that’s liquid gold! Finish with a sprinkle of sesame seeds and a confetti of green onions. That pop of green makes it Instagram-ready, but more importantly, it tastes fantastic.
How to Plate Your Masterpiece
Presentation is part of the joy! I love using wide, shallow bowls for this. Start with a fluffy bed of warm brown rice, then generously pile the teriyaki mixture right on top, letting some rice peek out at the edges. Spoon over every last bit of that sticky glaze. The final flourish is key: a vibrant sprinkle of sliced green onions and a pinch of sesame seeds. For a fun, interactive twist, serve the garnishes in little bowls on the table and let everyone customize their own bowl. It turns a simple dinner into a mini event!
Make It Your Own: 5 Delicious Twists
This recipe is a perfect canvas for creativity. Here are a few of my favorite ways to shake it up:
- Spicy Garlic Sriracha: Add 1-2 tablespoons of sriracha to the sauce and throw in an extra minced garlic clove. Fiery and fantastic!
- Pineapple Sweet & Sour Vibes: Add 1 cup of fresh pineapple chunks when you stir-fry the veggies. The caramelized pineapple with the teriyaki is a tropical dream.
- Gingery Citrus Zing: Swap the rice vinegar for fresh orange juice and add an extra teaspoon of grated ginger. Bright, zesty, and so refreshing.
- Go Fully Plant-Powered: Replace the chicken with cubed extra-firm tofu (pressed and pan-fried until crispy) or thick-sliced king oyster mushrooms. Use maple syrup instead of honey.
- “Everything But The Kitchen Sink” Veggie Bowl: Clean out the drawer! Thinly sliced carrots, broccoli florets, mushrooms, or baby corn all work beautifully. Just add harder veggies (like carrots) to the pan a minute or two before the softer ones.
From My Kitchen to Yours: A Few Parting Thoughts
This recipe has been a work-in-progress for over a decade, and it’s evolved with my own cooking journey. The biggest game-changer was discovering the cornstarch slurry trick—it took my sauce from “good” to “I could sell this” level. I also learned that high heat and not overcrowding the pan are the non-negotiable secrets to a great stir-fry, not some mysterious wok skill.
A funny memory: I once accidentally used smoked paprika instead of ginger (similar colored jars, pre-coffee mistake). It was… interesting. Not teriyaki, but it sparked a whole new recipe idea! The moral? Even “mistakes” can lead somewhere tasty. Don’t be afraid to play. This bowl is forgiving and flexible. Most of all, it’s meant to be a source of ease and joy in your kitchen, not stress. I hope it becomes a beloved repeat player in your home, just like it is in mine.
Your Questions, Answered!
Q: My sauce didn’t thicken! What happened?
A: No worries! This usually means the cornstarch slurry wasn’t mixed well with cold water first, or the sauce wasn’t bubbling enough when you added it. Cornstarch needs to come to a simmer to activate. Fix: Mix another teaspoon of cornstarch with 1 Tbsp cold water. Push the chicken and veggies to the side, pour the new slurry into the bubbling sauce in the center of the pan, and stir for 1-2 minutes until thick.
Q: Can I make this ahead of time?
A> Absolutely. You can cook the rice, chop the veggies, and mix the sauce (store separately) up to 2 days ahead. The actual stir-fry is best done fresh, but leftovers keep beautifully in the fridge for 3-4 days and reheat like a dream in the microwave or a skillet with a tiny splash of water.
Q: Is brown rice necessary? Can I use something else?
A> Not at all! While I love the fiber and chew of brown rice, white rice, quinoa, cauliflower rice, or even noodles (like soba or udon) are all fantastic bases. Cook your chosen base according to package directions.
Q: My chicken is tough. How do I keep it tender?
A> Two tips: 1) Don’t overcook it in the first sear. Remove it when it’s just cooked through (no pink inside). It will warm through again in the sauce. 2) Cutting against the grain of the chicken breast before cooking makes a huge difference in tenderness. Look for the lines running through the meat and slice perpendicular to them.
Teriyaki Chicken & Veggies Bowl : Bell Peppers, Snap Peas & Brown Rice
Description
Skip the takeout and make a fast, flavorful dinner right at home. These Teriyaki Chicken & Veggies Bowls deliver that sticky-sweet, savory taste you love—without the wait or extra cost. Juicy chicken, crisp vegetables, and a glossy homemade teriyaki sauce come together in one pan and land on a cozy bed of rice. Weeknight win!
Ingredients
For the Bowl
-
1 lb boneless, skinless chicken breast, cut into bite-size pieces
-
1 tbsp olive oil or sesame oil
-
2 bell peppers, sliced
-
1 cup sugar snap peas (or broccoli florets)
-
2 cups cooked brown rice (or white rice)
Teriyaki Sauce
-
¼ cup soy sauce (or tamari for gluten-free)
-
2 tbsp honey or maple syrup
-
1 tbsp rice vinegar
-
1 tsp toasted sesame oil
-
2 garlic cloves, minced
-
1 tsp fresh grated ginger
-
1 tsp cornstarch + 1 tbsp water (slurry)
Optional Toppings
-
Sesame seeds
-
Sliced green onions
Instructions
-
Make the Sauce
In a small bowl, whisk soy sauce, honey, rice vinegar, sesame oil, garlic, and ginger. Set aside. Mix cornstarch and water in a separate small bowl. -
Cook the Chicken
Heat oil in a large skillet over medium-high heat. Add chicken in a single layer and cook 5–6 minutes, stirring occasionally, until lightly golden and cooked through. Remove to a plate. -
Cook the Veggies
In the same pan, add bell peppers and snap peas. Stir-fry for 3–4 minutes until crisp-tender. -
Combine & Thicken
Return chicken to the pan. Pour in the sauce and bring to a gentle simmer. Stir in the cornstarch slurry and cook 1–2 minutes until thick and glossy. -
Serve
Spoon chicken and veggies over warm rice. Garnish with sesame seeds and green onions if desired.
Notes
-
Don’t overcrowd the pan when cooking chicken—this helps it brown instead of steam.
-
Fresh garlic and ginger give the best flavor; powdered versions work in a pinch.
-
Too thick? Add a splash of water to loosen the sauce.
-
Meal prep friendly: Keeps well in the fridge for up to 4 days.
Nutritional Information (Per Serving – Approximate)
Calories: 390 | Protein: 30g | Carbohydrates: 35g | Fiber: 4g | Sugar: 12g | Fat: 12g | Sodium: 900mg
Note: Nutrition is calculated using honey, olive oil, and includes ½ cup cooked brown rice per serving. Values are estimates and will vary with specific ingredients and substitutions.
Final Thoughts
Let’s be real—cooking at home isn’t just about saving money or eating healthier. It’s about reclaiming your kitchen as a place of creativity, calm, and connection. It’s about swapping that lukewarm, overpriced takeout box for a vibrant, steaming bowl you crafted with your own hands. The sizzle of the pan, the smell of garlic and ginger filling the air, the satisfaction of a sauce that glazes just right—these are small, tangible joys that turn a routine weeknight into something memorable.
This Teriyaki Chicken & Veggies Bowl is more than a recipe. It’s an invitation—to experiment, to adapt, to make something truly yours. Whether you’re cooking solo, for a partner, or for a hungry family, this dish meets you where you are. It’s proof that you don’t need fancy skills or expensive ingredients to eat well. You just need a few pantry staples, one trusty pan, and the courage to try.
So the next time that 5:30pm feeling hits, I hope you reach for your skillet instead of your phone. You have everything you need to create a flavor escape, right there in your kitchen. And remember: every great home cook started with a single meal. Let this bowl be yours.
Happy cooking, friends! I can’t wait to hear how it turns out.
With love and a well-seasoned skillet,
Olivia
Mediterranean Chicken Bowls: Lemon-Oregano Chicken with Quinoa, Hummus & Cucumber Salad
Mediterranean Chicken Bowls: Your New Favorite Feel-Good Feast
Hey there, friend! Come on in, pull up a stool. Can you smell that? It’s the scent of lemon and oregano sizzling in a pan, mingling with the earthy aroma of fluffy quinoa. It’s the promise of a meal that’s going to make you feel amazing. If your weeknight dinner routine has been feeling a little…beige…lately, I have the absolute perfect splash of color and flavor for you.
These Mediterranean Chicken Bowls are my love letter to easy, vibrant, and deeply satisfying eating. We’re talking juicy, herb-packed chicken, a confetti of crisp cucumber salad, creamy dreamy hummus, and wholesome quinoa all hanging out together in one beautiful bowl. It’s the kind of meal that looks like you fussed for hours but secretly comes together with minimal fuss. Whether you’re meal prepping for a winning week, need a dinner that’ll have everyone at the table saying “wow,” or just craving something that tastes as bright and sunny as a coastal village, this is your recipe. So, tie on your apron (the messy one is totally fine—mine is!), and let’s make something unforgettable.
The Memory That Inspired the Bowl
This recipe always takes me back to a sun-drenched afternoon years ago. I was visiting a friend’s family, and her yiayia (grandma) was in the kitchen, moving with a quiet, confident rhythm. There was no written recipe, just hands that knew. She grilled lemony chicken on a tiny balcony grill, the smoke scenting the air, while she casually tossed together a cucumber and onion salad that crackled with freshness. She served it all not on fancy plates, but in simple, mismatched bowls, with dollops of hummus and warm pitas on the side.
It wasn’t a fancy feast, but it was a perfect one. It was about abundance, freshness, and sharing. Every bite was a burst of life. When I got home, I tried to recreate that feeling—the balance, the zest, the cozy satisfaction. This bowl is my version. It captures that spirit of simple, sun-kissed ingredients coming together to create pure joy. It’s the magic of the Mediterranean, right in your kitchen.
Gathering Your Sunshine Ingredients
Here’s the beautiful part: every ingredient here is a superstar on its own, and together they create a symphony. I’ve added my little chef notes and swaps so you can make this bowl your own.
For the Lemon-Oregano Chicken:
- 1½ lbs boneless, skinless chicken thighs or breasts – I’m Team Thigh all the way here! They stay juicier and are more forgiving if you overcook them a tad. But breasts work beautifully too—just watch the cooking time.
- Juice of 1 lemon – Fresh is non-negotiable! It tenderizes the chicken and gives that iconic zing.
- 2 tbsp olive oil – The base of our marinade. Extra virgin gives the best flavor.
- 3 garlic cloves, minced – Because what’s a good marinade without garlic?
- 1½ tsp dried oregano – The classic Mediterranean herb. Rub it between your palms as you add it to wake up its oils!
- ½ tsp paprika – Adds a subtle sweetness and gorgeous color. Smoked paprika is a fun twist.
- Salt & pepper to taste – Season with confidence! This is how you build layers of flavor.
For the Fluffy Quinoa Base:
- 1 cup quinoa – A fantastic protein-packed grain. Rinse it in a fine-mesh strainer to remove its natural bitter coating (saponin).
- 2 cups water or broth – Using chicken or vegetable broth instead of water infuses the quinoa with extra savory flavor.
- Pinch of salt – Seasons it from the inside out.
For the Crisp Cucumber Salad:
- 1 cucumber, diced – I like English/hothouse cucumbers for fewer seeds and no need to peel.
- ½ red onion, thinly sliced – Soaking the slices in ice water for 10 minutes tames their bite and makes them extra crisp!
- 1 tbsp olive oil & 1 tbsp red wine vinegar or lemon juice – The simplest, brightest dressing.
- Salt & pepper to taste
- Optional: chopped parsley or dill – A handful of fresh herbs takes this from great to “oh wow.”
The Extras & Toppings (The Fun Part!):
- 1 cup hummus – Store-bought is perfect! Or go the extra mile with my easy homemade hummus.
- Lemon wedges – For an extra squeeze at the end.
- Optional toppings: feta crumbles, Kalamata olives, halved cherry tomatoes, chopped pepperoncini – This is where you play. Add what you love!
Let’s Build Your Bowl: Step-by-Step
Ready to cook? Let’s do this. We’ll marinate, cook, and assemble. It’s a relaxing kitchen dance.
Step 1: Marinate the Chicken (The Flavor Foundation)
In a bowl big enough to hold your chicken, whisk together the lemon juice, olive oil, minced garlic, oregano, paprika, a big pinch of salt, and a few grinds of pepper. Add your chicken pieces and toss them around, making sure every nook and cranny gets coated. Chef’s Hack: Use a zip-top bag for this! It’s less messy, and you can really massage the marinade in. Let it hang out in the fridge for at least 30 minutes. If you can plan ahead, even an hour or overnight will have that flavor singing! While it marinates, you can prep everything else.
Step 2: Cook the Quinoa (The Fluffy Pillow)
Remember to rinse your quinoa under cold water. Add it to a saucepan with your 2 cups of water or broth and a pinch of salt. Bring it to a boil, then immediately reduce the heat to the lowest setting, cover tightly, and let it simmer for 15 minutes. Key Tip: NO PEEKING! Lifting the lid lets the precious steam escape. After 15 minutes, take it off the heat, keep it covered, and let it steam for another 5 minutes. Then, fluff it with a fork. See? Perfect, separate, fluffy grains every time.
Step 3: Cook the Chicken (The Golden Star)
Heat a grill pan, skillet, or your actual grill over medium-high heat. Add a drizzle of oil. Take the chicken from the marinade (let excess drip off) and lay it in the hot pan. Listen to that sizzle! Cook for 6-7 minutes per side for thighs, 5-6 minutes per side for breasts, until they’re beautifully golden and cooked through (internal temp of 165°F). Biggest Chef Rule Here: DON’T move it around! Let it get that gorgeous sear. Once cooked, transfer it to a plate and let it rest for 5 minutes. This is crucial for juicy chicken! Then, slice it against the grain.
Step 4: Whisk Together the Cucumber Salad (The Fresh Crunch)
While the chicken rests, make your salad. Toss the diced cucumber, your rinsed and drained red onion slices, olive oil, vinegar, salt, pepper, and herbs in a bowl. That’s it. The simplicity is the magic.
Step 5: Assemble Your Masterpiece (The Best Part!)
Grab your favorite bowls. Start with a cozy bed of fluffy quinoa. Artfully (or just happily!) arrange slices of that gorgeous lemony chicken. Add a big scoop of the crunchy cucumber salad. Then, swoop a generous dollop of hummus right on the side. Scatter over your chosen toppings—feta, olives, tomatoes. Finish with a lemon wedge on the rim. Step back and admire. You did that!
How to Serve & Savor
Presentation is part of the fun! Use wide, shallow bowls so all the colorful components shine. I love to serve these with extra lemon wedges and maybe some warm pita bread or toasted naan on the side for scooping up every last bit of hummus and quinoa. It’s a complete, balanced meal in a bowl—no extra sides needed. Just good company and maybe a crisp glass of white wine.
Make It Your Own: Delicious Variations
- Vegetarian Power Bowl: Swap the chicken for crispy roasted chickpeas or baked falafel.
- Different Grain Base: Use couscous, farro, orzo, or even a bed of greens like spinach or arugula.
- Tzatziki Twist: Replace the hummus with a big spoonful of cool, creamy tzatziki sauce.
- Spice It Up: Add a pinch of red pepper flakes to the chicken marinade or a drizzle of harissa over the finished bowl.
- Seafood Swap: Grilled shrimp or lemon-herb salmon would be incredible here.
Olivia’s Kitchen Notes
This recipe is my weeknight warrior. I’ve made it probably a hundred times, and it’s evolved from a simple plate to these fun, deconstructed bowls. My family’s favorite addition? A quick pickle on the red onions—just submerge them in the vinegar with a pinch of sugar while you prep everything else. Game changer! And a funny story: I once was so eager to eat that I forgot to rinse the quinoa. Let’s just say my first bite was…surprisingly bitter. Now, I keep a sticky note on my pantry that just says “RINSE!” We live and we learn, right?
FAQs & Troubleshooting
Can I make this ahead for meal prep?
Absolutely! This is a meal prep champion. Store each component separately in airtight containers in the fridge for up to 4 days. The cucumber salad stays best when dressed just before eating, so keep its dressing separate. Assemble your bowls fresh each day.
My chicken turned out dry. What happened?
Two likely culprits: overcooking or not resting. Chicken breasts are lean and cook fast—use a meat thermometer and pull them at 165°F. And that 5-minute rest after cooking is NOT optional! It lets the juices redistribute back throughout the meat.
My quinoa is mushy/watery.
You might have used too much liquid or not let it steam properly. The 2:1 liquid-to-quinoa ratio is key. Also, after cooking, make sure you fluff it with a fork, not a spoon, to keep the grains separate.
Can I use a different protein?
Of course! The marinade works wonderfully on shrimp, firm fish like cod, or even tofu (press it well first). Adjust cooking times accordingly.
Mediterranean Chicken Bowls: Lemon-Oregano Chicken with Quinoa, Hummus & Cucumber Salad
Description
If you’re craving a meal that’s light yet filling, colorful yet simple, these Mediterranean Chicken Bowls are the answer. Juicy lemon-oregano chicken, fluffy quinoa, crisp cucumber salad, and creamy hummus come together in one nourishing bowl that’s perfect for busy weeknights or easy meal prep. Fresh, wholesome, and full of flavor—this is comfort food that loves you back.
Ingredients
Lemon-Oregano Chicken
-
1½ lb boneless, skinless chicken thighs or breasts
-
Juice of 1 lemon
-
2 tbsp olive oil
-
3 cloves garlic, minced
-
1½ tsp dried oregano
-
½ tsp paprika
-
Salt and black pepper, to taste
Quinoa Base
-
1 cup quinoa, rinsed
-
2 cups water or chicken/vegetable broth
-
Pinch of salt
Cucumber Salad
-
1 large cucumber, diced
-
½ red onion, thinly sliced
-
1 tbsp olive oil
-
1 tbsp red wine vinegar or lemon juice
-
Salt and pepper, to taste
-
Optional: chopped parsley or dill
Toppings (Optional)
-
1 cup hummus
-
Feta cheese crumbles
-
Kalamata olives
-
Cherry tomatoes, halved
-
Lemon wedges
Instructions
-
Marinate the Chicken
In a bowl, whisk lemon juice, olive oil, garlic, oregano, paprika, salt, and pepper. Add chicken and coat well. Marinate at least 30 minutes (up to overnight). -
Cook the Quinoa
Combine quinoa, liquid, and salt in a saucepan. Bring to a boil, reduce heat, cover, and simmer 15 minutes. Remove from heat, rest 5 minutes, then fluff with a fork. -
Cook the Chicken
Heat a skillet or grill pan over medium-high heat with a little oil. Cook chicken 5–7 minutes per side, until golden and cooked through (165°F / 74°C). Rest 5 minutes, then slice. -
Make the Cucumber Salad
Toss cucumber, red onion, olive oil, vinegar, salt, pepper, and herbs in a bowl. -
Assemble the Bowls
Divide quinoa among bowls. Top with sliced chicken, cucumber salad, and a scoop of hummus. Add any optional toppings and finish with a squeeze of lemon.
Notes
-
Rinse quinoa well to remove bitterness and keep it fluffy.
-
Let chicken rest after cooking to keep it juicy.
-
Use thighs for extra tenderness, especially if reheating for meal prep.
-
Meal-prep friendly: Store components separately for up to 4 days.
-
Customize freely: Swap quinoa for couscous or hummus for tzatziki.
Nutritional Information (Per Serving, Approximate)
Calories: 450 | Protein: 35g | Carbohydrates: 28g | Fat: 22g | Fiber: 5g
Note: This is an estimate based on the listed ingredients and includes 2 tbsp of hummus. Values will vary with specific ingredients and toppings used.
Final Thoughts: A Bowl Full of Sunshine
So there you have it—more than just a recipe, but a blueprint for a meal that feels like a warm embrace. These Mediterranean Chicken Bowls aren’t about perfection; they’re about the joy of creating something vibrant, nourishing, and deeply satisfying with your own hands.
Remember, the true magic lies in the harmony of simple things: the tang of lemon, the scent of oregano, the crunch of a cucumber, the creamy comfort of hummus. It’s a reminder that the best meals are often the ones that feed more than just our bodies—they spark a memory, brighten a routine, and bring a little sunshine to the table.
Whether you stick to the script or make it wildly your own, I hope this bowl becomes a trusted friend in your kitchen. A go-to for busy nights, a showstopper for friends, and a surefire way to turn an ordinary evening into a small, delicious celebration.
Now, go grab that bowl. You’ve earned it.
With love and a dash of oregano,
Olivia
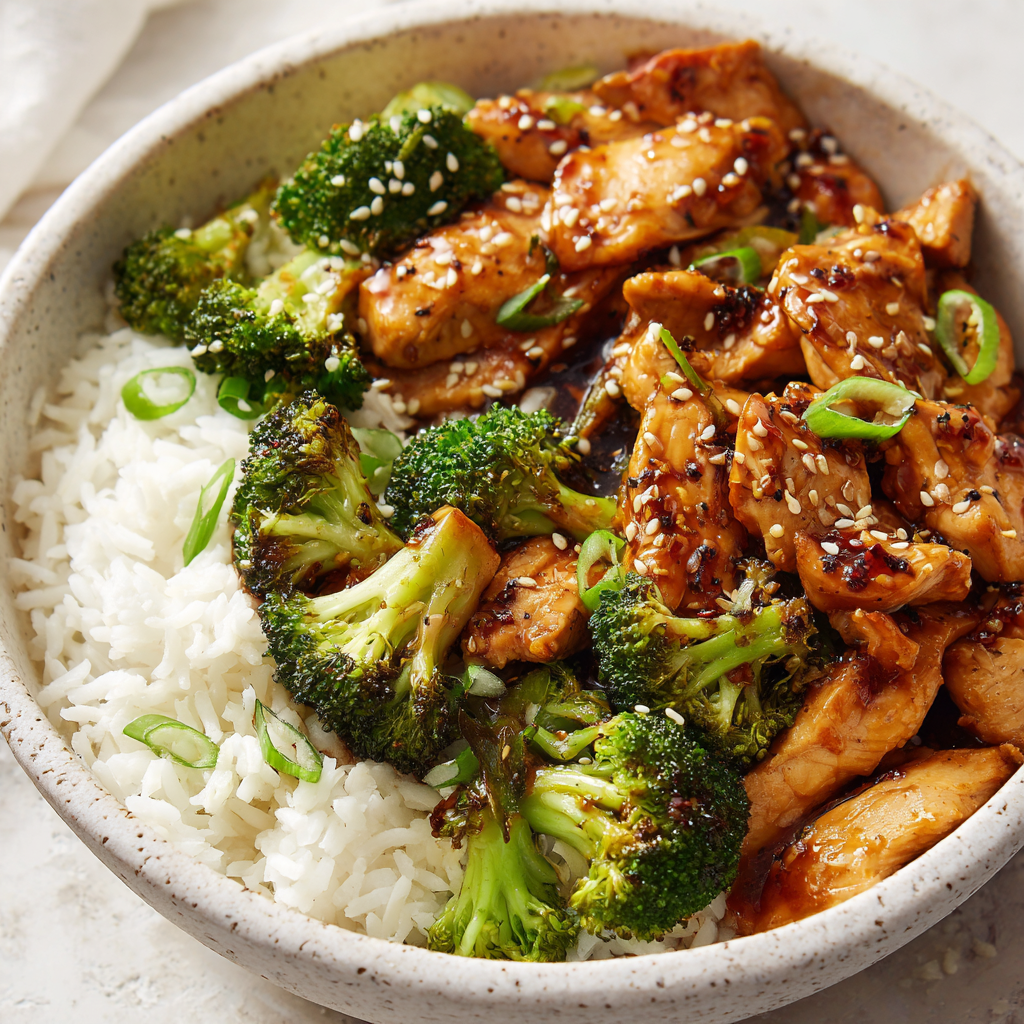
Honey Garlic Chicken Bowls with Roasted Broccoli & Jasmine Rice
Your New Favorite Bowl Awaits: Sweet, Savory, and Seriously Satisfying
Hey there, friend! Come on in, grab an apron, and let’s get something incredible simmering. If your weeknights are anything like mine, you’re constantly chasing that magical trifecta: a meal that’s fast enough for a Wednesday, delicious enough to feel like a Friday, and wholesome enough that you feel good about it. Well, consider the chase over. I’m so excited to share with you what has become my ultimate, no-fail, smile-inducing dinner: Honey Garlic Chicken Bowls with Roasted Broccoli & Jasmine Rice.
This isn’t just a recipe; it’s a flavor hug. Imagine juicy, roasted chicken thighs, their edges caramelized in a sticky-savory sauce of honey, garlic, and ginger. Picture vibrant green broccoli, roasted on the same pan until it’s tender and a little charred, soaking up all those delicious juices. Then, pile it all on a cloud of fluffy, fragrant jasmine rice that soaks up every last drop of that incredible glaze. Every single bite hits the perfect note—sweet, salty, savory, and utterly comforting.
The best part? This is a one-pan wonder (plus a pot for the rice, but that’s it!). We’re talking minimal cleanup, maximum flavor, and a meal that will have everyone at the table asking for seconds. Whether you’re a kitchen newbie or a seasoned home cook, this recipe is designed to build your confidence and fill your home with the most incredible aroma. So, let’s turn those simple ingredients into something unforgettable together.
The Night This Bowl Became a Legend
I have to tell you about the first time this dish truly saved the day. It was a classic “What on earth am I going to make for dinner?” kind of evening. I had a long day, the fridge was looking a little bare, and my energy was at an all-time low. I had some chicken thighs, a lonely head of broccoli, and the usual pantry staples. In a moment of “let’s just throw it together,” I whisked up a quick honey-garlic marinade, tossed everything on a sheet pan, and crossed my fingers.
As it roasted, the smell that took over my kitchen was nothing short of transformative. That sweet, garlicky aroma pulled my husband away from his computer and my grumpy, after-school self right out of my funk. When we sat down to eat, there was this beautiful moment of silence—the kind that only happens when everyone is genuinely, happily focused on their food. My husband looked up and said, “Okay, this is a keeper. You have to make this every week.” And just like that, a humble weeknight throw-together meal earned its permanent spot in our family’s recipe hall of fame. It proved that the best dinners aren’t about fancy techniques; they’re about simple, honest food that brings people together.
Gathering Your Flavor Friends
Here’s everything you’ll need to create this masterpiece. I love thinking of ingredients as a team—each one brings its own special talent to the bowl!
- Boneless, Skinless Chicken Thighs: My absolute top choice for this recipe. Thighs stay incredibly juicy and tender during roasting, and they have more flavor than breasts. Chef’s Insight: If you only have chicken breasts, use them! Just pound them to an even thickness so they cook at the same rate, and reduce the cooking time by 5-7 minutes to prevent drying out.
- Soy Sauce: Our salty, umami powerhouse. It’s the base of our incredible glaze. Substitution Tip: For a gluten-free version, use tamari or coconut aminos. Coconut aminos are slightly sweeter, so you might reduce the honey by a teaspoon if you use them.
- Honey: Nature’s golden sweetener that creates that irresistible sticky glaze. Chef’s Insight: Run your measuring spoon under hot water before scooping the honey—it will slide right out!
- Fresh Garlic & Ginger: Non-negotiables for the best flavor! Freshly minced garlic and grated ginger make the sauce sing. Substitution Tip: In a true pinch, ½ teaspoon of garlic powder and ¼ teaspoon of ground ginger can work, but fresh is truly best here.
- Olive Oil: A little fat to help the marinade cling and to roast our veggies. Avocado oil works great too.
- Black Pepper: A simple but essential flavor boost.
- Jasmine Rice: Its delicate, slightly floral fragrance is the perfect neutral base. Chef’s Insight: Rinse your rice in a fine-mesh strainer until the water runs clear. This removes excess starch and gives you beautifully separate, fluffy grains.
- Broccoli Florets: Our green, nutritious, and delicious sidekick. Roasting transforms it into something craveable. Substitution Tip: Feel free to swap in cauliflower, snap peas, or even sliced bell peppers!
- For Topping (Optional but Recommended):
- Sesame Seeds: A sprinkle adds a lovely nutty crunch and makes the bowl look professionally pretty.
- Sliced Green Onions: A pop of fresh color and a mild, oniony bite that cuts through the richness perfectly.
Let’s Build Some Flavor: Step-by-Step
Ready to cook? Let’s do this! I’ll walk you through each step with my favorite little hacks to guarantee success.
- Preheat & Prep: Crank your oven to 400°F (200°C). This high heat is our secret weapon for getting gorgeous caramelization on the chicken and beautifully roasted broccoli. Chef’s Hack: While the oven heats, take your chicken thighs out of the fridge. Letting them sit at room temperature for 10-15 minutes helps them cook more evenly.
- Whisk the Magic Sauce: In a bowl big enough to hold your chicken, whisk together the soy sauce, honey, olive oil, minced garlic, grated ginger, and black pepper. Don’t be shy—get in there and whisk until it’s a lovely, unified, glossy sauce. Taste it! This is your moment to adjust—want a little more ginger? Go for it! Chef’s Commentary: This sauce is so good, you could almost drink it. (I won’t tell.)
- Marinate the Chicken: Add the chicken thighs to the bowl and toss them around, making sure every nook and cranny is coated in that glorious glaze. Let it marinate for at least 15 minutes, or up to 30 if you have time. Chef’s Hack: No time to marinate? No problem! Just make sure you pour every last drop of the sauce from the bowl over the chicken on the pan. It will still be delicious.
- Sheet Pan Party Time: On a large, rimmed baking sheet, arrange the marinated chicken thighs in a single layer. In a separate bowl, toss your broccoli florets with a tablespoon of olive oil and a good pinch of salt and pepper. Scatter the broccoli around the chicken on the same pan. Chef’s Big Tip: Using one pan is our cleanup superpower! The broccoli roasts in the chicken drippings and sauce, absorbing insane flavor.
- Roast to Perfection: Slide the pan into your hot oven and roast for 15 minutes. Pull it out, flip the chicken thighs over, and give the broccoli a little stir/shake. This ensures even browning. Roast for another 10-15 minutes, until the chicken is deeply golden, cooked through (internal temp of 165°F), and the broccoli is tender with crispy edges.
- Rice, Please: While the chicken and broccoli roast, cook your jasmine rice according to package directions. Remember my rinsing tip for the fluffiest results! Chef’s Hack: Add a pinch of salt to the cooking water for perfectly seasoned rice from the inside out.
- The Grand Assembly: Fluff your rice with a fork. Slice your chicken thighs against the grain into beautiful strips. Now, build your bowls! Start with a generous base of rice, add a pile of that flavorful roasted broccoli, and top with the sliced chicken. Chef’s Final Touch: Drizzle any of the sticky, caramelized pan juices left on the baking sheet over everything. This is liquid gold!
- Garnish & Devour: Finish with a sprinkle of sesame seeds and a flourish of green onions. Then, take a moment to admire your creation before diving in.
How to Serve It Up in Style
Presentation is part of the fun! I love using shallow, wide bowls so you can see all the beautiful components. For a family-style vibe, serve the rice, broccoli, and sliced chicken in separate dishes on the table and let everyone build their own masterpiece. It’s interactive and fun! If you want to add a little extra something, a quick side of sliced cucumbers with a splash of rice vinegar or a simple side salad with ginger dressing makes the meal feel extra complete. Don’t forget the big spoon for scooping up every last bit of sauce and rice!
Make It Your Own: Delicious Twists
- Spicy Kick: Add 1-2 teaspoons of sriracha or a pinch of red pepper flakes to the marinade for a sweet-heat situation.
- Citrus Zing: Stir the zest and juice of half a lime or orange into the sauce for a bright, fresh twist.
- Veggie Swap: Try this with cauliflower, cubed sweet potato, or thick slices of bell pepper instead of (or in addition to!) the broccoli.
- Grain Swap: Quinoa, brown rice, or even cauliflower rice are fantastic, nutritious bases.
- Extra Veggie Power: Add shredded carrots or snap peas to the sheet pan during the last 10 minutes of roasting for extra color and crunch.
From My Kitchen to Yours: A Few Parting Thoughts
This recipe has truly evolved into my weeknight MVP. Over time, I’ve learned that the key is embracing the “messy sheet pan” aesthetic—those dark, caramelized bits on the pan are FLAVOR, not a mistake! I’ve also been known to double the sauce recipe on particularly tough days; having a little extra to drizzle over the finished bowls feels like a luxury. One funny story: I once was so eager to eat that I forgot to flip the chicken halfway through. You know what? It was still fantastic, just a little more golden on one side. This recipe is forgiving and flexible, just like we need our kitchen friends to be. It’s a reminder that great food doesn’t have to be complicated.
Your Questions, Answered!
Q: My sauce burned on the pan! What did I do wrong?
A: Don’t worry, this can happen! Ovens can run hot, or your baking sheet might be a dark metal (which absorbs more heat). If you notice the sauce/pan juices smoking or burning towards the end, add a tablespoon or two of water to the pan and swirl it around. This will deglaze the pan and save your sauce. Next time, try lining your pan with parchment paper for easier cleanup and a slight buffer against the direct heat.
Q: Can I make this ahead for meal prep?
A> Absolutely! This is a meal prep superstar. Let all the components cool completely, then store the rice, broccoli, and sliced chicken in separate airtight containers in the fridge for up to 4 days. When ready to eat, reheat gently in the microwave. The sauce might have soaked into the chicken, so I like to keep a little extra soy sauce and honey on hand for a fresh drizzle.
Q: Is the chicken supposed to be sticky right out of the oven, or more saucy?
A> It should be beautifully glazed and sticky, with some thickened, caramelized sauce in the pan. The high heat of the oven reduces the marinade, concentrating the flavors and creating that sticky texture we love. If it seems a little dry, just add a splash of water to the pan juices and swirl to create an instant extra “sauce.”
Q: Can I use frozen broccoli?
A> You can, but thaw and pat it *very* dry with paper towels first. Frozen broccoli releases a lot of water, which can steam the veggies and chicken instead of letting them roast and caramelize properly. For the best texture, fresh is the way to go!
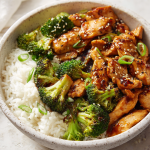
Honey Garlic Chicken Bowls with Roasted Broccoli & Jasmine Rice
Description
Looking for a weeknight dinner that’s easy, comforting, and packed with flavor? These Honey Garlic Chicken Bowls check all the boxes. Juicy roasted chicken, tender broccoli, and fluffy jasmine rice come together in a sweet-and-savory glaze that tastes like something you’d order at your favorite restaurant—but it’s made right at home with simple ingredients and minimal cleanup.
Ingredients
For the Chicken & Broccoli
-
1½ lb boneless, skinless chicken thighs
-
3 cups broccoli florets
-
3 tbsp olive oil, divided
-
Salt and black pepper, to taste
For the Honey Garlic Sauce
-
¼ cup soy sauce (or tamari for gluten-free)
-
3 tbsp honey
-
3 cloves garlic, minced
-
1 tsp fresh ginger, grated (or ½ tsp ground ginger)
-
¼ tsp black pepper
For Serving
-
2 cups jasmine rice (uncooked)
-
Sesame seeds (optional)
-
Sliced green onions (optional)
Instructions
-
Preheat Oven
Preheat oven to 400°F (200°C). Line a large baking sheet with parchment paper if desired. -
Make the Sauce
In a bowl, whisk together soy sauce, honey, garlic, ginger, and black pepper. -
Marinate Chicken
Add chicken thighs to the sauce and toss to coat well. Let marinate for 15 minutes (or up to 30 minutes if time allows). -
Prepare Broccoli
Toss broccoli with 1 tablespoon olive oil, salt, and pepper. -
Roast
Arrange chicken on the baking sheet and scatter broccoli around it. Drizzle remaining olive oil over the chicken.
Roast for 15 minutes, flip chicken and stir broccoli, then roast another 10–15 minutes until chicken is cooked through (165°F internal temp) and broccoli is tender and slightly charred. -
Cook Rice
While everything roasts, cook jasmine rice according to package instructions. -
Assemble Bowls
Divide rice into bowls, top with sliced chicken and roasted broccoli, and spoon any pan juices over the top. Garnish if desired.
Notes
-
Use chicken thighs for the juiciest results—they stay tender during roasting.
-
Rinse your rice before cooking for fluffier grains.
-
Don’t overcrowd the pan—space helps everything caramelize instead of steam.
-
Extra sauce lover? Double the sauce and drizzle more over the finished bowls.
-
Add heat with red pepper flakes or sriracha if you like it spicy.
Nutritional Information (Approximate, per serving)
Calories: 420 | Protein: 28g | Carbohydrates: 38g | Dietary Fiber: 3g | Sugar: 12g | Fat: 18g | Saturated Fat: 4g | Cholesterol: 110mg | Sodium: 650mg
Note: Nutrition is estimated based on the specific ingredients listed and includes all of the marinade/sauce. Using low-sodium soy sauce or reducing the amount used can lower the sodium content.

Taco Ranch Bites : Bold, Cheesy, and Totally Snackable
Taco Ranch Bites: Your New Go-To Party Hero (They’ll Disappear in Minutes!)
Hey there, friend! Come on in, grab an apron, and let’s get something sizzling. If you’ve ever stood in your kitchen, five minutes before guests arrive, thinking, “I need something incredible, fast, and preferably not messy,” then you and I are about to become best pals. I’m talking about that magic appetizer that makes people hover around the tray, the one that sparks the “Oh my gosh, what *is* this?” conversation. Today, we’re making exactly that: Taco Ranch Bites.
Imagine all the bold, savory, crave-worthy flavors of taco night—the seasoned beef, the melty cheese, that zing—meeting the cool, herby creaminess of ranch. Now, picture all that deliciousness packed into a single, crisp, flaky, two-bite phyllo shell. No plates, no forks, no drippy salsa down your shirt. Just pure, unadulterated snack joy. These little guys are the MVP of my party spread, from casual game days to fancy-ish potlucks. They come together in a flash, bake in just minutes, and have this magical ability to make everyone feel happy and fed. So, let’s turn up the oven, pour ourselves something fun to drink, and make a batch of bites that are guaranteed to be the life of the party. Trust me, your future self (the one who is calmly enjoying the party instead of stressing in the kitchen) will thank you.
The Snack That Saved Game Day (And My Sanity)
I have to confess: my love for these bites was born from a minor kitchen disaster. Picture this: it’s a big football Sunday at our house. The game is about to start, the crowd is hungry, and my grand plan—an elaborate layered dip—met an untimely fate with the edge of the refrigerator door. There I was, with a floor full of beans, cheese, and my shattered dignity. I had about 20 minutes and a pantry full of desperation.
My eyes landed on a forgotten box of mini phyllo shells in the freezer (a past impulse buy for a canapé phase I never quite started). Next to it, the staples: ground beef, taco seasoning, a packet of ranch mix. In a moment of “what do I have to lose?” inspiration, I scrambled it all together, stuffed the shells, and shoved them in the oven. Eight minutes later, I presented them hesitantly to the first guest. The reaction wasn’t just polite—it was a chorus of “THESE ARE AMAZING.” The tray was empty before the first touchdown. That day, a star was born. Now, they’re not just a recipe; they’re a reminder that sometimes the best, most beloved foods come from happy accidents and a little kitchen courage.
Gathering Your Flavor All-Stars
Here’s everything you need to create this flavor fiesta. I’ve included my little chef insights for each ingredient because knowing the “why” makes you a more confident cook!
- 1 lb ground beef (80/20 blend is perfect): This is our hearty, savory base. The little bit of fat in an 80/20 blend keeps the meat juicy and flavorful. Chef’s Tip: For a leaner option, ground turkey or chicken works beautifully! For a plant-based twist, my favorite meatless crumbles hold the seasoning like a champ.
- 1 packet taco seasoning: Our shortcut to big, bold Tex-Mex flavor. It’s a perfect blend of chili powder, cumin, garlic, and more. Chef’s Insight: If you have a DIY blend you love, use about 3 tablespoons of it. It’s a great way to control the salt level.
- 1 packet ranch seasoning mix: The secret weapon! This isn’t just for dressing; it adds a punch of buttermilk, garlic, dill, and onion powder that makes the filling incredibly addictive. Substitution Tip: In a pinch, use 2 tbsp of powdered buttermilk dressing mix.
- 1 (10 oz) can diced tomatoes with green chilies (drained!): This is our moisture and ZING. The tomatoes add a fresh, juicy element, while the mild green chilies give a subtle kick. Chef’s Note: Draining is key! We want flavor, not extra liquid that will make our phyllo shells soggy.
- 1½ cups shredded cheddar cheese: The glorious, melty glue that holds it all together. Pro Move: Always shred your own cheese from a block if you can! Pre-shredded cheese is coated to prevent clumping, which means it doesn’t melt as smoothly. The extra minute of shredding makes a world of difference in gooeyness.
- 1 package (30 count) mini phyllo shells: Our edible, crispy vessels. Find these in the freezer section near the desserts. They’re pre-baked and incredibly forgiving. Don’t Stress: They thaw in about 10 minutes on the counter. No need to pre-bake!
- Optional garnish: chopped fresh cilantro or green onions: A pop of green for color and a burst of fresh flavor right at the end. It makes them look restaurant-fancy with zero effort.
Let’s Build Some Bites! (Step-by-Step)
Ready? This is where the magic happens, and it’s so simple. I’ll walk you through each step with my favorite hacks to ensure perfection.
- Preheat & Prep: Fire up that oven to 375°F (190°C). Take your phyllo shells out of the freezer and arrange them on a standard baking sheet. They can sit out and thaw while you make the filling—see? Already multitasking!
- Brown the Beef: In a large skillet over medium heat, cook your ground beef. Break it up with a wooden spoon as it cooks until it’s no longer pink. Here’s my key tip for maximum flavor: Let the beef get a little crispy and browned in spots before draining. Those browned bits are pure gold! Drain the excess grease.
- The Flavor Fusion: Reduce the heat to medium-low. Stir in the taco seasoning, ranch seasoning mix, and your well-drained diced tomatoes and green chilies. Cook for just 2-3 minutes, stirring constantly. You’ll smell the spices blooming—it’s heavenly! This step is quick; we’re just marrying the flavors and heating everything through.
- The Cheesy Embrace: Remove the skillet from the heat. Immediately stir in your shredded cheddar cheese. The residual heat from the meat will melt it into a glorious, cohesive, cheesy filling. This off-heat method prevents the cheese from seizing up or getting greasy.
- Fill ‘Em Up: Using a small spoon (a teaspoon or a melon baller works great!), fill each phyllo shell with the taco-ranch mixture. Don’t be shy—mound it slightly! They won’t overflow, I promise. Pro Hack: For super neat filling, transfer your mixture to a zip-top bag, snip off a corner, and pipe it into the shells. So fast, so tidy!
- Bake to Perfection: Pop the baking sheet into your preheated oven for 8-10 minutes. You’re looking for the edges of the phyllo shells to turn a deeper golden brown and the cheese on top to be bubbly and irresistible.
- The Finishing Touch: Carefully remove the tray from the oven. Let the bites cool on the sheet for just 2-3 minutes—they’ll be molten lava hot! Then, if you’re using them, sprinkle on your chopped cilantro or green onions. The fresh herbs love to wilt just a tiny bit from the heat, releasing their aroma.
How to Serve These Little Stars
Presentation is part of the fun! I love to arrange these warm bites on a simple wooden board or a vibrant platter. Tuck a small bowl of cool, extra ranch dressing or a quick sour cream dip in the center for those who want to dive deeper. Scatter a few extra cilantro leaves or lime wedges around the edges for a pop of color. Serve them warm and watch the crowd gather. They’re perfect finger food, so no utensils needed—just plenty of napkins and happy smiles!
Mix It Up! Creative Twists on the Classic
Once you’ve mastered the base, the world is your taco-bite oyster! Here are a few of my favorite spins:
- Buffalo Chicken: Swap the beef for shredded rotisserie chicken. Use a buffalo seasoning packet instead of taco, and mix in a tablespoon of hot sauce. Top with blue cheese crumbles after baking.
- Fiesta Veggie: Sauté a mix of bell peppers, corn, and black beans. Use them instead of the beef, and keep the taco and ranch seasonings. A perfect meat-free option!
- Breakfast Bites: Fill shells with scrambled eggs, cooked breakfast sausage, cheddar, and a sprinkle of ranch seasoning. Bake as usual—ideal for brunch!
- Fully Loaded: After baking, add tiny dollops of sour cream, a slice of pickled jalapeño, and a sprinkle of crispy bacon bits.
- Spicy Southwest: Use pepper jack cheese instead of cheddar and add a teaspoon of chipotle powder to the beef mixture for a smoky kick.
Olivia’s Kitchen Notes
This recipe has become such a staple in my home that I’ve lost count of how many batches I’ve made. I’ve learned a few things along the way! First, you can absolutely make the filling up to two days ahead. Just store it covered in the fridge, then fill and bake when you’re ready. It’s a party-life saver. Second, don’t stress if a phyllo shell cracks as you’re unpacking it. Just spoon the filling in anyway—it all bakes up together and no one will ever know. Lastly, this recipe has evolved in my house to include a “kid station,” where my nieces and nephews get to fill their own shells (with extra cheese, of course). It’s messy, it’s fun, and it gets them involved in making the food they’re about to devour. That, to me, is the coziest kind of cooking.
Your Questions, Answered!
Q: Can I make these ahead of time and reheat them?
A: You can! They are best fresh, but for make-ahead ease, assemble the filled but *unbaked* bites on a baking sheet, cover tightly with plastic wrap, and refrigerate for up to 12 hours. Bake straight from the fridge, adding 1-2 minutes to the bake time. You can also reheat baked bites in a 350°F oven for 5-7 minutes to re-crisp.
Q: My shells got soggy. What happened?
A: The most common culprit is not draining the diced tomatoes and green chilies thoroughly enough. Give them a really good press in a mesh strainer. Also, ensure your meat mixture isn’t too wet after cooking—drain that grease well! Finally, avoid overfilling with an overly wet mixture; a heaping teaspoon is perfect.
Q: I can’t find mini phyllo shells. What can I use instead?
A: No problem! You can use premade mini tart shells or even scoop the mixture onto tortilla chips for “loaded nacho bites” and bake until melty. For a lower-carb option, spoon the mixture into hollowed-out mini sweet peppers—they’re delicious!
Q: Can I freeze Taco Ranch Bites?
A: I don’t recommend freezing them after baking, as the phyllo can lose its wonderful crisp texture. However, you can freeze the *unbaked* filled shells on a sheet pan, then transfer to a freezer bag once solid. Bake from frozen, adding 3-5 minutes to the bake time.

Taco Ranch Bites : Bold, Cheesy, and Totally Snackable
Description
Taco Ranch Bites
Prep Time: 10 mins
Cook Time: 10 mins
Total Time: 20 mins
Servings: 30 bites
Ingredients
-
1 lb ground beef (80/20 blend)
-
1 packet taco seasoning
-
1 packet ranch seasoning mix
-
1 (10 oz) can diced tomatoes with green chilies, drained
-
1½ cups shredded cheddar cheese
-
1 package (30 count) mini phyllo shells
-
Optional garnish: chopped fresh cilantro or green onions
Instructions
-
Preheat & Prep: Preheat oven to 375°F (190°C). Arrange phyllo shells on a baking sheet to thaw slightly.
-
Cook Beef: In a skillet over medium heat, cook the ground beef until no longer pink. Break it up as it cooks and let it brown in spots. Drain excess grease.
-
Mix Flavors: Reduce heat to medium-low. Stir in taco seasoning, ranch seasoning, and drained diced tomatoes with green chilies. Cook 2–3 minutes until heated through.
-
Add Cheese: Remove skillet from heat and stir in shredded cheddar cheese until melted and combined.
-
Fill Shells: Spoon or pipe the beef mixture into each phyllo shell, mounding slightly.
-
Bake: Bake in preheated oven for 8–10 minutes until phyllo edges are golden and cheese is bubbly.
-
Garnish & Serve: Let cool 2–3 minutes, then sprinkle with cilantro or green onions if desired. Serve warm.
Notes
-
Drain tomatoes and chilies well to prevent soggy shells.
-
Use a piping bag for neat, fast filling.
-
Make ahead: Fill shells but don’t bake; cover and refrigerate up to 12 hours. Bake straight from fridge, adding 1–2 minutes.
-
Reheat baked bites in a 350°F oven for 5–7 minutes to crisp.
Nutritional Info (A Quick Note!)
While these are a treat, it’s always helpful to know what you’re enjoying! Please note: These are estimates based on the specific ingredients used and will vary with substitutions.
Estimated per bite: Calories: 80 | Fat: 5g | Carbs: 3g | Protein: 5g
Remember, friends, food is about joy, connection, and flavor first. Enjoy every bite!
Final Thoughts
From a last-minute kitchen save to a beloved party staple, these Taco Ranch Bites truly live up to their name as the ultimate easy appetizer. They’re proof that the most memorable snacks aren’t always the most complicated—just a smart mix of bold, familiar flavors in a delightful, fuss-free package.
Whether you stick to the classic beef version or explore the fun twists, these little flavor bombs are guaranteed to bring people together and leave your platter empty (mission accomplished!). They’ve saved my hosting sanity more than once, and I have a feeling they’ll do the same for you.
So next time you need a guaranteed crowd-pleaser that’s as easy on you as it is delicious for your guests, remember this happy accident. Preheat that oven, grab those phyllo shells, and get ready to make a snack that sparks joy—one perfectly crispy, cheesy, savory bite at a time.
Happy hosting, and even happier snacking!
French Dip Biscuits (Savory, Cheesy, Dippable Goodness)
There’s Magic in the Dip: Welcome to Your New Favorite Snack
Hey there, friend! Come on in, grab an apron, and pull up a stool. Is there anything better than that moment you tear into something warm, savory, and dippable? The steam wafts up, carrying promises of melted cheese and rich, savory broth, and you just know you’re in for a seriously good time. If you’re nodding along right now, then buckle up, because we’re about to turn your love for French dip sandwiches into the most fun, shareable, finger-food masterpiece you’ve ever met: French Dip Biscuits.
Picture this: flaky, buttery biscuit dough, stretched and wrapped around a hearty pocket of tender roast beef and oozy, melty provolone. They bake up into golden, puffy little parcels of joy. And the pièce de résistance? A little bowl of warm, deeply flavorful au jus for dunking, swirling, and downright reveling in. This isn’t just a recipe; it’s an experience. It’s the star of the game day spread, the hero of a cozy “snack dinner” night, and the guaranteed crowd-pleaser at your next gathering. The best part? We’re starting with a brilliant shortcut—refrigerated biscuit dough—so you’re mere minutes away from pure, cheesy, dippable bliss. Let’s make some kitchen magic together!
A Happy Accident & The Birth of a Blog Star
This recipe has a special place in my heart because, like so many of my favorite kitchen creations, it was born from a happy accident and a serious craving. A few years back, I was hosting a last-minute gathering for friends to watch the big game. I’d promised “substantial snacks,” but time had gotten away from me (story of my life!). I had a can of biscuits in the fridge, some leftover deli roast beef from lunch, and a packet of au jus mix in the pantry—a remnant from a previous soup experiment.
In a moment of “what if?” inspiration, I started stuffing and folding, crossing my fingers that I wasn’t about to serve my friends a pan of leaky, confused pastries. The smell that filled my kitchen as they baked was pure wizardry. When I pulled them out, golden and puffed, and set them next to that steaming cup of jus, my friends descended like delighted vultures. They were gone in minutes, with requests for the recipe following immediately. That’s when I knew: this wasn’t just a quick fix; it was a keeper. It’s proof that the most memorable food often comes from a bit of playful improvisation and a whole lot of love.
Gathering Your Flavor Toolkit
Here’s everything you’ll need to create these irresistible bundles. I’ve added my little chef insights and swaps so you can make this recipe your own!
- 1 can refrigerated biscuit dough (8 count): Our fabulous, flaky foundation! I love the “grands” style for their size and layers. Chef’s Insight: This is our glorious shortcut, giving us that perfect biscuit texture without the fuss. For a homemade touch, you can absolutely use your favorite drop biscuit dough!
- 1/2 lb deli roast beef, chopped: The savory star. Ask your deli counter for roast beef sliced “#1 thickness” (the thickest)—it holds up better and gives a meatier bite. Substitution Tip: Leftover pot roast, shredded, is INCREDIBLE here. For a different twist, try thinly sliced pastrami or even grilled chicken.
- 1 cup shredded provolone or Swiss cheese: The melty, creamy glue. Provolone is my go-to for its mild, buttery flavor that melts like a dream. Swiss gives that classic French dip authenticity. Chef’s Insight: A pre-shredded Italian cheese blend works in a pinch, but freshly shredded cheese melts more smoothly!
- 1 packet au jus gravy mix: Our dip’s flavor powerhouse. It’s concentrated, easy, and delivers that signature savory-umami depth. Chef’s Insight: To elevate it, prepare it with beef broth instead of water, and add a splash of Worcestershire sauce and a pinch of cracked black pepper.
- 2 tbsp butter, melted: The golden glow-up. Brushing this on before baking gives our biscuits that beautiful, glossy, golden-brown top and an extra layer of rich flavor.
- Optional: garlic powder or dried parsley for brushing: The finishing flair. A light sprinkle on the buttered tops adds a whisper of extra flavor and makes them look professionally pretty!
Let’s Build Some Flaky, Cheesy Dreams: Your Step-by-Step Guide
Ready to roll? Literally! Let’s walk through this together. I’ll be with you every step, sharing my favorite tips to ensure your biscuits are perfect.
Step 1: Preheat & Prep. Start by preheating your oven to 375°F (190°C). This is crucial for getting that instant oven-spring lift! Line a baking sheet with parchment paper. Not only does this prevent sticking, but it makes cleanup a absolute breeze—because we’d rather be eating than scrubbing, right?
Step 2: Flatten & Form. Pop open that can of biscuits (the sound alone is so satisfying!). Separate them onto a clean surface. Using your fingers or the palm of your hand, gently flatten and stretch each biscuit into a rough 4-inch circle. Chef’s Hack: Don’t use a rolling pin! You want to press and stretch, not crush, those lovely layers. It’s okay if they’re not perfect circles; rustic is charming!
Step 3: Stuff & Seal. Now for the fun part! Place a small heap of chopped roast beef and a generous pinch of cheese in the center of each dough round. Here’s the key: don’t overstuff! About 1 1/2 to 2 tablespoons total filling is perfect. Gently lift the edges of the dough and bring them together over the filling. Pinch the seams firmly to seal, then give it a little roll in your hands to form a smooth ball. Place it seam-side down on your prepared baking sheet. This is your secret to keeping all that cheesy goodness locked inside!
Step 4: Brush & Bake. Give each stuffed biscuit a generous brush with the melted butter. If you’re using garlic powder or parsley, sprinkle a tiny bit on top now. Slide the pan into your preheated oven and bake for 12-15 minutes. You’re looking for a deep, golden-brown color and puffed tops. Your kitchen will smell absolutely insane.
Step 5: The Grand Dipping Finale. While the biscuits are baking, prepare your au jus. In a small saucepan, whisk the gravy mix with water (or broth, if you’re feeling fancy!) according to the packet directions. Bring it to a simmer, then reduce the heat to low to keep it warm. This is the moment it all comes together!
Step 6: Serve Immediately! As soon as the biscuits come out of the oven, transfer them to a serving platter. Pour the warm au jus into a small bowl or ramekins for sharing. Serve them up hot and watch the smiles appear. The first dip is a moment of pure culinary joy.
How to Serve Up the Goodness
Presentation is part of the fun! I love serving these on a big, rustic wooden board or a simple platter. Place the bowl of warm au jus right in the center, surrounded by the pile of golden biscuits. Scatter a little extra chopped fresh parsley around for a pop of color. For a full meal, pair them with a crisp, simple green salad or some crunchy pickle spears on the side to cut through the richness. It’s casual, inviting, and downright irresistible.
Make It Your Own: Delicious Twists & Swaps
- The Philly Cheesesteak: Swap the roast beef for thinly sliced sautéed steak, add some diced green bell pepper and onion to the filling, and use Cheez Whiz or American cheese for ultimate authenticity.
- Pizza Pocket Style: Use pepperoni and shredded mozzarella. Brush with butter mixed with a little Italian seasoning and serve with warm marinara for dipping instead of au jus.
- Turkey & Cranberry: Perfect for leftovers! Use shredded turkey, a smear of cream cheese, and a teaspoon of whole-berry cranberry sauce inside. Serve with a side of warmed turkey gravy for dipping.
- Vegetarian Delight: Sauté sliced mushrooms and onions until caramelized. Mix with a sturdy cheese like Gruyère or fontina. Use a rich mushroom or onion gravy for dipping.
- Spicy Southwest: Mix the roast beef with a bit of shredded pepper jack cheese and a diced jalapeño. Add a teaspoon of ranch dressing to the au jus for a cool, spicy dip.
Olivia’s Kitchen Notes & Stories
This recipe has evolved in my kitchen from that first experimental batch. I’ve learned that sealing is EVERYTHING—I sometimes use a fork to crimp the edges for an extra-tight seal, which also gives a cute pattern. One time, in a hurry, I tried to skip the butter brush… and instantly regretted it. That butter is non-negotiable for flavor and color! I also love making a double batch and freezing the unbaked, stuffed biscuits on a sheet pan before transferring them to a bag. Then, I can bake a few straight from frozen (adding 5-7 extra minutes) whenever the craving hits. It’s my secret weapon for impromptu guests or those “I deserve a treat” nights.
Your Questions, Answered!
Q: My biscuit filling leaked out while baking! What happened?
A: Oh, we’ve all been there! This usually means one of two things: overstuffing or not sealing tightly enough. Next time, use a smidge less filling and really pinch that seam hard. Placing them seam-side down also helps weigh it closed. A little cheese melt-out is normal and delicious, but a major breach means check your filling-to-dough ratio.
Q: Can I make these ahead of time?
A> Absolutely! You can assemble the biscuits completely, place them on the parchment-lined sheet, and cover tightly with plastic wrap. Refrigerate for up to 24 hours. When ready, just brush with butter and bake—you may need to add 1-2 extra minutes since they’re starting cold. You can also freeze them (unbaked) for up to 3 months.
Q: What’s the best way to reheat leftovers?
A> To keep them from getting soggy, reheat in the air fryer or a toaster oven at 350°F for 5-8 minutes until crispy and warm. The microwave will work in a pinch, but it will soften the biscuit. Reheat the au jus separately on the stovetop or in the microwave.
Q: Can I use homemade biscuit dough?
A> 100% YES! Use your favorite drop biscuit or rolled biscuit recipe. Portion the dough into 8 pieces, flatten, and proceed with the stuffing steps. The bake time might vary slightly, so keep an eye on them for that perfect golden hue.
French Dip Biscuits (Savory, Cheesy, Dippable Goodness)
Description
French Dip Biscuits
Prep Time: 10 mins
Cook Time: 15 mins
Total Time: 25 mins
Servings: 8 biscuits
Ingredients
-
1 can refrigerated biscuit dough (8 count)
-
½ lb deli roast beef, chopped
-
1 cup shredded provolone or Swiss cheese
-
1 packet au jus gravy mix
-
2 tbsp butter, melted
-
Optional: garlic powder or dried parsley for brushing
Instructions
-
Preheat & Prep: Preheat oven to 375°F (190°C). Line a baking sheet with parchment paper.
-
Flatten Dough: Separate biscuits and flatten each into a 4-inch circle using your hands.
-
Stuff & Seal: Place 1½–2 tbsp of roast beef and a pinch of cheese in the center. Fold edges over filling and pinch to seal. Place seam-side down on the baking sheet.
-
Brush & Bake: Brush tops with melted butter and sprinkle optional garlic or parsley. Bake for 12–15 minutes until golden brown.
-
Prepare Au Jus: While baking, whisk au jus mix with water or beef broth according to packet instructions. Keep warm.
-
Serve: Serve biscuits hot with au jus for dipping. Optional garnish with parsley or additional cheese.
Notes
-
Don’t overstuff the biscuits—less is more to prevent leaks.
-
Use seam-side down for a tight seal.
-
Make ahead: Assemble and refrigerate up to 24 hours, or freeze for up to 3 months. Bake from frozen, adding 5–7 minutes.
-
Reheat in an air fryer or toaster oven to keep them crispy; microwave will soften the biscuits.
Nutritional Info (Per Biscuit, Approximate)
Calories: ~290 | Protein: 13g | Carbohydrates: 22g | Fat: 16g
Note: This is an estimate based on the specific ingredients used. Values can vary based on brands and substitutions.
Prep Time: 10 mins | Cook Time: 15 mins | Total Time: 25 mins | Servings: 8 biscuits
Final Thoughts
And there you have it—the entire, glorious, dippable journey from a humble can of biscuits to a platter of pure joy. These French Dip Biscuits are more than just a clever recipe; they’re a reminder that the best food doesn’t have to be complicated. It’s about taking familiar flavors we love and presenting them in a new, fun, and irresistibly shareable way.
They prove that with a little creativity and a few simple ingredients, you can turn an ordinary evening into a mini-celebration. Whether it’s the centerpiece of a game-day feast, the star of a cozy family snack night, or your secret weapon for impressing last-minute guests, these little parcels deliver every single time. The combination of flaky biscuit, savory beef, melty cheese, and that rich, silky au jus is simply magic—a perfect bite every time.
So next time you’re craving comfort, connection, and something deliciously dippable, remember this recipe. It’s waiting to become your new favorite tradition, your happy accident turned into a sure thing. Now, go grab that baking sheet, and get ready for the best kind of kitchen applause: the sound of happy people, dipping into happiness.
Slow Cooker Honey Buffalo Meatballs (Sweet & Spicy Crowd Favorite)
The Magic of Sweet Heat: Your New Party Hero Is Here!
Hey there, friend! Come on in, grab a cup of coffee (or maybe a cold beverage—no judgment here), and let’s talk about one of life’s greatest kitchen mysteries: how to be the hero of any gathering without actually breaking a sweat. I’m talking about that magical dish that makes people hover around the slow cooker, napkin in hand, eyes wide with anticipation. The one that disappears faster than you can say, “Wait, did I make enough?” I’ve been there, apron askew, wondering if my food would be a hit. And let me tell you, the answer I found is these Slow Cooker Honey Buffalo Meatballs.
This recipe is my edible love letter to balance. It’s the glorious, messy, finger-licking intersection where sweet, sticky honey meets the bold, tangy kick of buffalo sauce. They’re saucy, they’re tender, and they have this incredible way of making a room feel instantly cozier and more fun. Whether you’re prepping for game day, hosting book club, or just need a seriously easy, flavor-packed dinner that cooks itself while you do… well, anything else, this is your secret weapon. All you need is five minutes of hands-on time and a slow cooker ready to work its low-and-slow magic. So, tie on that “messy apron” with me, and let’s make something unforgettable!
A Sauce-Splattered Discovery: How These Meatballs Found My Heart
I have to confess, this recipe was born from a minor kitchen panic. Picture it: a few years back, my husband spontaneously invited his entire fantasy football league over for playoffs. Our house was suddenly filled with a hungry, cheering crowd, and my planned snack spread was looking… puny. I had a giant bag of frozen meatballs in the freezer (a home cook’s safety net!) and a fridge full of condiments. In a whirlwind of inspiration (or desperation!), I started whisking things together—hot sauce for energy, honey for sweetness, soy sauce for that deep, savory *umami*.
I dumped it all in the slow cooker, crossed my fingers, and set it on high. An hour later, the most incredible aroma began to drift through the house—spicy, sweet, and deeply inviting. The guys descended on that slow cooker like it was the championship trophy itself. There was laughter, sauce on chins, and the beautiful sound of an empty ceramic insert. That night, amidst the chaos and the happy, full bellies, I knew this thrown-together creation was a keeper. It wasn’t about fancy technique; it was about joy, sharing, and the beautiful things that happen when flavors dance together. That’s the spirit I want to bring to your kitchen today.
Gathering Your Flavor All-Stars
Here’s everything you’ll need to create this sweet and spicy symphony. The beauty is in the simplicity! I’ve added my little chef notes next to each one because knowing your ingredients is the first step to cooking with confidence.
- 2 lbs frozen or homemade meatballs: This is your foundation! Using frozen is the ultimate shortcut—I love a good homestyle or Italian blend. If you’re feeling ambitious, your favorite homemade meatball recipe will shine here, too. Chef’s Insight: If using frozen, no need to thaw! The slow cooker handles it beautifully, and they soak up the sauce as they cook.
- 1/2 cup Frank’s RedHot or preferred buffalo sauce: Frank’s is my go-to for that classic, tangy buffalo flavor. It’s not just heat; it’s flavor! Substitution Tip: If you’re sensitive to spice, use a mild buffalo sauce or swap half for BBQ sauce for a sweeter, smokier profile.
- 1/2 cup honey: The perfect sweet counterpoint to the heat. It creates that irresistible, glossy glaze. Chef’s Insight: For a richer flavor, try using dark amber honey. In a pinch, pure maple syrup works wonderfully.
- 1/4 cup ketchup: Don’t underestimate the humble ketchup! It adds body, a touch of sweetness, and helps the sauce cling to every meatball. Substitution Tip: Tomato paste (2 tbsp) thinned with a tablespoon of water can work in a pinch.
- 2 tbsp soy sauce: This is the secret depth-charge. It adds a savory, salty complexity that takes the sauce from good to “what IS in this?!” Substitution Tip: For a gluten-free version, use tamari or coconut aminos, which are equally delicious.
- 1 tbsp apple cider vinegar: A little acidity is key! It brightens all the flavors and cuts through the richness. Chef’s Insight: White vinegar or even a squeeze of fresh lime juice can stand in here.
- Optional: green onions or sesame seeds for garnish: A sprinkle of green onions adds a fresh, crunchy finish, and sesame seeds give a lovely visual pop and nutty note. Chef’s Insight: Don’t skip the garnish if you have it! It adds a professional touch and a new layer of flavor.
Let’s Get Cooking: Your Foolproof, Flavor-Packed Steps
Ready to watch the magic happen? Follow these simple steps, and I’ll walk you through every little tip I’ve learned along the way.
Step 1: The Five-Minute Sauce Symphony. Grab a medium bowl and a whisk. Pour in your buffalo sauce, honey, ketchup, soy sauce, and apple cider vinegar. Now, whisk it like you mean it! You want everything completely emulsified—that’s just a fancy way of saying perfectly blended so the honey isn’t lurking at the bottom. Little Chef Hack: Taste the sauce now! This is your moment to adjust. Want more heat? Add an extra dash of hot sauce. More tang? A tiny bit more vinegar. Make it yours!
Step 2: The Great Meatball Meet-Up. Place your frozen or homemade meatballs right into the slow cooker insert. No greasing needed! Pour that glorious, whisked sauce over the top. Using a large spoon or spatula, gently toss and turn the meatballs until they’re all evenly coated. It’s okay if they’re stacked a little; the heat circulates beautifully. Little Chef Hack: For extra flavor penetration, you can poke each frozen meatball with a fork before adding the sauce. It creates little channels for the sauce to seep into!
Step 3: The Low-and-Slow Transformation. Pop the lid on your slow cooker. Here’s your choice: For the most tender, fall-apart texture where the flavors have really melded, cook on LOW for 3-4 hours. If you’re short on time (we’ve all been there!), HIGH for 1.5-2 hours will get you there. Little Chef Hack: Stir the meatballs gently once or twice during cooking if you’re around. This helps ensure even saucing and prevents any edges from drying out. You’ll know they’re done when the sauce is bubbling around the edges, has thickened slightly, and your kitchen smells like heaven.
Step 4: The Grand Finale & Serve. Once cooking time is up, give them one final, gentle stir. You’ll see the sauce has reduced into a sticky, clingy glaze. Transfer them to a serving dish, or for the ultimate cozy vibe, just leave them in the slow cooker set to “warm.” Scatter over your sliced green onions or sesame seeds for that perfect finish. Little Chef Hack: If your sauce seems a bit thin for your liking, you can thicken it quickly. Transfer the meatballs to a serving bowl, then pour the sauce into a small saucepan. Simmer on the stove for 5-7 minutes until it reduces to your desired thickness, then pour it back over the meatballs.
How to Serve These Saucy Superstars
Presentation is part of the fun! For a party, keep it simple and casual: set the slow cooker right on the table (on a trivet!) with a stack of small plates, napkins, and toothpicks nearby. For a hearty dinner, serve a generous scoop over a bed of fluffy white rice, mashed potatoes, or even buttered noodles to soak up every last drop of that incredible sauce. A side of crisp celery sticks and cool, creamy ranch or blue cheese dressing for dipping is the classic, perfect accompaniment that balances the heat.
Make It Your Own: Creative Twists & Swaps
I love recipes that are a canvas for your creativity! Here are a few ways to play with this classic:
- Asian-Inspired Twist: Swap the buffalo sauce for sriracha, use hoisin sauce instead of ketchup, and garnish with lots of sesame seeds and chopped cilantro.
- BBQ Bourbon Blend: Use 1/2 cup of your favorite BBQ sauce instead of buffalo, add a tablespoon of bourbon (or extra apple cider vinegar) to the sauce, and use precooked cocktail sausages instead of meatballs.
- Sweet & Sour Veggie: For a vegetarian option, use frozen plant-based meatballs or even whole, canned pineapple chunks and chopped bell peppers. Use sweet and sour sauce as the base, adding a tablespoon of soy sauce and a pinch of red pepper flakes for heat.
- Spicy Peach Glaze: Replace the honey with peach preserves and add a teaspoon of grated fresh ginger to the sauce for a sweet, fruity, and spicy combo.
Olivia’s Kitchen Notes & Stories
This recipe has evolved like a good friend over the years. I’ve made it for baby showers, potlucks, and even as a comforting dinner on a rainy Tuesday. One time, I accidentally used smoked paprika instead of… well, nothing, because the recipe doesn’t call for it! I’d grabbed the wrong shaker. And you know what? It was AMAZING. A happy, smoky accident that I now recommend trying on purpose. I also learned the hard way that doubling the recipe for a huge party doesn’t necessarily double the cooking time—it just needs an extra hour or so on low. The key is to trust your senses: when the sauce is thick and glossy and the meatballs are hot through, you’re golden. This dish is forgiving, flexible, and always, always a hit.
Your Questions, Answered!
Q: Can I make these ahead of time?
A: Absolutely! You have two great options. 1) Prep the sauce: Whisk the sauce ingredients together up to 2 days ahead and store it in the fridge. When ready, pour over the meatballs and cook. 2) Full cook-and-hold: After cooking, you can keep the meatballs in the slow cooker on the “warm” setting for up to 2 hours. For longer storage, let them cool and refrigerate for up to 3 days. Reheat gently in a saucepan or back in the slow cooker.
Q: My sauce is too thin/too thick! Help!
A: No worries, both are easy fixes! Too thin: Use the reduction hack mentioned in Step 4. Alternatively, make a slurry by mixing 1 tablespoon of cornstarch with 1 tablespoon of cold water. Stir this into the simmering sauce in the slow cooker, and let it cook for 10-15 minutes on HIGH until thickened. Too thick: Simply stir in a splash of water, broth, or even pineapple juice to loosen it up to your desired consistency.
Q: Can I use fresh, raw meatballs instead of frozen?
A: You can, but the method changes slightly. For food safety, raw meatballs should be browned in a skillet first to render some fat and create a nice crust. Then, add them to the slow cooker with the sauce and cook on LOW for 3-4 hours until cooked through (internal temperature of 165°F). This extra step adds great flavor, but using frozen is the ultimate shortcut I stand by!
Q: What’s the best way to keep these warm for a party?
A: Your slow cooker is your best friend here! Once the meatballs are done, just turn the setting to “WARM.” They’ll stay at the perfect serving temperature for hours without overcooking. If you need to transport them, a portable slow cooker or an insulated carrier is ideal.
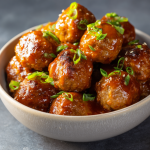
Slow Cooker Honey Buffalo Meatballs (Sweet & Spicy Crowd Favorite)
Description
Slow Cooker Honey Buffalo Meatballs
Prep Time: 5 mins
Cook Time: 1.5–4 hrs (depending on slow cooker setting)
Servings: 8–10
Ingredients
-
2 lbs frozen or homemade meatballs
-
½ cup buffalo sauce (Frank’s RedHot or preferred brand)
-
½ cup honey
-
¼ cup ketchup
-
2 tbsp soy sauce
-
1 tbsp apple cider vinegar
-
Optional: green onions or sesame seeds for garnish
Instructions
-
Mix the sauce: In a medium bowl, whisk together buffalo sauce, honey, ketchup, soy sauce, and apple cider vinegar until smooth. Taste and adjust—more honey for sweetness, more buffalo for heat.
-
Combine meatballs and sauce: Place meatballs in the slow cooker and pour the sauce over them. Gently stir to coat all meatballs evenly.
-
Cook low and slow: Cover and cook:
-
LOW: 3–4 hours for tender, flavor-packed meatballs
-
HIGH: 1.5–2 hours if short on time
-
-
Optional thickening: If the sauce is too thin, remove meatballs and simmer the sauce on the stove for 5–7 minutes until thickened, then pour back over meatballs.
-
Serve: Garnish with sliced green onions or sesame seeds. Keep warm in the slow cooker for parties or serve over rice, mashed potatoes, or noodles for a meal.
Notes
-
Frozen meatballs are perfect: No need to thaw; they absorb the sauce as they cook.
-
Adjust heat: Swap half the buffalo sauce for BBQ sauce for a milder, sweeter version.
-
Make ahead: Whisk sauce 1–2 days in advance. Meatballs can also be cooked ahead and reheated gently.
Nutritional Info (A Note from Olivia)
While I’m all about joy and flavor first, I know some folks like to have a general idea of what’s on their plate. This estimated breakdown is for one serving as an appetizer (about 4-5 meatballs), based on using standard frozen homestyle meatballs. Remember, variations in brands and homemade recipes will change this! ~280 Calories | 14g Protein | 12g Fat | 25g Carbs
Final Thoughts
So, there you have it—your new secret weapon for effortless, crowd-pleasing magic. These Slow Cooker Honey Buffalo Meatballs are more than just a recipe; they’re a promise of good times, full bellies, and that beautiful moment when a simple dish brings everyone together.
Whether you’re feeding a hungry game-day crowd, hosting a casual get-together, or just craving something that feels special without the effort, this recipe has your back. It’s forgiving, flexible, and packed with that irresistible sweet-heat balance that keeps people coming back for “just one more.”
Remember, the best meals aren’t about perfection—they’re about connection. And something magical happens when you set out a slow cooker filled with these sticky, saucy, flavor-packed bites. The laughter gets a little louder, the conversations flow a little easier, and you get to be the hero who made it all happen… with barely any work at all.
So go ahead, embrace the simplicity, and get ready for the compliments. Your party (or your Tuesday night) is about to get a whole lot tastier.
Happy cooking, and even happier sharing!
“`




