

Sweet Potato Nacho Bowl
Sweet Potato Nacho Bowl: Your New Comfort Food Obsession
Hey there, kitchen friends! Olivia here, waving from my flour-dusted countertop. Can we talk about that magical moment when you’re craving something crunchy, cheesy, and soul-warming… but also secretly want to feel like you’re making a *slightly* healthier life choice? Enter my Sweet Potato Nacho Bowl – the love child of taco night and loaded nachos that’ll make your taste buds do a happy dance. 🎉
Imagine this: golden rounds of roasted sweet potatoes (crispy-edged and tender-hearted) playing base for spicy taco chicken, melty cheese, creamy avocado, and all those vibrant toppings that make your eyes sparkle. It’s colorful, nourishing, and ridiculously satisfying – like a hug in bowl form. No fancy skills required, just a baking sheet and that gorgeous enthusiasm you bring to the kitchen. This recipe is your ticket to a 30-minute dinner that feels like a fiesta, whether you’re feeding hungry kids, impressing a date, or treating yourself to solo comfort food bliss. Ready to ditch the chips and dive into something gloriously messy? Let’s get roasting!
Why This Dish Sparks Joy (and a Little Nostalgia)
This bowl actually started as a happy accident! Picture this: It was Super Bowl Sunday, and my crew demanded nachos. But my niece – my sweet, veggie-loving goddaughter – looked so crestfallen when she saw that mountain of chips. “Aunt Liv,” she whispered, “potatoes make my tummy wobbly.” Cue my kitchen improv mode! I spotted sweet potatoes glowing like sunshine in my pantry. I sliced them thick, blasted them with taco seasoning, and crossed my fingers. Twenty minutes later? We had a platter of sweet potato “chips” that disappeared faster than the halftime show. My niece piled hers high with beans and avocado, beaming like she’d won the trophy. That’s when it hit me: This wasn’t just a substitute. It was an UPGRADE. Now, every time I smell those spicy-sweet rounds roasting, I remember her victorious grin – proof that the best recipes are born from love, a little chaos, and feeding the people who light up your world.
Gather Your Flavor Dream Team 🥑
Here’s what you’ll need for two generous bowls (double it for a crowd!). Don’t stress – flexibility is my kitchen mantra:
- 2 medium sweet potatoes, sliced into ½” rounds: Your sturdy, vitamin-packed base! Look for firm potatoes with smooth skin. Chef’s Insight: Slice ’em evenly so they roast uniformly. Too thin = crisp but might burn. Too thick = soft centers take forever. Swap: Butternut squash rounds work beautifully!
- 1 cup shredded chicken (seasoned with taco seasoning): Use leftover rotisserie chicken! Instant flavor hero. Chef’s Tip: No pre-seasoned chicken? Toss plain shredded chicken with 1.5 tsp of your fave taco blend while warming it.
- ½ cup black beans, rinsed & drained: Creamy, protein-packed goodness. Swap: Pinto beans or even corn kernels add a sweet pop!
- ½ cup shredded cheese (cheddar or Mexican blend): The melt factor! Chef’s Insight: Freshly grated melts WAY better than pre-shredded (which has anti-caking agents). Swap: Pepper jack for extra kick, or dairy-free shreds.
- ¼ cup diced red onion: For that essential zesty crunch! Soak in cold water for 5 mins if raw bite is too intense.
- 1 small tomato, diced: Fresh, juicy acidity. Swap: 2 tbsp salsa if tomatoes are sad.
- ½ avocado, diced: Creamy, cool contrast. Spritz with lime juice to prevent browning.
- Jalapeño slices (optional): For my heat-seekers! Remove seeds for milder spice.
- 2 tbsp sour cream: Tangy richness. Swap: Greek yogurt or cashew cream.
- 2 tbsp taco sauce: Flavor amplifier! I adore green salsa (salsa verde) here too.
- Fresh cilantro for garnish: The confetti finish! Skip if you’re a cilantro-hater.
- PLUS: 1 tbsp olive oil & 1.5 tsp taco seasoning for roasting the potatoes!
Let’s Build Your Flavor Masterpiece! ✨
Trust me, this is easier than assembling IKEA furniture (and way more rewarding).
- Roast Those Sweet Potato “Chips” to Perfection: Preheat your oven to 400°F (200°C). On a large baking sheet, toss your sweet potato rounds with olive oil and 1.5 tsp taco seasoning. Massage it in like you’re giving them a spa treatment! CHEF’S HACK: Line the sheet with parchment paper for ZERO stuck potatoes and easy cleanup. Arrange rounds in a single layer – no overlapping! Crowding = steamed potatoes, not crispy. Roast for 15 minutes, then flip each round (tongs are your BFF here). Roast another 10-15 minutes until gorgeously golden and fork-tender. Pro Tip: If they’re browning too fast, lower the rack in your oven.
- Warm Your Chicken & Beans – Quick & Sizzly: While potatoes roast, warm your shredded chicken and black beans together in a small skillet over medium heat. Stir in 1-2 tbsp water or broth to keep it juicy! No skillet? Microwave for 60-90 seconds. CHEF’S CONFESSION: I sometimes add a squeeze of lime here – brightens everything!
- Assemble Like the Nacho Boss You Are: Time for the fun part! Grab your plates or wide bowls. Lay down those glorious roasted sweet potato rounds like edible tiles. Immediately sprinkle the cheese over the hot potatoes – hello, melty magic! Now, pile on the warm chicken & beans, followed by red onion, tomato, and avocado. CHEF’S SECRET: This order matters! Hot potatoes melt cheese, warm chicken heats beans, and cool veggies stay crisp.
- Finish with Flair: Dollop with sour cream, drizzle generously with taco sauce, scatter jalapeños if using, and crown it all with fresh cilantro. CHEF’S TOUCH: A final pinch of flaky sea salt over the avocado makes it sing!
Serving Up Sunshine 🌞
Presentation is half the joy! I serve these in wide, shallow bowls so all those vibrant layers shine. For a fun “build-your-own” vibe (perfect for friends or picky kiddos!), arrange the roasted sweet potatoes on a big platter and let everyone pile on toppings buffet-style. Pair it with an icy-cold limeade or a light Mexican lager. Got extra cilantro? Sprinkle it everywhere – edible confetti! This bowl is a complete meal, but a simple side of lime-kissed slaw or charred corn adds extra fresh crunch.
Shake It Up! 5 Delicious Twists
This bowl is your canvas! Get creative:
- Veggie Fiesta: Skip chicken, double the black beans, and add roasted corn or sautéed peppers/mushrooms.
- Breakfast Nachos: Top with a fried or poached egg! Swap chicken for crumbled chorizo sausage.
- Tex-Mex BBQ: Use pulled pork tossed in BBQ sauce instead of taco chicken. Pickled red onions are *chef’s kiss* here.
- Mediterranean Twist: Swap taco seasoning for za’atar on potatoes. Top with chickpeas, feta, cucumber, tzatziki, and kalamata olives.
- Fully Loaded Vegan: Use spicy seasoned lentils or tofu crumbles, vegan cheese shreds, and cashew sour cream. Boom!
Olivia’s Kitchen Chronicles: Nacho Edition
This recipe has evolved like my favorite playlist! The first time I made it, I sliced the sweet potatoes WAY too thin – nacho shards, anyone? Lesson learned: ½-inch is the Goldilocks zone. My husband once tried to “speed things up” by broiling the potatoes… cue the smoke alarm serenade! We laugh about it now. Over time, I’ve embraced shortcuts – rotisserie chicken is a weeknight MVP. The biggest evolution? Embracing the mess! This isn’t a dainty dish. Embrace the cheese drips, the rogue bean escapees, the sour cream smears. That’s the sign of a meal made and enjoyed with heart. Leftovers? Store components separately. Reheat potatoes in the oven/toaster oven (not microwave!) to keep them crispy.
Nacho Bowl Q&A: Your Questions, Solved!
Q: My sweet potatoes got soggy! What happened?
A: Ah, the sogginess struggle! Likely culprits: Overcrowding the pan (steam is the enemy of crispness!), slicing unevenly (thin pieces overcook), or not flipping halfway. Next time: Give ’em space, slice consistently, flip with gusto, and ensure your oven is fully preheated. A hot start is key!
Q: Can I prep this ahead for a busy weeknight?
A: Absolutely! Roast the sweet potato rounds up to 2 days ahead – store them uncovered in the fridge (this helps them stay crisper). Cook and shred the chicken, rinse the beans, and dice the onion/tomato. Store toppings separately. When ready to eat, reheat potatoes at 375°F for 10 mins, warm chicken/beans, and assemble fresh! The avocado and cilantro should always be added last-minute.
Q: How can I make it spicier (or milder)?
A: Spice control is yours! For Heat Lovers: Add a pinch of cayenne to the taco seasoning on the potatoes, use spicy taco sauce or salsa, extra jalapeños (seeds in!), or a dash of hot sauce at the end. For Mild Moods: Use mild taco seasoning, skip jalapeños, choose a mild salsa/taco sauce, and consider swapping red onion for milder green onions.
Q: Can I use regular potatoes instead of sweet potatoes?
A: You sure can! Yukon Gold or Russet potatoes work well. Slice them ½-inch thick, toss with oil/taco seasoning, and roast the same way. They might cook slightly faster, so check at 20 mins. The flavor will be more classic “nacho,” but still deliciously cozy!

Sweet Potato Nacho Bowl
- Total Time: 35 mins
Description
Born from a Super Bowl improv, this sweet potato nacho bowl is the ultimate crowd-pleaser—satisfying, nourishing, and brimming with bold, vibrant flavors. Roasted sweet potato “chips” form the base for melty cheese, taco-spiced chicken, creamy avocado, and tangy toppings. It’s comfort food you can feel good about—perfect for taco night or a quick weeknight win!
Ingredients
-
2 medium sweet potatoes (½” slices)
-
1 tbsp olive oil + 1.5 tsp taco seasoning
-
1 cup shredded taco chicken
-
½ cup black beans
-
½ cup shredded cheese (cheddar or blend)
-
¼ cup diced red onion
-
1 small tomato, diced
-
½ avocado, diced
-
2 tbsp sour cream or Greek yogurt
-
2 tbsp taco sauce or salsa
-
Jalapeños (optional), fresh cilantro for garnish
Instructions
-
Roast Potatoes – Toss slices with oil & seasoning. Roast at 400°F for 15 mins, flip, roast 10–15 more until crisp-edged.
-
Heat Chicken & Beans – Warm in skillet with a splash of broth or microwave.
-
Assemble – Layer sweet potatoes in bowls, sprinkle cheese to melt. Top with warm chicken & beans, then veggies and avocado.
-
Finish – Add sour cream, sauce, jalapeños, and cilantro. Sprinkle flaky salt on avocado.
Notes
-
Sub squash or Yukon potatoes.
-
Add fried egg for brunch vibes.
-
Use BBQ pulled pork or vegan lentils.
-
Store leftovers separately; reheat potatoes in oven.
- Prep Time: 10 mins
- Cook Time: 25 mins
Nutrition
- Calories: 520 per serving
- Fat: 25g
- Carbohydrates: 40g
- Fiber: 10g
- Protein: 35g
Final Thoughts: Why This Bowl Wins Every Time
The Sweet Potato Nacho Bowl isn’t just a meal—it’s a celebration of textures, flavors, and pure comfort. It’s the kind of dish that feels indulgent but still leaves you energized, not weighed down. Whether you’re a busy parent, a meal-prep enthusiast, or just someone who loves a good flavor fiesta, this recipe is flexible, forgiving, and downright delicious.
So next time you’re staring into the fridge wondering what to make, remember: sweet potatoes are your canvas, and nacho night just got a whole lot brighter. Now go forth, roast with abandon, and make every bite a little celebration. 🌮✨
Nourishment Note (Because We Care!)
Per Serving (Approximate, based on specific ingredients used): Calories: ~520 | Protein: 35g | Carbohydrates: 40g | Fat: 25g | Fiber: 10g
This bowl packs a nutritional punch! Sweet potatoes offer vitamin A and fiber, chicken provides lean protein, black beans add more fiber and plant-based protein, and avocado brings healthy fats. It’s a balanced, satisfying meal!
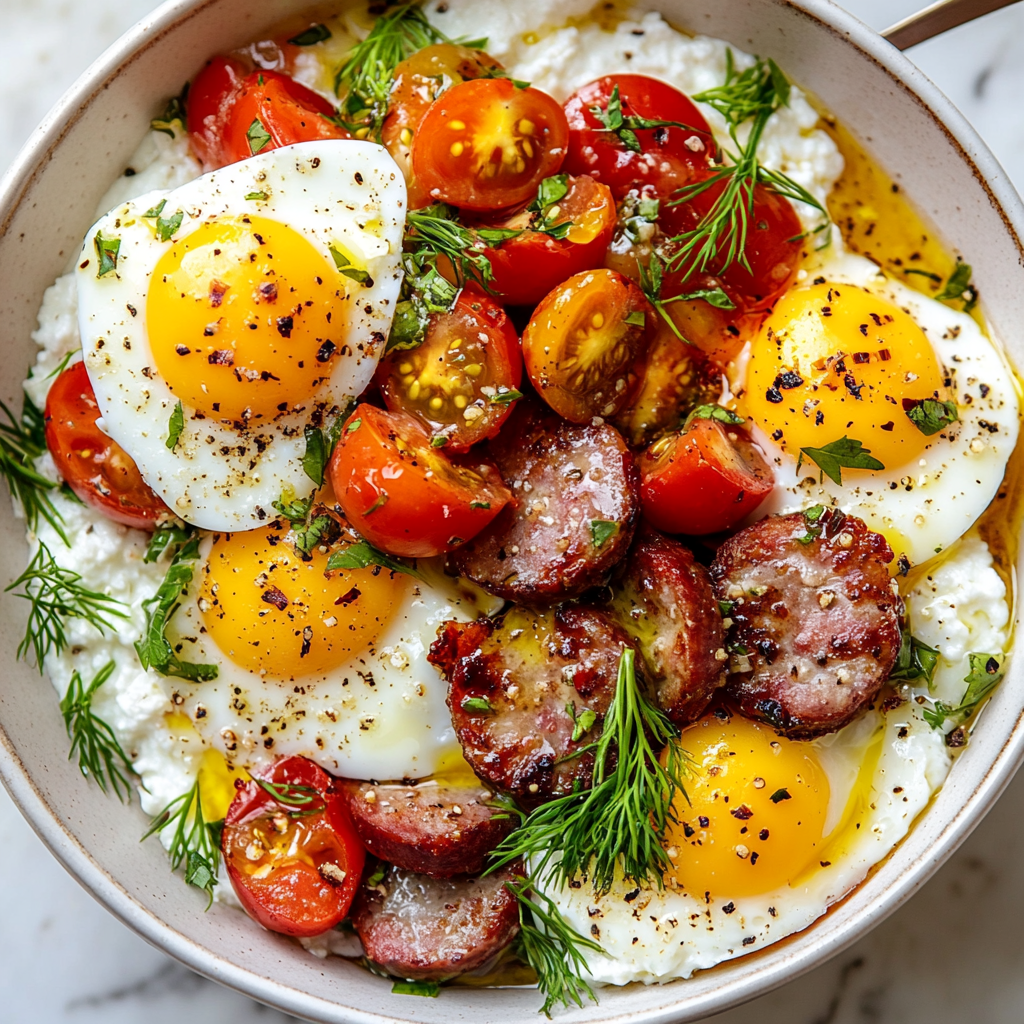
Savory Breakfast Power Bowl
Savory Breakfast Power Bowl: Fuel Your Morning with Color & Comfort! 🍳🥣
Rise, Shine, and Conquer Your Morning (One Delicious Bite at a Time)
Hey there, early birds and sleepyheads alike! Olivia here, your apron-clad cheerleader for all things cozy and delicious. Tell me, friend: How many mornings have you stared blankly into your pantry, dreaming of something that feels both nourishing and exciting? That magical breakfast unicorn that fuels your body without sacrificing flavor? If you’re nodding along (maybe with a half-yawn, half-smile), pull up a stool – we’re about to become best kitchen companions.
I created this Savory Breakfast Power Bowl for exactly those mornings. You know the ones: when sugary cereals leave you crashing by 10 AM, or when toast feels… well, just meh. This isn’t just food; it’s a vibrant, protein-packed hug in a bowl designed to make you feel capable and delighted. Imagine creamy cottage cheese, tangy kraut, juicy tomatoes, savory sausage, and those dreamy jammy eggs – all mingling in one glorious, colorful bowl. It’s quick (10 minutes, promise!), endlessly adaptable, and packed with 32g of protein to keep you buzzing happily until lunch. Whether you’re resetting after a hectic week or savoring a slow Sunday, this bowl is your edible sunshine. Let’s make mornings something you genuinely look forward to!
The Cozy Kitchen Memory That Sparked This Bowl
This bowl’s soul comes straight from my grandma’s farmhouse kitchen. Picture this: frosty Michigan mornings, the woodstove crackling, and Nana bustling about in her floral apron. She’d always have a pot of something simmering – but breakfast? That was her quiet triumph. No fancy gadgets, just intuition. Her mantra? “Feed the engine right, Livvy-girl.”
One snowy Saturday, after a chaotic week of burnt toast and skipped meals, I found her assembling the quirkiest plate: a scoop of cottage cheese, leftover roasted sausage, pickled beets from the cellar, and a perfectly boiled egg. “Leftover magic, sweetheart,” she’d winked. It was humble, a bit haphazard, yet utterly satisfying. That plate taught me breakfast doesn’t need rules – just good, real food that makes you feel strong. This power bowl is my love letter to Nana’s wisdom. It’s that same spirit of nourishing simplicity, jazzed up with color and modern flair. Every bite takes me back to her warm kitchen – and now, I hope it brings a little cozy magic to yours.
Your Flavor-Packed Toolkit: Ingredients & Smart Swaps
Think of this as your breakfast blueprint! Each ingredient brings texture, tang, or protein power. Here’s the breakdown (and how to make it YOURS):
- 2 Soft-Boiled Eggs: The creamy, golden-yolked heart of the bowl! (Chef’s Tip: Room temp eggs peel easier! Sub: Fried eggs or crispy tofu scramble for vegan.)
- ¼ Cup Sauerkraut: Our tangy, probiotic punch! (Why I love it: Adds brightness and gut-friendly zing. Sub: Kimchi for spicy kick or quick-pickled red onions.)
- ¼ Cup Cottage Cheese: Creamy, high-protein base. (Insider Hack: Use full-fat for richness! Sub: Thick Greek yogurt, ricotta, or smashed avocado.)
- 1–2 Breakfast Sausage Links: Savory, hearty goodness. (Pro Swap: Chicken apple sausage, plant-based patties, or crispy bacon bits.)
- ½ Cup Cherry Tomatoes, Halved: Bursting juicy sweetness! (Seasonal Twist: Swap for roasted sweet potatoes in winter or fresh peaches in summer!)
- Optional Magic Makers: Fresh dill (herbal pop!), chili flakes (heat!), black pepper (depth!), mustard drizzle (tangy zip!). (Don’t skip these – they’re flavor elevators!)
Let’s Build Your Breakfast Masterpiece: Step-by-Step
Grab your favorite bowl – the fun begins! This comes together faster than your coffee brews.
- Egg-cellent Timing: Gently lower eggs into boiling water. Set that timer for 6.5 minutes for gloriously jammy yolks! (Hack: Add 1 tsp vinegar to the water – it helps prevent leaks if shells crack!) Immediately transfer to an ice bath. Let them chill for 2 minutes – this stops cooking and makes peeling a breeze. Tap, roll gently, and peel under cool water. Slice carefully – admire that sunshine center!
- Sizzle That Sausage: While eggs cook, heat a small skillet over medium. Add sausage links (no oil needed – they’ll release their own tasty fat!). Cook for 6-8 minutes, turning often, until beautifully browned and cooked through. (Chef’s Secret: Cut links into coins halfway through cooking for extra crispy edges!) Transfer to a paper towel.
- Bowl Assembly Joy: Spoon the cottage cheese into your bowl as the creamy base. Artfully arrange your halved tomatoes, tangy sauerkraut, and those glorious sausage pieces around it. Think vibrant sections!
- The Grand Finale: Nestle your sliced soft-boiled eggs on top. Now, the flourish: Drizzle with mustard (I love whole grain!), sprinkle generously with fresh dill, crack on black pepper, and add a pinch of chili flakes for warmth. (Pro Move: Sprinkle flaky sea salt on those eggs!)
Take a breath. Admire your colorful creation. Now, dive in and let those flavors dance!
Serving Up Sunshine: How to Present Your Power Bowl
We eat with our eyes first! Use a wide, shallow bowl to showcase all those gorgeous layers. Place the cottage cheese slightly off-center – it creates visual interest. Group the tomatoes and kraut in vibrant little piles next to the sausage coins. Let the sliced eggs star in the center, yolks gleaming. Finish by draping that mustard drizzle artfully over the eggs and cottage cheese. Sprinkle herbs and spices generously – they look like confetti! Serve immediately with a big spoon (or crusty toast for scooping!). Perfect for savoring solo at the kitchen counter or doubling up for a cozy weekend brunch spread.
The Art of Balancing Flavors & Textures
At the heart of this Savory Breakfast Power Bowl is a masterclass in contrast. Each ingredient plays a specific role in creating a symphony of flavors and textures that wake up the palate. The creamy cottage cheese (or its substitutes) acts as a neutral canvas, tempering the tangy sauerkraut’s sharpness and the umami-rich sausage’s savoriness. Meanwhile, the jammy eggs introduce a luscious, velvety texture, while the cherry tomatoes burst with juicy acidity. Even the garnishes—cracked black pepper, chili flakes, and fresh dill—add layers of warmth, heat, and herbal brightness.
This balance isn’t accidental. It’s a lesson borrowed from global breakfast traditions: think Middle Eastern labneh bowls with olives and za’atar, or Japanese rice bowls with pickled veggies and tamago. The key is ensuring no single element overpowers the others. For example, if you’re using a particularly salty sausage (like chorizo), balance it with extra cottage cheese or a drizzle of honey. If sauerkraut feels too intense, a handful of peppery arugula can bridge the gap. Texture-wise, the bowl avoids monotony by combining soft (eggs, cheese), crunchy (sausage edges, fresh veggies), and fermented (kraut) components.
Pro Tip: For an even deeper flavor profile, try roasting the tomatoes with a pinch of sugar to caramelize their sweetness, or toast the sausage with fennel seeds for an aromatic twist. The bowl’s adaptability is its superpower—swap ingredients, but always aim for that harmony of creamy, tangy, savory, and fresh.
The Science Behind the Sustenance
This bowl isn’t just delicious—it’s engineered to fuel your body efficiently. Let’s break down its nutritional prowess:
Protein Powerhouse: With 32g of protein primarily from eggs, cottage cheese, and sausage, this bowl supports muscle repair and satiety. The combination of fast-digesting whey protein (in cottage cheese) and slow-digesting casein (in eggs) provides a steady release of energy, preventing mid-morning crashes. Plant-based? Swap in tofu scramble and chickpea-based sausage for similar benefits.
Gut-Friendly Ferments: Sauerkraut isn’t just for zing—it’s a probiotic superstar. Fermented foods introduce beneficial bacteria to the gut, aiding digestion and immunity. Studies suggest regular consumption may reduce inflammation and improve nutrient absorption. For maximum benefits, use unpasteurized kraut (look for refrigerated varieties).
Smart Fats: The fats here—from egg yolks, sausage, and dairy—are satiating and support brain function. To boost this further, add avocado or a drizzle of olive oil for heart-healthy monounsaturated fats.
Low-Sugar Energy: Unlike sugary cereals or pastries, this bowl keeps carbs minimal and fiber-rich (thanks to tomatoes and kraut), stabilizing blood sugar. The result? No 10 AM energy slump.
Practical Hack: For meal preppers, cook components in advance, but store eggs unpeeled and kraut separately to preserve texture. Reheat sausage gently to avoid drying it out.
Cultural Inspirations & Global Twists
This bowl is a passport to global breakfast traditions. Here’s how to take it on a world tour:
Nordic Revival: Swap sausage for smoked salmon, use skyr (Icelandic yogurt) instead of cottage cheese, and top with diced cucumbers and radishes. Add a sprinkle of dill and capers for a Scandinavian vibe.
Asian Fusion: Replace sausage with miso-glazed tempeh, use kimchi instead of sauerkraut, and drizzle with sesame oil and furikake. Soft-boiled eggs can be marinated in soy-mirin broth for ramen-inspired flavor.
Mexican Fiesta: Black beans, crumbled queso fresco, and pickled jalapeños bring heat and heartiness. Top with avocado and a squeeze of lime for freshness.
French Bistro: Use herbed goat cheese as the base, add crispy lardons (French bacon), and swap tomatoes for roasted mushrooms. A dollop of Dijon mustard ties it together.
Each variation respects the original’s balance while celebrating local ingredients. This adaptability makes the bowl a weeklong staple without monotony.
Make It Your Own: Delicious Twists & Swaps
This bowl is your canvas! Get creative:
- Mediterranean Magic: Swap sausage for crumbled feta & olives, add cucumber, use tzatziki instead of cottage cheese. Top with oregano.
- Green Goddess: Use smashed avocado as the base. Add sautéed spinach, asparagus, and a sprinkle of pumpkin seeds. Drizzle with lemon tahini.
- Southwest Fiesta: Black beans instead of sausage! Corn, avocado, pickled jalapeños, salsa. Cotija cheese & cilantro on top.
- Vegan Vibes: Crispy seasoned tofu scramble or tempeh bacon replaces eggs/sausage. Coconut yogurt swap for cottage cheese. Add sunflower seeds!
- Lower-Carb Love: Double the sausage or eggs. Skip tomatoes, add extra kraut and sautéed mushrooms. Drizzle with olive oil.
Olivia’s Kitchen Confessions & Tips
This bowl has seen some experiments! Once, mid-blog photoshoot, my cat Balthazar leapt onto the counter and tried to abscond with a sausage link – chaos ensued, eggs flew (RIP, jammy yolk). Lesson learned: defend your breakfast fiercely! Over time, I’ve tweaked the formula – the mustard drizzle was a happy accident when I ran out of hot sauce, and adding fresh dill felt like unlocking a secret garden in my mouth. The real magic? Embrace the mess! Don’t stress perfect egg slicing. Cottage cheese blob looking rustic? That’s homemade charm! This recipe thrives on flexibility. Use what’s fresh, use what you love, and make it work for YOUR morning rhythm. That’s the true power in this bowl.
Your Breakfast Bowl Questions, Answered!
Q: Help! My soft-boiled eggs are impossible to peel neatly. What am I doing wrong?
A: Egg-stremely common frustration! Try these tricks: 1) Use slightly older eggs (fresh ones cling tighter to the membrane). 2) Shock them REALLY well in ice water – full 2 minutes. 3) Gently tap the entire egg on the counter, then roll it between your palms to crackle the shell before peeling under running water. Patience is key!
Q: Can I meal prep components ahead?
A: Absolutely! Soft-boil eggs (keep unpeeled in fridge for 3 days). Cook sausage links and store separately. Halve tomatoes. Assemble cottage cheese + kraut + tomatoes in a container. Morning-of: Reheat sausage briefly, peel/slice eggs, assemble, and garnish! Avoid pre-assembling the full bowl with kraut – it can make things watery.
Q: The sauerkraut tang is too strong for me. Alternatives?
A: No problem! Rinse it quickly under cold water to mellow the flavor. Or swap for milder fermented veggies like curtido (Latin American slaw) or a spoonful of quick-pickled shallots. Kimchi works if you love heat!
Q: My cottage cheese seems watery in the bowl. How to fix?
A: Great eye! Drain off any excess liquid from your cottage cheese container before scooping. For extra creaminess, try “small-curd” or “squeezed dry” cottage cheese. You can also mix in a pinch of everything bagel seasoning or herbs to thicken it slightly!

Savory Breakfast Power Bowl
- Total Time: 10 mins
Description
Born from my grandma’s no-fuss farmhouse mornings, this bowl blends comfort and nutrition in one vibrant scoop. Think creamy cottage cheese, golden-yolked eggs, juicy sausage, and tangy kraut—all layered with care, not rules. Whether it’s a busy Tuesday or a slow Sunday, this breakfast bowl says: you’ve got this.
Ingredients
-
2 soft-boiled eggs
-
¼ cup sauerkraut
-
¼ cup full-fat cottage cheese
-
1–2 breakfast sausage links
-
½ cup cherry tomatoes, halved
-
Fresh dill, mustard drizzle, black pepper, chili flakes (optional but powerful!)
Instructions
-
Boil Eggs – Boil eggs for 6.5 mins, ice bath 2 mins, peel and halve.
-
Cook Sausage – Sauté links 6–8 mins, slice into crispy coins.
-
Assemble Bowl – Spoon cottage cheese in. Add tomatoes, kraut, sausage, and nestle sliced eggs on top.
-
Finish – Drizzle mustard, sprinkle herbs, crack pepper, add chili flakes.
Notes
-
Swap sauerkraut for kimchi, or sausage for crispy tofu.
-
Use Greek yogurt or avocado instead of cottage cheese.
-
Add sweet potatoes or spinach for extra color and fiber.
- Prep Time: 5 mins
- Cook Time: 5 mins
Nutrition
- Calories: 430 per serving
- Fat: 28g
- Carbohydrates: 10g
- Fiber: 3g
- Protein: 32g
Final Thoughts: More Than a Meal
This Savory Breakfast Power Bowl transcends its ingredients—it’s a mindset. It’s about rejecting rushed mornings and embracing nourishment as self-care. Whether you’re a busy parent, a fitness enthusiast, or someone rediscovering the joy of cooking, this bowl meets you where you are. It’s forgiving (burnt sausage? Toss it in!), versatile (clean-out-the-fridge-friendly), and deeply satisfying.
Most importantly, it carries a legacy—Olivia’s grandma knew that food is more than fuel; it’s love, memory, and resilience. So tomorrow, when you stand at the pantry, unsure, remember: breakfast doesn’t need to be perfect. It just needs to be yours. Now, go forth and conquer your morning.
Nutritional Power-Up (Per Serving)
Calories: ~430 | Protein: 32g | Carbs: 10g (Fiber: 3g) | Fat: 28g
Note: Values are estimates. Includes 1 sausage link and standard ingredients. Optional toppings not included. Swaps will alter values!
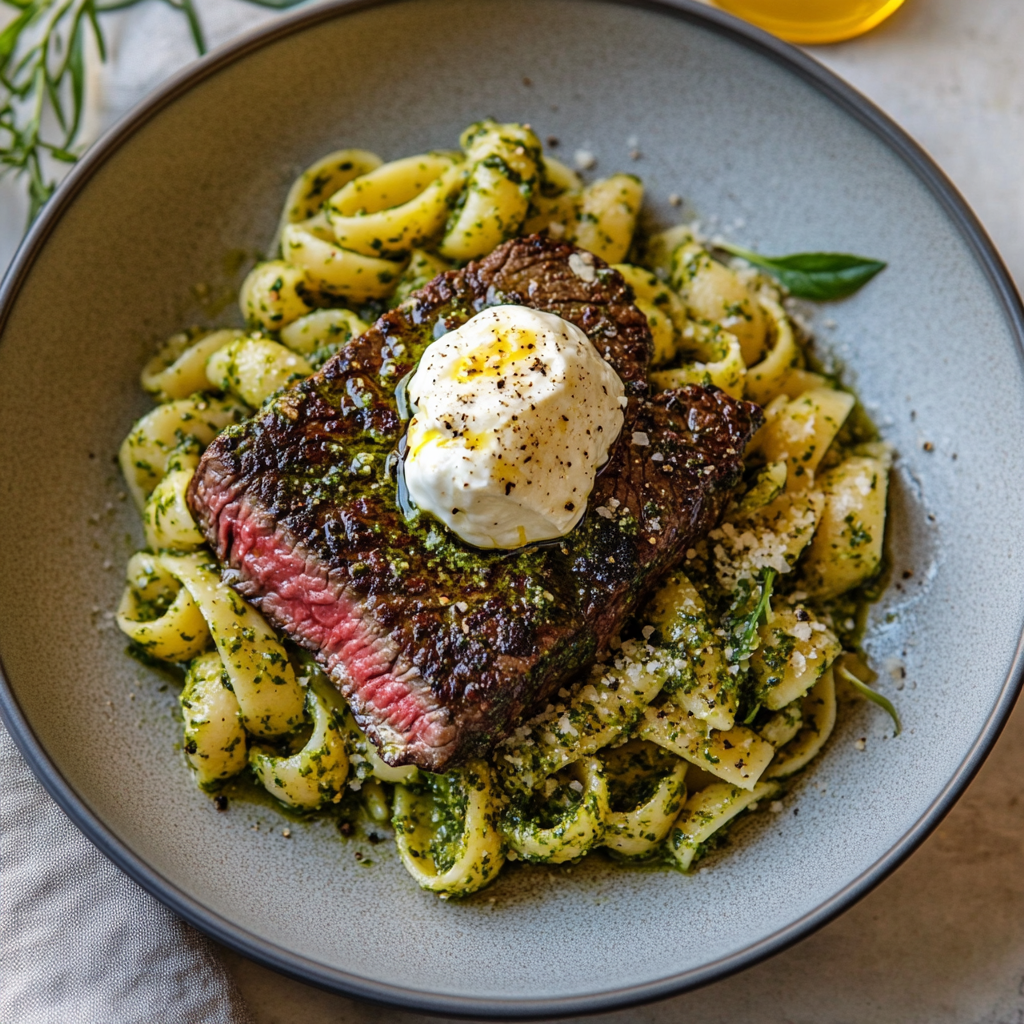
Grass-Fed Ribeye with Pesto Pasta
Celebrate the Everyday with Juicy Ribeye & Dreamy Pesto Pasta
Hey there, kitchen friend! Olivia here, waving from my flour-dusted countertop. Ever have one of those days where you crave something that feels special but doesn’t demand a PhD in culinary arts? That exact craving sparked this beauty: Grass-Fed Ribeye with Pesto Pasta & Burrata. Picture this: a seared, juicy steak resting beside vibrant green pasta swirled with homemade basil pesto, crowned with a cloud of creamy burrata that oozes decadence when you cut in. It’s elegant enough for date night but simple enough for a Tuesday “treat yourself” moment. Why do I love it? Because it’s pure, unfussy indulgence. The grass-fed ribeye brings deep, rich flavor, the pesto sings with fresh herbs, and that burrata? Pure magic. No fancy skills needed—just good ingredients, a hot pan, and the joy of creating something delicious. Ready to turn your kitchen into a celebration station? Let’s dive in!
Why This Dish Sparks Joy
This recipe always takes me back to my third anniversary with my partner. We’d planned a fancy dinner out, but a surprise snowstorm left us housebound. Panic? Nope! I raided the freezer (hello, trusty ribeye!) and the pantry. I whipped up pesto with sad-looking basil that perked right up in the blender, tossed it with orecchiette, and plopped the last burrata ball from the fridge on top. Cooking that steak by candlelight, laughing as snow piled up outside… it was pure, unscripted coziness. When we sat down? The creamy burrata melting into the pesto, the steak’s savory bite—it felt luxurious and real. That night taught me celebration isn’t about reservations; it’s about savoring the moment (and a really good meal) with someone you love. Now, this dish is my go-to “happy place” recipe.
Gather Your Flavor Heroes
For the Steak:
- 1 grass-fed ribeye (about 12 oz): Grass-fed beef has a richer, slightly mineral flavor and leaner profile. Chef’s tip: If unavailable, choose well-marbled conventional ribeye—fat equals flavor!
- Salt & pepper to season: Be generous! Salt draws out natural juices for a killer crust. I use coarse sea salt and freshly cracked black pepper.
- 1 tbsp olive oil or butter: Olive oil has a higher smoke point for searing. Butter adds richness—try both! Use avocado oil if you’re searing super hot.
For the Pesto Pasta & Burrata:
- 6 oz short pasta (rigatoni or orecchiette): These shapes trap pesto perfectly! Substitute: Fusilli or penne work great too. Need GF? Brown rice pasta holds up well.
- 1 cup fresh basil (packed!): Non-negotiable for bright pesto. Chef’s insight: Bruise leaves gently before blending to release oils. Sub half with spinach if basil is scarce.
- ¼ cup extra virgin olive oil: Use the good stuff—it’s the pesto’s backbone. Tip: Reserve a splash for finishing.
- 2 tbsp grated parmesan: Adds salty umami. Freshly grated melts smoother than pre-shredded.
- 1 garlic clove: Start with one! You can always add more. Roast it first for a mellower kick.
- 2 tbsp pine nuts or walnuts: Pine nuts are classic (pricey, though!), walnuts add earthy depth. Toast them for 2 minutes in a dry pan—game changer!
- Salt to taste: Season pesto AFTER blending—cheese adds saltiness.
- 1 ball burrata cheese: The star! It’s fresh mozzarella with a creamy center. Find it: Near fresh mozzarella in most cheese sections. Sub: Fresh mozzarella (still delicious, less ooze).
Let’s Get Cooking! (It’s Easier Than You Think)
Here’s your foolproof roadmap to dinner bliss. I’ve tucked tips into every step—you’ve got this!
- Make the Pesto (5 mins): Toss basil, olive oil, parmesan, garlic, nuts, and a pinch of salt into a blender or food processor. Pulse until mostly smooth, scraping sides as needed. Chef hack: Don’t over-blend or it heats up and darkens! Aim for vibrant green. Too thick? Drizzle in 1 tsp water or extra oil. Taste and adjust salt. Set aside. Tip: Pesto can sit for 30 mins—the flavors marry beautifully!
- Cook the Pasta (10 mins): Bring a large pot of salted water to a rolling boil (taste it—it should be like the sea!). Add pasta and cook until al dente (check package time, usually 9-11 mins). Golden rule: Reserve ½ cup pasta water BEFORE draining! Drain pasta, return it to the warm pot. Add pesto and toss vigorously. If it seems tight, splash in reserved pasta water 1 tbsp at a time—the starch creates a silky sauce. Cover and keep warm.
- Cook the Steak (10 mins + Rest): Take steak out of the fridge 30 mins before cooking—crucial for even cooking! Pat it bone-dry with paper towels (wet steak = sad sear). Season generously all over with salt and pepper. Heat oil or butter in a heavy skillet (cast iron is my MVP!) over medium-high until shimmering. Carefully add steak. Sear undisturbed for 3-4 mins until a gorgeous brown crust forms. Flip! Sear other side 3-4 mins for medium-rare (120-125°F internal temp). Chef move: Tilt pan, spoon hot fat over steak the last minute for extra flavor. Transfer steak to a cutting board, tent loosely with foil, and LET IT REST 5-10 mins. Why? Resting lets juices redistribute—slice too soon, and they’ll flood your board!
- Slice & Plate (2 mins): Slice steak against the grain into ½-inch strips—this makes it tender. Divide pesto pasta between two plates. Gently tear the burrata ball in half and place one half on each pasta mound. Sprinkle with cracked pepper. Arrange steak slices alongside. Final flourish: Drizzle reserved olive oil over the burrata and steak. Maybe a basil leaf? Perfection!
Setting the Scene for Deliciousness
Presentation is part of the fun! Use warm plates—it keeps everything cozy. Spoon that vibrant pesto pasta slightly off-center. Let the burrata take center stage, draping over the pasta like a luxurious blanket. Fan those gorgeous steak slices beside it, showing off that perfect pink center. A final crack of black pepper and maybe a tiny sprinkle of flaky salt over the burrata? *Chef’s kiss*. Serve immediately with crusty bread to mop up any pesto-burrata goodness left behind. Dim the lights, light a candle—instant restaurant vibes at home!
Make It Your Own!
This dish is a canvas—play with it!
- Protein Swap: Not a steak person? Pan-seared salmon or juicy chicken thighs work wonders with pesto.
- Vegan Vibes: Skip steak. Use nutritional yeast instead of parmesan in pesto, and swap burrata for a dollop of cashew cream or vegan ricotta. Add roasted chickpeas for protein!
- Green Goddess: Stir a handful of baby spinach or arugula into the hot pasta with the pesto for extra greens.
- Sun-Drenched Twist: Fold in ½ cup halved sun-dried tomatoes or roasted cherry tomatoes with the pesto.
- Nut-Free Pesto: Replace pine nuts/walnuts with 2 tbsp sunflower seeds or pumpkin seeds (pepitas)—toast them first!
The Art of Selecting the Perfect Ribeye
A great meal starts with great ingredients, and when it comes to steak, the ribeye is king. This cut, known for its rich marbling and deep beefy flavor, is a favorite among steak lovers. But not all ribeyes are created equal—choosing the right one makes all the difference.
Why Grass-Fed?
Grass-fed beef has a distinct flavor profile—earthy, slightly mineral, and leaner than grain-fed beef. Cattle raised on grass develop a firmer texture and a more complex taste. Grass-fed ribeyes also contain higher levels of omega-3 fatty acids and antioxidants, making them a healthier choice. However, because they’re leaner, they require careful cooking to avoid toughness.
Choosing the Best Cut
When selecting a ribeye, look for:
-
Bright red color (avoid grayish or brown hues).
-
Even marbling (thin streaks of fat throughout the meat for juiciness).
-
A thick cut (1.5 inches or more)—thinner steaks overcook too quickly.
If grass-fed isn’t available, a well-marbled conventional ribeye works—just expect a richer, buttery flavor from the extra fat.
Prepping the Steak for Success
-
Bring it to room temperature—30 minutes out of the fridge ensures even cooking.
-
Pat it dry—moisture prevents a good sear.
-
Season generously—coarse salt and freshly cracked pepper are all you need.
A perfectly cooked ribeye should have a deep brown crust and a juicy, pink center. The key? A screaming-hot pan and patience—let it sear undisturbed for that restaurant-quality crust.
Crafting the Perfect Pesto Pasta
Pesto is one of those magical sauces that transforms simple pasta into something extraordinary. Made with fresh basil, garlic, nuts, and olive oil, it’s vibrant, aromatic, and incredibly versatile.
The Science of Great Pesto
-
Fresh basil is non-negotiable—wilted or old basil lacks the bright, peppery punch.
-
Toasting the nuts (pine nuts or walnuts) enhances their flavor.
-
Quality olive oil binds everything together—use extra virgin for the best taste.
-
Garlic intensity can be adjusted—raw garlic is sharp, while roasted garlic is mellow.
Step-by-Step Pesto Perfection
-
Blend basil, garlic, nuts, and parmesan—pulse until finely chopped.
-
Drizzle in olive oil—just enough to make it smooth but not runny.
-
Season to taste—salt amplifies the flavors, but go easy (parmesan is already salty).
Pasta Pairing Tips
-
Short, textured pasta (orecchiette, rigatoni) holds pesto best.
-
Reserve pasta water—the starch helps the sauce cling to the noodles.
-
Toss while hot—the heat releases the pesto’s aromas.
For an extra touch of luxury, burrata—a creamy mozzarella with a soft center—melts into the pesto, creating a luscious, velvety finish.
The Magic of Plating & Pairing
A dish this delicious deserves a beautiful presentation. How you plate it affects not just the visual appeal but also the eating experience.
Plating for Impact
-
Warm plates—keeps the food at the right temperature.
-
Pasta first—swirl it into a nest-like shape for height.
-
Burrata placement—gently tear it open so the creamy center spills out.
-
Steak slices—fan them alongside the pasta for contrast.
-
Final drizzle—a touch of olive oil and cracked black pepper for elegance.
Perfect Pairings
-
Wine: A medium-bodied red like Chianti or a crisp white like Sauvignon Blanc.
-
Bread: Crusty baguette to soak up leftover pesto and burrata.
-
Side salad: A simple arugula salad with lemon dressing balances the richness.
Make It a Full Experience
-
Dim the lights, light a candle, and play soft music—turn dinner into an event.
-
Serve family-style for a relaxed, shareable meal.
Olivia’s Extra Sprinkle of Love
This recipe has evolved like my favorite apron—gaining character! Early versions used jarred pesto (shh!), but discovering how EASY homemade pesto is? Life-changing! One time, I accidentally used a whole head of garlic instead of one clove… let’s just say my partner joked we were vampire-proof for a week. Lesson learned! The burrata addition came later—inspired by a market find. Its cool creaminess against the warm steak is divine. Remember: Cooking is an adventure, not a test. Forgot the parmesan? It happens! Burrata broke before plating? Call it “deconstructed” and dive in. The goal? Joy, connection, and a darn tasty plate. Now, go make some memories!
Your Questions, Answered!
Let’s tackle those common kitchen hiccups:
- “Can I use store-bought pesto?” Absolutely! Grab a high-quality one (aim for basil as the first ingredient). Use about ½ cup. But honestly? Homemade is fresher, brighter, and takes 5 mins—give it a try next time!
- “My steak isn’t searing well/steaming instead. Help!” Two culprits: Wet steak or a cold pan. Pat that steak DRY! And ensure your pan is properly hot before adding it—test with a drop of water; it should sizzle and dance. Don’t crowd the pan either. If it sticks? Let it cook a bit longer; it’ll release when ready.
- “Pesto turned brown! What did I do wrong?” Over-blending or using a dull blade can heat the basil and cause oxidation. Pulse gently just until combined. Adding a tiny squeeze of lemon juice to the blender helps preserve color too. It’s still tasty, just less vibrant!
- “How do I know the steak’s done without cutting it open?” Invest in an instant-read thermometer! For medium-rare: 130-135°F (54-57°C). No thermometer? Use the “finger test”: Gently press the steak. If it feels like the fleshy part of your palm below your thumb when your hand is relaxed, it’s medium-rare. Practice makes perfect!
Grass-Fed Ribeye with Pesto Pasta
- Total Time: 30 mins
Description
It all started on a snowy anniversary night—with plans foiled by weather and saved by pantry heroes. From that cozy candlelit meal came this unforgettable dish: a seared grass-fed ribeye, rich with flavor, paired with herb-loaded pesto pasta and a creamy burrata center that melts into the plate. It’s elegant yet effortless, indulgent but unfussy—ideal for slow dinners or surprise celebrations. Your table’s about to feel extra special.
Ingredients
Ingredients:
For the Steak:
-
1 grass-fed ribeye (12 oz)
-
Salt & freshly cracked black pepper
-
1 tbsp olive oil or butter
For the Pesto Pasta:
-
6 oz short pasta (rigatoni or orecchiette)
-
1 cup fresh basil
-
¼ cup olive oil
-
2 tbsp grated parmesan
-
1 garlic clove
-
2 tbsp toasted pine nuts or walnuts
-
Salt to taste
-
1 ball burrata cheese
Instructions
-
Make Pesto – Blend basil, oil, parmesan, garlic, nuts, and salt until smooth. Set aside.
-
Cook Pasta – Boil until al dente. Reserve ½ cup water, drain, toss with pesto in the pot.
-
Sear Steak – Pat steak dry. Season. Sear in hot pan with oil, 3–4 mins per side for medium-rare. Rest 5–10 mins before slicing.
-
Plate & Serve – Divide pasta onto plates. Top with halved burrata and sliced steak. Drizzle with olive oil, season with black pepper.
Notes
-
Use store-bought pesto if pressed for time—choose high-quality!
-
Add sun-dried tomatoes or arugula to the pasta for extra flavor.
-
Not a steak fan? Try pan-seared salmon or grilled chicken.
- Prep Time: 10 mins
- Cook Time: 20 mins
Nutrition
- Calories: 700 per serving
- Fat: 48g
- Carbohydrates: 30g
- Protein: 45g
Final Thoughts: Why This Dish is Special
This meal is more than just food—it’s a celebration of simplicity and flavor. The ribeye brings depth, the pesto adds freshness, and the burrata delivers indulgence. But beyond taste, it’s about the experience: the sizzle of the steak, the aroma of basil, the joy of sharing a beautifully plated dish.
Whether it’s a date night, a solo treat, or an impromptu gathering, this recipe proves that great meals don’t need to be complicated. They just need love, good ingredients, and a little bit of flair. So grab that ribeye, blend that pesto, and savor every bite—you deserve it.
Happy cooking! 🍽️
Nutritional Notes (Approximate per serving)
Calories: ~700 | Protein: 45g | Carbs: 30g | Fat: 48g | This is a satisfying, protein-rich meal. The grass-fed beef offers healthy fats like omega-3s, and olive oil provides heart-healthy monounsaturated fats. Enjoy it as a balanced indulgence!

Crispy Chicken Caesar Salad
Why This Salad Will Steal Your Heart (And Crunch Its Way Into Your Regular Rotation!)
Hey there, kitchen friend! Olivia here, apron dusted with rogue parmesan and probably a cornflake or two stuck to my sleeve. You know that magical moment when you bite into something so perfectly crunchy-creamy-savory that you actually pause mid-chew? That’s exactly what I live for—and it’s why I’m practically buzzing to share this Crispy Chicken Caesar Salad with you today. Forget sad desk salads; we’re building a TEXTURE FEAST here. Imagine golden chicken tenders shattering under your fork to reveal juicy insides, all snuggled into cool romaine draped in creamy Caesar dressing. And the secret? Oh, honey—we’re crushing cornflakes into that breading for a crunch that’ll make you swoon. This isn’t just lunch; it’s a crispy, salty, cheesy hug in a bowl. Ready to make any Tuesday feel like a celebration? Let’s get cluckin’!
The Happy Accident That Started My Cornflake Obsession
Picture this: It’s 2010, my tiny Brooklyn apartment kitchen, and I’m hosting my then-boyfriend (now husband!) for a “fancy” dinner. I planned chicken Parmesan—until I realized my breadcrumb jar held nothing but dusty crumbs. Panic! Then I spotted a half-eaten box of cornflakes on top of the fridge (breakfast-for-dinner survivor). Desperate times called for crunchy measures. I smashed those flakes, mixed in parm, and baked those chicken strips praying for a miracle. The result? He took one bite, looked at me wide-eyed, and said, “This is BETTER than breadcrumbs.” Reader, I married him—but honestly, the real love story began with that cornflake crust. Now, every time I make this salad, I grin remembering how a kitchen fail sparked my forever obsession with cereal-coated anything. Life’s messy. Your chicken? Doesn’t have to be.
Gather Your Flavor Squad
Crispy Chicken Tenders:
- 2 chicken breasts, sliced into strips — Go for plump, even-thickness breasts! Pro hack: Freeze them for 15 minutes before slicing—it makes cleaner cuts.
- 1 cup crushed cornflakes — SECRET WEAPON! They give an airy, shattery crunch breadcrumbs dream about. Gluten-free? Use GF cornflakes!
- ½ cup grated parmesan — Freshly grated tastes brighter, but the green-can stuff works in a pinch. Adds salty umami magic.
- 1 egg — Our “glue”! Whisk it with 1 tbsp water for easier dipping.
- Salt, pepper, garlic powder — Season like you mean it! I do ½ tsp salt, ¼ tsp each pepper and garlic powder. Feeling fancy? Add smoked paprika.
Salad Base:
- 4 cups chopped romaine lettuce — Crisp hearts only! Wash, spin dry (soggy lettuce = sad salad). Swap with kale for extra heft.
- ¼ cup Caesar dressing — Homemade is divine, but a quality store-bought (like Cardini’s) saves the day. Need it creamy? Add an extra spoonful!
- ½ cup croutons — Bake day-old bread cubes with olive oil & garlic. Or cheat (I do!) with store-bought garlic-parm ones.
- Extra parmesan for topping — Shave it with a veg peeler for fancy ribbons, or grate for snowy coverage.
Let’s Build That Crunchy Masterpiece!
Step 1: Bread Like a Boss — Slice chicken against the grain into 1-inch strips. Whisk egg in a shallow bowl. In another bowl, mix crushed cornflakes (crush ’em fine-ish but leave some flakes for texture!), parmesan, salt, pepper, and garlic powder. Chef’s Tip: Use one hand for wet (egg), one for dry (crumb mix). No breadcrumb-finger-cement hands!
Step 2: Bake or Air Fry to Golden Glory — Dip each chicken strip in egg, let excess drip off, then roll in cornflake mix, pressing gently so it sticks. Place on a parchment-lined baking sheet or air fryer basket. DON’T CROWD! Bake at 400°F (200°C) for 15-18 mins, flipping halfway, until deeply golden and internal temp hits 165°F. Air fry at 390°F for 10-12 mins—shakes basket once. Chef’s Hack: Spritz chicken lightly with olive oil before cooking for extra crisp!
Step 3: Lettuce Get Fresh — While chicken cooks, chop romaine. Toss ONLY with dressing in a big bowl. Biggest mistake? Dressing the whole salad too early. Toss greens + dressing JUST before serving to avoid wilting.
Step 4: Assemble Your Victory Lap — Pile dressed lettuce onto plates or a big platter. Scatter with croutons. Artfully arrange hot chicken tenders on top (that heat slightly wilts the lettuce underneath—divine!). Snow with extra parmesan. Final Touch: Crack fresh black pepper over everything. Simple. Perfect.
Plate It Pretty (Or Just Dive In!)
Presentation matters—even for salads! For “fancy”: Use wide, shallow bowls. Arrange chicken tenders leaning against a romaine mound, croutons scattered like edible confetti, with parmesan shavings on top. For “family-style fun”: Pile everything onto a huge rustic platter—let people dig in! Serve immediately while chicken is piping hot and crisp. Pair with icy lemonade or a crisp Pinot Grigio. Got hungry humans? Add garlic bread soldiers for dunking into runaway dressing!
Shake It Up, Salad-Style!
This recipe LOVES a remix! Try these twists:
- Spicy Caesar Kick: Add 1 tsp chili powder + ¼ tsp cayenne to cornflake mix. Drizzle sriracha into dressing!
- Gluten-Free Goddess: Use certified GF cornflakes & GF croutons. Swap regular flour for cornstarch if dredging (though egg alone works!).
- Bacon & Egg Upgrade: Top salad with chopped crispy bacon + a soft-boiled egg. Because bacon makes everything better.
- Keto-Friendly Crunch: Swap cornflakes for crushed pork rinds + almond flour (2:1 ratio). Use full-fat, sugar-free dressing.
- Mediterranean Sunshine: Add Kalamata olives, cucumber slices, and swap Caesar for lemon-herb vinaigrette. Feta > parmesan!
Olivia’s Extra Nuggets of Wisdom
This salad evolved from my “I have nothing to eat” days! Originally, I used leftover takeout fried chicken strips (still delicious, zero shame). The cornflake hack stuck because it’s FOOLPROOF—even my niece Lily (age 7!) nails it. Pro tip: Make extra chicken! Leftover tenders reheat beautifully in the air fryer (5 mins at 370°F) for next-day salads or sandwiches. One time, I accidentally used Frosted Flakes—sweet-salty chaos ensued! (Not terrible, but… stick to cornflakes). Truth? The best part isn’t the crunch—it’s seeing my kids actually FIGHT over who gets the last piece of lettuce. Victory!
Your Crispy Chicken Conundrums—Solved!
Q: Can I pan-fry instead of bake/air fry?
A: Absolutely! Heat ¼ inch oil in a skillet over medium-high. Fry tenders 3-4 mins per side until golden and cooked through. Drain on paper towels—extra crunch alert!
Q: Help! My breading is falling off!
A: Three tricks: 1) Pat chicken SUPER dry before dipping. 2) Press crumbs firmly onto chicken. 3) Let breaded strips rest 5 mins before cooking—helps coating adhere!
Q: Can I prep this ahead?
A: Partially! Prep chicken (bread but don’t cook), store covered in fridge up to 4 hours. Cook just before serving. Dressing goes on lettuce MAX 10 mins pre-serving. Pre-chopped lettuce? Store wrapped in damp paper towels.
Q: Caesar dressing too rich? Lighter options?
A: Try Greek yogurt Caesar! Mix 3 tbsp Greek yogurt + 3 tbsp mayo + 1 tbsp lemon juice + 1 tsp Worcestershire + garlic, parm, anchovy (optional). Creamy but tangier!
Crispy Chicken Caesar Salad
- Total Time: 30 mins
Description
It started with a cornflake panic. One “breadcrumb emergency” night turned into a forever favorite—juicy chicken strips wrapped in golden crunch, nestled into cool romaine, and kissed with Caesar dressing. This salad is my weeknight hero, my potluck showstopper, and the one dish my kids actually argue over. It’s quick, crowd-pleasing, and delivers that crispy-creamy perfection every time.
Ingredients
Crispy Chicken:
-
2 chicken breasts, sliced into strips
-
1 cup crushed cornflakes
-
½ cup grated parmesan
-
1 egg + 1 tbsp water
-
½ tsp salt, ¼ tsp pepper, ¼ tsp garlic powder
Salad Base:
-
4 cups chopped romaine hearts
-
¼ cup Caesar dressing
-
½ cup croutons
-
Extra parmesan for topping
Instructions
-
Prep Chicken – Slice breasts into strips. Dip in whisked egg, then coat in cornflake-parmesan mix.
-
Cook – Bake at 400°F (15–18 mins) or air fry at 390°F (10–12 mins), flipping halfway. Spritz with oil for max crunch!
-
Toss Salad – Mix romaine with Caesar dressing just before serving.
-
Assemble – Layer lettuce, croutons, hot chicken, and parmesan. Finish with cracked black pepper.
Notes
-
Spice it up with chili powder in the crust.
-
Swap Caesar for Greek yogurt dressing.
-
Use leftover tenders in wraps or sandwiches!
- Prep Time: 10 mins
- Cook Time: 15–18 mins
Nutrition
- Calories: 520 per serving
- Fat: 30g
- Carbohydrates: 22g
- Fiber: 3g
- Protein: 38g
Final Thoughts
This Crispy Chicken Caesar Salad isn’t just a meal—it’s a celebration of textures, flavors, and happy accidents. From the cornflake-crusted chicken to the cool, creamy romaine, every bite is a reminder that the best recipes often come from improvisation.
Whether you’re serving it for a quick weeknight dinner, impressing guests, or just treating yourself to something deliciously crunchy, this salad delivers. And hey, if you accidentally grab Frosted Flakes instead of cornflakes? Roll with it. (Sweet and salty chaos can be fun too.)
Nutritional Nibbles (Per Serving)
Calories: ~520 | Protein: 38g | Carbs: 22g | Fat: 30g | Fiber: 3g | Sugar: 3g
Note: Stats vary based on dressing/chicken size. Using light dressing? Save ~70 cals. Air frying? Saves 40 cals vs baking with oil spray.
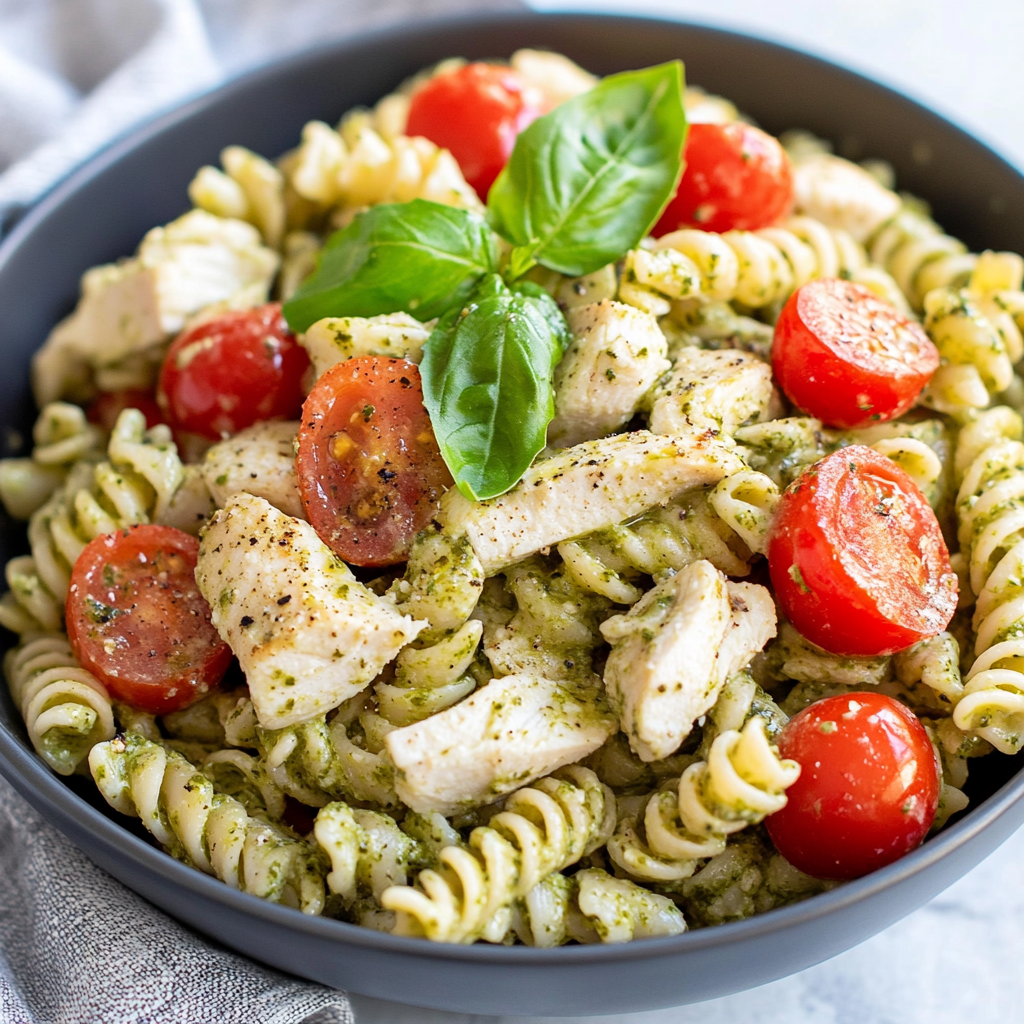
Creamy Chicken Pesto Pasta Salad
Sunshine in a Bowl: My Creamy Chicken Pesto Pasta Salad That Steals Every Summer Gathering
Hey there, kitchen friend! Olivia here, apron slightly flour-dusted and heart full of excitement because today? We’re diving fork-first into my absolute summer MVP: Creamy Chicken Pesto Pasta Salad. 🍃🍝 Picture this: tender pasta cradling juicy chicken, bursts of sweet cherry tomatoes, peppery greens, and creamy mozzarella pearls, all swirled in a luscious pesto sauce that’s kissed with parmesan. It’s not just a salad—it’s a vibrant, crave-worthy hug in a bowl that somehow manages to be refreshing and deeply satisfying at the same time.
If your summer is anything like mine—packed with impromptu picnics, backyard BBQs, or those “I can’t turn the oven on” weeknights—this recipe is your new best friend. It’s ridiculously easy (we’re talking 15 minutes if you cheat with rotisserie chicken!), endlessly adaptable, and guaranteed to make people hover around the serving bowl whispering, “Who made this?” It’s the dish I bring when I want to feel like I fussed, without actually fussing. No fancy skills required, just a love for big, unapologetic flavors. Ready to make something that tastes like sunshine? Let’s go!
Why This Salad? A Tale of Picnic Panic & Pesto Magic
Let me take you back to my friend Maya’s lakeside potluck a few years ago. I’d ambitiously signed up for a “showstopper salad,” only to realize—mid-morning chaos—that my planned recipe required obscure ingredients I absolutely did not have. Cue the pre-picnic panic! I stared into my fridge like it held state secrets: leftover rotisserie chicken, half a tub of pesto from pasta night, wilting arugula, and a container of cherry tomatoes threatening to go soft. Desperation breeds innovation, right? I tossed it all with some cold pasta, a dollop of Greek yogurt for creaminess, and hoped for the best.
Friends, it was an accidental triumph. That bowl vanished faster than kids chasing an ice cream truck. People scraped the sides, asked for the recipe, and Maya still texts me every summer demanding “The Salad.” What started as a fridge-clearer became my signature warm-weather dish. It taught me that the best recipes often aren’t planned—they’re born from resourcefulness, a little love, and trusting your gut (and your taste buds!). Every time I make it now, I smile remembering that sunny panic and the chorus of “Mmmms” floating over the lake.
Your Flavor Toolkit: Ingredients & Smart Swaps
Gather these simple stars! Remember: cooking is play, not perfection. Swap freely based on what’s in your kitchen.
- 2 cups cooked rotini pasta – Chef Insight: Rotini’s twists are perfect for trapping sauce! Substitute with fusilli, penne, or farfalle. Pro Tip: Cook it al dente! Mushy pasta = sad salad.
- 1 cup cooked shredded chicken – My Hack: Rotisserie chicken is your weeknight hero! Leftover grilled chicken or quickly poached breast works too. Vegetarian? Swap in chickpeas or white beans for protein.
- ½ cup pesto (homemade or jarred) – Flavor Boost: Basil pesto is classic, but try sun-dried tomato or kale pesto! Jarred is fine—look for one with olive oil as the first ingredient. Sub Note: Nut-free? Swap pesto for ⅓ cup olive tapenade + 2 tbsp basil.
- ¼ cup plain Greek yogurt or mayo – Why Both Work: Yogurt adds tang & lightness; mayo gives richer creaminess. Dietary Swap: Vegan? Use vegan mayo or blended silken tofu.
- 1 cup cherry tomatoes, halved – Seasonal Tip: In winter, use roasted bell peppers or sun-dried tomatoes (oil-packed, drained). Their sweetness balances the pesto!
- 1 cup arugula or baby spinach – Texture Talk: Arugula adds peppery bite; spinach is milder. Swap in chopped kale (massage it first!) or fresh basil leaves.
- 1 cup mozzarella pearls – Cheese Bliss: These little balls add creamy bursts! Shredded mozzarella or diced fresh mozzarella works too. Feta or goat cheese crumbles offer a salty tang twist.
- ¼ cup grated parmesan – Umami Magic: Use the real stuff (Parmigiano Reggiano) if you can! It adds salty depth. Vegetarians: check for rennet-free parmesan.
- Salt & pepper to taste – Key Reminder: Season AFTER mixing! Pesto & parmesan are salty. Taste first!
Let’s Build Your Bowl: Effortless Steps & Chef Secrets
This is where the magic happens—fast! Grab your biggest mixing bowl; things are about to get deliciously messy.
- Pasta Perfect: Cook your rotini in well-salted boiling water until al dente (check package timing, usually 8-10 mins). Drain, rinse IMMEDIATELY under cold water until completely cool. Why? This stops cooking and prevents clumping. Toss with a tiny drizzle of olive oil if not using right away. Chef Hack: Cook pasta the night before! Store rinsed pasta in the fridge in a sealed container.
- Creamy Dreamy Base: In your big bowl, combine the pesto and Greek yogurt (or mayo). Whisk it vigorously until smooth and creamy. Insider Tip: If using thick pesto, add 1 tsp of lemon juice or water to loosen it slightly for easier mixing.
- The Grand Toss: Add the cooled pasta, shredded chicken, halved cherry tomatoes, arugula/spinach, and mozzarella pearls to the bowl with the pesto sauce. Gently fold everything together using a large spatula or salad tongs. Key Move: Fold, don’t stir aggressively! We want to keep those tomatoes and greens intact. Chef Secret: Add the greens last in the folding to prevent wilting.
- Finishing Touches: Sprinkle the grated parmesan over the top. Now, taste! Season carefully with salt (you might only need a pinch) and freshly cracked black pepper. Give one final, gentle fold. Decision Time: Serve immediately for vibrant, distinct flavors, or cover and chill for 30-60 mins for more melded, picnic-ready bliss.
Plate It Pretty: Serving Your Summer Star
Presentation is easy-peasy! Spoon your pasta salad into a large, shallow serving bowl or platter. For a restaurant-worthy touch, scatter a few extra whole basil leaves, a sprinkle of extra parmesan, or a handful of toasted pine nuts over the top. A light drizzle of good olive oil adds shine. Perfect Pairings: Serve chilled alongside grilled lemon-herb chicken or salmon, or as the star of a picnic spread with crusty bread, fresh fruit, and crisp white wine. For lunches? Portion into mason jars—dressing on the bottom, pasta mix on top—shake to mix when ready!
Make It Your Own: Delicious Twists on the Theme
This salad is a blank canvas! Here are my favorite spins:
- Mediterranean Magic: Swap chicken for chickpeas, add chopped Kalamata olives, cucumber, and crumbled feta. Use a lemon-herb pesto!
- Caprese Vibes: Double the mozzarella pearls and cherry tomatoes. Add fresh basil ribbons. Swap pesto for a basil-heavy homemade version. Drizzle with balsamic glaze.
- Protein Power-Up: Use flaked tuna, cooked shrimp, or diced ham instead of chicken. Perfect for using leftovers!
- Veggie-Loaded: Add ½ cup finely chopped roasted zucchini, bell peppers, or artichoke hearts. Swap half the pasta for quinoa or farro.
- Lighter & Brighter: Use all Greek yogurt, swap arugula for watercress, add lemon zest to the dressing, and use whole wheat pasta.
Olivia’s Kitchen Confessions & Evolution
Okay, full disclosure: my original “panic” version used way too much mayo and turned slightly gloppy by the lake. Lesson learned: balance is key! Over the years, I’ve refined it—testing Greek yogurt for tang, adjusting pesto ratios, and learning that rinsing pasta in cold water is non-negotiable. One hilarious fail? Forgetting to halve the tomatoes before a big BBQ. Watching guests awkwardly bite into whole cherry tomatoes mid-conversation was… memorable. Now I always halve them! The biggest evolution? Confidence. I now eyeball greens, throw in extra herbs, or swap cheeses based on mood. That’s the joy—make it yours. This salad isn’t just food; it’s a reminder that cooking should be fun, forgiving, and full of flavor.
Your Questions, Answered: Pesto Pasta Salad SOS
Q: Can I make this ahead? How long does it keep?
A: Absolutely! It’s a meal prep dream. Make it up to 24 hours ahead. Store covered in the fridge. The flavors meld beautifully! Add delicate greens (like arugula) just before serving to prevent wilting. It keeps well for 3 days, though the greens soften.
Q: My salad seems dry after chilling. Help!
A: No worries! Pasta absorbs dressing. Give it a good stir. If still dry, whisk together 1 tbsp pesto + 1 tbsp olive oil or lemon juice and gently fold it in. Next time, reserve 1-2 tbsp of the pasta cooking water when draining—it helps keep things saucy!
Q: Can I use a different pasta shape? Gluten-free?
A: Totally! Any short pasta with nooks works: penne, farfalle, shells. For gluten-free, use your favorite GF pasta (corn/quinoa blends hold up well). Cook it VERY al dente, as GF pasta can get mushy faster.
Q: Is Greek yogurt better than mayo?
A: It depends on your vibe! Yogurt gives a lighter, tangier creaminess. Mayo is richer and more traditional. I often use a mix! For dietary needs, vegan mayo or silken tofu puree work great.

Creamy Chicken Pesto Pasta Salad
- Total Time: 20 mins
Description
One warm lakeside afternoon, a last-minute fridge dive gave birth to what my friends now call “The Salad.” What began as a panic pasta moment turned into my go-to summer star—tender rotini, juicy chicken, sweet cherry tomatoes, and mozzarella pearls, all swirled in creamy pesto magic. It’s easy, uplifting, and secretly clever. Whether for a BBQ, picnic, or no-oven dinner, this bowl is sunshine made edible.
Ingredients
-
2 cups cooked rotini pasta (or penne/farfalle)
-
1 cup shredded cooked chicken (rotisserie shortcut!)
-
½ cup pesto (jarred or homemade)
-
¼ cup Greek yogurt or mayo
-
1 cup halved cherry tomatoes
-
1 cup arugula or spinach
-
1 cup mozzarella pearls
-
¼ cup grated parmesan
-
Salt & black pepper to taste
Instructions
-
Cook Pasta – Boil in salted water until al dente. Rinse with cold water to cool, then drain well.
-
Mix Sauce – In a large bowl, whisk pesto and yogurt/mayo until smooth.
-
Toss It Together – Add pasta, chicken, tomatoes, greens, and mozzarella. Gently fold to coat.
-
Finish & Serve – Top with parmesan. Season to taste. Serve chilled or let rest 30–60 mins for extra flavor.
Notes
-
Add lemon zest for brightness.
-
Try with chickpeas or shrimp.
-
Stir in chopped roasted veggies for a boost.
- Prep Time: 10 mins
- Cook Time: 10 mins
Nutrition
- Calories: 450 per serving
- Fat: 24g
- Carbohydrates: 30g
- Fiber: 3g
- Protein: 32g
Nutritional Notes (Per Serving)
Approximate values (using Greek yogurt & rotisserie chicken): Calories: ~450 | Protein: 32g | Carbs: 30g | Fat: 24g | Fiber: 3g
Note: Values vary based on specific ingredients/brands used. This is a balanced meal rich in protein and healthy fats from pesto & olive oil!

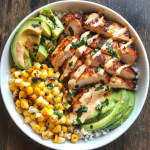
Creamy Chipotle Chicken & Corn Bowl
Hey There, Bowl Lover! Let’s Make Magic Happen
Is there anything better than digging into a vibrant, hearty bowl that feels like a warm hug? You know the kind—layers of fluffy rice, juicy grilled chicken, sweet charred corn, and creamy avocado, all drenched in a smoky chipotle-lime crema that makes your taste buds dance. If you’re dreaming of Chipotle but crave that homemade touch (and maybe saving a few bucks), you’ve landed in the right place! I’m Olivia, and this Creamy Chipotle Chicken & Corn Bowl is my love letter to easy, flavor-packed meals that turn weeknight dinners into little celebrations. No fancy skills needed—just grab your favorite apron (mine’s currently dusted with paprika, oops) and let’s create something unforgettable. Whether you’re cooking solo or prepping for your crew, this bowl is your ticket to cozy, restaurant-worthy goodness in under 30 minutes. Trust me, that zesty crema? It’s life-changing. 🔥
Why This Bowl? A Little Backyard Memory…
Picture this: It’s a golden-hour summer evening, my tiny Brooklyn balcony overflowing with potted herbs, and my best friend Sofia laughing as she nearly drops a tray of corn cobs onto our mini grill. We’d just moved in together, broke but determined to host “fancy” dinners. That night, we threw together random leftovers—grilled chicken, rice, corn scorched at the edges—and drowned it in a spicy yogurt sauce I’d whipped up. No recipe, just vibes. One bite in, Sofia gasped: “Liv, this tastes like happiness!” That messy, cobbled-together bowl became our signature dish all season long. It reminds me that cooking isn’t about perfection—it’s about joy, improvising, and sharing what you love with people who matter. Every time I make this now, I smile thinking of Sofia’s corn-induced panic and that first magical bite. Food memories? They stick with you.
Gather Your Flavor Heroes (Plus Swaps!)
Here’s your grocery list—simple, fresh, and flexible. Don’t stress if you’re missing something; I’ve got backups!
- 2 cups cooked rice (jasmine or cilantro-lime): Jasmine’s floral notes rock here, but brown rice or quinoa work for extra fiber. Chef hack: Cook rice in broth instead of water for a flavor boost!
- 1 large chicken breast, grilled & cubed: Thighs are juicier if you prefer! Shortcut? Grab a rotisserie chicken. Just shred it warm.
- 1 ripe avocado, sliced: Creaminess king! No avocado? Try smashed black beans for texture.
- 1 cup grilled or roasted corn: Frozen corn’s my freezer hero—char it in a dry pan for that fire-kissed sweetness. Fresh cobs? Even better!
- 1 tbsp olive oil + salt, pepper, garlic powder, smoked paprika: This spice squad builds depth. No smoked paprika? Regular works, but add a dash of liquid smoke to the crema.
For the Chipotle Crema (The STAR!):
- ½ cup sour cream or Greek yogurt: Yogurt lightens it up; sour cream adds richness. Vegan? Coconut yogurt + lime works!
- 1 chipotle pepper in adobo (or 1 tsp chipotle powder): Peppers add smoky heat—start with half if you’re sensitive! Adobo sauce tip: Freeze leftover peppers in ice cube trays for future recipes.
- Juice of ½ lime + pinch of salt: Brightens everything. Bottled lime juice? It’s okay in a pinch!
Let’s Build That Bowl, Step by Step
Ready? Channel your inner grill master—no fancy gear needed!
- Season & sizzle that chicken: Rub your breast with olive oil, then coat it generously with salt, pepper, garlic powder, and smoked paprika. Heat a skillet or grill pan over medium-high. Cook chicken 6-7 mins per side until golden and cooked through. Chef hack! Let it rest 5 minutes before cubing—this keeps it juicy. Toss cubes with extra lime juice if you’re feeling zesty!
- Char your corn like a pro: While chicken rests, add corn to the same hot pan (hello, flavor leftovers!). Stir occasionally for 5-7 minutes until kernels get little black spots. No fresh/frozen? Canned corn works—drain well and pat dry so it sears, not steams!
- Whip up the magic crema: In a blender or small bowl, combine sour cream/yogurt, chipotle pepper (seed it for less heat!), lime juice, and salt. Blend until smooth. Too thick? Add a splash of water or milk. Taste—add honey if you want sweet heat!
- Assemble your masterpiece: Fluff rice with a fork and divide between bowls. Top with chicken, corn, and fan out those avocado slices like you’re plating at a bistro. Pro move: Warm the rice slightly—it makes the bowl cozier!
- Drench it & devour: Generously drizzle crema over everything. Garnish with cilantro, extra lime, or crumbled cotija cheese. Now, take that Instagram pic quick… because it’s time to dig in!
How to Serve It Up Right
This bowl shines bright solo, but let’s make it feel extra special! I love serving it family-style: pile rice in a big platter, arrange chicken and corn in colorful sections, and let everyone add avocado and crema at the table. For lunches? Layer ingredients in mason jars (crema at the bottom, then rice, chicken, corn, avocado on top) and shake when ready to eat. Pair it with icy watermelon agua fresca or a crisp lager—the coolness balances the smoky heat perfectly. And please, grab the biggest spoon you own. This isn’t a dainty dish!
Shake It Up: 5 Delicious Twists
This bowl’s a canvas—make it yours!
- Vegan Fiesta: Swap chicken for crispy baked tofu or roasted sweet potatoes. Use coconut yogurt crema.
- Seafood Lover’s: Replace chicken with grilled shrimp or chili-lime salmon.
- Tex-Mex Style: Add black beans, pickled red onions, and crushed tortilla chips for crunch.
- Low-Carb: Skip rice—use cauliflower rice or a bed of shredded lettuce.
- Breakfast Bowl: Top with a fried egg and swap crema for chipotle hollandaise. Yes, really!
Olivia’s Extra Kitchen Confessions
Okay, full disclosure: The first time I made this crema, I accidentally used THREE chipotle peppers. Cue my husband chugging milk! We now call that version “Dragon Breath Bowl.” 😂 Over time, I’ve learned a few things: 1) Always make double crema—it’s killer on tacos, eggs, or even as a veggie dip. 2) Leftovers? The chicken and corn reheat beautifully; just add fresh avocado. 3) This recipe evolved from my “clean-out-the-fridge” nights, so don’t overthink it. Got zucchini? Grill it! Extra cilantro? Toss it in. Cooking should feel playful, not precise. Oh, and if you spill crema on your shirt? Welcome to my world—it’s a badge of honor.
The Art of Building the Perfect Bowl
There’s something undeniably satisfying about a well-constructed bowl—layers of textures, flavors, and colors that come together in a single, harmonious bite. The Creamy Chipotle Chicken & Corn Bowl is no exception. It’s a masterpiece of balance: smoky, spicy, creamy, and fresh, all in one dish. But what makes a bowl truly great? Let’s break it down.
The Foundation: Rice Matters
Every great bowl starts with a solid base. Here, jasmine rice is the ideal choice—its floral aroma and slightly sticky texture hold up against the bold chipotle crema. But if you want a nuttier flavor, brown rice or quinoa are excellent swaps. Pro tip: Cook your rice in chicken or vegetable broth instead of water for an extra layer of richness. If you’re short on time, pre-cooked rice (the kind you heat in 90 seconds) works in a pinch—just dress it up with a squeeze of lime and chopped cilantro.
The Star: Perfectly Cooked Chicken
The chicken in this bowl should be juicy, well-seasoned, and slightly charred. Whether you grill it, pan-sear it, or even bake it, the key is in the seasoning. A simple mix of smoked paprika, garlic powder, salt, and pepper creates a deep, savory crust. For extra tenderness, marinate the chicken for 30 minutes in lime juice and olive oil before cooking. And if you’re in a rush? Rotisserie chicken is a lifesaver—just shred it and warm it up with a sprinkle of spices.
The Supporting Cast: Corn & Avocado
Charred corn adds sweetness and a smoky crunch. If you don’t have fresh corn, frozen kernels work just as well—toss them in a hot, dry pan until they get those beautiful blackened spots. As for the avocado, it’s the cooling contrast to the spicy crema. If yours isn’t ripe yet, pop it in a paper bag with a banana overnight to speed things up. No avocado? Black beans or even sliced cucumbers can add creaminess and crunch.
The Crown Jewel: Chipotle Crema
This sauce is what ties everything together. Made with sour cream (or Greek yogurt), chipotle peppers in adobo, lime juice, and salt, it’s smoky, tangy, and just spicy enough. If you’re sensitive to heat, remove the seeds from the chipotle pepper before blending. And if you love extra flavor, add a touch of honey to balance the spice.
Final Bowl Assembly Tips
-
Warm your rice before assembling—it makes the bowl feel heartier.
-
Layer strategically: Rice first, then chicken, corn, and avocado on top.
-
Drizzle generously—don’t be shy with the crema!
-
Garnish for freshness: Cilantro, lime wedges, or even pickled onions add brightness.
The Science of Flavor Pairing (Why This Bowl Works So Well)
Ever wonder why some dishes just click? The Creamy Chipotle Chicken & Corn Bowl is a perfect example of flavor harmony—where every ingredient plays a role in creating a balanced, crave-worthy meal. Let’s dive into the science behind the deliciousness.
1. Smoky + Sweet = Magic
The chipotle peppers bring a deep, smoky heat, while the charred corn adds natural sweetness. This contrast is key—our taste buds love opposing flavors that play off each other. The Maillard reaction (that beautiful browning on the chicken and corn) also enhances umami, making every bite more satisfying.
2. Creamy + Acidic = Perfect Balance
The richness of the crema (whether from sour cream or Greek yogurt) is cut by the bright lime juice, preventing the dish from feeling too heavy. Acid also heightens other flavors, making the spices in the chicken pop even more.
3. Texture Contrast: Why Crunch Matters
A great bowl needs multiple textures. Here, you’ve got:
-
Tender chicken
-
Chewy rice
-
Crisp charred corn
-
Creamy avocado
This variety keeps every bite interesting and prevents flavor fatigue.
4. The Role of Fat in Flavor Absorption
The avocado and crema aren’t just for taste—they also help carry fat-soluble flavors, making the spices and smokiness more pronounced. That’s why a well-dressed bowl tastes so much better than a dry one!
5. The Psychological Comfort of Bowls
Studies show that eating from a bowl feels more comforting than a plate. The contained, layered format makes the meal feel more intentional and satisfying. Plus, it’s instantly Instagram-worthy—which, let’s be honest, is a nice bonus.
How to Maximize Flavor Next Time
-
Toast your spices before rubbing them on the chicken for deeper flavor.
-
Let the crema sit for 10 minutes before serving—the flavors meld and intensify.
-
Add a sprinkle of cotija cheese for a salty, crumbly finish.
Meal Prep & Creative Variations
One of the best things about this bowl? It’s incredibly versatile. Whether you’re meal-prepping for the week or switching up ingredients based on what’s in your fridge, here’s how to keep it fresh and exciting.
Meal Prep Like a Pro
-
Batch-cook the chicken & corn—they reheat beautifully.
-
Store crema separately (it keeps for 5 days in the fridge).
-
Pack avocado separately (squeeze lime juice on it to prevent browning).
-
Assemble bowls fresh to maintain texture.
5 Delicious Twists to Try
-
Breakfast Bowl – Swap chicken for a fried egg, add crispy potatoes, and drizzle with chipotle hollandaise.
-
Vegan Version – Use grilled tofu or portobello mushrooms, and swap crema for cashew cream.
-
Seafood Lover’s – Replace chicken with grilled shrimp or chili-lime salmon.
-
Tex-Mex Style – Add black beans, pickled jalapeños, and crushed tortilla chips.
-
Low-Carb Option – Skip the rice and use cauliflower rice or a bed of greens.
Leftover Hacks
-
Turn it into tacos (just warm tortillas and stuff ‘em!).
-
Toss with mixed greens for a hearty salad.
-
Use extra crema as a dip for veggies or fries.
Your Questions, Answered!
Q: My crema is too spicy! How do I fix it?
A: No sweat! Stir in 1 tbsp honey or maple syrup to balance heat. Next time, use just ½ pepper (or only adobo sauce) and add more gradually.
Q: Can I prep this ahead?
A: Totally! Cook chicken/corn and make crema up to 3 days ahead. Store separately—assemble bowls fresh so avocados don’t brown and rice stays fluffy. Reheat chicken/corn gently in a pan.
Q: Why did my chicken turn out dry?
A: Overcooking is the usual culprit. Use a meat thermometer—chicken’s done at 165°F (74°C). And that resting step? NON-NEGOTIABLE. It lets juices redistribute.
Q: No adobo peppers? Help!
A> Mix 1 tsp chipotle powder + 1 tsp tomato paste + 1 tsp vinegar. Or use 2 tbsp smoky BBQ sauce in a pinch!
Creamy Chipotle Chicken & Corn Bowl
- Total Time: 25 mins
Description
Years ago, my friend Sofia and I were broke roommates grilling corn on a tiny Brooklyn balcony. One happy accident (and a whole lot of smoky crema) turned our leftovers into a signature bowl. Every bite reminds me: cooking is joy, not perfection. Let this bowl bring a little sunshine to your table—fast, flavorful, and soul-satisfying. Let’s build your new favorite weeknight ritual.
Ingredients
-
2 cups cooked jasmine rice (or brown rice/quinoa)
-
1 large chicken breast, grilled & cubed (or rotisserie)
-
1 ripe avocado, sliced
-
1 cup grilled or roasted corn (fresh, frozen, or canned)
-
1 tbsp olive oil
-
½ tsp each: salt, pepper, garlic powder, smoked paprika
Chipotle Crema:
-
½ cup sour cream or Greek yogurt
-
1 chipotle pepper in adobo (or 1 tsp chipotle powder)
-
Juice of ½ lime
-
Pinch of salt
Instructions
-
Cook Chicken – Rub chicken with oil & spices. Grill or pan-fry 6–7 mins/side. Rest 5 mins, then cube.
-
Char Corn – In same pan, heat corn 5–7 mins until lightly charred.
-
Make Crema – Blend yogurt/sour cream with chipotle, lime, and salt until smooth.
-
Assemble Bowls – Layer rice, chicken, corn, and avocado. Drizzle generously with crema. Garnish with lime or cilantro if desired.
Notes
-
Cook rice in broth for extra flavor.
-
No chipotle? Use smoky BBQ sauce.
-
Too spicy? Stir honey into crema.
- Prep Time: 10 mins
- Cook Time: 15 mins
Nutrition
- Calories: 580 per serving
- Fat: 29g
- Carbohydrates: 38g
- Protein: 36g
Final Thoughts
This Creamy Chipotle Chicken & Corn Bowl isn’t just a meal—it’s a celebration of bold flavors, smart prep, and kitchen creativity. Whether you stick to the classic version or experiment with your own twists, the key is to have fun with it. Cooking should feel joyful, not stressful.
So grab your ingredients, turn up some music, and make this bowl your own. And when you take that first bite? Savor it. Because good food isn’t just about eating—it’s about creating moments worth remembering.
Nutrition Per Serving (Because You’re Curious!)
Calories: ~580 | Protein: 36g | Carbs: 38g | Fat: 29g
Note: Stats include Greek yogurt crema. Using sour cream adds ~30 more calories.
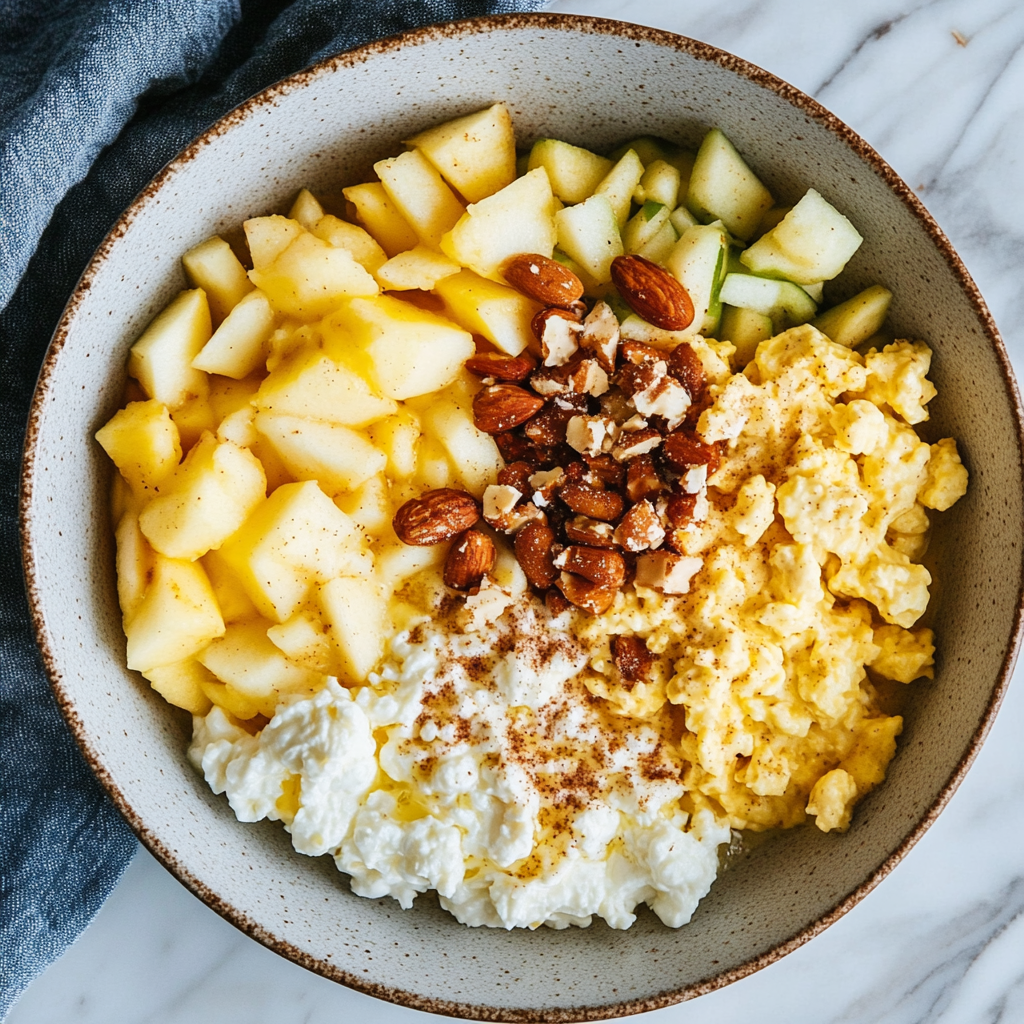
Balanced Breakfast Power Bowl
🍎🍳 Sweet, Savory & Protein-Packed Goodness
Rise, Shine & Crush Your Morning Goals
Hey there, kitchen friend! Olivia here, apron dusted with cinnamon and heart full of breakfast love. Ever have those mornings when you stare into the fridge, craving something that hits all the notes—creamy, crunchy, sweet, salty, and protein-packed? That’s exactly why I created this Balanced Breakfast Power Bowl. It’s my secret weapon for busy days, post-workout refuels, and “I-want-comfort-but-don’t-want-to-slump” moments. Picture this: velvety scrambled eggs hugging salty turkey, crisp apples dancing in spiced peanut butter, and honey-drizzled cottage cheese that tastes like a hug. No fancy skills needed—just 10 minutes, one bowl, and a symphony of flavors that’ll make your taste buds high-five. Ready to turn your morning routine into a joyride? Let’s dive in!
My Grandma’s Kitchen & the “Everything Bowl”
This bowl? It’s a love letter to my grandma’s chaotic Sunday breakfasts. Nana Bennett believed food should be fun—no rules, just deliciousness. I’d perch on her countertop (always in my PJs), watching her toss scrambled eggs with leftover ham, slice apples straight into the pan, and dollop cottage cheese beside toast crumbs. “Life’s too short for boring plates, Livvy!” she’d say, winking as she drizzled honey over everything. Those messy, joyful bowls taught me that balance isn’t perfection—it’s the sweet and the savory, the cozy and the energizing, all in one glorious bite. Every time I make this, I hear her laugh… and maybe steal an extra sprinkle of cinnamon.
Your Power-Packed Lineup
- 2 eggs – Our protein MVP! Swap with tofu scramble for vegan vibes.
- 2 slices turkey/ham – Adds salty depth. Bacon or smoked salmon work too!
- ½ apple (chopped) – Crisp Fuji or Honeycrisp hold up best. Pears in a pinch!
- 1 tbsp peanut butter – Creamy or crunchy. Almond butter for nut-free? Yes!
- 1 tsp cinnamon – Warmth magic. Try cardamom for a floral twist.
- 1 tbsp golden raisins – Chewy sweetness. Dried cranberries or chopped dates rock too.
- ½ cup cottage cheese – Creamy base. Greek yogurt if you prefer tang.
- 1 tsp honey – Sunshine in a spoon. Maple syrup or agave for vegan.
- Cheese cubes (optional) – Cheddar or feta for salty pops. Omit if dairy-sensitive.
Chef’s insight: This bowl is a choose-your-own-adventure! Raid your fridge—leftover roasted sweet potatoes? Toss ’em in! Got walnuts? Crunch time!
Let’s Build Breakfast Magic
- Scramble Like a Boss: Whisk eggs with a splash of water (makes ’em fluffier!). Heat a non-stick pan over medium, add chopped turkey/ham, and sizzle 1 minute. Pour in eggs. Wait until edges set, then gently push with a spatula. Stop when slightly glossy—they’ll keep cooking off-heat! (Tip: Undercook eggs now; they’ll warm up later in the bowl!)
- Apple Tango: Toss apple chunks with peanut butter and cinnamon in a small bowl. Massage it like kale! This coats every piece. Fold in raisins. (Hack: Squeeze lemon juice over apples first to prevent browning.)
- Cottage Cheese Cloud: Spoon cottage cheese into your serving bowl. Drizzle honey over the top—swirl it with a spoon for Insta-worthy streaks!
- Bowl Symphony: Layer ingredients side by side, not mixed: eggs on one side, apple mix opposite, cottage cheese center stage. Scatter cheese cubes over everything. (Why? Texture contrasts stay crisp!)
Hot tip: Warm your bowl first—pop it in the microwave 30 seconds. Cold bowls = sad eggs!
Plate It Pretty (or Just Dive In!)
Grab your widest, shallow bowl—this beauty deserves to shine! Keep components distinct so every forkful lets you choose a flavor combo. Garnish with extra cinnamon dust, microgreens, or toasted seeds. Pair with black coffee for bitter balance or a green smoothie for turbo nutrition. Eat immediately! The warmth of the eggs melts the PB slightly… trust me, it’s heavenly.
Mix It Up, Friend!
- Tropical Twist: Swap apples for mango, PB for coconut butter, raisins for toasted coconut.
- Savory Lover: Skip honey. Add avocado, everything bagel seasoning, and hot sauce!
- Paleo Power: Use almond butter, coconut aminos instead of honey, and ditch cheese.
- Berry Bliss: Replace apples with mixed berries and cinnamon with vanilla.
The Science Behind the Perfect Scramble: Why These Eggs Are Fluffier
Let’s geek out for a minute about scrambled eggs—because not all eggs are created equal. The secret to the cloud-like texture in this power bowl comes down to three key factors: water content, heat control, and stopping time.
The Water Trick: Steam = Fluff
Adding a splash of water (about 1 tsp per egg) before whisking might seem odd, but it’s a game-changer. Unlike milk or cream, water evaporates quickly during cooking, creating steam pockets that lift the eggs. Milk proteins can actually weigh eggs down, making them denser. For the lightest scramble, whisk vigorously to incorporate air—imagine you’re making a tiny egg meringue.
Low and Slow Wins the Race
High heat = rubbery disappointment. Eggs contain delicate proteins that tighten when exposed to intense heat. Cooking them over medium-low heat allows the proteins to coagulate gently, resulting in tender curds. Here’s the pro move:
-
Let your pan preheat for 2 minutes (a drop of water should sizzle but not explode).
-
Add your eggs and wait—no stirring for the first 30 seconds! This lets the bottom set slightly.
-
Use a silicone spatula to push the set edges toward the center, tilting the pan to let uncooked egg flow outward.
The Carryover Cooking Phenomenon
Ever notice how eggs keep firming up after you plate them? That’s residual heat at work. Pulling them off the pan when they’re still slightly wet (about 90% done) ensures they stay creamy by the time you take your first bite. Overcooked eggs release sulfur compounds—hence that unappealing gray-green tint and rubbery texture.
Bonus: The Umami Boost
Browning the turkey or ham before adding eggs isn’t just for texture—it’s a flavor catalyst. The Maillard reaction (that glorious browning effect) creates complex savory notes that infuse into the eggs. For vegetarian versions, try sautéing mushrooms or sun-dried tomatoes first.
Thoughts on Egg Mastery
Eggs are one of the most humble yet technically fascinating ingredients. Mastering them transforms not just this bowl, but your entire cooking repertoire—from omelets to custards.
Final Thoughts
Treat your scramble like a delicate custard, not an afterthought. With these science-backed tricks, you’ll never suffer through dry eggs again.
The Psychology of a Balanced Breakfast: Why This Bowl Satisfies
There’s a reason this combination feels so fundamentally right—it’s not just tasty, it’s neurologically satisfying. Let’s break down how this bowl hacks your brain’s reward system.
The Flavor Spectrum: Sweet, Salty, Umami, Fat
Our brains are wired to seek diverse flavors for nutritional completeness. This bowl delivers:
-
Sweet (apples, honey, cinnamon) → Quick energy, dopamine hit
-
Salty (turkey, cheese, peanut butter) → Electrolyte balance, primal craving
-
Umami (eggs, aged cheese if using) → Deep savoriness triggers contentment
-
Fat (peanut butter, egg yolks) → Sustained satiety signals
Studies show meals incorporating multiple taste profiles lead to greater meal satisfaction and reduced snacking urges later.
Texture Therapy: A Symphony for Your Teeth
The human mouth loves variety. This bowl provides:
-
Crisp (apples) → Auditory satisfaction (that crunch sound releases endorphins)
-
Creamy (cottage cheese, eggs) → Comforting, nostalgic
-
Chewy (raisins) → Prolongs eating enjoyment
-
Crunchy (optional nuts) → Requires more chewing, slowing intake
Research indicates textured foods increase meal mindfulness—you’re 23% less likely to overeat compared to homogenous textures (like smoothies).
The Protein Paradox
With 32g protein, this bowl exploits an interesting biological trick: Protein leverage hypothesis. When our bodies detect adequate protein, they downregulate hunger hormones more effectively than with carbs or fats alone. The eggs and cottage cheese provide:
-
Fast-digesting whey (cottage cheese) → Quick satiety
-
Slow-digesting casein (also in cottage cheese) → Long-lasting fullness
-
Complete amino profile (eggs) → Optimizes muscle repair
The Color Connection
The vibrant red apples, golden raisins, and white cottage cheese aren’t just pretty—they trigger visual appetite stimulation. Studies show people perceive colorful meals as 19% more flavorful before even tasting.
Thoughts on Eating Psychology
Understanding why certain foods satisfy helps us build better meals intuitively—not through restrictive dieting, but through strategic joy.
Final Thoughts
This bowl isn’t just fuel; it’s a multi-sensory experience designed by evolution (and grandma wisdom) to leave you both nourished and happy.
Meal Prep Magic: How to Hack This Bowl for Busy Weeks
Love the idea but short on morning time? Here’s how to streamline this bowl for meal prep without sacrificing quality.
The Component Strategy
Instead of assembling full bowls in advance (which leads to sogginess), prep individual elements to mix-and-match all week:
1. Scrambled Eggs: The Freezer Surprise
-
Cook a big batch using the water method (12 eggs + ¼ cup water).
-
Spread hot eggs on a baking sheet to cool quickly (prevents overcooking).
-
Portion into silicone muffin cups, freeze solid, then transfer to bags.
-
Reheat: Microwave frozen pucks 60 seconds, stirring halfway.
Why it works: Flash-cooling stops the cooking process. Reheating with a splash of water restores moisture.
2. Apple Mix: The No-Brown Trick
-
Toss apple cubes with 1 tsp lemon juice + ½ tsp cinnamon per apple.
-
Store separately from peanut butter (prevents sogginess).
-
Morning of: Mix in PB and raisins.
Pro tip: Use firmer apples (Granny Smith, Pink Lady) for longest shelf life.
3. Cottage Cheese: The Flavor Infusion
-
Pre-portion cottage cheese into small jars.
-
Swirl honey underneath (creates a hidden sweet layer).
-
Top with airtight lid to prevent drying.
Assembly Line Efficiency
-
Night before: Move frozen eggs to fridge.
-
AM routine:
-
Reheat eggs (90 sec).
-
Toss apples with PB (30 sec).
-
Grab pre-portioned cottage cheese.
-
Assemble in travel container if needed.
-
The Time-Saving Twists
-
Microwave eggs: Whisk 2 eggs + 1 tbsp water in a mug. Microwave 45 sec, stir, then 30 sec more.
-
Pre-cut apples: Store submerged in water (prevents oxidation for 5 days).
-
Single-serve PB packets: No measuring, no mess.
Confessions from My Messy Counter
This recipe evolved from my “desperation breakfast” phase during culinary school finals. I’d toss whatever was left in my tiny fridge into a bowl—hence the optional cheese cubes! Over time, I realized the texture balance was key: soft eggs against crunchy apples, creamy cottage cheese with chewy raisins. Pro tip? Double the apple mix and keep it in a jar for 3 days—your future self will thank you on hectic mornings. Oh, and my dog Charlie always appears when I crack eggs… so yes, he gets one plain bite. #priorities!
Your Questions, Answered!
Q: My eggs turned rubbery! Help?
A: Medium heat is crucial! High heat = tough eggs. Also, pull them off the pan when 90% cooked—they firm up fast.
Q: Can I meal prep this?
A: Absolutely! Prep components separately: store scrambled eggs (2 days), apple mix (3 days in airtight container), and cottage cheese (5 days). Assemble cold or reheat eggs gently.
Q: Too sweet for me. Adjustments?
A: Skip honey, reduce raisins, or add black pepper to the apple mix! Savory reigns supreme.
Q: Cottage cheese texture freaks me out.
A: Blend it until smooth! Or swap for thick Greek yogurt or silken tofu.
Balanced Breakfast Power Bowl
- Total Time: 10 minutes
Description
Say goodbye to boring breakfasts—this power bowl is the flavor-packed hug your morning needs. With creamy eggs, crisp apple, cinnamon-kissed peanut butter, and cottage cheese drizzled in honey, it’s perfectly balanced to fuel your day in just 10 minutes.
Ingredients
-
2 eggs
-
2 slices turkey or ham
-
½ apple, chopped
-
1 tbsp peanut butter
-
1 tsp cinnamon
-
1 tbsp golden raisins
-
½ cup cottage cheese
-
1 tsp honey
-
Cheese cubes (optional, like cheddar or feta)
Instructions
-
Scramble Eggs: Whisk eggs with a splash of water. Sauté turkey in a non-stick pan over medium heat for 1 min. Add eggs, stir gently until just set.
-
Apple Mix: Toss chopped apple with peanut butter, cinnamon, and raisins. (Add lemon juice if prepping ahead.)
-
Cottage Base: Spoon cottage cheese into a bowl. Swirl honey on top.
-
Assemble: Layer eggs, apple mix, and cottage cheese side-by-side in a warm bowl. Top with cheese cubes, extra cinnamon, or seeds if you like.
Notes
-
Want a smoother texture? Blend the cottage cheese.
-
Swap peanut butter with almond butter or tahini for variety.
-
For a prep hack, store extra apple mix in a jar for up to 3 days.
- Prep Time: 5 minutes
- Cook Time: 5 minutes
Nutrition
- Calories: 480 per serving
- Fat: 26g
- Carbohydrates: 25g
- Fiber: 5g
- Protein: 32g
Thoughts on Sustainable Habits
Meal prep shouldn’t mean eating the same sad Tupperware meal all week. This method keeps things fresh and flexible.
Final Thoughts
With these hacks, you can enjoy this power bowl in under 3 minutes on busy mornings—because great food shouldn’t require sacrificing sleep or sanity.
Fuel Facts (Per Serving)
Calories: 480 | Protein: 32g | Carbs: 25g (Fiber: 5g) | Fat: 26g
Note: Stats include turkey, 1% cottage cheese, and optional cheddar. Customize to fit your goals!
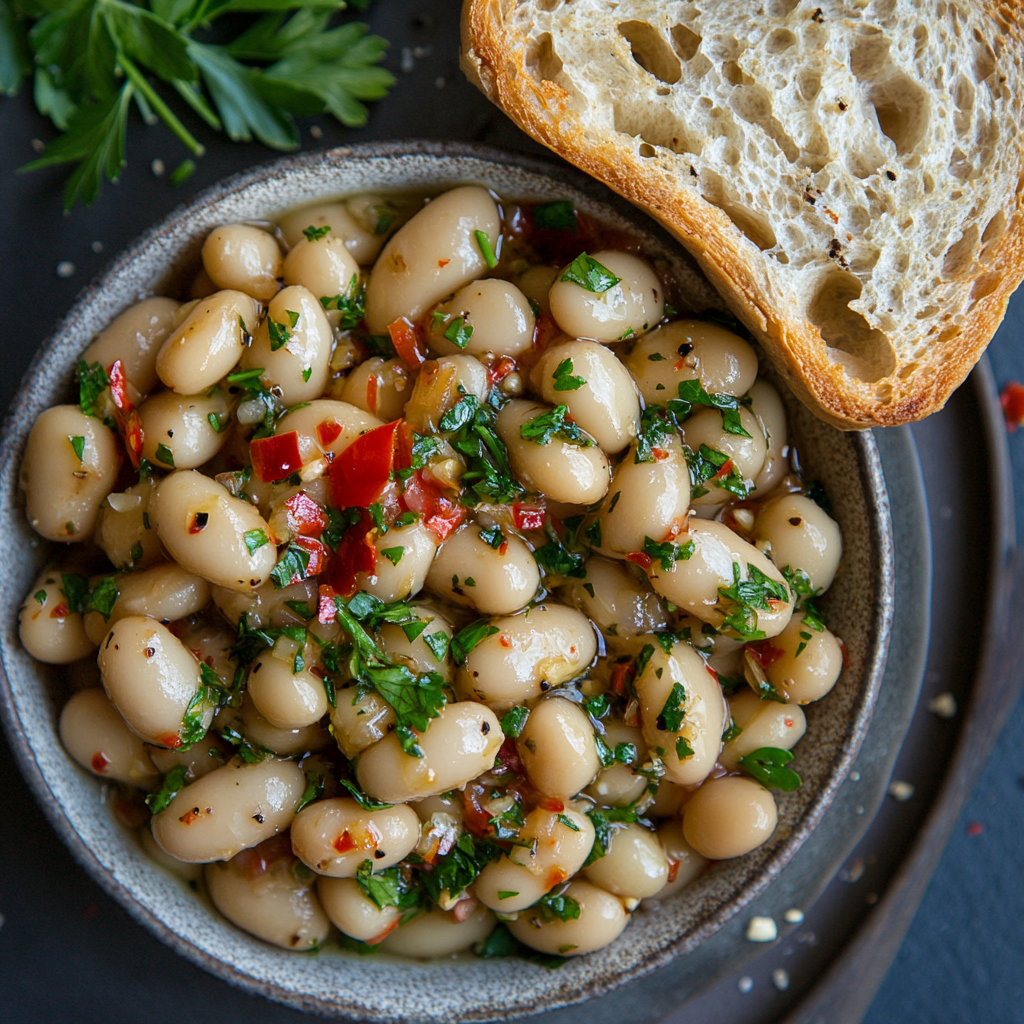
Marinated White Beans
Introduction: The Humble Bean That Steals the Show
Hey there, kitchen friend! Olivia here, apron dusted with flour and heart full of excitement. Let’s talk about a little secret I’ve been hoarding: marinated white beans. This isn’t just another side dish—it’s a flavor-packed, versatile rockstar that’ll make you rethink everything you know about canned beans. Imagine plump, creamy beans swimming in grassy olive oil, zingy lemon, and confetti-bright herbs. They’re briny, garlicky, and just spicy enough to make your taste buds dance. Perfect for when you’re juggling work, life, and a serious craving for something wholesome but *effortless*. Whip these up in 10 minutes flat, let ’em soak up all that goodness while you tackle your to-do list (or sip wine), then watch them disappear—whether piled on crusty bread, tossed with greens, or devoured straight from the jar. Trust me, your future self will high-five you when you pull these from the fridge on a chaotic Tuesday. Let’s make magic happen!
My Mediterranean “Aha!” Moment
Picture this: It’s 2018, and I’m crammed into a tiny Sardinian deli, sweating through my sundress. The air smells like salt and oregano. Behind the counter, Nonna Maria scowls as I butcher Italian pronunciations. Desperate, I point at a glistening tub of beans bobbing in golden oil. She slaps a scoop onto crusty ciabatta, thrusts it at me, and grunts, “*Mangia.*” One bite—**creamy beans**, **charred peppers**, and **sunshine-bright lemon**—and I swear angels sang. I begged the recipe. She waved me off: “*Olio, limone, amore.*” Back home, I recreated that epiphany using pantry staples. Now, these beans star at my picnics, potlucks, and solo “I deserve nice things” lunches. They’re my edible love letter to that stubborn nonna and her life-changing simplicity.
Ingredients: Pantry Raid Meets Fresh Flair
Why these work: Creamy beans + bright acid + punchy aromatics = pure alchemy. Don’t stress substitutions—this recipe forgives!
- 2 (15 oz) cans white beans — Cannellini or Great Northern. Chef’s tip: Rinse WELL! Canned liquid = bland mush. For silky beans, sub 1.5 cups cooked dry beans.
- ½ cup chopped fresh herbs — Mix at least 3! Parsley (freshness), basil (sweet), dill (tang). No tarragon? Mint or chives rock too.
- 2 roasted red peppers, diced — Jarred saves time! Or char fresh bell peppers on your stove burner.
- ⅓ cup finely diced shallot — Milder than onion. Soak in lemon juice 5 mins to mellow bite.
- 2 garlic cloves, minced — Swap: ½ tsp garlic powder in a pinch.
- ½ cup extra virgin olive oil — Splurge on the good stuff! It’s the sauce backbone.
- Zest + juice of 1 lemon — Zest FIRST, then juice. Bottled juice? Use 3 tbsp but add extra zest.
- ½ tsp kosher salt — Critical! Beans need seasoning love. Start here; add more later.
- ¼ tsp red pepper flakes — Optional but *chef’s kiss*. Aleppo pepper works too.
- Black pepper — Freshly cracked = aromatic bliss.
Step-by-Step: Let’s Build Flavor Layers!
Step 1: In a big bowl, combine rinsed beans, diced peppers, shallot, garlic, and herbs. Chef hack: Gently fold with a spatula—no smushed beans allowed! They’re delicate divas.
Step 2: In a jar or small bowl, whisk olive oil, lemon zest + juice, salt, pepper flakes, and black pepper. Pro insight: Taste your dressing! Too tart? Add 1 tsp honey. Flat? More salt.
Step 3: Pour dressing over beans. Fold gently—think “tossing salad,” not “digging trenches.” Game-changer: Let it sit 30+ minutes at room temp. Why? Cold mutes flavors. Let the oil and lemon cozy up to those beans!
Step 4: Sample. Adjust! Need more zing? Lemon. Herbs fading? Toss in extra. Salt MIA? Sprinkle away. Storage tip: Fridge = thicker oil. If it solidifies, rest at room temp 15 mins before serving.
Serving: Where the Magic Happens
These beans are social butterflies! Pile them onto toasted sourdough with avocado smash. Toss into kale salads with feta and cucumbers. Serve alongside grilled chicken or fold into grain bowls. My fave? Straight from a mason jar with a fork—zero shame. Garnish with extra herbs, flaky salt, or a drizzle of chili oil for ✨drama✨.
Shake It Up: 5 Delicious Twists
- Mediterranean: Add crumbled feta, kalamatas, and oregano.
- Spicy & Smoky: Swap roasted peppers for chipotles in adobo + 1 tsp smoked paprika.
- Vegan Creamy: Stir in 2 tbsp tahini + extra lemon for richness.
- Italian Antipasto: Fold in chopped artichokes, sun-dried tomatoes, and capers.
- Herb-Lover’s: Use ALL the herbs—parsley, dill, basil, mint, chives, tarragon.
The Magic of Marination – How Time Transforms Ingredients
Marination is often associated with meats, but when applied to humble white beans, it becomes something extraordinary. The process isn’t just about soaking beans in dressing—it’s a slow, flavorful alchemy where textures soften, flavors deepen, and simple ingredients evolve into something greater than the sum of their parts.
What makes this marinated white bean dish so special is the way it harnesses time as an ingredient. Unlike quick stir-fries or last-minute salads, this recipe demands patience. Those 30 minutes at room temperature aren’t just a suggestion—they’re essential. During this window, the olive oil permeates the beans, carrying with it the sharpness of garlic, the brightness of lemon, and the subtle heat of chili flakes. The shallots, initially pungent, mellow into a sweet, almost pickled tenderness. Even the beans themselves change, their starchy interiors absorbing the surrounding flavors while maintaining a satisfying bite.
The beauty of this dish lies in its adaptability. While the base recipe is perfection on its own, the marinade acts as a blank slate for creativity. Swap lemon for lime and add cilantro for a Mexican-inspired twist. Use white wine vinegar and rosemary for a more Italian flair. The beans don’t just sit in the dressing—they become the dressing, each bite bursting with layered flavor.
Thoughts:
I love how this recipe challenges the notion that marination is only for proteins. Beans, with their porous texture, are actually ideal candidates. They lack the dense structure of meat, meaning they absorb flavors faster and more thoroughly. The result? A dish that feels indulgent despite its simplicity.
Final Thoughts:
This isn’t just a side dish—it’s a lesson in the power of patience. In a world of instant meals, it’s refreshing to find a recipe where waiting is the secret ingredient. The beans don’t just taste better after marination; they transform entirely, proving that sometimes, the best flavors come to those who wait.
The Unsung Hero of Plant-Based Cooking – White Beans as a Protein Powerhouse
In the world of plant-based eating, white beans are often overshadowed by trendier ingredients like quinoa or chickpeas. But this marinated white bean recipe puts them right back in the spotlight—where they belong.
Nutritionally, white beans are a powerhouse. A single serving packs 9 grams of protein and 6 grams of fiber, making them a filling, nutrient-dense option for vegetarians, vegans, or anyone looking to cut back on meat. Unlike processed meat substitutes, they’re a whole food, free from artificial additives but rich in natural flavor.
What makes this recipe particularly brilliant is how it elevates beans from a mere protein source to a culinary delight. The olive oil adds healthy fats, the lemon provides a dose of vitamin C, and the herbs contribute antioxidants. Even the garlic and chili flakes offer their own health perks, from immune-boosting properties to metabolism support.
But the real magic is in the versatility. These marinated beans can be:
-
A salad topper (swap croutons for a protein punch)
-
A sandwich spread (mashed slightly for a creamy texture)
-
A grain bowl base (paired with quinoa and roasted veggies)
-
A standalone snack (eaten straight from the jar, no shame)
Thoughts:
I’m struck by how this recipe makes plant-based eating feel effortless—and delicious. Too often, vegetarian dishes rely on heavy cheeses or processed ingredients to compensate for flavor. Here, the beans shine on their own, enhanced but not overshadowed by the marinade.
Final Thoughts:
This dish is proof that plant-based cooking doesn’t have to be complicated or bland. With a few smart techniques, white beans go from forgettable to unforgettable. Whether you’re vegan, flexitarian, or just bean-curious, this recipe is a game-changer.
The Global Appeal – How One Dish Bridges Culinary Traditions
Marinated white beans might seem like a modern wellness trend, but their roots stretch across continents and centuries. From Italian fagioli all’uccelletto to Greek fasolada, cultures worldwide have long celebrated the magic of beans soaked in olive oil and aromatics.
This recipe taps into that universal appeal. The combination of beans, oil, and acid is a recurring theme in Mediterranean, Middle Eastern, and Latin American cuisines. What changes are the supporting players:
-
Italy might add rosemary and tomatoes.
-
Spain could include smoked paprika and sherry vinegar.
-
Lebanon would toss in sumac and parsley.
Olivia’s version, with its lemon and chili flakes, feels like a love letter to all these traditions while remaining distinctly her own. It’s a reminder that the best recipes aren’t invented—they’re inherited, adapted, and shared.
Chef’s Notes: Confessions & Upgrades
Okay, real talk: The first time I made these, I drowned them in vinegar (RIP). Lesson learned: Lemon is queen! Over the years, I’ve added roasted garlic (heavenly), capers (briny pop), and even toasted cumin (earthy depth). They’re BETTER day two—the beans drink up the dressing like flavor sponges. Last summer, I brought a giant tub to a potluck… and found my cousin hoarding it in the pantry with a spoon. High praise! Pro tip: Double the batch. You’ll thank me when midnight snack cravings hit.
FAQs: Your Bean Queries, Solved!
Q: Can I use dried beans?
A: Absolutely! Simmer 1 cup dried beans with bay leaf until tender (1-2 hours). Cool before marinating.
Q: Why are my beans mushy?
A: Over-rinsing or aggressive stirring! Rinse gently under low water pressure. Fold dressing with care.
Q: How long do they keep?
A: 5 days in the fridge. Oil solidifies—just rest at room temp before serving. Freezing? Not recommended (texture turns grainy).
Q: Too oily? Too acidic?
A: Drain excess oil or add more beans. Acid overwhelming? Stir in 1 tsp honey or maple syrup to balance.

Marinated White Beans
- Total Time: 10 minutes
Description
Who knew canned beans could taste like an Italian summer? These zesty, herb-loaded marinated white beans come together in 10 minutes and turn humble pantry staples into a dish you’ll crave. Perfect solo, on toast, or tossed in salads—they’re your new flavor-packed fridge friend.
Ingredients
-
2 (15 oz) cans white beans, rinsed
-
½ cup chopped fresh herbs (try parsley, basil, dill)
-
2 roasted red peppers, diced
-
⅓ cup shallot, finely chopped
-
2 garlic cloves, minced
-
½ cup extra virgin olive oil
-
Zest + juice of 1 lemon
-
½ tsp kosher salt
-
¼ tsp red pepper flakes (optional)
-
Black pepper, to taste
Instructions
-
Mix the Base: In a large bowl, gently combine beans, herbs, roasted peppers, shallot, and garlic.
-
Whisk the Dressing: In a small bowl, whisk olive oil, lemon zest/juice, salt, pepper flakes, and black pepper. Taste and adjust.
-
Combine: Pour dressing over bean mixture. Fold gently—no mashing! Let sit 30+ minutes for best flavor.
-
Serve & Savor: Eat straight, pile onto toast, or add to salads or grain bowls.
Notes
-
Let rest at room temp before serving if chilled (olive oil firms up).
-
Add feta, capers, or smoked paprika for variety.
- Prep Time: 10 minutes
Nutrition
- Calories: 300 (approx. per ¾ cup)
- Fat: 18g
- Carbohydrates: 25g
- Fiber: 6g
- Protein: 9g
Thoughts:
What fascinates me is how this dish transcends borders. It’s not tied to one culture but borrows freely from many, creating something that feels both familiar and new. The use of roasted peppers nods to Spanish pimientos, while the sesame seed garnish (if added) whispers of Asian influence.
Final Thoughts:
This isn’t just a recipe—it’s a passport. Each bite carries the flavors of distant kitchens, proving that good food knows no boundaries. Whether served with crusty bread, pita, or tortillas, these marinated beans are a global feast in a bowl.
Nutritional Perks (Because Balance!)
Per serving (¾ cup): Calories 300 • Protein 9g • Carbs 25g • Fiber 6g • Fat 18g (mostly heart-healthy olive oil!). Vegan + gluten-free. Packed with plant protein and gut-friendly fiber!

10-Minute Mediterranean Tuna Salad
Sunshine in a Bowl: My 10-Minute Mediterranean Tuna Salad Revolution
Hey there, kitchen friend! Olivia here, apron probably dusted with parsley flakes, waving a wooden spoon in greeting. Can you smell that? It’s the bright, zesty perfume of lime, fresh herbs, and briny olives cutting through the air—no oven required. If your idea of tuna salad involves gloopy mayo and sad celery bits, prepare for a flavor earthquake. This 10-Minute Mediterranean Tuna Salad isn’t just lunch; it’s a passport to a sun-drenched coastal village, crammed into your mixing bowl. Imagine crisp cucumbers, peppery radishes, fragrant mint, and tuna that actually tastes like the sea, all dancing in a tangy Dijon-lime dressing. It’s bold, healthy, and ridiculously fast. I created this for days when life feels like a sprint—maybe you’re juggling work calls, shuttling kids, or just craving something vibrant without the fuss. No fancy skills? Perfect. This recipe celebrates simplicity with a punch of Mediterranean magic. Grab your sharpest knife (or just tear those herbs with your hands—I won’t tell!), and let’s turn pantry staples into a meal that’ll make your taste buds do a happy dance. Trust me, one bite and you’ll be texting pics to your foodie group chat. Ready? Let’s chop, whisk, and toss our way to delicious!
That One Greek Island Picnic (Where Tuna Salad Got an Upgrade)
Picture this: me, age 22, backpacking through Greece with my college bestie, Sarah. We’d saved for months, living off dubious hostel pasta, dreaming of feta and sunshine. On Santorini, we splurged on a tiny seaside taverna. Starving, we ordered a “fisherman’s salad”—expecting greens. Out came a jewel-toned masterpiece: chunks of tuna glistening with olive oil, tossed with cucumbers, onions, olives, and fistfuls of herbs, bright with lemon. No mayo in sight! We devoured it with warm pita, feet dangling over the caldera, sea breeze in our hair. It tasted like adventure and pure joy. Years later, stuck in a rainy city apartment craving that vibrancy, I recreated it using pantry tuna. I swapped lemon for lime (my fridge hero), added radishes for crunch, and whisked in Dijon for kick. That humble bowl teleported me back to that cliffside lunch. Now, it’s my go-to when I need a quick escape or want to feed a crowd without stress. It’s proof that the best food memories aren’t just about taste—they’re about feeling alive. And guess what? Sarah still demands I make it every time she visits!
Your Mediterranean Flavor Arsenal (Plus Clever Swaps!)
Gather these fresh pals and pantry rockstars. Don’t stress about exactness—cooking’s an art, not a science exam!
- Dijon mustard (2 ½ tsp): Our flavor anchor! Adds tangy depth. Swap: Whole-grain mustard for texture, or yellow mustard in a pinch (use 1 tsp less).
- Lime (zest of 1 + juice of 1 ½): Sunshine in citrus form! Zest first—it’s where the magic oils live. Swap: Lemon works beautifully too.
- Extra virgin olive oil (⅓ cup): Use the good stuff! It’s the silky backbone of the dressing. Chef insight: Taste your oil first—fruity beats bitter here.
- Sumac (½ tsp): The secret weapon! Adds a lemony, earthy vibe. Swap: Smoked paprika (½ tsp) for warmth, or skip it.
- Kosher salt & black pepper (pinch each): Season as you go! Kosher dissolves evenly. Tip: Pepper flakes (optional ½ tsp) add a fun kick—I always use ’em!
- Tuna (3 cans, 5oz each, drained): Opt for olive oil-packed for richness or water-packed for lighter vibes. Chef hack: Fork-flake it right in the bowl!
- Celery (2 ½ stalks, chopped): Classic crunch. Swap: Fennel bulb (¼ cup) for a licorice twist.
- English cucumber (½, chopped): Crisp & hydrating! Tip: No need to peel—the skin adds color and nutrients.
- Radishes (4-5, chopped): Peppery bite & gorgeous pink flecks. Swap: Halved cherry tomatoes for juiciness.
- Green onions & red onion (3 green + ½ red, chopped): Double onion power! Red adds sharpness, green for mild freshness. Soak red onion in ice water for 5 mins to mellow it.
- Kalamata olives (½ cup, pitted/halved): Salty, briny gems! Swap: Green olives or capers for a different tang.
- Parsley & mint (1 cup chopped parsley + ½ cup chopped mint): The HERB BOMB! Don’t skimp—they’re the soul of this salad. Chef insight: Chop herbs last-minute for maximum brightness.
Let’s Build Your Flavor Bomb (Step-by-Step!)
This is where the 10-minute magic happens! Channel your inner Mediterranean chef—no stress, just joy.
- Wake Up the Dressing: Grab a small bowl. Whisk together Dijon, lime zest, lime juice, sumac, salt, pepper, and those optional red pepper flakes like you mean it! Now, slowly drizzle in the olive oil while whisking constantly. Why? This emulsifies it—transforming it from separated ingredients into a creamy, cohesive dressing that clings perfectly to every bite. Chef hack: No whisk? Use a fork and shake your wrist like you’re drumming! Taste it. Needs more zing? Add lime. More depth? A tiny pinch more sumac. Set this golden elixir aside.
- Chop Party Time! Take your large mixing bowl. Add the drained tuna and flake it gently with a fork—no compact bricks allowed! Now, chop your celery, cucumber, radishes, both onions, and olives. Toss them all into the bowl with the tuna. Pro Tip: Chop the veggies roughly the same size (about ½-inch pieces) so every forkful gets a bit of everything. Don’t obsess—rustic is charming! Feeling speedy? Pulse the veggies briefly in a food processor, but avoid mush.
- Herb Heaven: Wash your parsley and mint. Shake ’em dry (or spin if you’re fancy). Pile the leaves together and chop roughly—stems are usually too tough, so ditch most of them. Add these vibrant green beauties to the bowl. Why now? Adding herbs last before dressing prevents them from wilting or bruising too early. Gently stir the tuna, veggies, and herbs together—just enough to mingle.
- The Grand Toss: Pour that glorious dressing you made over the salad. Here’s the key: fold, don’t stir aggressively! Use a large spoon or spatula to lift from the bottom and gently turn everything over. You want every ingredient coated in that tangy dressing without crushing the tuna or bruising the herbs. Chef secret: Let it sit for 5 minutes if you can! This lets the flavors hug each other tightly. But honestly? Digging in immediately is totally fair game.
How to Serve Your Mediterranean Masterpiece
This salad screams versatility! Keep it simple or get creative. For a light lunch, pile it high on butter lettuce leaves or peppery arugula—the greens add a fresh base. Craving carbs? Scoop it into warm whole-wheat pita pockets or pile it onto toasted sourdough slices for irresistible open-faced sandwiches. Entertaining? Serve it in a big, beautiful bowl surrounded by crackers, cucumber rounds, and endive spears for scooping—it’s a stunning, colorful centerpiece. Feeling fancy? Top with a sprinkle of extra sumac, crumbled feta cheese (because cheese!), or a few extra mint leaves. It’s equally glorious slightly chilled or at room temperature, making it perfect for picnics or packed lunches (just keep dressing separate if prepping hours ahead). However you serve it, do it with a smile—you made something awesome!
Make It Your Own! (5 Tasty Twists)
Love the base? Run with it! Here are my favorite riffs:
- Greek Goddess: Add ½ cup crumbled feta cheese and ¼ cup chopped pepperoncini. Swap mint for oregano.
- Protein Power-Up: Replace 1 can tuna with 1 cup rinsed chickpeas for extra fiber (great vegan option—skip tuna entirely!).
- Spicy Harissa Kick: Whisk 1 tsp harissa paste into the dressing. Add ¼ cup chopped roasted red peppers.
- No-Tuna Mediterranean: Use 2 cups cooked, flaked salmon or 1 ½ cups chopped grilled chicken. Drizzle with extra olive oil.
- Creamy Dreamy (Lighter!): Fold in 2-3 tbsp plain Greek yogurt or avocado mash with the dressing for extra richness without mayo overload.
Olivia’s Kitchen Confessions & Tips
Okay, real talk: the first time I tested this, I went wild with the red onion. Let’s just say my breath could’ve powered a small rocket! Lesson learned: soak those red onion bits in ice water while prepping other ingredients—it tames the bite beautifully. This recipe also evolved from my desperate “clean out the crisper drawer” phase. No radishes? Bell peppers jumped in. Out of parsley? Cilantro crashed the party (surprisingly delicious!). Don’t be afraid to improvise with what’s fresh. I once made it for my skeptical dad, a mayo-tuna purist. He took one bite, paused, and said, “Huh. That’s… actually good.” High praise! Now it’s his golf lunch staple. The biggest win? Seeing my kids devour the veggies because they’re “hidden” in all that tasty tuna and herbs. It’s proof healthy doesn’t mean boring. This salad has been on beach days, fancy brunches, and countless Tuesday nights. Make it yours!
Your Questions, Answered!
Q: My salad seems watery after chilling. What happened?
A: Cucumbers and radishes release water! To prevent this: (1) Salt cucumber chunks lightly, let sit 5 mins, then squeeze out excess water before adding. (2) Don’t overdress initially—add half, toss, then add more if needed. (3) Serve soon after making for maximum crunch. If it’s already watery, drain excess liquid and add a handful more herbs!
Q: Can I make this ahead? How long does it last?
A: Absolutely! For best texture: Prep veggies and herbs, store separately. Make dressing, store in a jar. Drain tuna. Combine everything max 2 hours before serving. Pre-mixed, it keeps well-covered in the fridge for 1 day—flavors meld beautifully, but veggies soften slightly.
Q: I can’t find sumac. Is it really necessary?
A> No worries! Sumac adds a unique tang, but the salad is still fantastic without it. Boost the lime zest by ½ tsp, add a pinch more Dijon, or use the smoked paprika swap mentioned earlier. It’s still bursting with flavor!
Q: Help! My herbs (parsley/mint) are wilting fast.
A> Keep them fresh longer: (1) Store unwashed herbs stems-down in a glass of water (like flowers!), covered loosely with a plastic bag in the fridge. (2) Wash and chop ONLY right before using. (3) If they’re slightly sad, revive them in an ice water bath for 10 minutes before chopping.
Your Mediterranean Flavor Arsenal (Plus Clever Swaps!)
Gather these fresh pals and pantry rockstars. Don’t stress about exactness—cooking’s an art, not a science exam!
The Dressing (The Flavor Boss!):
-
Dijon mustard (2 ½ tsp) – Our tangy depth! Swap: Whole-grain mustard for texture, or yellow mustard in a pinch (use 1 tsp less).
-
Lime (zest of 1 + juice of 1 ½) – Sunshine in citrus form! Zest first—it’s where the magic oils live. Swap: Lemon works beautifully too.
-
Extra virgin olive oil (⅓ cup) – Use the good stuff! It’s the silky backbone. Chef insight: Taste your oil first—fruity beats bitter here.
-
Sumac (½ tsp) – The secret weapon! Adds a lemony, earthy vibe. Swap: Smoked paprika (½ tsp) for warmth, or skip it.
The Salad Stars:
-
Tuna (3 cans, 5oz each, drained) – Opt for olive oil-packed for richness or water-packed for lighter vibes. Chef hack: Fork-flake it right in the bowl!
-
English cucumber (½, chopped) – Crisp & hydrating! Tip: No need to peel—the skin adds color and nutrients.
-
Radishes (4-5, chopped) – Peppery bite & gorgeous pink flecks. Swap: Halved cherry tomatoes for juiciness.
-
Kalamata olives (½ cup, pitted/halved) – Salty, briny gems! Swap: Green olives or capers for a different tang.
-
Parsley & mint (1 cup chopped parsley + ½ cup chopped mint) – The HERB BOMB! Don’t skimp—they’re the soul of this salad.
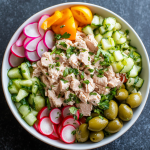
10-Minute Mediterranean Tuna Salad
- Total Time: 10 minutes
Description
Forget soggy tuna sandwiches—this fresh, herb-packed Mediterranean version is zesty, colorful, and lightning-fast. With crunchy veggies, briny olives, and a Dijon-lime dressing, it’s your new favorite lunch (or light dinner) that feels like a vacation, minus the travel time.
Ingredients
For the Dressing:
-
2½ tsp Dijon mustard
-
Zest + juice of 1½ limes
-
⅓ cup extra virgin olive oil
-
½ tsp sumac (or smoked paprika)
-
Pinch kosher salt & black pepper
-
Optional: ½ tsp red pepper flakes
For the Salad:
-
3 (5 oz) cans tuna, drained
-
2½ stalks celery, chopped
-
½ English cucumber, chopped
-
4–5 radishes, chopped
-
½ red onion, chopped (soaked if sharp)
-
3 green onions, sliced
-
½ cup Kalamata olives, halved
-
1 cup fresh parsley, chopped
-
½ cup fresh mint, chopped
Instructions
-
Make Dressing: Whisk Dijon, lime zest/juice, sumac, salt, and pepper. Slowly whisk in olive oil until emulsified.
-
Toss the Base: In a large bowl, flake the tuna with a fork. Add all chopped veggies and herbs.
-
Combine: Pour dressing over the salad. Gently fold to coat without smashing the tuna. Let sit 5 mins or serve right away.
Notes
-
Use oil-packed tuna for richness, water-packed for lightness.
-
Swap mint for basil or oregano if preferred.
-
Make-ahead? Keep dressing separate until ready to serve.
- Prep Time: 10 minutes
Nutrition
- Calories: 310 (approx. per serving, serves 4)
- Fat: 21g
- Carbohydrates: 8g
- Fiber: 3g
- Protein: 25g
Thoughts:
This section is crystal clear—no guesswork. The swaps and chef tips make it adaptable for any kitchen. The emphasis on quality ingredients (good olive oil, fresh herbs) ensures big flavor payoff.
Final Thoughts:
With pantry staples + a few fresh heroes, this salad is accessible but feels gourmet. The flexibility (swaps for tuna, herbs, spices) means no stress if you’re missing an ingredient.
Fuel Your Body Right
This isn’t just tasty—it’s nourishing! Here’s the scoop per serving (approx. ¼ of the recipe):
- Calories: ~360
- Protein: 28g (Tuna power!)
- Healthy Fats: 24g (Thanks, olive oil & olives!)
- Carbs: 8g (Mostly from veggies)
- Fiber: 3g (Keeps you full!)
Packed with omega-3s from tuna, antioxidants from herbs and veggies, and heart-healthy monounsaturated fats from olive oil. Gluten-free naturally!
Pin This Recipe For Later!
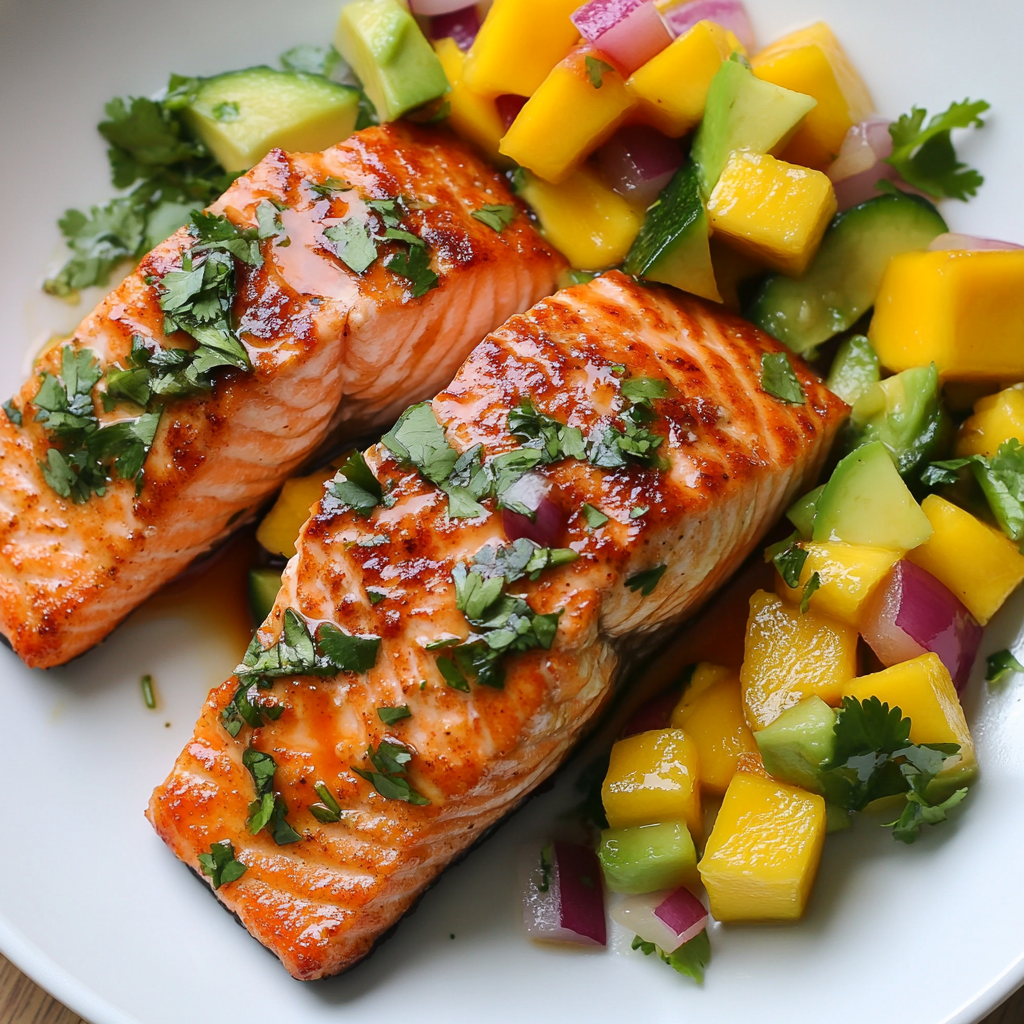
Sriracha Glazed Salmon with Mango Salsa
Why This Dish Feels Like a Vacation on a Plate
Hey there, kitchen friend! Olivia here, apron slightly flour-dusted (okay, maybe more than slightly) and heart full of excitement to share today’s recipe. Ever have one of those days where you crave sunshine, salty air, and flavors that make your taste buds do a happy dance? That’s exactly where this **Sriracha Glazed Salmon with Mango Salsa** was born. It’s my culinary antidote to gray skies, packed schedules, or just needing dinner to feel like a celebration without the fuss. Picture this: flaky, buttery salmon wearing a glossy coat of sweet-heat sriracha magic, topped with a confetti of juicy mango, creamy avocado, and zippy lime. It’s vibrant, it’s balanced, and honestly? It’s shockingly easy. We’re talking 20 minutes start-to-finish easy. I designed this recipe for *you*—the busy human who wants to feel like a rockstar in the kitchen without needing chef-level skills or hours to spare. It’s weeknight-friendly but fancy enough for date night or impressing your in-laws. The air fryer (our trusty sidekick!) locks in moisture while giving that gorgeous caramelized glaze, and the salsa? Pure, fresh joy that comes together while the salmon cooks. Ready to turn your kitchen into a tropical getaway? Let’s dive in!
The Beach Hut That Sparked a Kitchen Obsession
This recipe always whisks me back to a rickety wooden table on a Thai beach years ago. My husband Dan and I were backpacking, sunburnt and starving, when we stumbled upon a tiny family-run hut. The air smelled of charcoal, chili, and the sea. We ordered grilled fish—it arrived sizzling, drenched in a sticky, scarlet glaze and piled high with the most absurdly fresh mango salsa. One bite and we just *stopped*. No words, just wide eyes and frantic fork-dueling over the last flaky piece. That humble beach meal became our flavor benchmark. Back home, I became obsessed with recreating that magic. Countless trials followed (some too spicy, some too sweet, one infamous “mango avalanche” off the plate!). Finally, after tweaking glazes and salsa ratios like a mad flavor scientist, this version was born. It’s not identical to that beach hut dream—it’s *better*. It captures that sun-soaked feeling but fits perfectly into our real, wonderfully messy lives. Now, every time I make it, I’m 25 again, sandy toes and all, sharing that “oh WOW” moment with someone I love.
Your Flavor Adventure Toolkit
Grab these bright, beautiful ingredients! Don’t stress about perfection—cooking is about joy, not rigid rules. Here’s what you’ll need, plus my favorite swaps and chef secrets:
For the Sriracha Glazed Salmon
- 8–10 oz salmon filet 🐟 – Skin-on or off! Skin gets crispy and delicious in the air fryer. Wild-caught if possible, but farmed works beautifully. Pro tip: Pat it SUPER dry for maximum glaze adhesion.
- 2 tbsp sriracha 🌶️ – The star! Adds tangy heat. Swap with gochujang for deeper funk, or use half sriracha + half ketchup for milder palates.
- 2 tbsp light maple syrup or honey 🍯 – Balances the heat. Pure maple syrup caramelizes gorgeously. Agave works too! Avoid thick pancake syrup.
- 3 garlic cloves, finely minced 🧄 – Fresh is best! Jarred minced garlic (1.5 tsp) works in a pinch.
- 1 tbsp soy sauce – Adds salty umami depth. Use tamari or coconut aminos for gluten-free.
- 1 tbsp smoked paprika – Secret weapon! Gives a subtle “grilled” smokiness. Regular paprika works, but you’ll miss that campfire kiss.
- 1/2 tsp salt – Enhances all the flavors. I use flaky sea salt.
For the Mango Salsa
- 2 ripe mangoes, chopped 🥭 – Look for fragrant, slightly soft fruit. Frozen/thawed mango chunks are totally okay off-season!
- 1 red onion, chopped – Soak diced onion in cold water for 5 mins to mellow the bite if sensitive.
- 1 avocado, chopped 🥑 – Adds creamy richness. Add it LAST before serving to prevent browning.
- 1 jalapeño, finely diced 🌶️ – Remove seeds/membranes for mild heat, leave ’em in for fire! Substitute with bell pepper for zero spice.
- 1 large cucumber, chopped 🥒 – English or Persian cukes are best (less seeds). Crunchy freshness is key!
- 1/3 cup chopped cilantro – Love it or hate it? Flat-leaf parsley makes a great sub for cilantro-haters.
- Juice of 1 lime 🍋🟩 – Brightens everything! Bottled lime juice in emergencies, but fresh is magic.
- Salt & pepper, to taste – Season in layers—start light, taste, adjust!
Let’s Make Some Magic: Simple Steps, Big Wow
Ready? Aprons on! This comes together fast, so have your ingredients prepped (that’s your “mise en place,” fancy chef talk for “get organized”).
- Whip Up That Glaze: In a small bowl, combine the sriracha, maple syrup (or honey), minced garlic, soy sauce, smoked paprika, and salt. Chef’s Hack: Whisk it with a fork until it’s smooth and looks like shiny, red lava. Taste it! Want more heat? Add a squirt more sriracha. Sweeter? Drizzle in honey. This is YOUR glaze.
- Glaze the Salmon: Pat your salmon filet VERY dry with paper towels (crucial for the glaze to stick!). Place it skin-side down (if it has skin) on a plate or cutting board. Brush or spoon about ¾ of the glaze generously over the top and sides of the salmon. Pro Tip: Let it sit for 5 minutes while you preheat the air fryer—this helps the flavors penetrate!
- Air Fry to Perfection: Preheat your air fryer to 385°F (196°C) for 3 minutes. Lightly spray or brush the air fryer basket with oil. Place the salmon in the basket, skin-side down if applicable. Air fry for 8-10 minutes. Chef Secret: At the 5-minute mark, CAREFULLY open the basket and brush the salmon with the remaining glaze. This double-glaze builds incredible flavor and shine! Cooking time depends on thickness—check at 8 mins. Salmon is done when it flakes easily with a fork and reaches 145°F internally.
- Make the Salsa While Salmon Cooks: In a medium bowl, combine the chopped mango, red onion, jalapeño, cucumber, and cilantro. Squeeze over the fresh lime juice. Gently stir. Important: Wait to add the avocado! Gently fold in the chopped avocado just before serving and season with salt & pepper. This keeps it gorgeously green.
- Finish & Serve: Once the salmon is caramelized and flaky, carefully remove it from the air fryer using tongs or a spatula. Let it rest for 2 minutes (this keeps it juicy!). Plate the salmon immediately and top with a generous, colorful scoop of the vibrant mango salsa. Final Flourish: A tiny extra squeeze of lime over the top makes the flavors sing!
Plating Your Tropical Masterpiece
Presentation is part of the fun! I love serving this salmon on a simple white plate or a vibrant ceramic platter to let those colors pop. Slide the glazed salmon slightly off-center, then artfully pile that confetti-bright salsa right on top, letting some spill over the sides. For a complete island escape, pair it with:
- Fluffy coconut rice (stir a spoonful of coconut milk into your cooking water!)
- Quick-pickled cucumbers or red cabbage
- Grilled pineapple slices brushed with leftover glaze
- An ice-cold lager or a zesty mocktail with lime and mint
No fancy sides? A simple bed of baby spinach or quinoa works wonders. The goal? Make it feel special, even on a Tuesday!
Make It Your Own: Delicious Twists
This recipe is a fantastic canvas! Play around:
- Protein Swap: Try the glaze on shrimp (air fry 4-6 mins!), tofu cubes, or chicken thighs.
- Fruit Fiesta: Swap mango with peaches, pineapple, or even pomegranate arils in the salsa.
- Heat Adjustment: Too spicy? Use half sriracha + half ketchup in the glaze. Need fire? Add a pinch of cayenne to the glaze or extra jalapeño seeds.
- No Air Fryer? Bake salmon at 400°F (200°C) for 12-15 mins on a parchment-lined sheet, or pan-sear glaze-side down first for 2 mins, then flip and cook skin-side down for 5-7 mins.
- Pescatarian Power Bowl: Flake the salmon over greens, quinoa, black beans, and extra salsa for a hearty meal.
Olivia’s Kitchen Confessions & Evolution
This recipe has seen some *moments*! There was the infamous “Salmon Slip” of 2021, where I enthusiastically brushed on the glaze, only for the filet to slide right off the plate onto my (thankfully clean-ish) floor. Cue the five-second rule debate! Then there was the “Mango Measurement Mayhem,” where I got overzealous and made enough salsa for a small army. We ate mango salsa on *everything* for days—scrambled eggs? Surprisingly good. Over time, I learned less is more with the jalapeño seeds (unless you’re Dan, my heat-loving husband), and that letting the glaze sit on the salmon for a few minutes is a game-changer. I also started using smoked paprika instead of regular—that single swap added a whole new layer of backyard-barbecue vibe without firing up the grill. The biggest evolution? Embracing the air fryer. It gives that perfect caramelized crust without drying out the fish, making weeknight gourmet truly achievable. Don’t be afraid of your own kitchen adventures—sometimes the messy mistakes lead to the best discoveries!
Your Questions, Answered!
Q: Can I bake this instead of air frying?
A: Absolutely! Preheat your oven to 400°F (200°C). Line a baking sheet with parchment paper. Place the glazed salmon on the sheet and bake for 12-15 minutes, or until flaky. For extra caramelization, broil for the last 1-2 minutes—watch it like a hawk!
Q: Help! My glaze isn’t sticking to the salmon!
A: The #1 culprit is moisture! Pat your salmon DRY with paper towels before glazing. Also, make sure your glaze isn’t too thin. If it is, simmer it gently in a small pan for 1-2 minutes to thicken slightly before brushing.
Thoughts on Food & Memory
This recipe is proof that food is more than fuel—it’s a time machine. One bite can transport you back to a specific moment, a place, a feeling. For me, this salmon is that beach, that laughter, that sense of adventure.
I also love how cooking allows us to recreate and reinvent those cherished flavors. Maybe you’ve never been to a Thai beach hut, but this dish can still bring a little of that magic into your kitchen. That’s the beauty of food: it connects us to places and people, even if only in our imaginations.
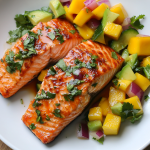
Sriracha Glazed Salmon with Mango Salsa
- Total Time: 20 minutes
Description
This dish is sunshine on a plate: sweet-heat glazed salmon with a zesty mango salsa that sings with lime and crunch. It’s a weeknight wonder that feels like a fancy getaway—fast, fresh, and unforgettable. Let dinner transport you to a Thai beach hut, no passport needed!
Ingredients
For the Glazed Salmon:
-
8–10 oz salmon filet
-
2 tbsp sriracha
-
2 tbsp maple syrup or honey
-
3 garlic cloves, minced
-
1 tbsp soy sauce
-
1 tbsp smoked paprika
-
½ tsp salt
For the Mango Salsa:
-
2 ripe mangoes, chopped
-
1 red onion, chopped (soaked in cold water 5 mins)
-
1 avocado, diced (add last)
-
1 jalapeño, finely diced (seeds removed for mild)
-
1 cucumber, chopped
-
⅓ cup cilantro, chopped
-
Juice of 1 lime
-
Salt & pepper to taste
Instructions
-
Make the Glaze: Mix sriracha, maple syrup, garlic, soy sauce, smoked paprika, and salt. Set aside.
-
Prep Salmon: Pat salmon dry. Brush with ¾ of glaze and let sit for 5 mins.
-
Air Fry: Preheat air fryer to 385°F. Spray basket. Air fry salmon skin-side down for 8–10 mins, brushing with remaining glaze at halfway mark.
-
Make Salsa: In a bowl, combine mango, onion, jalapeño, cucumber, cilantro, and lime juice. Add avocado last. Season with salt and pepper.
-
Serve: Plate salmon and top generously with mango salsa. Optional: a fresh lime squeeze for extra zing!
Notes
-
No air fryer? Bake at 400°F for 12–15 mins.
-
Swap mango with pineapple or peaches.
-
Add coconut rice or greens to round out the meal.
- Prep Time: 10 minutes
- Cook Time: 10 minutes
Nutrition
- Calories: 450 per serving
- Sugar: 12g
- Fat: 24g
- Carbohydrates: 22g
- Protein: 35g
Final Thoughts
If you’ve ever had a meal that stuck with you—not just because it was delicious, but because it was tied to a memory—this recipe is for you. It’s a reminder that great cooking isn’t about perfection; it’s about joy. So whether you’re making it for a special occasion or just because, let it be a celebration.
Q: How do I pick a ripe mango? Any chopping tips?
A: Give it a gentle squeeze—it should yield slightly like a ripe avocado, not be rock hard. Smell the stem end; it should smell sweet and fruity. To chop: Slice off the two fleshy cheeks alongside the flat pit. Score the flesh in a grid pattern without cutting through the skin, then push the skin inside-out to pop the cubes out! Easy!
Recent Posts
- Moist Vegan Banana Bread : One-Bowl, No-Fail Classic
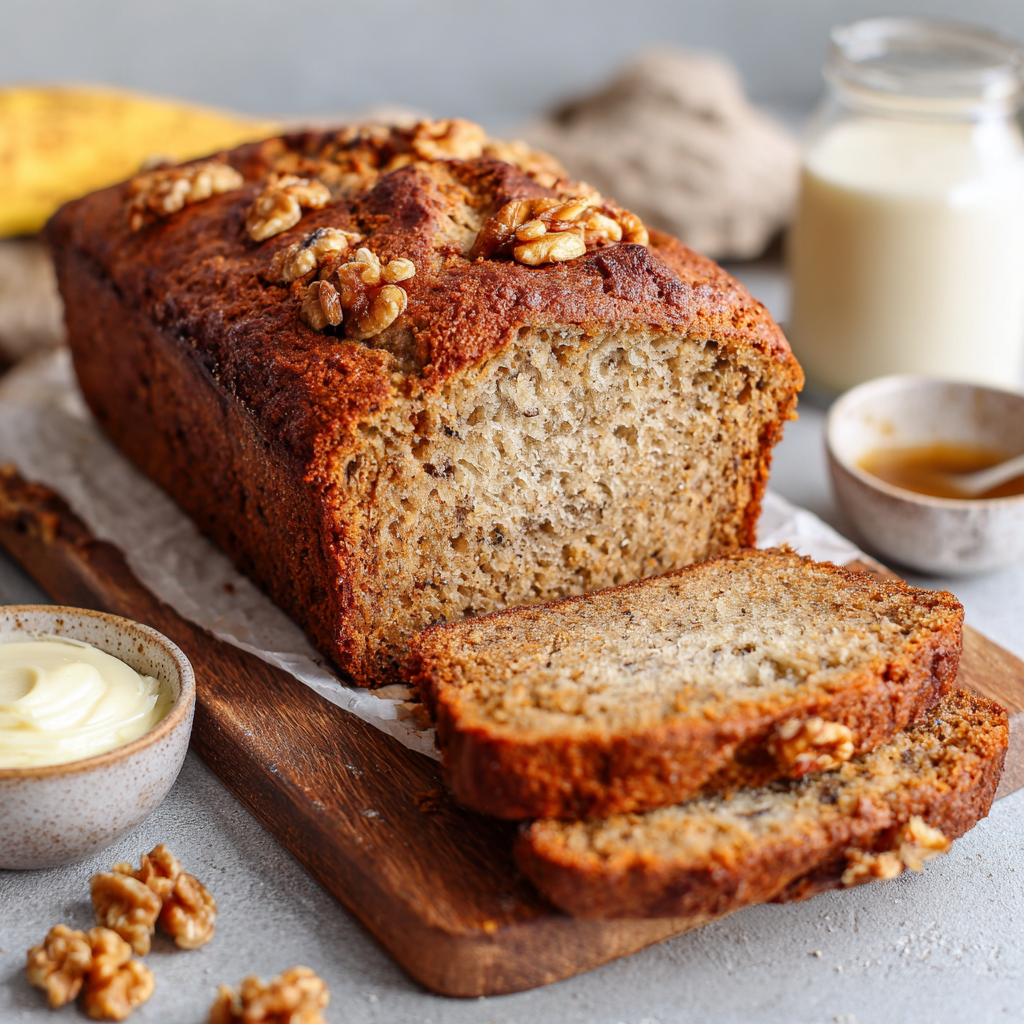
- Homemade Turkey Gravy : Rich, Silky, and Full of Flavor
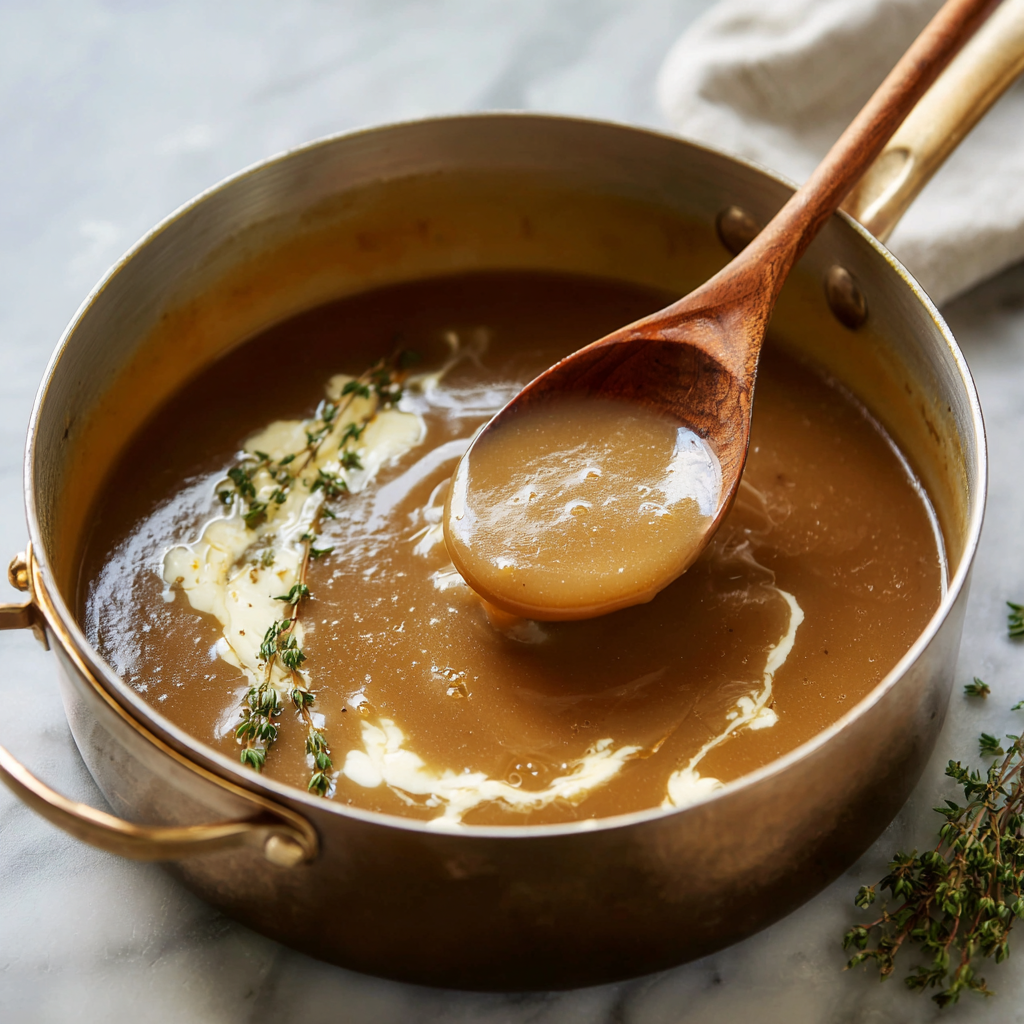
- Easy Keto Broccoli Salad : Low-Carb, Crunchy, and Totally Craveable
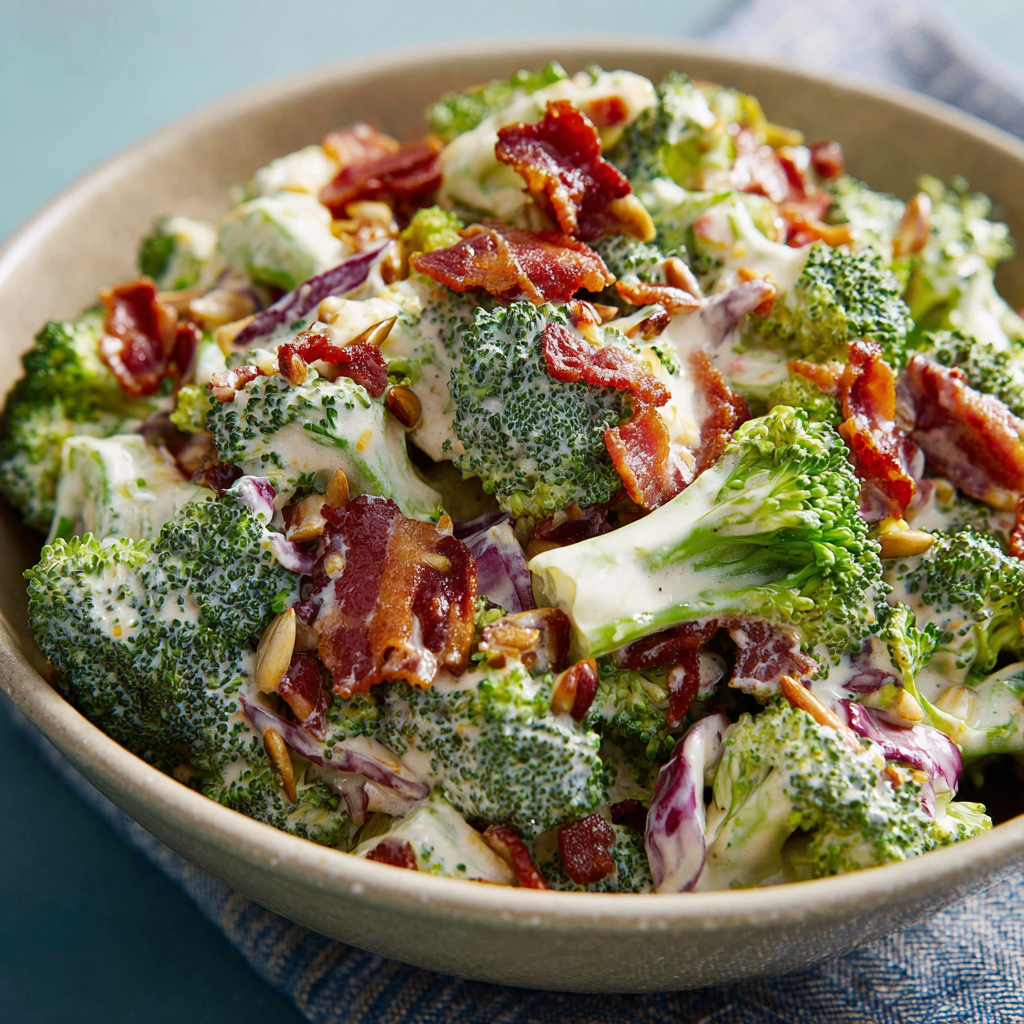
- Hearty Vegan Chili : One-Pot, Protein-Packed & Totally Comforting
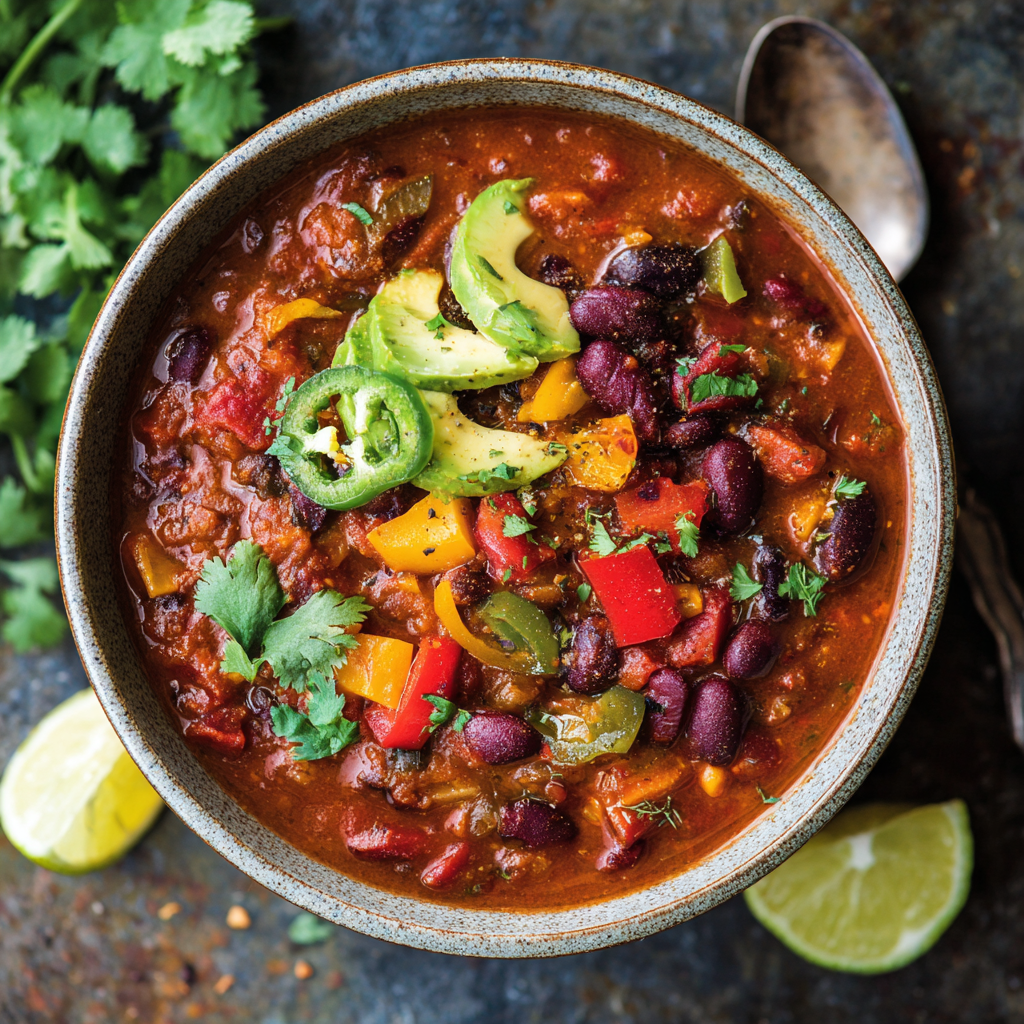
- The Best Crispy Baked Chicken Nuggets : Healthy, Easy & Kid-Approved
