
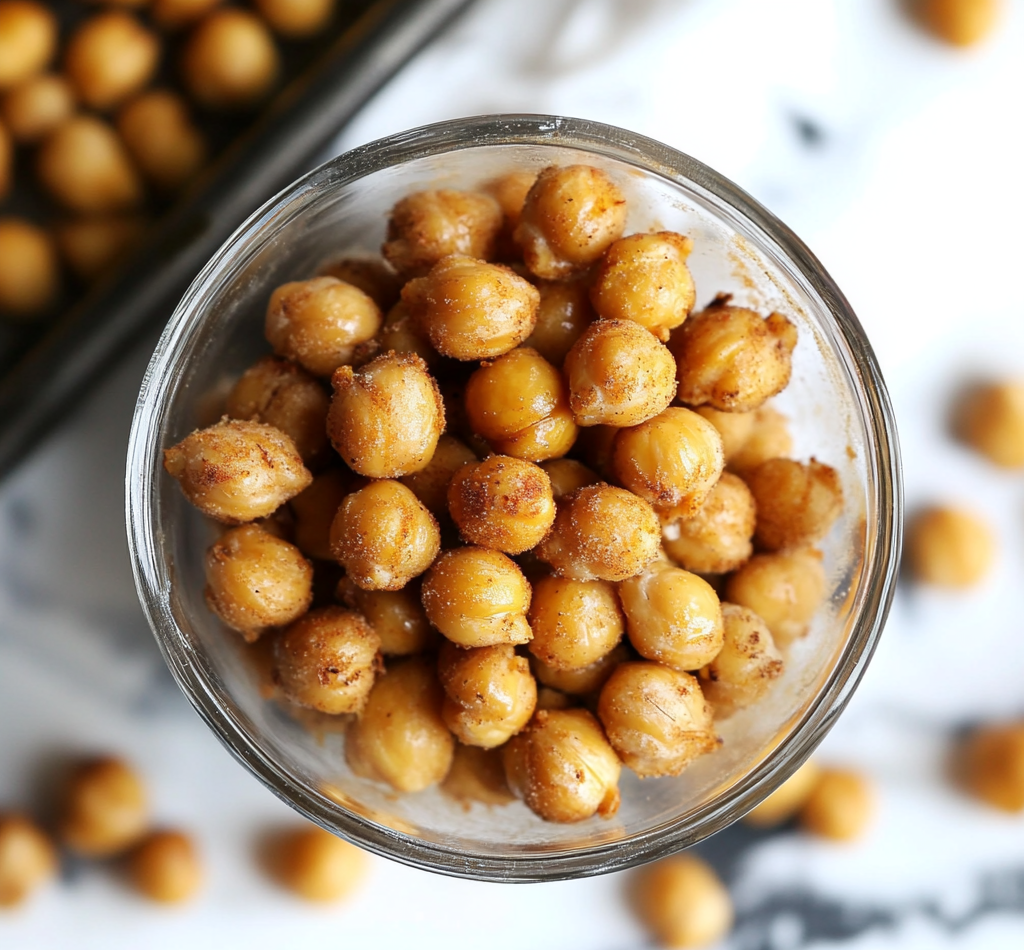
Crispy Roasted Chickpeas
Why Crispy Roasted Chickpeas Are My Kitchen’s MVP
Hey there, snack adventurer! Olivia here, apron dusted with chickpea crumbs and heart full of kitchen joy. If your soul does a happy dance when you hear that satisfying CRUNCH from a perfectly roasted bite, you’ve found your people. Let’s talk about crispy roasted chickpeas – those humble little legumes that transform into golden, crave-worthy nuggets. I first stumbled upon these while desperately rummaging for a post-yoga snack that wasn’t sad carrot sticks. What emerged from my oven that day? Pure magic. These aren’t just chickpeas; they’re flavor canvases waiting for your culinary brushstrokes! Whether you’re Netflix-bingeing, hosting book club, or jazzing up salads, these gems deliver crunch, protein, and endless customization. Best part? You need zero chef skills – just a baking sheet and that beautiful appetite of yours. So tie on your comfiest apron (the one with questionable stains – no judgment here!), and let’s turn pantry staples into snack-time stardom!
The Chickpea Epiphany: A Kitchen Accident Gone Right
Picture this: It’s 2018, and I’m hosting my niece’s disastrously messy “Rainbow Unicorn” birthday party. I’d ambitiously planned rainbow hummus platters but accidentally tripled the chickpeas. With sticky-fingered toddlers invading in 20 minutes, I frantically tossed the extra legumes with olive oil and smoked paprika, shoving them in the oven while mopping glitter glue off the dog. When the timer dinged? Chaos paused. Those shimmering, crispy orbs became the surprise rockstars! Kids abandoned cake for them (seriously!), and my sister-in-law whispered, “You’re hiding chef wizardry, right?” That moment cemented two truths: 1) Chickpeas are culinary shape-shifters, and 2) The best recipes often emerge from beautiful kitchen messes. Now, every time that roasty aroma fills my kitchen, I grin remembering tiny unicorn horns bobbing toward the snack bowl like crunchy-seeking missiles. Magic!
Your Crunch Toolkit: Simple Ingredients, Big Flavor
- 1½ cups cooked chickpeas (drained & rinsed): Canned works beautifully! Chef’s hack: Save the aquafaba (that starchy liquid) for vegan meringues! For extra crisp, peel chickpeas – just pinch ’em – but I rarely bother.
- Extra-virgin olive oil (for drizzling): The glue for spices! Use avocado oil for higher heat tolerance. Substitution: Melted coconut oil adds a subtle sweetness for curry flavors.
- Sea salt (to taste): Flaky salt creates delightful bursts. Insider tip: Salt AFTER roasting if using finer salt to prevent moisture pull.
- Spices (optional but glorious!): This is your playground! Why I love ’em: Paprika adds warmth, curry powder brings exotic flair, cumin earthiness. Ranch powder? Heck yes! Start with 1 tsp per batch.
Why these work: Chickpeas are protein-packed sponges. Oil conducts heat for crispness while carrying spice flavors deep into every nook. Simple ingredients, infinite personality!
Crispy Alchemy: Your Foolproof Roadmap
- Preheat Oven to 400°F (200°C): Crank it up! High heat = maximum crunch. Chef’s secret: Place a baking sheet IN the oven while preheating – a hot start boosts crispiness!
- Dry Chickpeas RELENTLESSLY: Pat soaked/canned chickpeas bone-dry with paper towels or a clean kitchen cloth. Game-changer: Let them air-dry 10 mins post-rinsing. Wet chickpeas = sad, chewy results. Channel your inner chickpea desiccant!
- Season & Toss Like You Mean It: On your preheated baking sheet (careful, it’s hot!), toss chickpeas with oil, salt, and spices. Pro move: Use your hands! Massage oil/spices in to coat every crevice. Single-layer them – no pile-ups!
- Roast & Shake Party: Bake 30-40 mins, shaking pan vigorously every 10 mins. Why shake? Prevents scorching and ensures even browning. Listen for the “maraca sound” – less sizzle, more rattle means they’re drying out! They’re done when golden-brown and shrunken.
- Cool Completely: Transfer chickpeas to a bowl – they’ll stick if cooled on the sheet! Patience pays: They crisp up SIGNIFICANTLY as they cool (about 15 mins). Try not to devour them immediately (hard, I know).
Hack Attack: For insane crunch, roast an extra 5 mins, turn oven OFF, and leave chickpeas inside for 1 hour as it cools. Thank me later!
The Science of Crunch: Why Roasted Chickpeas Work
Ever wonder why roasted chickpeas transform from mushy legumes into crispy little flavor bombs? It’s all about science—delicious, snackable science. Chickpeas are packed with starch and protein, two components that react beautifully to dry heat. When you roast them, the oven’s heat drives out moisture, causing the starches to gelatinize and then harden into that irresistible crunch. The proteins, meanwhile, undergo the Maillard reaction—the same browning process that gives seared steak and toasted bread their deep, savory flavors.
But moisture is the enemy of crispiness. That’s why drying your chickpeas thoroughly before roasting is non-negotiable. Any lingering water turns to steam in the oven, creating a chewy texture instead of a satisfying snap. Even the oil plays a crucial role—it conducts heat evenly, ensuring every chickpea gets uniformly crispy while helping spices cling to the surface.
Temperature is another key factor. Roasting at 400°F (200°C) or higher ensures rapid dehydration, locking in crunch before the chickpeas have a chance to toughen. Lower temps might seem gentler, but they often lead to uneven results—some chickpeas stay soft while others burn. And don’t forget the shake! Stirring them every 10 minutes prevents hot spots and ensures all sides get equal exposure to heat.
For the crunch-obsessed (like me), there’s a pro trick: after roasting, turn off the oven and leave the chickpeas inside as it cools. This slow drying phase removes any last traces of moisture, resulting in an almost glass-like crispness. It’s the difference between “pretty good” and “I-can’t-stop-eating-these” territory.
Beyond Snacking: Creative Uses for Roasted Chickpeas
Sure, eating them straight from the pan is a joy, but roasted chickpeas are culinary multitaskers. Here’s how to take them beyond the snack bowl:
1. Salad Supercharger
Tired of sad, soggy croutons? Toss a handful of roasted chickpeas onto your greens for a protein-packed crunch. They pair perfectly with Mediterranean salads (try lemon-tahini dressing and feta) or hearty grain bowls. My favorite combo? Arugula, roasted sweet potatoes, and cumin-spiced chickpeas drizzled with yogurt sauce.
2. Soup & Stew Topper
Move over, crackers. A sprinkle of crispy chickpeas adds texture to creamy soups like butternut squash or tomato bisque. For a smoky twist, use paprika-roasted chickpeas on top of chili—they hold their crunch longer than you’d expect!
3. Pasta & Risotto Upgrade
Add them to pasta dishes for contrast. Think: garlicky chickpeas on carbonara, or rosemary-infused ones over mushroom risotto. They’re also fantastic in cold pasta salads, replacing croutons or bacon bits.
4. Breakfast Boost
Elevate your morning avocado toast with chili-lime chickpeas, or mix maple-cinnamon roasted chickpeas into yogurt parfaits. They even work as a granola alternative—just crush them slightly for easier spooning.
5. Party Appetizer Hero
Set out bowls of differently seasoned chickpeas (buffalo, ranch, za’atar) alongside nuts and olives for a crowd-pleasing snack mix. Or blend finely crushed chickpeas with cream cheese for a protein-rich dip base.
6. Vegan “Breadcrumbs”
Pulse roasted chickpeas in a food processor for a gluten-free, high-protein breadcrumb substitute. Use them to coat tofu cutlets, top mac and cheese, or add texture to veggie burgers.
The possibilities are endless—once you start experimenting, you’ll find yourself adding them to everything!
The Global Flavors Edition: Seasoning Inspirations from Around the World
Why stick to basic salt when roasted chickpeas can take your taste buds on a world tour? Here are five globally inspired seasoning blends to try:
1. Moroccan Magic
-
1 tsp cumin
-
½ tsp smoked paprika
-
½ tsp cinnamon
-
Pinch of cayenne
-
½ tsp brown sugar (optional)
Why it works: Sweet, smoky, and subtly spicy—this blend mimics the flavors of a tagine. Perfect over couscous salads!
2. Indian Street Food Vibes
-
1 tsp chaat masala
-
½ tsp turmeric
-
¼ tsp amchur (dried mango powder)
-
Pinch of asafoetida (hing)
Pro tip: Toss with chopped cilantro and a squeeze of lime post-roast for an authentic tang.
3. Japanese Furikake Twist
-
1 tbsp furikake seasoning
-
½ tsp sesame oil (replace olive oil)
-
1 tsp crushed nori flakes
Bonus: Add wasabi powder for heat. These are addictive atop rice bowls.
4. Italian Herb Delight
-
1 tsp dried oregano
-
½ tsp garlic powder
-
½ tsp crushed fennel seeds
-
1 tbsp grated vegan Parmesan (post-roast)
Pair with: Marinara sauce for dipping, or crush over pizza.
5. Caribbean Heat
-
1 tsp jerk seasoning
-
½ tsp allspice
-
½ tsp thyme
-
1 tsp lime zest (add after roasting)
Serve with: Mango salsa or coconut rice for a tropical kick.
Mix and match spices based on what’s in your pantry—the beauty of chickpeas is their versatility. Don’t be afraid to go bold!
Serving Your Crunchy Masterpieces
These aren’t just a solo act! Pile smoky paprika chickpeas into mini bowls for game night – watch them vanish. Craving texture? Toss za’atar-spiced ones over creamy hummus with pomegranate seeds. Salad skeptic? A handful of garlic-rosemary chickpeas transforms greens into a textural adventure! For next-level brunch, crown avocado toast with lime-chili chickpeas. My Tuesday ritual? Eating them straight from the jar while hiding in the pantry. No shame!
Flavor Voyages: 5 Delicious Twists
- Everything Bagel: Toss with 1 tsp everything seasoning + ½ tsp onion powder pre-roast.
- Maple-Cinnamon Crunch: Post-roast, drizzle with 1 tsp maple syrup + ½ tsp cinnamon (toss quickly!).
- Spicy Buffalo: Post-roast, toss with 1 tsp hot sauce + ½ tsp nutritional yeast.
- Vegan “Parmesan”: Add 1 tbsp nutritional yeast + ½ tsp garlic powder pre-roast.
- Oil-Free Option: Skip oil! Use aquafaba + spices. Less crispy but still tasty.
Olivia’s Notebook Scribbles
Over the years, my chickpea journey got wild. Once, I “helped” my cat bat a cumin-scented batch off the counter – my floor became a spicy treasure hunt! I also learned: chickpeas roasted alongside chopped bacon? LIFE-CHANGING (though decidedly less vegan). My biggest evolution? Embracing imperfections. Some batches stay crunchier days than others – it’s okay! Store them loosely covered (no airtight containers – they’ll steam!) at room temp. If they soften, revive them in a 350°F oven for 5 minutes. Remember, cooking’s about joy, not perfection. Now go make crunchy magic!
Your Crispy Chickpea Conundrums Solved!
Q: Why are my chickpeas chewy, not crispy?
A: The Usual Suspects: 1) Not dry enough pre-roasting (PAT THEM LIKE THEY OWE YOU MONEY!), 2) Overcrowded pan (single layer is non-negotiable), 3) Skipped shaking (hotspots create steam).
Q: Can I use dried chickpeas?
A: Absolutely! Soak 1/2 cup dried chickpeas overnight in water + 1 tsp baking soda (softens skins). Drain, rinse, boil 45-60 mins until tender but not mushy. Proceed as directed!
Q: How long do they stay crunchy?
A: At room temp in a paper bag or loosely covered bowl? 2-3 days max. Humidity is the enemy! For longer crunch, store airtight with a silica packet (like those in jerky bags).
Q: Spices burning before chickpeas crisp?
A: Delicate spices (like garlic powder) can scorch. Add them in the last 10 minutes of roasting, or use whole/spice blends with higher smoke points (paprika, cumin seeds).

Crispy Roasted Chickpeas
- Total Time: 45 min
Description
It all began at a chaotic “Rainbow Unicorn” birthday party – glitter on the dog, frosting in my hair, and a hummus overload. One desperate toss of chickpeas into the oven later, I discovered gold. That unexpected crunch turned these little legumes into legends. They’ve since powered my pantry through Netflix marathons, lunchbox revamps, and late-night pantry raids. Roasted chickpeas are more than snacks – they’re your crunchy kitchen MVP. Ready to fall in love one golden bite at a time?
Ingredients
-
1½ cups canned chickpeas (rinsed & drained)
-
1 tbsp olive oil (or aquafaba for oil-free)
-
Sea salt to taste
-
Optional: 1 tsp spices (paprika, curry, garlic, or ranch powder)
Instructions
-
Preheat oven to 400°F (200°C). Place a baking sheet inside while preheating.
-
Dry chickpeas thoroughly using towels. Let air-dry for 10 minutes for best results.
-
Season & toss chickpeas with oil, salt, and spices on the hot tray. Spread in a single layer.
-
Roast for 30–40 mins, shaking the pan every 10 minutes. Chickpeas should sound hollow and look golden.
-
Cool completely in a bowl (not on the tray). Crunch develops as they cool!
Notes
-
For ultra-crunch, turn off oven after roasting and leave chickpeas inside for 1 hour.
-
Want sweet? Try cinnamon-maple. Spicy? Go buffalo-style.
-
Keep storage loose – airtight traps moisture. Re-crisp in the oven if needed!
- Prep Time: 10 min
- Cook Time: 35 min
Nutrition
- Calories: 120 cal Per Serving:
- Fat: 4g
- Carbohydrates: 15g
- Fiber: 4g
- Protein: 5g
Nutritional Highlights (Per Serving)
Calories: ~120 | Protein: 5g | Fat: 4g | Carbs: 15g | Fiber: 4g
Note: Plant-powered protein + fiber makes these a guilt-free snack slam dunk! Sodium varies based on seasoning.
Final Thoughts: Why Chickpeas Deserve a Permanent Spot in Your Kitchen
Roasted chickpeas are more than a snack—they’re a lesson in simplicity, adaptability, and the joy of cooking. They’ve saved me from last-minute appetizer panic, turned boring lunches into exciting meals, and even convinced veggie-skeptics that plant-based eating can be fun.
What I love most is their forgiving nature. Burned a batch? Blend them into a spice-dusted breading. Forgot to shake the pan? Call them “extra rustic” and no one will care. They’re cheap, nutritious, and endlessly customizable—whether you’re craving salty, sweet, or spicy.
So here’s my challenge to you: Grab a can of chickpeas, raid your spice rack, and play. Cooking should be fun, not fussy. And who knows? Your next kitchen accident might just become your family’s new favorite snack. Now, if you’ll excuse me, I have a date with a tray of sriracha-honey chickpeas and a hidden corner of the pantry…
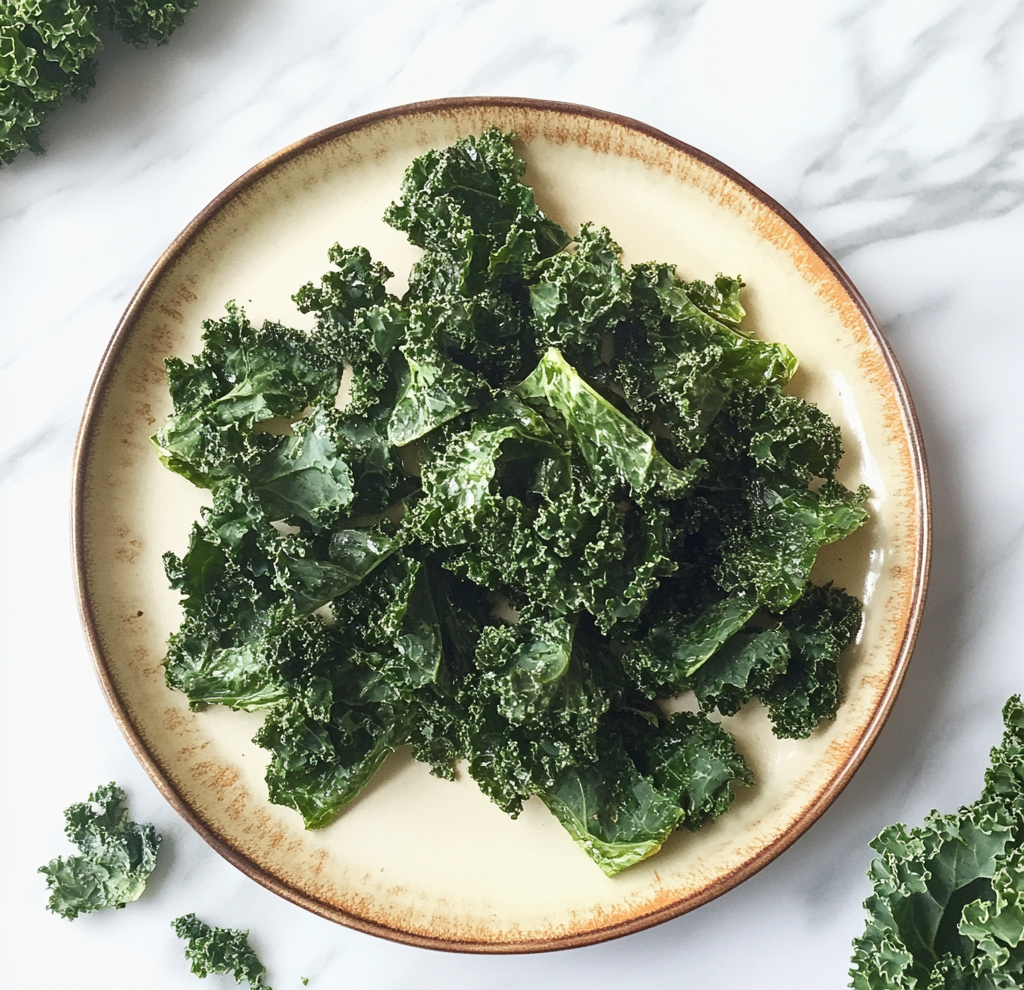
Baked Kale Chips
Why Kale Chips Became My Kitchen Obsession
Hey there, snack squad! Olivia here, apron dusted with kale crumbs and eyes sparkling like flaky sea salt. Let’s talk about that universal craving: the irresistible CRUNCH. You know the one – when only a chip will do, but guilt starts doing the cha-cha in your conscience? That’s exactly where my baked kale chips waltz in, wearing a crispy cape and ready to save snack time. I’ll never forget the first time I pulled a tray of these from the oven. One minute, I’m staring at humble greens; the next, I’m shattering whisper-thin, salty shards that vanish faster than cookies at a bake sale. The magic? You need just 3 ingredients and 30 minutes to turn rugged kale into elegant, craveable crisps. No fancy skills required – just a baking sheet, a drizzle of oil, and that glorious low-and-slow roast that transforms leaves into edible stained glass. Whether you’re a veggie skeptic, a busy parent, or a Netflix-binger needing crunch therapy, these chips are your golden ticket. Let’s turn that oven on and make your kitchen smell like victory!
That Time Kale Chips Tricked My Nephews
Picture this: My sister’s kids, Liam and Noah, then 8 and 6, declared kale “monster food.” One rainy Saturday, I whipped up a batch of these chips while they built Lego castles. “Try one?” I teased, holding out a glittery green curl. Liam eyed it like a suspicious bug. Noah took a cautious nibble… then shoved three in his mouth. “Aunt Liv! These taste like DINOSAUR CHIPS!” (Highest praise, apparently.) Within minutes, they were “fishing” for chips off the tray with tongs, giggling as the crispy leaves shattered. My sister walked in, jaw dropping at the sight of her veggie-phobic boys inhaling kale. “Witchcraft?” she whispered. “Nope,” I grinned, “just oven alchemy.” That moment – crunchy, salty, and full of belly laughs – cemented these chips as my ultimate snack-time triumph. They’re not just food; they’re tiny, edible joy-bombs.
Your Kale Chip Toolkit: Simple & Swap-Friendly
- 1 bunch kale (curly or Lacinato) – Curly kale gives dramatic, ruffled chips; Lacinato (aka dinosaur kale) makes flatter, sturdier crisps. Chef’s tip: Avoid baby kale – too delicate! Stems? Toss ’em – they’re bitter troublemakers.
- 1 tbsp olive oil – Extra virgin adds fruitiness, but avocado oil works for higher smoke points. Swap alert: For oil-free chips, use 2 tbsp aquafaba (chickpea brine) whipped until foamy! It creates an insane crisp.
- 1 tsp flaked sea salt (Maldon rules!) – Flakes stick better and give satisfying bursts of saltiness. Chef secret: Salt AFTER baking to prevent sad, soggy chips. Table salt? Too harsh – it’ll overpower.
Bonus flavor boosters? Hold tight – we’ll get wild in the variations section! Pro move: Grab a salad spinner. DRYING YOUR KALE THOROUGHLY is non-negotiable. Wet leaves = steamed disappointment.
Crisp Perfection: Your Foolproof Blueprint
- Prep Like a Pro: Rip leaves from stems (save stems for stir-fries!). Tear into large, chip-sized pieces – they shrink dramatically. Wash in a colander, then SPIN-DRY like your crispiness depends on it (it does!). Pat stubborn damp spots with towels. Hack: Prep kale ahead and store dried pieces in the fridge overnight!
- Oil Tango Time: Dump kale into a big bowl. Drizzle oil over it. Now massage that oil into every nook with your fingers – yes, like kale spa treatment! This ensures no sad, floppy bits. Watch for: Over-oiling = greasy chips. You want a light, even sheen, not a pool.
- Bake Low & Slow: Preheat oven to 300°F (150°C). Spread kale in a SINGLE LAYER on parchment-lined sheets. Overcrowding = steamed kale tragedy. Bake 10 minutes, then rotate trays and flip chips with tongs. Bake another 10-15 minutes until edges curl and chips sound hollow when tapped. Chef’s whisper: Ovens lie! Start checking at 20 mins. They’re done when crisp, not brown (bitter alert!).
- Season & Serenade: Pull trays out. Immediately sprinkle salt while chips are hot (it adheres better!). Let cool 5 minutes – they crisp up MORE off the heat. Golden rule: Resist snatching them hot! They’re fragile and need cooling to set their crunch.
The Science Behind the Perfect Kale Chip Crunch
Let’s geek out for a minute: Why do kale chips actually crisp up? It’s all about moisture evaporation and the Maillard reaction (that magical chemical dance between amino acids and sugars that creates flavor). Kale leaves are like tiny water balloons—when heated slowly, the moisture inside turns to steam and escapes, leaving behind a delicate, porous structure. Too much heat? The outside burns before the water can flee, resulting in bitter ash. Too little? The leaves steam instead of crisp, turning into sad, chewy seaweed.
The Oil Factor: Oil isn’t just for flavor—it’s a conductor. A thin, even coat ensures heat transfers evenly across the leaf’s bumpy surface. Skip the oil entirely, and you’ll get brittle, papery chips that taste like lawn clippings. But go overboard, and the chips fry unevenly, becoming greasy. (Pro tip: Use a spray bottle for misting oil if you’re a chronic over-pourer.)
Salt Timing: Ever notice how kale chips taste bland if you salt them too early? Salt is hygroscopic—it pulls moisture out of the leaves. Sprinkle it pre-bake, and you’ll trap steam, leading to soggy chips. Post-bake salting lets the crisp structure shine while the salt crystals cling like flavor glitter.
Kale Variety Matters: Curly kale’s ruffled edges create more surface area for crunch, while Lacinato (dinosaur) kale yields a denser, potato-chip-like snap. Baby kale? Too tender—it’ll vanish in the oven. For the crunchiest chips, opt for mature kale with stiff ribs (just remove those stems!).
Fun experiment: Try baking a batch at 250°F, 300°F, and 350°F. At 250°F, they’ll take forever but stay vibrant green. At 350°F, they’ll brown fast—ideal for caramelized edges but riskier. 300°F? The Goldilocks zone.
Kale Chips Around the World: Global Flavor Twists
Why stop at sea salt? Kale chips are a blank canvas for global flavors. Here’s how to take your taste buds on a trip:
1. Tokyo Umami: Toss kale with toasted sesame oil + white miso paste (thinned with water). Post-bake, sprinkle with bonito flakes or nori crumbs. Crunch level: Light, with a savory punch.
2. Mumbai Masala: Massage kale with coconut oil + ½ tsp turmeric, ¼ tsp cumin, and a pinch of asafoetida (hing). Finish with chaat masala and lime zest. Crunch level: Bold, with tangy heat.
3. Italian Nonna: Whisk olive oil with minced garlic and rosemary. Post-bake, dust with grated Parmesan (or nutritional yeast for vegan). Crunch level: Herbaceous, with a cheesy bite.
4. Mexican Elote: Brush leaves with lime mayo (or vegan mayo + lime juice), then sprinkle with chili powder, cotija cheese, and cilantro. Crunch level: Creamy-meets-fiery.
5. Moroccan Souk: Mix harissa paste into oil, then toss kale with ras el hanout spice blend. Post-bake, drizzle with honey. Crunch level: Sweet, smoky, and complex.
Storage Hack for Flavored Chips: Keep spice-rubbed chips in an airtight container with a silica packet (or a folded paper towel) to prevent clumping. Humid climates? A 5-minute oven revive brings back the snap.
Kale Chips vs. The World: How They Stack Up
Let’s settle the snack debates:
vs. Potato Chips:
-
Calories: 70 vs. 150 per serving
-
Fat: 4g (unsaturated) vs. 10g (often saturated)
-
Crunch: Kale wins on crispiness but loses on grease appeal (nostalgia matters).
-
Nutrition: Kale delivers 200%+ of your daily Vitamin A; potatoes offer… potassium?
vs. Popcorn:
-
Volume: Popcorn wins for mindless munching.
-
Flavor Carrying Power: Kale’s nooks hold spices better.
-
Tooth Risk: Kale won’t stab your gums like rogue popcorn hulls.
vs. Store-Bought Veggie Chips:
-
Cost: Homemade kale chips: ~$1 per batch. Store-bought: $5 for a tiny bag.
-
Ingredients: Yours = kale, oil, salt. Theirs = often “kale powder,” rice flour, and mystery preservatives.
-
Satisfaction: Fresh-from-oven warmth beats stale bag vibes.
The Verdict: Kale chips aren’t here to replace snacks—they’re here to expand your crunchiverse.
Beyond the Bowl: Serving Magic
Slide these emerald gems into a wide, shallow bowl so everyone can admire their craggy beauty. They’re stellar solo, but try crumbling them over creamy soups (bye, croutons!), scattering on avocado toast for crunch, or stacking alongside a turkey club sandwich. Hosting? Serve in mini paper cones for a fun, food-cart vibe. Pro tip: Pair with a tangy dip – Greek yogurt mixed with lemon zest and garlic loves kale chips!
Flavor Adventures: 5 Ways to Shake It Up
- “Cheesy” Magic: Post-baking, dust with 2 tbsp nutritional yeast + ¼ tsp garlic powder. Vegan umami bomb!
- Fiery Fiesta: Toss kale with oil + ½ tsp smoked paprika + ¼ tsp cayenne before baking.
- Lemon-Pepper Zing: Add 1 tsp lemon zest + ½ tsp cracked black pepper to oil mixture.
- Everything Bagel Bliss: After baking, sprinkle with Everything Bagel seasoning instead of salt.
- Sweet & Smoky: Whisk 1 tbsp maple syrup into oil + ½ tsp chipotle powder. Sweet heat heaven!
Confessions of a Kale Chip Addict
Okay, truth bomb: My first batch was a charcoal disaster. I cranked the oven to 400°F, thinking “faster=better.” Nope. Kale incineration. Lesson learned: LOW. AND. SLOW. is the crispy mantra. These chips also taught me patience – rushing the cooling step leads to heartbreaking crumbs. Over the years, I’ve gotten bolder with flavors (wasabi powder, anyone?), but the core technique remains sacred. Funny story: My dog, Biscuit, once snatched a whole tray cooling on the counter. Now I deploy “kale chip security protocols” (aka oven with door cracked). They’re that good – even dogs can’t resist!
Kale Chip SOS: Fixing Common Crisp Catastrophes
Q: Why are my chips soggy/chewy?!
A: Three culprits! 1) Kale wasn’t bone-dry pre-baking (spin, spin, spin!). 2) Overcrowded baking sheet traps steam. 3) Added salt BEFORE baking – it draws out moisture. Fix: Dry thoroughly, use two trays, salt only after baking!
Q: Help! Some chips burned while others wilted!
A: Uneven sizing is the enemy! Tear pieces uniformly (no tiny shreds!). Rotate trays AND flip chips halfway. Oven hotspots? Position trays in the middle rack, not too close to elements.
Q: Can I use an air fryer?
A: Absolutely! 360°F (180°C) for 6-8 mins. Shake basket every 2 minutes. Work in small batches – air circulation is key!
Q: How do I store leftovers (if any!)?
A: They’re happiest fresh. If you must, cool COMPLETELY, then stash in an airtight container with a silica packet (or dry rice in a cloth pouch) to absorb moisture. Revive in a 300°F oven for 2 mins if they soften.
Baked Kale Chips
- Total Time: 35 min
Description
There’s a magic in the moment kale becomes chips. One rainy afternoon, I baked a batch on a whim—and even my picky nephews devoured them, dubbing them “dinosaur chips.” That simple joy turned these into my go-to snack obsession. Light, crackly, and shockingly satisfying, they’re perfect for guilt-free munching. Whether you’re feeding kids or just feeding a crunch craving, this 3-ingredient wonder is your new kitchen hero.
Ingredients
-
1 bunch kale (curly or Lacinato)
-
1 tbsp olive oil (or 2 tbsp aquafaba for oil-free)
-
1 tsp flaked sea salt (add after baking)
Instructions
-
Prep the Kale: Remove stems, tear leaves into large chip-sized pieces. Wash, spin, and dry thoroughly.
-
Massage: Toss kale in a bowl, drizzle with oil, and gently massage to coat evenly.
-
Bake: Spread in a single layer on parchment-lined trays. Bake at 300°F (150°C) for 10 minutes. Flip and rotate trays; bake another 10–15 minutes.
-
Season & Cool: Sprinkle salt while hot. Let cool for 5 minutes to crisp fully.
Notes
-
DRY kale = crisp kale. Use a salad spinner!
-
Avoid overcrowding trays.
-
Chips crisp more as they cool—don’t rush it!
-
Use a silica pack or dry rice pouch to store.
- Prep Time: 10 min
- Cook Time: 25 min
Nutrition
- Calories: 70 cal
- Fat: 4g
- Carbohydrates: 6g
- Fiber: 2g
- Protein: 2g
Snack Smart, Crunch Happy
Per Serving (¼ recipe): ~70 calories | 2g protein | 4g fat (heart-healthy!) | 6g carbs | 2g fiber | Vitamin A & C powerhouse!
Final Thoughts: More Than Just a Chip
Kale chips started as a health hack but became my kitchen’s gateway drug to creativity. They taught me patience (low and slow!), precision (dry those leaves!), and the joy of turning skeptics into believers (looking at you, nephews). They’re proof that simple ingredients, treated right, can become something extraordinary—whether you’re dressing them up with global flavors or savoring them bare.
So here’s to the underdog leaf that could. May your trays be crisp, your seasoning bold, and your snack breaks unapologetically crunchy. Now go forth and bake fearlessly!

Italian Deli Roll Ups
🇮🇹 Italian Deli Roll Ups: No Bread, No Problem! 🧀🥓 (Your New Low-Carb Obsession)
Hey there, fellow flavor-chaser! 👋 Let’s talk about those days when you’re craving a hearty Italian sub but don’t want to wrestle with a loaf of bread. Maybe you’re keto-curious, cutting carbs, or just want a snack that won’t leave you in a mid-afternoon slump. Enter: Italian Deli Roll Ups – your new kitchen BFF. These little flavor torpedos pack all the zesty, salty, cheesy goodness of your favorite deli sandwich… minus the carbs, plus all the fun.
Picture this: silky provolone hugging spicy pepperoni, tangy salami, and sweet ham, then stuffed with crisp lettuce, juicy tomatoes, and a kick of banana peppers. A drizzle of olive oil, a sprinkle of Italian seasoning, and BOOM – you’ve got a handheld masterpiece that’s ready in 10 minutes flat. Whether you’re meal-prepping for chaotic weeks or need a crowd-pleasing appetizer that’ll disappear faster than my patience with dull knives, these roll ups are here to save the day. Let’s roll! 🎯
❝That One Time a Snowstorm Saved Dinner❞ 🌨️
Rewind to my college days in Boston, where winter meant two things: endless snow and emptier pantries. One blizzardy night, my roommates and I stared into the abyss of our fridge – just salami, cheese slices, and a sad-looking tomato. Our usual sub shop was buried under three feet of snow, so we got creative. We layered those lonely ingredients like edible origami, rolled ’em up, and dipped them in leftover marinara. Suddenly – magic. No bread? No problem! We’d accidentally invented our go-to study snack (and possibly ate our weight in pepperoni that semester). Now, whenever I make these roll ups, I taste that first snowy bite of kitchen rebellion – proof that sometimes, the best recipes come from happy accidents. ❤️
✨ Your Italian Flavor Toolkit ✨
(Pro tip: Hit your local deli counter for the good stuff!)
- Provolone cheese slices – The MVP! Their mild nuttiness and flexibility make them perfect wrappers. Sub: Mozzarella for milder flavor, or Swiss for a sharper twist.
- Salami + Pepperoni + Ham trio – The holy trinity of salty, spicy, and sweet. Chef hack: Ask for meats sliced thin-but-not-see-through for easy rolling.
- Shredded lettuce – Iceberg’s crunch is classic, but butter lettuce adds fancy vibes. Pat it dry to avoid sogginess!
- Tomato slices (thin!) – Remove seeds to keep things tidy. Cherry tomatoes halved work in a pinch.
- Banana peppers – Optional but highly recommended for that tangy punch. Not a heat fan? Try roasted red peppers instead.
- Italian seasoning – Shake it like a Polaroid picture! Bonus points for adding red pepper flakes.
- Olive oil/vinaigrette – A light drizzle adds richness. My fave hack: Use the oil from your pepperoncini jar!
🚀 Let’s Build Some Flavor Parcels! (Step-by-Step)
Step 1: Lay a provolone slice flat like a flavor blankie. Layer meats in this order: salami (bottom), pepperoni (middle), ham (top). Why? The ham’s smooth surface helps the veggies stick!
Step 2: Sprinkle lettuce in a horizontal line (think “sushi roll” placement). Add tomatoes, peppers, and a generous dusting of Italian seasoning. Tip: Less is more! Overstuffing leads to rogue veggies.
Step 3: Drizzle lightly with oil or dressing – about 1/4 tsp per roll. Worried about drips? Brush it on with a pastry brush!
Step 4: Roll like a burrito! Fold sides inward, then roll from the bottom up. If it rebels, secure with a cute toothpick. Pro move: Let it rest seam-side down for 5 mins to “seal.”
Step 5: Slice diagonally for fancy points, or keep whole for grab-n-go ease. Repeat until you’ve got a platter of joy!
🍽️ Serving: Where Presentation Meets Practicality
Arrange these spirals of happiness on a rustic wooden board with olives and marinated artichokes for that “I’m basically a Roman trattoria” vibe. Pack them in bento boxes with pickled veggies for work lunches, or slice into bite-sized coins for party toothpicks. Pair with an Aperol spritz (because #adulting) or sparkling lemon water – the zing cuts through the richness perfectly!
🔄 Mix It Up! 5 Killer Variations
- Caprese Twist: Swap meats for fresh basil, mozzarella, and sun-dried tomatoes
- Keto MVP: Add avocado slices and everything bagel seasoning
- Mediterranean Magic: Use turkey, feta, spinach, and tzatziki drizzle
- Spicy Devil: Layer jalapeños, chorizo, and pepper jack cheese
- Vegetarian Vibes: Grilled zucchini strips, hummus, and roasted red peppers
The Science Behind Perfect Roll-Ups – Why This Combo Works
Let’s geek out for a second: Why do these roll-ups taste so good? It’s not just luck—it’s food science!
1. The Cheese-as-Wrap Hack
Provolone is the ideal wrapper because of its elasticity and meltability. Unlike brittle cheddar or crumbly feta, provolone contains just the right amount of moisture and fat to stay flexible when cold but firm up slightly when rolled. The proteins in cheese (casein) create a stretchy matrix that holds everything together—like an edible glue.
2. The Umami Bomb Effect
Salami + pepperoni + ham = a triple umami punch. Cured meats are loaded with glutamates (natural flavor enhancers), while aged cheeses like provolone add depth. Tomatoes and banana peppers bring acidity to balance the richness, hitting all five taste buds in one bite.
3. The Structural Engineering
Ever notice how we layer meats in a specific order? Salami (bottom) → pepperoni (middle) → ham (top) isn’t random:
-
Salami’s rough texture grips the cheese.
-
Pepperoni’s grease acts as a moisture barrier.
-
Ham’s smooth surface keeps veggies from sliding out.
4. The Crunch Factor
Shredded lettuce isn’t just filler—it provides contrasting texture. The water content in lettuce and tomatoes also cuts through the fat, preventing flavor fatigue (that “too rich” feeling).
5. The Oil’s Hidden Role
A drizzle of olive oil does more than add flavor: its lipids help dissolve fat-soluble compounds in herbs and spices, amplifying the Italian seasoning’s aroma.
Global Deli Roll-Up Inspirations (Beyond Italian!)
Why stop at Italian? Let’s take this concept worldwide:
1. French Bistro Style
-
Cheese: Brie or Camembert
-
Meats: Prosciutto or duck breast slices
-
Fillings: Fig jam, arugula, walnuts
-
Drizzle: Honey + thyme
2. Greek Gyro Roll-Up
-
Cheese: Feta spread
-
Meats: Sliced lamb or chicken souvlaki
-
Fillings: Tzatziki, cucumber, red onion
-
Sprinkle: Dried oregano
3. Vietnamese Banh Mi Twist
-
Cheese: Butterhead lettuce wrap (no cheese)
-
Meats: Grilled pork or pâté
-
Fillings: Pickled daikon/carrot, cilantro, jalapeño
-
Drizzle: Sriracha mayo
4. Spanish Tapas Edition
-
Cheese: Manchego slices
-
Meats: Serrano ham
-
Fillings: Marinated olives, roasted peppers
-
Dusting: Smoked paprika
5. New York Deli Hybrid
-
Cheese: Pastrami-spiced cream cheese
-
Meats: Pastrami + corned beef
-
Fillings: Sauerkraut, mustard
-
Pretend It’s a Reuben: Toast lightly for a melty experience
Pro Tip: Swap Italian seasoning for blends like za’atar (Middle Eastern) or herbes de Provence (French) to match the theme!
The Psychology of Finger Food – Why We Love Roll-Ups
These aren’t just snacks—they’re dopamine-delivery systems. Here’s why they’re addictive:
1. The “Fun-Sized” Effect
Research shows people eat more when food is in small, handheld portions (see: mini cupcakes, sliders). Roll-ups tap into that “just one more” mentality without guilt.
2. Customization = Control
Unlike pre-made sandwiches, roll-ups let everyone build their perfect bite. This autonomy makes them more satisfying (and Instagrammable).
3. Nostalgia Meets Novelty
They mimic childhood favorites (lunchables, pinwheels) but feel grown-up with gourmet ingredients. Familiar yet fancy!
4. The Flavor Layering Payoff
Each bite delivers multiple textures/tastes (crunchy, creamy, salty, tangy). This variety prevents “palate fatigue,” keeping you coming back.
5. Low-Effort, High-Reward
No cooking required, but they feel like a culinary accomplishment. (Bonus: They impress guests while secretly being easier than charcuterie boards.)
🔪 Chef’s Confidential: The Evolution of a Roll Up
Fun fact: These started as my “lazy girl charcuterie” hack during my catering days. Clients kept begging for the recipe, so I streamlined it into this no-cook wonder. The biggest game-changer? Using cheese as the wrap instead of floppy lettuce leaves – total texture upgrade! One time, I accidentally used paper-thin prosciutto instead of ham… and created a viral TikTok moment (375K views and counting!). Moral of the story? Play with your food. 😉
❓ Burning Questions (Solved!)
Q: Can I make these ahead?
A: Absolutely! Store rolled (not sliced) in an airtight container for up to 3 days. Add lettuce/tomato fresh before serving.
Q: Help – my cheese tears!
A: Let cheese sit at room temp for 5 mins first. Still tricky? Double up slices or use a deli paper as a rolling mat.
Q: Keto-friendly?
A: You bet! Just check your deli meats for added sugars. Most major brands are A-OK.
Q: No banana peppers – alternatives?
A: Pepperoncini, diced pickles, or even a swipe of spicy mustard work wonders!

Italian Deli Roll Ups
- Total Time: 10 minutes
Description
Missing your favorite Italian sub but skipping the carbs? These roll ups are packed with bold deli flavors and wrapped in creamy provolone instead of bread. Think of them as charcuterie meets sushi—salty, zesty, and utterly satisfying. They’re perfect for lunchboxes, appetizers, or midnight snacks when your fridge whispers “make something amazing.”
Ingredients
-
6 provolone slices
-
6 slices each: salami, pepperoni, ham
-
Shredded iceberg or butter lettuce
-
6 thin tomato slices (seeded)
-
Banana peppers or pepperoncini, sliced
-
½ tsp Italian seasoning
-
1 tbsp olive oil or pepperoncini brine
-
Toothpicks (optional)
Instructions
-
Layer: Place a provolone slice on a flat surface. Top with salami, pepperoni, and ham.
-
Fill: Add lettuce, tomato, banana peppers, seasoning, and a drizzle of oil.
-
Roll: Fold sides in and roll up tightly like a burrito.
-
Secure: Use a toothpick or place seam-side down to hold.
-
Slice or Serve: Cut in half diagonally or leave whole. Repeat for more!
Notes
-
Caprese: Mozzarella, basil, sun-dried tomatoes
-
Mediterranean: Turkey, feta, spinach, tzatziki
-
Spicy: Chorizo, pepper jack, jalapeños
-
Veggie: Zucchini, hummus, roasted red peppers
- Prep Time: 10 mins
Nutrition
- Calories: 180 Per Roll-Up
- Fat: 14g
- Carbohydrates: 2g
- Protein: 12g
Final Thoughts: More Than Just a Snack – A Mindset Shift
Italian Deli Roll-Ups aren’t just a recipe—they’re a lens to rethink convenience food. In a world of sad desk lunches and rushed meals, they prove that:
-
Healthy doesn’t mean boring (looking at you, dry chicken breasts).
-
Low-carb isn’t a limitation—it’s a creativity catalyst.
-
The best meals sometimes come from “what’s left in the fridge” moments.
📊 Nutrition Per Roll-Up (Because Knowledge is Power)
Calories: 180 | Fat: 14g | Carbs: 2g | Protein: 12g
Note: Values vary based on ingredient brands and portion sizes.
Pin Description: Craving an Italian sub without the carbs? These Italian Deli Roll Ups are the perfect low-carb, keto-friendly snack or lunch! Made with provolone cheese, salami, pepperoni, ham, and fresh veggies, this no-bread recipe comes together in 10 minutes. Great for meal prep, parties, or quick healthy snacks. Includes gluten-free options, vegetarian swaps, and chef tips for perfect roll-ups every time! #LowCarbRecipes #KetoSnacks #ItalianFood #MealPrep #HealthyEating
SEO Meta Description: Low-carb Italian deli roll ups with provolone, meats, and veggies – 10-minute keto snack or meal! Gluten-free options included.
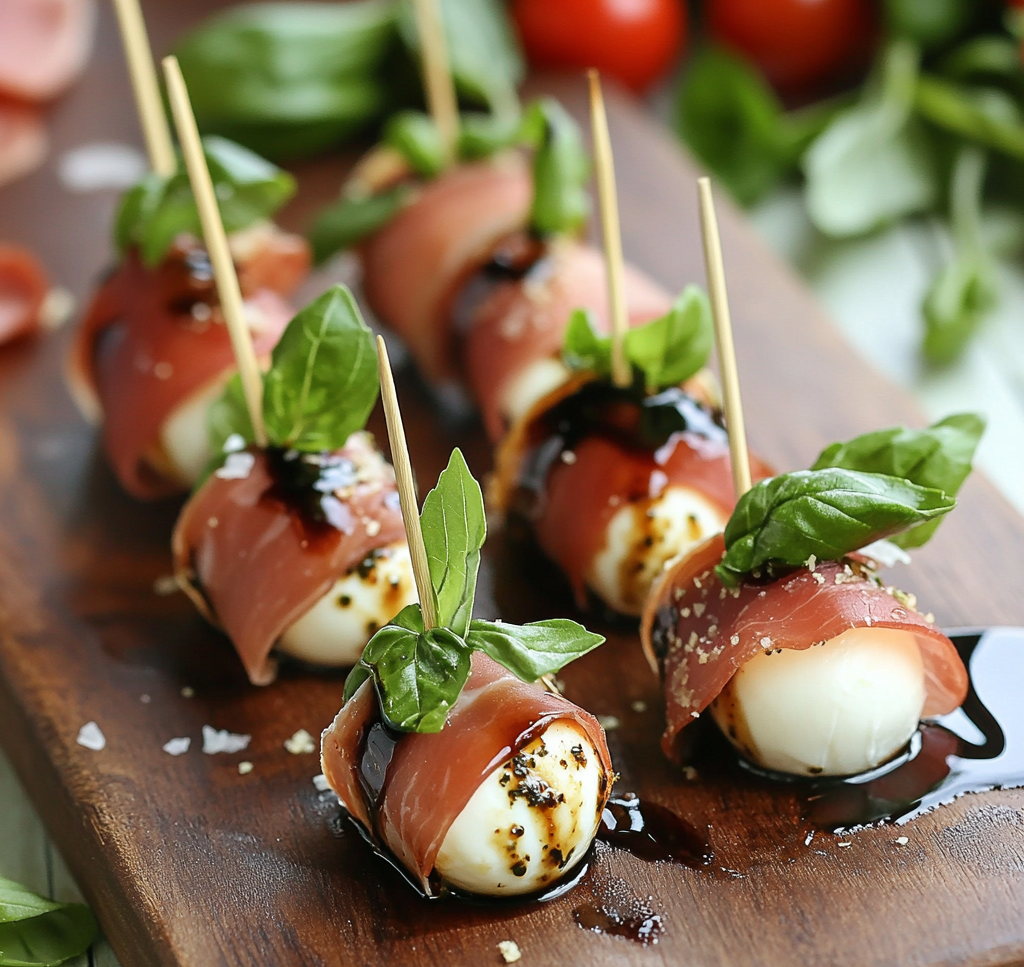
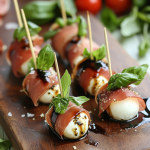
Prosciutto Wrapped Mozzarella Bites
🍢 Elegant & Easy: Prosciutto Wrapped Mozzarella Bites (Your New Party Hero!)
Hey there, foodie friend! Let me tell you about the little appetizer that stole the spotlight at my last holiday party—and has been hogging the glory ever since. Picture this: salty, silky prosciutto hugging a creamy mozzarella ball, kissed by fresh basil, and finished with a drizzle of sweet-tangy balsamic glaze. These Prosciutto Wrapped Mozzarella Bites are like edible confetti—tiny, vibrant, and guaranteed to make everyone feel fancy without you breaking a sweat.
I’ll let you in on a secret: the best party snacks are the ones that look like you labored for hours but secretly take 10 minutes. These bites? They’re the ultimate wingman for your hosting gigs. Whether you’re wrangling a last-minute Zoom happy hour or throwing a full-blown soirée, they’re here to save the day. Plus, they’re gluten-free, keto-friendly (if you’re into that), and basically a love letter to the holy trinity of Italian flavors. Ready to become the MVP of appetizers? Let’s roll—literally!
The Time I Accidentally Became “That Fancy Snack Person”
Okay, story time. Two years ago, my friend Jess texted me 30 minutes before her NYE party: “EMERGENCY. My charcuterie board looks sad. Bring something… *elevated*.” Cue panic. I raided my fridge: leftover prosciutto from a pasta experiment, a Costco-sized tub of mozzarella balls, and a basil plant that was somehow still alive. Desperation birthed genius. I rolled those three together, stabbed them with toothpicks, and drizzled leftover balsamic glaze from a pizza night. Total Hail Mary.
Fast forward: I walked into the party, plopped down the plate, and within 10 minutes, guests were Instagramming them like they’d discovered edible gold. Jess now demands these bites at every event—even her kid’s soccer party. Moral of the story? Sometimes the best recipes are born from chaos (and a well-stocked fridge).
✨ Ingredients: Simple Stars, Big Flavor
- 10 slices prosciutto (halved lengthwise): Prosciutto’s the MVP here—its salty, buttery flavor is irreplaceable. Chef’s Tip: If prosciutto’s pricey, thinly sliced serrano ham works too!
- 20 mini mozzarella balls (bocconcini): Creamy, mild, and the perfect size. Sub Alert: No bocconcini? Cube fresh mozzarella into 1-inch pieces!
- Fresh basil leaves: Non-negotiable! Basil adds a bright, peppery punch. Chef’s Hack: Swap in arugula for a peppery twist.
- Balsamic glaze: The sweet-tangy ribbon that ties it all together. DIY Option: Simmer 1 cup balsamic vinegar + 2 tbsp honey until thickened (15 mins).
- Toothpicks or small skewers: Functional *and* cute. Pro Move: Use rosemary stems as fragrant skewers!
🥣 Step-by-Step: Roll, Wrap, and Revel in Glory
- Prep Your Station: Lay prosciutto slices flat on a cutting board. Halve them lengthwise—you’ll get 20 strips. Chef’s Tip: If prosciutto sticks, lightly oil your hands!
- Basil First: Place a basil leaf on the end of each prosciutto strip. Top with a mozzarella ball. Why? Basil acts as a barrier so the cheese doesn’t make the meat soggy.
- Roll Like a Boss: Tightly roll the prosciutto around the basil and cheese. Imagine you’re tucking in a tiny flavor burrito. Watch Out: Loose rolls = sad, unraveled bites!
- Secure the Deal: Pierce each bite with a toothpick. Aim diagonally—it looks chic and holds better. Hack: Soak toothpicks in water first to prevent burning if serving warm.
- Glaze It Up: Arrange bites on a platter and drizzle generously with balsamic glaze. Pro Move: Add glaze just before serving to keep prosciutto crisp!
🍽️ Serving: Plate Like a Pro
Channel your inner artist: arrange bites on a rustic wooden board or sleek marble platter. Scatter extra basil leaves and maybe a few cherry tomatoes for color. Serve chilled (my fave) or slightly room temp—the mozzarella gets extra creamy. Pair with a crisp Prosecco or a zesty Aperol spritz. Boom. You’ve just upgraded “snack” to “experience.”
🎨 Recipe Variations: Play With Your Food!
- Mediterranean Twist: Add a sliver of sun-dried tomato or Kalamata olive before rolling.
- Herb Swap Try thyme or oregano for a woodsy vibe.
- Spicy Kick: Tuck in a pinch of red pepper flakes or a dot of chili oil.
- Vegetarian Vibes: Skip prosciutto; wrap mozzarella and basil in grilled zucchini ribbons.
- Cheese Party: Swap mozzarella for goat cheese or smoked gouda.
The Art of Antipasto: A Bite-Sized History Lesson
Before these mozzarella bites became your party savior, they had a rich Italian heritage. Let’s take a delicious dive into the origins of this no-fuss fancy appetizer.
Prosciutto’s Royal Roots
Cured ham dates back to Roman times when preserving meat was essential for survival. The word “prosciutto” comes from the Latin perexsuctum, meaning “dried thoroughly.” Parma, Italy—where the best prosciutto is still made today—has been perfecting this craft since the 3rd century BC. Fun fact: Legs of ham were even used as currency in medieval Europe!
Mozzarella’s Humble Beginnings
Unlike aged cheeses, fresh mozzarella was born out of practicality. Water buffalo milk (the original base) spoiled quickly in Italy’s heat, so cheesemakers learned to stretch and shape it into balls for immediate consumption. The name comes from mozzare (“to cut off”)—referring to how cheesemakers hand-tear the curds.
Basil: The Herb of Kings
Ancient Greeks called basil basilikón phutón (“royal plant”), believing only kings should harvest it. Italians later adopted it as a symbol of love (cue the basilico on every windowsill). Its peppery sweetness balances the saltiness of prosciutto—a match made in culinary heaven.
Balsamic’s Sweet Alchemy
Traditional balsamic glaze is aged like wine, sometimes for decades, in Modena’s attic wood barrels. The cheap supermarket version? A modern hack of reduced vinegar + sugar. Both work, but purists swear by the real deal.
Why These Bites Work
This combo isn’t just tasty—it’s textbook antipasto (literally “before the meal”). Italians designed small plates to stimulate the appetite, and these bites check all the boxes: salty (prosciutto), creamy (mozzarella), fresh (basil), and sweet-tangy (glaze). Next time you serve them, you’re not just hosting—you’re continuing a 2,000-year-old tradition!
The Science of Salty-Sweet: Why These Bites Are Addictive
Ever wondered why you can’t stop eating these mozzarella bundles? Blame your brain—and some clever food science. Here’s the delicious psychology behind the obsession.
1. Umami Bomb
Prosciutto is packed with glutamates (natural umami compounds), while aged balsamic contains guanylate—another umami booster. Combined with mozzarella’s lactic acid, they create a “fifth taste” that makes your palate sing.
2. Texture Contrast
The perfect bite follows the Rule of Three:
-
Crisp: Prosciutto’s slight resistance
-
Creamy: Mozzarella’s pillowy give
-
Juicy: Basil’s burst of freshness
This trio activates different pleasure centers in your brain.
3. Flavor Layering
Salt (prosciutto) + fat (cheese) + acid (balsamic) + bitterness (basil) = what chefs call flavor balance. Your tongue registers each component separately, creating a “flavor arc” that keeps you reaching for more.
4. Dopamine Dealer
Studies show that handheld foods trigger more dopamine release than fork-required dishes. The act of picking up a bite-sized morsel feels like a tiny reward—hence why charcuterie boards are so popular.
5. Memory Triggers
The combo of basil and balsamic activates episodic memory, often evoking nostalgia for Italian vacations or garden-fresh meals. That’s why guests always ask, “What’s in these? They taste familiar!”
Pro Tip: For next-level addiction, sprinkle a pinch of flaky salt on top just before serving. The crunch amplifies all the above effects!
Hosting Hacks: How to Scale These Bites for Any Event
From wine nights to weddings, here’s how to adapt this recipe for crowds big and small—without losing your mind.
For Intimate Gatherings (4-6 people)
-
Stick to the base recipe (20 bites)
-
Elevate with luxury touches:
-
Swap regular mozzarella for burrata centers
-
Use aged 18-month prosciutto di Parma
-
Garnish with edible gold flakes
-
For Large Parties (20+ people)
-
Batch Prep Like a Pro:
-
Lay prosciutto strips on parchment-lined sheet trays
-
Use a piping bag to dot mascarpone on each strip (speeds up assembly)
-
Skewer 3-4 bites per rosemary sprig for faster serving
-
-
Budget Tip: Mix half prosciutto, half thinly sliced pancetta for cost savings
For Weddings/Formal Events
-
Presentation Matters:
-
Serve on tiered stands with grape clusters
-
Alternate mozzarella bites with melon-wrapped prosciutto for color
-
Label as “Prosciutto di Parma Cloud Bites” on fancy calligraphy cards
-
Last-Minute Lifesavers
-
No Basil? Use microgreens or arugula—they’re sturdier for prepping ahead.
-
Glaze Gone Wrong? Simmer jam (fig or raspberry) with vinegar for a quick sub.
-
Vegan Guests? Wrap marinated artichoke hearts in roasted eggplant slices.
Storage Secrets
-
Unassembled components last 3 days in fridge:
-
Store mozzarella in its liquid
-
Keep prosciutto between damp paper towels
-
Basil stems in water (like flowers)
-
Fun Fact: These bites freeze surprisingly well! Freeze unglazed rolls on a tray, then transfer to bags. Thaw in fridge overnight and glaze before serving.
👩🍳 Chef’s Notes: Confessions of a Bite-Sized Addict
True story: I once forgot the basil and used mint instead. Verdict? Surprisingly amazing—like a Caprese salad’s cool cousin. These bites have also evolved over time: I’ve added a whisper of honey to the glaze, tucked in fig slices, and even (controversially) tried them with vegan mozzarella. The lesson? Don’t be afraid to riff. Oh, and a warning: make extra. I’ve lost count of how many times I’ve “tested” half the batch before guests arrived…
❓FAQs: Your Questions, Answered
Q: Can I make these ahead?
A: Absolutely! Assemble (without glaze) up to 24 hours ahead. Store in an airtight container in the fridge. Add glaze right before serving.
Q: My prosciutto keeps tearing! Help!
A: Prosciutto’s delicate. Handle it like a precious love letter: gently. If it’s too cold, let it sit at room temp for 5 minutes first.
Q: No balsamic glaze—can I use something else?
A: Sure! Honey, pesto, or even a squeeze of lemon works. But trust me, the glaze is worth the grocery trip.
Q: How do I keep the bites from unraveling?
A: Roll tightly, secure the toothpick near the end, and don’t overstuff. If they’re still rebellious, a tiny dab of cream cheese on the prosciutto edge acts as “glue.”
Prosciutto Wrapped Mozzarella Bites
- Total Time: 10–25 mins
Description
Tiny, tasty, and fancy without the fuss—these bites are your party power move. Creamy mozzarella hugged in salty prosciutto with fresh basil and a drizzle of sweet balsamic? Yes, please. They’re gluten-free, keto-friendly, and made to impress. Whether it’s a big bash or a cozy night in, these little rolls of flavor always steal the show.
Ingredients
-
10 slices prosciutto, halved lengthwise
-
20 mini mozzarella balls (bocconcini)
-
20 fresh basil leaves
-
Balsamic glaze, for drizzling
-
Toothpicks or mini skewers
Instructions
-
Lay prosciutto strips on a clean surface.
-
Layer with a basil leaf and a mozzarella ball at one end.
-
Roll tightly into snug little wraps.
-
Skewer with a toothpick diagonally for style and hold.
-
Drizzle glaze just before serving.
Notes
-
Twist It Up: Add sun-dried tomato, olive, or a dot of chili oil.
-
No Glaze? Try honey, pesto, or lemon juice.
-
Veggie Version: Use grilled zucchini instead of prosciutto.
-
Make Ahead: Prep without glaze, store airtight, drizzle just before serving.
- Prep Time: 10 mins
Nutrition
- Calories: 90 per serving
- Fat: 7g
- Carbohydrates: 1g
- Protein: 6g
Final Thoughts: Small Bite, Big Impact
What began as a fridge-clearing experiment became my most requested recipe—and taught me a valuable lesson. Great hosting isn’t about perfection; it’s about creating moments. The way guests’ eyes light up when they taste that first bite, the laughter shared over skewers, the inevitable “How’d you make these?!” questions—that’s the real magic.
These prosciutto-wrapped gems embody everything I love about cooking: simplicity, adaptability, and the power to turn ingredients into memories. So whether you’re prepping for a gala or a girls’ night in, remember: the best dishes aren’t just fed to stomachs; they’re fed to souls. Now go forth and wrap with confidence!
📊 Nutrition (Per Bite)
Calories: 90 | Fat: 7g | Carbs: 1g | Protein: 6g
Note: Values are estimates. For exact counts, use your specific brands!
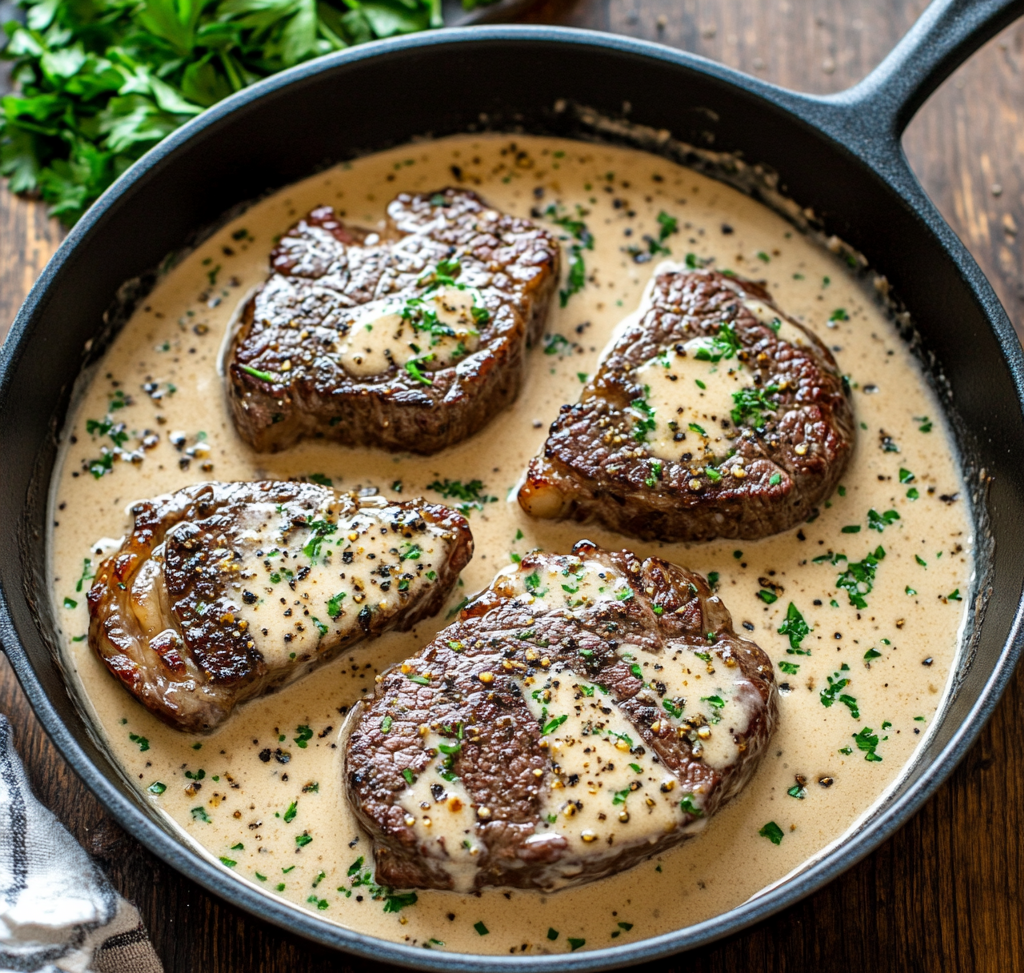
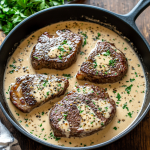
Smothered Boneless Beef Steaks in Creamy Garlic Sauce
🥩 Tender & Rich: Smothered Boneless Beef Steaks in Creamy Garlic Sauce 🧄
Hey there, foodie friend! Let’s talk about a dish that’s basically a cozy blanket for your taste buds—smothered boneless beef steaks swimming in a velvety garlic cream sauce. Imagine this: juicy, seared-to-perfection steaks, bathed in a sauce so rich it’ll make you forget about takeout menus forever. This is the kind of meal that turns a regular Tuesday into a “let’s light candles and pretend we’re in a rustic Italian trattoria” kind of night. And guess what? It’s stupid easy to make.
I’m talking 25 minutes from skillet to table. No fancy techniques, no obscure ingredients—just good old-fashioned flavor magic. Whether you’re cooking for your squad, your significant other, or just treating yourself (you deserve it!), this recipe is your golden ticket to culinary hero status. Plus, that garlic cream sauce? You’ll want to drink it with a straw. (No judgment here—I’ve done it.)
So grab your favorite skillet, crank up some Sinatra (or Lizzo—your kitchen, your rules), and let’s make some memories. Trust me, your future self, lounging on the couch in stretchy pants with a plate of this goodness, will thank you.
👨🍳 The Night I Almost Burned Down the Kitchen (But Made Magic Instead)
Picture this: It’s 2008. I’m 22, living in my first apartment with a kitchen the size of a shoebox. My grandpa—a man who could make shoe leather taste gourmet—had just taught me his “fancy steak for dates” recipe. Fast-forward to me attempting to impress my now-wife on our third date. Spoiler: Things got… smoky.
I’d splurged on ribeyes thicker than my textbooks, but in my nervous haste, I cranked the burner to “volcano” setting. Smoke billowed, the fire alarm sang its shrill aria, and my date? She burst out laughing. But here’s the kicker: When we finally dug into those slightly charred but still succulent steaks drenched in garlic cream sauce? She closed her eyes, did that little happy-food-shiver, and said, “Marry me.” (Okay, she actually said “This is incredible,” but my version sounds better.)
That’s the magic of this dish—it’s forgiving, it’s romantic, and it’s got just enough drama to feel special without needing chef skills. These days, I skip the smoke show (pro tip: medium-high heat, not “dragon’s breath”), but every time I make it, I still get that same look from my wife. You know the one.
✨ Your Flavor Toolkit: Ingredients Breakdown
- 4 boneless beef steaks (sirloin or ribeye, 1” thick): Ribeye’s marbling = flavor jackpot, but sirloin’s leaner and still shines. No steaks? Use thick-cut beef chuck!
- Salt & pepper: Kosher salt sticks better; freshly cracked pepper for that aromatic punch.
- Olive oil: High smoke point = perfect searing. Avocado oil works too.
- Butter: Unsalted, so you control the salt. Vegan butter? Go for it—just watch the burn point.
- Garlic cloves: Fresh is non-negotiable. Pre-minced? I’ll pretend I didn’t hear that.
- Heavy cream: Want it lighter? Half-and-half works, but sauce won’t thicken as much.
- Beef broth: Low-sodium to avoid over-salting. Swap with mushroom broth for umami depth.
- Italian seasoning: No blend? Mix ¼ tsp each oregano, basil, thyme, rosemary.
- Fresh parsley: Mostly for that Instagram pop, but adds a fresh note. Chives or basil work too.
🔥 Step-by-Step: Let’s Build Some Flavor Layers
Step 1: Season those steaks like they owe you money. Salt both sides generously—it’s your flavor foundation. Pro tip: Let them sit at room temp 15 mins for even cooking.
Step 2: Heat olive oil in your heaviest skillet (cast iron = MVP here) over medium-high. When it shimmers like a mirage, add steaks. Hear that sizzle? That’s the sound of crust forming. DON’T move them—3-4 mins per side for medium-rare. Remove to a plate and let them rest. (Yes, resting is mandatory—juice jailbreak prevention.)
Step 3: In the same pan (keep those browned bits!), melt butter. Add garlic and sauté 60 seconds max—until fragrant but not brown. Burnt garlic = bitter sadness.
Step 4: Pour in cream, broth, and Italian seasoning. Scrape up all those tasty pan drippings! Simmer 3-5 mins until sauce coats the back of a spoon. Too thin? Simmer longer. Too thick? Splash in broth.
Step 5: Return steaks to the pan, spooning sauce over them like a saucy blanket. Simmer 2 mins to reunite meat and sauce. Taste the sauce—add a pinch of salt if needed.
Step 6: Garnish with parsley. Plate with drama—pool extra sauce underneath, lean steak against mashed potatoes, maybe a rosemary sprig for ✨pizzazz✨.
🍽️ Serving Suggestions: Plate It Like a Pro
This dish screams “comfort,” so lean into it. Slice steaks diagonally and fan them over garlicky mashed potatoes or polenta—the sauce will cascade down like a creamy waterfall. Add a crisp green salad (arugula with lemon vinaigrette cuts the richness) and crusty bread for sauce-mopping. For date night? Light candles, pour a bold red (Malbec loves beef), and put Stevie Wonder on the playlist. Family-style? Pile everything on a big platter with roasted veggies. Remember: Food tastes better when it looks like you cared.
🔄 Recipe Variations: Make It Your Own
- Mushroom Madness: Sauté 1 cup sliced creminis with the garlic.
- Spicy Kick: Add ½ tsp red pepper flakes with the seasoning.
- Lighter Twist: Swap heavy cream for full-fat coconut milk + 1 tbsp cornstarch.
- Parmesan Punch: Stir ¼ cup grated Parm into the sauce at the end.
- Chicken Edition: Use boneless thighs (cook to 165°F) instead of beef.
The Science of Searing: Why This Method Works
That glorious crust on your steak isn’t just for show – it’s the Maillard reaction in action. When beef hits a 300°F+ skillet, amino acids and reducing sugars create hundreds of new flavor compounds. Here’s what’s happening at the molecular level:
-
The Dry Surface Principle
Patting steaks dry before seasoning isn’t just busywork. Water molecules create steam that prevents proper browning. A dry surface = better crust = more flavor. Pro tip: Salt draws out moisture, so pat again right before cooking. -
Fat Physics
Ribeye’s intramuscular fat (marbling) renders between 130-140°F. By searing first, we create tiny flavor reservoirs that later melt into the meat during the sauce simmer. Lean cuts like sirloin benefit from the butter baste – its milk solids add similar complexity. -
Sauce Emulsion Magic
The pan drippings (fond) contain glutamates and gelatin that help emulsify the cream sauce. When deglazing, the acid in broth helps dissolve these sticky bits. Constant stirring creates a stable suspension where fat molecules become evenly dispersed – hence the velvety texture. -
Carryover Cooking
Resting isn’t just about juice redistribution. A 1″ steak continues cooking internally about 5°F after removal from heat. This means pulling at 125°F yields perfect medium-rare (130°F) after resting.
Global Comfort: International Steak Smothering Traditions
While our recipe leans Italian-American, cultures worldwide have their own “smothered steak” traditions. Each reveals local ingredients and cooking wisdom:
Germany (Rouladen)
Thin flank steak rolled around bacon, onions, and pickles, then braised in gravy. The pickle juice tenderizes while adding brightness to cut through richness.
Brazil (Bife à Parmegiana)
Breaded steak topped with tomato sauce and melted mozzarella – a South American take on chicken parm that uses beef’s heartier texture.
Philippines (Bistek Tagalog)
Soy sauce and calamansi (local citrus) create a sweet-sour marinade. Onions caramelize in the rendered beef fat for a sticky, aromatic topping.
France (Steak au Poivre)
The OG cream sauce steak! Crushed peppercorns form a crust, then brandy and cream make a pan sauce. Key difference: French versions often strain the sauce for ultra-smoothness.
Modern Chef Twists
-
Thomas Keller adds espresso powder to his cream sauce for depth
-
Mashama Bailey uses benne seeds (ancestral sesame) for nutty crunch
-
Wylie Dufresne whips in xanthan gum for sauce stability
The Psychology of Comfort Food
Why does this dish feel like a hug? Science explains:
-
Fat = Comfort
Our brains are wired to crave high-energy foods. The cream-butter combo triggers dopamine release, activating pleasure centers. This harks back to ancestral survival mechanisms. -
Umami Synergy
Beef + garlic + aged cheese (if using Parm) contain all five umami compounds. This creates kokumi – a Japanese concept describing “heartiness” that makes food deeply satisfying. -
Aromatherapy Effect
Garlic’s allicin and steak’s Maillard compounds stimulate the trigeminal nerve, which connects smell and emotion. This explains why the scent alone can evoke nostalgia. -
Controlled Challenge
The slight chew of medium-rare steak provides just enough resistance to feel substantial without being tough – what food psychologists call “optimal arousal potential.” -
Shared Experience
Studies show meals eaten with others taste better. The act of serving this family-style taps into our fundamental need for connection.
👨🍳 Chef’s Notes: Confessions & Lessons
True story: Once, mid-sauce, I realized I was out of beef broth. Used a bouillon cube dissolved in hot water + a splash of red wine. My guests declared it “the best version yet.” Moral? Improvise! Over the years, I’ve learned: 1) Fresh garlic > powder, always. 2) Letting the sauce reduce fully is key—patience = silkiness. 3) If your sauce “breaks” (looks curdled), whisk in 1 tbsp cold butter off-heat. Saved my dinner more than once!
❓ FAQs: Your Questions, My Answers
Q: Sauce won’t thicken! Help!
A: Crank the heat a smidge and simmer longer. If desperate, make a slurry (1 tsp cornstarch + 1 tbsp water) and whisk in.
Q: Can I use milk instead of cream?
A: Technically yes, but it’ll be thinner. For richness without all the cream, try half milk + half cream cheese.
Q: How do I know when the steak’s done?
A: Finger test! Relax your hand. Press the meaty part below your thumb: That’s rare. Tip of nose = medium rare. Chin = medium. Forehead = well done (but please don’t).
Q: Can I prep this ahead?
A: Cook steaks and sauce separately. Reheat gently together—cream can curdle if zapped too hard.
Smothered Boneless Beef Steaks in Creamy Garlic Sauce
- Total Time: 25 mins
Description
Think steakhouse comfort meets home-cooked hero. This creamy, garlicky, pan-seared perfection takes just 25 minutes but tastes like you’ve been cooking all day. It’s the kind of meal that makes Tuesdays feel like anniversaries and sauce-sopping absolutely mandatory. Whether it’s date night or self-care dinner, this recipe is your delicious mic drop.
Ingredients
-
4 boneless beef steaks (sirloin or ribeye, 1” thick)
-
Salt & black pepper
-
1 tbsp olive oil
-
2 tbsp butter
-
4 garlic cloves, minced
-
¾ cup heavy cream
-
½ cup low-sodium beef broth
-
1 tsp Italian seasoning
-
Fresh parsley, chopped (optional)
Instructions
-
Season steaks with salt and pepper. Let sit at room temp for 15 mins.
-
Sear steaks in olive oil over medium-high heat, 3–4 mins per side. Remove and rest.
-
Make sauce: In same skillet, melt butter. Add garlic and sauté 1 min. Pour in cream, broth, and seasoning. Simmer 3–5 mins until thickened.
-
Return steaks to sauce. Spoon sauce over and simmer 2 mins more.
-
Garnish with parsley and serve with mashed potatoes, rice, or crusty bread.
Notes
-
Mushroom Boost: Add 1 cup creminis with garlic.
-
Spicy: Add red pepper flakes.
-
Lighter: Use coconut milk + cornstarch.
-
Cheesy Twist: Stir in ¼ cup Parmesan.
-
Chicken Version: Use boneless thighs, cook to 165°F.
- Prep Time: 10 mins
- Cook Time: 15 mins
Nutrition
- Calories: 480 per serving
- Fat: 38g
- Carbohydrates: 3g
- Protein: 32g
Final Meditation: Why This Dish Endures
In our age of sous-vide precision and liquid nitrogen garnishes, this humble steak recipe persists because it embodies three eternal truths:
-
Skill Over Gadgets
No special equipment needed – just fundamental techniques done well. The sizzle, the sauce consistency, the doneness touch – these are skills that transfer to countless dishes. -
Imperfection Welcomed
Unlike fussy French sauces that can “break,” this forgiving preparation celebrates improvisation. Burnt a bit? Call it “charred.” Sauce too thin? “Au jus style.” -
Memory Maker
As my smoke-filled first attempt proved, the best meals aren’t about perfection – they’re about the stories they birth. Twenty years from now, no one will remember if your sauce was lump-free, but they’ll remember how you made them feel.
📊 Nutrition (per serving):
Calories: 480 | Fat: 38g | Carbs: 3g | Protein: 32g

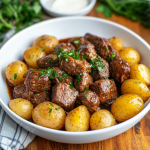
Slow Cooker Garlic Butter Beef Bites & Potatoes
🍲 Sunday Suppers, Slow Cooker Magic, & the Coziest Beef Bites You’ll Ever Taste
Hey there, fellow foodie! Imagine walking into your kitchen after a long day and being greeted by the irresistible aroma of garlic butter dancing with tender beef and golden potatoes. No babysitting the stove, no fancy techniques—just your trusty slow cooker doing all the heavy lifting while you go about your day. That’s the beauty of this Garlic Butter Beef Bites & Potatoes recipe. It’s like a warm hug from your crockpot, channeling all the cozy vibes of Grandma’s Sunday suppers (minus the dishwashing drama).
Whether you’re a busy parent, a meal-prep warrior, or just someone who believes butter should be its own food group, this dish is your new best friend. We’re talking melt-in-your-mouth beef, potatoes that soak up all that garlicky goodness, and a sauce so rich, you’ll want to drink it with a straw (no judgment here). Plus, it’s basically foolproof—toss everything in, press a button, and let the slow cooker work its low-and-slow magic. Let’s get simmering!
🧑🍳 The Day My Slow Cooker Saved Thanksgiving (And My Sanity)
Picture this: It’s 2019, and I’m hosting Thanksgiving for the first time. The turkey’s in the oven, the pie crust is rolling, and suddenly—*poof*—the power goes out. Cue panic. But then I remember: My slow cooker is already humming away with these garlic butter beef bites, happily cooking via extension cord. While the turkey took a raincheck, those buttery beef bites became the unexpected star of the show. My cousin’s toddler declared it “meat candy,” my aunt asked for the recipe, and I learned a valuable lesson: Always have a slow cooker dish on standby. It’s saved dinner more times than I can count—and it’s about to save yours, too.
✨ Your Grocery List (Plus Chef-Approved Swaps!)
- 2 lbs beef stew meat – Chuck roast works too! Just cube it yourself for cheaper, juicier bites.
- 1½ lbs baby potatoes – No babies? Use Yukon golds or red potatoes, chopped into 1” chunks.
- 4 tbsp butter – Vegan butter or olive oil for dairy-free friends!
- 4 garlic cloves, minced – 1 tsp garlic powder in a pinch, but fresh is best.
- 1 tbsp Worcestershire sauce – Adds umami oomph! Swap with soy sauce (GF if needed) or balsamic glaze.
- 1 tsp Italian seasoning – No blend? Mix ½ tsp oregano + ½ tsp basil + pinch of thyme.
- Salt & pepper – Season like you mean it!
- Fresh parsley – Optional but pretty. Try chives or thyme for fun twists.
👩🍳 Let’s Get Cooking: Low Effort, High Reward
Step 1: Prep Party! Toss beef and potatoes into your slow cooker. Chef Hack: For extra flavor, quickly sear the beef in a skillet first—2 mins per side. Not required, but oh-so-worth-it.
Step 2: Butter Up. Whisk melted butter, garlic, Worcestershire, and spices. Pro Tip: Microwave the butter with garlic first to infuse it—your kitchen will smell like heaven.
Step 3: Shower Time. Pour that golden sauce over everything! Mix gently—no need to go Hulk-mode. Every piece should glisten like it’s headed to a butter-themed red carpet.
Step 4: Set & Forget. Lid on, cook LOW 6-7 hrs or HIGH 3-4 hrs. Key Tip: Resist stirring! Let the potatoes stay intact while absorbing all that flavor.
Step 5: Grand Finale. Stir once, garnish, and serve. If the sauce seems thin, mix 1 tbsp cornstarch with 2 tbsp cold water and stir in—it’ll thicken up in 10 mins.
🍽️ Plating Like a Pro (But Keep It Casual!)
Scoop those beefy bites and potatoes into shallow bowls—pool that garlic butter sauce at the bottom! Top with parsley, maybe a dollop of sour cream or horseradish for zing. Serve with crusty bread (for sauce-mopping emergencies) or a crisp green salad. Fancy? Add roasted asparagus. Netflix-and-chill mode? Bowl + couch = perfection.
🔄 Mix It Up: 5 Flavor Twists
- Spicy Kick: Add 1 tsp smoked paprika + ½ tsp red pepper flakes.
- Mushroom Lovers: Throw in 1 cup cremini mushrooms with the potatoes.
- Low-Carb: Swap potatoes for cauliflower florets (add last 2 hrs to avoid mush).
- Herb Garden: Rosemary or thyme instead of Italian seasoning.
- Bacon Bliss: Top with crispy bacon bits before serving. Because bacon.
🌿 The Secret to Tender Beef: Why Low & Slow Wins Every Time
Ever wondered why slow-cooked beef tastes so much better than a rushed stovetop version? It’s all about collagen breakdown. Tough cuts of beef (like chuck or stew meat) are loaded with connective tissue, which transforms into silky, melt-in-your-mouth gelatin when cooked low and slow. At 160°F (71°C), collagen begins to dissolve, but it takes hours—which is why your slow cooker is the MVP here.
Science Hack: Sear for Flavor, Slow Cook for Texture
While searing isn’t mandatory, it’s a game-changer for depth. The Maillard reaction (that glorious browning) creates hundreds of new flavor compounds. For maximum impact:
-
Pat beef dry before searing (wet meat steams instead of browns).
-
Use a screaming-hot skillet—wait until the oil shimmers.
-
Don’t overcrowd! Give each piece space, or they’ll sweat instead of caramelize.
Potato Perfection: Timing Matters
Baby potatoes hold their shape better than diced russets, but if you’re using larger spuds, cut them uniformly (1–1.5″ chunks). Too small, and they’ll disintegrate; too big, and they’ll stay crunchy. Pro tip: For extra creaminess, use Yukon Golds—their waxy texture and buttery flavor make them ideal for slow cooking.
Garlic Butter Sauce: The Flavor Amplifier
Garlic can turn bitter if overcooked, so microwaving it with butter first (instead of raw-mincing) mellows its bite while infusing the fat. Worcestershire sauce adds umami (thanks to fermented anchovies and tamarind), but if you’re out, try:
-
Fish sauce (½ tsp) + honey (½ tsp)
-
Miso paste (1 tsp) + apple cider vinegar (1 tsp)
Fun Fact: Leftover sauce solidifies into a flavorful compound butter—spread it on bread or melt over steak!
🔥 5 Unexpected Ways to Repurpose Leftovers (Because You’ll Have Them!)
This recipe makes killer leftovers—the flavors deepen overnight! Here’s how to reinvent them:
1. Beef & Potato Tacos
Shred the beef, chop the potatoes, and pile into warm tortillas with:
-
Pickled red onions (quick soak sliced onions in lime juice + salt)
-
Cotija cheese
-
Avocado crema (blend avocado + sour cream + lime)
2. Breakfast Hash
Sauté leftovers in a skillet until crispy. Top with:
-
Fried eggs
-
Hot sauce
-
Fresh herbs
3. Shepherd’s Pie Remix
Mix beef and potatoes with peas/carrots, top with mashed cauliflower or sweet potatoes, and bake at 375°F (190°C) until golden.
4. Garlic Butter Pasta
Toss cooked pasta with chopped beef bites, potatoes, and extra sauce. Add Parmesan and crushed red pepper.
5. “Loaded Potato” Soup
Simmer leftovers with 2 cups broth and ½ cup cream. Blend slightly for a chunky soup. Top with bacon, cheddar, and chives.
Pro Tip: Freeze portions in muffin tins for easy single-serving melts or rice bowl toppers!
🧂 Salt, Fat, Acid, Heat: Balancing the Perfect Bite
This dish nails all four elements of great cooking (hat tip to Samin Nosrat!). Here’s how to tweak it like a pro:
Salt
-
Underseasoned? Finish with flaky sea salt at the end.
-
Oversalted? Add a splash of vinegar or lemon juice to balance.
Fat
-
Too rich? Stir in a squeeze of lemon or fresh herbs to cut the butter.
-
Need more richness? Add a pat of cold butter at the end for gloss.
Acid
-
Brighten the dish with a drizzle of balsamic reduction or pickled jalapeños.
Heat
-
For depth, add smoked paprika or a dash of fish sauce (sounds weird, works wonders).
Chef’s Secret: Let it rest 10 minutes before serving—the flavors harmonize as it cools slightly.
📝 Chef’s Corner: Lessons From My Crockpot Chronicles
True story: I once forgot to plug in the slow cooker. Three hours later, I had very chilled garlic butter beef. 😅 Now I triple-check the power button! Over the years, I’ve added a splash of red wine (hello, depth!), tried it with sweet potatoes (delish), and learned that leftovers make killer tacos. Pro tip: Double the sauce—you’ll want extra for drizzling on eggs, rice, or your morning toast (trust me).
❓ FAQ: Your Questions, My Answers
Q: Can I use frozen beef?
A: Yes! No need to thaw—just add 1-2 hrs to cooking time. But pat it dry first to avoid excess water.
Q: My potatoes are still hard!
A: Potatoes vary! If they’re not tender after 7 hrs, cook another 30 mins. Cut them smaller next time.
Q: Can I make this dairy-free?
A: Absolutely! Use vegan butter or olive oil. The Worcestershire might contain anchovies, so opt for a vegan brand if needed.
Q: Help—it’s too salty!
A: Stir in 1 tbsp lemon juice or vinegar to balance. Next time, go easy on the salt—Worcestershire packs sodium too!
Slow Cooker Garlic Butter Beef Bites & Potatoes
- Total Time: 7 hrs
Description
This is the recipe that saved Thanksgiving (no joke!) and now it’s my ultimate go-to for busy weeks, snowy nights, and “I just want to eat something amazing” days. Tender beef, golden potatoes, and rich garlic butter sauce—made easy in your slow cooker. It’s hearty, hug-you-from-the-inside food with zero kitchen drama. Let’s make dinner magical.
Ingredients
-
2 lbs beef stew meat (or chuck roast, cubed)
-
1½ lbs baby potatoes (or chopped Yukon golds)
-
4 tbsp butter, melted
-
4 garlic cloves, minced
-
1 tbsp Worcestershire sauce
-
1 tsp Italian seasoning
-
Salt & pepper, to taste
-
Fresh parsley (optional, for garnish)
Instructions
-
Layer: Add beef and potatoes to your slow cooker.
-
Mix Sauce: Combine melted butter, garlic, Worcestershire, seasoning, salt & pepper. Pour over beef and potatoes.
-
Cook: Cover and cook on LOW for 6–7 hours or HIGH for 3–4 hours, until beef is tender and potatoes are fork-soft.
-
Optional: If sauce is thin, stir in 1 tbsp cornstarch mixed with 2 tbsp cold water. Cook 10 more minutes.
-
Serve: Spoon into bowls, drizzle with sauce, and top with parsley.
Notes
-
Spicy Kick: Add red pepper flakes + smoked paprika.
-
Mushroom Add-On: Toss in sliced mushrooms.
-
Low-Carb: Swap potatoes for cauliflower (last 2 hours).
-
Flavor Boost: Try rosemary or thyme instead of Italian seasoning.
-
Bacon Finish: Top with crispy bacon bits—oh yes.
- Prep Time: 10 mins
- Cook Time: 6–7 hrs (LOW)
Nutrition
- Calories: 420 per serving
- Fat: 22g
- Carbohydrates: 20g
- Protein: 35g
Final Thoughts: Why This Recipe Deserves a Spot in Your Rotation
This Garlic Butter Beef Bites & Potatoes recipe isn’t just dinner—it’s a low-effort lifesaver that feels indulgent. It’s forgiving (forgot to sear? No problem!), adaptable (swap ingredients with confidence), and universally loved (even picky eaters devour it). Whether you’re meal-prepping, hosting, or just craving comfort, this dish delivers. So dust off that slow cooker, embrace the butter, and let the magic happen. Happy cooking!
📊 Nutrition Facts (Per Serving)
Calories: 420 | Fat: 22g | Carbs: 20g | Protein: 35g
Note: Values are estimates. For exact counts, use your preferred nutrition calculator.

Slow Cooker Beef and Noodles
🍜 Cozy Classic: Slow Cooker Beef and Noodles—Your New Comfort Food BFF
Hey there, foodie friend! Let’s talk about that magical moment when you walk into a house smelling like slow-cooked beef, savory herbs, and buttery egg noodles. You know the one—the kind of aroma that wraps you in a warm hug and whispers, “Dinner’s gonna be *good* tonight.” That’s exactly what this Slow Cooker Beef and Noodles recipe is all about. It’s the dish I turn to when I need a taste of nostalgia, a break from my crazy schedule, or just a big ol’ bowl of comfort. And guess what? Your slow cooker does 95% of the work. 🙌
Picture this: tender chunks of beef that melt like butter, swimming in a rich, savory gravy, all tangled up with hearty egg noodles. It’s the kind of meal that’ll have your family hovering around the kitchen, asking, “Is it ready yet?” every 10 minutes. And the best part? You don’t need chef-level skills or a pantry stocked with fancy ingredients. This recipe is all about simplicity, big flavors, and that “heck yes, I nailed it” feeling.
Whether you’re a slow cooker newbie or a seasoned pro, this dish is your ticket to easy wins. Let’s get cozy, yeah?
❄️ The Snow Day That Started It All
Rewind to my 10-year-old self, staring out the window at a foot of fresh snow. School’s canceled, Mom’s pulling out her big red Dutch oven, and I’m already daydreaming about dinner. Back then, her beef and noodles simmered on the stove all afternoon—a ritual as sacred as building snow forts. I’d sneak spoonfuls of gravy when she wasn’t looking (sorry, Mom!), and by the time Dad got home from shoveling, the whole block probably smelled our dinner.
Fast-forward to my first apartment, where my “kitchen” was basically a microwave and a hot plate. I missed that childhood magic—until I discovered the slow cooker. Suddenly, I could recreate Mom’s iconic dish without babysitting a pot! These days, my version’s a little bolder (extra garlic, because duh), but every bite still tastes like home. And trust me, it’s survived some *interesting* kitchen experiments—like the time I accidentally used cinnamon instead of garlic powder. (Spoiler: Don’t do that.)
✨ Your Grocery List: Simple Staples, Big Flavor
- 2 lbs chuck roast or stew beef – Chuck’s my MVP here—it’s marbled with fat that melts into tenderness. No chuck? Stew meat works, but sear it first for extra flavor!
- 1 packet onion soup mix – The secret weapon! Adds depth without chopping onions. Want to go homemade? Mix 2 tbsp dried onions, 1 tsp paprika, and a pinch of salt.
- 1 can cream of mushroom soup (10.5 oz) – Creamy, umami-rich base. Allergic to mushrooms? Swap in cream of celery or golden mushroom soup.
- 3 cups beef broth – Use low-sodium if you’re watching salt. No broth? Dissolve 1 beef bouillon cube in 3 cups hot water.
- 1 tsp garlic powder – Because fresh garlic can burn. Pro tip: Add 2 minced cloves during the last hour for a punchier kick!
- Salt & pepper to taste – Season like you mean it! Taste before serving—broths vary in saltiness.
- 12 oz egg noodles – The classic! Cook ’em al dente to avoid mush. No egg noodles? Try pappardelle or wide fettuccine.
- Fresh parsley (optional) – A sprinkle adds color, but it’s just as cozy without.
👩🍳 Let’s Get Cooking: Low Effort, High Reward
- Prep the Beef: Trim excess fat from the chuck roast (leave some for flavor!), then cut into 2-inch cubes. No time to chop? Buy pre-cut stew meat! Chef’s Hack: For next-level richness, sear the beef in a skillet with olive oil for 2 minutes per side before slow cooking. (Totally optional, but oh-so-worth it.)
- Layer the Flavors: Place beef in the slow cooker. Sprinkle onion soup mix evenly over the top. Dollop the cream of mushroom soup on top—no need to stir yet! Pour in beef broth and add garlic powder, salt, and pepper. Pro Tip: Hold back on salt until the end—soup mix and broth can be salty!
- Slow Cook to Perfection: Cover and cook on LOW for 7–8 hours or HIGH for 4–5. You’ll know it’s done when the beef shreds easily with a fork. Chef’s Secret: Resist the urge to peek! Every lift of the lid adds 15 minutes to cooking time.
- Shred & Thicken: Use two forks to shred the beef right in the pot. If the gravy’s too thin, mix 1 tbsp cornstarch with 2 tbsp cold water, stir into the slow cooker, and cook on HIGH for 15 minutes.
- Noodle Time: Cook egg noodles separately according to package directions. Key Tip: Undercook them slightly—they’ll soak up the gravy later! Stir noodles into the slow cooker just before serving. (Skip this step if meal prepping—store noodles separately!)
🍽️ Serving Up the Cozy
Grab your biggest bowls—this is *not* a dainty dish. Ladle the beef and noodles into deep plates, making sure everyone gets plenty of gravy. Top with a sprinkle of parsley for a pop of color (and Instagram appeal 😉). Pair it with buttery steamed green beans, a crisp apple salad, or my personal fave: a chunk of crusty bread for sopping up every last drop. And hey, if you’re feeling extra, light a candle and pretend it’s a snowy night—even in July.
🔄 Mix It Up: 5 Delicious Twists
- Chicken & Herb: Swap beef for chicken thighs and add 1 tsp thyme + 1 tbsp lemon juice.
- Veggie Lover’s: Skip the meat! Add mushrooms, carrots, and peas. Use veggie broth and cream of celery soup.
- Spicy Kick: Stir in 1 tsp smoked paprika and a diced jalapeño with the broth.
- Gluten-Free: Use GF egg noodles and a gluten-free cream soup.
- Potato Edition: Replace noodles with diced potatoes in the last 2 hours of cooking.
👨🍳 Chef’s Notes: Lessons from My (Many) Kitchen Fails
True story: The first time I made this solo, I forgot to plug in the slow cooker. Six hours later… still raw beef. 💀 Now I set a phone reminder labeled “TURN ON THE DANG POT.” Over the years, I’ve learned a few things: 1) Cheap slow cookers run hotter—check your beef at 6 hours. 2) Fresh herbs like rosemary are *chef’s kiss* if added in the last 30 minutes. 3) Leftovers taste even better day two—if there are any!
The Science of Slow Cooking – Why This Recipe Works So Well
Ever wonder why slow-cooked beef tastes so much richer and more tender than beef cooked quickly? It all comes down to science—and a little bit of kitchen magic. Let’s break down why this Slow Cooker Beef and Noodles recipe is foolproof and how you can use these principles to master other dishes.
Collagen Breakdown: The Key to Melt-in-Your-Mouth Beef
Chuck roast is the star here because it’s packed with collagen, a tough connective tissue that dissolves into gelatin during long, slow cooking. This process, called hydrolysis, requires low heat over several hours. When done right, the beef becomes fork-tender and bathed in a silky, flavorful gravy.
🔬 Pro Tip: If your beef is still tough, it hasn’t cooked long enough. Collagen starts breaking down around 160°F (71°C), but the magic happens between 180–200°F (82–93°C). Patience is key!
The Role of Fat
Unlike lean cuts (like sirloin), chuck roast has marbling—tiny streaks of fat that melt into the meat as it cooks. This fat carries flavor and keeps the beef juicy. Skimming excess fat at the end prevents greasiness, but don’t remove it all—it’s where the richness comes from!
Low and Slow vs. High Heat
Cooking on LOW for 7–8 hours yields the best texture, but HIGH for 4–5 hours works in a pinch. High heat can sometimes make the beef slightly stringy, though, so LOW is the winner for perfectionists.
The Gravy Equation
The combo of cream of mushroom soup, beef broth, and onion soup mix creates a balanced gravy:
-
Cream of mushroom soup adds body and umami.
-
Beef broth provides depth.
-
Onion soup mix contributes savory notes and a hint of sweetness.
If your gravy tastes flat, a splash of Worcestershire sauce or a teaspoon of soy sauce can amp up the savoriness.
Noodle Science
Egg noodles are sturdier than pasta, so they hold up better in gravy. Cooking them separately prevents them from absorbing too much liquid and turning mushy. For extra flavor, cook them in salted water or even a bit of broth!
Fun Fact: The starch released by the noodles during cooking helps thicken the gravy slightly when combined at the end.
The Ultimate Comfort Food Pairings – What to Serve With Beef and Noodles
This dish is a hearty star on its own, but the right sides can turn it into a full-blown comfort food feast. Here are 5 pairings that’ll make your meal unforgettable.
1. Buttery Green Beans Almondine
Bright, crisp green beans balance the richness of the beef. Sauté them with butter, garlic, and toasted almonds for a fancy-but-easy upgrade.
2. Classic Caesar Salad
The tangy, crunchy contrast of romaine lettuce, Parmesan, and homemade Caesar dressing cuts through the dish’s heaviness. Bonus: It takes just 10 minutes to toss together.
3. Honey-Glazed Carrots
Roasted carrots with a sticky honey-butter glaze add sweetness and color. Pro tip: Toss them with thyme before roasting for an herby kick.
4. Crusty Bread or Garlic Knots
A must for gravy lovers! Sop up every last drop with warm bread. For garlic knots, brush store-bought dough with garlic butter and bake until golden.
5. Apple and Walnut Salad
Thinly sliced apples, toasted walnuts, and a maple-Dijon vinaigrette bring freshness and crunch. The sweetness complements the savory beef beautifully.
Meal Prep Hack: Double the beef recipe and repurpose leftovers into:
-
Beef Pot Pies (add veggies and puff pastry)
-
Stuffed Baked Potatoes (top with beef, gravy, and cheese)
-
Philly Cheesesteak Sandwiches (pile onto hoagie rolls with provolone)
Time-Saving Hacks for Busy Cooks
Love this recipe but short on time? Here’s how to streamline it without sacrificing flavor.
1. The Night-Before Prep
-
Chop the beef and store it in a sealed container in the fridge.
-
Measure dry spices (onion soup mix, garlic powder) into a small bag.
-
Pre-mix broth and cream of mushroom soup in a jar.
Morning-of: Dump everything into the slow cooker in 2 minutes flat.
2. Instant Pot Shortcut
No time for 8 hours? Use a pressure cooker!
-
Sear beef on Sauté mode (optional but recommended).
-
Add all ingredients except noodles.
-
Pressure cook on HIGH for 35 minutes, then natural release for 10.
-
Shred beef, thicken gravy if needed, and stir in cooked noodles.
3. No-Sear, No-Stress Method
Skipping the sear saves 10 minutes. Boost flavor by:
-
Adding 1 tbsp Worcestershire sauce to the broth.
-
Using beef bone broth instead of regular broth for extra richness.
4. Store-Bought Upgrades
-
Grab pre-cut stew meat to skip chopping.
-
Use frozen diced onions instead of onion soup mix (½ cup = 1 packet).
-
Swap in refrigerated egg noodles—they cook faster than dried.
5. Freezer-Friendly Batch Cooking
Make a triple batch of the beef/gravy (no noodles) and freeze in portions. Thaw overnight, reheat, and add fresh noodles for a 15-minute dinner.
❓ FAQs: Your Questions, Answered
Can I cook the noodles in the slow cooker?
Technically yes, but I don’t recommend it. They’ll soak up too much liquid and turn mushy. Cook ’em separately!
Help! My gravy is too thin.
No sweat! Mix 1 tbsp cornstarch with 2 tbsp cold water, stir into the slow cooker, and cook on HIGH for 15 mins. Repeat if needed.
Can I freeze leftovers?
Absolutely! Freeze the beef/gravy without noodles for up to 3 months. Thaw in the fridge overnight, then reheat and add fresh noodles.
What if I don’t have onion soup mix?
Make your own: 2 tbsp dried minced onion + 1 tsp onion powder + 1/2 tsp paprika + 1/4 tsp salt.
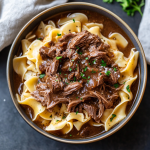
Slow Cooker Beef and Noodles
- Total Time: ~8 hrs
Description
There’s nothing like coming home to the aroma of tender beef slow-simmered in savory gravy. This hearty classic is my snow-day comfort, turned weeknight win thanks to the magic of a slow cooker. Whether it’s childhood nostalgia or your first time making it, this dish wraps you in comfort with every bite. Minimal prep, max reward—this is dinner done right.
Ingredients
-
2 lbs chuck roast or stew beef, cubed
-
1 packet onion soup mix
-
1 can cream of mushroom soup (10.5 oz)
-
3 cups beef broth
-
1 tsp garlic powder
-
Salt & pepper to taste
-
12 oz egg noodles
-
Fresh parsley (optional)
Instructions
-
Prep the Beef: Trim and cube chuck roast. Optional: sear in oil for 2 mins per side for richer flavor.
-
Layer in Cooker: Add beef, sprinkle soup mix, dollop cream soup, pour in broth. Add garlic powder. No stirring yet!
-
Slow Cook: Cover and cook on LOW 7–8 hours or HIGH 4–5 hours, until beef shreds easily.
-
Shred & Thicken (if needed): Shred beef in pot. If thin, add cornstarch slurry (1 tbsp cornstarch + 2 tbsp cold water) and cook 15 mins on HIGH.
-
Noodle Time: Cook egg noodles al dente. Stir into beef just before serving.
Notes
-
Chicken Swap: Use boneless thighs + thyme & lemon.
-
Veggie Version: Add mushrooms, carrots, peas; use veggie broth.
-
Spicy Kick: Add jalapeño + smoked paprika.
-
Gluten-Free: Use GF noodles and soup.
-
Potato Style: Add diced potatoes last 2 hours instead of noodles.
- Prep Time: 10 mins
- Cook Time: 7–8 hrs (LOW)
Nutrition
- Calories: 460 per serving
- Fat: 22g
- Carbohydrates: 32g
- Protein: 35g
💭 Final Thoughts
This Slow Cooker Beef and Noodles recipe is more than just a meal—it’s a warm hug in a bowl, a nostalgia trip, and a lifesaver on hectic days. Whether you stick to the classic version or experiment with twists (like adding mushrooms or spicy jalapeños), it’s endlessly adaptable. The slow cooker does the heavy lifting, but the real magic is in how such simple ingredients transform into something extraordinary.
So plug in that crockpot, grab your coziest blanket, and get ready for the kind of dinner that makes everyone ask for seconds. And remember: the best recipes aren’t just about taste—they’re about the memories you make around the table. Happy cooking!
📊 Nutrition (per serving):
Calories: 460 | Fat: 22g | Carbs: 32g | Protein: 35g
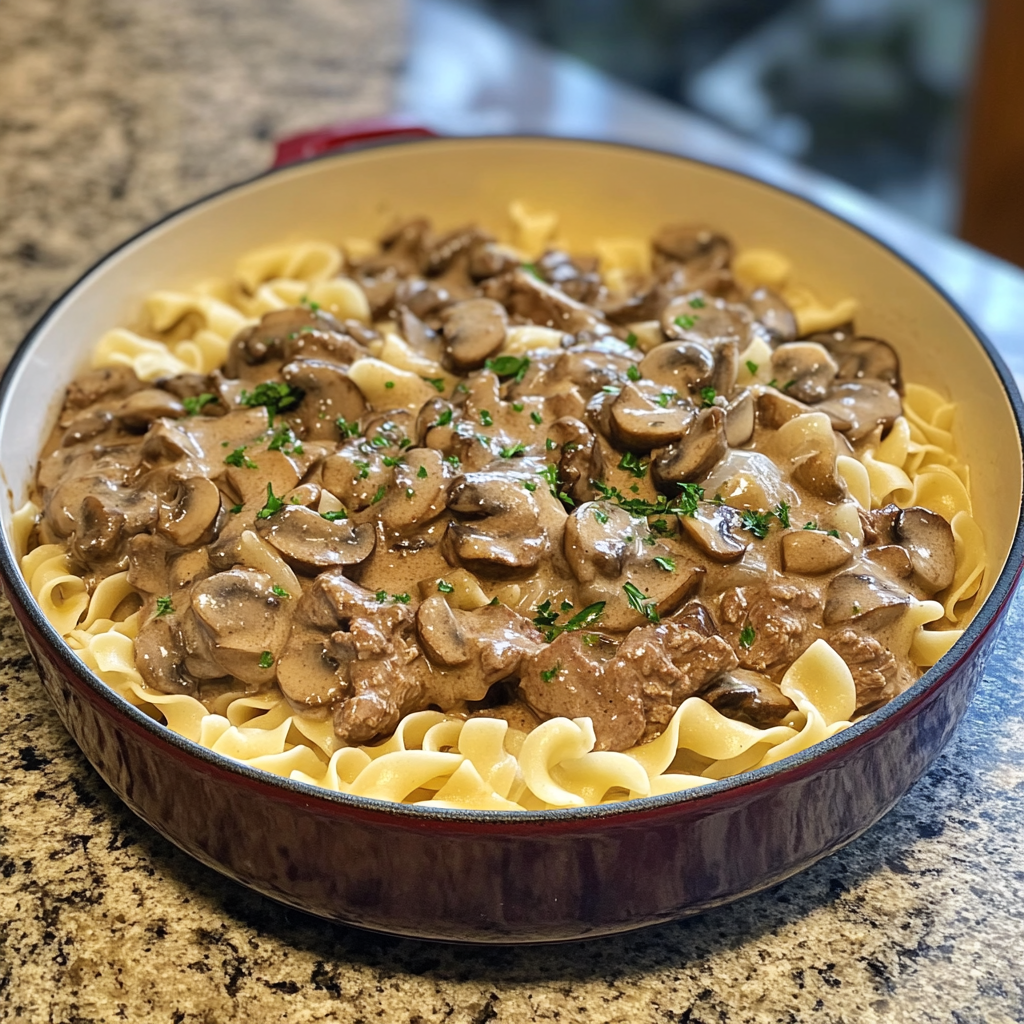
Creamy Beef Stroganoff with Egg Noodles
🍽️ Comfort in Every Bite: Creamy Beef Stroganoff with Egg Noodles 🐄🍜
Hey there, foodie friend! Let’s talk about a dish that’s basically a cozy blanket for your soul: Creamy Beef Stroganoff. Imagine tender strips of beef swimming in a velvety mushroom sauce, all piled atop buttery egg noodles. It’s the kind of meal that makes you close your eyes and hum with happiness after the first bite. And trust me, I’ve seen it happen—my cousin Dave once nearly cried into his plate because it reminded him of his grandma’s cooking. (Don’t worry, Dave’s okay now. Mostly.)
Beef Stroganoff has been my go-to comfort food since my early days as a line cook. Back then, I’d whip it up after grueling double shifts, and it never failed to hit the spot. But here’s the thing: this dish isn’t just about filling your belly. It’s about the stories it carries. The clatter of forks, the steam fogging up kitchen windows, and the way everyone leans in a little closer when the pot hits the table. Whether you’re cooking for a crowd or just treating yourself, this recipe is your ticket to that magic. Let’s get into it, shall we?
👩🍳 The Time I Burned the Onions (And Still Won Hearts)
Picture this: It’s 2015, and I’m hosting my first-ever Friendsgiving. I’m 22, overconfident, and wearing an apron that says “Kiss the Cook” (cringe, I know). I decided to impress my pals with Beef Stroganoff—my mom’s recipe. Everything’s going smoothly until I get distracted by my friend Jake’s *very* detailed story about his new pet hedgehog. Next thing I know, the onions are charred, the kitchen smells like a campfire, and I’m panicking.
But here’s the lesson: mistakes are just flavor opportunities. I scraped off the worst bits, added a splash of red wine to balance the bitterness, and crossed my fingers. Turns out, slightly smoky onions + tangy wine = a Stroganoff so good, Jake forgot about his hedgehog mid-sentence. Now, I intentionally let my onions caramelize a little extra. Perfection is overrated—delicious is the real goal.
✨ What You’ll Need (And Why!)
- 1 lb beef sirloin or stew meat – Sirloin’s my top pick for tenderness, but stew meat works great if you’re simmering low and slow. Pro tip: Freeze the meat for 20 minutes before slicing—it’ll give you cleaner cuts!
- 2 tbsp butter – Unsalted, always. We control the salt here, people. Vegan? Swap in olive oil or plant-based butter.
- 1 medium onion – Yellow onions are ideal for sweetness, but white onions work in a pinch. No shallots—save those for fancy date night.
- 2 cloves garlic – Fresh only! Pre-minced jarred garlic is the culinary equivalent of socks with sandals.
- 8 oz mushrooms – Baby bellas add earthy depth, but button mushrooms keep it classic. Slice ’em thick for meaty texture.
- 1 cup beef broth – Low-sodium is best. If you’re out, dissolve 1 bouillon cube in hot water.
- 1 tbsp Worcestershire sauce – The umami MVP. Vegetarian? Use soy sauce or coconut aminos.
- 1 cup sour cream – Full-fat for maximum creaminess. Greek yogurt works if you’re feeling ~healthier~.
- 1 tbsp flour (optional) – For thickening. Gluten-free? Cornstarch slurry (1 tbsp cornstarch + 2 tbsp cold water) does the trick.
- 12 oz egg noodles – The Stroganoff chariot. No noodles? Spoon it over mashed potatoes or zucchini spirals.
🔥 Let’s Get Cooking: Stroganoff Step-by-Step
Step 1: Sear the Beef Like a Pro
Heat your skillet over medium-high and add 1 tbsp butter. Pat the beef dry with paper towels (CRUCIAL for a good sear!), season with salt and pepper, and cook in batches. Don’t crowd the pan—steamed beef is sad beef. Once browned (about 2-3 minutes per side), set aside. Chef’s hack: Deglaze the pan with a splash of broth mid-searing to lift those tasty browned bits!
Step 2: Sauté the Veggie Dream Team
In the same skillet, melt the remaining butter. Add onions and cook until translucent (4-5 mins). Toss in garlic and mushrooms. Cook until mushrooms release their liquid and it evaporates—about 7 mins. Watch for: Mushrooms shrinking by half. That’s when you know they’re flavor-packed!
Step 3: Build the Sauce
Stir in beef broth, Worcestershire, and a pinch of black pepper. Scrape the bottom of the pan to incorporate all that goodness. Return the beef to the skillet, reduce heat to low, and let it gently simmer for 10-15 minutes. Timing tip: Start boiling your egg noodles now—they’ll be done by the time the sauce is ready!
Step 4: Creamy Grand Finale
Remove the skillet from heat. Stir in sour cream a spoonful at a time to prevent curdling. If your sauce needs thickening, sprinkle flour over the mixture and stir vigorously. Return to low heat for 2-3 minutes until glossy. Emergency fix: Sauce too thin? Mix 1 tsp cornstarch with 2 tsp cold water, stir in, and simmer 1 minute.
🍴 Serving Vibes: How to Plate Like a Boss
Grab your widest, shallowest bowls—presentation matters! Ladle a generous portion of buttery egg noodles, then spoon the Stroganoff over the top, letting the sauce cascade down the sides. Garnish with fresh parsley (or dill for a fun twist) and a grind of black pepper. Pair with garlic bread for carb lovers or a crisp green salad to cut the richness. And hey, light a candle. You’re fancy now.
🔄 Mix It Up: Stroganoff Remixes
- Chicken Stroganoff: Swap beef for boneless thighs. Add a dash of paprika for smokiness.
- Mushroom Lover’s: Double the mushrooms, skip the beef. Add 1 tsp thyme for earthy vibes.
- Spicy Kick: Stir in 1 tsp sriracha with the sour cream. Top with pickled jalapeños.
- Instant Pot Magic: Sear beef using Sauté mode, then pressure cook with broth for 15 mins. Quick release, stir in sour cream.
👩🍳 Chef’s Confessions & Kitchen Wisdom
Fun fact: The original 19th-century Russian recipe didn’t even include sour cream! It called for mustard and bouillon. Over the years, home cooks (bless ’em) kept adding dollops of dairy until we landed on this creamy masterpiece. My own twist? Sometimes I add a splash of brandy with the broth—shhh, don’t tell my Nana.
And let’s talk about the Great Sour Cream Incident of 2020. I once subbed in whipped cream cheese mid-recipe, thinking “Hey, it’s dairy!” Spoiler: It’s not the same. The sauce turned gluey, and my roommate still won’t let me live it down. Stick to sour cream, folks.
A Global Affair: The Surprising History of Beef Stroganoff
You might think Beef Stroganoff is as American as apple pie, but its roots stretch far beyond your grandma’s recipe card. Born in 19th-century Russia, this dish was named after the Stroganov family—a wealthy dynasty known for their lavish banquets. The original version? Thinly sliced beef in a mustard-and-bouillon sauce, served with crispy fries (yes, fries!). No sour cream in sight.
So how did it morph into the creamy dream we know today? Blame (or thank) post-WWII globalization. Russian immigrants brought the dish to China, where dairy got swapped for soy sauce in some versions. By the 1950s, American housewives—armed with canned cream soups and a love of convenience—transformed it into a one-pot wonder. The addition of sour cream? Likely inspired by Eastern European smetana, a tangy cultured cream.
Fun Fact: In Brazil, Strogonoff is a party staple—but it’s made with chicken, tomatoes, and heavy cream, often served with rice and potato sticks. In Sweden, they add pickles (!). My wildest Stroganoff encounter? A vegan version in Berlin with smoked tofu and cashew cream. Moral of the story: This dish is a culinary chameleon.
Why This Matters
Understanding a recipe’s history isn’t just foodie trivia—it’s permission to play. If Stroganoff can evolve from mustardy beef to mushroom-laden noodles, your kitchen experiments are valid. Swap ingredients. Mess with traditions. Just maybe avoid the pickles unless you’re Swedish.
🧪 The Science of Creaminess: Why This Recipe Works
Ever wondered why Beef Stroganoff’s sauce clings so perfectly to noodles? Or why sour cream doesn’t curdle when you stir it in? Let’s geek out on food science for a sec.
1. The Maillard Reaction = Flavor Gold
When you sear the beef, amino acids and sugars react at high heat, creating hundreds of new flavor compounds. That’s why properly browned meat tastes 10x better than gray steamed bits. Pro tip: Pat your beef bone-dry before searing—water is the enemy of browning.
2. Sour Cream’s Superpower
Dairy can split when heated too aggressively, but sour cream’s high fat content (20%+) and acidity stabilize it. The key? Temper it: Remove the pan from heat, stir a spoonful of hot sauce into the sour cream first, then blend it all together. This prevents shocking the dairy with sudden temperature changes.
3. Gluten vs. Cornstarch
Traditional flour thickens sauces by forming a roux (cooked fat + flour), but cornstarch works differently. Its starch molecules swell when heated, creating a glossy, translucent sauce. Bonus: Cornstarch is twice as potent as flour—use half the amount.
4. Umami Bomb
Mushrooms + Worcestershire + beef broth = a trifecta of savory depth. Mushrooms contain guanylate, a compound that amplifies umami, while Worcestershire’s fermented anchovies (don’t panic—it’s undetectable) add glutamate. Together, they make your taste buds sing.
Lab Notes from My Kitchen
-
Acid Test: Added a squeeze of lemon juice at the end. Verdict? Brightened the richness but split the sauce. Stick to Worcestershire.
-
Fat Swap: Used coconut milk instead of sour cream. Creamy, but weirdly sweet. Save for Thai curry.
👨👩👧👦 Feeding the Masses: Stroganoff for Crowds & Kids
Beef Stroganoff is my secret weapon for feeding picky eaters, hangry roommates, and that one uncle who “doesn’t like fancy food.” Here’s how to scale it up without losing your mind.
For Big Gatherings (Serves 12+)
-
Double the beef, but sear in three batches to avoid overcrowding.
-
Use a Dutch oven—it distributes heat evenly.
-
Sauce hacks: Mix 2 cups sour cream with 1/2 cup heavy cream for extra stability.
-
Kid-Friendly Twist: Blend the mushrooms into the sauce (they’ll never know), or serve toppings buffet-style (beef, noodles, sauce separate). Let kids DIY their bowls.
Make-Ahead Magic
-
Freezer-Friendly: Portion cooled Stroganoff (sans noodles) in zip-top bags. Reheat in a saucepan with a splash of broth.
-
Crockpot Savior: Sear beef/veggies, then dump everything (except sour cream) into a slow cooker on Low for 6 hours. Stir in dairy at the end.
Picky Eater Wins
-
Color Psychology: My niece refused “white sauce” until I called it “golden cheese gravy” (mixed in a pinch of turmeric). She devoured it.
-
Texture Fixes: For mushroom-haters, pulse them in a food processor before cooking—they’ll dissolve into the sauce.
Budget Tip
Swap sirloin for chuck roast: Simmer cubed chuck in broth for 1.5 hours until tender, then proceed. Half the cost, double the comfort.
❓ FAQs: Your Questions, My Answers
Q: Can I make this ahead?
A: Absolutely! Cook the beef and sauce (without sour cream) up to 2 days ahead. Store separately from noodles. Reheat gently, then stir in sour cream before serving.
Q: Why is my sauce grainy?
A: Likely from overheating the sour cream. Always remove the pan from heat before adding dairy. If it’s too late, blend the sauce briefly with an immersion blender.
Q: Can I use ground beef?
A: You bet—it’s a weeknight lifesaver! Brown 1 lb ground beef with the onions, drain excess fat, then proceed as usual.

Creamy Beef Stroganoff with Egg Noodles
- Total Time: 35 mins
Description
When life gets a little too loud, this Stroganoff whispers “you’re home.” With tender beef, earthy mushrooms, and a silky sour cream sauce poured over buttery egg noodles, this dish turns any evening into a warm memory. It’s the meal that saved my first Friendsgiving (despite burnt onions and hedgehog distractions), and it’s been my comfort go-to ever since. Let’s turn your kitchen into a hug factory.
Ingredients
-
1 lb beef sirloin or stew meat, sliced thin
-
2 tbsp unsalted butter
-
1 medium yellow onion, sliced
-
2 cloves garlic, minced
-
8 oz mushrooms (baby bella or button), sliced
-
1 cup low-sodium beef broth
-
1 tbsp Worcestershire sauce
-
1 cup full-fat sour cream
-
Salt & pepper to taste
-
1 tbsp flour or 1 tbsp cornstarch slurry (optional)
-
12 oz egg noodles, cooked
Instructions
-
Sear the Beef: Heat 1 tbsp butter in a skillet. Pat beef dry, season, and sear in batches. Set aside.
-
Sauté Veggies: Melt remaining butter. Cook onions 4–5 mins, add garlic and mushrooms, cook until mushrooms reduce by half.
-
Make Sauce: Add broth, Worcestershire, and beef. Simmer 10–15 mins.
-
Finish Creamy: Off heat, stir in sour cream slowly. Thicken if needed. Return to low heat briefly to warm through.
-
Serve: Ladle over egg noodles. Garnish with parsley or dill.
Notes
-
Chicken Swap: Use boneless thighs + paprika.
-
Mushroom Lover’s: Double mushrooms, skip beef.
-
Instant Pot: Sauté, then pressure cook beef 15 mins.
-
Dairy-Free: Try cashew cream, though the vibe shifts.
- Prep Time: 10 mins
- Cook Time: 25 mins
Nutrition
- Calories: 480 per serving
- Fat: 25g
- Carbohydrates: 30g
- Protein: 30g
Final Thoughts: More Than a Meal
Beef Stroganoff isn’t just dinner—it’s a edible hug, a blank canvas, and a time machine to memories (even the burnt-onion ones). Whether you’re riffing on its Russian roots, geeking out on sauce chemistry, or sneaking veggies past your kids, this dish meets you where you are. So grab your skillet, embrace the imperfections, and let every creamy bite remind you: Good food doesn’t have to be perfect. It just has to be shared. Now, who’s seconds?
📊 Nutrition (per serving)
Calories: 480 | Fat: 25g | Carbs: 30g | Protein: 30g
Note: Values are estimates. For lighter versions, use Greek yogurt and leaner cuts.
Grilled Lemon Herb Chicken with Cucumber Feta Salad
Grilled Lemon Herb Chicken with Cucumber Feta Salad: Your New Go-To Summer Feast
Picture this: golden-hour sunlight, the sizzle of chicken hitting a hot grill, and the tangy aroma of lemon and garlic dancing in the air. That’s the magic of this Grilled Lemon Herb Chicken with Cucumber Feta Salad—a dish that’s equal parts vibrant, juicy, and downright refreshing. Whether you’re hosting a backyard BBQ or craving a light weeknight dinner, this recipe is like a vacation on a plate. I first whipped it up during a chaotic family reunion (more on that later!), and it’s been my summer MVP ever since. Let’s dive into why this combo of zesty chicken and crisp salad deserves a spot in your recipe rotation.
The Time This Dish Saved My Summer BBQ (And My Sanity)
Let me take you back to July 4th, 2019. My cousin’s backyard. 95 degrees. The grillmaster (my Uncle Dave) forgot to buy burgers. Chaos ensued. Enter: the lemon herb chicken marinating in my fridge, originally meant for meal prep. I threw it on the grill, sliced cucumbers and feta like my life depended on it, and BOOM—the crowd went wild. My aunt still claims it’s the best thing I’ve ever made (rude, but accurate). Now, it’s my secret weapon for last-minute gatherings. Pro tip: Always keep lemons and garlic on hand. You’re welcome.
What You’ll Need (And Why It All Works Together)
- Chicken breasts or thighs: Thighs stay juicier, but breasts work if you’re watching fat. Chef hack: Pound ’em to even thickness for perfect grilling.
- Lemons: Fresh juice ONLY. Bottled stuff tastes like regret.
- Garlic: Minced fine so it doesn’t burn. Swap with 1 tsp garlic powder in a pinch.
- Oregano: Dried herbs hold up better on the grill. Want to go fancy? Use 1 tbsp fresh rosemary.
- Cucumber & cherry tomatoes: Crunch + sweetness = salad heaven. No cherry tomatoes? Dice a ripe heirloom.
- Feta: Salty, creamy magic. Vegan? Crumble tofu marinated in lemon and miso.
How to Make It: Grill Like a Pro (No Fancy Tools Required)
Step 1: Marinate the chicken. Pro tip: Use a zip-top bag—massage the marinade in, then toss it in the fridge. 30 minutes minimum, but overnight? Flavor explosion.
Step 2: Grill time! Heat your grill to medium-high. Oil those grates—nobody wants stuck-on chicken. Grill 5-6 mins per side. Chef test: Cut into the thickest piece. Clear juices? You’re golden.
Step 3: Salad shuffle. Toss everything BUT the feta first. Add cheese last to keep it pretty. Chill 10 mins—it’s worth the wait.
Step 4: Rest the chicken 5 mins. Why? Juices redistribute. Patience = tender bites.
Plating Tips: Make It Instagram-Worthy
Slice the chicken diagonally—fancy but easy. Fan it over a bed of salad, then drizzle leftover marinade as “grill sauce.” Garnish with lemon wedges and oregano sprigs. Serve with crusty bread to sop up the lemony goodness.
Mix It Up: 5 Delicious Twists
- Mediterranean: Add olives and swap feta for goat cheese
- Spicy: Add red pepper flakes to the marinade
- Low-carb: Serve over zucchini noodles
- Grilled veg: Toss zucchini or bell peppers on the grill with the chicken
- Pita pockets: Stuff everything into warm pita with tzatziki
The Science Behind the Perfect Marinade (And Why This One Works)
Marinades are often misunderstood—some think they’re just for flavor, while others believe they’re the key to tender meat. The truth? They’re a bit of both, and this lemon-herb marinade nails the balance. Let’s break down why:
Acidity (Lemon Juice): The citric acid in lemon juice lightly breaks down muscle fibers, making the chicken more tender. But there’s a catch—over-marinating can turn meat mushy. For chicken, 30 minutes to 4 hours is ideal (unlike my first attempt, a 12-hour soak that turned the texture oddly chalky).
Fat (Olive Oil): Oil carries fat-soluble flavors (like garlic and herbs) into the meat and prevents dryness during grilling. It also creates a barrier against high heat, reducing charring. Extra virgin olive oil’s low smoke point isn’t an issue here because the marinade drips off during cooking.
Salt & Seasonings: Salt penetrates the chicken, enhancing moisture retention. Dried oregano, unlike fresh, won’t burn on the grill and delivers a concentrated earthiness. Garlic’s allicin (a sulfur compound) mellows when cooked, adding depth without sharpness.
Pro Tip: Avoid adding salt directly to the marinade if prepping ahead—it can draw out moisture. Instead, salt the chicken right before grilling.
Common Marinade Mistakes:
-
Using too much acid: Your chicken shouldn’t taste like a lemon drop. Balance is key.
-
Skipping the oil: Without it, herbs cling to the surface instead of infusing the meat.
-
Marinating too long: Fish needs minutes; chicken needs hours. Beef? That’s another story.
This marinade’s brilliance lies in its simplicity: just five ingredients, but each plays a critical role. Want proof? Try grilling one batch with marinade and one without. The difference in juiciness and flavor will convince you forever.
Cucumber Feta Salad: The Unsung Hero of Side Dishes
Let’s talk about the salad—because it’s not just a sidekick. This cucumber feta combo is a masterclass in texture and contrast, and here’s why it’s as essential as the chicken:
Texture Play:
-
Cucumbers: Their high water content (96%!) makes them refreshing, but salting them beforehand (see the Q&A) prevents a soggy salad. English or Persian cucumbers work best; their thin skins and tiny seeds need no peeling.
-
Cherry Tomatoes: Bursting with umami, they add pops of juiciness. Halve them or roast them briefly for intensified sweetness.
-
Feta: Creamy yet crumbly, it’s the salty counterpoint. Buy it in blocks and crumble it yourself—pre-crumbled feta contains anti-caking agents that dull the flavor.
Dressing Science:
The salad’s dressing is intentionally light—just olive oil, lemon, and a whisper of garlic. Heavy dressings (like ranch) would weigh down the crisp veggies. The acid in the lemon also slightly “cooks” the cucumbers (see: quick pickling), amplifying their brightness.
Cultural Roots:
This salad is a nod to Greek horiatiki (village salad), but with a speedier prep. Traditional versions include red onion and olives, but this streamlined version keeps it weeknight-friendly. Fun fact: In Greece, feta is protected by EU law—only cheese made from sheep/goat milk in specific regions can bear the name.
Make-Ahead Tips:
-
Prep veggies ahead, but add dressing and feta last-minute to prevent wilting.
-
Swap-ins: Try watermelon cubes for sweetness, or avocado for richness (add lime to prevent browning).
-
Leftovers? Toss them with quinoa or stuff into a wrap with the chicken for next-day lunch.
This salad isn’t just a palate cleanser—it’s a crunchy, salty, tangy foil to the smoky chicken. Skip it, and you’re missing half the experience.
Grilling vs. Pan-Searing: Which Method Wins?
Grilling might be the star here, but what if you’re grill-less or battling rain? Let’s compare techniques so you can adapt like a pro:
Grilling (The Ideal Method):
-
Pros: Smoky flavor, gorgeous char marks, and fat drips away (reducing calories).
-
Cons: Requires outdoor space and attention to avoid flare-ups.
-
Hack: Use a grill basket for smaller chicken pieces to prevent them from falling through grates.
Pan-Searing (Stovetop Savior):
-
Pros: Achieves a crispy crust with less effort. A cast-iron skillet retains heat like a grill.
-
Cons: Lacks smokiness; more oil is needed to prevent sticking.
-
Hack: Finish in a 375°F oven if chicken is thick—this mimics indirect grilling heat.
Broiling (The Underdog):
-
Pros: Quick and mimics grilling’s high heat.
-
Cons: Easy to burn. Keep the oven door slightly ajar to monitor.
Smoke Point Showdown:
-
Grill: ~500°F
-
Cast iron: ~450°F
-
Non-stick pan: ~400°F (don’t use high heat—it releases toxic fumes)
Best Method for You?
-
Grill purists: Stick with charcoal for added flavor.
-
Urban cooks: A grill pan or broiler works in a pinch.
-
Meal preppers: Bake a batch at 425°F for hands-off ease.
No matter the method, the marinade ensures flavor, and resting the chicken guarantees juiciness. Adaptability is the real secret ingredient.
Behind the Recipe: My Kitchen Confessions
Fun fact: The original version had WAY too much garlic (RIP, everyone’s breath). Over time, I dialed it back and added honey to the marinade—then nixed it for purity. The salad? Born from a “clean out the fridge” moment. Now, I make it weekly. Bonus: My dog once stole a thigh off the counter. Jury’s out on whether he’s a food critic.
Your Questions, Answered
Q: Can I bake the chicken instead?
A: Absolutely! 425°F for 20-25 mins. Still juicy!
Q: Salad gets watery. Help!
A: Salt cucumbers first, let sit 10 mins, then pat dry. Crisis averted.
Q: No grill—can I use a pan?
A> Cast-iron skillet = perfect crust. Medium-high heat, 6 mins per side.

Grilled Lemon Herb Chicken with Cucumber Feta Salad
- Total Time: : 25–40 mins
Description
Imagine a summer breeze, grill sizzling, and a plate that tastes like sunshine. This lemony herb chicken with cool cucumber-feta salad was born during a chaotic family BBQ and instantly became a seasonal staple. Juicy, zesty, and oh-so-fresh, it’s perfect for weeknights or wow-worthy gatherings. Keep lemons and garlic in your kitchen, and you’re never far from a delicious save-the-day dinner.
Ingredients
For the Chicken:
-
4 boneless chicken thighs (or breasts, pounded evenly)
-
Juice of 2 lemons
-
3 garlic cloves, minced
-
1½ tsp dried oregano
-
2 tbsp olive oil
-
Salt & black pepper
For the Salad:
-
1 large cucumber, sliced
-
1 cup cherry tomatoes, halved
-
½ cup crumbled feta
-
2 tbsp olive oil
-
1 tbsp lemon juice
-
Pinch of salt
Instructions
-
Marinate Chicken: Mix lemon juice, garlic, oregano, olive oil, salt & pepper. Pour over chicken in a zip-top bag. Chill for 30 mins to overnight.
-
Grill: Preheat grill or skillet to medium-high. Oil grates. Grill chicken 5–6 mins per side, until juices run clear.
-
Make Salad: Toss cucumbers and tomatoes with lemon juice, olive oil, and salt. Add feta just before serving.
-
Rest Chicken: Let grilled chicken rest 5 mins. Slice diagonally.
-
Serve: Layer salad on a platter, top with sliced chicken, and garnish with lemon wedges or herbs.
Notes
-
No Grill? Bake at 425°F for 20-25 mins or sear in a skillet.
-
Make It Spicy: Add red pepper flakes to the marinade.
-
Low-Carb? Serve over zucchini noodles.
-
Add Veggies: Grill extra zucchini or peppers.
-
Pita Option: Tuck it all into a warm pita with tzatziki!
- Prep Time: 10 mins
- Cook Time: 15 mins
Nutrition
- Calories: 320 Per Serving
- Sugar: 2g
- Fat: 18g
- Carbohydrates: 6g
- Protein: 30g
Final Thoughts
This Grilled Lemon Herb Chicken with Cucumber Feta Salad isn’t just a recipe—it’s a blueprint for summer cooking. The marinade’s science ensures tender meat, the salad’s contrasts keep each bite exciting, and the flexible cooking methods mean you’re never stuck. It’s a dish born from chaos (per my family BBQ saga), perfected through experimentation, and designed for real life. Whether you’re a grill master or a stovetop survivor, this meal delivers sunshine on a plate. Now, go forth and make those cucumbers crunch.
Nutrition Per Serving (Because Knowledge is Power)
Calories: 320 | Fat: 18g | Carbs: 6g | Protein: 30g | Sugar: 2g
Pin This for Later!

Easy Breakfast Egg Muffins
Easy Breakfast Egg Muffins: Your Secret Weapon for Crazy Mornings
Hey there, friend! Olivia here, waving from my flour-dusted kitchen island. Raise your hand if your morning routine feels like a race against the clock ⏱️—kids scrambling for backpacks, emails pinging, and your stomach growling louder than the coffee grinder? Yeah, I’ve been there too. That frantic “What’s for breakfast?!” scramble used to leave me reaching for sad cereal boxes… until I discovered the magic of Easy Breakfast Egg Muffins. Think of these little guys as edible sunshine: warm, protein-packed, portable, and bursting with flavor. They’re the ultimate kitchen hack for busy bees, meal-prep masters, and anyone who believes breakfast should feel like a cozy hug (not a chore!). Whip up a batch on Sunday, stash them in the fridge, and boom—you’ve got a delicious, homemade breakfast ready in 60 seconds flat all week. No fancy skills required, just a bowl, a whisk, and your favorite mix-ins. Let’s turn chaotic mornings into moments of delicious calm, one muffin at a time!
A Road Trip Revelation: Why These Muffins Stole My Heart
Picture this: It’s 5 AM, pitch black outside, and my family is buzzing with pre-road-trip chaos. Suitcases are half-zipped, the dog is convinced he’s coming, and my kids are already asking “Are we there yet?” from the driveway. I knew drive-thru breakfasts would leave us feeling blah by mile 50, so I scrambled (pun intended!) to use up fridge leftovers—eggs, a wrinkly bell pepper, leftover bacon, and that last nub of cheddar. I threw it all into muffin tins, crossed my fingers, and popped them in the oven. The smell alone woke everyone up properly! By the time we hit the highway, those warm, cheesy muffins were devoured. My youngest, mouth full, mumbled, “Mom, these are BETTER than pancakes.” That’s when I knew: this wasn’t just a recipe, it was a golden ticket to stress-free mornings and happy bellies. Now, they’re our non-negotiable pre-adventure fuel, whether we’re hiking or just tackling Monday.
Your Kitchen Cheer Squad: Ingredients & Why They Shine
Gather your flavor all-stars! This lineup is flexible—swap based on what’s in your crisper.
- Cooking spray: Essential! Prevents sticking. Butter or olive oil work too, but spray gives even coverage.
- 1 green bell pepper, chopped: Adds crunch & freshness. Swap for red/yellow pepper, spinach, or mushrooms!
- 1 red bell pepper, chopped: Sweetness & color. Use poblano for mild heat or skip if you’re not a pepper person.
- 1 bunch green onions, chopped: Mild oniony zing. Sub with 1/4 cup diced red onion or chives.
- 8 large eggs: The superstar! Chef’s tip: Room temp eggs blend smoother.
- 2¾ oz fully-cooked bacon pieces (like Oscar Mayer®): Smoky, salty goodness. Use chopped ham, turkey sausage, or go veggie with sun-dried tomatoes.
- ¼ cup whole milk: Creates fluffy texture. Any milk works, or use cream for extra richness.
- Pinch garlic powder & onion powder: Flavor boosters! No fresh garlic? Double the powder.
- Salt and ground black pepper, to taste: Season like you mean it! Start with 1/4 tsp salt.
- 4 oz shredded mild Cheddar cheese: Melty magic! Try pepper jack, feta, or mozzarella.
Let’s Get Muffin’! Simple Steps to Egg-cellence
- Preheat & Prep: Fire up your oven to 375°F (190°C). Generously spray a 12-cup muffin tin—get into every nook! Chef’s Hack: Use silicone liners for zero-stick guarantee and easy cleanup.
- Whisk Wonder: In a large bowl, whisk together the eggs, milk, garlic powder, onion powder, salt, and pepper. Whisk like you’re making clouds—about 1 minute until fully blended and slightly frothy. Tip: Add a dash of hot sauce here for hidden depth!
- Mix-Ins Party: Stir in the chopped bell peppers, green onions, bacon, and most of the cheese (save a handful for topping!). Fold gently—don’t overmix! Chef’s Insight: Sauté veggies first for softer texture and sweeter flavor.
- Fill ‘Er Up: Pour the mixture evenly into muffin cups, filling each about ¾ full. They puff up! Sprinkle reserved cheese on top. Pro Move: Use a ladle or measuring cup for less mess.
- Bake to Golden Glory: Bake 20-25 minutes until puffed, set in the center, and edges are golden. Watch Closely: Ovens vary! A toothpick should come out clean.
- Cool & Release: Let cool in the tin for 5-10 minutes. Run a butter knife around edges, then gently lift out. Patience Pays: Waiting prevents crumbling!
Plate (Or Pack!) Like a Pro
These muffins are the ultimate shape-shifters! Serve them warm right out of the oven on a rustic board with fresh fruit for a cozy brunch. Pack 2-3 in a bento box with avocado slices and berries for a powerhouse on-the-go breakfast. Dunk them in hot sauce or salsa for a kick, or pair with a simple green salad for lunch. Storage Smarts: Cool completely, then store in an airtight container in the fridge for up to 5 days. Reheat in the microwave for 30-60 seconds, or pop them in a toaster oven to revive the crispiness!
Make It Your Own: 5 Tasty Twists
Customize these muffins endlessly! Here’s some inspo:
- Mediterranean Magic: Swap bacon for chopped Kalamata olives, sun-dried tomatoes, spinach, and feta cheese.
- Keto Powerhouse: Skip the peppers, add sautéed mushrooms, spinach, and extra bacon or sausage. Use heavy cream instead of milk.
- Southwest Fiesta: Add 1/4 cup black beans (drained!), corn, diced jalapeño, and pepper jack cheese. Top with avocado after baking!
- Veggie Delight: Omit bacon, add broccoli florets, shredded zucchini (squeezed dry!), and goat cheese.
- “Everything Bagel” Style: Mix 1 tbsp Everything Bagel seasoning into the egg base. Top with extra seasoning and a schmear of cream cheese after baking.
Olivia’s Kitchen Confessions & Tips
Okay, real talk: The first time I made these, I used a cheap non-stick pan without enough spray… and let’s just say we ate “scrambled egg muffin crumbles” that week! Lesson learned: grease is non-negotiable. These muffins have evolved from my fridge-cleanout experiment into my most-requested recipe. My neighbor’s toddler calls them “Olivia’s Egg Cupcakes,” which I adore. Over time, I’ve learned sautéing veggies first deepens their flavor, and letting the mixture sit for 5 minutes before baking helps fluffiness. Don’t stress about perfection—if your chopping is rustic or you accidentally dump in extra cheese (guilty!), they’ll still taste amazing. That’s the beauty of home cooking!
The Psychology of Morning Routines – How Egg Muffins Reduce Decision Fatigue
Ever notice how your willpower feels strongest in the morning but evaporates by afternoon? That’s because every decision—no matter how small—chips away at mental energy. Breakfast is often the first casualty of decision fatigue, leading to skipped meals or sugary grabs. Here’s why egg muffins are a psychological game-changer:
1. The Power of Pre-Commitment
By prepping breakfast in advance, you’ve already made the “healthy choice” decision. No 7 AM debate over oatmeal vs. toast vs. nothing—just grab and go. Studies show that reducing morning decisions preserves willpower for important tasks later (like resisting office donuts!).
2. The Comfort of Routine
Humans are creatures of habit. When egg muffins become a reliable part of your morning, your brain stops viewing breakfast as a chore and starts associating it with reward (hello, cheesy goodness!). This neural pathway reinforcement makes healthy habits stick.
3. Protein’s Impact on Mood & Focus
Eggs contain tyrosine, an amino acid that helps produce dopamine—the neurotransmitter linked to motivation and alertness. Starting your day with protein stabilizes blood sugar, preventing the 10 AM crash that leads to poor choices.
4. The “Effortless” Perception
Even if reheating takes 60 seconds, the act of eating something warm and homemade feels indulgent compared to cold cereal. This small luxury tricks your brain into feeling cared for, reducing stress hormones.
Pro Tip: Double your batch and freeze half. Knowing you have backups eliminates the “I’ll just buy a muffin today” excuse when supplies run low.
Global Breakfast Inspirations – Egg Muffin Edition
Why limit yourself to basic combos when you can take a flavor trip around the world? Here’s how to adapt egg muffins using iconic breakfast ingredients from different cultures:
1. Japanese Tamagoyaki Style
-
Mix-Ins: 1 tbsp mirin + 1 tsp soy sauce + 1 tsp sugar whisked into eggs. Add diced scallions and imitation crab.
-
Post-Bake: Drizzle with kewpie mayo and sprinkle bonito flakes.
-
Why It Works: Sweet-savory umami flavors mimic traditional rolled omelets.
2. Mexican Chilaquiles Twist
-
Mix-Ins: Stir 2 tbsp salsa verde into eggs + crumbled queso fresco + torn tortilla chips.
-
Post-Bake: Top with crema, pickled onions, and cilantro.
-
Pro Tip: The chips soften slightly but retain crunch—like deconstructed chilaquiles!
3. Indian Masala Spice
-
Mix-Ins: Sauté 1 tsp cumin, ½ tsp turmeric, 1 diced green chili, and 2 tbsp cilantro into eggs. Add paneer cubes.
-
Serve With: Mint chutney for dipping.
4. Middle Eastern Shakshuka Vibes
-
Mix-Ins: Fold in 2 tbsp harissa-spiced tomato sauce + crumbled feta.
-
Garnish: Za’atar and olive oil.
5. French Oeufs en Cocotte
-
Technique: Pour eggs over sautéed mushrooms + shallots in cups. Top with gruyère and bake in a water bath (place muffin tin in a larger pan with 1″ hot water) for silky texture.
Cultural Bonus: Pair each variation with its traditional beverage—matcha for Japanese, café de olla for Mexican, or chai for Indian!
The Unexpected Uses for Egg Muffins (Beyond Breakfast!)
These versatile bites shine in surprising ways. Think outside the muffin tin!
1. Crouton Upgrade
-
Cube day-old muffins, toss with olive oil, and bake at 300°F until crispy.
-
Perfect For: Caesar salads or creamy soups.
2. Protein-Packed Appetizers
-
Slice muffins into quarters, skewer with toothpicks, and serve with dips:
-
Marinara for “egg bite parm”
-
Tzatziki for Greek flair
-
Buffalo sauce + blue cheese crumbles
-
3. Sandwich Swap
-
Replace bread with sliced muffins for low-carb “sliders.”
-
Favorite Combo: Turkey + avocado + sprouts between cheddar muffin halves.
4. Doggy Treats (Pet-Safe Version!)
-
Recipe: Eggs + pureed pumpkin + grated carrot (no salt/onion/garlic!).
-
Bake in paw-shaped molds for homemade pup snacks.
5. Camping/Hiking Fuel
-
Their portability and protein make them ideal for trails.
-
Pack Smart: Wrap in foil and reheat over a campfire grate.
Your Egg Muffin Questions, Answered!
Q: Can I freeze these?
A: Absolutely! Cool completely, then freeze in a single layer on a baking sheet before transferring to a freezer bag. Squeeze out air! They last 2-3 months. Reheat frozen muffins in the microwave (1-2 mins) or oven (350°F for 15-20 mins).
Q: Why did my muffins stick/collapse?
A: Sticking usually means not enough grease—douse that pan! Collapsing happens if they’re underbaked (egg needs to fully set) or cooled too fast. Ensure a clean toothpick test and let them rest in the tin.
Q: Can I use egg whites only?
A: Yes! Swap the 8 whole eggs for 1 cup liquid egg whites. They’ll be less rich and slightly denser, so add extra seasoning and maybe a splash more milk.
Q: Can I make these without dairy?
A: Easily! Use almond milk or oat milk, skip the cheese (or use dairy-free shreds), and ensure your bacon is dairy-free if using. Add nutritional yeast for a cheesy flavor boost.

Easy Breakfast Egg Muffins
- Total Time: 35 mins
Description
Mornings used to be mayhem—kids, emails, rumbling tummies—until these egg muffins became my lifesaver. Born from a fridge clean-out before a road trip, they’ve now become my go-to for calm, cozy starts. Packed with protein and customizable goodness, these portable bites are perfect for anyone who wants a warm, nourishing breakfast without slowing down. Prep on Sunday, reheat all week—these aren’t just muffins, they’re edible sanity.
Ingredients
-
Cooking spray (or oil/butter)
-
1 green & 1 red bell pepper, chopped
-
1 bunch green onions, chopped
-
8 large eggs
-
¼ cup milk (any kind)
-
2¾ oz cooked bacon pieces (or chopped ham/veggie option)
-
¼ tsp garlic powder
-
¼ tsp onion powder
-
Salt & pepper, to taste
-
4 oz shredded cheddar (or cheese of choice)
Instructions
-
Preheat oven to 375°F (190°C). Spray muffin tin well.
-
Whisk eggs with milk, seasonings, salt, and pepper until frothy.
-
Stir in mix-ins: peppers, onions, bacon, and most cheese.
-
Fill muffin cups ¾ full. Top with remaining cheese.
-
Bake 20–25 mins until puffed and golden. Toothpick should come out clean.
-
Cool 5–10 mins before removing. Enjoy warm or store.
Notes
-
Veggie Option: Use mushrooms, spinach, sun-dried tomatoes.
-
Dairy-Free: Use plant milk + dairy-free cheese or nutritional yeast.
-
Kid-Friendly: Swap bacon for ham, add sweet corn or mild cheese.
-
Freezer-Friendly: Cool completely before freezing. Reheat in microwave or oven.
- Prep Time: 10 mins
- Cook Time: 25 mins
Nutrition
- Calories: 120 Per Muffin
- Fat: 9g
- Carbohydrates: 2g
- Protein: 8g
Final Thoughts: Egg Muffins as a Lifestyle Upgrade
What started as a kitchen hack reveals deeper truths: good mornings breed good days. These muffins aren’t just food—they’re tiny ambassadors of preparedness, self-care, and global curiosity. Whether you’re optimizing your psychology, traveling via taste buds, or repurposing leftovers creatively, they prove that the simplest tools can yield the richest rewards.
Nutritional Nibbles (Per Muffin)
Calories: ~120 | Fat: 9g | Protein: 8g | Carbs: 2g
Note: Values are estimates. Variations will change nutrition.
Prep Time: 10 mins | Cook Time: 25 mins | Serves: 12 muffins
Recent Posts
- Moist Vegan Banana Bread : One-Bowl, No-Fail Classic
- Homemade Turkey Gravy : Rich, Silky, and Full of Flavor
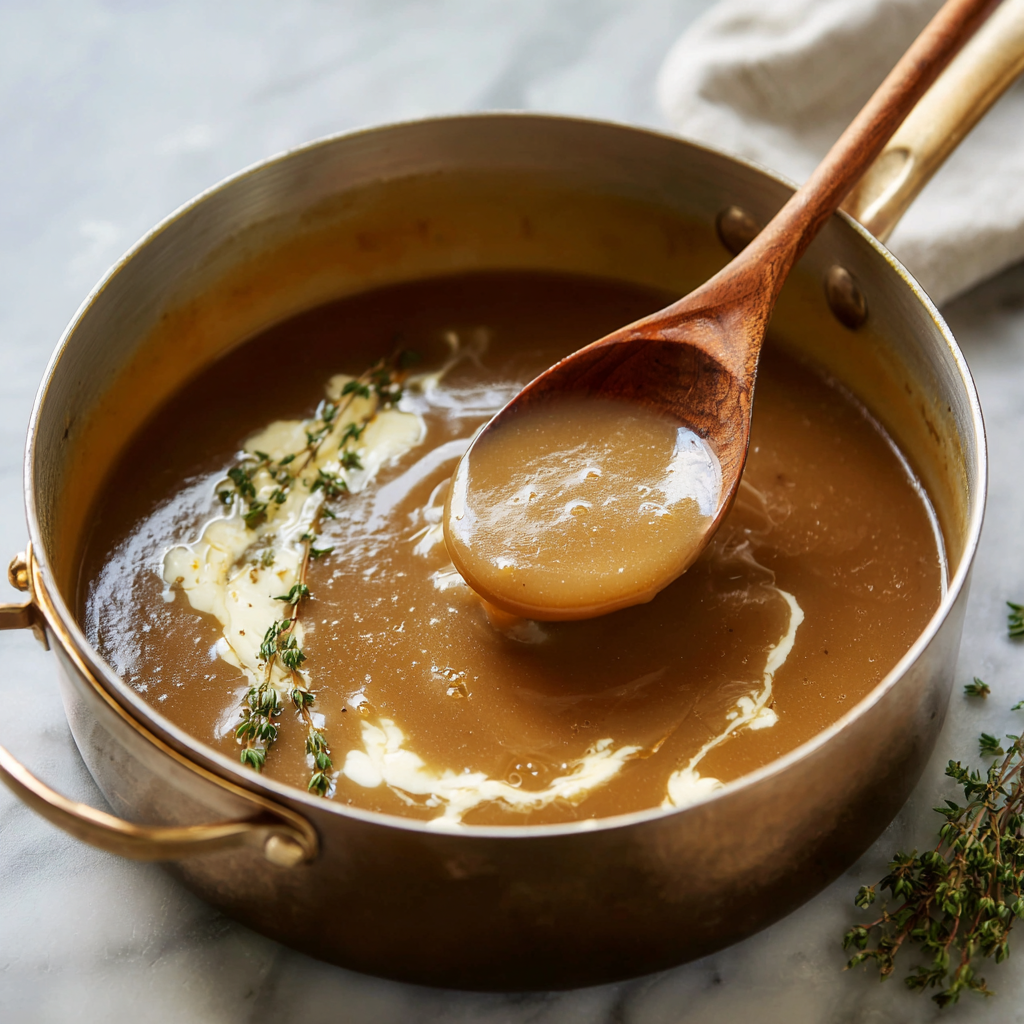
- Easy Keto Broccoli Salad : Low-Carb, Crunchy, and Totally Craveable
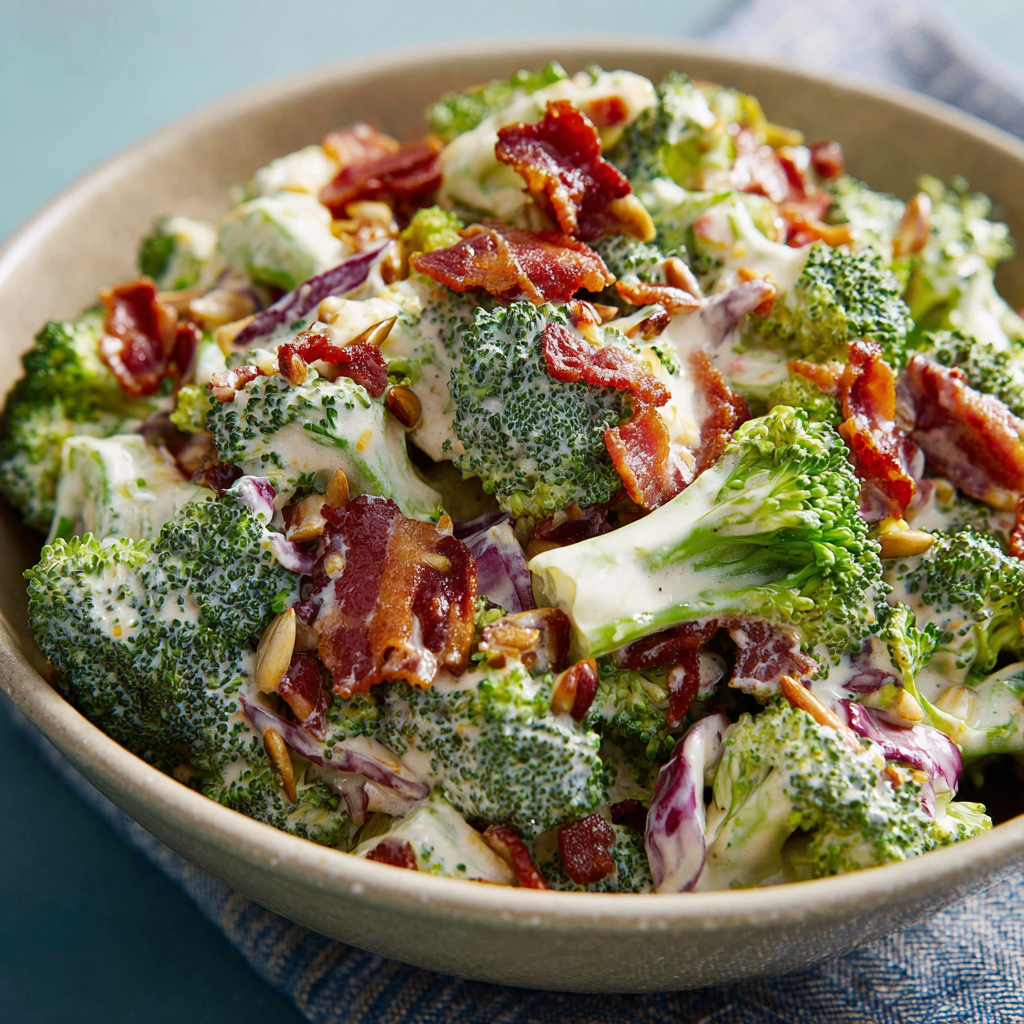
- Hearty Vegan Chili : One-Pot, Protein-Packed & Totally Comforting
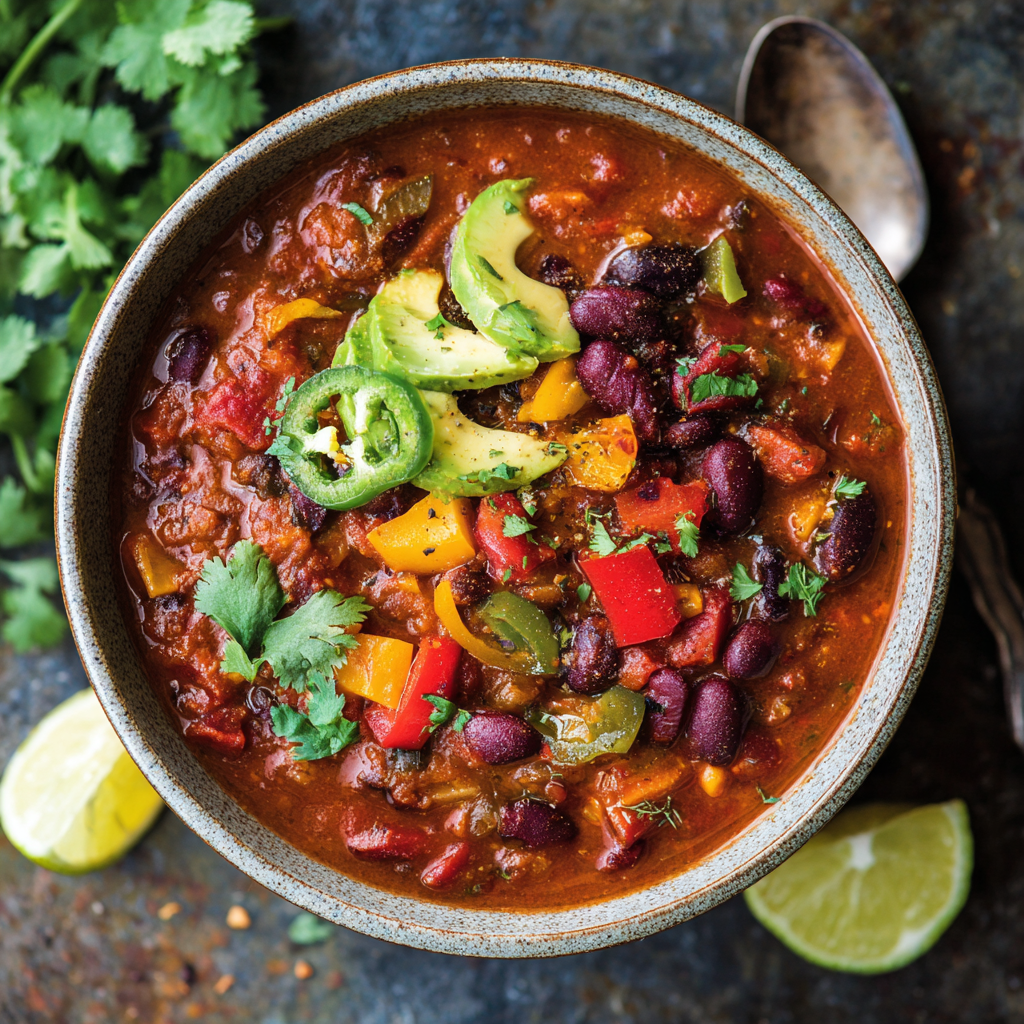
- The Best Crispy Baked Chicken Nuggets : Healthy, Easy & Kid-Approved
