

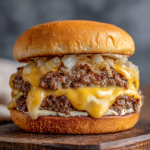
Cheese Steak Butter Burger
The Cheese Steak Butter Burger: Your New Weekend Showstopper
Hey there, kitchen friends! Olivia here, apron slightly flour-dusted and absolutely buzzing to share today’s recipe. You know that feeling when two incredible comfort foods collide? Like finding out peanut butter and chocolate were soulmates? That’s exactly what happened in my kitchen one rainy Sunday, and the glorious lovechild is this Cheese Steak Butter Burger. Imagine: a juicy beef patty meets tender shaved steak, piled high with caramelized onions, drowned in silky cheddar sauce, all hugged by a buttery, toasted bun. It’s not just a burger—it’s a full-blown flavor festival designed for sharing (or not, zero judgment here!).
I get it—life’s busy. But trust me, this isn’t some fussy, restaurant-only fantasy. My whole blog is built on making big, joyful food feel totally doable in your own kitchen. This burger? It’s pure, unapologetic indulgence that’ll make your crew’s eyes light up. We’re talking crispy-edged patties, steak that melts like a dream, and cheese sauce so luscious you’ll want to swim in it. And yes, butter is basically the co-star here—because why whisper when you can sizzle? So grab your favorite skillet, crank up some tunes, and let’s turn dinner into a standing ovation moment. Ready to make some delicious magic?
How a Snowstorm Birthed a Burger Legend
Picture this: It’s a wild, snowy night last winter. My fridge was looking… creative. Half a pack of ground beef? Check. Some leftover shaved steak from fajita night? Yep. A mountain of onions? Always. Instead of ordering pizza, I thought, “What if I smash these worlds together?” I’d been dreaming of Philly cheesesteak vibes but craved burger heft. So, I caramelized those onions low and slow (the snow wasn’t going anywhere!), whipped up a quick cheese sauce, and pan-seared everything in glorious butter. The result? My husband took one bite, did a little chair dance, and declared, “This is the burger of my dreams!” Now, it’s our go-to for game nights, birthdays, or when we just need a giant, cheesy hug on a plate. That snowy “experiment” became a family legend—proof that the best recipes often start with a little chaos and a lot of hunger!
Gathering Your Flavor Arsenal
Here’s your grocery list for 4 epic burgers! Don’t stress—I’ve added swaps and chef notes to make it foolproof.
- Four 6 oz ground beef patties: (80/20 blend is perfect—fat = flavor! Too lean? Your burger will be sad and dry. Swap: Ground chuck or sirloin.)
- 16 oz shaved steak (4 portions of 4 oz): (Look for “shaved beef” or “steak-umm” style. Pro hack: Freeze a ribeye for 30 mins, then slice paper-thin against the grain with a sharp knife.)
- 8 slices provolone cheese: (Its mild creaminess balances the cheddar sauce. Swap: Swiss or mozzarella if you’re out.)
- 2 large white onions, diced: (White onions caramelize sweeter! Yellow work too—avoid red for this.)
- 4 large potato hamburger buns: (Their slight sweetness & squishiness hold up! Swap: Brioche or Kaiser rolls.)
- 1 cup salted butter (divided): (Salted builds layers of flavor. Chef secret: Use COLD butter for toasting buns—crispier result!)
- CHEESE SAUCE:
- 2 cups grated medium cheddar: (Pre-grated won’t melt as smoothly! Grating yourself is worth it.)
- 3 cans (12 oz each) evaporated milk: (Not sweetened condensed! This makes sauce ultra-creamy without flour. Swap: 4.5 cups whole milk + 1/4 cup cream, simmered 20 mins to reduce.)
- 2 tbsp cornstarch: (Our thickening hero! Mix with 1 tbsp COLD water first to avoid lumps.)
Let’s Build Your Masterpiece (Step-by-Step!)
Don’t be daunted—we’ll tackle this like a pro. I’ll walk you through with all my favorite hacks!
- Make the Cheese Sauce (Do this first!): Pour evaporated milk into a saucepan over medium heat. Warm it until tiny bubbles form at the edges—DO NOT BOIL (scorched milk = sad sauce). In a tiny bowl, mix cornstarch with 1 tbsp cold water until smooth. Whisk this slurry into the warm milk. It’ll thicken slightly in 1-2 minutes—think “light gravy.” Reduce heat to low. Gradually add cheddar, stirring constantly until it’s velvety and dreamy (about 3 mins). Keep it warm on the lowest setting, stirring occasionally. Chef Tip: If sauce gets too thick, whisk in 1 tbsp warm milk at a time. Too thin? Simmer 2 mins longer.
- Caramelize the Onions (Low & Slow Wins!): Melt 3-4 tbsp butter in a large skillet over medium heat. Add onions and a pinch of salt (salt draws out moisture!). Sauté, stirring often, for 5 mins until softened. Now, here’s the magic: reduce heat to medium-low. Cook another 7-10 mins, stirring occasionally, until deeply golden and sweet. No rushing! Burnt onions taste bitter. Set aside. Chef Hack: Deglaze the pan with 1 tbsp water or broth after—those brown bits add flavor to the steak!
- Cook the Steak (Hot & Fast!): In the same skillet (no need to wash—flavor bonus!), melt 2 tbsp butter over medium-high heat. Pat steak dry with paper towels (crucial for browning!). Add half the steak in a single layer; season with salt & pepper. Sear 1-2 mins per side until browned but still tender. DON’T overcrowd—steam isn’t our friend! Repeat with remaining steak. Set aside with onions. Pro Move: Toss cooked steak with a spoonful of cheese sauce to keep it juicy!
- Cook the Burger Patties (Butter = Crispy Edges): Gently form beef into four 1-inch thick patties. Season generously with salt & pepper. In a clean skillet (or wipe out the steak pan), melt 2-3 tbsp butter over medium-high heat. Add patties. Resist pressing them! Cook 4-5 mins per side for medium (160°F internal temp). In the last minute, drape 2 slices of provolone over each patty. Cover the skillet briefly to melt the cheese. Chef Secret: Make a small dimple in the center of each raw patty—prevents puffing!
- Toast the Buns (Butter Makes It Better): Slather inside surfaces of buns with the remaining cold butter. Place butter-side down in a skillet (or grill pan) over medium heat. Toast 1-2 mins until golden and crisp. Watch closely—they burn fast!
- Assemble the Glory: Place toasted bun bottoms on plates. Top each with: 1 cheesy beef patty, a generous pile of shaved steak, a heaping spoonful of caramelized onions, and a lavish pour of warm cheese sauce. Crown with the bun top. Serve IMMEDIATELY! Warning: Napkins required. Happiness guaranteed.
Plating Up Pure Joy
These burgers are stars—let them shine! I serve them open-faced at first so everyone gasps at the layers. Pile steak and onions high so they peek out the sides. Drizzle extra cheese sauce over the top (go big or go home!). Skip fancy sides—this is a handheld feast! But if you must, crispy beer-battered onion rings or simple dill pickle spears cut the richness. Cold beer, lemonade, or a bold red wine are perfect sips. Most importantly? Gather your people, take a messy, glorious bite, and wait for the happy sighs.
Make It Your Own! Delicious Twists
This recipe loves to play dress-up! Try these fun spins:
- “Philly Firecracker”: Add sliced jalapeños to the onions while caramelizing & swap cheddar for pepper jack in the sauce.
- Mushroom Lover’s Dream: Sauté 8 oz sliced cremini mushrooms with the onions. Use Swiss cheese instead of provolone.
- Breakfast Burger: Top the assembled burger with a fried egg & crispy bacon. Serve with hash browns!
- Lighter(ish) Swap: Use ground turkey patties, lean sirloin steak, low-fat cheese sauce (made with 2% milk & reduced-fat cheddar), and whole wheat buns.
- Pizza Burger Fusion: Swap provolone for mozzarella, add pepperoni slices under the steak, and mix 1 tsp Italian herbs into the cheese sauce.
Olivia’s Kitchen Confessions & Wisdom
Okay, real talk: The first time I made this, I tried to layer the cheese sauce inside the patty. Big mistake! It erupted like a cheesy volcano, creating a skillet disaster worthy of a soap opera. Lesson learned: Keep the sauce as a glorious topping! Over the years, I’ve tweaked it—adding cornstarch to the cheese sauce for foolproof silkiness, using cold butter on the buns for maximum crisp, and always, ALWAYS caramelizing those onions slow. This burger embodies my cooking philosophy: Be bold, embrace the butter, and prioritize flavor joy over perfection. It’s evolved from a snowstorm experiment to the most-requested recipe by my nephews (who now call it “The Cheese Avalanche”). Make it messy, make it loud, and make memories around it. That’s what home cooking’s all about!
Your Questions, Answered!
Let’s tackle common kitchen hiccups before they happen:
- Q: Can I use ground beef instead of shaved steak?
A: You *can*, but you’ll lose that signature Philly texture! If you must, use very finely ground beef (or pulse chunks in a food processor) and cook it quickly in thin crumbles. But trust me—shaved steak is worth finding! - Q: My cheese sauce is lumpy! Help!
A: Don’t panic! Remove from heat immediately. Blend it smooth with an immersion blender or whisk vigorously. If it’s still grainy, add 1 tsp lemon juice or vinegar—acidity helps cheese emulsify. Next time: Grate cheese yourself (pre-shredded has anti-caking agents), add cheese SLOWLY off-heat, and always mix cornstarch with cold liquid first. - Q: Can I prep anything ahead?
A> Absolutely! Caramelize onions up to 3 days ahead; store in the fridge. Make the cheese sauce 1 day ahead; gently reheat with a splash of milk. Shave steak the night before. But cook patties, steak, and toast buns RIGHT before serving for maximum freshness. - Q: Is there a way to make this less rich?
A> Sure! Use 90% lean beef, reduce butter to 1/2 cup (use olive oil for onions/steak), swap evaporated milk for 2% in the sauce (simmer 5 mins longer to thicken), and skip butter-toasting on buns. It’ll still be delicious, just slightly lighter.
Cheese Steak Butter Burger
- Total Time: 50 mins
Description
The juicy, cheesy mashup of Philly steak and classic burger—dripping in indulgence and ready to steal the weekend!
Ingredients
-
Proteins & Buns
-
4×6 oz beef patties (80/20 blend), seasoned with salt & pepper
-
16 oz shaved steak
-
4 potato-style hamburger buns
-
-
Savory Caramelized Onions
-
2 large white onions, diced
-
3–4 Tbsp butter + pinch of salt
-
-
Cheese Sauce
-
2 cups freshly grated medium cheddar
-
3×12 oz cans evaporated milk (or ≈4½ cups whole milk reduced)
-
2 Tbsp cornstarch + 1 Tbsp cold water
-
-
Extras
-
8 slices provolone cheese
-
1 cup salted butter (for toasting buns)
-
Instructions
-
Make the Cheese Sauce
-
Warm evaporated milk until steamy; whisk in cornstarch slurry.
-
Simmer 1–2 min to thicken, then whisk in cheddar off heat until creamy.
-
Keep warm on low; thin with milk if needed.
-
-
Caramelize Onions
-
Melt butter in skillet over medium. Sauté onions with salt 5 min, then lower heat and cook 7–10 min until golden. Set aside.
-
-
Cook Shaved Steak
-
In same pan, melt butter, sear steak in batches 1–2 min per side. Season with salt & pepper, then stir in a spoonful of cheese sauce. Keep warm.
-
-
Cook Burgers & Melt Cheese
-
In a clean skillet with butter, sear patties 4–5 min per side until ~160°F.
-
Add 2 slices provolone each, cover to melt.
-
-
Toast Buns
-
Spread cold butter inside buns; toast in pan 1–2 min until crisp and golden.
-
-
Assemble
-
Bun bottom → cheesy burger → shaved steak → caramelized onions → drizzle deluxe cheese sauce → bun top. Napkins required!
-
Notes
-
Butter buns cold: yields ultimate crisp
-
Combine steak with cheese sauce: keeps it moist
-
Slow onions = richer flavor
-
Use freshly grated cheddar for smoother, luscious sauce
- Prep Time: 20 mins
- Cook Time: 30 mins
Nutrition
- Calories: 870 cal per Burger
- Fat: 60 g
- Carbohydrates: 45 g
- Protein: 55 g
Nutritional Breakdown (Per Burger)
Serves: 4 | Prep: 20 mins | Cook: 30 mins | Calories: ~870
Note: This is indulgent comfort food! Calories vary based on exact ingredients and swaps. Enjoy it as an occasional, celebratory feast.
Final Thoughts: More Than a Meal
This burger started as a snowstorm experiment but became something greater – a reminder that cooking is alchemy. It’s about transforming simple ingredients into joy, about the courage to try unlikely combinations, and about gathering people around something unabashedly delicious. As one reader wrote: “Made this for my son’s graduation. He took one bite and said, ‘This tastes like being loved.'” That’s the real recipe here – equal parts butter, bravery, and heart. Now go forth and make some delicious memories!
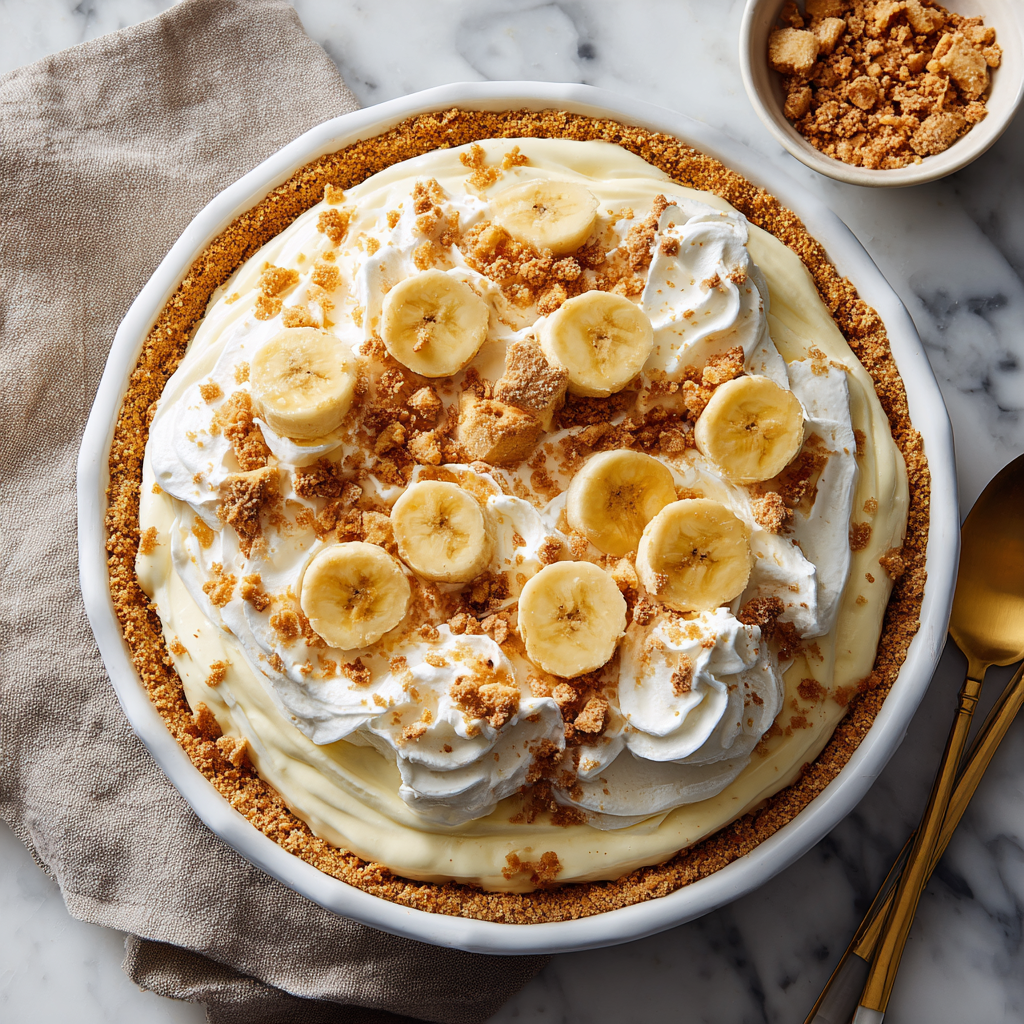
Banana Bread Cream Pie
The Magical Mashup That’ll Make You Say “Why Didn’t I Think of That?!”
Hey there, fellow flavor adventurers! Olivia Bennett here, apron dusted with flour and heart full of excitement. Have you ever had one of those lightbulb moments where two beloved desserts collide in your mind? That’s exactly how this Banana Bread Cream Pie was born – a happy accident during last year’s chaotic (but wonderful!) Friendsgiving feast. Picture this: creamy banana pudding hugging slices of moist banana bread, all wrapped in clouds of vanilla-kissed whipped cream with a cookie crunch. It’s like your grandma’s banana bread grew up, put on its fanciest dress, and decided to become a showstopping pie. Whether you’re a baking newbie or a seasoned whisk-wielder, this beauty comes together faster than you can say “second slice please!”
What makes this pie pure magic? It’s the ultimate comfort food transformer – banana bread becomes the crust (genius, right?), instant pudding gets a flavor upgrade with real mashed bananas, and those vanilla wafers? They’re the crispy fairy dust on top. The best part? We’re using smart shortcuts like boxed banana bread mix so you spend less time stressing and more time savoring. So tie on your favorite apron, grab those spotty bananas languishing on your counter, and let’s make dessert magic happen!
When Banana Bread Met Pudding: A Love Story
This pie tastes like Sunday mornings at my Grandma Eleanor’s farmhouse. She’d always have a loaf of banana bread warming on the counter when we arrived – the smell wrapping around you like a hug. One rainy afternoon when I was ten, we made banana pudding together. I dropped a slice of banana bread into my bowl by accident. Grandma didn’t miss a beat: “Taste it, buttercup – sometimes mistakes are delicious!” That gooey, creamy, bready bite sparked fireworks in my mouth. Years later, when developing this recipe, I channeled Grandma’s kitchen wisdom: desserts should be joyful, not fussy. That happy childhood “mistake” inspired this very pie! Every time I make it, I imagine her wink as the vanilla wafers crunch – proof that the best recipes often come from playful accidents and generations of love.
Your Flavor Toolkit: Ingredients & Why They Shine
- 1 box instant banana pudding mix – Our flavor foundation! Instant is key for that perfect set. Chef’s hack: For extra depth, whisk in ¼ tsp cinnamon.
- 1½ cups heavy cream (for pudding) – Creates silkier texture than milk. Substitute: Full-fat coconut cream for dairy-free.
- 2 ripe bananas, mashed – The browner, the better! Their natural sugars intensify when mashed. Insight: Leave small chunks for surprise bursts of flavor.
- 1 package Pillsbury banana bread mix (prepared & baked) – Our time-saving superstar! Why it rocks: Consistent results every time. Bake in an 8×8 pan for perfect thickness.
- 1 cup heavy whipping cream (for topping) – Chill bowl & beaters for faster peaks! Pro tip: Add 1 tbsp powdered sugar for stability.
- 1 tbsp vanilla extract – Use real vanilla, not imitation! It elevates every layer. Fun swap: Bourbon vanilla for a warm note.
- 1 cup crushed vanilla wafers – The “crunch” crown! Alternative: Graham crackers or biscoff cookies add fun twists.
Let’s Build Some Deliciousness: Step-by-Step
- Bake that bread! Prepare banana bread mix according to package directions in an 8×8 pan. Why? Thicker slices hold up better than loaf shapes! Cool COMPLETELY – warm bread turns mushy. Chef’s hack: Speed-cool by placing pan on a wire rack in freezer for 20 mins.
- Create your crust canvas. Slice bread into ½-inch thick rectangles. Line a 9-inch pie dish, slightly overlapping slices to cover bottom and sides. Gently press to “seal” gaps. Tip: Save leftover bread for snacking or layering!
- Whip up dreamy pudding. In a large bowl, whisk pudding mix with 1½ cups heavy cream for 2 full minutes – no shortcuts! It should ribbon off the whisk. Fold in mashed bananas JUST until combined. Watch: Overmixing makes pudding thin. Pour over bread base.
- Cloudify your cream. Using chilled tools, beat 1 cup heavy cream with vanilla until stiff peaks form. Test: Tip bowl sideways – cream shouldn’t slide! Dollop over pudding layer.
- Crunch time! Place wafers in a ziplock bag and crush with a rolling pin. Sprinkle evenly over cream. Pro move: Leave some larger pieces for texture contrast!
- The patience payoff. Chill pie MINIMUM 4 hours (overnight is gold!). Why? This lets bread soak up pudding magic and flavors marry. Cover loosely with plastic wrap.
The Science of Squish & Crunch: Why This Pie Works
Ever wonder why banana bread makes the perfect pie base while vanilla wafers stay crispy for days? Let’s geek out on the food science:
Banana Bread’s Secret Superpower
Stale-ish banana bread is ideal here because its porous structure acts like a sponge. The starches in bread recrystallize as it cools, creating tiny pockets that soak up pudding without dissolving completely. This gives you that magical “soft but structured” texture. Pro tip: Slightly underbaking the bread (by 3–4 minutes) keeps it extra absorbent.
Pudding’s Transformation
Instant pudding sets via a chemical reaction between the powder’s modified cornstarch and cold liquid. Heavy cream (with 36–40% fat) creates a richer, more stable structure than milk because fat molecules interfere with gluten formation. The mashed bananas introduce acidity, which slows starch gelatinization – that’s why we fold them in last to prevent a runny texture.
Vanilla Wafers’ Crunch Paradox
Those crispy cookies defy sogginess thanks to their low moisture content (about 3%) and high sugar. Sugar is hygroscopic, meaning it attracts water molecules from the air – but in this pie, the whipped cream layer acts as a moisture barrier, protecting the wafers. For extra insurance, sprinkle them just before serving!
Temperature’s Role
Chilling for 4+ hours isn’t just about firming up – it allows amylose (a starch in bread) to retrograde, creating a more cohesive texture. Meanwhile, the fat in whipped cream crystallizes, giving it staying power.
Fun experiment: Try substituting angel food cake for banana bread. Without the fat and moisture from bananas, it’ll disintegrate – proving banana bread’s unique suitability!
From Potluck Star to Gourmet Showstopper: Presentation Tricks
This pie shines at any event with these pro-level upgrades:
1. The Tiered Centerpiece
-
Bake banana bread in a springform pan for taller sides. Layer pudding, then top with concentric circles of: whipped cream rosettes (use a piping bag with a star tip), banana slices brushed with lemon juice, and gold leaf flakes for New Year’s Eve.
2. Individual Jars for Crowds
-
Layer cubed banana bread, pudding, and cream in 8-oz mason jars. Seal with lids and stack in a basket for picnics. Tie spoons to jars with twine labeled “Shake before eating!” for a fun interactive touch.
3. Kids’ Build-Your-Own Pie Bar
-
Set out bowls of: baked banana bread cubes, pudding, whipped cream, and toppings (sprinkles, chocolate chips, crushed Oreos). Provide small pie tins and let kids assemble their own creations!
4. Holiday Glam Edition
-
For Christmas: Add peppermint extract to whipped cream and use crushed candy canes instead of wafers.
-
For Thanksgiving: Mix 1/4 cup pumpkin puree into the pudding and garnish with candied pecans.
Gifting with Flair
-
Package dry ingredient kits: banana bread mix box, pudding packet, and vanilla wafers in a cellophane bag. Attach a recipe tag with instructions and a note: “Just add cream & love!”
-
For neighbors: Deliver mini pies in 4-inch disposable pans with a handwritten note: “Hope this brightens your day!”
Storage hack: Freeze individual slices on a parchment-lined tray before wrapping tightly. Thaw overnight in the fridge – the whipped cream will stay fluffy!
Troubleshooting: Pie Problems Solved
Even pros encounter these issues – here’s how to fix (or disguise!) them:
Problem: Pudding layer weeping liquid.
Fix: This is syneresis – starch breaking down. Prevent it by:
-
Ensuring pudding is fully whisked (2 full minutes!)
-
Not over-mashing bananas (small chunks stabilize the mixture)
-
Chilling pie uncovered for the first hour to prevent condensation
Problem: Banana bread base crumbling when sliced.
Fix: Next time:
-
Press bread slices firmly into the pan, overlapping edges by 1/4 inch
-
Brush with melted butter before adding pudding (creates a moisture barrier)
For now: Serve with a spoon and call it a deconstructed trifle!
Problem: Whipped cream deflating.
Causes & Solutions:
-
Overbeating (stop when peaks hold their shape)
-
Warm kitchen (chill bowl in freezer 10 mins before starting)
-
High humidity (add 1 tsp cornstarch to stabilize)
Problem: Bananas browning on top.
Prevention:
-
Toss banana slices in 1 tbsp lemon juice + 1 tsp honey before garnishing
-
Or, caramelize them first: Sauté in butter and brown sugar for 2 mins, then cool before adding
Salvage Operation Ideas:
-
Pudding too thin? Blend with 1/4 cup mascarpone and rechill
-
Bread too dry? Brush with simple syrup before assembling
-
Over-whipped cream? Fold in 2 tbsp cold milk to loosen
Remember: Imperfections often taste the best – my family now requests the “messy test-run pies” because they have extra caramelized bits!
Showtime: Serving Your Masterpiece
Presentation is key with this stunner! Run a knife under hot water before slicing – it glides through layers cleanly. Wipe blade between cuts. Serve chilled on simple white plates to let those gorgeous layers shine. Garnish with banana coin “halos” dipped in lemon juice (prevents browning!) or extra wafer crumbs. For dinner parties, pre-slice and plate with tiny mint sprigs. Coffee or cold milk are mandatory sidekicks – the creaminess demands it! Remember: this pie gets better as it chills, so leftovers (if they exist!) taste even more incredible on day two.
Make It Your Own: Delicious Twists
- Salted Caramel Swirl: Drizzle ¼ cup warm caramel between pudding and cream layers. Sprinkle flaky salt on top.
- Chocolate-Banana Bliss: Add ½ cup mini chocolate chips to pudding layer. Use chocolate wafer cookies for crunch.
- Nutty Professor: Fold ⅓ cup toasted pecans or walnuts into banana bread batter before baking.
- Tropical Escape: Replace vanilla wafers with crushed macadamia cookies. Add ¼ cup toasted coconut to whipped cream.
- Vegan Wonder: Use plant-based banana bread mix, coconut whipped cream, and dairy-free pudding mix with almond milk.
From My Messy Apron to Yours: Chef’s Confessions
This recipe evolved from my epic “pantry panic” during a surprise dinner guest situation! I had stale banana bread, pudding mix, and desperation. Throwing them together felt rebellious – until everyone demanded the recipe. Over time, I learned two game-changers: 1) Using slightly UNDER-baked banana bread (moister texture!) and 2) Adding a whisper of nutmeg to the pudding. My funniest fail? Once I used unripe bananas – the pie tasted like sweetened cardboard! Lesson learned: spotty bananas or bust. This pie now stars at every family gathering, and my niece calls it “banana lasagna” – which might just stick! Remember, friends: imperfect pies still taste phenomenal. If your layers slump, just call it “deconstructed” and pass the forks!
Banana Pie SOS: Your Questions Answered
Q: My pudding layer isn’t setting! Help!
A: Did you use INSTANT pudding? Cook-and-serve won’t work! Also, ensure you’re whipping the full 2 minutes with heavy cream – undermixing is the #1 culprit. If it’s still thin, pop the whole pie in the freezer for 45 minutes before adding whipped cream.
Q: Can I use homemade banana bread instead?
A: Absolutely! Use your favorite recipe (about 2 cups cubed). Bake it a day ahead so it’s extra firm. Pro tip: Reduce sugar slightly since pudding is sweet.
Q: The banana bread layer got soggy overnight. Fixable?
A> Sogginess usually means bread wasn’t cooled completely before assembling. Next time, freeze slices 15 mins first! For now, embrace the delicious “bread pudding” texture – it’s still amazing.
Q: Can I make this gluten-free?
A> Yes! Use GF banana bread mix and GF vanilla wafers (or crushed gluten-free pretzels for salty-sweet vibes!). Check pudding mix labels – most are GF but verify.

Banana Bread Cream Pie
- Total Time: 25 minutes
Description
This dessert is everything you love rolled into one glorious pie. Start with banana bread as the crust, swirl in luscious banana pudding, top with vanilla wafer crunch, and crown it all with fluffy whipped cream. It’s nostalgia, innovation, and comfort—perfect for Friendsgiving, potlucks, or when you just want dessert to feel like a hug.
Ingredients
-
Banana Bread Layer:
-
1 box banana bread mix (prepare in 8×8 pan)
-
-
Pudding Layer:
-
1 box instant banana pudding mix (+ ¼ tsp cinnamon, optional)
-
1½ cups heavy cream
-
2 ripe bananas, mashed (leave some chunks)
-
-
Whipped Cream Topping:
-
1 cup heavy whipping cream
-
1 tbsp powdered sugar
-
1 tsp vanilla extract
-
-
Crunchy Topping:
-
1 cup crushed vanilla wafers (or graham crackers, Biscoff)
-
Instructions
-
Bake Banana Bread: Follow box directions in an 8×8 pan. Cool completely (quick-chill in freezer for 20 mins).
-
Form Pie Base: Slice cooled bread into ½″ rectangles. Line a 9″ pie dish, slightly overlapping to cover bottom and sides.
-
Make Banana Pudding: Whisk pudding mix with heavy cream for 2 mins until thick. Gently fold in mashed bananas. Pour over bread base.
-
Whip Topping: In a chilled bowl, beat 1 cup cream, powdered sugar, and vanilla until stiff peaks form. Dollop or spread over pudding.
-
Add Crunch: Sprinkle crushed wafers evenly over the whipped cream.
-
Chill: Refrigerate at least 4 hours (overnight is best!) for flavors to meld and layers to set.
Notes
-
Use slightly under-baked banana bread—it stays softer under the pudding.
-
Avoid warm bread—fully cool before assembling to prevent sogginess.
-
Warm knife under water before slicing for clean layers.
- Prep Time: 25 mins (plus baking & chilling time)
Nutrition
- Calories: 420 Calories per Slice
Sweet Indulgence, By The Numbers
Serves: 8 | Prep: 25 mins (+chill) | Chill: 4 hours min | Calories per slice: ~420
Note: Nutrition estimates vary based on specific brands. For lighter versions: try sugar-free pudding mix, light whipped topping, and reduced-fat banana bread mix. But hey – life’s short, eat the pie!
Final Thoughts: A Pie That Tastes Like Home
This Banana Bread Cream Pie is more than a dessert – it’s edible nostalgia. Every bite carries the warmth of Grandma’s kitchen, the laughter of impromptu gatherings, and the joy of discovering that the “wrong” way sometimes tastes just right. Whether you’re making it for a special occasion or just because bananas were on sale, this pie reminds us that the best recipes aren’t about perfection. They’re about butter-stained recipe cards, the smell of toasting vanilla wafers, and the collective “mmmm” when the first slice hits the plate.

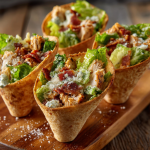
Chicken Caesar Cones
Introduction
Hey there, kitchen friends! Olivia Bennett here, apron probably dusted with Parmesan and a big grin on my face. Is there anything more *joyful* than finding a way to make a classic feel brand-new again? That’s exactly what happened when I dreamed up these Chicken Caesar Cones! Forget stuffy silverware and sad desk salads – we’re turning your favorite Caesar into a crispy, crunchy, totally handheld party. Imagine: warm, savory ground chicken spiced just right, tucked into a golden tortilla cone, then piled high with crisp romaine, addictive homemade croutons made from sweet rolls (trust me!), all drenched in a luxuriously creamy, tangy, anchovy-kissed dressing, and finished with a shower of salty bacon and Parmesan. It’s a flavor explosion you eat like an ice cream cone! Perfect for casual dinners, picnics that need a “wow” factor, or when you just want dinner to feel like a celebration. Let’s ditch the bowls and make mealtime an adventure!
The Picnic That Sparked It All
This recipe was born from pure, unadulterated picnic panic. Picture it: last summer, my best friend convinced me to join her family’s epic lakeside potluck. “Just bring something easy, Liv!” she said. Easy? My brain immediately went to Caesar salad – crowd-pleasing, right? But the thought of soggy lettuce and dressing pooling at the bottom of a container by the time we arrived made me cringe. Then, while packing, I knocked over a box of ice cream cones next to my tortillas. *Lightbulb moment!* What if the salad *was* the cone filling? I frantically browned some chicken, whipped up dressing, tore up leftover sweet rolls for instant croutons, and molded tortillas into cones using foil and sheer willpower. They were a little wonky, but oh my stars – the second we pulled them out, everyone descended! Kids loved the fun shape, adults raved about the layers of flavor and crunch. No forks needed, zero sogginess, just pure, handheld joy. That messy, improvisational picnic triumph is baked right into every bite of these cones!
Your Flavor Toolkit: Ingredients & Insights
Gather your squad! Here’s what you’ll need to build these epic cones, along with my chef-y notes to make it seamless:
- Ground Chicken (2 lbs): The hearty, savory base. Why ground? It cooks fast, seasons beautifully, and fits perfectly in the cone! Swap: Ground turkey works great, or use shredded rotisserie chicken for a shortcut (about 3 cups).
- Garlic & Onion Powder (2 tbsp): Our flavor power duo! They distribute evenly through the chicken, giving that essential savory backbone without chopping. Chef Tip: Using powder ensures no big chunks get stuck in your cone!
- Red Pepper Flakes (2 tsp): Just enough warmth to wake up the chicken. Adjust: Love heat? Go for 1 tbsp! Sensitive? Drop to 1/2 tsp. It’s your kitchen!
- Large Flour Tortillas (4): The edible vessel! Burrito-sized works best. Insight: Slightly stale tortillas crisp up even better! Swap: For a gluten-free twist, use large gluten-free wraps or even sturdy lettuce cups (romaine hearts work!).
- Mayonnaise (1 ½ cups): The lush foundation of our dressing. Chef Secret: Full-fat mayo gives the best texture and flavor. Light mayo can make it thin.
- Lemons (Juice of 1 ½): Bright, essential tang! Tip: Roll your lemons firmly on the counter before juicing – you’ll get way more juice!
- Grated Parmesan (¾ cup for dressing + ¾ cup for salad/garnish): Salty, umami magic. Key: Use freshly grated if possible – the pre-grated stuff has anti-caking agents that can make the dressing gritty.
- Worcestershire Sauce (1 ½ tbsp): That deep, complex savory note. It’s non-negotiable for true Caesar depth!
- Garlic Cloves (1 ½, finely grated): Fresh garlic punch! Grating it ensures it blends seamlessly. Hack: Use a microplane – it’s faster and gets every bit of flavor.
- Dijon Mustard (3 tbsp): Adds tang and helps emulsify the dressing. Chef Love: Its sharpness cuts through the richness perfectly.
- Anchovy Paste (1 ½ tbsp): The *secret* umami bomb! Don’t Skip! It adds incredible depth without tasting “fishy.” Swap: Mash 3-4 anchovy fillets if you don’t have paste.
- Chopped Romaine (4 cups): The classic crisp base. Tip: Chop it fairly small so it’s easy to eat from the cone! Wash and dry *thoroughly* – soggy lettuce is the enemy.
- King’s Hawaiian Sweet Rolls (12, diced): Our genius crouton swap! Why They Rock: Their slight sweetness and soft texture become addictively crispy when toasted and soak up dressing beautifully. Swap: Any soft dinner roll or baguette cubes work.
- Cooked Bacon Bits (¾ cup): The salty, smoky crown! Pro Move: Cook your own bacon for maximum flavor and crunch. Pre-cooked is fine in a pinch!
- Salt & Pepper: Season at every step! Taste your chicken, taste your dressing.
Let’s Build Some Deliciousness: Step-by-Step
Ready for fun? Let’s turn these ingredients into handheld magic!
- Conquer the Chicken: Grab your favorite skillet and crank it to medium heat. No oil needed if your chicken isn’t super lean. Add the ground chicken, breaking it up with a spatula or wooden spoon like you’re crumbling ground beef. Sprinkle in the garlic powder, onion powder, red pepper flakes, a good pinch of salt, and some freshly cracked black pepper. Chef Hack: Don’t stir constantly! Let it get some nice golden-brown bits – that’s FLAVOR! Cook for 8-10 minutes until no pink remains. Drain any excess fat if needed. Set this savory goodness aside. (Timing Tip: Do this while the oven preheats for the cones!)
- Craft the Crispy Cones: Preheat your oven to 375°F (190°C). This is where the fun (and maybe a little foil origami) begins! Take one tortilla. Roll it tightly into a cone shape – aim for an ice cream cone size. Secure the overlapping edge with a small piece of foil wrapped around the outside, or carefully use 2-3 toothpicks inserted where the tortilla overlaps. Pro Tip: If using toothpicks, remember to tell your eaters to remove them! Place the cones seam-side down on a baking sheet. Bake for 8-10 minutes until they are beautifully golden brown and rigid. Watch Closely! They go from perfect to burnt fast. Let them cool COMPLETELY on the tray before removing the foil/toothpicks. This cooling step is crucial – it lets them set and become sturdy vessels! (Kitchen Story: My first batch collapsed because I got impatient… learn from my mess!)
- Whip Up the Dreamy Dressing: While the cones cool, let’s make the heart of the Caesar. In a medium bowl, combine the mayonnaise, freshly squeezed lemon juice, ¾ cup grated Parmesan, Worcestershire sauce, that finely grated garlic, Dijon mustard, anchovy paste, and a big pinch each of salt and pepper. Grab a whisk and go to town! Whisk vigorously until everything is completely smooth, creamy, and emulsified. Secret Weapon: Taste it! Does it need more lemon? More pepper? More anchovy depth? Adjust to YOUR palate. Cover and pop it in the fridge until assembly. (Flavor Boost: Letting it sit for 15 mins lets the flavors marry beautifully.)
- Toss That Star Salad: In a large bowl, combine the chopped romaine (make sure it’s bone dry!), the diced King’s Hawaiian rolls (they are your croutons!), and the remaining ¾ cup grated Parmesan. Dressing Strategy: Start by adding about ¾ cup of your fabulous dressing. Gently toss everything together with salad tongs or clean hands until evenly coated. Golden Rule: You can always add more dressing, but you can’t take it away! We want it coated, not swimming, especially since it’s going in a cone. Add more dressing a tablespoon at a time if needed.
- The Grand Assembly (The Fun Part!): Time to build your masterpieces! Grab your cooled, crispy tortilla cones. Spoon a generous layer of the warm seasoned ground chicken into the bottom of each cone – this acts as a delicious, savory base and helps soak up any dressing. Next, pile high with the dressed Caesar salad mixture, gently pressing it down slightly. Overflow is Encouraged! Finally, crown each glorious cone with a generous sprinkle of those crispy bacon bits and an extra shower of Parmesan cheese if you’re feeling fancy (and let’s be real, you always should!).
Serving Up the Fun
Presentation is part of the joy! Serve these cones immediately, standing tall in sturdy glasses or mason jars filled with a little dried beans or rice to keep them upright (like you would for an ice cream cone holder!). They’re naturally eye-catching, so a simple platter works too. Have napkins ready – the best food is often the messiest! These are perfect as a main course for a light dinner (serve two per person for heartier appetites), a show-stopping appetizer at a party (make mini-cones with smaller tortillas!), or the star of your next picnic basket. Pair them with a crisp white wine, a cold beer, or simply some sparkling water with lemon.
Mix It Up! Flavorful Twists
Love the concept? Make it your own!
- Mediterranean Mezze: Swap the chicken for seasoned ground lamb or beef. Use a lemon-herb dressing (skip Worcestershire/anchovy), add chopped cucumber, tomato, Kalamata olives, and feta cheese to the salad. Garnish with fresh mint or dill.
- Buffalo Chicken Crunch: Toss the cooked ground chicken in ½ cup of your favorite buffalo sauce before adding to the cone. Use a blue cheese dressing instead of Caesar (thin yogurt-based works great!). Keep the bacon! Add thinly sliced celery to the salad for extra crunch.
- Veggie-Packed Power: Skip the chicken or use seasoned lentils or chickpeas. Bulk up the salad with shredded kale, roasted sweet potato cubes, and sunflower seeds. Use a vegan Caesar dressing (made with soaked cashews or vegan mayo, nutritional yeast for parm, capers for anchovy).
- Seafood Sensation: Replace the chicken with flaked cooked salmon, shrimp, or even lump crab meat tossed lightly with lemon and Old Bay seasoning. Keep the classic Caesar dressing – it’s a match made in heaven!
- Breakfast Caesar: Use crispy diced breakfast potatoes or tater tots instead of chicken. Add a soft-boiled or poached egg on top of the salad inside the cone before garnishing with bacon. A lighter lemon-dill dressing works well here.
Olivia’s Kitchen Chronicles
Oh, the evolution of this cone! That first picnic version? Let’s just say structural integrity was… aspirational. I’ve learned the hard way that cooling the cones completely is non-negotiable. I also used to make big, fancy croutons, but one day I was out of bread and grabbed leftover sweet rolls in desperation – the sweet-savory crunch was a REVELATION and now I’ll never go back! The anchovy paste was a game-changer too; mashing whole fillets worked, but the paste blends so seamlessly, converting even the anchovy-skeptics at my table. My biggest laugh? The time I forgot to tell my brother about the toothpicks holding his cone together. His surprised yelp was priceless (don’t worry, no teeth were harmed!). Now I’m a foil evangelist. This recipe embodies my kitchen philosophy: start with good flavors, embrace happy accidents, prioritize fun, and always, ALWAYS have extra napkins.
Your Caesar Cone Questions, Answered!
Let’s tackle those potential kitchen hiccups before they happen:
- Q: My tortilla cone won’t stay rolled! Help! A: This is common! First, ensure you’re rolling it tightly from the tip. Use slightly larger pieces of foil than you think you need, wrapping them firmly around the outside seam area to hold it in place during baking. If using toothpicks, insert them vertically through the overlapping layers near the top and bottom of the seam. Post-Baking Tip: If it *still* feels a bit floppy after cooling, pop it back in the oven for 2-3 more minutes.
- Q: Can I make these ahead of time? A: You can prep components! Cook the chicken and bacon up to 2 days ahead (store separately in the fridge, reheat chicken gently). Make the dressing 2-3 days ahead (flavors improve!). Dice the rolls for croutons a day ahead (store in an airtight container). Wash and chop lettuce, store wrapped in paper towels in a bag. BUT: Assemble the cones just before serving. Baked cones lose crispness if stored assembled or wrapped, and dressed lettuce wilts.
- Q: My dressing is too thick/too thin. Fixes? A: Too Thick: Whisk in lemon juice or a teaspoon of cold water at a time until desired consistency. Too Thin: Whisk in more grated Parmesan (it thickens as it absorbs) or an extra tablespoon of mayo. Avoid adding more Dijon/Worcestershire directly for thinning as it can overpower.
- Q: Can I skip the anchovy paste? It weirds me out. A: You *can*, but you’ll lose that deep, savory “umami” punch that makes Caesar dressing special. Try substituting 1 tablespoon of rinsed capers, finely mashed, plus an extra ½ teaspoon of Worcestershire sauce. It won’t be identical, but adds complexity. Or, simply omit it and add a pinch more salt and Parmesan.
- Q: Help! My cone got soggy after filling. A: Speed is key! Assemble just before serving. Ensure your lettuce is VERY dry. Don’t overdress the salad – excess dressing is the main sogginess culprit. Using warm chicken can also soften the cone faster, so let it cool slightly if you have time.
Chicken Caesar Cones
- Total Time: 30 mins
Description
Classic Caesar meets crispy cone in this fresh twist on a favorite. Packed with savory ground chicken, sweet roll croutons, creamy homemade dressing, crisp romaine, and a crown of bacon and Parmesan—all tucked into a golden tortilla cone. It’s part salad, part sandwich, and totally unforgettable!
Ingredients
-
2 lbs ground chicken
-
2 tbsp garlic powder + 2 tbsp onion powder
-
2 tsp red pepper flakes
-
4 large flour tortillas
-
1½ cups mayonnaise
-
Juice of 1½ lemons
-
1½ tbsp Worcestershire sauce
-
1½ tbsp anchovy paste (or mashed anchovies)
-
3 tbsp Dijon mustard
-
1½ garlic cloves, grated
-
1½ cups grated Parmesan (divided)
-
4 cups chopped romaine
-
12 King’s Hawaiian sweet rolls, diced
-
¾ cup cooked bacon bits
-
Salt & pepper, to taste
Instructions
-
Cook chicken with garlic powder, onion powder, red pepper, salt & pepper until browned (8–10 mins).
-
Form tortilla cones, wrap with foil/toothpicks, and bake at 375°F for 8–10 mins until golden. Cool fully.
-
Make Caesar dressing: Whisk mayo, lemon juice, ¾ cup Parmesan, Worcestershire, garlic, Dijon, anchovy paste, salt, pepper until smooth. Chill.
-
Toss salad: Mix romaine, roll croutons, ¾ cup Parmesan, and ¾ cup dressing.
-
Assemble cones: Add warm chicken to cone base, top with Caesar salad, then bacon bits & extra Parmesan.
Notes
-
Let cones cool fully before filling—crispy = sturdy!
-
Use foil over toothpicks for safety and style
-
For parties, make minis with small tortillas!
- Prep Time: 20 mins
- Cook Time: 10 mins
Nutrition
- Calories: 560 cal per Cone
- Fat: 35g
- Carbohydrates: 35g
- Protein: 35g
Nutritional Note
Each Chicken Caesar Cone is a satisfying handheld meal! Approximate nutrition per cone (using full-fat mayo and including bacon): Calories: ~560, Protein: ~35g, Fat: ~35g (Saturated Fat: ~10g), Carbohydrates: ~35g, Fiber: ~3g, Sugar: ~8g. Remember, these are estimates and can vary based on specific brands and ingredient amounts used
Final Thoughts: Why Food Should Be Playful
These cones represent more than a clever presentation trick – they’re an invitation to rediscover joy in everyday meals. In our screen-dominated world, tactile, interactive food creates natural connection points. Watching kids and adults alike light up when handed their edible vessel reminds me that cooking isn’t just about sustenance, but about creating edible memories. The best recipes aren’t museum pieces – they’re living traditions that invite improvisation. So go ahead: get sauce on your chin, laugh when a crouton escapes, and relish the simple magic of eating with your hands. After all, isn’t that how we all enjoyed food first?
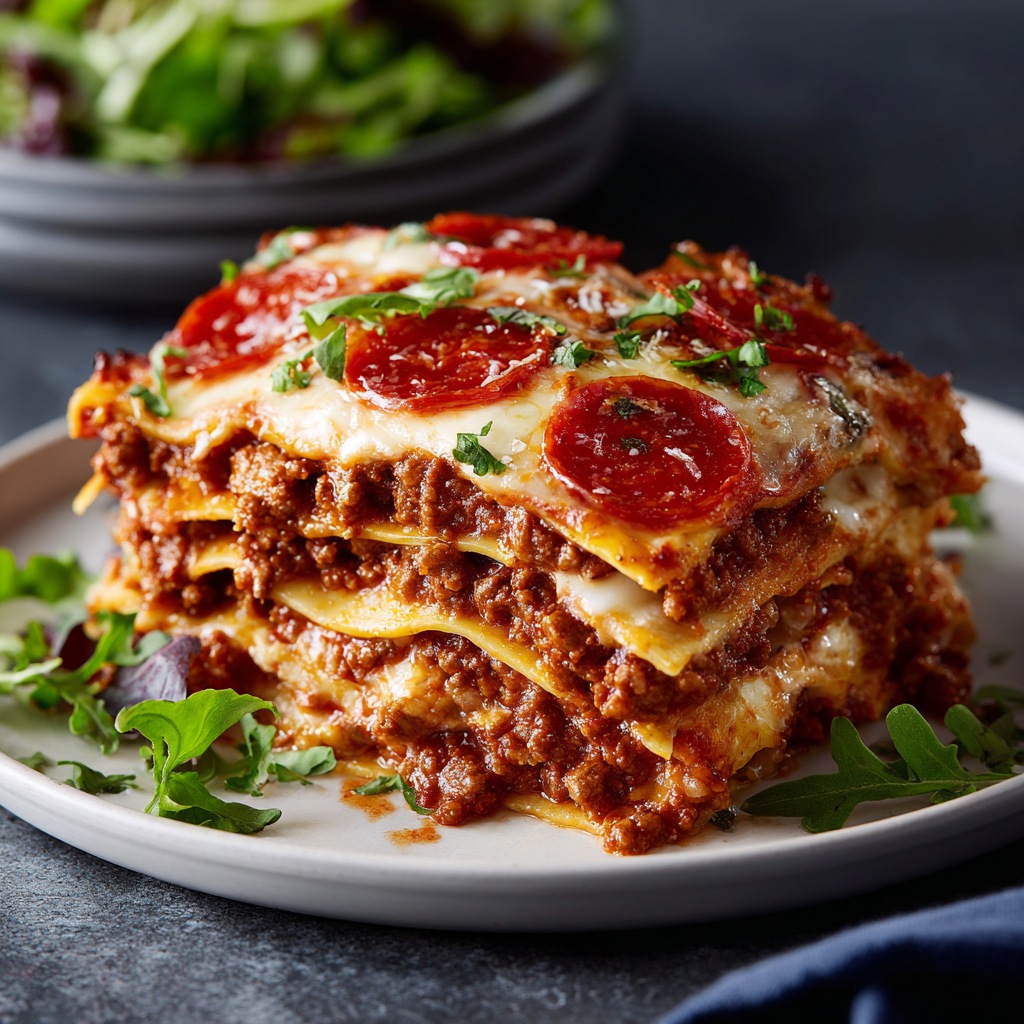
Protein-Packed Pizza-Lasagna
When Pizza Met Lasagna: A Love Story
Hey friends! Olivia here, apron dusted with oregano and heart full of kitchen chaos. Raise your hand if you’ve ever stood paralyzed between pizza Friday and lasagna Sunday cravings? 🙋♀️ That exact dilemma birthed this glorious Protein-Packed Pizzagna – a towering, saucy, cheese-laced hybrid that’s become my family’s ultimate crowd-pleaser. Imagine lasagna’s cozy layers hugging pizza’s zesty spirit, all while packing a whopping 102g protein per serving. No fancy skills needed! Just pure, unapologetic comfort food that fuels busy weeknights, game-day gatherings, or “I deserve carbs” moments. It’s the culinary equivalent of your favorite sweatpants: reliable, satisfying, and secretly impressive. Ready to turn your kitchen into a flavor stadium? Let’s roll!
The Midnight Experiment That Went Viral (In My House!)
Picture this: It’s 10 PM after a chaotic soccer-practice-dinner-meeting whirlwind. My teens are chanting “pizza!” while my husband wistfully mentions his grandma’s lasagna. In a sleep-deprived stroke of genius (or madness?), I grabbed tortillas instead of pasta sheets, spiked lean beef with pepperoni, and did a reckless layer-jam. The result? Silence. Then my 15-year-old mumbled through a cheese-stuffed mouth: “This is your best mistake ever, Mom.” Now, “Pizzagna Night” is sacred in our house – complete with competitive topping debates and garlic-powder fingerprints on the fridge. That happy accident taught me: sometimes the best recipes are born from desperation (and a well-stocked spice rack!).
Your Flavor Arsenal: Simple & Swappable
- 8 low-calorie tortillas – Our clever “pasta” swap! They hold layers without sogginess. Chef’s tip: Whole wheat or spinach versions add extra fiber!
- 2 lbs 93/7 ground beef – Lean protein powerhouse. Swap: Ground turkey, chicken, or plant-based crumbles work beautifully.
- 1 cup tomato purée + 1 cup water – Creates a rich, marinara-like base. Insider hack: Stir in 1 tbsp balsamic vinegar for depth!
- 2 tbsp garlic powder + 2 tbsp onion powder – The dynamic duo for instant umami. Fresh? Use 4 minced garlic cloves + ½ diced onion.
- 2 tbsp Italian seasoning – Your flavor fairy godmother. DIY blend: 1 tsp each dried basil, oregano, thyme + ½ tsp rosemary.
- ½ cup chopped turkey pepperoni (divided) – Pizza vibes, leaner profile! Spice it up: Use spicy chorizo or vegan pepperoni.
- 1 cup ricotta + 1 cup low-fat mozzarella – Creamy meets stretchy. Lighter option: Cottage cheese instead of ricotta!
- 2 eggs – Binds the cheese layer. Vegan? Flax eggs (2 tbsp ground flax + 5 tbsp water).
- 2 tbsp dried oregano – For that iconic pizza-parlor aroma.
- Extra 1 cup low-fat mozzarella + 20 turkey pepperoni slices – Because the top layer deserves drama!
Building Your Flavor Skyscraper: Layer by Layer
- Meat Sauce Magic: Brown beef in a skillet over medium-high heat, breaking it into crumbles (5 mins). Pro tip: Drain excess fat if needed – we want lean layers! Stir in purée, water, garlic powder, onion powder, Italian seasoning, and HALF the chopped pepperoni. Simmer 10-12 mins until it thickens into a luscious ragù. Chef’s confession: I always sneak a spoonful – quality control!
- Ricotta Cloud Whipping: In a bowl, combine ricotta, 1 cup mozzarella, eggs, and oregano. Mix until fluffy. Secret weapon: A dash of nutmeg here makes it taste “fancier”!
- The Grand Layer-Up: In a 9×13″ casserole dish (or 4 individual oven-safe bowls):
- Layer 1: Tortilla (trim to fit if needed)
- Layer 2: ⅓ ricotta mix (spread like frosting!)
- Layer 3: ⅓ meat sauce (swoop it into corners)
Repeat twice. Top with final tortilla, remaining meat sauce, ¼ cup mozzarella, and 5 pepperoni slices per portion. Hot tip: Press gently with a spatula – it helps layers meld.
- Bake to Golden Glory: Preheat oven to 375°F (190°C). Bake uncovered 25-30 mins until cheese is molten and edges bubble like a volcano. Watch for the “cheese crown” – when pepperoni crisps and mozzarella turns spotty-golden, it’s DONE.
The Science of Layering – Why This Hybrid Works
At first glance, tortillas in lasagna might seem sacrilegious—until you taste the magic. Let’s break down the culinary engineering behind this mashup:
1. Tortillas vs. Pasta:
Traditional lasagna noodles absorb moisture, becoming tender during baking. Tortillas, however, are pre-cooked and contain less gluten, so they hold their structure while still softening just enough to cut cleanly. Their slight chew mimics the “al dente” texture of good pasta.
2. Protein Power Play:
The 93/7 ground beef delivers lean protein without excessive fat (which can make layers greasy). Turkey pepperoni adds a punch of flavor with 70% less saturated fat than pork versions. Ricotta’s whey protein binds with eggs for a creamy yet firm layer that doesn’t weep moisture.
3. Sauce Chemistry:
Simmering tomato purée with water (instead of canned sauce) allows you to control thickness. The balsamic vinegar hack (if used) caramelizes during baking, balancing acidity and sweetness. A thick sauce prevents sogginess—aim for a texture akin to sloppy joe filling.
Pro Tip: For extra structure, brush tortillas with egg wash before layering. It creates a moisture barrier while adding protein!
Global Pizzagna Inspirations – A World Tour
Why stick to Italian-American flavors when you can globe-trot? Here’s how to remix your Pizzagna with international flair:
1. Greek Spanakopita Style:
-
Replace beef with lamb and spinach.
-
Swap ricotta for feta + Greek yogurt.
-
Add a layer of phyllo dough on top for crunch.
2. Indian Butter Chicken Twist:
-
Use tandoori-spiced ground chicken.
-
Sauce: Tomato purée + cream + garam masala.
-
Top with paneer cubes and cilantro.
3. Tex-Mex Fiesta:
-
Season beef with taco spice.
-
Substitute ricotta with queso fresco.
-
Add a corn tortilla layer and top with pickled jalapeños.
4. Japanese Okonomiyaki Version:
-
Replace meat with shredded cabbage and shrimp.
-
Sauce: Kewpie mayo + tonkatsu sauce.
-
Top with bonito flakes post-bake.
Cultural Note: Layered dishes exist worldwide—from Mexican pastel azteca to Filipino lasagna. Pizzagna is your passport to play!
Meal Prep Magic – Pizzagna for Busy Lives
This dish is a meal-prepper’s dream. Here’s how to optimize it:
1. Freezer-Friendly Components:
-
Meat sauce: Freeze flat in ziplock bags for up to 3 months. Thaw overnight before layering.
-
Assembled unbaked Pizzagna: Wrap tightly in foil and freeze for 1 month. Bake from frozen (add 15-20 mins).
2. Portion Control:
-
Use 8-inch cake pans for individual servings. Stack in the fridge for easy grab-and-bake lunches.
-
Sous vide hack: Vacuum-seal sliced portions with extra sauce. Reheat in warm water for a saucy revival.
3. Protein Boosters:
-
Add 1 scoop unflavored collagen powder to ricotta mix (adds 10g protein per serving).
-
Mix lentils or quinoa into meat sauce for fiber and plant-based protein.
Time-Saver: Pre-chop pepperoni and freeze in portions. No need to thaw—toss straight into cooking meat!
Plating Like a Pro (Zero Fuss Required!)
Let Pizzagna rest 5-10 mins – this prevents saucy avalanches! Slice into squares or scoop from ramekins. Pair with a zesty arugula salad (lemon vinaigrette cuts richness) or roasted broccoli. For true pizza-lasagna fusion, serve with garlic-dusted breadsticks for dipping into those crispy cheese edges. Paper plates totally allowed – this is comfort food, not a china moment!
Remix Your Pizzagna: 5 Delicious Twists
- Mediterranean: Swap beef for ground lamb, add feta to ricotta, and top with kalamata olives.
- Breakfast Edition: Use scrambled eggs + sausage in place of meat sauce, and hash browns instead of tortillas!
- Veggie-Loaded: Add sautéed mushrooms, spinach, and bell peppers to the sauce. Vegan? Use lentils + nutritional yeast “cheese”.
- White “Pizza” Style: Substitute meat sauce with Alfredo, and add grilled chicken + spinach.
- Spicy Fiesta: Mix jalapeños into ricotta, use taco-seasoned beef, and top with avocado crema.
Olivia’s Kitchen Confessions
This recipe evolved from my “lazy lasagna” phase – tortillas were originally a pantry hack! The first version used full-fat cheese and pork pepperoni… until my fitness-obsessed nephew asked, “Aunt Liv, can we protein-max this?” Challenge accepted! Now we use lean turkey pepperoni (surprisingly flavorful!) and low-fat cheeses without sacrificing gooeyness. Funny story: Once I forgot the eggs in the ricotta layer – it became a delicious cheese lava flow. Not terrible, but binding is better! Pro tip: Freeze individual portions before baking – future-you will send past-you thank-you notes.
Your Pizzagna Questions, Answered!
Q: Can I prep this ahead?
A: Absolutely! Assemble up to 24 hours ahead. Cover and refrigerate. Add 5-10 mins baking time if chilled.
Q: My tortillas got soggy. Help?
A: Two tricks: 1) Lightly toast tortillas before layering. 2) Don’t over-sauce! Meat sauce should be thick, not watery.
Q: Can I freeze Pizzagna?
A: Yes! Bake, cool completely, slice, and freeze in airtight containers for up to 3 months. Reheat at 350°F covered with foil.
Q: Is 102g protein per serving real?!
A: Cross my heart! Lean beef, turkey pepperoni, eggs, and low-fat cheese pack a protein punch. Nutrition info is calculated with exact ingredients listed.

Protein-Packed Pizza-Lasagna
- Total Time: 50 minutes
Description
This cheesy, saucy, tortilla-layered hybrid is what happens when pizza night crashes into lasagna Sunday—and brings 102g of protein along for the ride. No noodles, no stress, just comfort food glory with a fitness twist. Perfect for prepping ahead, freezing, or feeding a hungry crowd.
Ingredients
-
8 low-cal tortillas
-
2 lbs lean ground beef (93/7)
-
1 cup tomato purée + 1 cup water
-
2 tbsp garlic powder + 2 tbsp onion powder
-
2 tbsp Italian seasoning
-
½ cup chopped turkey pepperoni (divided)
-
1 cup ricotta cheese
-
1 cup low-fat mozzarella
-
2 eggs
-
2 tbsp dried oregano
-
1 cup extra mozzarella + 20 turkey pepperoni slices (for topping)
Instructions
-
Cook meat sauce: Brown beef. Add purée, water, spices, and HALF the pepperoni. Simmer 10–12 mins.
-
Mix ricotta layer: Blend ricotta, 1 cup mozzarella, eggs, and oregano until fluffy.
-
Layer (in 9×13″ dish):
-
Tortilla → ⅓ ricotta mix → ⅓ meat sauce
-
Repeat layers 2 more times
-
Top with tortilla, remaining sauce, cheese & pepperoni
-
-
Bake at 375°F uncovered for 25–30 mins, until golden and bubbling.
-
Rest 10 mins before slicing. Serve hot with a green salad or garlic bread.
Notes
-
Pre-toast tortillas for extra structure
-
Add a dash of nutmeg to ricotta for depth
-
Freeze slices before baking for easy meal prep
- Prep Time: 20 mins
- Cook Time: 30 mins
Nutrition
- Calories: 619 per serving
- Fat: 24g
- Carbohydrates: 30.5g
- Protein: 102g
Fuel Your Fun: Nutritional Stats
Per Serving (¼ recipe): 619 calories | 102g protein | 24g fat | 30.5g carbs | 3g fiber | 9g sugar
Note: Values may vary slightly with ingredient swaps. Calculated using MyFitnessPal.
Final Thoughts: More Than a Mashup
Protein-Packed Pizzagna isn’t just a recipe—it’s a mindset. It’s about refusing to choose between cravings, transforming “what’s in the pantry” into brilliance, and remembering that the best meals are often the ones that break rules. Whether you’re feeding picky kids, fueling a fitness journey, or just seeking comfort without guilt, this dish proves that boundaries (and tortillas) were meant to be folded. So go ahead—layer recklessly, swap boldly, and let those cheese pulls be your victory flag.
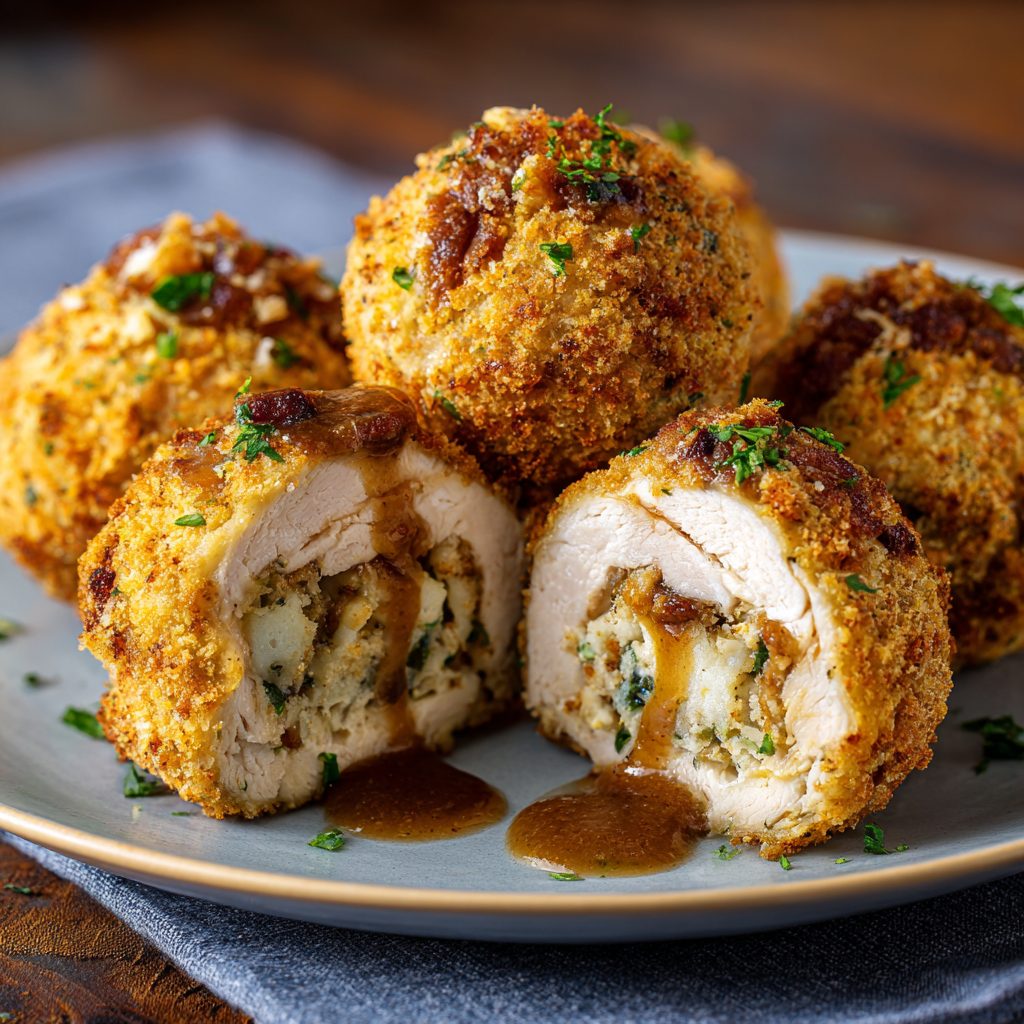
Giant Stuffed Turkey Balls
When Holiday Magic Meets Comfort Food Cravings
Hey there, kitchen friend! Olivia here, apron dusted with flour and heart full of excitement. Have you ever looked at your holiday leftovers and thought, “What if we rolled EVERYTHING into one glorious, crispy, gravy-drenched bite?” Well, grab your favorite mug of cider (or wine, no judgment here!) because today we’re making Giant Stuffed Turkey Balls – your entire Thanksgiving plate reimagined as a handheld, golden-brown masterpiece. Imagine: tender turkey wrapped around creamy mashed potatoes and savory stuffing, then coated in crunchy seasoned crumbs and baked (or fried!) until it sings. One bite sends you straight to the coziest corner of the holiday season, no long table required!
This recipe is for anyone who believes comfort food should be fun, a little playful, and absolutely bursting with flavor. It’s perfect for smaller gatherings, using up leftovers creatively, or just shaking up Sunday dinner. Don’t worry about fancy skills – if you can roll a burrito and dunk something in eggs, you’ve got this. We’re talking BIG smiles, minimal fuss, and maximum “wow” factor. Let’s turn simple ingredients into pure, unapologetic joy, shall we?
My “Leftover Lightning Bolt” Moment
Picture this: It’s the day after Thanksgiving a few years back. My tiny NYC kitchen looked like a food bomb went off – containers of mashed potatoes, stuffing, and turkey breast threatening to topple off every surface. My best friend Sarah, fueled by her third espresso, stared at the chaos and declared, “Liv, we need turkey sushi rolls… but, like, not sushi?” Challenge accepted! We started layering cold turkey slices with spoonfuls of cold stuffing and potatoes, rolling them haphazardly. They looked… questionable. “Bread them!” Sarah yelled. We dredged our Franken-rolls in flour, egg, and crushed-up leftover stuffing mix, then pan-fried them. The result? Pure magic. Crispy outside, molten holiday center. We ate them standing at the counter, laughing at our ridiculousness, gravy dripping down our chins. That messy experiment birthed these glorious Giant Stuffed Turkey Balls – proof that the best recipes often start with leftovers, laughter, and a slightly caffeinated friend!
Your Flavor-Packed Toolkit
Gather these goodies! Don’t stress about perfection – substitutions are your friends here.
- 8 large turkey breasts (pounded flat or butterflied): The edible hug for our filling! Pounding them thin (about 1/4 inch) is KEY for easy wrapping without breaking. No turkey? Large, thin chicken cutlets work beautifully.
- 2 cups cooked stuffing (divided): The soul of the holiday! Use your leftover homemade stuffing or a good-quality store-bought version. Pro Insight: Slightly drier stuffing holds up better than super moist. Sage & onion classic is my fave!
- 2 cups mashed potatoes (divided): Creamy comfort central. Homemade with butter and cream is dreamy, but store-bought works in a pinch! Chef Tip: Ensure they’re cold or room temp – hot potatoes make rolling messy.
- 2 boxes (about 6-7 cups) ground stuffing (uncooked): This is our CRUNCH magic! Those boxes of dry stuffing mix (like Stove Top). Pulse in a food processor or crush in a bag until fine crumbs. Substitution: Plain panko mixed with 1 tbsp poultry seasoning works.
- 12 eggs, beaten: Our glue for the crispy coating! Whisk them well with a pinch of salt and pepper.
- 4 cups all-purpose flour: The first layer of the breading trifecta, ensuring the egg sticks. Gluten-free 1:1 flour blends work perfectly too.
- 2 cups turkey gravy (for serving): The liquid gold finish! Homemade, store-bought, or even a packet mix – just make sure it’s piping hot and generous.
Let’s Build Some Deliciousness!
Ready for the fun part? Put on some tunes and let’s get rolling – literally!
- Prep the Turkey Blankets: Lay out two pounded turkey breasts, slightly overlapping like a Venn diagram, creating a large enough surface (about 8×10 inches total) to hold your filling. Chef Hack: Place them between plastic wrap or parchment paper before pounding – saves cleanup and prevents tearing! If they’re not thin enough, they’ll be tough to wrap.
- Load Up the Goodness: Spoon ½ cup mashed potatoes right into the center of your turkey duo. Top with ½ cup cooked stuffing, spreading it gently over the potatoes. Pro Tip: Leave a 1-inch border around the edges – overfilling is the enemy of a tight seal!
- Roll & Seal the Deal: Carefully bring the longer sides of the turkey up and over the filling, tucking slightly. Roll it forward, jelly-roll style, into a tight ball. Don’t panic if filling peeks! Secure the seam tightly with 3-4 toothpicks or wrap kitchen twine around the “equator.” Chef Secret: Wetting your fingers helps prevent sticking and makes sealing easier. Repeat for all 4 balls.
- Breading Station Bonanza: Set up your assembly line: 1) Shallow dish with flour, 2) Bowl with beaten eggs, 3) Large dish with ground stuffing crumbs. Roll each secured ball first in flour (shake off excess!), then dunk thoroughly in egg, letting excess drip off, then roll aggressively in the stuffing crumbs, pressing gently to adhere. Double Crunch Hack: For EXTRA crispy perfection, repeat the egg and crumb step once! Place breaded balls on a parchment-lined baking sheet.
- Cooking Showdown (Choose Your Adventure!):
- Baking (My Go-To for Hands-Off Ease): Preheat oven to 375°F (190°C). Bake balls for 35-40 minutes, or until deeply golden brown and the internal temperature reaches 165°F (74°C) in the center of the turkey. CRISP TRICK: Broil on high for the last 1-2 minutes – watch closely! – for an irresistible extra crunch.
- Frying (For Ultimate Decadence): Heat vegetable or canola oil in a large, heavy pot or deep fryer to 350°F (175°C). Carefully lower balls (don’t overcrowd!) and fry for 6-8 minutes until golden brown. Transfer to a wire rack set over a baking sheet and finish in a 375°F oven for 10-15 minutes to ensure the turkey cooks through to 165°F.
- Rest & Gravy Up: Let balls rest for 5-10 minutes after cooking. This helps them set and makes slicing easier. Carefully remove toothpicks or twine. Slice each giant ball in half horizontally (like opening a treasure chest!), revealing the glorious layers. Plate cut-side up and drench generously with hot turkey gravy. The ooze-factor is mandatory!
Plating Your Masterpiece
Presentation is part of the fun! Place each halved Giant Stuffed Turkey Ball cut-side up on a warm plate or shallow bowl – this showcases that beautiful layered interior. Pour that glorious hot gravy right over the top, letting it cascade down the sides and pool invitingly. For a festive touch, sprinkle with a tiny bit of fresh chopped parsley or thyme. These are hearty stars, so simple sides work best: a small pile of roasted green beans, a light cranberry sauce dollop on the side, or a simple winter salad. Most importantly? Serve immediately with big napkins and bigger smiles!
Shake It Up! Flavor Twists & Swaps
Make these balls your own! Here are some tasty ideas:
- Cheesy Bliss: Add 1/4 cup shredded sharp cheddar or Gruyère to the mashed potato layer before rolling.
- Italian Fest: Swap turkey for thin chicken cutlets. Use Italian-seasoned stuffing or breadcrumbs, add 2 tbsp pesto to the potatoes, and serve with warm marinara instead of gravy.
- Thanksgiving Remix: Stir 1/4 cup chopped dried cranberries and 2 tbsp chopped pecans into the stuffing filling.
- Lighter Touch: Use ground turkey mixed with breadcrumbs and egg as a “meat shell” instead of whole breasts. Bake as directed.
- Vegetarian Wonder: Skip the turkey! Use large, blanched cabbage or collard green leaves to wrap the filling. Bake seam-side down. Use mushroom gravy.
Olivia’s Kitchen Confessions
Oh, the stories these turkey balls could tell! Version 1.0? Let’s just say I underestimated the need for COLD filling. Warm potatoes turned my first attempt into a delicious but structurally unsound “turkey volcano” – tasty lava everywhere! Hence my cold-filling insistence. Over the years, the double-breading hack emerged purely because I’m extra and believe there’s no such thing as too much crunch. And the toothpick vs. twine debate? I’m team toothpick for speed, but twine gives a satisfyingly rustic, butcher-shop look. The best part? Seeing friends’ faces light up when they cut into one – it’s pure holiday joy, rolled, breaded, and baked. Don’t strive for perfection; embrace the delicious chaos!
Your Questions, Answered!
Let’s tackle those kitchen hiccups before they happen:
- “Help! My filling keeps bursting out!” Ah, the classic blowout! Three culprits: 1) Overfilling – stick to 1/2 cup each potatoes and stuffing. 2) Not sealing tightly – really tuck and roll! Use enough toothpicks (3-4 crossing works). 3) Filling too warm – cold is much firmer and easier to handle.
- “Can I prep these ahead?” Absolutely! Assemble and bread the balls up to 24 hours ahead. Store uncovered on the parchment-lined tray in the fridge (uncovered helps the coating stay crispier). Let them sit at room temp for 20-30 mins before baking/frying. You can also freeze the breaded, uncooked balls solid on the tray, then transfer to a freezer bag for up to 2 months. Cook from frozen, adding 10-15 mins baking time.
- “My coating isn’t sticking/cooking evenly!” Breading blues! Ensure you shake off excess flour after the first dredge. Let the egg-coated ball drip for a good 5-10 seconds before rolling in crumbs. Press the crumbs on firmly! For even browning, don’t crowd the baking sheet or fryer basket – give them space. Rotate the tray halfway through baking.
- “I don’t have ground stuffing mix. Help?” No panic! Pulse plain breadcrumbs or panko in a blender/food processor until fine. Mix in 1.5 tbsp poultry seasoning, 1/2 tsp garlic powder, 1/2 tsp onion powder, and 1/4 tsp salt. Boom! Instant flavor-packed coating.

Giant Stuffed Turkey Balls
- Total Time: 19 minute
Description
Turn your Thanksgiving leftovers into golden, gravy-smothered treasures! With creamy mashed potatoes and savory stuffing tucked inside juicy turkey and coated in a crunchy seasoned shell, these stuffed balls are everything you love about the holidays—rolled, breaded, and baked (or fried) to perfection. Big flavor. Bigger smiles.
Ingredients
-
8 thin turkey breasts (or chicken cutlets), pounded flat
-
2 cups mashed potatoes (cold)
-
2 cups cooked stuffing
-
6–7 cups dry stuffing mix (ground into crumbs) or seasoned panko
-
4 cups all-purpose flour
-
12 eggs, beaten
-
2 cups hot turkey gravy
-
Optional: Kitchen twine or toothpicks
Instructions
-
Layer & Roll: Overlap 2 turkey cutlets. Add ½ cup mashed potatoes and ½ cup stuffing in center. Roll tightly like a jelly roll. Secure with toothpicks or twine.
-
Breading Station: Roll each ball in flour → dip in egg → coat with stuffing crumbs. For extra crunch, repeat egg and crumbs.
-
Bake (Preferred): Bake at 375°F for 35–40 mins until 165°F inside. Broil 1–2 mins for crisp top.
OR
Fry + Bake: Fry in 350°F oil for 6–8 mins, then bake at 375°F for 10–15 mins to finish. -
Serve: Let rest 5 mins. Remove toothpicks. Slice and plate with hot gravy poured over top.
Notes
-
Cold fillings hold shape better—trust me!
-
Double-breading = next-level crunch
-
Make ahead & refrigerate (unbaked) up to 1 day or freeze up to 2 months
- Prep Time: 25 mins
- Cook Time: 35–40 mins
Nutrition
- Calories: 720 cal per Ball
- Fat: 22g
- Carbohydrates: 75g
- Protein: 55g
Nutritional Info (Per Serving – 1 Giant Ball)
Approximate: Calories: ~720 | Protein: ~55g | Carbohydrates: ~75g | Fat: ~22g (Varies based on specific ingredients, cooking method – baking vs frying, and gravy amount). It’s a hearty, celebratory dish packed with protein and comfort!
Final Thoughts: Leftovers Never Looked This Good
These Giant Stuffed Turkey Balls are more than just a clever way to use up holiday leftovers—they’re a celebration of comfort, creativity, and the joy of eating with your hands. Whether you serve them at a Friendsgiving, a cozy family dinner, or just for yourself (no shame!), they’re guaranteed to bring smiles.
So go ahead—roll, bread, bake, and drench in gravy. Then sit back and watch them disappear faster than pumpkin pie at Thanksgiving.
Save This Recipe For Later!

No-Bake Pumpkin Spice Energy Bites
Hey, Pumpkin! Your Busy Season Snack Hero Has Arrived 🎃
Can you feel it? That crisp snap in the air, the way sunlight turns liquid gold through changing leaves, and the sudden urge to wear chunky sweaters like a uniform? Fall isn’t just a season—it’s a full-body hug. But between school runs, work deadlines, and that overflowing PSL craving, finding time to make something wholesome feels harder than finding matching socks on Monday morning. That’s exactly why I’m sliding these No-Bake Pumpkin Spice Energy Bites into your life like your favorite cozy blanket. Imagine: all the warm, spiced magic of autumn, packed into bite-sized orbs of joy that come together faster than you can say “leaf pile!” No oven wars, no fancy equipment—just you, a bowl, and 10 minutes between life’s beautiful chaos. These little fellas live in my fridge year-round (shhh, don’t tell summer), but when September hits? They become SNACK ROYALTY. Perfect for lunchboxes, post-yoga fuel, or sneaking at 3 p.m. when your energy’s tanking harder than your phone battery. Let’s make your kitchen smell like a cinnamon-kissed dream!
Why Pumpkin Bites Feel Like Coming Home
Picture this: It’s 2017, my tiny Brooklyn apartment kitchen barely fits two people, but I’m determined to host Friendsgiving for 12. The turkey’s hogging the oven, my pie crust cracks like a dry riverbed, and panic starts bubbling like forgotten gravy. Then my roommate Sofia—bless her snack-genius soul—drops a bowl of sticky orange goo on the counter. “Olivia, breathe. Roll these.” We stood there, covered in oats and laughter, rolling these pumpkin bites while Fleetwood Mac played. The turkey was late, the pies were… rustic, but those bites? GONE before dinner. Friends crammed them into coat pockets “for the subway ride home.” That’s when it hit me: food magic isn’t about perfection. It’s about the messy, joyful moments that taste like belonging. Every time I make these now, I’m right back in that crumb-covered kitchen, laughing with my people. ✨
Your Fall Flavor Toolkit 🧺
Grab these pantry pals (no unicorn ingredients here!):
- 1 cup old-fashioned oats – The hearty MVP! They soak up moisture and add chew. Chef’s tip: Gluten-free? Swap in certified GF oats!
- ½ cup almond butter (or peanut butter) – The glue holding it all together! Almond butter keeps it mellow, but PB brings nostalgia. Struggle with runny nut butter? Pop it in the fridge 10 mins first.
- ⅓ cup pumpkin puree – NOT pie filling! Puree adds moisture and that iconic fall flavor. Extra can? Freeze in ice cube trays for future bites!
- ¼ cup honey or maple syrup – Sweetness with personality! Maple syrup = vegan vibes, honey = floral notes. Too sticky? Lightly oil your measuring cup.
- ½ tsp vanilla extract – The flavor booster! Makes spices sing. Bourbon vanilla? Yes, chef.
- 1 tsp pumpkin pie spice – Fall in a jar! No store-bought? Mix ½ tsp cinnamon + ¼ tsp ginger + pinch nutmeg & cloves.
- Pinch of salt – Balances sweetness like a dream. Flaky sea salt on top? *chef’s kiss*
- Optional mix-ins: Mini chocolate chips (melty joy!), chopped pecans (crunch!), flax seeds (omega-3 boost!), or dried cranberries (tangy!).
Let’s Roll! (Literally) 👩🍳
Step 1: Dump everything except mix-ins into a medium bowl. Channel your inner kid making mud pies—no fancy tools needed! A silicone spatula is your bestie here. Why no mix-ins yet? We want even spice distribution before the party crashers arrive.
Step 2: Stir until it looks like autumn confetti! 1-2 minutes max. If it feels too wet (hello, humid kitchen!), add 1 tbsp extra oats. Too dry? A tsp of almond milk or extra pumpkin. Hack: Use slightly damp hands to prevent sticking!
Step 3: Fold in your mix-ins. Chocolate chips? Yes. Toasted coconut? Absolutely. Crushed pretzels? Rebel energy—I love it.
Step 4: CHILL TIME! Pop the bowl in the fridge for 10-15 mins. This is non-negotiable, friends! Cold = firm = no crumbly disaster. Use this time to dance to “Sweater Weather” or check TikTok.
Step 5: Scoop & roll! Use a tablespoon or mini cookie scoop for even bites. Roll between palms into 1-inch balls. Sticky? Lightly oil your hands or wear disposable gloves. Pro move: Roll half in cinnamon sugar for sparkly sweetness!
Step 6: Store in an airtight container in the fridge (1 week) or freezer (3 months). They defrost in 5 mins—perfect for hangry emergencies!
The Psychology of Snackable Comfort Food
Why do we crave bite-sized treats when the weather turns? Science says it’s more than nostalgia—it’s biology! Cooler temps trigger our desire for calorie-dense, carb-rich foods (thanks, hibernation instincts). But these pumpkin bites hit the sweet spot between indulgence and nourishment:
-
Texture Therapy: The chew of oats + creaminess of nut butter satisfies our primal need for varied mouthfeel. Research shows combining textures makes food more pleasurable!
-
Spice Memory: Cinnamon and nutmeg contain compounds that activate warm, fuzzy memories. Your brain literally associates them with safety and celebration.
-
Portion Control: Single-serving bites trick us into feeling indulgent while avoiding portion overwhelm. Pro tip: Freeze half the batch to prevent “just one more” syndrome!
Fun fact: Rolling the bites by hand adds a tactile ritual that reduces stress. It’s like adult Play-Doh with benefits!
Pumpkin’s Secret Superpowers (Beyond Latte Status)
Move over, PSL—pumpkin puree is a nutritional powerhouse hiding in plain sight! Here’s why these bites are stealthily wholesome:
1. Vision Booster: One serving packs 200% of your daily vitamin A (thanks, beta-carotene!), crucial for eye health and immunity.
2. Happy Gut: The fiber in oats and pumpkin acts as a prebiotic, feeding good gut bacteria. Translation: better digestion + brighter mood!
3. Stable Energy: Almond butter’s healthy fats + oats’ complex carbs prevent sugar crashes. Perfect for that 3 p.m. slump!
4. Stress Support: Pumpkin seeds (try adding 1 tbsp to the mix!) are rich in magnesium—nature’s chill pill.
Recipe Hack: For an extra nutrient punch, add:
-
1 tbsp chia seeds (omega-3s)
-
1 tsp maca powder (adaptogen energy)
-
½ tsp turmeric (anti-inflammatory) + black pepper to activate it
From My Kitchen to Yours: Real-Life Success Stories
These bites have become a community favorite—here’s how readers reinvented them:
1. The Soccer Mom Savior: “I keep a tub in my minivan for post-game hangry meltdowns. My secret? Adding crushed pretzels for salty-sweet chaos!” — Jenna, Ohio
2. The Dorm Room Delight: *”No fridge? No problem! I use sunflower seed butter + shelf-stable oat milk powder. They last 3 days in my desk drawer.”* — Marcus, college freshman
3. The Fancy-Pants Upgrade: “I roll them in edible gold dust for book club. Suddenly, we’re ‘gourmet’!” — Priya, NYC
4. The Pet Connection: “My dog goes nuts for these! I make a pup-safe version with unsweetened pumpkin, oat flour, and peanut butter (no xylitol!).” — Dave & Buddy, Colorado
Snack Smarter, Not Harder 🍂
These bites are the ultimate grab-and-go heroes! Pile them in a rustic wooden bowl for parties (watch them vanish!). Pack 2-3 in reusable stasher bags for lunchboxes—kids ADORE them. Craving dessert? Arrange 3 bites on a saucer with a dollop of whipped cream and a sprinkle of cinnamon. Coffee date? Serve alongside espresso—sweet without the crash! For gifting? Layer in a mason jar tied with twine. Instant autumn joy!
Mix It Up, Buttercup! 🔄
Don’t let limits cramp your style:
- Protein Power: Add 2 tbsp vanilla protein powder (reduce oats by 1 tbsp to balance dryness).
- Tropical Escape: Swap pumpkin spice for 1 tsp cinnamon + 2 tbsp diced dried mango + coconut flakes.
- Chocoholic’s Dream: Use chocolate protein powder + mini chocolate chips + 1 tbsp cocoa powder.
- Nut-Free Bliss: Substitute almond butter with sunflower seed butter + omit nuts.
- Gingerbread Twist: Replace pumpkin spice with 1 tsp ginger + ½ tsp cinnamon + 2 tbsp molasses instead of honey.
Confessions from My Flour-Dusted Heart ❤️
Okay, real talk: my first batch looked like sad orange pebbles because I skipped the chill step. Learn from my mistakes! These bites evolved from a Pinterest fail into my most-requested recipe. My neighbor’s toddler calls them “pumpkin poppers” and demands them after preschool. I’ve made them with frozen butternut squash puree during a pumpkin shortage (worked like a charm!). The beauty? They’re resilient. Forget the salt? They’ll live. Accidentally double the spice? Call it “bold flavor” and lean in. Food isn’t about rigid rules—it’s about making your taste buds happy. Now go get sticky!
Your Questions, My Answers! 🗣️
Q: Why are my bites crumbly and falling apart?
A: Three culprits: 1) Didn’t chill the dough (cold = binding power), 2) Used thick, dry nut butter (add 1 tsp maple syrup), or 3) Measured oats wrong (packed cups = dense bites!). Fix: Stir in ½ tbsp almond milk until it holds together when squeezed.
Q: Can I use quick oats instead of old-fashioned?
A: Yes, but texture changes! Quick oats absorb more liquid, making denser bites. Use ¾ cup quick oats + 2 tbsp extra pumpkin or nut butter.
Q: How do I make these vegan?
A: Easy! Use maple syrup (not honey) and ensure chocolate chips are dairy-free. Nut butter is naturally vegan—just check labels for sneaky additives.
Q: My bites taste bland. Help!
A: Pumpkin puree is mild! Amplify flavor by: toasting oats first, adding ¼ tsp extra spice, using roasted nut butter, or rolling in cinnamon sugar post-chill.
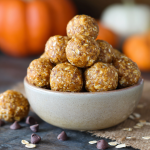
No-Bake Pumpkin Spice Energy Bites
- Total Time: 54 minute
Description
When fall hits full swing, these chewy, spiced bites are your go-to for snack time magic. Quick to make, freezer-friendly, and packed with warm pumpkin flavor, they’re perfect for lunchboxes, pre-yoga boosts, or late-night fridge visits. Simple, wholesome, and seriously addictive—these are autumn in edible form.
Ingredients
-
1 cup old-fashioned oats
-
½ cup almond or peanut butter
-
⅓ cup pumpkin puree (not pie filling)
-
¼ cup honey or maple syrup
-
½ tsp vanilla extract
-
1 tsp pumpkin pie spice
-
Pinch of salt
Optional Add-ins:
Mini chocolate chips, chopped pecans, flaxseed, dried cranberries
Instructions
-
Mix all base ingredients in a bowl until fully combined.
-
Adjust texture: Too dry? Add 1 tsp almond milk. Too wet? Add more oats.
-
Fold in any mix-ins.
-
Chill for 10–15 minutes to firm up.
-
Roll into 1-inch balls (use damp or oiled hands).
-
Store in fridge (1 week) or freezer (3 months).
Notes
-
Chill before rolling = no crumbly mess
-
Roll in cinnamon sugar for extra sparkle
-
Great for gifting in jars or packing for on-the-go fuel
- Prep Time: 10 mins + chill
Nutrition
- Calories: 90 cal per Bite
- Sugar: 5g
- Fat: 4g
- Carbohydrates: 12g
- Fiber: 2g
- Protein: 2g
Bite-Sized Goodness, Big Nutrition 🥄
(Per bite, based on 14 bites with almond butter & no add-ins)
Calories: 90 | Fat: 4g | Carbs: 12g | Fiber: 2g | Sugar: 5g | Protein: 2g
Note: Adding chocolate chips increases sugar; flax boosts fiber!
Final Thoughts: More Than a Snack
These pumpkin bites started as a kitchen shortcut but became something bigger. They’re the recipe I text to new neighbors with a “welcome to the block!” note. The treat my kid’s teacher requests for parent-teacher conferences. The thing my friend’s chemo nurse whispered, “Can I get the recipe?” after noticing how they eased nausea.
Food isn’t just fuel—it’s connection disguised as crumbs on a plate. So when you’re rolling these between conference calls or with sticky-fingered helpers, remember: you’re not just making snacks. You’re creating little edible hugs for the people you love (including yourself!).

Crispy Baked Apple Chips
Fall’s Favorite Crispy Companion Is Here!
Hey there, kitchen friend! Olivia here, waving from my flour-dusted countertop where the scent of cinnamon and caramelizing apples is practically hugging the room. There’s something magical about fall, isn’t there? That first crisp morning when you pull out your favorite chunky sweater, the way sunlight turns maple leaves into stained glass, and the joyful chaos of apple orchards bursting with fruit just begging to be transformed. And today? We’re turning humble apples into glittering, crispy jewels with just two ingredients. Yes, really! These baked apple chips taste like autumn bottled up—sweet, subtly spiced, and shatteringly crisp. They’re the snack that’ll make your lunchbox feel like a love note, turn cheese boards into showstoppers, and fill your kitchen with that “something wonderful is happening” aroma. No fancy dehydrator or chef skills needed—just your oven, a dash of patience (they’re low-effort, I promise!), and that glorious feeling of creating something extraordinary from the simplest ingredients. Ready to make magic?
Orchard Memories & Lunchbox Legends
Picture this: Upstate New York, circa 2005. My tiny niece, Lily, is “helping” me pick Honeycrisps at our family’s favorite orchard. She’s wearing rain boots two sizes too big, determined to carry a basket overflowing with apples that nearly topples her. Later, at Grandma’s farmhouse table, we’d slice apples paper-thin on her ancient wooden mandoline, giggling as cinnamon sugar dusted our noses like freckles. The oven became a warm beacon for hours while we played cards, the scent wrapping around us like a cozy scarf. When those chips emerged—golden and crisp—we’d pile them into Mason jars tied with twine. Lily tucked hers into her kindergarten lunchbox like buried treasure, and every year since, she texts me when apple season starts: “Aunt Liv, chip time?” That’s the power of this recipe. It’s not just a snack; it’s a memory catalyst. Every crunchy bite? Pure, sticky-fingered joy.
Your Tiny (But Mighty!) Ingredient Squad
Here’s the beautiful part: You only need two players to create this symphony of crunch. But let’s unpack them like the kitchen nerds we are!
- 2 Large, Firm Apples (Honeycrisp or Fuji work great!) – Why firm? Juicy apples like Red Delicious steam instead of crisping. Honeycrisp brings honeyed sweetness; Fuji stays perky and tart. Chef’s Hack: No “perfect” apples? Use Gala or Pink Lady! Just avoid mealy textures.
- 1 Teaspoon Cinnamon Sugar – That’s ¾ tsp granulated sugar + ¼ tsp cinnamon mixed! Why mix it yourself? Fresh blending avoids clumps! Dietary Twist: Swap sugar for coconut sugar (earthy notes!) or monk fruit sweetener. Not a cinnamon fan? Cardamom or pumpkin spice makes it feel like a fall festival!
Wait, why no oil or lemon juice? Trust me! Skipping oil lets them truly crisp up. Lemon juice? It can make them leathery. We’re going pure and simple!
Let’s Bake Some Crispy Magic: Step-by-Step
Don’t let the low-and-slow bake time fool you—this is hands-off zen baking! Here’s how to nail it:
- Preheat & Prep (225°F is the sweet spot!) – Crank that oven to 225°F (110°C). Line TWO baking sheets with parchment paper. Why two? Crowding = soggy chips! Hot Tip: If your oven runs hot, drop to 215°F. Low heat dehydrates gently!
- Core & Conquer the Slices (⅛ inch or bust!) – Core apples (a melon baller works wonders!) or leave cores for a rustic look. Now, slice THIN. Aim for 1/8-inch thickness—use a mandoline if you have one (watch those fingers!). Chef’s Secret: Uneven slices? Bake similar sizes together so they finish at the same time.
- Arrange & Dust (Single layers are non-negotiable!) – Lay slices flat—no overlapping! They shouldn’t touch. Sprinkle that cinnamon sugar like fairy dust. Pro Move: Flip half the slices sugared-side down before baking. Double the spice coverage!
- Bake, Flip, & Wait (Embrace the slow crisp!) – Bake 1 hour. Pull sheets out—slices will feel leathery. FLIP each slice (tongs help!). Bake another 60-75 mins. Watch Closely: Edges should curl and turn golden. Thicker slices? They might need 15 extra mins.
- The Cool Down (Patience = CRUNCH!) – Turn off the oven. Crack the door open. Let chips cool INSIDE for 30 mins. Why? Sudden temperature changes make them chewy. They’ll crisp up dramatically as they cool!
The Science Behind the Crisp: Why This Method Works
Let’s geek out for a moment about why this low-and-slow baking method transforms floppy apple slices into shatteringly crisp chips. It’s all about moisture evaporation and the Maillard reaction—but don’t worry, I’ll explain it like we’re chatting over coffee!
The Dehydration Dance:
At 225°F (107°C), your oven becomes a dehydrator. Unlike high-heat baking, which can caramelize sugars too quickly, this gentle temperature allows water to evaporate gradually from the apple cells. Here’s the key: Apples are about 85% water. By baking them for 2+ hours, we’re removing almost all that moisture without burning the natural sugars. The result? A chip that’s light as a leaf but packed with concentrated apple flavor.
Why No Oil?
You might notice most store-bought apple chips list oil as an ingredient. While oil helps conduct heat, it also creates a “fried” texture and can make chips feel greasy. By skipping it, we achieve pure, unadulterated crispness—like nature’s version of a rice paper roll. Bonus: Oil-free means these stay crunchier longer in storage!
The Flip Factor:
That mid-bake flip isn’t just busywork. Apples curl as they dry, creating little moisture pockets underneath. Flipping ensures even dehydration. Pro tip: If you’re using a mandoline, slice one side slightly thicker (about 1/10-inch) to prevent over-curling.
Cinnamon’s Secret Role:
Beyond flavor, cinnamon is hygroscopic—meaning it attracts water molecules. This helps pull moisture from the apple’s surface, speeding up crisping. For extra science points: Try one batch with cinnamon and one without. The cinnamon-dusted chips will crisp up about 15 minutes faster!
Fun Experiment:
Slice an apple vertically (stem to base) and another horizontally (into rings). The vertical slices will dry more evenly due to consistent cell structure, while rings may curl dramatically—perfect for creating “apple chip roses” for garnishes!
Beyond Snacking: 5 Unexpected Uses for Apple Chips
These crispy wonders aren’t just for munching! Here’s how to make them the MVP of your kitchen:
1. Soup Garnish Supreme:
Crumble apple chips over butternut squash or carrot soup instead of croutons. The sweet crunch cuts through creamy textures beautifully. Try it with a drizzle of browned butter for a restaurant-worthy touch.
2. Cheese Board Game-Changer:
Pair chips with aged cheddar, blue cheese, or baked brie. The crispness cleanses the palate between rich bites. For holidays, arrange them like fallen leaves around a wheel of Camembert.
3. Cocktail (or Mocktail) Magic:
Use as a swizzle stick for autumn drinks! They add subtle apple flavor to hot toddies or cider. For kids, float chips on top of sparkling apple juice—it’s like edible confetti.
4. Salad Texture Boost:
Substitute crumbled apple chips for nuts in salads. They’re phenomenal with bitter greens (endive, radicchio), goat cheese, and a maple vinaigrette. The contrast of crunchy-sweet with tangy dressing? Chef’s kiss.
5. DIY Potpourri:
Simmer apple chips with cinnamon sticks and orange peels in a pot of water for a natural, edible air freshener. Afterward, the softened chips make a delicious compote for oatmeal!
Storage Hack: Keep a jar in your car for traffic jam snacks—they won’t melt like chocolate or get stale like crackers.
Global Apple Chip Inspirations: A World Tour
Apples are universal, so let’s take these chips on a flavor voyage:
1. French Tarte Tatin Style:
After baking, brush chips with warm apricot jam and sprinkle with crushed hazelnuts. Stack them like fallen petals for an elegant dessert garnish.
2. Japanese Umami Twist:
Replace cinnamon with matcha salt (1/2 tsp matcha + 1 tsp flaky salt). The earthy notes highlight the apple’s sweetness in a surprising way.
3. Mexican Chili-Lime:
Toss warm chips with tajín seasoning and a spritz of lime. Serve alongside mango slices for a sweet-spicy duo.
4. Swedish Fika Moment:
Layer chips with cloudberry jam and quark cheese for a Nordic-inspired parfait.
5. Indian Chaat-Inspired:
Sprinkle with chaat masala and minced cilantro. Perfect with yogurt dips!
Cultural Note: In Korea, similar dried fruit slices are called “gwa-il” and often served with tea. In Switzerland, they’re traditional in muesli. Your kitchen, your rules—mix traditions freely!
Serving Up Autumn Joy
Once cooled, these glistening gems are ready for their spotlight! Pile them high in a wooden bowl for a cozy movie night. Thread them onto skewers with cheese cubes and grapes for a stunning party appetizer. Or my favorite: layer them in mason jars with wax paper between tiers—tie with twine for gifting! They’re divine alongside sharp cheddar, crumbled blue cheese, or dunked in vanilla yogurt. Packed in lunchboxes? They stay crisp for days (if they last that long!).
Shake It Up! 5 Flavorful Twists
Once you master the basic, play with these fun spins:
- Maple Smokehouse: Replace sugar with ½ tsp maple syrup brushed on slices + a pinch of smoked paprika.
- Savory Rosemary: Skip sugar. Toss slices with ½ tsp olive oil, 1 tsp minced rosemary, and sea salt.
- Tropical Twist: Use coconut sugar + ¼ tsp ginger + lime zest. Perfect with Granny Smith apples!
- Berry Dusted: Pulverize freeze-dried raspberries into powder. Mix with cinnamon instead of sugar.
- Pumpkin Pie Spice: Swap cinnamon for pumpkin spice blend. Serve with whipped cream for dipping!
Olivia’s Notebook Scribbles
Confession: My first batch? I rushed the cooling step. They were chewy little discs that stuck to our teeth! Lesson learned: Letting them chill in the turned-off oven is non-negotiable. Over the years, I’ve tested every apple under the sun—avoid overly tart varieties like Braeburn unless you balance them with extra sugar. Storage? Easy! Keep them in airtight containers (never plastic bags—trapped moisture kills crunch!) for 2 weeks. If they soften? Pop ’em back in a 225°F oven for 10 minutes. Funny story: My husband once mistook a batch for potato chips during game night. His shocked “These are APPLES?!” was the best compliment.
Your Apple Chip Queries, Solved!
Q: Why aren’t my chips crispy? They’re chewy!
A: Three culprits! 1) Slices were too thick. 2) They overlapped on the tray. 3) You skipped the cool-down in the oven. Fix: Always slice ⅛-inch, use two trays, and let them rest in the off oven!
Q: Can I make these faster? 2 hours is long!
A: Try an air fryer! Arrange slices in a single layer at 300°F. Cook 15-20 mins, flipping halfway. Watch CLOSELY—they burn fast! Oven baking is more hands-off though.
Q: Do I really need to core the apples?
A: Nope! Leaving cores creates charming star shapes. Just warn guests about seeds. Kids love the whimsy!
Q: Can I use store-bought cinnamon sugar?
A: Absolutely! But check ingredients—some brands add starch or silica, which can affect texture. Homemade blends fresher.
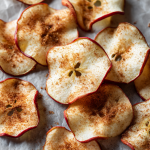
Crispy Baked Apple Chips
- Total Time: 4 minute
Description
The Two-Ingredient Snack That Tastes Like a Hug from Autumn
When apples meet cinnamon sugar and a slow, loving bake, the result is pure fall magic—crunchy, spiced, and sweet with no guilt, just joy. These golden apple chips are perfect for snacking, gifting, and filling your kitchen with cozy orchard aromas. You don’t need fancy tools—just time, love, and thinly sliced apples
Ingredients
-
2 large firm apples (Honeycrisp, Fuji, or Pink Lady)
-
1 tsp cinnamon sugar (¾ tsp sugar + ¼ tsp cinnamon)
Instructions
-
Preheat oven to 225°F (110°C). Line 2 baking sheets with parchment.
-
Slice apples thin (⅛ inch). Core or leave whole for rustic look.
-
Arrange slices in a single layer. Sprinkle with cinnamon sugar.
-
Bake 1 hour, flip slices, then bake another 60–75 mins.
-
Turn off oven, crack door, and let cool inside for 30 mins. Chips will crisp as they cool!
Notes
-
Thinner = crisper. Use a mandoline if you can.
-
No overlap on the pan—airflow is key!
-
Cool in oven = crunch guaranteed.
-
Store in airtight container for 2 weeks. Re-crisp at 225°F if needed.
- Prep Time: 10 mins
- Cook Time: 2–2½ hrs
Nutrition
- Calories: 50 cal per 15 Chips
- Sugar: 10g
- Fat: 0g
- Carbohydrates: 14g
- Fiber: 2g
Light as a Crisp Autumn Leaf
Per Serving (Approx 15 chips): Calories: 50 | Fat: 0g | Carbs: 14g | Fiber: 2g | Sugar: 10g | Protein: 0g. Naturally gluten-free, vegan, and paleo-friendly! A guilt-free crunch.
Final Thoughts: Crunch Time Wisdom
As I pack up another batch of these golden crisps (half of which mysteriously vanish before the jar is sealed), I’m reminded that the best recipes aren’t about perfection. They’re about the flour-dusted moments of discovery—like realizing those “failed” thicker slices make incredible apple-infused tea when steeped in hot water.
These chips embody autumn’s paradox: They’re ephemeral (let’s be real, they’ll disappear fast) yet timeless. Whether you’re recreating childhood orchard memories or starting new traditions, their magic lies in their simplicity. So slice unevenly, burn a batch or two, and laugh when your chips curl into whimsical shapes. As the poet Mary Oliver might say: “Tell me, what is it you plan to do with your one wild and precious apple?”
Now go forth and crispify! And when you pull that first perfect chip from the oven, take a beat to savor the sound—that delicate snap is the taste of autumn itself.

Pumpkin Cheddar Crackers
Why These Pumpkin Cheddar Crackers Will Become Your New Fall Obsession
Hey there, kitchen friend! Can you smell it? That crisp autumn air swirling with woodsmoke and caramelized sugar? That’s my absolute favorite signal to dive into cozy baking projects – like these utterly irresistible Pumpkin Cheddar Crackers! 🎃🧀 Imagine: crunchy, golden bites bursting with sharp cheddar, real pumpkin warmth, and whispers of smoky paprika. These started as a “rainy-day experiment” when my pantry felt bare, but one bite had my family hovering around the oven begging for more. Now they’re our go-to for everything – packed into lunchboxes, scattered on charcuterie boards, or devoured during spooky movie marathons with hot cider. The magic? They’re shockingly simple (no fancy pastry skills needed!), use pantry staples, and taste like autumn hugged a cheese wheel. Whether you’re a seasoned baker or just own a rolling pin, these crackers promise crunch, coziness, and that glorious feeling of “I MADE THIS!” Let’s get our aprons messy!
The Rainy Day That Sparked a Crackery Revolution
Picture this: Last October, rain lashed against my kitchen windows while my kids groaned, “There’s nothing to eeeat!” (Spoiler: The pantry was full). I craved something savory, seasonal, and fast. Spotting leftover pumpkin puree and a lonely block of cheddar, I channeled my grandma’s “waste-not” spirit. She’d turn scraps into magic – like her infamous “everything-but-the-kitchen-sink” cheese straws. As I pulsed dough in the food processor, my skeptical kiddos poked their heads in. “Cheese crackers? With PUMPKIN? Weird, Mom.” But the moment those golden squares emerged, glittering with spice? Silence. Then crunching. Then, “Can we make these for my class party?” Now, baking these together as leaves fall is our ritual. That “weird” experiment? It became our edible autumn hug. 💛
Gather Your Cozy-Makers: Ingredients & Why They Rock
Every ingredient here plays a delicious role! Here’s your shopping list with chef secrets:
- 1 cup all-purpose flour – The trusty base! For extra tenderness, swap ¼ cup with whole wheat pastry flour.
- ¾ cup sharp cheddar cheese (finely shredded!) – Non-negotiable: Hand-shred it! Pre-shredded cheese has anti-caking agents that dull flavor and texture. Aged white cheddar works beautifully too.
- ¼ cup pumpkin puree – Use pure pumpkin, NOT pie filling. Squeeze excess liquid in a paper towel for extra crispness!
- 2 Tbsp unsalted butter (cold, cubed) – Cold = flaky layers. Vegan? Use frozen coconut oil.
- ½ tsp salt – Balances the cheese. Flaky sea salt on top before baking? Chef’s kiss.
- ¼ tsp garlic powder – Adds umami depth without raw bite.
- ¼ tsp smoked paprika – The “secret cozy”! Gives warmth, not heat. Regular paprika works in a pinch.
- 1–2 Tbsp cold water – Add slowly! Too much water = tough crackers.
Pro Insight: Measure flour by spooning into the cup and leveling. Packed flour = hockey pucks!
Let’s Make Magic: Step-by-Step with Chef’s Secrets
Ready for crispy, cheesy bliss? Follow these steps (and my sneaky hacks!):
- Preheat & Prep: Crank that oven to 350°F (175°C). Line your baking sheet with parchment paper – no sticking, easy cleanup! (Why? Bare sheets can cause uneven browning.)
- Pulse the Dry Crew: In your food processor (or a large bowl), combine flour, shredded cheddar, cold cubed butter, salt, garlic powder, and smoked paprika. Pulse 8-10 times (or cut butter in with a pastry cutter) until it looks like sandy pebbles. Hack Alert: Freeze your butter for 10 mins first for extra flakiness!
- Bring in the Pumpkin: Add pumpkin puree and 1 Tbsp cold water. Pulse/mix just until dough starts clumping. Squeeze a bit – if it holds together, STOP. If crumbly, add ½ Tbsp water. Overmixing = tough crackers!
- Roll & Reveal: Dump dough onto lightly floured parchment. Roll to ⅛ inch thick – seriously, THIN is key for crunch! Use guide sticks (chopsticks!) if needed. Cut into 1-inch squares or use fun fall cookie cutters (re-roll scraps once). Pro Move: Chill dough 15 mins before rolling if your kitchen is warm.
- Bake to Golden Glory: Arrange crackers on the sheet (they don’t spread much). Bake 12-15 minutes until edges are deeply golden and centers look dry. Rotate the tray halfway! Cool COMPLETELY on the sheet – they crisp up as they relax. Patience, grasshopper!
Watchpoint: Ovens vary! Start checking at 10 mins. Deep gold = maximum flavor.
The Science Behind the Perfect Crunch
What makes these crackers so irresistibly crisp? It’s all about chemistry! Here’s why this recipe works:
1. The Flour-Fat Ratio
The balance of flour to fat (butter + cheese) is critical. Too much flour = dry cardboard; too little = greasy puddles. This recipe uses just enough butter to coat the flour proteins, preventing excessive gluten formation (which would make the crackers tough). The cheddar’s natural oils add extra richness without overwhelming the structure.
2. Pumpkin’s Hidden Superpower
Pumpkin puree isn’t just for flavor—it’s a natural tenderizer! The pectin in pumpkin creates a delicate crumb, while its moisture (controlled by squeezing out excess) helps bind the dough without overworking it. Unlike water, pumpkin caramelizes slightly in the oven, adding depth to the crunch.
3. The Thinness Principle
Rolling to ⅛ inch isn’t a suggestion—it’s physics! Thin dough exposes more surface area to oven heat, ensuring rapid moisture evaporation. Thicker crackers steam instead of crisp, ending up more like sad mini-scones. Pro tip: If your crackers puff up, dock them with a fork before baking to release steam.
4. Cheese Chemistry
Sharp cheddar’s low moisture content is key. Mild cheddar has more water, which can make crackers soggy. Aged cheese also contains tyrosine crystals (those crunchy bits in good Parmigiano!), which amplify the satisfying snap.
5. The Cool-Down Factor
Letting crackers cool on the sheet isn’t just patience—it’s science! As they cool, residual heat drives off lingering moisture, while the starches set into a rigid, crunchy matrix. Moving them too soon traps steam, leading to limp results.
Fun Experiment: Try baking one batch at 325°F (slow and steady) and another at 375°F (fast and furious). The slower bake yields even browning and deeper flavor, while the hotter one creates more blistering and a lighter crunch. Which do you prefer?
From Pantry to Party: 10 Unexpected Ways to Use These Crackers
Beyond snacking, these crackers are versatile kitchen MVPs! Here’s how to repurpose them:
1. Savory Bread Pudding
Crush 2 cups of crackers into a buttered baking dish. Whisk 3 eggs, 1.5 cups milk, ½ tsp mustard, and a pinch of nutmeg. Pour over crackers, top with caramelized onions and Gruyère, bake at 375°F for 30 mins. Comfort food upgraded!
2. “Cheater’s” Pumpkin Fondue
Melt 1 cup Brie (rind removed) with ¼ cup cream and 1 Tbsp pumpkin puree. Dunk crackers directly into the pot—no forks needed.
3. Stuffing Upgrade
Substitute 1/3 of the bread in your favorite stuffing recipe with crushed crackers. Their cheese flavor infuses the whole dish!
4. Salad Croutons
Toss whole crackers with olive oil and roast at 300°F for 10 mins. They’ll harden into spiced croutons perfect for kale salads with maple dressing.
5. Cheese Ball Crust
Roll a goat cheese ball in finely crushed crackers mixed with chopped pecans. Serve with honey for dipping.
6. Breakfast Strata
Layer crackers with cooked sausage, spinach, and cheddar in a casserole dish. Pour over an egg-milk mixture (like French toast custard) and bake.
7. Ice Cream Topper
Crumble over vanilla ice cream with a drizzle of bourbon caramel. Sweet-salty heaven!
8. Soup Garnish
Float whole crackers on butternut squash soup instead of croutons—they’ll soak up flavor while staying crunchy at the edges.
9. Charcuterie “Glue”
Spread crackers with mascarpone, then layer with prosciutto and arugula for instant hors d’oeuvres.
10. DIY Cheese Crackers
Pulse stale crackers in a food processor with nutritional yeast and olive oil for a quick “Parmesan” sprinkle.
The Emotional Alchemy of Baking: Why This Recipe Feels Like a Hug
These crackers aren’t just food—they’re nostalgia makers. Here’s why:
1. The Ritual of Repetition
Like folding origami or knitting, the rhythmic process of rolling and cutting dough is meditative. The scent of paprika and pumpkin triggers memories of autumns past, creating a sense of continuity. One reader told me she bakes these annually on the first chilly day while playing her late mother’s favorite jazz records.
2. The Power of “I Made That!”
In a world of takeout and pre-packaged snacks, handmade crackers feel like a small rebellion. A 7-year-old named Liam wrote to me: “I cut mine into dinosaurs. Mom said they’re ugly but I ate them all anyway.” Ugly or not, pride tastes delicious.
3. Shared Vulnerability
Baking for others is an act of trust. My neighbor, a retired firefighter, once admitted he was nervous to bring these to his poker group (“Guys don’t do pumpkin!”). They devoured them and now demand a monthly supply.
4. The Imperfection Bonus
Misshapen crackers have charm! A food blogger with arthritis shared how her uneven cuts became her “signature style,” reminding followers that flavor matters more than perfection.
5. The Generosity Loop
These crackers beg to be shared. A teacher in Minnesota told me her students now trade them like Pokémon cards during lunch. One parent even started a “cracker swap” at school for families to exchange homemade versions.
Serving Up the Cozy: How to Enjoy Your Masterpiece
These crackers are social butterflies! For movie night, pile them high in a rustic bowl with spiced pepitas. Building a fall grazing board? Pair them with sliced apples, fig jam, prosciutto, and honey-drizzled goat cheese. Packing lunchboxes? Toss them in a container with grapes and turkey slices. They’re also incredible crumbled over butternut squash soup! Serve at room temperature – their flavor and crunch shine brightest then. ✨
Shake It Up: 5 Delicious Twists
Play with your food! Try these riffs:
- Everything Spice: Brush crackers with egg wash before baking; sprinkle with everything bagel seasoning.
- Rosemary & Honey: Add 1 tsp finely chopped fresh rosemary to the dough. Drizzle baked crackers lightly with honey.
- Gluten-Free: Swap AP flour for a 1:1 GF blend (like Bob’s Red Mill). Add ½ tsp xanthan gum if the blend doesn’t include it.
- Spicy Kick: Add ¼ tsp cayenne pepper or chipotle powder with the spices.
- Vegan Version: Use vegan cheddar shreds, frozen coconut oil (not melted!), and ensure pumpkin is plain.
Olivia’s Extra Sprinkle of Thoughts
These crackers have come a long way from that rainy day! Batch #3 involved my attempt at “pumpkin pie spice” flavor… let’s just say cinnamon and cheese had a heated argument. 😅 Stick to savory spices! Over time, I learned the thinner the roll, the better the snap – my kids now compete for who gets the “see-through” crackers. They also freeze beautifully! Layer cooled crackers between parchment in an airtight container; freeze up to 2 months. Thaw at room temp. P.S. If your dough feels sticky after adding pumpkin, don’t panic! Just flour your surface and rolling pin well. Embrace the imperfections – rustic is charming!
Your Crackery Questions, Answered!
Q: My crackers are soft, not crunchy! What happened?
A: Three likely culprits: 1) Dough rolled too thick (aim for ⅛ inch!), 2) Underbaked (they should look DEEP golden, not pale), or 3) Skipped the cooling step (they crisp up as they cool on the sheet!). Next time, bake 1-2 mins longer and let them fully rest.
Q: Can I make these without a food processor?
A: Absolutely! Use a box grater on frozen butter into the flour/cheese mix. Cut it in with a pastry cutter or two forks until pebbly. Mix pumpkin/water in with a spatula, then knead gently by hand just until combined.
Q: Why is my dough so sticky/wet?
A> Pumpkin puree moisture varies! Always squeeze it in a paper towel first. If dough feels wet, add 1-2 Tbsp extra flour when rolling. Work fast and keep surfaces floured.
Q: How long do they stay fresh?
A> Stored airtight at room temp, they’re crispiest for 3 days. If they soften slightly, pop them in a 300°F oven for 5 mins to re-crisp!
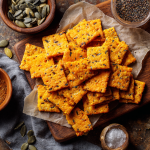
Pumpkin Cheddar Crackers
- Total Time: 30 minutes
Description
Born from pantry odds and pumpkin leftovers, these crackers became our family’s fall obsession. Sharp cheddar meets smooth pumpkin with a smoky paprika kick—all baked into golden, flaky bites. They’re cozy, cheesy, and surprisingly simple. Pack them, stack them, or just eat them by the handful. Welcome to your new favorite baking ritual!
Ingredients
-
1 cup all-purpose flour
-
¾ cup sharp cheddar (hand-shredded!)
-
¼ cup pumpkin puree (dab with paper towel to remove moisture)
-
2 Tbsp cold unsalted butter, cubed
-
½ tsp salt
-
¼ tsp garlic powder
-
¼ tsp smoked paprika
-
1–2 Tbsp cold water
Instructions
-
Preheat oven to 350°F (175°C). Line baking sheet with parchment.
-
Combine dry ingredients in a food processor or bowl: flour, cheese, butter, salt, garlic, paprika. Pulse or cut in butter until crumbly.
-
Add pumpkin + water, pulse until dough clumps. Don’t overmix!
-
Roll dough ⅛ inch thick on floured parchment. Cut into 1-inch squares or use cookie cutters.
-
Bake 12–15 mins until edges are golden. Cool completely to crisp up.
Notes
-
Thin dough = crunchy crackers!
-
Sprinkle flaky salt before baking for gourmet flair
-
Freeze extra crackers in layers with parchment—re-crisp in oven!
- Prep Time: 15 mins
- Cook Time: 15 mins
Nutrition
- Calories: 25 cal per Cracker
- Fat: 1.2g
- Carbohydrates: 2.5g
- Protein: 0.8g
Nutritional Nibbles (Approximate per cracker)
Calories: 25 | Fat: 1.2g | Carbs: 2.5g | Fiber: 0.1g | Protein: 0.8g | Sodium: 35mg
Note: Values are estimates. Actual nutrition depends on specific ingredients and cracker size.
Final Thoughts: More Than a Snack
What began as a pantry-cleanout experiment became a vessel for connection—between generations, between strangers swapping stories in recipe comments, and between ourselves and the seasons. These crackers carry the magic of transformation: humble ingredients turned golden, rainy-day boredom turned creativity, and skepticism turned delight. As you bake them, know that you’re not just making a snack. You’re crafting a tiny, crunchy piece of joy. Now go forth, roll thin, and let the world hear your crunch!

Cinnamon Sugar Pretzel Bites
Welcome to the Coziest Kitchen Tradition: Cinnamon Sugar Pretzel Bites!
Hey there, fellow flavor adventurer! Olivia here, apron dusted with flour and heart full of excitement because today? We’re making my most requested recipe: Cinnamon Sugar Pretzel Bites. Picture this: pillowy-soft dough nuggets, boiled to chewy perfection, baked until golden, then rolled in crackly cinnamon sugar while still warm. They’re like little clouds of joy that melt on your tongue, with that magical sweet-salty balance that makes you close your eyes and sigh. Serve ’em with a tangy cream cheese dip for dunking, and suddenly your Tuesday feels like a county fair night! 🎡
What I love most (besides eating them, obviously) is how they bring people together. These bites transform any gathering – whether it’s kids clamoring for an after-school treat, friends huddled around a football game, or just you and a rom-com on a rainy afternoon. They’re shockingly simple to make, even if you’ve never baked with yeast. No fancy skills required – just enthusiasm and a craving for something warm and sugary. So tie on your favorite apron (messy ones earn extra cred!), and let’s turn simple ingredients into pure, buttery magic.
The Game Day That Started It All
Let me take you back to a crisp October Sunday three years ago. My husband was hosting his fantasy football crew, and I wanted a snack that felt special but wouldn’t keep me chained to the kitchen. I’d been dreaming of soft pretzels but wanted bite-sized fun. Enter: these cinnamon sugar wonders. I remember the moment I pulled that first batch from the oven – the kitchen smelled like a carnival and fresh-baked bread had a love child. I tossed them in cinnamon sugar, arranged them haphazardly on our chipped platter, and carried them out… only to have six grown men go silent mid-game analysis. Within minutes, the plate was empty, and I had demands for “more of those crack bites, Liv!” Now? They’re a non-negotiable autumn ritual. Every time that cinnamon hits buttery dough, I’m back in that laughter-filled living room, reminding me that the best memories often start with melted butter and a shared plate.
Your Treasure Map to Pretzel Bliss
Pretzel Dough:
- 1½ cups warm water (110°F/43°C): Think baby-bottle warm! Too hot kills yeast; too cold won’t wake it up. Chef hack: Use a thermometer until you can gauge it by wrist-testing.
- 2¼ tsp instant yeast: The magic maker! Instant yeast skips proofing, but active dry works too (just mix it with the warm water/sugar first for 5 mins until foamy).
- 1 Tbsp brown sugar: Feeds the yeast + adds subtle caramel notes. Honey or maple syrup work in a pinch!
- 1 tsp salt: Balances the sweetness. Use fine sea salt for even distribution.
- 4 cups all-purpose flour: Spoon & level it! Packing flour = dense bites. For tenderness, swap 1 cup with bread flour.
- 2 Tbsp melted butter: Adds richness and that irresistible softness. Vegan? Coconut oil works beautifully.
Baking Soda Bath:
- 4 cups water + ¼ cup baking soda: This is the pretzel’s secret weapon! It creates that iconic chewy crust and golden color. Safety tip: Add soda to simmering water – it bubbles vigorously!
Cinnamon Sugar Coating:
- ½ cup granulated sugar: The sweet hug. For extra sparkle, use turbinado sugar.
- 1½ tsp cinnamon: Use Ceylon for floral notes or Saigon for spicy warmth. Freshness matters – sniff it!
- 4 Tbsp melted butter: The glue for our sugary jacket. Salted butter adds a lovely contrast.
Cream Cheese Dip (Optional but Highly Recommended):
- 4 oz cream cheese, softened: Full-fat for creaminess. For tang, try Greek yogurt cream cheese.
- 2 Tbsp powdered sugar: Dissolves smoothly. Adjust to your sweetness preference.
- 1 Tbsp milk: Whole milk or oat milk for richness. Add gradually for perfect dip consistency.
- ½ tsp vanilla: The flavor amplifier. Almond extract is fun too!
Let’s Get Rolling: Your Foolproof Pretzel Journey
Step 1: Wake Up Your Yeast
In a large bowl, combine warm water, yeast, and brown sugar. Give it a gentle stir and let it sit for 5 minutes. You’re looking for a slightly creamy, foamy surface – this means your yeast is alive and excited! Chef Tip: If nothing happens, your water might be too hot/cold or yeast is old. Start over!
Step 2: Build the Dough
Add salt, flour, and melted butter to the yeast mixture. Stir with a wooden spoon until shaggy, then turn onto a lightly floured surface. Knead for 5-7 minutes until smooth and elastic – it should feel like a soft earlobe! Chef Hack: No knead? Use a stand mixer with a dough hook on medium for 4 mins. Place dough in a greased bowl, cover with a damp towel, and let rise in a warm spot for 1 hour (it should double!).
Step 3: Shape Those Bites!
Punch down the risen dough (so satisfying!). Divide into 4 pieces. Roll each piece into a 1-inch thick rope. Cut ropes into ¾-inch chunks – no perfection needed! Pro Move: Keep pieces covered with a towel to prevent drying.
Step 4: The Magical Bath
Preheat oven to 425°F (220°C). Line a baking sheet with parchment. Bring water and baking soda to a gentle boil in a wide pot. Working in batches (don’t crowd!), boil dough bites for 30 seconds. They’ll puff up slightly! Use a slotted spoon to transfer them to the baking sheet. Critical Tip: Drain well – excess water makes soggy bites.
Step 5: Bake to Golden Glory
Bake for 12-15 minutes until deeply golden brown. Rotate the pan halfway for even baking. Watch Closely: They go from perfect to overdone quickly! Transfer bites to a wire rack – but work fast while they’re hot.
Step 6: Sugar Coat & Serve
While bites bake, mix sugar and cinnamon in a medium bowl. Brush warm bites generously with melted butter, then toss in cinnamon sugar until coated like glittery gems. For the dip, beat cream cheese, powdered sugar, milk, and vanilla until silky. Serve bites immediately – they’re best warm!
Serve with Style (and Lots of Napkins!)
Pile these warm, sugary bites high on a rustic wooden board or in a big, cozy bowl. Nestle the cream cheese dip right in the center – a little ramekin keeps it tidy. Scatter extra cinnamon sugar around the plate for flair. For gatherings? Set out mini skewers for easy dipping! Pair with hot apple cider, cold milk, or a bold coffee. Remember: fingers are the best utensils here – embrace the sticky joy!
Shake Things Up: Creative Twists!
1. Churro Style: Add ¼ tsp nutmeg to the cinnamon sugar. Serve with chocolate ganache for dipping.
2. Savory-Sweet Swap: Skip cinnamon sugar. Toss baked bites in garlic butter, then grated parmesan and parsley.
3. Apple Pie Bites: Mix 2 tsp apple pie spice into the sugar. Serve with salted caramel dip.
4. Gluten-Free: Use a 1:1 GF flour blend and add 1 tsp xanthan gum to the dough.
5. Vegan Delight: Use coconut oil instead of butter, and swap cream cheese dip for coconut yogurt blended with maple syrup.
Olivia’s Extra Sprinkle of Wisdom
Confession: My first batch looked like lumpy pebbles because I skipped the baking soda bath (rookie mistake!). That iconic pretzel flavor and chew? All thanks to that weird-but-wonderful boil! Over time, I learned to roll my dough ropes thinner than I thought necessary – they plump up beautifully in the bath. These bites also freeze like a dream: freeze UNcoated baked bites on a tray, then bag them. Reheat at 375°F for 8 mins, THEN butter and sugar them. Game-changer for surprise cravings! Last week, my 5-year-old “helped” toss them in sugar… resulting in a glitter bomb effect on my floor. Worth every crumb. 🥰
Your Pretzel Queries, Solved!
Q: My dough didn’t rise! Help!
A: Likely culprit: dead yeast or too-hot/too-cold water. Yeast needs warmth (110°F is ideal). Test water with a thermometer or your wrist – it should feel warm, not hot. If using active dry yeast (not instant), proof it in water/sugar until foamy before adding flour.
Q: Why are my pretzel bites dense?
A: Over-kneading or too much flour! Measure flour by spooning into the cup and leveling off. Knead just until smooth. Also, ensure your rising spot is warm (near a preheating oven works).
Q: Can I make these ahead?
A: Absolutely! Prep dough, shape bites, and refrigerate covered overnight. Boil and bake cold. OR freeze baked/unsugared bites for 1 month. Sugar them fresh!
Q: Baking soda bath scares me. Can I skip it?
A: Please don’t! This step creates the signature pretzel texture and flavor. For less fuss, use a wide, shallow skillet and simmer gently. The bath is quick!
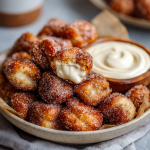
Cinnamon Sugar Pretzel Bites
- Total Time: 35 minutes
Description
Soft, warm, and wrapped in cinnamon sugar sparkle, these pretzel bites bring fairground flavor right to your kitchen. From game-day feasts to movie-night snacking, they’re buttery pillows of comfort with just the right chew. Add the optional cream cheese dip and suddenly, your kitchen smells like joy itself.
Ingredients
For Dough:
-
1½ cups warm water (110°F)
-
2¼ tsp instant yeast
-
1 Tbsp brown sugar
-
1 tsp salt
-
4 cups all-purpose flour
-
2 Tbsp melted butter
Baking Soda Bath:
-
4 cups water + ¼ cup baking soda
Cinnamon Sugar Coating:
-
½ cup sugar
-
1½ tsp cinnamon
-
4 Tbsp melted butter
Cream Cheese Dip (Optional):
-
4 oz cream cheese, softened
-
2 Tbsp powdered sugar
-
1 Tbsp milk
-
½ tsp vanilla
Instructions
-
Make Dough: Mix warm water, yeast, and sugar. Let sit 5 mins. Stir in salt, flour, butter. Knead 5–7 mins until smooth. Let rise 1 hour.
-
Shape Bites: Punch down dough. Roll into ropes, cut into ¾-inch bites.
-
Boil: Boil in baking soda water for 30 seconds. Drain well.
-
Bake: Bake at 425°F for 12–15 mins until golden.
-
Coat: Brush hot bites with butter, toss in cinnamon sugar.
-
Dip: Blend cream cheese, sugar, milk, and vanilla until smooth.
Notes
-
Don’t skip the baking soda bath—it’s where the pretzel magic happens!
-
Use freshly ground cinnamon for extra warmth.
-
Freeze unsugared baked bites for a future sweet fix!
- Prep Time: 20 mins (+1 hr rise)
- Cook Time: 15 mins
Nutrition
- Calories: 240 calper serving
- Sugar: 12g
- Fat: 9g
- Carbohydrates: 36g
- Protein: 4g
Nutritional Info (Approximate per serving with dip)
Calories: 240 | Fat: 9g | Carbs: 36g | Protein: 4g | Sugar: 12g | Sodium: 480mg
Final Thoughts: More Than a Recipe
Cinnamon Sugar Pretzel Bites are a lesson in joy disguised as baking. They remind us that the best things in life are often simple: flour, sugar, and time shared with others. Every time I make them, I’m transported—to that first football Sunday, to my toddler’s sugar-dusted giggles, to the quiet satisfaction of nailing that perfect golden bake.
These bites aren’t just about the recipe; they’re about the feeling. The way a plate passed between friends turns strangers into family. How the scent of cinnamon can make a Tuesday feel like a holiday. So whether you’re baking for a crowd or just treating yourself, know that you’re creating more than a snack—you’re making memories, one buttery, sugar-crusted bite at a time.
Pin & Share the Love!
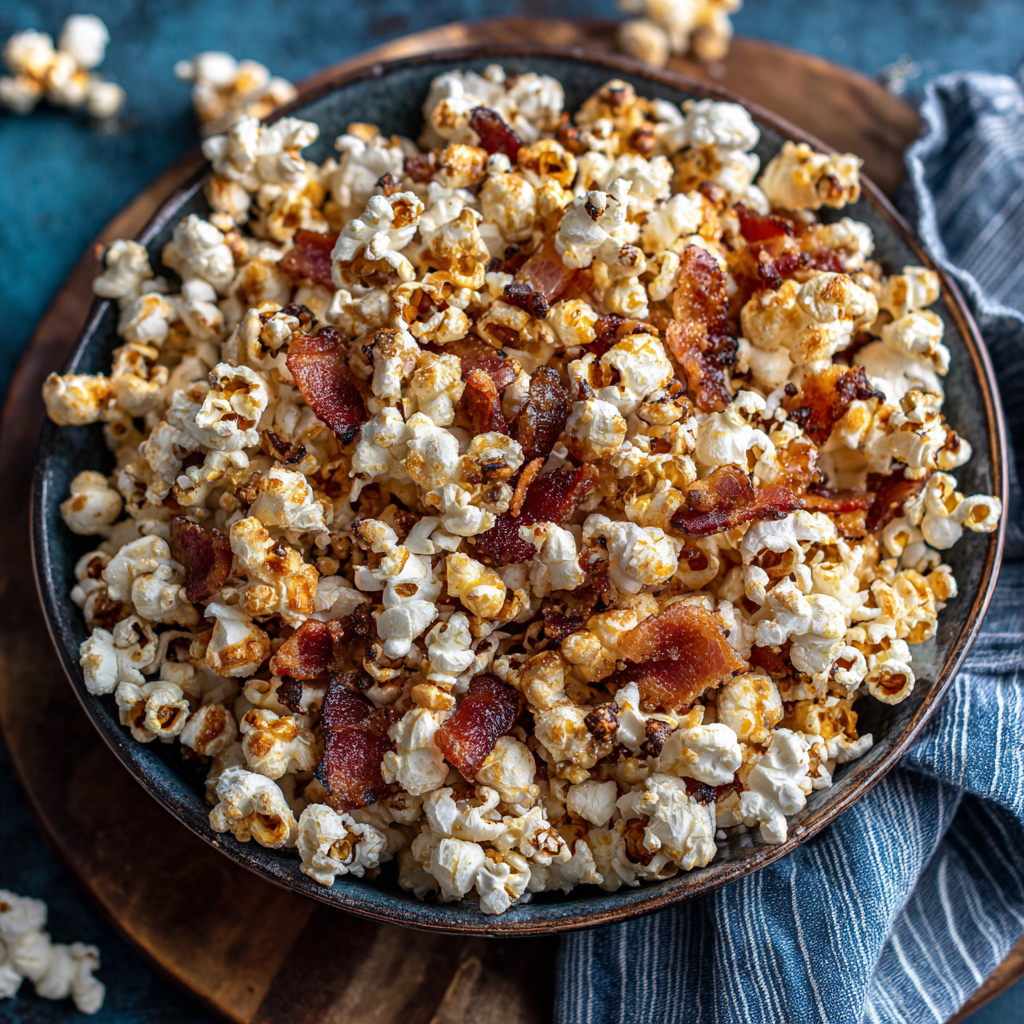
Maple Bacon Popcorn
Fall in a Bowl: Your New Favorite Snack Awaits!
Hey there, kitchen friends! Olivia here, apron dusted with popcorn kernels and probably a smudge of maple syrup on my cheek. Can you feel it? That crisp snap in the air, the leaves doing their fiery dance, that irresistible urge to curl up with something warm and delicious? Fall isn’t just a season; it’s a *vibe*. And what’s the soundtrack to cozy sweaters, football Sundays, and spooky movie marathons? The crunch of the ultimate snack, of course! Enter our Maple Bacon Popcorn – the sweet, smoky, salty hug your taste buds have been dreaming about.
Picture this: fluffy popcorn, glistening with real maple syrup, studded with crispy bacon bits, all baked to golden, shatteringly good perfection. It’s not just snack mix; it’s a conversation starter, a crowd-pleaser, and quite possibly the reason your friends keep “accidentally” dropping by. The magic? It’s shockingly easy. No fancy skills needed, just a love for bold flavors and maybe a willingness to lick the spoon. This isn’t just my recipe; it’s YOUR ticket to becoming the snack hero of every autumn gathering. Let’s make some magic!
The Movie Night That Started It All
Let me take you back to a chilly October evening a few years ago. My husband, Alex, and I were hosting our first “Boo & Brews” movie night – think classic horror flicks, local pumpkin ales, and a serious snack spread. I wanted something different. Popcorn felt obvious, but plain? Nah. I had this wild idea: “What if… bacon? And maple?” (A home cook’s eureka moment!).
I whipped up a batch, skeptically drizzling that sticky maple-bacon fat mixture over the popcorn. The smell alone had everyone hovering around the kitchen island. We took the bowl into the living room, put on a cheesy 80s slasher flick… and within minutes, the popcorn was gone. Like, *scandalously* fast. The movie? Forgotten. All anyone could talk about was the popcorn! Alex looked at me, covered in a few rogue kernels, and declared: “Olivia, this is it. This is the one.” It became our non-negotiable fall tradition. That messy, delicious experiment turned into the snack I’m most asked to bring, proving that sometimes the best recipes are born from a little kitchen courage (and a love for bacon).
🧁 Your Maple Bacon Popcorn Toolkit
- 8 cups popped popcorn (about ½ cup kernels): Freshly popped is king! Air-popped or stovetop in a little coconut oil works best for maximum crispness and neutral flavor. Avoid pre-buttered microwave bags – they clash with our maple magic! Stale popcorn? Give it a quick 5-minute warm-up in the oven first.
- 6 slices thick-cut bacon: This is your flavor foundation. Thick-cut renders beautiful, meaty bits and gives us that glorious bacon fat. Can’t find thick? Regular works, but cook it extra crispy. For a turkey bacon swap, pat it SUPER dry after cooking to avoid sogginess.
- ¼ cup pure maple syrup: No compromises here, friends! Grade A Amber or Dark adds deep caramel notes. Pancake syrup is too thin and artificial tasting – it won’t cling or caramelize properly. This is where the fall essence lives!
- 2 Tbsp brown sugar: Our depth charge! It intensifies the maple’s richness and helps create that addictive crunchy coating. Light or dark brown works (dark = more molasses kick). Coconut sugar is a great 1:1 sub for a less refined option.
- 1 Tbsp butter: The flavor conductor. Unsalted is best so we control the saltiness. Melt it right into the syrup mix for seamless blending. Vegan? Swap in your favorite plant-based butter – it works beautifully!
- Pinch of salt: The essential balancer. It heightens the sweet and savory notes. Use flaky sea salt for the best texture if you have it.
- Optional: Cayenne or black pepper for heat: Chef’s secret weapon! Just a tiny pinch (1/8 tsp) of cayenne adds a warm, sneaky kick that cuts the richness. Black pepper (¼ tsp) is subtler. Trust me, it elevates the whole experience!
Chef’s Insight: That reserved bacon fat isn’t just grease; it’s liquid gold flavor! It infuses the syrup with an irreplaceable smoky, savory depth. Don’t skip it!
👩🍳 Let’s Get Popping: Your Foolproof Steps
- Bacon Brilliance: “Cook your bacon until beautifully crisp.” Lay those bacon slices in a cold, large skillet. Turn heat to medium. This gentle start renders the fat evenly, preventing burnt spots. Cook, flipping occasionally, until deeply golden and crisp (about 8-10 mins). Transfer to paper towels, RESERVING 1 Tbsp of that glorious bacon fat in the pan. Crumble the bacon into small bits. Chef Hack: Bake your bacon! 400°F on a wire rack over a sheet pan for 15-18 mins. Less splatter, perfect crispness every time!
- Maple Magic Mixture: “Combine syrup, sugar, butter, salt, and that precious bacon fat.” In the same skillet (why wash an extra pan?) or a small saucepan, add the maple syrup, brown sugar, butter, pinch of salt, and the reserved bacon fat. Bring to a gentle simmer over medium heat, whisking constantly. Let it bubble actively for 2-3 minutes. Watch for the change: It should thicken slightly, coat the back of a spoon, and smell intensely caramelized. This step is crucial for texture – undercook and it’s sticky, overcook and it hardens too much. Remove from heat. Stir in cayenne/pepper now if using!
- The Grand Toss: “Toss popcorn and bacon with the maple mixture.” Place your popped popcorn and crumbled bacon in a VERY large bowl – think bigger than you think you need! Working quickly while the syrup is hot, drizzle it evenly over the popcorn. Immediately use two large spoons or spatulas to gently toss, toss, TOSS! Lift from the bottom to coat every nook and cranny. Hot Tip: Spray the spoons/bowl lightly with cooking spray first – it prevents sticking!
- Crisp to Perfection: “Bake for that signature crunch.” Preheat your oven to 300°F (150°C). Spread the coated popcorn mixture evenly on a parchment-lined or silicone mat-lined baking sheet (crucial for easy cleanup!). Bake for 10-15 minutes, stirring gently halfway through. Why bake? It dries the syrup coating, making it gloriously crunchy instead of sticky or chewy. The smell? Heavenly torture!
- The Patience Payoff: “Cool completely.” This is the hardest step! Remove the baking sheet and let the popcorn cool COMPLETELY at room temperature. As it cools, the coating hardens into that perfect, shattering crispness. Rushing = chewy disappointment. Distract yourself with dishwashing!
🍂 Serving Up the Cozy
Presentation is part of the fun! Dump that glorious, crunchy mix into a giant rustic wooden bowl for family-style snuggling on the couch. For parties, scoop individual portions into brown paper lunch bags or cute mason jars tied with twine – instant edible favors! This popcorn is the MVP of gatherings: pair it with hot apple cider for a classic fall duo, offer it alongside sharp cheddar slices and crisp apples on a charcuterie board, or surprise guests by setting out bowls during the big game. It’s equally perfect solo with a good book and a fuzzy blanket. Just be warned: You *will* find people sneaking extra handfuls!
✨ Mix It Up: Endless Flavor Adventures
Once you master the base, the playground opens! Try these delicious twists:
- Nutty Professor: Add ½ cup toasted pecans or walnuts to the bowl before tossing. Their buttery crunch loves maple and bacon.
- Spicy Maple Inferno: Up the cayenne to ¼ tsp and add ½ tsp smoked paprika to the syrup. Fiery, smoky heaven!
- Everything Nice (Savory Edition): After baking, sprinkle with 1 tsp Everything Bagel Seasoning. Onion, garlic, sesame – yes please!
- Vegan Victory: Skip bacon, use 1 Tbsp coconut oil + ½ tsp liquid smoke instead of bacon fat. Use vegan butter. Add ½ cup crispy coconut flakes or smoked almonds for texture.
- Autumn Spice Delight: Stir ½ tsp cinnamon + ¼ tsp nutmeg into the syrup mixture. Tastes like a cozy fall morning!
🧡 Notes from My (Messy) Apron Pocket
This recipe is my kitchen soulmate – simple, reliable, and always a hit. It evolved from that first messy movie night! Originally, I just tossed hot popcorn with maple syrup and bacon bits. Delicious, but sticky fingers galore. Adding the baking step? Game-changer! It gave us that addictive crunch. I also learned the hard way: cheap syrup makes sad popcorn. Pure maple is non-negotiable. One hilarious fail involved doubling the cayenne… let’s just say we needed gallons of milk that night! Now, I keep a batch ready for unexpected guests or when the fall blues hit. It’s amazing how such humble ingredients create pure magic. The best part? Watching someone try it for the first time. That wide-eyed “WHAT IS THIS SORCERY?!” look? Priceless. Make it yours, share it often!
❓ Maple Bacon Popcorn: Your Questions, Answered!
Q1: Help! My popcorn turned out chewy/soggy instead of crunchy. What happened?
A1: Don’t despair! The main culprits are usually: 1) Not baking long enough – ensure it bubbles actively for the full time. 2) Not cooling completely – patience is key! 3) Overcrowding the baking sheet – spread it thin! 4) Using too much syrup – stick to the recipe measurements. If it’s already cooled and chewy, pop it back in the oven at 300°F for 5-10 mins, then cool again.
Q2: Can I make this ahead of time? How do I store it?
A2: Absolutely! It’s a fantastic make-ahead snack. Cool it COMPLETELY, then store in an airtight container (a large zip-top bag works great too!) at room temperature. Avoid the fridge – humidity is the enemy of crunch! Properly stored, it stays deliciously crisp for 3-4 days. Give the container a gentle shake before serving.
Q3: I’m vegetarian! Can I still make this magic happen?
A3: You sure can! Omit the bacon. Replace the reserved bacon fat with 1 Tbsp melted butter or coconut oil + ½ tsp liquid smoke (find it near BBQ sauces) for that essential smokiness. Boost texture with extras like toasted pumpkin seeds (pepitas) or smoked almonds. The maple coating is still divine!
Q4: Can I use microwave popcorn? What kind?
A4: Yes, for convenience! Use a plain, unsalted, unbuttered microwave popcorn bag. Avoid any “movie theater butter” or strong flavors – they’ll clash with the maple and bacon. You’ll need about 1 standard bag (yielding ~8-10 cups popped).

Maple Bacon Popcorn
- Total Time: 25 mins
Description
Born on a movie night and perfected through cozy weekends and sticky-fingered snack attacks, this maple bacon popcorn is what happens when fall decides to party. Crispy popcorn gets coated in buttery maple syrup and smoky bacon magic, then baked into golden perfection. Whether you’re curled up solo or sharing with friends, it’s a bowlful of hugs and crunchy joy.
Ingredients
-
8 cups popped popcorn (air-popped or stovetop)
-
6 slices thick-cut bacon, cooked & crumbled (reserve 1 Tbsp fat)
-
¼ cup pure maple syrup
-
2 Tbsp brown sugar
-
1 Tbsp butter (or vegan alternative)
-
Pinch of salt
-
Optional: ⅛ tsp cayenne or ¼ tsp black pepper
Instructions
-
Cook Bacon: Fry until crisp, reserve 1 Tbsp fat, crumble bacon.
-
Make Syrup Mix: Simmer maple syrup, brown sugar, butter, bacon fat, and salt for 2–3 mins until thickened. Stir in optional spice.
-
Toss: In a large bowl, combine popcorn and bacon. Drizzle syrup mix and toss well to coat.
-
Bake: Spread on a lined sheet. Bake at 300°F (150°C) for 10–15 mins, stirring halfway.
-
Cool: Let cool completely—this step gives that signature crunch!
Notes
-
Fresh popcorn = best texture
-
Pure maple syrup only—no pancake syrup
-
Add toasted pecans, cinnamon, or liquid smoke for flair
- Prep Time: 10 mins
- Cook Time: 15 mins
Nutrition
- Calories: 220 cal per serving
- Sugar: 14g
- Fat: 12g
- Carbohydrates: 24g
- Fiber: 2g
- Protein: 5g
🍎 Quick Bite: Nutritional Info (Approximate)
Prep Time: 10 mins | Bake Time: 15 mins | Serves: 6 (about 1.3 cups per serving)
Calories: ~220 | Fat: 12g | Saturated Fat: 4g | Carbohydrates: 24g | Fiber: 2g | Sugar: 14g | Protein: 5g
Final Thoughts: More Than Just a Snack
This recipe isn’t just about feeding hunger—it’s about creating moments. The sound of kernels popping, the smell of caramelizing maple, the laughter over a shared bowl—these are the tiny rituals that make fall feel magical. It’s a reminder that the best recipes aren’t about perfection; they’re about connection. Whether you’re tweaking the spice level or gifting a batch to a neighbor, you’re participating in a delicious, age-old tradition: using food to say, “This season, and you, matter.” Now go forth, crunch loudly, and share generously.
Recent Posts
- Moist Vegan Banana Bread : One-Bowl, No-Fail Classic
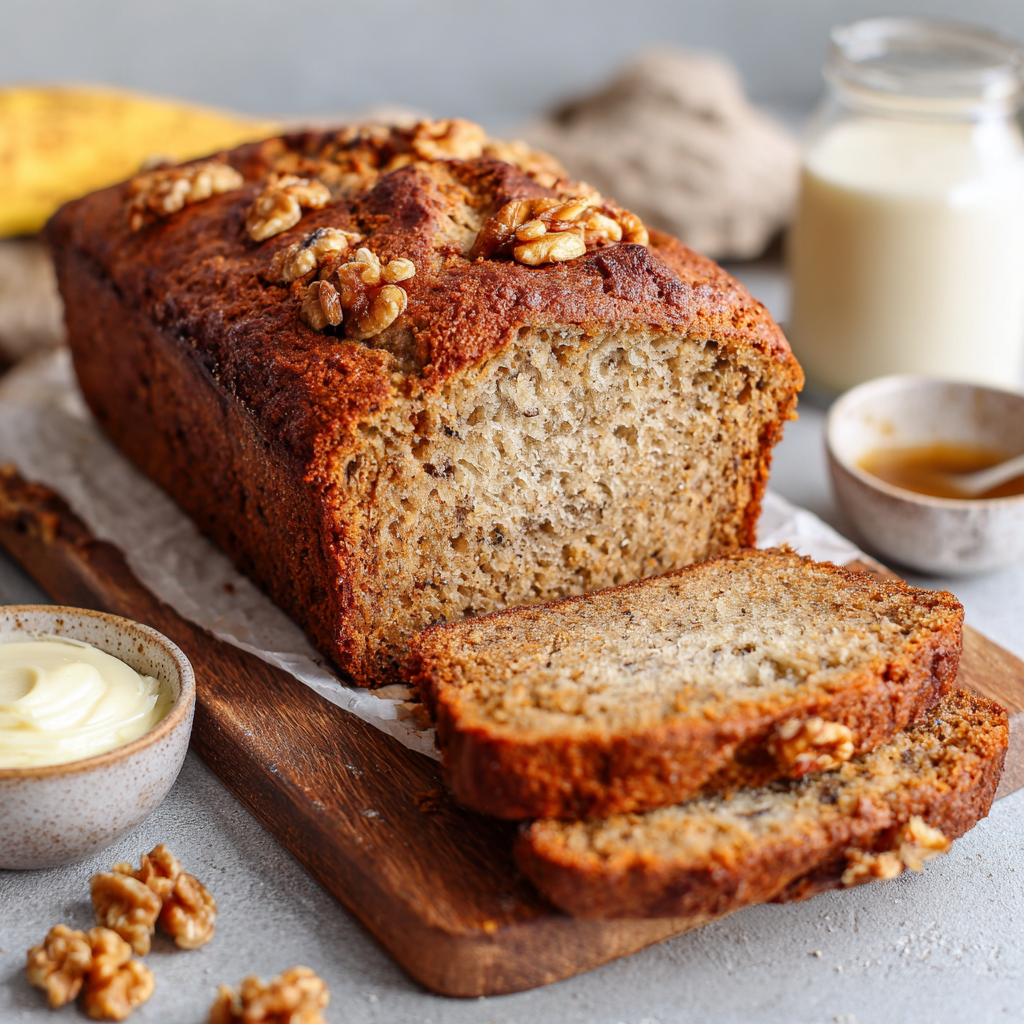
- Homemade Turkey Gravy : Rich, Silky, and Full of Flavor
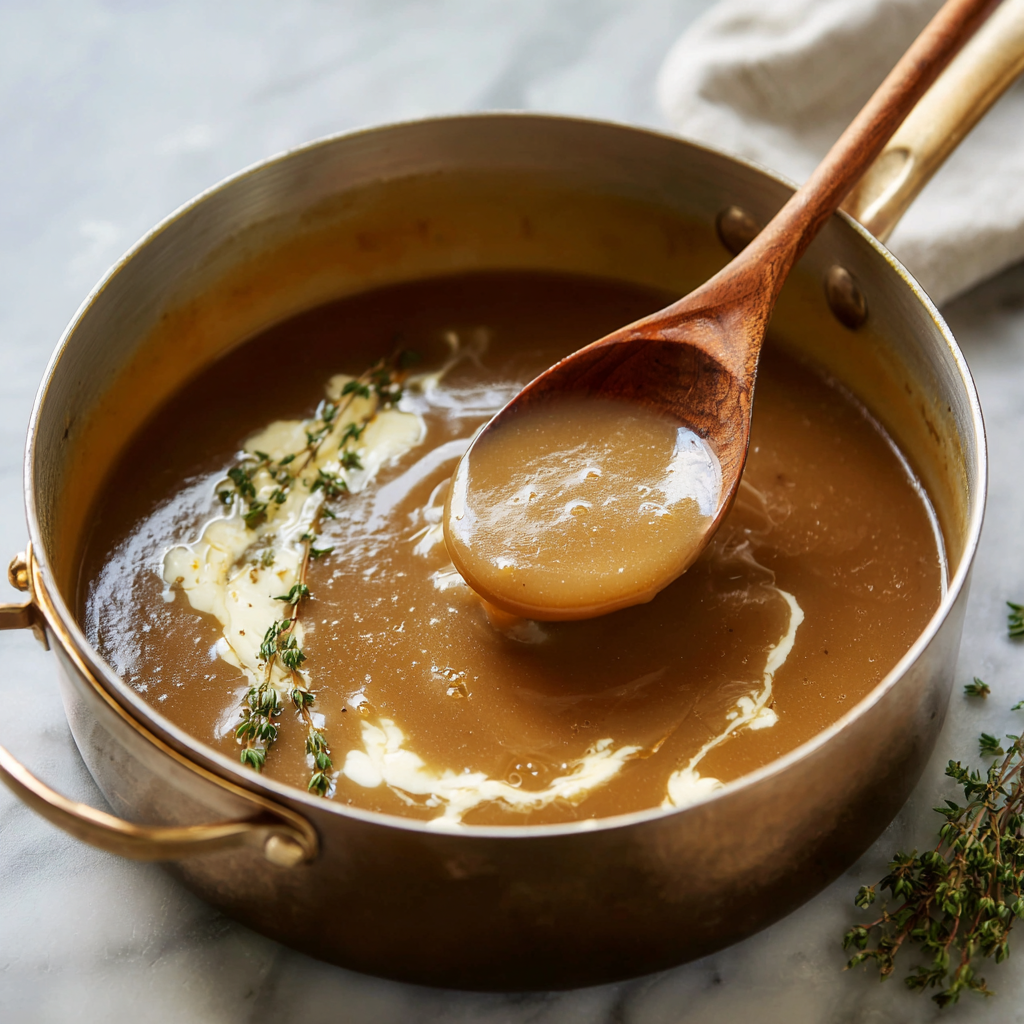
- Easy Keto Broccoli Salad : Low-Carb, Crunchy, and Totally Craveable
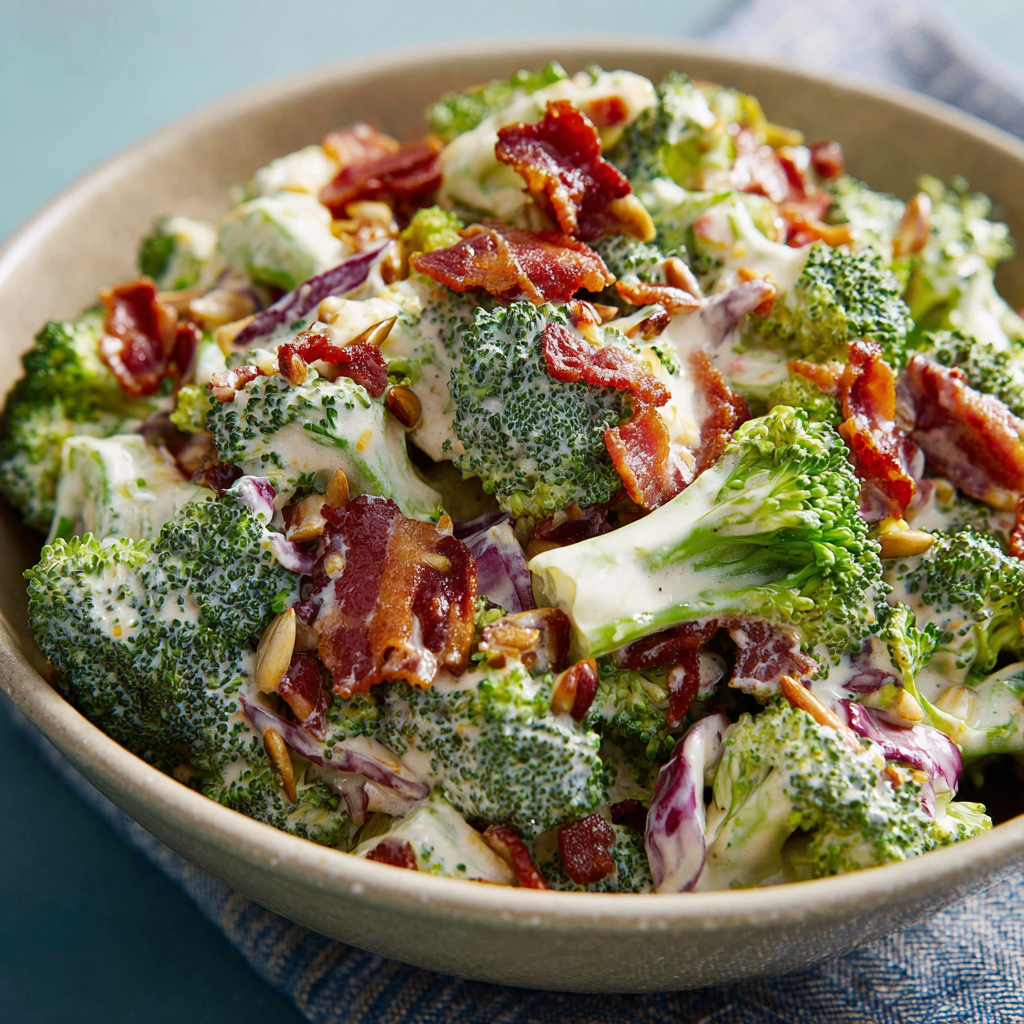
- Hearty Vegan Chili : One-Pot, Protein-Packed & Totally Comforting
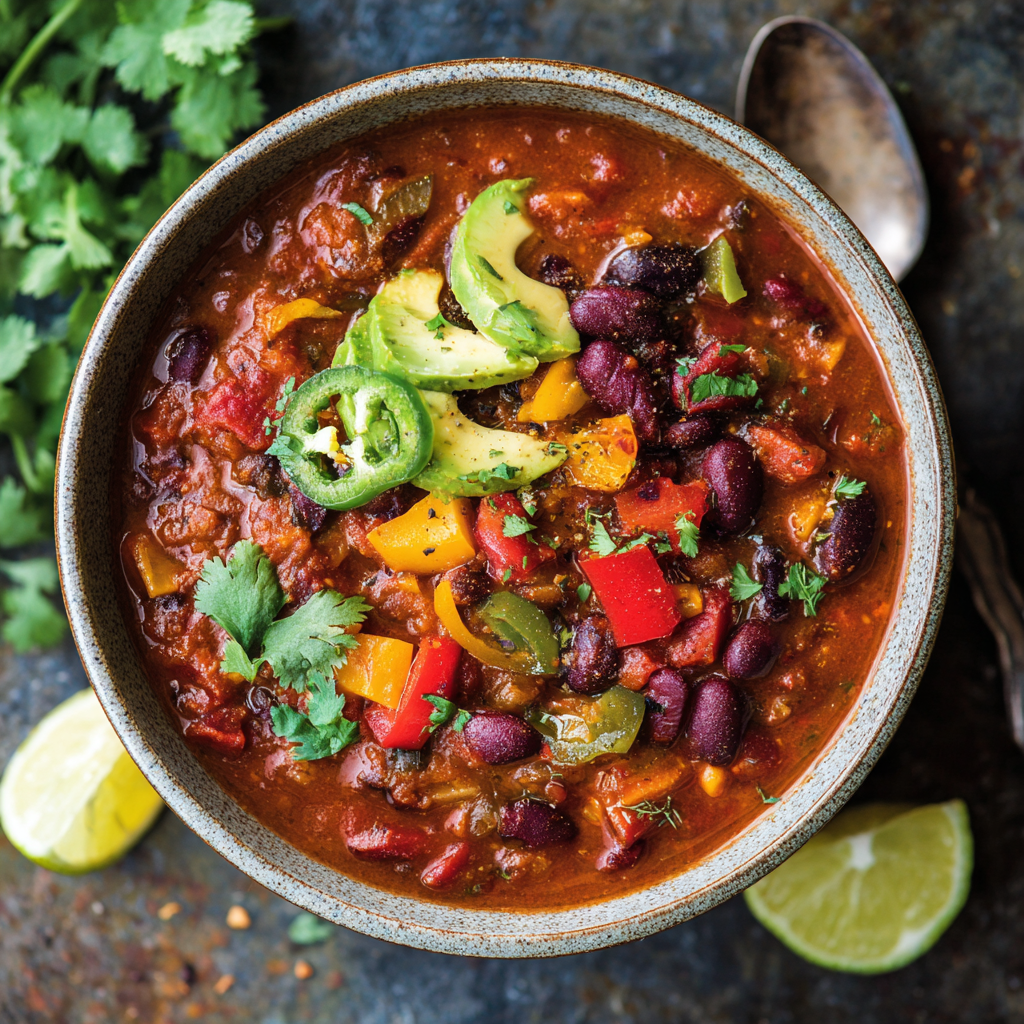
- The Best Crispy Baked Chicken Nuggets : Healthy, Easy & Kid-Approved
