

Burger Bowl Bliss
Burger Bowl Bliss: All the Juicy Flavor Without the Bun!
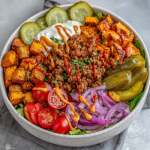
Hey there, kitchen friends! Olivia here, waving from my flour-dusted countertop. You know that moment when you’re craving a big, juicy burger but also want something fresh, nourishing, and maybe… *not* sandwiched between carbs? That exact craving birthed this Burger Bowl Bliss—a deconstructed burger that’s become my weeknight superhero. Imagine seasoned turkey sizzling in a skillet, crispy-sweet roasted sweet potatoes, tangy pickles, and all those crunchy fresh veggies piled high. It’s got that diner-style satisfaction but feels like a high-five to your body. Perfect for busy evenings, post-workout fuel, or when you just want comfort food that doesn’t weigh you down. No fancy skills needed—just a fork and enthusiasm! Let’s turn that burger fantasy into a vibrant, forkable reality.
The Backyard BBQ That Started It All
Picture this: It’s midsummer, my dad’s flipping turkey burgers on our rickety grill, and I’m sneaking pickles straight from the jar. My niece—then five—declared buns “too squishy” and dumped her burger into a bowl with extra tomatoes. Genius, right? We all followed suit, laughing as ketchup dripped down our chins. That messy, joyful moment stuck with me. Years later, when I wanted a lighter take on burgers that still delivered BIG flavor, my niece’s “bowl rebellion” inspired this recipe. It’s my tribute to uncomplicated happiness: no rules, just deliciousness. Every time I layer those pickles and sweet potatoes, I’m right back in that sunshine-soaked backyard, surrounded by people I love.
Your Flavor-Packed Toolkit
- 1 cup chopped romaine lettuce – Our crisp, hydrating base! Swap for spinach or kale if you’re feeling fancy.
- ½ cup roasted sweet potatoes – Nature’s candy! Dice ’em small for extra caramelized edges. No sweet potatoes? Butternut squash works too.
- ¼ cup cherry tomatoes, halved – Bursting sweetness! Use heirlooms for color or sun-dried tomatoes for intensity.
- ¼ cup pickles (crinkle-cut!) – The CRUNCH MVP. Crinkle cuts hold sauce better! Bread-and-butter pickles add sweetness.
- 2 tbsp diced red onion – Soak in ice water for 5 mins if raw bite scares you—it mellows beautifully.
- 4 oz lean ground turkey – My fave for lightness, but beef or plant-based crumbles work great!
- Burger Seasoning Mix:
- ½ tsp garlic powder – No fresh garlic? Double this!
- ½ tsp onion powder – Adds depth without chopping.
- ¼ tsp paprika – Smoked paprika = 🔥 flavor upgrade.
- Salt & pepper – Season like you mean it!
- Drizzle of burger-style sauce – I mix 1 tbsp Greek yogurt + 1 tsp ketchup + ½ tsp mustard. Ranch or sriracha mayo? YES.
Chef’s Tip: This bowl is a canvas! Raid your fridge—avocado, corn, even roasted beets can join the party.
Let’s Build Some Burger Magic!
- Season & Sizzle That Turkey: Crumble turkey into a hot skillet (no oil needed—it’ll release its own juices!). Sprinkle ALL the seasoning over it. Cook 5-7 mins until browned, breaking it up. Hack: Don’t stir constantly! Let it sit for a minute to get those tasty browned bits.
- Roast Those Sweet Potatoes: Toss ½” diced sweet potatoes with 1 tsp olive oil and a pinch of salt. Air-fry at 400°F for 12 mins (shake halfway!) or roast at 425°F for 20 mins. Secret: Add a sprinkle of garlic powder pre-roast—caramelization heaven!
- Chop & Chill Your Veggies: While things cook, dice lettuce, halve tomatoes, and prep onions/pickles. Pro Move: Pop ’em in the fridge—cold veggies = refreshing crunch!
- Layer Like You Mean It: Start with romaine in a wide bowl (we eat with our eyes first!). Artfully pile sweet potatoes, tomatoes, pickles, onion, and that glorious turkey. Tip: Place pickles on top—they stay crisp!
- Drizzle & Devour: Zig-zag sauce over everything. Grab a fork and MIX—it’s like a burger salad party! Chef’s Confession: I sometimes add extra pickles mid-bite. No regrets.
The Science of Flavor Layering – Why This Bowl Works So Well
Ever wonder why a burger tastes so satisfying? It’s not just the meat—it’s the layers of texture, temperature, and umami working together. This bowl nails that science without the bun! Let’s break it down:
1. The Crunch Factor
A great burger has crisp lettuce, juicy tomatoes, and pickles that snap. Here, romaine, chilled cherry tomatoes, and crinkle-cut pickles replicate that contrast against the soft turkey and roasted sweet potatoes. Pro Tip: For extra crunch, add quick-pickled cucumbers (soak slices in vinegar + sugar for 10 mins).
2. Umami Bomb
Burger seasoning isn’t just salt—it’s garlic powder, onion powder, and paprika, which amplify savory depth. Turkey (or beef) delivers natural glutamates, while roasted sweet potatoes caramelize, adding sweetness to balance the salt. Swap: Add a dash of Worcestershire sauce to the turkey while cooking for an umami boost.
3. Temperature Play
Warm meat + cold veggies = sensory magic. The bowl’s structure keeps ingredients distinct until mixing, so you get hot-and-cool bites. Meal-Prep Hack: Store roasted sweet potatoes and turkey separately; reheat the protein while keeping veggies fridge-cold.
4. Sauce as the “Glue”
The yogurt-ketchup-mustard mix mimics burger sauce’s tangy creaminess, binding flavors. Why It Works: Fat in the sauce (even light yogurt) helps carry fat-soluble flavors in the spices.
5. Visual Appeal
We eat with our eyes first! The bowl’s rainbow colors—orange sweet potatoes, red tomatoes, green lettuce—trigger dopamine. Presentation Trick: Use wide, shallow bowls to showcase layers.
Fun Experiment: Try eating the ingredients separately, then mixed. The combined version will taste richer—proof that layering matters!
The Meal-Prep Revolution – How This Bowl Saves Your Week
Confession: I created this recipe during a chaotic week when takeout tempted me daily. Here’s how it became my meal-prep MVP:
Batch Like a Boss
-
Sweet Potatoes: Roast a big batch (425°F for 20 mins) with olive oil, salt, and smoked paprika. They stay good for 4 days.
-
Protein: Cook 1 lb turkey (or lentils for plant-based) with double the seasoning. Freeze portions for up to 3 months!
-
Veggies: Pre-chop lettuce, onions, and tomatoes (store in airtight containers with a paper towel to absorb moisture).
Assembly Line Speed
Morning-of, grab:
-
A container for greens (base).
-
A microwave-safe jar for sweet potatoes + turkey (heat 60 secs).
-
A small tub for cold toppings.
At work? Dump, drizzle, devour—5 minutes flat.
Customization Stations
-
Kid-Friendly: Skip onions, add shredded cheese and ketchup.
-
Keto: Swap sweet potatoes for roasted radishes; use full-fat ranch.
-
Spicy: Toss turkey with cayenne; top with jalapeños.
Olivia’s Lunchbox Story:
Once, I forgot the sauce. A coworker lent me her hot sauce packet—disaster became a delicious Tex-Mex twist! Now I keep single-serve sauce packets in my bag.
Money-Saving Bonus:
This bowl costs ~$3/serving vs. $12 for a takeout burger. Over a month, that’s $270 saved!
The Global Burger Bowl Tour – 5 International Twists
Why stick to classic when you can travel via taste buds?
1. Greek Souvlaki Bowl
-
Protein: Lemon-oregano grilled chicken.
-
Toppings: Cucumber, Kalamata olives, feta, tzatziki.
-
Grain Base: Swap lettuce for quinoa.
2. Korean BBQ Bowl
-
Protein: Ground pork with gochujang + soy sauce.
-
Toppings: Kimchi, shredded carrots, sesame seeds.
-
Sauce: Sriracha mayo + lime.
3. Hawaiian Luau Bowl
-
Protein: Teriyaki-glazed turkey.
-
Toppings: Grilled pineapple, crispy coconut flakes.
-
Fun Add: Macadamia nuts for crunch.
4. Indian Spiced Bowl
-
Protein: Lamb with garam masala.
-
Toppings: Mango chutney, cilantro, roasted cauliflower.
-
Sauce: Mint-yogurt drizzle.
5. Italian Antipasto Bowl
-
Protein: Turkey + Italian herbs.
-
Toppings: Artichoke hearts, prosciutto, mozzarella pearls.
-
Sauce: Basil pesto thinned with olive oil.
Cultural Tip: Research shows combining carbs + veggies + protein in one bowl (like Buddha bowls) is a global tradition—from Korean bibimbap to Middle Eastern grain bowls. You’re part of a delicious legacy!
Serving Up the Good Vibes
I serve this in wide, shallow bowls so every forkful gets a bit of everything! For fun, set out extra toppings (bacon bits, shredded cheese, sunflower seeds) and let folks customize. Pair it with iced herbal tea on a warm day or a cozy mug of tomato soup when it’s chilly. And please—serve with a big, cheeky grin. You just made burger magic!
Shake It Up! 5 Tasty Twists
- Mediterranean: Swap turkey for lamb, add feta, olives, and tzatziki.
- Breakfast Bowl: Use breakfast sausage, top with a fried egg, and skip pickles for sautéed mushrooms.
- Plant-Powered: Lentil-walnut “meat,” roasted chickpeas, and tahini sauce.
- Tex-Mex: Black beans, corn, jalapeños, and chipotle ranch.
- Pizza Bowl: Turkey seasoned with Italian herbs, add pepperoni, mozzarella, and marinara drizzle.
Olivia’s Extra Nuggets of Joy
This recipe’s evolved from my “I need dinner NOW” nights! Originally, I used frozen sweet potato fries (still legit in a pinch), but roasting fresh became my therapy. Once, I accidentally used cinnamon instead of paprika—surprisingly delicious with turkey! Now I keep a big jar of the seasoning mix pre-mixed. It’s also my meal-prep star: Cook a turkey batch and roast sweet potatoes Sunday, then assemble bowls in 5 mins all week. My husband adds crushed potato chips for “burger vibes,” and honestly? I support it. Food should be fun, nourishing, and full of flavor—just like life!
Your Questions, Answered!
Q: Can I meal-prep this ahead?
A: Absolutely! Store components separately: cooked turkey (3-4 days), roasted sweet potatoes (4 days), and chopped veggies (2 days). Assemble cold ingredients just before eating to keep everything crisp.
Q: My turkey turns out dry. Help!
A: Two tricks: 1) Don’t overcook—turkey’s done at 165°F. 2) Add 1 tbsp broth or water to the skillet when cooking for extra moisture. Lean meat needs love!
Q: Low-carb sauce ideas?
A: Mix 2 tbsp Greek yogurt + 1 tsp Dijon + squeeze of lemon + garlic powder. Or try sugar-free ketchup blended with avocado!
Q: Can I make it vegetarian without fake meat?
A: Yes! Try spiced roasted chickpeas, lentils, or my fave: diced portobello mushrooms sautéed with burger seasoning until meaty.
Burger Bowl Bliss
- Total Time: 25 mins
Description
Hey burger lovers! Olivia here—turning your burger craving into a fresh, feel-good bowl you’ll want on repeat. Juicy seasoned turkey, crispy roasted sweet potatoes, crunchy pickles, and fresh veggies all drizzled with burger-style sauce… it’s that backyard BBQ feeling in a nourishing, forkable bowl. Comfort food that loves you back? Sign me up!
Ingredients
-
1 cup chopped romaine lettuce
-
½ cup roasted sweet potatoes (½” cubes)
-
¼ cup cherry tomatoes, halved
-
¼ cup crinkle-cut pickles
-
2 tbsp diced red onion
-
4 oz lean ground turkey
-
Burger Seasoning: ½ tsp garlic powder, ½ tsp onion powder, ¼ tsp paprika, salt & pepper
-
Sauce: 1 tbsp Greek yogurt + 1 tsp ketchup + ½ tsp mustard (or your fave burger sauce!)
Instructions
1️⃣ Sizzle: Cook turkey in a hot skillet with seasoning for 5–7 mins, breaking it up until browned.
2️⃣ Roast: Toss sweet potatoes with olive oil & garlic powder; air-fry (12 mins) or roast (425°F, 20 mins).
3️⃣ Prep: Chop veggies. Soak onions in ice water if you like them milder!
4️⃣ Layer: In a wide bowl, pile romaine, turkey, sweet potatoes, tomatoes, pickles & onion.
5️⃣ Finish: Drizzle with sauce, grab your fork, and dig in!
Notes
-
Add avocado or cheese for extra burger vibes.
-
Make it ahead: Store turkey & sweet potatoes separately. Assemble fresh!
-
Swap turkey for plant-based crumbles, chickpeas, or lentils.
- Prep Time: 10 mins
- Cook Time: 15 mins
Nutrition
- Calories: 450 Cal per serving
- Fat: 15g
- Carbohydrates: 45g
- Fiber: 8g
- Protein: 31g
Nourishment in Every Bite (Per Serving)
Calories: ~450 | Protein: 31g | Carbs: 45g (Fiber: 8g) | Fat: 15g
Note: Stats include optional yogurt-based sauce. Using beef adds ~50 calories.
Final Thoughts: More Than a Meal
This bowl isn’t just dinner—it’s a mindset. It’s about:
-
Freedom: No food rules! Love buns? Add ’em. Prefer plant-based? Go wild.
-
Joy: That pickle-crunch sound is tiny happiness.
-
Connection: Every bite reminds me of my niece’s grin, my dad’s grill smoke, and the friends who’ve shared this bowl.
So here’s my challenge to you: Make it once as written, then break all the rules. Food’s meant to be played with. Now, go forth and bowl-ify your cravings!

Taco Power Bowl
Taco Tuesday Got a Power-Up (And Your Taste Buds Will Thank You!)
Hey kitchen rockstars! Olivia here, apron slightly dusted with paprika and eyes sparkling like a perfectly diced bell pepper. If your heart does a happy salsa dance at the thought of taco night but your energy levels crave something fresher and fiercer, buckle up. We’re about to take your favorite fiesta flavors and transform them into a vibrant, nourishing Taco Power Bowl that’ll make you feel like a superhero. Seriously, this isn’t just dinner—it’s edible confetti celebrating flavor AND well-being!
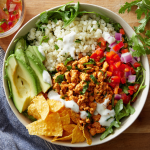
Imagine this: spicy, perfectly seasoned ground chicken snuggled into a bed of light-as-air cauliflower rice and peppery arugula. Crunchy tortilla chips play tag with creamy avocado cubes, while a zesty salsa-yogurt drizzle ties it all together like the best kind of flavor bow. It’s got that addictive taco essence we all crave—the warmth, the spice, the satisfying textures—but packed into a single, glorious bowl that’s high-protein, low-carb, gluten-free, and ready in about 15 minutes flat. Meal-prep magic? Oh yeah. Post-workout fuel? Absolutely. That “I need something delicious NOW” moment? Consider it handled. Let’s ditch the food coma and power up!
From Crumpled Napkins to Power Bowls: My Taco Night Evolution
Picture this: It’s 2017, my tiny Brooklyn apartment kitchen is steamy, and I’m hosting my first “big” taco night for eight friends. Spoiler alert? Tortillas ripped, fillings tumbled everywhere, and we ended up eating deconstructed tacos off mismatched plates with *a lot* of laughter (and a few stray black beans on the floor). That messy, joyful chaos sparked an “aha!” moment.
Why fight the delicious disintegration? Why not celebrate it? I started layering all those incredible taco components—the spiced meat, the crunchy bits, the cool toppings—into bowls over greens or grains. It was freedom! No assembly required, maximum flavor impact, and way less cleanup (RIP, rogue beans). This Taco Power Bowl is the glorious evolution of those early experiments. It captures every bit of that communal, festive taco-night feeling but in a streamlined, energy-boosting package that fits real life. Every time I make it, I smile remembering those crumpled napkins and the happy realization: sometimes the best meals come from beautiful messes.
Your Flavor Toolkit: What You’ll Need
Gather these fresh, flexible players! Don’t stress about exact measurements—this bowl is your canvas.
- ½ cup Cauliflower Rice: Our low-carb “base camp.” Chef’s Tip: Grab pre-riced for speed, or pulse fresh florets! Swap: Quinoa, brown rice, or even shredded lettuce for extra crunch.
- 1 Handful Arugula (Baby Spinach/Kale work too!): Adds a peppery punch and vibrant color. Why I love it: That slight bitterness balances the richness perfectly.
- ½ cup Cooked Ground Chicken w/ Taco Seasoning: The MVP! Pro Swap: Ground turkey, lean beef, lentils (vegan!), or crumbled tofu. Use your favorite store-bought seasoning or my quick blend: 1 tsp chili powder, ½ tsp cumin, ¼ tsp each garlic powder, onion powder, paprika, pinch of salt.
- ¼ cup Diced Bell Peppers (Any Color!): Sweet crunch & color explosion. Insight: Red/yellow are sweeter, green is more herbaceous. Use what’s bright!
- 2 tbsp Chopped Red Onion: Essential zing! Soak in cold water for 5 mins if you want milder bite.
- ¼ Avocado, Cubed: Creamy, dreamy healthy fats. Keep it green: Spritz with lime juice to prevent browning.
- 1 tbsp Salsa (Your Heat Level!): The flavor lifter! Chef’s Secret: Roasted tomato salsa adds depth, fruity mango salsa brings sweetness.
- 2 tbsp Greek Yogurt (or Sour Cream): Cool, creamy tang. Why Greek Yogurt? Extra protein punch! Dairy-free? Cashew cream rocks.
- Handful Tortilla Chips (Siete Grain-Free are fab!): CRUNCH factor. Must-do: Crush some over the top right before eating!
Let’s Build Your Flavor Masterpiece! (Step-by-Step)
This isn’t rocket science, it’s *flavor* science! Grab your favorite bowl—let’s make magic.
- Chicken Fiesta Time: Heat a drizzle of olive oil in a skillet over medium-high. Add your ground chicken, breaking it up with a spoon. Once it starts losing its pinkness, sprinkle your taco seasoning over it. Stir like you mean it! Cook for 5-7 minutes until beautifully browned and cooked through. Chef’s Hack: Deglaze the pan with a splash of water or broth at the end to scrape up those flavorful browned bits—liquid gold for your chicken! Let it rest off the heat while you prep the rest.
- Base Layer Bliss: Pile that gorgeous, fluffy cauliflower rice right into your serving bowl. Fluff it up with a fork! Top it immediately with your fresh arugula. The warmth from the rice (if using freshly cooked) will *gently* wilt the greens, making them perfectly tender-crisp. Texture Tip: Want colder greens? Chill your cooked cauliflower rice first!
- Topping Extravaganza: Now, the fun part! Artfully (or just enthusiastically) scatter your cooked taco chicken over the greens. Follow with those vibrant diced bell peppers and the zippy chopped red onion. Nestle in those creamy avocado cubes like little green treasures. Pro Move: Season the avocado lightly with salt and pepper right now—it makes a difference!
- Drizzle Drama: In a tiny bowl or mug, mix together the Greek yogurt and salsa. Swirl it until it’s beautifully marbled and pourable. Grab a spoon and drizzle this zesty, creamy goodness all over your bowl creation. Don’t be shy! Hack Alert: Put the mix in a small zip-top bag, snip the corner, and pipe it for fancy restaurant-style swirls!
- Crunch Finale: Grab those tortilla chips. You have options: Place a few whole ones dramatically on the side for scooping, or take a fistful and crush them generously over the top for maximum crunchy coverage in every bite. Golden Rule: Add the chips LAST so they stay gloriously crisp!
Serving Up Sunshine (How to Present Your Bowl!)
We eat with our eyes first, right? Grab a wide, shallow bowl—think pasta bowl or generous salad bowl—to show off those gorgeous layers! Arrange the toppings in distinct little piles or sections over the base; it makes the colors pop and lets your eater customize each bite. That vibrant salsa-yogurt drizzle? Swirl it with intention! Garnish with an extra chip sticking out jauntily or a tiny sprinkle of chopped fresh cilantro if you have it. Serve it IMMEDIATELY with a big smile (and maybe a lime wedge on the side for extra zing). Perfect solo, or add a side of black beans for extra heft!
Shake It Up! Taco Bowl Twists
This bowl is your flavor playground! Try these tasty spins:
- Mediterranean Fiesta: Swap chicken for spiced ground lamb or chickpeas. Use tzatziki instead of salsa-yogurt, add cucumber, olives, and feta. Skip the chips or use pita chips!
- Breakfast Power Bowl: Replace chicken with seasoned scrambled eggs or tofu scramble. Use sweet potato “rice” as the base. Top with pico de gallo, avocado, and a dollop of plain yogurt. Crumbled bacon bits instead of chips? Yes, please!
- Veggie-Loaded Rainbow: Double down on plants! Use black beans or lentils as the protein. Add roasted corn, zucchini ribbons, shredded carrots, and pickled jalapeños. Cilantro-lime dressing works wonders here.
- Seafood Sensation: Swap chicken for quick-cooked shrimp tossed in taco seasoning or flaked seasoned cod. Mango salsa pairs amazingly. Skip yogurt and use a light avocado crema.
- Keto Kick: Double the cauliflower rice! Add extra avocado or cheese. Use full-fat sour cream for the drizzle. Ensure salsa is low-sugar. Pork rinds make a great crunchy swap for tortilla chips.
Olivia’s Kitchen Confessions & Pro Tips
Okay, truth bomb: The very first time I tested this, I got overzealous with the chili powder. Let’s just say my “power bowl” had me breathing actual fire! Lesson learned: Taste your seasoning mix! Start with less spice—you can always add more. This recipe has evolved into my weekly MVP because it’s SO adaptable. Got leftover roasted veggies? Toss ’em in! Found a lonely ear of corn? Char it and add the kernels! The salsa-yogurt drizzle was actually a happy accident when I ran out of sour cream—now I prefer the tangy protein boost. Biggest pro tip? Prep components ahead! Cook a big batch of taco-seasoned chicken, rice your cauliflower, chop peppers/onions. Store separately. Assembly takes 3 minutes flat on busy days. It’s the ultimate feel-good fuel that never gets old.
Taco Bowl SOS: Your Questions Answered!
Q: Can I meal-prep this bowl ahead?
A: Absolutely! BUT: Prep components SEPARATELY. Store cooked chicken, cauliflower rice, chopped veggies (keep onions airtight), avocado (with lime juice!), salsa-yogurt mix, and chips in different containers. Assemble RIGHT before eating to keep greens fresh, avocado green, and chips crunchy. Pre-assembled bowls get soggy fast!
Q: My cauliflower rice is soggy! Help!
A: Sogginess is the enemy! Key moves: 1) If using frozen, cook it per package but SPREAD IT THIN on a baking sheet after cooking to let steam escape & cool completely. 2) If using fresh, don’t overcook! Sauté quickly (3-5 mins) in a hot pan with a tiny bit of oil until just tender-crisp, no lid! Drain any excess liquid.
Q: What’s the best dairy-free swap for the Greek yogurt?
A: You have awesome options! Cashew cream (blend soaked cashews with water/lemon juice/salt) is luxuriously creamy. Plain coconut yogurt works too (choose unsweetened!). For tang, add a squeeze of lime to either. Vegan sour cream is also readily available now!
Q: Can I make this vegetarian/vegan?
A: 100%! Swap the chicken for: 1) Seasoned black beans or pinto beans, 2) Crumbled tempeh or tofu sautéed with taco spices, 3) Lentil “taco meat” (cooked lentils mashed slightly with seasoning). Use a dairy-free yogurt alternative as mentioned above. Double-check chips are vegan (most corn chips are!).
Taco Power Bowl
- Total Time: 15 mins
Description
Hey flavor seekers! Olivia here—ready to rescue your Taco Tuesday with this high-protein, low-carb Taco Power Bowl. Picture spicy taco-seasoned chicken over fluffy cauliflower rice and peppery arugula, plus crunchy bell peppers, creamy avocado, and a zesty salsa-yogurt drizzle. Finish it off with crisp tortilla chips for that must-have crunch. Ready in 15 minutes—this bowl is everything you love about tacos, minus the napkin chaos!
Ingredients
-
½ cup cauliflower rice (fresh or frozen)
-
1 handful arugula (or spinach)
-
½ cup cooked ground chicken, seasoned with taco spices
-
¼ cup diced bell peppers
-
2 tbsp chopped red onion
-
¼ avocado, cubed
-
1 tbsp salsa (your favorite!)
-
2 tbsp Greek yogurt (or dairy-free alternative)
-
Handful of tortilla chips
Instructions
1️⃣ Cook Chicken: In a skillet, cook ground chicken with taco seasoning until browned (5–7 mins).
2️⃣ Prep Base: Warm cauliflower rice and fluff into your bowl. Top with arugula.
3️⃣ Assemble: Add cooked chicken, bell peppers, onion, and avocado.
4️⃣ Drizzle: Mix salsa + Greek yogurt. Drizzle over your bowl.
5️⃣ Crunch: Add tortilla chips on the side or crumble on top for big crunch!
Notes
-
Keep avocado green with a squeeze of lime.
-
Meal-prep friendly: store toppings separate, assemble fresh!
-
Swap chicken for beans or tofu for a veggie version.
- Prep Time: 10 mins
- Cook Time: 5 mins
Nutrition
- Calories: 480 Cal Per Bowl
- Carbohydrates: 20g
- Fiber: 10g
- Protein: 35g
Fueling Your Awesome (Nutritional Per Serving)
Approximate Per Bowl: Calories: ~480 kcal | Protein: 35g | Fat: 25g (Healthy fats from avocado!) | Net Carbs: ~20g | Fiber: 10g | Naturally Gluten-Free | Low Carb | High Protein
Note: Values can vary based on specific ingredients used (e.g., chicken fat %, avocado size, yogurt type). This is a balanced, nutrient-dense meal designed to satisfy and energize!
Ready to Power Up Your Feed?
Final Thoughts: More Than Just a Meal
This Taco Power Bowl isn’t just about feeding your body—it’s about joy, creativity, and feeling good. It’s proof that healthy eating doesn’t mean sacrificing flavor or fun. Whether you’re meal-prepping for the week, fueling up post-workout, or just craving something deliciously balanced, this bowl delivers.
So next time you’re staring at a sad desk lunch or wondering how to jazz up taco night, remember: Bowls are your canvas. Mix, match, and make it yours. Because food should always be as vibrant and lively as you are. Now go forth and crunch, drizzle, and savor your way to a tastier, more energized life!

Cucumber Tuna Bites
Ditch the Chips, Grab the Crunch: Your New Go-To Snack is Here!
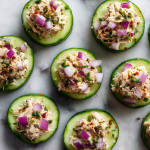
Hey there, kitchen friend! Olivia Bennett here, apron dusted with flour (okay, maybe a sprinkle of paprika from last night’s experiment) and ready to share one of my all-time favorite quick, healthy snacks. Ever have one of those moments when hunger strikes like a tiny, persistent drum solo, but you want something light, bright, and packed with flavor? Enter the hero of today’s story: Cucumber Tuna Bites! These little rounds of joy are the ultimate crowd-pleaser – whether you’re hosting book club, prepping protein-packed lunches, or just need a 5-minute win against snack-time boredom. Picture this: cool, crisp cucumber slices playing base to a creamy, zesty tuna salad, finished with a confetti of zippy red onion. They’re gluten-free, low-carb, keto-friendly, and seriously addictive. Best part? No fancy skills or hours chained to the stove required. Just fresh vibes, big flavor, and that gorgeous feeling of feeding yourself (or your people) something truly good. Ready to make your taste buds dance? Let’s roll!
The Picnic Basket Revelation
Let me take you back to a sun-drenched afternoon by Willow Lake, picnic blanket spread wide, and my best friend Sarah unpacking the world’s most chaotic (but glorious) basket. Sandwiches, berries, cookies… and then she pulls out this quirky little Tupperware filled with cucumber rounds topped with… tuna salad? My first thought? “Huh. Bold move, Sarah.” But one bite? Total game-changer. The crunch of the cucumber against the creamy filling was pure magic – light yet satisfying, perfect lake-side fuel. Sarah laughed, “My grandma’s hack! Uses up leftover tuna salad without the bread sogginess.” That moment stuck! It became our signature picnic snack, evolving over countless gatherings. I tweaked the filling (hello, Dijon kick!), perfected the cucumber thickness, and added that pop of red onion. Now, every time I make these bites, I smell pine trees, hear lake water lapping, and remember Sarah’s triumphant grin. Food memories? They’re the best kind of recipe.
Your Flavor Toolkit: Simple & Smart
Gather these fresh pals! Don’t stress – flexibility is key here. My notes help you shine:
- 1/2 large cucumber, sliced into thick rounds (~12 slices): The star vessel! Go for firm, unwaxed English or Persian cukes – less watery, more crunch. Chef’s Hack: Pat slices dry with paper towels after cutting to prevent slippage!
- 1 can tuna (in water or olive oil), drained (~4 oz): Sustainably caught is my jam. Water-packed? Lighter. Olive oil? Richer flavor & extra moisture. Sub: Flaked cooked salmon or mashed chickpeas for a pescatarian/vegan twist!
- 1 tbsp mayonnaise: Creaminess central! Insight: Full-fat gives best texture, but Greek yogurt or avocado mash work for lighter/Whole30 versions.
- 1 tsp Dijon mustard: The flavor spark plug! Adds tangy depth. Sub: Yellow mustard if that’s your pantry MVP, or 1/2 tsp horseradish for kick!
- 1 tbsp finely chopped red onion: Zingy confetti! Soak in ice water for 5 mins if raw bite worries you. Sub: Chives, green onion, or capers.
- Salt & pepper to taste: The essential enhancers! Start light, taste, adjust. Chef’s Whisper: A tiny pinch of celery salt? *Chef’s kiss*.
Let’s Build Bite-Sized Brilliance!
Ready? This is faster than scrolling your feed! Grab a bowl and let’s go:
- Prep Your Cuke Canvas: Wash that cucumber! Slice into 1/2-inch thick rounds – sturdy enough to hold the goods. Pro Tip: Use a mandoline for laser-precision, but a sharp knife works great. Pat. Them. Dry. Seriously, this prevents tuna-slide-off disaster! Lay them out on your serving plate like little edible lily pads.
- Drain & Flake: Open your tuna can and drain it well. Give it a gentle press with a fork in a sieve or against the can lid. Kitchen Story: I once skipped draining… ended up with sad, watery bites. Learn from my puddle!
- Mix Magic: In a small bowl, flake the tuna with a fork. Add mayo, Dijon, salt, and pepper. Mix gently but thoroughly. Chef’s Hack: Want extra fluffy filling? Fold, don’t smash! Taste it! Adjust seasoning NOW. Needs more pep? More mustard. Too dry? A tiny drizzle of olive oil or lemon juice.
- Top & Garnish: Spoon about 1 tbsp of the tuna mix onto each cucumber round. Don’t be shy – mound it proudly! Sprinkle the finely chopped red onion over each bite. Pro Move: Use a small spoon or piping bag for super-neat, Instagram-worthy tops!
- Chill or Charge! Need to prep ahead? Cover loosely and chill for up to 1 hour. But honestly? They’re incredible fresh. The cucumber stays snappier! Active Voice Win: “Set them on the counter, call your crew, and watch these beauties disappear!”
Plate Like a Pro (It’s Easier Than You Think!)
Presentation is part of the fun! Arrange your bites on a vibrant platter or rustic wooden board. Scatter extra microgreens, dill fronds, or lemon zest around them for a pop of color. Serving at a party? Add tiny forks or colorful toothpicks for easy grabbing. Packing lunch? Nestle them in a bento box between berries and nuts. For a chic appetizer, layer them on a long rectangular plate lined with edible flowers or radish slices. Keep it simple, fresh, and inviting – just like the bites themselves!
Mix It Up! Your Bite, Your Rules
Got an idea? Run with it! Here’s some inspo:
- Mediterranean Twist: Swap mayo for 1 tbsp hummus + 1 tsp lemon juice. Add 1 tbsp chopped Kalamata olives & a pinch of oregano. Garnish with feta crumbles!
- Spicy Sriracha Kick: Stir 1 tsp sriracha into the mayo mix. Top with sesame seeds and a sliver of jalapeño.
- Dill & Lemon Refresh: Add 1 tbsp fresh dill + 1 tsp lemon zest to the tuna. Garnish with thin lemon slice curls.
- Avocado Cream Dream (Dairy-Free): Mash 1/4 ripe avocado with the Dijon instead of mayo. Creamy, dreamy, green goodness!
- Everything Bagel Vibe: Sprinkle the tops generously with everything bagel seasoning before serving!
Olivia’s Kitchen Confessions & Wisdom
Oh, these bites! They’ve seen it all. Remember my first attempt? I used gargantuan garden cucumbers… slices so wide they doubled as coasters! Lesson learned: smaller cukes = cuter bites. This recipe is my kitchen therapy – when recipe testing gets intense, I whip these up. They ground me. Over time, the Dijon became non-negotiable (sorry, yellow mustard lovers!), and soaking the red onion is my secret for mellow perfection. Funny story: My cat, Whiskers, is OBSESSED with the tuna smell. I now have a strict “cucumber bite assembly zone” far from his stealthy paws. The biggest evolution? Realizing these aren’t just snacks. They’re my go-to light lunch with a side salad, a post-workout refuel, and my most requested potluck item. Simple food, big love. That’s the heart of it.
Your Questions, Answered!
Let’s tackle the common kitchen hiccups before they happen:
- “Help! My tuna mix is sliding off the cucumber!” Ah, the dreaded slide! Two culprits: 1) Wet cucumber slices (PAT THEM DRY!), or 2) Overloading the slice. Use a thick enough cucumber round and mound, don’t volcano! Chilling for 15 mins can also help set the mayo.
- “Can I make these ahead for a party?” Yes! BUT with strategy. Prep the tuna mix (store covered in fridge) and slice cucumbers (store dry in a container lined with paper towels) separately up to 24 hours ahead. Assemble 1 hour max before serving for optimal crunch. Garnish right before!
- “Any tips for keeping the red onion from overpowering?” Totally! Soaking the chopped onion in cold water (or ice water) for 5-10 minutes mellows its sharp bite beautifully. Drain and pat dry before using. Or, swap for milder chives!
- “My bites taste bland. What did I miss?” Seasoning is key! Taste your tuna mix BEFORE topping. Needs more salt? Pepper? A squeeze of lemon juice brightens everything. Don’t underestimate that Dijon either – it adds necessary tang!
Cucumber Tuna Bites
- Total Time: 10 minutes
Description
Hey snack lover! Olivia here—ready to rescue your snack game with my favorite fresh bites. These Cucumber Tuna Bites are crisp, creamy, and full of protein—perfect for picnics, parties, or a quick mid-day pick-me-up. Think cool cucumber rounds topped with zesty, Dijon-kissed tuna salad and a sprinkle of tangy red onion. They’re low-carb, gluten-free, and done in 10 minutes. Snack time just got fancy and fuss-free!
Ingredients
-
½ large English cucumber, sliced into 12 thick rounds
-
1 can tuna (4 oz, drained)
-
1 tbsp mayonnaise (or Greek yogurt)
-
1 tsp Dijon mustard
-
1 tbsp finely chopped red onion
-
Salt & pepper, to taste
Instructions
1️⃣ Slice & Prep: Wash cucumber, slice into ½-inch rounds, and pat dry.
2️⃣ Mix Filling: Flake tuna in a bowl, mix with mayo, Dijon, salt, and pepper.
3️⃣ Assemble: Spoon tuna mix onto each cucumber slice. Top with red onion.
4️⃣ Serve: Arrange on a platter, garnish with fresh herbs if you like. Enjoy fresh!
Notes
-
Pat cucumbers dry to prevent soggy bites.
-
Chill red onion in ice water to mellow its bite.
-
Prep filling ahead; assemble right before serving for max crunch!
- Prep Time: 10 mins
Nutrition
- Calories: 110 per serving
- Fat: 6g
- Carbohydrates: 2g
- Protein: 11g
Light Bite, Big Nutrition (Per Serving: 4 Bites)
Prep time: 10 minutes | Servings: 3 | Calories: 110 kcal | Protein: 11g | Fat: 6g | Carbs: 2g | Fiber: 0.5g | Net Carbs: 1.5g
Dietary Notes: Gluten-free | Low-carb | Keto-friendly | Grain-Free
These little powerhouses deliver clean protein and healthy fats to keep you fueled, with minimal carbs and maximum refreshment. Perfect for mindful munching!
Final Thoughts: More Than Just a Snack
What started as a picnic experiment has become one of my most versatile kitchen staples. Cucumber Tuna Bites aren’t just a snack—they’re a:
-
Party hero
-
Meal prep MVP
-
Kid-friendly hack
-
Healthy craving crusher
They prove that eating well doesn’t mean sacrificing flavor or fun. So next time hunger strikes, skip the chips. Whip up these bites instead—your body (and taste buds) will thank you.
Now, go forth and crunch!

Turkey Veggie Panini
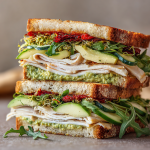
The Ultimate Turkey Veggie Panini: Your New Go-To Comfort Crunch
Hey there, kitchen friend! Olivia here, waving from my flour-dusted countertop. You know that magical moment when you bite into something so perfectly crispy, melty, and fresh that you just close your eyes and sigh? That’s exactly what I’m bringing you today with this Turkey Veggie Panini. Imagine golden sourdough hugging creamy avocado, zesty hummus, peppery greens, and tender turkey—all pressed into a warm, gooey hug. It’s not just a sandwich; it’s a 5-minute vacation for your taste buds! Whether you’re racing between Zoom calls or craving a cozy lunch escape, this panini is your flavor-packed superhero. No fancy skills needed—just big, delicious energy. Ready to make your kitchen smell like a trendy café? Let’s dive in!
Why This Panini Steals My Heart (Every. Single. Time.)
Picture this: It’s 2018, rainy Sunday, and my bestie Maya shows up at my door looking like a drowned squirrel. “Feed me something that feels like a hug?” she pleads. I raid my fridge—leftover turkey, sad-looking sprouts, that half-avocado whispering “use me.” I slap it all between sourdough, press it in my ancient George Foreman grill (shhh, we’ve all been there!), and BAM. Maya’s eyes light up: “Olivia, this is stupid good.” That messy, thrown-together sandwich became our ritual. Now, every time I make it, I’m back at that counter, laughing as rain patters against the window. Food isn’t just fuel; it’s memory glue. This panini? It’s my edible scrapbook.
Gather Your Flavor Squad: Ingredients & Swaps
Here’s your no-stress grocery list! Pro tip: Treat this like a choose-your-own-adventure book. Flexibility is key!
- Sourdough bread (2 slices): Our crispy MVP! Its tangy chew holds up to pressing. Swap it: Ciabatta or whole-grain if you’re out. Avoid super-soft bread—it turns soggy.
- Applegate turkey breast (2-3 slices): Lean, savory, and nitrate-free. Chef insight: Leftover rotisserie chicken? Yes! Vegetarian? Use marinated tofu slices.
- Plain hummus (2 tbsp): Creamy binder with protein punch. Why I love Ithaca: Smooth texture, no overpowering garlic. Swap: Mash white beans with lemon if hummus isn’t your jam.
- Dijon mustard (1 tsp): Zingy kick-cut through richness. Hot tip: Yellow mustard works, but Dijon’s complexity is *chef’s kiss*.
- Avocado (¼, mashed): Buttery lushness! Save it from browning: Spritz mashed avocado with lemon juice.
- Cucumber (2-3 thin slices): Crunchy refreshment. Swap: Zucchini ribbons or bell peppers.
- Sun-dried tomatoes (2 pieces): Sweet-tart bombs. No oil-packed? Use fresh tomato + pinch of dried oregano.
- Arugula (handful): Peppery bite! Swap: Spinach or butter lettuce for milder greens.
- Broccoli sprouts (handful): Earthy, nutrient-packed crunch. Can’t find them? Alfalfa sprouts or microgreens rock too.
Let’s Build Your Masterpiece: Step-by-Step Magic
Grab your favorite knife—we’re making sandwich art!
- Spread the love: Slather hummus on one sourdough slice. On the other, swipe Dijon. Pro hack: Spread to the edges! This seals bread against sogginess.
- Layer like a boss: On the hummus side, stack turkey, then mashed avocado. Top with cucumbers, sun-dried tomatoes, arugula, and sprouts. Biggest mistake? Overstuffing! Keep layers flat—sprouts on top prevent slippage.
- Close & press: Gently cap your creation. Secret weapon: Lightly press with your palm to “glue” layers together pre-grilling.
- Grill to glory: Heat a panini press or grill pan over medium. No press? Use a heavy skillet (cast iron = crunch king!). Grill 3-4 mins until golden with visible grill marks. Watch closely: If using a skillet, flip halfway and press down with a spatula.
- Slice & swoon: Cut diagonally (extra fancy points!) and serve IMMEDIATELY. Why rush? That warm avocado-hummus embrace waits for no one.
The Art of Bread Selection – Why Sourdough Reigns Supreme
When it comes to crafting the perfect panini, the bread isn’t just a vessel—it’s the foundation of texture, flavor, and structural integrity. While many breads can technically work, sourdough stands out as the undisputed champion for a Turkey Veggie Panini. Here’s why:
1. Texture & Structure
Sourdough’s sturdy crust and chewy interior hold up beautifully under pressure (literally!). Unlike softer breads like white sandwich loaves, which can turn gummy or collapse when pressed, sourdough maintains its integrity, delivering that signature crunch with every bite. The natural fermentation process also gives it a slightly denser crumb, preventing fillings from making the bread soggy.
2. Flavor Complexity
The tangy, slightly acidic profile of sourdough adds depth to your panini, balancing creamy avocado, rich hummus, and savory turkey. It’s like a flavor conductor, harmonizing all the ingredients without overpowering them. Compare that to plain whole wheat, which can taste flat, or ciabatta, which sometimes leans too bready.
3. The Golden Grill Factor
Ever notice how sourdough develops those gorgeous, deep grill marks? Its low sugar content means it browns beautifully without burning quickly. Pro tip: Lightly brush the outer slices with olive oil (or butter, if you’re feeling indulgent) before pressing—this enhances crispiness and adds a subtle richness.
Bread Swaps & Considerations
-
Ciabatta: A close second! Chewy and porous, but watch for over-crumbling.
-
Whole Grain: Nutty and hearty, but opt for a sturdy brand (like Dave’s Killer Bread).
-
Gluten-Free: Use a GF sourdough or a thick, pre-toasted gluten-free loaf to avoid disintegration.
Final Bread Verdict: If you want a panini that’s crispy outside, tender inside, and packed with flavor, sourdough is non-negotiable. It’s the unsung hero of this sandwich!
The Science of Layering – Why Order Matters
You’ve got your ingredients prepped, but how you stack them can make or break your panini. Here’s the foolproof method to ensure every bite is balanced and structurally sound.
1. The Moisture Barrier Rule
Wet ingredients (hummus, avocado, mustard) should never touch the bread directly without a protective layer. Why? They seep into the bread, causing sogginess. Solution:
-
Bottom slice: Spread hummus first—it’s thick enough to act as a moisture barrier.
-
Top slice: Swipe on mustard, then layer drier ingredients (turkey, sprouts) closest to the bread.
2. Weight Distribution
Heavy or slippery ingredients (avocado, cucumber) should be nestled between “grippy” layers to prevent sandwich slide-out. Example:
-
Turkey (base) → Avocado (sticks to turkey) → Cucumber (light, crunchy) → Sun-dried tomatoes (chewy, anchors greens).
3. The Green Rule
Delicate greens (arugula, sprouts) should go on top of other fillings, not beneath them. Heat wilts them, so placing them last ensures they stay fresh and crisp.
Common Layering Mistakes
-
Overstuffing: More isn’t always better. Keep fillings flat—no towering stacks!
-
Avocado Overload: Spread it thin. A ¼ avocado is plenty for creaminess without squishing out.
-
Sprouts on the Bottom: They’ll turn to mush. Always tuck them on top!
Pro Tip: Press the assembled sandwich gently with your palm before grilling. This “pre-press” helps layers adhere, reducing fillings shifting during cooking.
Pressing Techniques – Beyond the Panini Press
No panini press? No problem! Here’s how to achieve that perfect press with everyday kitchen tools.
1. Cast-Iron Skillet + Heavy Object
-
Heat a skillet over medium-low. Add the sandwich, then place another heavy skillet (or foil-wrapped brick) on top.
-
Press gently for even contact. Flip after 2-3 minutes.
2. Grill Pan + Spatula
-
Use a grill pan for those coveted marks. Press down firmly with a spatula every 30 seconds.
3. The George Foreman Hack
-
The OG panini cheat code! Close the lid and let it work its magic—no flipping needed.
4. Toaster Oven Trick
-
Assemble sandwich, wrap in foil, and place a baking sheet on top weighted with cans. Bake at 375°F for 8-10 mins.
Key Pressing Tips:
-
Low and Slow: High heat burns bread before fillings warm. Medium heat is ideal.
-
Even Pressure: Uneven pressing = uneven browning. Use a balanced weight.
-
Don’t Crowd the Pan: Cook one at a time for optimal crispiness.
Serving Vibes: Make It a Moment
Slide that panini onto a rustic board—rustle up some sides! Pair with dill pickle spears for tang or sweet potato fries for cozy contrast. Serving guests? Add a mason jar of tomato soup for dunking. Coffee? Cold brew. Wine? Crisp Pinot Grigio. This sandwich screams “easy elegance,” so lean into it! Pro plating: Wipe edges clean, sprinkle with sesame seeds, and photograph fast… before you devour it.
Shake It Up: 5 Tasty Twists
Play with your food! Here’s how to remix your panini:
- Mediterranean Magic: Swap turkey for feta, add kalamata olives & roasted red peppers.
- Spicy ’n Sweet: Spread jalapeño hummus + add apple slices. Boom!
- Vegan Delight: Use smoked tempeh instead of turkey, vegan mayo instead of hummus.
- Caprese Dream: Skip mustard/hummus—layer pesto, mozzarella, tomato, and basil.
- Breakfast Panini: Turkey → crispy bacon, add a fried egg. Thank me later.
Olivia’s Kitchen Confessions
Okay, real talk: My first version of this had so many sprouts, it looked like a chia pet sandwich. Lesson learned! Over the years, I’ve tweaked it based on fridge raids and reader feedback (shoutout to Linda in Ohio who suggested sun-dried tomatoes—genius!). One hilarious fail? I once used frozen bread. It… disintegrated. Now I keep sourdough slices in the freezer (thaw 10 mins first!) for emergency panini cravings. This recipe’s like a good friend—forgiving, adaptable, and always there when you need joy.
Panini Puzzles Solved: FAQs
Q: My panini squishes flat when I press it. Help!
A: Overfilling is the culprit! Use thinner layers—especially avocado. Press gently pre-grill, then firmly in the press/pan.
Q: Can I meal-prep this ahead?
A: Absolutely! Prep fillings (store avocado with lemon juice) and assemble morning-of. Avoid grilling ahead—it gets soggy. Un-grilled sandwiches keep wrapped in fridge 24 hours.
Q: No panini press? Alternatives?
A: No sweat! Use a grill pan + heavy skillet as a press. Or, butter bread’s outer surface and cook grilled-cheese-style in a non-stick pan.
Q: Greens wilting too much?
A: Layer them between turkey and avocado—they’re insulated from direct heat!
Turkey Veggie Panini
- Total Time: 10 mins
Description
Hey kitchen friend! Olivia here—ready to help you turn an ordinary lunch into a warm, melty hug. This Turkey Veggie Panini is stacked with creamy avocado, tangy hummus, crisp veggies, and tender turkey, all pressed between golden sourdough. Think café vibes at home in just 10 minutes. Let’s turn a rainy day (or any day) into a delicious escape!
Ingredients
-
2 slices sourdough bread
-
2–3 slices turkey breast
-
2 tbsp plain hummus
-
1 tsp Dijon mustard
-
¼ avocado, mashed
-
2–3 cucumber slices
-
2 sun-dried tomatoes
-
Handful arugula
-
Handful broccoli sprouts
Instructions
1️⃣ Spread: Hummus on one slice, Dijon on the other—edge to edge for max flavor!
2️⃣ Layer: Stack turkey, mashed avocado, cucumber, sun-dried tomatoes, arugula, and sprouts. Keep layers flat to avoid slippage.
3️⃣ Press: Close the sandwich, gently press with your palm.
4️⃣ Grill: Heat a panini press or grill pan. Grill 3–4 mins until golden with crisp grill marks. Flip if using a skillet!
5️⃣ Serve: Cut diagonally and enjoy warm—panini magic waits for no one!
Notes
-
Use day-old bread for extra crunch.
-
Don’t overfill—flat layers = perfect press.
-
No panini press? Grill cheese-style with a heavy skillet.
- Prep Time: 5 mins
- Cook Time: 5 mins
Nutrition
- Calories: 430 per Panini
- Fiber: 6g
- Protein: 28g
Nutritional Nibbles
Per serving (1 sandwich): Calories: ~430 • Protein: 28g • Fiber: 6g • Carbs: 42g • Fat: 18g (mostly heart-healthy from avocado!)
Note: Values approximate. Using low-sodium turkey? Sodium drops to ~500mg.
Final Thoughts: Why This Panini is a Weeknight Hero
This Turkey Veggie Panini isn’t just a meal—it’s a masterclass in efficient, satisfying cooking. It’s:
-
Fast: 5 minutes to assemble, 4 to grill.
-
Adaptable: Endless variations for dietary needs.
-
Forgiving: No precision required, just good instincts.
It’s the sandwich that feels like a hug, tastes like a gourmet café, and fits into even the craziest days. So go ahead—press, devour, repeat. Your future self (and your taste buds) will thank you.

High Protein Power Bagel
Welcome to My Ultimate Breakfast Game-Changer!
Hey there, kitchen friends! Olivia here, and I’ve got a confession: I used to be the queen of sad desk breakfasts. You know the drill—gulping cold coffee while scrolling through emails, wondering why my energy tanked by 10 AM. Sound familiar? That all changed when I created this High Protein Power Bagel. It’s not just fuel; it’s a flavor explosion that hugs your taste buds while packing a serious nutritional punch. Imagine creamy avocado and cottage cheese mingling with spicy chili flakes and sweet-hot honey on a crunchy everything bagel, all crowned with jammy soft-boiled eggs. We’re talking 28g of protein, 6g of fiber, and healthy fats that’ll keep you full ’til lunch—no “hangry” meltdowns in sight! Whether you’re crushing a morning workout, juggling school drop-offs, or just craving something decadent (yet wholesome), this 10-minute marvel is your new best friend. Let’s turn breakfast from blah to BOOM together!
How a Rainy Morning Birthed My Breakfast Obsession
Picture this: It’s 6 AM, pouring rain, and my post-yoga tummy is rumbling like a freight train. I’m staring into the fridge, half-awake, when I spot leftover bagels from Sunday brunch. Lightbulb moment! I grab avocado (always on hand), my fave cottage cheese (creamy protein magic), and eggs. But here’s the kicker—my husband’s artisanal hot honey is sitting there, winking at me. I drizzle it on, sprinkle chili flakes, and… BAM. The first bite? Pure euphoria. The spicy-sweet heat cut through the richness, the eggs oozed gold over the crunchy bagel, and suddenly, my gloomy morning felt like a cozy café date. Now, it’s our family’s “power breakfast”—my teen even requests it before exams! Funny how kitchen accidents become legends, right?
Your Grocery List: Simple Stars, Big Impact
Gather these rockstars—each plays a crucial role! Swap freely based on what’s in your kitchen.
- 1 everything bagel, halved & toasted – That garlic-onion-sesame crust adds crunch and umami depth. Chef tip: Use day-olds! They toast up crispier. Swap: Whole wheat bagel for extra fiber, or gluten-free if needed.
- ½ ripe avocado, mashed – Nature’s butter! Loaded with heart-healthy fats and fiber. Chef insight: Sprinkle with lemon juice to keep it green. Swap: Hummus for a savory twist if avocados are pricey.
- ½ cup cottage cheese – The protein MVP (14g per serving!). Its mild creaminess balances the heat. Pro move: Blend it smooth if you dislike curds. Swap: Greek yogurt or ricotta for similar creaminess.
- Chili flakes (to taste) – Wake up your palate! Start with ¼ tsp. Chef secret: Toast flakes in a dry pan for 30 seconds to intensify flavor. Swap: Smoked paprika or a dash of hot sauce.
- Drizzle of hot honey – Spicy + sweet = addiction. Why I’m obsessed: It caramelizes slightly on warm ingredients. Swap: Mix 1 tsp honey + 2 drops Sriracha.
- 2 soft-boiled eggs – Farm-fresh eggs have richer yolks! Game-changer: Boil extras for quick salads or snacks. Swap: Scrambled or fried eggs—yolk runniness is non-negotiable for “sauce”!
Let’s Build Your Flavor Masterpiece!
Follow these steps—I’ve packed ’em with hacks to make you feel like a pro. Total time: 10 minutes!
- Toast the bagel halves until golden. Pop ’em in a toaster, air fryer (3 mins at 375°F), or oven. Why this matters: Crispiness prevents sogginess from the toppings! Hack: Rub cut sides with a garlic clove for extra punch.
- Mash the avocado in a bowl with a pinch of salt and pepper. Chef trick: Use the back of a fork for rustic texture—no food processor needed! Spread it evenly on both bagel halves. Layer logic: Avocado acts as a moisture barrier between bagel and cottage cheese.
- Top with cottage cheese. Spoon it over the avocado, gently spreading to cover. Pro tip: Use a measuring cup to avoid spills and control portions. For pretty plating, leave a ½-inch border.
- Sprinkle with chili flakes & hot honey. Start light—you can always add more! Drizzle honey in zigzags. Flavor hack: Add the chili flakes BEFORE honey so it sticks. Want more heat? Add cracked black pepper too.
- Serve with halved soft-boiled eggs. Cook eggs 6-7 minutes in boiling water, then plunge into ice water. Peel, slice in half, and place on the side. Egg mastery: Use a spoon to crack shells gently for easier peeling. Presentation pro: Sprinkle eggs with everything bagel seasoning for extra crunch!
Plating Like a Pro (No Fancy Skills Required!)
This beauty deserves a moment! Slide your loaded bagel halves onto a vibrant plate—contrast is key. Nestle the halved eggs alongside, yolks facing up (that golden ooze is Instagram gold!). Garnish with microgreens or extra chili flakes for color. Pair with: A big citrus salad (think grapefruit + mint) to cut richness, or an iced matcha latte for caffeine without coffee jitters. Pro tip: Serve open-faced with a fork and knife—it’s messy in the best way!
Shake It Up: 5 Delicious Twists
Customize this blueprint based on cravings or dietary needs!
- Smoked Salmon Luxe: Swap cottage cheese for herbed cream cheese + add 2 oz smoked salmon. Skip chili flakes—use dill and capers!
- Vegan Powerhouse: Replace eggs with crispy tofu slices (marinated in turmeric + nutritional yeast). Use almond-based yogurt instead of cottage cheese.
- Mediterranean Vibes: Substitute cottage cheese with whipped feta, add sliced cucumbers, kalamata olives, and a sprinkle of za’atar.
- BBQ Chicken Crush: Top with shredded rotisserie chicken tossed in BBQ sauce. Swap hot honey for regular—add pickled red onions!
- Lower-Carb Style: Use a sliced portobello mushroom (roasted 10 mins) as the “bagel.” Increase eggs to 3 for protein!
The Science Behind This Power Breakfast – Why It Works
Ever wonder why this High Protein Power Bagel keeps you full for hours while other breakfasts leave you crashing? It’s not magic—it’s science! Let’s break down why this combo is a nutritional powerhouse.
1. Protein: The Satiety Superstar
With 28g of protein from cottage cheese, eggs, and bagel, this meal hits the sweet spot for morning fuel. Protein slows digestion, stabilizes blood sugar, and triggers hormones that signal fullness. Compared to a sugary cereal (which spikes and crashes insulin), this keeps energy steady. Fun fact: Studies show high-protein breakfasts reduce cravings by 60% compared to low-protein ones!
2. Healthy Fats: Brain & Energy Boost
Avocado delivers monounsaturated fats (the heart-healthy kind), while egg yolks provide choline, a nutrient vital for brain function. Fats also help absorb fat-soluble vitamins (A, D, E, K). The result? Mental clarity and long-lasting energy—no mid-morning fog.
3. Fiber: The Digestive Hero
Between the bagel (whole grains) and avocado, this meal packs 6g of fiber. Fiber feeds gut bacteria, aids digestion, and prevents sugar crashes. Most people only get 15g of fiber daily (half the recommended amount)—this breakfast gets you a third of the way there!
4. The Flavor Chemistry
Spicy chili flakes + sweet hot honey = a phenomenon called “dynamic contrast.” Your taste buds register multiple sensations (heat, sweet, creamy), making each bite more satisfying. This tricks your brain into feeling fuller faster!
Pro Tip: For maximum benefits, pair with a hydration booster (water with lemon or herbal tea). Digestion starts with saliva, and hydration aids nutrient absorption!
The Psychology of a Winning Breakfast – More Than Just Food
Why does this bagel feel like a hug in meal form? Because breakfast isn’t just about nutrients—it’s a mindset reset. Here’s how this recipe impacts your psychology.
1. The Ritual Effect
Taking 10 minutes to assemble this beautiful plate creates a mini mindfulness practice. Unlike scarfing down a granola bar over the sink, the act of layering toppings forces you to slow down. Studies show mindful eating reduces overeating by 30% and enhances meal satisfaction.
2. Visual Appeal = Dopamine Hit
Bright yellow yolks, green avocado, and red chili flakes trigger a dopamine response (your brain’s “reward” chemical). Food stylists know: We eat with our eyes first. A vibrant plate subconsciously signals, “This is special,” making you savor it more.
3. The Comfort-Novelty Balance
The bagel is familiar (comfort), while the hot honey + chili combo adds excitement (novelty). This balance prevents breakfast boredom—a key reason people skip meals. Ever notice how fast food chains constantly introduce “limited-time” items? Same principle!
4. Empowerment Through Customization
Choosing your swaps (smoked salmon? tofu? za’atar?) gives autonomy, a psychological need linked to motivation. When you “own” a recipe, you’re more likely to stick with healthy habits.
Pro Tip: Name your creation! Calling it “My Spicy Sunrise Bagel” reinforces ownership and makes it memorable.
The Global Breakfast Connection – How This Fits Worldwide
This bagel is a mashup of global breakfast traditions—proof that great flavors transcend borders. Let’s travel the world without leaving your kitchen!
1. Avocado: Mexico’s Gift
In Mexico, avocado on toast (or tortillas) is breakfast gold. Adding lime and chili? Classic “aguacate” style. Fun fact: Mexico eats 3x more avocado per person than the U.S.!
2. Cottage Cheese: Eastern Europe’s Protein Staple
In Poland and Russia, farmers’ cheese (similar to cottage cheese) is served with honey and bread. The sweet-salty pairing has fueled generations.
3. Chili-Honey: Thailand’s Sweet Heat
Thai street vendors drizzle “nam prik pao” (chili jam) over fruit and sticky rice. The spicy-sweet combo wakes up the senses—just like our hot honey hack!
4. Soft-Boiled Eggs: Japan’s Onsen Tamago
Japanese breakfasts often feature custardy slow-cooked eggs with soy sauce. The runny yolk acts as a rich sauce, just like in this recipe.
Pro Tip: Try a cultural spin by swapping bagel for:
-
Arepa (Venezuela)
-
Bao bun (China)
-
Injera (Ethiopia)
Olivia’s Behind-the-Scenes Scoop
This recipe evolved from my “kitchen sink” experiments! Originally, I used cream cheese, but cottage cheese won for its protein boost and tang. The hot honey? Total accident—I grabbed the wrong jar mid-sleepy chaos. Best mistake ever! Over time, I’ve learned: Egg timing is EVERYTHING. Undercook by 30 seconds? Liquid gold. Overcook? Sad rubber. I set phone timers like my life depends on it! Funny story: Once, I subbed ghost pepper flakes for regular—cue fire-breathing reactions from my kids. Lesson learned: Label your spice jars, friends. Now, this bagel is my love letter to busy mornings. Make it yours!
Your Burning Questions, Answered!
Q: Can I meal prep this ahead?
A: Yes—with smarts! Prep components separately: Store mashed avocado with lemon juice in airtight containers (3 days). Boil eggs ahead (peel on day of). Keep cottage cheese chilled. Assemble morning-of to avoid sogginess!
Q: Help! My bagel got soggy. What went wrong?
A: Likely culprit: Warm toppings on non-crispy bread. Always toast bagels until GOLDEN. Also, spread avocado thickly—it’s a moisture barrier. If using moist add-ons (like tomatoes), add them last!
Q: I hate runny yolks. Can I use hard-boiled eggs?
A: Absolutely! Hard-boil for 10-12 minutes. Slice or chop ’em. But hear me out: The runny yolk acts like a sauce—try medium-boiled (8 mins) for a jammy compromise!
Q: Is there a lower-calorie version?
A: Yep! Use a mini bagel (save 100 cal), reduce avocado to ¼, and swap full-fat cottage cheese for low-fat. Still packs 20g protein! Add extra chili flakes for flavor without calories.
High Protein Power Bagel
- Total Time: 10mins
Description
Hey breakfast hero! Olivia here—ready to rescue your mornings with my High Protein Power Bagel. Think creamy avocado, protein-packed cottage cheese, spicy chili flakes, and a drizzle of hot honey, all piled on a toasty everything bagel and crowned with jammy soft-boiled eggs. One bite, and you’ll forget sad desk breakfasts forever. Fuel up, feel amazing, and crush your day!
Ingredients
-
1 everything bagel, halved & toasted
-
½ ripe avocado, mashed
-
½ cup cottage cheese
-
2 soft-boiled eggs
-
Chili flakes, to taste
-
Drizzle of hot honey
Instructions
1️⃣ Toast the bagel until golden and crisp.
2️⃣ Mash avocado with a pinch of salt & pepper, then spread over bagel halves.
3️⃣ Top with cottage cheese, spreading gently.
4️⃣ Sprinkle chili flakes and drizzle with hot honey.
5️⃣ Cook eggs (6–7 mins), cool in ice water, peel, halve, and serve alongside.
Notes
-
Toast bagels well—no soggy breakfasts!
-
Add lemon juice to avocado to keep it green.
-
Want extra heat? Add cracked pepper or smoked paprika.
- Prep Time: 5 mins
- Cook Time: 5 mins
Nutrition
- Calories: 400 per serving
- Fiber: 6g
- Protein: 28g
Nutritional Powerhouse Breakdown (Per Serving)
Calories: 480 | Protein: 28g | Fiber: 6g | Healthy Fats: 22g (mostly monounsaturated from avocado!) | Carbs: 45g
Why it rocks: Balanced macros for sustained energy. Protein builds muscle, fats support brain health, and fiber aids digestion. Perfect for post-workout recovery or conquering back-to-back meetings!
Final Thoughts: More Than a Meal, It’s a Morning Revolution
This High Protein Power Bagel isn’t just food—it’s a tiny act of self-care in a busy world. It proves that:
✅ Fast food doesn’t mean unhealthy.
✅ Breakfast can be indulgent AND nourishing.
✅ The best recipes are born from happy accidents (looking at you, hot honey!).
So tomorrow, when you’re tempted to grab a sad muffin, remember: You deserve a breakfast that loves you back. Now go forth and conquer your day—one delicious bite at a time!
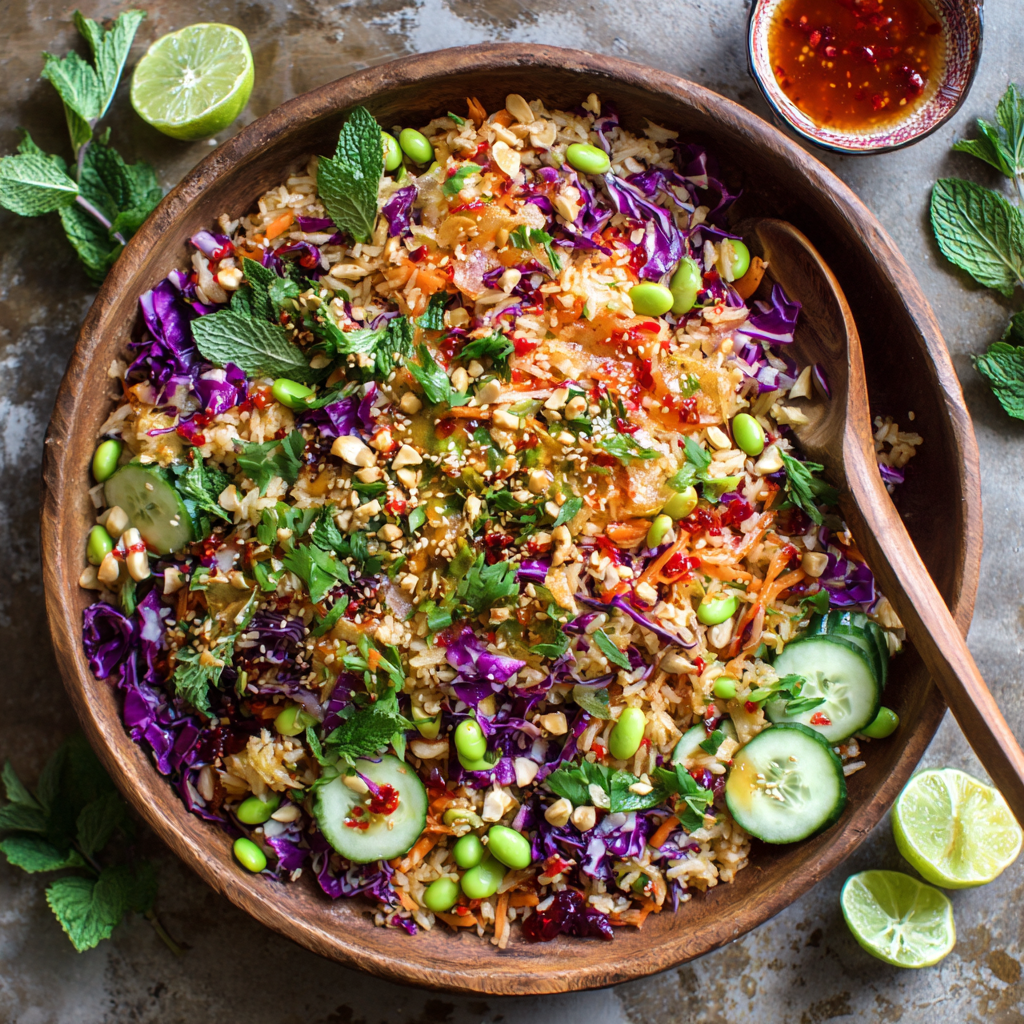
Crispy Rice Salad with Maple Tahini Ginger Dressing
Let’s Make Magic with Leftover Rice!
Hey there, friend! Olivia here, apron dusted with rice grains and a big grin on my face because we’re about to transform humble leftovers into a showstopping meal. Ever open your fridge, spot that lonely container of day-old rice, and think… “Meh”? I’ve been there too! But today? We’re turning that “meh” into a “WOW” with my Crispy Rice Salad drizzled in Maple Tahini Ginger Dressing. Imagine this: golden, crackly rice nuggets mingling with cool cucumbers, vibrant purple cabbage, and crunchy cashews, all wrapped in a creamy-spicy-sweet dressing that dances on your tongue. It’s like a party in a bowl—textural fireworks, flavor explosions, and pure joy in every bite. Whether you’re a meal-prep pro, a busy parent racing against the dinner clock, or just craving something fresh and exciting, this salad is your new best friend. No fancy skills needed—just your favorite skillet, a big mixing bowl, and that gorgeous appetite of yours. Ready to make some noise (literally—that rice CRUNCH is everything)? Let’s get cooking!
The Little Salad That Stole My Potluck
Picture this: It’s 2018, and I’m frantically rummaging through my kitchen an hour before a friend’s potluck. My grand plan? A fancy layered trifle. Epic fail. The custard curdled, and I was left with… cold rice, wilting veggies, and panic sweat. But then? Kitchen intuition kicked in. I remembered a street-food-style crispy rice bowl I’d adored in Bangkok years ago—all crunch and zing and messy fingers. I threw my sad rice into a scorching skillet with soy and chili crunch, chopped whatever veggies looked perky, and whisked tahini with maple syrup (a happy accident—I’d run out of honey!). The result? A ragtag bowl of magic. My friends descended on it like seagulls on fries. One bite and Sarah gasped, “Olivia, what IS this?!” That chaotic, thrown-together moment birthed this recipe. Now, it’s my go-to when life feels messy. Because sometimes? The best memories—and meals—come from beautiful accidents.
Gather Your Flavor Squad 🛒
Here’s your treasure list! Pro tip: Use cold, leftover rice—it’s drier and crisps WAY better than fresh. But don’t sweat subs; I’ve got your back!
- For the Crispy Rice Salad:
- 2 cups cooked white rice (cold or leftover): The star! Starchier varieties like jasmine or sushi rice work best. Chef’s hack: Spread fresh rice on a tray; refrigerate uncovered for 30 mins to dry it out! Sub: Brown rice for nuttier flavor (add 1 extra tsp oil).
- 1 tbsp soy sauce or coconut aminos: Salty depth. Sub: Tamari for gluten-free, or liquid aminos.
- 1 tbsp sesame oil: Toasted version please—it’s nuttier! Insight: This is your crispy rice’s best friend.
- 1–2 tsp chili crunch or sriracha: Heat level’s your call! Chili crunch adds texture. Sub: Gochujang (thin with 1 tsp water).
- 2–3 cups shredded red cabbage: Color + crunch! Tip: Slice thin for no awkward “wow that’s a huge chunk” moments. Sub: Napa cabbage or shredded Brussels sprouts.
- 3 mini cucumbers, sliced: Refreshing crunch. Sub: 1 large English cucumber.
- 1 cup shelled, steamed edamame: Protein pop! Chef’s shortcut: Use frozen—thaw in hot water for 5 mins!
- 1/4 cup green onions, thinly sliced: Mild oniony zing. Use both white and green parts!
- 1/3 cup cashews, chopped: Buttery crunch. Sub: Peanuts or almonds. Toast them for extra oomph!
- 2 tbsp cilantro, chopped: Bright, herby lift. Hate cilantro? Sub: Parsley or basil.
- 1 tbsp mint, chopped: Cool contrast to spice. Don’t skip—it’s a game-changer!
- For the Maple Tahini Ginger Dressing:
- 1/4 cup tahini: Creamy base. Insight: Stir jar well first—oil separates! Sub: Almond butter (dressing will be sweeter).
- 1 tbsp sesame oil: Flavor anchor. Use toasted!
- 1 tsp grated ginger: Fresh is best! Chef’s hack: Freeze ginger knobs; grate frozen—no peeling!
- 1 tsp chili crunch or sriracha: Harmonizes with the rice heat.
- 2 tbsp maple syrup: Balances spice. Sub: Honey or agave.
- 2 tbsp lime juice (about 1 lime): Acidic zing. Tip: Roll limes on the counter first—juicier!
- 1 tbsp mirin or rice vinegar: Sweet tang. Sub: Apple cider vinegar + 1/2 tsp sugar.
- 1 tbsp soy sauce or coconut aminos: Salty-savory backbone.
Let’s Build That Crunchy Dream! 👨🍳
Ready for the fun part? Grab your skillet—we’re making kitchen music!
- Crisp that rice like a boss: Heat sesame oil in a non-stick or well-seasoned cast-iron skillet over medium heat. Swirl to coat. Add rice, soy sauce, and chili crunch. Spread evenly, then PRESS DOWN with a spatula—compact it! Walk away for 5–7 mins. Seriously—no stirring! This builds that golden crust. Peek at 5 mins; edges should be brown. Flip sections (don’t stir wildly—we want chunks, not mush!), press again, crisp 2–3 more mins. Chef’s secret: Heard sizzling stop? That’s your cue to flip! Too pale? Boost heat slightly. Transfer to a plate. Let cool—this keeps it crispy!
- Chop & mingle your veggies: While rice cools, toss cabbage, cucumbers, edamame, green onions, cashews, cilantro, and mint in a huge bowl. Massage the cabbage gently with your hands for 10 seconds—it softens slightly and soaks up dressing better! Time-saver: Pre-chop veggies up to 1 day ahead; store in fridge.
- Whip up that luscious dressing: In a small bowl or jar, combine all dressing ingredients. WHISK LIKE YOU MEAN IT until smooth and creamy. Uh-oh, too thick? Add warm water, 1 tsp at a time, until it ribbons off your whisk. Pro tip: Taste! Want more zing? Add lime. More sweet? Drizzle maple.
- Bring it all home: Add cooled crispy rice to the veggie bowl. Pour dressing over everything. Gently toss with salad tongs or clean hands—don’t massacre those crispy bits! Serve IMMEDIATELY while the rice is still gloriously crunchy. Final flourish? Sprinkle extra cashews and herbs on top!
Plate It Pretty (or Just Dive In!)
This salad screams “look at me!” Serve it family-style in a wide, shallow bowl to show off those colors and textures. For individual portions, pack it into bowls or even mason jars (dressing at the bottom, then rice, then veggies—shake before eating!). Pair it with grilled shrimp or miso-glazed tofu for a hearty meal, or alongside lemony roasted chicken if you’re feeling fancy. Lunchbox win? Layer undressed salad + crispy rice in a container, dressing in a small jar—assemble at work for MAX crunch. Garnish with extra mint, sesame seeds, or a lime wedge. And hey—no judgment if you eat it straight from the mixing bowl. I do!
Make It Your Own! 5 Tasty Twists
This recipe is your playground! Try these riffs:
- Protein Power-Up: Add 1 cup shredded rotisserie chicken, pan-seared shrimp, or crispy baked tofu cubes.
- Rainbow Swap: Use shredded carrots, bell peppers, or snap peas instead of cabbage. Edamame MIA? Try chickpeas!
- Heat Seeker: Double the chili crunch in the rice AND dressing. Top with sliced jalapeños.
- Grain Game: Swap rice for quinoa or farro (cook, spread, chill first). Bonus fiber boost!
- Nut-Free/Dairy Twist: Use sunflower seeds instead of cashews. Dressing too thick? Thin with unsweetened almond milk.
Olivia’s Backstage Kitchen Confessions 😉
This recipe is my kitchen’s happy accident that stuck! Version 1.0 involved burnt rice (RIP, non-stick pan), and I once used peanut butter instead of tahini—tasty but… gluey. Lesson learned: tahini is queen! Over the years, I’ve tweaked it based on YOUR feedback—adding mint after Sarah from Milwaukee said it “made the flavors sing,” and upping the maple because my nephew declared Version 2 “not sweet enough, Aunt Liv.” The biggest win? Discovering that pressing the rice is non-negotiable for maximum crunch. My husband now calls it “crack rice” because he’s obsessed with scraping the crispy bits from the skillet. True story: I once made this for my skeptical dad (“Salad? For dinner?”). He finished three servings. Moral? Never underestimate crispy carbs + creamy dressing. It’s a universal love language!
Your Questions, Answered!
Let’s troubleshoot like pros!
Q: My rice turned out soggy/mushy! What did I do wrong?
A: Three common culprits: 1) Rice was too fresh/wet—always use cold, dry leftover rice (see Ingredients hack!). 2) You stirred too soon/too much. Patience, grasshopper! Let it form a crust. 3) Skillet wasn’t hot enough. Heat oil until it shimmers before adding rice.
Q: Can I prep this ahead for meal prep?
A: Yes—but strategically! Store components separately: undressed veggie mix in one container, crispy rice in another (re-crisp in a skillet for 2 mins if needed), dressing in a jar. Assemble right before eating. Dressed salad leftovers get softer but still taste great—eat within 24 hours.
Crispy Rice Salad with Maple Tahini Ginger Dressing
- Total Time: 20 mins
Description
Hey friend! Olivia here, ready to turn that lonely leftover rice into a crunchy, colorful bowl of magic. This salad brings together golden crispy rice, crisp veggies, fresh herbs, and a dreamy sweet-spicy dressing. Perfect for quick lunches, potlucks, or whenever your fridge surprises you. Grab your skillet—let’s make some noise!
Ingredients
For the Crispy Rice Salad:
-
2 cups cold cooked white rice
-
1 tbsp soy sauce or coconut aminos
-
1 tbsp toasted sesame oil
-
1–2 tsp chili crunch or sriracha
-
2–3 cups shredded red cabbage
-
3 mini cucumbers, sliced
-
1 cup shelled, steamed edamame
-
1/4 cup green onions, thinly sliced
-
1/3 cup cashews, chopped
-
2 tbsp cilantro, chopped
-
1 tbsp mint, chopped
For the Maple Tahini Ginger Dressing:
-
1/4 cup tahini
-
1 tbsp toasted sesame oil
-
1 tsp grated fresh ginger
-
1 tsp chili crunch or sriracha
-
2 tbsp maple syrup
-
2 tbsp fresh lime juice
-
1 tbsp mirin or rice vinegar
-
1 tbsp soy sauce or coconut aminos
Instructions
1️⃣ Crisp the Rice: Heat sesame oil in a skillet over medium. Add rice, soy sauce, and chili crunch. Press down firmly. Cook 5–7 mins, flip sections, press again, cook 2–3 mins more. Set aside to cool.
2️⃣ Veggie Party: In a big bowl, toss cabbage, cucumbers, edamame, onions, cashews, cilantro, and mint. Massage cabbage gently.
3️⃣ Dressing Magic: Whisk all dressing ingredients until smooth. Thin with warm water if needed.
4️⃣ Bring It Together: Add crispy rice to veggies, drizzle with dressing, toss gently. Top with extra cashews and herbs. Serve immediately for maximum crunch!
Notes
-
Always use cold rice for best crunch.
-
Massage cabbage for softer bites.
-
Store dressing separately if meal prepping.
- Prep Time: 10 mins
- Cook Time: 10 mins
Nutrition
- Calories: 400 kcalper serving
- Fat: 18g
- Carbohydrates: 45g
- Protein: 12g
Final Thoughts: Why This Recipe Will Stay in Your Rotation
This Crispy Rice Salad isn’t just a meal—it’s a celebration of resourcefulness. It teaches us that:
✅ Leftovers can be luxurious. (No more sad fridge rice!)
✅ Texture is as important as flavor. (Crunch = happiness.)
✅ The best recipes come from happy accidents. (Mistakes can be delicious.)
So next time you spot that forgotten container of rice, don’t sigh—smile. You’re not just making dinner… you’re making culinary magic.
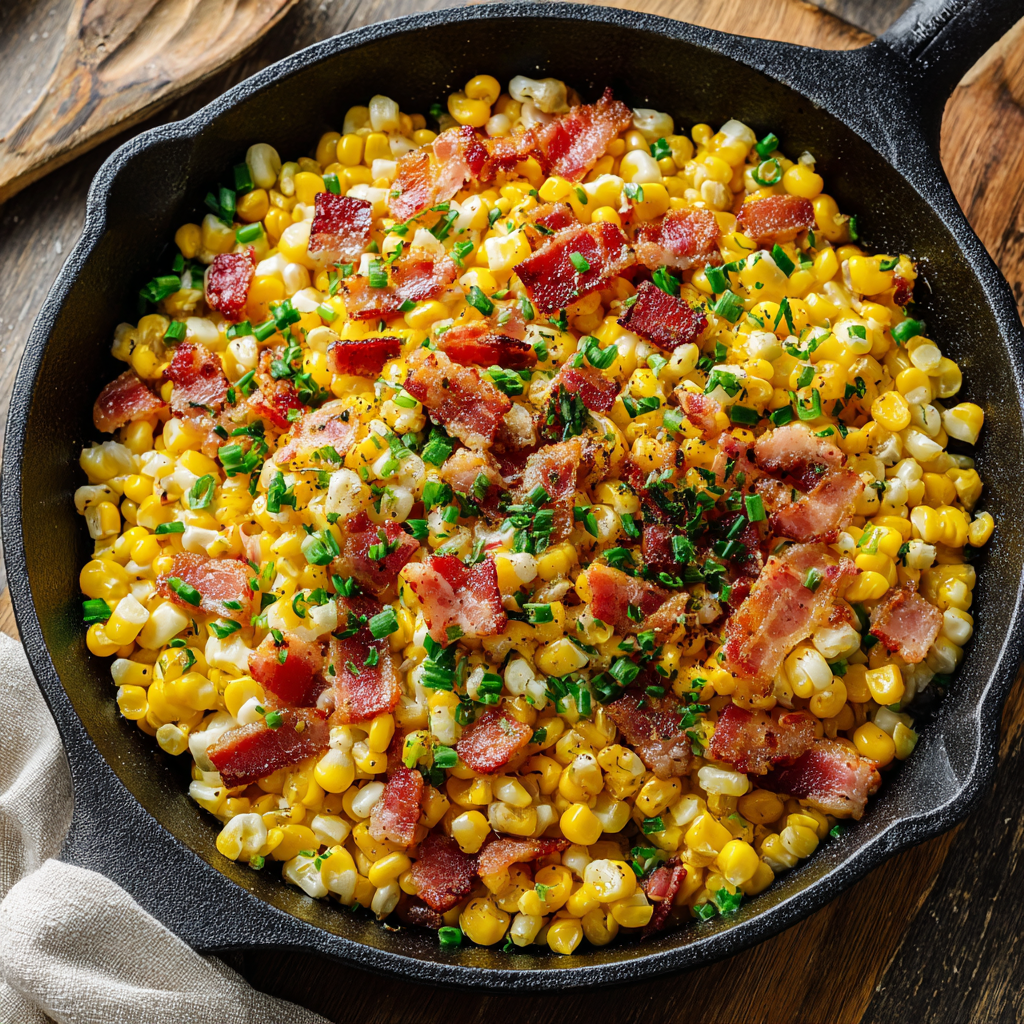
Fresh Corn and Bacon Side Dish
Summer in a Skillet: Your New Favorite Corn & Bacon Sidekick
Hey there, kitchen friend! Olivia here, apron dusted with corn silk and the irresistible scent of sizzling bacon wafting through my cozy nook. Can we talk about those magical moments when humble ingredients transform into pure joy? That’s exactly what happens with this Fresh Corn and Bacon side dish. Picture this: golden kernels popping in butter, crispy bacon bits glistening like edible confetti, and that unmistakable peppery kick tying it all together. It’s not just a side—it’s sunshine on a spoon!
Whether you’re juggling weeknight dinners or prepping for a backyard feast, this 20-minute wonder has your back. No fancy techniques, no hard-to-find ingredients—just honest, soul-warming goodness that makes people hover around the stove begging for “just one taste.” I’ve watched this dish vanish faster than ice cream in July at potlucks, and trust me, that smoky-sweet aroma? It’s basically a family reunion in pan form. So grab your favorite skillet—let’s make memories together!
Grandpa’s Grill & The Corn That Started It All
Every time I make this corn, I’m instantly transported to my grandpa’s rickety lakeside grill. Picture tiny Olivia, barefoot and grass-stained, watching him flick bacon drippings onto glowing coals while corn steamed in its husks nearby. One sweltering August afternoon, he winked, chopped that bacon, and tossed it with freshly shucked kernels right in the cast iron skillet meant for fish. “Why waste happy flavors?” he’d chuckle. That impromptu mashup became our secret ritual—corn silk in our hair, butter on our chins, and the lake sparkling beyond the pines.
Decades later, I still feel that childlike thrill when the bacon crackles. It’s wild how food stitches time together, isn’t it? Now I make it for my own crew, and when my nephew declares, “Aunt Liv’s corn is BETTER than fries,” I know Grandpa’s mischief lives on. That’s the magic—it’s not just corn and bacon. It’s laughter over paper plates, sticky high-fives, and love served straight from the skillet.
Your Flavor Dream Team (Plus Handy Swaps!)
- ¼ cup butter – Our creamy foundation! Chef’s tip: Salted butter balances the corn’s sweetness beautifully. Vegan? Coconut oil works, but add a pinch of smoked paprika for depth.
- 6 ears fresh corn – Non-negotiable summer stars! Heard that “snap” when shucking? That’s freshness talking. Off-season? Frozen fire-roasted corn (thawed!) brings surprising charm.
- 4 slices thick-cut slab bacon – Flavor bombs incoming! Slab bacon gives meaty bites. Sub turkey bacon for leaner vibes, or diced pancetta for fancy nights. Vegetarian? Smoked tempeh + ½ tsp liquid smoke nails it.
- Black pepper, to taste – The zesty finale! Freshly cracked is key—it releases citrusy oils. For heat lovers, add cayenne or chipotle powder with the pepper.
Why these four rockstars? Butter hugs each kernel, corn bursts with sugar, bacon delivers smoke & salt, and pepper wakes it all up. Simple? Yes. Compromise? Never!
Let’s Make Magic Happen: Step-by-Step
1. Cook Bacon – Grab a large skillet (cast iron = flavor MVP!) over medium heat. Toss in diced bacon. Hack: Don’t stir yet! Let it render slowly for 5-7 minutes until crispy. Scoop out bacon, but leave 1 tbsp glorious fat behind. Why? That liquid gold is flavor dynamite! Drain bacon on paper towels—it’ll stay crisp.
2. Sauté Corn – Melt butter into the bacon fat. Hear that sizzle? That’s the sound of happiness! Dump in corn kernels. Pro move: Spread them in one layer. Let them sit untouched 2 minutes—this creates caramelized “flavor bombs.” Stir occasionally 6-8 minutes until plump and golden-edged. Chef’s secret: Toss in 1 tsp minced garlic here if you’re feeling fancy!
3. Combine & Season – Kill the heat. Stir bacon back in—it’ll sizzle softly. Now rain down that black pepper! Tip: Grind directly over the skillet for maximum aroma. Taste! Need salt? Bacon’s usually salty enough, but tweak to your heart’s content.
4. Serve Hot – Get it into bowls pronto! Corn waits for no one. Garnish with chives or parsley if you’re extra (I always am).
The Science of Sizzle: Why This Combo Works
Let’s geek out on why corn and bacon are a match made in culinary heaven!
1. Maillard Magic
When corn hits that bacon-infused butter, the high heat triggers the Maillard reaction—the same chemical process that browns steak. Corn’s natural sugars caramelize, creating complex flavors (hello, nutty depth!). Bacon fat’s smokiness amplifies this, while butter’s milk solids add toasty notes.
2. Texture Symphony
Crispy bacon + juicy corn = crunch-meets-pop perfection. Our brains love contrasting textures—studies show they make food 30% more satisfying. Pro tip: For extra crunch, save some bacon to sprinkle on top raw.
3. Umami Bomb
Bacon is packed with glutamates (natural umami), while corn contains ferulic acid, which enhances savory perception. Together, they create a “moreish” quality that keeps forks moving.
4. Fat’s Flavor Highway
Butter and bacon fat carry fat-soluble flavor compounds straight to your taste buds. Without them, spices like black pepper wouldn’t shine as brightly.
5. Seasonal Synergy
Summer corn’s peak sweetness (thanks to rapid sugar-to-starch conversion after picking) balances bacon’s salt. Off-season? Roast frozen corn to concentrate sugars!
Global Corn: 5 International Twists
Take this skillet global with these inspired riffs:
1. Mexican Elote Style
After cooking, toss with:
-
¼ cup cotija cheese
-
1 tbsp chili powder
-
Lime mayo (mix 2 tbsp mayo + 1 tsp lime zest)
-
Chopped cilantro
Serve with grilled lime wedges!
2. Italian Contadina
Swap bacon for pancetta. Add:
-
1 tbsp chopped rosemary
-
½ cup sun-dried tomatoes
-
Finish with shaved Parmesan
Chef’s secret: Deglaze pan with white wine after corn cooks.
3. Thai Street Food Vibes
Stir in:
-
1 tbsp fish sauce
-
1 minced lemongrass stalk
-
1 chopped bird’s eye chili
Top with crushed peanuts and basil.
4. Southern BBQ Mashup
Replace black pepper with:
-
2 tsp BBQ dry rub
-
¼ cup diced pickles
-
Splash of apple cider vinegar
5. French Salade Chaude
Fold in:
-
1 cup frisée lettuce
-
2 tbsp Dijon vinaigrette
-
Poached egg on top (optional but glorious)
Leftover Alchemy: 5 Next-Day Transformations
1. Corn & Bacon Chowder
Sauté onions in leftover fat, add diced potatoes and broth. Simmer until tender, stir in leftovers + cream. Garnish with oyster crackers.
2. Breakfast Hash
Pan-fry diced sweet potatoes, then add corn mix and top with fried eggs.
3. Stuffed Peppers
Mix with cream cheese, stuff into bell peppers, bake at 375°F for 20 mins.
4. Fritter Frenzy
Combine with 1 egg + ¼ cup flour. Pan-fry dollops until crispy. Serve with sriracha mayo.
5. Pizza Topping
Spread over pizza dough with mozzarella. Bake—bacon becomes crispy topping!
How to Serve This Superstar
Slide this beauty into a wide, shallow bowl so those golden kernels shine. Top with extra bacon confetti and a flourish of fresh herbs—chives or parsley add color pop! Pair it with grilled lemon chicken or slather it on buttermilk cornbread for carb-on-carb joy. At BBQs? Let guests scoop it straight from the skillet (warning: may cause happy queueing). Brunch twist: Fold leftovers into scrambled eggs! Always serve warm—cold bacon weeps, and we don’t do sad bacon here.
Shake It Up: 5 Delicious Twists
Southwest Fiesta – Add 1 diced jalapeño with the corn, then stir in lime zest + cilantro after cooking. Queso fresco crumbles on top!
Herb Garden Delight – Swap black pepper for 2 tbsp fresh basil/thyme. Finish with lemon juice.
Cheesy Comfort – Fold in ⅓ cup grated cheddar or pepper jack at the end until melty.
Light & Bright – Use olive oil instead of butter, turkey bacon, and add cherry tomatoes + zucchini.
Umami Bomb – Add 1 tbsp soy sauce + 1 tsp maple syrup with the butter. Top with sesame seeds.
Confessions from My Messy Apron Pocket
This recipe? It’s survived 3 kitchens, 2 burnt skillets, and one comical bacon-grease-smoke-alarm incident (open windows are your friend!). Originally, I used canned corn—bless past Olivia—but fresh kernels are GAME CHANGING. Over the years, I’ve learned: Don’t crowd the pan! Corn steams instead of searing. And that bacon fat? Once I tried draining it all… never again. The dish wept literal buttery tears. My favorite evolution? Adding a splash of apple cider vinegar at the end sometimes—it cuts richness like a dream. Last tip: Double the batch. Always. Because nothing sparks joy like leftovers fried into corn fritters the next morning!
Your Questions, My Answers!
Q: Can I make this ahead?
A: Cook bacon and cut corn 1 day prior! Store separately. Recombine in skillet 5 mins before serving—freshness is key.
Q: Why isn’t my corn caramelizing?
A: Two culprits! Heat’s too low (medium is perfect) or overcrowded pan. Work in batches if needed. Patience = crispy gold edges!
Q: Help! My bacon turned soggy…
A: Ah, the dreaded sogg. Drain bacon WELL on paper towels. Only stir it back in OFF the heat. Also, thick-cut bacon > flimsy strips!
Q: Can I use frozen corn?
A: Yes! Thaw + pat dry. But for best texture? Roast frozen corn on a sheet pan at 400°F for 10 mins before sautéing. Thank me later!

Fresh Corn and Bacon Side Dish
- Total Time: 20 minutes
Description
Say goodbye to plain veggie sides—this skillet of golden corn tossed with crispy bacon and butter is summer comfort on a spoon. It’s simple, show-stopping, and oven-ready in 20 minutes. Perfect for cookouts, weeknight dinners, or any time you crave sunshine in a bowl. Let’s get popping!
Ingredients
-
¼ cup butter (salted or coconut oil for vegan)
-
4 slices thick-cut bacon, diced (or turkey bacon / smoked tempeh)
-
6 ears fresh corn, kernels shaved off (or 2 cups thawed frozen fire-roasted corn)
-
Freshly cracked black pepper (plus a pinch of cayenne for heat)
Optional garnish: chopped chives, parsley, or fresh cilantro + squeeze of lime
Instructions
-
Crisp the Bacon
-
Preheat a large cast-iron or heavy skillet over medium heat.
-
Add diced bacon and cook undisturbed for 5–7 minutes until browned and crisp.
-
Remove bacon, leaving ~1 tbsp of rendered fat in the pan. Drain on paper towel.
-
-
Sauté the Corn
-
Melt butter in the skillet with the bacon fat.
-
Add corn kernels in a single layer. Let cook untouched for 2 minutes to caramelize.
-
Stir occasionally for 6–8 additional minutes until kernels are plump and lightly golden around the edges. Add minced garlic in the last 2 minutes for extra flavor.
-
-
Combine & Season
-
Remove skillet from heat. Stir in crispy bacon and crack fresh black pepper over everything.
-
Taste—no salt needed if bacon was salty. Add lime juice or a pinch of salt to balance if needed.
-
-
Serve Immediately
-
Spoon into a warm serving bowl and top with fresh herbs or cilantro.
-
Pair with grilled meats, tacos, cornbread, or serve as a vibrant side at any barbecue!
-
Notes
-
Southwest Fiesta: Add diced jalapeño during corn sauté; finish with lime zest and cilantro; top with queso fresco.
-
Cheesy Comfort: Stir in ⅓ cup shredded cheddar or pepper-jack until melty.
-
Herb Garden Style: Season with lemon juice and fresh basil or thyme instead of pepper.
-
Veggie Swap: Use olive oil and turkey bacon, add zucchini or cherry tomatoes for brightness.
-
Umami Boost: Drizzle 1 tbsp soy sauce + 1 tsp maple syrup into the butter before adding corn; finish with sesame seeds.
- Prep Time: 5 mins
- Cook Time: 15 mins
Nutrition
- Calories: 220 per serving
- Fat: 16g
- Carbohydrates: 14g
- Protein: 5g
Nutritional Per Serving (¾ cup)
Calories: ~220 | Carbs: 14g | Fat: 16g | Protein: 5g | Servings: 6
Note: Values are estimates. Using turkey bacon drops fat to ~10g, while vegan swaps vary. Loaded with Vitamin B6 from corn!
Final Thoughts: More Than a Side Dish
This skillet isn’t just about feeding hungry mouths—it’s about creating moments. The sizzle when corn hits the pan, the way bacon scent lures people into the kitchen, the joy of scraping up every buttery bit with your fork.
It’s proof that great food doesn’t need complexity. Just honest ingredients, a hot pan, and the willingness to turn summer’s bounty into something extraordinary. So invite someone to shuck corn with you. Let them steal bacon bits from the draining plate. Laugh when the first bite burns your tongue because no one could wait.
Because the best recipes? They’re not just measured in cups and teaspoons—they’re measured in sticky fingers, shared forks, and the quiet “mmm” sounds that mean you’ve nailed it. Now go forth and make your own skillet memories!

Upside Down Garlic Bread Lasagna
Upside Down Garlic Bread Lasagna: Where Comfort Food Gets a Standing Ovation
Hey there, kitchen comrades! Olivia here, wiping flour off my apron and grinning like a kid on cookie-baking day. Why? Because I’m about to share the recipe that’s been breaking the internet in my friend group: Upside Down Garlic Bread Lasagna. Picture this: layers of saucy beef, creamy ricotta, and gooey mozzarella hugged by garlic-buttered pizza dough that bakes into a golden, crispy crown. Then—plot twist!—we flip it so that crown becomes your showstopper base. It’s not just dinner; it’s a culinary mic drop.
If you’ve ever stared at a lasagna pan and thought, “This needs more carb-y chaos,” you’re my people. This dish is for Sunday suppers when you want oohs and aahs, for potlucks where you secretly want to outshine Aunt Carol’s Jell-O mold, and for those nights when “comfort food” deserves confetti. No fancy skills? No problem! We’re using pizza dough instead of wrestling with pasta sheets. Messy aprons and happy tummies guaranteed. Ready to turn lasagna night upside down? Let’s get gloriously messy.
When Lasagna Met Garlic Bread: A Love Story
So, how did this wild hybrid land in my kitchen? Blame it on a blizzard, a near-empty pantry, and my carb-craving college roommate, Maya. Trapped indoors with zero lasagna noodles but two frozen pizza dough balls, we eyed our last jar of tomato sauce like survivalists. “What if…” Maya mumbled through a mouthful of emergency chocolate, “we use the dough AS the lasagna?” Cue skeptical eyebrows. But desperation breeds genius, friends. We layered sauce, cheese, and whatever else we could scavenge (RIP, sad zucchini) between those dough sheets. When we flipped that steaming pan? MAGIC. The crust had crisped into garlicky nirvana, cradling the saucy layers like a buttery throne. We ate straight from the pan, snowed in and triumphant. Now, every time I make it, I taste that stormy-day rebellion—proof that kitchen “mistakes” often become legends.
Your Flavor Toolkit: Ingredients & Why They Matter
- 24 oz pizza dough (1½ lbs) – Your edible “baking dish”! Thaw overnight in the fridge. Chef’s tip: Grab whole-wheat dough for nuttiness, or herb-infused for extra pizzazz.
- 1¼ lbs ground beef (85% lean) – Fat = flavor! Swap: Ground turkey or lentils for lighter vibes.
- Garlic & onion powder (1½ tbsp each) – The dynamic duo for savory depth. Fresh works too—sauté 4 minced cloves + 1 diced onion with the beef!
- Tomato paste + sauce (⅓ cup paste + 2¼ cups sauce) – Paste = richness, sauce = silkiness. Use fire-roasted sauce for smoky sass.
- Ricotta (¾ cup) + parmesan (⅓ cup) – Ricotta’s creaminess + parm’s salty kick. No ricotta? Cottage cheese (blended smooth) works!
- Eggs (2) – 1 binds the ricotta; 1 seals the dough “crown.” Vegan? Use flax eggs.
- Oregano & garlic powder (1½ tbsp each) – The Italian seasoning’s backup dancers. Fresh oregano? Triple the amount.
- Mozzarella slices (16) – Melty glue! Pre-sliced saves time, but block cheese melts dreamier.
- Oven-ready lasagna noodles (10) – No-boil heroes. Gluten-free? Use GF noodles—no pre-cook needed!
- Garlic butter (¾ cup) – The golden glory. Make your own: melt butter + 5 minced garlic cloves + parsley.
Why this combo? The dough soaks up sauce like a flavor sponge, while layers stay distinct thanks to no-boil noodles. It’s architecture you can eat.
Let’s Build (and Flip!) Your Masterpiece
Step 1: Preheat oven to 375°F (190°C). Grease a DEEP 9×13″ dish like you’re buttering a sunbather—every inch matters! Why deep? This beast rises! No dish? A large oven-safe skillet works.
Step 2: Brown beef in a skillet over medium heat. Sprinkle garlic powder, onion powder, Italian seasoning, salt, and pepper. When no pink remains, stir in tomato paste until beef coats like glossy armor. Add tomato sauce, simmer 10 mins. Chef’s hack: Deglaze the pan with ¼ cup red wine first for extra oomph!
Step 3: Mix ricotta, ⅓ cup parmesan, 1 egg, oregano, garlic powder, salt, and pepper. Consistency check: It should spread like cloud frosting.
Step 4: Roll half the dough into a rectangle slightly larger than your dish. Press it into the dish, letting dough climb the sides. No rolling pin? Stretch with oiled fingers—it’s oddly therapeutic.
Step 5: Layer like a boss:
- Layer 1: 8 mozzarella slices (slightly overlap)
- Layer 2: Half the meat sauce
- Layer 3: 5 lasagna noodles (break to fit gaps)
- Layer 4: All the ricotta mix
- REPEAT: Noodles, meat sauce, mozzarella
Pro tip: Avoid ricotta touching noodles directly—it prevents sogginess!
Step 6: Seal the deal! Roll the second dough half to fit the top. Place over layers, tucking edges into the side dough. Brush edges with beaten egg to “glue” them. Think pastry empanada energy.
Step 7: Generously brush garlic butter over dough. Sprinkle 3 tbsp parmesan. Extra credit: Add sesame seeds or red pepper flakes for crunch/heat.
Step 8: Bake 35-40 mins until top is deep gold. Watch closely—dough browns fast! Tent foil if needed. REST 10 mins—this is non-negotiable for clean flips!
The Grand Flip™: Place a large tray over the dish. With oven mitts and confidence, FLIP! Lift the dish slowly. If cheese sticks, gently pry with a spatula. Channel your inner gymnast—you’ve got this!
Serving: Where Drama Meets Delicious
Slice into squares with a serrated knife—those crispy edges deserve respect! Plate it crust-side down (hello, garlic bread stage!), spoon any escaped sauce on top, and shower with fresh basil or parsley. Pair with a zesty arugula salad to cut the richness. Pro move: Serve straight from the flipped tray for communal, finger-licking vibes. This isn’t just food; it’s dinner theater.
Shake It Up: 5 Tasty Twists
1. Veggie Fiesta: Swap beef for roasted mushrooms + spinach. Add sun-dried tomatoes to ricotta.
2. Spicy ‘Nduja: Mix 2 tbsp ‘nduja paste into meat sauce. Top dough with chili flakes.
3. White Pizza Lasagna: Use Alfredo sauce instead of tomato. Layer prosciutto and peas.
4. Breakfast Edition: Fill with scrambled eggs, sausage, and cheddar. Serve with maple syrup (!).
5. Cheesesteak Flip: Replace beef with thinly sliced steak + sautéed peppers/onions. Cheese sauce instead of ricotta!
Olivia’s Kitchen Confessions
This recipe evolved from “pantry disaster” to “most requested dish” in my circle. The first time I flipped it? Half stuck to the pan—I served it as “deconstructed garlic bread lasagna soup” (charmingly chaotic!). Now, I grease my dish like it owes me money. Over time, I’ve learned: Resting is sacred (impatient flippers get scrambled layers), and more garlic butter is always the answer. My husband calls it “lasagna cake,” and honestly? He’s not wrong. It’s a reminder that cooking should be playful—even when it flops (literally).
Your Questions, My Answers
Q: My dough ripped while rolling! Help?
A: No stress—patch holes with dough scraps. Think of it as edible quilting. Prevent tears by letting dough warm up for 20 mins before rolling.
Q: Can I make this ahead?
A: Absolutely! Assemble (unbaked) 1 day ahead. Cover and refrigerate. Add 5-10 mins to bake time since it’s cold. Or freeze unbaked for 3 months—thaw overnight before baking.
Q: Flip anxiety is real. Any tips?
A: 1) REST 10+ mins so layers set. 2) Use a tray with a lip. 3) Press tray firmly to dish, flip fast but controlled. 4) If cheese sticks, slide a spatula gently between dough and dish. If it falls apart? Call it “rustic” and devour.
Q: Why oven-ready noodles? Won’t they be crunchy?
A: Nope! Trapped steam cooks them perfectly. If using regular noodles, boil them first—but trust me, no-boil is the lazy genius move.

Upside Down Garlic Bread Lasagna
- Total Time: 5 minute
Description
This isn’t your nona’s lasagna—it’s a carb-lover’s dream flipped upside down! Layers of rich meat sauce, creamy ricotta, and stretchy mozzarella get sealed inside garlic-buttered pizza dough, then flipped for the ultimate comfort food crown. It’s dramatic, delicious, and dangerously easy to love. The kind of meal that steals the show, steals hearts, and leaves zero leftovers.
Ingredients
• 24 oz pizza dough (1½ lbs), divided
• 1¼ lbs ground beef (or turkey/lentils)
• 1½ tbsp garlic powder + 1½ tbsp onion powder
• ⅓ cup tomato paste + 2¼ cups tomato sauce
• ¾ cup ricotta + ⅓ cup Parmesan cheese
• 2 eggs (1 for ricotta mix, 1 for brushing)
• 1½ tbsp oregano
• 16 slices mozzarella cheese
• 10 oven-ready lasagna noodles
• ¾ cup garlic butter (melted butter + minced garlic + parsley)
Instructions
-
Prep Oven: Preheat to 375°F. Grease a deep 9×13″ baking dish generously.
-
Make Meat Sauce: Brown beef with seasonings, stir in paste and sauce. Simmer 10 mins.
-
Mix Ricotta Layer: Combine ricotta, parmesan, 1 egg, garlic powder, oregano, salt & pepper.
-
Roll Dough: Roll half the dough to fit the bottom and sides of the dish. Press in gently.
-
Layer:
-
Mozzarella slices
-
Half meat sauce
-
Lasagna noodles
-
Ricotta mix
-
Noodles, meat sauce, mozzarella
-
-
Top Dough: Roll and place second dough half over top. Tuck edges in. Brush with beaten egg and garlic butter. Sprinkle with parmesan.
-
Bake: 35–40 mins until golden. Tent with foil if browning too fast. Rest 10 mins.
-
Flip & Serve: Invert onto tray, lift dish, and reveal your crispy garlic bread base. Slice and serve!
Notes
• Veggie Version: Swap beef for mushrooms + spinach
• Alfredo Dream: Use white sauce + prosciutto
• Breakfast Mode: Eggs, sausage, and cheddar inside
• Cheesesteak Style: Steak, peppers, and cheese sauce
- Prep Time: 25 mins
- Cook Time: 40 mins + 10 min rest
Nutrition
- Calories: 570per serving
- Fat: 28g
- Carbohydrates: 48g
- Protein: 34g
Nutritional Snapshot (Per Serving)
Calories: ~570 | Protein: 34g | Carbs: 48g | Fat: 28g | Fiber: 3g
Note: Stats vary with swaps. Using turkey/lentils cuts fat; whole-wheat dough boosts fiber.
Final Thoughts: Why This Lasagna Deserves a Standing Ovation
This isn’t just another pasta bake—it’s a rebellious remix of comfort food classics. It’s for those who believe:
-
Rules are made to be broken (who says lasagna needs noodles on bottom?).
-
Texture is king (crispy + creamy = happiness).
-
Cooking should be fun (flipping food is oddly thrilling).
It’s a dish that turns “oops” into “oh yes”—whether you’re a beginner or a seasoned chef. So grab that dough, embrace the mess, and let’s flip tradition on its head.
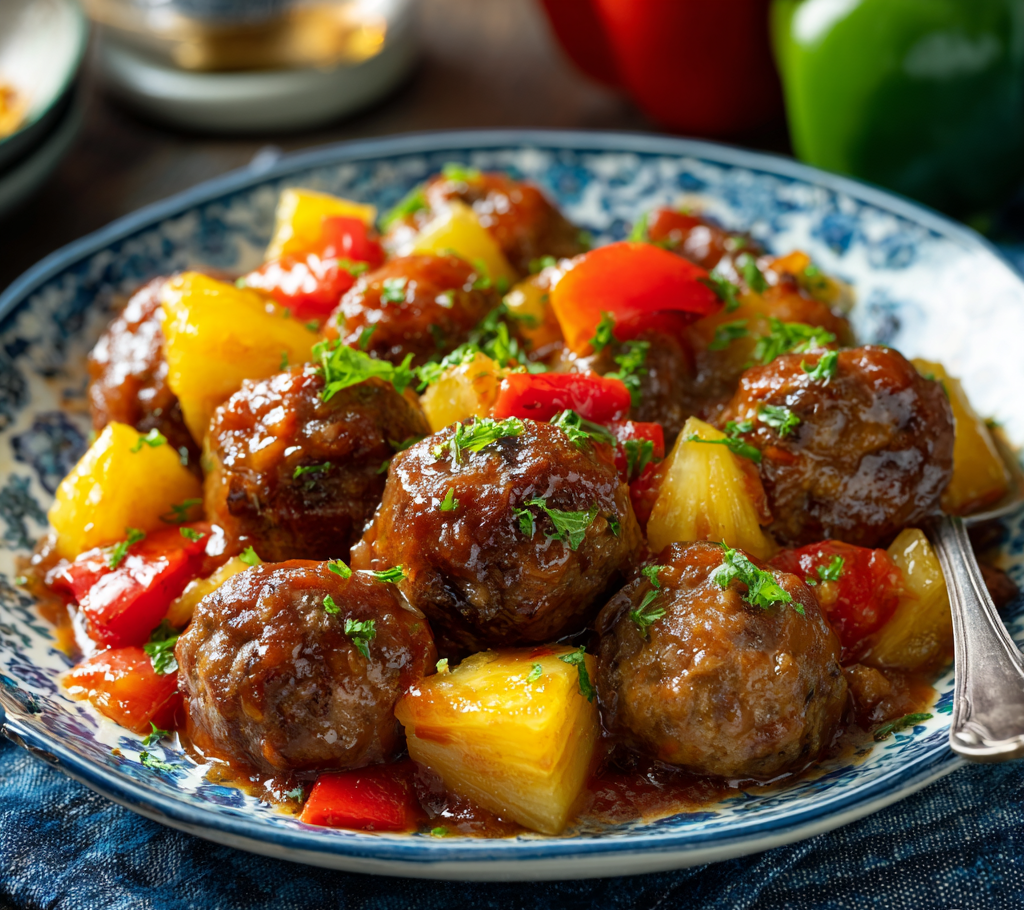
Dump & Go Crockpot Sweet and Sour Meatballs
Dump & Go Crockpot Sweet and Sour Meatballs: Your New Busy-Day BFF
Hey there, kitchen friend! Olivia here, apron dusted with flour (okay, maybe a little BBQ sauce from lunch) and ready to share one of my all-time favorite lifesavers. Picture this: It’s 4 PM. Your to-do list is laughing at you, the family’s hangry radar is pinging, and that party you volunteered to bring an appetizer to starts in… oh, three hours. Panic? Nope! You’re making my Dump & Go Crockpot Sweet and Sour Meatballs. Seriously, if your slow cooker had a superhero cape, this recipe would be its origin story. We’re talking juicy meatballs swimming in that perfect tangy-sweet glaze, vibrant bell peppers, and those irresistible pineapple gems that burst with sunshine in every bite. It’s the kind of dish that makes people hover around the crockpot with a toothpick in one hand and their phone in the other, snapping pics for their own feeds. Zero fancy skills required—just dump, click, and let the magic happen. Whether it’s Tuesday night chaos or Saturday’s game-day spread, this recipe is your ticket to flavor town with minimal effort. Let’s make some magic!
The Potluck Miracle That Started It All
This recipe? It’s got roots in a near-disaster that still makes me giggle. Years ago, I signed up for my neighborhood’s annual potluck, planning to wow everyone with my from-scratch, labor-of-love meatballs. Cue the universe laughing! My toddler decided that day was prime time for a spectacular stomach bug. Between mopping floors and rocking a feverish kiddo, my gourmet dreams evaporated. Desperate, I scanned my freezer and pantry like a contestant on Chopped. Frozen meatballs? Check. A bottle of sweet and sour sauce leftover from takeout? Check. A can of pineapple hiding behind the beans? Jackpot! I dumped it all into my trusty crockpot, crossed my fingers, and sprinted to the party (slightly disheveled, if we’re honest). The result? People raved! “Olivia, these are incredible!” “What’s your secret?” My secret? Survival mode and a slow cooker. That humble, thrown-together dish became a legend in our cul-de-sac and a permanent star in my recipe arsenal. It taught me that sometimes, the best meals are born from beautiful chaos—and that freezer shortcuts are nothing to apologize for!
Gather Your Flavor Crew
Here’s the dream team (Serves 6 hungry humans):
- 2 lbs frozen meatballs: The MVP of busy days! I grab homestyle beef ones (like Cooked Perfect®), but turkey, chicken, or plant-based balls work great. Chef’s Tip: No need to thaw—they cook perfectly from frozen! Prefer homemade? Use pre-cooked ones to keep it “dump & go.”
- 1 cup sweet and sour sauce: The flavor backbone! Store-bought is my go-to (Kikkoman or Mae Ploy are fab), but if you’re feeling fancy, blend ¾ cup ketchup, ¼ cup rice vinegar, 2 tbsp brown sugar, and 1 tbsp soy sauce. Chef’s Insight: Taste your sauce first! Some are sweeter; add a splash of vinegar if yours needs more tang.
- 1 cup pineapple chunks (with a bit of juice): The sunny surprise! Canned is easiest (reserve 2-3 tbsp juice!). Substitution Magic: Fresh pineapple works—just add 2 tbsp orange juice for acidity. Hate pineapple? Use mandarin oranges (drained) instead.
- 1 bell pepper, chopped (any color): The crunch factor! I love a mix—red for sweetness, green for bite. Pro Swap: No peppers? Toss in matchstick carrots or snap peas last minute.
Why these four? The meatballs bring savory heft, the sauce delivers sticky-sweet punch, pineapple adds fruity brightness, and peppers give fresh crunch. It’s a harmony of textures and tastes!
Let’s Build the Magic: Effortless Steps
Ready for the easiest cooking session ever? Let’s do this!
- Unlock Your Crockpot: Grab your 4-6 quart slow cooker. No need to grease it—the sauce does the work! Chef’s Hack: If your crockpot runs hot, give it a quick spritz of cooking spray on the bottom to prevent stickage.
- The Grand Dump: Toss in the frozen meatballs, sweet and sour sauce, pineapple chunks (with that precious juice!), and chopped bell pepper. Order Doesn’t Matter—this isn’t fussy baking! Watch My Mistake: I once added the pineapple without juice—sauce was too thick. Juice = flavor gold!
- Gentle Stir: Use a silicone spatula to nudge everything around until coated. Don’t stress about perfection—the heat will meld it all. Pro Tip: If your sauce seems thick, add 2 tbsp water or pineapple juice to help it spread.
- Lid On, Worries Off: Cover and cook! Low: 4-5 hours. High: 2-3 hours. Chef’s Secret: Stir halfway ONLY if you’re nearby. No peeking otherwise—heat escapes! Meatballs are done when piping hot (165°F internal temp) and sauce is bubbly.
- Final Flourish: Stir gently before serving. Sauce thickens as it cools slightly. Too Thin? Mix 1 tbsp cornstarch with 2 tbsp cold water, stir in, and cook 10 mins more on High. Too Thick? Splash in pineapple juice or broth.
See? Even if you’re multitasking (helping with homework, walking the dog), this recipe forgives you. The crockpot does the heavy lifting!
Serving Up the Goodness
Presentation is playground-easy! For dinners, spoon meatballs and sauce over fluffy jasmine rice or noodles—the sauce soaks in deliciously. Going appetizer mode? Keep ’em warm in the crockpot on “Low,” set out toothpicks, and watch them disappear! Garnish with sliced green onions or sesame seeds for a pop of color. Sidekick Ideas: Pair with a simple cucumber salad or steamed edamame. Party pro-tip? Set out small bowls for guests—things get sticky (in the best way)!
Make It Your Own: Flavor Twists
Play with these fun spins:
- Spicy Fiesta: Add 1 tbsp sriracha to the sauce and top with chopped cilantro.
- Teriyaki Twist: Swap sweet and sour sauce for teriyaki, and add 1 tsp grated ginger.
- Veggie Power: Toss in ½ cup matchstick carrots or snap peas 30 mins before serving.
- Paleo/Whole30: Use compliant meatballs and homemade sauce (skip sugar—use date paste!).
- Hawaiian Luau: Add ¼ cup chopped ham with the pineapple!
Olivia’s Extra Scoop
This recipe is my kitchen’s happy accident that stuck! Over time, I’ve learned: Size matters—stick to 1-inch meatballs; giant ones overcrowd. Freezer gold: I double-batch leftovers (they freeze beautifully for 3 months!). Once, my cat, Butters, tried to leap onto the counter to investigate the smell… and took down the pepper flakes. We had “unintentionally extra-spicy” meatballs that night! Lesson: Keep pets (and toddlers!) away from the spice rack. The beauty? This dish evolves with you—add what you love, skip what you don’t. It’s forgiving, just like a good friend.
Your Questions, Answered!
Q: Can I use raw homemade meatballs?
A: Absolutely! But cook them first (bake or pan-fry) to avoid greasy sauce. Raw meatballs release fat and water, thinning the sauce. Pre-cooked is key for true “dump & go.”
Q: My sauce separated/is watery. Help!
A: No sweat! Separation: Stir well before serving—it’s just fats and liquids cozying up. Watery Sauce: Uncover, crank to High, and simmer 20-30 mins. Or, mix 1 tbsp cornstarch + 2 tbsp cold water, stir in, and cook 10 mins more.
Q: Can I prep this overnight?
A: Yes! Combine everything except pineapple in the crockpot insert. Cover and refrigerate. Next morning, add pineapple, stir, and start cooking. (Pineapple breaks down if soaked too long).
Q: How long do leftovers last?
A: 4 days in the fridge (reheat in microwave or on stove). Freeze portions for up to 3 months—thaw overnight before reheating.

Dump & Go Crockpot Sweet and Sour Meatballs
- Total Time: 45 minute
Description
Need a party hit or a no-fuss dinner in a flash? These Sweet and Sour Meatballs are your slow cooker’s time to shine. Juicy meatballs bathe in tangy, sticky-sweet sauce with bursts of pineapple and bell pepper. Whether you’re hosting game night or facing the 5 PM “what’s for dinner” panic, this recipe is your flavorful, five-minute fix.
Ingredients
• 2 lbs frozen meatballs (beef, turkey, chicken, or plant-based)
• 1 cup sweet and sour sauce (store-bought or homemade)
• 1 cup pineapple chunks (with 2–3 tbsp juice)
• 1 bell pepper, chopped (red, green, or combo)
Instructions
-
Layer in Crockpot: Add frozen meatballs, sauce, pineapple (with juice), and peppers to a 4–6 qt slow cooker.
-
Stir Gently: Mix to coat everything evenly.
-
Cover & Cook: On Low for 4–5 hours or High for 2–3 hours, until meatballs are heated through and sauce is bubbly.
-
Adjust Texture: Too thin? Stir in 1 tbsp cornstarch mixed with 2 tbsp cold water and cook 10 more mins. Too thick? Add pineapple juice or water.
-
Serve: Over rice or noodles, or as party bites with toothpicks!
Notes
• Spicy Kick: Add sriracha or chili flakes
• Teriyaki Style: Use teriyaki sauce + fresh ginger
• Veggie Boost: Toss in carrots or snap peas
• Tropical Touch: Add chopped ham for Hawaiian vibes
- Prep Time: 5 mins
- Cook Time: 2–5 hrs (depending on setting)
Nutrition
- Calories: 380per serving
- Fat: 22g
- Carbohydrates: 28g
- Protein: 18g
Nutritional Nibbles (Per Serving)
Calories: ~380 | Protein: 18g | Carbs: 28g | Fat: 22g | Sugar: 18g | Sodium: 650mg
Note: Estimates vary based on meatball type/brand and sauce. Using turkey meatballs cuts fat by ~30%!
Final Thoughts: More Than a Recipe—A Lifesaver
This Sweet and Sour Meatball dish is the culinary equivalent of a trusty babysitter: reliable, low-maintenance, and always leaves everyone happy. It’s proof that great food doesn’t require complexity—just smart combos and a crockpot. Whether it’s saving your sanity on a hectic weeknight or making you the star of a potluck, this recipe is a reminder that sometimes, the best solutions are the simplest.
So here’s to less stress, more flavor, and the magic of dumping ingredients into a pot. Now go forth and conquer—your slow cooker’s got your back!
Loved this recipe? Save it for later!

Marry Me Chicken Salad
Why This Isn’t Just Another Chicken Salad
Hey there, kitchen friends! Olivia here, wiping flour off my apron (again) and bubbling over with excitement to share today’s recipe. If your tastebuds have ever sighed with longing at the words “creamy,” “tangy,” and “Mediterranean magic,” you’re about to fall head over heels. Meet my Marry Me Chicken Salad – the dish that earned its name after my friend Jenna served it to her now-fiancé, who promptly blurted out “Marry me?” mid-bite! True story. This isn’t just lunch; it’s a flavor explosion wearing a little black dress. Imagine sun-dried tomatoes bursting like edible confetti, fresh basil doing a happy dance with Parmesan, and a creamy dressing with just enough heat to make things interesting. Whether you’re meal-prepping for the week or hosting a chic garden brunch, this recipe turns humble chicken into pure seduction. And the best part? You don’t need fancy skills – just a bowl and a spoon. Ready to make something unforgettable? Let’s get mixing!
The Proposal Picnic (And Other Kitchen Shenanigans)
Picture this: It’s 2019, golden-hour sunlight dappling through oak trees at our favorite vineyard. My college roommate Jenna begged me to “make something impressive” for her third date with Mark. I packed a wicker basket with this chicken salad tucked between crusty baguettes and peach iced tea. We joked that if Mark didn’t propose after tasting it, he had no soul. Fast forward to bite #3 – Mark stares at his sandwich, then at Jenna, and deadpans: “Okay, I have to marry you just for access to this chicken salad.” Cue shocked laughter… followed by an actual proposal six months later! They still call it their “engagement chicken.” Every time I make it now, I remember Jenna’s tomato-stained grin and how food becomes this invisible thread connecting memories. That’s the power of a truly great recipe – it’s never just about the ingredients, but the stories we stir into the bowl.
Your Flavor Toolkit: Ingredients & Secrets
Gather these simple stars – I’ve included swaps for pantry emergencies!
- Mayonnaise (½ cup) – The creamy backbone! For richer flavor, use Duke’s or Kewpie. Sub: Greek yogurt for a lighter twist.
- Sour cream (½ cup) – Adds tangy velvetiness. Sub: Full-fat coconut milk for dairy-free.
- Sun-dried tomato oil (2 tbsp) – Liquid gold! This infused oil is flavor dynamite. No jarred tomatoes? Use extra virgin olive oil + ½ tsp tomato paste.
- Paprika (1 tsp) – Smoked paprika adds depth, sweet paprika keeps it bright. Your call!
- Red pepper flakes (1 tsp) – The “will-you-marry-me?” kick! Adjust to your heat tolerance.
- Black pepper (1 tsp) – Freshly cracked is non-negotiable. It wakes up every other flavor.
- Garlic (1 tbsp minced) – For that irresistible aroma. Chef hack: Sauté briefly in tomato oil if raw garlic bites too hard.
- Cooked chicken (16 oz shredded) – Rotisserie chicken is my weeknight hero! Poached breasts work beautifully too.
- Sun-dried tomatoes (1 cup diced) – Chewy, sweet-tart flavor bombs. Oil-packed are juicier than dry.
- Parmesan cheese (½ cup shredded) – Buy a block and shred yourself – no gritty pre-shredded stuff!
- Fresh basil (½ cup chopped) – The aromatic crown jewel. Sub: In winter, use 2 tbsp pesto + extra parsley.
Pro Tip: Taste your sun-dried tomato oil before adding – if it’s very salty, reduce added salt later!
Let’s Build Some Magic: Step-by-Step
Ready for the easiest culinary love affair? Grab that big mixing bowl!
- The Flavor Foundation: In your bowl, whisk mayo, sour cream, sun-dried tomato oil, garlic, paprika, red pepper flakes, and black pepper. Chef’s whisper: Whisk for a full 60 seconds – emulsifying properly makes it luxuriously creamy, not gloppy! Taste now (you wild thing!) and add a pinch of salt only if needed.
- Fold in the Goodness: Add shredded chicken, sun-dried tomatoes, Parmesan, and basil. Critical tip: Use a silicone spatula and fold gently from the bottom up. Over-mixing = sad, mushy chicken! We want every shred coated but still distinct.
- The Patience Payoff: Cover and chill 30+ minutes. Why? This lets the garlic mellow, the basil infuse, and transforms it from “yum” to “OH MY GOD.” Stir once halfway if you peek (no judgment).
- Consistency Check: After chilling, assess texture. If too thick, drizzle in 1 tsp lemon juice or tomato oil. Too loose? Add extra Parmesan.
Avoid this rookie mistake: Adding salt before tasting! Between the Parmesan and tomato oil, it might already be perfectly seasoned.
Showtime: Serving Your Masterpiece
Presentation is flirting! For elegant lunches, pile it high on buttery croissants with arugula. Feeling fancy? Serve in endive spears or hollowed heirloom tomatoes. Low-carb lovers – crisp romaine cups are divine. My favorite? A charcuterie-style board with crackers, cornichons, and prosciutto. Garnish with extra basil leaves and a sprinkle of flaky sea salt. This salad shines brightest at room temp – pull it from the fridge 15 minutes before serving!
Make It Your Own: Delicious Twists
This recipe is wildly adaptable! Try these love letters to different tastes:
- Mediterranean Goddess: Add ⅓ cup chopped Kalamata olives + 2 tbsp capers. Swap basil for dill.
- Nutty Crunch Affair: Fold in ½ cup toasted pine nuts or chopped pecans post-chill.
- Spicy Elopement Edition: Double the red pepper flakes + add 1 minced Calabrian chili.
- Lighter Summer Fling: Replace all mayo/sour cream with Greek yogurt + lemon zest.
- Pescatarian Proposal: Use flaked roasted salmon or chickpeas instead of chicken!
Olivia’s Kitchen Confessions
This recipe started as a fridge-cleaner experiment! My first version used dried basil (cringe) and skipped the tomato oil (double cringe). After Jenna’s picnic, it became legendary in our friend group. I now double batches because my husband “steals” it for midnight sandwiches. One hilarious fail? I once used vanilla Greek yogurt by accident – let’s just say sweet+garlicky is NOT a vibe. Lesson learned: Label your yogurt containers! Over the years, I’ve learned chilling is non-negotiable – it’s like letting a good wine breathe. The flavors need that cozy mingling time!
Your Burning Questions Answered!
Let’s troubleshoot like kitchen BFFs:
Q: Can I use canned chicken? Please say no…
A: *Sigh* Technically yes… but texture and flavor suffer. Rotisserie chicken is the MVP here! If you must, drain canned chicken VERY well and flake it finely.
Q: How long does it keep?
A: In a sealed container, 4 days max! The basil browns after that. Freezing? Not recommended – dairy splits sadly.
Q: Help! Mine tastes bland.
A: Three culprits: 1) Underseasoned dressing – always taste pre-chill! 2) Low-quality Parmesan – splurge on real Reggiano. 3) Skipped chilling time – patience, grasshopper!
Q: Can I make it ahead for a party?
A: Absolutely! Mix everything EXCEPT basil. Add basil 1 hour before serving to keep it vibrant. Store dressing and chicken separately overnight if prepping super early.
Marry Me Chicken Salad
- Total Time: 10 minutes
Description
This isn’t your average chicken salad—it’s creamy, tangy, and bursting with Mediterranean charm. Packed with juicy shredded chicken, sun-dried tomatoes, fresh basil, and Parmesan, all hugged by a rich, slightly spicy dressing, it’s earned the name “Marry Me” for good reason. Whether served on croissants, with crackers, or straight from the spoon, it’s the kind of dish that turns meals into memories.
Ingredients
• ½ cup mayonnaise (or Greek yogurt for lighter twist)
• ½ cup sour cream
• 2 tbsp sun-dried tomato oil (or EVOO + ½ tsp tomato paste)
• 1 tbsp minced garlic
• 1 tsp smoked or sweet paprika
• 1 tsp red pepper flakes
• 1 tsp black pepper
• 16 oz shredded cooked chicken (rotisserie works great)
• 1 cup diced sun-dried tomatoes
• ½ cup shredded Parmesan cheese
• ½ cup chopped fresh basil
Instructions
-
Make the Dressing: Whisk mayo, sour cream, tomato oil, garlic, paprika, red pepper flakes, and black pepper in a large bowl.
-
Add the Good Stuff: Fold in chicken, sun-dried tomatoes, Parmesan, and basil gently.
-
Chill: Cover and refrigerate for at least 30 minutes to let flavors meld.
-
Serve: Let come to room temp before serving. Enjoy in sandwiches, lettuce cups, or as part of a charcuterie board!
Notes
• Add Crunch: Toasted pine nuts or chopped pecans.
• Go Greek: Add olives and capers, swap basil for dill.
• Make It Spicier: Add a minced Calabrian chili.
• Try Chickpeas: Great vegetarian swap!
• Lighter Version: Use all Greek yogurt + lemon zest.
- Prep Time: 10 mins
Nutrition
- Calories: 420 per serving
- Fat: 28g
- Carbohydrates: 9g
- Protein: 32g
Nutritional Highlights (Per Serving)
Approx 420 calories | 32g protein | 9g carbs | 28g fat (without bread)
Packed with protein for staying power! Sun-dried tomatoes deliver lycopene, and olive oil provides heart-healthy fats. Using Greek yogurt lowers fat/calories significantly.
Final Thoughts: More Than a Recipe—A Culinary Love Language
This chicken salad is my edible equivalent of a handwritten letter—it says “I care enough to make something special.” Whether it’s the way my toddler “helps” by sneaking Parmesan or the way friends text me “I made your proposal chicken for my in-laws—they’re obsessed,” this dish connects people.
So the next time you’re staring at a rotisserie chicken, remember: You’re not just making lunch. You’re crafting a moment—one that might just inspire a marriage proposal, a childhood core memory, or simply the happiest work lunch your cubicle neighbor has ever seen. Now go forth and spread the love (and maybe keep a few extra napkins handy).
Save This Recipe For Later!
Recent Posts
- Moist Vegan Banana Bread : One-Bowl, No-Fail Classic
- Homemade Turkey Gravy : Rich, Silky, and Full of Flavor
- Easy Keto Broccoli Salad : Low-Carb, Crunchy, and Totally Craveable
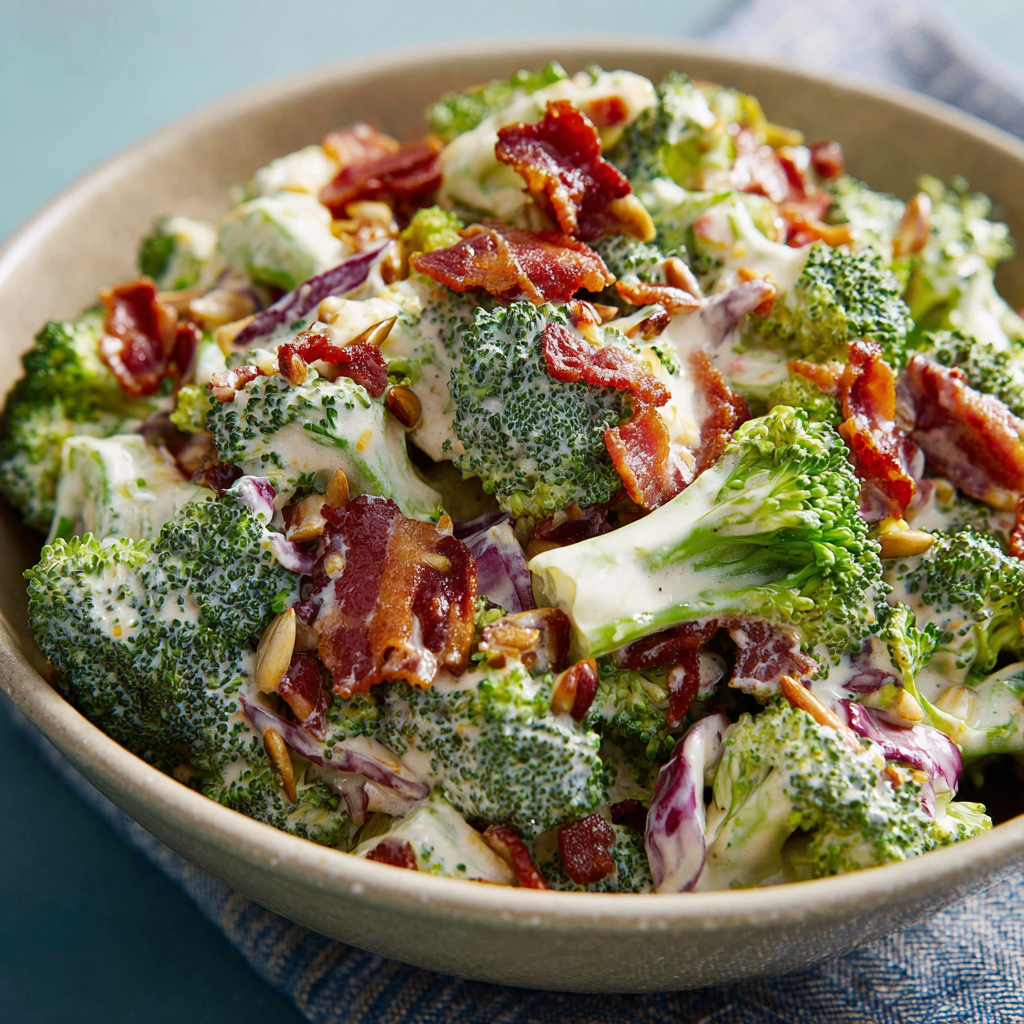
- Hearty Vegan Chili : One-Pot, Protein-Packed & Totally Comforting
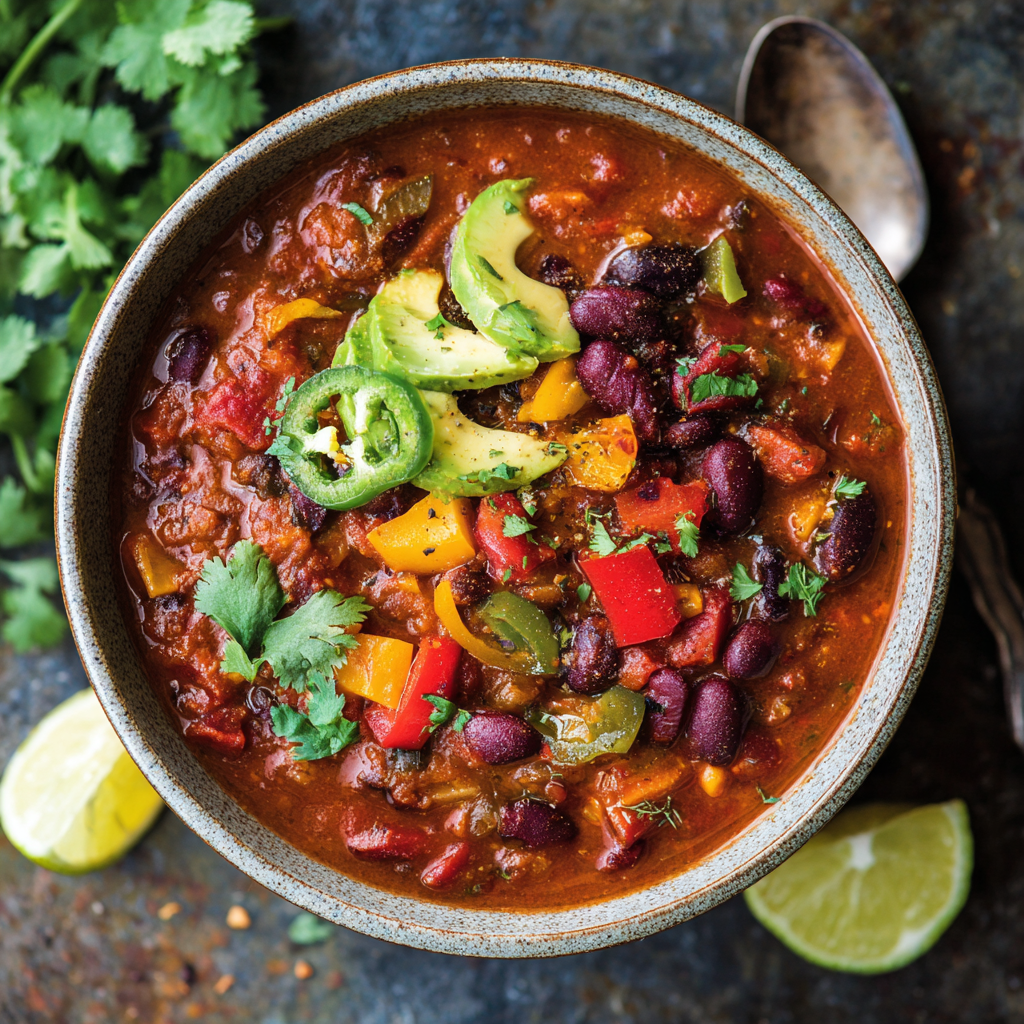
- The Best Crispy Baked Chicken Nuggets : Healthy, Easy & Kid-Approved
