

Chicken Teriyaki Burgers
Hey There, Burger Lover! Ready for a Flavor Adventure?
Picture this: It’s Friday night, the kitchen smells like caramelized magic, and you’re about to bite into a burger that’s equal parts juicy, sweet, savory, and downright thrilling. No, it’s not your average beef patty—it’s a Chicken Teriyaki Burger that’ll make your taste buds throw a confetti parade! 🎉
I’m Olivia, your kitchen hype-woman, and I live for moments where humble ingredients transform into something extraordinary. These teriyaki chicken burgers? They’re my love letter to cozy weeknights and “wow!” weekend gatherings. Imagine tender ground chicken hugged by ginger and garlic, glazed with sticky-sweet homemade teriyaki, then topped with crunchy slaw on a buttery brioche bun. It’s fusion comfort food that’s faster than takeout and twice as rewarding.
Whether you’re a meal-prep maestro or just craving something new, this recipe’s your golden ticket. No fancy skills needed—just an appetite for fun and a skillet. Let’s turn burger night into an unforgettable flavor journey together!
My Teriyaki Burger “Aha!” Moment
Let me take you back to my college days. My tiny apartment kitchen barely fit two people, but my roommate Jess and I would cram in every Sunday for “Burger Experiments.” One rainy night, we stared at a lone pack of ground chicken, soy sauce, and sad takeout menus. Jess sighed, “What if we made teriyaki… but burger?” Challenge accepted!
We whisked, taste-tested, and accidentally doubled the ginger (oops!). When those juicy patties hit the pan? The smell alone drew neighbors like moths to a flame. We slapped them on discount-store buns with whatever slaw-ish stuff we had. That first messy bite? Silence. Then Jess mumbled through a full mouth: “Olivia… this is stupid good.”
Twelve years later, that chaotic kitchen moment lives on in this recipe—perfected but still joyfully imperfect. It’s proof that the best dishes start with a “Why not?” and end with sticky fingers and happy hearts.
Gather Your Flavor Squad 🧾
Pro tip: Mise en place (a.k.a. prepping everything first) is your secret weapon here! Measure sauces, chop garlic, and mix that slaw before touching the chicken. Trust me—it’s a weeknight game-changer.
For the Burgers
- 1 lb ground chicken – Thigh meat adds extra juiciness! Swap for turkey if needed.
- ½ cup panko breadcrumbs – Their lightness keeps patties tender. Gluten-free? Crushed rice crackers work!
- 1 egg – The glue holding our juicy dreams together.
- 3 tbsp teriyaki sauce – Use the homemade stuff below (worth it!) or quality store-bought in a pinch.
- 3 tsp garlic powder – Double the punch vs fresh garlic in patties. No bitter raw bits!
- ½ tsp salt – Balances the sweetness. Pink Himalayan or sea salt preferred.
- ½ tsp ground ginger – Warmth without chew. Fresh ginger? Grate 1 tsp, but squeeze out juice first.
- ½ tsp onion powder – Sweet depth. No sub needed—it’s magic dust.
- 1 tbsp cooking oil – Avocado or olive oil for that golden sear.
- 4 brioche buns – Their buttery sweetness is *chef’s kiss*. Potato buns or ciabatta rock too.
For the Teriyaki Sauce (Makes extra for glazing!)
- ¼ cup low-sodium soy sauce – Controls saltiness. Coconut aminos for gluten-free.
- ½ cup water – Secret to silky texture.
- 1 tbsp dark brown sugar – Molasses depth > white sugar. Maple syrup works!
- 1 tbsp honey – Floral sweetness. Agave for vegan.
- ½ tbsp avocado or olive oil – Sheen and richness.
- 2 garlic cloves, grated – Fresh bite! Use a microplane.
- ¼ tsp ground ginger – Bright heat.
- 2 tsp cornstarch + 3 tsp water – Your glossy sauce thickener. Arrowroot starch also works.
For the Slaw
- 2 cups coleslaw mix – Buy pre-shredded! Or DIY with cabbage/carrots.
- 2 tbsp mayo – Creamy base. Greek yogurt for tanginess.
- 2 tsp apple cider vinegar – Zip! Rice vinegar or lemon juice in a pinch.
- 1 tsp white sugar – Just a kiss to balance acidity.
- ⅛ tsp salt + black pepper – Season to taste!
Let’s Build Some Burger Magic 👩🍳
Active time: 20 mins | Cook time: 15 mins | Serves: 4
Roll up those sleeves—we’re diving in! I’ve tucked chef hacks into every step. You’ve got this.
Step 1: Whip Up That Teriyaki Sauce
In a small saucepan, combine soy sauce, water, brown sugar, honey, oil, grated garlic, and ginger. Whisk over medium heat until simmering—about 3 minutes. In a separate cup, mix cornstarch and water into a smooth slurry. Pour into the simmering sauce while whisking! Cook 1-2 minutes until thick enough to coat a spoon. Off heat, let cool. (It thickens more as it sits!)
Chef hack: Taste and tweak! Want more tang? Add a splash of pineapple juice. Too sweet? Dash of rice vinegar. Set aside 3 tbsp for patties.
Step 2: Chill Out With Slaw
In a medium bowl, toss coleslaw mix, mayo, vinegar, sugar, salt, and pepper until every shred is happy. Cover and refrigerate until assembly. This lets flavors mingle and keeps that crunch!
Chef hack: Add toasted sesame seeds or sliced scallions for extra flair. No soggy slaw here!
Step 3: Patty Party Time
In a large bowl, gently mix ground chicken, panko, egg, 3 tbsp teriyaki sauce, garlic powder, salt, ginger, and onion powder. Don’t overmix—just fold until combined! Divide into 4 equal balls. Gently flatten into ¾-inch thick patties (slightly wider than your buns; they’ll shrink). Press a thumbprint into the center of each to prevent puffing.
Chef hack: Wet hands = no sticky mess! Keep patties cold until cooking—warm meat = tough burgers.
Step 4: Sear & Sizzle
Heat oil in a skillet (nonstick or cast-iron) over medium-high. When oil shimmers, add patties. Cook 5-6 minutes per side until deeply golden and internal temp hits 165°F. In the last minute, brush patties with extra teriyaki sauce for a sticky glaze. Transfer to a plate.
Chef hack: NO squishing patties with spatulas! That’s juice escaping. Flip just once.
Step 5: Toast & Assemble
Split buns and lightly toast in the same skillet (cut-side down) for 1 minute. Now build: Bottom bun → extra teriyaki drizzle → patty → slaw → top bun. Serve immediately with napkins—this is gloriously messy!
Chef hack: Warm plates = happy burgers. Pop ’em in the microwave for 30 secs while patties rest.
Serving Up the Good Vibes 🍔
These burgers shine brightest as the main event! Slice them in half diagonally to show off those layers, then pile ’em on a rustic wooden board with:
- Crinkle-cut sweet potato fries (tossed in sesame oil!)
- Grilled pineapple rings (hello, tropical twist!)
- Pickled cucumber salad for a bright, vinegary kick
For gatherings, set up a “Teriyaki Bar” with extra toppings: sriracha mayo, crispy onion strings, or avocado slices. Let friends DIY their dream burger!
Shake It Up! 5 Tasty Twists 🌈
- Pineapple-Jalapeño Fiesta: Mix ¼ cup finely diced pineapple and 1 minced jalapeño into patties. Top burgers with grilled pineapple rings.
- Umami Bomb (Veggie): Swap chicken for mashed black beans + cooked quinoa. Add 1 tbsp miso paste to teriyaki sauce.
- Spicy Korean BBQ: Use gochujang instead of honey in sauce. Top burgers with kimchi slaw (swap mayo for gochujang + rice vinegar).
- Paleo Power: Almond flour instead of panko, coconut aminos for soy sauce. Serve in lettuce cups!
- Hawaiian Luau: Add 2 tbsp crushed macadamia nuts to patties. Top with slaw + crispy SPAM slices (trust me!).
Olivia’s Kitchen Confessions ✨
Okay, real talk: The first time I made these, I flipped a patty onto the floor mid-photo shoot. My dog, Basil, lunged—teriyaki chaos ensued! Now I keep him locked out during burger time. 😂
Over the years, I’ve tweaked this recipe based on YOUR feedback! A reader suggested cornstarch slurry for glossier sauce (genius!). Another insisted brioche buns were non-negotiable (correct!). The slaw? Originally had sesame oil, but we simplified it to let the teriyaki shine.
My biggest lesson? Don’t stress perfection. Cracked patties? More “rustic charm.” Extra sauce dripping? Flavor confetti. Cooking’s about joy, not Pinterest pics—though these burgers are stupid photogenic.
Your Teriyaki Burger Questions, Solved! ❤️
Q: Help—my patties fell apart!
A: Three culprits: 1) Overmixing (handle meat gently!), 2) Skipping the egg/panko (they bind!), or 3) Flipping too early. Let patties form a crust before flipping!
Q: Can I bake these instead of pan-fry?
A: Absolutely! Bake at 400°F (200°C) on a parchment-lined sheet for 18-20 mins. Brush with sauce last 5 mins.
Q: Sauce too thick/thin?
A> Too thick? Whisk in 1 tsp water. Too thin? Simmer longer or add ½ tsp cornstarch slurry. Consistency should coat the back of a spoon.
Q: Make-ahead tips?
A> Patties freeze raw! Layer between parchment in a container. Freeze slaw + sauce separately. Thaw patties overnight before cooking.

Chicken Teriyaki Burgers
- Total Time: 35 mins
Description
Hey there, burger lover! Olivia here—ready to turn your next burger night into a sweet, savory, sticky adventure? These Chicken Teriyaki Burgers pack juicy ground chicken, a homemade glossy teriyaki glaze, and a crunchy slaw, all tucked in a buttery brioche bun. It’s fusion comfort food that feels fancy but stays easy. Grab a skillet—your taste buds are in for a wild ride!
Ingredients
For the Burgers:
-
1 lb ground chicken (thigh meat = extra juicy!)
-
½ cup panko breadcrumbs
-
1 egg
-
3 tbsp homemade teriyaki sauce (see below)
-
3 tsp garlic powder
-
½ tsp salt
-
½ tsp ground ginger
-
½ tsp onion powder
-
1 tbsp cooking oil (avocado or olive)
-
4 brioche buns
For the Teriyaki Sauce (makes extra!):
-
¼ cup low-sodium soy sauce (or coconut aminos)
-
½ cup water
-
1 tbsp dark brown sugar
-
1 tbsp honey
-
½ tbsp oil
-
2 garlic cloves, grated
-
¼ tsp ground ginger
-
2 tsp cornstarch + 3 tsp water (slurry)
For the Slaw:
-
2 cups coleslaw mix
-
2 tbsp mayo (or Greek yogurt)
-
2 tsp apple cider vinegar
-
1 tsp white sugar
-
Salt & pepper, to taste
Instructions
1️⃣ Make the Sauce: Simmer soy sauce, water, sugar, honey, oil, garlic, and ginger in a small pan for 3 mins. Stir in cornstarch slurry; cook 1–2 mins until thick. Cool.
2️⃣ Slaw Time: Toss slaw mix with mayo, vinegar, sugar, salt, and pepper. Chill.
3️⃣ Mix Patties: Combine chicken, panko, egg, 3 tbsp teriyaki, garlic powder, salt, ginger, and onion powder. Form 4 patties.
4️⃣ Cook: Heat oil in skillet on medium-high. Sear patties 5–6 mins per side (internal temp 165°F). Brush with more sauce before removing.
5️⃣ Assemble: Toast buns. Layer bottom bun, teriyaki drizzle, patty, slaw, top bun. Dive in!
Notes
-
Keep patties cold for best shape.
-
Don’t press patties while cooking—juicy is the goal!
-
Add grilled pineapple rings for a sweet twist.
- Prep Time: 20 mins
- Cook Time: 15 mins
Nutrition
- Calories: 430 cal Per Burger
- Fat: 20g
- Carbohydrates: 28g
- Protein: 28g
Nutritional Notes (Per Burger)
- Calories: ~430
- Carbs: ~28g | Protein: ~28g | Fat: ~20g
- Storage: Cooked patties + slaw keep 3 days separately. Reheat patties in skillet or air fryer.
Final Thoughts: Why This Burger Wins Every Time
The Chicken Teriyaki Burger isn’t just a meal—it’s a celebration of contrasts: sweet and savory, tender and crunchy, familiar and adventurous. Whether you’re a weeknight warrior or an entertaining enthusiast, this recipe delivers big flavors with minimal fuss.
So next time you’re staring at ground chicken, channel that “Why not?” spirit. Burn a patty? Call it “charred teriyaki.” Sauce too thick? Drizzle it like gourmet abstract art. Cooking’s about joy, not perfection—and this burger? It’s pure, sticky-fingered happiness.
Pin This Recipe For Later! 📌

Garlic Parmesan Cheeseburger Bombs
When Comfort Food Gets a Delicious Upgrade
Hey there, kitchen friends! Olivia here, waving from my perpetually flour-dusted countertop. Can you smell that? It’s the warm, buttery scent of pure joy wafting from the oven—and today, it’s carrying the irresistible promise of crispy dough, savory beef, and rivers of melted cheese. If your stomach just did a happy little flip, you’re exactly where you belong.
Picture this: All the cozy, crowd-pleasing magic of a juicy cheeseburger… but transformed into golden, bite-sized orbs of pure delight. No buns to squish, no toppings tumbling off—just pure, handheld bliss. These Garlic Parmesan Cheeseburger Bombs are my not-so-secret weapon for turning any gathering into an instant party. Game days? Potlucks? Late-night snack attacks? They rise to the occasion every. Single. Time.
Why do I adore them so much? Because they’re the culinary equivalent of a warm hug. They take simple, humble ingredients—the kind you likely have right now—and explode them into something extraordinary. That satisfying *crunch* as you bite through the garlicky, parmesan-kissed crust? The way the steamy, cheesy, perfectly seasoned beef filling spills out? Pure. Magic. And the best part? They’re ridiculously easy. No fancy skills required, just a hungry heart and a baking sheet. So preheat that oven, grab your favorite apron (messy is encouraged!), and let’s make some edible fireworks!
The Game Day That Started It All
Okay, let me take you back a few years. It was the biggest football game of the season for my family—think rival teams, generations of friendly trash talk, and a living room packed with hungry uncles and cousins. I was on appetizer duty, and I wanted something *epic*. Burgers felt too messy for the chaos. Sliders? Overdone. Then, staring at a can of biscuit dough and some leftover taco-seasoned beef (don’t judge my fridge chaos!), lightning struck: *What if I stuffed the burger INSIDE the dough?*
The first batch was… experimental. Leaky, slightly lopsided, but the *flavor*? Oh, the flavor had everyone abandoning the game to crowd around the kitchen island. My cousin Dave, usually a man of few words mid-game, mumbled through a mouthful of molten cheese: “Liv, these are bombs. Like… *flavor bombs*.” The name stuck! That messy kitchen experiment became a tradition. Now, no family gathering is complete without them. There’s something incredibly satisfying about watching people’s eyes light up when they take that first bite—it’s the same spark I felt as a kid helping my grandma roll dumplings. Pure, uncomplicated food joy. It’s why I cook!
Your Cheeseburger Bomb Arsenal
Gather these simple stars! Don’t stress about perfection—cooking is about deliciousness, not rigid rules.
- 1 lb Ground Beef (80/20 blend): The juicy hero! 80% lean/20% fat is my sweet spot for flavor and moisture without being greasy. Chef’s Tip: Ground turkey or chicken works great too! For a vegetarian twist, seasoned lentils or plant-based crumbles rock.
- 1 cup Shredded Cheddar Cheese: Sharp cheddar gives that classic burger punch. Substitution Siren: Monterey Jack melts beautifully, pepper jack adds heat, or Swiss brings a nutty twist. Pre-shredded is fine, but block cheese shredded yourself melts smoother!
- ½ cup Cream Cheese, softened: The secret weapon! It makes the filling luxuriously creamy and helps bind everything. Lighter Option: Neufchâtel cheese works perfectly.
- 1 can (16.3 oz) Refrigerated Biscuit Dough: Our easy, buttery vessel! Flaky layers or homestyle both work. Homemade Heart: Got time? Use your favorite pizza dough or even crescent roll dough (press seams together).
- 2 tbsp Butter, melted: For that glorious golden sheen and garlic delivery. Salted or unsalted is fine.
- 1 tsp Garlic Powder: Infuses the butter topping with instant, mellow garlic goodness. Garlic Lover’s Hack: Add ½ tsp onion powder too! Or mince 1 fresh garlic clove into the melted butter.
- 2 tbsp Grated Parmesan: Adds salty, umami depth to the crust. Use the good stuff from the refrigerated section, not the shaker can!
- 1 tbsp Chopped Fresh Parsley: That pop of color and fresh flavor! No Fresh? 1 tsp dried parsley works in a pinch.
Flavor Boosters (Optional but Awesome): 1 tsp Worcestershire sauce mixed into the beef, ½ tsp smoked paprika in the filling, or a pinch of red pepper flakes for heat!
Let’s Build Some Bombs! Step-by-Step
Ready for cheesy, beefy magic? Follow these steps for explosion-proof success!
- Brown & Blissful Beef: Fire up a skillet over medium-high heat. Crumble in your ground beef. Cook, breaking it up with a spoon, until beautifully browned and no pink remains (about 5-7 mins). Chef’s Secret: Don’t stir constantly! Let it get a little crispy sear in spots for extra flavor. Carefully drain off *most* of the fat (leave about 1 tbsp for richness!). Reduce heat to low. Add the softened cream cheese and stir, stir, stir until it’s completely melted and coats the beef in a creamy, dreamy embrace. Critical Tip: Let this mixture cool for at least 10-15 minutes! Hot filling = leaky bombs and dough that’s hard to seal. Stir in the shredded cheddar once slightly cooled.
- Dough Duty: Preheat your oven to 375°F (190°C). Line a baking sheet with parchment paper (hello, easy cleanup!). Pop open the biscuit can (that satisfying *thwump* never gets old!). Separate the biscuits. On a lightly floured surface, gently flatten each biscuit into a circle about 4 inches wide. Dough Whisperer Tip: Use your fingers to press outwards from the center, leaving the edges slightly thicker than the middle – this helps prevent leaks!
- Fill & Seal Like a Pro: Spoon a heaping tablespoon (about 1.5-2 tbsp) of the cooled beef mixture onto the center of each flattened dough circle. Portion Patrol: Don’t overfill! This is the #1 cause of bomb explosions. Imagine folding a little dough purse. Carefully gather the edges of the dough up and over the filling. Pinch, pinch, PINCH the seams together firmly to create a tight seal. Roll it gently between your palms to form a smooth ball. Place it seam-side DOWN on your prepared baking sheet. Repeat with all your doughy delights, leaving about 1.5 inches between them for puffing.
- Bake to Golden Perfection: Slide that baking sheet into your preheated oven. Bake for 12-15 minutes. You’re looking for gloriously golden brown tops and bottoms. Oven Intel: Rotate the pan halfway through if your oven has hot spots. They should sound slightly hollow if tapped!
- The Flavor Glow-Up: While the bombs bake, mix your melted butter and garlic powder in a small bowl. As soon as those golden beauties come out of the oven, brush them GENEROUSLY with the garlic butter – it’ll soak right in. Immediately sprinkle with the grated Parmesan and fresh parsley. Hot Tip: The residual heat helps the parsley wilt slightly and the parmesan stick perfectly. Resist eating one straight away for at least 5 minutes – molten cheese lava is real!
Showtime! Serving Your Masterpieces
Presentation is part of the fun! Let those golden Garlic Parmesan Cheeseburger Bombs shine. Arrange them slightly piled on a rustic wooden board or a vibrant platter. Tuck in a few sprigs of fresh parsley for a pop of green. Serve them warm, straight from the oven when the cheese is at its most seductively gooey. Offer small bowls of dipping sauces on the side – classic ketchup and mustard are a must, but don’t underestimate the power of a creamy sriracha mayo, tangy BBQ sauce, or even a quick garlic aioli! They’re perfect finger food for passing around during game time, setting out as the star appetizer at a party, or even as a fun, indulgent dinner alongside a simple green salad. Just be prepared: They disappear faster than you can say “Is there another batch?”
Mix It Up! Flavor Adventure Awaits
Once you master the classic, the world (or at least your kitchen) is your oyster! Try these tasty twists:
- Pizza Party Bombs: Swap the ground beef for cooked Italian sausage. Use mozzarella instead of cheddar. Add 1 tbsp pizza sauce and some mini pepperoni bits to the filling. Brush with garlic butter mixed with Italian herbs!
- Buffalo Chicken Boom: Replace beef with 1.5 cups shredded cooked chicken tossed in ¼ cup buffalo sauce. Use blue cheese crumbles instead of cheddar. Add 2 tbsp ranch dressing to the cream cheese. Brush with garlic butter, skip the parm, and sprinkle with extra blue cheese.
- Veggie-Loaded Delight: Sauté ½ cup finely diced mushrooms, onions, and bell peppers with the beef (or use lentils!). Add a handful of fresh spinach to the filling when you add the cheddar.
- Breakfast Bombastic: Fill with cooked, crumbled breakfast sausage, scrambled eggs, and cheddar cheese. Add a pinch of dried sage to the filling. Perfect for brunch!
- Spicy Southwest Kick: Add 1 tsp chili powder, ½ tsp cumin, and a diced jalapeño (seeds removed for less heat) to the beef filling. Use pepper jack cheese. Serve with avocado crema for dipping.
Olivia’s Kitchen Confessions & Wisdom
Oh, the journey of the Cheeseburger Bomb! That very first game day batch? Let’s just say… ambitious. I overfilled them like a rookie, and half erupted like cheesy volcanoes in the oven! My baking sheet looked like a beefy crime scene. But you know what? My family still DEVOURED the survivors and demanded more. That’s the beauty of home cooking – sometimes the messy fails become the best stories (and learning moments!).
Over time, I’ve learned the zen of the *slightly cooled filling* and the *firm pinch*. I’ve experimented with adding caramelized onions (divine!) and even tried a version wrapped in bacon (overkill, but delicious overkill). The recipe has evolved, but the core remains: accessible, fun, flavor-packed food meant for sharing. These bombs are forgiving. If one leaks? Call it the “taster” and enjoy the chef’s perk! If they’re slightly lopsided? That’s handmade charm! Cooking should feel joyful, not stressful. So crank up your favorite tunes, pour yourself a drink, and embrace the delicious chaos. These little bites of joy are worth it!
Your Cheeseburger Bomb Questions, Answered!
Let’s tackle those kitchen curveballs:
- Help! My bombs leaked everywhere! What went wrong? Leaks usually mean one of three things: 1) Filling was too hot when you wrapped it (melted the dough faster). Cool it down! 2) Overfilled! Stick to 1.5-2 tbsp max per biscuit. 3) Seal wasn’t tight enough. Pinch, pinch, PINCH that seam! Roll it smooth. Seam-side down baking is crucial too.
- Can I make these ahead of time? Absolutely! You have options: a) Assemble & Chill: Form the uncooked bombs, place them seam-side down on the baking sheet, cover tightly with plastic wrap, and refrigerate for up to 4 hours. Bake straight from the fridge, adding 1-2 extra minutes. b) Freeze for Later: Freeze uncooked bombs solid on the baking sheet, then transfer to a freezer bag. Bake from frozen, adding 5-7 minutes to the bake time. c) Reheat Cooked: Leftover cooked bombs? Re-crisp them beautifully in a 350°F (175°C) oven or air fryer for 5-8 minutes.
- My dough didn’t cook through in the middle. Why? This often happens if the oven temp was too high (causing the outside to brown before the inside cooks) or the bombs were packed too closely on the pan, trapping steam. Ensure proper spacing (1.5 inches) and double-check your oven temp with a thermometer! Also, ensure your filling is *warm*, not piping hot, when assembling to prevent the dough from starting to cook prematurely.
- Can I use homemade dough instead of canned biscuits? Yes! Homemade pizza dough or even a simple yeast roll dough works wonderfully. Portion it into balls slightly larger than a golf ball (about 2 oz each), let them rest, then flatten and proceed. You might need a slightly longer bake time (16-18 mins) depending on the dough thickness.

Garlic Parmesan Cheeseburger Bombs
- Total Time: 30 min
Description
When comfort food needs an upgrade, these golden, cheesy Cheeseburger Bombs step in to steal the show! Imagine a juicy cheeseburger wrapped in buttery biscuit dough, brushed with garlicky butter, and sprinkled with fresh parsley and parmesan. They’re crowd-pleasing, bite-sized, and guaranteed to disappear faster than you can make them. Fire up that oven—let’s turn snack time into party time!
Ingredients
-
1 lb ground beef (80/20)
-
1 cup shredded cheddar cheese
-
½ cup cream cheese, softened
-
1 can (16.3 oz) refrigerated biscuit dough
-
2 tbsp butter, melted
-
1 tsp garlic powder
-
2 tbsp grated parmesan
-
1 tbsp fresh parsley, chopped
-
Optional: Worcestershire sauce, smoked paprika, or red pepper flakes for extra kick!
Instructions
1️⃣ Brown the Beef: In a skillet, cook ground beef over medium-high heat until browned (5–7 min). Drain most fat. Stir in cream cheese until smooth. Let filling cool 10–15 min, then stir in cheddar.
2️⃣ Prep the Dough: Preheat oven to 375°F (190°C). Line baking sheet with parchment. Flatten each biscuit into a 4-inch circle.
3️⃣ Fill & Seal: Spoon 1.5–2 tbsp beef filling into each circle. Fold dough over filling, pinch edges tightly, and roll into a ball. Place seam-side down on baking sheet.
4️⃣ Bake: Bake 12–15 min until golden brown.
5️⃣ Finish: Mix melted butter & garlic powder. Brush warm bombs with garlic butter, sprinkle with parmesan & parsley. Cool 5 min before serving—careful, the cheese is lava!
Notes
-
Keep filling warm but not hot to avoid leaks.
-
Don’t overfill—pinch seams well!
-
Serve with ketchup, mustard, or spicy mayo for dipping.
- Prep Time: 15 min
- Cook Time: 15 min
Nutrition
- Calories: 180 cal Per Bomb
- Fat: 12g
- Carbohydrates: 12g
- Protein: 9g
Nutritional Information (Per Bomb, Approximate)
Servings: ~16 bombs | Prep Time: 15 mins | Bake Time: 15 mins
Final Thoughts: More Than Just a Snack
What started as a game-day experiment has become a beloved recipe because it taps into something universal: the joy of sharing flavorful, comforting food. These Garlic Parmesan Cheeseburger Bombs aren’t just about taste—they’re about connection.
-
They bring people together – Whether it’s family crowding the kitchen or friends passing a platter at a party.
-
They encourage creativity – Once you master the basics, the variations are endless.
-
They prove cooking should be fun – No perfection required, just enthusiasm and a willingness to experiment.
So, the next time you make these, remember: you’re not just baking snacks. You’re creating memories, one cheesy, garlicky, golden-brown bite at a time. Now go forth and bomb-ify everything! (Responsibly, of course.)

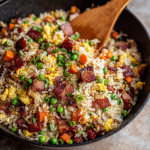
Bacon Fried Rice
Bacon Fried Rice: Your New Weeknight Hero
Hey there, kitchen friend! Olivia here, waving from my flour-dusted countertop. Can you smell that? It’s the sizzle of bacon hitting a hot pan – that magical sound that makes everyone suddenly appear in the kitchen asking, “Whatcha making?” If your weeknights feel rushed and dinner inspiration is running low, let me introduce you to my crispy, salty, soul-warming lifesaver: Bacon Fried Rice. This isn’t just leftovers tossed in a pan; it’s a flavor explosion that turns humble rice into something downright addictive. Picture this: smoky bacon bits, sweet pops of peas and carrots, fluffy scrambled eggs, and rice soaked in savory soy and oyster sauce. It’s ready faster than takeout, uses up that lingering container of rice in your fridge, and tastes even better the next day (if it lasts that long!). Whether you’re a fried rice newbie or a wok warrior, this recipe is your ticket to a stress-free, crowd-pleasing meal. Grab your favorite spatula – we’re about to make magic!
How Bacon Fried Rice Saved My Rainy Tuesday
Let me take you back to a gloomy Tuesday last fall. Rain lashed against the windows, my energy was at zero, and my fridge held… well, not much. A lone container of day-old rice, half a pack of bacon, some sad-looking carrots, and a freezer-burned bag of peas stared back at me. Takeout tempted me, but then I remembered my grandma’s mantra: “Waste not, want not, honey.” With nothing to lose, I chopped that bacon, sizzled it up, and tossed everything together in my trusty skillet. The smell alone perked me right up – smoky, savory, and utterly comforting. When my partner walked in, soaked and grumpy, he took one bite and grinned. “This is incredible! Did you plan this?” I laughed. Nope! It was pure pantry desperation magic. That rainy night rescue mission became our weekly ritual. Now, whenever life feels chaotic, I know bacon fried rice will bring us back to the cozy kitchen table, sharing stories over steaming bowls. It’s proof that the best meals often start with “What on earth can I make with *this*?”
Your Flavor Toolkit: Bacon Fried Rice Ingredients
Gather these simple stars! Don’t stress about perfection – fried rice is famously flexible.
- 6 slices thick-cut bacon, chopped: The MVP! Thick-cut gives those meaty, crispy bites. Chef’s Swap: Pancetta works, or use diced ham in a pinch. Veggie? Try smoked tofu or tempeh.
- ½ large onion, diced: Yellow or sweet onions add a mellow base. Chef’s Tip: Dice finely for even cooking and no big onion surprises!
- 2 cloves garlic, minced: Non-negotiable flavor booster! Chef’s Hack: Use a microplane for super-fine mincing if you’re short on time.
- 1 cup frozen peas and carrots: The classic sweet pop! Frozen = no chopping, maximum convenience. Chef’s Insight: Thawing isn’t needed – they cook fast!
- 4 cups cooked, cooled long-grain rice (preferably day-old): This is KEY! Day-old rice is drier, preventing mush. Jasmine or Basmati are perfect. Chef’s SOS: Fresh rice? Spread it thin on a tray for 15 mins in the freezer.
- 3 large eggs, beaten: For protein and richness. Chef’s Trick: Beat them with a tiny splash of water for fluffier curds.
- 2 tbsp soy sauce: Salty umami depth. Chef’s Swap: Tamari for gluten-free, or coconut aminos for lower sodium.
- 1 tbsp oyster sauce: The secret weapon! Adds complex, savory-sweet richness. Chef’s Must: Don’t skip it! Vegetarian? Use mushroom stir-fry sauce.
- 1 tsp sesame oil: Adds nutty aroma at the END. Chef’s Warning: High heat kills its flavor – stir it in last!
- Salt and pepper, to taste: Season as you go, but taste before adding extra salt – bacon and soy are salty!
- 2 green onions, chopped: Fresh, bright finish. Use both white and green parts!
Let’s Get Sizzling: Your Foolproof Bacon Fried Rice Steps
Ready? Fire up that burner! Use your biggest skillet or a wok if you have one.
- Bacon Bliss: Toss chopped bacon into your cold skillet. Turn heat to medium. Why start cold? It renders the fat slowly for super crispy bacon and plenty of golden drippings – our flavor base! Cook, stirring occasionally, for 8-10 minutes until perfectly crisp. Chef’s Hack: Resist nibbling ALL the bacon bits! Scoop them onto paper towels, leaving about 1 1/2 tablespoons of that liquid gold (bacon fat) in the pan.
- Aromatic Awakening: Crank the heat to medium-high. Add the diced onion to the bacon fat. Stir-fry for 2 minutes until it starts to soften. Add the minced garlic and stir constantly for just 30 seconds – until fragrant! Chef’s Tip: Don’t let the garlic brown or it turns bitter. Keep that spatula moving!
- Veggie Vibrance: Dump in the frozen peas and carrots. No need to thaw! Stir-fry for 2-3 minutes. You want them heated through but still bright and crisp-tender. They’ll cook a tad more later. Chef’s Note: Hear that satisfying sizzle? That’s the sound of flavor building!
- Egg-cellent Adventure: Push the veggie mixture to one side of the pan. Pour the beaten eggs into the empty space. Let them set for 10 seconds, then gently scramble them with your spatula until just cooked through – soft curds, not rubber! Chef’s Secret: Slightly undercook them; they’ll finish cooking when mixed in. Now, blend the eggs into the veggies.
- Rice to the Occasion: Add your cooled rice! Break up any big clumps with your spatula fingers or the back of a spoon. Stir-fry constantly for 2-3 minutes. You’re coating every grain in that glorious fat and heating it through. Chef’s Key Move: Press the rice gently against the hot pan for a few seconds here and there – hello, delicious little crispy bits!
- Sauce Symphony: Drizzle the soy sauce and oyster sauce evenly over the rice. Add the sesame oil. Quickly stir-fry for another minute, tossing constantly, until the rice is evenly coated and steaming hot. Chef’s Pro Move: Toss, don’t stir! Use a flipping motion with your wrist to combine everything evenly without smashing the rice.
- Grand Finale: Turn off the heat! Fold in the crispy bacon bits and most of the chopped green onions (save some for garnish!). Give it one final, gentle toss. Taste! Need pepper? A tiny pinch of salt? Adjust now. Chef’s Wisdom: Folding off-heat keeps the bacon crisp and onions fresh.
Serving Up the Comfort
This fried rice is a star solo act! Scoop it piping hot into deep bowls. Sprinkle the reserved green onions over the top for a pop of color and freshness. For a fun restaurant touch, pack it lightly into a small bowl, then invert it onto the serving plate for a neat dome. Want to make it a fuller meal? Slide a fried egg with a runny yolk on top – the yolk becomes instant, luxurious sauce! Simple sides like quick-pickled cucumbers or steamed edamame keep things light and balanced. Grab big spoons and dig in immediately – it’s comfort in every bite.
Shake It Up: Delicious Twists on Bacon Fried Rice
Once you master the base, the wok’s your playground!
- Kimchi Kick: Swap half the bacon for chopped kimchi (drain it first!) and add 1 tsp gochujang with the sauces. Top with sesame seeds.
- Pineapple Party: Add 1/2 cup diced fresh pineapple with the veggies. Swap oyster sauce for teriyaki. Top with toasted coconut flakes.
- Spicy Garlic Lover’s: Add 1 tsp grated ginger with the garlic. Stir in 1-2 tsp sriracha or chili garlic sauce with the soy sauce. Garnish with extra chili flakes.
- Breakfast-for-Dinner: Skip the peas/carrots. Add diced bell pepper with the onion. Serve topped with extra crispy fried eggs and hot sauce!
- Lower-Carb Cauli-Rice: Replace half the rice with riced cauliflower (thawed and squeezed VERY dry). Add an extra egg for binding.
Olivia’s Kitchen Confessions
This recipe has seen some… experimentation over the years. Remember that “crispy bacon is key” note? Yeah, learned that the hard way when my nephew (bless him) dumped *all* the soft, floppy bacon bits back in too early. We called it “Bacon Mush Rice.” Not our finest hour! I also used to stir constantly like a maniac, fearing burnt rice. Turns out, letting it sit briefly against the hot pan creates those coveted crispy bits – pure gold! My biggest evolution? Embracing the “clean-out-the-fridge” spirit. Wilted spinach? Toss it in with the peas! Leftover roast chicken? Shred it in! That lone stalk of celery? Dice it fine! Fried rice forgives and adapts. It’s become less of a recipe and more of a delicious, forgiving kitchen philosophy in my house. Messy aprons and happy tummies guaranteed.
Bacon Fried Rice Q&A: Your Questions, Solved!
Let’s tackle those common kitchen hiccups!
- Q: Help! My fried rice turned out soggy/mushy. What went wrong?
A: Soggy rice is enemy #1! Two main culprits: 1) Using fresh, warm rice (it steams and clumps). Always use cold, day-old rice! 2) Overcrowding the pan/cooking on too low heat. Work in batches if needed, and keep that heat medium-high to evaporate moisture fast. If using fresh rice, spread it on a baking sheet and pop it in the freezer for 15 mins first! - Q: Can I use brown rice?
A: Absolutely! Day-old brown rice works well. Just note it might be slightly chewier and absorb more sauce. You might need an extra splash of soy sauce or broth at the end. Cook it slightly al dente for best results. - Q: I don’t have oyster sauce. Is there a substitute?
A> While oyster sauce adds unique depth, you can substitute: 1) 1 extra tbsp soy sauce + 1/2 tsp sugar, or 2) 1 tbsp hoisin sauce (sweeter), or 3) 1 tbsp vegetarian mushroom stir-fry sauce. The flavor profile changes slightly, but it’ll still be tasty! - Q: How do I reheat leftovers without drying it out?
A: Skip the microwave if possible! Reheat it in a skillet over medium heat with a tiny splash of water or broth. Cover for a minute to steam, then uncover and stir-fry until hot. This revives the texture way better!
Bacon Fried Rice
- Total Time: 25 minutes
Description
Hey kitchen friend! Olivia here—ready to rescue your weeknights with the crispy, savory magic of Bacon Fried Rice. Imagine smoky bacon bits, sweet pops of peas and carrots, fluffy scrambled eggs, and day-old rice turned golden and glorious in under 30 minutes. One skillet, zero stress, big flavor—this is comfort food that loves leftovers. Let’s get sizzling!
Ingredients
-
6 slices thick-cut bacon, chopped
-
½ large onion, diced
-
2 cloves garlic, minced
-
1 cup frozen peas & carrots
-
4 cups cold, cooked rice (day-old is best!)
-
3 large eggs, beaten
-
2 tbsp soy sauce
-
1 tbsp oyster sauce (or hoisin for veggie twist)
-
1 tsp sesame oil (added at the end)
-
Salt & pepper, to taste
-
2 green onions, chopped
Instructions
1️⃣ Crisp Bacon: Start bacon in a cold pan. Cook on medium until crispy, ~8–10 mins. Scoop bacon out, leave 1–2 tbsp fat.
2️⃣ Sauté Aromatics: Add onion to bacon fat. Cook 2 mins. Add garlic, stir 30 secs—don’t burn it!
3️⃣ Veggies & Eggs: Stir in peas & carrots, cook 2–3 mins. Push aside, scramble eggs on empty side until just set.
4️⃣ Add Rice: Stir in cold rice. Break clumps. Fry 2–3 mins, press gently for crispy bits!
5️⃣ Flavor It Up: Add soy sauce, oyster sauce, and sesame oil. Toss well!
6️⃣ Finish: Fold in bacon & green onions. Taste & season. Serve hot!
Notes
-
Day-old rice = perfect texture!
-
Use a hot skillet or wok for best fried bits.
-
Swap bacon for pancetta, ham, or tofu.
- Prep Time: 25 mins
Nutrition
- Calories: 410 Cal per serving
- Fat: 24g
- Carbohydrates: 35g
- Protein: 14g
Nutritional Information (Per Serving)
Servings: 4 | Calories: ~410 | Carbs: 35g | Protein: 14g | Fat: 24g
Note: Nutritional info is an estimate based on specific ingredients used. Values may vary with substitutions.
Final Thoughts: The Joy of Imperfect Cooking
Bacon fried rice isn’t about precision—it’s about resilience. It rescues limp veggies, revives forgotten rice, and turns “I have nothing to eat” into “Wow, you made this?!”
The real secret? Confidence. Burned the garlic? Toss it and start again. No peas? Use corn. Your kitchen, your rules.
So here’s to messy stovetops, adaptable recipes, and the magic that happens when bacon meets rice. May your spatula always be ready, and your leftovers forever flavorful.

Italian Sushi
Italian Sushi: Your New Favorite No-Cook Party Hero!
Hey there, friend! Olivia here, waving from my perpetually flour-dusted kitchen counter. Ever have one of those days where you crave something spectacularly delicious but absolutely refuse to turn on the stove? Or maybe you need a last-minute appetizer that’ll make guests think you secretly trained under a nonna in Tuscany? Enter: Italian Sushi! Think of it as your favorite charcuterie board decided to get cozy and roll up into adorable, flavor-packed bites. We’re talking whisper-thin prosciutto hugging creamy burrata, zesty salami, sweet sun-dried tomatoes, and peppery greens—all drizzled with balsamic glaze like liquid gold. No cooking, no fuss, just pure, unadulterated joy on a plate. Whether you’re hosting a fancy soiree or treating yourself to a “I-deserve-this” snack, these roll-ups are your ticket to effortless Italian flair. Grab your apron (or don’t—I won’t tell!), and let’s make magic happen!
Seriously, what’s not to love? They’re gluten-free (naturally!), keto-friendly, and ready in 10 minutes flat. It’s the kind of recipe that makes you feel like a kitchen rockstar without breaking a sweat. I call that a win-win. Let’s roll—literally!
The Picnic That Started It All
Picture this: It’s a sweltering summer day, and my best friend texts, “Surprise picnic in 30 minutes? I’ve got wine!” My fridge was nearly bare—except for remnants of last night’s antipasti platter. Panic? Nope! Inspiration struck. I grabbed the prosciutto, leftover burrata, and a jar of sun-dried tomatoes, layered them haphazardly, rolled it all up, and sliced it into little spirals. Drizzled with balsamic? Chef’s kiss. We devoured them under an oak tree, laughing as juice from the tomatoes dribbled down our chins. My friend dubbed it “Italian Sushi,” and the name stuck. Now, these roll-ups are my go-to for everything—baby showers, book club, even solo Netflix binges. They’re not just food; they’re a happy little accident that became a memory-making staple. Every bite tastes like sunshine and spontaneity!
What You’ll Need (& Why It Works!)
Gather these simple stars—flexibility is key here! Use what you love or have on hand.
- 7 slices prosciutto: The silky, salty foundation. Chef tip: Ask the deli counter for thicker slices—they hold better! Swap with speck or Serrano ham if needed.
- 5–7 slices Italian salami: Adds a spicy, robust punch. Genoa or Calabrese work beautifully. Vegetarian? Skip it or use marinated artichoke hearts!
- 3–4 fresh basil leaves: That essential herbal brightness. No basil? Fresh mint or baby arugula adds a similar pep.
- 1–2 cups arugula or spinach: Peppery bite and crunch! Baby spinach is milder; wild arugula brings more zing. Wilted greens? No thanks—keep ’em crisp!
- 1 ball burrata (drained & gently torn): The creamy dream! Sub alert: Fresh mozzarella works, but burrata’s oozy center is *chef’s kiss*. Drain well—soggy rolls are sad rolls.
- ⅓ cup sun-dried tomatoes (drained): Sweet, tangy bursts of joy. Oil-packed? Pat ’em dry! Swap with roasted red peppers for milder vibes.
- Kosher salt, black pepper, oregano: Season to taste! Oregano’s earthy notes scream Italy. Fresh thyme? Also divine.
- Extra virgin olive oil & balsamic glaze: Quality matters! Drizzle EVOO for richness; balsamic glaze adds sticky-sweet drama. Homemade glaze? Even better!
Rolling Like a Pro: Let’s Build Flavor!
Ready? Channel your inner sushi master—no bamboo mat required!
- Lay It Out: On a cutting board or parchment paper, arrange prosciutto slices slightly overlapping (like shingles!) into a 9×7-inch rectangle. Pro hack: Slightly dampen the surface—it stops prosciutto from sliding!
- Layer the Fillings: Top prosciutto with salami, then basil leaves, greens, torn burrata, and tomatoes. Key move: Leave a 1-inch border at one end—it seals the roll! Avoid overloading the center; distribute evenly.
- Season: Sprinkle lightly with salt, pepper, and oregano. Drizzle with a thin stream of olive oil. Chef secret: Underseason now—you’ll add more glaze later!
- Roll Tight: Starting at the end with fillings, gently but firmly roll into a log, tucking ingredients inward. No tears, please: Use parchment to help roll, like sushi! Chill 5 mins if it feels loose.
- Slice & Serve: With a sharp knife (dip in hot water for cleaner cuts!), slice into 1-inch rounds. Wipe knife between slices! Drizzle lavishly with balsamic glaze. Boom—you’re a hero!
The Art of Italian Finger Food – Why Handheld Elegance Wins Every Time
There’s something magical about food you can eat with your hands—it’s intimate, playful, and universally appealing. Italian cuisine masters this with antipasti like arancini and bruschetta, but these roll-ups take it further by merging convenience with gourmet flair. Here’s why they’re a modern classic:
Texture Symphony
The prosciutto’s delicate crispness, burrata’s lush creaminess, and sun-dried tomatoes’ chew create a textural crescendo in every bite. Pro Tip: For extra crunch, add a sprinkle of toasted pine nuts or breadcrumbs between layers.
Portion Control (or Not!)
Each roll-up feels like a complete bite—no messy drips or awkward plate-balancing. But let’s be real: They’re so addictive, you’ll lose count. Party Hack: Skewer slices with decorative toothpicks to discourage double-dipping (and add charm).
Temperature Matters
Unlike hot appetizers that stress hosts, these thrive at room temp. The burrata softens slightly, melding flavors without becoming soggy. Science Note: Fats in the cheese carry fat-soluble flavors (like basil’s aroma), enhancing taste as they warm.
A Lesson from Nonna’s Pantry
Traditional Italian cooking celebrates cucina povera (peasant food)—transforming humble ingredients into brilliance. These rolls honor that ethos:
-
Prosciutto ends (cheaper at deli counters!) work perfectly.
-
Wilted basil? Blend into pesto for drizzling.
-
Stale bread? Pulse into crumbs for a crispy topping.
Olivia’s Disaster-Turned-Delicious:
Once, I forgot the balsamic glaze. A frantic pantry raid led to honey-mustard—a happy accident guests now request!
The 10-Minute Host(ess) Manifesto – Stress-Free Entertaining, Italian-Style
Let’s banish the myth that impressive food requires hours. Here’s how to lean into effortless elegance:
The “Fake It Till You Make It” Guide
-
Cheat the Spread: Arrange roll-ups on a store-bought olive tapenade or artichoke dip base. Instant sophistication!
-
Garnish Like a Pro: A $3 bunch of parsley or edible flowers distracts from any imperfections.
-
Music > Perfection: Cue up Dean Martin and light candles—ambiance outweighs precision.
Time-Saving Shortcuts
-
Pre-sliced meats/cheeses: Many grocers offer these. No shame!
-
Jarred roasted peppers: Rinse and pat dry for quick layering.
-
Pre-washed greens: Baby arugula is your ally.
Make-Ahead Magic
-
Roll the log 4 hours ahead; slice while guests sip aperitivos.
-
Freeze individual slices on a tray, then transfer to bags. Thaw 30 mins pre-party—great for surprise guests!
Budget-Friendly Swaps
-
Prosciutto → Capicola: Half the price, same salty punch.
-
Burrata → Ricotta salata: Firmer, cheaper, still delicious.
-
Balsamic glaze → Reduce cheap balsamic vinegar + honey (simmer 10 mins).
Olivia’s “Oops” Moment:
I once served these to a food critic friend… using paper plates. Verdict? “Who cares about dishes when flavors sing?”
Beyond the Appetizer – Italian Sushi for Every Meal
Why limit genius to parties? Reinvent these rolls for all occasions:
Breakfast Power-Ups
-
Fill with scrambled eggs + pesto (skip tomatoes).
-
Swap meats for smoked salmon + herbed cream cheese.
Lunchbox Glory
-
Wrap rolls in collard greens (sturdier than lettuce).
-
Pack with couscous salad for a Mediterranean bento.
Dinner Party Star
-
Layer into a grain bowl with farro, roasted veggies, and extra glaze.
-
Serve alongside risotto as a salty counterpoint.
Kids’ Version
-
Use turkey slices + mild cheese sticks (rolled like sushi).
-
Dip in marinara for “pizza rolls.”
Olivia’s Family Hack:
My toddler calls them “flavor snakes.” Whatever gets greens in them!
Plating Perfection: Serve with Flair!
Presentation is everything! Arrange rolls on a rustic wooden board or white platter. Scatter extra basil leaves, microgreens, or cracked pepper around them. For parties, pop each round onto a cucumber slice or crostini for easy grabbing. Pair with chilled Prosecco, a crisp Pinot Grigio, or sparkling lemonade. These beauties shine at room temp—let them sit 10 minutes before serving so flavors mingle!
Mix It Up: Your Roll, Your Rules!
Get creative! Try these twists:
- Caprese Twist: Swap salami for fresh mozzarella balls (ciliegine) + extra basil. Add a pesto drizzle!
- Spicy ‘Nduja: Spread a thin layer of ‘nduja (spicy Calabrian paste) under the prosciutto. Fiery heaven!
- Vegetarian Delight: Omit meats. Use grilled zucchini ribbons + whipped ricotta + toasted pine nuts.
- Mediterranean: Add crumbled feta, kalamata olives, and a sprinkle of za’atar.
- Low-Carb Lunch: Skip the roll—layer ingredients in a jar for a stunning salad!
Olivia’s Extra Sprinkle of Love
Confession: My first attempt looked like a burrata avalanche! I overstuffed, rolled too fast, and ended up with… well, Italian sushi nachos. Tasted amazing, though! Now, I embrace imperfection—slightly messy rolls still disappear. Over time, I’ve learned chilling the log for 10 minutes pre-slicing is a game-changer. Also, if prosciutto tears? Patch it like flavor quilting! These rolls have starred in my kitchen for years, evolving from picnic scraps to my signature party trick. They’re proof that cooking isn’t about perfection—it’s about sharing joy, one delicious, balsamic-dripped bite at a time. P.S. Leftovers? Ha! Good luck.
Your Questions, Answered!
Q: My rolls keep falling apart! Help?
A: Don’t despair! Chilling before slicing firms everything up. Also, avoid overfilling—less is more. If they unravel, secure with toothpicks pre-slicing, or call it a “deconstructed” appetizer (wink!).
Q: Can I make these ahead?
A: Absolutely! Roll the log whole, wrap tightly in plastic, and refrigerate up to 4 hours. Slice just before serving—add balsamic then. Greens might soften slightly, but flavor rocks!
Q: Burrata alternatives? It’s pricey!
A: Fresh mozzarella is great (drain well!). For tang, try goat cheese or whipped ricotta. Vegan? Cashew cream or almond ricotta work wonders!
Q: Are these keto-friendly?
A: Yes! With only 4g net carbs per serving, they’re perfect. Just ensure your balsamic glaze is sugar-free (or make your own with reduced sugar balsamic vinegar).

Italian Sushi
- Total Time: 10 minutes
Description
Hey friend! Olivia here—ready to level up your appetizer game with Italian Sushi. Imagine silky prosciutto rolled with creamy burrata, zesty salami, sun-dried tomatoes, and peppery greens—drizzled with balsamic glaze for that “wow” finish. No stove, no stress—just 10 minutes to a show-stopping, naturally gluten-free bite. Roll it up, slice it pretty, and watch it disappear!
Ingredients
-
7 slices prosciutto
-
5–7 slices Italian salami
-
3–4 fresh basil leaves
-
1–2 cups arugula or baby spinach
-
1 ball burrata, drained & gently torn
-
⅓ cup sun-dried tomatoes, patted dry & chopped
-
Pinch kosher salt, black pepper, oregano
-
Drizzle olive oil & balsamic glaze
Instructions
1️⃣ Build Base: Overlap prosciutto slices on parchment into a rectangle.
2️⃣ Layer: Add salami, basil, greens, burrata, tomatoes. Season lightly.
3️⃣ Roll: Tightly roll into a log, tucking fillings. Chill 5–10 mins if needed.
4️⃣ Slice: Cut into 1-inch rounds with a sharp knife.
5️⃣ Finish: Drizzle with balsamic glaze. Serve with extra basil or microgreens!
Notes
-
Chill the roll before slicing = perfect spirals.
-
Use parchment for easy rolling.
-
Swap burrata with mozzarella or whipped ricotta if needed.
- Prep Time: 10 mins
Nutrition
- Calories: 210 Cal 3 Pieces
- Fat: 16g
- Carbohydrates: 4g
- Protein: 12g
Nutritional Info (Per 3 Pieces)
Calories: ~210 | Protein: 12g | Fat: 16g | Carbs: 4g | Servings: 4
Note: Values are estimates. Adjust based on ingredient brands/variations.
Prep Time: 10 mins | Total Time: 10 mins
Final Thoughts: La Dolce Vita, One Bite at a Time
Food should be fun—not fussy. These roll-ups embody the Italian spirit of abbondanza (abundance) without the labor. They’re reminders that:
-
The best recipes are often accidents. (Thank you, picnic panic!)
-
Shared food = shared joy. Even solo eaters deserve pretty plates.
-
Tradition can bend. Who says sushi must be Japanese?

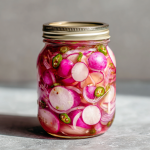
Easy Quick Pickled Radishes
Easy Quick Pickled Radishes: Your New Fridge Superhero!
Hey there, kitchen friend! Olivia here, waving from my flour-dusted countertop. Ever open your fridge and feel like everything’s beige? Tacos begging for confetti? Salad whispering “I need jazz hands”? That’s where these electric-pink Quick Pickled Radishes burst in like a flavor fireworks show! I started making these when my garden radishes staged a coup (seriously, they multiplied like bunnies). Now? They’re my culinary secret weapon. No fancy canning gear or days of waiting – just 15 minutes of active magic. We’re talking tangy crunch, jalapeño kisses, and a vinegar hug that turns humble roots into edible confetti. Whether you’re a meal-prep ninja or a “oops-I-have-guests-in-20-minutes” hero, this recipe’s your ticket to vibrant eats. Grab a jar – let’s make your taste buds dance!
Picture this: You drizzle tacos with these ruby gems, and suddenly it’s a fiesta. You scatter them over avocado toast, and brunch gets a standing ovation. You fork them straight from the jar at midnight (no judgment!), and life feels zestier. That’s the power of pickling – it’s alchemy for busy humans. And trust me: if I can make these while my dog “helps” by stealing cucumber peels, you’ve got this. Ready to banish bland forever? Let’s pickle!
The Radish Rebellion: How My Garden Forced Me to Get Creative
Okay, story time! Remember my first spring in this house? I planted radishes thinking, “Cute! Little salad toppers!” Well, those suckers grew like they were training for Radish Olympics. I had buckets. My neighbors started locking their doors when they saw me coming with yet another bag. One Tuesday, drowning in radishes and desperation, I remembered my grandma’s quick-pickled onions. “What if…?” I thought, slicing radishes furiously while my cat watched like a tiny, furry food critic. The result? Jars of shocking pink that tasted like spring had a party with a chili pepper. The game-changer? When my spice-averse nephew DEVOURED them on hot dogs, declaring them “cooler than ketchup.” Now, every April, I plant extra radishes just to relive that glorious, crunchy rebellion against boring food. Moral: Sometimes a veggie overload is life’s way of handing you confetti!
Your Vibrant Vinegar Brigade: Ingredients & Why They Rock
- 6 cups radishes, sliced into rounds – Pick firm, blemish-free ones! Their peppery bite mellows beautifully in brine. Sub: Daikon radish for milder crunch.
- 2 cups red onion, thinly sliced – Adds sweet sharpness and turns dreamy pink. Chef hack: Soak in ice water for 5 mins first if you hate raw onion breath!
- ½ jalapeño, thinly sliced – My “wink of heat.” Remove seeds for mild, keep ’em for firecracker mode! Sub: ¼ tsp red pepper flakes for smokiness.
- 2½ cups rice wine vinegar – The MVP! Mildly sweet & less harsh than white vinegar. Sub: Apple cider vinegar for fruity tang (color will be warmer).
- 2 cups water – Balances acidity. Filtered is best for crisp texture.
- ½ cup sugar – Not for sweetness, but to round out sharp edges. Sub: Honey or maple syrup for depth (use ⅓ cup).
- 2 tsp sea salt – Flavor enhancer & crisping agent. Avoid iodized salt – it can make veggies soft!
Why this combo rocks: The vinegar punches up flavor, sugar tames it, salt keeps things snappy, and that jalapeño? It’s the surprise high-five at the end. Together, they transform crunchy veggies into tart, sweet-spicy magic!
Let’s Make Magic: Step-by-Step with Chef Olivia
Step 1: Pack the Veggies – Grab a squeaky-clean 1.5-quart glass jar (or divide between two smaller ones). Layer radishes, onions, and jalapeños like you’re building a crunchy rainbow. Pro tip: Pack ’em tight! They’ll shrink slightly in brine.
Step 2: Make the Brine – In a saucepan, combine vinegar, water, sugar, and salt. Whisk it like you mean it over medium heat JUST until sugar and salt dissolve (about 3-4 minutes). NO BOILING! Boiling = sad, limp radishes. We want happy crunch! Chef hack: Toss in ½ tsp whole peppercorns or a garlic clove now for bonus flavor layers.
Step 3: Pour & Cool – Carefully pour the hot brine over your veggie pile until they’re fully submerged. Tap the jar gently to release air bubbles – think “tucking them in.” Let it cool uncovered on the counter until room temp (about 1 hour). Why uncovered? Steam escape = crisper pickles! Patience, grasshopper.
Step 4: Chill & Store – Pop on the lid and refrigerate. They’re technically edible in 1-2 hours (emergency taco situations!), but for maximum “WOW,” wait 24 hours. Storage secret: They keep for 3-4 weeks… if they last that long! Always use clean forks to grab ’em.
The Science of Quick Pickling – Why This Method Works Magic
Quick pickling isn’t just a kitchen hack—it’s a flavor revolution rooted in food science. Unlike traditional canning, which requires sterilization and weeks of waiting, this method relies on vinegar’s acidity and salt’s osmosis to transform veggies in hours. Here’s the breakdown:
1. Vinegar’s Acidic Power
Rice wine vinegar (or apple cider vinegar) has a 4-5% acetic acid concentration—strong enough to preserve and soften veggies slightly but gentle enough to keep them crisp. The acid penetrates the radish cells, amplifying their natural peppery bite while mellowing it into tangy brightness. Pro Tip: Avoid distilled white vinegar for this recipe—it’s too harsh and can overpower delicate radishes.
2. Salt’s Crisp-Keeper Role
Sea salt does double duty: It draws out excess moisture (preventing sogginess) and enhances flavor by opening the veggies’ pores to absorb brine. Iodized salt is a no-go here—its additives can make radishes mushy.
3. Sugar’s Balancing Act
The ½ cup sugar isn’t for sweetness—it’s a flavor harmonizer. It rounds out vinegar’s sharpness and highlights the radishes’ natural earthiness. For low-sugar versions, honey or maple syrup adds depth without refined sugar.
4. Heat Control = Crunch Control
Heating the brine just until dissolved (not boiling) is critical. Boiling breaks down pectin—the structural carbohydrate in veggies—leading to limp pickles. Think of it like blanching: You want to awaken flavors, not cook them to death.
5. The Jalapeño Wildcard
Capsaicin (the compound in jalapeños) is fat-soluble, but vinegar acts as a carrier, dispersing subtle heat throughout the jar. Remove seeds for mild heat or leave them in for a slow burn that builds with each bite.
Why Radishes Shine
Radishes have high water content and thin cell walls, so they pickle faster than denser veggies (like carrots). Their peppery flavor mellows into a tangy crunch, making them ideal for quick-pickling newbies.
The Cultural Roots of Pickling – A Global Affair
Pickling isn’t new—it’s a ancient preservation technique with vibrant global variations. These radishes are part of a delicious lineage:
1. Asia’s Pickle Obsession
-
Japan: Tsukemono (pickled veggies like daikon) are served with every meal. Fun fact: Rice vinegar’s mildness comes from fermenting rice wine—hence its subtle sweetness.
-
Korea: Kimchi is the OG spicy pickle, but quick danmuji (yellow pickled radish) is a taco-topper cousin.
2. Europe’s Vinegar Love
-
Britain: Pickled onions are pub snack staples, often malt-vinegar-based.
-
Germany: Gewürzgurken (spicy pickles) use mustard seeds and dill—try adding these to your radish brine!
3. Latin America’s Brightness
-
Mexico: Escabeche (pickled jalapeños and carrots) inspired this recipe’s spicy kick.
-
Peru: Salsa criolla (onions quick-pickled in lime) shows how acid can replace vinegar.
4. Middle Eastern Quick Fixes
-
Torshi (Persian pickles) often include beets for color—just like our optional beet variation!
Why It Matters
Understanding these traditions helps you riff creatively. Add star anise for a Chinese twist, or swap vinegar for lime juice for a Peruvian vibe. Pickling is a passport to global flavors!
The Psychology of Pickling – Why We’re Obsessed
Beyond taste, quick pickling taps into deeper cravings:
1. Instant Gratification
In an era of delayed rewards, a recipe that delivers in hours (not weeks) feels like wizardry. The 24-hour flavor bloom becomes a delicious countdown.
2. The “I Made That!” High
Preserving food triggers primal satisfaction. Even novice cooks feel like homesteaders when they pop open a DIY pickle jar.
3. Color Therapy
That electric pink isn’t just pretty—studies show vibrant food colors subconsciously signal freshness and nutrient density.
4. Customization = Ownership
Like playlist curation, tweaking heat/sweetness makes the recipe “yours.” A sprinkle of peppercorns or a garlic clove becomes a signature.
5. The Snack-Sneak Phenomenon
There’s rebellious joy in eating pickles straight from the jar at midnight. It’s guilt-free indulgence with a crunchy payoff.
The Social Media Effect
Jars of pink radishes are Instagram catnip—they’re visually striking and subtly say, “I’m the kind of person who pickles.” Shareability boosts their appeal.
Where to Deploy Your Crunchy Pink Power
These radishes aren’t picky – they’ll jazz up ANYTHING! Pile them high on fish tacos with lime crema. Scatter over grain bowls for a zingy surprise. Fold into chicken salad sandwiches instead of celery (game-changer!). Top avocado toast with an extra sprinkle of salt. Or my fave: Drain a spoonful, toss with olive oil and parsley, and crown a humble bowl of hummus. They even make killer Bloody Mary garnishes! Basically, if it’s edible and could use joy, throw these at it.
Shake It Up: 5 Zesty Variations
- Asian Twist: Swap rice vinegar for seasoned rice vinegar + add 1 star anise and 5 slices ginger to brine.
- Sweet & Spicy: Add 2 tbsp honey + 1 extra jalapeño to brine. Hello, pulled pork topping!
- Dill Delight: Toss 3 sprigs fresh dill and 1 tsp mustard seeds into the jar before pouring brine (pickle vibes!).
- Beet-Berry Blush: Add ½ cup shredded raw beets – they turn everything jewel-toned! Or toss in ¼ cup raspberries for fruity tang.
- Low-Sugar: Replace sugar with ¼ cup monk fruit sweetener. Still bright, less guilt!
Olivia’s Notebook: Confessions & Radish Revelations
True story: I once gifted these in mason jars for Christmas… and got “orders” for next year. Who knew pickled radishes > fruitcake? Over time, I’ve learned: Thickness matters! Slice radishes ⅛-inch thick – too thin = floppy, too thick = too peppery. Also, brine recycling is genius – after eating radishes, pour brine over sliced cucumbers or carrots! My biggest blunder? Using metallic bowls for cooling (hello, weird metallic aftertaste). Glass or ceramic only, pals. These radishes have seen me through lazy dinners and fancy parties – they’re the culinary equivalent of jeans that dress up or down!
Radish Rescue: Your FAQs Answered
Q: Why are my pickled radishes soft instead of crunchy?
A: Three likely culprits: 1) You boiled the brine instead of just warming it (heat murder crunch!). 2) Old radishes – always use crisp, fresh ones. 3) You skipped the sea salt. Iodized table salt can soften veggies.
Q: Can I use white vinegar instead of rice vinegar?
A: Absolutely! But white vinegar is sharper. Reduce it to 2 cups and add ½ cup water to compensate. Taste and adjust!
Q: How long do they REALLY last?
A: Officially, 3-4 weeks refrigerated. Real talk? Mine vanish in 5 days. If brine gets cloudy or smells funky, toss it.
Q: Can I make these without sugar?
A: Yes, but they’ll be VERY tart. Substitute with ¼ cup honey, agave, or monk fruit sweetener for balance.
Easy Quick Pickled Radishes
- Total Time: 15 minutes
Description
Hey flavor friend! Olivia here—ready to rescue boring meals with these zippy Quick Pickled Radishes. Think crisp, tangy, slightly spicy little gems that brighten tacos, toast, salads, or your midnight snack fork raids. No canning, no fuss—just 15 minutes of your day for weeks of pink crunch power. Let’s pickle!
Ingredients
-
6 cups radishes, sliced ⅛-inch thick
-
2 cups red onion, thinly sliced
-
½ jalapeño, sliced (optional, seeds for heat)
-
2½ cups rice wine vinegar (or apple cider vinegar)
-
2 cups water
-
½ cup sugar (or honey)
-
2 tsp sea salt
Instructions
1️⃣ Pack: Layer radishes, onion & jalapeño tightly in a clean jar.
2️⃣ Warm Brine: In a saucepan, heat vinegar, water, sugar & salt. Stir until dissolved—don’t boil!
3️⃣ Pour: Cover veggies with warm brine. Tap jar to release air bubbles.
4️⃣ Cool: Let sit uncovered 1 hour, then seal & refrigerate.
5️⃣ Enjoy: Best after 24 hrs. Stays crunchy & zippy for up to 4 weeks!
Notes
-
Slice radishes evenly for perfect crunch.
-
Want extra flavor? Add garlic, peppercorns, or dill!
-
Use brine leftovers to pickle cucumbers or carrots.
- Prep Time: 15 mins
Nutrition
- Calories: 15 per ¼ cup
- Fat: 0g
- Carbohydrates: 3g
Nutritional Perks (Because We’re Fancy Like That)
Per ¼ cup serving: Calories: ~15 | Carbs: 3g | Fat: 0g | Sugar: 2g | Servings: ~10
Why we love it: Radishes are vitamin C powerhouses! Plus, vinegar may aid digestion. It’s basically confetti with benefits.
Final Thoughts: More Than a Condiment
These radishes are kitchen alchemy—turning humble roots into a versatile, vibrant staple. They’re proof that big flavor doesn’t require fancy tools or time. Whether you’re topping tacos, gifting jars, or sneaking midnight snacks, they’ll make every bite brighter. So next time life (or your garden) hands you radishes, remember: A little vinegar, a sprinkle of salt, and a dash of creativity can transform the ordinary into something extraordinary. Now go forth and pickle with purpose!

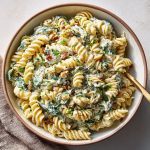
Spinach Dip Gluten-Free Pasta Salad
Spinach Dip Gluten-Free Pasta Salad: Your New Party Hero!
Hey there, kitchen friends! Olivia here, waving from my flour-dusted countertop. You know that moment when you open the fridge, stare at leftovers, and think, “How can I turn this into something magical?” That’s exactly how this Spinach Dip Gluten-Free Pasta Salad was born! Picture this: the creamy, garlicky hug of your favorite spinach dip (you know, the one that disappears in 5 minutes at parties?) cozying up to hearty gluten-free pasta. It’s the ultimate mashup for potlucks, picnics, or when you just need a big bowl of comfort after a long day. No fancy skills required—just your favorite mixing bowl and a craving for something deliciously scoopable. Whether you’re gluten-free, feeding a crowd, or simply chasing that “oh wow” flavor, this dish is your new secret weapon. Let’s make magic happen!
Why This Dish Feels Like Home
Confession time: My love affair with spinach dip started at my cousin’s chaotic ’90s wedding. Picture ruffled dresses, a questionable DJ, and me—a tween “helping” in the kitchen. The caterers left out a giant bowl of spinach dip “for the staff.” One taste of that cool, creamy goodness with crunchy water chestnuts? I was hooked! Fast-forward to last summer: I’m hosting a backyard BBQ, staring at leftover gluten-free pasta and a half-eaten spinach dip. Lightbulb moment! I tossed them together, added extra herbs, and BAM—the pasta salad that had everyone begging for the recipe. Now, it’s not just a dish; it’s a reminder that the best creations come from joy, messiness, and a little rebellious kitchen experimentation. Just like that ’90s wedding, it’s pure happiness in every bite.
Gather Your Flavor Crew
Here’s what you’ll need (and why!):
- 16 oz gluten-free fusilli pasta: Those twisty shapes hold the creamy dressing like flavor pockets! Chef tip: Corn-based pasta (like Jovial) stays firm and won’t turn mushy. Swap for chickpea pasta if you want extra protein.
- 2 cups sour cream: Our creamy base. For a lighter twist, Greek yogurt works, but add 1 extra tbsp mayo to keep it lush.
- ½ cup mayonnaise: Adds richness and helps the dressing cling to every noodle. Vegan mayo? Absolutely!
- 1 tsp garlic powder + 1 tsp onion powder: The dynamic duo! They deliver big flavor without raw bite. Feeling fancy? Sauté 1 minced fresh garlic clove in olive oil first.
- ½ tsp black pepper + ½ tsp sea salt: Season layers! Start here, then taste after chilling. I use flaky sea salt—it’s my kitchen crush.
- 2 tsp dried parsley: For that fresh pop of color and herbiness. No dried? Use 1 tbsp fresh chopped parsley or chives!
- 16 oz frozen chopped spinach (thawed & drained): Squeeze out ALL the water (seriously, go Hulk-mode!). Chef hack: Wrap it in a clean kitchen towel and twist.
- 5 oz sliced water chestnuts (drained & chopped): The CRUNCH factor! Don’t skip these—they’re like little flavor fireworks.
Let’s Build Flavor Town!
Cook Pasta: Boil your pasta in well-salted water (like the sea!) until al dente—about 1 minute less than the package says. Why? Gluten-free pasta turns mushy fast! Drain, rinse under cold water to stop cooking, and let it cool completely. Pro tip: Toss it with 1 tsp olive oil to prevent clumping. Patience is key—warm pasta melts the dressing (sad salad alert!).
Make Dressing: In your largest mixing bowl (trust me, go big!), whisk together sour cream, mayo, garlic powder, onion powder, pepper, salt, and parsley. Taste it! Want more zing? Add a squeeze of lemon. Too thick? A splash of almond milk loosens it up. This is your flavor canvas—paint boldly!
Add Veggies: Drop in your bone-dry spinach and chopped water chestnuts. Fold gently with a spatula. Watch the magic: The spinach turns the dressing into a vibrant green hug. If it looks too thick, don’t panic—the pasta will soak up some love.
Combine: Add the cooled pasta to the bowl. Use two forks or your hands (clean, please!) to gently lift and fold. Don’t stir aggressively—we’re mingling flavors, not smashing noodles! Every piece should wear a creamy coat.
Chill & Serve: Cover and refrigerate for at least 1 hour (overnight is IDEAL!). This lets the flavors throw a party. Before serving, taste and adjust seasoning—sometimes it needs an extra pinch of salt or pepper. Secret weapon: A sprinkle of smoked paprika on top!
The Ultimate Crowd-Pleaser – Why This Salad Steals Every Potluck
Picture this: You arrive at a summer BBQ with a bowl of something that makes everyone pause mid-conversation. That’s the power of this Spinach Dip Gluten-Free Pasta Salad. It’s not just a side dish—it’s a conversation starter, a nostalgia trigger, and the first empty bowl on the table. Here’s why it works every time:
The Flavor Alchemy
This salad hits all the right notes:
-
Creamy (thanks to the sour cream-mayo duo)
-
Crunchy (hello, water chestnuts!)
-
Garlicky (but not overpowering)
-
Fresh (the spinach keeps it bright)
Unlike traditional mayo-heavy pasta salads, this one feels indulgent yet light—a rare combo that keeps people coming back for seconds.
The Make-Ahead Magic
Potluck stress is real. This salad solves three big problems:
-
No last-minute prep: It actually tastes better after chilling overnight.
-
Travels like a champ: Toss it in a cooler or insulated bag—no wilting or separation.
-
Feeds a crowd: Double the recipe in the same time (just use your biggest stockpot!).
The Gluten-Free Bonus
Even non-GF folks won’t miss the gluten here. The corn-based fusilli holds its shape beautifully, and the rich dressing distracts from any texture differences. For mixed crowds, it’s a safe bet that pleases everyone—celiacs, keto-adjacent friends, and carb-lovers alike.
Pro Tip for Parties
Serve it in a hollowed-out watermelon bowl for summer vibes, or layer it in mason jars for a picnic. Garnish with edible flowers or crispy prosciutto strips for Insta-worthy flair!
Meal Prep Hero – How This Salad Saves Your Week
Raise your hand if you’ve ever opened your fridge at noon to find… sad desk lunch options. This salad is your ticket to a week of flavorful, no-reheat meals. Here’s how to hack it:
The Foundation
Batch-cook the pasta and dressing separately on Sunday. Store them in airtight containers (undressed pasta stays perfect for 3 days). When ready to eat, mix individual portions with spinach and water chestnuts—this keeps the crunch intact.
5 Meal Prep Twists
-
Lunchbox Power Bowl: Top with grilled shrimp, cherry tomatoes, and avocado.
-
Post-Workout Fuel: Add shredded rotisserie chicken and extra black pepper.
-
Breakfast Salad: Fry an egg and place it on top—runny yolk = instant sauce!
-
Vegan Upgrade: Swap in marinated tofu and coconut yogurt dressing.
-
Snack Attack: Scoop with cucumber slices or gluten-free crackers.
Storage Secrets
-
Dressed salad lasts 4 days (the acid in mayo preserves it).
-
Revive dried-out salad with a splash of olive oil or lemon juice.
-
Freeze the dressing (without spinach) for future quick batches.
Why It Beats Takeout
At ~$1.50 per serving, it’s cheaper than a sad deli sandwich, and infinitely more satisfying. Plus, no 3 p.m. energy crash—thanks to the protein-fat-fiber trifecta!
Kid-Friendly Hacks – Sneaky Veggies They’ll Actually Eat
Getting kids to eat spinach is like negotiating with tiny food critics. But this salad? It’s a stealth health bomb they’ll devour. Here’s how to make it kid-approved:
The Psychology of Success
-
Fun shapes: Use dinosaur-shaped pasta or rainbow fusilli.
-
Dip mentality: Serve with gluten-free pretzels for scooping.
-
Crunch factor: Kids adore water chestnuts—call them “flavor crunchies.”
Picky-Eater Tweaks
-
Hide the greens: Pulse spinach into the dressing until smooth.
-
Milder flavor: Reduce garlic powder by half and add a teaspoon of honey.
-
Cheesy bribe: Stir in ½ cup shredded cheddar (it melts slightly into the dressing).
Lunchbox Win
Pack in a divided bento box with:
-
Left side: Pasta salad
-
Right side: Grapes, cheese cubes, and a fun treat
-
Bonus: Freeze a juice box to keep it chilled!
Real Parent Tested
*“My 6-year-old calls it ‘Superhero Pasta’ and eats spinach now without a fight!”* — Jenna, mom of 3
How to Serve It Like a Pro
This salad shines in a big rustic bowl with colorful utensils! For parties, serve it in a hollowed-out bread bowl (gluten-free, of course) for double the fun. Garnish with extra chopped parsley, chives, or even crispy bacon bits. Pair it with grilled chicken skewers for a full meal, or scoop it onto lettuce cups for a low-carb twist. It’s perfect at room temp, so let it sit out for 15 minutes before serving—creamy, cool, and crunchy!
Make It Your Own!
1. Protein Power: Add 1 cup diced rotisserie chicken, chickpeas, or chopped hard-boiled eggs.
2. Veggie Fiesta: Stir in ½ cup finely chopped roasted red peppers or sun-dried tomatoes for a sweet-tangy punch.
3. Dairy-Free Dream: Use coconut yogurt + vegan mayo, and swap in nutritional yeast for a cheesy vibe.
4. Spice It Up: Add ¼ tsp cayenne or 2 tbsp hot sauce to the dressing—fiendishly good!
5. Nutty Crunch: Top with toasted almonds or pepitas right before serving.
Olivia’s Kitchen Confessions
This recipe? It’s a survivor! The first time I made it, I forgot to drain the spinach (hello, watery disaster!). Lesson learned: SQUEEZE LIKE YOUR SALAD DEPENDS ON IT! Over the years, I’ve added more pepper (because life needs spice!) and tested 7 gluten-free pastas—corn fusilli wins for texture. My husband calls it “Dip That Ate a Pasta Salad,” and my kids fight over the water chestnuts. Pro tip: Double the batch. Leftovers taste even better on day two… if they last that long! Remember: Cooking is about joy, not perfection. If your pasta salad looks messy but tastes amazing? You nailed it.
Your Questions, Answered!
Q: Can I use fresh spinach instead of frozen?
A: Absolutely! Sauté 10 oz fresh spinach until wilted, then squeeze it dry. But frozen is cheaper and easier—no chopping!
Q: Why is my dressing watery after chilling?
A> Two culprits: Undrained spinach or warm pasta. Next time, squeeze spinach in a towel until no liquid drips, and cool pasta separately on a baking sheet.
Q: Can I make this dairy-free without sacrificing creaminess?
A> Yes! Use thick coconut yogurt + vegan mayo. Add 1 tbsp lemon juice for tang. Cashew cream also works wonders!
Q: How long does it keep?
A> Up to 4 days covered in the fridge. If it thickens, stir in 1 tbsp milk or broth before serving.
Spinach Dip Gluten-Free Pasta Salad
- Total Time: 46 minute
Description
Hey kitchen friend! Olivia here—ready to turn your love for creamy spinach dip into the dreamiest gluten-free pasta salad ever. Imagine twisty noodles coated in a cool, garlicky hug, studded with crunchy water chestnuts and vibrant spinach. It’s scoopable comfort food that disappears in minutes—perfect for potlucks, BBQs, or just you and a big bowl on the couch. Let’s get mixing!
Ingredients
-
16 oz gluten-free fusilli pasta
-
2 cups sour cream (or Greek yogurt)
-
½ cup mayonnaise
-
1 tsp garlic powder + 1 tsp onion powder
-
½ tsp black pepper + ½ tsp sea salt
-
2 tsp dried parsley (or 1 tbsp fresh)
-
16 oz frozen chopped spinach, thawed & squeezed dry
-
5 oz sliced water chestnuts, chopped
Instructions
1️⃣ Cook Pasta: Boil in salty water till al dente. Drain, rinse cold, toss with 1 tsp olive oil. Cool completely!
2️⃣ Make Dressing: In a big bowl, whisk sour cream, mayo, garlic, onion, pepper, salt & parsley. Taste & adjust!
3️⃣ Fold In: Add spinach & water chestnuts. Mix gently—watch the color magic!
4️⃣ Combine: Add cooled pasta. Toss lightly until coated. Cover & chill 1 hr minimum.
5️⃣ Serve: Taste, adjust seasoning, sprinkle smoked paprika if you’re fancy. Dig in!
Notes
-
Squeeze spinach dry—no soggy salad!
-
Chill time = flavor time. Overnight is even better.
-
Add diced chicken or chickpeas for protein boost.
- Prep Time: 10 mins
- Cook Time: 1 hr 10 mins
Nutrition
- Calories: 280 Cal Per Cup
- Fat: 18g
- Carbohydrates: 22g
- Protein: 6g
Nutritional Per Serving (1 cup)
Calories: ~280 | Carbs: 22g | Fat: 18g | Protein: 6g | Servings: 8
Prep: 10 mins | Cook: 10 mins | Chill: 1 hr | Total: 1 hr 20 mins
Final Thoughts: More Than a Recipe
This dish is a lesson in kitchen confidence. It started as a happy accident (like all the best recipes do) and became a staple because:
-
It’s forgiving (forgot to drain the spinach? Squeeze it now!).
-
It’s adaptable (allergies? Swaps work seamlessly).
-
It’s joyful (because food should make you smile).
So next time you’re staring at leftovers or panicking about a potluck, remember: Great meals don’t need to be complicated. Just toss, taste, and trust your instincts. Now go forth and salad!
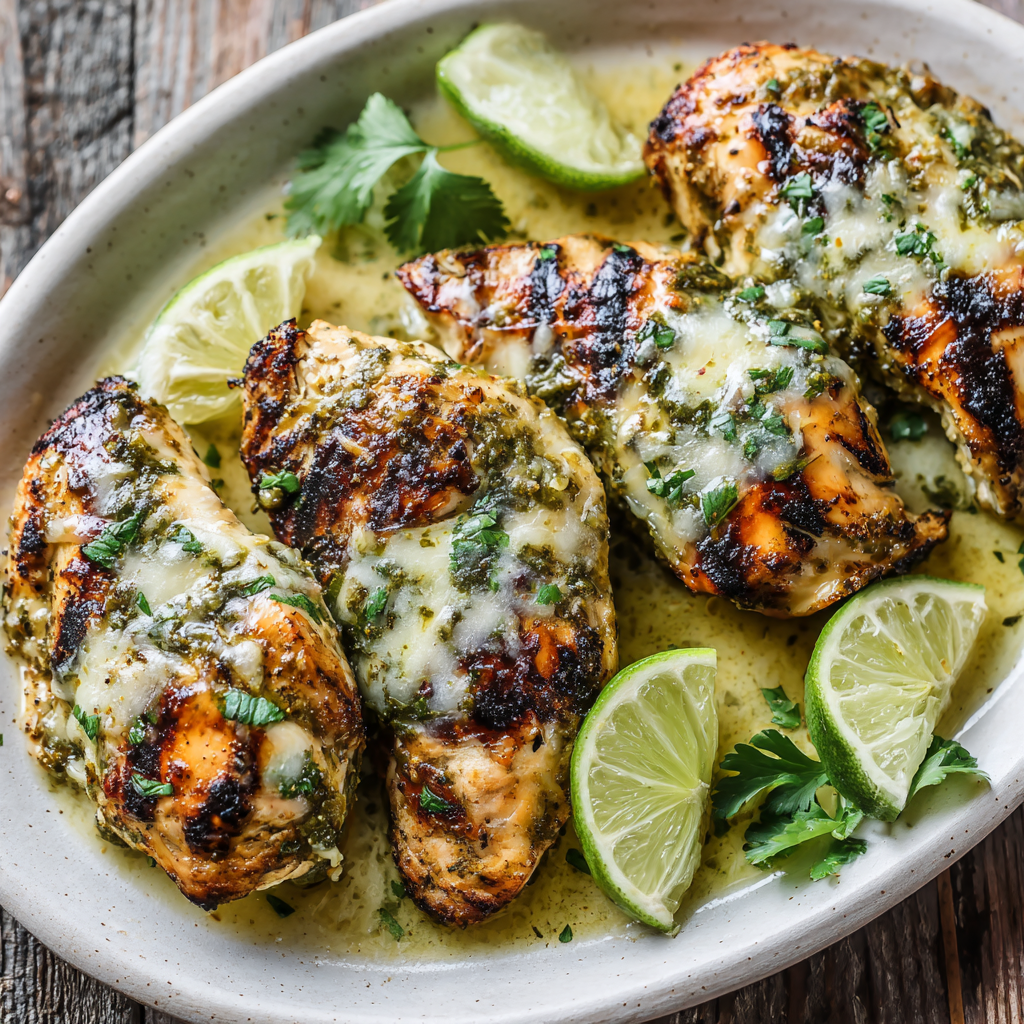
Grilled Salsa Verde Pepper Jack Chicken
When Summer Sizzles, This Chicken Steals the Show
Hey friends! Olivia here, waving from my sun-drenched patio where the grill’s already fired up and my apron’s splattered with today’s adventure. If your idea of summer heaven involves smoky aromas, melty cheese, and that *zing* of lime-kissed salsa verde… oh honey, we’re soulmates. This Grilled Salsa Verde Pepper Jack Chicken isn’t just dinner—it’s a flavor fiesta that turns basic chicken into a standing-ovation moment. Picture this: tender grilled chicken soaked in tangy green salsa, crowned with oozy pepper jack that’s just spicy enough to make you reach for another icy lemonade. It’s the recipe I make when I want my people to gather ’round the grill, laughing and stealing bites straight from the platter. No fancy skills needed—just big, bold flavors and 10 minutes of active cooking. Ready to make magic?
The Night This Recipe Saved Dinner (and My Pride)
Let me take you back to last July. My in-laws were visiting, thunderclouds were rolling in, and my “foolproof” paella had just… well, let’s call it “charcoal tribute.” Panicked, I grabbed salsa verde, limes, and pepper jack from the fridge, praying for a miracle. As rain pattered on the grill lid, I threw marinated chicken on the flames. Ten minutes later? My father-in-law took one bite, raised his glass, and said, “Olivia, you’ve outdone yourself.” (Bless him for forgetting the paella graveyard!) That stormy night taught me something: the best recipes aren’t perfect—they’re resilient. Now this chicken’s my go-to when life gets messy… which, let’s be real, is every Tuesday.
Your Flavor Toolkit: Simple Ingredients, Big Impact
- 1½ lbs thin-sliced chicken breasts – Pro tip: Look for “thin-cut” or pound them to ½-inch thickness. Why? Even cooking + more surface area for marinade hugs! Swap: Chicken thighs work beautifully for extra juiciness.
- 12 oz salsa verde – My heart belongs to Trader Joe’s, but any tangy green salsa works. Chef insight: Roasted tomatillo versions add smoky depth! Swap: Blend fresh tomatillos with jalapeños and cilantro if you’re feeling fancy.
- 3 tbsp olive oil – Helps the marinade cling and prevents sticking. Extra virgin’s great, but regular works too. Swap: Avocado oil for higher smoke point.
- 2 tbsp fresh lime juice – Non-negotiable! Brightens the salsa. Bottled lime? Emergency-only—fresh is 10x zingier.
- 1 tsp cumin – Adds earthy warmth. For a floral twist, try smoked paprika.
- Salt + pepper – Season like you mean it! I use coarse sea salt for better texture.
- 4 slices pepper Jack cheese – The MVP! Melts like a dream with gentle heat. Swap: Monterey Jack for mildness, or habanero cheddar for firewalkers.
- Fresh cilantro + lime wedges – Not just garnish—they cut the richness. Hate cilantro? Try chopped chives.
Let’s Grill! Your Foolproof Roadmap
Step 1: Marinate Like You’re on Vacation
In a bowl (or ziplock bag—less dishes!), whisk salsa verde, olive oil, lime juice, cumin, salt, and pepper. Drop in the chicken, squish everything around, and let it soak up the goodness. Chef hack: Stash it in the fridge while you prep sides! 30 minutes is golden, but 4 hours? Flavor fireworks.
Step 2: Grill With Confidence
Heat your grill to medium-high (around 400°F). Oil those grates—trust me, nobody wants stuck chicken! Lay the chicken down at an angle for sexy crosshatch marks. Grill 4-5 minutes per side. Watch for doneness: Chicken’s ready at 165°F, but don’t overcook! Poke test: Springs back slightly? Perfect.
Step 3: Cheesy Grand Finale
In the LAST minute, drape pepper Jack over each piece. Shut the grill lid—hello, melty magic! Pro move: If cheese isn’t bubbly, slide chicken to indirect heat for 60 seconds.
Step 4: Rest & Shine
Let chicken rest 3 minutes (keeps juices locked in). Garnish with cilantro and lime wedges. Secret: Squeeze lime AFTER plating—it keeps the cheese glossy.
The Magic of Salsa Verde – More Than Just a Sauce
Salsa verde isn’t just a condiment—it’s the soul of this dish. Unlike its red salsa cousin, salsa verde (Spanish for “green sauce”) brings a vibrant, tangy brightness that elevates grilled chicken from simple to spectacular. Here’s why it works so well:
1. The Flavor Science
Made from tomatillos, jalapeños, onions, cilantro, and lime, salsa verde is acidic enough to tenderize chicken while infusing it with herbaceous depth. The tomatillos’ natural pectin also helps the marinade cling to the meat, creating a caramelized crust when grilled.
2. Store-Bought vs. Homemade
-
Store-bought: Convenient and consistent (Trader Joe’s and Herdez are favorites). Look for “roasted” versions for smokiness.
-
Homemade: Blend 1 lb roasted tomatillos, 2 garlic cloves, 1 jalapeño (seeded for mildness), ½ cup cilantro, 1 tbsp lime juice, and salt. Pro tip: Char the tomatillos under the broiler first for extra depth.
3. Marinade Mastery
The salsa verde’s acidity breaks down proteins gently, making the chicken juicy. For food safety, always marinate in the fridge, and never reuse marinade that’s touched raw chicken.
Why It Beats BBQ Sauce: Unlike sugary sauces that burn easily, salsa verde’s low sugar content means it chars without turning bitter—ideal for high-heat grilling.
Cheese Matters – Why Pepper Jack is the Perfect Pick
Not all cheeses melt gracefully on grilled chicken. Pepper Jack—a Monterey Jack studded with spicy peppers—is the ideal choice for three reasons:
1. Meltability
Pepper Jack contains just enough moisture to melt into a luscious blanket without separating into grease. Compare that to cheddar, which can become oily, or mozzarella, which lacks flavor punch.
2. Flavor Synergy
The cheese’s subtle heat (from jalapeños or habaneros) mirrors the salsa verde’s spice, while its creamy richness balances the marinade’s acidity. It’s a flavor bridge that ties everything together.
3. Visual Appeal
When melted, Pepper Jack turns golden and slightly stretchy—a feast for the eyes. For extra drama, broil the chicken for 30 seconds post-grill to bubble the cheese.
Cheese Swaps & Tips:
-
Monterey Jack: Milder but equally melty.
-
Oaxaca Cheese: Stringy, mild, and authentic for a quesadilla-style twist.
-
Vegan Option: Violife’s Jalapeño Block melts surprisingly well.
Pro Move: Let the chicken rest after adding cheese—this keeps the juices in and prevents a cheese landslide when slicing.
Grill vs. Grill Pan – Mastering Heat for Juicy Chicken
Grilling isn’t just about slapping meat on flames—it’s about control. Here’s how to nail it every time:
1. Outdoor Grill Method
-
Heat: Medium-high (400°F). Too hot = charred outside/raw inside.
-
Prep: Clean grates + oil them twice—once while cold, again when hot.
-
Technique: Place chicken at a 45° angle to grates for crosshatch marks. Flip only once!
2. Indoor Grill Pan Hack
-
Use a heavy cast-iron grill pan preheated for 5 minutes. Press chicken with a spatula for even contact.
-
No Smoke Alarm Drama: Turn on fans and open windows—salsa verde marinade can smoke.
3. Doneness Cues
-
Thermometer: 165°F in the thickest part.
-
Touch Test: Firm but slightly springy = done.
-
Visual: Clear juices (no pink!).
Common Pitfalls:
-
Overcrowding: Lowers pan temp, causing steaming instead of searing.
-
Frequent Flipping: Prevents caramelization. Let it sear undisturbed!
Serving: Where the Party Begins
Slide this chicken onto a rustic platter with charred lime halves. Pair with cilantro-lime rice to soak up salsa drippings, or pile it into warm tortillas with crunchy slaw. For backyard vibes? Add grilled corn and icy margaritas. Key move: Place extra salsa verde on the table—drizzle lovers will worship you!
Shake It Up! 5 Delicious Twists
- Taco Fiesta: Shred chicken, stuff into tortillas with avocado crema and pickled onions.
- Salad Star: Slice over greens with black beans, corn, and chipotle ranch.
- Dairy-Free Dream Skip cheese, add avocado slices and cashew cream.
- Pizza Party Chop chicken, layer on flatbread with refried beans and extra cheese.
- Honey-Kissed Add 1 tbsp honey to marinade for sweet-heat balance.
Olivia’s Kitchen Confessions
This recipe’s evolved from “desperation dinner” to legend status. One Tuesday, my toddler dumped an entire jar of pickled jalapeños into the marinade—accidental win! We now call it “Danger Chicken.” Over time, I learned: Grill marks matter less than joy. Burnt edges? Slice it thin for nachos. Cheese slid into the coals? Laugh, grab another slice. Food’s meant to be savored, not stressed. Pro tip: Double the marinade and freeze half with raw chicken—future you will throw a parade!
Your Questions, My Answers
Q: Can I bake instead of grill?
A: Absolutely! Bake at 400°F for 18-20 mins. Add cheese last 3 minutes. Broil briefly for browning.
Q: Why is my chicken dry?
A: Two culprits: Overcooking or thick breasts. Use a meat thermometer (165°F is goal!), and pound uneven pieces thin.
Q: Too spicy for kids?
A: Swap pepper Jack for mild cheddar. Use mild salsa verde—or mix with regular salsa.
Q: Can I prep ahead?
A: Marinate 24 hours for deeper flavor! Cooked chicken keeps 3 days—reheat gently to keep cheese happy.

Grilled Salsa Verde Pepper Jack Chicken
- Total Time: 46 minute
Description
Hey grill master! Olivia here, ready to rescue your summer dinners with my Grilled Salsa Verde Pepper Jack Chicken. Think juicy chicken soaked in zesty green salsa, crowned with melty pepper jack, and kissed with fresh lime—easy, bold, and ready to steal the patio spotlight. No stress, no fuss—just big flavor and good times. Let’s fire it up!
Ingredients
-
1½ lbs thin-sliced chicken breasts
-
12 oz salsa verde (store-bought or homemade)
-
3 tbsp olive oil
-
2 tbsp fresh lime juice
-
1 tsp cumin
-
Salt & pepper
-
4 slices pepper Jack cheese
-
Fresh cilantro & lime wedges (for serving)
Instructions
1️⃣ Marinate: Whisk salsa verde, oil, lime juice, cumin, salt & pepper. Coat chicken, marinate 30 mins (up to 4 hrs).
2️⃣ Grill: Heat grill to medium-high. Oil grates. Grill chicken 4–5 mins per side until cooked (165°F).
3️⃣ Cheese It: Top with pepper Jack in last minute. Close lid for melty perfection!
4️⃣ Rest & Serve: Rest 3 mins, garnish with cilantro & lime wedges. Squeeze lime right before serving.
Notes
-
Swap pepper Jack for Monterey Jack or cheddar if milder heat’s your jam.
-
No grill? Bake at 400°F for 18–20 mins, broil cheese at the end!
-
Double marinade for freezer-ready magic next time.
- Prep Time: 5 mins + marinating
- Cook Time: 10 mins
Nutrition
- Calories: 330 Cal Per Breast
- Fat: 20g
- Carbohydrates: 3g
- Protein: 32g
Nutrition Per Serving (1 chicken breast)
Calories: 330 | Protein: 32g | Carbs: 3g | Fat: 20g | Servings: 4
Note: Values estimated. Cheese amounts and salsa brands vary.
Final Thoughts: Why This Recipe Deserves a Spot in Your Summer Rotation
This Grilled Salsa Verde Pepper Jack Chicken is more than a meal—it’s a celebration of summer’s ease and abundance. It’s:
-
Adaptable: Works with pantry staples or farmers’ market finds.
-
Forgiving: No marinating? Brush salsa on while grilling.
-
Crowd-Pleasing: Equally at home on weeknight plates or party platters.
It’s proof that the best dishes aren’t fussy—they’re flavorful, flexible, and full of life. So fire up that grill, squeeze that lime, and let the fiesta begin!

Homemade Nutella
Why Homemade Nutella Became My Kitchen’s Happy Place
Hey there, fellow flavor adventurer! Olivia here, waving from my flour-dusted countertop. Can we just talk about that magical moment when you open a jar of chocolate-hazelnut spread? It smells like childhood joy and cozy mornings, right? But here’s the thing: what if I told you that *you* could create something even more incredible in your own kitchen? Something rich, velvety, and made with ingredients you can actually pronounce? Enter: Homemade Healthy Nutella.
Picture this: no mystery oils, no eye-watering sugar levels—just toasted hazelnuts dancing with cocoa and your favorite natural sweetener. This isn’t just a recipe; it’s your ticket to feeling like a kitchen wizard. Maybe you’re a busy parent sneaking a spoonful after bedtime, a brunch host wowing friends, or someone reclaiming joy in simple rituals. Whoever you are, this jar is your edible hug. And guess what? You don’t need fancy gear or chef-level skills. Just a food processor, 25 minutes, and that gorgeous curiosity of yours. Ready to make magic?
I’ll walk you through every step, spill my favorite messy-apron secrets, and even share why my first batch looked like chocolate gravel (spoiler: we’re fixing that!). Let’s turn those humble hazelnuts into liquid gold.
That Time I Burned the Hazelnuts (And Found Joy Anyway)
So, confession time: my first homemade Nutella adventure started with… smoke alarms. Yep. Picture 24-year-old me, newly obsessed with “clean eating,” determined to recreate my favorite spread. I was so busy belting out Shania Twain (don’t judge) that I forgot the hazelnuts roasting away. Suddenly, my tiny apartment smelled like a campfire. I frantically fanned the alarm with a towel while my cat gave me judgey side-eye.
But here’s the sweet part: scraping those slightly-charred nuts into the food processor anyway. I added cocoa and maple syrup, praying for a miracle. And friends? The *flavor*—deep, almost smoky, with this addictive toasted edge—was UNREAL. My “mistake” became my signature twist! Now, I intentionally roast those nuts until they’re dancing on the edge of dark. It taught me that kitchen “oops” moments often lead to the best discoveries. Perfection is overrated; flavor and fun are everything. Now, let’s make your version (sans fire department, promise).
Your Nutella Dream Team: Simple, Wholesome & Flexible
Gather these beauties! Measurements matter, but creativity rules. *Pro tip: Set everything out before starting—it’s like a flavor mise en place party!*
- Hazelnuts (2 cups / 240g): The rockstar! Raw or blanched work, but raw lets you control the roast. Chef’s insight: Toast them dark for depth—it hides bitterness!
- Cocoa Powder (¼ cup): Not hot chocolate mix! Use natural, unsweetened cocoa for true chocolate intensity. Sub: Cacao powder works but tastes fruitier.
- Sweetener (⅓ cup): Your call! Maple syrup adds earthiness, honey gives floral notes, powdered sugar makes it ultra-smooth, erythritol keeps it sugar-free. Adjust to taste!
- Pure Vanilla Extract (¼ tsp): The flavor booster! Chef’s secret: A tiny pinch of espresso powder here? *Chef’s kiss.*
- Salt (¼ tsp): Crucial! Balances sweetness. Use fine sea salt to blend seamlessly.
- Milk or Oil (½ cup milk OR 2 tbsp oil): Optional creaminess! Almond milk keeps it light, coconut oil firms up when chilled (great for dipping!), avocado oil is neutral. Add gradually!
Let’s Make Magic: Step-by-Step with Chef Cheers!
Step 1: Roast Those Nuts Like a Boss (10-12 mins)
Preheat oven to 375°F (190°C). Spread hazelnuts on a baking sheet—no oil needed! Roast 10-12 minutes until fragrant and skins split. Watch closely after 8 mins! They burn fast. Hack: Shake the pan halfway for even color. Done when they smell like heaven and look crackly.
Step 2: Skin Removal Shimmy (5 mins)
Dump warm nuts onto a CLEAN kitchen towel. Bundle it up, let them steam 1 minute (this loosens skins!). Then, rub vigorously like you’re warming cold hands. Truth bomb: Don’t obsess! 80% removed is fine. Stubborn skins? Toss ’em—flavor’s in the nut!
Step 3: Blend to Butter Bliss (8-10 mins)
Add nuts to food processor/blender. Blend on high, scraping down every minute. Patience, grasshopper! It’ll go: crumbs → paste → thick dough → suddenly SILKY butter. Takes 8-10 mins. Hot tip: If your machine groans, pause to cool it. We avoid motor meltdowns!
Step 4: Flavor Fusion Dance (2 mins)
Add vanilla, cocoa, sweetener, and salt to the nut butter. Blend 1-2 minutes until glossy. Taste! Want sweeter? Add 1 tsp sweetener. Game changer: For melt-in-mouth texture, stream in milk/oil while blending until it ribbons.
Step 5: Jar It Up! (2 mins)
Scoop into a clean jar. It thickens in the fridge. Pro move: Lick the spatula. Chef’s privilege.
Beyond the Spoon: Serving Your Liquid Gold
This isn’t just toast topping—it’s a vibe! For brunch: Swirl into yogurt with bananas and sea salt. Feeling fancy? Dollop on pancakes with raspberries. Kid-approved? Dip apple slices or pretzels. My fave? A warm spoonful over vanilla ice cream. Or hey, straight from the jar at 11 pm… I won’t tell! Store chilled; it spreads easier if you let it sit 10 minutes first.
Homemade Nutella: The Science Behind the Magic
What makes this homemade Nutella so much better than store-bought? It’s not just the absence of palm oil and refined sugar—it’s the food chemistry at work. Let’s break it down:
1. The Maillard Reaction: Toasting = Flavor Alchemy
When hazelnuts roast, the Maillard reaction occurs—a chemical process where amino acids and sugars in the nuts transform into complex, rich flavors. That’s why deeply toasted nuts taste nuttier, almost caramel-like, compared to raw ones. Bonus: This reaction also reduces bitterness!
2. Emulsion: How Nuts Turn into Butter (Then Spreadable Gold)
Blending hazelnuts breaks down their cell walls, releasing natural oils. At first, it looks dry and crumbly, but with patience, the oils emulsify into a smooth, liquid consistency. Adding a splash of milk or oil stabilizes the emulsion, preventing separation and creating that silky texture we love.
3. Cocoa’s Role: More Than Just Chocolate Flavor
Natural cocoa powder contains flavanols, antioxidants linked to heart health. Unlike commercial Nutella (which uses processed cocoa), homemade retains more of these benefits. Plus, cocoa’s bitterness balances the sweetness, making it craveable without being cloying.
4. Sweetener Science: Why Your Choice Matters
-
Maple syrup/honey add moisture, keeping the spread softer when chilled.
-
Powdered sugar dissolves instantly for ultra-smooth texture.
-
Sugar-free options (erythritol, monk fruit) don’t caramelize like sugar, so the flavor profile stays brighter.
Pro Tip: For a thicker, fudge-like spread, use coconut oil—it solidifies when cold, perfect for dipping fruit!
The Psychology of Homemade Treats: Why This Nutella Feels Special
This isn’t just a recipe—it’s a happiness trigger. Here’s why:
1. The Pride of Mastery
Creating something from scratch (especially a beloved treat) gives a dopamine boost. That “I made this!” feeling is linked to self-efficacy, a psychological motivator for sticking with healthy habits.
2. Nostalgia, Reinvented
Store-bought Nutella tastes like childhood, but homemade adds personal pride. It’s familiar yet novel—a psychological sweet spot for satisfaction.
3. Mindful Indulgence
Because you control the ingredients, there’s no guilt. Studies show that when people perceive food as “clean” or “wholesome,” they enjoy it more and feel fuller longer.
4. The Joy of Sharing
Gifting a jar triggers oxytocin (the “bonding hormone”). Whether for a neighbor or your future self, it’s edible love.
Pro Tip: Label your jar with a fun name (“Olivia’s Midnight Magic”) to reinforce the emotional connection!
Global Inspirations: Nutella’s Cultural Cousins
This recipe is part of a worldwide tradition of nut-chocolate pairings:
-
Italy’s Gianduja: The OG hazelnut-chocolate paste (1800s!), born when cocoa was scarce and nuts stretched it.
-
Turkey’s Çikolatalı Fındık Ezmesi: A less sweet, more nutty version, often eaten with simit (sesame bread).
-
Colombia’s Arequipe con Nueces: Dulce de leche + walnuts, proving the nut-chocolate combo is universal.
Cultural Twist Idea: Swap hazelnuts for pecans (Southern U.S. style) or pistachios (Middle Eastern vibe) for a regional spin!
Mix It Up: 5 Delicious Twists
- Orange Dream: Add 1 tbsp orange zest + ½ tsp cinnamon with the cocoa.
- Mocha Buzz: Blend in 1 tbsp instant espresso powder.
- Protein Power: Stir 2 scoops collagen peptides after blending (adds creaminess!).
- Vegan & Oil-Free: Use maple syrup + almond milk. Creamy without compromise!
- Nut-Free “Notella”: Swap hazelnuts for sunflower seeds! Roast same way.
Olivia’s Notebook: Real Talk from My Kitchen
This recipe evolved from my smoky hazelnut disaster! Early versions used expensive blanched nuts—turns out, lazy skin removal works fine. Texture woes? I learned: blend longer than you think, and adding liquid WARM makes it smoother. Also, a reader once subbed beet powder for cocoa (bless her heart)… stick to cocoa, friends. Now, I double batches for gifting—tie a ribbon around the jar! Nothing beats seeing someone’s face light up tasting real homemade goodness. It’s kitchen alchemy: simple ingredients + love = edible joy.
Your Nutella Queries—Solved!
Q: Why is my Nutella gritty? Help!
A: Two fixes! 1) Blend longer—up to 15 mins total. 2) Add 1-2 tbsp warm milk/oil while processing. Grit usually means under-blending or old nuts.
Q: Can I use a blender instead of a food processor?
A: Yes, but high-speed blenders (like Vitamix) work best. Use the tamper! Regular blenders may struggle—pause often to scrape.
Q: How long does it keep?
A: 2 weeks refrigerated. Oil versions may separate—just stir! Freezing? Portion in ice cube trays for smoothies!
Q: Too bitter? Too sweet?
A: Balance is key! Too bitter? Add 1 tsp sweetener + pinch salt. Too sweet? Blend in 1 tbsp extra nuts or cocoa.
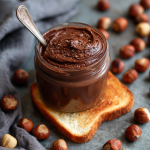
Homemade Nutella
- Total Time: 25 minutes
Description
Hey flavor adventurer! Olivia here—ready to help you transform simple hazelnuts into rich, velvety Homemade Nutella that’s way better than store-bought. No mystery oils, no sugar overload—just deep chocolate flavor, natural sweetness, and the nostalgic comfort of spreading love on toast. Grab your food processor—it’s time to feel like a kitchen wizard!
Ingredients
-
2 cups (240g) raw or blanched hazelnuts
-
¼ cup unsweetened cocoa powder
-
⅓ cup natural sweetener (maple syrup, honey, or powdered sugar)
-
¼ tsp pure vanilla extract
-
¼ tsp fine sea salt
-
½ cup milk or 2 tbsp neutral oil (optional, for extra creaminess)
Instructions
1️⃣ Roast: Preheat oven to 375°F (190°C). Spread hazelnuts on a tray, roast 10–12 mins until fragrant and skins split. Shake halfway—don’t walk away!
2️⃣ Skin: Wrap warm nuts in a clean towel, rub to remove skins (perfection not required!).
3️⃣ Blend: Add nuts to processor. Blend 8–10 mins, scraping sides often. Be patient—crumbs → paste → glossy nut butter.
4️⃣ Flavor: Add cocoa, sweetener, vanilla, and salt. Blend 1–2 mins more. For a silkier spread, stream in warm milk or oil until smooth.
5️⃣ Jar: Spoon into a clean jar. Chill to thicken, spread at room temp for max scoopability!
Notes
-
Roast nuts darker for a deep, toasty flavor.
-
For smoother texture, add liquid warm.
-
Store in fridge for 2 weeks—stir if it separates!
- Prep Time: 25 mins
Nutrition
- Calories: 80 Cal per serving
- Fat: 6g
- Carbohydrates: 4g
- Protein: 1.5g
Nutritional Perks (Per 1 tbsp)
Calories: ~80 | Fat: 6g (Healthy fats from nuts!) | Carbs: 4g | Protein: 1.5g | Sugar: Varies by sweetener
Note: Values vary with subs. Using only nuts/oil? Fat increases. Sugar-free sweetener? Carbs decrease.
Final Thoughts: More Than a Spread—A Little Jar of Joy
This Homemade Healthy Nutella isn’t just about skipping additives. It’s about:
✅ Owning your cravings (no guilt, just goodness).
✅ Celebrating mistakes (hello, smoky hazelnut happy accident!).
✅ Creating moments of delight—whether it’s a solo spoonful or a brunch centerpiece.
So next time you dip a strawberry or swipe some on toast, remember: You’re not just eating. You’re crafting joy, one blend at a time. Now, go forth and spread the love—literally!
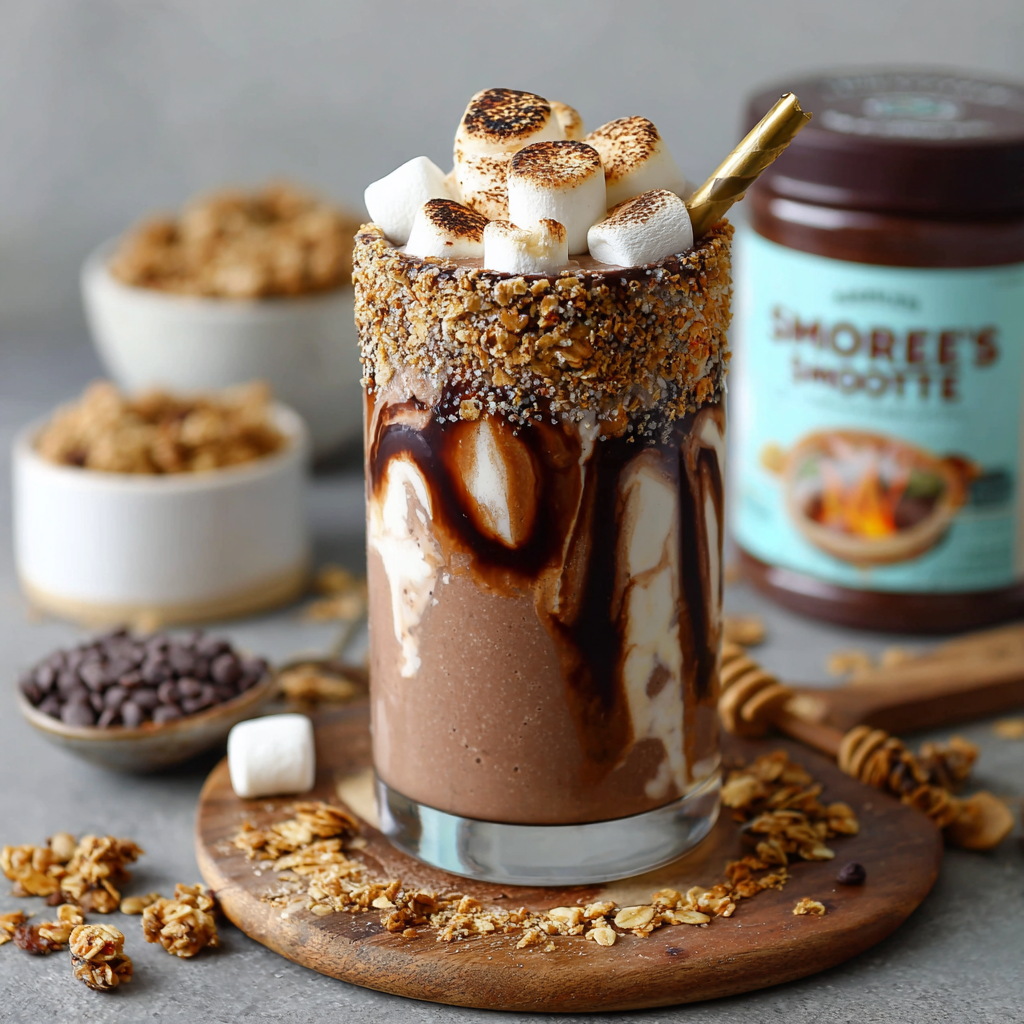
S’mores Smoothie
Hey, Smoothie Lover! Let’s Make Magic in a Glass
Is there anything more nostalgic than that first bite of a gooey, crackling s’more by a campfire? That perfect harmony of melted chocolate, toasted marshmallow, and crunchy graham cracker? I’ve been chasing that cozy feeling since I was eight, scraping sticky marshmallow off my fingers after family camping trips. But let’s be real—we can’t build a campfire at 7 AM on a Tuesday (my fire department friends would have *words*). That’s why I created this S’mores Smoothie: all the soul-warming flavor of your favorite campfire treat, packed into a creamy, energizing breakfast that’s secretly nourishing. Imagine sipping chocolatey bliss swirled with fluffy “marshmallow” yogurt, topped with granola that mimics graham cracker crunch… without singeing your eyebrows. Whether you’re rushing out the door or need an afternoon reboot, this smoothie turns ordinary moments into little celebrations. Grab your blender—we’re about to make your taste buds dance!
Campfire Dreams & Kitchen Experiments
Picture this: 11-year-old me, desperately trying to roast a marshmallow without incinerating it, while my older brother dramatically recited “The Raven” by flashlight. (Yes, we were *those* camping kids.) Fast-forward to my first NYC apartment—a kitchen so tiny, my blender lived on the windowsill. I missed those starry-night s’mores sessions but craved something energizing for my chaotic nurse shifts. One rainy Tuesday, after a grueling night shift, I stared at a sad banana and a tub of coconut yogurt. “What if…” I thought, tossing in cocoa nibs for crunch and a cinnamon dash for campfire smokiness. That first sip? Pure nostalgia meets grown-up practicality. Now, this smoothie is my edible hug—a reminder that joy doesn’t need a bonfire, just a blender and a little imagination. My brother still quotes Poe, but now I fuel his recitals with this instead of charred marshmallows!
Your Flavor Toolkit: Ingredients & Genius Swaps
- 1 frozen banana – Thickens like a dream and adds natural sweetness. No banana? Use ½ cup frozen cauliflower rice + 1 pitted date. Seriously—it works!
- 1 scoop vanilla protein powder – My secret for staying full till lunch. Vegan? Swap for plant-based powder. Not into protein? Omit it and add ¼ cup oats.
- ¼ cup coconut yogurt – That tangy swirl mimics marshmallow fluff! Dairy lovers: Greek yogurt works too. For extra fluff, whip it with a fork first!
- 1 tbsp almond butter – Gives richness and healthy fats. Allergy? Sunflower butter or tahini add the same creaminess.
- 1 tbsp cocoa nibs – Tiny chocolatey crunches without added sugar. No nibs? Mini dark chocolate chips or cacao powder (1 tsp) work.
- 1 tsp maca powder – My energy-boosting hack! Adds a caramel-like depth. Can skip it, but you’ll miss that “je ne sais quoi” glow.
- ¾ cup almond milk – Keeps it light and blendable. Any milk works—oat milk makes it extra creamy!
- Dash of cinnamon – That subtle “campfire smoke” whisper. Add a pinch of cayenne for grown-up s’mores with a kick!
- Granola for topping – The graham cracker stand-in! Gluten-free? Use GF granola or crushed rice cakes.
Let’s Blend It Like We Mean It!
- Prep your glass first. Before blending, grab your favorite tumbler and swirl 1-2 tbsp of extra coconut yogurt along the inside walls. This creates those dreamy “toasted marshmallow” streaks! Pro tip: Chill your glass for 10 mins first—the swirls hold better.
- Layer smart, blend smoother. Add liquids to the blender first (almond milk), then softer ingredients (yogurt, almond butter), followed by frozen banana and powders. Why? It prevents powder tornadoes and blends evenly in 30 seconds flat. Trust me—your blender motor will thank you.
- Blend, pause, dance. Blend on high until velvety (about 45 sec). If it stalls, stop and scrape! Never add hot liquid to free a stuck blade—just pulse with a spoon handle gently nudging things down. Too thick? Add milk 1 tbsp at a time.
- The grand pour. Slowly pour your smoothie into the swirled glass. Watch those yogurt ribbons rise like marshmallows over a flame! Tap the glass gently on the counter to settle.
- Crunch time. Generously sprinkle granola over the top—aim for full coverage like a graham cracker crust. Finish with extra cocoa nibs for chocolatey drama. Chef’s kiss: Drizzle with melted dark chocolate if you’re feeling fancy!
S’mores Smoothie: Campfire Magic in a Glass
There’s something undeniably magical about s’mores—the crackle of a graham cracker, the ooze of melted chocolate, the sticky-sweet char of a toasted marshmallow. But since we can’t (and probably shouldn’t) start a campfire in our kitchens at dawn, this S’mores Smoothie brings all that nostalgic flavor into a healthy, energizing breakfast. Creamy, chocolatey, and layered with crunchy granola “graham crackers” and fluffy yogurt “marshmallow,” it’s a grown-up twist on the classic treat—no fire required.
Why This Smoothie Works (The Science of Flavor & Texture)
1. The Creamy Base: Frozen Banana Trick
-
Frozen banana replaces ice cream, adding natural sweetness and a thick, velvety texture.
-
Why frozen? Ice crystals break down during blending, creating a creamy consistency without dilution.
-
Pro Tip: Slice ripe bananas before freezing for easier blending.
2. The Marshmallow Swirl: Coconut Yogurt Hack
-
Coconut yogurt mimics marshmallow fluff—tangy, airy, and slightly sweet.
-
Dairy-free? Greek yogurt or whipped cashew yogurt work too.
-
Key Technique: Swirl it on the glass before pouring the smoothie for that campfire aesthetic.
3. The Graham Cracker Crunch: Granola Topping
-
Granola stands in for graham crackers, adding a toasty, crunchy contrast.
-
Gluten-free? Use crushed gluten-free oats or rice cakes.
-
Next-Level Move: Toast the granola lightly for extra warmth.
4. The Chocolate Factor: Cocoa Nibs vs. Chocolate Chips
-
Cocoa nibs give a bitter, crunchy chocolate hit without added sugar.
-
For a sweeter touch: Mini dark chocolate chips or a drizzle of melted chocolate.
5 Delicious Variations to Try
1. Peanut Butter Cup S’mores
-
Swap almond butter for peanut butter + add 1 tbsp cacao powder.
-
Top with crushed peanuts and chocolate syrup.
2. Coffee Lover’s S’mores
-
Blend in ½ shot of espresso or 1 tsp instant coffee.
-
Garnish with cocoa powder and espresso beans.
3. Tropical S’mores
-
Add ¼ cup frozen pineapple + swap cinnamon for toasted coconut flakes.
-
Use mango yogurt for the swirl.
4. Midnight Dark Chocolate
-
Blend in 1 tbsp black cocoa powder for an ultra-rich, Oreo-like flavor.
-
Top with shaved dark chocolate.
5. Protein-Packed Post-Workout
-
Use chocolate protein powder + add 1 tbsp chia seeds.
-
Boost with a scoop of collagen peptides.
Serving: Where Cozy Meets Instagram-Worthy
Serve this beauty in a clear mason jar or tumbler to showcase those swoon-worthy swirls! Pair it with a reusable straw (for nib-catching) and a shortbread cookie on the side if you’re leaning into full dessert mode. Morning rush? Skip the glass—blend, top, and sip straight from your travel tumbler. For weekend vibes, set up a “s’mores bar” with topping options: mini marshmallows, melted chocolate, even crushed pretzels for salty-sweet bliss. The goal? Make every sip feel like a campfire cuddle.
Shake Up Your S’mores!
- PB Cup Twist Replace almond butter with peanut butter + 1 tbsp cacao powder. Top with chopped peanuts.
- Tropical Escape Add ¼ cup frozen pineapple + swap cinnamon for coconut flakes. Use mango yogurt!
- Midnight Dark Use black cocoa powder (1 tbsp) + chocolate protein powder. Top with shaved dark chocolate.
- Vegan Firelight Choose plant-based protein, vegan yogurt, and maple syrup if skipping banana.
- Coffee Buzz Add ½ shot espresso or 1 tsp instant coffee to the blender—perfect for pre-workout fuel!
Olivia’s Kitchen Confessions
This recipe was born from a near-disaster: my first attempt used actual melted marshmallows. Spoiler—they seized into chewy lumps mid-blend! After testing 27 versions (my freezer overflowed with banana casualties), I landed on coconut yogurt for that fluffy magic. My husband still teases me about “The Great Sticky Blender Incident of 2020,” but hey—innovation is messy! Over time, I added maca for sustained energy during my nursing shifts and learned frozen cauliflower makes it extra thick without tasting veggie-ish (promise!). Now, it’s my most-requested recipe by friends’ kids. Pro tip: Double the batch and freeze leftovers in popsicle molds for “s’moresicles”!
Your Questions, Answered!
Q: My smoothie turned out watery. Help!
A: Three culprits: 1) Your banana wasn’t frozen solid—always freeze slices overnight. 2) Too much milk. Start with ½ cup, adding more only if needed. 3) Weak blender. If it struggles, let the banana thaw slightly first.
Q: Can I make this ahead?
A: Absolutely! Blend (without toppings), pour into an airtight jar, and refrigerate for up to 24 hours. The granola will soften, so add it fresh when ready to sip. Shake well before serving.
Q: How do I make it sweeter without sugar?
A: Try these: 1) Use very ripe, spotty bananas. 2) Add 1 pitted Medjool date to the blend. 3) Choose a vanilla protein powder with stevia or monk fruit.
Q: I hate coconut. What yogurt substitute won’t ruin the “marshmallow” vibe?
A: Go for thick, plain Greek yogurt (dairy or vegan). For fluffiness, whip it with a fork before swirling! Skyr also works beautifully.

S’mores Smoothie
- Total Time: 5 minutes
Description
Hey smoothie lover! Olivia here—bringing you my S’mores Smoothie, the ultimate nostalgic hug in a glass. Think chocolatey, marshmallow-y bliss with crunchy graham-style granola—ready in 5 minutes and secretly good for you. No bonfire required, just grab your blender and get ready to sip pure childhood magic!
Ingredients
-
1 frozen banana
-
1 scoop vanilla protein powder (or ¼ cup oats)
-
¼ cup coconut yogurt (or Greek yogurt)
-
1 tbsp almond butter
-
1 tbsp cocoa nibs (or 1 tsp cacao powder)
-
1 tsp maca powder (optional)
-
¾ cup almond milk (or any milk)
-
Dash of cinnamon
-
Granola for topping
Instructions
1️⃣ Swirl: Chill your glass & swirl extra coconut yogurt inside for “marshmallow” streaks.
2️⃣ Blend: Add milk, yogurt, almond butter, banana, powders, and cocoa nibs to blender. Blend until velvety.
3️⃣ Pour: Pour into swirled glass.
4️⃣ Top: Pile granola on top for that graham cracker crunch. Add extra cocoa nibs if you love a bite!
Notes
-
Use frozen banana for the thickest texture!
-
Sweet tooth? Add 1 Medjool date.
-
Make it ahead—blend, store chilled, add toppings when ready.
- Prep Time: 5 mins
Nutrition
- Calories: 380 Cal per serving
- Fiber: 7g
- Protein: 22g
Nourishment Breakdown (Per Serving)
Calories: 380 • Protein: 22g • Carbs: 32g • Fiber: 7g • Sugar: 14g (naturally occurring) • Fat: 18g • Prep Time: 5 mins
Note: Stats include granola topping and vary based on brands used. Maca powder adds adaptogens for stress support!
Final Thoughts: Why You’ll Make This Again & Again
This smoothie isn’t just a drink—it’s an experience. It captures the cozy joy of s’mores while fueling your day with real ingredients. Whether you’re:
-
Rushing out the door (it blends in 5 mins!)
-
Craving dessert for breakfast (without the sugar crash)
-
Meal-prepping (store blended base for 24 hours)
…this recipe is your new go-to.
So grab your blender, channel your inner campfire storyteller, and sip on nostalgia. Because some days, you just need a s’more—even if it’s in smoothie form.
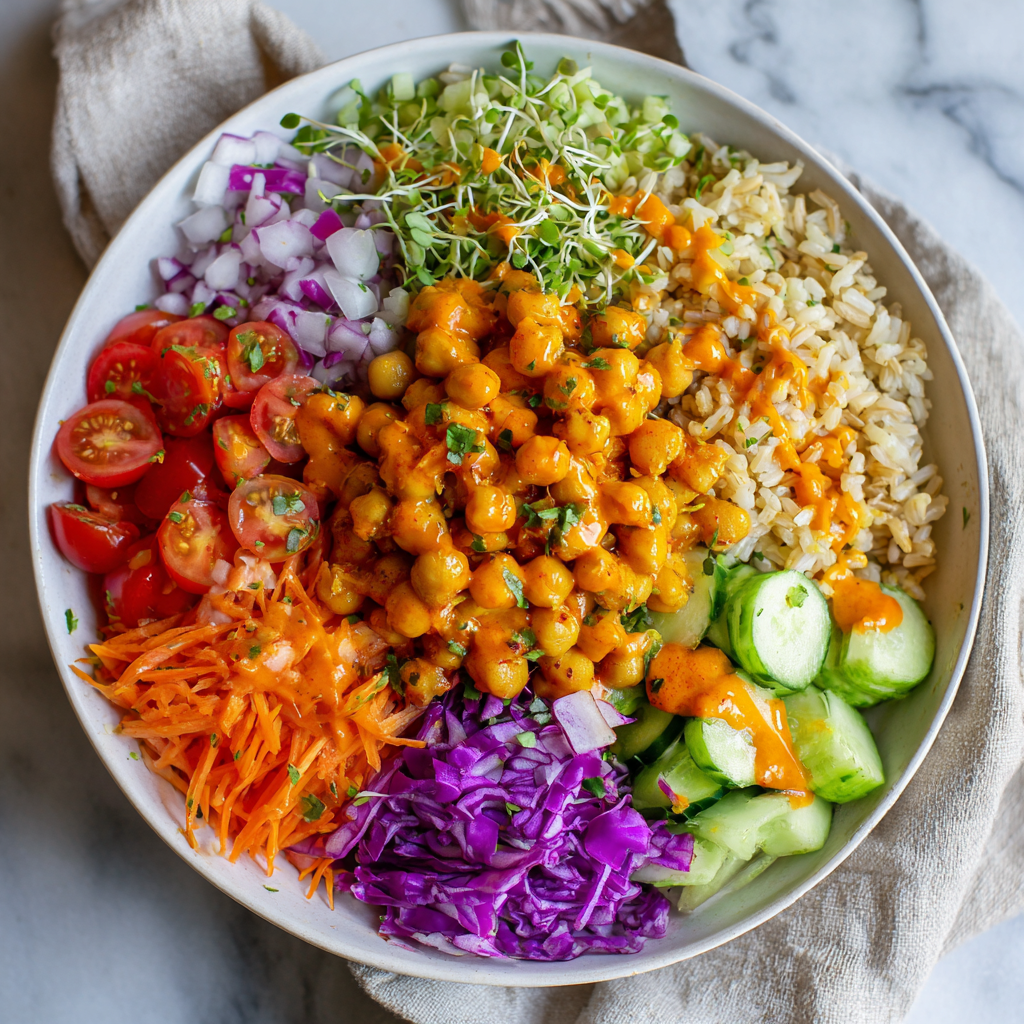
Buffalo Chickpea Rainbow Bowl
Spice Up Your Life (One Vibrant Bite at a Time!)
Hey there, kitchen adventurer! Olivia here, apron slightly dusted with paprika and my heart full of flavor excitement. Ever have one of those days where you crave something explosively tasty but also want to feel like you’re giving your body a big, crunchy hug? Yeah, me too. That’s exactly why I’m practically doing a happy dance while introducing you to my Buffalo Chickpea Rainbow Bowl – the plant-powered rockstar that’s become my lunchbox MVP and weeknight savior.
Imagine this: tender, protein-packed chickpeas slathered in that fiery, tangy buffalo sauce we all adore, piled onto nutty brown rice, and then… BAM! A confetti explosion of the crispest, most colorful veggies you can find. Purple cabbage that crunches like autumn leaves, juicy tomatoes bursting with sunshine, cool cucumber, snappy carrots, and those adorable little sprouts adding a fresh, earthy kiss. It’s not just food; it’s a flavor and texture party happening right in your bowl. And the best part? It comes together faster than you can say “Where did my takeout menu go?” Seriously, 10 minutes flat! Whether you’re a seasoned vegan, a veggie-curious explorer, or just someone who loves a seriously satisfying, spicy kick, this bowl is your new best friend. It’s bold, balanced, ridiculously nutritious (hello, 14g protein and 10g+ fiber!), and built to fuel your busiest days without sacrificing an ounce of joy. Ready to ditch the dull and embrace the vibrant? Let’s make magic!
My Buffalo Wing Epiphany (Sans Wings!)
Okay, confession time. My love affair with buffalo sauce started in a… slightly unconventional way. Picture college Olivia, cramming for finals, surviving on questionable dorm food and instant noodles. A friend dragged me to a sports bar for a “study break” (wink, wink). I wasn’t a big meat-eater even then, but the smell? Oh, that addictive, vinegary, spicy aroma wafting from every plate of wings? Pure torture! I desperately wanted that flavor – the heat, the tang, the messy-fingered satisfaction – but without the wings. Fast forward a few years (and many kitchen experiments later!), I was hosting a game night for my veggie and vegan crew. Panic set in – what could possibly give everyone that buffalo fix? Cue the humble chickpea! I tossed them in my favorite hot sauce, roasted them until crispy-edged, and piled them high with every colorful veggie I had. The result? Silence. Then, pure, blissful crunching sounds, followed by “Olivia, this is INCREDIBLE!” requests for seconds. That moment, seeing my friends light up over a bowl bursting with plants and punchy flavor, cemented this rainbow bowl as a forever favorite. It’s proof that comfort food cravings can be met in the brightest, kindest way possible.
Gathering Your Rainbow Brigade
Here’s the colorful cast of characters you’ll need for one gloriously big bowl (or two perfectly portioned sides!). Don’t sweat it if your fridge isn’t an exact match – flexibility is key!
- 1/2 cup cooked brown rice: Our hearty, nutty base! (Chef’s Insight: Cook it in veggie broth for extra flavor depth! Short on time? Microwaveable brown rice packs are lifesavers. Quinoa or farro make fabulous, protein-rich swaps too.)
- 1/2 cup chickpeas (canned or cooked): The protein-packed stars! (Tip: Rinse canned chickpeas REALLY well to remove that tinny taste and excess sodium. For extra crispy texture, pat them super dry and air-fry or pan-roast them for 5 mins before saucing!)
- 1/4 cup shredded purple cabbage: Crunchy, vibrant, and packed with antioxidants! (Sub: Swap in shredded kale or Brussels sprouts for a different, equally hearty crunch.)
- 1/4 cucumber, diced: The cool, refreshing counterpoint to the heat. (Chef’s Trick: Leave the skin on for extra color, nutrients, and crunch!)
- 1/4 cup sprouts (alfalfa or your fave mix): Tiny powerhouses of freshness! (Sub: Baby spinach, microgreens, or even finely chopped celery leaves work beautifully.)
- 1/4 cup chopped carrots: Sweet, colorful, and great for texture. (Hack: Use a veggie peeler to make pretty ribbons instead of chopping!)
- 1/3 cup halved roma tomatoes: Juicy bursts of acidity to balance the richness. (Sub: Cherry tomatoes halved, or even a spoonful of salsa if tomatoes aren’t in season.)
- 2 tbsp finely chopped red onion: That essential sharp bite! (Tip: Soak chopped onion in cold water for 5 mins if you find raw onion too harsh. Drain well before using.)
- 2 tbsp buffalo sauce (like Primal Kitchen Foods): The fiery, tangy soul of the bowl! (Crucial Insight: Choose a sauce you LOVE! Primal Kitchen is my go-to for clean ingredients. Frank’s RedHot + a splash of melted vegan butter is a classic DIY option. Adjust quantity to your heat preference!)
Let’s Build That Flavor Bomb! (It’s Easier Than You Think)
Seriously, this is less “cooking” and more “joyful assembly.” But these little tips make a big difference!
- The Foundation: Grab your biggest, prettiest bowl – we eat with our eyes first! Plop that fluffy, cooked brown rice right in the center. (Chef’s Hack: If your rice is cold/sticky from the fridge, fluff it with a fork and sprinkle with a teeny splash of water before microwaving for 20 seconds. Game-changer for texture!)
- Chickpea Charm: Add your glorious chickpeas. (Pro Tip: If you took my advice and gave them a quick roast or air-fry for crispiness? DO IT! That extra texture against the soft rice and veggies? *Chef’s kiss* Just let them cool slightly before adding.)
- Veggie Fiesta: Now, the fun part! Artfully (or just enthusiastically!) scatter your shredded purple cabbage, diced cucumber, sprouts, chopped carrots, halved roma tomatoes, and that finely chopped red onion over the rice and chickpeas. (Chef’s Commentary: Don’t stress about perfect placement! The beauty is in the colorful chaos. Think “confetti explosion.”)
- Gentle Toss (Round 1): Using clean hands or salad tongs, give everything a very gentle toss. We just want the rice, chickpeas, and veggies to start mingling, not turn into mush. (Watch Out: Be kind to those sprouts! They’re delicate little guys.)
- The Buffalo Bath: Drizzle that glorious, vibrant orange buffalo sauce all over the top. Don’t be shy! (Hot Tip: Start with 1.5 tbsp, toss, then add more if you want more heat. You can always add, but you can’t take away! Reserve a tiny drizzle for garnish too.)
- Final Fusion: Toss everything again, gently but thoroughly, until every grain of rice, every chickpea, and every veggie piece gets a gorgeous, saucy coating. (Secret Weapon: Tossing with your hands gives you the best control and prevents crushing!)
- Chill or Thrill: You can absolutely dig in right now at room temp! But honestly? Letting it chill in the fridge for 15-20 minutes lets the flavors mingle and marry beautifully. The buffalo sauce soaks into the chickpeas, the veggies stay crisp… it’s worth the tiny wait! (Meal Prep Magic: This is PERFECT made ahead! Just store components separately if prepping more than a day out. Toss with sauce right before eating.)
Plating Your Masterpiece (Minimal Effort, Max Impact!)
This bowl is already a showstopper! For serving, I love packing it into a wide, shallow bowl to really showcase all those gorgeous layers and colors. If I’m feeling fancy (or hosting!), I might add a final flourish: a sprinkle of fresh chopped parsley or cilantro, a tiny extra drizzle of buffalo sauce over the top, or even a handful of crushed vegan tortilla chips or roasted pepitas for an irresistible extra crunch. It’s fantastic all on its own as a satisfying main, but if you’re feeding a crowd or want to bulk it up, pairing it with some simple baked sweet potato wedges or a side of creamy avocado slices is pure bliss. Grab a fork (or dig in with gusto!), and get ready for that spicy, crunchy, utterly addictive symphony!
Shake Up Your Rainbow!
The beauty of this bowl is its infinite adaptability! Here are 5 fun twists to keep it exciting:
- Mediterranean Meets Buffalo: Swap the buffalo sauce for a mix of tahini, lemon juice, and a pinch of smoked paprika. Add kalamata olives and crumbled vegan feta. Boom!
- BBQ Ranch Twist: Use a smoky BBQ sauce instead of buffalo. Add corn kernels and black beans. Drizzle with a creamy vegan ranch dressing.
- Protein Power-Up: Add crispy baked tofu cubes, tempeh “bacon” bits, or even a scoop of cooked lentils alongside the chickpeas.
- Grain Game Strong: Substitute brown rice with quinoa, cauliflower rice (low-carb!), orzo pasta, or even a mix of wild rice.
- “Cool Down” Version: Love the buffalo heat but need balance? Add a big dollop of cool, creamy vegan avocado crema or dairy-free yogurt right on top before serving.
Olivia’s Extra Nuggets of Kitchen Wisdom
This recipe feels like an old friend now! It started as a desperate “clean out the fridge” experiment on a busy Tuesday and has evolved into my most-requested meal prep recipe. The biggest lesson? Embrace the veggie drawer! Don’t have purple cabbage? Use radicchio or beets! Out of carrots? Bell peppers step right up. The core is the saucy chickpeas + grain + fresh crunch combo. I once accidentally used way too much buffalo sauce (think face-melting levels!), and you know what? My spice-loving neighbor declared it the best batch ever! So, own your preferences. Another fun evolution? I started roasting a big batch of chickpeas (tossed in a little olive oil, salt, and garlic powder) at the start of the week. Having those ready makes assembling this bowl literally a 5-minute affair. Honestly, hearing from readers who’ve made this for potlucks, lunches, or even their skeptical meat-loving partners (who ended up stealing half!) brings me more joy than a perfectly risen soufflé. Food is connection, and this little bowl connects through big flavor and bright colors.
Your Buffalo Bowl Questions, Answered!
Let’s tackle those common kitchen hiccups before they happen!
- Q: Help! My bowl got soggy after storing it. What went wrong?
A: Sogginess is usually about moisture management! The biggest culprits are: (1) Not draining chickpeas/veggies well enough. Pat them dry! (2) Adding the sauce too early. For meal prep, store components separately and toss with sauce just before eating. (3) Chopping veggies too far ahead. Cucumber and tomatoes release water. Prep them fresh if possible! - Q: I can’t find Primal Kitchen Buffalo Sauce. Any alternatives?
A: Absolutely! Look for any vegan buffalo sauce (check for no dairy/butter). Frank’s RedHot Original is vegan and wildly popular – mix 1.5 tbsp Frank’s with 0.5 tbsp melted vegan butter or olive oil for that classic “wing sauce” vibe. Tessemae’s and Noble Made also have great options! - Q: Is this spicy? How can I adjust the heat?
A: The heat level depends entirely on your sauce! Start with less sauce (1 tbsp), toss, taste, and add more gradually. To tame existing heat: Add a dollop of vegan yogurt/avocado crema, extra cucumber/carrots, or a squeeze of fresh lime juice to balance. For MORE fire: Add a pinch of cayenne pepper or a dash of your favorite hot sauce on top! - Q: Can I use dried chickpeas instead of canned?
A: Yes, absolutely! Cook 1/4 cup dried chickpeas according to package directions (usually soak overnight, then simmer 1-1.5 hours until tender). You’ll get about 3/4 cup cooked, so use roughly half for one bowl. Bonus: You control the salt!

Buffalo Chickpea Rainbow Bowl
- Total Time: 10 minutes
Description
Hey flavor fan! Olivia here—your guide to turning everyday veggies and humble chickpeas into a fiery, feel-good bowl of colorful magic. Picture this: protein-packed chickpeas slathered in tangy buffalo sauce, fluffy brown rice, and a confetti of crisp veggies. It’s bold, plant-powered, and ready in 10 minutes flat. Lunch just got a glow-up!
Ingredients
-
½ cup cooked brown rice
-
½ cup chickpeas (canned or cooked)
-
2 tbsp buffalo sauce (Primal Kitchen or Frank’s)
-
¼ cup shredded purple cabbage
-
¼ cucumber, diced
-
¼ cup sprouts (alfalfa, microgreens, or spinach)
-
¼ cup chopped carrots
-
⅓ cup halved roma or cherry tomatoes
-
2 tbsp finely chopped red onion
Instructions
1️⃣ Prep Chickpeas: Rinse, pat dry, and toss chickpeas in buffalo sauce. Optional: air-fry or roast 5 mins for crispy edges!
2️⃣ Layer: In a wide bowl, pile cooked brown rice in the center.
3️⃣ Top: Arrange chickpeas, cabbage, cucumber, sprouts, carrots, tomatoes, and onion in colorful sections.
4️⃣ Toss & Drizzle: Gently toss everything with extra buffalo sauce if you like it spicy.
5️⃣ Serve: Enjoy fresh or chill for 15 mins for peak flavor fusion!
Notes
-
Meal prep magic: Store sauce and veggies separate; toss fresh!
-
Balance heat with extra cucumber, avocado, or a swirl of dairy-free yogurt.
-
Roast a big batch of chickpeas for speedy bowls all week!
- Prep Time: 10 mins
Nutrition
- Calories: 430 Cal per serving
- Fat: 10g
- Fiber: 10g
- Protein: 14g
-
Final Thoughts: More Than a Meal
This Buffalo Chickpea Rainbow Bowl is a celebration—of flavor, nourishment, and the joy of eating with abandon. It’s proof that plant-based food doesn’t mean sacrifice; it’s an invitation to play, to experiment, and to nourish your body and soul in equal measure.
Whether you’re a busy parent, a student on a budget, or someone simply craving a meal that makes you feel alive, this bowl meets you where you are. It’s forgiving (swap, skip, or splurge on ingredients!), flexible (hello, meal prep!), and unapologetically vibrant.
Recent Posts
- Moist Vegan Banana Bread : One-Bowl, No-Fail Classic
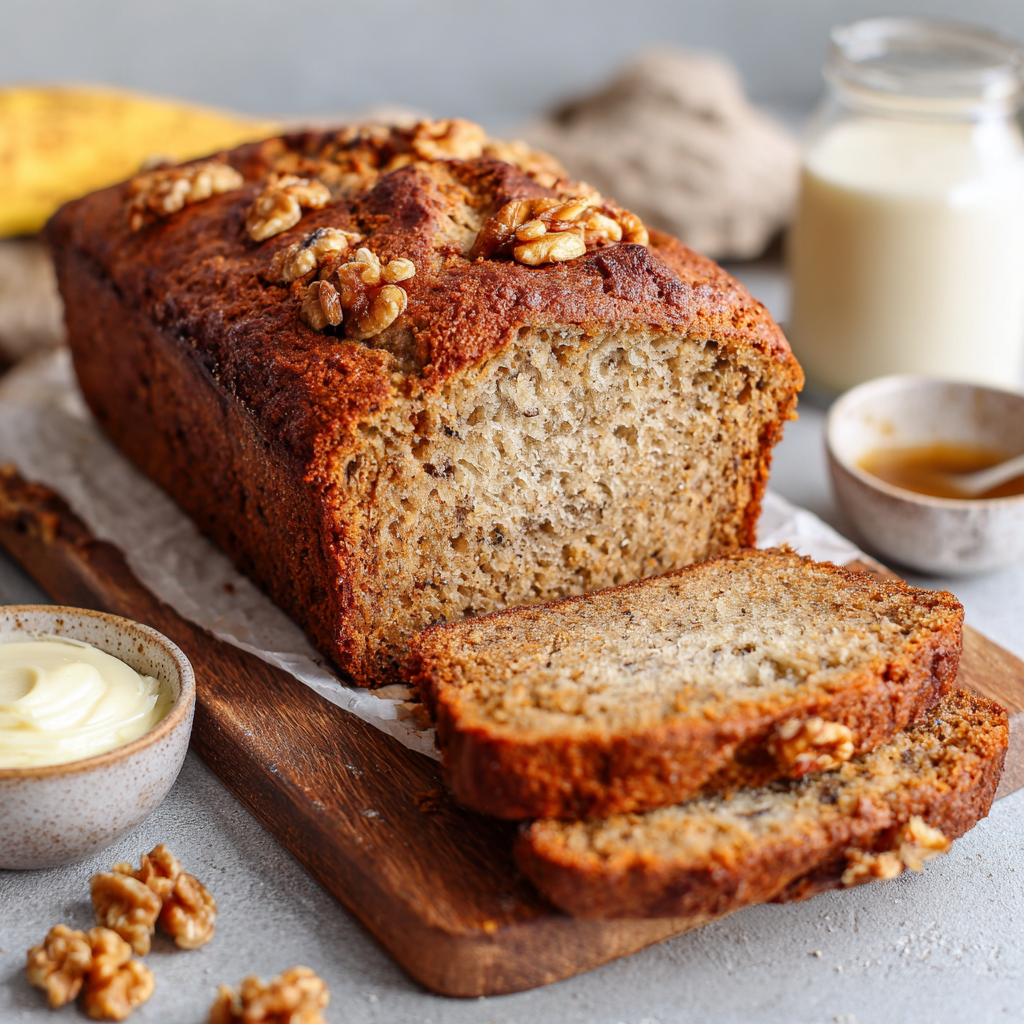
- Homemade Turkey Gravy : Rich, Silky, and Full of Flavor
- Easy Keto Broccoli Salad : Low-Carb, Crunchy, and Totally Craveable
- Hearty Vegan Chili : One-Pot, Protein-Packed & Totally Comforting
- The Best Crispy Baked Chicken Nuggets : Healthy, Easy & Kid-Approved
