
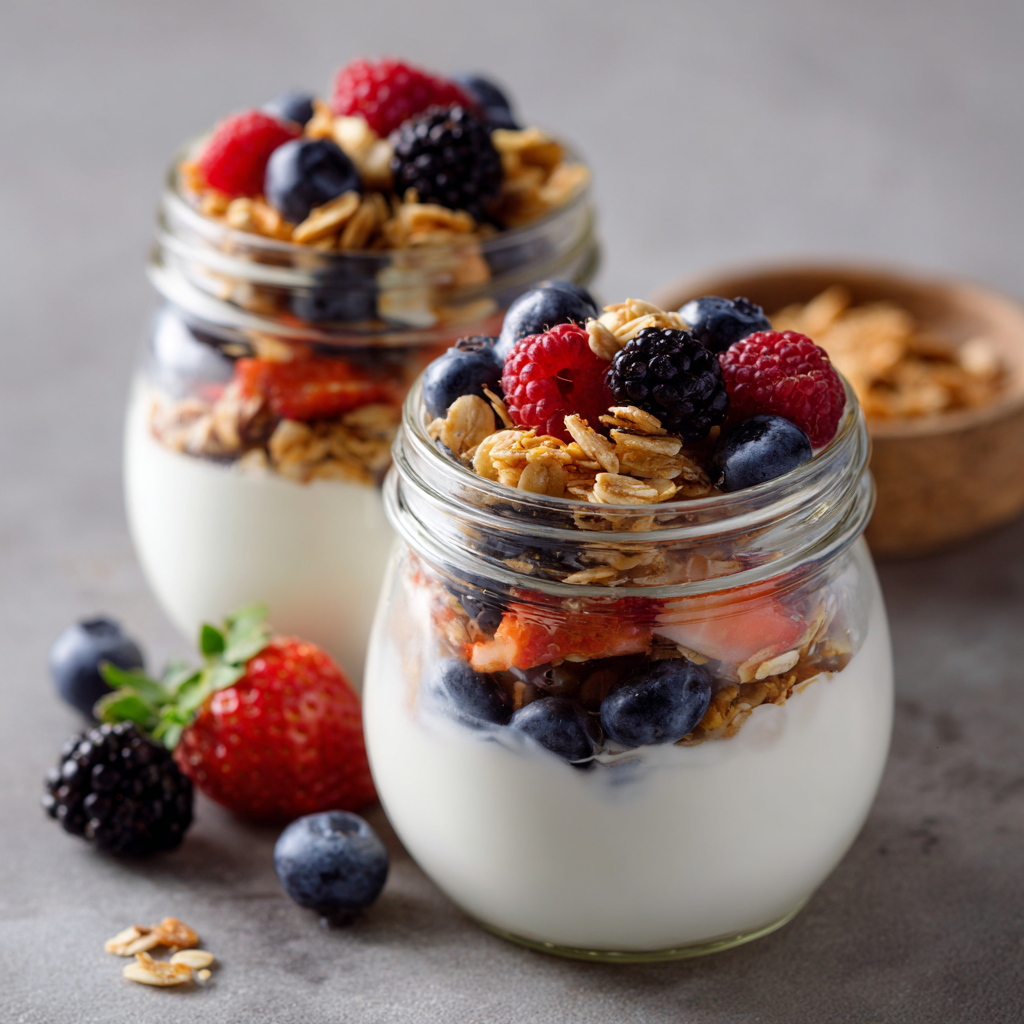
Yogurt Parfaits: Fresh, Creamy, and Perfect for Meal Prep
Your New Favorite Ritual: The Art of the Everyday Parfait
Is there anything better than opening the fridge to find a gorgeous, ready-to-eat jar of creamy yogurt, jewel-toned berries, and crunchy granola just waiting for you? It feels like a little gift from your past self. A moment of calm in a hectic morning. A bright spot in a busy afternoon. That, my friend, is the simple magic of a well-made yogurt parfait.
I used to think “parfait” meant something fancy and fussy you’d only order at a brunch spot with tiny, expensive menus. But then I realized—it’s just layers! Layers of flavor, texture, and goodness that you can absolutely master in your own kitchen. This isn’t just about throwing yogurt and fruit in a glass. It’s about creating a balanced, beautiful, and deeply satisfying meal that fuels your body and delights your senses. Whether you’re sprinting out the door with a jar in hand or sitting down to savor each spoonful, this recipe is your blueprint for a fresh, protein-packed start. So, grab your favorite jars, and let’s turn this simple concept into your new secret weapon for delicious, no-stress days.
A Breakfast Lesson from My Grandpa
My love for a good, textured breakfast bowl started way before I knew what “Greek yogurt” was. It started with my grandpa. Every Sunday morning, he’d make us what he called “The Works”: a big bowl of plain yogurt from the local dairy, a generous glug of honey from his neighbor’s bees, and whatever fruit was on the counter—sliced peaches, bananas, sometimes just a handful of raisins. But the pièce de résistance was always the toasted oat and nut mixture he kept in a giant tin. It wasn’t fancy granola; it was just old-fashioned oats, chopped walnuts, and a pinch of salt toasted in a skillet with a tiny bit of butter until golden and fragrant.
He’d let me layer it all myself in a tall sundae glass. “You gotta get a bit of everything in every bite, Liv,” he’d say, his eyes twinkling. “That’s the whole point.” He was right. That perfect spoonful—cool, creamy yogurt, sweet fruit, sticky honey, and the warm, toasty crunch—was a revelation. It taught me that the best food isn’t complicated; it’s thoughtful. It’s about combining simple, honest ingredients in a way that makes you pause and smile. Every parfait I make now is a little nod to him and that Sunday morning lesson in layering joy, one spoonful at a time.
Gathering Your Parfait Palette: Ingredients & Insights
Think of these ingredients as your artist’s toolkit. Each one plays a specific role in the symphony of flavor and texture. Here’s exactly what you need and why, plus my favorite swaps to make it your own.
- 1 cup plain or vanilla Greek yogurt: This is our creamy, protein-rich foundation. I love full-fat Greek yogurt for its luxurious texture and staying power—it keeps you full for hours. The tang of plain yogurt is a perfect counterpoint to sweet fruit, but vanilla is a dream if you want a hint of fragrance. Chef’s Insight: Give your yogurt a quick stir in its container before scooping. It smooths it out and makes for much prettier, more even layers!
- ½ cup granola: Our crunch factor! This is where personality shines. Choose a low-sugar or homemade blend to control sweetness. I adore granolas with big clusters, seeds, and maybe a few cacao nibs for a bitter-chocolate surprise. Substitution Tip: No granola? Toasted old-fashioned oats, chopped nuts, or even a crumbled-up graham cracker or digestive biscuit make a fantastic crunchy layer.
- 1 cup mixed berries: The juicy, vibrant burst. I’m using a mix of blueberries, raspberries, and chopped strawberries for color and variety. Frozen berries work beautifully too—just thaw and drain them well to avoid a soupy parfait. Chef’s Insight: Tossing your berries (especially strawberries) with just a teaspoon of honey or maple syrup 10 minutes before assembling lets them macerate and create a tiny bit of delicious, natural syrup.
- Optional: Drizzle of honey or maple syrup: The flavor enhancer. A little drizzle between layers or on top at the end adds a beautiful gloss and a touch of floral (honey) or caramel (maple) sweetness. Substitution Tip: Agave nectar, a sprinkle of coconut sugar, or a dollop of fruit jam swirled into the yogurt are all gorgeous alternatives.
Building Your Masterpiece: Step-by-Step Layering Guide
This is the fun part! Assembling a parfait is less about strict rules and more about rhythm. Follow these steps for a parfait that’s both stunning and structurally sound (no collapsing layers!).
- Choose Your Vessel: Clear glass jars or cups are my go-to. Why? Because you eat with your eyes first! Seeing all those beautiful layers is part of the joy. Wide-mouth mason jars are perfect for meal prep, but even a nice drinking glass works for immediate enjoyment.
- The Foundation Layer: Start with a generous spoonful of yogurt right in the bottom of your jar. Use the back of your spoon to spread it evenly. Pro Tip: This first yogurt layer acts like “glue” for your first crunchy layer, helping everything stay put.
- Add Crunch & Fruit: Now, sprinkle a layer of granola over the yogurt. Don’t just dump it in the middle—gently sprinkle it so it covers the yogurt surface evenly. Next, add a handful of your berries. If you macerated them, spoon some on, letting a little of that pink syrup drizzle down too.
- Repeat the Rhythm: Keep going! Another layer of yogurt, another of granola, another of berries. I usually aim for 2-3 full cycles depending on the size of my jar. Chef’s Hack: For the cleanest layers, try to keep the fruit away from the glass sides as you build. Push berries toward the center so the yogurt and granola layers remain visible from the outside.
- The Grand Finale: Always, always finish with a final flourish of fresh berries on the very top. It looks instantly inviting. If you’re using the optional honey or maple syrup, now is the time for a delicate drizzle over everything.
- The Meal Prep Magic: If you’re making these ahead for the week (you brilliant meal-prepper, you!), here’s the golden rule: store the granola separately. Pack it in a tiny bag or container and add it just before you eat. This one step is the difference between a satisfying crunch and a sad, soggy mush. Assemble everything else, cover, and refrigerate for up to 3 days.
How to Serve & Savor
Presentation is half the fun! For a casual breakfast at home, serve your parfait in a wide, shallow bowl—it’s easier to get that perfect bite. If you’re hosting a brunch, line up a few jars on a tray with long-handled spoons for a gorgeous, effortless buffet. For on-the-go, just screw the lid on tight and toss it in your bag. The key to eating it? Dig your spoon all the way down to the bottom on your first scoop to experience every single layer in one glorious bite. That’s where the magic happens.
5 Delicious Twists to Keep Things Exciting
Once you master the basic formula, the flavor world is your oyster! Here are a few of my favorite riffs:
- Tropical Escape: Use coconut yogurt, layer with mango chunks, pineapple tidbits, and granola with coconut flakes. Top with a sprinkle of toasted coconut.
- Apple Pie Parfait: Swap berries for finely diced apples sautéed with a dab of butter and cinnamon until soft. Use vanilla yogurt and a crumble-style oat topping.
- Chocolate & Cherry: Stir a tablespoon of cocoa powder into your Greek yogurt. Layer with pitted dark cherries and a chocolate-hazelnut granola.
- Dairy-Free Dream: Use a thick, plain plant-based yogurt (like coconut or almond). Ensure your granola is vegan, and sweeten with maple syrup.
- Savory-Spiced Option: For a unique snack, use plain yogurt, a za’atar-spiced nut mix for crunch, and roasted chickpeas. Top with fresh herbs and a drizzle of olive oil.
Chef’s Notes: A Few Parting Thoughts
This recipe has been my faithful companion through early morning photo shoots, last-minute potlucks, and countless “I need something good and fast” moments. It’s evolved from my grandpa’s simple bowl to the Instagram-worthy jars I make today, but the heart of it remains the same: joy in layers.
One funny kitchen story? I once tried to make a “deconstructed” parfait for a fancy dinner party, serving each component in separate little dishes. My friends just looked confused, then proceeded to mix everything together in their bowls anyway. Lesson learned: some formulas are perfect just as they are. Don’t overcomplicate the cozy. The beauty of this recipe is in its simplicity and its adaptability. Make it once, then make it yours. I can’t wait to hear what delicious combinations you create!
Your Parfait Questions, Answered!
Q: My granola gets soggy even when I eat it right away. Help!
A: This usually means your yogurt is too wet or your fruit is very juicy. Try using a thicker, strained Greek yogurt (or even labneh, which is super thick). Also, pat your fresh fruit dry with a paper towel after washing, and if using thawed frozen fruit, drain it *very* well. The granola storage trick is still your best friend!
Q: Can I use regular yogurt instead of Greek?
A: You can, but the texture will be different. Regular yogurt is thinner, so your layers might not hold their shape as defined, and the parfait might feel less substantial. If you do use it, consider adding a layer of chia seeds to help thicken things up a bit.
Q: How long do assembled parfaits (without the granola) really last in the fridge?
A: I find they are best within 3 days. After that, the fruit can start to weep a lot of liquid, and the yogurt might separate a little. They’re still safe to eat, but the fresh, vibrant texture starts to fade.
Q: Any tips for making these for kids?
A> Absolutely! Let them build their own! Set out small bowls of yogurt, granola, fruit, and maybe some fun toppings like mini chocolate chips or sprinkles. They love the creative control, and it’s a great way to get them excited about a healthy snack.
Yogurt Parfaits: Fresh, Creamy, and Perfect for Meal Prep
Description
Sometimes the best meals are the easiest ones. This everyday yogurt parfait is all about simple layers—creamy yogurt, fresh fruit, and crunchy granola. It’s quick to make, easy to customize, and perfect for breakfast, a snack, or even a light dessert. Whether you enjoy it at home or prep it ahead, this parfait brings a little calm and goodness to your day.
Ingredients
-
1 cup Greek yogurt (plain or vanilla)
-
½ cup granola
-
1 cup fresh mixed berries (strawberries, blueberries, raspberries)
-
1–2 teaspoons honey or maple syrup (optional)
Instructions
-
Spoon half of the yogurt into the bottom of a glass or jar.
-
Add a layer of granola, then a layer of berries.
-
Repeat with the remaining yogurt, granola, and berries.
-
Drizzle with honey or maple syrup if desired.
-
Serve immediately or cover and refrigerate.
Notes
-
For meal prep: Store granola separately and add just before eating to keep it crunchy.
-
Thicker parfait: Use Greek yogurt for better texture and more protein.
-
Extra flavor: Lightly toss berries with a little honey and let them sit for 5–10 minutes.
-
Make it your own: Swap berries for bananas, mango, apples, or peaches.
Nutritional Information*
*Estimated per parfait, based on using full-fat plain Greek yogurt, low-sugar granola, and mixed berries without added sweetener.
- Calories: ~250
- Protein: 12g
- Carbohydrates: 28g
- Fat: 9g
- Prep Time: 5 minutes
- Total Time: 5 minutes
This is a fantastic source of protein, calcium, and antioxidants—a truly balanced way to start your day or power through the afternoon slump.
Final Thoughts: More Than a Recipe, A Ritual of Joy
This yogurt parfait is so much more than a quick breakfast. It’s a five-minute act of self-care that pays dividends all day long. It’s the quiet satisfaction of opening a fridge filled with ready-to-go goodness. It’s a delicious lesson in balance—creamy, crunchy, sweet, and tart, all in one spoonful.
I hope this recipe does more than just fill your belly. I hope it gives you a moment of calm in your morning, a spark of creativity in your kitchen, and a reminder that the most nourishing things are often the simplest. Like my grandpa taught me, it’s not about fancy ingredients; it’s about the thoughtful layering of what you have, what you love, and what makes you feel good.
Don’t be afraid to play, to substitute, to make it yours. Let it evolve with the seasons, with your cravings, with the contents of your pantry. Because the true magic of this parfait isn’t just in the jar—it’s in the ritual of making it, and in the joyful pause it creates in your day.
Save This Recipe For Later!

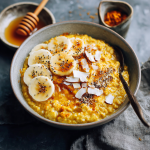
Turmeric Ginger Oatmeal : Cozy, Nourishing & Anti-Inflammatory
Good Morning, Sunshine! Let’s Make a Golden Bowl of Comfort
There’s something magical about the first meal of the day. It’s a quiet promise to yourself before the world gets loud. Will it be a frantic grab-and-go, or a moment of delicious, intentional calm? I’m here to passionately advocate for the latter, especially when it involves a bowl so vibrant it seems to glow with its own inner sunshine. Enter my Turmeric Ginger Oatmeal – your new favorite edible hug.
If you’ve ever scrolled past photos of “golden milk” and felt a twinge of curiosity, this is your gateway recipe. We’re taking that beloved, anti-inflammatory elixir and turning it into a hearty, spoonable breakfast. Imagine the earthy, warm depth of turmeric, the bright, peppery kick of ginger, and the creamy sweetness of banana and honey, all wrapped up in the humble comfort of oats. It’s not just breakfast; it’s a nourishing ritual. This bowl is for the mornings when you need a little extra warmth, when you’re feeling a bit under the weather, or when you simply want to start your day knowing you’ve given your body something truly good. You don’t need any fancy skills, just a saucepan and about 12 minutes. So, tie on that apron (messy is welcome here!), and let’s make a morning that tastes as good as it feels.
The Story Behind the Golden Spoon
This recipe was born on a particularly grey, drizzly Tuesday a few winters ago. I was feeling run-down, the kind of tired that seeps into your bones, and the thought of another plain bowl of oats was just… sad. I was staring into my spice cabinet, willing inspiration to strike, when my eyes landed on the little jar of golden turmeric next to the ginger. On a whim, I shook a bit of each into my simmering pot of oats, added a crack of black pepper (a trick I’d read about), and drizzled in some honey. The transformation was instant. The oatmeal took on this gorgeous, sunshiny hue and a fragrance that was both exotic and deeply comforting. That first steaming spoonful was a revelation. It was cozy, but invigorating. It felt healing. It turned a mundane, dreary morning into something special. Now, it’s my go-to feel-good fuel, and I love hearing from readers who tell me it’s become their family’s “sunshine in a bowl” on hectic school mornings or a restorative treat after a tough workout. Food with a story – and a feeling – is always the best kind.
Your Golden Bowl Toolkit: Ingredients & Insights
Every ingredient here plays a special role, from building creaminess to unlocking superfood benefits. Here’s what you’ll need and why:
- 1 cup rolled oats: Also called old-fashioned oats, these are my perfect middle ground. They cook up creamy but still have a lovely, substantial texture. Chef’s Tip: Want more fiber? Use steel-cut oats! Just simmer for 20-25 minutes with an extra 1/2 cup of liquid.
- 2 cups almond milk (or any milk of choice): I love almond milk for its light, nutty sweetness, but this is your playground! Creamy oat milk, rich coconut milk, or classic cow’s milk all work beautifully. The milk creates the lush, porridge-like base.
- 1/2 teaspoon ground turmeric: The star of the show! It gives that incredible golden color and its celebrated anti-inflammatory properties. Chef’s Insight: For a more intense, fresh flavor, you can grate about 1 teaspoon of fresh turmeric root instead.
- 1/4 teaspoon ground ginger: This adds a warm, zesty spark that dances perfectly with the turmeric. Substitution Tip: Fresh ginger is fantastic here! A 1/2-inch knob, peeled and finely grated, will make the flavor pop.
- 1 tablespoon honey or maple syrup: A natural sweetener to balance the earthy spices. I adore the floral note of honey, but pure maple syrup keeps this 100% plant-based. Adjust to your sweetness preference!
- 1 banana, sliced: A double-duty ingredient! Half gets stirred in to melt and create a natural, creamy sweetness throughout the oats. The other half is for that perfect fresh topping.
- Pinch of black pepper: This is NOT optional! Piperine, the compound in black pepper, enhances the absorption of curcumin (the active goodie in turmeric) by a whopping 2000%. It’s a tiny step with a huge payoff.
- Optional toppings: This is where you get creative! A sprinkle of chia seeds for omega-3s, a dollop of almond butter for protein and richness, or some coconut flakes for tropical crunch. Make it yours!
Let’s Cook! Step-by-Step to Golden Goodness
Follow these simple steps, and you’ll have a perfect bowl in no time. I’m chatting you through each one with my best tips!
- Combine and Conquer: Grab your favorite medium saucepan (one with a heavy bottom is great for even heating). Add the rolled oats, milk, ground turmeric, ground ginger, and that all-important pinch of black pepper. My Little Hack: I give the dry spices a quick stir with a fork before adding the milk. It helps prevent any little clumps of turmeric!
- Simmer to Creamy Perfection: Place the pot over medium heat. Bring the mixture to a lively simmer, stirring occasionally with a wooden spoon. You’ll see little bubbles popping at the edges. Once it’s simmering, reduce the heat just a tad to maintain a happy, gentle bubble. Let it cook for 5-7 minutes. You’ll notice the oats drinking up the milk and the whole mixture thickening into a gorgeous, golden porridge. Stir it more frequently as it thickens to prevent sticking. Watch for the “Lava Stage”: When you drag your spoon through the oats and the path fills in slowly, like thick lava, you’re almost there!
- Sweeten and Creamify: Now, stir in the honey or maple syrup. Take half of your sliced banana and add it to the pot. As you stir for that final minute of cooking, the banana will soften and almost melt into the oats, creating an incredible natural creaminess and sweetness that’s woven into every bite.
- Serve with Joy: Remove the saucepan from the heat. Pour or spoon that glorious, golden oatmeal into your favorite bowls. I’m a firm believer that food tastes better in a bowl you love!
- The Grand Finale – Toppings! Artfully arrange the remaining banana slices on top. Now, go wild with your optional toppings. A drizzle of almond butter, a sprinkle of chia seeds, a few coconut flakes… this is your edible canvas. The contrasting textures make every spoonful an adventure.
How to Serve Your Sunshine Bowl
Presentation is part of the joy! Serve this oatmeal immediately while it’s wonderfully hot and creamy. I love placing the bowl on a small wooden board or a colorful napkin for a bright, inviting look. Have little dishes of extra toppings on the table so everyone can customize their bowl. It pairs perfectly with a hot cup of herbal tea (ginger or chamomile are lovely) or a cold glass of orange juice. This is a breakfast that deserves to be savored, not rushed.
Make It Your Own: Delicious Variations
- Tropical Escape: Use coconut milk, top with mango chunks, pineapple bits, and toasted coconut flakes.
- Apple Pie Spice: Add a dash of cinnamon and nutmeg with the turmeric. Stir in grated apple in the last 2 minutes of cooking. Top with walnuts.
- Protein Power Bowl: Stir in a scoop of vanilla or unflavored protein powder with the milk at the start. Top with a big spoonful of Greek yogurt and berries.
- Chocolate Ginger Twist: Add 1 tablespoon of cacao or cocoa powder with the spices. Top with cacao nibs for crunch.
- Savory Sunrise: Omit the banana and sweetener. Top with a soft-boiled egg, avocado slices, a drizzle of soy sauce, and sesame seeds.
Olivia’s Chef Notes & Kitchen Tales
This recipe has evolved like a good friend over the years. The first time I made it, I was so cautious with the turmeric, afraid it would be bitter. Now, I’m more generous! I’ve also learned that a tiny splash of vanilla extract stirred in at the end is a sublime addition. One funny fail: I once accidentally used cayenne pepper instead of paprika for a smoky variation I was testing. Let’s just say it was a very awakening breakfast! My biggest tip? Don’t skip the black pepper. It’s the secret handshake that unlocks all the golden goodness. This oatmeal also reheats like a dream, so feel free to make a double batch for quick weekday mornings.
Your Questions, Answered!
Q: My oatmeal turned out too thick/gummy. What happened?
A: No worries! Oats can vary in how much liquid they absorb. If it’s too thick for your liking, simply stir in a splash of warm milk or water until it reaches your perfect creamy consistency. For next time, you can start with an extra 1/4 cup of milk.
Q: Can I make this the night before?
A> Absolutely! This is a great candidate for overnight oats. Just mix all ingredients (except fresh toppings) in a jar, shake well, and refrigerate overnight. In the morning, give it a stir, add your toppings, and enjoy it cold or heat it gently on the stove.
Q: I don’t like banana. What can I use instead?
A> You have options! To replace the creamy sweetness of the stirred-in banana, try stirring in 1/4 cup of unsweetened applesauce or pumpkin puree. For the topping, use any fresh or cooked fruit you love—berries, sautéed apples, or pear slices are all fantastic.
Q: Will this stain my plastic containers or spoons?
A> Turmeric is a powerful natural dye. To avoid potential staining, use glass or ceramic bowls for storage and serving, and wooden or metal spoons for stirring. If you do get a stain, a paste of baking soda and dish soap can often help lift it.
Turmeric Ginger Oatmeal : Cozy, Nourishing & Anti-Inflammatory
Description
Turmeric Ginger Oatmeal
Golden, cozy, anti-inflammatory breakfast in a bowl
Start your morning with a nourishing, warm, and slightly sweet oatmeal that’s as comforting as it is energizing.
Ingredients
Base
-
1 cup rolled oats (old-fashioned)
-
2 cups almond milk (or milk of choice)
-
1/2 tsp ground turmeric
-
1/4 tsp ground ginger
-
Pinch of black pepper (essential!)
-
1 tbsp honey or maple syrup
Banana
-
1 banana, sliced (half stirred in, half for topping)
Optional Toppings
-
Chia seeds, almond butter, coconut flakes, fresh berries, nuts
Instructions
-
Combine & Start Cooking
In a medium saucepan, combine oats, milk, turmeric, ginger, and black pepper. Stir dry spices first to prevent clumping. -
Simmer to Creaminess
Heat over medium until lively simmering, then reduce slightly. Cook 5–7 min, stirring occasionally, until oats are creamy and thickened. -
Sweeten & Add Banana
Stir in honey or maple syrup and half the sliced banana. Cook 1 more minute until banana melts slightly into the oats. -
Serve & Top
Divide oatmeal into bowls. Arrange remaining banana slices on top and add any optional toppings. Enjoy warm.
Notes
-
Tropical Escape: Use coconut milk, top with mango, pineapple, and toasted coconut.
-
Apple Pie Spice: Add cinnamon, nutmeg, and grated apple. Top with walnuts.
-
Protein Power Bowl: Stir in 1 scoop protein powder with milk; top with Greek yogurt and berries.
-
Chocolate Ginger Twist: Add 1 tbsp cocoa powder; top with cacao nibs.
-
Savory Sunrise: Omit banana/sweetener. Top with soft-boiled egg, avocado, soy sauce, sesame seeds.
Nutritional Information*
Servings: 2 | Prep Time: 5 mins | Cook Time: 7 mins | Total Time: 12 mins
*Approximate values, calculated with almond milk and honey, without optional toppings.
- Calories per serving: ~250
- Protein: ~6g
- Fat: ~5g
- Carbohydrates: ~45g
- Fiber: ~7g
Final Thoughts
So, there you have it. What began as a desperate attempt to brighten a dreary Tuesday has become my go-to morning ritual—a promise of warmth and nourishment in a bowl. This Turmeric Ginger Oatmeal is more than just a breakfast; it’s a small, daily act of kindness to yourself. It’s the edible equivalent of wrapping your hands around a steaming mug and taking a deep, calming breath before the day begins.
The true magic of this golden bowl isn’t just in the vibrant color or the anti-inflammatory superpowers (though those are wonderful bonuses). It’s in the feeling it creates. It’s the comfort of something familiar, made new and exciting. It’s the confidence that comes from knowing exactly what you’re fueling your body with—simple, wholesome ingredients that work together in perfect harmony. It’s the quiet joy of a morning ritual that feels both ancient and brand new.
I hope this recipe becomes a source of sunshine in your kitchen. May it be the cozy, reliable hug on a hectic weekday, the gentle restorative after a tough workout, or the bright, beautiful centerpiece of a lazy weekend brunch. Most of all, I hope it reminds you that the best mornings start with intention, a little bit of spice, and a spoonful of golden goodness.
Now, go start your day as the brightest version of yourself. You’ve got this.
With warmth and a well-stocked spice rack,
Olivia

Espresso Cookies : Soft, Chewy & Caffeinated Treats
The Cookie That Packs a Punch: Your New Coffee Break BFF
Hey there, friend! Come on in, grab an apron, and let’s get something straight: life is too short for weak coffee and boring cookies. If you’ve ever taken a sip of your perfectly brewed cup only to wish you could eat that rich, roasty flavor, I have glorious news for you. Welcome to the world of Espresso Cookies—the soft, chewy, caffeinated hug your taste buds have been dreaming of.
Imagine this: a cookie that’s audaciously buttery, with a crackly sugar edge that gives way to a center so tender it practically melts. And then—BAM—that deep, resonant note of real espresso hits, singing a duet with sweet, dark chocolate. This isn’t just a cookie; it’s an experience. It’s your 3 PM slump’s worst enemy and your dessert table’s new star. Whether you’re a baking newbie or a seasoned spoon-licker, this recipe is your ticket to becoming a kitchen legend. So, preheat that oven. We’re about to make your house smell like a cozy Italian café and your cookie jar the most popular spot in the house.
My “Eureka!” Moment: How These Cookies Came to Be
This recipe was born from a happy little accident, as the best ones often are. Picture it: a rainy Sunday, my third cup of coffee growing cold as I dove into a classic chocolate chip cookie recipe. In my caffeine-fueled haze, I knocked over a nearly-full jar of instant espresso powder. A fragrant, earthy cloud poofed up, and a good tablespoon or two landed squarely in my mixing bowl. My heart sank for a second… and then curiosity won. I shrugged, gave it a stir, and popped the tray in the oven.
The smell that filled my kitchen was nothing short of magic. When my husband bit into the first warm cookie, his eyes went wide. “This is it,” he said, with a mouth full of crumbs. “This is the cookie. It tastes like our favorite coffee shop feels.” That was the moment. It wasn’t a mistake; it was a discovery! That batch disappeared faster than any cookie I’d ever made, and the recipe was forever changed. Now, it’s my most-requested treat, the one I pack for road trips and bring to potlucks. It’s a tiny, edible reminder that sometimes the best flavors come from leaning into the beautiful mess.
Gathering Your Flavor Arsenal
Let’s break down the team of ingredients that make these cookies legendary. I’ve got notes and swaps for you, because flexibility is power in the kitchen!
- 1 cup (2 sticks) unsalted butter, softened: This is our flavor and texture foundation. Unsalted lets you control the salt level. “Softened” is key—it should give slightly when pressed, not be melty. Pro tip: if you forgot to take it out, cut it into chunks and let it sit for 15-20 minutes. No microwave!
- 1 cup brown sugar & ½ cup granulated sugar: The dynamic duo! Brown sugar brings moisture, chew, and a hint of molasses warmth. Granulated sugar helps create those lovely crisp edges. For a deeper flavor, try using dark brown sugar.
- 2 large eggs: Our binders and leaveners, bringing richness and structure. Make sure they’re at room temperature to blend smoothly with the butter.
- 2 tsp vanilla extract: The flavor enhancer. It rounds out the sharpness of the espresso and complements the chocolate. Use the real stuff if you can—it makes a difference!
- 2 tbsp instant espresso powder: The STAR. This isn’t ground coffee; it’s concentrated, soluble espresso. It delivers that intense coffee flavor without grittiness. My favorite brand is Medaglia d’Oro. If you only have very finely ground espresso, it might work but could add a slight texture.
- 2 ½ cups all-purpose flour: The structure. For a foolproof measure, fluff your flour with a spoon, spoon it into your measuring cup, and level it off. No packing!
- 1 tsp baking soda: Our leavening agent, giving the cookies their perfect lift and spread.
- ½ tsp salt: The flavor booster. It makes the sweet and bitter notes pop. I use fine sea salt.
- Optional: 1 cup chocolate chips or chopped dark chocolate: Highly recommended! The bitterness of dark chocolate (70% is perfect) is a dream with espresso. But semi-sweet or even white chocolate chips are delicious, too.
Let’s Bake! Your Step-by-Step Roadmap to Cookie Bliss
Follow these steps, lean into the process, and don’t forget to sneak a taste of the dough (we all do it).
- Preheat & Prep: Fire up your oven to 350°F (175°C). Line your baking sheets with parchment paper. This isn’t just for easy cleanup; it prevents the bottoms from over-browning. No parchment? A silicone baking mat works great too.
- Creaming is Key: In a large bowl, beat the softened butter and both sugars together for a good 2-3 minutes with a hand mixer or stand mixer fitted with the paddle. You’re not just mixing; you’re incorporating air. The mixture should become pale, fluffy, and look like creamy frosting. This step is non-negotiable for that perfect texture!
- Incorporate the Wet Team: Beat in the eggs, one at a time, making sure each is fully blended before adding the next. Then, add the vanilla and the glorious espresso powder. Here’s a chef hack: mix the espresso powder with the vanilla before adding to help it dissolve and distribute evenly. Beat until the batter is smooth and a beautiful coffee color.
- Whisk the Dry: In a separate bowl, whisk together the flour, baking soda, and salt. This ensures the leavening and salt are evenly distributed throughout the flour, preventing bitter soda pockets in your finished cookies.
- Combine Gently: Gradually add the dry ingredients to the wet mixture. Mix on low speed *just until* the flour disappears. A few streaks are okay! Overmixing is the enemy of tenderness—it develops gluten and leads to tough cookies.
- The Fun Part – Fold Ins: If you’re using chocolate, now’s the time! Use a spatula to gently fold them in until evenly dispersed. The dough will be thick and gorgeous.
- Scoop & Space: Using a cookie scoop or two spoons, portion dough into balls about 2 tablespoons each. Roll them gently in your hands to smooth them out. Place them on your prepared sheet at least 2 inches apart—they need room to spread and become their best selves.
- Bake to Perfection: Bake for 10-12 minutes. The cookies are done when the edges look set and are lightly golden, but the centers still appear soft, puffy, and slightly underdone. They will firm up as they cool. For super chewy centers, err on the side of 10 minutes.
- The Patient Wait: Let the cookies cool on the hot baking sheet for 5 minutes. This allows them to finish setting up without falling apart. Then, transfer them to a wire rack to cool completely… or enjoy immediately with a cold glass of milk.
How to Serve These Little Gems
Presentation is part of the joy! Pile these espresso cookies high on a rustic wooden board or a vintage cake stand. For the ultimate experience, serve them slightly warm when the chocolate is still gooey. A dusting of flaky sea salt or a drizzle of melted chocolate right before serving takes them to gourmet heights. Of course, their natural partner is a cup of excellent coffee—an espresso for the brave, a creamy latte for the decadent. They’re also incredible crumbled over vanilla ice cream. You really can’t go wrong.
Make It Your Own: Delicious Twists & Swaps
- Mocha Chip: Swap ¼ cup of the flour for unsweetened cocoa powder for a double-chocolate coffee experience.
- Espresso Walnut: Fold in 1 cup of toasted, chopped walnuts along with the chocolate for a fantastic crunch.
- Dulce de Leche Swirl: After scooping, press your thumb into the center of each dough ball and fill with a teaspoon of dulce de Leche before baking. Sweet, salty, coffee magic.
- Gluten-Free: Use a 1:1 gluten-free all-purpose flour blend (like Bob’s Red Mill or King Arthur). The texture will be slightly more delicate but just as delicious.
- “Tiramisu” Style: Once cooled, dust the tops generously with a mixture of cocoa powder and powdered sugar.
From My Kitchen to Yours: A Few Final Whispers
This recipe is a living thing in my kitchen. I’ve played with adding a pinch of cinnamon (heavenly), and once I even swirled in a ribbon of salted caramel sauce into the dough before baking—chaotic but brilliant. The biggest lesson? Don’t skip the chilling if you have time. Pop the scooped dough balls in the fridge for 30-60 minutes before baking. This solidifies the butter, leading to a thicker, chewier cookie with more pronounced flavor. If you’re a freezer-meal prepper, these dough balls freeze beautifully! Just scoop onto a tray, freeze solid, then transfer to a bag. Bake from frozen, adding 1-2 minutes to the bake time. Fresh cookies, on demand. You’re welcome.
Your Questions, Answered
Q: My cookies came out flat and spread too much. What happened?
A> The usual suspects: 1) Butter was too soft or melted. 2) The baking sheet was still warm from a previous batch. 3) Not enough flour (did you pack your measuring cup?). Next time, ensure your butter is just softened, use cool baking sheets, and try the fluff-spoon-level measuring method. Chilling the dough will also fix this.
Q: Can I use brewed coffee or ground coffee instead of espresso powder?
A> I don’t recommend it. Liquid coffee won’t provide the concentrated flavor punch and will throw off your wet/dry ingredient balance. Finely ground coffee will make the cookies unpleasantly gritty. Instant espresso powder is truly the secret weapon here. Look for it in the coffee aisle of most grocery stores!
Q: My cookies are too cakey/puffy. How do I get them chewier?
A> A cakey texture often means there was too much flour or the leavening was too active. Double-check your flour measurement. Also, using an extra egg yolk (in addition to the two whole eggs) can add richness and chew. And remember, slightly under-baking is the chewy cookie’s best friend.
Q: How do I store them to keep them soft?
A> Once completely cool, store them in an airtight container at room temperature with a piece of bread tossed in. The cookies will draw moisture from the bread and stay soft for days! The bread gets hard; you replace it. It’s an old baker’s trick that works like a charm.

Espresso Cookies : Soft, Chewy & Caffeinated Treats
Description
Espresso Cookies
Soft, Chewy, Caffeinated Bliss for Coffee Lovers
A buttery, crackly-edged cookie with tender centers and a bold espresso punch. Perfect for your 3 PM coffee break or dessert table.
Ingredients
Cookie Base
-
1 cup (2 sticks) unsalted butter, softened
-
1 cup brown sugar
-
1/2 cup granulated sugar
-
2 large eggs, room temperature
-
2 tsp vanilla extract
-
2 tbsp instant espresso powder
Dry Ingredients
-
2 1/2 cups all-purpose flour
-
1 tsp baking soda
-
1/2 tsp salt
Optional Mix-ins
-
1 cup chocolate chips or chopped dark chocolate
Instructions
-
Preheat & Prep
Preheat oven to 350°F (175°C). Line baking sheets with parchment paper or silicone mats. -
Cream Butter & Sugars
Beat butter and sugars 2–3 min until pale and fluffy. -
Add Wet Ingredients
Beat in eggs one at a time. Mix in vanilla and espresso powder (mix espresso with vanilla first for even distribution). -
Combine Dry Ingredients
Whisk flour, baking soda, and salt in a separate bowl. Gradually fold into wet mixture until just combined. -
Fold in Mix-ins
Gently fold in chocolate chips or other mix-ins. -
Scoop & Space
Portion dough into ~2 tbsp balls. Place on baking sheet 2 inches apart. -
Bake
Bake 10–12 min until edges are set and lightly golden; centers should look slightly underdone. -
Cool
Cool 5 min on baking sheet, then transfer to wire rack. Enjoy warm or fully cooled.
Notes
-
Chewier Cookies: Slightly underbake and/or add an extra egg yolk.
-
Flat Cookies Fix: Ensure butter is softened, not melted, and chill dough 30–60 min.
-
Mocha Chocolate: Replace 1/4 cup flour with unsweetened cocoa.
-
Nutty Crunch: Fold in 1 cup toasted walnuts.
-
Dulce de Leche Surprise: Press 1 tsp into the center before baking.
-
Gluten-Free: Use 1:1 gluten-free flour blend.
-
Tiramisu Style: Dust with cocoa + powdered sugar once cooled.
Nutritional Info (Because We’re Curious!)
Per cookie (approximately, based on a batch of 24 with chocolate chips):
Calories: ~180 | Protein: 2g | Carbohydrates: 22g | Fat: 9g | Saturated Fat: 5g | Cholesterol: 30mg | Sodium: 85mg | Fiber: 1g | Sugar: 14g
This is just an estimate. For precise dietary calculations, use your specific ingredients with a nutrition calculator. Now, go enjoy your well-earned treat!
Final Thoughts: The First Batch is Just the Beginning
And that’s the full story—from a happy kitchen accident to your new go-to recipe. You’ve got all the tips, tricks, and heartfelt advice to make your first batch a smashing success.
But this is really just the first chapter. Your chapter. Whether you stick to the classic or dive into the delicious twists, these cookies are now yours to perfect, share, and love. I can’t wait to hear about the memories you create with them, the variations you invent, and the moments of quiet satisfaction they bring to your kitchen.
Thank you for baking with me. Now, go create something wonderful.
With love and a full cookie jar,
Olivia

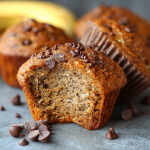
Protein Banana Muffins (Healthy Grab & Go Breakfast)
The Ultimate Morning Hack: Protein Banana Muffins That Actually Taste Amazing
Let’s be real for a second. Mornings can be… a lot. The alarm blares, your to-do list starts screaming in your head, and amidst the beautiful chaos of getting out the door, you’re faced with The Great Breakfast Dilemma. Do you grab something sugary that will leave you crashing by 10 AM, or do you settle for something “healthy” that tastes like cardboard? What if I told you there’s a third option—one that’s secretly packed with protein, naturally sweet, and so delicious you’ll forget it’s good for you?
Welcome to the magic of my Protein Banana Muffins. This isn’t just a recipe; it’s your new favorite kitchen secret weapon. We’re talking about muffins that are soft, sweet, and incredibly satisfying. They’re the perfect marriage of a cozy, homemade treat and a powerhouse breakfast that will actually fuel your day. I created this recipe for exactly those rushed mornings, for the post-workout hunger monster, and for that 3 PM slump when you need a pick-me-up that doesn’t come with a side of guilt.
The best part? You probably have most of this stuff in your kitchen right now. No refined sugar, no complicated techniques—just simple, wholesome ingredients turned into something truly special. So, tie on that apron (messy is encouraged!), and let’s bake something that will make your future self do a happy dance.
A Batch of Muffins, A Lifeline of Love
This recipe was born out of pure necessity and a whole lot of love. A few years ago, my best friend was training for her first marathon. I’d see her after her long runs, absolutely spent but glowing with this incredible sense of accomplishment. The one thing she kept complaining about? Finding a quick, portable breakfast that actually tasted good and gave her body the protein it needed to recover.
I wanted to help, to fuel her in the same energetic way she inspired me. I started baking batch after batch of muffins, tweaking and tasting, determined to crack the code. The “aha!” moment came when I swapped out regular flour for oat flour for a heartier texture and stirred in a scoop of vanilla protein powder. The result was a muffin that was moist, flavorful, and genuinely filling. I packed a dozen into a tin, scribbled “RUN FUEL!” on a note, and left them on her doorstep.
The text I got an hour later was just a string of heart-eye emojis. She said they were the perfect grab-and-go bite before her early runs. That’s when I knew this recipe was a keeper. It’s a little edible hug, a way to say “I’ve got you” to the busy people you love—including yourself.
Your Kitchen Allies: What You’ll Need & Why
Every ingredient here has a purpose, bringing moisture, sweetness, protein, or lift. Let’s break it down so you feel like a pro before you even preheat the oven.
- 3 ripe bananas, mashed – The riper, the better! Those spotty, almost-too-brown bananas are sugar bombs of natural sweetness and moisture. This is your primary sweetener. Chef’s Insight: No ripe bananas? You can use 1 cup of unsweetened applesauce in a pinch, but you’ll miss that classic banana flavor.
- 2 eggs – Our binding agents and a source of protein. They give the muffins structure and a lovely, tender crumb.
- 3/4 cup Greek yogurt – The secret weapon for insane moisture and a tangy balance to the sweetness. It also adds a serious protein punch. Substitution Tip: Any plain yogurt works, or for a dairy-free version, use an equal amount of unsweetened almond or coconut yogurt.
- 1/4 cup pure maple syrup – A touch of liquid sweetness that complements the bananas beautifully. Chef’s Insight: Honey or agave nectar work just as well here.
- 1 tsp vanilla extract – The flavor enhancer. It rounds out all the other tastes and makes everything smell like heaven.
- 2 cups oat flour – My favorite flour for healthy baking! It’s naturally gluten-free (just ensure your package says it is), high in fiber, and gives a wonderfully hearty, nutty texture. Quick Hack: Make your own by blending rolled oats in a food processor or high-speed blender until fine!
- 1 scoop vanilla protein powder – The “protein” in the title! It boosts the nutritional profile and adds a subtle vanilla note. Substitution Tip: Use unflavored or chocolate protein powder for a twist. If you don’t have any, just replace it with an additional 1/4 cup of oat flour.
- 2 tsp baking powder & 1 tsp baking soda – Our dynamic leavening duo. They work together to make sure our muffins rise nice and tall. Check they’re fresh for best results!
- Dash of cinnamon & Pinch of salt – Flavor magic! Cinnamon adds warmth, and salt makes all the other flavors pop. Don’t skip it.
- Chocolate chips – Because joy is an essential ingredient! I like to sprinkle them on top for a pretty look, but folding a handful into the batter is always a good idea.
Let’s Get Baking: Your Foolproof Blueprint
This is where the fun happens. I’ll walk you through each step with my favorite little hacks to ensure muffin perfection.
- Preheat & Prep: Fire up your oven to 350°F (175°C). This gives it time to reach the perfect, even temperature. While it’s heating, line a 12-cup muffin tin with paper liners or give each cup a generous spray with cooking oil. This is your “get ready” step so you’re not scrambling later.
- The Wet Team Mix-Up: In a large mixing bowl, mash those ripe bananas with a fork until mostly smooth (a few small lumps are totally fine—they add character!). Crack in the eggs, add the Greek yogurt, maple syrup, and vanilla. Whisk it all together until it’s one happy, creamy, slightly goopy family. Chef’s Hack: Doing the wet ingredients first means you can use the same whisk for everything without dirtying extra bowls!
- Bring in the Dry Crew: Right into that same bowl, add the oat flour, protein powder, baking powder, baking soda, cinnamon, and salt. Here’s the golden rule: mix until *just* combined. Use a spatula and fold gently. A few streaks of flour are okay! Overmixing is the #1 reason muffins turn out tough or dense. We want them tender and fluffy.
- The Joyful Fold-In: If you’re mixing chocolate chips into the batter (highly recommended), now’s the time. Gently fold in about 1/2 a cup. Reserve a few for sprinkling on top for that bakery-style finish.
- Portion with Love: Divide the batter evenly among the 12 muffin cups. I like to use a large cookie scoop or a 1/4 cup measure for neatness and even baking. They should be about 3/4 full. Top with the remaining chocolate chips, pressing them in slightly so they don’t roll off.
- Bake to Perfection: Slide the tin into your preheated oven. Bake for 15-18 minutes. Start checking at 15 minutes—a toothpick inserted into the center of a muffin should come out clean or with a few moist crumbs (not wet batter). Chef’s Tip: Ovens can be sneaky! If yours runs hot, check early. The tops should be springy to the touch.
- The Crucial Cool Down: This is the hardest part! Let the muffins cool in the tin for 5 minutes. This allows them to set. Then, transfer them to a wire rack to cool completely. This stops the cooking process and prevents soggy bottoms. I know it’s tempting, but try to wait at least 10 minutes before the first bite!
How to Serve & Savor
These muffins are delicious completely naked, but here’s how I love to enjoy them! For breakfast, I’ll grab one and run, or I’ll slice it in half, toast it lightly, and smear it with a dollop of almond butter for an extra protein hit. For a cozy snack, warm one up for 15 seconds and enjoy it with a cup of coffee or tea. They’re perfect packed in lunchboxes, taken on road trips, or served on a plate for a simple, satisfying weekend brunch alongside some fresh fruit.
Make It Your Own: Delicious Twists
The beauty of this base recipe is its flexibility! Try one of these easy swaps:
- Chocolate Peanut Butter: Use chocolate protein powder and fold in 1/4 cup of peanut butter powder (like PB2) with the dry ingredients. Top with chopped peanuts.
- Berry Blast: Omit the chocolate chips and fold in 1 cup of fresh or frozen blueberries or raspberries. Frozen berries work great—don’t thaw them first to avoid purple streaks!
- Tropical Vibes: Add 1/2 cup of shredded coconut and 1/4 cup of diced dried mango to the batter.
- Nutty Crunch: Fold in 1/2 cup of chopped walnuts or pecans. A sprinkle of turbinado sugar on top before baking adds a lovely crunch.
- Double Chocolate: Use chocolate protein powder, replace 2 tbsp of oat flour with cocoa powder, and keep the chocolate chips. Decadence, disguised.
Olivia’s Kitchen Notes
This recipe has evolved more than my music taste since middle school! The first batch was so dense you could have used it as a doorstop. Lesson learned: don’t overmix! I’ve also learned that the type of protein powder can change the moisture level slightly. Whey protein tends to make them a bit fluffier, while plant-based powders can be more absorbent—if your batter seems too thick, add a splash of milk. And a funny story: I once accidentally used chili powder instead of cinnamon (same color container, whoops!). Let’s just say they were… interesting. Now I label EVERYTHING. The moral? Baking is an adventure. Have fun with it, and don’t be afraid to make it your own.
Your Questions, Answered
Q: Can I make these without protein powder?
A: Absolutely! Just replace the one scoop with an additional 1/4 cup of oat flour. They’ll still be delicious and healthy, just with a bit less protein.
Q: My muffins didn’t rise much. What happened?
A> Two likely culprits: 1) Your baking powder/soda might be old. They lose potency over time. Check the expiration date! 2) You might have overmixed the batter. Remember, gentle folds until just combined are key.
Q: How do I store these, and can I freeze them?
A: They keep beautifully in an airtight container in the fridge for up to 5 days. For longer storage, freeze them! Let them cool completely, then wrap individually and freeze in a bag for up to 3 months. Thaw at room temperature or pop them in the microwave for 30 seconds.
Q: Can I use regular all-purpose flour?
A> You can! Substitute the 2 cups of oat flour with 1 3/4 cups of all-purpose flour. The texture will be slightly lighter and more traditional.
Protein Banana Muffins (Healthy Grab & Go Breakfast)
Description
Protein Banana Muffins
The Ultimate Morning Hack That Actually Tastes Amazing
Soft, naturally sweet, and packed with protein—perfect for breakfast, post-workout fuel, or a guilt-free snack.
Ingredients
Wet Ingredients
-
3 ripe bananas, mashed
-
2 eggs
-
3/4 cup Greek yogurt (or dairy-free alternative)
-
1/4 cup pure maple syrup (or honey/agave)
-
1 tsp vanilla extract
Dry Ingredients
-
2 cups oat flour (or 1 3/4 cups all-purpose flour)
-
1 scoop vanilla protein powder (or extra 1/4 cup oat flour)
-
2 tsp baking powder
-
1 tsp baking soda
-
Dash of cinnamon
-
Pinch of salt
Optional Mix-ins
-
1/2 cup chocolate chips (plus a few extra for topping)
-
Or nuts, berries, dried fruit, shredded coconut
Instructions
-
Preheat Oven & Prep Tin
Preheat to 350°F (175°C). Line a 12-cup muffin tin with paper liners or spray with cooking oil. -
Mix Wet Ingredients
Mash bananas in a large bowl. Add eggs, Greek yogurt, maple syrup, and vanilla. Whisk until combined. -
Add Dry Ingredients
Stir in oat flour, protein powder, baking powder, baking soda, cinnamon, and salt. Fold gently until just combined. -
Fold in Optional Mix-ins
Gently fold in chocolate chips, berries, nuts, or other mix-ins. Reserve a few for the tops. -
Portion Batter
Divide evenly among muffin cups (about 3/4 full). Top with remaining chocolate chips or nuts. -
Bake
Bake 15–18 minutes until a toothpick inserted in the center comes out clean or with a few moist crumbs. -
Cool
Let muffins cool 5 minutes in the tin, then transfer to a wire rack to cool completely.
Notes
-
Protein Powder Swap: Use chocolate or unflavored; adjust sweetness as needed.
-
Berry Muffins: Fold in 1 cup fresh or frozen berries.
-
Nutty Muffins: Add 1/2 cup chopped walnuts or pecans.
-
Double Chocolate: Use chocolate protein powder and add cocoa powder plus chips.
Nutritional Snapshot*
*Estimated per muffin, based on using whey protein powder and 1 tbsp of chocolate chips per muffin. Values will vary based on your specific ingredients.
- Calories: ~165
- Protein: ~9g
- Fat: ~4g
- Carbohydrates: ~25g
- Fiber: ~3g
- Sugar: ~10g (naturally occurring from banana & maple syrup)
Prep Time: 10 mins | Cook Time: 18 mins | Total Time: 28 mins | Servings: 12 muffins
Final Thoughts
And there you have it—a batch of muffins that defy the tired old rules of “healthy” vs. “indulgent.” These Protein Banana Muffins are proof that you don’t have to sacrifice flavor for fuel or joy for nutrition. In under 30 minutes, you can create something that feels like a warm, homemade treat while quietly powering you through your busiest days.
I hope this recipe becomes a reliable, feel-good staple in your kitchen—a tool for showing up for yourself and the people you love with something simple, nourishing, and downright delicious. Whether you’re fueling a marathon, a Monday, or a moment of needing a better snack, these muffins are here for it.
Remember, the best recipes are the ones that fit into your real life and make it a little brighter. So go ahead, bake a batch, share one with a friend, and savor the small, sweet victories.
Happy baking!
Olivia

Easy Ground Beef Tacos (Better Than Takeout in 20 Minutes!)
Your New Favorite Weeknight Escape Is Sizzling in the Skillet
Hey there, friend! Come on in, grab a wooden spoon, and pull up a stool. Can you smell that? It’s the instant, soul-warming aroma of onions hitting a hot pan, followed by the savory sizzle of ground beef getting perfectly browned. It’s the sound of a Tuesday (or a Thursday, or a “I just need something good and fast” day) transforming into something special. If your idea of a perfect weeknight involves minimal fuss, maximum flavor, and the happy, chatty chaos of everyone building their own perfect bite, then you and I are already on the same page.
Today, we’re making my Easy Ground Beef Tacos. Now, I know what you might be thinking: “Olivia, everyone knows how to make tacos.” And you’re right! But this isn’t just about throwing meat in a shell. This is about a simple, powerhouse spice blend that you probably already have in your pantry, a little chef’s trick with broth or water that makes the meat incredibly juicy and saucy, and the confidence to ditch the takeout menu for good. We’re talking about a meal that’s on the table in 20 minutes flat, but tastes like you fussed for hours. It’s my weeknight hero, my back-pocket save-the-day recipe, and I am so excited to share every cozy, delicious detail with you. Let’s turn your kitchen into the best taqueria on the block!
Taco Tuesdays & Life’s Simple Joys
My love for this recipe started long before I had a food blog, in the tiny, galley-style kitchen of my first apartment. My roommate Sam and I, both broke and perpetually hungry grad students, instituted a sacred ritual: Weekly Taco Tuesday. The budget was tight, but our ambitions were high. We’d spread every topping we could afford—shredded cheese, iceberg lettuce, a single perfectly ripe avocado we’d split with care—across our wobbly Ikea table. The star was always this simple ground beef, simmering away in our one good skillet.
Those nights weren’t about gourmet ingredients; they were about connection. It was the one night we guaranteed we’d sit down together, laugh about our days, and forget the stress of deadlines. The act of building our tacos, of customizing each bite, felt creative and personal. To this day, the sound of cumin hitting warm beef sends me right back to that tiny kitchen, filled with laughter and the undeniable feeling that, even on a budget, we were eating like royalty. That’s the magic I want for you: not just a fast dinner, but a little moment of joy you can build with your own hands.
Gathering Your Flavor Arsenal
Here’s the beautiful part: you likely have 90% of this already. No fancy trips to the store required! This is about building layers of flavor with humble, everyday ingredients.
- 1 lb ground beef (85% lean): This is our Goldilocks zone! The 85/15 blend has enough fat to stay juicy and carry flavor, but not so much that you’re swimming in grease. Chef’s Insight: If you use a leaner blend, add a tiny drizzle of oil to the pan before the onions.
- ½ small onion, finely chopped: Our aromatic base. It adds a sweet, savory depth. No onion? A spoonful of onion powder works in a pinch.
- 2 cloves garlic, minced: The flavor booster! Fresh is fantastic, but ½ tsp of garlic powder is a totally respectable stand-in when you’re in a rush.
- 1 tbsp chili powder: The heart of the spice blend! This is usually a mix of ground chiles, cumin, and garlic. It gives that classic taco flavor without being overly spicy.
- 1 tsp ground cumin: The warm, earthy, unmistakable soul of so many incredible dishes. Don’t skip it!
- ½ tsp paprika: Sweet or smoked paprika both work! Smoked adds a subtle, campfire-like whisper of complexity.
- ½ tsp dried oregano: A little herbal note that ties everything together. Rub it between your palms as you add it to wake up the oils.
- Salt & pepper to taste: Your essential flavor awakeners. Season in layers!
- ⅓ cup water or beef broth: This is the SECRET WEAPON! It lets the spices coat every bit of meat and creates a saucy, clingy texture that’s so much better than dry, crumbly beef. Broth adds an extra savory punch.
- Optional: A squeeze of lime or splash of hot sauce to finish. A bright acid lift at the end makes all the flavors pop!
For Serving: The playground! Use 8 small corn or flour tortillas (hard shells or soft—you do you!). Raid your fridge for toppings: shredded lettuce, diced tomato, shredded cheese, sour cream, salsa, avocado, fresh cilantro… the world is your taco.
Let’s Get Cooking: Your Foolproof Roadmap to Taco Glory
Ready? Apron on (or not, I won’t judge), skillet out. Let’s create some magic, step by simple step.
- Start with the Aromatics: Grab your favorite large skillet (I use my trusty cast iron) and place it over medium heat. No oil needed yet if your beef has good fat! Add the finely chopped onion and cook for 2-3 minutes, until it starts to turn translucent and smell amazing. Chef’s Hack: We’re sweating the onion here, not browning it. This gentle heat coaxes out its natural sweetness as a flavor foundation for the beef.
- Brown the Beef Beautifully: Crumble in the ground beef with your onions. Now, here’s a key move: let it sit for a minute to get some good browning on one side before you start breaking it apart. Then, use a wooden spoon or spatula to break it up into small, bite-sized crumbles. Cook until it’s no longer pink. If there’s a lot of excess fat, you can drain it off, but I usually leave a tablespoon or two for flavor. Chef’s Tip: Don’t stir it constantly! Letting it get a little crispy in spots adds wonderful texture.
- The Spice Bloom: Clear a little well in the center of the skillet. Add the minced garlic (if using fresh) and let it cook for just 30 seconds until fragrant—burnt garlic is bitter, and we don’t want that! Then, sprinkle all your spices—chili powder, cumin, paprika, oregano, salt, and pepper—right over the meat. Stir everything tirelessly for a full minute. This “blooms” the spices in the heat and fat, unlocking their deepest, most delicious flavors. Your kitchen should smell incredible right now.
- The Saucy Simmer: Pour in your water or beef broth. It will sizzle and steam up gloriously. Give it a good stir, scraping up any tasty browned bits from the bottom of the pan (that’s flavor gold!). Reduce the heat to low and let it simmer gently for 5-7 minutes. This is where the magic happens: the liquid reduces slightly, creating a glossy, flavorful sauce that perfectly coats every single crumble of beef. Taste it! Need more salt? A squeeze of lime? This is your moment to adjust.
- Warm Your Vessels: While the meat simmers, warm your taco shells or tortillas. For soft tortillas, I love a dry skillet over medium heat for about 30 seconds per side, or wrapping them in a damp paper towel and microwaving for 20 seconds. For hard shells, the oven or a quick minute in the toaster oven does the trick. A warm shell is a happy shell—it’s more pliable and tastes fresher.
- The Grand Assembly: It’s time! Lay out your toppings like a vibrant buffet. Let everyone spoon the juicy, saucy beef into their warm shells and top with abandon. My perfect build? A layer of shredded lettuce, the beef, a sprinkle of sharp cheddar, diced tomato, a dollop of cool sour cream, and a final crown of avocado and cilantro. But that’s just me—you do you!
Setting the Scene for Taco Night
Presentation is part of the fun! I ditch the formal plating and go for a family-style feast. Pile the warm shells in a basket lined with a tea towel. Transfer the taco meat to a colorful, rustic bowl. Then, arrange all your toppings in small bowls or on a platter. It’s interactive, it’s colorful, and it lets everyone craft their own masterpiece. Don’t forget the napkins—the good, messy ones are always the most delicious!
Make It Your Own: Endless Taco Possibilities
The beauty of this recipe is its adaptability. Here are a few of my favorite twists:
- Turkey or Chicken Twist: Swap the beef for ground turkey or chicken. Since they’re leaner, use broth for simmering and consider adding an extra teaspoon of olive oil with the onions.
- Spicy Fiesta: Kick up the heat! Add ¼ to ½ tsp of cayenne pepper with the other spices, or stir in a diced jalapeño with the onions.
- Loaded Veggie: Sneak in extra veggies by adding a finely diced bell pepper with the onion, or a handful of frozen corn right before the simmer stage.
- Taco Salad Bowl: Skip the shells! Serve the meat over a huge bed of crisp romaine lettuce with all the toppings for a delicious, low-carb option.
- Breakfast Tacos: The next morning, reheat a scoop of meat, scramble it with some eggs, and wrap it in a warm tortilla with cheese and salsa. Chef’s kiss!
A Few More Thoughts From My Messy Apron to Yours
This recipe has been with me for over a decade, and it has evolved in the best ways. I used to just dump a packet of store-bought seasoning in, but once I realized how simple and INFINITELY better the homemade blend was, I never looked back. The “simmer with liquid” trick was a happy accident one night when I thought I’d ruined it by adding too much broth—turns out, I’d perfected it!
A funny kitchen story? I once was so engrossed in a phone call while making these that I accidentally used cinnamon instead of cumin. Let me tell you, that was a… unique taco experience. I salvaged it with extra lime and hot sauce, but now I always double-check my spice jars! The moral: cooking is forgiving. Have fun with it. This isn’t a fussy French sauce; it’s a hearty, happy taco. Make it your own.
Your Taco Questions, Answered!
Q: My taco meat turned out a bit dry. What happened?
A: The most common culprit is using beef that’s too lean (like 93/7) or skipping the simmering liquid step. The water/broth is crucial for creating a saucy texture! Next time, try 85/15 beef and make sure to add that ⅓ cup of liquid and let it simmer for the full time. If it’s already dry, stir in a extra splash of broth or a bit of salsa when reheating.
Q: Can I make this ahead of time?
A> Absolutely! This is a fantastic make-ahead. Cook the meat completely, let it cool, and store it in an airtight container in the fridge for up to 3 days. The flavors often get even better! Reheat gently in a skillet with a tiny splash of water to loosen it up.
Q: What’s the best way to store leftovers?
A: Store the meat and toppings separately. The meat reheats beautifully, but soggy lettuce is a sad thing. Keep hard shells in their package at room temp, and store soft tortillas in the fridge.
Q: My spice blend tastes bland. Help!
A> First, make sure you’re using fresh spices (they lose potency after about a year). Second, don’t be shy with salt—it’s essential for waking up all the other flavors. Finally, that full minute of stirring the spices in the hot fat is non-negotiable for blooming their flavor.

Easy Ground Beef Tacos (Better Than Takeout in 20 Minutes!)
Description
Easy Ground Beef Tacos
Your New Favorite Weeknight Escape
Fast, juicy, boldly seasoned ground beef tacos made with pantry spices and one simple trick that guarantees saucy, never-dry meat. Dinner’s on the table in 20 minutes.
Ingredients
-
1 lb ground beef (85% lean recommended)
-
½ small onion, finely chopped
-
2 cloves garlic, minced
-
1 tbsp chili powder
-
1 tsp ground cumin
-
½ tsp paprika (sweet or smoked)
-
½ tsp dried oregano
-
Salt and black pepper, to taste
-
⅓ cup water or beef broth
-
Optional: squeeze of lime or hot sauce
For Serving
-
8 small corn or flour tortillas (soft or hard)
- Toppings of choice: shredded lettuce, diced tomatoes, shredded cheese, sour cream, salsa, avocado, cilantro
Instructions
-
Cook the Onion
Heat a large skillet over medium heat. Add chopped onion and cook 2–3 minutes until soft and translucent. -
Brown the Beef
Add ground beef to the skillet. Let it brown slightly before breaking it apart. Cook until no longer pink. Drain excess fat if needed. -
Bloom the Spices
Add garlic and cook 30 seconds until fragrant. Sprinkle in chili powder, cumin, paprika, oregano, salt, and pepper. Stir continuously for 1 minute to release flavor. -
Simmer for Juiciness
Pour in water or broth, stirring to scrape up browned bits. Reduce heat to low and simmer 5–7 minutes until saucy and well coated. - Warm Tortillas & Serve
Warm tortillas in a dry skillet or microwave. Fill with beef and top as desired.
Notes
-
Use 85/15 beef for best flavor and texture
-
Let the meat simmer—this is the key to juicy tacos
- Taste before serving and finish with lime or hot sauce
Nutritional Information (Approximate)
Per serving (2 tacos with beef, corn shells, lettuce, tomato, and 1 tbsp cheese), based on 4 servings.
Calories: ~320 | Protein: 22g | Carbohydrates: 25g | Fat: 16g | Saturated Fat: 6g | Cholesterol: 60mg | Sodium: 380mg | Fiber: 4g | Sugar: 3g
Note: This is an estimate and can vary greatly based on your specific ingredients, toppings, and shell choices.
Final Thoughts: Your New Weeknight Ritual
And just like that, in about the time it takes to watch a sitcom, you’ve created something far more rewarding than takeout. You’ve filled your kitchen with incredible aromas, gathered your people around a vibrant spread, and shared in the simple, universal joy of building the perfect bite.
This recipe is more than ground beef in a tortilla. It’s a formula for connection, a blueprint for ease, and a delicious reminder that the best meals don’t have to be complicated. They just have to be made with a little intention—and a really good spice blend.
I hope this becomes your go-to, your crowd-pleaser, your “I’ve got this” weeknight victory. May it fuel countless conversations, messy hands, and happy bellies in your home.
Now, I’d love to see your creations! Did you try a spicy twist? Did the kids go crazy for the toppings bar? Tag me in your taco night photos—I want to see your colorful, delicious masterpieces.
Here’s to reclaiming your weeknights, one perfectly saucy, utterly satisfying taco at a time. Now, go enjoy the feast you made.

Fluffy Blueberry Pancakes : Classic, Juicy, and Made from Scratch
Fluffy Blueberry Pancakes: Your New Favorite Weekend Ritual
Hey there, friend! Can you smell it? That magical, unmistakable aroma of pancakes sizzling on a hot griddle, butter melting into golden pools, and sweet blueberries bursting into little pockets of jammy goodness. If your idea of a perfect morning involves a stack of something warm, comforting, and downright delicious, then you and I are already on the same page. Welcome to my kitchen counter—grab a cup of coffee and pull up a stool.
Today, we’re making my absolute go-to, never-fail, crowd-pleasing Fluffy Blueberry Pancakes. This isn’t just a recipe; it’s a mood. It’s the promise of a slow, syrup-drizzled morning, whether you’re feeding a hungry family, impressing a special someone, or treating yourself to a little weekday joy. These pancakes are everything you want them to be: tender and soft in the center, with those perfect, slightly crisp, buttery edges, and absolutely loaded with juicy berries in every single bite.
The best part? You don’t need a pastry degree or a pantry full of weird ingredients. We’re making these glorious stacks completely from scratch, and I’m going to walk you through every single step. I’ll share all my little chef secrets—the ones that guarantee fluffiness, prevent rubbery pancakes, and ensure those blueberries don’t all sink to the bottom. So, tie on your favorite apron (the messy one tells the best stories), and let’s turn simple ingredients into a breakfast masterpiece that’s sure to spark joy.
The Pancakes That Started It All
This recipe takes me right back to my grandma’s sun-drenched kitchen. Every Sunday without fail, the sound of her old metal whisk clanging against her yellow mixing bowl was my alarm clock. My brother and I would race down the stairs, still in our pajamas, drawn by the scent of melting butter and vanilla. She’d let me be the official “blueberry distributer,” carefully placing each berry onto the dollops of batter on the griddle. I was convinced my careful placement was the secret to their magic.
Her pancakes were these legendary, plate-sized clouds—so light, I’m surprised they didn’t float away. She’d stack them sky-high on a warm platter, the steam carrying that sweet, berry scent through the whole house. That ritual, that act of cooking together and gathering around a table piled high with food made with love, is where my own food story truly began. This recipe is my homage to those mornings. It’s my attempt to bottle that feeling of cozy, uncomplicated happiness and share it with you. Because sometimes, the most powerful memories are the ones we create over something as simple as a perfect pancake.
Gathering Your Blueberry Bliss Ingredients
Here’s our cast of characters! This is a beautifully simple list, but each ingredient plays a starring role. Let’s chat about why we’re using them and how you can make smart swaps.
- 1 cup all-purpose flour: The foundation of our fluffy structure. I like to fluff the flour in the bag, then gently spoon it into the measuring cup and level it off. No packing! This ensures we don’t accidentally add too much and end up with dense pancakes.
- 2 tablespoons sugar: Just enough for a hint of sweetness and to help with that beautiful golden-brown color when they hit the pan. You can reduce this slightly if you prefer, but don’t skip it entirely.
- 1 tablespoon baking powder: This is our FLUFFINESS SECRET WEAPON. It’s what creates those lovely air bubbles that make the pancakes rise. Make sure yours is fresh (less than 6 months old) for maximum lift!
- 1/4 teaspoon salt: The flavor booster. Salt makes all the other ingredients sing and balances the sweetness perfectly.
- 1 cup milk: Whole milk gives the richest flavor, but any milk you have works beautifully—dairy or non-dairy. I’ve had great success with oat milk and almond milk for a dairy-free version.
- 1 large egg: Our binder and extra richness provider. It gives the batter structure and a lovely tenderness.
- 2 tablespoons melted butter, plus more for the pan: Butter equals flavor, my friends! Melted butter in the batter makes the crumb incredibly tender. And cooking the pancakes in butter (not oil!) gives those irresistible, lacy, golden edges.
- 1 teaspoon pure vanilla extract: The warm, aromatic note that makes these taste like a bakery treat. Imitation vanilla works in a pinch, but the real stuff is a game-changer.
- 1 cup fresh or frozen blueberries: The star of the show! If using fresh, give them a rinse and pat them very dry. If using frozen, do NOT thaw them—toss them in straight from the freezer to prevent them from bleeding too much purple into your batter.
Let’s Make Some Pancake Magic: Step-by-Step
Alright, team! Let’s get mixing. Follow these steps, lean into the little tips, and you’ll have pancake perfection.
Step 1: The Dry Team Meeting. In a large mixing bowl, grab your whisk and give the flour, sugar, baking powder, and salt a good whisk together. We’re not just mixing; we’re aerating the flour and making sure our leavening agent is evenly distributed. This is the first step to uniform fluffiness! No one wants a bite of just baking powder.
Step 2: The Wet Team Huddle. In a separate bowl (a glass measuring cup works great for pouring!), whisk together the milk, egg, melted butter, and vanilla. Pro Tip: Let your melted butter cool for a minute before adding it to the cold milk and egg, so you don’t accidentally cook the egg!
Step 3: The Gentle Merge. This is the most important step: DO NOT OVERMIX. Pour the wet ingredients into the dry. Using your whisk or a spatula, gently stir until the ingredients are *just* combined. I mean it—stop when you still see a few streaks of flour and the batter is lumpy. Those lumps will hydrate as the batter rests, and overmixing develops gluten, which leads to tough, chewy pancakes. We want tender, fluffy clouds!
Step 4: Berry Best Friends. Gently fold in your blueberries with a spatula. A few gentle folds is all it takes. If you’re using frozen berries, your batter will thicken up a bit—that’s totally normal and okay!
Step 5: The Pre-Heat is Key. Place your non-stick skillet or griddle over medium heat. Let it get properly hot for a good 3-4 minutes. To test, flick a few drops of water onto the surface—they should skitter and dance, not just sit and boil. Add a small pat of butter and swirl it around.
Step 6: The Perfect Pour & Patience. Using a 1/4-cup measure or a ladle, pour batter onto the hot pan. Don’t crowd them! Now, the hardest part: be patient. Let them cook until you see lots of little bubbles forming and popping on the surface, and the edges look set and slightly dry, about 2-3 minutes. This is your sign that the bottom is perfectly golden.
Step 7: The Confident Flip. Slide your spatula underneath, take a deep breath, and flip with confidence! Don’t hesitate. Cook for another 1-2 minutes on the second side until golden. Transfer to a plate or, better yet, a wire rack in a warm oven (set to 200°F) while you cook the rest. This keeps them all warm and prevents the bottoms from getting soggy.
Serving Your Sunshine Stack
Presentation is part of the fun! I love stacking them high on a big, warm platter or individual plates. Slide a little pat of butter between each pancake so it melts into rivers of goodness. Drench the whole stack in warm, pure maple syrup—the real stuff is worth it. For a final flourish, scatter a handful of fresh blueberries on top, maybe a light dusting of powdered sugar, or even a dollop of whipped cream for a truly decadent treat. Serve immediately with more hot coffee and big smiles.
Get Creative! Flavor Twists & Swaps
This recipe is your perfect canvas. Here are a few of my favorite riffs:
- Lemon Blueberry Bliss: Add the zest of one lemon to the dry ingredients and use buttermilk instead of regular milk for a tangy, bright twist.
- Whole-Grain Goodness: Swap half the all-purpose flour for whole wheat pastry flour or white whole wheat flour. The texture will be heartier but still delicious.
- “Anything” Berry Pancakes: Use a mix of raspberries, blackberries, and chopped strawberries. Frozen mixed berries work perfectly!
- Cozy Spice: Add 1/2 teaspoon of cinnamon and a pinch of nutmeg to the dry ingredients for a warm, autumnal flavor.
- Double Chocolate Chip: Omit the blueberries, reduce the sugar to 1 tbsp, and fold in 3/4 cup of chocolate chips. You’re welcome.
Chef Olivia’s Notes from a Flour-Dusted Kitchen
This recipe has been my weekend workhorse for years, and it’s evolved through many, many batches (and happy taste-testers). My biggest lesson learned? Letting the batter rest for 5-10 minutes after mixing makes a noticeable difference in fluffiness. It gives the baking powder a chance to start working and the flour granules to fully hydrate. Also, I used to be scared of a “too-thick” batter, but a thicker batter actually leads to taller, fluffier pancakes that cook through evenly! So if yours looks thick, trust the process. And a funny story: I once accidentally used powdered sugar instead of flour. Let’s just say we had very sweet, very flat, very sticky “crepes” that day. A happy kitchen disaster, but a good reminder to always label your canisters!
Your Pancake Questions, Answered!
Q: My pancakes are dense and gummy, not fluffy. What went wrong?
A: The #1 culprit is overmixing the batter. Remember, gentle stirring until just combined! The #2 culprit could be old baking powder. Test it by stirring 1/2 teaspoon into a cup of hot water. If it doesn’t bubble vigorously, it’s time for a new can.
Q: Can I make the batter ahead of time?
A: You can mix the dry and wet ingredients separately the night before and combine them in the morning. But I don’t recommend mixing the full batter and letting it sit overnight, as the baking powder will lose its oomph and the blueberries may bleed.
Q: Why do my pancakes burn on the outside before cooking through?
A: Your heat is too high! Medium heat is your friend. It should be hot enough to sizzle butter but not so hot that it smokes. If the first batch is too dark, lower the heat slightly for the next one.
Q: Can I freeze these pancakes?
A: Absolutely! Let them cool completely on a wire rack, then layer them between sheets of parchment paper in a freezer bag. They’ll keep for up to 2 months. Reheat in a toaster or a 350°F oven until warm.

Fluffy Blueberry Pancakes : Classic, Juicy, and Made from Scratch
Description
Fluffy Blueberry Pancakes
Your New Favorite Weekend Ritual
Soft, tender pancakes with golden edges and juicy blueberries in every bite. Simple ingredients, foolproof steps, and perfectly fluffy results—every single time.
Ingredients
-
1 cup all-purpose flour
-
2 tablespoons sugar
-
1 tablespoon baking powder
-
¼ teaspoon salt
-
1 cup milk (dairy or non-dairy)
-
1 large egg
-
2 tablespoons butter, melted (plus more for cooking)
-
1 teaspoon pure vanilla extract
- 1 cup blueberries (fresh or frozen, do not thaw if frozen)
Instructions
-
Mix Dry Ingredients
In a large bowl, whisk together flour, sugar, baking powder, and salt. -
Mix Wet Ingredients
In a separate bowl, whisk milk, egg, melted butter (slightly cooled), and vanilla. -
Combine Gently
Pour wet ingredients into dry and stir just until combined. Batter should be slightly lumpy—do not overmix. -
Fold in Blueberries
Gently fold in blueberries with a spatula. -
Heat the Pan
Heat a non-stick skillet or griddle over medium heat. Lightly butter the surface. -
Cook Pancakes
Pour about ¼ cup batter per pancake. Cook 2–3 minutes until bubbles form and edges look set. Flip and cook another 1–2 minutes until golden. - Serve Warm
Serve immediately or keep warm in a 200°F (95°C) oven while finishing the batch.
Notes
-
Let the batter rest 5–10 minutes before cooking
-
Make sure baking powder is fresh
-
Keep heat at medium, not high
- Thick batter = taller pancakes
Nutritional Information (Per Pancake, Approximate)
Calories: ~140 | Protein: ~4g | Carbohydrates: ~20g | Fat: ~5g | Fiber: ~1g | Sugar: ~6g
Note: This is an estimate based on the ingredients listed using 2% milk. Values will change with substitutions.
There you have it, my friend—everything you need to make the most incredible, soul-warming, fluffy blueberry pancakes. I hope this recipe becomes a part of your own family’s story, creating moments of connection and joy one delicious stack at a time. Now, go forth and make a mess! And don’t forget to tag me if you share your creations—I love seeing your kitchen wins.
Final Thoughts: More Than Just Breakfast
And there you have it—the recipe for a perfect morning, wrapped up in a stack of warm, berry-studded bliss. These Fluffy Blueberry Pancakes are more than just a meal; they’re a little ritual of joy, a delicious pause in a busy world.
What makes this recipe special isn’t just the tender crumb or the burst of juicy blueberries—it’s the feeling it creates. It’s the sound of laughter around the table, the quiet satisfaction of a slow Saturday, and the simple magic of turning basic ingredients into something extraordinary. This is food that nourishes the soul as much as the body.
Remember, cooking is a conversation, not a commandment. This recipe is your trusty guide, but your kitchen is your domain. Trust your instincts—add a little more vanilla, swap in that seasonal fruit, or make them mini for little hands. Every variation becomes part of your own story.
Most of all, I hope this recipe inspires you to create your own moments of connection. Whether you’re cooking for a crowd or savoring a quiet solo stack, let it be an act of kindness—for yourself or for someone you love.
Here’s to fluffier pancakes, stickier fingers, and memories in the making.
Happy flipping, friends!
With love and a drizzle of syrup,
Olivia
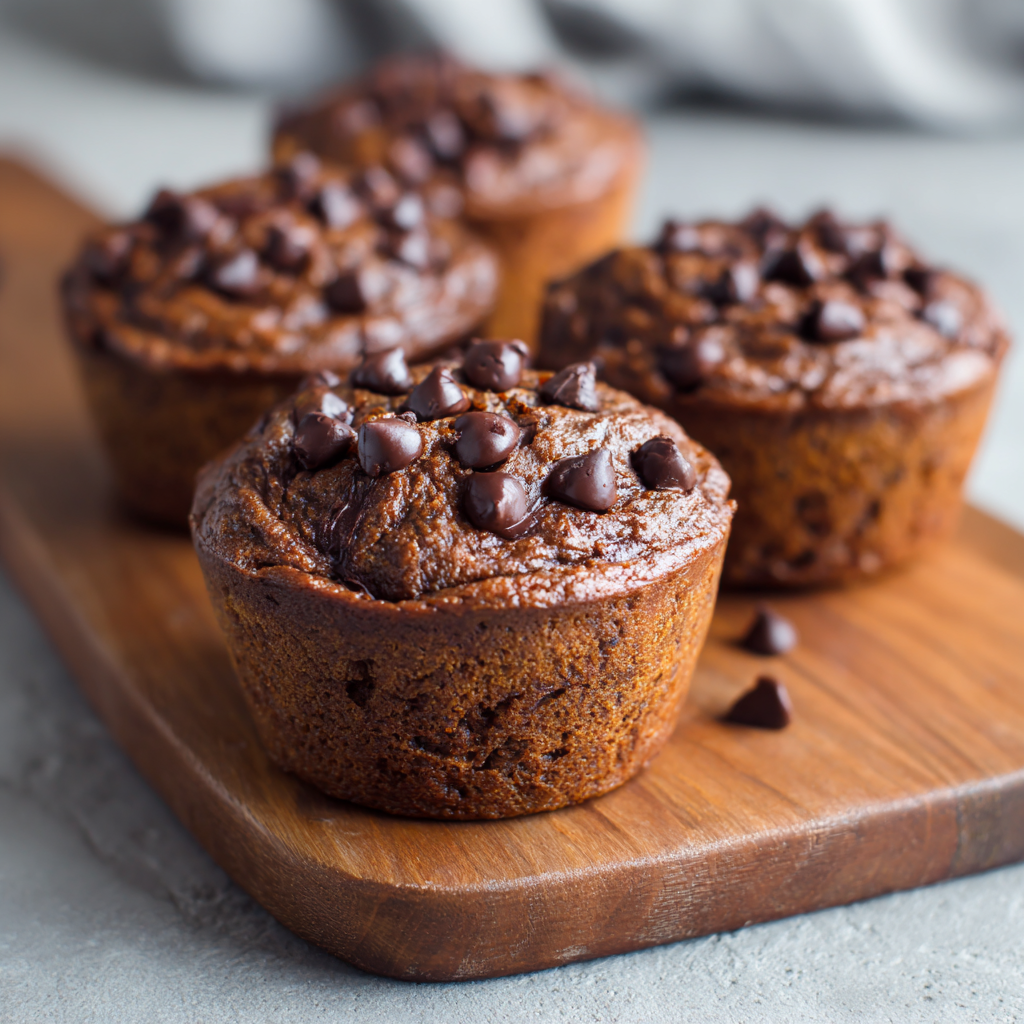
Protein Chocolate Chip Muffins : Fudgy, Nourishing & Naturally Sweetened
Your New Favorite Chocolate Fix (That Loves You Back)
Hey there, friend! Come on in, grab an apron, and let’s talk about that 3 PM chocolate craving that hits like a freight train. You know the one. Or maybe it’s the frantic morning scramble, where you need something real to eat but your hand keeps drifting toward that tempting pastry case. What if I told you we could have our chocolate cake and eat it too—literally?
I’m talking about a warm, fudgy, melt-in-your-mouth chocolate muffin that tastes like you’re indulging in a decadent brownie, but secretly packs a powerful punch of protein and real-food fuel. These aren’t your dry, chalky “health” muffins. Oh no. These Healthy Chocolate Protein Muffins are moist, deeply chocolatey, and sweetened naturally with ripe bananas and a touch of maple syrup. They come together in one bowl in about 10 minutes, no fancy skills required. They’re flourless, easily gluten-free and dairy-free, and they disappear from my kitchen counter at lightning speed. Whether you need a breakfast you can actually look forward to, a lunchbox superstar, or a post-workout treat that feels like a hug, these little guys are about to become your kitchen’s MVP. Ready to bake something that makes you feel absolutely amazing? Let’s do this.
The Muffin That Started It All: A Tale of Hungry Hikers & Happy Accidents
This recipe was born out of sheer, hangry necessity. Picture this: my husband and I, ambitious but slightly overzealous, planned a big weekend hike. I, being the perpetual food optimist, declared, “I’ll whip up a healthy snack for the trail!” The night before, I stared into the pantry. We were out of flour. We were out of oats. We had three bananas singing their final, spotty chorus on the counter, a giant tub of PB2, and my eternal stash of cocoa powder.
In a classic “kitchen sink” moment, I mashed, mixed, and hoped for the best. The batter looked suspiciously thin, so I poured it into a mini muffin tin, thinking, “Well, at least they’ll be bite-sized failures.” But when that chocolatey scent started wafting from the oven, I knew we had something special. They puffed up beautifully, with crackly tops and a fudgy center. We packed them in our backpacks the next day, and halfway up the mountain, biting into a cold, dense, intensely chocolatey muffin was a revelation. It was energy. It was joy. It was a moment of pure, chocolate-fueled triumph. That happy accident is now a weekly ritual, and I’m so thrilled to share the official, perfected version with you.
Gathering Your (Simple, Powerful) Ingredients
Here’s the beautiful part: you likely have most of this in your kitchen right now. Each ingredient plays a specific role in creating magic, so let’s break it down.
- 3 ripe bananas, mashed – This is our natural sweetener and moisture MVP. The spottier, the better! They should be soft and super fragrant. Chef’s Insight: No ripe bananas? You can “ripen” them quickly by baking whole, unpeeled bananas at 300°F for 15-20 minutes until blackened. Let cool, then scoop out the soft insides.
- 1 cup PB2 (powdered peanut butter) – The protein powerhouse! PB2 gives us that delicious peanut butter flavor and a major protein boost without all the fat of regular nut butter, which helps keep the structure light. Substitution Tip: You can use any brand of peanut butter powder or even powdered almond butter. In a pinch, you could use ½ cup of regular drippy nut butter, but your muffins will be denser and you may need to add a minute or two to the bake time.
- 1 large egg – Our binder. It brings everything together and adds to the lovely structure. Substitution Tip: For a vegan version, a “flax egg” (1 tbsp ground flax + 2.5 tbsp water, set for 5 mins) works perfectly here.
- Splash of pure vanilla extract – The flavor enhancer. It deepens all the chocolate and banana notes. Don’t skip it!
- 1/4 cup sweetener of choice – I love the caramel notes of maple syrup or honey here. But light brown sugar works beautifully too. This adds just enough extra sweetness to make them feel like a true treat. Chef’s Insight: If your bananas are extremely ripe and sweet, you can reduce this to 2 tablespoons.
- 1/4 cup unsweetened cocoa powder – Use the best quality you have! This is where the deep, rich chocolate flavor comes from. Dutch-processed will give a darker, milder flavor, while natural cocoa powder has a more intense, fruity bite. Both are fantastic.
- 1 teaspoon baking soda – Our leavening agent. It reacts with the acidic bananas to give these muffins their perfect lift and tender crumb.
- Splash of milk (any kind) – This is our “secret” adjustable ingredient! The batter should be thick but spoonable, like a brownie batter. Start with a tablespoon or two of any milk—dairy, almond, oat, you name it—and add more only if your batter seems too thick. It depends on the size of your bananas and egg.
- A hearty handful of chocolate chips – Because every bite deserves a melty pocket of joy. I like mini chips for distribution, but regular work great. Use dairy-free if needed. Chef’s Hack: Toss your chocolate chips in a tiny pinch of the PB2 or cocoa powder before folding them in—this helps prevent them from sinking to the bottom during baking!
Let’s Make Some Magic: The Foolproof, One-Bowl Method
Preheat your oven to 350°F (175°C). Grease a 24-cup mini muffin tin really well with non-stick spray or line with mini muffin papers. I’m team spray for these because you get those lovely crispy edges, but papers make for easy cleanup and portability. Your call!
Step 1: The Banana Mash. In a large mixing bowl, peel and add your three ripe bananas. Grab a fork and mash them until you have a relatively smooth, lump-free puree. A few small lumps are totally fine—they’ll melt into sweet pockets. This is your base.
Step 2: The Wet Team Assembly. Crack in the egg, add your splash of vanilla, your 1/4 cup of sweetener, and that initial splash of milk (start with about 2 tablespoons). Now, take a whisk or a sturdy spoon and mix it all together until it’s completely combined and looks a little frothy. You’re building the foundation of your batter here.
Step 3: The Dry Team Dive. Here’s where it gets exciting. Sprinkle the PB2, cocoa powder, and baking soda right over the wet ingredients. I like to give the baking soda a quick stir with the PB2 to distribute it evenly before I start mixing everything. Now, stir, stir, stir! Go from the bottom of the bowl upwards until you have a thick, glossy, uniformly brown batter. It will be thick, but it should be scoopable. If it feels like cement, add another tablespoon of milk. Chef’s Tip: Don’t overmix once the dry ingredients are incorporated! We want tender muffins, not tough ones.
Step 4: The Chocolate Chip Fold. Add your handful of chocolate chips (tossed in that pinch of powder if you’re fancy). Use a gentle folding motion with a spatula to distribute them evenly throughout the batter. This ensures every muffin gets its fair share of chocolatey treasure.
Step 5: The Fill & Bake. Using a small cookie scoop or two spoons, divide the batter evenly among the prepared mini muffin cups. Fill them almost to the top! These muffins rise beautifully but don’t tend to overflow. Pop the tin into your preheated oven and set your timer for 10 minutes.
Step 6: The Patience Test. At 10 minutes, rotate the pan for even baking. Your total bake time will be 18-22 minutes. The key sign of doneness? The tops will look set and will spring back lightly when touched. A toothpick inserted into the center should come out with a few moist crumbs attached, but not wet batter. Because of the bananas and chocolate chips, it might never come out totally clean, and that’s perfect—it means they’re fudgy!
Step 7: The (Brief) Cool Down. Let the muffins cool in the pan for 5 minutes. This is crucial—they need to set. Then, run a small knife around any stubborn edges and gently transfer them to a wire rack. I won’t judge you if you eat one warm, right now, with the chocolate chips still gooey. It’s a chef’s privilege.
How to Serve These Little Fudgy Wonders
These muffins are fantastic any which way! Warm from the oven, they’re like individual molten lava cakes. At room temperature, their fudgy texture truly shines, making them perfect for packing. For a next-level treat, I love splitting one and topping it with a dollop of Greek yogurt or a thin smear of almond butter. They’re incredible crumbled over a bowl of vanilla ice cream for a healthy-ish sundae, or simply enjoyed with a hot cup of coffee as the ultimate afternoon pick-me-up. Stack them on a cute plate for brunch, or toss them in a container for a post-gym snack.
Mix It Up! Your Creative Playground
The beauty of this base recipe is its flexibility. Here are some of my favorite twists:
- Double Chocolate Peanut Butter: Use peanut butter chips instead of chocolate chips for an insane PB-choc flavor bomb.
- Mocha Buzz: Add 1-2 teaspoons of instant espresso powder to the dry ingredients. It intensifies the chocolate flavor beautifully.
- Berry Bliss: Fold in 1/4 cup of frozen raspberries or chopped strawberries instead of chocolate chips for a chocolate-berry vibe.
- Trail Mix Crunch: Fold in 2 tablespoons each of chopped nuts and seeds (like walnuts and pepitas) along with the chocolate chips.
- “Cookie Dough” Bites: Omit the cocoa powder for a blonde version. Use vanilla protein powder if you have it, or just an extra 1/4 cup of PB2. Fold in mini chocolate chips. They taste like edible cookie dough!
Olivia’s Kitchen Notes & Stories
Over the hundreds of batches I’ve made (not even kidding), this recipe has evolved. I started by trying to add oats, which made them gummy. I tried skipping the extra sweetener, which only worked if the bananas were perfect. This version? It’s the goldilocks “just right.” My dog, Biscuit, has learned to appear magically in the kitchen the second the cocoa tin opens, hoping for a stray chip. And my husband has a sixth sense for when they’re cooling, always appearing with a plate and hopeful smile. That’s the real goal of any recipe, isn’t it? To create something that becomes a little part of your story, a reliable joy you can make with your eyes closed. These muffins are that for me, and I hope they become that for you, too.
Your Questions, Answered
Q: Can I make these as regular-sized muffins?
A: Absolutely! For standard muffins, fill the liners about 2/3 full. The bake time will increase to about 22-28 minutes. Use the same visual and toothpick tests for doneness.
Q: My muffins turned out a bit wet/gummy in the middle. What happened?
A: This usually means they needed a minute or two more in the oven, or your bananas were extra large, adding more moisture. Next time, try reducing the milk by a tablespoon or baking for 2-3 minutes longer. Also, make sure your baking soda is fresh!
Q: Can I freeze these?
A: They freeze like a dream! Let them cool completely, then store in a single layer in a freezer bag for up to 3 months. Thaw at room temperature or pop one frozen in the microwave for 20 seconds for an instant warm treat.
Q: I don’t have PB2. Can I use regular peanut butter?
A: You can, but it changes the texture. Use ½ cup of regular, drippy natural peanut butter. The batter will be heavier and the muffins denser and more brownie-like (still delicious!). You may not need the splash of milk. Bake time might be slightly longer.
Protein Chocolate Chip Muffins : Fudgy, Nourishing & Naturally Sweetened
Description
Healthy Chocolate Protein Muffins
Fudgy, chocolatey, protein-packed, and naturally sweetened with bananas
Perfect for breakfast, snacks, or a post-workout treat—these muffins are moist, indulgent, and made in one bowl.
Ingredients
Base
-
3 ripe bananas, mashed
-
1 cup PB2 (powdered peanut butter)
-
1 large egg
-
Splash pure vanilla extract
-
1/4 cup sweetener of choice (maple syrup, honey, or light brown sugar)
-
1/4 cup unsweetened cocoa powder
-
1 tsp baking soda
-
1–2 tbsp milk (any kind, optional to adjust batter consistency)
-
1 handful chocolate chips (dairy-free if needed)
Instructions
-
Preheat & Prep
Preheat oven to 350°F (175°C). Grease a 24-cup mini muffin tin or line with papers. -
Mash Bananas
In a large bowl, mash bananas until smooth. Small lumps are fine. -
Mix Wet Ingredients
Add egg, vanilla, sweetener, and initial splash of milk. Whisk until combined and slightly frothy. -
Add Dry Ingredients
Sprinkle in PB2, cocoa powder, and baking soda. Stir gently from bottom up until thick, glossy, and uniform. Add a tiny bit of milk if batter feels too stiff. -
Fold in Chocolate Chips
Toss chips with a pinch of cocoa or PB2 to prevent sinking, then fold into the batter gently. -
Fill Muffin Tin & Bake
Spoon batter into mini muffin cups, almost to the top. Bake 18–22 min for minis, 22–28 min for standard muffins. Rotate pan halfway through. Muffins are done when tops spring back lightly and toothpick inserted comes out with a few moist crumbs. -
Cool & Enjoy
Cool 5 min in the pan, then transfer to a wire rack. Enjoy warm or at room temperature.
Notes
-
Double Chocolate Peanut Butter: Use peanut butter chips instead of chocolate chips.
-
Mocha Buzz: Add 1–2 tsp instant espresso powder to dry ingredients.
-
Berry Bliss: Fold in 1/4 cup frozen raspberries or chopped strawberries.
-
Trail Mix Crunch: Add 2 tbsp chopped nuts and seeds with chocolate chips.
-
Cookie Dough Bites: Omit cocoa, add vanilla protein powder or extra PB2, fold in mini chocolate chips.
Nutritional Information*
*This is an estimate for 1 mini muffin (recipe makes ~24), calculated using maple syrup, unsweetened almond milk, and assuming 1 tbsp of mini chocolate chips divided across the batch. Values will vary based on your specific ingredients and brands.
- Calories: ~90
- Protein: ~5g
- Carbohydrates: ~11g
- Dietary Fiber: ~2g
- Sugars: ~6g (primarily from banana & maple syrup)
- Fat: ~3g
Dietary Notes: Naturally gluten-free and grain-free. Easily made dairy-free (use non-dairy milk and chocolate chips) and vegan (use a flax egg and maple syrup).
Final Thoughts
These Healthy Chocolate Protein Muffins are more than just a recipe—they’re a permission slip to enjoy chocolate without compromise. They prove that what fuels your body can also delight your soul, and that the line between “healthy” and “indulgent” doesn’t have to exist. In one simple bowl, you create portable joy: little fudgy miracles that power your day, satisfy your cravings, and remind you that eating well is an act of kindness to yourself.
Whether you’re packing them for a hike, sneaking one with your morning coffee, or sharing them with someone you love, these muffins carry the spirit of that happy kitchen accident—a reminder that some of the best things in life come from simplicity, a little creativity, and a lot of chocolate.
So here’s to snacks that love you back. Here’s to less guilt and more goodness. And here’s to that moment of pure bliss when you bite into a muffin that’s both your chocolate fix and your protein boost.
Now, go preheat that oven. Your new favorite treat is waiting.
Happy baking,
Olivia
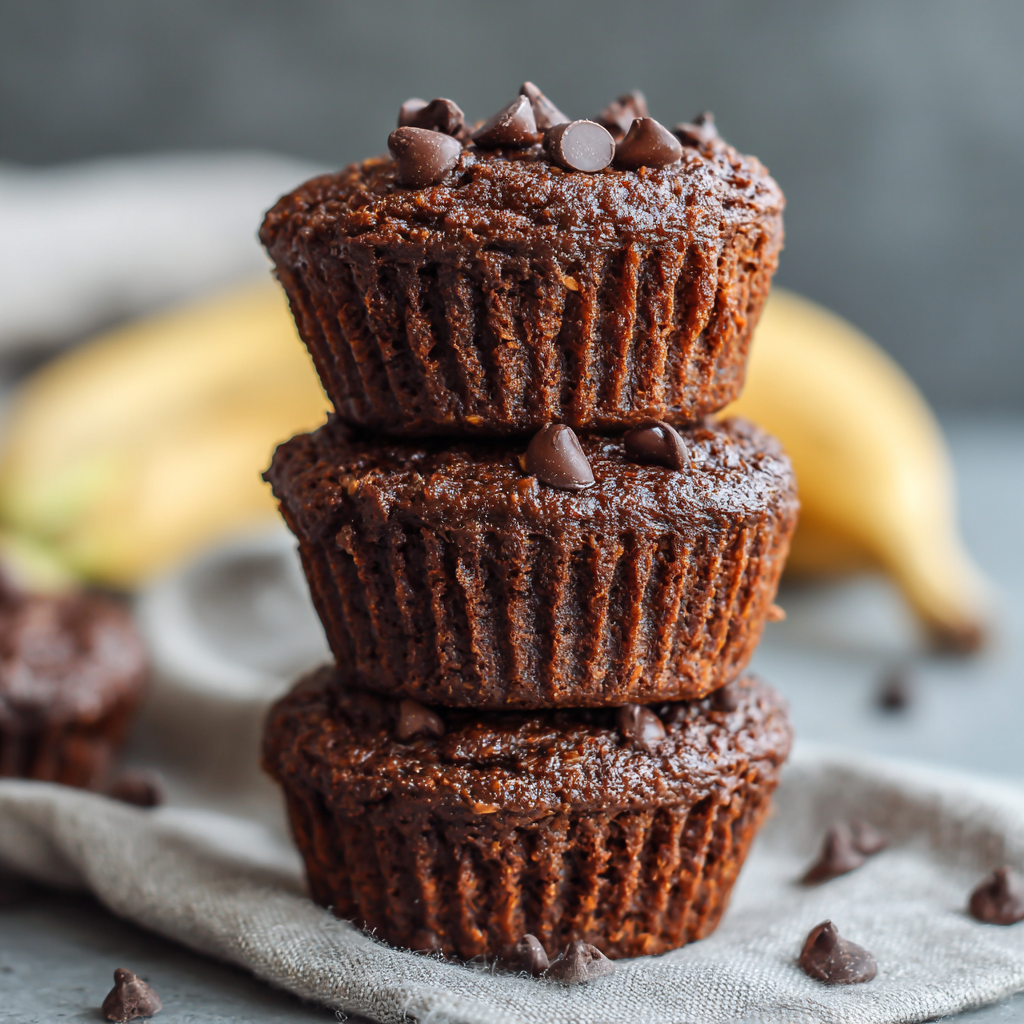
Healthy Chocolate Breakfast Muffins (Low-Cal, Guilt-Free Treat!)
Waking Up to a Chocolate Hug: Your New Morning Best Friend
Good morning, friend! Let’s talk about that first magical, sleepy moment when your brain switches on for the day. You know the one. The sun is peeking through the blinds, the coffee maker is gurgling its promise, and a little voice in your head whispers… “What if… chocolate?” For so long, we’ve been told that a chocolatey breakfast is a forbidden fantasy, a weekend splurge, a dessert in disguise. But what if I told you that the dream is not only possible but can be a genuinely nourishing, energizing way to start your day? That’s the whole, beautiful reason these Healthy Chocolate Breakfast Muffins exist.
I wanted to create something that felt like a decadent treat but functioned like a powerhouse breakfast. Something you could whip up in minutes with a blender and a hopeful heart. These muffins are that. They’re deeply fudgy, satisfyingly rich, and have this incredible moist texture that makes you do a double-take. “Wait, there’s no flour? No butter? No refined sugar?” Nope! Their magic comes from simple, whole-food ingredients: humble oats, a ripe banana, and good cocoa powder. They’re gluten-free, dairy-free, and each one clocks in under 200 calories. They are the ultimate kitchen sleight of hand – a total crowd-pleaser that happens to be a secret health nut. So, let’s ditch the guilt and grab the blender. Your new favorite morning ritual is just a bake away.
The Recipe That Started with a Sad, Speckled Banana
Every great recipe has a “Eureka!” moment, and for these muffins, it was born from two universal truths: 1) I am incapable of finishing a bunch of bananas before one goes rogue, and 2) my pre-coffee self is not a rational decision-maker. One Tuesday morning, I was staring down a particularly sad, brown banana on the counter. My usual move—banana bread—felt like a project. I craved chocolate, immediately. In a haze of hunger and determination, I just started throwing things into the blender: the banana, the oats from the canister, a scoop of cocoa powder, a splash of almond milk from my coffee stash. I figured I’d make some kind of sad, single-serve mug cake.
But when I poured that dark, silky batter into a muffin tin (because it seemed more official), and the most incredible aroma started to fill the kitchen, I knew I was onto something. My husband wandered in, sniffing the air. “Are you making brownies for breakfast?” he asked, incredulous. When the timer dinged and we each took a bite of a warm, tender muffin, we just looked at each other. It was that perfect balance of indulgence and wholesomeness. That sad banana became our happy little secret. Now, I almost hope a banana gets a little extra speckled on my counter, because it’s just an excuse to make these again.
Your Simple, Pantry-Friendly Lineup
Here’s the beautiful part: you probably have most of this in your kitchen right now. No special trip to the store required! This recipe makes 3 generous muffins—perfect for a small household or for testing the waters. You can absolutely double or triple it for meal prep.
- 90g (about 1 cup) Rolled Oats (Old-Fashioned): This is our “flour”! Oats give the muffins structure, a lovely heartiness, and keep you full for hours. Chef’s Insight: Make sure you’re using gluten-free oats if you need them to be GF. Quick oats will work in a pinch, but rolled oats give the best texture.
- 30g (about 1/3 cup) Unsweetened Cocoa Powder: The star of the show! Use the best quality you have for that deep, rich chocolate flavor. Substitution Tip: If you only have cacao powder, that works perfectly too—it’s just a bit more bitter and robust.
- 1 tsp Baking Powder: Our little lift agent. It’s what gives the muffins their perfect dome and soft crumb. Make sure yours is fresh!
- 30g Sweetener of Choice: This is where you customize. I love using a granulated monk fruit-erythritol blend because it measures like sugar and has zero calories. Substitution Tips: You can use coconut sugar, regular sugar, or more ripe banana (though this will change the texture slightly). The amount is perfect for a not-too-sweet, breakfast-appropriate muffin.
- A Generous Pinch of Salt: Never, ever skip this! Salt makes the chocolate flavor pop and balances all the sweetness. It’s the difference between “yum” and “WOW.”
- 1 cup Water or Unsweetened Almond Milk: The liquid base. Water keeps it super simple, but almond milk (or any milk you like) adds a tiny bit of extra creaminess and flavor.
- 1 Large, Very Ripe Banana: The other secret weapon! This provides natural sweetness, incredible moisture, and binds everything together. The spottier, the better. Chef’s Insight: No ripe banana? You can use 1/2 cup of unsweetened applesauce in a pinch, but the banana flavor is part of the charm.
- Optional, But Highly Encouraged: A Handful of Chocolate Chips! I love throwing a few on top before baking—some sugar-free dark chocolate chips are my go-to. They melt into little pools of joy on the muffin tops.
Let’s Make Some Magic: Blender to Oven in 5 Minutes Flat
This process is so satisfyingly simple. We’re using the “dump and blend” method, which means minimal cleanup and maximal efficiency. Perfect for those “I need chocolate NOW” mornings.
- Preheat & Prep: First, crank your oven to 350°F (175°C). This gives it plenty of time to come to the perfect temperature while you make the batter. Line 3 cups of a muffin tin with liners, or give them a very light spritz of oil. I’m a liner person—it makes cleanup a dream. Little Chef Hack: If you only have a 6- or 12-cup tin, just fill every other cup with batter. This allows for better heat circulation and more even baking.
- The Grand Blend: Here’s the fun part. Add ALL of your ingredients—the oats, cocoa powder, baking powder, sweetener, salt, liquid, and that ripe banana—straight into your blender. Yes, all at once! Secure the lid tightly. Start on low, then ramp up to high, and blend for a solid 45-60 seconds. You want it completely smooth, with no oat bits remaining. It should look like a thick, gorgeous chocolate milkshake. Chef’s Commentary: Don’t be tempted to skip the blending time. This step is crucial for breaking down the oats completely, which gives the muffins their incredible, non-grainy texture.
- Pour & Adorn: Now, pour that luscious batter evenly into your three prepared muffin cups. They should be about 3/4 full. This is the time to sprinkle on those optional chocolate chips—press a few gently into the top of each one. They’ll melt and create little pockets of heaven.
- Bake to Perfection: Slide the tin into the center of your preheated oven. Set your timer for 18 minutes. At the 18-minute mark, do the classic toothpick test: stick one into the center of a muffin. We want it to come out with a few moist crumbs clinging to it, but not wet batter. If it’s too wet, give them another 2-4 minutes. Watch them closely! Ovens vary, and overbaking is the enemy of moistness. Little Chef Hack: The muffins will also look set on top and will have pulled away slightly from the liners when they’re done.
- The Most Important Step: COOL! I know, the aroma is torture. But patience, young Padawan. Let the muffins cool in the tin for at least 10 minutes. This allows them to finish setting up. If you try to peel a liner off too soon, they might stick. After 10 minutes, transfer them to a wire rack to cool completely… or, if you’re like me, eat one immediately while gloriously warm. The choice is yours, and both are excellent.
How to Serve Your Chocolate Masterpiece
Honestly, one of these muffins, still slightly warm, with a big mug of coffee is a perfect breakfast. But let’s get fancy! For a truly Instagram-worthy (and delicious) plate, slice a muffin in half and toast it lightly. Serve it with a dollop of Greek yogurt, a drizzle of almond butter, and a handful of fresh berries. The contrast of warm chocolate, cool yogurt, and tart berries is phenomenal. They’re also fantastic crumbled over a bowl of oatmeal (chocolate-ception!) or packed as the ultimate afternoon snack to beat the 3 p.m. slump.
Make It Your Own: 5 Fun Twists
The basic recipe is a canvas for your creativity! Here are a few of my favorite ways to switch it up:
- Protein Power-Up: Add a scoop of your favorite chocolate or vanilla protein powder. You may need to add an extra tablespoon or two of liquid to keep the batter the right consistency.
- Peanut Butter Cup: Swirl 2 tablespoons of natural peanut butter into the blended batter for a marbled effect, or drop a small spoonful into the center of each muffin cup before baking.
- Double Chocolate Chunk: Fold in a handful of chopped sugar-free dark chocolate or cacao nibs into the batter before pouring for intense, melty pockets.
- Mocha Buzz: Replace 2 tablespoons of the liquid with cold brewed coffee or a shot of espresso for a sophisticated mocha flavor.
- Berry Bliss: Gently fold a handful of frozen raspberries or chopped strawberries into the batter. The berry juice creates little bursts of tangy sweetness.
Olivia’s Kitchen Notes & Stories
This recipe has evolved so much from that first banana-fueled experiment! I’ve learned that blending the batter for a full minute is non-negotiable—it’s the key to the fudgy texture. I’ve also played with adding a splash of vanilla extract or a pinch of cinnamon, which are delightful touches. One time, I accidentally used baking soda instead of powder. Let’s just say the resulting volcanic, bitter muffins were a hilarious (and inedible) lesson in reading labels! They’ve become my most-requested item for potlucks and new mom care packages. There’s something about handing someone a chocolate muffin and saying, “Don’t worry, it’s healthy,” that never gets old. It feels like sharing a happy little secret.
Your Questions, Answered!
Q: My muffins came out a bit dense/wet in the middle. What happened?
A: This usually means they needed a touch more baking time. Ovens can run cool, so trust the toothpick test more than the timer. Also, ensure your baking powder is fresh! If it’s expired, it won’t provide the necessary lift. Finally, make sure you blended the batter until completely smooth.
Q: Can I make these vegan?
A: They already are! Just make sure to use a plant-based milk (or water) and check that your chocolate chips are vegan/dairy-free if using.
Q: How do I store these, and can I freeze them?
A: Absolutely! They keep in an airtight container at room temperature for 2 days, or in the fridge for up to 5 days. For longer storage, wrap cooled muffins individually in plastic wrap and freeze in a zip-top bag for up to 3 months. Thaw at room temperature or pop in the microwave for 20 seconds.
Q: Are they sweet enough for my kids (or my serious sweet tooth)?
A: The recipe is designed to be breakfast-sweet, not dessert-sweet. If you’re serving them to kids or want a sweeter treat, feel free to increase the sweetener to 40g, or simply add those chocolate chips! The banana also provides natural sweetness, so the riper it is, the sweeter the muffin.
Healthy Chocolate Breakfast Muffins (Low-Cal, Guilt-Free Treat!)
Description
Hey there, friend! Olivia here. These muffins were made for that moment when a chocolate craving hits hard—but you still want something that fuels you. Warm, fudgy, brownie-like, and naturally sweetened, these Healthy Chocolate Protein Muffins feel indulgent while secretly packing protein and real-food goodness.
Ingredients
-
3 ripe bananas, mashed
-
1 cup PB2 or powdered peanut butter
-
1 large egg
-
¼ cup maple syrup, honey, or brown sugar
-
¼ cup unsweetened cocoa powder
-
1 teaspoon baking soda
-
Splash of vanilla extract
-
1–3 tablespoons milk of choice (as needed)
- Handful of chocolate chips (mini preferred)
Instructions
1. Preheat & Prep
Preheat oven to 350°F (175°C).
Grease or line a 24-cup mini muffin tin.
2. Mash the Bananas
In a large bowl, mash bananas until mostly smooth.
3. Mix Wet Ingredients
Add egg, sweetener, vanilla, and 2 tablespoons milk.
Whisk until fully combined.
4. Add Dry Ingredients
Sprinkle PB2, cocoa powder, and baking soda over the batter.
Stir just until smooth and glossy.
If batter is too thick, add milk 1 tablespoon at a time until spoonable.
5. Fold in Chocolate Chips
Gently fold in chocolate chips.
6. Bake
Fill muffin cups nearly to the top.
Bake 18–22 minutes, rotating the pan halfway.
Muffins are done when:
-
Tops are set and spring back lightly
-
A toothpick comes out with moist crumbs, not wet batter
7. Cool Briefly & Enjoy
Cool in pan for 5 minutes, then transfer to a rack.
Enjoy warm (melty chocolate!) or at room temperature.
Notes
-
Use very ripe bananas for best sweetness and moisture
-
Don’t overmix once dry ingredients are added
-
Toss chocolate chips in a pinch of cocoa powder to prevent sinking
-
For standard muffins: bake 22–28 minutes
Nutritional Information*
Prep Time: 5 mins | Cook Time: 20 mins | Yields: 3 muffins
*Approximate values per muffin (calculated without optional chocolate chips, using water and a zero-calorie sweetener):
- Calories: 195
- Carbohydrates: 29g
- Fat: 6g
- Protein: 6g
- Fiber: 6g
These muffins are a great source of fiber and provide a balanced mix of carbs, protein, and healthy fats to start your day right.
Final Thoughts
Remember that sad, speckled banana on the counter? It wasn’t a problem—it was an invitation. An invitation to play, to experiment, and to give yourself permission to enjoy chocolate for breakfast without a side of guilt. That’s the spirit of these muffins: a little bit of magic made from simple, real ingredients.
These muffins are more than just a recipe. They’re a gentle rebellion against the idea that healthy has to be boring or that indulgence has to come with regret. They’re proof that you can have it both ways: deep, fudgy chocolate satisfaction and a nourishing start to your day.
So the next time you see a ripe banana, don’t just see banana bread. See possibility. See a quick blender batter, a warm kitchen filled with the scent of cocoa, and a morning treat that feels like a hug in muffin form. Life is too short for bland breakfasts and too precious to deny yourself simple joys.
Here’s to starting your day with something that makes you smile. To easy baking, happy accidents, and the beautiful truth that sometimes, the best things really are that simple.
Wishing you many cozy, chocolate-filled mornings,
With love and a freshly baked batch,
Olivia
Chocolate Peanut Butter Protein Fluff : Thick, Creamy, and Packed with 11g Protein
The Fluff That Changed Everything: Your New Favorite High-Protein Treat
Hey there, friend! Come on in, pull up a stool. Can you smell that? It’s the scent of possibility—and maybe a little bit of chocolate. If you’ve ever found yourself staring into the fridge, caught in that eternal tug-of-war between “I want something delicious” and “I should probably eat something good for me,” then I have a feeling we’re about to become very close. I’m Olivia, and I live for those kitchen moments where a few simple ingredients magically become something greater than the sum of their parts. Today, I’m sharing one of my all-time favorite little miracles: Chocolate Peanut Butter Protein Fluff.
Let’s be real for a second. Sometimes, a girl just needs a giant bowl of chocolate mousse. But the sugar crash and that heavy, “why did I do that?” feeling? Not so much. That’s where this magical fluff swoops in to save the day. Imagine the creamiest, dreamiest frozen pudding you’ve ever had. Now imagine it’s packed with protein, low in carbs, and takes about five minutes to make. That’s not a daydream—that’s this recipe. It’s thick, it’s spoonable, it’s deeply chocolatey with a hint of peanut butter goodness, and it legitimately fuels your body. It’s the ultimate hack for post-workout cravings, a 3 PM slump, or when you need a dessert that feels decadent but doesn’t derail your day. So, grab your hand mixer (or a determined whisk and some elbow grease!), and let’s make a cloud. A delicious, protein-packed chocolate peanut butter cloud.
More Than Just a Snack: A Pudding Epiphany
This recipe always takes me back to my grandma’s kitchen. She wasn’t a “protein powder” kind of lady, but she was the queen of from-scratch chocolate pudding. She’d stand at the stove, patiently whisking for what felt like forever, and the reward was this silky, rich pot of joy. I’d hover, spoon at the ready, waiting for that first warm taste. It was pure comfort.
Years later, when I started focusing more on nutrition and protein, I missed that simple, satisfying texture. One desperate, chocolate-craving afternoon, I started playing with my Greek yogurt and protein powder, whipping it just to see what would happen. When it transformed into this voluminous, mousse-like fluff right before my eyes, I actually laughed out loud. It was my grandma’s pudding, reimagined for my grown-up life—a little boost of power hiding in a familiar, cozy package. That’s the beauty of the kitchen: we can honor the memories while creating something new that serves us right now. This fluff is my happy mash-up of nostalgia and nourishment.
Gathering Your Cloud-Making Ingredients
Here’s the beautiful part: you only need a handful of simple things. The magic is in the method! Here’s what you’ll need and why each one matters:
- 1/4 cup Plain Greek Yogurt: This is our superstar base. I use full-fat for ultimate creaminess and satiety, but any fat percentage works. Chef’s Insight: The thickness and tang of Greek yogurt are non-negotiable for structure. If you’re dairy-free, a very thick, plain coconut yogurt can work in a pinch, but the texture will be softer.
- 1/2 scoop Chocolate Protein Powder: The flavor and protein anchor! Pro Tip: A casein-blend or casein-dominant protein powder is the SECRET WEAPON for ultra-thick fluff. It’s designed to gel and thicken more than whey. If you only have whey, it’ll still work, but you may need less milk. Choose a powder you enjoy the taste of on its own.
- 1 teaspoon Peanut Butter Powder (like PB2): This gives us that iconic peanut butter flavor without adding a ton of fat or making the mixture oily. It blends in seamlessly! Substitution: You can skip it for a pure chocolate fluff, or use another nut butter powder.
- A Splash of Unsweetened Almond Milk: We’re talking 1-2 teaspoons, maybe a tablespoon. This is our texture adjuster. Start small! You can always add more, but you can’t take it out. Chef’s Insight: Any milk or even water works here. The liquid helps the powder incorporate and kickstarts the whipping process.
- Pinch of Sea Salt (Optional but Recommended): Just a tiny pinch elevates both the chocolate and peanut butter flavors from flat to fabulous. Trust me on this.
How to Whip Up Magic: Your Step-by-Step Guide
Ready to see the transformation? It’s so simple it feels like a party trick. Let’s do this.
Step 1: The Chill (Optional but Game-Changing). For the thickest, most stable fluff, pop your mixing bowl and your beaters (or whisk) in the freezer for 10-15 minutes before you start. A cold bowl helps the ingredients firm up as you whip. It’s a little hack that makes a big difference, especially on a warm day.
Step 2: The Dump & Mix. Take your chilled bowl and add everything: the Greek yogurt, chocolate protein powder, peanut butter powder, and that tiny pinch of salt. Pour in just one teaspoon of almond milk to start. Using your hand mixer on medium speed, start to combine. It will look dry and crumbly at first—that’s perfect!
Step 3: The Whipping Transformation. Now, here’s where the magic happens. Crank that mixer up to medium-high and whip! Stop to scrape down the sides after 30 seconds. You’ll see it start to come together. If it seems too dry or isn’t coming off the sides of the bowl, add another ½ teaspoon of almond milk. Then, whip, whip, whip! Total whipping time is usually 1.5 to 2.5 minutes. You’re looking for a dramatic change: it will become pale in color, very thick, and have stiff peaks that hold when you lift the beaters. It literally doubles in volume. Watch it happen – it’s the best part!
Step 4: The Fluff Fix (If Needed). Is it not thickening? Two likely culprits: 1) Your yogurt was too runny, or 2) You added too much milk. No panic! Just add a tiny bit more protein powder (a teaspoon at a time) and whip again. Is it too thick? Add a few drops of milk and whip for 10 more seconds.
Step 5: The Chill & Serve. For a mousse-like, almost ice-cream texture, transfer your glorious fluff to a serving bowl and freeze it for 10 minutes. This firms it up beautifully. If you can’t wait, eat it straight away—it’ll be like a creamy, airy pudding. I love to top mine with a tiny drizzle of real peanut butter or a few cacao nibs for crunch.
How to Serve Your Masterpiece
Presentation is half the fun! Scoop your fluff into a cute little bowl or a fancy glass. I love topping it with a mini dollop of peanut butter, a few dark chocolate chips, a sprinkle of sea salt, or some fresh berries for a hit of tartness. For a next-level “dessert hack,” crumble a few squares of a high-fiber brown rice cake on top for an amazing crunchy texture contrast. Eat it with a small spoon to savor every single cloud-like bite.
Make It Your Own: Flavor Twists & Swaps
The basic formula is your playground! Here are a few of my favorite spins:
- Cookies & Cream: Use vanilla protein powder and mix in 1 crushed-up oreo (or a healthy alternative) after whipping.
- Berry Cheesecake: Use vanilla protein powder, and after whipping, fold in 2 tablespoons of blended cottage cheese (for extra protein) and a handful of chopped strawberries.
- Mocha Buzz: Add 1/2 teaspoon of instant espresso powder to the original chocolate mix. Heaven for coffee lovers.
- Vegan Version: Swap Greek yogurt for extra-thick, plain coconut yogurt and use a vegan chocolate protein powder. The texture will be softer but still delicious.
- Nut-Free: Simply omit the peanut butter powder or use a sunflower seed butter powder.
Olivia’s Chef Notes & Kitchen Confessions
I’ve made this fluff probably a hundred times, and it has evolved from a weird experiment to a weekly staple. My biggest lesson? Patience with the whip. Don’t give up after 45 seconds if it’s still grainy. Keep going! The transformation happens suddenly, and it’s so satisfying. Also, I once accidentally used sweetened yogurt and learned it makes the fluff WAY too sweet. Stick to plain!
This recipe is also my go-to for impressing friends who are skeptical about “healthy desserts.” I serve it in little espresso cups with a dollop of coconut whip, and without fail, someone says, “Wait, this is protein powder? No way.” That’s my favorite kitchen win. Remember, cooking is about joy and feeling good. This fluff is a big, delicious spoonful of both.
Your Questions, Answered!
Q: My fluff is runny! What did I do wrong?
A: The most common fix is whipping longer! It can take a full 2-3 minutes. If you’ve whipped and whipped and it’s still thin, your yogurt might have been too watery or you added too much milk. Thicken it by whipping in an extra teaspoon of protein powder. Next time, start with just 1 tsp of milk.
Q: Can I make this without a hand mixer?
A: You can, but be ready for an arm workout! A sturdy whisk and some serious, fast whisking in a cold bowl can get you there. A small food processor or blender might also work, but be careful not to over-process it into liquid.
Q: What’s the best protein powder to use?
A: For the THICKEST fluff, a casein or casein-blend powder is king. It’s formulated to thicken and gel. Many whey proteins work fine, but results vary by brand. If you’re a fluff fanatic, it’s worth finding a casein-based one.
Q: How long does it keep in the fridge?
A> It’s best eaten immediately or within a few hours. It can be stored overnight, but it will lose some volume and weep a little liquid. Give it a quick stir before eating. I don’t recommend freezing it for long storage, as the texture changes.
Chocolate Peanut Butter Protein Fluff : Thick, Creamy, and Packed with 11g Protein
Description
Hey there, friend! Olivia here. This recipe was born for those moments when you want something rich, chocolatey, and comforting—but you also want it to love you back. This Chocolate Peanut Butter Protein Fluff is thick, airy, mousse-like, and secretly packed with protein. It tastes indulgent, feels cozy, and takes about five minutes to make.
Ingredients
-
¼ cup plain Greek yogurt (full-fat recommended for creaminess)
-
½ scoop chocolate protein powder
-
1 teaspoon peanut butter powder (PB2 or similar)
-
1–2 teaspoons unsweetened almond milk (as needed)
- Pinch of sea salt (optional but highly recommended)
Instructions
1. Chill Your Tools (Optional but Powerful)
Place your mixing bowl and beaters (or whisk) in the freezer for 10–15 minutes.
A cold bowl helps the fluff whip thicker and faster.
2. Add Everything to the Bowl
Add yogurt, protein powder, peanut butter powder, salt, and 1 teaspoon of almond milk to the bowl.
3. Whip the Magic
Using a hand mixer on medium-high speed, whip for 1½–2½ minutes.
Stop once or twice to scrape down the sides.
You’ll see a transformation:
-
Color lightens
-
Texture thickens
-
Volume doubles
-
Stiff, fluffy peaks form
If it looks too dry, add ½ teaspoon milk at a time and continue whipping.
4. Adjust if Needed
-
Too thin? Whip longer or add 1 teaspoon protein powder
-
Too thick? Add a few drops of milk and whip briefly
5. Chill & Serve
For a mousse-like, almost ice-cream texture, freeze for 10 minutes before serving.
Or grab a spoon and enjoy immediately!
Notes
-
Casein or casein-blend protein powder = thickest result
-
Start with less liquid than you think you need
-
Whip longer than feels necessary — the fluff happens suddenly
- Plain yogurt only (sweetened yogurt = overly sweet fluff)
Nutritional Information*
*This is an estimate and will vary based on the specific brands of ingredients you use.
Per Serving (Entire Recipe): Calories: 120-150 | Protein: ~11g | Carbohydrates: 6-8g (Net Carbs: ~4-5g) | Fat: 3-5g | Fiber: 2-3g
This is a gluten-free, high-protein, low-carb recipe. It’s a fantastic source of protein for a snack or a healthy dessert option.
Final Thoughts
So, there you have it. What started as a desperate, chocolate-craving experiment in my kitchen has become my little secret for feeling like I’m treating myself without the trade-offs. This isn’t just a “healthy alternative.” It’s a genuine delight in its own right—a bowl of pure, spoonable joy that happens to love you back.
The real magic of this Chocolate Peanut Butter Protein Fluff isn’t just in the whipping or the specific ingredients (though the casein powder hack is a game-changer). It’s in the feeling it gives you. It’s the satisfaction of making something with your own two hands in five minutes flat. It’s the victory of enjoying something deeply chocolatey and rich without the heavy aftermath. It’s that beautiful kitchen alchemy where simple, wholesome things transform into something greater.
I hope this recipe becomes more than just a snack for you. I hope it becomes a tool in your back pocket for those moments when a craving hits and you want to choose something that makes your body feel strong and your taste buds happy. I hope it inspires you to play, to tweak, to make it your own—whether that’s a mocha twist or a berry cheesecake dream.
Most of all, I hope it reminds you that eating well isn’t about restriction or missing out. It’s about creating new favorites. It’s about finding those perfect, happy mash-ups where nostalgia meets nourishment, and where a little bit of fluff can truly change your day.
Now, go grab that mixer and make a cloud. You deserve it.
With love and a fully stocked spoon,
Olivia
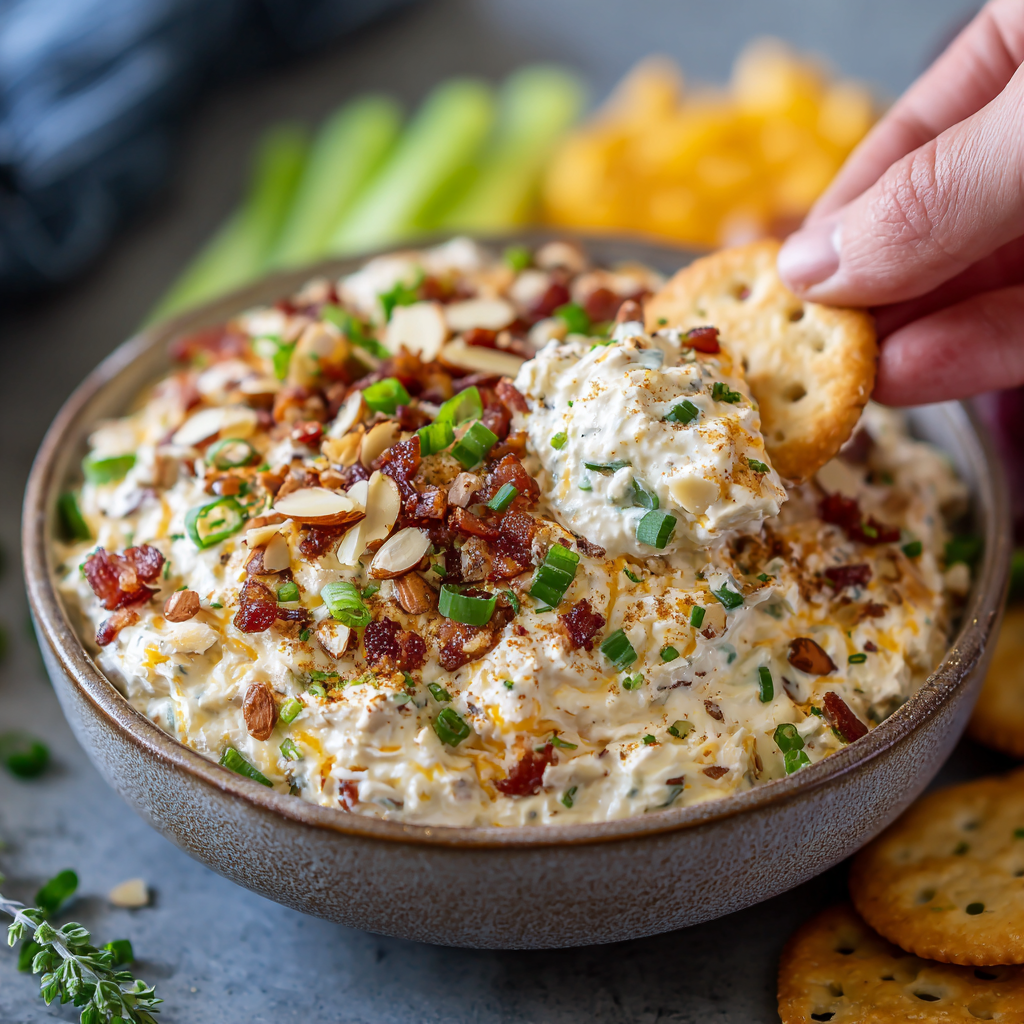
5-Minute Million Dollar Dip (Creamy, Cheesy, Crowd-Favorite!)
Your New Party Secret: The 5-Minute Dip That Tastes Like a Million Bucks
Hey there, friend! Come on in, pull up a stool. Can you smell that? It’s the unmistakable scent of good times about to happen—a little salty, a little cheesy, and 100% guaranteed to make people gather around the kitchen island. I’m talking about the kind of recipe that’s less of a formula and more of a social event catalyst: the legendary Million Dollar Dip.
We’ve all been there. You get a last-minute text: “Game night at our place!” or “Just dropping by with the kids!” Your heart does that little happy-skip because you love a spontaneous gathering, but your brain immediately goes to the fridge. What can you whip up that feels special, indulgent, and requires absolutely zero fuss? Something that says, “I’m a culinary genius who has it all together,” while secretly only taking five minutes and one bowl? This, my friend, is your answer.
This isn’t just a dip. It’s a creamy, crunchy, savory phenomenon. It’s the dish that vanishes before the main course even makes it to the table, the one that has guests casually (and not-so-casually) hovering near the serving plate with a cracker at the ready. The “million dollar” name isn’t just catchy—it’s a promise. Every single bite feels decadent, rich, and worth its weight in gold (or at least in happy taste buds). And the best part? You likely have most, if not all, of the ingredients sitting in your fridge and pantry right now. So, tie on that apron (messy is totally welcome here), and let’s make some magic.
Why This Dip Feels Like Home: A Little Story
This dip always takes me right back to my aunt Sharon’s sun-drenched kitchen on a lazy summer afternoon. She was the queen of effortless hosting. You’d show up, and without seeming to break a sweat, she’d have a spread that could feed a small army appear. One day, I was “helping” (which, at age 10, meant mostly sneaking shreds of cheese), and I watched her make this. She didn’t measure a thing—just dolloped, poured, and stirred. “The secret,” she whispered with a wink, “is that it’s supposed to look like you didn’t try at all. But the flavor? That’s where you shout ‘I love you’ without saying a word.”
She plopped the bowl in the middle of the patio table next to a sleeve of Ritz crackers. What happened next was pure comedy. My uncles, deep in a debate about baseball, slowly stopped talking. One would scoop, crunch, and go quiet. Then another. Within minutes, the bowl was the center of the universe, and we were all just laughing, dipping, and being together. That’s the real power of a recipe like this. It’s not about perfection; it’s about connection. It creates a pause, a shared “Mmmmm,” a moment of pure, uncomplicated joy. Every time I make it, I get a little of that sunshine and laughter back. And now, I’m so excited to pass that feeling on to you.
Gathering Your Treasure: The Ingredients (& Why They Work)
Let’s break down this simple treasure map. Each ingredient plays a crucial role in the symphony of flavor and texture. Here’s what you’ll need:
- 1 cup mayonnaise – This is the lush, creamy foundation. It brings everything together into that dreamy, dippable texture. Chef’s Insight: Use a good-quality, full-fat mayo for the richest flavor and texture. For a tangier, lighter twist, you can swap half or all of it with full-fat Greek yogurt or sour cream!
- 1 cup shredded sharp cheddar cheese – The star of the show! Sharp cheddar gives that punchy, cheesy backbone. Chef’s Insight: For the love of all that is melty and good, PLEASE shred your own cheese from a block. Pre-shredded cheese is coated to prevent clumping, which also prevents it from blending as smoothly into the dip. The extra two minutes make a world of difference in creaminess.
- 1/2 cup chopped green onions – These little green gems are your flavor brighteners. They add a necessary pop of freshness and a mild oniony zing that cuts through the richness. Sub Tip: Don’t have green onions? A couple of tablespoons of very finely minced red onion or shallot will work in a pinch (soak them in cold water for 5 mins first to mellow the bite).
- 1/2 cup real bacon bits or chopped cooked bacon – This is the salty, smoky, umami bomb. It’s what makes the dip irrestistible. Chef’s Commandment: Avoid the jarred “bac-o” style bits if you can. Cooking 4-6 strips of bacon until crisp and chopping them yourself is the ultimate upgrade. The flavor is deeper and the texture is superior. (But no judgment—I keep a bag of real cooked bacon pieces in my freezer for emergencies!).
- 1/4 cup slivered almonds (optional, but highly recommended) – The surprise MVP! These add the most delightful, subtle crunch in every bite, making the texture truly “million dollar.” Sub Tip: Not a fan of almonds? Try chopped pecans, sunflower seeds, or even a handful of French-fried onions for a different kind of crunch.
- Salt and freshly cracked black pepper to taste – Don’t skip the taste at the end! The bacon and cheese are salty, so you may not need much, but a few cracks of black pepper add a lovely warmth.
Let’s Make Magic: The Foolproof, 5-Minute Method
See? I told you it was easy. But let’s walk through it together with a few of my favorite kitchen hacks to make it absolutely perfect.
- The Great Shred. First, grab your block of sharp cheddar and your box grater. Shred it all into a nice, fluffy pile. Chef’s Hack: If your kitchen is warm and the cheese is getting sticky, pop the block in the freezer for 10-15 minutes before shredding. It makes the job cleaner and faster!
- Chop & Chat. Wash your green onions and slice them thinly, using all of the white and most of the green parts. If you’re using homemade bacon, give it a rough chop. Get those almonds measured out. This is the “prep” part, and it’s over in a flash.
- The Grand Unification. Grab your favorite medium-sized mixing bowl—something with a little room to stir comfortably. Plop in the mayonnaise, the glorious pile of freshly shredded cheddar, the green onions, bacon, and almonds. Chef’s Commentary: I love using a flexible silicone spatula for this. It gets into the corners of the bowl and folds everything together gently.
- Mix with Love (But Not Too Much). Now, stir! Fold everything together until it’s just combined and every ingredient is coated in that creamy mayo. You want it homogenous, but don’t over-mix into a paste. A few streaks are fine. Pro Tip: Taste it now. This is your moment. Need a pinch of salt? More pepper? A little more smoky bacon? Adjust to your heart’s content.
- The Patience Payoff (If You Can Wait!). You can absolutely serve this dip right away—it will be delicious. BUT, if you can manage it, cover the bowl with plastic wrap and tuck it into the fridge for 30 minutes to an hour. Why This Matters: This chill time allows the flavors to get to know each other, mingle, and deepen. The textures also settle, making it the perfect, scoopable consistency. It’s worth the wait, I promise.
How to Serve Your Culinary Gold
Presentation is part of the fun! I love serving this in a shallow, wide bowl so everyone can easily access the goods. Garnish with an extra sprinkle of cheese, a few extra bacon pieces, and a final scatter of sliced green onions. It looks profesh with zero effort. For dippers, go classic with Ritz crackers (that buttery flavor is a match made in heaven), sturdy pretzel chips, or tortilla chips. For a fresh contrast, offer a platter of sliced bell peppers, cucumber rounds, carrot sticks, or crisp celery. Watch and smile as your creation disappears.
Make It Your Own: Fun Twists & Swaps
- The “Everything Bagel” Twist: Swap the almonds for everything bagel seasoning and add a teaspoon of dried minced garlic. Serve with everything bagel chips!
- Southwestern Fiesta: Use a Mexican-blend cheese, add a 4oz can of diced green chiles (drained), and swap the bacon for chopped chorizo. A dash of smoked paprika is killer here.
- Lighter & Brighter: Use full-fat Greek yogurt instead of mayo, and swap in turkey bacon. It’s still incredibly flavorful but feels a bit lighter.
- Hot & Bubbly Bake: Feeling fancy? Spread the mixed dip into a small oven-safe dish, top with a little extra cheese, and bake at 375°F for 15-20 minutes until bubbly and golden. A whole new warm, gooey experience!
- Dill Pickle Delight: Add 1/4 cup of finely chopped dill pickles and a tablespoon of pickle juice for a briny, tangy punch. So good!
From My Kitchen to Yours: A Few Final Thoughts
Over the years, this recipe has become my culinary security blanket. I’ve made it for fancy holiday parties served in a crystal bowl, and I’ve eaten it straight from the Tupperware with a spoon after a long day (no shame!). The recipe itself hasn’t changed much since Aunt Sharon’s day, but my confidence in it has. I now know it’s virtually foolproof. I’ve learned that doubling the batch is always a good idea, and that the leftovers (if they exist) make an insane baked potato topping or sandwich spread the next day. One time, I even used it as a filling for stuffed mushrooms—bonus recipe idea for you! The point is, this dip is more than a list of ingredients; it’s a starting point for your own kitchen stories. Make it, share it, and enjoy the little moment of togetherness it creates.
Your Questions, Answered: Dip Wisdom
Q: Can I make this dip ahead of time?
A: Absolutely! In fact, I encourage it. You can make it up to 24 hours in advance. Just keep it tightly covered in the fridge. The flavors will be even more amazing. Give it a quick stir before serving to reincorporate any separation.
Q: My dip seems a bit too thick. What can I do?
A: No problem! This is easily fixed. Stir in a teaspoon or two of milk, buttermilk, or even the liquid from the jar of bacon bits (if you used real ones) to loosen it up to your preferred dippable consistency.
Q: Help! I’m serving someone with a nut allergy. What’s a good almond substitute?
A: The almonds are optional for a reason! You can simply leave them out for a perfectly creamy dip. For crunch without nuts, try toasted sunflower seeds, pumpkin seeds (pepitas), or my lazy-day favorite: crushed plain potato chips folded in right before serving.
Q: What’s the best way to store leftovers?
A: Cover the bowl tightly or transfer to an airtight container. It will keep happily in the refrigerator for 3-4 days. The green onions may soften a bit, but the flavor will still be fantastic.

5-Minute Million Dollar Dip (Creamy, Cheesy, Crowd-Favorite!)
Description
Hey there, friend! Olivia here. This is the dip I make when guests are walking up the driveway and I need something that looks impressive, tastes indulgent, and takes almost no effort. Million Dollar Dip is creamy, crunchy, salty, and downright addictive—the kind of appetizer that gathers people around the bowl and keeps them there.
Ingredients
-
1 cup mayonnaise
-
1 cup sharp cheddar cheese, freshly shredded
-
½ cup chopped green onions
-
½ cup cooked bacon, finely chopped
-
¼ cup slivered almonds (optional but highly recommended)
- Salt & freshly cracked black pepper, to taste
Instructions
-
Shred & Prep
Shred the cheddar, slice the green onions, chop the bacon, and measure the almonds. -
Mix It All Together
In a medium bowl, add mayonnaise, cheddar, green onions, bacon, and almonds.
Gently fold until everything is evenly coated and creamy. -
Season to Taste
Add black pepper and a small pinch of salt if needed (bacon and cheese are already salty). -
Chill (Optional but Worth It)
Serve immediately, or cover and refrigerate for 30–60 minutes to let the flavors meld.
Notes
-
Shred your own cheese for the creamiest texture
-
Add sesame-sized bacon pieces so every bite gets some crunch
-
Don’t overmix—fold gently to keep texture intact
- Taste before salting—bacon does a lot of the work
Quick Nutritional Snapshot*
*Please note: This is a rough estimate based on the original ingredients using homemade bacon and full-fat mayo. Values will change with substitutions.
- Serving Size: About 1/4 cup
- Calories: ~200
- Protein: ~5g
- Prep Time: 5 minutes (+ optional chilling)
- Cook Time: 0 minutes!
So there you have it! The ultimate no-fuss, all-flavor party hero. I can’t wait for you to try it and hear your stories. Now go forth, dip, and delight!
Final Thoughts: The Story Starts With You
And that’s everything you need! From the why to the how, and all the little tips in between, you’re now armed with more than a recipe—you have a tool for creating your own simple, delicious moments.
The best part? This story is just beginning. Your version, with your chosen twists, served at your table, is what makes it truly special. I’ve shared my aunt Sharon’s sunshine; now I can’t wait to hear about the memories you create with it.
Thank you for letting me share one of my favorite kitchen treasures with you. However you make it, and wherever you enjoy it, I hope it brings you and yours a whole lot of joy.
Happy dipping, friend.
Warmly,
Olivia




