
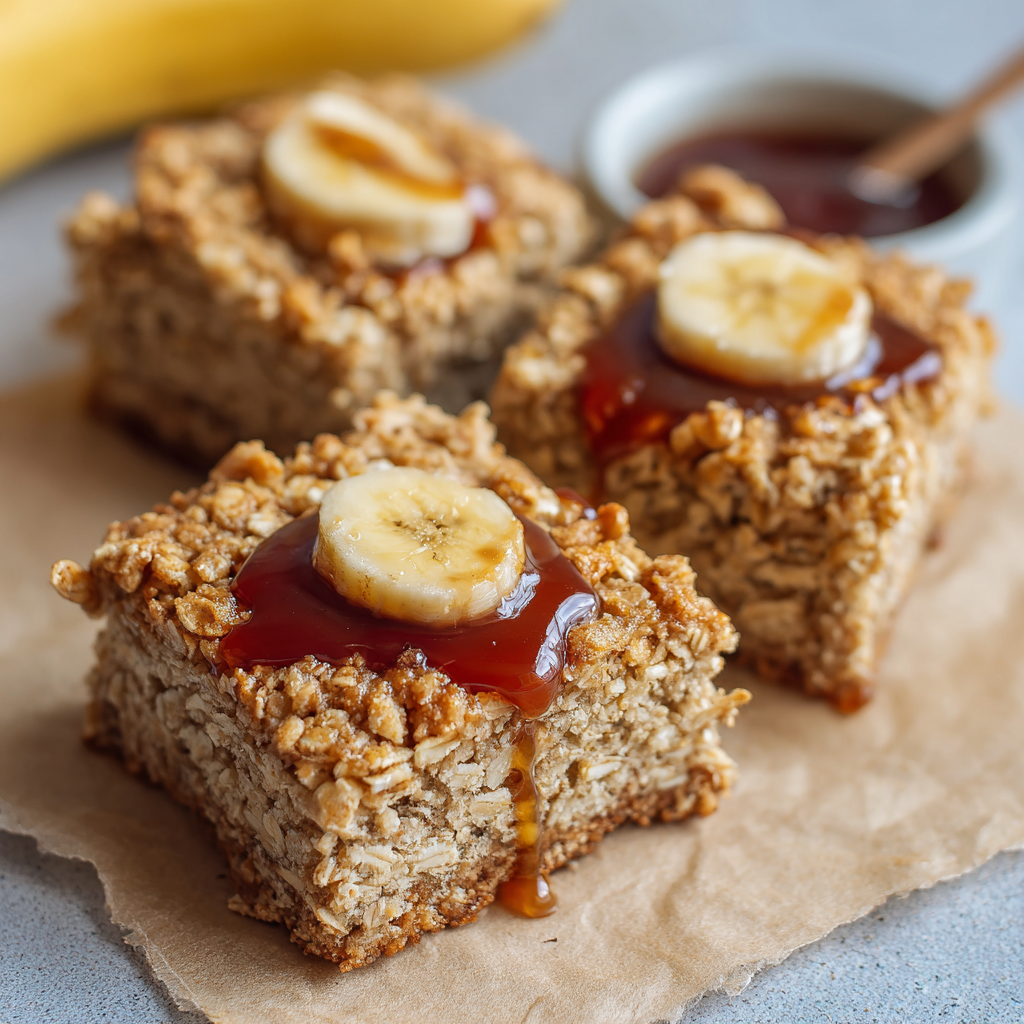
Banana Oat Bars : Soft, Naturally Sweet & Perfect for Snacking
Your New Go-To Snack: Wholesome, Easy, and Unbelievably Good
Hey there, friend! Come on in, grab an apron, and let’s talk about one of life’s great kitchen dilemmas. You know the one. It’s mid-afternoon, your energy is dipping, and you’re staring into the pantry abyss. You want something satisfying but not heavy, something sweet but not sinful, something you can feel genuinely good about giving to your kids (or sneaking for yourself!). Or maybe it’s morning, and the cereal just isn’t cutting it—you need a breakfast you can hold in your hand as you dash out the door.
I’ve been there more times than I can count. That’s why I’m practically buzzing to share this recipe with you today. These Banana Oat Bars are my kitchen’s MVP, the snack that never lets me down. Imagine the coziest, soft-baked banana bread, transformed into a perfectly portable, sliceable bar. They’re naturally sweetened with just banana and a kiss of maple syrup, packed with hearty oats, and spiced with warm cinnamon. The best part? You likely have every single ingredient in your kitchen right now, and the whole thing comes together in one bowl in about 5 minutes of active time.
This isn’t just a recipe; it’s a trusty sidekick. A lunchbox hero, a pre-workout fuel, a midnight nibble with a cup of tea. It’s the kind of homemade magic that proves you don’t need a laundry list of complicated ingredients to make something truly delicious and nourishing. So, let’s turn those spotty bananas on your counter into something amazing. I promise, once you try these, you’ll be baking them on repeat.
A Bowl, a Banana, and My Grandma’s Wisdom
This recipe always takes me back to my grandma’s sun-drenched kitchen. She was the queen of “waste not, want not,” and she had a sixth sense for spotting a perfectly overripe banana from across the room. “Olivia,” she’d say, pointing at the brown-speckled fruit, “that’s not past its prime. That’s at the peak of its flavor! Now it’s ready for something special.”
Her go-to was always a magnificent, towering banana bread. But one busy Sunday when I was visiting, with cousins running underfoot and the oven already full, she showed me her quick trick. She mashed that banana right into a bowl, stirred in some oats, a glug of syrup from the cupboard, and a single egg. In what felt like seconds, she had a thick batter that she pressed into a pan. “Sometimes, sweetheart,” she whispered with a wink, “you need the comfort of banana bread but in a hurry.” What came out of the oven were these dense, sweet, cake-like squares that we all devoured warm. It was less a formal recipe and more a kitchen instinct—a delicious solution born from simplicity and a little bit of cleverness. My version today is just a polished echo of her instinct, with a pinch of cinnamon for extra warmth. It reminds me that the best food often comes from resourcefulness and love, not complexity.
Gathering Your Simple, Wholesome Ingredients
See? I told you it was simple! Here’s everything you’ll need. I’ve added my little chef’s notes for each one because knowing your ingredients is the first step to feeling confident and creative in the kitchen.
- 1 Ripe Banana – The spottier, the better! Those brown spots mean the starches have converted to sugars, giving us incredible natural sweetness and moistness. Chef’s Insight: No ripe bananas? You can “ripen” a yellow banana in a 300°F oven for 15-20 minutes until the skin blackens. Let it cool before using.
- 1 Cup Oats – I use old-fashioned rolled oats for a hearty, textured bite. Quick oats work perfectly too and will yield a slightly more uniform, softer bar. Pro Tip: For a gluten-free version, ensure your oats are certified gluten-free!
- 1 Egg – Our binder and source of protein. It gives the bars structure and a lovely soft texture. Substitution Tip: For a vegan bar, a “flax egg” (1 tbsp ground flaxseed mixed with 2.5 tbsp water, left to gel for 5 mins) works wonderfully.
- 1/4 Cup Pure Maple Syrup – This adds a deep, caramel-like sweetness that pairs beautifully with banana. Chef’s Insight: Honey is a great 1:1 substitute, though it will impart its own distinct flavor. Avoid pancake syrup—it’s not the same!
- 1 Teaspoon Baking Soda – Our leavening agent! It gives the bars a gentle lift and soft, cakey crumb. Important: Make sure your baking soda is fresh for the best rise.
- 1 Teaspoon Cinnamon – The cozy factor! Cinnamon and banana are a match made in heaven. Feel free to add a pinch of nutmeg or allspice if you’re feeling adventurous.
- Optional: Chocolate Chips or Walnuts – My personal weakness is a handful of dark chocolate chips folded in—they create little pockets of melty joy. Chopped walnuts add a fantastic crunch and healthy fats. This is where you can make it your own!
Let’s Make Some Magic: The Simple Steps
Ready? This is the easiest process ever. I’ll walk you through each step with my favorite tips to ensure perfect bars every single time.
Step 1: Prep Your Pan & Oven. Preheat your oven to 350°F (175°C). This is the perfect temperature for gentle, even baking. Take an 8×8 inch baking pan and lightly grease it with butter, coconut oil, or a quick spritz of cooking spray. For ultimate ease, line it with parchment paper, leaving a little overhang on two sides—this creates a “sling” so you can lift the whole batch out for super clean cuts later!
Step 2: The One-Bowl Wonder Begins. In a medium mixing bowl, take your ripe banana and mash it thoroughly with a fork. You want it almost liquidy, with no large lumps. Chef’s Hack: If you have a few stubborn bits, that’s okay! They’ll bake into lovely little bursts of banana flavor. To the banana mush, add the egg and maple syrup. Now, whisk or stir vigorously until the mixture is smooth, creamy, and beautifully amalgamated. See how the maple syrup ribbons through? That’s the good stuff.
Step 3: Bring in the Dry Team. Dump in your oats, baking soda, and cinnamon right into the wet mixture. Here’s my key tip: stir just until everything is moistened and combined. Don’t overmix! We’re not making a smooth batter; we’re creating a cohesive, thick, spoonable mixture. Over-stirring can make the oats gummy. If you’re adding chocolate chips or walnuts, now’s the time to fold them in gently.
Step 4: Pan & Spread. Pour (or more accurately, plop and scrape) your mixture into your prepared pan. Use a spatula or the back of a spoon to spread it into a smooth, even layer, nudging it into the corners. A little damp fingertip can help smooth the top perfectly if it’s being stubborn.
Step 5: Bake to Golden Perfection. Slide the pan into your preheated oven. Now, set a timer for 20 minutes. Ovens vary, so at the 20-minute mark, start checking. You’re looking for golden edges that are pulling slightly away from the pan and a top that looks set. The center should spring back lightly when you gently press it. If it still looks wet or jiggles, give it another 3-5 minutes. Total bake time is usually 20-25 minutes.
Step 6: The Most Important Step: Patience! I know, the smell is incredible and you want to dive right in. But trust me here. Let the pan cool on a wire rack for at least 20-30 minutes. This allows the bars to finish setting up. If you try to cut them while they’re piping hot, they’ll be crumbly. For the cleanest cuts, let them cool completely before slicing into 9 or 12 squares.
How to Serve & Savor
These bars are delicious at any temperature! I love them slightly warm, just after they’ve cooled enough to handle. For a next-level treat, place a square in a bowl and top with a scoop of vanilla Greek yogurt and a drizzle of peanut butter. For breakfast, pair one with a piece of fruit and a latte. Pack them in lunchboxes, take them on hikes, or enjoy one with a cup of tea as an afternoon pick-me-up. They’re endlessly versatile and always welcome.
Make It Your Own: Delicious Twists
- Blueberry Lemon: Fold in 1/2 cup fresh or frozen blueberries and the zest of one lemon.
- Peanut Butter Chocolate: Swirl 1/4 cup of natural peanut butter into the batter before baking and use chocolate chips.
- Apple Pie: Replace the banana with 1 cup of unsweetened applesauce and add 1/2 cup of finely diced apple.
- Tropical: Add 1/4 cup shredded coconut and 2 tbsp of chopped dried mango.
- Protein Power: Stir 2 scoops of your favorite vanilla or unflavored protein powder into the wet ingredients. You may need to add a tablespoon or two of milk if the batter gets too thick.
Chef’s Notes & Kitchen Chatter
This recipe has evolved from my grandma’s quick fix to my most-baked staple. I’ve made it in vacation rentals with only a fork and a toaster oven, and I’ve doubled it for bake sales. One time, I accidentally used baking powder instead of soda (we’ve all been there!), and while they were a bit more cake-like, they were still totally edible! The beauty is in its forgiveness.
Over time, I’ve learned that letting the mixture sit for 5 minutes after combining allows the oats to absorb some of the moisture, resulting in a better texture. I also firmly believe a pinch of flaky sea salt on top before baking elevates all the flavors spectacularly. Don’t be afraid to play—it’s a blank canvas for your cravings!
Your Questions, Answered
Q: My bars turned out a bit wet/mushy in the middle. What happened?
A: This usually means they needed a few more minutes in the oven, or your banana was very large and extra watery. Next time, bake until a toothpick inserted comes out with just a few moist crumbs (not wet batter). You can also try using quick oats, which absorb moisture more readily.
Q: Can I make these without eggs?
A> Absolutely! A “flax egg” is my favorite substitute. Mix 1 tablespoon of ground flaxseed with 2.5 tablespoons of water, let it sit for 5-10 minutes to thicken, and use it in place of the egg. The bars will be slightly more dense but still delicious.
Q: How should I store them, and do they freeze well?
A: Store cooled bars in an airtight container in the fridge for up to 5 days. They also freeze beautifully! Wrap individual bars in plastic wrap and place them in a freezer bag for up to 3 months. Thaw at room temperature or pop them in the microwave for 20 seconds.
Q: Can I use steel-cut oats?
A> I wouldn’t recommend it for this recipe. Steel-cut oats won’t soften enough with the shorter baking time and lack of cooking liquid, resulting in a very hard, chewy texture. Stick with old-fashioned or quick oats for the best results.
Banana Oat Bars : Soft, Naturally Sweet & Perfect for Snacking
Description
Banana Oat Bars
Soft, wholesome, naturally sweet bars that are perfect for breakfast, snacks, or lunchboxes.
Prep Time: 5 minutes
Bake Time: 20–25 minutes
Total Time: 30 minutes
Yields: 9 bars
Ingredients
-
1 ripe banana (the browner, the sweeter)
-
1 cup rolled oats (old-fashioned or quick; gluten-free if needed)
-
1 egg (or 1 flax egg for vegan option: 1 tbsp ground flaxseed + 2.5 tbsp water, set 5–10 minutes)
-
1/4 cup pure maple syrup (or honey)
-
1 tsp baking soda
-
1 tsp cinnamon
-
Optional: 1/4 cup chocolate chips, walnuts, or other mix-ins
Instructions
-
Preheat Oven & Prep Pan – 350°F (175°C). Lightly grease an 8×8-inch pan or line with parchment paper, leaving an overhang for easy removal.
-
Mash Banana – In a medium bowl, mash the banana until smooth. Stir in the egg and maple syrup until creamy.
-
Add Dry Ingredients – Mix in oats, baking soda, and cinnamon until just combined. Fold in optional mix-ins if using.
-
Transfer & Spread – Pour batter into prepared pan and spread evenly. Smooth the top with a spatula.
-
Bake – 20–25 minutes, until edges are lightly golden and the center springs back to touch. If still too wet, bake 3–5 minutes longer.
-
Cool & Slice – Cool in pan 20–30 minutes before slicing into 9 bars.
Notes
-
Bananas: Use very ripe bananas for maximum natural sweetness.
-
Texture: Let the batter sit 5 minutes before baking to allow oats to absorb moisture.
-
Mix-Ins: Chocolate chips, nuts, dried fruit, or a sprinkle of sea salt on top.
-
Storage: Airtight container in fridge up to 5 days. Freeze individually wrapped bars up to 3 months.
Nutritional Information*
*This is an estimate for 1 bar (based on 9 servings) without optional add-ins, calculated using a nutrition database. Values will vary with specific ingredients and additions.
- Calories: ~120
- Protein: 3g
- Carbohydrates: 18g
- Sugar: 7g (all natural from banana & maple syrup)
- Fat: 3g
- Fiber: 2g
Prep Time: 5 mins | Bake Time: 20-25 mins | Total Time: 30 mins | Servings: 9 bars
Final Thoughts: Your Trusty Snack Secret, Perfected
And there you have it—a recipe that proves “simple” and “spectacular” can absolutely live on the same plate. These Banana Oat Bars are more than just a convenient snack; they’re a small act of everyday kindness to your future self. They’re the proof that wholesome food doesn’t have to be complicated, and that the most satisfying flavors often come from the humblest ingredients, treated with a little bit of care.
They bridge the gap between what we crave and what nourishes us, between a busy schedule and the desire for something homemade. Whether you’re packing them with love into a lunchbox, grabbing one as you run out the door, or enjoying a quiet moment with a square and a cup of tea, these bars are a tangible little bit of comfort and energy.
Remember, this recipe is a foundation. It’s your kitchen, your bananas, your adventure. Tweak the spices, fold in your favorite add-ins, make it exactly what you need it to be. Once this method is in your back pocket, you’ll never look at a ripe banana the same way again—you’ll see possibility.
So, mash those bananas, stir that one bowl, and fill your kitchen with the warm, comforting scent of cinnamon and toasted oats. You’ve just unlocked a new level of easy, feel-good baking.
Happy snacking,
Olivia

Spinach & Feta Biscuits : High-Protein, Gluten-Free & So Easy to Make
The Cozy Magic of a Warm, Savory Biscuit
Hey friend, come on in! Can you smell that? It’s the warm, toasty, cheesy, and faintly earthy scent of something wonderful baking in the oven. It’s the smell of a kitchen that’s alive, of a recipe so simple it feels like a secret, and of a snack that’s about to make your day a whole lot cozier. If you’ve ever wished you could grab something savory, satisfying, and genuinely good-for-you in one hand while chasing your day with the other, you’re about to become best friends with these Spinach & Feta Biscuits.
I’m Olivia, and I live for recipes like this. The kind that don’t require a culinary degree or a whole afternoon, but deliver maximum flavor and joy. These biscuits are my current obsession, and for good reason. They’re naturally gluten-free, packed with protein to keep you fueled, and sneak in a whole garden’s worth of spinach in the most delicious way possible. Imagine the fluffy, tender crumb of a great biscuit, the salty punch of feta, and the fresh whisper of green onions, all in one golden-brown package. They’re perfect for meal prep, a quick breakfast, a side for soup, or just because you deserve a warm bite of something wonderful.
So, tie on your apron (the messy one is always the best), and let’s make something incredible together. This isn’t just cooking; it’s creating a little pocket of comfort, one biscuit at a time.
Why These Biscuits? A Tale of Hungry Hikers & Kitchen Experiments
This recipe was born out of sheer, rumbling hunger and a fridge full of leftovers. Last fall, my partner and I got caught up in a hike that lasted way longer than planned (you know how it goes—one more lookout point!). We stumbled back home, famished, dreaming of something hearty, savory, and quick. I had a giant bag of spinach, a block of feta, and some almond flour from a previous baking adventure.
In that hungry, slightly desperate state, I just started throwing things together. I wilted the spinach, whisked some egg whites, crumbled the cheese, and hoped for the best. What came out of the oven 25 minutes later was nothing short of a miracle. We stood over the baking tray, blowing on our fingers, devouring these fluffy, green-flecked, cheesy clouds. They were everything we needed: warm, nourishing, deeply satisfying. That happy accident became a weekly staple. Now, they’re my go-to for potlucks (they always disappear first), for stocking the freezer, and for those days when I just need a reliable hug from my kitchen. They’re proof that the best creations often come from a simple need to feed yourself and the people you love, beautifully.
Gathering Your Flavor Toolkit
Here’s what you’ll need to create this magic. I’ve added my little chef notes next to each one—think of them as whispers from me to you across the kitchen counter.
- 1 package fresh spinach (about 142g/5oz): We’re wilting it down, so it seems like a mountain but cooks into a manageable, nutrient-packed green. Chef’s Insight: Don’t skip the wilting step! It removes excess water so your biscuits aren’t soggy. Frozen chopped spinach, thoroughly thawed and squeezed bone-dry, works perfectly here too.
- 1 cup liquid egg whites (or 4-5 large whole eggs): This is our protein powerhouse and binder. Using just whites gives an extra protein boost and a lighter color. Substitution Tip: Whole eggs add richness and a more golden color. Both are fantastic—choose your adventure!
- 1 cup crumbled feta cheese: The salty, tangy soul of the biscuit. Chef’s Insight: Buy a block and crumble it yourself for better texture and flavor than pre-crumbled. For a dairy-free twist, try a firm, crumbly vegan “feta” made from tofu or almonds.
- 1 cup almond flour: This is our gluten-free flour base, giving a tender, moist crumb and a lovely nutty flavor. Important: Use fine, blanched almond flour, not almond meal, for the best texture.
- 1 tsp baking powder: Our little leavening fairy that makes them rise up fluffy and light. Make sure yours is fresh for maximum puff!
- 5-6 green onions, finely chopped: They add a mild, fresh oniony bite. Substitution Tip: A small, finely diced yellow onion or a handful of chives work beautifully if that’s what you have.
- 1 tbsp olive oil: For sautéing our veggies to deliciousness.
- Salt & pepper, to taste: Season as you go! Remember, feta is salty, so I go easy on added salt until I taste the final mix.
Let’s Make Some Biscuit Magic: Step-by-Step
Ready? Let’s turn these ingredients into golden goodness. I’m walking you through every step with my favorite kitchen hacks.
Step 1: Preheat & Prep. Fire up your oven to 350°F (175°C). This is always step one—it gives the oven time to get perfectly hot. Line a baking sheet with parchment paper. No parchment? A light spray of oil works, but parchment is my MVP for no-stick bliss and easy cleanup.
Step 2: Wilt the Greens. In a large skillet, heat the olive oil over medium heat. Add the chopped green onions and give them a quick 1-minute sizzle. Now, add all that fresh spinach—it might seem like it won’t fit, but trust the process! Use tongs to gently toss and turn it until it’s fully wilted and dark green, about 3-4 minutes. Chef’s Hack: Transfer this mix to a bowl and let it cool for a few minutes. Adding piping-hot veggies to your egg mix can start cooking the eggs prematurely. We want to mix, not scramble!
Step 3: The Easy Mix. In a large mixing bowl, combine the egg whites (or beaten whole eggs), crumbled feta, almond flour, baking powder, a pinch of salt, and a few grinds of pepper. Stir until just combined—a few lumps are totally fine; we’re not looking for perfection. Chef’s Tip: If you’re using whole eggs, whisk them in a separate bowl first for a more uniform mix.
Step 4: Fold it All Together. Once your spinach mixture is warm but not hot, add it to the bowl. Use a spatula to fold everything together gently. You want all those beautiful green flecks and cheesy bits evenly distributed without over-mixing.
Step 5: Scoop & Shape. Using a large spoon, a cookie scoop, or an ice cream scoop (my secret for uniform biscuits!), drop generous mounds of the batter onto your prepared baking sheet. They won’t spread much, so you can place them about an inch apart. You should get 8-10 hearty biscuits. Don’t worry about making them perfectly round—rustic is charming!
Step 6: Bake to Golden Perfection. Slide the tray into your preheated oven. Bake for 20-25 minutes. You’re looking for beautifully golden tops and edges, and they should feel firm to a gentle touch. Chef’s Test: Insert a toothpick into the center of one—it should come out clean or with just a few moist crumbs.
Step 7: The (Hardest) Wait. Let them cool on the tray for at least 10 minutes. I know, the smell is irresistible! But this rest time lets them set and makes them easier to handle. They’ll be warm, not molten, and absolutely perfect.
How to Serve These Savory Gems
These biscuits are the ultimate multi-tasker! Serve them warm from the oven, split open with a little smear of soft butter or herbed cream cheese. They’re a dream alongside a big, cozy bowl of tomato soup or a fresh garden salad. I love packing them in lunchboxes cold—they’re just as tasty! For a next-level brunch, top a split biscuit with a soft-poached egg and a drizzle of hot sauce. Pure heaven.
Make It Your Own: Delicious Twists
Once you master the base, the flavor playground is open!
- Sun-Dried Tomato & Basil: Swap spinach for 1/2 cup chopped, oil-packed sun-dried tomatoes (pat them dry) and add 2 tbsp of fresh chopped basil.
- “Everything Bagel” Style: Before baking, brush the tops lightly with an egg wash (1 egg beaten with 1 tsp water) and sprinkle generously with everything bagel seasoning.
- Dairy-Free Delight: Use a vegan feta alternative and ensure your baking powder is gluten-free. The flavor profile changes slightly but remains delicious.
- Bacon & Cheddar: Add 1/2 cup cooked, crumbled bacon and swap feta for sharp cheddar cheese. A classic combo for a reason!
Olivia’s Kitchen Notes
This recipe has evolved with me. I started with whole eggs, then tried whites for a protein boost and loved the result. I’ve also learned that squeezing every last drop of moisture from the spinach (if using frozen) is the absolute KEY to a perfect texture. One time, I was chatting on the phone while mixing and accidentally used cumin instead of baking powder (similar jars!). We ended up with deliciously spiced, dense spinach feta pancakes… not biscuits. We ate them anyway with a laugh! The moral? Label your spice jars and always taste as you go. These biscuits freeze like a dream—pop cooled biscuits in a freezer bag for up to 3 months. To reheat, just toast or warm in a 300°F oven until hot through.
Your Questions, Answered
Q: My batter seems really wet. Did I do something wrong?
A: This is usually a moisture issue! If using frozen spinach, you must squeeze it until it’s very, very dry. Fresh spinach also holds water, so make sure you let your sautéed mix cool completely—the steam will escape as it cools. You can also add an extra tablespoon or two of almond flour to thicken it up.
Q: Can I make these muffins instead?
A: Absolutely! This batter works wonderfully in a muffin tin lined with papers. Fill cups about 2/3 full and bake at the same temperature. They might need an extra 3-5 minutes—just check with a toothpick.
Q: Why didn’t my biscuits rise much?
A: First, check the date on your baking powder—if it’s old, it loses its power. Also, make sure you’re not over-mixing the batter. Gently fold until just combined for the best rise.
Q: How do I store these, and how long do they last?
A: Let them cool completely, then store in an airtight container in the fridge for up to 5 days. They also freeze perfectly for up to 3 months. Reheat in a toaster oven or regular oven for the best texture.
Spinach & Feta Biscuits : High-Protein, Gluten-Free & So Easy to Make
Description
Spinach & Feta Biscuits
Warm, savory, protein-packed biscuits that are naturally gluten-free and perfect for breakfast, lunch, or a cozy snack.
Prep Time: 10 minutes
Cook Time: 20–25 minutes
Total Time: 30–35 minutes
Ingredients
-
5 oz (142 g) fresh spinach, chopped
-
1 tbsp olive oil
-
5 large egg whites (or 4–5 whole eggs)
-
1 cup almond flour (fine, blanched)
-
1 tsp baking powder
-
1 cup crumbled feta cheese
-
5–6 green onions, finely chopped
-
Salt & pepper, to taste
Instructions
-
Preheat Oven – Set to 350°F (175°C). Line a baking sheet with parchment paper.
-
Wilt the Spinach – Heat olive oil in a skillet over medium heat. Add green onions and cook 1 minute. Add spinach, toss until wilted (~3–4 minutes). Cool slightly.
-
Mix Wet & Dry Ingredients – In a large bowl, combine egg whites, almond flour, baking powder, feta, salt, and pepper. Stir until just combined.
-
Fold in Spinach – Add cooled spinach mixture and gently fold until evenly distributed.
-
Scoop & Shape – Use a spoon or cookie scoop to drop mounds of batter onto the baking sheet (about 1 inch apart).
-
Bake – 20–25 minutes, until tops are golden and biscuits feel firm. Test with a toothpick if unsure.
-
Cool & Serve – Let biscuits rest 10 minutes before serving. Enjoy warm or store for later.
Notes
-
Moisture Control: Make sure spinach is very dry to prevent soggy biscuits.
-
Muffin Option: Fill muffin tin 2/3 full; bake same temp, add 3–5 extra minutes if needed.
-
Flavor Twists:
-
Sun-Dried Tomato & Basil: Swap spinach for sun-dried tomatoes + basil
-
Bacon & Cheddar: Add ½ cup cooked bacon, replace feta with cheddar
-
Dairy-Free: Use vegan feta and check baking powder is gluten-free
-
-
Storage: Airtight container in fridge up to 5 days; freeze up to 3 months. Reheat in toaster or oven for best texture.
Nutritional Info (Per Biscuit, Approximate)
This is an estimate for 1 out of 10 biscuits, made with egg whites. Remember, it’s about nourishment and joy!
Calories: ~120 | Protein: 9g | Carbs: 3g | Net Carbs: 1g | Fat: 8g | Fiber: 2g
Final Thoughts
A Pocket of Comfort, Baked Fresh
Some of the most beloved recipes are born not from grand plans, but from necessity and a dash of inspiration. These Spinach & Feta Biscuits are exactly that—a delicious, fortuitous discovery that turns humble ingredients into something truly special.
They represent a kind of cooking that I cherish most: nourishing, intuitive, and flexible. They don’t demand perfection. They welcome your swaps and your schedule, fitting just as beautifully into a quiet morning ritual as they do into a busy week’s meal prep.
Every time you pull a tray of these golden, green-flecked biscuits from the oven, you’re not just baking a snack. You’re creating a tangible bit of warmth and care. You’re making a healthy choice that feels like a treat. You’re proving that food made with good ingredients and a little intention can be the coziest, most satisfying part of your day.
So whether you’re fueling an adventure, sharing with friends, or simply giving yourself a moment of savory comfort, remember that this is more than a recipe. It’s your toolkit for creating deliciousness on your own terms.

High-Protein Beef Quesadilla : 35g Protein with Simple, Healthy Ingredients
You CAN Have It All: The Quesadilla That Loves You Back
Hey there, friend! Come on in, grab a stool at the counter. Can I get you a drink? I’ve got a little something sizzling on the stove that I just have to tell you about. You know that feeling? The one where you’re craving something gloriously cheesy, satisfyingly crispy, and deeply comforting… but maybe, just maybe, you also want to feel like you made a choice that’s fueling your body and not just your soul? Yeah. I’ve been there. So many times. I’d stare into the fridge, torn between the “good-for-me” container of grilled chicken and the undeniable magnetic pull of melty cheese and carbs. It felt like a culinary crossroads: flavor on one side, “wellness” on the other. Well, I’m here to tell you it’s a false choice. A delicious, crispy, cheesy lie. We can have both. We deserve both! And that’s exactly why I’m so fired up about this High-Protein Beef Quesadilla. This isn’t a “diet” food dressed up in a sad, whole-wheat tortilla. This is a full-flavored, 35-grams-of-protein POWERHOUSE that honestly, might just become your new weekly MVP. It’s the answer to a busy Tuesday when you need dinner in 15 minutes flat. It’s the solution for a post-workout hunger that demands something substantial. It’s the comfort food hug that also gives you a high-five. We’re taking everything we love about a classic quesadilla—the golden-brown crunch, the gooey cheese pull, the savory beef—and we’re simply making it better. Leaner protein, a high-fiber wrap that actually tastes great, and smart, simple ingredients that work together like your favorite kitchen dream team. So, tie on your apron (the messy one is always welcome here), and let’s make a quesadilla that truly loves you back.The Quesadilla That Started It All
My love for quesadillas is deeply rooted in my childhood kitchen, which on most weeknights was a whirlwind of homework, sports gear, and the ever-present question: “What’s for dinner?” My mom was the queen of the 20-minute meal before it was a hashtag. Her secret weapon? The humble quesadilla. But hers weren’t just cheese and tortillas. She’d sneak in whatever was in the fridge—some leftover roasted chicken, a handful of black beans, a few rogue spinach leaves. It was her magic trick for cleaning out containers and feeding a hungry family. I remember standing next to her, watching her press that tortilla down with the spatula, listening to the glorious ssssssssss as it crisped up in the pan. The smell was pure anticipation. She’d slide it onto a cutting board, slice it into wedges with a loud pizza-cutter sound, and we’d all descend, dipping our wedges into bowls of chunky salsa and cool sour cream. It wasn’t fancy, but it was everything: warm, cheesy, communal, and fast. This recipe is my grown-up, protein-packed love letter to those nights. I took my mom’s “clean-out-the-fridge” spirit and gave it a specific, powerhouse mission. Instead of “whatever’s left,” it’s now “exactly what will make me feel amazing.” It’s the same comforting ritual, the same satisfying crunch, but built with intention. Every time I make one, I get a little wave of that childhood comfort, mixed with the grown-up pride of making something that’s both indulgent and nourishing. And that, my friends, is a pretty perfect flavor combo.Your Kitchen Dream Team: Ingredients & Insights
Great food starts with great ingredients, but “great” doesn’t have to mean complicated or expensive. Here’s our simple lineup, with a few chef-y notes to help you shop and swap with confidence.- 4 oz lean ground beef (90% lean or higher): This is our protein star! The 90/10 lean ratio gives us fantastic flavor and richness without leaving a pool of grease in the pan. Chef’s Insight: Don’t be afraid to give the beef some space in the pan—let it get a nice brown crust for maximum flavor. Easy Swap: Ground turkey (93% lean) or even shredded rotisserie chicken work beautifully here!
- 1/2 teaspoon taco seasoning: Our flavor booster! A good blend adds warmth, a touch of smokiness, and just the right amount of kick. Chef’s Insight: Check the label or make your own blend to control sodium. A simple mix of chili powder, cumin, garlic powder, and a pinch of paprika is magic.
- 1 high-fiber tortilla (like Xtreme Wellness): The unsung hero! These tortillas are soft, pliable, and pack a huge fiber punch (often 12+ grams!), which helps keep you full and makes this meal a nutritional home run. They crisp up perfectly. Easy Swap: Any whole wheat or low-carb tortilla will work. Just aim for one around 80-100 calories for a similar result.
- 1/4 cup shredded cheddar cheese: The glorious glue! Cheddar melts like a dream and has a sharp, tangy flavor that cuts through the beef. Chef’s Insight: Pre-shredded cheese is convenient, but a block you shred yourself melts creamier (it doesn’t have anti-caking agents). Easy Swap: Pepper jack for heat, Monterey Jack for milder melt, or a Mexican blend.
- 2 tablespoons pico de gallo: Our fresh, juicy crunch! The tomatoes, onion, cilantro, and lime juice add a crucial burst of freshness that cuts the richness. Easy Swap: Straight-up diced tomatoes, a spoonful of salsa verde, or even a quick chop of avocado.
- 2 tablespoons light sour cream: The cool, creamy finish. It adds a lovely tang and creaminess without weighing things down. Easy Swap: Plain Greek yogurt is my go-to hack here—identical tang, even more protein!
Let’s Get Cooking: Step-by-Step to Quesadilla Bliss
Ready? This is where the magic happens, and it’s faster than you think. I’ll walk you through each step with the little tips and tricks I’ve learned from making approximately one zillion of these.- Brown that Beautiful Beef: Heat a medium nonstick skillet over medium heat. No oil needed! Add your ground beef, breaking it up with a wooden spoon or spatula. Here’s my big tip: let it sit for a minute before stirring. We want some of those little bits to get brown and crispy—that’s called fond, and it’s pure flavor gold. Cook until no pink remains, about 4-5 minutes.
- Drain & Season: Carefully tilt the pan and use a spoon to drain off any excess fat (with 90% lean, there won’t be much). Reduce the heat to low. Sprinkle your taco seasoning over the beef and stir for about 30 seconds until it’s fragrant and coating every crumble. That quick toast in the pan wakes up the spices! Transfer the beef to a bowl for a sec. Wipe out the skillet with a paper towel—we’re going to use it again for maximum efficiency (and fewer dishes!).
- The Art of Assembly: Lay your tortilla flat on a cutting board. Sprinkle half of your cheese evenly over one half of the tortilla. This creates a protective, melty barrier between the juicy beef and the tortilla, preventing sogginess! Pile the seasoned beef on top of the cheese, then top with the remaining cheese. The cheese-on-bottom-and-top method ensures every bite is perfectly gooey. Now, fold the bare half of the tortilla over the filling to create a perfect half-moon. Press down gently.
- Crispy, Golden Perfection: Reheat your same skillet over medium heat. Carefully place the folded quesadilla in the dry, hot pan. Cook for 2-3 minutes, until the bottom is gorgeously golden brown and speckled. Chef’s Hack: If you want to guarantee melt, place a lid over the skillet for about 1 minute of this cooking time. It traps the heat and steam, turning your skillet into a mini cheese-melting oven! Flip the quesadilla (I use a big, confident spatula motion!) and cook the other side for another 2-3 minutes until equally golden and the cheese is audibly sizzling.
- The Grand Finale: Slide your masterpiece onto a cutting board. Let it rest for just 60 seconds—this helps the cheese set slightly so it doesn’t all gush out when you cut it. Use a sharp knife or pizza cutter to slice it into 3 wedges. Plate it up with little bowls of the bright pico de gallo and cool sour cream. You did it!
Plating Up Your Masterpiece
Presentation is the final joyful touch! I love serving this on a simple, colorful plate. Arrange the three wedges so they’re slightly fanned out. Place a small, vibrant bowl of the pico de gallo in the center for dipping, and a dollop of sour cream on the side. For a restaurant-worthy touch, sprinkle a few extra cilantro leaves over everything and add a lime wedge on the rim of the plate. It instantly looks like a meal you’re proud to serve (or devour solo on the couch—no judgment here!). A simple side of mixed greens with a squeeze of lime juice makes it a perfectly balanced plate.Make It Your Own: Creative Twists
- The “Fiesta” Veggie Load: Add 1/4 cup of sautéed bell peppers and onions to the beef filling for extra color, fiber, and flavor.
- Green Goddess: Swap the beef for 1/2 cup of canned black beans (rinsed and mashed slightly) and add a handful of fresh spinach after you season the “filling.” Vegetarian and packed with goodness!
- Buffalo Blue: Use shredded cooked chicken instead of beef. Toss the chicken with 1 tablespoon of buffalo sauce before adding to the tortilla, and swap cheddar for crumbled blue cheese. Serve with ranch for dipping.
- Breakfast-for-Dinner: Scramble 1 egg with the beef (or use scrambled eggs alone), and add a sprinkle of everything bagel seasoning inside. Swap sour cream for hot sauce!
- Lean & Mean Machine: Use 99% lean ground turkey and swap the cheddar for part-skim mozzarella. It lowers the fat even further while keeping all the satisfying texture.
From My Kitchen to Yours: Chef’s Notes
This recipe has been my trusty sidekick for years, and it’s evolved in the funniest ways. I once tried to “healthy it up” by using lettuce leaves as a wrap instead of a tortilla. Let’s just say it was a delicious, but very messy, beef salad situation. Not recommended for a first date! The biggest lesson I’ve learned? Trust the process of letting the tortilla get truly golden. That crisp shell is what makes it feel like an indulgence. And don’t stress about making it picture-perfect. My first ones were always oddly shaped and cheese would ooze out the sides. That’s where the sour cream and pico come in—they’re delicious camouflage for any “rustic” edges! Now, it’s my most-requested quick meal by friends. The recipe is so ingrained, I could make it in my sleep, but I never get tired of that moment when I flip it and see that perfect, toasty brown crust. Pure kitchen joy.Your Questions, Answered
Q: My tortilla is burning before the cheese melts! What am I doing wrong? A: Heat is likely too high! Medium heat is your friend here. It allows the inside to heat through and the cheese to melt without scorching the outside. Also, try the “lid trick” mentioned in the instructions—it works wonders! Q: Can I make a bunch ahead of time for meal prep? A: Absolutely! Cook the seasoned beef and store it in the fridge for up to 4 days. You can also assemble the quesadillas (without cooking), wrap them tightly in parchment paper, and freeze them in a single layer. Cook from frozen, adding a few extra minutes per side over medium-low heat. Q: My quesadilla comes out soggy. Help! A: Two common culprits: 1) Too much wet filling. Make sure your pico de gallo or other add-ins are well-drained. 2) Not enough direct heat on the tortilla. A dry, preheated pan is crucial. Also, that cheese-barrier method (cheese on the bottom first) really helps create a moisture block. Q: Can I bake these instead of pan-frying? A: For sure! Preheat your oven to 400°F (200°C). Place assembled quesadillas on a baking sheet lined with parchment. Lightly spray the tops with cooking spray and bake for 8-10 minutes, flipping halfway through, until golden and crispy. Great for making multiple servings at once! Print
High-Protein Beef Quesadilla : 35g Protein with Simple, Healthy Ingredients
Description
High-Protein Beef Quesadilla
Prep Time: 5 minutes
Cook Time: 8–10 minutes
Total Time: 15 minutes
Servings: 1 quesadilla
Ingredients
-
4 oz lean ground beef (90% lean or higher)
-
½ tsp taco seasoning
-
1 high-fiber tortilla (10-inch)
-
¼ cup shredded cheddar cheese
-
2 tbsp pico de gallo
-
2 tbsp light sour cream or plain Greek yogurt
-
Optional: cooking spray (if needed)
Instructions
-
Cook the Beef
Heat a nonstick skillet over medium heat. Add ground beef and cook, breaking it up, until browned and fully cooked (4–5 minutes). Drain excess fat if needed. -
Season
Lower heat and stir in taco seasoning. Cook 30 seconds until fragrant. Remove beef from skillet and set aside. Wipe skillet clean. -
Assemble the Quesadilla
Lay tortilla flat. Sprinkle half the cheese over one half of the tortilla.
Add the seasoned beef, then top with remaining cheese.
Fold tortilla in half. -
Cook Until Crispy
Return skillet to medium heat. Place quesadilla in the dry pan.
Cook 2–3 minutes per side until golden brown and cheese is melted.
(Optional: cover with a lid for 1 minute to help melt the cheese.) -
Serve
Let rest 1 minute, slice into wedges, and serve with pico de gallo and sour cream for dipping.
Notes
-
Sautéed peppers & onions
-
Black beans
-
Spinach
-
Jalapeños
Nutritional Information*
*The following is an estimate for one full quesadilla as written, using specific brands for calculation. Your exact numbers may vary.- Calories: ~380
- Protein: 35g
- Carbohydrates: 20g
- Fiber: 12g
- Fat: 18g
- Saturated Fat: 6g
- Sodium: ~600mg
Final Thoughts
So, there you have it. The proof that you really can have it all—without the compromise, the guilt, or the frantic 9 PM stare-down with your refrigerator.
This High-Protein Beef Quesadilla is more than just a recipe; it’s a permission slip. Permission to enjoy the deep, crispy, cheesy comfort you crave, while giving your body the premium fuel it deserves. It’s the end of choosing between flavor and fuel. Now, you get both in one glorious, golden-brown package.
I hope this recipe becomes your new kitchen secret—the reliable friend you turn to when time is short but standards are high. The one that delivers a 35-gram protein punch with a side of pure joy. Let it change the way you think about “healthy” eating. It’s not about subtraction; it’s about smart, delicious, and deeply satisfying addition.
Now, go forth and sizzle! Make it once, make it a dozen times, and make it your own with those fun twists. Most importantly, share it. Slice that golden wedge and pass it to someone you care about. Good food, made with good intentions, is meant to be shared.
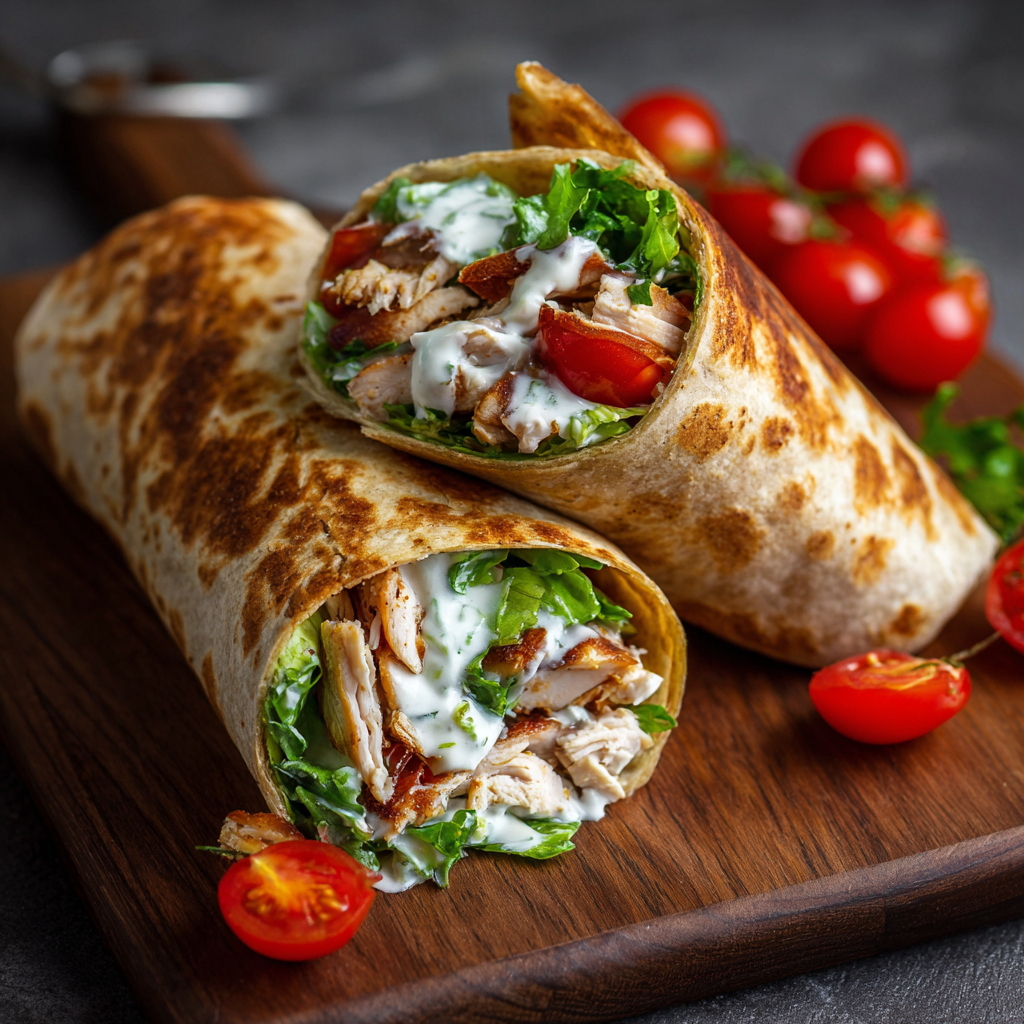
Crispy Chicken Wrap with Creamy Dressing : Quick, Healthy & Delicious Lunch
The Lunch That Changed My Game: My Crispy Chicken Wrap Obsession
Hey there, friend! Come on in, grab an apron, and let’s get something straight: lunch doesn’t have to be a sad desk salad or a boring sandwich. It can be the highlight of your day. I’m talking about that moment you bite into something so perfectly balanced—crispy, creamy, fresh, and savory—that you actually pause and think, “Wow, I made this.” That’s the magic of this Crispy Chicken Wrap.
Picture this: tender, flavorful chicken, a riot of crunchy lettuce, sweet bursts of tomato, all hugged by a creamy, herby dressing and wrapped in a whole-grain blanket that gets toasted to golden, shatter-crisp perfection. It’s a symphony of texture and taste that comes together in about 10 minutes flat. I created this recipe during a chaotic week of recipe testing, desperate for something that felt indulgent but wasn’t a project. It was an instant hit in our house, and it’s since become my most-requested “quick fix” meal. Whether you’re wrangling kids, powering through a work-from-home day, or just need a seriously satisfying fuel-up, this wrap is your new best friend. Let’s make lunch something to look forward to.
Why This Wrap? A Tale of Lunchtime Liberation
This recipe was born from pure lunchtime rebellion. For years, I’d stare into the fridge at noon, feeling uninspired. Leftovers? Meh. Another sandwich? Snooze. I’d end up grabbing a handful of this and a spoonful of that, never truly satisfied. Then, one Tuesday, I had some leftover herb-roasted chicken, a nearly empty jar of ranch, and a mission. I slapped it all into a tortilla, griddled it in a hot pan because everything is better crispy, and took a bite. Cue the angelic choir!
It wasn’t just food; it was a moment. It tasted like the gourmet wrap from my favorite cafe, but I made it in my own kitchen, in my pajamas, for a fraction of the cost. That’s the real joy here: transforming simple, maybe-even-leftover ingredients into something that feels special, restaurant-worthy, and utterly yours. Now, my husband will literally peek into the kitchen and ask, “Is it… wrap day?” with hopeful eyes. It’s our little lunchtime celebration, and I can’t wait for it to become yours.
Gathering Your Flavor Crew: Ingredients & Why They Matter
Great food starts with great ingredients, but let’s keep it simple and flexible. Here’s what you’ll need and my chef-y thoughts on each one.
- 1 Large Whole Grain Wrap or Tortilla: This is the foundation! I love the nutty flavor and extra fiber of whole grain, but a spinach herb wrap or a plain flour tortilla works beautifully. The key is size—go for the burrito-sized (10-inch) so you have plenty of real estate for filling.
- ½ cup Shredded Cooked Chicken: The star protein! This is perfect for using up leftover rotisserie chicken, last night’s grilled chicken breast, or even poached chicken. Chef Insight: For maximum flavor, toss the shredded chicken with a tiny pinch of salt, pepper, and maybe a sprinkle of garlic powder before adding it to the wrap.
- A Generous Handful of Fresh Lettuce: CRUNCH factor! I prefer romaine for its sturdy ribs and crispness, but butter lettuce or spinach are lovely, softer options. Tear it with your hands for a more rustic feel.
- 4–5 Cherry Tomatoes, Sliced: Little pockets of juicy sweetness. Slice them in half or quarters. In winter, when tomatoes are sad, a few slices of roasted red pepper from a jar are a fantastic, flavor-packed swap.
- 1–2 tbsp Creamy Dressing: The glue that brings the party together! My heart belongs to a homemade herby ranch, but a zesty Caesar, creamy cilantro-lime, or even a spicy sriracha mayo are all winners. Pro Tip: If your dressing is very thick, spread it. If it’s runnier, drizzle it over the fillings just before rolling.
- 1 tsp Olive Oil, Butter, or Cooking Spray (for grilling): This is non-negotiable for that golden, crispy exterior. Butter gives incredible flavor, while olive oil is a great dairy-free option. A light spray of avocado oil works too!
Let’s Build & Sizzle: Step-by-Step to Wrap Heaven
Ready to assemble? This is the fun part. I’ll walk you through each step with my best tips to ensure a tight, crispy, leak-proof masterpiece.
- Prep Your Station: Lay your wrap flat on a clean cutting board. Have all your fillings prepped and within arm’s reach. This is a “mise en place” moment (fancy for “everything in its place”) and it makes the process so smooth.
- Spread the Love: Using a spoon or a small spatula, spread your creamy dressing in a horizontal line across the center of the wrap. Leave about 2 inches bare on the left and right sides. Chef Hack: Don’t spread it edge-to-edge! Keeping the borders clean is the #1 secret to a wrap that doesn’t ooze out the sides when you roll it.
- Layer Like a Pro: On top of the dressing, layer your lettuce first. This creates a protective barrier between the dressing and the wrap, preventing sogginess. Next, pile on the shredded chicken, and finally, scatter the sliced tomatoes. Keeping the fillings in the center third of the wrap is key.
- The Art of the Tight Roll: Here’s where we avoid burrito bloat. Fold the left and right sides of the wrap inward over the ends of the filling. Then, starting from the side closest to you, use your fingers to tuck the fillings in tightly as you roll the wrap away from you into a neat cylinder. Apply gentle pressure as you roll.
- Seal & Sizzle: Place your wrap seam-side down on a plate. This lets it “seal” under its own weight while you heat the pan. Heat a non-stick or cast-iron skillet over medium heat. Add your oil or butter. Once it shimmers, carefully transfer the wrap to the pan, seam-side down. Grill for 2-3 minutes until deeply golden and crispy. Use a spatula to gently flip and repeat on the other side. Listen for that satisfying sizzle!
- Rest and Slice: Transfer your gorgeous, crispy wrap to a cutting board and let it rest for just 60 seconds. This lets the fillings settle, making it much easier to slice cleanly in half on a diagonal (or into pinwheels!).
Plating Up Your Masterpiece
Serve this wrap warm, right off the griddle! I love slicing it in half on a sharp diagonal—it just looks more enticing. For a casual lunch, place it right on a plate with a few pickle spears or a handful of kettle chips. Want to fancy it up? Add a simple side salad of mixed greens with a lemon vinaigrette. No matter how you serve it, that first crunchy, creamy bite is pure joy.
Make It Your Own: 5 Tasty Twists
The beauty of this wrap is its versatility. Here are some ways to play with the formula:
- Mediterranean Magic: Swap the ranch for tzatziki, use chopped grilled chicken, and add diced cucumber, red onion, kalamata olives, and a sprinkle of feta cheese.
- Buffalo Crunch: Toss the chicken in buffalo sauce. Use blue cheese dressing, and add very thinly sliced celery and carrots for extra crunch.
- Southwest Fiesta: Use a chipotle crema or cilantro lime ranch. Add black beans, corn, diced avocado, and pickled jalapeños alongside the chicken.
- Greek Veggie Power: Skip the chicken and use canned chickpeas (rinsed and patted dry). Add the tzatziki, lettuce, tomato, cucumber, red onion, and plenty of fresh dill.
- Apple & Cheddar Delight: Perfect for fall! Use a honey mustard dressing, add sliced crisp apple (like Honeycrisp), sharp cheddar cheese, and baby spinach.
From My Kitchen to Yours: Chef’s Notes
This recipe has evolved from a “throw-together” into a beloved staple, and I’ve learned a few things along the way. First, if your wrap cracks when you roll it, it might be too cold. A quick 10-second warm-up in a dry pan or microwave (between damp paper towels) makes it super pliable. Second, I once got overzealous with the filling and created a “wrap explosion” in the pan—a delicious, cheesy, messy lesson in moderation. More isn’t always better! Lastly, my favorite version uses leftover chicken from my lemon-herb roast recipe. The flavors meld in the fridge overnight and make this wrap next-level. Don’t be afraid to experiment with your leftovers!
Your Questions, Answered: FAQs & Troubleshooting
Q: My wrap is soggy/falling apart. What did I do wrong?
A: Sogginess usually comes from too much wet dressing or filling. Remember the “dry buffer” layer (lettuce first!) and don’t over-sauce. Falling apart often means the wrap was overfilled or rolled too loosely. Practice that tight tuck-and-roll technique!
Q: Can I make this ahead of time for meal prep?
A: You can prep the components (shred chicken, chop veggies, make dressing) and store them separately for 3-4 days. I highly recommend assembling and grilling the wrap fresh for maximum crispness. A pre-assembled, un-grilled wrap will get soggy in the fridge.
Q: What’s the best way to reheat leftovers?
A> If you have a leftover grilled wrap, re-crisp it in a toaster oven or air fryer at 375°F for 4-5 minutes. The microwave will make it soft and chewy (which isn’t terrible, but it’s not the same crispy experience).
Q: I don’t eat meat. What’s a good chicken substitute?
A> So many options! Crispy baked tofu cubes, seasoned chickpeas (smashed slightly), store-bought plant-based “chicken” strips, or even roasted cauliflower florets are all fantastic, hearty fillings.
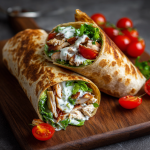
Crispy Chicken Wrap with Creamy Dressing : Quick, Healthy & Delicious Lunch
Description
Crispy Chicken Lunch Wrap
Golden, crunchy, creamy, and ready in 10 minutes
Prep Time: 5 minutes
Cook Time: 5 minutes
Total Time: 10 minutes
Servings: 1 wrap
Ingredients
-
1 large whole-grain wrap or tortilla (10-inch)
-
½ cup shredded cooked chicken (rotisserie, grilled, or roasted)
-
1 generous handful fresh lettuce (romaine, butter, or spinach)
-
4–5 cherry tomatoes, sliced
-
1–2 tbsp creamy dressing (ranch, Caesar, cilantro-lime, or spicy mayo)
-
1 tsp olive oil or butter (for grilling)
-
Salt & pepper, to taste (optional)
Instructions
-
Lay wrap flat on a cutting board.
-
Spread dressing in a horizontal line across the center, leaving 2 inches bare on each side.
-
Layer fillings: lettuce first, then chicken, then tomatoes.
-
Fold sides inward, then roll tightly from the bottom into a snug wrap.
-
Heat skillet over medium heat with oil or butter.
-
Grill wrap seam-side down for 2–3 minutes until golden and crispy. Flip and repeat.
-
Rest 1 minute, then slice in half and serve warm.
Notes
-
Lettuce first = moisture barrier (no soggy wraps!)
-
Don’t overfill—tight rolls crisp best
-
Warm stiff wraps for 10 seconds to prevent cracking
Nutritional Info (Approximate, Per Wrap)
This is a general estimate based on using a whole grain wrap, ½ cup roasted chicken breast, 2 tbsp light ranch, and 1 tsp olive oil.
Calories: ~350 | Protein: 25g | Carbs: 28g | Fat: 16g | Fiber: 5g
Prep Time: 5 mins | Cook Time: 5 mins | Total Time: 10 mins | Servings: 1
Final Thoughts: The 10-Minute Lunch Revolution
This wrap is more than just a quick meal. It’s a declaration that lunch deserves your attention—and that giving it doesn’t require hours of effort. It’s the satisfying crunch that turns a regular Tuesday into a small celebration. It’s the empowerment of knowing you can create something restaurant-quality with what’s already in your fridge.
I hope this recipe becomes more than just instructions on a page. I hope it becomes your secret weapon—the reliable, delicious answer to the eternal “What’s for lunch?” that fuels your afternoons with joy, not just calories. Let it be a reminder that cooking doesn’t have to be complicated to be profoundly good. Sometimes, the best recipes are simply the smart, crispy, creamy assembly of a few things you love.
So here’s to reclaiming the midday meal. To messy hands and clean plates. To the glorious sound of a wrap sizzling in a hot pan. May your lunches be forever crispy, never soggy, and always something to look forward to.
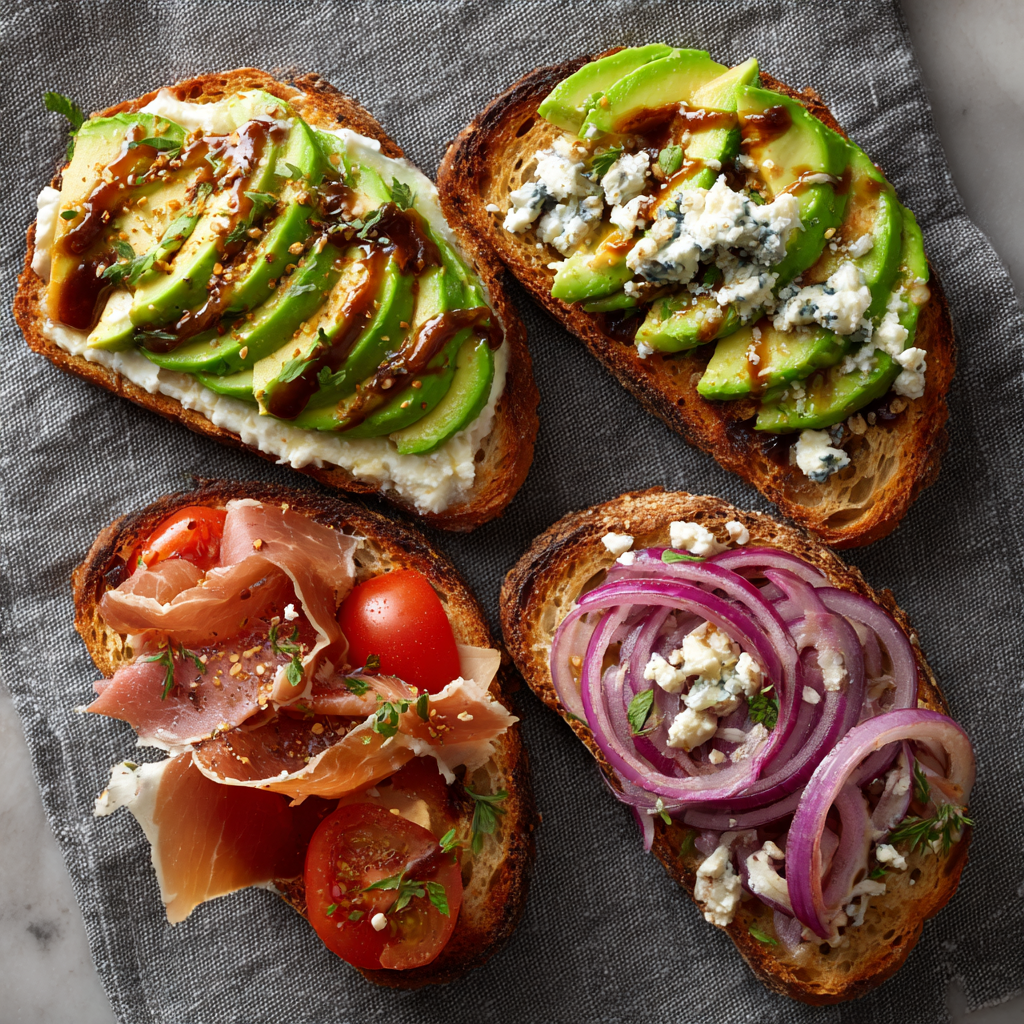
Healthy Sourdough Lunch Toasts : Sweet & Savory Mediterranean-Inspired Combos
Lunchtime, Reinvented: Why Your Midday Meal Deserves a Little Magic
Hey there, friend! Come on in, grab a seat at my kitchen island. Can I offer you a coffee? A cookie? Perfect. Let’s talk about the great midday mystery: lunch. Specifically, that moment when you’re staring into the fridge, hoping for inspiration to strike, and all you see are the usual suspects. Leftovers from two nights ago, a lonely tub of hummus, maybe some slightly-sad salad greens. Sound familiar?
I’ve been there more times than I can count. As a passionate home cook, it’s ironic how the meal meant to refuel us often gets the least creative energy. We deserve better! Lunch shouldn’t be a sad desk salad or a hastily-assembled sandwich that tastes of obligation. It should be a bright spot in your day—a few minutes of pure, delicious enjoyment that makes you pause and think, “Wow, I made this, and it’s so good.”
That’s exactly why I’m obsessed with the art of the Elevated Toast. Forget the basic avocado smash (though, no shade, I love it). I’m talking about treating a beautiful slice of sourdough like a blank canvas for flavor, texture, and nutrition. Today, I’m sharing two of my absolute favorite combinations that live in my weekly rotation. One is a vibrant, crunchy veggie situation that sings with freshness, and the other is a sweet-savory powerhouse that feels downright luxurious. They come together in minutes, use simple ingredients, and are guaranteed to make you look forward to lunch. This isn’t just food; it’s a delicious, manageable act of self-care. Ready to turn your lunch break into the best part of your day? Let’s get toasting!
The Toast That Started It All: A Tale of Empty Fridges & Full Hearts
This whole toast obsession started, like many great kitchen stories, in a moment of “what on earth do I have?” It was a lazy Sunday afternoon a few years back. My best friend had popped over unannounced, which is my favorite kind of visit. We’d talked for hours, the winter light was fading, and our stomachs started to rumble. The problem? It was that weird post-grocery, pre-shop limbo. The fridge was… sparse.
I had half a loaf of my weekly sourdough, a rogue avocado, some tomatoes, and a nub of blue cheese left over from a cheeseboard. In the pantry, a bottle of good honey and some balsamic glaze winked at me. “We’re having fancy toast,” I declared. I toasted the bread until it was shatteringly crisp, and we built our creations right there at the counter, arguing playfully over who got more blue cheese. We ate them standing up, leaning against the kitchen counter, making total messes of ourselves. The sweet honey against the salty prosciutto and funky cheese was a revelation. The creamy avocado with the sharp balsamic felt like a perfect balance.
It was more than a snack; it was a moment. Unplanned, imperfect, and utterly delicious. It reminded me that the best meals aren’t about complexity, but about intention and a little bit of playful creativity. That’s the spirit I want to bring to your kitchen today.
Gathering Your Flavor Toolkit
Here’s everything you’ll need to create this dynamic duo. I’ve added my little chef’s notes on “why” we’re using each thing—because knowing the reason makes you a more confident cook!
For the Vibrant Veggie Toast:
- 1 slice of good sourdough bread: This is your foundation! The slight tang and chewy, open crumb stand up to toppings without getting soggy. Chef’s Insight: No sourdough? A hearty whole-grain or seeded rye works beautifully.
- 1 tablespoon cream cheese, at room temp: Our creamy base layer. It adds a cool, rich contrast to the crisp veggies. Sub Tip: For a dairy-free or tangier twist, try whipped goat cheese, vegan cream cheese, or even a thick layer of plain hummus.
- 1/4 ripe avocado, mashed or sliced: Nature’s butter! It brings healthy fats, creaminess, and that gorgeous green color. Chef’s Insight: A squeeze of lemon on the avocado right after slicing keeps it bright green.
- 2 slices of ripe tomato: Juicy, sweet, and acidic. They lighten up the whole toast. Use the best you can find—a heirloom variety in summer is heaven.
- 2 very thin slices of red onion: They provide a crucial spicy crunch and a pop of color. Sub Tip: If raw onion is too intense, quick-pickle the slices in a mix of vinegar, water, and a pinch of sugar for 10 minutes. It mellows them right out!
- Balsamic glaze, for drizzling: This is the flavor bomb! Its sweet, syrupy acidity ties everything together. Chef’s Insight: You can buy it ready-made, or reduce regular balsamic vinegar in a saucepan over low heat until it thickens.
- Flaky sea salt and freshly cracked black pepper: Never an afterthought! They elevate every single layer.
For the Sweet-Savory Prosciutto Toast:
- 1 slice of good sourdough bread: Same sturdy, flavorful base.
- 1 tablespoon crumbled blue cheese: The star of the show. Its bold, funky saltiness is magic with the honey. Sub Tip: If blue cheese isn’t your thing, try sharp cheddar, gorgonzola dolce (milder), or even a creamy feta.
- 1–2 slices of prosciutto: Silky, salty, and delicate. It adds a luxurious protein punch. Chef’s Insight: Look for prosciutto that’s thinly sliced, almost translucent. You can also use serrano ham or, in a pinch, a few slices of high-quality bacon, cooked until crisp.
- 1 teaspoon of good honey: The sweet counterpoint that makes your taste buds dance. Sub Tip: Experiment with different honeys! A wildflower honey is classic, but try orange blossom or a rich buckwheat honey for a deeper flavor.
Let’s Build Some Beautiful Toast: A Step-by-Step Guide
This is where the magic happens, and it’s so simple! I’ll walk you through each step with my favorite little hacks to ensure perfect results every single time.
- Toast Your Foundation to Perfection.Pop your sourdough slices in the toaster, toaster oven, or under the broiler. We’re going for a deep, golden brown with serious crunch. Why? A sturdy, crisp base is critical—it won’t wilt under the weight of our toppings. My pro tip: if using a broiler, keep a close eye! It goes from golden to charcoal in seconds. I like to lightly brush the bread with a tiny bit of olive oil before toasting for an extra layer of flavor and even browning, but it’s not essential.
- Assemble the Vibrant Veggie Toast.Take your first gorgeous, warm slice of toasted sourdough. Immediately spread that room-temperature cream cheese all the way to the edges. The warmth of the bread will soften it just slightly, making it dreamily creamy. Next, layer on your avocado. You can go rustic with a mash (sprinkle it with salt and pepper right on the toast) or elegant with neat slices. Then, add the tomato slices and those thin rings of red onion. Now, the finishing touch: take your balsamic glaze and drizzle it in zig-zags or a lazy spiral over the whole thing. Don’t be shy! Finally, a generous pinch of flaky salt and a few cracks of black pepper. See how each ingredient has its own space and texture? That’s what we want!
- Create the Sweet-Savory Prosciutto Toast.Grab your second slice of toast. While it’s still warm, sprinkle the crumbled blue cheese evenly over the surface. The residual heat will take the very sharp edge off the cheese and make it slightly creamy. Next, gently drape the prosciutto over the cheese. I like to let it fold and ruffle naturally for a pretty, rustic look. Finally, take your teaspoon of honey. Hold it high above the toast and let the honey drizzle down in a thin stream. This gives you more control and ensures every bite gets a hint of sweetness. The contrast of the salty ham, funky cheese, and golden honey is absolutely irresistible.
Plating Your Masterpiece
Presentation is part of the fun! I love serving these toasts side-by-side on a simple wooden board or a large, colorful plate. The contrast between the green, red, and white of the veggie toast and the creamy, pink, and golden hues of the prosciutto toast is stunning. Add a few extra cherry tomatoes, some olives, or a little pile of dressed arugula on the side to make it feel like a true, restaurant-worthy plate. These toasts are best enjoyed immediately, with a big glass of sparkling water with lemon, a crisp white wine, or an iced herbal tea. Sit down, take a breath, and savor every single bite.
Make It Your Own: Endless Toast Possibilities
The beauty of this formula is its flexibility. Once you master the base, the sky’s the limit! Here are a few of my favorite spins:
- The Garden Party: Swap cream cheese for herby goat cheese. Top with mashed peas, thin radish slices, and a sprinkle of fresh mint.
- The Mediterranean: Use hummus as the base. Add sliced cucumber, crumbled feta, Kalamata olives, and a sprinkle of za’atar or dried oregano.
- The Sweet Fig & Prosciutto: Swap blue cheese for ricotta or mascarpone. Top with prosciutto, fresh fig slices (or fig jam), and a drizzle of honey.
- The Vegan Delight: Use a thick vegan cream cheese or smashed white beans. Top with avocado, everything bagel seasoning, and quick-pickled shallots.
- The Everything Bagel: Spread toast with whipped cream cheese, top with smoked salmon (or capers for vegan), red onion, and everything bagel seasoning.
From My Kitchen to Yours: A Few Final Thoughts
Over the years, this “fancy toast” concept has become my ultimate kitchen hack for quick, satisfying, and impressively delicious meals. It’s evolved from that first improvised snack into a full-blown philosophy: lunch deserves joy. I’ve made these for quick solo lunches while working from home, piled them onto a platter for a last-minute girls’ lunch, and even served mini versions as appetizers with cocktails.
The biggest lesson? Don’t overcomplicate it. The best ingredients you have on hand, treated with a little love and intention, will always win over a fussy, hours-long recipe. My kitchen is often a beautiful mess, with crumbs on the counter and a drizzle of honey where it shouldn’t be, and that’s how I know a good meal happened. I hope these toasts bring a bit of that joyful mess and a whole lot of flavor into your home.
Your Questions, Answered!
Q: My bread always gets soggy! How do I prevent that?
A: The enemy of crisp toast is moisture. Two key tips: 1) Toast your bread EXTRA crispy. It should almost sound like a cracker when you tap it. 2) Create a moisture barrier. That’s why the cream cheese or cheese layer is so important—it acts as a sealant between the warm bread and the juicy toppings (like tomato). Also, assemble and eat immediately!
Q: I can’t find balsamic glaze. What can I use instead?
A: No problem! You can make a quick version by simmering ½ cup of balsamic vinegar in a small saucepan over low heat for 8-12 minutes until it reduces by half and becomes syrupy. Let it cool slightly before using. Alternatively, a drizzle of good extra virgin olive oil and a sprinkle of flaky salt is a classic, delicious substitute.
Q: Can I prep any components ahead of time for a faster lunch?
A: Absolutely! You can slice your tomatoes and red onion, make your balsamic glaze, and even crumble your blue cheese the night before. Store them in separate small containers in the fridge. The key is to keep everything separate and only assemble on the toasted bread right before eating to maintain perfect texture.
Q: Are these toasts really filling enough for lunch?
A: They can be! The combo of complex carbs (sourdough), healthy fats (avocado, cheese), and protein (cheese, prosciutto) is designed to be satisfying. For a heartier meal, simply add a side—a simple green salad, a bowl of soup, or a handful of nuts will turn it into a very complete and filling lunch.
Healthy Sourdough Lunch Toasts : Sweet & Savory Mediterranean-Inspired Combos
Description
Elevated Lunch Toast Duo
Two crave-worthy toasts that turn lunch into a moment
Prep Time: 5–7 minutes
Cook Time: 3 minutes
Total Time: 10 minutes
Servings: 1 (2 toasts)
Instructions
Instructions
-
Spread cream cheese over warm toast.
-
Layer avocado, tomato, and red onion.
-
Drizzle with balsamic glaze.
-
Finish with flaky salt and black pepper.
Instructions
-
Sprinkle blue cheese over warm toast.
-
Gently drape prosciutto on top.
-
Drizzle honey evenly over the toast.
-
Serve immediately.
-
Notes
Serve side by side on a board or plate with:
-
A handful of dressed arugula
-
Sparkling water with lemon or iced tea
-
Optional olives or fruit for contrast
Nutritional Information*
*This is an approximate estimate for the two toasts as written, using standard ingredients. It will vary based on your specific bread, cheese, etc.
- Calories: ~420
- Protein: 17g
- Carbohydrates: 34g
- Fat: 24g
- Fiber: 5g
- Sugar: 6g
- Sodium: ~600mg
Prep Time: 5 min | Cook Time: 3 min | Total Time: 8 min | Servings: 1 (2 toasts)
Final Thoughts: Your Invitation to a Brighter Lunch Break
And there you have it. Two simple pieces of toast, but so much more than that. This is your invitation to break the monotony, to treat a daily necessity as a daily opportunity—for creativity, for a moment of calm, and for genuine enjoyment.
I know life is busy. The idea of “making lunch” can feel like just another task on the list. But what I hope you take away from this isn’t a rigid recipe, but a feeling. A feeling that you can open your fridge, look at those “usual suspects” with new eyes, and create something that makes you smile. It’s about reclaiming those ten minutes in the middle of your day, whether you’re at a kitchen counter, a desk, or a park bench, and turning them into something nourishing for both your body and your spirit.
The magic isn’t in following these combinations exactly (though I truly hope you love them). The magic is in the approach. It’s in seeing your bread as a canvas, your pantry as a palette, and giving yourself permission to play. Maybe it starts with a favorite cheese, a herb from your window sill, or the last perfect peach from the market. Build from there.
So tomorrow, when lunchtime rolls around, I hope you’ll give it a try. Toast that bread a little extra crispy, arrange your toppings with a bit of care, and take that first delicious bite. Let it be your small, sustainable act of midday magic.
Here’s to no more sad desk lunches. Here’s to your kitchen, your creativity, and your very own elevated toast.
Happy toasting, friend.

Savory Blackstone Garlic Parmesan Chicken Delight
Savory Blackstone Garlic Parmesan Chicken Delight: Your New Griddle Obsession
That Sizzle is Calling Your Name
Hey friend! Can we just take a moment to appreciate the symphony of a hot griddle? That initial hiss when food hits the surface is like the opening note to the best concert you’ll ever eat. If you’re anything like me, your Blackstone isn’t just an outdoor appliance; it’s a flavor-launching pad, a weeknight dinner superhero, and the heart of so many good memories. And today, we’re using it to create something truly magical: our Savory Blackstone Garlic Parmesan Chicken Delight.
This isn’t just another chicken recipe. This is the chicken recipe that will make you look like a gourmet griddle genius with minimal effort. We’re talking about chicken breasts transformed—perfectly seared and juicy on the inside, with a crusty, golden exterior that’s absolutely loaded with the bold, savory, nutty goodness of garlic and Parmesan. It’s rich without being heavy, impressive but impossibly simple, and it comes together in the time it takes to set the table.
Whether you’re feeding a hungry crowd after a long day or just treating yourself to a restaurant-quality meal under the open sky, this dish delivers every single time. So tie on that apron (the messy one is totally welcome here), fire up that griddle, and let’s turn simple ingredients into an unforgettable, flavor-packed experience. Your taste buds are in for a serious treat!
Why This Dish Hits Different
This recipe will always remind me of my first big “griddle leap of faith.” It was my husband’s birthday, and I’d promised a backyard feast for ten people. Of course, I planned an overly ambitious menu. The clock was ticking, guests were arriving, and I had a moment of pure panic staring at raw chicken breasts. My trusty oven was full of roasting veggies, and the stovetop was occupied. My only hope? The Blackstone, which I was still getting to know.
I remembered a simple garlic butter pasta sauce I loved and thought, “What if I just… put that on griddled chicken?” With nothing to lose, I went for it. I pounded the chicken, seasoned it boldly, and let the griddle work its high-heat magic. The smell of the garlic sizzling in butter on the side of the griddle stopped conversation. When I showered the golden chicken with Parmesan and it formed that irresistible, slightly crispy cheese blanket? A chorus of “What IS that?!” rang out. It was a smash hit, the star of the night, and proved that the best creations often come from a little chaos and a lot of garlic.
Gathering Your Flavor Arsenal
Here’s everything you’ll need to create this masterpiece. Remember, the quality of a few key players makes a world of difference!
- 4 boneless, skinless chicken breasts: The canvas for our masterpiece. Look for breasts that are similar in size so they cook evenly. Pro tip: if they’re very thick, you can also slice them horizontally into cutlets to speed up cooking and maximize that delicious seared surface area.
- 3 tablespoons olive oil: Our trusty griddle lubricant and flavor helper. A good extra virgin olive oil adds a fruity note, but a regular olive oil or even avocado oil (with its higher smoke point) works beautifully here.
- 4 garlic cloves, minced: The fragrant soul of the dish! Please, for the love of all things flavorful, use fresh garlic. The pre-minced jarred stuff just can’t compete in a recipe where garlic is the co-star. That sharp, aromatic punch is non-negotiable.
- ½ teaspoon garlic powder: “But Olivia, we already have fresh garlic!” I know, trust me. This is my little chef’s hack. The powder adheres to the chicken and creates a base layer of garlicky flavor that permeates every bite from the inside out. It’s a depth-builder.
- ½ cup grated Parmesan cheese: Not the dusty shelf-stable canister, friends! Get a wedge of real Parmigiano-Reggiano or a good-quality Parmesan and grate it yourself. It melts better, tastes nuttier and saltier, and creates those delightful little crispy cheese bits on the griddle. This is your flavor payoff.
- 2 tablespoons unsalted butter: Because butter and garlic are a match made in heaven. Using unsalted lets you control the seasoning perfectly. This combines with the olive oil and garlic to make the luxurious sauce that coats the chicken.
- Salt and pepper to taste: Season confidently! Chicken needs a good amount of salt to truly sing. Don’t be shy here.
- Fresh parsley (optional, for garnish): A pop of green for color and a tiny hint of freshness to cut through the richness. Chives or a little basil would also be lovely.
Let’s Get Sizzling: Your Step-by-Step Guide
Follow these steps, and you’re guaranteed success. I’ve packed each one with my favorite tips and hacks!
Step 1: Preheat Your Blackstone. Crank it up to medium-high heat. You want it nice and hot so the chicken sears instantly, locking in those juices. A good test: flick a few drops of water on the surface – they should skitter and evaporate almost immediately. While it heats, this is your prep window.
Step 2: Prep the Chicken. Place your chicken breasts between two sheets of plastic wrap or in a large zip-top bag. Using a meat mallet, rolling pin, or even a heavy skillet, gently pound them to an even thickness—about ¾-inch thick is perfect. This isn’t just about tenderizing; it’s the #1 secret to preventing dry, overcooked edges with a raw middle. Season both sides generously with salt, pepper, and that ½ teaspoon of garlic powder. Let it sit for a few minutes to absorb the flavors.
Step 3: Griddle Time! Drizzle the olive oil onto the hot griddle and spread it with your spatula. Carefully place the chicken breasts on the hot surface. You should hear that glorious, confident sizzle. Now, here’s the key: DO NOT MOVE THEM for a good 4-5 minutes. Let the griddle work its magic to form that perfect, golden-brown crust. Peek at the edges; when they look cooked about halfway up the side, it’s time to flip.
Step 4: Create the Garlic Butter Elixir. While the second side cooks (another 4-6 minutes), push the chicken to a slightly cooler part of the griddle if possible, or simply use the front corner. Add the butter. Once it melts and foams slightly, add the minced garlic. Sauté it for just 45-60 seconds, stirring constantly, until it’s incredibly fragrant but NOT brown. Burnt garlic is bitter, and we want sweet, aromatic bliss.
Step 5: The Grand Finale. Your chicken should now be cooked through (internal temperature of 165°F). Spoon that glorious garlic butter over each breast, making sure every nook gets coated. Immediately sprinkle the freshly grated Parmesan cheese over the top, dividing it evenly. Let it hang out on the griddle for just 1-2 more minutes. You’ll see the cheese melt and then start to get those irresistible crispy, lacy edges. That’s your cue!
Step 6: Serve & Impress. Use your spatula to transfer the chicken to a platter or plates. Drizzle any remaining garlic butter from the griddle over the top. Garnish with a flurry of chopped fresh parsley for that perfect finishing touch.
How to Serve This Showstopper
This chicken is the undeniable star, so keep the supporting cast simple! I love to plate it right on a bed of creamy mashed potatoes or fluffy parmesan risotto—they soak up the extra garlic butter sauce like a dream. For a lighter option, a crisp Caesar salad or a pile of simple grilled asparagus and zucchini from the Blackstone (cooked right alongside the chicken!) is perfect. Don’t forget a crusty loaf of warm bread for mopping up every last bit of flavor from the plate. Trust me, you’ll want to.
Make It Your Own: Delicious Twists
Once you’ve mastered the classic, try one of these fun variations!
- Creamy Spinach & Artichoke: After adding the cheese, toss a handful of chopped spinach and artichoke hearts on the griddle to wilt, then spoon over the chicken.
- Lemon Herb: Add the zest of one lemon and a tablespoon of fresh thyme or oregano to the garlic butter. Finish with a squeeze of fresh lemon juice.
- Spicy Cajun: Swap the garlic powder for 1 tsp of your favorite Cajun seasoning on the chicken. Add a pinch of red pepper flakes to the garlic butter.
- Keto/Low-Carb: Serve over cauliflower mash or with a side of roasted broccoli. It’s already perfectly keto-friendly!
- Mushroom Lover’s: Sauté sliced mushrooms in the butter before adding the garlic for an earthy, umami-packed version.
Olivia’s Kitchen Notes
This recipe has become my go-to for a reason—it’s foolproof and endlessly adaptable. Over the years, I’ve learned a few things: First, that letting the chicken rest for a couple of minutes after cooking (if you can resist!) makes it even juicier. Second, this method works just as brilliantly with chicken thighs for an even richer flavor. And third, I once ran out of fresh garlic and had to use roasted garlic paste in the butter. It was a happy accident that created a sweeter, deeper, almost caramelized flavor that was divine. Don’t be afraid to play! The griddle is your playground.
Your Questions, Answered
Q: My cheese just slides off the chicken and sticks to the griddle. Help!
A: This usually means the chicken surface wasn’t hot/dry enough when you added the cheese. Make sure you spoon the garlic butter over it first—the butter helps the cheese adhere. Also, ensure the chicken is fully cooked and has a good sear before adding toppings. If a little sticks, no worries, those crispy cheese bits are a chef’s treat!
Q: Can I make this indoors?
A: Absolutely! A heavy cast-iron skillet or stainless steel pan over medium-high heat will work great. You might need to cook in batches to avoid steaming the chicken. Do the garlic butter in the same pan after removing the chicken.
Q: How do I know the chicken is done without cutting into it?
A> Invest in an instant-read thermometer! It’s the best tool in your kitchen for perfect proteins. Aim for 165°F in the thickest part. If you don’t have one, the chicken should feel firm to the touch, and the juices should run clear.
Q: My chicken is cooking too fast on the outside but still raw inside.
A: The chicken was likely too thick. Next time, pound it more diligently to an even ¾-inch. If it’s happening now, move the chicken to a cooler zone on the griddle (or lower the heat) and cover it loosely with a metal bowl or disposable aluminum pan to trap heat and help it cook through without burning the exterior.

Savory Blackstone Garlic Parmesan Chicken Delight
Description
Savory Blackstone Garlic Parmesan Chicken Delight
Crispy, juicy chicken with buttery garlic and golden Parmesan—griddle perfection
Prep Time: 10 minutes
Cook Time: 12 minutes
Total Time: 22 minutes
Ingredients
-
4 boneless, skinless chicken breasts (pounded to even thickness)
-
3 tbsp olive oil
-
2 tbsp unsalted butter
-
4 cloves fresh garlic, minced
-
½ tsp garlic powder
-
½ cup freshly grated Parmesan cheese
-
Salt & black pepper, to taste
-
Fresh parsley, chopped (optional garnish)
Instructions
-
Preheat Blackstone to medium-high heat.
-
Prepare chicken: Pound to ~¾-inch thickness. Season both sides generously with salt, pepper, and garlic powder.
-
Oil the griddle and place chicken down. Cook 4–5 minutes per side, undisturbed, until golden and cooked through (165°F internal temp).
-
Make garlic butter: Push chicken aside. Melt butter, add garlic, and sauté 45–60 seconds until fragrant (do not brown).
-
Finish: Spoon garlic butter over chicken, sprinkle Parmesan evenly on top, and cook 1–2 minutes until melted and lightly crispy.
-
Serve immediately, drizzling any remaining garlic butter over the top. Garnish with parsley.
Notes
-
Mashed potatoes or parmesan risotto
-
Griddled asparagus, zucchini, or broccoli
-
Caesar salad or crusty bread for sauce-soaking
Pro Tips
-
Pound evenly = juicy chicken every time
-
Fresh Parmesan melts better and crisps beautifully
-
Works perfectly with chicken thighs or cutlets
Nutritional Info (Per Serving)
This is a general estimate. For precise numbers, use a nutrition calculator with your specific ingredients.
- Calories: ~320
- Protein: 35g
- Carbohydrates: 2g
- Fat: 19g
- Prep Time: 10 minutes
- Cook Time: 12 minutes
- Total Time: 22 minutes
- Servings: 4
Final Thoughts
If there’s one recipe that truly captures the spirit of griddle cooking—fast, flavorful, and undeniably satisfying—this Garlic Parmesan Chicken is it. It’s more than just a meal; it’s a reminder of why we fell in love with cooking outdoors in the first place. The sizzle, the smell, the sheer joy of creating something incredible with just a few simple ingredients… it doesn’t get much better than that.
Whether you’re a Blackstone beginner or a seasoned griddle master, this dish meets you right where you are. It’s forgiving enough for a weeknight but impressive enough for company. It’s adaptable, reliable, and consistently delicious—the kind of recipe that earns a permanent spot in your rotation
Save This Recipe For Later!
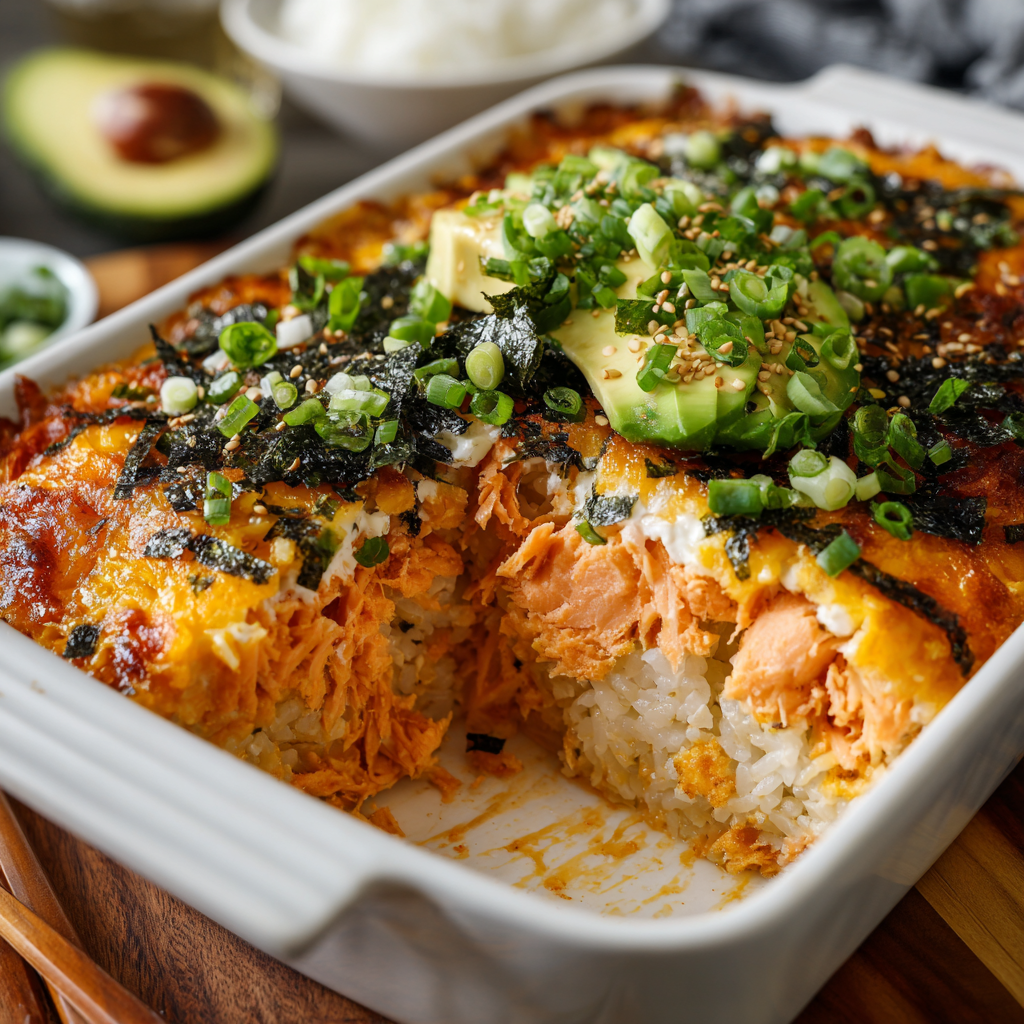
Easy Spicy Salmon Sushi Bake : A Crowd-Pleasing Weeknight Dinner
Easy Spicy Salmon Sushi Bake – Your New Go-To Weeknight Hero
Hey there, friend! Come on in, grab an apron, and let’s talk about one of life’s great dilemmas: that intense craving for sushi, crashing headfirst into a Tuesday night’s energy levels (or lack thereof). I’ve been there more times than I can count. You’re dreaming of that perfect bite—savory, a little spicy, creamy, with that unmistakable umami punch—but the thought of carefully rolling, slicing, and hoping it all holds together feels… well, let’s just say it doesn’t fit the ‘cozy’ vibe we’re going for.
That’s exactly why I fell head over heels for this Easy Spicy Salmon Sushi Bake. Imagine all the iconic flavors of your favorite spicy salmon roll, but instead of being neatly wrapped, they’re layered into a warm, bubbling, incredibly inviting casserole dish. It’s a hug in baking dish form. This dish is the glorious love child of convenience and crave-worthy flavor, and it’s about to become your secret weapon for busy nights, casual entertaining, and those “what should I make?!” moments.
The best part? You don’t need any fancy sushi-rolling skills. Just a bowl, a baking dish, and about 25 minutes. We’re taking simple, beautiful ingredients and letting the oven do the magic, transforming them into something that feels special, exciting, and utterly delicious. It’s the kind of recipe that makes everyone gather around the kitchen island, spoons at the ready, eyes wide. So, are you ready to turn your kitchen into the most popular spot in the house? Let’s get baking!
The Sushi Picnic That Started It All
This recipe always takes me back to a slightly chaotic, utterly perfect afternoon a few summers ago. My best friend and I had planned an elaborate picnic in the park, complete with a homemade sushi spread. We had grand visions of beautiful, tightly rolled maki. What we actually produced after a flour-dusted, laughing-fit-filled morning were… let’s call them “rustic” rolls. Some were bursting, others were a bit loose, but they were made with so much joy.
When we got to the park, a surprise breeze decided to join our party. As we wrestled with napkins and plates, one particularly adventurous roll essentially deconstructed itself right onto the blanket. We looked at the pile of flavorful rice, salmon, and avocado, laughed until we cried, and just dug in with spoons. And you know what? It was incredible. Every component was there, every flavor sang, just without the perfect form. That was my lightbulb moment. The flavor was all that mattered, and getting there didn’t have to be hard. This Sushi Bake is my ode to that messy, wonderful, delicious moment—all the heart of sushi, served with a big side of ease and a scoop of comfort.
Gathering Your Flavor Arsenal
Here’s everything you’ll need to build this flavor-packed bake. I’ve included my little chef notes and swaps so you can make this your own with what you’ve got!
- 2 cups cooked sushi rice – This is your foundation! Short-grain rice is key for its sticky, chewy texture. Don’t forget to season it while it’s warm with a mix of rice vinegar, a pinch of sugar, and a pinch of salt. That tangy-sweet note is the soul of sushi flavor. Chef’s Tip: No rice vinegar? A little apple cider vinegar or white wine vinegar with an extra tiny pinch of sugar works in a pinch.
- 8 oz cooked salmon – The star of the show! I love using leftover baked or pan-seared salmon. Flake it with a fork. In a hurry? A couple of cans of good-quality, skinless boneless salmon (drained well) are a fantastic pantry shortcut. Even pre-cooked grocery store salmon works!
- ½ cup mayo – For that luscious, creamy binder. I’m a Kewpie mayo devotee (it’s a bit richer and tangier), but your favorite regular or light mayo will do beautifully.
- 2 tablespoons sriracha – This brings the “spicy”! Adjust this to your heat preference. Start with 1 tablespoon if you’re sensitive, or add an extra squeeze if you’re a heat-seeker.
- 1 teaspoon soy sauce – For depth and salty umami. Use tamari for a gluten-free version.
- 1 teaspoon sesame oil – Just a teaspoon! This fragrant oil adds a nutty, authentic aroma you’ll love. Don’t skip it.
- ½ avocado, sliced (optional) – A cool, creamy finish. Add it after baking so it stays bright green and fresh.
- 2 tablespoons chopped green onions – For a pop of color and fresh, sharp flavor.
- 1 tablespoon furikake seasoning – This Japanese seasoning blend (with seaweed, sesame seeds, sometimes fish flakes) is a flavor bomb. Find it in the Asian aisle. If you can’t, a mix of toasted sesame seeds and a tiny crumble of nori is a good substitute.
- Nori sheets (for serving) – The fun part! Get full-sized sheets to tear, or the handy snack-size packs. They add that classic sea-salty crunch.
Let’s Build Some Deliciousness: Step-by-Step
Ready? This is where the magic happens, and it’s so simple. I’ll walk you through each step with my favorite kitchen hacks.
- Preheat & Prep: First, fire up your oven to 375°F (190°C). Grab an 8×8-inch baking dish (or a similar-sized oven-safe dish) and give it a very light coating of oil or a quick spritz of cooking spray. This isn’t so much for sticking—the rice is sticky enough—but it makes cleanup a dream. Chef’s Hack: Lining it with a sling of parchment paper makes lifting out squares super easy for serving!
- The Rice Layer: Take your beautifully seasoned, warm sushi rice and press it firmly and evenly into the bottom of your prepared dish. I use the back of a measuring cup or a spoon to get a nice, compact layer. This is your crispy-on-the-edges, chewy-in-the-middle base. Now, sprinkle about half of your furikake directly over the rice. We’re building flavor from the ground up!
- The Star Mix: In a medium bowl, combine your flaked salmon, mayo, sriracha, soy sauce, and sesame oil. Now, get in there with a fork and mix it until it’s gloriously creamy and every bit of salmon is coated. Taste it! This is your moment to adjust. Want more heat? More soy? This is your creation. Chef’s Commentary: I sometimes add a tiny squeeze of lime juice here for a bright note. Trust your palate!
- Layer It On: Spoon that incredible spicy salmon mixture over your rice layer. Use your spoon or a spatula to spread it right to the edges, creating one beautiful, even, salmon-covered landscape. No need to be perfect, just generous.
- Bake to Bubbly Perfection: Slide your dish into the preheated oven. We’re baking it for just 10-15 minutes. You’re looking for the edges to maybe get a tiny bit golden and the whole thing to be hot, bubbly, and incredibly inviting. Your kitchen will smell amazing.
- The Grand Finale (Toppings!): Once out of the oven, immediately scatter over your avocado slices (if using) and the chopped green onions. Give it one more flourish with the remaining furikake. This adds texture, color, and a final hit of flavor.
How to Serve Your Masterpiece
Presentation is part of the fun! I like to place the warm baking dish right in the middle of the table, family-style. Set out a stack of nori sheets, a bowl of extra steamed rice if you want to stretch it, and maybe a little dish of soy sauce for dipping. Here’s the drill: take a nori sheet, scoop a spoonful of the warm bake right onto it, wrap it up like a little tasty parcel, and take a bite. The combination of the warm, creamy filling and the crisp, salty seaweed is pure magic. Or, if you’re all about comfort, just grab a bowl, add some rice, top it with a big scoop of the bake, and eat it with a fork. Zero rules, maximum enjoyment.
Make It Your Own: Delicious Twists
This recipe is a fantastic canvas! Here are a few ways to play:
- Tuna Twist: Swap the salmon for canned or fresh cooked tuna. A dash of chili crisp in the mix would be amazing here.
- “California” Style: Add imitation crab (surimi) to the salmon mix or use it instead. Top with diced cucumber and a sprinkle of tobiko (flying fish roe) after baking.
- Spicy Mayo Drizzle: Whisk together 2 tbsp mayo with 1 tbsp sriracha and a tiny splash of rice vinegar. Drizzle this over the top after baking for extra creaminess and kick.
- Vegetarian/Vegan: Use finely chopped, roasted mushrooms or hearts of palm in place of salmon. Use vegan mayo and ensure your furikake is vegan (some contain fish).
- Extra Crunch: Before serving, add a sprinkle of panko breadcrumbs you’ve toasted in a pan with a little butter or oil. Texture heaven!
Olivia’s Chef Notes & Kitchen Tales
This recipe has evolved so much since that picnic! I started out making it almost too fancy, but over time, I’ve embraced its beautifully simple, weeknight-friendly soul. The biggest lesson? Don’t stress the rice. Even if your seasoning isn’t “perfect,” it will still be delicious. I’ve made this with slightly overcooked rice, under-seasoned rice, and once in a real pinch, with plain jasmine rice. It was still devoured.
A funny story: I once brought this to a potluck, and a friend’s dad, who claimed he “didn’t like fish,” tried it after much cajoling. He went back for thirds and asked for the recipe. That’s the power of this bake—it’s approachable and converts the skeptical! Now, I always keep a couple of cans of salmon in the pantry just for this. It’s my edible safety net, and it has saved dinnertime more than once.
Your Questions, Answered!
Q: Can I make this ahead of time?
A: Absolutely! You can assemble the entire dish (rice layer, salmon mix) cover it tightly, and refrigerate it for up to 24 hours before baking. You might need to add 2-5 extra minutes to the bake time since it’s going in cold. Hold the fresh toppings (avocado, green onion) until right before serving.
Q: My bake turned out a bit watery. What happened?
A: This usually comes from the salmon. If using canned salmon, be sure to drain it extremely well and even press it in a fine-mesh strainer. For fresh cooked salmon, pat it dry with a paper towel after flaking. Also, ensure your rice isn’t too wet.
Q: I don’t have an oven. Can I make this on the stovetop?
A> You sure can! Assemble in an oven-safe skillet. Cover and cook over low heat on the stovetop for about 10-15 minutes, until heated through. For a bit of top browning, you can pop it under a broiler for a minute or two (watch it closely!).
Q: Is there a substitute for furikake?
A> Yes! In a pinch, combine 2 teaspoons of toasted sesame seeds, 1/2 teaspoon of crumbled up nori (just tear a sheet), and a tiny pinch of sea salt. It won’t be identical, but it gives you that savory, sesame-seaweed vibe.
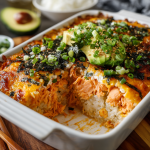
Easy Spicy Salmon Sushi Bake : A Crowd-Pleasing Weeknight Dinner
Description
Easy Spicy Salmon Sushi Bake
All the flavors of a spicy salmon roll—no rolling required
Prep Time: 10 minutes
Cook Time: 15 minutes
Total Time: 25 minutes
Ingredients
-
2 cups cooked sushi rice, seasoned
-
8 oz cooked salmon, flaked
-
½ cup mayonnaise (Kewpie preferred)
-
2 tbsp sriracha (adjust to taste)
-
1 tsp soy sauce or tamari
-
1 tsp sesame oil
-
1 tbsp furikake seasoning, divided
-
2 tbsp green onions, chopped
-
½ avocado, sliced (optional)
-
Nori sheets, for serving
Instructions
-
Preheat oven to 375°F (190°C). Lightly grease or line an 8×8-inch baking dish.
-
Press rice evenly into the bottom of the dish. Sprinkle with half the furikake.
-
Mix salmon topping: In a bowl, combine salmon, mayo, sriracha, soy sauce, and sesame oil until creamy.
-
Spread mixture evenly over the rice.
-
Bake for 10–15 minutes, until hot and bubbly.
-
Finish & serve: Top with avocado, green onions, and remaining furikake. Serve warm with nori sheets.
Notes
Scoop onto nori sheets and eat like hand rolls—or serve over extra rice in a bowl for peak comfort.
Nutritional Information (Approximate, per serving)
Note: This is an estimate for 1 of 6 servings, using regular mayo and without extra rice for serving. Values will vary based on your specific ingredients and portion size.
- Calories: ~380
- Protein: 22g
- Carbohydrates: 25g
- Fat: 21g
- Dietary Notes: Naturally gluten-free if using tamari, pescatarian, high-protein.
Prep Time: 10 mins | Cook Time: 15 mins | Total Time: 25 mins | Yield: 4-6 servings

Easy Spicy Salmon Sushi Bake – 25 Minute Dinner!
Craving sushi but short on time? This Easy Spicy Salmon Sushi Bake has all the flavor of your favorite roll without any rolling! A warm, layered casserole with creamy spicy salmon & sushi rice, topped with avocado & furikake. Perfect for a quick weeknight dinner, meal prep, or feeding a crowd. This crowd-pleasing recipe is pescatarian, high-protein, and ready in just 25 minutes. Great for beginners and a fun twist on classic Japanese flavors. #sushibake #salmonrecipe #easyweeknightdinner #mealprep #pescatarian #japanesefood #comfortfood
Final Thoughts: Your New Weeknight Hero Awaits
And there you have it—your passport to a world of incredible flavor, minus the fuss. This Easy Spicy Salmon Sushi Bake isn’t just a recipe; it’s a reminder that the best meals often come from simplicity, a little creativity, and a focus on what truly matters: joy, connection, and deliciousness shared right at your own table.
It captures everything we love about sushi—the savory depth, the gentle heat, the satisfying textures—and wraps it up in the cozy, welcoming embrace of a bake. It’s for the nights you want something special without the special effort. For feeding friends without fear. For turning “I don’t know what to cook” into “I can’t wait to eat.”
Remember, cooking is a conversation, not a monologue. This dish is your starting point. Tweak the heat, play with toppings, make it with what you have. Whether it becomes a trusted Tuesday tradition or your go-to potluck showstopper, I hope it brings as much warmth and happiness to your kitchen as it has to mine.
So, preheat that oven, flake that salmon, and get ready for the compliments. You’ve got this. Now, go make something amazing.
Happy cooking,
Olivia
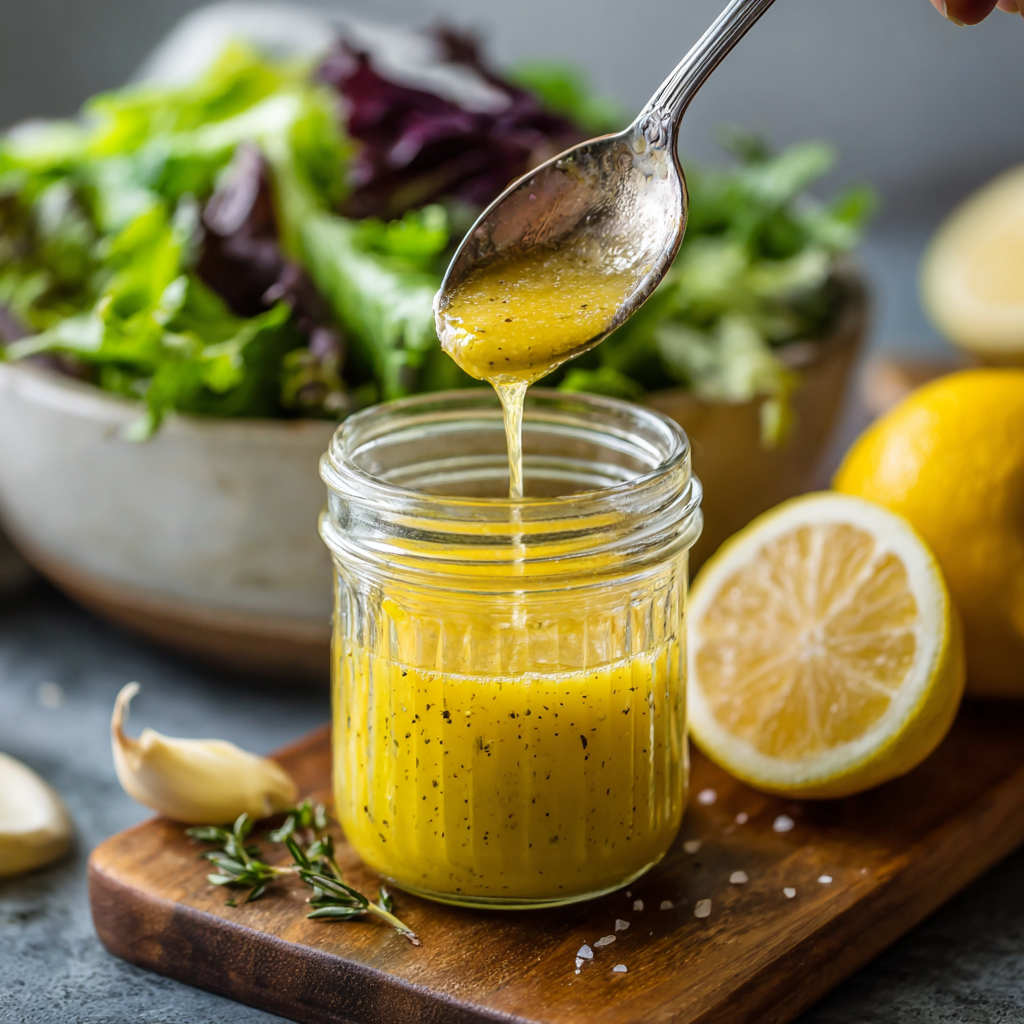
Zesty Lemon Vinaigrette Dressing : Fresh, Simple & Ready in 5 Minutes
Zesty Lemon Vinaigrette: Your Secret Weapon for Bright, Vibrant Meals
Hey there, friend! Come on in, the kitchen’s warm, and I’ve got a cutting board full of lemons that smell like sunshine. If you’ve ever stood in the grocery store aisle, staring at bottles of salad dressing and feeling… uninspired, I’ve been there too. So many are packed with preservatives, weird thickeners, and a sweetness that overpowers everything. What if I told you the absolute best salad dressing you’ll ever taste is waiting for you, and it’s just five minutes and a handful of simple ingredients away?
Today, we’re making my go-to, never-fail, Zesty Lemon Vinaigrette. This isn’t just a recipe; it’s a kitchen philosophy in a jar. It’s about trusting fresh ingredients, understanding how a few brilliant flavors can play together, and giving yourself the power to make something extraordinary with zero fuss. This vinaigrette is a wake-up call for simple greens, a magic elixir for roasted vegetables, and a secret sauce for grilled chicken or fish. It’s vibrant, tangy, lightly savory, and has that unmistakable homemade taste that says, “I care.”
So, grab your favorite whisk (or a trusty mason jar!), and let’s make something that will seriously upgrade your everyday cooking. No fancy skills required—just a love for bright, beautiful flavor. Ready? Let’s get shaking!
The Little Yellow Bowl: Why This Dressing Feels Like Home
This recipe takes me right back to my grandma’s tiny, sunflower-yellow kitchen. She wasn’t a “chef,” but she was a feeder. No meal, not even a simple Tuesday night dinner, was complete without a big, tossed salad. And she never, ever used bottled dressing. I can still see her: standing at the counter, squeezing a lemon into her favorite chipped ceramic bowl, adding a glug of oil from the big tin by the stove, and giving it a few furious whisks with a fork. She’d then do the “taste test,” dipping a piece of lettuce right into the bowl, her eyes closing for a second in concentration before adding another pinch of salt.
She’d let me do the final whisk, and I felt so important. That ritual—the fresh squeeze, the quick assembly, the tasting—made the salad feel special. It was the first thing I ever learned to “cook.” That little yellow bowl dressing taught me that the best meals aren’t about complexity; they’re about intention and freshness. Every time I make this vinaigrette, I get a little hit of that sunshine-yellow kitchen and the powerful, simple joy of making something good to share. Now, I want to share that feeling with you.
Gathering Your Sunshine: The Ingredients & Why They Matter
Here’s the beautiful part: we only need a few key players. But each one has a role to play in our flavor symphony. Let’s break it down.
- ¼ cup fresh lemon juice (about 2 lemons): This is our STAR. Please, I’m begging you, use freshly squeezed lemons. The bottled stuff tastes flat and preservative-y. We want that vibrant, aromatic zestiness that only comes from real fruit. Pro tip: roll your lemons firmly on the counter before cutting to get the most juice out!
- ½ cup extra virgin olive oil: Our rich, smooth background singer. A good, fruity extra virgin olive oil adds body and a lovely peppery finish. If you only have regular olive oil, that’s fine, but the flavor won’t be as complex. For a different twist, try a mild avocado oil.
- 1 teaspoon Dijon mustard: This is our sneaky MVP. It’s not for mustard flavor! Dijon is an emulsifier, meaning it helps bind the oil and lemon juice together into a creamy, cohesive dressing instead of a separated mess. It also adds a subtle savory depth. No Dijon? A tiny bit of regular yellow mustard or even a scant teaspoon of mayonnaise can work in a pinch.
- 1 garlic clove, minced (optional): For my garlic lovers! One small clove, minced super fine, adds a wonderful pungent kick. If you’re sensitive to raw garlic, you can rub the cut side of the clove around the inside of your mixing bowl for just a whisper of flavor.
- 1 teaspoon honey or maple syrup (optional): A tiny touch of sweetness is the ultimate flavor balancer. It rounds out the sharp lemon and makes the whole dressing sing. I love the floral note of honey, but pure maple syrup keeps it vegan. You can skip it if you prefer a purely tart vinaigrette.
- Salt and freshly cracked black pepper to taste: Don’t you dare forget these! Salt is crucial—it doesn’t make things salty; it makes them taste more like themselves. And fresh black pepper adds a warm, aromatic note that pre-ground pepper just can’t match.
Let’s Make Magic: Your Foolproof 5-Minute Method
You have two fantastic options here: the Whisk & Zen method or the Shake-It-Up method. Both are perfect!
- The Foundation: If you’re using the optional garlic and honey, place them in your medium-sized mixing bowl or your jar. Add the Dijon mustard and the fresh lemon juice. Now, take a moment to smell it—that’s the sound of freshness! Chef’s Hack: If you’re using honey and it’s stiff, let it sit in the lemon juice for a minute. The acid will loosen it right up, making it easier to blend.
- Emulsify & Combine: Here’s the key to a smooth, creamy dressing. If whisking, start whisking your lemon juice mixture briskly. Now, very slowly—think a thin, steady stream—pour in the olive oil while you never stop whisking. This gradual incorporation is what creates the emulsion. If using a jar, just add everything, screw the lid on tightly, and shake like you’re cheering on your favorite team for a solid 30 seconds! Chef’s Note: Don’t rush the oil pour when whisking. Patience here gives you a luxurious texture.
- Taste & Season: Dip a piece of lettuce, a green bean, or even just your clean pinky finger into the dressing. What does it need? It will almost always need a good pinch of salt. Add some, whisk or shake again, and taste. Then add a few cracks of black pepper. Taste again. Your palate is the boss! Chef’s Truth: Seasoning in stages is the secret weapon of all great cooks. You can always add more, but you can’t take it out.
- Serve or Store: That’s it! You just made a masterpiece. Drizzle it immediately over your favorite salad. Any leftovers go into a sealed jar or container in the fridge for up to a week. Important Reminder: The olive oil will solidify a bit when cold. Just let the jar sit at room temperature for 10-15 minutes and give it a good shake before using. Good as new!
Beyond the Salad Bowl: How to Serve Your Lemon Vinaigrette
While it’s a born-and-bred salad superstar (try it on a mix of bitter greens, arugula, and shaved Parmesan!), don’t stop there. This vinaigrette is a multi-tasking kitchen hero. Use it as a bright marinade for chicken or shrimp before grilling. Drizzle it over roasted broccoli, asparagus, or a medley of summer vegetables straight out of the oven. Spoon it over grilled fish or a simple piece of pan-seared salmon for an instant restaurant-quality finish. It even makes a delicious dip for crusty bread!
Make It Your Own: 5 Flavor Twists to Try
Once you’ve mastered the classic, play around! Here are some of my favorite riffs:
- Herb Garden Lemon: Add 2 tablespoons of finely chopped fresh herbs. Tarragon is classic and divine, but parsley, chives, dill, or a mix are all winners.
- Creamy Lemon-Parmesan: Whisk in 2-3 tablespoons of finely grated Parmesan cheese and 2 tablespoons of plain Greek yogurt or buttermilk for a richer, creamier, Caesar-style vibe.
- Sun-Dried Tomato & Oregano: Add 1 tablespoon of finely chopped oil-packed sun-dried tomatoes and ½ teaspoon of dried oregano (or 1 tsp fresh). Perfect for a Greek-inspired salad.
- Spicy Lemon: Add a pinch of red pepper flakes or a few dashes of your favorite hot sauce. Amazing on grain bowls or grilled zucchini.
- Shallot & Lemon: Swap the garlic for 1 tablespoon of very finely minced shallot. It’s a bit sweeter and more delicate.
Olivia’s Kitchen Notes & Stories
This recipe has been my faithful companion for years, and it’s evolved in the funniest ways. There was the time I was making a quadruple batch for a family reunion and accidentally used whole grain mustard instead of Dijon. It was… chunky and very seedy! Not terrible, but definitely a textural surprise. Lesson learned: read the label when you’re chatting and cooking!
I also used to be terrified of adding the optional sweetener, thinking it would make the dressing “un-savory.” Then one day, a chef friend tasted it and said, “It’s good, but it’s shouting at me.” He added a tiny drizzle of honey, and suddenly it was singing. It was a lightbulb moment about balance. Don’t be afraid of that tiny bit of sweetness—it’s a peacemaker between the acid and the oil.
Your Questions, Answered!
Q: My dressing separated in the fridge. Did I do it wrong?
A: Not at all! This is totally natural. A simple vinaigrette is a temporary emulsion. Just let it come to room temp for a few minutes and shake or whisk it vigorously again. It will come right back together. The Dijon helps it stay combined longer, but some separation is normal.
Q: Can I use a different citrus?
A: Absolutely! This method works for any acidic juice. Try lime juice for a tacos-and-salad night, orange juice for a sweeter, sunnier dressing, or even a mix of lemon and lime. Just taste and adjust the sweetness as you go.
Q: It tastes too sharp/acidic. How do I fix it?
A: No problem! This is an easy fix. Balance is key. First, try adding a tiny bit more of your sweetener (honey/maple), a quarter teaspoon at a time. If it’s still too punchy, you can also whisk in a bit more olive oil to mellow it out. Remember to re-season with salt after adjusting.
Q: How long does it really last in the fridge?
A: Because it’s all fresh ingredients, I recommend using it within 5-7 days for peak flavor. The lemon juice and garlic (if used) are natural preservatives to a degree, but it tastes so good, it never lasts that long in my house anyway!
Zesty Lemon Vinaigrette Dressing : Fresh, Simple & Ready in 5 Minutes
Description
This zesty lemon vinaigrette is the kind of simple kitchen staple that instantly makes meals feel special. Fresh lemon juice, good olive oil, and a few pantry basics come together into a vibrant dressing that wakes up salads, roasted veggies, grilled chicken, and fish. No preservatives, no fuss—just fresh flavor that works everywhere.
Ingredients
-
¼ cup fresh lemon juice (about 2 lemons)
-
½ cup extra virgin olive oil
-
1 teaspoon Dijon mustard
-
1 small garlic clove, minced (optional)
-
1 teaspoon honey or maple syrup (optional)
-
Salt and freshly cracked black pepper, to taste
Instructions
-
In a bowl or jar, combine lemon juice, Dijon mustard, garlic (if using), and honey or maple syrup.
-
Whisk continuously while slowly drizzling in the olive oil until emulsified.
(Or add everything to a jar, seal, and shake for 30 seconds.) -
Season with salt and black pepper to taste.
-
Taste and adjust—add more lemon, oil, or sweetness as needed.
Notes
-
Always use fresh lemon juice for best flavor
-
Dijon helps the dressing stay blended—don’t skip it
-
If dressing separates in the fridge, just shake or whisk again
-
Let chilled dressing sit at room temp 10–15 minutes before using
Quick Nutritional Info (Per Tablespoon)
This is an approximate breakdown, as ingredients can vary. Remember, we’re using wholesome, simple ingredients!
- Calories: 80
- Fat: 9g
- Carbohydrates: 0-1g
- Sugar: <1g
- Protein: 0g
Dietary Note: This recipe is naturally vegan, gluten-free, dairy-free, and paleo-friendly (if you use maple syrup or omit the sweetener).
Final Thoughts: More Than Just a Dressing
So there you have it—your secret weapon is no longer a secret. This Zesty Lemon Vinaigrette is more than just a recipe; it’s a small act of kitchen rebellion. It’s a choice to bypass the cluttered shelf of processed bottles and instead create something alive, vibrant, and utterly yours in just minutes.
Remember, this isn’t about perfection. It’s about the smell of lemons on your hands, the sound of a whisk against a bowl, and the confidence that comes from mastering a foundational skill. It’s about the difference between eating and tasting.
Keep this formula in your back pocket. Let it be the bright note in your weekday dinners and the simple, impressive touch for when friends gather. Play with the variations, make it your own, and don’t be afraid to taste as you go. Your palate is your best guide.
Most importantly, remember the spirit of that little yellow bowl: food is meant to be fresh, shared, and made with a dash of joy. Now go forth, drizzle liberally, and turn your everyday meals into something bright, beautiful, and full of sunshine.

McGriddle Breakfast Sandwiches : Sweet & Savory, High-Protein Breakfast Win
Good Morning, Sunshine! Let’s Make a Better-Than-Fast-Food Breakfast.
Is there anything more perfectly nostalgic than the sweet, savory, and slightly magical combination of a McGriddle? That soft pancake hugging salty bacon, savory sausage, melty cheese, and fluffy egg is a symphony of breakfast flavors. But here’s the thing, my friends—imagine all that cozy, crave-worthy goodness, but made with your own two hands, with ingredients you know and love. That’s exactly what we’re doing today.
These Homemade McGriddle Breakfast Sandwiches are my ultimate weekend win and secret weapon for epic meal prep. They’re not just a copycat recipe; they’re an upgrade. We get to control the quality, pack in the protein, and dial the cozy factor up to eleven. No mystery ingredients, no soggy wrapper—just pure, joyful, sweet-and-savory bliss that will make your kitchen smell like a dream.
Whether you’re fueling a lazy Sunday, feeding a hungry crowd after a sleepover, or prepping a week of grab-and-go breakfasts that actually excite you, this recipe is your new best friend. It’s forgiving, fun, and seriously satisfying. So, tie on that apron (the messy one is totally welcome here), and let’s turn simple ingredients into something unforgettable. Your taste buds are about to throw a party!
The Lazy Sunday That Started It All
This recipe was born from a very specific, very happy memory. Picture this: It’s a cold, drizzly Sunday morning. My college roommates and I are piled on the couch, debating the crucial “brunch vs. more sleep” question. We were broke, tired, and desperately craving the comforting taste of a certain fast-food breakfast sandwich, but the thought of putting on real pants and braving the rain was… not happening.
Someone (probably me) declared, “How hard could it be to make them ourselves?” What followed was a gloriously chaotic kitchen experiment. We used boxed pancake mix, nearly burned the bacon, and absolutely butchered the art of a perfectly folded egg. The first attempt was a delicious, syrupy, structurally unsound mess. We ate it with forks, laughing until our sides hurt. But that messy, collaborative, homemade version tasted a million times better than anything from a drive-thru. It was filled with our own effort and that unbeatable feeling of creating something together. Now, every time I make these, I think of that cozy, laughter-filled kitchen and smile. It’s proof that the best meals aren’t about perfection—they’re about the joy you stir into them.
Gathering Your Breakfast Dream Team
Here’s everything you’ll need to build four incredible sandwiches. I’ve added my little chef insights and swaps so you can make this recipe your own!
- 1 cup Pancake Mix (plus ingredients called for on box, usually water/milk/egg) – This is our “bun” shortcut! I love a good buttermilk mix for flavor. Chef’s Insight: For a from-scratch option, swap with 1 cup of your favorite dry pancake/waffle mix ingredients. The key is a batter that’s not too thin, so it holds its shape as a bun.
- 4 Pork Sausage Patties – The savory backbone. You can use pre-formed patties or take breakfast sausage out of its casing and shape your own. Sub Tip: For a lighter option, try turkey or chicken sausage patties. For a veggie twist, a thick, hearty plant-based patty works wonderfully!
- 4 slices Bacon, cooked until crispy – For that essential salty crunch. I prefer thick-cut for more substance. Chef’s Hack: Bake your bacon on a sheet pan at 400°F for 15-20 minutes—it cooks evenly, frees up your stovetop, and makes cleanup a breeze.
- 4 large Eggs – Our protein-packed layer. Insight: Cracking them into a bowl and whisking with a tiny splash of milk or water before scrambling leads to the fluffiest, most cohesive eggs for stacking.
- 4 slices American OR Cheddar Cheese – The melty glue! American is classic for its ultra-gooey melt, while sharp cheddar brings a bigger flavor punch. Don’t limit yourself: Pepper Jack for a kick, Swiss for a nutty note, or even Gouda are all fantastic.
- 2-3 tablespoons Pure Maple Syrup (optional but highly recommended!) – This is the magic. Two ways to use it: 1) Drizzle a tiny bit into the pancake batter OR 2) Lightly brush it on the cooked pancake “buns” before assembling. It creates that iconic sweet flavor without making things soggy.
- Butter or Neutral Oil (like avocado or canola) for cooking – For your griddle. Butter gives great flavor for the pancakes; oil has a higher smoke point for the meats.
- Salt & Freshly Ground Black Pepper – Season as you go! A little on the eggs and sausage makes all the difference.
Let’s Build Some Breakfast Magic: Step-by-Step
Follow these steps, and you’ll be a McGriddle master in no time. I’m chatting you through each one with all my best tips!
Step 1: The Pancake Buns – Our Foundation
Heat a large non-stick skillet, griddle, or electric griddle over medium-low to medium heat. Why not screaming hot? We want the pancakes to cook through in the center without burning on the outside. Lightly grease with butter or oil. Give your prepared pancake batter a final stir. For each bun, pour about 1/4 cup of batter to form a circle roughly 3-4 inches in diameter. Pro Tip: Leave plenty of space between them—they will spread! Cook until you see lots of bubbles form on the surface and the edges look set, about 2-3 minutes. Gently flip and cook for another 1-2 minutes until golden brown and cooked through. Transfer to a wire rack or plate. This keeps them from getting steamy and soft on the bottom. You’ll make 8 pancake buns total.
Step 2: The Savory Stars – Sausage & Bacon
In the same skillet (no need to wash it, that’s flavor!), increase heat to medium. Add your sausage patties. Cook for 3-4 minutes per side, until deeply browned and cooked through. If you’re using raw bacon, cook it now in the same pan, draining excess fat as needed, until it reaches your desired crispness. Time-Saver Hack: Cook your bacon ahead of time or use pre-cooked! While the sausage cooks, you can also start on the eggs. Multi-tasking is key here.
Step 3: The Fluffy Folded Eggs – The Art of the Fold
In a medium bowl, whisk your 4 eggs with a small splash of water or milk (this creates steam for fluffiness), and a pinch of salt and pepper. Return your skillet to medium heat (wipe out any major charred bits if needed) and add a little butter or oil. Pour in the eggs. As the edges set, gently push them toward the center with a spatula, letting the uncooked egg flow to the edges. Once the eggs are mostly set but still slightly wet on top, use your spatula to fold the egg mass in half, then in half again to create a rough square/rectangle that will fit nicely on your sandwich. Cook for another 30 seconds to set, then slide it out and cut into four equal portions.
Step 4: The Grand Assembly – Where It All Comes Together
Lay out four of your pancake buns. If using, lightly brush the top of each with a whisper of maple syrup. Place a slice of cheese on each. Top with a warm sausage patty (the heat will start melting the cheese—yes!). Add a portion of the folded egg, then a slice (or two!) of crispy bacon. Cap it all off with the remaining pancake buns. Give them a gentle press to secure. Optional Glory Move: Drizzle a tiny, artful spiral of maple syrup over the top of the assembled sandwich or serve a little on the side for dipping.
How to Serve These Beauties
These sandwiches are a full meal in your hand! I love serving them straight off the griddle on a big, shared platter for a family-style brunch. For a cute individual touch, wrap the bottom half in a piece of parchment paper or a cute napkin—it keeps fingers clean and makes it easy to hold. Pair with a bright, fresh fruit salad or a simple green smoothie to balance the richness. Don’t forget the coffee! A hot cup of coffee or a cold brew is the non-negotiable perfect partner for this sweet and savory feast.
Get Creative! Endless Flavor Twists
This recipe is a fantastic canvas. Here are a few of my favorite ways to mix it up:
- Southwest Style: Add a thin slice of avocado, a spoonful of pico de gallo, and use pepper jack cheese. A dash of hot sauce in the scrambled eggs is a must!
- Chicken & Waffle Vibe: Swap the sausage for a piece of crispy, seasoned chicken breast or a chicken tender. Add a drizzle of honey instead of maple syrup.
- Loaded Veggie: Sauté diced bell peppers, onions, and spinach, then mix them right into the scrambled eggs before folding. Use a meatless sausage patty or double up on the egg.
- Apple Cinnamon: Stir 1/4 cup of finely diced apple and a pinch of cinnamon into your pancake batter. Pair with sausage and sharp cheddar for an incredible fall flavor.
- Lower-Carb Option: Use two small, sturdy keto-friendly pancakes or even toasted, buttered low-carb bread as your bun.
A Few More Thoughts From My Kitchen
Over the years, this recipe has evolved from that college experiment into my most-requested brunch dish. I’ve learned a few things: First, prep is everything. If I’m making these for a crowd, I’ll cook the bacon and sausage patties the night before and gently reheat them. The pancakes can be made ahead and toasted in a toaster or oven to refresh. Second, embrace the “folded” egg method—it truly is the secret to a neat sandwich that doesn’t fall apart. And finally, the maple syrup debate! I’ve settled on brushing it on the pancake buns rather than mixing it into the batter. It gives you more control over the sweetness level and preserves that perfect pancake texture. Most importantly, have fun with it! My nephew once insisted on using chocolate chip pancakes as the buns. Was it messy? Incredibly. Was it a hit? An absolute, sugary, savory home run.
Your Questions, Answered!
Q: Can I really make these ahead for meal prep?
A: Absolutely! They are a meal prep superstar. Let the assembled sandwiches cool completely, then wrap each one tightly in parchment paper and foil, or place them in a single layer in an airtight container. Store in the fridge for up to 4 days. To reheat, unwrap, and microwave for 60-90 seconds, or for a crispier result, reheat in a toaster oven or air fryer at 350°F for 8-10 minutes. You can also freeze them for up to 2 months—reheat from frozen in the microwave (add time) or oven.
Q: My pancake buns are too thick/cakey or too thin/floppy. Help!
A: This is usually a batter consistency issue. If they’re too thick, your batter might be over-mixed or too dry. Next time, add a tablespoon or two more liquid. If they’re too thin and spread too much, your batter is likely too runny. Add a tablespoon more of the dry pancake mix to thicken it up. Aim for a scoopable, thick-but-pourable consistency.
Q: The sandwich falls apart when I eat it. What am I doing wrong?
A: This is a common grievance! A few fixes: 1) Ensure your pancake buns are completely cooked and not underdone/gummy in the middle. 2) Don’t overstuff. Stick to the one-of-each-protein rule. 3) The cheese is your glue—make sure it’s placed next to a warm component (sausage or egg) to get it melty and adhesive. 4) Let it sit for a minute after assembling. The residual heat helps everything “set” together.
Q: Can I bake the pancake buns instead?
A: For perfect circles and hands-off cooking, yes! Pour the batter onto a parchment-lined baking sheet into 3-inch circles. Bake in a preheated 375°F oven for about 10-12 minutes, until puffed and cooked through. This is a great method for doubling or tripling the recipe for a crowd.

McGriddle Breakfast Sandwiches : Sweet & Savory, High-Protein Breakfast Win
Description
Love the classic McGriddle but want a homemade version you can feel good about? These breakfast sandwiches deliver the same irresistible sweet-and-savory combo—fluffy pancake buns, savory sausage, crispy bacon, melty cheese, and soft eggs—made right in your own kitchen. They’re perfect for weekend brunch or easy grab-and-go breakfasts all week long.
Ingredients
-
1 cup pancake mix + ingredients listed on package
-
4 breakfast sausage patties
-
4 slices bacon
-
4 large eggs
-
4 slices cheese (American or cheddar)
-
2–3 tablespoons pure maple syrup (optional)
-
Butter or oil, for cooking
-
Salt and black pepper, to taste
Instructions
-
Make the pancake buns
Prepare pancake batter according to package directions. Heat a nonstick skillet or griddle over medium heat and lightly grease.
Pour about ¼ cup batter per pancake to make small 3–4 inch rounds. Cook until bubbles form, flip, and cook until golden.
Make 8 pancakes total and set aside. -
Cook the bacon and sausage
In the same skillet, cook bacon until crispy. Remove and drain.
Cook sausage patties over medium heat, 3–4 minutes per side, until fully cooked. -
Cook the eggs
Whisk eggs with a pinch of salt and pepper. Cook in a lightly buttered skillet, gently scrambling until just set.
Fold eggs into a rectangle and cut into 4 portions. -
Assemble the sandwiches
Place one pancake bun down, add cheese, sausage, eggs, and bacon.
Lightly brush pancake tops with maple syrup if desired, then close the sandwich with another pancake.
Notes
-
Add maple syrup after cooking, not into the batter, for better texture
-
Use thick pancake batter so buns hold their shape
-
Cheese melts best when placed next to hot sausage or eggs
-
Let sandwiches rest 1 minute after assembling to hold together
Nutritional Information*
*Please note: The following is an approximate estimate calculated using generic ingredients. Your specific brands and portions will cause variations.
Per Sandwich: Calories: ~520 | Protein: 24g | Carbohydrates: 28g | Dietary Fiber: 1g | Sugars: 8g (includes maple syrup) | Fat: 34g | Saturated Fat: 12g | Cholesterol: 245mg | Sodium: 980mg.
Prep Time: 10 mins | Cook Time: 15 mins | Total Time: 25 mins | Yield: 4 Sandwiches
Final Thoughts
A Breakfast Worth Waking Up For
This isn’t just another recipe—it’s an invitation. An invitation to slow down, to savor, and to create something with your own hands that nourishes both body and spirit. These Homemade McGriddle Sandwiches are more than a clever copycat; they’re a celebration of the simple, joyful act of cooking.
They remind us that the most memorable meals aren’t about flawless technique or exotic ingredients. They’re about the laughter in a messy kitchen, the comfort of a familiar flavor made better, and the pride of handing someone a plate filled with something you crafted with care. Whether it becomes your secret meal-prep weapon or your signature weekend brunch centerpiece, this recipe is designed to be yours—to tweak, to play with, and to fill with your own favorite flavors.
So the next time that sweet-and-savoy craving hits, skip the drive-thru line. Turn on some music, gather your ingredients, and create a little breakfast magic right at home. I promise, the smell of pancakes on the griddle, the sizzle of bacon, and that first glorious, syrupy bite will feel like a hug for your soul.
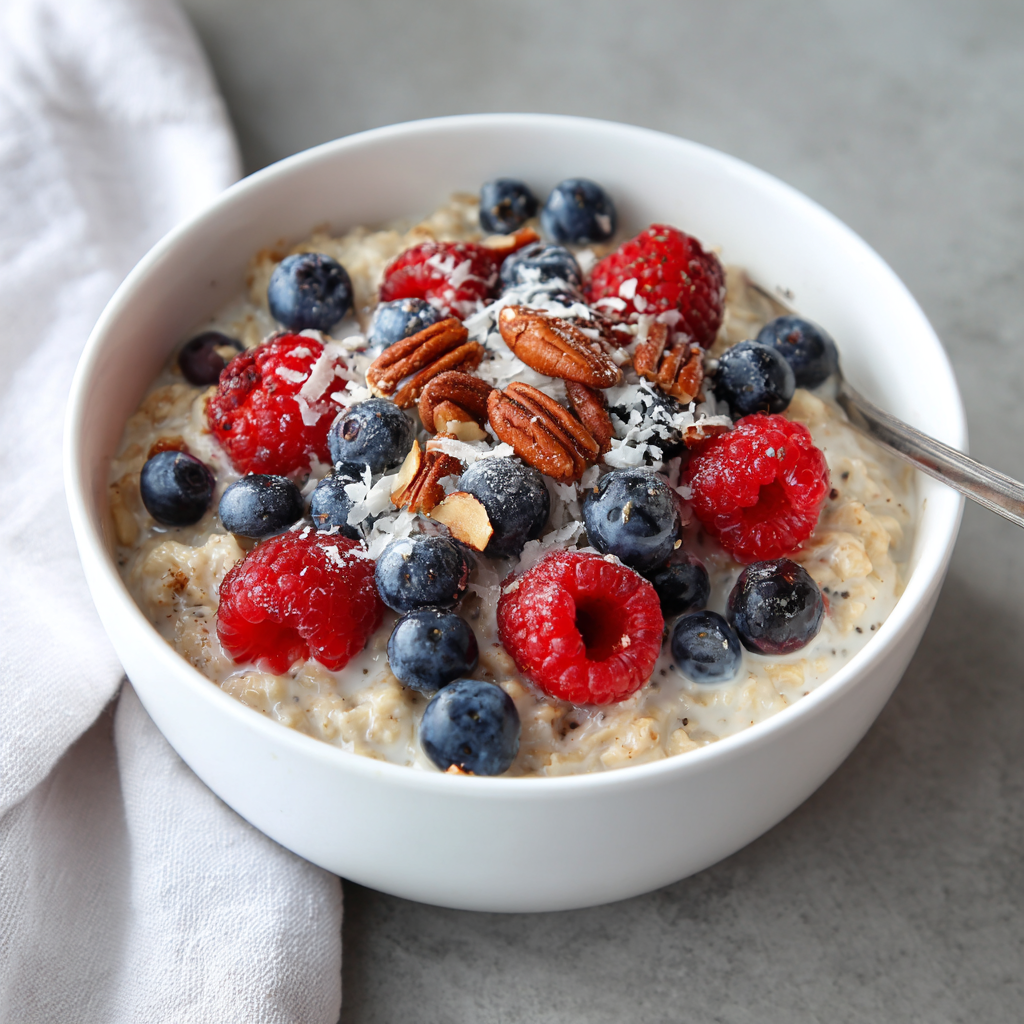
High Protein Oatmeal: Meal Prep Breakfast That Fuels Your Day
Wake Up to a Breakfast That Loves You Back
Let’s be real for a second. How many mornings have you stared into the abyss of your pantry, willing a magical, satisfying, and fast breakfast to materialize? You’re torn between the sugary lure of a quick fix and the daunting prospect of dirtying every pan in the kitchen before 7 AM. I’ve been there more times than I can count, usually while wearing one slipper and trying to remember where I put my coffee mug. It’s why I became obsessed with creating a morning hero: a breakfast that isn’t just fuel, but a genuine joy to eat—something that actually makes you look forward to getting out of bed.
Enter the humble oat, ready for its glow-up. We’re not talking about the gloppy, sad oatmeal of cafeteria lore. Oh no. We’re transforming it into a creamy, dreamy, power-packed masterpiece that will keep you full, focused, and firing on all cylinders until lunch. This High-Protein Oatmeal is my ultimate kitchen hack. It’s the cozy hug of a homemade breakfast, combined with the strategic genius of a meal-prep pro. In just about 15 minutes, you can create four days of breakfasts that taste delicious hot or cold. Imagine opening your fridge to a beautiful jar of creamy oats and berries, knowing your future self is already taken care of. That’s the kind of morning kindness we all deserve. So, tie on that apron (messy is welcome here!), and let’s make a breakfast that truly fuels your day—and your soul.
My Oatmeal Epiphany: From Survival to Celebration
My love affair with oats started out of pure necessity. Back in my early freelance days, my “office” was a tiny corner of my apartment, and my budget was… creative. Oatmeal was cheap, filling, and fast. But after the hundredth bowl of plain oats with a sad sprinkle of brown sugar, I hit a wall. I was crashing by 10:30 AM, my stomach growling like an offended bear, and my enthusiasm for my reliable breakfast had completely flatlined.
The turning point came during a weekend hiking trip with friends. One of them, a nutrition coach, pulled out these incredible-looking jars of layered oats and fruit for our mid-morning snack. They were cold, thick, and she called them “proats.” I was skeptical but starving. One bite was a revelation. It was creamy, sweet, and satisfying in a way my watery morning porridge never was. She explained the protein powder was the secret—it turned a simple carb source into a sustained energy powerhouse. That was my “aha!” moment in a mountain meadow. I raced home and spent the next week in my kitchen, experimenting relentlessly until I landed on this perfect, foolproof formula. Now, this oatmeal isn’t just breakfast; it’s a ticket to a calmer, more energized morning. It reminds me that taking care of yourself doesn’t have to be complicated—it can be as simple and wonderful as a jar of goodness waiting for you in the fridge.
Gathering Your Breakfast Dream Team
Here’s what you’ll need to build your ultimate morning fuel. Think of this list as your flavor and function blueprint!
- 2 cups rolled oats (old-fashioned oats): These are the heart of the dish! Rolled oats give you that perfect, creamy-yet-chewy texture. Chef’s Insight: Avoid instant or quick oats here—they tend to get too mushy, especially when stored for days. Steel-cut oats will work but require much longer cooking and more liquid, so they’re not ideal for this quick-prep method.
- 2 ½ cups unsweetened almond milk (or milk of choice): This is our cooking liquid. I love unsweetened almond milk for its light, nutty flavor and low calorie count. Substitution Tip: Any milk works beautifully! Dairy milk, oat milk, soy milk, or even coconut milk will add their own unique richness. Just adjust to your taste and dietary needs.
- 4 scoops vanilla protein powder: The protein powerhouse! This is what transforms this from a simple carb to a balanced meal. Chef’s Insight: The quality and type of protein powder matter. A good whey or casein blend mixes in smoothly. For plant-based, pea or brown rice protein blends work well, but you may need an extra splash of milk as they can thicken more. Vanilla is a perfect neutral sweetener, but chocolate or unflavored work too!
- 1 tablespoon chia seeds: These tiny seeds are magic. They absorb liquid and help create a lovely, thick, pudding-like consistency, especially once chilled. Plus, they add a bonus hit of fiber, protein, and omega-3s.
- 1 teaspoon cinnamon: A warmth powerhouse! Cinnamon adds a cozy, familiar flavor and helps balance blood sugar. Don’t skip it—it makes the kitchen smell amazing, too.
- 1 teaspoon vanilla extract: The flavor enhancer. It deepens the sweetness and makes the whole bowl taste more luxurious and homemade.
- 1 cup mixed berries (blueberries, raspberries, etc.): Our fresh, vibrant topping! They add a pop of color, a tangy sweetness, and a ton of antioxidants. Chef’s Insight: Using frozen berries is totally fine and often more economical! Just note they might bleed a little color into the oats if you mix them in before storing, which is still delicious.
- Optional: shredded coconut or chopped nuts for topping: The crunch factor! Adding these right before eating gives a fantastic textural contrast. Think toasted almonds, walnuts, pecans, or a sprinkle of coconut for a tropical twist.
Let’s Get Cooking: Your Foolproof Guide to Creamy Proats
This process is so simple, you’ll have it memorized after one try. Let’s walk through it together, step by cozy step.
- Combine & Simmer: In a medium saucepan, combine your rolled oats, almond milk, chia seeds, cinnamon, and vanilla extract. Give it a good stir. Now, place it over medium heat. Here’s my key tip: bring it to a low, gentle simmer. We’re not looking for a rolling boil. A gentle bubble around the edges is perfect. This slow heating prevents the oats from getting gummy and allows the chia seeds to start working their thickening magic.
- Stir & Cook: Once it’s simmering, reduce the heat to medium-low. This is where a little patience (and stirring) pays off. Cook for 5-7 minutes, stirring frequently. Why frequently? It prevents the oats from sticking to the bottom of the pot and ensures even cooking. You’ll know they’re done when the mixture has thickened significantly and the oats are tender but still have a pleasant bite. It should look creamy and luxurious.
- The Protein Power Move: This is the most important step for perfect texture! Remove the pot from the heat entirely. Now, sprinkle in your protein powder. If you add it while the oats are still on the burner, the high heat can cause the protein to denature too quickly, making it clumpy and gritty. Stir vigorously until the powder is completely dissolved and the mixture is smooth. Chef’s Hack: If it looks too thick (some protein powders are real thirst-quenchers!), don’t panic. Simply add a splash of extra milk, one tablespoon at a time, until you reach your desired creamy consistency.
- Portion & Cool: Divide the creamy oatmeal evenly among 4 meal-prep containers. I love using 16-ounce glass jars—they look pretty and are easy to grab and go. Let the oatmeal cool uncovered on the counter for about 15-20 minutes. This stops condensation from forming inside the lid, which can make your toppings soggy.
- Top & Store: Once cooled, top each container with your vibrant mixed berries and any optional crunchy toppings. Seal with a lid and store in the refrigerator for up to 4 days. The oats will continue to thicken and set into a delicious, spoonable pudding-like texture overnight. You’ve just gifted your future self four amazing breakfasts!
How to Serve Your Masterpiece
This is the fun part! You can enjoy this oatmeal hot or cold straight from the fridge—it’s fantastic both ways. For a hot breakfast, simply microwave a portion for 60-90 seconds, stirring halfway. To serve, give it a fresh stir, maybe add a tiny extra splash of milk if you like it looser, and admire your handiwork. I love eating mine right out of the jar with a big spoon, but pouring it into a beautiful bowl feels like a special treat. For maximum coziness, pair it with a hot cup of coffee or tea. It’s a complete, satisfying meal all on its own!
Make It Your Own: Endless Flavor Twists
The beauty of this base recipe is its versatility. Once you’ve mastered the basic formula, the flavor world is your oyster! Here are a few of my favorite riffs:
- Chocolate Peanut Butter Cup: Use chocolate protein powder. After removing from heat, stir in 2 tablespoons of natural peanut butter or powdered peanut butter (PB2) before adding the protein powder. Top with a few dark chocolate chips.
- Apple Pie Delight: Use unflavored or vanilla protein powder. Stir in ½ cup of unsweetened applesauce and ½ teaspoon of apple pie spice along with the oats. Top with diced fresh apple and a sprinkle of granola.
- Tropical Sunrise: Use coconut milk as your liquid. Top with diced mango, pineapple chunks, and your shredded coconut. A sprinkle of macadamia nuts would be incredible.
- Pumpkin Spice (Any Time of Year!): Stir in ½ cup of pure pumpkin puree and 1 teaspoon of pumpkin pie spice with the oats. It makes the oatmeal incredibly rich and festive.
- Savory Option: Yes, really! Use unflavored protein powder. Omit the cinnamon, vanilla, and berries. Cook the oats with a pinch of garlic powder and onion powder. After cooking, stir in a handful of shredded cheese (cheddar or gouda are great) and top with a fried or soft-boiled egg and everything bagel seasoning.
From My Kitchen to Yours: A Few Final Thoughts
This recipe has truly evolved with me. The first time I made it, I made the classic mistake of adding the protein powder directly to the boiling pot. Let’s just say I ended up with oatmeal that had the texture of wet sand—not my finest moment! That little “remove from heat” step is the golden rule I learned the hard way so you don’t have to.
Over the years, I’ve also learned that this oatmeal is incredibly forgiving. No chia seeds? Use a tablespoon of ground flaxseed. Out of fresh berries? A dollop of sugar-free jam or a sliced banana works wonders. The goal isn’t perfection; it’s a delicious, nourishing start to your day that makes you feel good. I’ve packed these jars for early flights, rushed school mornings, and slow Saturday brunches alike. Every time, they deliver. I hope this recipe becomes a trusted friend in your kitchen, too, giving you one less thing to worry about and one more thing to look forward to each morning.
Your Questions, Answered!
Q: My oatmeal turned out super thick and almost dough-like after adding the protein powder. What happened?
A: Different protein powders have different levels of “thirst.” Plant-based powders (pea, brown rice) and casein are especially absorbent. No worries! Just go back to the fix: add more liquid. Splash in extra milk, one tablespoon at a time, and stir vigorously until it smooths out to your preferred consistency. Think of the recipe as a guide—you’re always in charge of the final texture.
Q: Can I use quick oats or steel-cut oats instead?
A: You can, but the results will change. Quick Oats: They will cook faster and result in a much softer, less textured oatmeal. Reduce the initial cook time to 3-4 minutes. Steel-Cut Oats: These require a completely different method. They need more liquid (about a 1:3 oat to liquid ratio) and 20-30 minutes of simmering. I don’t recommend them for this specific 15-minute meal prep recipe.
Q: How do I reheat it without it drying out?
A: The key is moisture! When reheating in the microwave, add a teaspoon or two of water or milk to the jar or bowl before heating. Cover it loosely (a paper towel is perfect). Heat in 30-second intervals, stirring in between, until warm. This gentle method revives the creamy texture perfectly.
Q: Can I freeze this high-protein oatmeal?
A: Absolutely! Portion the cooled, cooked oatmeal (without fresh toppings) into freezer-safe containers or bags. It will keep for 1-2 months. Thaw overnight in the fridge and reheat as above, adding a bit more liquid as needed. Add your fresh berries and crunchy toppings after thawing for the best texture.
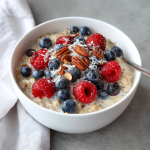
High Protein Oatmeal: Meal Prep Breakfast That Fuels Your Day
Description
This high-protein oatmeal is creamy, comforting, and designed to keep you full and energized all morning. Made in just 15 minutes, it’s perfect for meal prep and tastes great hot or cold. Think cozy oatmeal meets smart nutrition—simple, satisfying, and stress-free.
Ingredients
-
2 cups rolled oats (old-fashioned)
-
2½ cups milk of choice (almond, dairy, oat, soy)
-
4 scoops vanilla protein powder
-
1 tablespoon chia seeds
-
1 teaspoon cinnamon
-
1 teaspoon vanilla extract
-
1 cup mixed berries (fresh or frozen)
-
Optional toppings: chopped nuts, shredded coconut, nut butter
Instructions
-
In a medium saucepan, combine oats, milk, chia seeds, cinnamon, and vanilla.
-
Bring to a gentle simmer over medium heat.
-
Reduce heat to medium-low and cook for 5–7 minutes, stirring often, until thick and creamy.
-
Remove from heat and stir in protein powder until smooth.
-
Divide into 4 containers. Let cool slightly.
-
Top with berries and optional toppings.
-
Refrigerate up to 4 days.
Notes
-
Always add protein powder off heat to avoid clumps.
-
If oats are too thick, stir in extra milk 1 tablespoon at a time.
-
Use rolled oats only—quick oats get mushy, steel-cut take too long.
-
For meal prep, add crunchy toppings just before eating.
Nutritional Information*
*Estimated per serving, using unsweetened almond milk, a standard whey protein powder, and without optional toppings.
- Calories: ~320
- Protein: 22g (Hello, satisfaction!)
- Carbohydrates: 30g
- Fiber: 7g
- Fat: 9g
- Prep Time: 5 minutes
- Cook Time: 10 minutes
- Total Time: 15 minutes
- Makes: 4 servings
Final Thoughts
This recipe is more than just a bowl of oatmeal—it’s a promise to yourself. A promise that your mornings don’t have to be a frantic, unsatisfying scramble. They can be a moment of calm, of nourishment, and of genuine enjoyment. You deserve a breakfast that feels like a warm hug and works like secret fuel, powering you through your day with steady energy and a satisfied smile.
I created this High-Protein Oatmeal because I needed that promise to be simple, reliable, and utterly delicious. It’s the culinary equivalent of finding an extra hour in your day. In just 15 minutes, you gift your future self the ultimate luxury: a morning where everything is already taken care of. Whether you’re rushing out the door or savoring a quiet moment at the kitchen table, this breakfast has your back.
So, here’s my final nudge: give it a try. Embrace the messy apron, the experimenting with flavors, and the joy of opening your fridge to see those beautiful jars waiting for you. Let this be your small, powerful act of morning kindness. Wake up to a breakfast that loves you back, and feel the difference it makes—not just in your energy levels, but in your whole outlook. Your best days start here.




