
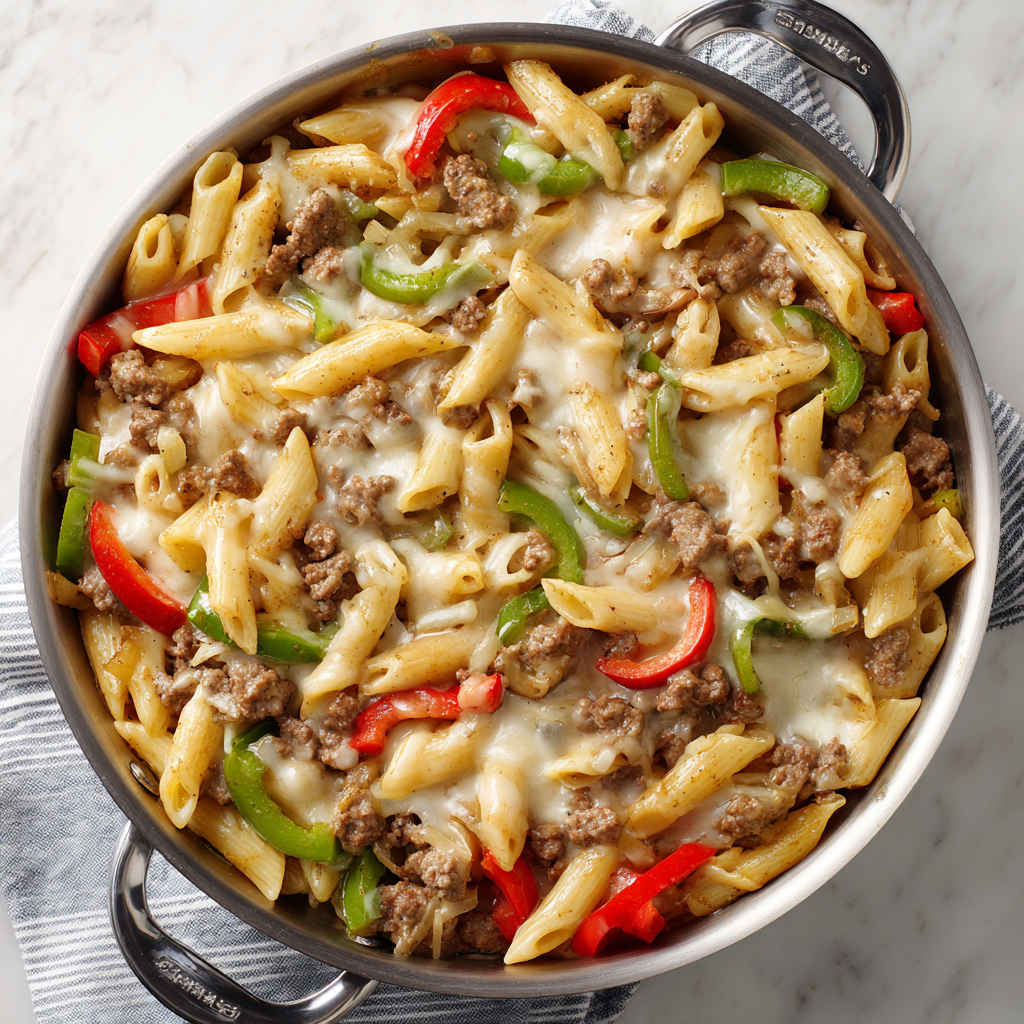
Philly Cheese Steak Pasta : Creamy, Cheesy One-Pot Twist on a Classic
Philly Cheese Steak Pasta: Your New Favorite One-Pot Wonder
When a Sandwich and a Bowl of Comfort Fall in Love
Hey there, friend! Come on in, grab an apron, and let’s get something sizzling. You know that feeling? When you’re craving the big, beefy, cheesy glory of a Philly cheesesteak but also want the cozy, curl-up-on-the-couch vibes of a creamy pasta? Yeah, me too. That’s exactly why this Philly Cheese Steak Pasta was born in my kitchen.
Imagine this: tender ground beef and those iconic sweet peppers and onions, all tangled up with twirls of pasta in a sauce that’s so rich, so velvety, and so utterly cheesy it’ll make you do a little happy dance right by the stove. This isn’t just dinner; it’s a hug in a bowl. And the best part? We’re making it all in one pot. That’s right—maximum flavor, minimum dishes. My kind of magic.
Whether it’s a hectic Tuesday, a lazy Sunday, or you’re feeding a hungry crew after a long day, this recipe is your secret weapon. It’s unfussy, deeply satisfying, and packed with the kind of familiar flavors everyone adores. So, let’s ditch the sandwich roll, grab a fork, and turn that classic comfort into a pasta night masterpiece. Trust me, your family (and your future self doing the dishes) will thank you.
The Sandwich That Started It All
My love affair with the Philly cheesesteak goes way back to my first real trip to Philadelphia. I was probably 16, wide-eyed, and on a mission to find the “real deal.” I remember the steamy windows of the tiny shop, the dizzying aroma of grilled meat and onions, and the beautiful chaos of the cooks slinging piles of beef onto the griddle. I took that first messy, juicy bite and my taste buds just stood up and cheered. It was pure, unapologetic joy on a roll.
But here’s the thing—while I love a great sandwich, I’m a pasta girl at heart. There’s something about a bowl of noodles that feels like home. So, one chilly evening, staring at ground beef and a half-empty box of pasta, inspiration struck. What if I took that unforgettable flavor combo and made it… forkable? A little tinkering, a lot of cheese later, and this one-pot wonder was born. It’s my tribute to that first magical bite, but made for those nights when you want to eat your comfort food straight from the pot with your favorite people gathered around.
Gathering Your Flavor Team
Here’s everything you’ll need to create this cozy masterpiece. I’ve added my little chef notes because knowing your ingredients is the first step to feeling confident and creative in the kitchen!
- 1 lb ground beef (80/20 blend is perfect): This is our flavor foundation. The bit of fat in an 80/20 blend adds incredible richness and ensures our beef stays juicy. Chef’s Tip: For a leaner option, use 90/10, but don’t drain all the fat—leave a tablespoon or so for cooking the veggies!
- 8 oz penne or rotini pasta: These shapes are champions at catching all that creamy sauce in their nooks and crannies. Penne is classic, but rotini’s fun spirals are great for little hands (and big forks!).
- 1 tbsp olive oil: Just enough to get our veggies glistening and happy.
- 1 small onion, sliced: Sweet, savory, and non-negotiable. Thin slices melt into the sauce beautifully.
- 1 green bell pepper, sliced: That classic, slightly bitter crunch that defines a Philly. Substitution: No green? A red or yellow pepper works, but you’ll miss that authentic diner flavor.
- 1 red bell pepper, sliced (optional): I always add it! It brings a pop of color and a sweeter, fruitier note that balances the green pepper perfectly.
- 2 cloves garlic, minced: Our aromatic secret weapon. It adds a deep, savory layer that makes the whole dish sing.
- 1 tsp Worcestershire sauce: This is the “what’s that amazing flavor?” ingredient. It adds umami depth, tang, and a secret savory boost. Don’t skip it!
- 1 tsp salt & ½ tsp black pepper: Season as you go! Taste and adjust at the end, too.
- 1 cup beef broth: This builds our sauce base and adds a rich, meaty backbone. Low-sodium is best so you can control the salt.
- 1 cup milk (whole or 2%): For creaminess without being too heavy. It creates the perfect liquid for our pasta to cook in and absorb flavor.
- 1 cup shredded provolone cheese: The star of the show! Provolone is the classic cheesesteak cheese—mild, melty, and wonderfully gooey. Chef’s Insight: Pre-shredded bags contain anti-caking agents that can make sauce a bit grainy. For ultra-silky results, shred a block yourself. Mozzarella is a fine backup.
- ½ cup cream cheese (or sour cream): This is our creamy magic trick. It thickens the sauce luxuriously and adds a subtle tang. Soften it first for easier blending!
Let’s Make Some Magic: Step-by-Step
Okay, team! Let’s fire up the stove. This process is simple, intuitive, and smells absolutely incredible. Follow these steps, and you’ll have a masterpiece in under 30 minutes.
- Pasta Prep First: Go ahead and cook your pasta according to the package directions, but cook it to al dente (firm to the bite). It’s going to hang out in our sauce later, and we don’t want it to get mushy. Drain it, but save about ½ cup of that starchy pasta water! This liquid gold is our secret weapon for adjusting the sauce consistency at the end if needed.
- Sizzle Those Veggies: In a large, deep skillet or Dutch oven, heat the olive oil over medium heat. Add your sliced onions and peppers. Here’s my hack: don’t stir them constantly! Let them sit for a minute or two to get a little caramelized color on the edges. That sweetness is everything. Sauté until they’re soft and fragrant, about 5-7 minutes. Add the garlic in the last minute—it cooks fast and burns faster!
- Brown the Beef: Push the veggies to the side of the pan or scoop them out into a bowl. Add the ground beef to the now-empty space. Crumble it with your spoon and let it get a good sear before stirring. We want flavorful browning, not gray steaming! Once cooked through, drain any excess fat, leaving maybe a tablespoon for flavor.
- Build the Sauce: This is where it all comes together. To the beef, stir in the Worcestershire sauce, salt, pepper, beef broth, and milk. Give it a good stir, scraping up any delicious browned bits from the bottom of the pan (that’s called fond, and it’s pure flavor!). Bring it all to a gentle simmer.
- Get Creamy: Reduce the heat to low. Add your cream cheese (make sure it’s softened!) in little dollops. Stir patiently until it’s completely melted and the sauce is smooth and unified. See how it’s already looking luxurious?
- The Grand Finale: Now, add back in the cooked pasta and those beautiful sautéed veggies. Toss everything to coat it in that creamy sauce. Finally, sprinkle over your shredded provolone cheese. Stir gently over low heat until every last strand of pasta is glistening and the cheese has melted into a glorious, stretchy, cheesy blanket. If the sauce seems too thick, splash in a little of that reserved pasta water until it’s perfectly silky.
- Taste and Triumph: Do your final taste test! Need more salt? A crack of pepper? This is your moment. Adjust to your heart’s content.
Dishing Up the Cozy
Serve this piping hot straight from the skillet! I love using shallow bowls for pasta—it feels special. A final sprinkle of fresh chopped parsley or chives adds a pop of color and freshness that cuts through the richness beautifully. If you’re feeling extra (I always am), a little extra shredded cheese on top never hurt anybody. Grab some crusty bread for mopping up every last bit of that sauce, and dinner is served!
Make It Your Own: Fun Twists & Swaps
The beauty of this recipe is its flexibility. Play with it!
- Mushroom Lover’s Twist: Sauté 8 oz of sliced cremini mushrooms with the peppers and onions for an earthy, hearty version.
- Chicken Philly Pasta: Swap the ground beef for 1 lb of diced boneless, skinless chicken thighs. Cook through before building the sauce.
- “The Works” Upgrade: Stir in a handful of sliced jalapeños (pickled or fresh) for a kick, or top with crispy fried onions for amazing texture.
- Vegetarian Version: Use a plant-based ground “beef” crumble and swap the beef broth for a rich mushroom or vegetable broth.
- Gluten-Free Friendly: Use your favorite GF pasta (a brown rice blend works great) and ensure your Worcestershire sauce is gluten-free (many brands are!).
Olivia’s Kitchen Notes
This recipe has seen many versions in my kitchen! I started out making a separate cheese sauce in another pot (so many dishes!), but the one-pot method with cream cheese was a total game-changer born from a “I don’t want to wash that” moment. The best recipes often are.
A funny story: I once was so excited to serve this to friends that I forgot to put the pasta in. I just proudly presented a skillet of saucy beef and veggies. We had a good laugh, boiled some noodles quick, and stirred them in. Crisis averted, and a reminder that cooking is about joy, not perfection. Even my “mistakes” usually taste pretty darn good.
Your Questions, Answered
Q: My sauce seems a bit dry/thick. What did I do wrong?
A: No worries! This happens sometimes if the pasta absorbs a bit more liquid or if the heat was a touch high. The fix is easy: just stir in a splash of that reserved pasta water, some extra milk, or even a bit more broth until it loosens up to your perfect, saucy consistency.
Q: Can I make this ahead of time?
A: Absolutely! You can assemble the entire dish, let it cool, and store it covered in the fridge for up to 2 days. Reheat it gently on the stove over low heat, adding a splash of milk or broth to bring it back to life. The pasta will soften more, but it will still be delicious.
Q: My cheese clumped up instead of melting smoothly. Help!
A> This usually means the heat was too high. Cheese likes to melt slowly and gently. Make sure you’re on low heat when you add it, and shred it yourself if you can (pre-shredded cheese has coatings that can hinder melting). If it clumps, just keep stirring patiently off the heat—it should eventually come together.
Q: What’s the best substitute for provolone if I can’t find it?
A> Mozzarella is your best bet for that gooey, mild melt. A combination of mozzarella and a little sharp white cheddar also works beautifully for a slightly tangier flavor. American cheese is the other classic cheesesteak choice and will give you an ultra-smooth, velvety melt.

Philly Cheese Steak Pasta : Creamy, Cheesy One-Pot Twist on a Classic
Description
Philly Cheese Steak Pasta
Creamy, cheesy comfort—made easy in one pot
Ingredients
-
1 lb ground beef (80/20 preferred)
-
8 oz penne or rotini pasta
-
1 tbsp olive oil
-
1 small onion, sliced
-
1 green bell pepper, sliced
-
1 red bell pepper, sliced (optional)
-
2 cloves garlic, minced
-
1 tsp Worcestershire sauce
-
1 tsp salt
-
½ tsp black pepper
-
1 cup beef broth (low-sodium)
-
1 cup milk (whole or 2%)
-
1 cup shredded provolone cheese
-
½ cup cream cheese, softened
Optional garnish: chopped parsley or chives
Instructions
-
Cook pasta:
Boil pasta in salted water until al dente. Drain, reserving ½ cup pasta water. -
Sauté veggies:
Heat olive oil in a large skillet or Dutch oven over medium heat. Add onion and peppers; cook 5–7 minutes until soft and lightly caramelized. Add garlic and cook 30 seconds. Remove veggies and set aside. -
Brown beef:
In the same skillet, add ground beef. Cook until browned, breaking it up as it cooks. Drain excess fat if needed. -
Build sauce:
Stir in Worcestershire sauce, salt, pepper, beef broth, and milk. Simmer 2–3 minutes, scraping up browned bits. -
Make it creamy:
Reduce heat to low. Add cream cheese and stir until fully melted and smooth. -
Combine:
Add cooked pasta and sautéed veggies back to the skillet. Stir to coat evenly. -
Cheese it up:
Add shredded provolone and stir gently until melted. Use reserved pasta water to loosen sauce if needed. -
Serve:
Taste, adjust seasoning, garnish if desired, and serve hot.
Notes
-
Shred cheese yourself for the smoothest melt.
-
Keep heat low when adding cheese to prevent clumping.
-
Pasta water is your best fix for thick sauce.
Nutritional Info (Per Serving, Serves 6)
Please note: This is an estimate provided for informational purposes. Values can vary based on specific ingredients used.
- Calories: ~520
- Protein: 28g
- Carbohydrates: 35g
- Fat: 30g
Prep Time: 10 minutes | Cook Time: 25 minutes | Total Time: 35 minutes
Final Thoughts
And there you have it—the glorious, melty, soul-satisfying answer to the age-old question: “What’s for dinner?” This Philly Cheese Steak Pasta is more than just a clever mashup; it’s a testament to the magic that happens when we let our cravings guide us and embrace the beautiful simplicity of one-pot cooking.
It takes the bold, comforting spirit of a street-corner classic and transforms it into a shareable, fork-twirling, family-friendly feast that’s ready in the time it takes to watch a sitcom. This recipe proves you don’t need a griddle or a hoagie roll to capture that iconic flavor—just a single pot, a handful of honest ingredients, and the willingness to create something wonderfully delicious.
Whether you stick to the classic blueprint or run wild with your own twists and add-ins, this dish is built to please. It’s hearty weeknight fuel, it’s crowd-pleasing party food, and it’s the ultimate edible hug after a long day. So the next time that craving hits, skip the takeout line and head to your own kitchen. In one pot and under one hour, you can create a cozy, cheesy masterpiece that turns an ordinary night into something special.
Now, go grab that big spoon, serve up a generous helping, and watch it disappear. Happy cooking, and happy eating!
With a full pot and an even fuller heart,
Olivia
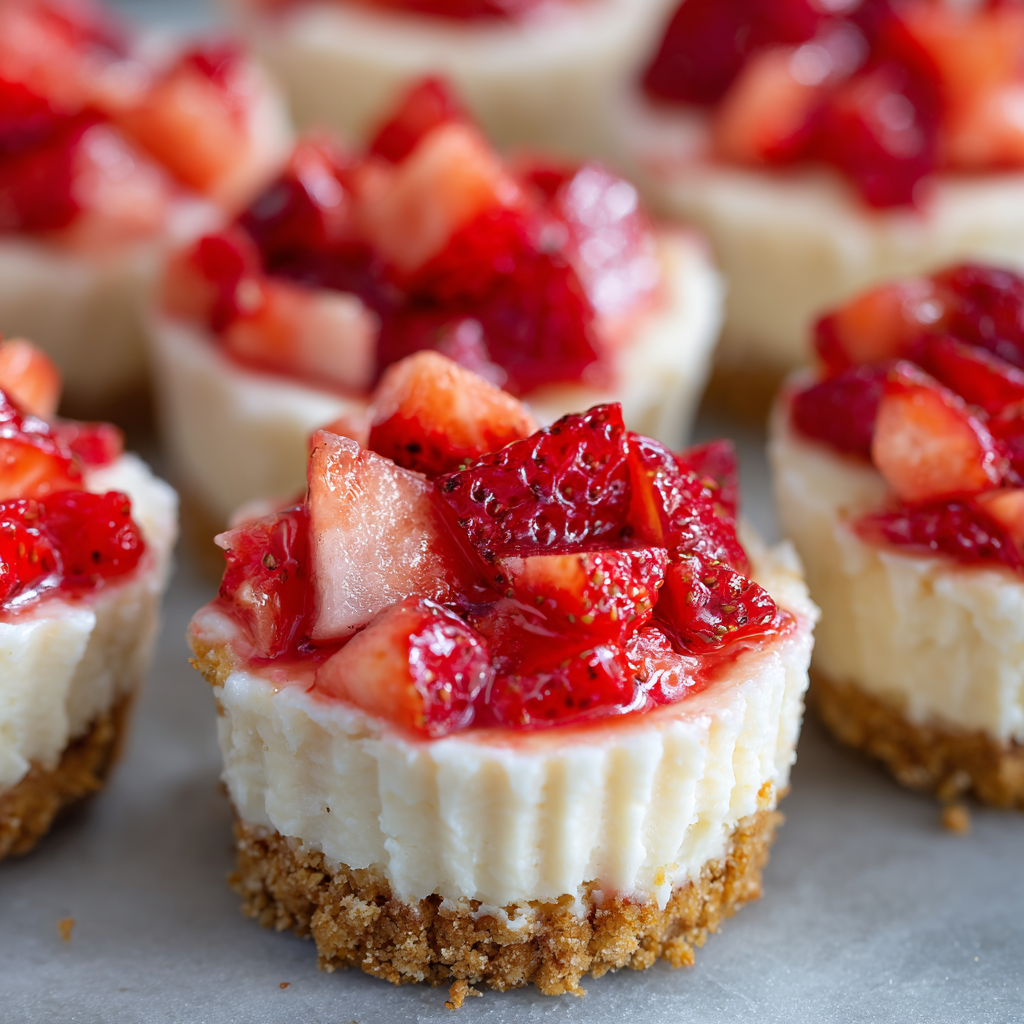
Strawberry Cheesecake Bites (No-Bake, Creamy & Crowd-Pleasing!)
No-Bake Strawberry Cheesecake Bites: Your New Favorite Party Trick
Hey there, friend! Come on in and pull up a stool. Can you smell that? It’s the sweet, buttery scent of graham crackers and the bright, summery promise of ripe strawberries. No, I haven’t been slaving over a hot oven all day. In fact, I’ve been whipping up pure magic without even turning it on. I’m talking about my absolute go-to for last-minute gatherings, spontaneous sweet cravings, and “wow, you made these?!” moments: No-Bake Strawberry Cheesecake Bites.
If you’ve ever stared at a classic cheesecake recipe and felt a mix of desire and dread (all those steps! The water bath! The cracking!), I’m here to liberate you. These little bites deliver every bit of that creamy, tangy, dreamy cheesecake experience but in a fun, poppable, no-stress package. They’re the perfect project for a lazy afternoon, a lifesaver for potlucks, and a guaranteed hit with kids and adults alike. The best part? You don’t need any fancy skills or equipment—just a bowl, a spoon, and a whole lot of love for delicious things. So, tie on your favorite apron (the messy one tells the best stories), and let’s make something wonderfully simple and spectacularly good together.
The Story Behind the Bite: A Sunshine-Filled Memory
Every great recipe has a story, and this one takes me straight back to my first “real” dinner party in my tiny, galley-style first apartment. I was determined to impress my new friends with a multi-course meal. The main course? Respectable. The salad? Fine. But dessert… dessert was a disaster. I attempted a fancy, layered torte that, let’s just say, decided to live its best life as a delicious puddle on my counter.
Panic set in. I had 30 minutes until guests arrived. Then I spotted a sleeve of graham crackers, a block of cream cheese from a bagel breakfast, and a pint of strawberries that were just begging to be used. In a frenzy of inspiration (and slight desperation), I smashed, mixed, whipped, and spooned. What emerged from the fridge an hour later, as we sipped our wine, were these adorable, makeshift cheesecake bites. They were imperfect, a little rustic, but utterly delicious. The laughter that filled my kitchen as we popped them straight from the tray was better than any perfectly-plated dessert could have ever inspired. That night taught me that the best food isn’t about perfection—it’s about joy, improvisation, and sharing something made with heart. These bites have been my little edible reminder of that ever since.
Gathering Your Sunshine: Ingredients & Why They Matter
Part of the joy of no-bake treats is how approachable the ingredient list is. Let’s walk through what you’ll need and why each component is a star player. I’ll also give you my favorite swaps and insider tips!
- 1½ cups graham cracker crumbs: This is the foundation of our crunchy, sweet base. You can buy pre-crumbed crackers or pulse whole ones in a food processor or sealed bag with a rolling pin (super therapeutic!). Chef’s Insight: For a deeper flavor, toast the crumbs in a dry pan for 2-3 minutes before mixing.
- 4 tbsp melted butter: This is the glue that holds our crust together. Use unsalted so you control the sweetness. Substitution Tip: For a dairy-free version, coconut oil works beautifully and adds a subtle tropical note.
- 2 tbsp sugar: A little extra sweetness for the crust to balance the tangy filling.
- 8 oz full-fat cream cheese, softened: NON-NEGOTIABLY SOFTENED. This is the heart of the operation. Take it out of the fridge at least an hour ahead. Full-fat gives you that luxurious, creamy mouthfeel that light versions can’t replicate. Chef’s Insight: Beat it alone first until it’s completely smooth—no lumps allowed!
- ½ cup powdered sugar: We use powdered (confectioners’) sugar because it dissolves instantly, creating a silky-smooth filling without graininess.
- 1 tsp pure vanilla extract: The warm, aromatic backbone of our filling. It elevates everything.
- ½ cup heavy cream, cold: The secret to the cloud-like, airy texture! It must be cold to whip up properly. Substitution Tip: For a stable non-dairy whip, chill a can of full-fat coconut cream overnight and scoop out the solid part.
- 1 cup diced fresh strawberries: The jewel on top! Use ripe, in-season berries for the best flavor. Pat them dry after dicing to prevent sogginess. Chef’s Insight: Toss them with a teensy pinch of sugar to macerate them slightly and create a lovely juicy syrup.
- Optional Garnishes: A sprinkle of extra graham crumbs for texture, a drizzle of melted white or dark chocolate, or a tiny fresh mint leaf. Make it your own!
Let’s Get Building: Step-by-Step with Chef’s Chatter
Ready to create? Here’s where the fun begins. I’ll guide you through each step with all my favorite little hacks to ensure success.
Step 1: The Foundation – Crafting the Crust
In a medium bowl, combine your graham cracker crumbs, melted butter, and sugar. Mix it with a fork until it resembles wet sand—you should be able to pinch it and have it hold its shape. Pro Tip: If it seems too dry, add another ½ tablespoon of melted butter. Too wet? A sprinkle more crumbs.
Now, grab your mini cupcake pan lined with paper or silicone liners. Using a small spoon or a tart tamper if you have one, firmly press about 1 tablespoon of the mixture into the bottom of each liner. We want a compact, solid base. Don’t be shy! Press it down well. Pop the whole tray into the fridge for 10-15 minutes to set. This chill time is what keeps the crust from crumbling when you bite into it later.
Step 2: The Clouds – Making the Dreamy Filling
In a large bowl, beat your softened cream cheese with an electric mixer (or a ton of arm power and a whisk!) for about 30 seconds until it’s completely smooth and lump-free. Scrape down the sides. Add the powdered sugar and vanilla extract, and beat again until fully combined and creamy.
Now, in a separate, clean, cold bowl, pour in your cold heavy cream. Whip it on medium-high speed until stiff peaks form. You’ll know it’s ready when you lift the beaters and the cream stands straight up. Watch closely—you’re going for fluffy clouds, not butter!
Here’s the magic moment: add about one-third of the whipped cream to the cream cheese mixture. Gently fold it in with a spatula. This lightens the dense cream cheese. Then, fold in the remaining whipped cream until no white streaks remain. Be gentle to keep all that beautiful air in the mixture. You should have a gloriously fluffy, pale, and spoonable filling.
Step 3: The Art of Assembly
Pull your crusts from the fridge. You can spoon the filling into the cups, but for a neater look and more fun, scoop the filling into a piping bag (or a zip-top bag with a corner snipped off). Pipe a generous swirl onto each crust.
Top each creamy swirl with a spoonful of your diced strawberries. If you’re feeling fancy, this is the time for that chocolate drizzle or graham crumb sprinkle. And that’s it! See? No oven required.
Step 4: The Patience Game – Chilling
This is the only “hard” part. Carefully transfer the tray to the refrigerator and let the bites chill for at least 1 hour, but ideally 2-3. This allows the fats to firm up, the flavors to meld, and gives you that perfect, cool, creamy cheesecake texture. Trust me, it’s worth the wait.
Sharing the Joy: How to Serve These Little Gems
Presentation is part of the fun! Arrange these bites on a beautiful platter or cake stand. They look stunning on a tiered tray for a party. I love serving them straight from the fridge, maybe with a dusting of extra powdered sugar right before guests arrive. Pair them with a glass of sparkling rosé, a cup of hot coffee, or just grab a couple as you walk through the kitchen—I won’t tell!
Make It Your Own: Delicious Twists & Swaps
The beauty of this recipe is its versatility. Here are a few ways to play:
- Lemon Berry Bliss: Add the zest of one lemon to the cream cheese filling. Top with a mix of strawberries, blueberries, and raspberries.
- Chocolate Dream: Replace the graham crumbs with crushed chocolate wafer cookies or Oreos (filling removed). Drizzle with dark chocolate.
- Tropical Escape: Use crushed vanilla wafers or shortbread for the crust. Top the filling with diced mango, kiwi, and toasted coconut flakes.
- PB&J Style: Add 2 tablespoons of smooth peanut butter to the cream cheese filling. Top with a dollop of strawberry jam instead of fresh berries.
- Boozy Adult Version: Fold 1 tablespoon of Grand Marnier or Chambord into the filling along with the whipped cream.
From My Kitchen to Yours: Chef’s Notes
Over the years, this recipe has become my culinary security blanket. I’ve made it in a heatwave when turning on the oven was unthinkable, and I’ve doubled it for a crowd of 50 with rave reviews. One funny fail? I once tried to use frozen strawberries without thawing and patting them dry. Let’s just say my “cheesecake bites” turned into “cheesecake soups.” Lesson learned! The recipe has evolved to stress the importance of dry fruit and properly softened cheese—two game-changers. Remember, cooking is about the journey, the little messes, and the big smiles at the end. These bites are a celebration of that.
Your Questions, Answered: FAQs & Troubleshooting
Q: Can I make these ahead of time?
A: Absolutely! They are the perfect make-ahead dessert. Assemble them completely, cover the tray tightly with plastic wrap, and store in the fridge for up to 24 hours before serving. The crust might soften slightly, but they’ll still be delicious.
Q: My filling is too runny. What happened?
A: This usually boils down to two things: 1) The cream cheese wasn’t full-fat or wasn’t fully softened, leading to lumps that break the emulsion. 2) The heavy cream wasn’t whipped to stiff peaks. If it happens, don’t panic! Just pop the whole mixing bowl of filling into the fridge for 20 minutes to firm up, then give it one more gentle fold before piping.
Q: Can I freeze strawberry cheesecake bites?
A: You can, but with a caveat. Freeze them on the tray until solid (about 2 hours), then transfer to an airtight container. They’ll keep for about a month. Thaw in the fridge for an hour before serving. Note: The texture of the fresh strawberry topping will change, becoming softer, so for freezing, I recommend using a cooked jam or compote topping instead of fresh fruit.
Q: I don’t have a mini muffin pan. Can I still make these?
A: Yes! You can use silicone molds, which pop out beautifully. Or, make them as bars in a 9×9 dish. Press the crust into the bottom, spread the filling over top, and scatter with strawberries. Chill and slice into squares.
Print
Strawberry Cheesecake Bites (No-Bake, Creamy & Crowd-Pleasing!)
Description
No-Bake Strawberry Cheesecake Bites
Creamy, poppable, and party-perfect—no oven required
Ingredients
Graham Cracker Crust
-
1½ cups graham cracker crumbs
-
4 tbsp butter, melted
-
2 tbsp sugar
Cheesecake Filling
-
8 oz full-fat cream cheese, softened
-
½ cup powdered sugar
-
1 tsp vanilla extract
-
½ cup heavy cream, cold
Topping
-
1 cup fresh strawberries, diced and patted dry
Optional Garnishes
-
Extra graham crumbs
-
Melted chocolate
-
Fresh mint
Instructions
-
Make the crust:
In a bowl, mix graham crumbs, melted butter, and sugar until it resembles wet sand. Press about 1 tablespoon into each lined mini muffin cup. Chill 10–15 minutes. -
Prepare the filling:
Beat softened cream cheese until smooth. Add powdered sugar and vanilla; beat until creamy. -
Whip the cream:
In a separate cold bowl, whip heavy cream to stiff peaks. -
Fold & combine:
Gently fold one-third of the whipped cream into the cream cheese mixture, then fold in the rest until fluffy and smooth. -
Assemble:
Spoon or pipe the filling over the chilled crusts. Top with diced strawberries and any garnishes. -
Chill:
Refrigerate at least 1 hour (2–3 hours best) until set. -
Serve:
Enjoy cold straight from the fridge.
Notes
-
Fully softened cream cheese = ultra-smooth filling.
-
Whip cream to stiff peaks for structure.
-
Pat strawberries dry to prevent soggy tops.
Quick Nutritional Snapshot
Please note: This is an approximate estimate for 1 cheesecake bite (recipe makes ~16).
- Calories: ~135
- Fat: 10g
- Carbohydrates: 11g
- Protein: 2g
- Prep Time: 20 mins | Chill Time: 1 hour+ | Total Time: 1 hour 20 mins | Storage: Refrigerated, up to 3 days.
Final Thoughts: More Than Just a Bite
So there you have it—your new secret weapon for effortless, impressive, and utterly delicious entertaining. These No-Bake Strawberry Cheesecake Bites are more than just a recipe; they’re a reminder that the best moments often come from simplicity, not complexity. They prove that you don’t need fancy techniques or hours of labor to create something that feels like a celebration.
Remember, cooking is an act of love—for yourself and for others. These little bites, born from a happy accident and perfected through shared laughter, are a testament to that. They’re forgiving, adaptable, and always ready to bring a smile. Whether you’re hosting a grand party, needing a sweet treat after a long day, or simply wanting to make an ordinary Tuesday feel special, this recipe is here for you.

Croissant French Toast : Buttery, Golden & Totally Indulgent
The Best Thing Since Sliced… Croissants: Introducing Croissant French Toast
Good morning, sunshine! Or, let’s be real—good afternoon, because let’s face it, the very best brunches are the ones that happen when you finally roll out of bed, shuffle into the kitchen with your favorite mug, and decide the day deserves a delicious, slow start. That first deep breath of the morning, when the air fills with the scent of buttery pastry, warm cinnamon, and maple syrup… that’s pure, unadulterated happiness right there. And that’s exactly the feeling I want to bottle up and share with you today.
We’re talking about taking the humble, beloved French toast and giving it a serious glow-up. We’re trading in our usual bread slices for something a little more… extra. Something with flaky layers and a rich, golden soul. We’re making Croissant French Toast. Just saying it out loud feels a little luxurious, doesn’t it? It’s the kind of dish that looks like you spent hours in a fancy patisserie, but secretly comes together with about 15 minutes of effort and a few simple, beautiful ingredients.
This isn’t just breakfast; it’s an experience. Imagine: day-old croissants, soaked in a sweet, spiced custard, then sizzled in a pan until the outside is gloriously crisp and caramelized, while the inside transforms into a soft, almost bread-pudding-like cloud. Each bite is a perfect contrast of textures and a celebration of butter (in the best possible way). It’s the ultimate weekend treat, the show-stopper for holiday brunch, or the perfect “I-love-you” breakfast in bed. So, tie on that apron (messy is welcome here!), grab those croissants, and let’s turn something simple into something absolutely unforgettable.
From Bakery Blunder to Brunch Brilliance: My Croissant “Aha!” Moment
This recipe was born from one of my favorite kitchen philosophies: the beautiful art of the “happy accident.” You know those moments? It was a few years ago, the morning after hosting a little dinner party. My eyes were bigger than my stomach (and my guest list), and I’d bought way too many gorgeous, flaky croissants from my local bakery. The next morning, I was faced with a basket of pastries that had lost their perfect, crackly crispness. They were still delicious, but that magical fresh-bakery texture was gone.
My heart sank a little. I hate food waste almost as much as I love butter. As I stared at them, feeling slightly guilty, my grandma’s voice popped into my head: “Stale bread is just French toast waiting to happen, sweetheart.” Lightbulb. What if…? I whisked up my usual custard, gently split one of the slightly-tired croissants, and let it take a bath. What came out of the pan minutes later wasn’t just French toast. It was a revelation. The croissant’s layers had soaked up the custard like a dream, creating pockets of silky softness, while the buttery exterior crisped up into something even more incredible than the original. My husband took one bite, his eyes went wide, and he declared, “You can never make it with regular bread again.” And you know what? I rarely have.
Gathering Your Brunch Brilliance: The Ingredients & Why They Matter
Here’s where the magic starts. You don’t need a long list, just a few good-quality players. Every single one has a role to play in creating that perfect bite.
- 2–3 large, day-old croissants, halved lengthwise: The star of the show! Using croissants that are a day old is actually a benefit—they’re sturdier and will soak up the custard without completely falling apart. Their buttery, layered structure is what makes this dish so special. Chef’s Insight: No day-old croissants? Leave fresh ones uncovered on the counter overnight, or pop them in a low oven (250°F) for 10 minutes to dry out slightly.
- 2 large eggs: Our custard base. They provide richness, protein, and that lovely golden color when cooked. They’re the glue that holds the flavor to the pastry.
- ½ cup milk (dairy or non-dairy): This thins the custard to the perfect soaking consistency. I love whole milk for extra richness, but any milk you have works beautifully. For a dairy-free version, unsweetened almond or oat milk are fantastic. Substitution Tip: For an ultra-decadent version, swap half the milk for heavy cream or half-and-half.
- 1 tbsp pure maple syrup or granulated sugar: A touch of sweetness from within. Maple syrup adds a lovely, nuanced flavor, while sugar keeps it simple. This little bit helps with caramelization in the pan.
- ½ tsp pure vanilla extract: The flavor booster. It adds a warm, aromatic sweetness that makes everything taste more “bakery-style.” Don’t skip it!
- ¼ tsp ground cinnamon: The cozy spice. It adds a hint of warmth that pairs perfectly with the butter and maple. Feel free to add a pinch of nutmeg or cardamom too if you’re feeling adventurous.
- A generous pinch of fine sea salt: The flavor enhancer. Salt balances the sweetness and makes all the other ingredients pop. It’s crucial in any good dessert or pastry recipe!
- Butter or neutral oil for cooking: Butter, of course, adds incredible flavor and helps achieve that gorgeous, golden-brown crust. For a higher smoke point, use a mix of butter and a little avocado or grapeseed oil.
Let’s Get Cooking: Your Step-by-Step Guide to Golden Perfection
Ready? Let’s transform these ingredients into brunch royalty. Follow these steps, and you’ll be a Croissant French Toast pro in no time.
Step 1: The Custard Concoction. Grab a wide, shallow bowl—a pie dish works perfectly here. Crack in your two eggs and give them a vigorous whisk until they’re smooth and uniform. Now, stream in your milk while whisking. Add the maple syrup (or sugar), vanilla, cinnamon, and that all-important pinch of salt. Whisk, whisk, whisk until everything is beautifully combined and you see little bubbles on the surface. This is your golden elixir! Chef’s Hack: Want an even silkier custard? Pour the mixture through a fine-mesh strainer into another bowl to catch any little bits of egg white or unmixed spices.
Step 2: The Gentle Soak. Take your halved croissants and, one by one, place them cut-side down into the custard. Let them lounge for about 10-15 seconds, then gently flip them. You want them to be thoroughly moistened and to drink up that custard, but not so long that they become saturated and risk falling apart. You’ll see the custard start to disappear into those beautiful layers—that’s exactly what you want! Important Tip: If your croissants are very fresh and soft, aim for the shorter end of the soak time. If they’re quite dry, they can handle a few more seconds.
Step 3: The Sizzle & Sear. Place a large non-stick or cast-iron skillet over medium heat. Let it get properly warm—a drop of water should sizzle and dance. Add a generous knob of butter (about 1 tablespoon) and let it melt and foam slightly. Carefully place your soaked croissant halves in the pan, cut-side down first. This seals those custard-filled layers. Cook for 2-3 minutes, until you see a deep, golden-brown crust forming. Peek by lifting a corner! Flip them over and cook for another 2 minutes on the other side. Chef’s Secret: Don’t crowd the pan! Cook in batches if needed, adding a bit more butter between batches. Crowding creates steam and prevents that perfect crispness.
Step 4: The Finishing Touch & Serve. Once both sides are gloriously golden and crisp, transfer your French toast to a wire rack set over a baking sheet for a minute. This prevents the bottom from getting soggy from trapped steam. Then, plate them up immediately while they’re hot and ready for their toppings!
Plating Your Masterpiece: Serving Suggestions
This is the fun part! I love serving these on a big, shareable platter or individual plates. Stack two halves slightly askew to show off those beautiful layers. Dust everything with a snowy drift of powdered sugar from a fine-mesh sieve—it looks so pretty. Then, let the toppings rain down! I like to scatter a handful of fresh, vibrant berries (the tartness is perfect against the sweet, rich toast), drizzle over plenty of warm maple syrup, and maybe add a dollop of lightly sweetened whipped cream or a scoop of vanilla mascarpone. Serve immediately with hot coffee and big smiles.
Make It Your Own: Delicious Twists & Variations
The basic recipe is a dream, but feel free to play!
- Chocolate-Hazelnut Dream: Spread the inside of the croissant halves with Nutella before soaking. Top with sliced bananas and chopped toasted hazelnuts.
- Berry Cream Cheese: Slather the croissants with a thin layer of whipped cream cheese or mascarpone before dipping. Serve with a mixed berry compote.
- Tropical Escape: Add a tablespoon of coconut milk to the custard and a pinch of cardamom. Top with toasted coconut, mango slices, and a drizzle of passion fruit syrup.
- Savory-Sweet Bacon & Maple: Add a teaspoon of fresh chopped rosemary to the custard. Serve the French toast with crispy bacon on the side and a maple-balsamic glaze.
- Stuffed French Toast: Don’t split the croissants! Instead, slice a pocket into the side and stuff with sliced strawberries and cream cheese, or almond paste and raspberry jam, before soaking and cooking.
Olivia’s Chef Notes & Kitchen Confessions
This recipe has become my non-negotiable for special mornings. Over time, I’ve learned a few things. First, not all croissants are created equal. A really good, all-butter croissant will give you the most phenomenal flavor and flaky texture. It’s worth seeking out from a local bakery if you can! Second, I’ve had my share of kitchen “oops” moments. Once, I got distracted by a text and left a croissant half soaking for a full minute… it became a delicious but fragile custard sponge that required a spatula and a prayer to flip! So, set a timer if you’re easily distracted like me. Lastly, this recipe scales up beautifully for a crowd. I just mix the custard in a big baking dish and do an assembly line of soaking and cooking. It’s the ultimate crowd-pleaser that lets me enjoy my guests instead of being stuck at the stove.
Your Questions, Answered: FAQs & Troubleshooting
Q: My French toast turned out soggy in the middle. What happened?
A: This usually means the pan wasn’t hot enough, or we rushed the cooking. Make sure your pan is properly preheated over medium heat before adding the butter and soaked croissant. You need that immediate sizzle to seal the exterior. Also, resist the urge to press down with your spatula—this squeezes out the lovely custard!
Q: Can I make this ahead of time for a brunch party?
A: You can do some prep! You can whisk the custard the night before and keep it covered in the fridge. You can also pre-slice the croissants. I don’t recommend soaking them ahead of time, as they’ll get too soggy. For serving a crowd, cook them in batches and keep finished pieces warm on a wire rack set over a baking sheet in a 200°F oven while you finish the rest.
Q: It tastes too “eggy.” How can I prevent that?
A> A strong egg flavor often means the custard wasn’t fully mixed, or the ratio was off. Whisk your custard extremely well until it’s totally uniform. Also, make sure you’re using large eggs. If you’re sensitive to the flavor, try adding an extra splash of vanilla or a tiny bit more cinnamon to balance it.
Q: My croissant fell apart in the pan! Help!
A> Oh no! This likely means it was either soaked for too long, or the croissant was very fresh and delicate. Use a gentle touch when flipping, and make sure your spatula is getting fully under the croissant for support. If they are very fresh, a quick 5-7 second soak per side is plenty.

Croissant French Toast : Buttery, Golden & Totally Indulgent
Description
Croissant French Toast
Flaky on the outside, custardy on the inside—pure brunch luxury
Ingredients
-
2–3 large butter croissants, day-old, halved lengthwise
-
2 large eggs
-
½ cup milk (or dairy-free alternative)
-
1 tbsp pure maple syrup or sugar
-
½ tsp vanilla extract
-
¼ tsp ground cinnamon
-
Pinch of fine sea salt
-
Butter (or butter + neutral oil) for cooking
Optional toppings: powdered sugar, maple syrup, fresh berries, whipped cream
Instructions
-
Whisk custard: In a wide shallow bowl, whisk eggs, milk, maple syrup (or sugar), vanilla, cinnamon, and salt until smooth.
-
Soak croissants: Dip croissant halves cut-side down for 10–15 seconds, flip, and soak briefly until moistened but not soggy.
-
Cook: Heat a skillet over medium. Add butter. Cook croissants cut-side down for 2–3 minutes until golden; flip and cook another 2 minutes.
-
Serve: Transfer to plates and serve immediately with desired toppings.
Notes
-
Day-old croissants soak better without falling apart.
-
Don’t overcrowd the pan—cook in batches for crisp edges.
-
Keep heat at medium to avoid burning the butter.
Nutritional Information*
*This is an approximate estimate per serving (based on 2 servings, using whole milk and 1 tbsp butter for cooking, without toppings).
- Calories: ~350
- Carbohydrates: ~25g
- Fat: ~20g
- Protein: ~9g
- Prep Time: 5 mins
- Cook Time: 10 mins
- Total Time: 15 mins
- Serves: 2-3
Final Thoughts: More Than a Recipe, a Ritual of Joy
Croissant French Toast is more than just a clever way to use up leftover pastries or an indulgent brunch dish. It’s a testament to a joyful, resourceful approach to cooking—where a potential “blunder” (slightly stale croissants) is transformed into a moment of pure brilliance. It celebrates texture, comfort, and the simple alchemy of a few good ingredients meeting a hot pan.
This recipe reminds us that the best meals often come from a place of intuition and love, not just rigidly following instructions. It invites you to play: to add your favorite spices, to raid the fridge for toppings, to turn a quiet morning into a small celebration. It’s forgiving, fast, and consistently impressive.

Viral Cookie Croissant : Buttery, Gooey & Totally Irresistible
When a Cookie Meets a Croissant: The Internet’s Newest Obsession
Hello, my kitchen friends! Olivia here. Can we talk about that magical moment when two perfect things collide in the best possible way? Like sunshine after rain, or a quiet Saturday with a new book. That’s exactly the kind of alchemy we’re diving into today with the treat that’s taken over my social feeds and has absolutely earned a permanent spot in my heart (and my recipe box): the Viral Cookie Croissant. Imagine this: the ethereal, buttery layers of a perfectly baked croissant. Now, cradle within its flaky embrace a pillow of rich, gooey cookie dough that bakes up just enough to be set, but stays decadently soft and melty in the center. It’s a textural dream come true—crisp, shattering pastry giving way to a warm, cookie-dough heart. It’s not just a dessert; it’s an experience. And the best part? It’s quite possibly the easiest “show-stopper” you’ll ever make. No fancy pastry skills required, just a love for deliciousness and about 15 minutes. So, tie on that apron (the messy ones are the most loved!), and let’s turn simple ingredients into pure, unadulterated joy.A Happy Accident & The Joy of Messy Experiments
This recipe reminds me of a lazy Sunday last autumn. My nephew was over, and we’d planned to bake chocolate chip cookies. But as we were creaming the butter and sugar, we realized we were completely out of flour! We had a bag of day-old croissants from the bakery, and in that moment of “what on earth do we do with this cookie dough now?”, a beautiful, messy idea was born. “What if we just… stuffed it in here?” he said, holding up a croissant. With nothing to lose, we sliced, stuffed, and baked. What emerged from the oven was pure magic. The look on his face—a mix of triumph and wonder—was everything I love about cooking. It wasn’t planned or polished; it was a spontaneous, playful experiment that turned into something extraordinary. That’s the spirit I want to bring to your kitchen. Sometimes, the best recipes aren’t found in glossy books, but in moments of happy, flour-dusted chaos with the people you love.Gathering Your Cookie Croissant Toolkit
Part of the beauty here is the short, simple ingredient list. This is about quality, not quantity. Let’s break it down.- 2 large butter croissants (preferably day-old): This is your foundation! I specifically call for butter croissants (check the label) because their flavor is superior. Using croissants that are a day old is actually a chef’s hack—they’re a bit sturdier and won’t tear as easily when you slice and stuff them. No stale croissants? Fresh works perfectly! Just handle them with a little extra care.
- ½ cup cookie dough (store-bought or homemade): The star of the show. For convenience, a high-quality store-bought tub is fantastic. If you’re a from-scratch hero like me, use your favorite chocolate chip cookie recipe, but omit the egg if it’s a recipe that uses one, for food safety since the bake time is short. Want a chef insight? Let your dough sit at room temp for 10-15 minutes to soften—it will be much easier to spread.
- 2 tbsp chocolate chips (optional for extra gooeyness): Optional? Debatable. I say mandatory! This is your insurance policy for maximum chocolatey pull. I love a mix of semi-sweet and dark chips for depth of flavor.
- 1 tbsp melted butter (for brushing): This is our golden-brown secret weapon. A light brush before baking gives the croissant that irresistible, glossy, crisp finish. Salted butter adds a lovely subtle contrast.
- Optional toppings: powdered sugar, sea salt, or a drizzle of melted chocolate: The finishing flair! A flurry of powdered sugar feels classic. A tiny pinch of flaky sea salt on top just after baking elevates every single flavor. And a drizzle of chocolate? Well, that’s just showing off (in the best way).
Let’s Build Some Magic: Step-by-Step
Ready? This is where the fun happens. I’ll walk you through each step with my favorite little tips to ensure perfection.- Preheat & Prep: Start by preheating your oven to 375°F (190°C). This is the ideal temperature to puff and crisp the pastry while gently cooking the dough inside. Line a baking sheet with parchment paper. This isn’t just for easy cleanup—it prevents the buttery croissant bottoms from getting too dark. Chef’s Tip: Don’t skip the preheat! A properly hot oven is crucial for that perfect lift.
- The Art of the Slice: Take your croissants and, using a serrated bread knife, slice them open lengthwise. The key here is to cut almost, but not all the way through. You want to create a deep pocket, like a warm, buttery book, leaving one long edge attached as a “hinge.” This hinge keeps all that gooey goodness securely inside while baking.
- Stuff It Good: Now, for the best part. Divide your softened cookie dough between the two croissant pockets. Use a small spoon or your fingers to gently press and spread the dough evenly from one end to the other, leaving a small border at the edges. Now, sprinkle in those bonus chocolate chips, nestling them right into the dough. Don’t overstuff! You should be able to close the croissant without it bursting open.
- Seal & Shine: Gently press the croissants closed. They might look a little plump and pregnant—that’s exactly what you want! Using a pastry brush, lightly but thoroughly brush the tops and visible sides with the melted butter. This thin, even coat is what gives you that professional, bakery-style glow and crunch. Little Hack: If you don’t have a brush, you can carefully use the back of a spoon.
- Bake to Golden Perfection: Place your stuffed croissants on the prepared baking sheet and bake for 10-12 minutes. You’re looking for the pastry to turn a deep, golden brown and become beautifully flaky. The cookie dough inside should be just set—it will look soft and puffed, not raw. Resist the urge to overbake searching for a firm cookie center; the residual heat will continue to cook it as it cools.
- The (Brief) Wait & The Finish: Remove from the oven and let them cool on the sheet for exactly 5 minutes. I know, it’s torture! But this allows the molten interior to settle just enough so you don’t burn your mouth. Then, this is your moment: dust with powdered sugar, add that pinch of flaky salt, or zig-zag with melted chocolate. And then… dive in.
How to Serve Your Masterpiece
These are best served warm, when the layers are at their crispiest and the center is at its peak goo-factor. I love placing them on a simple, rustic board for a casual brunch or plating them individually on small, pretty plates for a more dessert-like feel. A scoop of high-quality vanilla ice cream on the side turns this into a next-level sundae, and a cold glass of milk is its classic, perfect partner. It’s a treat that needs no introduction, just eager hands and happy smiles.Get Creative: Twists on the Classic
The basic formula is a canvas for your cravings! Here are a few of my favorite spins:- S’mores Dream: Use a sugar cookie dough base, stuff with mini marshmallows and broken graham cracker pieces, and drizzle with chocolate.
- Peanut Butter Cup: Fill with peanut butter cookie dough and chopped peanut butter cups. A sprinkle of sea salt on top is divine.
- Funfetti Birthday: Use funfetti or sprinkle-studded cookie dough and top with a simple vanilla glaze and rainbow sprinkles.
- Gluten-Free/Dairy-Free: Use your favorite GF croissants and a DF cookie dough. The method remains exactly the same!
- Salted Caramel Apple: Mix a tablespoon of finely chopped soft dried apples into your dough, stuff, and after baking, drizzle with salted caramel sauce.
Olivia’s Kitchen Notes
This recipe has become my go-to “emergency dessert” for unexpected guests or when I need a quick sweet fix. Over time, I’ve learned that bigger, bakery-style croissants work better than the super dainty ones—more room for stuffing! I once tried making a batch with almond croissants and a dash of cinnamon in the dough, and it was a revelation. Don’t be afraid to play. The funniest mishap? I got overzealous with the stuffing, and in the oven, one croissant burst open like a volcano, with cookie lava bubbling everywhere. It was a mess… but still delicious. Remember, even the “failures” are usually tasty. Cooking is about the joy, not just the perfect result.Your Questions, Answered
Q: Can I make these ahead of time? A: You can assemble them up to an hour ahead, keep them covered on the baking sheet at room temp, and then bake just before serving. I don’t recommend stuffing them too far in advance, as the croissant can get soggy. Q: My cookie dough is leaking out everywhere while baking. What happened? A> This usually means you overstuffed or didn’t leave that crucial “hinge” on the croissant. Next time, use a bit less dough and make sure your knife doesn’t cut all the way through. A little leakage is normal and tasty; a lot means just scale back a touch. Q: Can I use puff pastry instead? A> Absolutely! Thaw a sheet of puff pastry, cut it into rectangles, place a portion of dough in the center, fold it over like a turnover, seal the edges with a fork, and bake. It’s a different, but equally delicious, vehicle! Q: Is the egg in raw cookie dough safe here? A> Since the bake time is short, if you’re concerned, use a store-bought dough labeled as “safe to eat raw,” or make a small batch of homemade dough without the egg. The heat will safely cook the flour. Print
Viral Cookie Croissant : Buttery, Gooey & Totally Irresistible
Description
Viral Cookie Croissant Recipe
Flaky. Gooey. Irresistible.
This viral Cookie Croissant combines the buttery layers of a croissant with a soft, melty cookie dough center. It’s quick, indulgent, and guaranteed to impress with minimal effort.
Ingredients
-
2 large butter croissants (day-old preferred)
-
½ cup cookie dough (store-bought or homemade*)
-
2 tbsp chocolate chips (optional, but recommended)
-
1 tbsp butter, melted (for brushing)
Optional toppings
-
Powdered sugar
-
Flaky sea salt
-
Melted chocolate drizzle
*If homemade, use egg-free dough or dough labeled safe to eat raw.
Instructions
-
Preheat oven to 375°F (190°C). Line a baking sheet with parchment paper.
-
Slice croissants lengthwise, cutting almost all the way through to create a pocket.
-
Fill each croissant with cookie dough, spreading evenly. Sprinkle in chocolate chips if using.
-
Close gently and place on the baking sheet.
-
Brush tops lightly with melted butter.
-
Bake for 10–12 minutes, until golden brown and flaky.
-
Cool 5 minutes, then finish with desired toppings.
-
Serve warm and enjoy!
Notes
-
Day-old croissants hold their shape better and won’t tear.
-
Don’t overstuff—too much dough can leak while baking.
-
The cookie center should look soft; it firms up slightly as it cools.
-
Sprinkle flaky salt right after baking for the best flavor contrast.
Nutritional Information*
*This is a rough estimate per cookie croissant, based on specific ingredients used. For precise information, calculate with your exact brands. Calories: ~350 | Protein: 5g | Carbohydrates: 32g | Fat: 22g | Saturated Fat: 12g | Cholesterol: 45mg | Sodium: 280mg | Sugar: 18g Prep Time: 5 minutes | Cook Time: 12 minutes | Total Time: 17 minutes | Servings: 2Final Thoughts
Sometimes, the greatest kitchen triumphs aren’t found in meticulous perfection, but in playful, butter-smeared experiments. The Viral Cookie Croissant is proof of that—a chance pairing born from a happy accident that captures everything I love about baking: joy, simplicity, and the thrill of creating something unexpectedly wonderful.
This isn’t just a recipe; it’s an invitation. An invitation to see your kitchen as a playground, to treat a “mistake” as a spark of inspiration, and to turn a few humble ingredients into a moment of pure, shared delight. Whether you’re baking it for a sleepy Sunday treat, a last-minute dessert for friends, or a sweet project with someone you love, it’s a reminder that the best creations often come from curiosity, not a rulebook.
So, go ahead—slice, stuff, and bake. Embrace the gooey leakage, celebrate the golden flakes, and savor that first warm, melty bite. Here’s to the messy, delicious adventures waiting to happen in your kitchen. Happy baking!
With love and a dusting of powdered sugar, Olivia
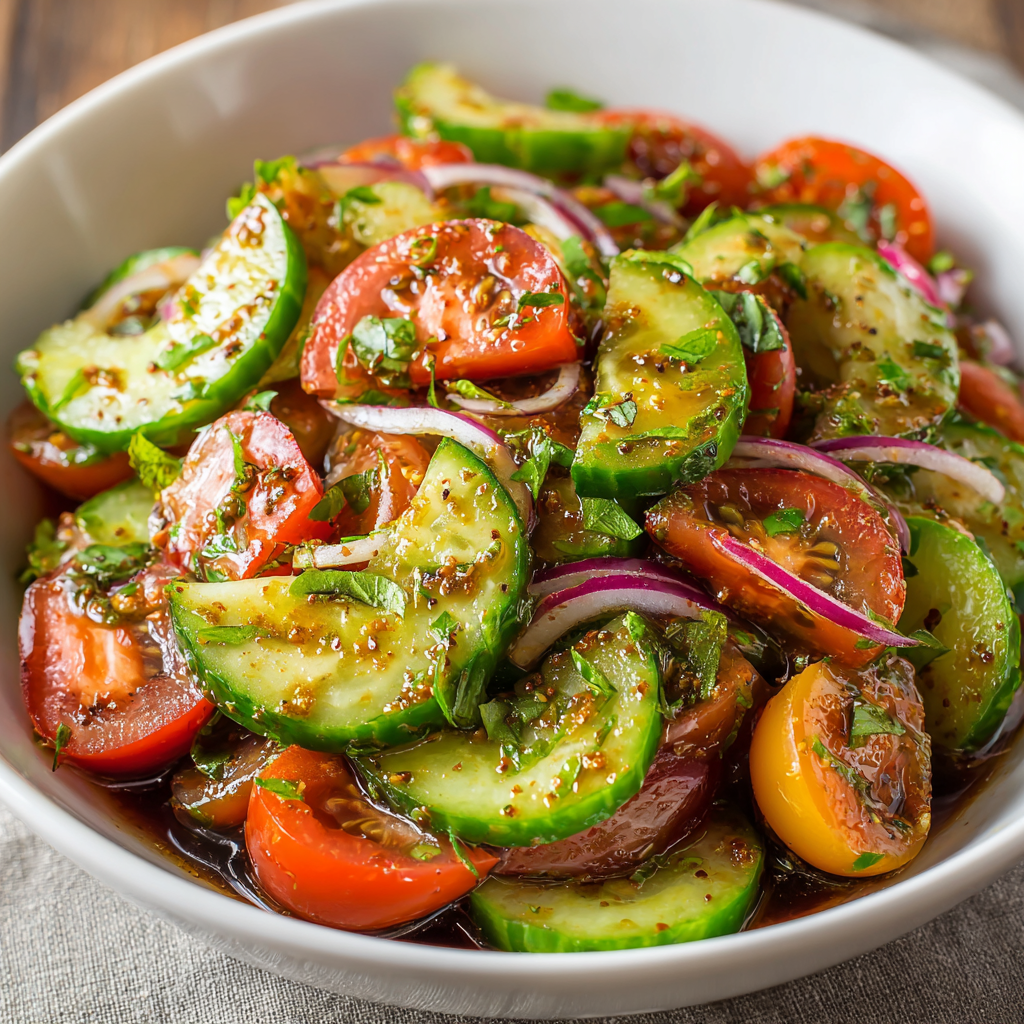
Fresh Cucumber Tomato Salad : Crisp, Juicy & 10-Minute Easy
The Salad That Tastes Like Sunshine (And Comes Together in 10 Minutes!)
Hey there, friend! Come on in, pull up a stool. Can you smell that? It’s the scent of ripe tomatoes, crisp cucumbers, and fresh herbs – it’s basically summer in a bowl. If there’s one recipe I make on repeat from June straight through September, it’s this utterly simple, gloriously fresh Cucumber Tomato Salad.
I’m talking about that kind of recipe you don’t even need to think about. The farmers’ market is bursting, your garden is overflowing, or your fridge just has a few stragglers that need loving attention. This salad is the answer. It’s not just a side dish; it’s a vibes-setter. It’s the crunch at your backyard BBQ, the bright note next to a rich pasta, the refreshing lunch you pack for the beach, and the “oh, I whipped this up” star that always gets rave reviews.
Best part? We’re talking 10 minutes, one bowl, and a handful of ingredients that sing together in perfect harmony. No fancy techniques, no stress. Just chopping, whisking, and tossing your way to something that tastes like pure, sun-ripened joy. So, tie on your apron (the messy one is always my favorite), and let’s make something that’s going to make your taste buds do a happy dance.
Why This Salad? A Little Story About Big Flavors
This salad takes me right back to my grandma’s kitchen table, the one with the red-checkered vinyl tablecloth. Every summer, without fail, she’d have a giant Tupperware bowl of something that looked just like this chilling in the fridge. It wasn’t a “recipe,” per se. It was just what you did when the garden gave you gifts.
I remember standing on a stool, “helping” her slice cucumbers with a butter knife (safe, she insisted), stealing cherry tomatoes when she wasn’t looking, and being mesmerized as she made the dressing right in the salad bowl with a quick glug of oil and a squeeze from a mysterious yellow lemon-shaped bottle. She’d let me give it one big stir with a wooden spoon. To me, it was magic. It was the taste of afternoons spent running through sprinklers, of family gathered on the porch, of simplicity that felt like a celebration.
My version is just a slightly grown-up homage to hers. I use fresh lemon now, and I’ve learned the magic of letting it sit for 20 minutes to let the flavors marry. But the soul of it? That’s all Grams. It’s a reminder that the best food isn’t complicated. It’s honest, it’s fresh, and it’s made to share. Every time I make it, that memory – and that feeling – comes right back to the table with us.
Gathering Your Garden Party: The Ingredients
Here’s the beautiful cast of characters. I love to think of each one as bringing its own special talent to the party. Pro-tip: The better the quality of your ingredients, the less you have to do to make them shine!
- 1½ cups cucumber, sliced: I love Persian or English cucumbers here. They have thinner skins (so no need to peel!), smaller seeds, and a delightfully crisp, sweet flesh. If you have a standard garden cucumber, that’s totally fine! Just give it a quick peel to avoid any waxiness and scoop out the big seeds with a spoon.
- 1½ cups cherry or grape tomatoes, halved: These little guys are sweet, juicy, and less watery than big tomatoes, which keeps our salad from getting soggy. Halving them lets all that lovely juice mingle with the dressing. Colorful heirloom cherry tomatoes make this salad a true showstopper!
- ¼ cup red onion, thinly sliced: That sharp, peppery bite is essential for balancing the sweetness. Chef’s Hack: If raw onion is too intense for you, soak the slices in a bowl of ice water for 10 minutes. It mellows the flavor and makes them extra crisp!
- 2 tbsp fresh parsley or basil, chopped: This is the fragrant, green confetti that finishes everything. Parsley is bright and grassy; basil is sweet and summery. Use what you love or what’s taking over your herb garden!
For the Simple-as-Sunshine Dressing:
- 2 tbsp extra virgin olive oil: The fruity, peppery base of our dressing. A good EVOO makes a difference here.
- 1 tbsp red wine vinegar or fresh lemon juice: Vinegar gives a sharper tang, lemon juice brings a sunny, fresh acidity. I lean towards lemon in the summer – it just feels right.
- ½ tsp Dijon mustard (optional, but genius): My little secret weapon! It doesn’t make the salad taste like mustard. Instead, it acts as an emulsifier, helping the oil and vinegar stay combined, and adds a subtle, complex tang in the background.
- Salt & freshly cracked black pepper to taste: Don’t be shy! Salt amplifies all the natural flavors. I always season, toss, taste, and then season again.
Let’s Make Some Magic: Your Step-by-Step Guide
Ready? Let’s turn these beautiful bits into a cohesive, crave-worthy salad. I’ll walk you through each step with all my favorite little kitchen hacks.
- Prep Your Veggies:Grab your cucumbers and give them a rinse. If using Persian/English, I just slice them into nice, hefty coins. For a garden cuke, peel, slice in half lengthwise, and use a spoon to scrape out the seeds before slicing. Toss them into a large, welcoming bowl – we want room to toss! For the tomatoes, pile them on your cutting board and slice them in half with a sharp knife. If they’re on the larger side, you can quarter them. Let those gorgeous halves tumble into the bowl with the cucumbers. Now, take your red onion, slice it in half, peel it, and then slice it as thinly as you can. Add it to the party. See how pretty it already is?
- Make Your Dressing (The Whisk & Taste Method):You can make this right in a small jar or a little bowl. I’m a bowl person – I like to see it come together. Add your olive oil, acid (vinegar or lemon juice), and that sneaky half-teaspoon of Dijon if you’re using it. Now, season generously with salt and a few good cracks of black pepper. Take a whisk and go to town! Whisk until the mixture looks smooth, slightly thickened, and unified – that’s your emulsion. Critical Tip: DIP A CUCUMBER SLICE IN AND TASTE IT. This is non-negotiable. Is it bright enough? Need more salt? More pepper? Adjust now. This dressing should make you pucker just a little with happiness.
- The Grand Toss & The Rest:Drizzle that perfectly tuned dressing all over your waiting vegetables. Using your hands or two big spoons, toss everything gently but thoroughly. You want every nook and cranny to get kissed by that dressing. Now, here’s the pro move: walk away. Let the salad sit at room temperature for 15-20 minutes before serving. This isn’t idle time; it’s flavor-building time. The salt draws out a tiny bit of the veggies’ natural juices, which mingles with the dressing to create a light, incredible “juice” at the bottom of the bowl. This is the secret sauce!
- The Finishing Touch:Just before serving, chop up your fresh herbs. I like a rough chop for lots of texture. Sprinkle them generously over the top of the salad and give it one final, gentle fold. This keeps the herbs vibrant and fragrant.
How to Serve Your Masterpiece
This salad is the ultimate team player! I love serving it in a big, wide, shallow bowl so all the gorgeous colors can shine. For a casual meal, it’s perfect straight from the mixing bowl. To elevate it, try serving it on a large platter, maybe over a bed of soft butter lettuce leaves. It’s incredible alongside anything from grilled chicken or fish to a gooey cheese pizza. Spoon some of that amazing accumulated “juice” from the bottom of the bowl over everything – that’s liquid gold!
Make It Your Own: Fun Twists & Swaps
The beauty of this template is how easily it adapts! Here are a few of my favorite riffs:
- The Creamy Dream: Add ½ cup of crumbled feta or creamy goat cheese right at the end. The salty, tangy cheese against the fresh veggies is *chef’s kiss*.
- Protein Powerhouse: Toss in a can of rinsed chickpeas or white beans, or some grilled shrimp or shredded chicken to turn this into a hearty main-dish salad.
- Avocado Lover’s Delight: Add 1 diced, ripe avocado just before serving for incredible creaminess. (A squeeze of extra lemon juice on the avocado keeps it green!)
- Italian Vibe: Swap the parsley for fresh basil or oregano, use red wine vinegar, and add a handful of pitted, sliced olives and a pinch of red pepper flakes.
- Vegan & Supercharged: Use a tablespoon of nutritional yeast in the dressing instead of Dijon for a cheesy, umami flavor boost!
From My Kitchen to Yours: A Few Parting Thoughts
This recipe has evolved from my grandma’s “little bit of this, little bit of that” method to my more measured version, but its spirit is unchanged. I’ve made it for fancy dinners and eaten it straight from the container while standing in my kitchen. It never fails.
A funny story: I once brought this to a potluck, and a friend spent ten minutes trying to guess the “secret complicated ingredient” in the dressing. She couldn’t believe it was just lemon, oil, salt, and pepper! That’s the power of great produce and a little resting time.
My biggest advice? Don’t skip the resting step. And always, always taste your dressing before it goes on the salad. Trust your palate – you’re the chef of your own kitchen!
Your Questions, Answered!
Q: Can I make this salad ahead of time?
A: Absolutely! Prep the veggies and make the dressing up to a day ahead, but keep them separate in the fridge. Toss everything together 20-30 minutes before you plan to serve it. This keeps the cucumbers crisp and perfect.
Q: My salad got a little watery after sitting. What did I do wrong?
A: You didn’t do anything wrong! The salt naturally draws moisture out of the veggies, creating that delicious “juice.” If you prefer it less juicy, you can salt the cucumber slices lightly in a colander, let them drain for 10 minutes, then pat them dry before adding to the bowl. But honestly, I love that juice for dipping bread in!
Q: What’s the best substitute for red wine vinegar?
A: Fresh lemon juice is my #1 swap. White wine vinegar, champagne vinegar, or even a dash of balsamic (it will darken the salad but tastes amazing) also work beautifully.
Q: I don’t have fresh herbs. Can I use dried?
A: For this salad, fresh is really best for that bright flavor and color. If you’re in a pinch, use 1 teaspoon of dried oregano or Italian seasoning mixed into the dressing, but know it will be a different (though still tasty) experience.
Fresh Cucumber Tomato Salad : Crisp, Juicy & 10-Minute Easy
Description
Fresh, crisp, and bursting with summer flavor, this Cucumber Tomato Salad is one of those recipes you’ll make on repeat. Juicy tomatoes, crunchy cucumbers, a touch of red onion, and fresh herbs come together with a light lemony dressing for a side dish that’s refreshing, versatile, and endlessly crowd-pleasing. It’s perfect for barbecues, picnics, quick lunches, or as a bright contrast to richer meals—and it comes together in just minutes.
Ingredients
Salad
-
1½ cups cucumber, sliced (Persian, English, or peeled garden cucumber)
-
1½ cups cherry or grape tomatoes, halved
-
¼ cup red onion, thinly sliced
-
2 tablespoons fresh parsley or basil, chopped
Dressing
-
2 tablespoons extra virgin olive oil
-
1 tablespoon fresh lemon juice or red wine vinegar
-
½ teaspoon Dijon mustard (optional)
-
Salt and freshly cracked black pepper, to taste
Instructions
-
Prepare the vegetables: Add cucumbers, tomatoes, and red onion to a large bowl.
-
Make the dressing: In a small bowl or jar, whisk together olive oil, lemon juice (or vinegar), Dijon (if using), salt, and pepper. Taste and adjust seasoning.
-
Toss: Pour the dressing over the vegetables and toss gently to coat.
-
Rest: Let the salad sit for 15–20 minutes at room temperature to allow flavors to meld.
-
Finish: Add fresh herbs just before serving and give one final gentle toss.
Notes
-
Use ripe tomatoes: The sweeter and juicier, the better the salad.
-
Soak the onion: If red onion is too strong, soak slices in cold water for 10 minutes, then drain.
-
Don’t skip resting time: This step builds flavor and creates a light, delicious natural “juice.”
-
Taste before serving: Adjust salt and acidity right at the end.
Quick Nutritional Snapshot
Per serving (based on 4 servings, without optional add-ins): Calories: ~110 | Carbohydrates: ~8g | Fat: ~8g (mostly healthy monounsaturated from olive oil) | Protein: ~2g | Fiber: ~2g. It’s a light, vitamin-packed side that brings flavor without weighing you down!
Final Thoughts: Your Taste of Sunshine Awaits
And there you have it—your ticket to summer, any day of the week.
This salad is more than just cucumbers and tomatoes. It’s a feeling. It’s that moment when you taste something so simple, so honest, that it stops you in your tracks. It’s the crunch that reminds you of picnics, the brightness that cuts through a hot day, and the simplicity that feels like a small, delicious victory.
I hope this recipe becomes a backdrop for your own memories—the laughter around a crowded table, the quiet satisfaction of a solo lunch on the patio, the “wow” from friends when you bring it to a gathering. Let it be your kitchen companion all season long, adaptable, forgiving, and always wonderfully refreshing.
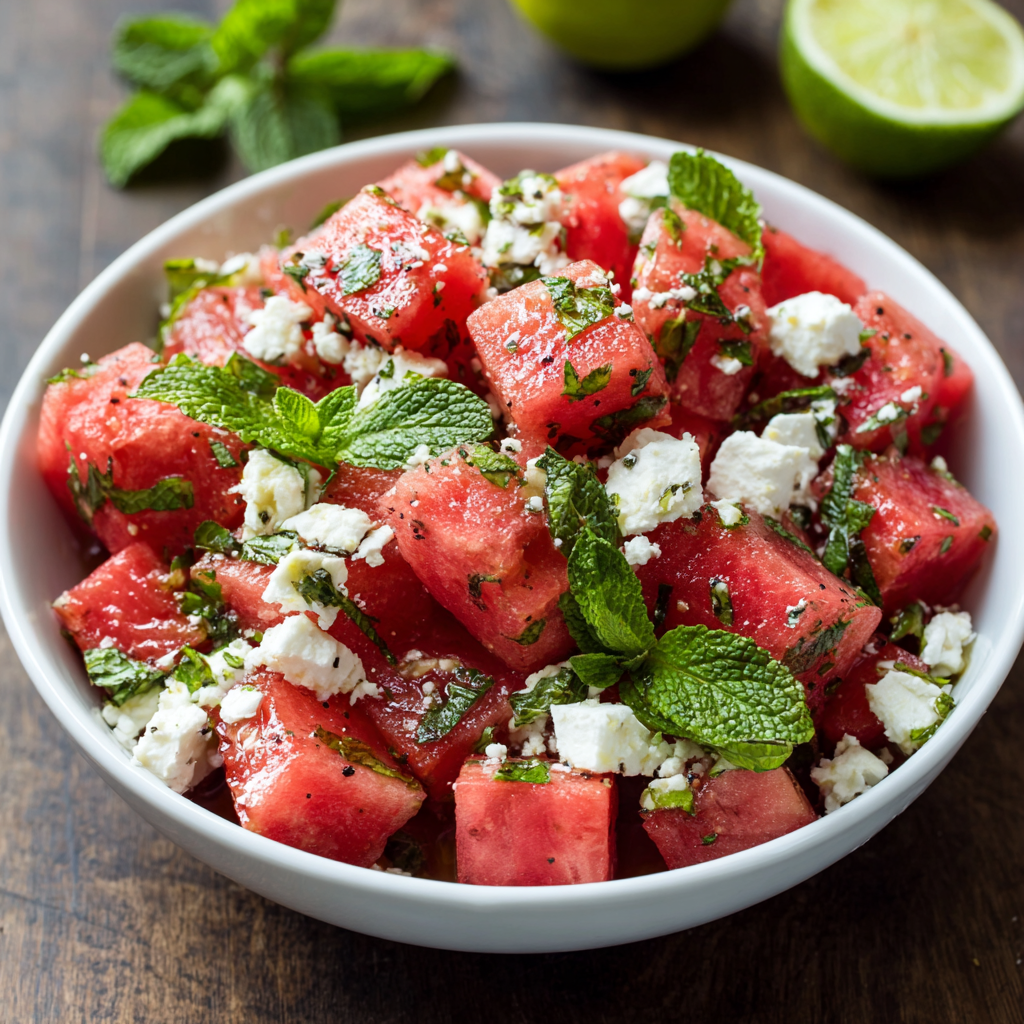
Refreshing Watermelon Feta Mint Salad : Sweet, Salty & Perfect for Summer
Let’s Make a Salad That Tastes Like Sunshine
Hey there, friend! Come on in, the kitchen’s nice and cool… well, as cool as it can be in the middle of a glorious summer heatwave. Is there anything better than that first crisp, sweet, juicy bite of a perfectly ripe watermelon? It’s the taste of backyard barbecues, lazy afternoons, and pure, unadulterated joy. But what if I told you we could take that simple pleasure and turn it into something truly spectacular?
Today, we’re whipping up my absolute go-to summer showstopper: the Watermelon Feta Mint Salad. This isn’t just a salad; it’s a flavor and texture party happening right in your bowl. We’re talking about the vibrant sweetness of watermelon, the creamy, salty punch of good feta, and the bright, refreshing kiss of fresh mint. It’s a combination that might sound simple, but trust me, it’s pure magic. Every bite is a little adventure—sweet, then salty, then cool and herby. It’s the salad that makes everyone at the picnic stop and ask, “What *is* that? Can I have the recipe?”
The best part? You don’t need to turn on the oven, and it comes together in under 10 minutes. It’s hydrating, light, and feels like a celebration on a plate. Whether you’re heading to a potluck, hosting a backyard bash, or just need a dazzling side for your weeknight grilled chicken, this recipe is your new best friend. So grab your favorite knife and a big bowl, and let’s make something that tastes as bright and happy as summer feels.
A Picnic, a Melon, and a Happy Accident
I have to confess, my love affair with this salad started with a happy kitchen accident. Years ago, I was frantically throwing together a last-minute picnic for a spontaneous trip to the lake with friends. My fridge was looking a little bare: half a giant watermelon I’d been snacking on, a block of feta left over from a pasta night, and a pot of mint threatening to take over my windowsill. In a “what-do-I-have-to-lose” moment, I cubed the melon, crumbled the cheese, tore up the mint, and gave it all a squeeze of lime from the fruit bowl.
I tossed it into a container, not thinking much of it. But when we sat down on our blankets by the water, that humble little melon mix was the first thing to disappear. The combination of the cool, sweet watermelon with the salty feta under the summer sun was a revelation. My friends raved about it. One of them said, “This tastes like vacation.” And she was right. It was effortless, refreshing, and felt uniquely special. That picnic-basket experiment became a staple. It’s a reminder that sometimes the most unforgettable dishes aren’t complicated; they’re just a few perfect ingredients, thrown together with a dash of spontaneity and a whole lot of sunshine.
Gathering Your Sunshine Ingredients
Here’s the beautiful shortlist for our summer masterpiece. The magic is in the quality, so let’s break it down.
- 4 cups seedless watermelon, cubed or balled: This is our star! Look for a melon that feels heavy for its size with a creamy yellow spot (the “field spot”) where it rested on the ground. Chef’s Insight: Cubes are fast and easy, but if you have a melon baller and a few extra minutes, the little spheres make the salad feel incredibly fancy and are fun to eat!
- ¾ cup crumbled feta cheese: The salty counterpoint to our sweet melon. I prefer a block of feta in brine that I crumble myself—it’s creamier and less dry than pre-crumbled. Substitution Tip: If you’re dairy-free, a good vegan feta can work, or for a different twist, try creamy, salty ricotta salata or even chunks of fresh mozzarella.
- ¼ cup fresh mint leaves, chopped or torn: Non-negotiable! Mint is the refreshing breeze that lifts the whole dish. Chef’s Insight: Always tear or chop mint just before adding it. If you do it too early, the edges can turn dark. Tearing with your hands releases the oils beautifully!
- Juice of 1 lime: Fresh lime juice is our “dressing.” It adds a necessary tangy zip that cuts through the richness and brightens every flavor. Substitution Tip: A lemon works in a pinch, but lime has a floral note that pairs magically with mint and melon.
- 1 tbsp extra virgin olive oil (optional): I often leave this out for maximum freshness, but a tiny drizzle of a good, fruity olive oil can add a lovely, subtle richness and help the flavors meld. It’s your call!
- Pinch of salt and cracked black pepper: Don’t skip these! A pinch of flaky sea salt enhances the watermelon’s sweetness, and a crack of black pepper adds a tiny, sophisticated hint of spice that’s just divine.
Let’s Build That Bowl of Summer
Ready? This is the easiest – and most satisfying – part. We’re not just throwing things in a bowl; we’re layering flavors with a little chef’s finesse.
- Prep Your Watermelon: First, let’s tackle that beautiful melon. Slice it into manageable slabs, then cut off the rind. Chop it into roughly 1-inch cubes. If you’re balling, go to town and make a pile of those cute little orbs! Chef’s Hack: Do this on a cutting board with a groove to catch all the delicious juice. You can add a splash of this juice to the bowl later for extra flavor.
- Crumble and Chop: Take your block of feta and crumble it with your fingers over a small plate. I like a mix of bigger, creamy chunks and smaller bits. Then, stack your mint leaves, roll them up like a little cigar, and thinly slice (this is called a chiffonade) for pretty ribbons, or simply give them a rough tear. The goal is fresh, fragrant pieces.
- The Gentle Toss: In your large, beautiful serving bowl, combine the watermelon, about two-thirds of the feta, and most of the mint. Why not all? We’re saving some for a gorgeous garnish on top! Using a large spoon or – my favorite – clean hands, toss everything together gently. We want to coat the melon without turning it into mush. Chef’s Tip: Hands are the best tools! You can feel if you’re being gentle enough.
- The Zest & Drizzle: Roll your lime on the counter under your palm to get the juices flowing, then cut it in half and squeeze the juice evenly over the salad. If you’re using olive oil, drizzle it now. Follow this with that all-important pinch of salt and a few generous cracks of black pepper.
- The Final Flourish: Give everything one more incredibly gentle fold to distribute the lime and seasonings. Then, artfully scatter the reserved feta crumbles and mint leaves over the top. It makes the salad look restaurant-worthy!
- To Chill or Not to Chill: You can serve this immediately, but I’m a firm believer in a 15-minute chill session in the fridge. This lets the flavors get to know each other—the salt lightly draws out the melon’s juices, the mint infuses, and everything becomes wonderfully harmonious.
How to Serve This Summer Star
Presentation is part of the fun! I love serving this salad in a wide, shallow bowl or on a big platter so all the colorful components are visible. For a casual BBQ, it’s perfect straight from the bowl. For a fancier dinner, you can plate individual portions: use a ring mold for a neat stack, or simply spoon a generous heap onto a plate beside grilled fish or chicken. A final tiny sprinkle of flaky sea salt right before serving makes it sparkle, both in looks and taste. It pairs brilliantly with anything off the grill and is a stunning, light dessert all on its own!
Make It Your Own: Fun Twists & Twirls
Once you’ve mastered the classic, play around! Here are a few of my favorite riffs:
- The “Green Goddess” Version: Add a few big handfuls of peppery arugula or baby spinach to turn it into a more substantial salad. The greens wilt slightly from the lime juice and become delicious.
- Add Some Crunch: Sprinkle with toasted pine nuts, slivered almonds, or even a handful of crispy, salty crushed pretzel bits for an amazing texture contrast.
- Balsamic Beauty: Replace the lime with a very light drizzle of thick, syrupy balsamic glaze. The deep sweetness with the feta is out of this world.
- Make it a Main: Top it with grilled shrimp, flaked grilled salmon, or shredded rotisserie chicken for a complete, refreshing meal.
- Herb Garden Mix: Swap half the mint for fresh basil or add a little chopped cilantro for a different herbal vibe.
A Few More Kitchen-Table Thoughts
This recipe has been my summer sidekick for so long, it’s practically evolved on its own. I remember one particularly hilarious 4th of July where I, in my hosting frenzy, accidentally used a whole cup of salt instead of sugar in the fruit salad I was *also* making. Disaster! But this watermelon feta salad was the unsung hero that saved the day—everyone piled their plates high with it. It’s that reliable.
Over time, I’ve learned to taste the melon first. If it’s super-sweet, I might use a touch more lime or pepper. If it’s milder, I’ll be a bit more generous with the salt and feta. Let your taste buds guide you! The recipe is a template for joy—adjust it to make you and your guests smile. And always, always make a little more than you think you need. It goes fast.
Your Questions, Answered!
Q: Can I make this salad ahead of time?
A: You can prep the components ahead, but I recommend assembling it no more than an hour before serving. Chop the melon and keep it in a sealed container in the fridge. Crumble the feta and chop the mint, storing them separately. Combine and dress just before you’re ready to eat to keep the melon crisp and the mint bright.
Q: My salad got watery after sitting. What did I do wrong?
A> You didn’t do anything wrong! Watermelon naturally releases juice, especially when salted. This is actually part of the delicious “dressing.” To minimize it, ensure your melon is cold when you cut it, don’t over-salt during assembly, and serve it promptly. If some juice pools at the bottom, that’s just more flavor—you can spoon a little over each serving.
Q: Is there a good way to pick a sweet, ripe watermelon?
A> Absolutely! Use the “look, lift, and listen” method: 1) Look for a firm, symmetrical melon with a dull (not shiny) rind and a prominent yellow “field spot.” 2) Lift it—it should feel heavy for its size, which means it’s full of water (and juice!). 3) Give it a tap—a ripe one will have a deep, hollow sound.
Q: Can I use a different type of melon?
A> Of course! Cantaloupe or honeydew make a fabulous variation. Their milder sweetness pairs beautifully with the feta and mint. You could even make a tri-melon salad for a gorgeous color explosion.
Refreshing Watermelon Feta Mint Salad : Sweet, Salty & Perfect for Summer
Description
Fresh, juicy, and unbelievably refreshing, this Watermelon Feta Mint Salad is the definition of summer on a plate. Sweet watermelon, salty feta, and cool mint come together with a squeeze of lime to create a salad that’s light, hydrating, and bursting with flavor. It takes less than 10 minutes, requires no cooking, and always steals the show at picnics, barbecues, and weeknight dinners.
Ingredients
-
4 cups seedless watermelon, cubed or balled
-
¾ cup feta cheese, crumbled
-
¼ cup fresh mint leaves, torn or roughly chopped
-
Juice of 1 lime
-
1 tablespoon extra virgin olive oil (optional)
-
Pinch of salt
-
Freshly cracked black pepper, to taste
Instructions
-
Prepare the watermelon: Cut the watermelon into bite-sized cubes or use a melon baller. Place in a large bowl.
-
Add the toppings: Sprinkle most of the feta and mint over the watermelon, reserving a little of each for garnish.
-
Dress lightly: Squeeze lime juice evenly over the salad. Add olive oil if using. Season with a small pinch of salt and black pepper.
-
Gently toss: Fold everything together carefully so the watermelon keeps its shape.
-
Finish & serve: Top with remaining feta and mint. Serve immediately or chill for 10–15 minutes for extra refreshment.
Notes
-
Block feta is best: Crumbling it yourself gives a creamier texture than pre-crumbled.
-
Add mint last: This keeps it bright green and fragrant.
-
Don’t over-salt: Feta already adds saltiness—taste before adding more.
-
Serve fresh: This salad is best enjoyed shortly after assembling.
Nutritional Info (per serving, serves 6)
This is a light and refreshing choice! Please note, nutrition can vary based on specific ingredients used.
Calories: ~120 | Protein: 4g | Carbohydrates: 12g | Fat: 7g | Fiber: 1g | Sugar: 10g
Final Thoughts: A Salad That Captures Summer
And there you have it—more than just a recipe, but a little jar of summer sunshine you can open whenever you need it. This Watermelon Feta Mint Salad is a testament to the magic that happens when a few humble, honest ingredients are combined with a spirit of joy and a touch of care. It’s proof that cooking doesn’t need to be complicated to feel special, and that the most memorable dishes are often born from what we already have on hand.
As you make it—tasting the melon for sweetness, tearing the mint, squeezing the lime—remember that you’re not just assembling a side dish. You’re creating a moment. You’re building the centerpiece of a lazy picnic, the talk of a backyard party, or a bright, cool refuge on a sweltering evening. This salad carries the essence of summer: its spontaneity, its abundance, and its simple, radiant pleasure.
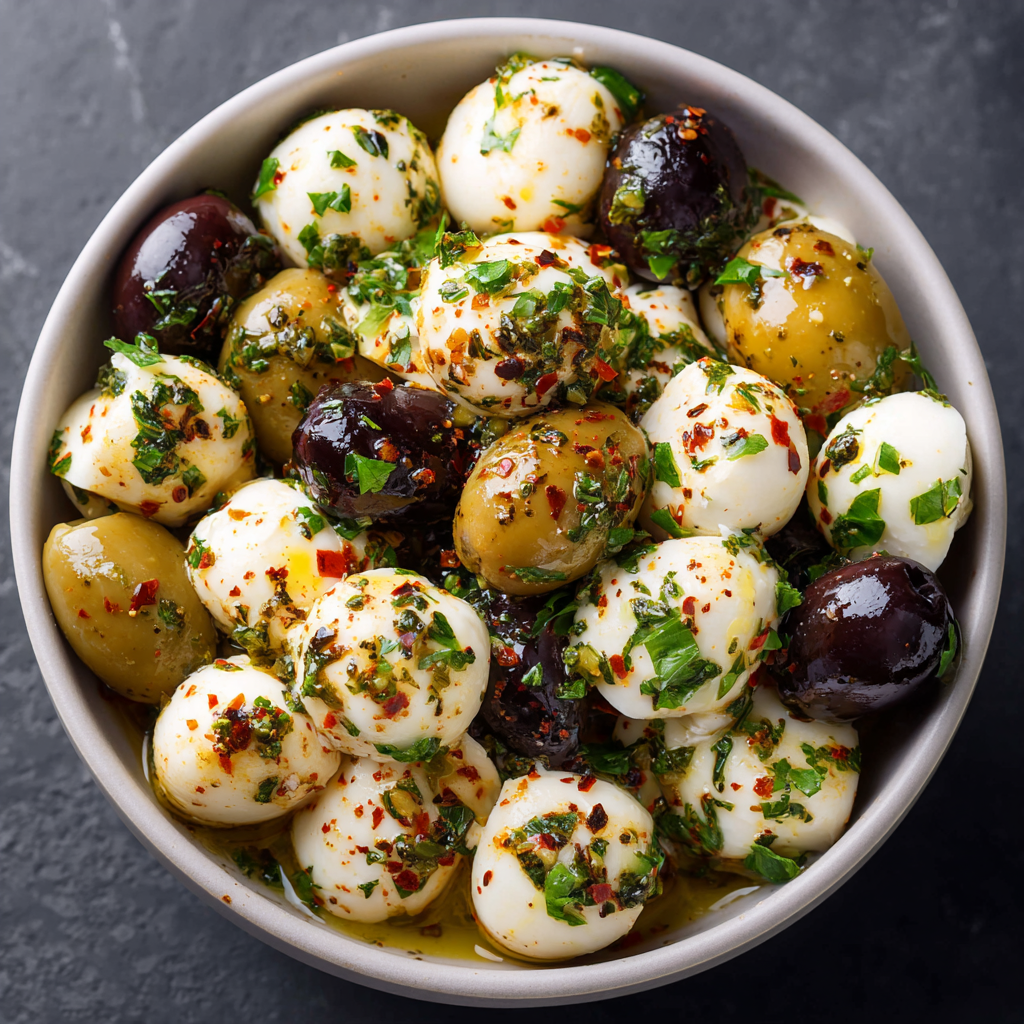
Olives & Marinated Mozzarella Balls : Easy Elegant Appetizer
Olives & Marinated Mozzarella Balls: Your New Go-To Easy Elegant Appetizer
Hey friends, Olivia here! Let me paint you a picture. It’s 5:45 PM. Your doorbell is going to ring in exactly 15 minutes. You have zero intention of turning on your oven, but you absolutely want to serve something that looks like you fussed for hours. Something that says, “Oh, this little thing? I just threw it together,” while secretly knowing it’s the most delicious, conversation-starting bite on the table.
If that scenario gives you even a tiny bit of anxiety, or if you just love having incredibly tasty, no-fuss food in your back pocket, then you and I are about to become best kitchen friends. Today, we’re making my Olives & Marinated Mozzarella Balls. This isn’t just a recipe; it’s a culinary magic trick. It’s the ultimate expression of my cooking philosophy: maximum flavor, minimum fuss, and 100% heart.
We’re talking creamy, milky mozzarella bocconcini and briny, salty olives, all tossed in a garlicky, herby, lemon-kissed bath of good olive oil. It’s a flavor-packed antipasto bite that transports you straight to a sun-drenched Italian coastline. It’s perfect for grazing boards, elegant enough for a dinner party starter, and downright dangerous when left in the fridge for “just a taste.” So, tie on that apron (embrace the mess!), grab a bowl, and let’s make something unforgettable together.
The Appetizer That Saved My Sanity (and My Reputation)
I’ll never forget the first time this recipe became my kitchen hero. It was years ago, and my now-husband (then brand-new boyfriend) called with the classic, “My boss and his wife are in town, mind if they stop by for a quick drink?” Of course, my brain immediately screamed “YES, I MIND!” but my mouth said, “That sounds lovely!”
I had about 40 minutes and a near-empty fridge. Panic set in. Then I saw them: a lonely tub of mozzarella balls hiding behind the mustard and a jar of mixed olives I’d bought for a recipe I never made. I threw them into a bowl with the only fresh herbs I had—some sad-looking parsley—garlic, a glug of olive oil, and a desperate squeeze of lemon juice. I let it all marinate while I frantically cleaned the living room.
When our guests arrived, I casually placed the bowl on the coffee table with some toothpicks. What happened next was pure magic. They couldn’t stop eating them! They raved about the “complex marinade” and the “perfect balance.” My boyfriend looked at me like I was a gourmet genius. Little did they know, it was a delicious act of desperation. That night taught me a powerful lesson: great food doesn’t have to be complicated. It just has to be made with a little love and a lot of flavor. This recipe has been my trusty sidekick ever since.
Gathering Your Flavor All-Stars
Here’s the beautiful part: this recipe is more of a guideline than a strict rulebook. It’s about building layers of flavor with simple, quality ingredients. Let’s break it down:
- 1 cup fresh mozzarella balls (bocconcini or ciliegine): The star! Look for the small, pearl-sized balls packed in water. Their creamy, mild flavor is the perfect canvas. Chef’s Insight: Always pat them dry thoroughly with a paper towel. This helps them soak up the marinade like little flavor sponges instead of watering it down.
- 1 cup mixed olives (green, kalamata, or your favorite): The briny co-star! I love a mix for color and varying flavors—buttery Castelvetrano, fruity Kalamata, classic green. Substitution Tip: No mixed olives? Use whatever you have! Even plain black olives from a can will work in a pinch.
- 2 tbsp extra virgin olive oil: This is the velvet robe our ingredients wear. Use the best you have for sipping—it makes a difference! This is the base of our marinade.
- 1 tbsp each chopped fresh basil & parsley: Fresh herbs are non-negotiable here. They bring a vibrant, garden-fresh aroma. Chef’s Hack: If you only have one, use two tablespoons of it. In a true emergency, 1 teaspoon of dried Italian seasoning can sub, but fresh is truly best.
- 1 garlic clove, minced: The aromatic backbone. Mince it finely so its flavor distributes evenly. Pro Tip: If you’re nervous about raw garlic bite, rub the inside of your mixing bowl with the cut clove instead of mincing it in.
- Zest of ½ lemon: This is the secret weapon! The zest holds incredible citrusy perfume without the acidity of the juice, which can sometimes “cook” the mozzarella. Use a microplane if you have one.
- 1 tsp red pepper flakes (optional): I say “optional,” but I never skip them! They provide a gentle, warm heat in the background. Adjust to your spice tolerance.
- Salt & black pepper to taste: Go easy on the salt initially—the olives and cheese bring plenty. Freshly cracked black pepper is a must for its subtle bite.
Let’s Make Some Magic: Step-by-Step
See? Just a handful of simple ingredients. Now, let’s transform them. This is the fun part!
- Prep Your Stars: Drain your mozzarella balls and give them a gentle but thorough pat-down with a clean paper towel or kitchen towel. Toss them into your mixing bowl. Add your olives right on top. Why we do this: Dry cheese = happy, absorbent cheese. We’re setting them up for success.
- Create the Flavor Bath: In a small bowl or a measuring cup, combine your extra virgin olive oil, minced garlic, lemon zest, chopped fresh herbs, red pepper flakes, a pinch of salt, and a few cranks of black pepper. Now, take a whisk or a fork and give it a vigorous 30-second whisk. You’re not just mixing; you’re emulsifying and bruising those herbs to release their oils. Smell it? That’s the sound of your future guests swooning.
- The Big Toss: Pour that glorious, fragrant oil right over the mozzarella and olives. Using a gentle folding motion with a spoon or silicone spatula, toss everything together until every single cheese ball and olive is glistening and dressed in the marinade. Chef’s Tip: Be gentle! We want to coat them, not smash the delicate mozzarella.
- The Patient Part – Marinate! Cover the bowl tightly with plastic wrap or transfer everything to a sealable jar or container. This is crucial: let it hang out in the fridge for at least 30 minutes. But, and this is a big but, if you can let it go for 2-4 hours or even overnight? DO IT. The flavors melt together, mellow, and become something truly special. The oil may solidify slightly in the fridge—that’s just the good olive oil getting cold. It will loosen up as it comes to room temp.
- Serve & Impress: When you’re ready, give it one more gentle stir. You can serve it straight from the pretty bowl you marinated it in, or pour the entire contents (oil and all!) into a elegant serving dish. The marinating oil is liquid gold—don’t waste a drop!
How to Serve Your Masterpiece
Presentation is part of the fun! I love serving this in a shallow, beautiful bowl with a small spoon or a pile of decorative toothpicks right alongside. For a fuller spread, make it the centerpiece of a grazing board. Surround it with slices of crusty baguette, crispy breadsticks, or herbed crackers for scooping up that glorious oil. A few slices of prosciutto or salami, some sun-dried tomatoes, and roasted artichoke hearts turn this simple appetizer into a full Mediterranean feast. For a party, I often double the recipe and set out little bowls with spoons so people can graze from multiple spots.
Make It Your Own: Delicious Twists
The beauty of this recipe is its adaptability. Play with it!
- Greek Vibe: Swap the mozzarella for creamy feta cubes. Use Kalamata olives only, add a sprinkle of dried oregano, and a handful of halved cherry tomatoes.
- Spicy & Smoky: Add ¼ teaspoon of smoked paprika to the marinade and use a mix of spicy green olives. A tiny drizzle of honey at the end balances the heat beautifully.
- Citrus Burst: Add the zest of a whole lemon and a whole orange. Throw in a few strips of the orange peel for a gorgeous look and extra flavor.
- Veggie-Packed: Toss in halved mini mozzarella balls (ciliegine) with quartered marinated artichoke hearts, roasted red pepper strips, and pepperoncini.
- Dairy-Free/Paleo: Skip the cheese! Use whole, pitted olives and add roasted almonds, walnuts, and chunks of crisp cucumber to the marinade.
Olivia’s Kitchen Notes
This recipe has evolved from that frantic first batch into my most-requested bring-along dish. I almost always make a double batch because it keeps wonderfully in the fridge for up to 5 days (if it lasts that long!). The flavors just get better and better. A funny truth? I’ve started calling it my “Bridge Recipe.” It’s the thing I serve to friends who claim they “don’t like olives” or “don’t like cheese.” Something magical happens when they’re combined and marinated—skeptics become converts every single time. It’s a reminder that sometimes, the best things in life (and in the kitchen) are the simplest combinations, done with care. Don’t stress over perfect measurements. Taste as you go, adjust with love, and make it yours.
Your Questions, Answered
- Q: Can I make this ahead of time?
A: Absolutely! In fact, I encourage it. Making it a day ahead allows the flavors to marry spectacularly. Just give it a stir before serving and let it sit at room temperature for 15-20 minutes to take the chill off. - Q: My mozzarella seems rubbery after marinating. What happened?
A: This can happen if you use low-moisture, pre-shredded mozzarella or if you added lemon *juice* (not just zest). The acid in lemon juice can “cook” and tighten the proteins in fresh cheese. Stick to fresh bocconcini in water and use only the zest for that bright flavor. - Q: The olive oil solidified in the fridge. Did I ruin it?
A: Not at all! This is a sign of good, quality extra virgin olive oil. It contains saturated fats that solidify when cold. It will return to its beautiful liquid state once it sits at room temperature for a bit. Give it a gentle stir. - Q: What’s the best way to store leftovers?
A: Keep them in an airtight container in the fridge for up to 5 days. The olives and herbs will continue to flavor the oil. The mozzarella may firm up slightly but is still delicious.
Olives & Marinated Mozzarella Balls : Easy Elegant Appetizer
Description
This no-cook appetizer is proof that effortless food can still feel special. Creamy mozzarella balls and briny olives are gently marinated in olive oil, fresh herbs, garlic, and lemon zest for a bright, savory bite that’s perfect for last-minute guests, grazing boards, or a cozy night in. It comes together in minutes—and tastes even better with time.
Ingredients
-
1 cup fresh mozzarella balls (bocconcini or ciliegine), drained and patted dry
-
1 cup mixed olives (green, Kalamata, or your favorites), pitted if needed
-
2 tablespoons extra virgin olive oil
-
1 tablespoon fresh basil, finely chopped
-
1 tablespoon fresh parsley, finely chopped
-
1 small garlic clove, minced
-
Zest of ½ lemon
-
½–1 teaspoon red pepper flakes (optional)
-
Freshly ground black pepper, to taste
-
Salt, to taste (use lightly—olives are salty)
Instructions
-
Prep the base: Add the dried mozzarella balls and olives to a medium bowl.
-
Make the marinade: In a small bowl, whisk together olive oil, garlic, lemon zest, basil, parsley, red pepper flakes, black pepper, and a small pinch of salt.
-
Toss gently: Pour the marinade over the mozzarella and olives. Gently fold to coat everything evenly.
-
Marinate: Cover and refrigerate for at least 30 minutes (2–4 hours or overnight is best).
-
Serve: Let sit at room temperature for 10–15 minutes before serving. Stir gently and enjoy—oil and all.
Notes
-
Dry the mozzarella well so it absorbs the marinade instead of watering it down.
-
Use lemon zest, not juice to avoid firming the cheese.
-
Go fresh with herbs for the brightest flavor (use 2 tbsp of one herb if that’s all you have).
-
Make it ahead: The flavors deepen beautifully after a few hours or overnight.
-
Serving idea: Pair with crusty bread or crackers to soak up the herby oil.
Nutritional Info (Per approx. ¼ cup serving)
Please note: This is an estimate provided for informational purposes. Values can vary based on specific ingredients used.
- Calories: ~160
- Protein: 6g
- Carbohydrates: 2g
- Fat: 14g
Prep Time: 10 min | Chill Time: 30 min (or more!) | Servings: 4–6 as an appetizer
Final Thoughts
So, there you have it. A bowl, a few simple ingredients, and 10 minutes are all that stand between you and an appetizer that feels both effortlessly chic and deeply satisfying. This isn’t about following a rigid recipe to the letter; it’s about embracing a formula for easy elegance that you can adapt, play with, and make uniquely yours.
Remember, the magic lies in the marination. Those 30 minutes (or glorious overnight hours) where garlic softens, herbs infuse, and olive oil becomes a conduit for flavor, transforming separate ingredients into a cohesive, craveable whole. It’s a lesson in patience and simplicity that pays off every single time.
Whether this becomes your secret weapon for last-minute guests, your reliable contribution to a potluck, or a little jar of sunshine waiting for you in your own fridge, I hope it brings you as much joy and confidence as it has brought me. Cooking shouldn’t be a source of stress—it should be an act of generous, flavorful love. This recipe, born from a moment of kitchen panic, is my love letter to that very idea.
Now, go forth, gather your all-stars, and create your own magic. And when someone inevitably asks, “What’s in this? It’s incredible!” you can just smile and say, “Oh, just a little something I threw together.”
With love and a full bowl,
Olivia
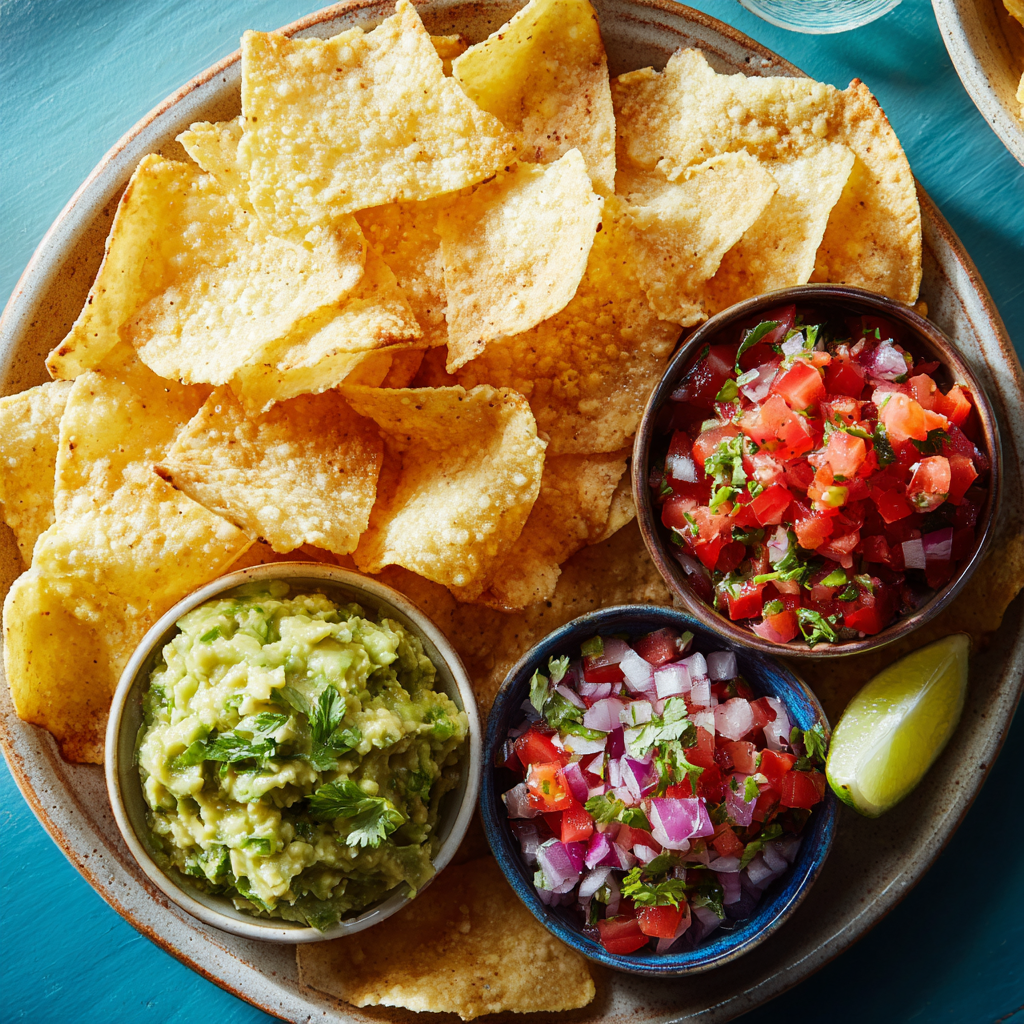
Chips with Salsa, Guacamole, or French Onion Dip : The Ultimate Snack Trio
The Snack That Brings Everyone to the Table: A Trio of Pure Joy
There’s a certain kind of magic that happens when you place a big, beautiful platter of chips and dips in the middle of a room. The conversation quiets for a second. Eyes light up. Hands reach out almost instinctively. It’s the universal sign of “We’re about to have a good time.” Whether it’s the prelude to a big game, the centerpiece of a casual girls’ night, or just a Tuesday evening when the craving for something crunchy and satisfying hits, this classic trio of salsa, guacamole, and French onion dip is my forever go-to.
I love this combo because it’s a perfect snapshot of what I believe cooking should be: approachable, adaptable, and utterly focused on sparking joy. You don’t need a culinary degree to make incredible salsa. Your guacamole doesn’t have to be Instagram-perfect to be devoured in seconds. And that French onion dip? It’s a five-minute wonder that tastes like pure nostalgia. This isn’t about fussy techniques or hard-to-find ingredients. It’s about gathering a few fresh, vibrant things from your kitchen and turning them into an experience.
Today, I’m sharing my absolute favorite, no-fail versions of each of these dips. We’re talking about a bright, chunky salsa that bursts with garden flavor, a creamy, perfectly seasoned guacamole that avoids all the common pitfalls (no brown, sad guac on my watch!), and a French onion dip that’s so much better than anything from a tub. We’ll walk through each one step-by-step, with all my favorite little chef hacks tucked in. So grab your favorite bowl, pick your chip weapon of choice, and let’s make a snack platter that’s guaranteed to disappear.
A Dip-Fueled Memory: My First “Hosting” Attempt
My love affair with this snack trio started way before I ever thought about having a food blog. It was the late 90s, I was about fourteen, and I had convinced my parents to let me have a few friends over for a “movie night.” Translation: we would watch Clueless for the hundredth time and eat our body weight in snacks. My mom, bless her, offered to make food, but I was determined to do it myself. I felt so grown-up.
My entire menu? A massive bag of tortilla chips, a jar of salsa (I hadn’t graduated to homemade yet!), and my very first from-scratch attempt at guacamole. I remember mashing those avocados with a fork, squeezing in what felt like a heroic amount of lime, and carefully stirring in diced tomato and onion. I arranged it all on our old wooden tray with a sense of pride I usually reserved for an A on a test. When my friends dug in, and one of them said, “Olivia, you made this? It’s so good!”—I was hooked. It was that simple act of making something with my hands and seeing it bring my people immediate happiness. That’s the feeling I chase in my kitchen every single day, and it all started with a bowl of guac.
Gathering Your Flavor Arsenal: The Ingredients
Here’s everything you’ll need to create this epic snack spread. I’ve included my notes and swaps for each ingredient because your kitchen, your rules!
For the Simple, Zesty Salsa
- 2–3 ripe tomatoes, diced: The foundation! Look for tomatoes that feel heavy for their size and smell sweet at the stem. In the winter, cherry or grape tomatoes often have better flavor than large, mealy ones. A quick chef’s trick: if you have time, de-seed your tomatoes for a less watery salsa.
- ½ red onion, finely chopped: Red onion adds a sharp, colorful bite. Soak the chopped onion in cold water for 10 minutes to mellow its intensity if you prefer.
- 1 clove garlic, minced: A little raw garlic goes a long way here, adding a pungent kick. If raw garlic is too strong for you, try a tiny pinch of garlic powder instead.
- 1 tbsp fresh lime juice: The acid that makes everything sing. Please use fresh lime juice—the bottled stuff just doesn’t have the same bright, clean zip.
- ¼ cup fresh cilantro, chopped: The love-it-or-leave-it herb. If you’re in the “leave-it” camp, just skip it! Fresh parsley or even a little chopped fresh oregano can be a nice, non-traditional substitute.
- Salt & pepper to taste: Don’t be shy. Salt amplifies all the other flavors.
- Optional: 1 jalapeño, finely chopped: For heat! Remove the seeds and white ribs for milder spice, or leave them in for a serious kick.
For the Easy, Creamy Guacamole
- 2 ripe avocados: The star. Your avocado should yield slightly to gentle pressure near the stem. If it’s rock-hard, give it a couple days in a paper bag with a banana. If it’s mushy, we can’t save it—use it for something else!
- 1 tbsp fresh lime juice: Crucial for flavor AND for keeping that beautiful green color from browning. The acid slows down oxidation.
- ½ small tomato, finely diced: Adds moisture and little pops of sweetness. I like to use Roma tomatoes here as they’re less watery.
- 1–2 tbsp red onion, finely chopped: A smaller amount than the salsa, so it complements without overwhelming the creamy avocado.
- Salt to taste: Avocados need salt. Taste and adjust!
- Optional adds: A minced garlic clove, a tablespoon of chopped cilantro, or some diced jalapeño are all fantastic additions.
For the Quick, Savory French Onion Dip
- 1 cup sour cream or full-fat Greek yogurt: Sour cream is classic and rich. Greek yogurt gives you a tangy, protein-packed twist that’s equally delicious. I often use a 50/50 blend!
- 3 tbsp French onion soup mix: The convenience hero. Look for a brand you like. For a quick homemade version, mix 2 tbsp dried minced onion, 1 tsp onion powder, ½ tsp garlic powder, ½ tsp salt, and a pinch of black pepper. It’s less salty and you control the flavors!
- Optional: 1 tbsp chopped fresh chives for garnish: Adds a lovely fresh onion flavor and a pop of green.
For Serving
- 1 bag of your favorite chips: Tortilla chips are the MVP for salsa and guac. A sturdy, kettle-cooked potato chip is divine with the French onion dip. Why not offer a mix? Pita chips, plantain chips, or even crunchy veggie sticks work too!
Let’s Get Dipping: Step-by-Step Instructions
We’re making three dips, but don’t worry—it’s a streamlined process. I like to make the salsa first so it can sit and get happy while I work on the others.
Step 1: The Salsa – Let the Flavors Marry
Grab a medium-sized mixing bowl. Dice your tomatoes and add them in. Follow with the finely chopped red onion and minced garlic. Here’s my little hack: add the salt now, directly onto the tomatoes and onions. Salt draws out their natural juices, which starts creating that delicious “salsa liquid” at the bottom of the bowl immediately. Give it a quick stir.
Now, chop your cilantro (if using) and stir it in with the lime juice and jalapeño. Give everything a really good mix. Taste it! Does it need more lime? More salt? Adjust to your liking. This is the most important step. Once you’re happy, cover the bowl and let it sit on the counter for at least 10-15 minutes. This resting time is non-negotiable in my kitchen. It lets the sharp edges of the onion and garlic mellow and allows all the flavors to meld into one harmonious, zesty mix. You can make this up to a few hours ahead—it only gets better.
Step 2: The Guacamole – Master the Mash
Time for the guac. Cut your ripe avocados in half, remove the pit, and scoop the flesh into a separate bowl. Immediately add the tablespoon of lime juice right over the avocado flesh—this is your first line of defense against browning. Now, take a fork or a pastry cutter and mash to your desired consistency. I’m team “slightly chunky.” I like little pockets of creamy avocado in every bite.
Once mashed, fold in your finely diced tomato and red onion. Sprinkle salt over the top and fold again. Taste! Avocados can vary in richness, so you might need more salt or another squeeze of lime. Remember, you can always add, but you can’t take away. Pro-tip for storage: Place a piece of plastic wrap directly on the surface of the guacamole, pressing out all the air bubbles before covering the bowl. The lime helps, but limiting air exposure is the real key to keeping it green.
Step 3: The French Onion Dip – The Two-Minute Wonder
This could not be easier. In a small bowl, add your sour cream (and/or Greek yogurt). Sprinkle the French onion soup mix (or your homemade blend) over the top. Using a spoon or a small whisk, stir until completely combined and smooth. If you have time, cover and pop it in the fridge for 15-30 minutes. This chill time lets the dried onions soften slightly and the flavors deepen. Right before serving, give it a stir, drizzle the top with a little extra sour cream if you’re feeling fancy, and sprinkle with those fresh chives.
Step 4: The Grand Assembly
Grab your largest platter or board. Pour your mountain of chips onto one side. Arrange your three bowls of dip—the vibrant red salsa, the emerald green guacamole, and the creamy white onion dip—around the chips. Scatter a few lime wedges and extra cilantro sprigs for garnish. That’s it! You’ve created a snack masterpiece.
Serving It Up with Style
Presentation is part of the fun! I love using a big, rustic wooden board or a colorful ceramic platter. Cluster the bowls of dip together in the center for a dramatic effect, or place them at different points around the chip pile to encourage mingling. For smaller gatherings, individual “snack boards” are a delight—just portion a handful of chips and small ramekins of each dip per person. Pair this trio with icy-cold Mexican beer, a citrusy margarita, or simply a big pitcher of agua fresca for a truly refreshing combination.
Mix It Up! Delicious Variations
The beauty of dips is their versatility. Here are a few ways to play with the formula:
- Fruit Salsa: Add ½ cup of diced mango or pineapple to your salsa for a sweet-and-spicy twist. It’s incredible with fish tacos, too!
- Smoky Guacamole: Add ¼ teaspoon of smoked paprika or chipotle powder to your mashed avocados. It adds a deep, warm flavor that’s unforgettable.
- “Everything Bagel” French Onion Dip: Stir 1 tablespoon of everything bagel seasoning into your sour cream along with the onion mix. Serve with extra-bagely pretzel chips.
- Veganize It: Use a plain, unsweetened vegan yogurt or vegan sour cream for the French onion dip. Guaranteed delicious.
- Seven-Layer Dip Shortcut: In a clear trifle dish, layer the refried beans, guacamole, salsa mixed with a little cream cheese for stability, sour cream, shredded cheese, olives, and green onions. It’s a showstopper!

Chips with Salsa, Guacamole, or French Onion Dip : The Ultimate Snack Trio
Description
There’s something timeless and irresistible about a big platter of chips and dips. This classic trio—fresh salsa, creamy guacamole, and savory French onion dip—hits every craving at once: bright, rich, crunchy, and comforting. It’s easy, crowd-pleasing, and perfect for game nights, casual gatherings, or anytime you want a snack that disappears fast. No fancy tools, no stress—just simple ingredients turned into pure joy.
Ingredients
Fresh Chunky Salsa
-
2–3 ripe tomatoes, diced
-
½ red onion, finely chopped
-
1 clove garlic, minced
-
1 tablespoon fresh lime juice
-
¼ cup fresh cilantro, chopped (optional)
-
Salt and black pepper, to taste
-
Optional: 1 jalapeño, finely chopped
Creamy Guacamole
-
2 ripe avocados
-
1 tablespoon fresh lime juice
-
½ small tomato, finely diced
-
1–2 tablespoons red onion, finely chopped
-
Salt, to taste
-
Optional: cilantro, garlic, or jalapeño
Quick French Onion Dip
-
1 cup sour cream or full-fat Greek yogurt (or a mix)
-
3 tablespoons French onion soup mix
-
Optional garnish: chopped fresh chives
For Serving
-
Tortilla chips, potato chips, or a mix
-
Optional: veggie sticks, pita chips, or pretzels
Instructions
In a bowl, combine tomatoes, red onion, garlic, salt, and pepper. Stir and let sit for 5 minutes to release juices. Add lime juice, cilantro, and jalapeño (if using). Mix well and adjust seasoning. Let rest 10–15 minutes for best flavor.
Scoop avocados into a bowl and immediately add lime juice. Mash with a fork to your preferred texture. Fold in tomato and red onion. Season with salt and any optional add-ins. Taste and adjust.
In a small bowl, mix sour cream (or yogurt) with the onion soup mix until smooth. Chill 15–30 minutes if possible for deeper flavor.
Arrange the three dips on a platter with chips. Garnish with lime wedges or herbs if desired, and serve immediately.
Notes
-
Taste as you go: Salt and lime make all the difference.
-
Prevent browning: Press plastic wrap directly onto the surface of guacamole if making ahead.
-
Make ahead smartly: Salsa and onion dip improve with time; guacamole is best fresh.
-
Control heat: Remove jalapeño seeds for mild spice, keep them for more kick.
Chef’s Notes: From My Kitchen to Yours
This recipe “trio” has been my culinary security blanket for years. It’s evolved from that first teenage guacamole to the versions I make now, where I’ve learned the hard way that yes, you really do need that much lime in the guac. I’ve made these dips for potlucks where I came home with empty bowls (the highest compliment), for last-minute get-togethers where I raided the pantry for the onion dip mix, and for quiet nights when my husband and I just need something fun with our movie.
One of my favorite kitchen memories is of my niece, about five years old, carefully carrying the bowl of guacamole to the table like it was the crown jewels. She took her job as “dip carrier” very seriously. It reminded me that cooking isn’t just about feeding people; it’s about involving them, creating little moments of pride and togetherness. So don’t stress if your salsa is a little watery or your guacamole isn’t perfectly smooth. I promise, no one at the party will care. They’ll just be thrilled you made it.
FAQs & Troubleshooting Your Dip Trio
Q: My guacamole always turns brown so fast! How do I keep it green?
A: The twin warriors against browning are acid and air exposure. Be generous with the lime juice. Then, for storage, use the plastic-wrap trick: press the wrap directly onto the surface of the guacamole, smoothing out any air pockets before sealing the bowl. An extra hack? Leave an avocado pit in the bowl—some swear it helps, and it certainly doesn’t hurt!
Q: My salsa is too watery. What did I do wrong?
A> You likely didn’t do anything wrong! Tomatoes release a lot of liquid. Next time, you can de-seed your tomatoes before dicing them. For this batch, simply drain off a bit of the excess liquid from the bowl before serving, or use a slotted spoon to serve it. You can also stir in 1-2 tablespoons of tomato paste to thicken it up and intensify the tomato flavor.
Final Thoughts
In a world of ever-changing food trends, some pleasures remain beautifully constant. The crisp break of a chip, the cool creaminess of guacamole, the bright zing of salsa, the savory richness of onion dip—these are the tastes and textures of togetherness. They speak a universal language of welcome and celebration.
This trio is my love letter to that feeling. It’s an homage to the idea that the most memorable meals aren’t always dinners, but the shared snacks in between. The ones that slow down an afternoon, deepen a conversation, and turn an ordinary moment into a small, delicious event. May your bowls be emptied, your chips plentiful, and your gatherings filled with the kind of easy joy that comes from sharing something truly good.
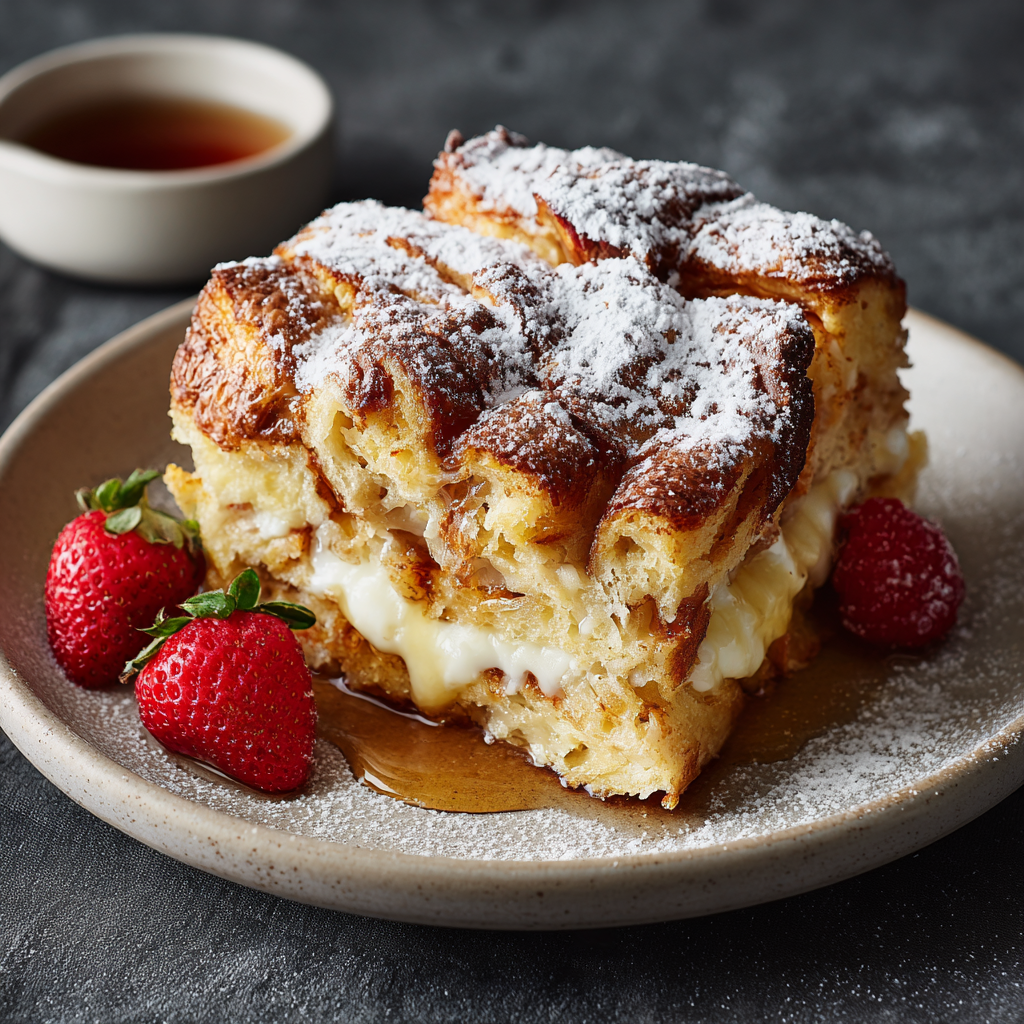
Croissant French Toast Bake : Buttery, Custardy, and Perfect for Brunch
`
Croissant French Toast Bake: Your New Favorite Lazy Sunday Recipe
Hey there, friend! Olivia here. Let’s talk about that magical, lazy Sunday morning feeling. You know the one: the sun is streaming in, the coffee is brewing, and the only mission for the next few hours is to create something delicious and soak up the coziness. You want a breakfast that feels indulgent, that makes the whole house smell like a bakery, but you also really, really don’t want to be chained to the stove flipping individual slices of French toast while everyone else is still in their pajamas.
That, my friend, is precisely where this glorious Croissant French Toast Bake swoops in to save the day. Imagine all the best parts of French toast – that creamy custard center, the caramelized edges, the warm hug of cinnamon and vanilla – but made with buttery, flaky croissants that soak up the custard like little edible sponges. Then, imagine baking it all together in one dish, so it comes out puffed, golden, and begging for a cascade of maple syrup.
This is more than a recipe; it’s a strategy. A strategy for maximum brunch joy with minimal morning effort. Whether you’re hosting your in-laws, treating your besties, or just giving your own family a delicious reason to get out of bed, this bake is your secret weapon. It’s forgiving, it’s flexible, and I promise, it will make you look like a brunch genius. So, tie on that apron (the messy one is totally fine), and let’s make some magic happen.
A Tale of Two Cities & One Very Important Brunch
This recipe will always remind me of my first tiny apartment in the city, where my kitchen was basically a closet with a stove. I loved having people over, but the space was… challenging. One Sunday, a group of my college friends were crashing after a reunion, and I desperately wanted to feed them all something special without spending the whole morning cooking solo in my culinary shoebox.
I stared at a bag of day-old croissants from the local bakery, a dozen eggs, and a serious desire to be part of the laughter happening in my living room. The classic French toast plan was out. Then, I had my “aha!” moment: What if I just tear everything up, mix it in a dish, and let the oven do the work? I threw it together the night before, and in the morning, I simply popped it in the oven. The smell alone brought everyone wandering in. We ate it straight from the pan, perched on counters and stools, and it was pure, uncomplicated happiness. That’s the spirit of this dish – it’s not about perfection; it’s about gathering, sharing, and making life a little sweeter, together.
Gathering Your Cast of Characters
Here’s what you’ll need to create this masterpiece. I’ve added my little chef notes next to each one because knowing the “why” makes you a more confident cook!
- 5–6 large croissants, torn into large pieces: Day-old croissants are actually IDEAL here! They’re slightly stale and thirsty, so they soak up the custard beautifully without falling apart. No day-olds? Fresh works perfectly—just be a little gentle when pressing them into the custard. For a fun twist, try chocolate or almond croissants!
- 6 large eggs: The backbone of our rich custard. They provide structure and that lovely, set texture.
- 1¾ cups whole milk: Whole milk gives us the best richness. For a lighter version, 2% works, but the custard won’t be quite as luxe.
- ½ cup heavy cream: This is our secret weapon for an insanely creamy, decadent texture. It’s the difference between good and “oh-my-goodness-I-need-the-recipe” great.
- ⅓ cup granulated sugar + 2 tablespoons brown sugar: The white sugar sweetens evenly, while the brown sugar adds a hint of warm molasses flavor and helps with caramelization on top. You can use all of one type if needed.
- 1½ teaspoons pure vanilla extract: A non-negotiable for that warm, classic French toast flavor. Use the real stuff if you can!
- ½ teaspoon ground cinnamon: Just enough for warmth without overpowering. A tiny pinch of nutmeg or cardamom is a lovely addition here too.
- A pinch of salt: Crucial for balancing all the sweetness and making the flavors pop. Don’t skip it!
- For serving: Powdered sugar & maple syrup: The finishing touches! A snowy dusting of powdered sugar and a river of warm maple syrup are pure brunch perfection.
Let’s Build Your Brunch Masterpiece: Step-by-Step
Ready? This is where the fun begins. I’ll walk you through each step with all my favorite kitchen hacks.
- Prep & Preheat. Start by warming your oven to 350°F (175°C). Grab your favorite 9×13-inch baking dish – a ceramic or glass one is perfect for even baking. Give it a good coating with butter, cooking spray, or a swipe of oil. This little step ensures your glorious bake slides out without a fight.
- Get Torn Up. Take your croissants and tear them into big, chunky pieces—about 1.5 to 2 inches wide. I love tearing over cutting because the craggy edges grab more custard! Scatter them evenly into your greased dish. If you’re adding berries or chocolate chips, nestle them in between the pieces now.
- Whisk the Magic Custard. In a large bowl, crack in your eggs. Give them a preliminary whisk to break them up. Now, add the milk, heavy cream, both sugars, vanilla, cinnamon, and that all-important pinch of salt. Whisk it all together until it’s completely smooth and homogenous. You shouldn’t see any streaks of egg white. Pro-Tip: Whisk vigorously for a full minute. This incorporates air and helps create a lighter, more uniform custard.
- The Soak. Slowly and evenly pour your custard mixture all over the croissant pieces. Now, use clean hands or a spatula to gently press the croissants down into the custard. You want to help them start absorbing that liquid goodness. Don’t smash them—just a gentle press.
- The Pause That Perfects. Here, you have a beautiful choice. For immediate baking, let the dish sit on the counter for 10-15 minutes, pressing the croissants down once or twice more. For the ultimate convenience and deeper flavor, cover the dish tightly with plastic wrap or a lid and refrigerate it overnight. The croissants will drink up every last drop of custard, resulting in an incredibly rich and uniform texture.
- Bake to Golden Perfection. When ready to bake, place the dish (uncovered) in your preheated oven. Bake for 35-40 minutes. You’re looking for a beautifully puffed, deep golden-brown top, and a center that’s just set (a little jiggle is okay, but it shouldn’t look liquidy). Chef’s Hack: If the top is browning too quickly, you can lay a loose piece of aluminum foil over the top for the last 10 minutes.
- The Grand Finale. Take the bake out of the oven and let it cool on a rack for about 5-10 minutes. This allows the custard to set further, making it easier to slice. Just before serving, give it a generous dusting of powdered sugar (I use a fine-mesh sieve for a pretty snow-like effect). Slice, plate, and drown each serving in warm maple syrup.
Serving Your Sun-Drenched Masterpiece
Presentation is part of the joy! I love serving this right from the baking dish at the table for that rustic, family-style vibe. Slice it into big squares and use a sturdy spatula to lift them out. For individual plates, add a final flourish: a fresh berry or two on the side, a tiny extra sprinkle of cinnamon, or even a dollop of whipped cream. The contrast of the warm, creamy bake, cool berries, and sweet syrup is absolutely divine. Don’t forget the coffee!
Make It Your Own: Delicious Variations
The beauty of this bake is its flexibility. Here are a few ways to play with the formula:
- Berry Bliss: Add 1 cup of fresh or frozen blueberries, raspberries, or chopped strawberries with the croissant pieces.
- Chocolate-Hazelnut Dream: Sprinkle ½ cup of chocolate chips and ¼ cup of chopped toasted hazelnuts into the dish. Drizzle with Nutella after baking!
- Apple Cinnamon Streusel: Sauté 1 diced apple with a tablespoon of butter and a sprinkle of cinnamon until tender. Scatter over the croissants. Mix ¼ cup flour, ¼ cup brown sugar, 2 tbsp cold butter, and ¼ cup chopped pecans into a crumbly streusel and sprinkle on top before baking.
- Dairy-Free/Delicious: Use your favorite unsweetened almond or oat milk and full-fat coconut cream in place of the milk and heavy cream. The coconut adds a lovely subtle flavor.
- Bourbon Maple: Add 1-2 tablespoons of bourbon to the custard mixture for a warm, grown-up twist. Serve with bourbon-infused maple syrup.
Olivia’s Kitchen Notes & Stories
Over the years, this recipe has become my go-to for pretty much every brunch occasion. I’ve learned a few things: First, it’s practically foolproof. Even when I once accidentally doubled the cinnamon (oops!), it was still declared a winner. Second, it travels surprisingly well for potlucks – just bake, cover, and re-warm gently. The biggest evolution was embracing the overnight rest. I was always an “immediate bake” person until a reader wrote in raving about the overnight method. I tried it, and wow – the texture is so incredibly rich and cohesive. It’s now my standard move for stress-free mornings. Remember, cooking is about joy, not stress. If you forget the sugar until the end? Sprinkle it on top before baking. It’ll be fine. I promise.
Your Questions, Answered!
Q: My bake turned out soggy in the middle. What happened?
A: This usually means it needed more bake time! Ovens vary, so trust the visual cues over the clock. Next time, bake until the center is fully set with no liquid custard visible when you gently press. A toothpick inserted should come out mostly clean. Sogginess can also happen if the dish is overcrowded – make sure you’re using a full 9×13 inch pan.
Q: Can I use another bread instead of croissants?
A> Absolutely! Brioche, challah, or a sturdy French bread are fantastic substitutes. Just note that denser breads will need a longer soak time (especially overnight) to fully absorb the custard. Croissants are extra forgiving because of their airy, layered texture.
Q: How far in advance can I make this?
A> You can assemble the entire dish (without baking) and keep it covered in the fridge for up to 24 hours before baking. You can also bake it, let it cool completely, cover, and refrigerate for up to 2 days. Reheat individual portions in the microwave or the whole dish, covered with foil, in a 300°F oven until warm throughout.
Q: The top browned before the center was cooked. Help!
A> No problem! This is common. Next time, tent the dish loosely with aluminum foil at the 20-minute mark. This will slow the browning and allow the center to cook through without the top burning. You can remove the foil for the last 5 minutes if you want to crisp it up a bit.
Croissant French Toast Bake : Buttery, Custardy, and Perfect for Brunch
Description
Croissant French Toast Bake
Buttery, custardy, and perfect for a lazy Sunday—feeds a crowd with minimal effort!
Prep Time: 15–20 minutes (or assemble overnight)
Bake Time: 35–40 minutes
Total Time: 50–60 minutes
Yields: 8 servings
Ingredients
-
5–6 large croissants, torn into 1.5–2 inch pieces (day-old preferred)
-
6 large eggs
-
1¾ cups whole milk (or 2% for lighter)
-
½ cup heavy cream (or coconut cream for dairy-free)
-
⅓ cup granulated sugar
-
2 tablespoons brown sugar
-
1½ tsp pure vanilla extract
-
½ tsp ground cinnamon (optional: pinch of nutmeg or cardamom)
-
Pinch of salt
-
For serving: Powdered sugar, maple syrup, fresh berries (optional)
Instructions
-
Prep & Preheat: Preheat oven to 350°F (175°C). Grease a 9×13-inch baking dish with butter, cooking spray, or oil.
-
Tear Croissants: Tear croissants into large chunks and place evenly in the prepared dish. Optional: add berries or chocolate chips between pieces.
-
Whisk Custard: In a large bowl, whisk eggs, milk, cream, sugars, vanilla, cinnamon, and salt until smooth and uniform.
-
Soak Croissants: Pour custard over croissant pieces. Gently press down with a spatula or clean hands to help absorb custard.
-
Tip: Let sit 10–15 minutes for immediate baking or cover and refrigerate overnight for deeper flavor and richer texture.
-
-
Bake: Uncover and bake for 35–40 minutes until puffed, golden brown on top, and center is set (a slight jiggle is okay). Tent loosely with foil if the top browns too quickly.
-
Cool & Serve: Cool 5–10 minutes, then dust with powdered sugar, slice, and serve with warm maple syrup and optional berries.
Notes
-
Bread Substitutes: Brioche, challah, or sturdy French bread can be used. Denser breads need a longer soak.
-
Overnight Prep: Assemble, cover, and refrigerate up to 24 hours before baking.
-
Toppings: Add chocolate chips, nuts, or streusel before baking. Serve with whipped cream or fresh fruit.
-
Flavor Twists:
-
Berry Bliss: 1 cup fresh or frozen berries
-
Chocolate-Hazelnut: ½ cup chocolate chips + ¼ cup toasted hazelnuts, drizzle with Nutella
-
Apple Cinnamon Streusel: 1 diced sautéed apple + streusel (¼ cup flour, ¼ cup brown sugar, 2 tbsp butter, ¼ cup chopped pecans)
-
Bourbon Maple: 1–2 tbsp bourbon in custard + bourbon-infused maple syrup
-
Nutritional Information (Approximate, per serving)
Please note: This is an estimate for 1 of 8 servings, without optional add-ins, using the ingredients listed. Values may vary based on specific brands and measurements.
- Calories: ~350
- Total Fat: 22g
- Saturated Fat: 12g
- Cholesterol: 190mg
- Sodium: 210mg
- Carbohydrates: 27g
- Sugars: 13g
- Protein: 9g
Final Thoughts: A Warm, Sweet Sunday Hug
And there you have it—the secret to a perfectly lazy, perfectly indulgent Sunday morning, all baked into one glorious dish.
I hope this Croissant French Toast Bake becomes more than just a recipe in your kitchen. I hope it becomes a tradition. The one you make when friends sleep over, when you want to treat your family to something special without the fuss, or when you simply decide that your ordinary Sunday deserves a little extra sweetness.
What I love most about this bake is how it prioritizes you. It gives you back your morning. Instead of hovering over the stove, you get to sip your coffee, set the table, or just linger in your pajamas a little longer while the oven fills your home with that unforgettable scent of vanilla, cinnamon, and butter.
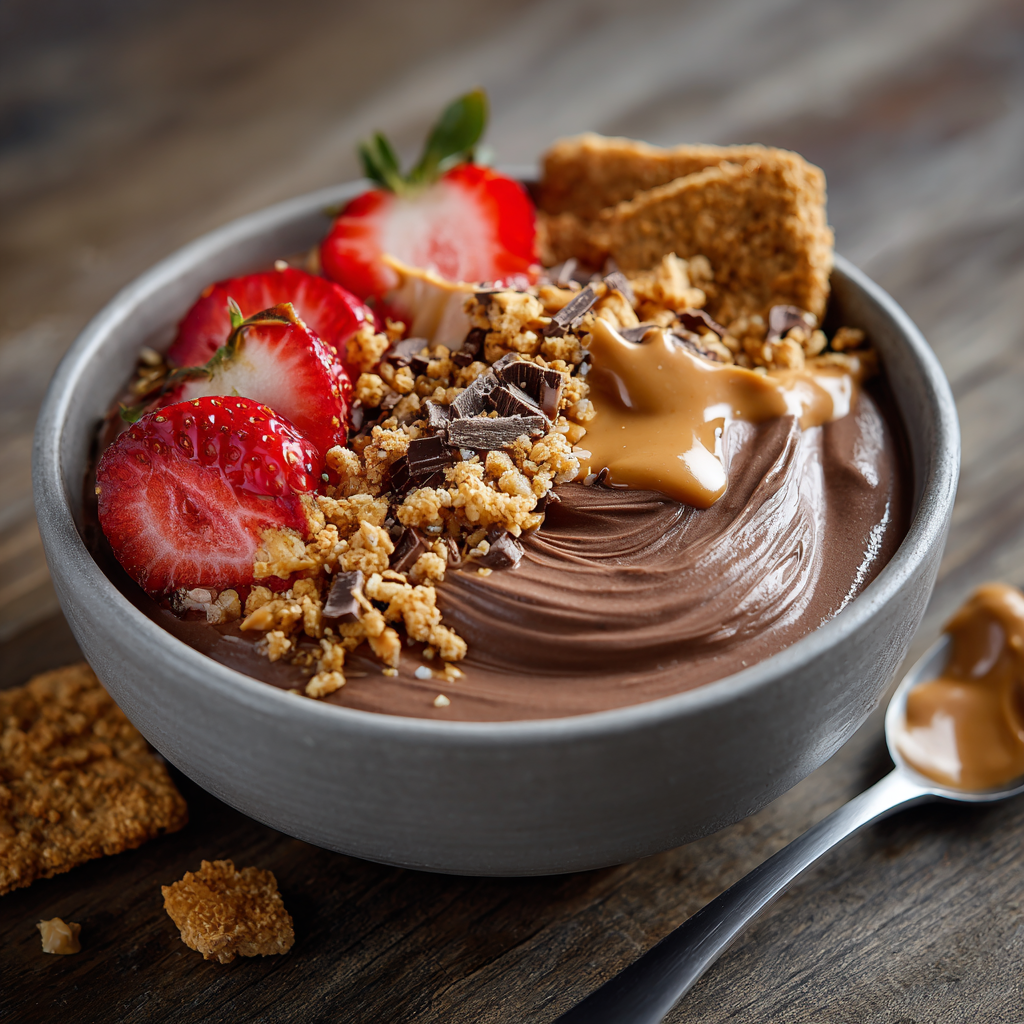
Chocolate Protein Yogurt Bowl : 30g of Protein in One Creamy, Dreamy Snack
The Sweet, Creamy Secret That Fuels My Day (And Might Just Change Yours)
Hey there, friend! Come on in, pull up a stool. Can you smell that? It’s not a cake in the oven this time, but something just as magical—and it’s ready in under five minutes. I’m talking about my Chocolate Protein Yogurt Bowl, the little kitchen creation that single-handedly solved my 3 PM slump, my post-workout “I-need-food-now” panic, and my nightly “this-craves-something-chocolatey” ritual.
If you’ve ever stared into the fridge, willing a delicious and nutritious snack to materialize, you’re my people. We want something that feels like a treat, tastes like dessert, but actually does our body good. We’re over chalky, boring protein shakes. We deserve creaminess. We deserve joy in a bowl.
That’s exactly what this is. Imagine the creamiest, dreamiest chocolate mousse or soft-serve ice cream. Now, imagine it’s packed with a whopping 30 grams of protein to keep you full and energized. It’s thick, it’s indulgent, and it’s endlessly customizable with your favorite toppings. This isn’t just a snack; it’s a high-protein pick-me-up that feels like a hug. Whether you’re rushing out the door, refueling after a sweat session, or just need a moment of sweet, guilt-free bliss, this bowl is your answer. Let’s make it together!
Why This Bowl? A Tale of Post-Workout Desperation & Chocolate Salvation
So, how did this beauty come to be? Picture this: It’s a Tuesday. I’ve just finished a tough workout, and that familiar, ravenous hunger hits me like a freight train. You know the one—where you could eat anything in sight, but you also know that a bag of chips will leave you crashing in 20 minutes. I opened the fridge, saw my trusty tub of yogurt, my protein powder, and a sad little strawberry. In my hangry state, I just started mixing. A scoop of this, a spoonful of that… and then I tasted it.
Friends, it was a revelation. It was creamy. It was chocolatey. It was substantial. I topped it with the strawberry and a desperate scoop of peanut butter, and in five minutes flat, I went from “hangry monster” to “satisfied human.” That was the “aha!” moment. This wasn’t just a thrown-together snack; it was the perfect solution. It became my non-negotiable afternoon ritual, my pre-noon writing fuel, and my favorite “I did something good for myself” dessert. It’s the recipe born from real-life hunger, and that’s always the best kind.
Gathering Your Goodies: It’s All About Quality & Flavor
Here’s the fun part—gathering your ingredients. This is where you can really make it your own. I’ll walk you through my favorites and why I choose them, plus plenty of swaps so you can use what you’ve got!
- 1 cup whole milk yogurt (I love @maplehillcreamery) – This is the creamy foundation. Full-fat yogurt gives you that luxurious, mousse-like texture and helps keep you full. Chef’s Insight: The fat is your friend here! It carries flavor and creates an incredibly satisfying mouthfeel. Swap it: For a dairy-free option, almond milk yogurt (like @threetreesfoods) works beautifully. Greek yogurt will make it even thicker and higher in protein!
- 1 scoop chocolate peanut butter protein powder (@truvani) – The protein powerhouse and main flavor driver. A clean, great-tasting powder is key. Chef’s Insight: I’m obsessed with chocolate peanut butter here, but any high-quality chocolate or vanilla protein will work. The powder also acts as a thickener.
- 1 tablespoon unsweetened cocoa powder – The deep chocolate booster. This isn’t optional—it transforms the flavor from “protein shake” to “rich chocolate dessert.” Chef’s Insight: Use natural or Dutch-processed. Dutch-process is milder and less acidic, perfect for a smoother chocolate flavor.
- 1 Chopped peanut butter cookie bar (@honeymamas) – The chewy, salty-sweet crunch. This is my “special” topping that makes it feel decadent. Swap it: Any of your favorite snack bar, a handful of chocolate chips, or even a crumbled graham cracker.
- 2 tablespoons cookie granola (@purely_elizabeth) – For that essential textural contrast. The crunch against the creamy base is everything. Swap it: Any granola, chopped nuts, or even rice cereal will do the trick.
- 1 tablespoon natural peanut butter (@spreadthelove) – The rich, creamy ribbon of joy. It adds healthy fats, more protein, and that iconic flavor. Chef’s Insight: Warm it for 10 seconds in the microwave to make it drizzle-able!
- Sliced strawberries – The fresh, juicy pop. They cut through the richness and add a vitamin C boost. Any fresh or frozen (thawed) berry is fantastic here.
Let’s Make Magic: Your Step-by-Step Guide to Creamy Perfection
Ready? This is the easiest “cooking” you’ll do all week. No oven, no stovetop—just a bowl, a spoon, and a whole lot of deliciousness.
- Combine Your Base. Grab your favorite medium-sized bowl—something you’ll be happy eating out of! Plop in the yogurt, scoop in the protein powder, and dust in the cocoa powder. Now, take a spoon or a small whisk and start stirring. Chef’s Hack: Stir slowly at first to incorporate the powders without creating a dust cloud! Then, go to town until it’s completely, utterly smooth. You’re looking for a uniform, thick, dark chocolate mixture. No streaks! This is where the “mousse” texture is born. Tip: If it feels too thick for your liking, add a teaspoon of milk (any kind) to loosen it up.
- Attack the Toppings. Here’s where you become an artist. Chop your cookie bar into bite-sized chunks. Slice those strawberries. Get your granola and peanut butter ready. I like to think of the bowl as a canvas: the creamy base is your blank slate.
- Build Your Bowl. Pour your perfectly blended chocolate yogurt mousse into your serving bowl if you mixed it in a separate one. Now, artfully (or just enthusiastically!) arrange your toppings. I usually do a ring of granola and strawberries around the edge, scatter the cookie chunks in the center, and then drag a beautiful, swooping river of peanut butter right through the middle. Chef’s Philosophy: There is no wrong way to top this. Pile it high! Make it pretty for your Instagram, or just dump it all in for maximum enjoyment—your kitchen, your rules.
- Serve & Savor. That’s it. Seriously. Grab a spoon and dive in immediately for the ultimate thick, mousse-like experience. The contrast of the cold, creamy base with the crunchy, chewy toppings is pure texture heaven. Chef’s Note: You *can* cover and chill it for later if you have willpower I can only dream of. It will firm up a bit more, almost like a pudding parfait.
How to Serve This Little Bowl of Sunshine
This bowl is a star all on its own, but presentation is half the fun! I love serving it in a wide, shallow bowl so all the toppings have room to shine. For a special touch, use a mini ice cream scoop to quenelle the yogurt base before topping—it looks incredibly fancy for zero extra effort. Pair it with a big glass of cold water or a hot cup of coffee for the perfect afternoon break. It’s meant to be eaten with a smile, straight from the bowl you made it in.
Make It Your Own: Endless Delicious Twists
The beauty of this recipe is its versatility. Play with these ideas!
- Tropical Escape: Use vanilla protein powder, coconut yogurt, and top with mango, pineapple, shredded coconut, and a drizzle of almond butter.
- Birthday Cake Funfetti: Use vanilla protein, mix in a drop of almond extract and rainbow sprinkles, and top with a crumbled vanilla cupcake or cone.
- Cookie Dough Lover’s: Use vanilla protein, mix in mini chocolate chips and a pinch of sea salt. Top with a spoonful of cookie butter and crushed chocolate cookies.
- Berry Bliss (Lower Cal): Use plain Greek yogurt and vanilla protein. Swirl in blended raspberries and top exclusively with a mountain of mixed fresh berries and a sprinkle of chia seeds.
- S’mores Style: Use chocolate protein, top with mini marshmallows (toast them with a kitchen torch if you’re feeling fancy!), crushed graham crackers, and a dark chocolate square.
From My Apron-Pocket to Yours: A Few Extra Thoughts
This recipe has evolved from that first desperate post-workout mix into my most-made “recipe” ever. I’ve made it in hotel rooms with a plastic spoon, prepped it in a jar for road trips, and even served a fancy version at a girls’ brunch. The one constant? It always delivers. A funny kitchen story: I once was so excited to make it, I grabbed the cinnamon instead of the cocoa powder. Let me tell you, chocolate-cinnamon isn’t the worst accident, but it’s not the goal! Now I always do a quick “sniff test” before adding. Lesson learned: even 5-minute recipes deserve a moment of focus! Over time, I’ve learned that letting the mixed base sit for just 2-3 minutes before topping allows the protein powder to fully hydrate, making it even creamier and eliminating any chance of grittiness. It’s a tiny step with a big payoff.
Your Questions, Answered!
Q: My yogurt mixture is super gritty. What did I do wrong?
A: Don’t worry, this is common! It usually means the protein powder hasn’t fully dissolved or hydrated. The fix is simple: just keep stirring! Stir for a full minute, really working the mixture. Letting it sit for 5 minutes and then stirring again can also work wonders. Using a finer, higher-quality protein powder makes a difference, and a tiny splash of milk can help smooth it out.
Q: Can I make this the night before for breakfast?
A> Absolutely! It’s a fantastic make-ahead breakfast. I’d recommend keeping the toppings (especially granola) separate in a little baggie until you’re ready to eat so they stay crunchy. Mix the base, put it in a sealed container, and store it in the fridge. In the morning, give it a quick stir, pour it into your bowl, and add your toppings.
Q: I don’t have a “fancy” cookie bar or granola. What are the best pantry swaps?
A> The spirit of this recipe is “use what you love!” Instead of a cookie bar, try: a handful of chocolate chips, a crumbled Oreo, a broken-up rice cake with peanut butter, or even a chopped-up square of dark chocolate. Instead of granola, try: chopped almonds or walnuts, sunflower seeds, a sprinkle of cheerios, or a tablespoon of hemp hearts for extra protein.
Q: Is this really a meal, or just a snack?
A> With 30g of protein and a balanced mix of carbs and fats, this absolutely holds its own as a light meal! I have it for breakfast, lunch on a hot day, or a substantial post-workout refuel. Listen to your body—it’s incredibly satisfying and will keep you full for hours. For a more “meal-like” feel, you can always double the base or add more substantial toppings like a scoop of oats or more nut butter.
Chocolate Protein Yogurt Bowl : 30g of Protein in One Creamy, Dreamy Snack
Description
Chocolate Protein Yogurt Bowl
Creamy, chocolatey, high-protein snack or breakfast—ready in 5 minutes!
Prep Time: 5 minutes
Servings: 1 bowl
Ingredients
-
1 cup whole milk yogurt (or dairy-free/almond yogurt)
-
1 scoop chocolate peanut butter protein powder (or chocolate/vanilla protein)
-
1 tablespoon unsweetened cocoa powder
-
1 chopped peanut butter cookie bar (or any favorite snack bar)
-
2 tablespoons granola (or chopped nuts, cereal, or seeds)
-
1 tablespoon natural peanut butter (optional, for drizzle)
-
Sliced strawberries (or any berries for topping)
Instructions
-
Mix the Base – In a medium bowl, combine yogurt, protein powder, and cocoa powder. Stir until completely smooth. If too thick, add a teaspoon of milk to loosen.
-
Prepare Toppings – Chop cookie bar, slice berries, and measure granola. Warm peanut butter for 10 seconds if you want it drizzle-able.
-
Assemble the Bowl – Pour the chocolate yogurt base into your serving bowl. Arrange toppings however you like: granola, cookie chunks, berries, and a swirl of peanut butter.
-
Serve & Enjoy – Eat immediately for the creamiest texture. Optionally, cover and chill for a firmer, pudding-like texture.
Notes
-
Protein Swap: Any chocolate or vanilla protein works; adjust sweetness to taste.
-
Toppings: Use pantry-friendly swaps like chocolate chips, crumbled cookies, nuts, or seeds.
-
Make-Ahead: Store base in fridge, add crunchy toppings just before eating to keep them crisp.
-
Texture Tip: Let base sit 2–3 minutes after mixing to hydrate protein powder fully.
Flavor Twists:
-
Tropical: Vanilla protein + coconut yogurt + mango, pineapple, coconut, almond butter
-
Birthday Cake: Vanilla protein + almond extract + sprinkles + crumbled cupcake
-
Cookie Dough: Vanilla protein + mini chocolate chips + pinch of sea salt + cookie butter
-
Berry Bliss (Lower Cal): Plain Greek yogurt + vanilla protein + blended berries + fresh fruit topping
-
S’mores: Chocolate protein + mini marshmallows, crushed graham crackers, dark chocolate
Nutritional Information*
*This is an approximate estimate based on the specific brands listed. Your totals may vary based on substitutions.
Per Serving:
Calories: ~360 | Protein: 30g | Carbohydrates: 22g | Dietary Fiber: 4g | Sugars: 10g (mostly natural from yogurt & fruit) | Fat: 18g | Saturated Fat: 5g
Final Thoughts
There are moments in the kitchen that feel less like cooking and more like uncovering a secret—a simple, delicious truth that makes life just a little bit sweeter and a whole lot easier. This Chocolate Protein Yogurt Bowl is exactly that. It’s the proof that eating well doesn’t have to be a chore, that a treat can also be nourishing, and that the most satisfying meals often come together in just a few minutes, with a spoon and a smile.
It’s become more than a recipe for me; it’s a ritual. A small act of kindness I can give myself in the middle of a busy day. It’s the creamy, chocolatey reminder that taking care of our bodies can—and should—be a genuine pleasure. Whether it fuels your morning, powers you through an afternoon, or satisfies a sweet craving without the crash, this little bowl holds a special kind of magic.
So the next time you’re standing at the open fridge, searching for that perfect something, remember this: your secret weapon is just a scoop, a stir, and a sprinkle away. No fancy skills required, just a willingness to treat yourself well.
Here’s to simple joys, to chocolate for breakfast (or lunch, or dinner), and to finding your own delicious rhythm, one spoonful at a time.
With love and a dollop of peanut butter,
Olivia




