
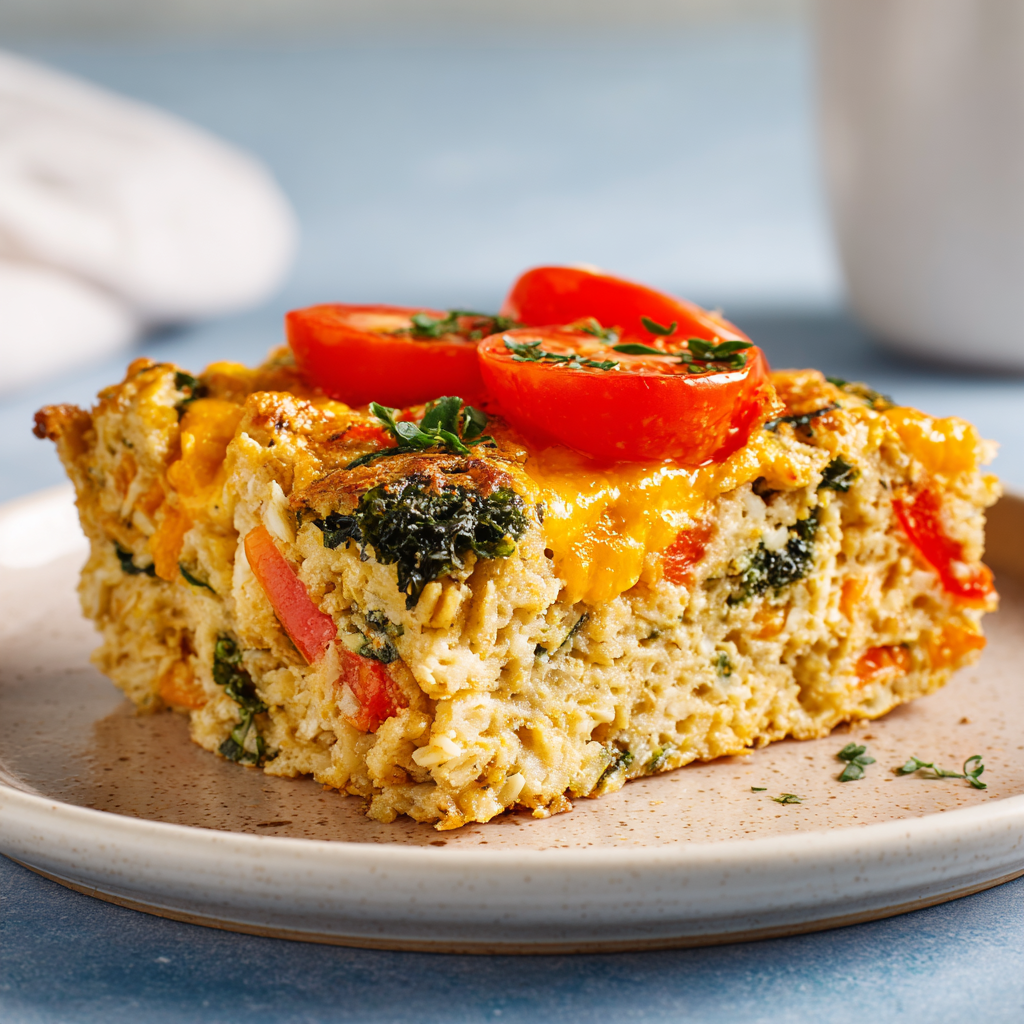
Savory Veggie-Packed Oatmeal Bake : A Wholesome Breakfast Twist
Say Goodbye to Boring Breakfasts: My Savory Veggie-Packed Oatmeal Bake
Hey there, kitchen friend! Olivia here. Can we have a real, cozy-kitchen-counter chat about breakfast for a second? I love a fluffy pancake or a perfect slice of banana bread as much as the next person, but sometimes, first thing in the morning, my body just craves something hearty, savory, and packed with staying power. Something that feels like a warm hug but fuels my day like a superhero. Enter the humble oat.
We all know oats are a breakfast superstar, but if your mind immediately jumps to a bowl of sweet, mushy porridge, I’m about to rock your world. What if I told you that oats could be the base for a dish that’s more like a rustic, vegetable-studded frittata or a crustless quiche? A dish that bakes up golden, slices beautifully, and can be enjoyed hot from the oven or grabbed straight from the fridge on a frantic Tuesday morning? That, my friend, is the magic of this Savory Veggie-Packed Oatmeal Bake.
This recipe is for anyone who’s tired of the sugar crash, who needs a meal-prep hero, or who just wants to start their day feeling genuinely nourished. It’s a forgiving, flexible formula that celebrates whatever veggies are wilting in your crisper drawer and turns them into something truly special. So, tie on your favorite apron (the slightly flour-dusted one is a mood), preheat your oven, and let’s transform the way you think about breakfast together. This isn’t just food; it’s a delicious, feel-good strategy for busy, beautiful mornings.
The Breakfast Rebellion: How This Bake Was Born
This recipe has a little bit of a rebellious origin story. Picture it: me, a few years back, staring into my pantry at the giant canister of rolled oats. I’d just come back from a trip where breakfast was a daily feast of savory delights—think shakshuka, cheesy egg bakes, and herby frittatas. My sweet oatmeal routine suddenly felt… one-note. I missed those bold, savory flavors first thing in the AM!
My mom, the queen of practical kitchen wisdom, always said, “Hunger is the best spice, but creativity is a close second.” One Sunday, faced with a carton of eggs, some wilting spinach, and that same canister of oats, I decided to experiment. What if I treated oats like I would bread in a strata? I whisked, I folded, I poured, and I held my breath as it baked. The smell that filled my kitchen was unreal—toasty, herby, and deeply savory. That first warm, cheesy, veggie-packed slice was a revelation. It was the comfort of oatmeal married with the satisfaction of a hearty bake. It was my personal breakfast rebellion, and it was a delicious success. Now, it’s a weekly ritual, and I’m so thrilled to share that “a-ha!” moment with you.
Gathering Your Flavor Crew: Ingredients & Insights
Here’s your cast of characters! The beauty of this bake is its flexibility, so think of this list as a fantastic blueprint. I’ll give you the why behind each one and plenty of swaps so you can make it your own.
- 2 cups rolled oats (old-fashioned oats): This is our sturdy, fiber-rich foundation. Rolled oats give the perfect texture—they soften and become tender without turning to mush. Chef’s Insight: Don’t use quick oats or steel-cut here; quick oats will get too soft, and steel-cut won’t cook through in time.
- 1½ cups milk (dairy or plant-based): The liquid that brings it all together. Whole milk adds richness, but unsweetened almond, oat, or soy milk work perfectly. Sub Tip: If you only have a nut milk that’s lightly sweetened, don’t worry—the savory ingredients balance it out.
- 3 large eggs: Our binding agents and protein powerhouses. They give the bake structure and a lovely, set texture. Chef’s Insight: Make sure they’re at room temperature for a smoother blend! Just pop them in a bowl of warm water for 5 minutes if you forgot.
- 1 tsp garlic powder & 1 tsp dried oregano (or Italian seasoning): The flavor dynamos! Garlic powder distributes evenly, and oregano brings that sunny, Mediterranean vibe. Sub Tip: Feel free to play with dried basil, thyme, or a pinch of smoked paprika for a different twist.
- Salt & black pepper, to taste: Essential for making all the other flavors pop. I start with ½ tsp of kosher salt and a few good grinds of pepper.
- 1 cup chopped spinach or kale: Our green goodness! It wilts perfectly into the bake. Chef’s Hack: If using kale, remove the tough stems and give it a good massage with a bit of oil to tenderize it first.
- 1 red bell pepper, diced & ½ cup zucchini, grated or diced: Color, texture, and subtle sweetness. The zucchini adds wonderful moisture. Sub Tip: Any summer squash, finely chopped broccoli, or even grated carrot works beautifully here.
- ½ cup crumbled feta or shredded cheese: The salty, creamy, glorious accent. Feta brings a tangy punch, while cheddar or mozzarella offer classic melty goodness. Chef’s Insight: For a richer flavor, use a combo—half feta, half Monterey Jack is a dream.
- 1 small tomato, sliced (for topping): This isn’t just pretty! The tomato slices roast slightly, adding juicy bursts of flavor. Sub Tip: A few halved cherry tomatoes scattered on top are equally delightful.
- 1 tbsp olive oil (optional, for richness): A little fat carries flavor and adds a lovely mouthfeel. You can skip it if you prefer, but I love the depth it adds.
Let’s Get Baking: Your Step-by-Step Guide
Ready to see some kitchen magic happen? This is where the cozy, simple process comes together. Follow these steps, and you’ll be a savory oatmeal bake pro in no time.
- Preheat & Prep: First things first, crank that oven to 375°F (190°C). This gives it plenty of time to get perfectly hot and ready for our bake. While it’s heating, grab an 8×8-inch baking dish. Lightly grease it with butter, cooking spray, or a drizzle of olive oil. You can also line it with parchment paper for ultimate easy cleanup—my secret for lazy Sunday mornings! Chef’s Tip: A well-preheated oven is key for that initial “oven spring” that helps the bake set beautifully.
- The Whisking Party: In a large mixing bowl, crack in your 3 eggs. Grab your whisk and give them a vigorous beating for a good 30 seconds until they’re uniformly pale and bubbly. This incorporates air and is the first step to a light texture. Now, pour in your milk and the optional olive oil. Add the garlic powder, oregano, salt, and pepper. Whisk it all together until it’s one happy, seasoned liquid. You should see little bubbles on the surface—that’s what you want!
- Fold in the Goodness: Time to bring in the team! Dump in your 2 cups of rolled oats. Then, add your chopped spinach, diced bell pepper, grated zucchini, and most of your cheese (save a small handful for topping if you’re feeling fancy). Now, put down the whisk and pick up a sturdy spatula. Gently fold everything together until every oat is coated in the eggy mixture and the veggies are evenly distributed. The batter will look loose and soupy—that’s perfect! The oats will drink up that liquid as it bakes.
- Pour & Decorate: Carefully pour the mixture into your prepared baking dish. Use the spatula to scrape out every last bit and to smooth the top into an even layer. Now for the fun, artistic touch: arrange your tomato slices on top in a pretty pattern. It makes it look like it came from a fancy bakery! Sprinkle that reserved handful of cheese over the tomatoes for extra golden-brown spots.
- The Big Bake: Slide your dish into the middle of your preheated oven. Now, resist the urge to open the door for at least 30 minutes! Let the heat work its magic. Bake for 35-40 minutes total. You’ll know it’s done when the top is a beautiful golden brown, the edges are pulling away slightly from the pan, and the center is firmly set (it shouldn’t jiggle wildly when you give the pan a gentle shake). Chef’s Hack: If the top is browning too quickly, you can loosely tent it with a piece of foil for the last 10 minutes.
- The (Tough) Wait & Serve: This is the hardest part, I know! Pull the bake out of the oven and let it cool in the dish for at least 10-15 minutes. This allows it to finish setting and makes slicing so much cleaner. Then, cut it into squares, rectangles, or triangles—you do you! Serve it warm, right from the pan.
Plating Your Masterpiece: Serving Suggestions
This bake is a star all on its own, but a little accessorizing never hurts! For a complete meal, I love serving a warm square with a dollop of creamy Greek yogurt or a drizzle of hot sauce for a kick. If you’re feeling extra, a simple side of avocado slices or a light arugula salad with lemon vinaigrette makes it a fantastic brunch or lunch. And remember, it’s just as delicious at room temperature or cold, straight from the fridge, making it the ultimate grab-and-go breakfast.
Make It Your Own: Delicious Recipe Variations
- “Everything Bagel” Style: Swap the oregano for 1 tbsp of everything bagel seasoning and use cream cheese instead of feta. Top with extra seeds before baking!
- Mediterranean Twist: Add ¼ cup chopped sun-dried tomatoes and a handful of kalamata olives to the batter. Use all feta cheese. Divine!
- Protein Power-Up: Stir in ½ cup of cooked, crumbled breakfast sausage, diced ham, or even rinsed canned lentils for an extra protein punch.
- Dairy-Free/Vegan: Use plant-based milk, skip the cheese (or use a vegan alternative), and replace the eggs with a “flax egg” (1 tbsp ground flax + 3 tbsp water per egg, let sit 5 mins). The texture will be denser but still delicious.
- Southwestern Fiesta: Use chili powder and cumin instead of oregano. Add a can of drained green chiles and some corn kernels. Top with pepper jack cheese and serve with salsa.
Olivia’s Chef Notes & Kitchen Stories
This recipe has become a living, evolving staple in my kitchen. I’ve made it for sleepy houseguests (who now request it), packed it for picnics, and even crumbled leftovers into a skillet to make savory “oatmeal hash” with a fried egg on top—highly recommend! One time, I was out of bell pepper and used a finely chopped apple instead. The subtle sweetness with the savory herbs was a weirdly wonderful surprise! The moral of the story? Don’t be afraid to play. Your veggies, your cheese, your rules. This bake is forgiving. The only true mistake is not making it at all. It’s a testament to the fact that the coziest, most satisfying meals often come from a simple idea and a willingness to mix things up.
Your Questions, Answered: FAQs & Troubleshooting
Q: Can I make this the night before?
A: Absolutely! You have two great options. 1) Assemble and Refrigerate: Mix everything up, pour it into the dish, cover tightly, and refrigerate overnight. In the morning, let it sit on the counter while the oven preheats, then bake. You may need to add 5-10 minutes to the bake time. 2) Bake and Reheat: I often bake the whole thing on Sunday, let it cool, slice, and store squares in an airtight container. Reheat in the microwave for 60-90 seconds or in a toaster oven to re-crisp the edges.
Q: My bake turned out a bit soggy in the middle. What happened?
A: A few things could be at play. First, ensure your oven is fully preheated. Second, veggies with very high water content (like fresh tomatoes mixed *in*) can release liquid. That’s why I prefer drier veggies inside and tomato only on top. Finally, make sure you’re using the right size pan. An 8×8 is ideal; a larger pan will make a thinner, potentially under-set bake. The center should not jiggle when it’s done.
Q: Can I freeze the leftovers?
A: You can! Let the baked and cooled squares freeze individually on a parchment-lined tray, then transfer them to a freezer bag. They’ll keep for up to 2 months. Reheat from frozen in the microwave (2-3 mins) or wrap in foil and warm in a 350°F oven until heated through.
Q: It tastes a bit bland. How can I boost the flavor?
A: Great question! Seasoning is key. First, don’t be shy with the salt and pepper in the wet mix. Second, consider adding aromatics like ¼ cup finely diced onion or 2 minced garlic cloves (sauté them lightly first to soften). Third, amp up the cheese or add a tablespoon of nutritional yeast for a cheesy, umami kick. A dash of your favorite hot sauce in the batter works wonders, too!
Savory Veggie-Packed Oatmeal Bake : A Wholesome Breakfast Twist
Description
Hey there, kitchen friend! If sweet oatmeal just isn’t doing it for you anymore, this Savory Veggie-Packed Oatmeal Bake is about to become your new breakfast favorite. Think of it as a cozy cross between baked oatmeal and a crustless quiche—hearty, satisfying, and perfect for meal prep. It’s loaded with vegetables, protein-rich eggs, and wholesome oats, making it a warm, nourishing way to start the day without a sugar crash.
Ingredients
-
2 cups rolled oats (old-fashioned)
-
1½ cups milk (dairy or unsweetened plant-based)
-
3 large eggs
-
1 cup chopped spinach or kale
-
1 red bell pepper, diced
-
½ cup zucchini, grated or finely diced
-
½ cup crumbled feta or shredded cheese (cheddar, mozzarella, or a mix)
-
1 teaspoon garlic powder
-
1 teaspoon dried oregano or Italian seasoning
-
½ teaspoon salt (or to taste)
-
¼ teaspoon black pepper
-
1 tablespoon olive oil (optional)
-
1 small tomato, sliced (for topping)
Instructions
-
Preheat oven to 375°F (190°C). Lightly grease an 8×8-inch baking dish.
-
Whisk the wet ingredients: In a large bowl, whisk eggs until smooth. Add milk, olive oil (if using), garlic powder, oregano, salt, and pepper.
-
Add oats and veggies: Stir in oats, spinach, bell pepper, zucchini, and most of the cheese (reserve a little for topping).
-
Assemble: Pour the mixture into the prepared dish and spread evenly. Top with tomato slices and remaining cheese.
-
Bake for 35–40 minutes, until golden on top and the center is set.
-
Rest for 10–15 minutes before slicing and serving.
Notes
-
Use rolled oats only—quick oats get mushy, and steel-cut oats won’t cook through.
-
Let it rest before slicing for clean cuts and better texture.
-
Meal-prep friendly: Store slices in the fridge for up to 4 days or freeze for up to 2 months.
-
Boost flavor with a dash of hot sauce, fresh herbs, or a sprinkle of nutritional yeast.
Nutritional Information*
*This is an approximate estimate per serving (1/6th of the bake), calculated using 2% milk, feta cheese, and olive oil. Values will vary based on your specific ingredients and substitutions.
- Calories: 220
- Protein: 10g
- Carbohydrates: 20g
Final Thoughts
And just like that, you’ve done it. You’ve taken the humble oat and transformed it into something truly special—a savory, nourishing, make-ahead masterpiece that redefines what breakfast can be.
This isn’t just a recipe; it’s an invitation to break the routine. It’s permission to look at your pantry and your crisper drawer with new eyes, to trust your creativity, and to give your mornings a delicious, energizing start. Whether you’re meal-prepping for a chaotic week, hosting a leisurely brunch, or simply treating yourself to something warm and wholesome, this bake is your reliable, versatile companion.
Remember, the greatest meals often come from a spirit of play and a dash of rebellion. So take this blueprint and make it yours. Swap the veggies, change the cheese, spice it up, or keep it simple. Every time you pull this golden, fragrant dish from the oven, you’re not just making breakfast—you’re crafting a moment of feel-good nourishment.
Here’s to no more boring breakfasts, to cozy kitchens, and to meals that fuel both your body and your joy. Now, go enjoy that first delicious bite. You’ve earned it.
Happy cooking,
Olivia

Ultimate Grilled Cheese Sandwich : Crispy, Gooey Comfort in Every Bite
The Ultimate Grilled Cheese: A Love Letter to Simple, Soul-Satisfying Food
Hey there, friend! Come on in, pull up a stool. Can you smell that? It’s the scent of butter hitting a hot pan, the quiet sizzle that promises something truly magical is about to happen. Of all the dishes in my kitchen repertoire, the one that never, ever fails to make everything feel right with the world is the humble, glorious grilled cheese sandwich.
It’s more than just bread and cheese, isn’t it? It’s a warm hug on a plate. It’s the culinary equivalent of your favorite cozy sweater. It’s the quick lunch that turns into a moment of pure, unadulterated joy. But here’s my little kitchen confession: for years, I made “good” grilled cheese. It was fine. It was cheesy. But it wasn’t transcendent. It wasn’t the ultimate version that makes you close your eyes and sigh with the first bite.
So, I got obsessed. I turned my kitchen into a grilled cheese laboratory. I tested breads, cheeses, fats, heats, and presses. I ate more grilled cheese in a month than I care to admit (it’s a tough job, but someone had to do it!). And today, I’m sharing everything I learned. This isn’t just a recipe; it’s your blueprint to grilled cheese perfection. We’re going for maximum crispiness on the outside, and a lava flow of dreamily melted cheese on the inside. Forget everything you thought you knew about this classic. Let’s build your new favorite sandwich together.
My First Kitchen Victory: Dad’s “Secret” Grilled Cheese
My love affair with this sandwich started long before I had any real kitchen skills. It was a rainy Saturday, I was about seven, and my dad was on “lunch duty.” Mom was out, and the prospect of dad cooking was always a little… adventurous. But that day, he declared he was making his “world-famous” grilled cheese. I remember perching on the counter, watching him with skepticism.
He used the big, heavy cast-iron skillet that was usually off-limits. He didn’t just slap margarine on bread; he gently softened real butter in a little dish and painted it on thick, right to the edges. The cheese wasn’t a single slice from a plastic package; it was a mix of orange cheddar and something white and creamy he grated himself. He cooked it low and slow, and he taught me the most important lesson: listen. “Hear that quiet sizzle, Liv? That’s the sound of patience. If it’s spitting and shouting, the heat’s too high and we’ll burn our treasure.” When he slid that golden, crisp sandwich onto my plate and I pulled it apart to see the long, beautiful cheese strands, I was a goner. It was my first understanding that a little attention and love could turn the simplest ingredients into a masterpiece. That’s the spirit we’re bringing to this recipe today.
Gathering Your Golden, Gooey Toolkit
Here’s where we build our foundation. Every ingredient here has a role to play. Choosing great components is the first step to a next-level sandwich.
- 2 Slices of Excellent Bread (about ½” thick): This is your structural canvas. I highly recommend a sturdy sourdough or a country white. The slight chew and robust structure prevent sogginess and give that fantastic crisp. Chef’s Insight: Avoid ultra-soft, thin sandwich bread—it can’t stand up to the butter and heat. Day-old bread is actually perfect here!
- 2-3 tbsp Butter, softened to room temperature: Not melted! Softened butter spreads evenly, creating a consistent, golden-brown crust. This is non-negotiable for the ultimate crisp. Substitution Tip: For an even crispier, more savory edge, you can use an equal amount of high-quality mayonnaise on the outside of the bread. It sounds wild, but trust me—it works.
- 3-4 oz of Your Cheese Dream Team: This is the heart. I use a blend of cheeses for perfect melt and flavor.
- Sharp Cheddar (about 2 oz): Provides the classic, tangy flavor punch and beautiful color.
- Fontina or Gruyère (about 1.5 oz): The melt master. These cheeses get incredibly creamy and oozy without becoming greasy.
- A thin slice of Monterey Jack or American (about 0.5 oz): My secret weapon! These cheeses contain sodium citrate, which helps emulsify the entire cheese blend into one supremely smooth, melt. Don’t knock it till you try it!
Chef’s Insight: Always grate your own cheese! Pre-shredded bags contain anti-caking agents that can hinder a smooth melt.
- A Pinch of Flaky Sea Salt: A tiny sprinkle on the buttered outside of the bread before cooking elevates the buttery flavor to new heights.
Crafting Your Masterpiece: Step-by-Step
Ready? Let’s cook. This is where patience and our senses come into play. Clear your stovetop, grab your favorite spatula, and let’s make some magic.
- Prep is Everything. Take your butter out of the fridge at least 30 minutes before you start. Grate all your cheeses and mix them gently in a bowl. This blend is now ready for maximum meltability. Get your bread sliced to an even ½-inch thickness. Chef’s Hack: I like to spread a very thin layer of Dijon mustard or fig jam on the inside of the bread before adding cheese. It adds a subtle background note that cuts the richness beautifully. Try it once you master the classic!
- Butter to the Edge. Using a knife or the back of a spoon, spread a generous, even layer of softened butter all the way to the very edges of one side of each bread slice. This ensures every single bite of crust gets golden. Sprinkle the buttered sides lightly with flaky salt.
- Build Your Sandwich, Cold. Place one slice of bread, buttered side down, on your cutting board. Pile your cheese blend high in the center, leaving just a small border so it doesn’t all spill out. Top with the second slice, buttered side up. Press down gently.
- Heat & Wait (The Hardest Part!). Place a heavy-bottomed skillet (cast-iron is king) or griddle over medium-low heat. Let it preheat for a full 2-3 minutes. You want steady, gentle heat. Chef’s Tip: If your butter immediately burns and smokes when the sandwich hits the pan, your heat is too high. We’re going for a steady, golden sizzle.
- The First Side: The Foundation of Flavor. Carefully place your sandwich in the pan. Now, here’s the game-changer: cover the skillet with a lid. This traps the heat and acts like a mini-oven, melting the cheese from the top down while the bottom crisps. Cook covered for 3-4 minutes. Peek to check for a deep, golden-brown color.
- The Flip & Final Crisp. Use a confident, smooth motion with your spatula to flip the sandwich. It should feel sturdy. Cook the second side, uncovered now, for another 2-3 minutes, until equally golden and glorious. If you want, press down lightly with the spatula to ensure even contact. Listen for that gentle, buttery sizzle.
- The Rest (Yes, Really!). This is crucial! Transfer your masterpiece to a wire rack (not a plate!) for just 60 seconds. This lets the cheese settle slightly so it doesn’t immediately gush out when you cut it, and it keeps the bottom crust from steaming and getting soft. You’ve waited this long—you can wait one more minute, I promise.
How to Serve This Golden Glory
The presentation is simple but impactful. Use a sharp serrated knife and cut the sandwich diagonally—those triangles just taste better, it’s science (or at least, it feels that way). Plate it with the gooey cheese interior facing up. The classic pairing is, of course, a steaming bowl of creamy tomato soup for dipping. But it’s also fantastic with a simple side of crunchy potato chips, a tangy dill pickle spear, or a bright, crisp apple salad. Serve it immediately and watch the cheese pull!
Get Creative: Your Grilled Cheese, Your Rules!
Once you’ve nailed the classic, the world is your oyster (or, more fittingly, your cheese board!). Here are a few of my favorite twists:
- The “Everything” Grill: Add a schmear of cream cheese mixed with everything bagel seasoning to the inside of the bread before adding cheddar.
- Apple & Sharp Cheddar: Add a few very thin slices of crisp apple (like Honeycrisp) and a drizzle of honey inside with your cheddar blend.
- Caprese Style: Use fresh mozzarella, a slice of ripe tomato, and a few fresh basil leaves. After cooking, drizzle with balsamic glaze.
- For a Dairy-Free Friend: Use your favorite vegan butter and a high-quality melty vegan cheese (the shreds that come in a block often work better). A swipe of miso paste inside adds a fantastic umami depth.
- The “Inside Out”: Butter the bread, then press the buttered sides into grated Parmesan before cooking. You get an incredible, crispy-cheesy crust.
Olivia’s Kitchen Notes & Stories
This recipe has been my edible science project for years. The “lid trick” was a total happy accident discovered one day when I was trying to melt the cheese faster because I was *starving*. It revolutionized my grilled cheese game! I’ve also learned that the type of pan matters. My dad’s heavy cast iron distributes heat evenly and gives an unbeatable sear, but a good non-stick skillet works beautifully, too.
And a funny story: I once hosted a “Grilled Cheese Bar” for friends, with every bread, cheese, and add-in you could imagine. The winner? A bizarre-sounding combo of sourdough, brie, strawberry jam, and crispy bacon that someone invented on the spot. It was insane and incredible. So don’t be afraid to play with your food! The best recipes, even the “ultimate” ones, have room for your own personality.
Grilled Cheese 911: Your Questions, Answered
Let’s tackle some common hiccups so your sandwich is flawless every time.
Q: My bread is burning before my cheese melts! What am I doing wrong?
A: Your heat is too high, my friend! Grilled cheese is a low-and-slow affair. Dial it back to medium-low. If you’re already there, your pan might be too thin or your burner too powerful. Try moving it to a smaller burner. And don’t forget the lid trick from Step 5—this is the ultimate solution to this problem.
Q: Why is my cheese not getting that beautiful, stringy pull?
A: Two likely culprits. First, the cheese type. Some cheeses (like pre-shredded bags or very aged, dry cheddar) don’t melt well. Use the blend I recommend, and always grate it fresh. Second, you might be cutting into it too quickly! That 60-second rest lets the molten cheese cool just enough to become stretchy instead of liquid.
Q: Can I make more than one at a time?
A: Absolutely, but don’t overcrowd the pan. Each sandwich needs its own space for heat circulation. If your pan is big enough, go for it! If not, cook them in batches and keep the finished ones warm on that wire rack in a 250°F oven.
Q: Is mayonnaise really better than butter on the outside?
A: It’s not “better,” but it’s a fantastic alternative with a different result. Mayo (made with oil and eggs) creates an incredibly crisp, evenly browned crust with a slightly tangy flavor. Butter gives a richer, more traditional taste. I say try both and pick your favorite team!

Ultimate Grilled Cheese Sandwich : Crispy, Gooey Comfort in Every Bite
Description
Hey there, friend! Few things in life are as comforting as a perfectly made grilled cheese sandwich. Golden and crisp on the outside, irresistibly gooey on the inside—this is the kind of food that feels like a warm hug. This recipe takes the classic we all love and turns it into the ultimate version, using simple techniques and the right combination of cheeses to deliver maximum flavor and melt. No fancy tricks—just care, patience, and really good ingredients.
Ingredients
-
2 slices sturdy bread (sourdough or country white, about ½-inch thick)
-
2–3 tablespoons butter, softened (or mayonnaise, optional)
-
3–4 oz cheese, freshly grated (see blend below)
-
2 oz sharp cheddar
-
1–1½ oz fontina or Gruyère
-
½ oz Monterey Jack or American (for extra melt)
-
-
Pinch of flaky sea salt (optional)
Instructions
-
Prepare the cheese
Grate all cheeses and gently mix them together in a bowl. Set aside. -
Butter the bread
Spread softened butter evenly over one side of each slice of bread, all the way to the edges. Sprinkle lightly with flaky salt if using. -
Assemble the sandwich
Place one slice of bread butter-side down on a cutting board. Add the cheese mixture evenly on top. Cover with the second slice of bread, butter-side up. Press gently. -
Cook low and slow
Heat a skillet (preferably cast iron) over medium-low heat. Place the sandwich in the pan and cover with a lid. Cook for 3–4 minutes until the bottom is golden brown. -
Flip and finish
Flip carefully and cook uncovered for another 2–3 minutes, until the second side is golden and the cheese is fully melted. -
Rest briefly
Transfer to a wire rack and let rest for about 1 minute. Slice diagonally and serve immediately.
Notes
-
Low heat is key: High heat burns bread before cheese melts. Patience pays off.
-
Always grate your own cheese: Pre-shredded cheese doesn’t melt as smoothly.
-
Cover the pan at first: This traps heat and ensures perfectly melted cheese.
-
Butter vs. mayo: Butter gives classic flavor; mayo creates an ultra-crisp crust—try both!
-
Rest before cutting: This keeps the cheese gooey but not runny.
Nutritional Information*
*For 1 sandwich made with sourdough bread, the specified cheese blend, and 2 tbsp butter. This is an estimate.
Calories: ~520 | Protein: 22g | Carbohydrates: 32g | Fat: 34g | Saturated Fat: 19g | Fiber: 2g
Final Thoughts
The journey to the ultimate grilled cheese is more than just mastering a sandwich—it’s a celebration of the simple, soul-satisfying moments that good food brings into our lives. It’s about the smell of butter in a hot pan, the sound of a gentle sizzle, and the sight of that first, glorious cheese pull.
Whether you stick to the classic blend or venture into wild, creative twists, remember that the heart of this recipe isn’t just in the ingredients—it’s in the patience, the attention, and the little bit of love you pour into it. This sandwich has been my comfort, my kitchen experiment, and my edible love letter to the power of simplicity.
So here’s to rainy days, to shared lunches, and to the humble grilled cheese that feels like home. Now, go forth, butter your bread to the edges, and create your own golden, gooey masterpiece.
Happy cooking, friends.
Olivia
Spring Veggie Quinoa Salad : Fresh, Zesty & Perfect for Warmer Days
Spring Veggie Quinoa Salad: Your Sunny, Crunchy, Happy-Making Bowl
Hey there, friend! Come on in, grab an apron (I promise, a little mess is just a sign of good things happening), and let’s make something that tastes exactly like a perfect spring day feels. You know the ones I mean: sunshine on your shoulders, a light breeze, and that first glimpse of bright green pushing up through the earth. That’s the energy we’re bringing straight to your table today.
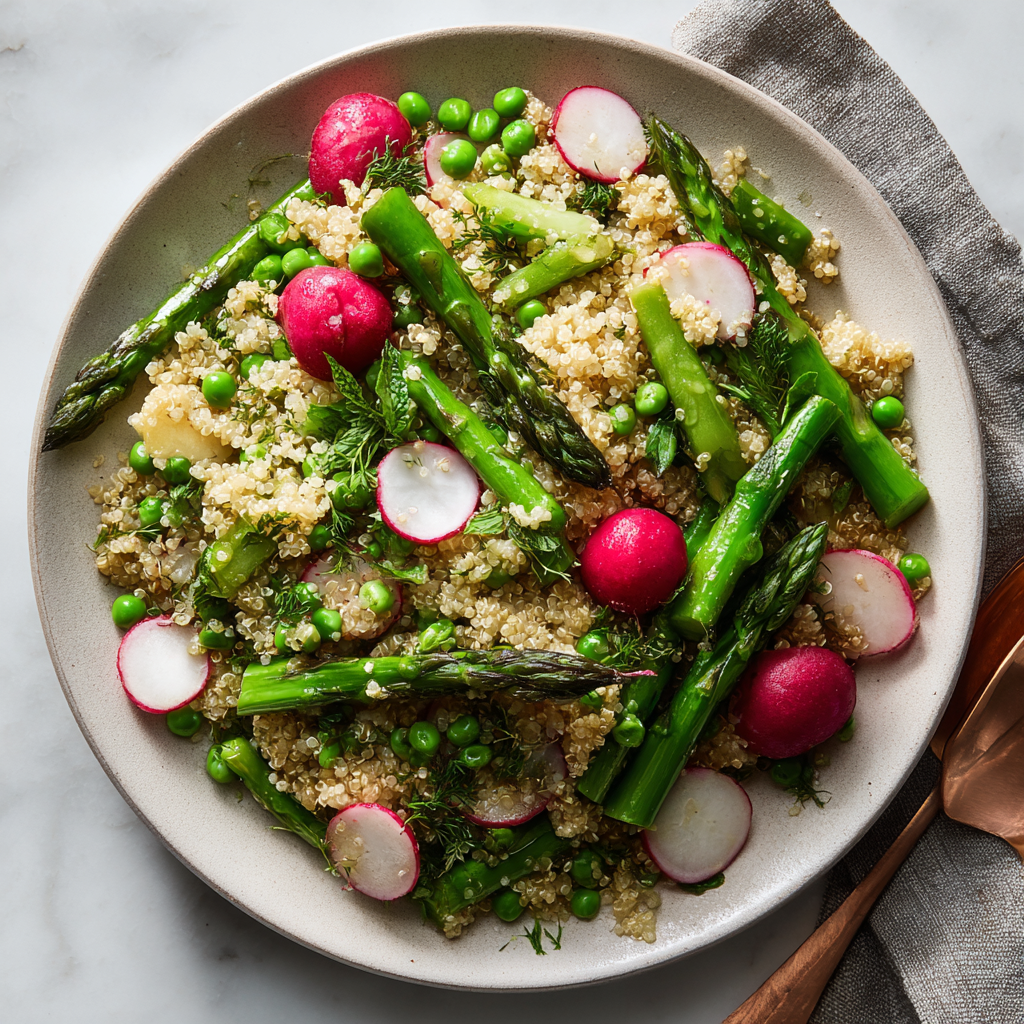
I don’t know about you, but as soon as the seasons start to turn, my body starts craving food that’s light, vibrant, and packed with fresh flavor. I want meals that make me feel nourished and energized, not weighed down. Enter this superstar: my Spring Veggie Quinoa Salad. It’s a celebration of all the gorgeous produce popping up at the market—crisp asparagus, sweet little peas, and those peppery, jewel-toned radishes—all tossed together with fluffy, protein-packed quinoa and the zippiest lemon vinaigrette you’ve ever met.
This isn’t just a “side dish.” Oh no. This is a main character meal. It’s perfect for meal prep that you’ll actually look forward to all week, a stunning addition to a picnic spread, or a simple, satisfying lunch that proves healthy eating can be ridiculously delicious. It’s proof that you don’t need complicated techniques or hours in the kitchen to create something truly special. You just need a few good ingredients and a willingness to play. So, are you ready? Let’s get that quinoa cooking and make our kitchens smell like spring.
Why This Salad Has My Heart: A Farmers’ Market Memory
This recipe was born on a Saturday morning that just felt… magic. It was one of the first truly warm weekends of the year, and I was at my local farmers’ market, coffee in hand, just soaking it all in. The air was buzzing, and the stalls were exploding with color: bundles of asparagus standing at attention, baskets of the most vibrant green peas, and radishes so pretty they looked like little rubies with their bright green tops still attached.
I bought a little of everything, not with a plan, but purely on joy. Back in my kitchen, with sunlight streaming across the counter, I started throwing things together. I had some leftover quinoa in the fridge, whipped up my go-to lemon dressing, and gave it all a toss. That first forkful was a revelation. It was fresh, crunchy, zesty, and satisfying all at once. It tasted like optimism on a plate. I’ve tweaked it here and there since, but that spirit of simple, seasonal joy is still the heart of the recipe. Every time I make it, it takes me right back to that sunny morning.
Gathering Your Sunshine: Ingredients & Chef’s Insights
Here’s everything you’ll need to build your bowl of spring. Think of this as your flavor blueprint—feel free to get creative with what you have!
- 1 cup uncooked quinoa (or 3 cups cooked): Our hearty, protein-packed base. I love the tri-color kind for visual pop, but any variety works. Chef’s Insight: Rinsing quinoa before cooking is a non-negotiable step for me—it removes the natural saponin coating that can make it taste bitter. Trust me on this!
- 1 bunch asparagus, trimmed and cut into 1-inch pieces: The symbol of spring! Look for firm, bright green stalks with tight tips. Substitution Tip: No asparagus? Trimmed green beans or chopped broccoli florets are fabulous stand-ins.
- 1 cup fresh or frozen peas: Little bursts of sweet flavor. Frozen peas are a fantastic, year-round pantry hero—they’re flash-frozen at peak ripeness, so they’re often just as good as fresh! No need to thaw if you’re blanching.
- 4–5 radishes, thinly sliced: They bring the crunch and a delightful peppery bite. A mandoline makes quick, paper-thin work of them, but a sharp knife does the job beautifully.
- 2 tbsp fresh parsley or mint, chopped (optional but highly recommended): The “optional” fairy is a liar here. These fresh herbs are the flavor fairy dust that takes this salad to the next level. Parsley is bright and clean; mint adds a surprising, refreshing twist. Or use both!
- Salt & pepper to taste: Your essential flavor enhancers. We’ll season at every stage for a perfectly balanced dish.
For the Lemony Vinaigrette:
- 1/4 cup extra virgin olive oil: The rich, fruity backbone of our dressing. Use the good stuff here—you’ll taste the difference.
- Juice of 1 large lemon (about 3 tbsp): The star of the show! Freshly squeezed is key for that vibrant, sunny acidity. Chef’s Hack: Roll the lemon firmly on the counter before cutting and juicing—you’ll get so much more juice out of it.
- 1 tsp Dijon mustard: Our secret weapon for emulsification (fancy word for keeping the oil and juice together) and adding a subtle depth of flavor.
- 1 clove garlic, minced: A little aromatic punch. Feel free to grate it on a microplane for a more dispersed, milder garlic flavor.
- 1 tsp honey or maple syrup: Just a touch to round out the sharpness of the lemon and mustard. It creates a beautifully balanced dressing.
- Salt & pepper to taste: Season your dressing well—it needs to flavor the entire salad!
Let’s Build Some Flavor: Step-by-Step Instructions
Alright, let’s get cooking! I’ll walk you through each step with all my favorite little kitchen hacks to make this foolproof and fun.
Step 1: Cook the Quinoa. First, give that quinoa a good rinse in a fine-mesh strainer under cold water. This is our bitterness-banishing ritual! Cook it according to your package directions (typically a 1:2 quinoa-to-water ratio, bring to a boil, then simmer covered for 15 minutes). Once it’s done, fluff it immediately with a fork, transfer it to a large mixing bowl, and let it start cooling down. Pro Tip: Spreading it out in the bowl helps it cool faster and stops it from getting gummy.
Step 2: Blanch the Veggies. While the quinoa is cooking, bring a medium pot of salted water to a rolling boil. We’re going to blanch our asparagus and peas. This quick cook in boiling water, followed by an ice bath (or a very cold rinse), is the key to locking in that incredible bright green color and crisp-tender texture. Add the asparagus pieces and peas to the boiling water and let them party for just 2 minutes—set a timer! Then, drain them and immediately rinse under very cold water or plunge them into a bowl of ice water to stop the cooking. Drain again thoroughly. Chef’s Hack: I often use the same pot I boiled the water in to cook the quinoa. Multitasking for the win!
Step 3: Make the Magic Dressing. In a small jar with a tight-fitting lid, combine the olive oil, fresh lemon juice, Dijon mustard, minced garlic, honey, salt, and pepper. Screw the lid on tightly and shake it like you’re celebrating something! Shake until the dressing is creamy and fully combined. Give it a taste and adjust—want more zing? Add a squeeze more lemon. More sweetness? A tiny drizzle more honey. This is your dressing, make it sing to you.
Step 4: The Grand Assembly. To your large bowl with the cooled quinoa, add the blanched (and now perfectly crisp) asparagus and peas, the thinly sliced radishes, and the chopped fresh herbs. Now, here’s an important step: pour about 3/4 of the dressing over everything. Gently toss, toss, toss until every grain and veggie is lightly coated. Let it sit for 5 minutes, then taste. This lets the flavors start to mingle. Now, decide if you want to add the remaining dressing. I usually do, but it’s your call based on how dressed you like your salads!
Step 5: The Final Rest (The Hardest Part!). If you can bear it, let the salad chill in the fridge for 15-20 minutes before serving. This allows the quinoa to fully absorb the dressing and all the flavors to become best friends. Of course, sneaking a bite straight from the bowl is not only allowed, it’s encouraged for quality control.
How to Serve Your Masterpiece
This salad is a beauty, so let it shine! I love serving it in a big, wide, colorful bowl. For a heartier meal, spoon a generous portion into a deep plate or shallow bowl. Top it with extra fresh herbs, a few extra radish slices for garnish, and maybe a sprinkle of crumbled feta or goat cheese if you’re feeling fancy (highly recommended!). It’s fantastic on its own, alongside grilled chicken or salmon, or as part of a spring brunch spread with crusty bread. It packs up beautifully for picnics and potlucks, too.
Make It Your Own: Delicious Twists & Swaps
- Add a Protein Punch: Fold in a can of drained and rinsed chickpeas, flaked grilled salmon, shredded rotisserie chicken, or a handful of toasted nuts (almonds or pistachios are amazing).
- Cheese, Please: Crumble in some tangy feta, creamy goat cheese, or salty ricotta salata for a rich contrast.
- Herb Garden Explosion: Swap or add dill, chives, or basil alongside the parsley and mint for a different herbal profile.
- Grain Swap: Not a quinoa fan? Cooked farro, couscous, or even orzo pasta make great bases.
- Veggie Variations: Use what’s in season! Thinly sliced sugar snap peas, blanched broccoli, chopped artichoke hearts, or diced avocado (add right before serving) are all fantastic.
From My Kitchen to Yours: Chef’s Notes
This recipe is a living, breathing thing in my house! The first time I made it, I completely forgot the Dijon in the dressing. The result was… fine, but the oil and lemon kept separating. The next time, the Dijon went in, and it was a total “AHA!” moment—creamy, cohesive, perfect. A happy accident that taught me a lesson! Over time, I’ve also learned that this salad’s flavor gets even better on day two, as the quinoa soaks up every last drop of that lemony goodness. It’s my ultimate make-ahead, no-fuss hero. Just give it a good stir and maybe a tiny fresh squeeze of lemon before serving leftovers.
Your Questions, Answered: FAQs & Troubleshooting
Q: My quinoa turned out mushy/soggy. What did I do wrong?
A: The most common culprit is too much water or not fluffing it soon enough. Always use the 1:2 ratio (1 cup quinoa to 2 cups water) and set a timer. As soon as it’s done, take off the lid, fluff it with a fork immediately, and get it out of the hot pot to cool. Rinsing beforehand also helps keep the grains separate.
Q: Can I make this ahead of time for meal prep?
A: Absolutely! It’s one of the best meal prep recipes out there. Store it in an airtight container in the fridge for up to 4 days. The veggies will soften slightly but still taste delicious. I often leave the dressing separate and add it the morning I plan to eat it for maximum crunch.
Q: My dressing separated after I shook it. Did I fail?
A> Not at all! Emulsions can break. Just give it another vigorous shake right before you pour it. The Dijon mustard helps stabilize it, but if it separates in the fridge, no worries—a quick shake brings it right back together.
Q: I don’t have fresh lemons. Can I use bottled lemon juice?
A> You can in a pinch, but the flavor won’t be as bright and vibrant. Fresh lemon juice is really the soul of this dressing. If you must use bottled, start with a little less and adjust to taste.
Spring Veggie Quinoa Salad : Fresh, Zesty & Perfect for Warmer Days
Description
Hey there, friend! This Spring Veggie Quinoa Salad tastes exactly like the season feels—fresh, bright, and full of life. When the weather warms up, this is the kind of meal that makes you feel energized and nourished, not weighed down. Fluffy quinoa, crisp spring vegetables, and a zippy lemon vinaigrette come together in a bowl that’s perfect for lunch, meal prep, picnics, or an easy dinner side. Simple ingredients, big flavor, zero fuss.
Ingredients
Salad
-
1 cup uncooked quinoa (or 3 cups cooked), rinsed
-
1 bunch asparagus, trimmed and cut into 1-inch pieces
-
1 cup peas (fresh or frozen)
-
4–5 radishes, thinly sliced
-
2 tablespoons fresh parsley or mint, chopped (or a mix)
-
Salt and black pepper, to taste
Lemon Vinaigrette
-
¼ cup extra-virgin olive oil
-
Juice of 1 large lemon (about 3 tablespoons)
-
1 teaspoon Dijon mustard
-
1 small clove garlic, minced
-
1 teaspoon honey or maple syrup
-
Salt and black pepper, to taste
Instructions
-
Cook the quinoa
Cook quinoa according to package instructions (usually 1 cup quinoa to 2 cups water). Once tender, fluff with a fork and let cool slightly in a large bowl. -
Blanch the vegetables
Bring a pot of salted water to a boil. Add asparagus and peas and cook for 2 minutes until bright green and crisp-tender. Drain and immediately rinse under cold water. Set aside. -
Make the dressing
In a small jar or bowl, combine olive oil, lemon juice, Dijon, garlic, honey, salt, and pepper. Shake or whisk until well combined. -
Assemble the salad
Add blanched vegetables, radishes, and herbs to the quinoa. Pour about ¾ of the dressing over the salad and toss gently. Taste and add more dressing if needed. -
Rest and serve
Let the salad rest for 10–15 minutes (or chill briefly) so the flavors meld. Serve and enjoy!
Notes
-
Always rinse quinoa to remove bitterness and keep the grains fluffy.
-
Don’t overcook the veggies—quick blanching keeps them crisp and vibrant.
-
Make it ahead: This salad tastes even better the next day as the quinoa absorbs the dressing.
-
Boost the protein with chickpeas, grilled chicken, salmon, or toasted nuts.
-
Add creaminess with crumbled feta or goat cheese just before serving.
Nourishment Info (Because Feeling Good is Part of the Joy!)
Estimated per serving (based on 6 servings): Calories: ~240 | Protein: 7g | Carbohydrates: 28g | Fat: 12g | Fiber: 4g. This salad is a fantastic source of plant-based protein, fiber, and healthy fats to keep you full and energized.
Final Thoughts: More Than Just a Salad
This Spring Veggie Quinoa Salad is so much more than a recipe. It’s a reminder that the most joyful food often comes from simple, seasonal ingredients combined with a little bit of intention. It’s about celebrating the bright, hopeful energy of spring and letting that sunshine nourish you from the inside out.
Making this dish is an act of self-care—a promise to your body to feed it something vibrant and full of life. But it’s also a lesson in flexibility. Cooking isn’t about rigid perfection; it’s about tasting, adjusting, and making it your own. Forgot the Dijon? Toss in some chickpeas? Used basil instead of mint? You haven’t made a mistake. You’ve created your own version, and that’s where the real magic happens.
I hope this salad becomes a staple in your kitchen—a trusted friend for busy weekdays, a showstopper for gatherings, and a tangible taste of the season’s beauty. Most of all, I hope it reminds you that cooking can be light, playful, and deeply satisfying. No fancy skills required, just a willingness to embrace fresh flavors and the simple joy of creating something good.
Now, I’d love to hear from you! Did you add a special twist? Did it become your new favorite lunch? Share your creations and stories. After all, the best recipes are the ones we make and share together.
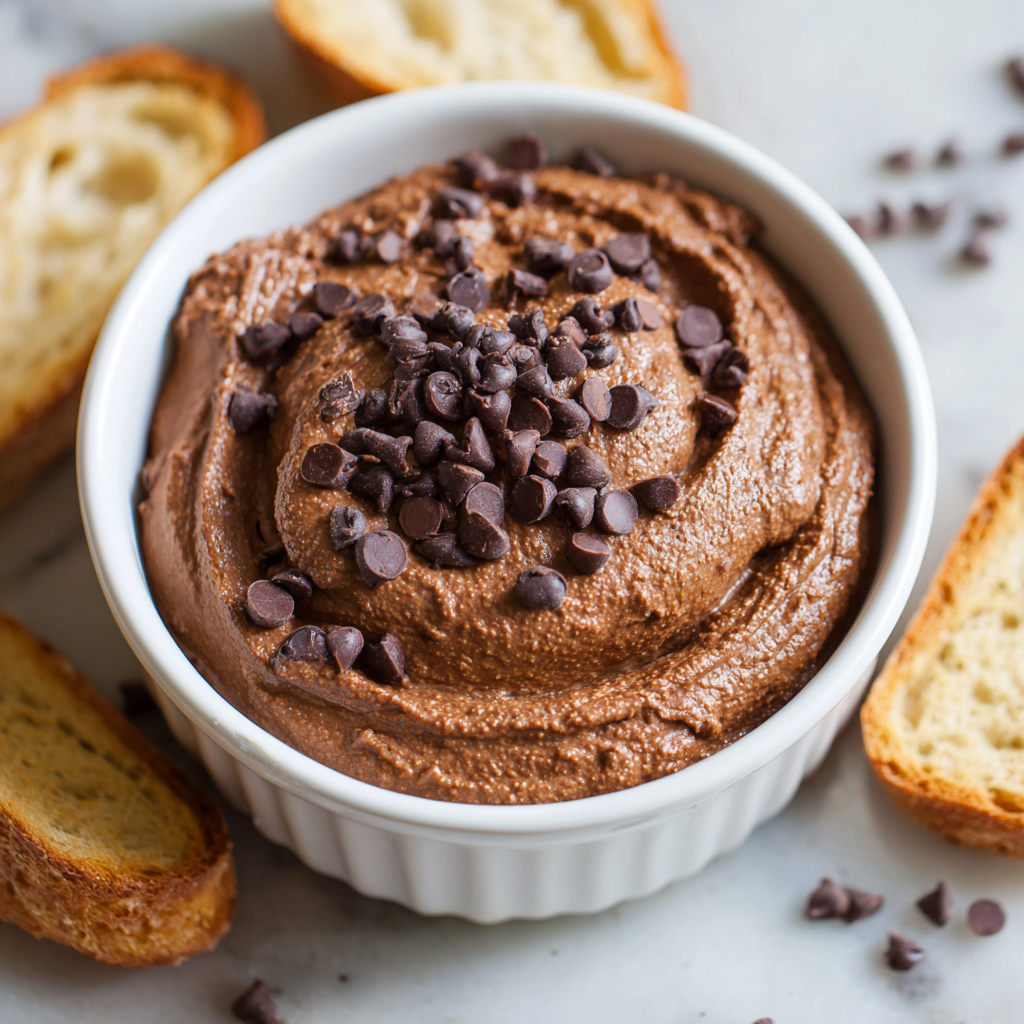
Creamy Chocolate Hummus : Healthy Dessert Dip in 5 Minutes
Creamy Chocolate Hummus: Your New Favorite Healthy Dessert Dip (Ready in 5 Minutes!)
Hey friends, Olivia here! Let’s be real for a second. How many times have you stared into the fridge at 9 PM, craving something decadently chocolatey but also feeling that little nudge of, “Hey, maybe I should be a bit nicer to my body tonight”? You’re torn between a spoonful of straight-up frosting and a sad, plain apple. I’ve been there more times than I can count, usually covered in a light dusting of flour and determination.
Well, what if I told you there’s a magical, delicious middle ground? A dessert that feels like you’re diving into a bowl of brownie batter but is actually packed with plant-based protein and fiber? Enter my hero: Creamy Chocolate Hummus. I know, I know. “Chocolate” and “hummus” in the same sentence might make you do a double-take. But trust me—this isn’t your savory, garlicky lunch spread. This is a smooth, rich, swoon-worthy dessert dip that’s about to revolutionize your snack game.
Imagine the creamiest, most chocolatey dip you can think of. Now imagine it takes just five minutes to make, requires zero baking, and uses simple, wholesome ingredients you probably already have in your pantry. That’s the magic we’re creating today. It’s perfect for dipping strawberries, pretzels, or graham crackers, spreading on toast, or (my personal favorite) eating straight from the spoon with zero shame. It’s kid-friendly, party-perfect, and so good for you that you can enjoy it completely guilt-free. So, tie on your apron (the messy one is fine—that’s where the love is!), and let’s make dessert dreams come true.
The Skeptic’s Guide to Chocolate Hummus: A Kitchen Story
I’ll never forget the first time I served this to my best friend, Maya. We were having one of our classic “girls’ night in” sessions, which always involves a mountain of snacks and a lot of solving the world’s problems. I brought out a bowl of this glossy, dark chocolate hummus surrounded by a rainbow of fruit. She took one look, raised a perfectly sculpted eyebrow, and said, “You’ve finally lost it, Bennett. You put beans in dessert.”
I just smiled and handed her a strawberry. “Try it. For me.” With the skepticism of someone about to eat a mystery cafeteria meal, she dipped. The silence that followed was punctuated only by the sound of her crunching the berry. Then her eyes went wide. “Okay. What is this sorcery?” she mumbled, already reaching for a pretzel rod. Ten minutes later, the bowl was half empty, and she was texting her husband to tell him to “bring more strawberries STAT.” That’s the power of this recipe. It turns skeptics into believers, one delicious dip at a time. It’s now a non-negotiable staple at all our gatherings, and the story never fails to make me laugh. It reminds me that the best kitchen adventures often start with a little bit of weird and a whole lot of delicious.
Your Kitchen Cast: What You’ll Need
Here’s the beautiful part: this recipe is a pantry superhero. No fancy, hard-to-find ingredients here. Let’s break down what goes into this creamy dream and why each one matters.
- 1 (15 oz) can chickpeas, drained and rinsed – The star of the show! Don’t worry, you won’t taste them. They provide an incredibly creamy, protein-packed base. Chef’s Insight: For the absolute smoothest texture, take an extra 30 seconds to pop the skins off the chickpeas by gently pinching them. It’s a game-changer! Canned is perfect for convenience, but if you cook your own from dry, that works too.
- ¼ cup unsweetened cocoa powder – This is where the deep, rich chocolate flavor comes from. Use a good-quality one for the best taste. Chef’s Tip: Don’t sub with hot chocolate mix—it has sugar and other additives that will throw off the flavor and sweetness.
- ¼ cup pure maple syrup – Our natural sweetener. It adds a lovely, subtle caramel note that plays so nicely with chocolate. Substitution Tip: Agave nectar, date syrup, or even honey (if not vegan) work beautifully here. Start with ¼ cup and add more to taste after blending.
- 2 tbsp nut butter – The secret weapon for richness and to help emulsify everything into silkiness. I love tahini for a more neutral, classic hummus background, or almond butter for a slight marzipan note. Peanut butter gives it a “peanut butter cup” vibe! Allergy Alert: Sunflower seed butter is a perfect nut-free swap.
- 2 tbsp plant milk – This is our texture tuner. I use unsweetened almond or oat milk. Chef’s Hack: Start with 2 tbsp, but have more on standby. The amount you need can depend on your chickpeas and nut butter. Add a splash at a time until you hit that perfect, dip-able consistency.
- 1 tsp pure vanilla extract – The flavor enhancer. It rounds out all the other ingredients and makes the chocolate taste even more chocolatey. Never skip the vanilla!
- 1 pinch of salt – Crucial! Salt makes flavors pop. It balances the sweetness and heightens the chocolate. Think of it like in a chocolate chip cookie.
- Optional: 2–3 tbsp mini vegan chocolate chips – For a fun, textural surprise and extra chocolatey pockets. I like mini chips because they distribute better, but regular work too!
Let’s Make Magic: The 5-Minute Method
Ready? This is so easy, you’ll have it memorized after one try. Let’s walk through it step-by-step, with all my favorite kitchen hacks along the way.
Step 1: The Great Rinse. Open your can of chickpeas and dump them into a colander. Give them a really good rinse under cold water. This washes away the starchy liquid (aquafaba) they’re packed in, which can give a beany aftertaste if left on. While you’re rinsing, feel free to do the “skin popping” trick I mentioned—it’s a mini meditation that leads to ultimate creaminess! Shake off the excess water and let them drain for a moment.
Step 2: The Processor Party. Grab your food processor. (A high-speed blender works in a pinch, but you may need to stop and scrape more often). Add all of your ingredients to the bowl: the rinsed chickpeas, cocoa powder, maple syrup, nut butter, plant milk, vanilla, and that all-important pinch of salt. Hold off on the chocolate chips for now—they’re the grand finale.
Step 3: Blend to Bliss. Pop the lid on securely and start blending! Start on low, then ramp up to high. Let it run for a good 60 seconds. Stop, take off the lid, and use a spatula to scrape down the sides and any bits hiding at the bottom. This is the key to a uniformly smooth hummus. Put the lid back on and blend again for another 60-90 seconds. Pause and check. Does it look like the world’s smoothest, most luscious brownie batter? If it seems a little thick or grainy, add one more tablespoon of plant milk and blend again. Repeat until it’s perfectly silky.
Step 4: Taste & Tweak (The Best Part!). This is where you make it yours. Grab a clean spoon and have a taste. Want it sweeter? Add another half tablespoon of maple syrup and blend for 10 seconds. Want it more chocolatey? You can add another teaspoon of cocoa powder (just know it might thicken it up). Need it creamier? Another splash of milk! Adjust until it makes your taste buds sing.
Step 5: The Fun Mix-In. If you’re using the chocolate chips, now’s the time. Transfer the hummus to a mixing bowl and fold them in gently with your spatula. This ensures they stay whole and give you those little bursts of chocolate. If you just pulse them in the processor, they’ll get chopped up.
Step 6: Serve or Savor. You can absolutely dive in right now—it’s delicious at room temperature. But for the best flavor and a slightly thicker texture, I love popping it in an airtight container in the fridge for at least 30 minutes. This lets the flavors really get to know each other and marry into something spectacular.
How to Serve & Swoon
Presentation is half the fun! I love serving this in a shallow, beautiful bowl. For a rustic look, use the back of a spoon to make a few decorative swirls on top. A tiny drizzle of extra maple syrup and a sprinkle of flaky sea salt or cacao nibs makes it look like it came from a fancy café. Now, surround it with an array of dippers! My go-to lineup includes: fresh strawberry halves, apple slices, banana coins, pretzel rods or twists, graham crackers, rice cakes, or even shortbread cookies. For a next-level breakfast, spread it thickly on whole-wheat toast or swirl it into your morning oatmeal. The possibilities are endless!
Get Creative: Flavor Twists & Swaps
Once you’ve mastered the basic recipe, the kitchen playground opens up! Here are a few of my favorite riffs:
- Mocha Madness: Add 1-2 teaspoons of instant espresso powder or finely ground coffee to the food processor. It deepens the chocolate flavor incredibly.
- Orange Dream: Add the zest of one small orange and a drop of orange extract along with the vanilla. A classic, elegant chocolate-orange combo.
- Peppermint Patty: Swap the vanilla for ¼-½ teaspoon of peppermint extract. Perfect for the holidays!
- Cookie Dough Delight: After blending, fold in a handful of vegan mini chocolate chips and a tablespoon or two of oat flour or almond flour. It thickens it up to a more authentic “cookie dough” texture.
- Protein Power-Up: Add a scoop of your favorite chocolate or vanilla plant-based protein powder. You may need an extra splash of milk to compensate for the dryness.
Olivia’s Kitchen Notes
This recipe has been on quite a journey in my kitchen! The first version I ever made was… well, let’s just say it had the texture of slightly sweet cement. I learned that the liquid components are everything—don’t be afraid to add that extra milk to get it moving in the processor. Also, I used to skip the salt, thinking “it’s a dessert, why salt?” BIG mistake. That one pinch is the difference between “yum” and “WOW.”
A funny story: My husband, who is a self-proclaimed “savory hummus purist,” once caught me eating this straight from the food processor bowl. He gave me the same side-eye Maya did. I handed him the spatula. He licked it. Then he took the bowl. Moral of the story? Don’t judge a dip by its main ingredient. This one’s a heart-stealer.
Your Questions, Answered!
Q: My hummus is grainy, not smooth. What did I do wrong?
A: Don’t worry! This is usually one of two things. First, your food processor might just need more time. Keep blending, stopping to scrape, and blending again. It can take a few minutes to get perfectly smooth. Second, chickpea skins. If you didn’t peel them, they can contribute to a grainier texture. Next time, try the skin-popping trick, or simply blend for a bit longer—the power of persistence!
Q: Can I make this without a food processor or blender?
A: Honestly, to get that signature creamy-smooth texture, a food processor or high-speed blender is essential. A regular blender might work if you’re patient and scrape constantly. Mashing by hand won’t give you the right consistency—it’ll be more like a chunky chocolate chickpea mash (which… might have its own rustic charm, but it’s not this dip!).
Q: How long does it keep in the fridge?
A> Stored in an airtight container, it stays fresh and delicious for up to 5-7 days. The flavor actually gets better after the first day! You may notice it thickens in the fridge. If it gets too thick for your liking, just stir in a teaspoon of plant milk to loosen it up before serving.
Q: Is it really sweet enough with only ¼ cup of maple syrup?
A> For most adults, yes! The natural sweetness of the maple syrup combined with the rich chocolate creates a perfectly balanced, not-too-sweet dessert. But sweetness is so personal! This is why the “taste and tweak” step is vital. For a kid’s party or a bigger sweet tooth, feel free to add another tablespoon. You’re the boss of your blender!
Creamy Chocolate Hummus : Healthy Dessert Dip in 5 Minutes
Description
Hey friends! If you’ve ever wanted something rich and chocolatey but still light enough to enjoy without guilt, this Creamy Chocolate Hummus is for you. It’s smooth, sweet, and tastes like brownie batter—yet it’s made with simple pantry ingredients and packed with plant-based goodness. Best of all, it comes together in just 5 minutes with no baking required. Perfect for snacking, sharing, or sneaking spoonfuls straight from the bowl.
Ingredients
-
1 (15 oz / 425 g) can chickpeas, drained and rinsed
-
¼ cup unsweetened cocoa powder
-
¼ cup pure maple syrup (or to taste)
-
2 tablespoons nut butter (tahini, almond butter, or peanut butter)
-
2 tablespoons plant milk (almond, oat, or soy), plus more as needed
-
1 teaspoon vanilla extract
-
1 small pinch of salt
-
Optional: 2–3 tablespoons mini chocolate chips
Instructions
-
Rinse the chickpeas well under cold water and drain thoroughly.
-
Add all ingredients (except chocolate chips) to a food processor or high-speed blender.
-
Blend until very smooth, scraping down the sides as needed. If it’s too thick, add 1 tablespoon of plant milk at a time until creamy.
-
Taste and adjust sweetness or cocoa if needed.
-
Stir in chocolate chips if using.
-
Serve immediately, or chill for 30 minutes for a thicker texture.
Notes
-
For extra smooth hummus: Gently remove the skins from the chickpeas before blending.
-
Don’t skip the salt: It enhances the chocolate flavor and balances sweetness.
-
Sweetness is personal: Start with ¼ cup maple syrup and add more if needed.
-
Storage: Keep in an airtight container in the fridge for up to 5–7 days. Stir in a splash of milk if it thickens.
Nutritional Info (A Note from Olivia)
While I’m not a dietitian, I love knowing that what I’m eating fuels my body and my joy. This recipe is a fantastic source of plant-based protein and fiber from the chickpeas, and using natural sweeteners and cocoa powder means you’re avoiding refined sugars and processed ingredients. It’s a treat you can feel genuinely good about. A standard 2-tablespoon serving has approximately: ~100 calories, 3g protein, 14g carbs, 4g fat, and 3g fiber. Remember, this is an estimate—the exact numbers can vary based on your specific ingredients and any adjustments you make!
Final Thoughts
There’s something quietly profound about making cabbage rolls from scratch. In our fast-paced world, taking the time to carefully peel, fill, and roll each bundle is a deliberate act of care—for yourself and for anyone you share them with. This isn’t just cooking; it’s creating edible heirlooms.
These rolls carry the weight of history and the warmth of personal stories, like the ones from my Nana’s kitchen. They teach us patience (yes, even when a leaf tears), reward our effort with incredible flavor, and fill our homes with an aroma that promises comfort. They’re proof that the most satisfying meals often come from humble ingredients treated with respect and a little bit of love.
Whether you’re recreating a family tradition or starting a new one, you’re not just making dinner. You’re crafting an experience—a cozy, hearty, and deeply nourishing centerpiece for the table. So, embrace the process, enjoy the simmering anticipation, and take pride in that first perfect bite. You’ve earned it.
Here’s to the classics. May they always have a place in our hearts and on our tables.
With a full heart and an even fuller baking dish,
Olivia
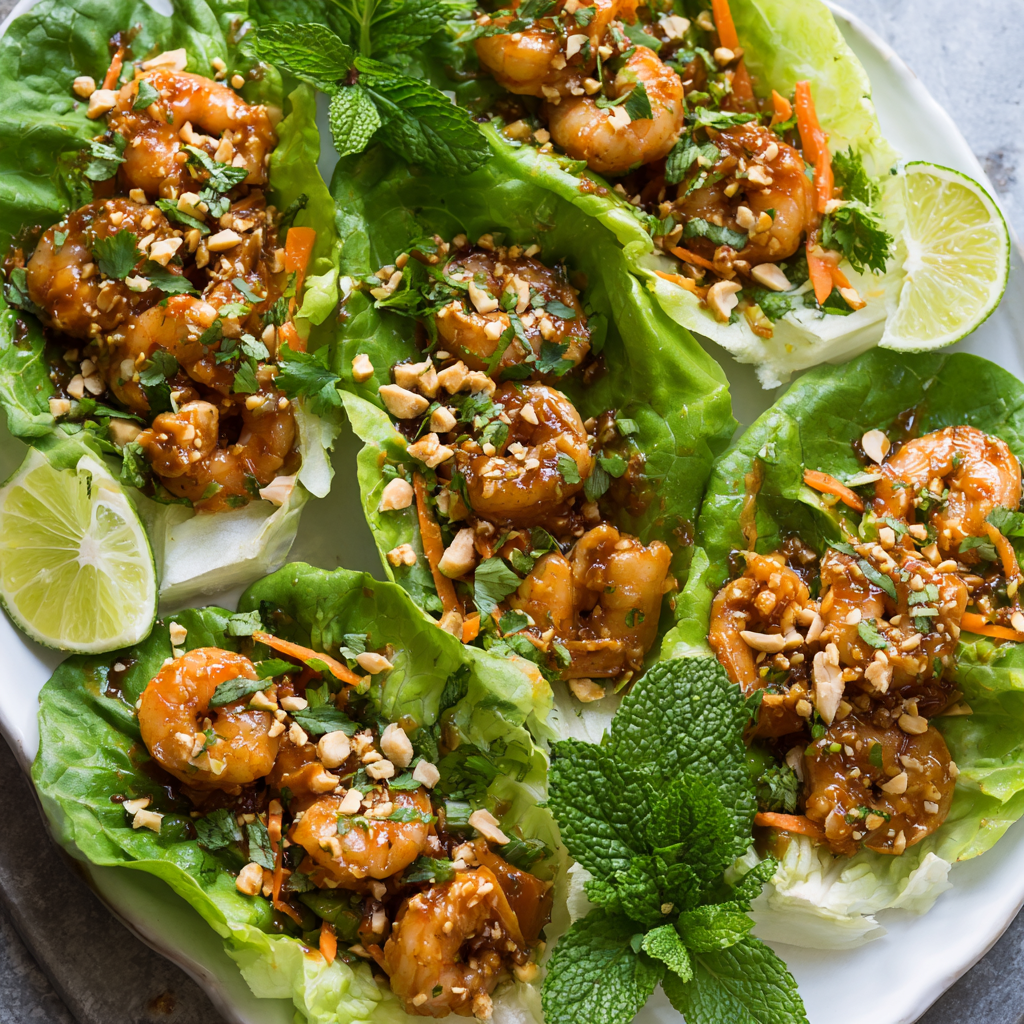
Thai Shrimp Lettuce Wraps : Fresh, Flavorful & Ready in 20 Minutes
Let’s Make Dinner the Best Part of Your Day (In 20 Minutes Flat!)
Picture this: it’s been a long day. You’re standing in front of the fridge, the “what’s for dinner?” question looming like a thundercloud. You want something that feels like a treat, something vibrant and exciting, but you absolutely do not have the energy for a culinary marathon. You want flavor, not fuss. My friend, I am so glad you’re here.
This is the exact moment my Thai Shrimp Lettuce Wraps were born for. They are my go-to, my secret weapon, my answer to the midweek meal slump. In the time it takes to scroll through takeout menus and debate with your family, you can have a fresh, healthy, and explosively flavorful dinner on the table. We’re talking sweet, savory shrimp glazed in a tangy sauce, tucked into crisp, cool lettuce leaves, and loaded with crunchy peanuts and confetti-bright herbs. Every bite is a perfect little package of texture and taste.
This isn’t just a recipe; it’s a feeling. It’s the feeling of lightness after a satisfying meal. It’s the fun of everyone building their own perfect wrap at the table. It’s the joy of discovering that “healthy” and “incredibly delicious” are absolutely not mutually exclusive. So, tie on that apron (messy is welcome here!), grab a bowl, and let’s turn 20 minutes and a handful of simple ingredients into your new favorite weeknight victory.
The Bangkok Street Food Stall That Stole My Heart (And Inspired This Recipe)
This recipe has a heartbeat, and it started on a sweltering, wonderfully chaotic night in Bangkok about five years ago. Jet-lagged but buzzing with excitement, I stumbled upon a tiny, neon-lit street food stall, just a woman, a single burner, and a cloud of the most incredible aroma. She was deftly tossing shrimp in a wok, the sizzle harmonizing with the hum of motorbikes. With a few swift motions, she scooped the glistening shrimp into lettuce leaves, added a handful of herbs and a squeeze of lime, and handed it to me on a piece of wax paper.
I took that first bite standing on the busy sidewalk, and my entire concept of “fast food” was rewritten. It was alive—fresh, spicy, sweet, salty, and herbaceous all at once. It was pure, unadulterated joy in edible form. I must have gone back three nights in a row. When I returned home, that flavor memory was tattooed on my taste buds. My mission became clear: recreate that magic in my own kitchen, using ingredients I could find easily, and making it simple enough for any Tuesday night. After many happy (and delicious) experiments, this wrap was born. It’s my edible postcard from that trip, and I’m so thrilled to share it with you.
Your Flavor Toolkit: Ingredients & Why They Matter
Great recipes are built on understanding your ingredients. Here’s everything you’ll need and why each one plays a starring role.
- 1 lb (450g) Shrimp, peeled & deveined: The star of the show! I prefer large (31/40 count) for a hearty bite. Chef’s Tip: For the best texture, pat your shrimp very dry with paper towels before cooking. This ensures a beautiful sear instead of a steam. Thaw frozen shrimp overnight in the fridge for best results.
- 1 tbsp Oil: A neutral oil like avocado or grapeseed oil is perfect for its high smoke point. Olive oil works in a pinch, but can burn at higher heats.
- 1 tbsp Soy Sauce: Our salty, umami backbone. For a gluten-free version, tamari or coconut aminos are fantastic 1:1 swaps.
- 1 tbsp Fish Sauce: Don’t be scared! This is the secret weapon of Southeast Asian cooking. It adds an irreplaceable depth and savory complexity. Chef’s Insight: It won’t taste “fishy” in the final dish, I promise. It just makes everything taste more.
- 1 tbsp Honey or Brown Sugar: The sweet balance to our salty and tangy flavors. Honey gives a brighter sweetness, brown sugar a deeper, more caramel note. Agave nectar works too!
- 1 tsp Sriracha (Optional): The gentle heat elevator. Add it if you like a little warmth! You can also use chili garlic sauce or a pinch of red pepper flakes.
- 2 Garlic Cloves, minced: Fresh is best here! The quick cook in the pan mellows its bite and creates an incredible aroma.
- Juice of 1/2 Lime: Fresh lime juice is non-negotiable for that bright, tangy finish. We’ll use the other half for serving.
- Butter Lettuce or Romaine Leaves: Your edible vessel! Butter lettuce (“living lettuce” with the roots on) is my first choice for its delicate, cup-like shape and sweet flavor. Romaine hearts are a great, crunchy backup.
- 1/4 cup Chopped Peanuts: For essential crunch and nutty richness. If you have a peanut allergy, roasted sunflower seeds or chopped cashews are wonderful.
- 1/4 cup Shredded Carrots: For color, a touch of sweetness, and more crunch. Buy pre-shredded to save time, or use a peeler to make ribbons.
- Fresh Herbs: Cilantro, Mint, or Thai Basil: The “confetti” that makes this dish sing! Use one or all three. They add a layer of freshness that dried herbs just can’t match.
- Lime Wedges for Serving: An extra squeeze at the end wakes up all the flavors on your plate.
Let’s Get Cooking: Your Foolproof, Flavor-Packed Steps
Ready? Let’s turn these ingredients into magic. I’ll walk you through every step with my favorite kitchen hacks.
Step 1: The “Mise en Place” (A Fancy Term for Getting Organized)
Before you even turn on the stove, do this! It makes the 10-minute cook time a breeze. Peel and devein your shrimp if needed, mince the garlic, chop the peanuts, shred the carrots, pick your herb leaves, and juice that half lime. Separate your lettuce leaves, give them a gentle rinse, and lay them out on a kitchen towel to dry. Chef’s Hack: Having everything prepped and in little bowls (your “stations”) means you can cook without stress or scrambling. This is the secret to feeling like a pro!
Step 2: The Glaze & The Sizzle
Grab your largest skillet (a non-stick or well-seasoned cast iron is perfect) and place it over medium-high heat. Add the oil and let it heat for just 30 seconds—you should see it shimmer. Now, add your impeccably dried shrimp in a single layer. Let them sear untouched for about 90 seconds. This builds flavor! Then, add the minced garlic right over the shrimp and give everything a quick stir. The garlic will become fragrant in seconds.
Step 3: The Flavor Bomb
This is the fun part. Pour in the soy sauce, fish sauce, honey (or brown sugar), and sriracha (if using). The second it hits the hot pan, it’ll bubble and foam beautifully. Immediately squeeze in the fresh lime juice. Use tongs or a spoon to toss the shrimp constantly in this glossy, rapidly reducing sauce. Chef’s Tip: Don’t walk away! Shrimp cook fast. You’re looking for them to curl into a loose “C” shape and turn opaque pink, which will take just 2-3 more minutes. The sauce will thicken and coat each shrimp in a sticky, gorgeous glaze.
Step 4: The Rest (The Hardest 2 Minutes!)
As soon as the shrimp are cooked, turn off the heat and transfer them to a clean plate. Do not leave them in the hot pan! Let them rest for 2 minutes. This allows the juices to redistribute, guaranteeing a tender, not rubbery, bite. This tiny pause makes a huge difference.
Step 5: The Grand Assembly
Take your prepared lettuce leaves and arrange them on a big platter or individual plates. Spoon the warm, glazed shrimp into the leaves. Top with a pinch of shredded carrots, a generous sprinkle of fresh herbs, and a final shower of chopped peanuts. Don’t be shy! The toppings are what make each bite an adventure.
How to Serve & Savor
Presentation is part of the fun! I love serving this family-style. Pile the glazed shrimp in the center of a large platter, surround them with the lettuce “cups,” and scatter the carrots, herbs, and peanuts in little bowls around it. Put a bowl of lime wedges in the center. Encourage everyone to build their own perfect wrap—it’s interactive, customizable, and there are no wrong answers. For a complete meal, serve alongside a simple cucumber salad or a bowl of steamed jasmine rice for those who want a heartier base. Don’t forget extra napkins; the best bites are the juicy ones!
Make It Your Own: Delicious Twists & Swaps
- Chicken or Tofu Version: Swap the shrimp for 1 lb of ground chicken, turkey, or crumbled firm tofu. Cook the protein through before adding the sauce ingredients.
- “Peanutty” Power-Up: Whisk 1 tablespoon of creamy peanut butter into the sauce mixture before adding it to the pan for an extra-rich, nutty dimension.
- Mango Salsa Topping: Dice a ripe mango and mix it with some red onion, cilantro, and lime juice for a sweet-and-spicy fruit salsa to spoon over the top.
- Low-Carb “Noodle” Bowl: Skip the lettuce wraps and serve the shrimp and toppings over a bed of zucchini noodles or thinly sliced cabbage for a fork-and-knife meal.
- Pork & Mushroom Blend: Use half ground pork and half finely chopped mushrooms for a deeply savory, umami-packed filling that’s also budget-friendly.
From My Kitchen to Yours: A Few Final Thoughts
This recipe has evolved from that initial Bangkok-inspired attempt into my most requested “fast and fancy” dish. I’ve made it for book club, for last-minute guests, and for countless “just me” dinners. The biggest lesson? It’s incredibly forgiving. Once, I realized I was out of fish sauce mid-cook and used a splash of Worcestershire sauce mixed with a bit of water as a panic substitute. Was it authentic? Nope. Was it still delicious? Absolutely! It taught me that the spirit of this dish—fresh, fast, flavorful—is what matters most. Don’t let perfection be the enemy of a really great dinner. Have fun with it, taste as you go, and adjust the sweet, salty, or spicy notes to suit your palate. That’s what home cooking is all about.
Your Questions, Answered
Q: My shrimp turned out rubbery. What happened?
A: The most common culprit is overcooking. Shrimp cook in just 3-5 minutes total. As soon as they curl and turn pink, they’re done! Also, ensure you’re not crowding the pan. If the shrimp are piled on top of each other, they’ll steam instead of sear. Cook in batches if necessary.
Q: Can I make the filling ahead of time?
A> You can prep the shrimp mixture up to a day ahead, but I recommend storing the cooked, glazed shrimp separately from the fresh toppings. Reheat the shrimp gently in a skillet or microwave, and add your fresh herbs, peanuts, and lime right before serving to keep their textures vibrant.
Q: My lettuce leaves are wilting/tearing when I try to fill them. Help!
A> Choose the sturdiest, cup-shaped leaves from the head of lettuce. Romaine hearts are particularly hardy. Also, make sure the leaves are completely dry after washing, as water makes them more slippery and prone to tearing. Pat them gently with a kitchen towel.
Q: Is there a substitute for fish sauce for vegetarians?
A> Yes! Soy sauce or tamari with a tiny pinch of white pepper can work in a pinch. For a closer flavor, look for a vegan “fish sauce” made from seaweed or mushrooms at Asian grocery stores or online. Liquid aminos are another good option.
Thai Shrimp Lettuce Wraps : Fresh, Flavorful & Ready in 20 Minutes
Description
Thai Shrimp Lettuce Wraps
Sweet, savory, tangy shrimp wrapped in crisp lettuce with crunchy peanuts and fresh herbs. Ready in 20 minutes!
Ingredients
For the Shrimp
-
1 lb (450g) shrimp, peeled & deveined
-
1 tbsp oil (neutral oil like avocado or grapeseed)
-
1 tbsp soy sauce (or tamari for gluten-free)
-
1 tbsp fish sauce (or vegan substitute: soy sauce + pinch of white pepper)
-
1 tbsp honey or brown sugar
-
1 tsp sriracha (optional)
-
2 cloves garlic, minced
-
Juice of ½ lime
For the Wraps
-
Butter lettuce or romaine leaves, washed & dried
-
¼ cup chopped peanuts (or sunflower seeds/cashews)
-
¼ cup shredded carrots
-
Fresh herbs: cilantro, mint, and/or Thai basil
-
Lime wedges, for serving
Instructions
-
Prep Ingredients:
Peel/devein shrimp, mince garlic, chop peanuts, shred carrots, pick herbs, and wash/dry lettuce leaves. Juice the lime. -
Cook Shrimp:
Heat oil in a large skillet over medium-high heat. Add shrimp in a single layer. Sear 1–2 minutes per side until just pink and opaque. -
Add Flavor:
Add garlic, soy sauce, fish sauce, honey, sriracha, and lime juice. Toss shrimp in sauce for 2–3 minutes until glazed and cooked through. Remove from heat and let rest 2 minutes. -
Assemble Wraps:
Spoon shrimp into lettuce leaves. Top with shredded carrots, fresh herbs, and chopped peanuts. Serve with lime wedges on the side.
Notes
-
Protein Swap: Use chicken, turkey, ground pork, or tofu instead of shrimp.
-
Nutty Boost: Stir 1 tbsp peanut butter into the sauce for extra richness.
-
Fruit Twist: Add diced mango for a sweet-spicy kick.
-
Low-Carb Option: Serve over zucchini noodles or sliced cabbage instead of lettuce wraps.
-
Advance Prep: Cook shrimp ahead; reheat gently and add fresh toppings just before serving.
Nutritional Information (Approximate, per 2 wraps)
Calories: 230 | Protein: 22g | Carbohydrates: 10g | Dietary Fiber: 2g | Total Fat: 12g | Sodium: 880mg
Note: Nutritional information is an estimate provided for convenience and may vary based on specific ingredients used and portion sizes.
Final Thoughts: Your Weeknight, Reimagined
And that’s it. In less time than it takes for delivery to arrive, you’ve created something vibrant, nourishing, and alive with flavor. These Thai Shrimp Lettuce Wraps are more than just a quick dinner; they’re a mindset shift. They prove that a meal doesn’t need to be heavy or complicated to be completely and utterly satisfying.
As you sit down to the colorful, build-your-own platter, take a moment. This is the reward—not just for your 20 minutes in the kitchen, but for choosing to nourish yourself and your people with something joyful. Listen to the crunch, savor the sweet-salty glaze, feel the bright pop of herbs. This is what it feels like to make dinner the best part of your day.
Remember, this recipe is a blueprint, not a rulebook. Cook the shrimp until they’re just perfect for you. Pile on the extra herbs. Add more chili. Make it exactly what you crave. That’s the real magic of home cooking: it’s always, ultimately, for you.
So the next time that “what’s for dinner?” cloud rolls in, I hope you remember this feeling. I hope you remember that a world of flavor is just a skillet, a few fresh ingredients, and a confident 20 minutes away. You’ve got this.
Now, go enjoy your well-earned feast. You deserve it.
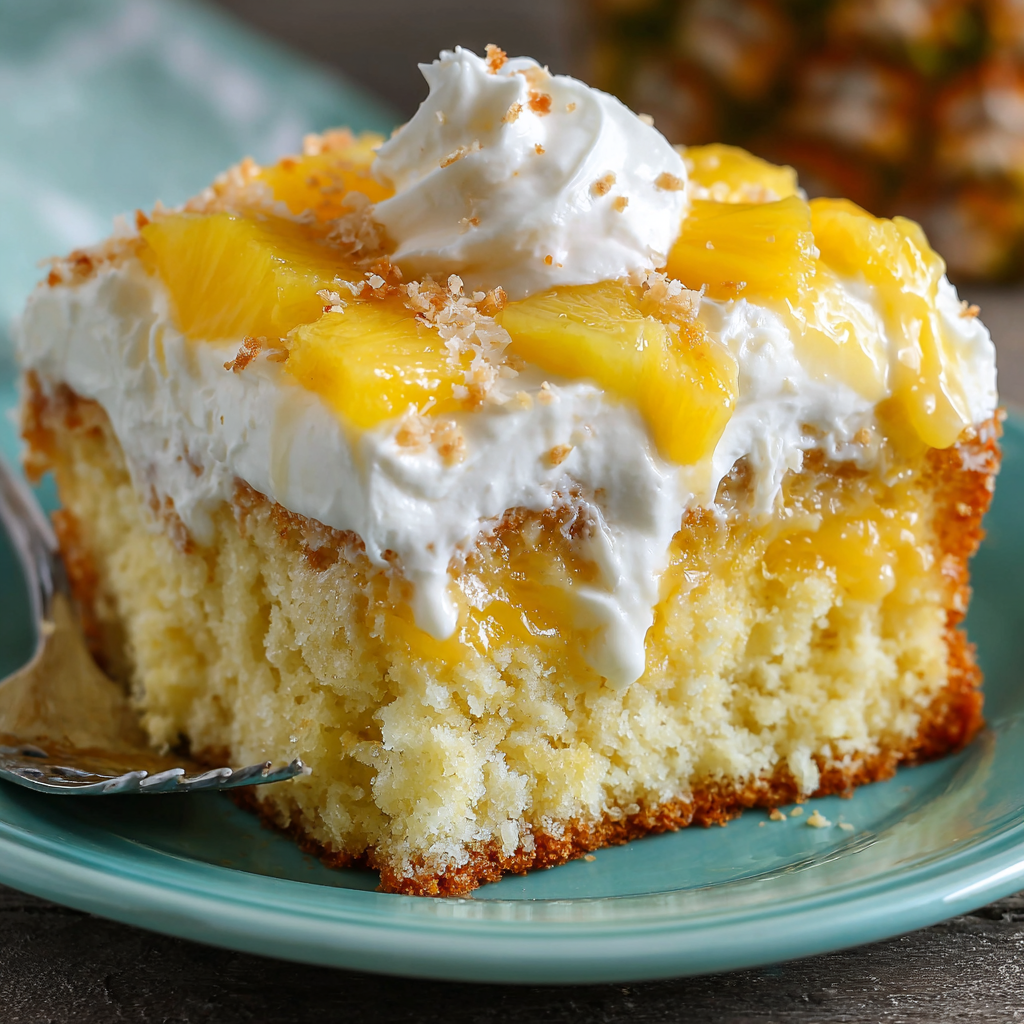
Easy Hawaiian Pineapple Cake with Cream Cheese Frosting
Sunshine in Every Slice: My Unbeatable Hawaiian Pineapple Cake
Hey there, friend! Come on in, tie on an apron, and let’s get something wonderfully sweet baking. If you’ve ever dreamt of a cake that tastes like a hug from a tropical breeze—moist, bursting with flavor, and topped with a cloud of creamy frosting—then you’re in for the happiest kind of kitchen magic today.
This isn’t just any cake. This is my go-to, never-fail, always-gets-raves Hawaiian Pineapple Cake. It’s the recipe I turn to when I need a guaranteed smile, whether it’s for a potluck, a birthday that snuck up on me, or just a Tuesday that deserves a little celebration. The secret? A whole can of crushed pineapple, juice and all, baked right into the batter. It creates an unbelievably tender crumb and a natural, sun-kissed sweetness that’s impossible to resist.
The best part? You can ditch the stand mixer and the fussy techniques. This is a glorious, one-bowl wonder. We’re talking ten minutes of prep, one pan to wash, and a kitchen that smells like a paradise picnic. It’s the kind of effortless baking that makes you look like a rockstar, and I’m so excited to share every tip and trick I’ve learned over the years. So, preheat that oven and let’s bake a slice of pure, unadulterated joy.
The Cake That Started It All: A Story of Sticky Fingers & Sweet Memories
This cake recipe is woven into the fabric of my family. It was my Grandma Louise’s absolute specialty, scribbled on a notecard stained with vanilla and butter. She called it her “Sunshine Cake,” and it made an appearance at every single family gathering, without fail.
My most vivid memory is of being about seven years old, standing on a wobbly stool next to her formica countertop. My job was to “help” by pouring the entire can of crushed pineapple into the big yellow mixing bowl. I remember the glorious *schlop* sound it made, and how she’d let me swipe a finger through the sweet, tangy juice before she stirred it all together. The anticipation while it baked was torture, but the reward was heaven: a warm, sticky corner piece she’d sneak me before dinner, whispering, “Our little secret.”
That cake wasn’t just dessert; it was the centerpiece. It was the reason we all lingered at the table a little longer, laughing and scraping the last bits of cream cheese frosting from our plates. It represented comfort, simplicity, and the profound joy of sharing something made by hand. Every time I bake it now, that scent transports me right back to her kitchen, and I feel that same rush of happiness. That’s the power of a truly great recipe—it feeds more than just your stomach.
Gathering Your Sunshine: Ingredients & Insights
Part of what makes this cake so magical is its simple, humble ingredient list. Each one plays a starring role. Here’s exactly what you’ll need and why it matters:
For the Cake:
- 2 cups all-purpose flour: The dependable foundation of our cake. I don’t recommend swapping for a whole-grain flour here, as it can make the cake dense. For a gluten-free version, a 1:1 gluten-free baking blend works beautifully!
- 2 cups granulated sugar: Yes, it’s two full cups. The pineapple juice adds acidity and moisture, but we need this sugar for structure, tenderness, and that perfect golden-brown top. Trust the process!
- 2 large eggs, at room temperature: Room temp eggs incorporate more evenly, giving us a uniform crumb. If you forget, just pop them in a bowl of warm water for 5 minutes.
- 1 teaspoon baking soda: This is our only leavener! It reacts with the acidic pineapple juice to create bubbles, making the cake rise beautifully. Make sure yours is fresh for the best lift.
- 1 teaspoon pure vanilla extract: The flavor enhancer. It rounds out the tropical notes with warm, cozy depth. Don’t skip it!
- 1 can (20 oz) crushed pineapple, UNDRAINED: This is the MVP, the star, the secret weapon! The juice provides all the necessary liquid and acidity, and the pulp gives every bite little bursts of flavor. Do not drain it—pour the whole glorious can in there.
For the Dreamy Cream Cheese Frosting:
- 1 package (8 oz) full-fat cream cheese, softened: Full-fat is non-negotiable for a silky, pipeable, non-runny frosting. Let it sit on the counter for at least an hour. The softer it is, the smoother your frosting will be.
- 1/2 cup (1 stick) unsalted butter, softened: Unsalted lets you control the salt level. Combined with the cream cheese, it creates a perfectly balanced, rich, and tangy base.
- 2 cups powdered sugar: Sift it if you have time! This prevents any little lumps in your otherwise velvety frosting.
- 1 teaspoon vanilla extract: A must for the frosting, too. It adds a lovely flavor bridge between the tangy frosting and the sweet cake.
- Optional Toppings: 1/2 cup chopped toasted walnuts for crunch, or 1/2 cup toasted shredded coconut for extra tropical vibes. Toasting nuts and coconut is a quick step that amplifies their flavor tenfold!
Let’s Bake! Your Foolproof Step-by-Step Guide
Ready? This is where the fun begins. I’ll walk you through each step with all my favorite chef hacks to ensure perfect results.
- Preheat & Prep: First, crank your oven to 350°F (175°C). This is the sweet spot for even baking. Grab your trusty 9×13-inch baking pan. Grease it generously with butter, cooking spray, or even a light coating of oil. I’m a butter loyalist for that extra flavor. Chef’s Tip: For ultimate non-stick insurance, grease the pan, then dust it with a light sprinkle of flour, tapping out the excess. Your cake will flip out (or rather, won’t flip out) perfectly.
- Mix the Magic (One Bowl!): In a large mixing bowl—I mean large, this batter is generous—simply combine the flour, sugar, eggs, baking soda, vanilla, and the entire can of pineapple with all its juice. Yes, you add everything at once! No separate wet and dry bowls needed. Use a sturdy wooden spoon or a rubber spatula and stir until you have a smooth, well-blended batter. It will be thick but pourable. Chef’s Hack: Don’t overmix! Once you stop seeing dry flour streaks, you’re done. Overmixing can develop gluten and lead to a tougher cake.
- Pan & Bake: Pour that beautiful, speckled batter into your prepared pan. Use your spatula to spread it into an even layer, nudging it gently into the corners. Slide it onto the center rack of your preheated oven. Now, set a timer for 30 minutes, but do NOT open the oven door before then. We need that steady heat to work its magic. Important Note: Ovens can vary. At 30 minutes, perform the toothpick test: insert a toothpick into the center of the cake. If it comes out with a few moist crumbs clinging to it, it’s perfect. If it comes out with wet batter, give it 3-5 more minutes. The cake is done when it’s golden brown on top and springs back lightly when touched.
- The Crucial Cool Down: This might be the hardest step! Once baked, place the pan on a wire cooling rack. You must let the cake cool completely in the pan before you even think about frosting. I mean it! If you frost a warm cake, that luscious cream cheese frosting will melt into a sad, runny puddle. Patience is a virtue that pays off in perfect slices. This usually takes about 1-2 hours.
- Make the Frosting Cloud: While the cake cools, make your frosting. In a medium bowl, use a hand mixer (or a stand mixer fitted with the paddle) to beat the softened cream cheese and butter together on medium speed for 2-3 minutes, until it’s completely smooth, pale, and fluffy. Scrape down the bowl. Add the vanilla and beat to combine. With the mixer on low, gradually add the sifted powdered sugar. Once incorporated, crank the speed to medium-high and beat for another minute until it’s gloriously creamy and spreadable. Pro Tip: If your kitchen is very warm, pop the finished frosting in the fridge for 15 minutes to firm up slightly before spreading.
- Frost & Finish: Once the cake is 100% cool, spread the frosting evenly over the top with an offset spatula or the back of a spoon. Get creative with swoops and swirls! Now’s the time to sprinkle on your toasted walnuts or coconut, if using. The frosting acts like delicious glue for those toppings.
Serving Your Slice of Paradise
This cake is a beautiful, homey masterpiece just as it is, served right from the pan. For serving, I love using a simple metal spatula or pie server to get clean slices. If you want to dress it up, garnish each plate with a thin, fresh pineapple ring or a few extra shreds of toasted coconut. It pairs magically with a cup of strong coffee to cut the sweetness, or a glass of cold milk for the ultimate nostalgic treat. For a dinner party, a scoop of vanilla bean ice cream or a dollop of barely-sweetened whipped cream alongside turns it into a truly decadent dessert.
Make It Your Own: Delicious Twists & Swaps
- Tropical Coconut Dream: Add 1 cup of sweetened shredded coconut to the cake batter. Frost as usual and top with toasted coconut for a double coconut punch.
- Piña Colada Version: Substitute 1 teaspoon of vanilla extract with 1/2 teaspoon of coconut extract in the cake AND the frosting. You’ll swear you’re on a beach.
- Nutty Crunch Delight: Fold 3/4 cup of chopped pecans or macadamia nuts into the batter before baking for texture in every bite.
- Dairy-Free/ Vegan Adaptation: Use flax eggs (2 tbsp ground flax + 5 tbsp water, set for 5 mins) for the eggs. For the frosting, use vegan cream cheese and plant-based butter. The cake itself is already accidentally dairy-free!
- Mini Cake Layers: Divide the batter between two greased 8-inch round pans and bake for 25-30 minutes. Let cool, then frost between layers and on top for a stunning layer cake.
From My Kitchen to Yours: Chef’s Notes
Over the years, this recipe has become my kitchen confidante—it never lets me down. I’ve learned a few things: First, the brand of pineapple doesn’t matter much, but do try to find one packed in 100% juice, not heavy syrup, for the best flavor. Second, if I’m bringing this to a picnic, I sometimes skip the frosting and instead, while the cake is still warm, I’ll poke holes all over the top with a fork and pour a simple glaze (1 cup powdered sugar mixed with 2-3 tbsp pineapple juice) over it. It soaks in and creates a fabulous, travel-friendly snack cake.
One funny story: I once accidentally used a can of pineapple chunks instead of crushed. In a panic, I just threw it in the blender for a pulse! It worked, but it was much more liquidy. The cake baked up extra moist and a bit sunk in the middle, but you know what? My friends dubbed it “Pineapple Pudding Cake” and fought over the gooey center pieces. There are no real mistakes here, just happy accidents!
Your Questions, Answered: FAQs & Troubleshooting
Q: My cake is very moist/soggy in the middle. What happened?
A: This almost always means it needed more baking time. Ovens vary, and a too-early toothpick test can be deceiving. Next time, make sure the top is uniformly golden brown and the cake springs back when pressed. If it’s consistently soggy, check your oven temperature with an independent thermometer—it might be running cool.
Q: Can I use fresh pineapple instead of canned?
A: I don’t recommend it for this specific recipe. Canned crushed pineapple is consistently soft and comes packed in the exact amount of sugary juice the batter chemistry needs. Fresh pineapple is more variable in sweetness and moisture, and its enzymes can prevent the cake from setting properly.
Q: My frosting is too runny. How can I fix it?
A> This usually happens if the cream cheese or butter was too warm. Immediately pop the whole bowl of frosting into the fridge for 20-30 minutes to firm up, then re-whip it. For future success, ensure your ingredients are softened but still cool to the touch, not oily or melty.
Q: Can I make this ahead of time?
A> Absolutely! You have options: 1) Bake the cake, cool completely, wrap the pan tightly in plastic wrap, and store at room temp for 1 day. Frost the day of serving. 2) Frost the entire cake, cover loosely (a cake carrier is perfect), and refrigerate for up to 2 days. Let it sit at room temperature for an hour before serving for the best texture and flavor.

Easy Hawaiian Pineapple Cake with Cream Cheese Frosting
Description
Hawaiian Pineapple Cake
Sunshine in every bite—moist, tropical, and topped with dreamy cream cheese frosting.
This cake is bursting with crushed pineapple, giving it natural sweetness and a tender, fluffy crumb. Perfect for birthdays, potlucks, or any day that deserves a tropical treat.
Ingredients
For the Cake
-
2 cups all-purpose flour
-
2 cups granulated sugar
-
2 large eggs, room temperature
-
1 tsp baking soda
-
1 tsp vanilla extract
-
1 can (20 oz) crushed pineapple, undrained
For the Cream Cheese Frosting
-
8 oz cream cheese, softened
-
½ cup (1 stick) unsalted butter, softened
-
2 cups powdered sugar, sifted if possible
-
1 tsp vanilla extract
Optional Toppings
-
½ cup chopped toasted walnuts
-
½ cup toasted shredded coconut
Instructions
-
Preheat & Prep:
Preheat oven to 350°F (175°C). Grease a 9×13-inch baking pan with butter or cooking spray. For extra insurance, lightly dust with flour. -
Mix the Batter:
In a large bowl, combine flour, sugar, eggs, baking soda, vanilla, and the entire can of pineapple (with juice). Stir gently until smooth. Do not overmix. -
Bake the Cake:
Pour batter into prepared pan, spreading evenly. Bake for 30–35 minutes. Test doneness with a toothpick; it should come out with a few moist crumbs but not wet batter. Golden brown on top is key. -
Cool Completely:
Place pan on a wire rack and let the cake cool completely (1–2 hours) before frosting. Frosting a warm cake will melt it. -
Make the Frosting:
In a medium bowl, beat cream cheese and butter until smooth and fluffy (2–3 minutes). Add vanilla. Gradually add powdered sugar and beat until creamy. Chill 15 minutes if too soft. -
Frost & Decorate:
Spread frosting evenly over the cooled cake. Sprinkle optional toasted walnuts or coconut on top.
Notes
-
Tropical Coconut Dream: Add 1 cup shredded coconut to the batter and top with toasted coconut.
-
Piña Colada: Substitute ½ tsp coconut extract for ½ tsp vanilla in both cake and frosting.
-
Nutty Crunch: Fold ¾ cup chopped pecans or macadamia nuts into the batter.
-
Mini Layer Cake: Divide batter between two 8-inch round pans, bake 25–30 minutes, and frost between layers.
-
Dairy-Free/Vegan: Use flax eggs and plant-based cream cheese and butter.
Nutritional Information*
*Please note: These values are approximate estimates calculated using online tools and will vary based on specific brands and optional toppings used.
- Prep Time: 10 minutes
- Cook Time: 35 minutes
- Total Time: 45 minutes (plus cooling)
- Servings: 12
Per Serving (approximate, without nuts/coconut): Calories: 390 | Fat: 17g | Saturated Fat: 10g | Carbohydrates: 55g | Fiber: 1g | Sugar: 42g | Protein: 4g
Final Thoughts: A Taste of Pure, Sun-Drenched Joy
This Hawaiian Pineapple Cake is more than just a dessert—it’s a passport to a simpler, sweeter time. It’s the alchemy of pantry staples transforming into something that feels like a celebration, embodying the warmth of shared memories and the effortless pleasure of home baking.
What makes this recipe truly special isn’t just its undeniable deliciousness or its incredibly easy, one-bowl method. It’s the way it consistently creates joy. It’s a humble cake that wears its heart on its sleeve (or rather, in its juicy, pineapple-speckled crumb). It asks for so little—no fancy techniques, no temperamental ingredients—and gives back so much: a moist, tender bite, a perfect balance of sweet and tangy, and the kind of comforting aroma that makes a house feel like a home.
Whether you’re baking it to continue a family tradition, to create a new one, or simply to brighten an ordinary day, this cake is a guaranteed success. It’s a testament to the fact that the most beloved recipes are often the simplest ones, passed down on stained notecards and perfected through years of happy repetition.
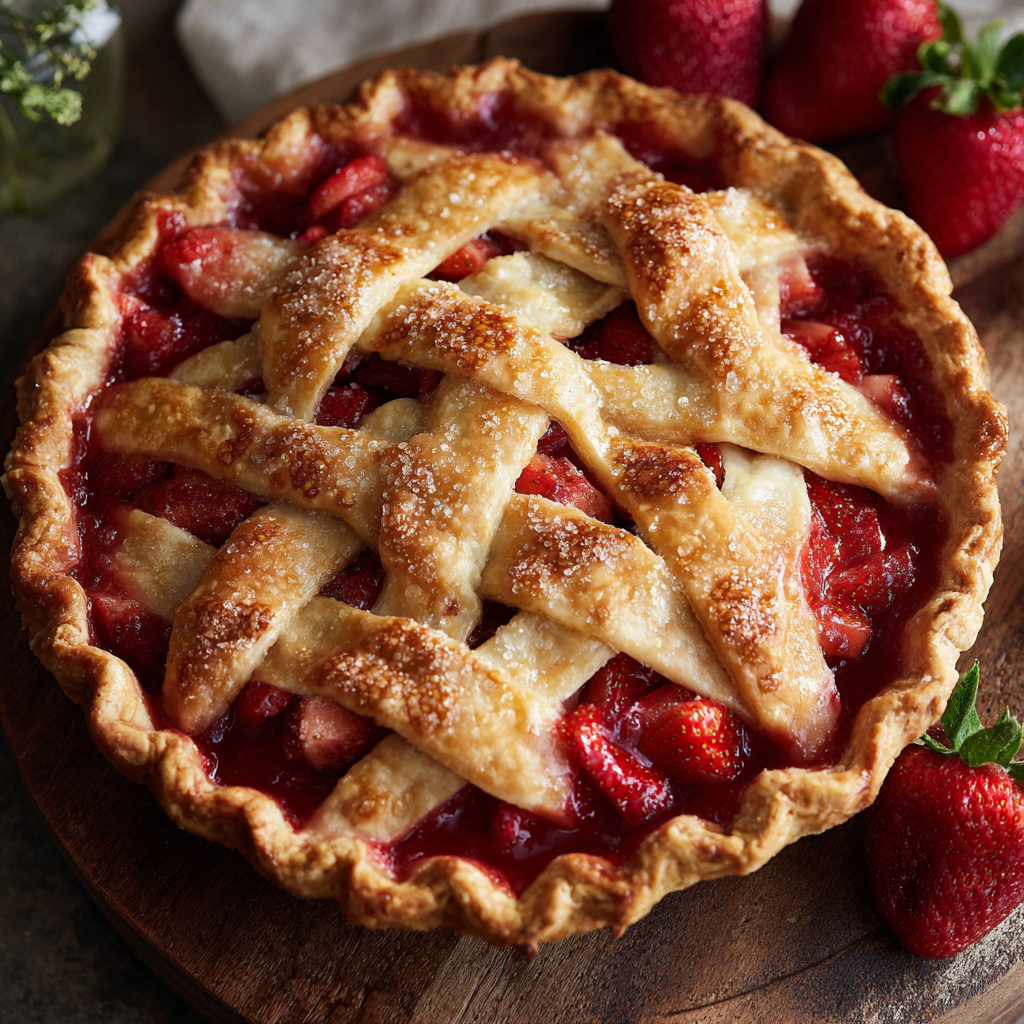
Strawberry Rhubarb Pie : A Sweet & Tangy Classic with a Flaky Crust
There’s a Certain Kind of Magic in a Strawberry Rhubarb Pie
Hey there, friend! Come on in, pull up a stool. Can you smell that? It’s the sweet, jammy perfume of strawberries getting cozy with the sharp, tangy whisper of rhubarb, all wrapped up in the warm, buttery embrace of a flaky crust. That, my friends, is the scent of pure, unadulterated joy. It’s the smell of late spring turning into early summer, of backyard gatherings, and of a dessert so iconic, it feels less like a recipe and more like a heirloom passed down through generations.
If you’ve never danced with rhubarb before, let me tell you—you’re in for a treat. On its own, it’s puckeringly tart, the vegetable (yep, it’s a veggie!) masquerading as a fruit. But pair it with sun-ripened strawberries and a little sugar, and something alchemical happens. They balance each other perfectly, creating a filling that’s both vibrant and deep, sweet and sophisticated, bubbling up into a glossy, ruby-red masterpiece.
Today, we’re not just making a pie. We’re creating a centerpiece. A conversation starter. A slice of nostalgia that’s somehow both comforting and exciting. Whether you’re a pie pro or your rolling pin still has the price tag on it, I’m here with you. We’re going to make the most beautiful, delicious Strawberry Rhubarb Pie, with a crust so good people will ask for your secret (spoiler: it’s butter and a little know-how). So tie on that apron—the messy ones are the best—and let’s bake some happiness.
The Pie That Started It All: A Lesson from Grandma Rose
My love affair with this pie began not in a fancy kitchen, but at my Grandma Rose’s laminate countertop, flour dusting the air like snow. I was maybe seven, standing on a wobbly wooden stool, tasked with the “very important job” of sprinkling sugar over the mountain of chopped rhubarb. I remember being suspicious of the celery-looking stalks. “You’re going to eat that?” I’d ask. She’d just wink and say, “Trust the process, Livvie.”
Her hands, quick and sure, would weave a lattice top that looked less like pastry and more like a golden tapestry. I was always in charge of the egg wash, painting it on with a little pastry brush, my tongue poking out in concentration. The magic happened in the oven. The worrying tartness of the rhubarb melted away with the strawberries, and that smell… it would float through her entire house, a siren’s call that promised something wonderful was coming.
The best part? She never cared about perfect crimps or even lattice strips. If the juice bubbled over, she’d call it “flavor caramelization.” Her lesson was clear: the love you stir into the bowl and the anticipation you share while it bakes are the most important ingredients. Every time I make this pie, I’m back on that stool, and I can almost hear her saying, “See? I told you to trust it.” That’s the heart of this recipe—it’s not about perfection, it’s about creating something real and wonderful to share.
Your Pie-Making Toolkit: A Guide to the Good Stuff
Great pies start with great ingredients. Here’s everything you’ll need, plus my little chef-y insights to help you understand the “why” behind the “what.”
For the Filling:
- 3 cups fresh strawberries, hulled and halved (or quartered if large) – Look for berries that smell sweet and fragrant. In a pinch, frozen whole strawberries (not in syrup!) work too—just thaw and drain them really well. Chef’s Insight: The strawberries bring the jammy sweetness and beautiful color. Halving them creates the perfect juicy bite without turning the filling to mush.
- 2½ cups chopped fresh rhubarb (½-inch pieces) – Use firm, crisp stalks. The color doesn’t affect flavor much, but the redder stalks make a prettier, pinker filling. Trim off any leafy tops (they’re toxic!). Substitution Tip: No fresh rhubarb? Frozen chopped rhubarb is a fantastic, year-round alternative. No need to thaw—just toss it in frozen and add an extra 1-2 tbsp of cornstarch.
- 1 cup granulated sugar – This is the sweet peacemaker between the tart rhubarb and sweet berry. If your strawberries are super sweet or your rhubarb is very mild, you can scale back to ¾ cup. Taste your fruit first!
- ¼ cup cornstarch – Our thickening hero. It creates a clear, glossy filling that lets the fruit’s color shine, unlike flour which can be cloudy. Chef’s Hack: For extra insurance against a runny pie, use up to ⅓ cup, especially if your fruit is super juicy.
- 1 tbsp fresh lemon juice – A bright spark! It enhances all the other flavors and keeps the fruit’s color vibrant. Always use fresh here—it makes a difference.
- ½ tsp pure vanilla extract – The flavor booster. It adds a warm, round depth that makes the pie taste “complete.”
- A generous pinch of salt – Never, ever skip this! Salt makes the sweet taste sweeter and balances the entire flavor profile.
For the Crust & Assembly:
- 1 recipe for a double pie crust – Use your favorite all-butter recipe (mine’s below in the notes!), or a good-quality store-bought crust to save time. No judgment here! Chef’s Creed: Cold butter = flaky layers. That’s the golden rule.
- 1 large egg, beaten with 1 tsp water (egg wash) – This is your pie’s makeup. It gives that gorgeous, deep golden-brown shine and helps any sugar topping stick.
- 1 tbsp coarse sugar (like turbinado or sanding sugar) – Optional, but oh-so-recommended. It adds a delightful crunch and a beautiful sparkle. Plain granulated sugar works in a pinch, too.
Let’s Build Your Masterpiece: Step-by-Step with Chef Liv
Ready? Here we go. We’ll move through this together, one simple step at a time. Remember, breathe, have fun, and don’t stress the small stuff.
Step 1: Preheat & Prep
Fire up your oven to 400°F (200°C). Place a rack in the lower third of your oven. This helps the bottom crust cook through and get crispy. While it heats, get out a 9-inch pie dish (glass or ceramic is best for seeing how the bottom is browning).
Step 2: Macerate the Filling (A Fancy Word for “Let it Get Juicy”)
In a large bowl, gently toss the strawberries and rhubarb with the sugar, cornstarch, lemon juice, vanilla, and salt. I use my hands for this—it’s therapeutic! Let it sit for at least 10-15 minutes. You’ll see a lovely ruby syrup start to pool at the bottom. This is a GOOD sign—it means the cornstarch is already starting to work with the juices, which will lead to a perfectly set filling, not a soupy one.
Step 3: Roll & Line
On a lightly floured surface, roll out one disk of your chilled pie dough into a circle about 12 inches across. Don’t worry about a perfect circle! Rustic is charming. Gently drape it into your pie dish. Use your fingers to nestle it in, letting the edges overhang. Don’t stretch the dough—just let it slump in. Stretching leads to shrinkage. Pop this in the fridge to stay cool while you roll the top crust.
Step 4: Fill ‘Er Up!
Take your bowl of filling and give it one more gentle stir. Pour all of it, including every last drop of that delicious syrup, into the bottom crust. Spread it into an even layer. Those juices are flavor gold.
Step 5: Top It Off (Lattice or Full-Crust)
For a Full Top Crust: Roll out your second disk. Drape it over the filling. Trim the overhang to about ½ inch. Tuck the top edge under the bottom crust edge and crimp all the way around with your fingers or a fork. Cut 4-5 slits in the center to let steam escape.
For a Lattice Top (It’s Easier Than You Think!): Roll the second disk into a rough rectangle. Cut it into 10-12 even strips with a pizza cutter or knife. Lay half the strips vertically over the pie, spacing them apart. Fold every other strip back, lay a horizontal strip across, then fold the vertical strips back down. Repeat, weaving over and under. Crimp the edges. It looks impressive but is just simple weaving!
Pro-Tip: If the dough gets too warm and sticky while you work, slide the whole pie plate onto a baking sheet and chill it for 10 minutes.
Step 6: The Golden Glow-Up
Brush the top crust (not the crimped edges) evenly with your egg wash. This is key for color! Then, sprinkle generously with that coarse sugar. It’s the finishing touch.
Step 7: Bake to Perfection
Place your pie on a rimmed baking sheet (this catches any bubbling-over juices and saves your oven from a smoky mess!). Bake at 400°F for 20 minutes. This initial high heat sets the crust.
Then, without opening the door, reduce the oven temperature to 350°F (175°C). Bake for another 30-35 minutes. You’re looking for a deeply golden brown crust and thick, bubbly filling bubbling through the vents or lattice. If the edges start browning too fast, tent them loosely with aluminum foil or a pie shield.
Step 8: The Hardest Part: Wait.
When the timer dings, transfer the pie (still on its baking sheet) to a wire cooling rack. You must, must, MUST let it cool completely—at least 3-4 hours. I know, it’s torture. But this is non-negotiable. This cooling time is when the cornstarch fully sets the filling. Slicing into a warm pie is a recipe for a delicious, but soupy, mess. Trust me on this. Let it set.
How to Serve Your Slice of Sunshine
Once fully cooled, slice your beautiful pie with a sharp, thin knife. The perfect serving? A generous wedge on a plate, ideally still with a slight warmth from the day. The classic, and truly unbeatable, pairing is a big scoop of vanilla bean ice cream melting slowly over the top. The cold, creamy ice cream against the sweet-tart fruit is a match made in heaven. For a lighter touch, softly whipped cream or a dollop of Greek yogurt is divine. Pour a cup of coffee, gather your people, and watch how one simple pie can turn an ordinary day into a small celebration.
Make It Your Own: Delicious Twists & Swaps
Love the base recipe? Here are some fun ways to play with it:
- Herb-Infused: Add 1 tablespoon of finely chopped fresh basil or thyme to the filling. It adds an incredible, fragrant complexity that will have people guessing your secret ingredient.
- Berry Medley: Swap out 1 cup of the strawberries for raspberries or blackberries for a deeper, more complex berry flavor.
- Ginger Kick: Add 1-2 tablespoons of minced crystallized ginger or ½ tsp of ground ginger to the filling for a warm, spicy zing.
- Oat Crumble Topping: Skip the top crust! Mix ¾ cup flour, ½ cup rolled oats, ½ cup brown sugar, a pinch of salt, and 6 tbsp melted butter into a crumble. Sprinkle over the filling and bake.
- Gluten-Free: Use a certified gluten-free flour blend in your favorite pie crust recipe or a store-bought GF crust. The filling is naturally gluten-free.
Liv’s Kitchen Confessions & Pro-Tips
This recipe has been my trusty sidekick for years, and it’s evolved with every bake. My biggest lesson? Don’t fear the bubble-over. My first “solo” pie as a teen bubbled over so dramatically it set off the smoke alarm. My dad called it “Volcano Pie,” and we ate it with spoons, laughing. It was still delicious. So if your pie juices caramelize on the baking sheet, just smile—you’ve made a pie with character.
My ultimate crust hack? I use a mix of butter for flavor and a touch of vodka or vinegar for tenderness. The alcohol evaporates in the oven, leaving behind a crust that’s incredibly flaky and easy to work with. If you want that recipe, just shout—I’ll share it in my next post!
Finally, remember: fruit is unpredictable. Some berries are juicier, some rhubarb is tarter. Taste your mix before it goes in the crust. You’re the chef—adjust the sugar or cornstarch to your liking. That’s the beauty of homemade.
Your Pie Questions, Answered
Q: My bottom crust was soggy! What happened?
A: The classic pie puzzle! A few tricks: 1) Make sure your filling isn’t too warm when it goes in. 2) Use a glass or ceramic pie dish (they conduct heat better than metal for a crispier bottom). 3) Bake on that lower oven rack AND on a preheated baking sheet. Putting the pie dish on a hot surface gives the bottom crust a powerful heat boost from the get-go.
Q: The filling is runny after cooling. Can I fix it?
A> First, did it cool completely? If so, it might need more thickener next time. For this recipe, you can safely increase the cornstarch to ⅓ cup, especially with frozen fruit or peak-season berries. If you’ve already baked it, just serve it in bowls! It’ll taste amazing. For future bakes, let the macerating fruit sit longer

Strawberry Rhubarb Pie : A Sweet & Tangy Classic with a Flaky Crust
Description
Strawberry Rhubarb Pie
Sweet, tangy, and wrapped in buttery flakiness—a classic spring-to-summer dessert.
This pie balances the tartness of rhubarb with the sweetness of strawberries, all encased in a golden, flaky crust. Perfect for family gatherings, picnics, or any day that needs a little celebration.
Ingredients
For the Filling
-
3 cups fresh strawberries, hulled and halved (or quartered if large)
-
2½ cups fresh rhubarb, chopped into ½-inch pieces
-
1 cup granulated sugar (adjust if fruits are very sweet)
-
¼ cup cornstarch
-
1 tbsp fresh lemon juice
-
½ tsp pure vanilla extract
-
Pinch of salt
For the Crust & Assembly
-
1 double pie crust (homemade or store-bought, all-butter recommended)
-
1 large egg, beaten with 1 tsp water (for egg wash)
-
1 tbsp coarse sugar (optional, for topping)
Instructions
-
Preheat & prep:
Preheat oven to 400°F (200°C) with a rack in the lower third. Have a 9-inch pie dish ready. -
Macerate the fruit:
In a large bowl, gently toss strawberries and rhubarb with sugar, cornstarch, lemon juice, vanilla, and salt. Let sit 10–15 minutes until juices start forming. -
Roll & line bottom crust:
Roll out one dough disk into a 12-inch circle. Gently place it in the pie dish, letting edges overhang. Chill while rolling the top crust. -
Add filling:
Pour fruit mixture (with all juices) into the bottom crust. -
Top crust:
-
Full crust: Place second disk on top, trim edges to ½ inch, crimp edges, and cut 4–5 slits for steam.
-
Lattice: Cut dough into strips and weave over filling. Crimp edges.
-
-
Egg wash & sugar:
Brush top crust with egg wash and sprinkle coarse sugar. -
Bake:
Place pie on a rimmed baking sheet. Bake at 400°F for 20 minutes. Reduce to 350°F (175°C) and bake 30–35 more minutes until golden and bubbly. Tent edges with foil if browning too quickly. -
Cool completely:
Transfer to a wire rack. Let cool 3–4 hours for the filling to set.
Notes
-
Use glass or ceramic pie dishes for a crisp bottom crust.
-
Let fruit juices macerate; it helps the filling set.
-
Adjust sugar to taste depending on fruit sweetness.
-
Slice with a sharp knife for clean cuts.
Final Thoughts
The magic of Strawberry Rhubarb Pie lies in its beautiful contradiction: humble ingredients transformed into a show-stopping centerpiece. It’s a lesson in trust—trusting the process, trusting the alchemy of fruit and sugar, and trusting that the love you bake into it is the most important ingredient of all.
Remember: keep your butter cold, let your filling macerate, and for the love of flaky crusts, let it cool completely before you slice! This pie isn’t just a treat; it’s an experience. An experience of patience, creativity, and the simple, profound pleasure of sharing something homemade.
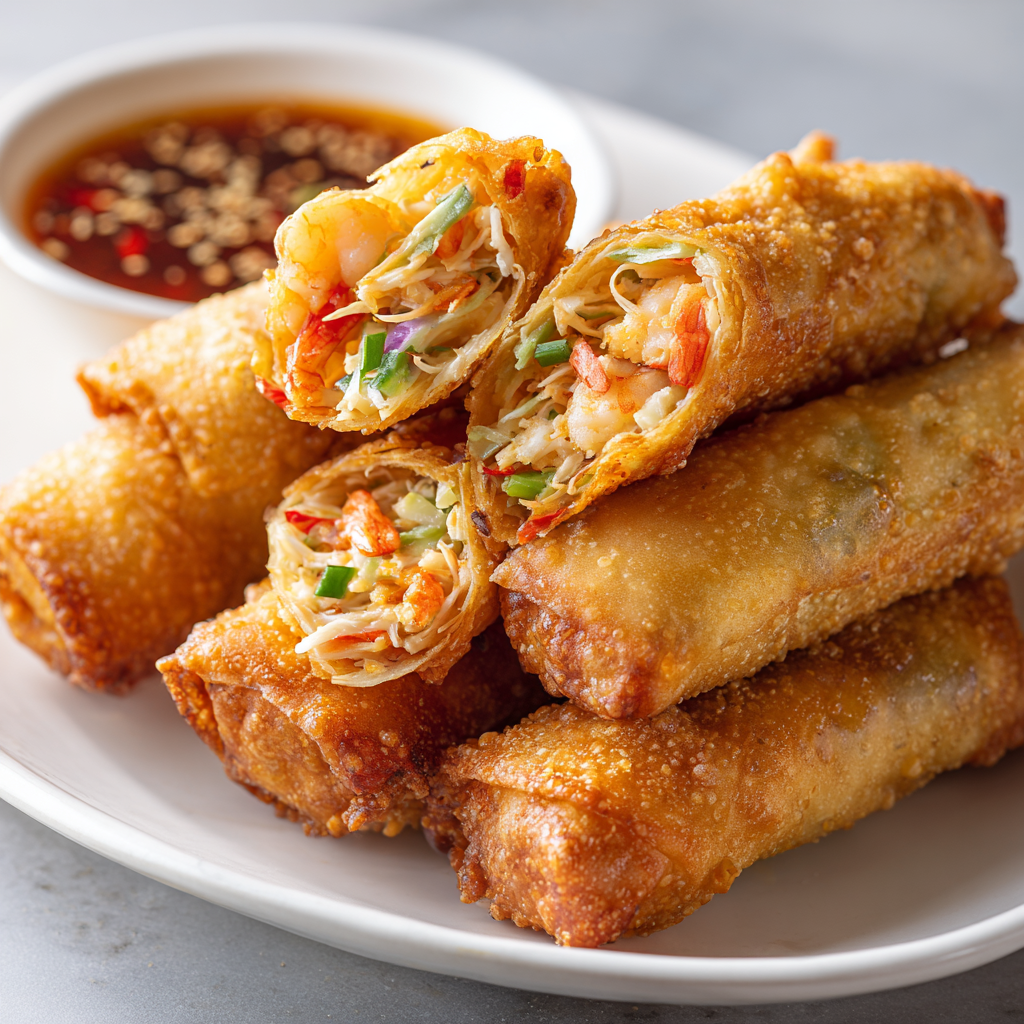
Crispy Seafood Egg Rolls : Golden, Crunchy & Loaded with Flavor
Crispy Seafood Egg Rolls – Your New Favorite Party Hero (No Takeout Box Needed!)
Hey there, friend! Olivia here, apron on and a smile on my face. Can we just take a moment to appreciate the pure, unadulterated joy of that first bite into a perfectly crispy egg roll? That shattering, golden crust giving way to a steaming, savory, flavor-packed filling… it’s a little bite of magic. And when that filling is a creamy, dreamy mix of tender shrimp and sweet crab? Forget about it. You’ve just leveled up.
Today, we’re ditching the delivery menu and making our own Crispy Seafood Egg Rolls right in our cozy kitchens. I promise, these are easier than you think and about a hundred times more satisfying because you made them. They’re the ultimate crowd-pleaser for game day, the star of your next appetizer spread, or even a fantastically fun “breakfast-for-dinner” situation (trust me on this).
This recipe is all about that gorgeous contrast: an incredibly crunchy exterior hugging a luxuriously creamy, seafood-studded heart. We’re keeping things simple with accessible ingredients, and I’ll walk you through every fold, fry (or bake!), and dip. Whether you’re a first-time egg roll wrapper folder or a seasoned pro looking for a new twist, this recipe is for you. So, tie on your favorite apron—the messy one with the good vibes—and let’s create something incredibly delicious together.
The Beach Picnic That Started It All
This recipe has a very special place in my heart, and it all started with a slightly sandy, completely wonderful beach picnic. A few summers back, my best friends and I decided to forego the fancy restaurant for our annual get-together and just pack a ridiculous feast for the shore. I was on appetizer duty and wanted to make something that traveled well, could be eaten with one hand, and tasted like a celebration.
I’d been dreaming of a seafood egg roll, something that captured the taste of the coast. I cobbled together a filling from what I had—some leftover shrimp from last night’s pasta, a pack of imitation crab (a home cook’s secret weapon!), and the ever-reliable bag of coleslaw mix languishing in the fridge. The cream cheese was a last-minute “hmm, this needs to be creamy” inspiration. We fried them up at home, packed them still warm in towels, and raced to the beach.
Sitting there, toes in the sand, passing around these crispy, golden bundles with the sunset painting the sky, was pure bliss. The sound of the waves, the laughter, and the unanimous “OH MY GOSH, these are incredible!” sealed the deal. This wasn’t just a recipe; it was a memory maker. And that’s the kind of food I live for.
Gathering Your Flavor Crew: The Ingredients
Here’s your shopping list for seafood roll success! I’ve added my little chef notes next to each one—because knowing the why makes you a more confident cook.
- 1 cup cooked shrimp, chopped: I use medium-sized, peeled, and deveined shrimp. You can boil, steam, or sauté them with a pinch of salt. Chef’s Insight: Chilling the cooked shrimp before chopping makes them easier to handle and keeps them nice and tender in the filling.
- 1 cup imitation crab meat, shredded: Don’t let the “imitation” fool you! This is surimi, a seasoned fish paste, and it’s fantastic for its sweet flavor, flaky texture, and affordability. Substitution Tip: For a splurge, feel free to use an equal amount of fresh lump crab meat. It’s divine!
- 1 cup coleslaw mix (or shredded cabbage & carrots): The ultimate shortcut! This pre-shredded veggie mix adds crunch, sweetness, and moisture. Chef’s Insight: If using fresh, a quick 30-second blanch in boiling water softens it just enough without making it soggy.
- 2 green onions, chopped: They add a necessary pop of fresh, oniony brightness that cuts through the richness.
- 2 cloves garlic, minced: Non-negotiable flavor foundation. Fresh is best here!
- 4 oz cream cheese, softened: This is the secret to that luscious, creamy filling that holds everything together. Make sure it’s at room temperature so it mixes in smoothly.
- 1 tbsp soy sauce: Our salty, umami powerhouse. Use low-sodium if you’re watching salt, or tamari for a gluten-free version.
- 1 tsp sesame oil (optional): Just a teaspoon adds a deep, nutty, aromatic flavor that makes the filling taste “restaurant-quality.” Highly recommended!
- Salt & pepper to taste: Always season in layers. Taste your filling before you start wrapping!
- 10–12 egg roll wrappers: Usually found in the produce cooler section. Keep them covered with a damp towel while you work to prevent drying out.
- Oil for frying or brushing: For frying, use a neutral oil with a high smoke point like vegetable, canola, or peanut oil. For baking/air-frying, a light brush of oil is all you need for that golden finish.
Let’s Get Rolling: Your Step-by-Step Guide
Okay, team! Here we go. Clear a little space on your counter, put on some good music, and let’s transform these ingredients into golden perfection.
- Mix the Magic Filling. In a large bowl, combine the chopped shrimp, shredded crab, coleslaw mix, green onions, garlic, cream cheese, soy sauce, sesame oil, salt, and pepper. Use a fork or your hands to mix it all together until it’s beautifully cohesive. Chef’s Hack: If your cream cheese is still a little cold, pop the whole bowl (microwave-safe!) in the microwave for 10-second bursts until it’s mixable. Don’t overheat it!
- Set Up Your Wrapping Station. Lay an egg roll wrapper on a clean surface so it looks like a diamond (one corner pointing toward you). Place a small bowl of water nearby. Keep the rest of the wrappers under that damp towel! Pro-Tip: If a wrapper tears a little, don’t panic. Just use a second one to double-wrap—it’ll fry up extra crispy.
- Spoon & Fold. Place about 2-3 tablespoons of filling in the center of the diamond, just below the horizontal midline. Step 1: Fold the bottom corner up and over the filling, tucking it tightly underneath. Step 2: Fold the left and right corners inward toward the center, like you’re making an envelope. Step 3: Now, roll the bundle tightly upward toward the remaining top corner. Before the final roll, dip your finger in the water and moisten the edges of that top corner. This acts as the “glue.” Finish rolling and press to seal. Place seam-side down on a plate. Repeat!
- Choose Your Cooking Adventure.
- For Deep Frying (The Classic Crisp): Heat 2-3 inches of oil in a heavy pot to 350°F (175°C). Use a thermometer for accuracy! Fry 3-4 rolls at a time for 3-4 minutes, turning occasionally, until deeply golden brown. Drain on a wire rack over a baking sheet—this keeps them crispy instead of getting soggy on paper towels.
- For Baking (The Hands-Off Hero): Preheat oven to 400°F. Place rolls on a parchment-lined baking sheet, seam-side down. Brush or spray generously with oil. Bake for 15-18 minutes, flipping halfway through, until golden and crisp.
- For Air Frying (The Quick Fix): Preheat air fryer to 375°F. Arrange rolls in a single layer (don’t crowd!), spray with oil, and cook for 10-12 minutes, flipping halfway. They’ll be beautifully crunchy!
- The Golden Rule of Resting. However you cook them, let your seafood egg rolls rest for 5 minutes after they come out of the oil/oven/air fryer. This allows the filling to set slightly so it doesn’t burst out on the first bite, and it saves your tongue from a steam burn!
Serving Up the Crispy Goodness
Presentation is part of the fun! I love serving these on a big, vibrant platter or in a rustic basket lined with parchment paper. Scatter some extra chopped green onions or sesame seeds over the top for a pretty finish. Now, the dipping sauce is non-negotiable. Offer a couple of options: a bottle of sweet chili sauce is perfect, or whip up a quick spicy mayo (mix ½ cup mayo with 1-2 tbsp sriracha and a squeeze of lime). For a fancy touch, sprinkle some furikake over the sauce. Serve immediately and watch them disappear!
Make It Your Own: Delicious Twists & Swaps
Love this blueprint? Here’s how to run with it:
- Spicy Bang Bang Style: Swap the cream cheese for ½ cup of bang bang sauce (mayo, sweet chili sauce, and sriracha) mixed right into the filling.
- “Clean Out the Fridge” Veggie Boost: Add finely chopped water chestnuts for crunch, or some sautéed mushrooms for an earthy depth.
- Gluten-Free & Low-Carb: Use gluten-free egg roll wrappers or try wrapping the filling in large, sturdy butter lettuce leaves for refreshing lettuce cups.
- Crab Rangoon Fusion: Add a tablespoon of finely grated Parmesan and a dash of Worcestershire sauce to the filling for that classic rangoon flavor profile.
- Pork & Shrimp Combo: Replace half the seafood with ½ cup of cooked, seasoned ground pork for a more traditional, hearty flavor.
From My Kitchen to Yours: A Few Parting Thoughts
This recipe is a living, breathing thing in my house. I’ve made it probably fifty times since that beach day, and it’s never exactly the same twice—and that’s the beauty of home cooking! Sometimes I add a little ginger, sometimes I go heavy on the black pepper. Once, in a true “Olivia” moment, I accidentally used whipped cream cheese (it was all I had). The filling was a bit softer, but you know what? They were still utterly delicious.
My biggest tip? Don’t fear the fold. Your first one might look a little… abstract. That’s okay! As long as it’s sealed, it will taste amazing. By your third one, you’ll be a pro. I also highly recommend doubling the batch and freezing some before cooking. Lay them on a baking sheet to freeze solid, then transfer to a bag. Cook straight from frozen, adding a few extra minutes to the cooking time. Future-you will be so grateful on a busy weeknight.
Your Questions, Answered!
Q: My filling is leaking out while frying! What did I do wrong?
A: This usually means 1) the wrapper wasn’t sealed properly (be generous with that water “glue”), or 2) the oil wasn’t hot enough. If the oil is below 350°F, the wrapper won’t seal quickly, allowing the filling to escape. Use a thermometer and make sure your seal is tight!
Q: Can I make these ahead of time?
A: Absolutely! You have two great options: 1) Assemble the uncooked rolls, place them on a baking sheet, and freeze. Once frozen, bag them up. Cook from frozen, adding 2-3 extra minutes. Or, 2) Cook them completely, let them cool, and refrigerate for up to 2 days. Re-crisp in a 375°F oven or air fryer for 5-8 minutes.
Q: My baked/air-fried egg rolls aren’t as crispy as I’d like. Help!
A: The key here is enough oil and enough space. Don’t just mist them—give them a good brush or spray so the wrappers can fry in the hot air. Also, never overcrowd the pan or air fryer basket. They need hot air circulating all around them to get properly crunchy.
Q: What’s the best dipping sauce?
A: Beyond sweet chili and spicy mayo, try a simple soy-vinegar mix (soy sauce, rice vinegar, a pinch of sugar), a creamy sriracha-lime sauce, or even a quick duck sauce (apricot jam thinned with a little rice vinegar and soy sauce). Get creative!

Crispy Seafood Egg Rolls : Golden, Crunchy & Loaded with Flavor
Description
Golden, crunchy, and packed with creamy shrimp & crab filling—your ultimate party appetizer.
These homemade seafood egg rolls are easier than takeout and infinitely more satisfying. Crunchy outside, creamy seafood inside, and perfect with sweet chili or spicy mayo.
Ingredients
-
1 cup cooked shrimp, chopped
-
1 cup imitation crab meat, shredded (or lump crab meat)
-
1 cup coleslaw mix (shredded cabbage & carrots)
-
2 green onions, chopped
-
2 cloves garlic, minced
-
4 oz cream cheese, softened
-
1 tbsp soy sauce
-
1 tsp sesame oil (optional)
-
Salt & pepper, to taste
-
10–12 egg roll wrappers
-
Oil for frying, or brushing for baking/air-frying
Instructions
-
Make filling: In a large bowl, mix shrimp, crab, coleslaw mix, green onions, garlic, cream cheese, soy sauce, sesame oil, salt, and pepper until smooth and combined.
-
Prepare wrappers: Lay one egg roll wrapper on a clean surface as a diamond. Keep others covered with a damp towel.
-
Fill & fold: Place 2–3 tbsp of filling near the bottom corner. Fold bottom corner over filling, fold sides inward, roll tightly toward top corner, and seal with a little water. Place seam-side down. Repeat.
-
Cook:
-
Fry: Heat oil to 350°F (175°C). Fry 3–4 rolls at a time for 3–4 minutes, turning occasionally. Drain on a wire rack.
-
Bake: Preheat oven to 400°F. Place rolls seam-side down on parchment-lined sheet, brush with oil, bake 15–18 minutes, flipping halfway.
-
Air-fry: Preheat to 375°F. Cook rolls in single layer, sprayed with oil, for 10–12 minutes, flipping halfway.
-
-
Rest & serve: Let sit 5 minutes before serving. Serve with sweet chili sauce, spicy mayo, or soy-vinegar dipping sauce.
Notes
-
Don’t overcrowd pans or air fryer for best crispiness.
-
Freeze uncooked rolls for later—cook straight from frozen, adding 2–3 minutes.
-
Brush oil generously when baking/air-frying for golden crunch.
Nutritional Information*
*Approximate values per egg roll (based on frying and yielding 10 rolls). For baking/air-frying, fat and calories will be slightly lower.
- Calories: ~180
- Protein: 9g
- Carbohydrates: 12g
- Fat: 10g
Prep Time: 20 minutes | Cook Time: 10-15 minutes | Total Time: 35 minutes | Servings: 10-12 egg rolls
Final Thoughts: The Crispy, Golden Joy Is All Yours
Well, friend, we’ve reached the best part—the part where you get to take that first incredible bite. Look at what you made! Those golden, shatteringly crisp bundles of joy are proof that magic happens right in your own kitchen.
This recipe is more than just a delicious appetizer. It’s a confidence-builder. It’s the triumphant feeling of mastering a fold, the sizzle of something frying to perfection, and the shared smiles around the table. You didn’t just make egg rolls; you created an experience.
I hope this recipe becomes your go-to for bringing people together. Let it be the star of your game day spread, the surprise hit at your potluck, or the fun weekend project that ends with a feast. Most of all, I hope it gives you the same little thrill it gives me—that joy of creating something restaurant-worthy with your own two hands.
Remember my sandy beach story? That’s the real secret ingredient here: the memory you’ll make while you cook and share them. So don’t stress over a torn wrapper or a slightly odd shape. The imperfections are what make them yours, and I promise they’ll taste just as amazing.
Thank you for rolling up your sleeves and cooking along with me. Now, go forth, dip deeply, and savor that crunchy, creamy, seafood-packed victory.
Happy rolling, and even happier eating!
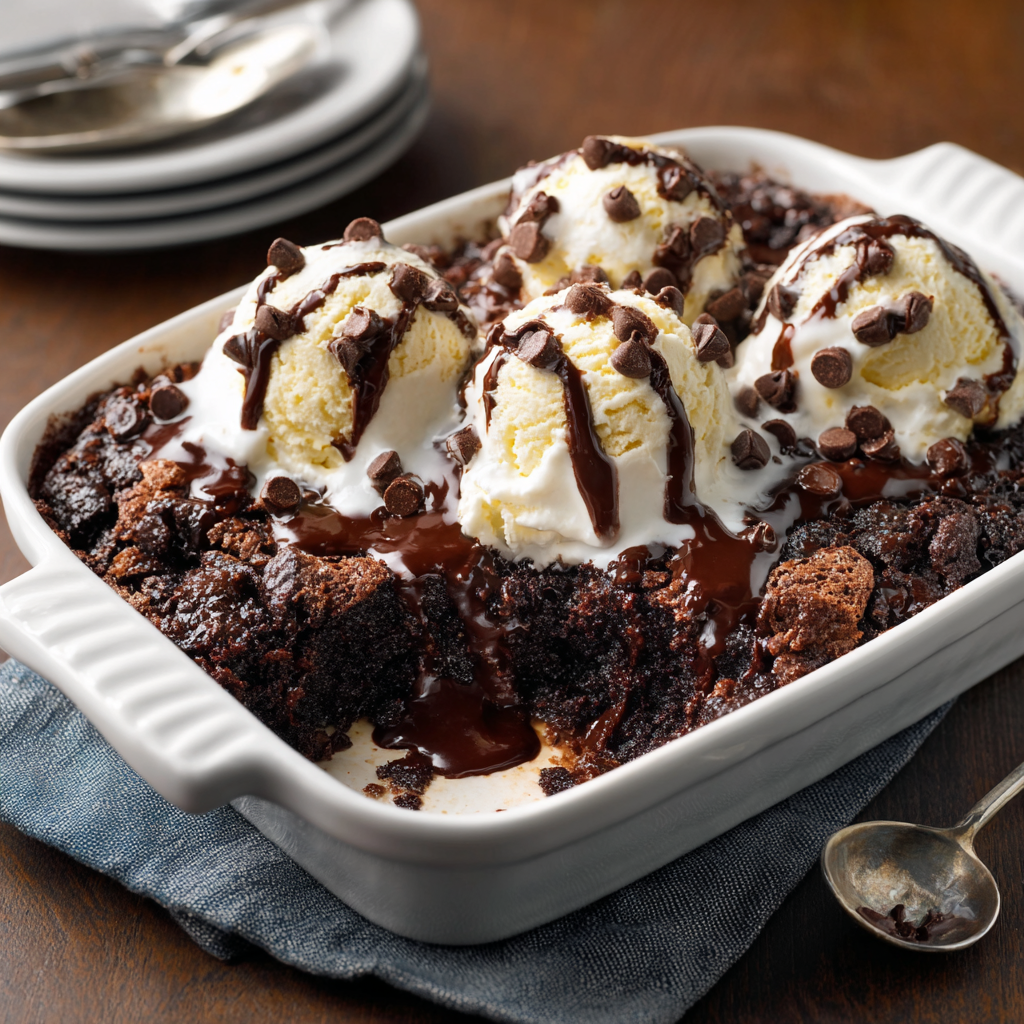
Chocolate Dump Cake : Rich, Gooey, and Amazingly Easy
Chocolate Dump Cake: Your New Secret Weapon for Ridiculously Easy Dessert Magic
Hey there, friend! Come on in, grab an apron (a clean one, or… you know what, any apron will do), and get ready for a story that ends with the most decadent, soul-warming, chocolate-filled hug you can imagine. I’m talking about the legendary, the infamous, the downright magical Chocolate Dump Cake.
We’ve all been there. It’s 4 PM on a Tuesday, the week is already feeling long, and a serious chocolate craving hits you like a freight train. Or maybe it’s Sunday night, family is coming over, and you promised to bring dessert but… life happened. You don’t have the bandwidth for creaming butter and sugar, sifting flour, or washing a mountain of bowls. I see you, I feel you, and I am here to tell you: the solution is here, and it’s gloriously simple.
This cake is my not-so-secret secret. It’s the dessert I make when I want to impress without the stress. It’s the recipe I pass to new cooks with a wink, because it guarantees success and cheers. With a name as unpretentious as “dump cake,” you know it’s going to be straightforward. You literally dump a few pantry staples into a dish, walk away, and the oven works its alchemy. What emerges is a wonder: a rich, fudgy, pudding-like base with a crackly, brownie-like top, all swimming in pools of melted chocolate chips. It’s comfort in a 9×13 pan, and it’s about to become your best friend. Let’s make some magic, the easy way.
The Cake That Saved (Many) Evenings
I have to laugh thinking about the first time I made a dump cake. It was years ago, during my “everything must be from scratch” phase (we’ve all been there!). My best friend showed up at my door with a diaper bag, a toddler on her hip, and that exhausted-but-smiling look only moms understand. “I need chocolate,” she declared. “And I need it in 10 minutes or less.”
I panicked. My from-scratch brownies took an hour! Then I remembered a crumpled, butter-stained recipe card my grandma had given me, titled simply “Chocolate Dump.” I was skeptical. It felt like cheating. But with a skeptical friend and a now-crying toddler as my audience, I had nothing to lose.
Five minutes later, the cake was in the oven. We sat at the kitchen island, sipping tea, watching through the glass door as this bizarre, unmixed concoction started to bubble and transform. The smell was insane—like a chocolate factory had exploded in my kitchen. When we scooped out warm, gooey spoonfuls into bowls, topped with vanilla ice cream, we were silent for a full minute. Then she looked at me and said, “This is the best thing you’ve ever made me.” It was a lesson I’ve never forgotten: the goal isn’t complexity; it’s connection. And sometimes, the simplest tools create the coziest, most memorable moments.
Gathering Your Chocolate Arsenal
The beauty here is in the short, sweet list. Here’s what you’ll need and why each one is a star player:
- 1 box (approx. 15.25 oz) chocolate cake mix – This is our dry foundation. Chef’s Insight: Don’t get fancy here; the classic, cheap “devil’s food” or “dark chocolate” mix works perfectly. It provides the structure and that familiar cake flavor. For a fun twist, try a chocolate fudge or German chocolate mix (just ignore any included frosting packets!).
- 1 (3.9 oz) box instant chocolate pudding mix – The SECRET WEAPON! This is what creates that luxurious, custardy layer beneath the cakey top. It’s the reason this dessert is so rich and fudgy. Instant is key—cook-and-serve won’t work the same way.
- 2 cups milk – Whole milk will give you the creamiest result, but 2% works great too. This activates the pudding mix. Sub Tip: For an ultra-decadent version, swap in half-and-half or even full-fat canned coconut milk for a dairy-free, incredibly lush alternative.
- 1½ cups chocolate chips – The molten chocolate pockets! I use semi-sweet for a perfect balance, but this is your playground. Chef’s Choice: A mix of dark chocolate chunks and milk chocolate chips is divine. Mini chips distribute more evenly, while large chunks create glorious chocolate lava pockets.
- ½ cup (1 stick) unsalted butter, sliced into thin pats – The golden crown. As the butter melts over the dry cake mix, it creates that irresistible crumbly, crisp topping. Pro Tip: Using cold butter and slicing it thinly ensures even distribution and melting. If you only have salted butter, that’s fine—it will just add a hint of salty contrast to all the sweet.
The “Dump & Bake” Magic Act
Ready? This is the easiest dance you’ll ever do in the kitchen. Preheat your oven to 350°F (175°C). Grease your trusty 9×13-inch baking dish well with butter, cooking spray, or a swipe of oil. Let’s go!
- Create the Pudding Base. In your greased dish (yep, right in the pan—less mess!), whisk together the dry instant pudding mix and the milk. Whisk for a good 30-60 seconds until it’s smooth and starting to thicken slightly. You’re building your flavor foundation right in the serving vessel. “No bowl? No problem!”
- The Great Dump (Part 1). Here’s where you have to trust the process. Take your dry cake mix and sprinkle it evenly over the top of the pudding layer. Use your fingers or a spoon to break up any huge clumps, but otherwise, just let it rain down in a pretty, even blanket. Now, here is the most important instruction: DO NOT STIR. I mean it! Don’t whisk it, don’t fold it, don’t even think about mixing. This separation of layers is what creates the magical dual-texture result.
- The Chocolate Chip Blanket. Take your chocolate chips and scatter them generously and evenly over the dry cake mix. This is the layer that will become your melty, gooey treasure. Pretend you’re sowing chocolate seeds for a fantastic harvest.
- The Buttery Crown. Take your thinly sliced pats of cold butter and distribute them as evenly as you can over the entire surface. Try to cover most of the dry mix. It’s like putting little butter blankets on every square inch. This step is crucial for getting that gorgeous, golden-brown, crisp topping.
- Bake to Bubbly Perfection. Slide the dish into your preheated oven. Now, walk away. Seriously, set a timer for 35 minutes and resist the urge to open the oven door. You’ll know it’s done when the top is set, looks crackly and dry (not powdery), and the edges are bubbling with dark, fragrant chocolate lava. It might look a bit uneven—that’s part of its charm! A toothpick inserted won’t come out clean, and that’s perfect. You’re aiming for a fudgy cake, not a dry one. Total bake time is usually 35-40 minutes.
- The (Brief) Torture of Waiting. Remove the pan from the oven. I know, the smell is incredible. But let it sit for at least 15-20 minutes before diving in. This allows the molten chocolate and pudding layers to settle into a creamy, sliceable (well, scoopable) bliss. It will still be gloriously warm.
How to Serve This Chocolate Masterpiece
This cake begs to be served warm and cozy. I like to scoop it straight from the pan into bowls—embrace its rustic, “cobbler-style” beauty. The non-negotiable partner? A giant scoop of vanilla ice cream. The hot/cold, fudgy/creamy contrast is life-changing. A dollop of freshly whipped cream and a tiny sprinkle of flaky sea salt is my gourmet move. For a brunch twist, a spoonful of raspberry or strawberry compote cuts the richness beautifully. Serve it with a big spoon and lots of napkins!
Make It Your Own: Delicious Dump Cake Twists
The basic formula is your canvas! Get creative:
- Cookies & Cream: Use a white or yellow cake mix, vanilla pudding, and dump a cup of crushed Oreos on top with the butter.
- Peanut Butter Cup: Use chocolate cake mix, add 1 cup peanut butter chips with the chocolate chips, and drizzle ¼ cup of melted peanut butter over the top before adding the butter.
- Black Forest: Use chocolate cake mix, cherry pie filling as your first “dump” layer (skip the pudding/milk), then top with cake mix, chocolate chips, and butter.
- Gluten-Free/Dairy-Free: Use a certified GF chocolate cake mix, dairy-free instant pudding with coconut milk, vegan chocolate chips, and a plant-based butter stick. It works like a dream!
- Salted Caramel Pretzel: Sprinkle ½ cup crushed pretzels and ½ cup caramel bits over the cake mix before adding the butter for a sweet-salty-crunchy wonder.
Olivia’s Kitchen Notes & Stories
Over the years, this recipe has been my steadfast companion. I’ve made it in beach rental ovens, for last-minute school bake sales (where it always disappears first), and as a “welcome to the neighborhood” gift. The funniest thing? People always ask for the “complicated” recipe, and their jaws drop when I tell them it’s a dump cake.
One time, I was filming a quick video of the “dump” process for my stories and got so excited talking that I accidentally used the cook-and-serve pudding mix. The result was… interesting. Much soupier, but still delicious! It just reinforced the rule: instant pudding is key for the right set. My other evolution? I sometimes add a teaspoon of espresso powder to the dry cake mix to deepen the chocolate flavor, or a splash of vanilla to the milk. But the classic version never fails. It’s proof that good food doesn’t have to be hard. It just has to be made with joy (and a lot of chocolate).
Your Dump Cake Questions, Answered!
Q: My cake turned out super soupy in the middle, even after cooling. What happened?
A: This usually means it needed more bake time. Ovens vary! If the top looks set but it’s very jiggly, give it another 5-10 minutes. Also, double-check you used instant pudding, not cook-and-serve. Finally, make sure you’re using the right size pan—a smaller dish will make the layers too thick to set properly.
Q: Can I mix everything together instead of layering?
A: You can, but you’ll lose the magical two-texture effect! The layering is what creates the pudding-bottom/cakey-top dynamic. If you mix it, you’ll get a more uniform, heavier cake. Trust the dump method!
Q: What’s the best way to store leftovers?
A: Cover the pan tightly with foil or plastic wrap and keep it at room temp for up to 2 days, or in the fridge for up to 4. Reheat individual servings in the microwave for 20-30 seconds to bring back that gooey, just-baked warmth.
Q: I don’t have a 9×13 pan. Can I use something else?
A: A deep 10-inch oven-safe skillet or a 3-quart ceramic baking dish works wonderfully. Just avoid shallow pans, as the cake bubbles up while baking. Adjust bake time slightly if the surface area is significantly different.
Chocolate Dump Cake : Rich, Gooey, and Amazingly Easy
Description
This is the ultimate “throw it together” dessert that looks impressive but is effortless. Layers of instant chocolate pudding, rich chocolate cake mix, chocolate chips, and butter bake into a fudgy, crackly, chocolate-filled masterpiece that everyone will love.
Ingredients
-
1 box (15.25 oz) chocolate cake mix (dry, any brand)
-
1 box (3.9 oz) instant chocolate pudding mix
-
2 cups milk (whole or 2%)
-
1½ cups chocolate chips (semi-sweet, or mix of milk & dark)
-
½ cup (1 stick) unsalted butter, sliced into thin pats
Instructions
-
Preheat oven: 350°F (175°C). Grease a 9×13-inch baking dish.
-
Make pudding layer: In the prepared dish, whisk together instant pudding mix and milk until smooth and slightly thickened.
-
Layer the cake mix: Sprinkle the dry chocolate cake mix evenly over the pudding. Do not stir.
-
Add chocolate chips: Scatter them evenly over the cake mix.
-
Top with butter: Place thin pats of butter evenly across the surface.
-
Bake: 35–40 minutes, until the top is crackly and edges are bubbling. The center may jiggle slightly—this is perfect.
-
Cool slightly: Let sit 15–20 minutes before serving to let layers set.
-
Serve: Scoop into bowls and top with vanilla ice cream or whipped cream, if desired.
Notes
-
Use instant pudding, not cook-and-serve, for the proper fudgy layer.
-
Don’t stir the layers—this is what creates the cake/pudding dual texture.
-
Thin slices of cold butter ensure an evenly golden, crisp top.
-
Optional: Add espresso powder to intensify chocolate flavor.
Nutritional Information*
*Please note: Nutritional info is an estimate based on standard ingredients and will vary with substitutions.
Per Serving (1 of 12): Calories: ~390 | Protein: 4g | Carbohydrates: 45g | Fat: 22g
Prep Time: 5 minutes | Cook Time: 35-40 minutes | Total Time: 45 minutes | Servings: 12
Final Thoughts: The Beauty of Effortless Joy
So there you have it—the recipe that redefines “easy” and reimagines what it means to bake something wonderful. This Chocolate Dump Cake is more than a dessert; it’s a permission slip. Permission to embrace simplicity, to choose joy over perfection, and to believe that something extraordinary can come from the most humble, no-fuss beginnings.
In a world that often feels complex and demanding, this cake is a delicious rebellion. It’s a reminder that the heart of cooking isn’t found in intricate techniques or a mountain of dishes—it’s found in the shared moment around the table, the contented silence that falls when something warm and chocolatey is served, and the pure, uncomplicated pleasure of a craving satisfied.
It proves that magic doesn’t require a wand, just a warm oven and a willingness to trust the process. That layered “dump” isn’t a shortcut; it’s the secret. It’s the alchemy that transforms a few pantry staples into a texture wonderland—creamy, fudgy, crackly, and molten, all in one spoonful.
Keep this recipe in your back pocket. Let it be your secret weapon for spontaneous gatherings, your comfort on a tough day, and your guaranteed smile-maker for anyone lucky enough to get a scoop. Because the best kind of baking doesn’t just fill your kitchen with a heavenly smell—it fills your home with warmth and your people with happiness.
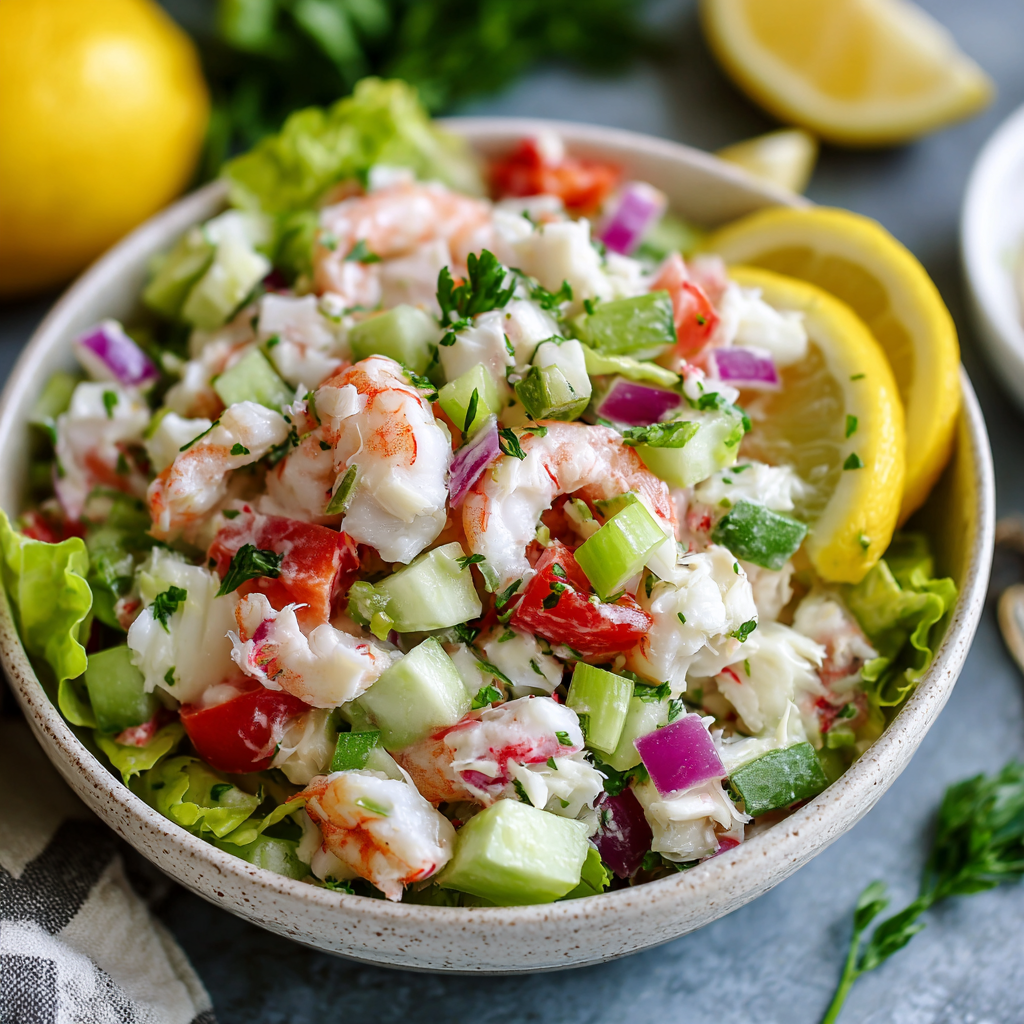
Seafood Salad (Light, Zesty & Packed with Fresh Flavor!)
My Go-To Light & Zesty Seafood Salad (The Ultimate Crowd-Pleaser!)
Hey there, friend! Come on in and pull up a stool. Can you smell that? It’s the crisp, clean scent of lemon, the gentle briny whisper of the ocean, and the promise of something refreshingly delicious waiting in the fridge. That, my friends, is the magic of my absolute favorite make-ahead marvel: a bright, beautiful, and utterly irresistible Seafood Salad.
If you’re like me, you’re constantly on the hunt for that unicorn of a recipe. You know the one. It needs to be impressive enough for guests, but easy enough for a Tuesday night. It should feel indulgent, yet not weigh you down. It has to be packed with flavor, but come together without a fuss. Well, consider the search over. This seafood salad is that recipe.
Picture this: tender, sweet bites of shrimp and crab, hanging out with a chorus of crunchy, colorful veggies, all wearing a coat of the zippiest, herbiest, most perfect lemon-dijon dressing you can imagine. It’s cool, it’s creamy (but not too creamy!), and it sings with every spoonful. Whether you pile it into buttery rolls for the best sandwich of your life, spoon it over crisp lettuce cups, or just grab a fork and stand triumphantly over the bowl (no judgment here), this salad delivers pure, unadulterated joy.
So, tie on your apron—the cute one with the stains that tell stories—and let’s make something wonderful together. This isn’t just about following steps; it’s about creating a little container of sunshine you can pull out whenever you need a guaranteed smile. Ready? Let’s dive in.
A Bowl Full of Summer Memories
This recipe always takes me straight back to my grandparents’ rickety dock on the lake. Every summer, my Pop-Pop would wake up at dawn, his old metal tackle box clinking, and return by lunch with a cooler of fresh-caught… well, let’s just say it wasn’t always shrimp and crab from our Midwestern waters! But the feeling was the same.
My Nana would magically transform his catch into a huge, chilled bowl of “special salad.” It was the centerpiece of every lazy afternoon lunch—eaten on paper plates with the sound of water lapping and kids laughing in the background. It felt fancy, but it was the essence of simple, happy togetherness. That’s the spirit I try to capture every time I make this. It’s not about expensive ingredients; it’s about the gathering, the shared “mmm’s,” and the feeling that you’ve made something special for your people. It’s a taste of nostalgia, with a generous squeeze of fresh lemon.
Gathering Your Cast of Characters
Here’s what you’ll need to bring this sunny salad to life. The beauty is in the simplicity and quality—so let’s chat about each player!
- 1 lb cooked shrimp, chopped: I use medium-sized, peeled and deveined shrimp for the perfect bite. You can buy them pre-cooked (look for “salad shrimp”) or poach them yourself in just 2-3 minutes! Chef’s Tip: A pinch of salt and a bay leaf in your poaching water adds great flavor.
- 1 cup lump crab meat: The star! Lump crab has those gorgeous, sweet chunks. For a budget-friendly swap, flaky imitation crab (surimi) works beautifully too—just shred it with your fingers.
- ½ cup celery, finely chopped: The essential CRUNCH. Don’t skip it! It adds a fresh, clean texture that’s absolutely key.
- ¼ cup red onion, finely chopped: They add a sharp, pretty pop of color and flavor. If raw onion is too strong for you, soak the diced pieces in ice water for 10 minutes—it mellows them right out.
- ¼ cup red bell pepper, diced: For color and a touch of sweetness. Yellow or orange pepper would be just as happy here.
- ⅓ cup mayonnaise: The creamy binder. Use a good-quality mayo you love—it’s the base of the dressing! For a lighter twist, you can swap half with plain Greek yogurt.
- 1 tbsp Dijon mustard: My secret weapon! It doesn’t make it taste like mustard; it just adds a wonderful tangy depth and helps emulsify everything. Trust me on this.
- Juice of 1 lemon: The ZEST factor. Fresh is non-negotiable here. Roll the lemon on the counter before juicing to get every last drop!
- 1 tbsp fresh parsley, chopped: Fresh herbs make it taste like a chef made it. Dill or chives are also fantastic friends for seafood.
- Salt & pepper to taste: Season in layers! A little in the dressing, and a final check after chilling.
- Optional: pinch of Old Bay seasoning or chili flakes: Want a little warmth or that classic coastal vibe? A sprinkle of either is divine.
Let’s Make Some Magic: Step-by-Step
This is where the fun happens. We’re not just mixing; we’re building layers of flavor. Grab your biggest, prettiest mixing bowl and let’s go.
Step 1: The Chop & Prep Party. First, make sure your shrimp and crab are well-drained of any excess liquid. Give your shrimp a rough chop—you want them in bite-sized pieces, not miniscule. Add them to your large bowl. Next, finely chop your celery, red onion, and bell pepper. I like a pretty fine dice here so every forkful gets a bit of everything. Toss them all in with the seafood. Chef’s Hack: Doing this first lets the veggies start to mingle and get friendly.
Step 2: Whisk That Winning Dressing. In a smaller bowl, let’s make the heart and soul of this salad. Add your mayonnaise, Dijon mustard, the juice from your lemon, and the chopped fresh parsley. Now, whisk, whisk, whisk until it’s smooth, creamy, and a lovely pale yellow. Give it a tiny taste. Need more zip? Add a bit more lemon. More depth? A tiny bit more Dijon. This is your moment to tailor it to your taste buds! Season with a pinch of salt and pepper.
Step 3: The Gentle Toss. Here’s the key: gently. Pour your bright, lemony dressing over the seafood and veggie mixture. Using a large rubber spatula or a big spoon, fold everything together. You want every piece to be lightly and happily coated, but you’re not trying to mash the beautiful lumps of crab. Be a gentle folding genius.
Step 4: The All-Important Chill Time. This step is NOT optional, and it’s the secret to transcendent flavor. Cover the bowl tightly with plastic wrap and pop it in the refrigerator for at least 30 minutes. Honestly, an hour is even better. This quiet time allows the flavors to get to know each other, mellow, and marry into something far greater than the sum of its parts. The salad chills, the flavors intensify, and magic happens.
Step 5: The Final Flourish. Just before serving, give the salad one more gentle stir. Do a final taste test—does it need another pinch of salt or a crack of black pepper? Maybe a fresh parsley sprinkle on top for that gorgeous green contrast? Now, it’s showtime!
How to Serve Your Masterpiece
Oh, the possibilities! For a light, low-carb lunch, spoon it over crisp butter lettuce or romaine leaves. To make my Granddad’s favorite, split a soft, buttered brioche roll and pile it high for the most incredible seafood salad sandwich. It’s also perfect on a cracker or crostini for an easy appetizer, or as the shining star on a picnic table next to potato chips and fresh fruit. Serve it straight from a beautiful bowl with a serving spoon and watch it disappear.
Make It Your Own: Fun Variations
- Mediterranean Twist: Add ¼ cup chopped Kalamata olives, a handful of crumbled feta, and swap the parsley for fresh dill.
- Spicy Cajun Kick: Use a spicy mayo or remoulade as the base, add a dash of hot sauce, and use Andouille sausage slices instead of crab for a hearty spin.
- Avocado-Lime Fiesta: Fold in diced creamy avocado right before serving and use lime juice instead of lemon. A little chopped cilantro is magic here!
- Pasta Salad Upgrade: Add 2 cups of cooked and cooled small pasta (like ditalini or shells) to stretch it for a bigger crowd. You might need a touch more dressing.
- Dairy-Free & Lighter: Swap the mayo entirely for mashed avocado or a dairy-free yogurt alternative for a different, but still creamy, profile.
Olivia’s Chef Notes & Kitchen Confessions
I’ve made this salad approximately a million times, and it’s evolved in the best ways. I used to be heavy-handed with the mayo until I realized the power of that lemony-Dijon punch—it lets you use less and taste more. One hilarious fail? I once accidentally used horseradish sauce instead of Dijon (similar jar, very different result!). It was…spicy. We still ate it, but now my mustard jar has a giant label!
The best piece of advice I can give you is to taste as you go. Love dill? Add more! Want it brighter? More lemon! This recipe is a wonderful, forgiving blueprint for your own perfect seafood salad. Make it once, then make it yours.
Your Questions, Answered!
Q: Can I make this ahead of time?
A: Absolutely! That’s one of its best features. You can make it up to 24 hours in advance. In fact, I think it’s even better the next day. Just keep it covered tightly in the fridge. If adding avocado (see variations), add that right before serving so it doesn’t brown.
Q: My salad seems a bit runny/wet after chilling. What happened?
A: No worries! This usually means the seafood or veggies had a bit of extra moisture. Next time, pat them dry with a paper towel before mixing. For this batch, you can drain off any excess liquid in the bowl, or stir in a tablespoon of extra mayo or a handful of plain breadcrumbs to soak it up.
Q: Can I use frozen seafood?
A: Of course! Thaw frozen cooked shrimp or crab in the refrigerator overnight. The key is to thaw it gently and make sure it’s thoroughly drained and patted dry before using. This prevents a watery salad.
Q: How long does it keep in the fridge?
A: For food safety and best texture, enjoy it within 2 days. The lemon juice acts as a bit of a preservative, but seafood salads are best enjoyed fresh!
Seafood Salad (Light, Zesty & Packed with Fresh Flavor!)
Description
My Go-To Light & Zesty Seafood Salad
Fresh, creamy, and perfectly lemony—this easy seafood salad is a guaranteed crowd-pleaser.
This is the kind of recipe you make once and keep forever. It’s light but satisfying, bright with lemon, and comes together quickly with simple ingredients. Perfect for lunches, picnics, or effortless entertaining.
Ingredients
-
1 lb cooked shrimp, peeled, deveined, and chopped
-
1 cup lump crab meat (or imitation crab, shredded)
-
½ cup celery, finely chopped
-
¼ cup red onion, finely chopped
-
¼ cup red bell pepper, diced
-
⅓ cup mayonnaise
-
1 tbsp Dijon mustard
-
Juice of 1 fresh lemon
-
1 tbsp fresh parsley, chopped
-
Salt and black pepper, to taste
Optional: pinch of Old Bay seasoning or chili flakes
Instructions
-
Prep the base: In a large bowl, combine shrimp, crab, celery, red onion, and bell pepper.
-
Make the dressing: In a small bowl, whisk together mayonnaise, Dijon mustard, lemon juice, parsley, salt, and pepper.
-
Combine: Gently fold the dressing into the seafood mixture until evenly coated.
-
Chill: Cover and refrigerate for at least 30 minutes to allow flavors to blend.
-
Serve: Stir gently, adjust seasoning if needed, and enjoy.
Notes
-
Pat seafood dry before mixing to prevent a watery salad.
-
For a lighter version, replace half the mayo with plain Greek yogurt.
-
Chill time is key—this salad tastes better after resting.
-
Taste before serving and refresh with extra lemon if needed.
Quick Nutrition & Prep Info
Serves: 6 | Prep time: 15 mins | Chill time: 30 mins | Total time: 45 mins
Storage: Refrigerate in an airtight container for up to 2 days.
Approximate Nutrition per serving (using real mayo): 200-250 calories, 18g protein, 4g carbohydrates, 14g fat.
Final Thoughts
There you have it—my little treasure chest of a recipe, the one I turn to when I want to serve sunshine on a plate. It’s a dish that whispers of summer docks and laughing afternoons, yet fits perfectly onto a busy weeknight table. That’s the true magic of this seafood salad: it bridges the gap between memory and meal, between special occasion and simple supper, without ever losing its sparkle.
Remember, the goal isn’t rigid precision. It’s the joyful squirt of lemon, the gentle fold to keep the crab lumps proud, and the patient chill that turns good ingredients into something great. This salad is a conversation starter, a sandwich filler, a picnic star—it’s whatever you need it to be. It’s proof that the most satisfying dishes are often the simplest, built on fresh flavors and meant to be shared.
So, I hope you’ll make this salad your own. Add your favorite herb, your chosen crunch, your family’s twist. Then, share it with someone. Watch their eyes light up with that first bright, creamy, briny bite. Because some recipes nourish more than just our bodies; they feed our connections. And that, my friend, is the ultimate crowd-pleaser.




