

☕ Coffee Crème Brûlée: The Dessert That’ll Make You Feel Like a French Pastry Pro
Hey there, fellow foodies! Let’s talk about a dessert that’s equal parts fancy and fun—Coffee Crème Brûlée. Imagine this: velvety custard infused with bold coffee flavor, hiding under a glass-like layer of caramelized sugar that shatters with the tap of a spoon. It’s the kind of dessert that makes you want to slow-clap for yourself after the first bite. And guess what? It’s *way* easier to make than you’d think.
I’ll let you in on a secret: the first time I made this, I was sweating bullets. Picture me, apron askew, frantically Googling “how to not ruin custard” while my friends sipped wine in the next room. But when I finally nailed that silky texture and heard that iconic *crack* as everyone dug in? Pure magic. Now, it’s my go-to when I want to wow guests without spending hours in the kitchen. Let’s get you there too—no sweat (or Google panic) required.
That Time I (Almost) Burned Down My Kitchen… For Love
Rewind to my early chef days: I’d just landed a gig cooking for a friend’s ultra-fancy engagement party. Naturally, I decided to debut a *completely* untested Coffee Crème Brûlée. Spoiler: Things got… dramatic.
Midway through torching the sugar tops, my dollar-store kitchen torch sputtered out. Cue me, in full panic mode, sliding ramekins under the broiler while yelling “IT’S PART OF THE SHOW, FOLKS!” Miraculously, they caramelized perfectly—crispy, golden, and *just* shy of burnt. The couple loved it so much, they asked me to cater their wedding. Moral of the story? Even kitchen fails can taste like victory. (But maybe test your equipment first.)
🍮 What You’ll Need (+ Why Each Ingredient Matters)
- Heavy cream (2 cups): The backbone of that luscious texture. Sub with half-and-half for a lighter version, but expect a slightly less creamy result.
- Whole milk (½ cup): Balances the cream’s richness. In a pinch, 2% works—just don’t tell the French pastry purists.
- Ground coffee or instant espresso (¼ cup or 2 tbsp): Chef’s tip! Freshly ground beans give floral notes; espresso powder packs a bolder punch. Cold brew concentrate? Swap ½ cup milk for it!
- Egg yolks (5 large): Your custard’s best friends. Save the whites for omelets or meringues!
- Granulated sugar (½ cup + extra for topping): Superfine sugar caramelizes faster, but regular works—just spread it thin.
- Vanilla extract (1 tsp): The secret harmonizer. Use the real stuff—your taste buds deserve it.
🔥 Step-by-Step: Let’s Build Some Custard Magic
- Heat the coffee-cream mix: Simmer cream, milk, and coffee until it *just* starts bubbling (don’t boil!). Steep 10 minutes, then strain. Why? Over-steeping = bitter. Set a timer!
- Whisk yolks + sugar: Go for pale yellow and ribbony—about 2 minutes. This aerates the custard, making it extra silky.
- Temper like a pro: Slowly drizzle the warm cream into the yolks while whisking. Too fast = scrambled eggs. Nobody wants that.
- Bake in a water bath: Place ramekins in a deep pan, pour hot water halfway up. Pro hack: Lay a kitchen towel under the ramekins to prevent sliding.
- Chill out: Cool to room temp, then refrigerate 4+ hours. Patience, Padawan—this sets the texture.
- Torch time! Sprinkle a thin, even sugar layer. Torch in circular motions until golden. No torch? Broil for 1-2 mins, but WATCH CLOSELY.
🎨 Serving: How to Make It Look *Almost* Too Pretty to Eat
Serve these beauties straight in their ramekins—rustic charm! Add a few coffee beans on top for a “chef’s kiss” moment. Pair with:
- A tiny espresso cup of dark chocolate ganache for dipping
- Fresh berries to cut through the richness
- A cheeky glass of bourbon or dessert wine
✨ Mix It Up: 5 Twists on the Classic
- Spiked: Add 1 tbsp Kahlúa or Baileys to the custard pre-bake.
- Chocolate-Coffee: Whisk 2 tbsp cocoa powder into the sugar mix.
- Vegan: Swap cream for coconut milk and use agar-agar (3 tsp) instead of eggs.
- Pumpkin Spice: Add ¼ cup pumpkin purée + 1 tsp spice blend to the custard.
- Mocha Crunch: Sprinkle crushed cocoa nibs under the sugar layer before torching.
👩🍳 Chef’s Confessions & Lessons Learned
Over the years, I’ve learned:
- Cheap kitchen torches are worth their weight in gold. (Looking at you, $10 Amazon special.)
- If your custard cracks, call it “artisanal” and serve it with pride.
- Always make extra—people will beg for seconds.
Fun fact: My dog once licked an entire sugar topping off a ramekin mid-dinner party. We served it as “deconstructed coffee custard” and got rave reviews. Improvise, adapt, overcome!
❓ Burning Questions (Pun Intended)
Q: Help! My custard’s still liquid after baking.
A: It needed more time. Bake until edges are set but center jiggles *slightly*—like Jell-O, not water.
Q: Can I use white sugar substitutes?
A: For the custard, yes (monk fruit works!). But the topping needs real sugar—it’s the only way to get that crack.
Q: Why strain the coffee grounds?
A: Unless you want gritty custard (you don’t), strain through a fine mesh sieve or cheesecloth.
Q: How long does it keep?
A: Up to 3 days refrigerated—but add the sugar topping RIGHT before serving.
The Science of Silky Custard – How to Avoid Curdling, Cracking & Kitchen Disasters
Let’s talk custard chemistry—because nailing that velvety texture is easier when you understand why things work.
The Egg Yolk Miracle
Egg yolks contain proteins and fats that thicken the custard when heated. But push them too hard, and they scramble. The key? Tempering—slowly introducing hot liquid to yolks to gently raise their temperature.
Pro Tempering Technique:
-
Whisk yolks and sugar until pale and ribbony (this dissolves sugar and prevents graininess).
-
Drizzle hot cream in a thin stream while whisking constantly.
-
Strain the mixture through a fine sieve to catch any rogue cooked bits.
Water Bath Wisdom
Baking custard directly in dry heat = cracked, rubbery mess. A water bath (bain-marie) provides:
-
Gentle, even heat (water can’t exceed 212°F/100°C).
-
Steam to prevent surface drying.
Hack: Place a folded kitchen towel under ramekins to stabilize them and prevent hot spots.
The Chill Factor
Refrigeration isn’t just for setting—it lets the custard’s structure relax. Skip it, and your texture might be grainy or loose.
Chef’s Rule: 4 hours minimum, overnight for best results.
Sugar Showdown – How to Get the Perfect Caramelized Crust (Without a Blowtorch)
That iconic crack is all about sugar science. Here’s how to master it with or without fancy tools.
Best Sugars for Torching
| Sugar Type | Pros | Cons |
|---|---|---|
| Granulated White | Classic, even caramelization | Can burn quickly |
| Superfine/Caster | Melts faster, smoother layer | Not always pantry-staple |
| Raw/Turbinado | Deeper flavor, crunchy texture | Uneven browning if layer too thick |
Torch vs. Broiler Method
🔥 Torch Technique:
-
Sprinkle 1 tsp sugar per ramekin in a thin, even layer.
-
Hold torch 4–6 inches away, moving in circles until golden amber.
♨️ Broiler Backup Plan:
-
Place ramekins on a baking sheet close to the broiler.
-
Broil 1–3 minutes, rotating for even color. Watch like a hawk—it goes from golden to burnt in seconds!
Pro Tip: For extra crunch, do two layers—torch, chill 2 minutes, then add another sprinkle and torch again.
Next-Level Flavor Twists – From Boozy to Vegan
Once you’ve mastered the classic, try these showstopping variations.
1. Spiked with Booze
-
Kahlúa or Baileys (1 tbsp): Mix into custard before baking.
-
Bourbon (2 tsp) + orange zest: Adds sophistication.
2. Chocolate-Coffee Hybrid
-
Whisk 2 tbsp cocoa powder into sugar-yolk mix.
-
Top with crushed espresso beans for crunch.
3. Vegan Hack
-
Replace dairy with full-fat coconut milk.
-
Swap eggs for 3 tsp agar-agar (dissolved in warm milk).
4. Seasonal Spin: Pumpkin Spice
-
Add ¼ cup pumpkin purée + 1 tsp spice blend to custard.
-
Garnish with candied pecans.
5. Mocha Crunch
-
Sprinkle cocoa nibs under the sugar layer before torching.
-
Drizzle with dark chocolate ganache post-caramelization.
Final Tip: Embrace Imperfection
Even if your custard cracks or your sugar burns, own it. My first “successful” crème brûlée had a charred edge, but my guests raved about the “smoky depth.”
Print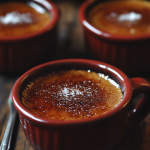
Coffee Crème Brûlée
- Total Time: 5 hours
Description
Velvety custard, bold coffee notes, and a sugar top that cracks like your favorite crime show plot twist—this Coffee Crème Brûlée is the kind of dessert that makes you feel like you’ve mastered Parisian patisserie in your own kitchen. Born from panic, perfected by torchlight, and beloved by dinner guests everywhere, this recipe is your golden ticket to dessert legend status. No drama, no pastry degree—just pure, sweet satisfaction.
Ingredients
-
2 cups heavy cream
-
½ cup whole milk
-
2 tbsp instant espresso or ¼ cup ground coffee
-
5 egg yolks
-
½ cup granulated sugar (plus extra for topping)
-
1 tsp vanilla extract
Instructions
-
Infuse the Cream: In a saucepan, heat cream, milk, and coffee until just simmering. Steep 10 mins, then strain to remove grounds.
-
Whisk Yolks + Sugar: Beat until pale and creamy, about 2 minutes.
-
Temper Carefully: Slowly add warm cream to egg mixture while whisking constantly.
-
Strain Again (Optional): For ultra-smooth custard, strain one more time before pouring.
-
Bake in Water Bath: Pour into ramekins. Place in a deep pan, add hot water halfway up sides. Bake at 325°F (160°C) for 30–35 mins until just set.
-
Cool & Chill: Cool to room temp, then refrigerate at least 4 hours or overnight.
-
Torch It: Sprinkle sugar over each custard and caramelize with a kitchen torch or under a broiler.
Notes
-
Use fresh egg yolks for the smoothest set.
-
Don’t skip the chilling—this firms up the custard to perfection.
-
Torch in a circular motion for even caramelization.
- Prep Time: 20 minutes
- Cook Time: 35 minutes
Nutrition
- Calories: 320 Per Serving
- Sugar: 19g
- Fat: 26g
- Carbohydrates: 21g
- Protein: 5g
📊 Nutrition Per Serving (Because Balance, Right?)
Calories: 320 | Protein: 4g | Carbs: 24g | Fat: 24g
Note: This is dessert. Live a little. 😉


