

The One Pie That Makes Everyone Smile (Seriously, Try It!)
Hey there, friend! Come on in—grab a mug of coffee and pull up a chair. If you’ve ever had one of those days where only something rich, creamy, and peanut-buttery will do, then you and I are already on the same wavelength. Today, we’re not just making dessert; we’re creating a masterpiece of comfort. I’m talking about my legendary No-Bake Creamy Peanut Butter Pie.
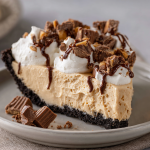
Picture this: a velvety, cloud-like peanut butter filling that’s somehow both decadent and light, all nestled into a crisp, chocolatey cookie crust. It’s the dessert that disappears first at every potluck, the one my family requests for birthdays over cake, and my secret weapon for when I need a guaranteed “wow” without spending all day in the kitchen. The best part? You don’t even need to turn on your oven. This is about mixing a few gorgeous ingredients together and letting the fridge do the magic. Whether you’re a seasoned baker or someone who considers boiling water an adventure, this recipe is your ticket to dessert-hero status. So, tie on that (probably already messy) apron, and let’s make something unforgettable!
Why This Pie is My Kitchen Comfort Blanket
This pie holds a special, slightly chaotic place in my heart. Years ago, I volunteered to bring dessert to a big, loud family reunion. I had grand plans for a towering layer cake, but life had other ideas—a broken oven element and a kitchen that looked like a flour bomb went off. With two hours to go and mild panic setting in, I stared into my pantry. There it was: a jar of peanut butter, a brick of cream cheese, and a box of chocolate wafers. I threw them together with a prayer.
What emerged from the fridge later was nothing short of a miracle. That pie was the star of the table. My grumpy uncle had two slices. Cousins I hadn’t seen in years asked for the recipe. It was the moment I truly learned that the best food isn’t about being fancy; it’s about being real, resourceful, and made with a big scoop of love. Now, every time I make it, I remember that chaos-to-triumph feeling and smile. It’s proof that sometimes the simplest things bring the most joy.
Gathering Your Dream Team of Ingredients
Here’s everything you’ll need to create this peanut butter paradise. I’ve included my little chef-y insights to help you understand the “why” behind each item!
- 1 (9-inch) Chocolate Cookie Crust (store-bought or homemade): This is our foundation. I often use a store-bought chocolate graham cracker crust for ultimate ease—no shame in that game! But if you’re feeling fancy, pulse 20 Oreos (filling included) with 5 tbsp melted butter and press into a pie plate. Chef Insight: The bittersweet chocolate notes are the perfect contrast to the sweet, creamy filling.
- 1 cup Creamy Peanut Butter: Use a standard, no-stir kind like Jif or Skippy. The stabilizers in them help the filling set better. Natural, oily peanut butter can make the pie too soft. Sub Tip: For a nut-free version, SunButter works shockingly well and gives a similar color/texture!
- 8 oz Cream Cheese, softened: This is our secret for structure and that luscious tang. Full-fat is non-negotiable here for the right texture. Leave it on the counter for a good 1-2 hours. Chef Hack: If you forget, microwave it unwrapped for 15-second bursts until it yields to a gentle press.
- ¾ cup Powdered Sugar: It sweetens and dissolves seamlessly without graininess. Sift it if it’s lumpy for the smoothest filling possible.
- 1 tsp Pure Vanilla Extract: The flavor amplifier. It rounds out all the other ingredients. Don’t skip it!
- 1 cup Heavy Whipping Cream: This is what gives our pie its ethereal, mousse-like lift. Make sure it’s cold, cold, cold straight from the fridge for the best whip. Chef Insight: The higher the fat content, the more stable and luxurious your whipped cream will be.
For Toppings (Go Wild!): Chocolate shavings, a simple chocolate drizzle (melt ¼ cup chocolate chips with 1 tsp coconut oil), crushed peanut butter cups, or just a dollop of extra whipped cream. It’s your canvas!
Let’s Build Some Magic: Step-by-Step
Follow these steps, and you’ll be a no-bake pie pro in no time. I’m chatting you through each one like you’re right here with me at the counter!
- The Fluffening (aka Beating Cream Cheese & PB): In a large bowl, beat the softened cream cheese and peanut butter with a hand mixer (or stand mixer) on medium-high speed for 2-3 minutes. Stop and scrape down the sides once. We want this supremely smooth and fluffy—no lumps allowed! This aerates the mixture, which is key for a light pie. Chef Hack: If your mixture seems stubbornly stiff, add a single tablespoon of the heavy cream from your carton to loosen it up.
- Sweeten the Deal: Reduce the mixer speed to low and add the powdered sugar and vanilla. Mix until just combined, then scrape the bowl and beat for another 30 seconds on medium. Taste it! This is your moment to adjust—want it a touch sweeter? Add another tablespoon of powdered sugar.
- Whip It Good: In a separate, clean, cool bowl, pour in your cold heavy cream. Whip on medium-high until stiff peaks form. You’ll know they’re stiff when you lift the beaters and the peak stands straight up without flopping over. Pro-Tip: Chill your bowl and beaters in the freezer for 10 minutes beforehand for even faster, more voluminous whipped cream.
- The Gentle Fold: This is the most crucial step for a light texture. Add about 1/3 of the whipped cream to the peanut butter mixture. Use a rubber spatula to fold it in—this means gently cutting through the center, sliding along the bottom, and turning the mixture over itself. Rotate the bowl as you go. Once incorporated, add the remaining whipped cream and fold until no white streaks remain. Be patient and gentle; we’re keeping all that air we just whipped in!
- Fill & Chill: Spoon this dreamy filling into your waiting crust. Smooth the top with an offset spatula or the back of a spoon. Now, the hardest part: walk away. Cover loosely with plastic wrap and refrigerate for at least 4 hours, but overnight is absolute perfection. This chill time lets the flavors marry and the filling firm up to sliceable bliss.
- Garnish & Serve: Just before serving, add your toppings! Drizzle with chocolate, sprinkle with crushed candy, or add rosettes of whipped cream. Run a sharp knife under hot water, wipe it dry, and slice cleanly for beautiful pieces.
How to Serve This Beauty
Presentation is the final fun step! I love serving this on a simple cake stand or a colorful ceramic plate. For a rustic-chic look, sprinkle the toppings just in the center. For individual servings, use a warm knife to get clean slices and plate each piece with a tiny extra pinch of sea salt or a mini peanut butter cup on the side. A cup of strong cold brew or a glass of cold milk is its perfect soulmate. It’s rich, so small slices are totally acceptable (but good luck stopping at one!).
Make It Your Own: Fun Variations
This recipe is a fantastic blueprint for creativity. Here are a few of my favorite twists:
- Chocolate Peanut Butter Cup: Fold ½ cup of mini chocolate chips into the filling before chilling. Top with chopped Reese’s cups.
- Salted Caramel Swirl: Before chilling, drizzle ¼ cup of thick salted caramel sauce over the filled pie and use a knife to swirl it gently into the top layer.
- Vegan Dream: Use vegan cream cheese, a plant-based heavy cream alternative (like Country Crock Plant Cream), and ensure your chocolate crust is vegan. Sweeten with maple syrup to taste (note: this will be a softer set).
- Banana Cream Fusion: Spread a layer of sliced bananas over the crust before adding the peanut butter filling. Top with fresh banana slices and a dusting of cinnamon before serving.
- Cookie Dough Lover’s: Fold in ½ cup of mini chocolate chips and ¼ cup of oat flour or heat-treated all-purpose flour into the filling mixture for a safe-to-eat “cookie dough” vibe.
Olivia’s Chef’s Notes & Kitchen Confessions
This recipe has evolved from my panic-mode original. I used to just mix everything together in one bowl, but I learned that whipping the cream separately and folding is the game-changer for that cloud-like texture. One time, I accidentally used chunky peanut butter, and you know what? The little peanut bits added a fantastic crunch that my dad now insists on! So, feel free to try it.
My biggest kitchen story with this pie involves my dog, Baxter. Let’s just say he has a sixth sense for peanut butter and once managed to gently nose a finished (but unguarded) pie off the counter. The pie was a loss (RIP), but the look of pure, unadulterated guilt on his furry face was priceless. Moral of the story: guard your chilled pie with your life, or at least with a securely placed oven mitt!
Your Questions, Answered!
Q: My filling seems a bit soft/runny after chilling. What happened?
A: This usually means the whipped cream wasn’t whipped to stiff peaks, or the natural peanut butter was used (which is oilier). Don’t worry—it will still taste amazing! Serve it in bowls as a mousse. Next time, ensure your cream is very cold and whip until truly stiff, and use a standard processed peanut butter.
Q: Can I make this ahead of time?
A: Absolutely! That’s one of its best features. It keeps beautifully, covered, in the fridge for up to 3 days. Add any fresh toppings (like whipped cream or candy) right before serving.
Q: Can I freeze the peanut butter pie?
A> You can! Wrap it tightly in plastic wrap and freeze for up to a month. Thaw in the refrigerator overnight. The texture will be slightly denser but still delicious—like a frozen peanut butter cheesecake slice.
Q: My cream cheese was still a bit lumpy when I mixed it. How do I avoid that?
A> Proper softening is key! If you get small lumps, you can press the finished filling through a fine-mesh sieve—a bit fussy but it works. Or, embrace the rustic texture and call it “homestyle.”
Creamy Peanut Butter Pie (Easy No-Bake Dessert)
Description
If you need a guaranteed dessert win, this no-bake peanut butter pie is it. It’s smooth, fluffy, rich, and perfectly balanced with a chocolate cookie crust. No oven, no complicated steps — just simple mixing, chilling, and smiling when everyone asks for seconds. It’s ideal for parties, birthdays, or anytime you want something impressive with minimal effort.
Ingredients
-
1 prepared 9-inch chocolate cookie crust (store-bought or homemade)
-
1 cup creamy peanut butter (regular, not natural-style)
-
8 oz (225 g) cream cheese, softened
-
¾ cup powdered sugar
-
1 tsp vanilla extract
-
1 cup cold heavy whipping cream
Optional Toppings
-
Chocolate drizzle
-
Chocolate shavings
-
Crushed peanut butter cups
-
Extra whipped cream
Instructions
-
Beat peanut butter & cream cheese
In a large bowl, beat softened cream cheese and peanut butter for 2–3 minutes until completely smooth and fluffy. -
Add sugar & vanilla
Mix in powdered sugar and vanilla until fully combined. Scrape the bowl and mix again briefly. -
Whip the cream
In a separate cold bowl, whip heavy cream to stiff peaks (peaks stand straight when beaters lift). -
Fold gently
Fold one-third of the whipped cream into the peanut butter mixture to lighten it. Then gently fold in the remaining whipped cream until smooth and airy. -
Fill the crust
Spoon filling into the crust and smooth the top. -
Chill
Refrigerate at least 4 hours (overnight is best) until firm. -
Decorate & serve
Add toppings just before serving. Slice with a warm knife for clean cuts.
Notes
-
Use regular creamy peanut butter — natural versions can make the pie too soft.
-
Cream cheese must be fully softened to avoid lumps.
-
Cold cream whips better — chill the bowl and beaters if possible.
-
Fold, don’t stir — gentle folding keeps the filling light and mousse-like.
-
Overnight chill = best texture and flavor.
Nutritional Information (Approximate)
Per slice (1/8th of pie, without additional toppings): Calories: ~450 | Fat: 35g | Saturated Fat: 16g | Carbohydrates: 28g | Sugar: 20g | Protein: 9g
Remember, this is a celebratory treat! Enjoy it mindfully and savor every single creamy, peanut-buttery bite.
Final Thoughts
The One Pie That Makes Everyone Smile (Seriously, Try It!)
And here we are, friend—coffee mug empty, apron dusted with powdered sugar, and a gorgeous pie resting peacefully in your fridge. All that’s left is the hardest part: waiting.
But while we wait, let me tell you what I hope you’ve taken from this little kitchen adventure of ours.
This No-Bake Creamy Peanut Butter Pie isn’t just a recipe. It’s permission. Permission to take shortcuts when life gets chaotic. Permission to show up with something simple that still steals the show. Permission to believe that you—yes, you—can create something that makes people close their eyes on the first bite and let out that involuntary little mmmph of pure satisfaction.
I’ve made this pie in a borrowed apartment with a dull butter knife and a whisk that squeaked. I’ve made it at midnight when I couldn’t sleep, the fridge humming its quiet song while I folded cream cheese and peanut butter together like a prayer. I’ve made it for celebrations and for heartbreaks, for potlucks and for no reason at all except that Tuesday needed to be a little better.
And every single time, it works.
Not because I’m a pastry chef or because I own fancy equipment. It works because peanut butter and chocolate are soulmates. It works because cream cheese and whipped cream refuse to let you down. It works because sometimes the most honest, generous thing you can offer someone is something creamy and cold and made just for them.
So go ahead—pull that pie out of the fridge. Run your knife under hot water. Wipe it dry. Slice cleanly through that chocolate crust and into that cloud of peanut butter heaven. Watch the way the fork glides through. Listen to the quiet click against the plate.
And when you take that first bite, the one you’ve been waiting for since you started reading this? I hope you smile. I hope you close your eyes. I hope you think, I made this.
Because you did.


