
Say Hello to Your New Favorite Easter Treat: No-Bake Cheesecake Eggs!
Hey there, friend! Can you smell that? It’s the sweet, promising scent of spring in the air, mixed with a hint of chocolate and nostalgia. Easter has always been my favorite holiday for one delicious reason: it’s a celebration that happens almost entirely around the table. But between dyeing eggs, prepping a big meal, and hunting for that last hidden chocolate bunny, who has hours to spend baking? That’s exactly why I’m practically bouncing with excitement to share this recipe with you today.
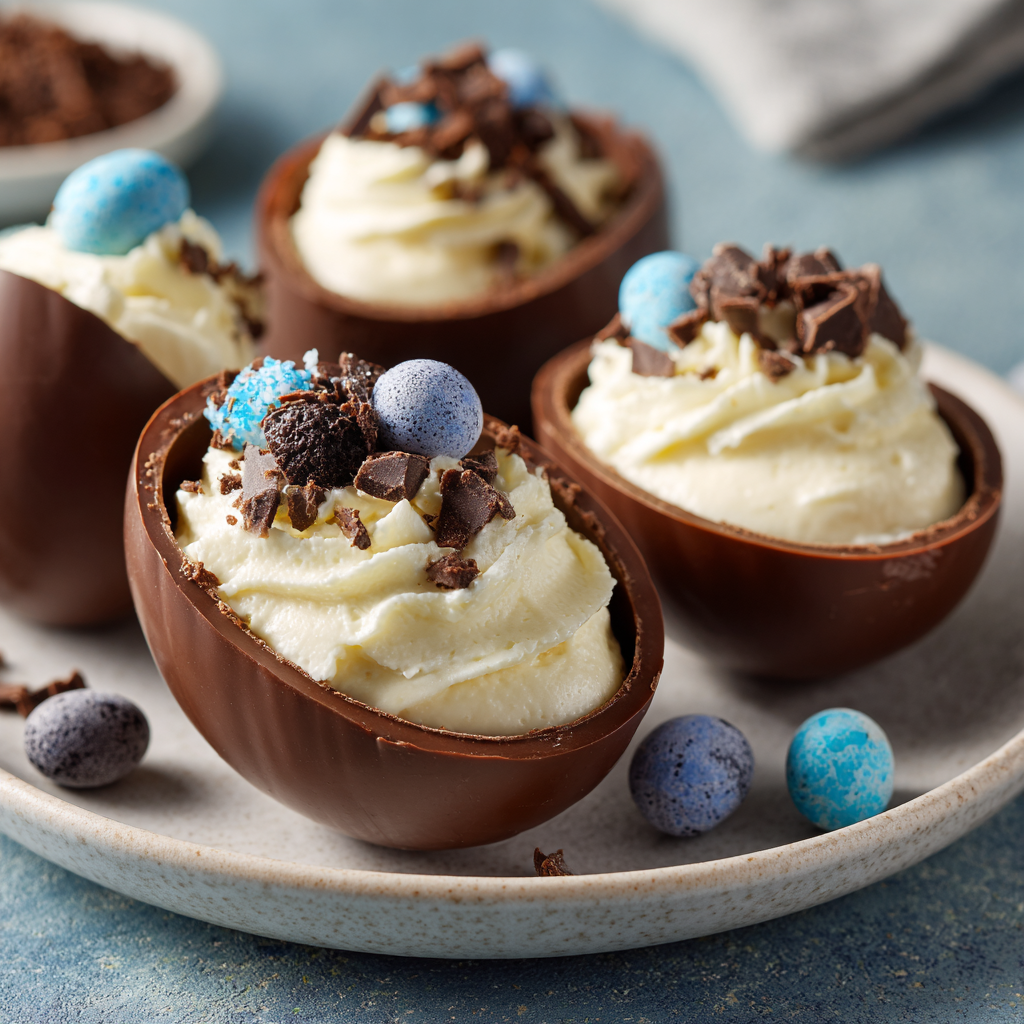
Imagine this: a gorgeous, glossy chocolate egg that cracks open not to a hollow center, but to a cloud of dreamy, tangy, no-bake cheesecake filling. It’s rich, it’s creamy, it’s delightfully decadent, and the best part? You don’t even need to turn on your oven. These Cheesecake-Filled Chocolate Eggs are the ultimate show-stopper for your Easter table, a surefire hit for any spring gathering, and such a fun project to make with loved ones in the kitchen.
We’re talking about a dessert that looks like it came from a fancy chocolatier but is made with simple, joyful steps right in your own home. Whether you’re a seasoned dessert-maker or someone who gets nervous just looking at a springform pan, this recipe is for you. So tie on your favorite apron (the messy one tells the best stories, I always say), and let’s create some magic—and memories—together.
The Easter That Started It All: A Tale of Melted Chocolate & Big Dreams
This recipe didn’t start in a flash of genius. Oh no. It started with a kitchen disaster of the sweetest, stickiest kind. Picture a much younger me, about ten years old, determined to make my Grandma Rose’s famous chocolate truffles for our family Easter. I was ambitious! I melted chocolate, mixed in cream, and ended up with a bowl that looked more like chocolate soup. My little heart sank.
But my grandma, in her infinite kitchen wisdom, didn’t see a failure. She saw a chance to play. “Well, Olivia,” she said, her eyes twinkling, “if it’s too runny for truffles, what else can it fill?” She rummaged in the cupboard and pulled out a bag of those classic, hollow foil-wrapped chocolate eggs. With a careful twist, she popped the two halves apart. “Let’s see what happens,” she whispered, like we were scientists in a lab.
We spooned my “failed” ganache into those little chocolate shells, chilled them, and presented them to the family. The look of surprise and delight when everyone bit into a chocolate egg filled with creamy goodness? That feeling was pure magic. It taught me that the best recipes often come from happy accidents and a willingness to experiment. These Cheesecake-Filled Eggs are the grown-up, perfected version of that messy, wonderful kitchen memory, and every time I make them, I think of her.
Gathering Your Joyful Ingredients
One of my core cooking beliefs is that fantastic food doesn’t need a mile-long ingredient list. We’re keeping things simple and high-quality here. Every component plays a starring role, so let’s break it down. Here’s what you’ll need to create these edible treasures:
For the Chocolate Shells:
- 8–10 Hollow Chocolate Eggs: This is your edible vessel! You can use milk, dark, or white chocolate eggs based on your preference. Chef’s Insight: I often use a mix for a pretty platter! Look for eggs that are a decent size and have a fairly sturdy shell. The classic foil-wrapped ones from the grocery store work perfectly.
For the Luxurious No-Bake Cheesecake Filling:
- 8 oz (one block) Full-Fat Cream Cheese, softened: Full-fat is non-negotiable here for the proper rich, creamy texture and stability. Leave it on the counter for 1-2 hours until it’s soft to the touch. Substitution Tip: For a lighter version, Neufchâtel cheese works, but the filling will be slightly softer.
- 1/4 cup Powdered Sugar: Also called icing sugar or confectioners’ sugar. It dissolves seamlessly into the cream cheese without any graininess. Chef’s Insight: Sift it if it’s lumpy for an ultra-smooth filling.
- 1/2 teaspoon Pure Vanilla Extract: The warm, floral notes of vanilla are the perfect bridge between the tangy cheese and sweet chocolate. For a next-level twist, try vanilla bean paste!
- 1/2 cup Heavy Cream (also called Heavy Whipping Cream), chilled: This is what gives our filling its incredible, light-as-air fluffiness. Make sure it’s cold straight from the fridge—it whips up faster and holds peaks better.
For the Fun Finishes (Optional but Encouraged!):
- Crushed Cookies: Graham cracker crumbs are a classic cheesecake nod! Biscoff or vanilla wafer crumbs are also divine.
- Mini Chocolate Chips: For a delightful little crunch and extra chocolatey punch.
- Sprinkles or Chopped Nuts: Instant color and joy! Pastel sprinkles scream Easter. Toasted pecans or almonds add a lovely sophisticated crunch.
- Fresh Berries: A tiny strawberry slice or a couple of raspberries on top look beautiful and add a pop of freshness.
Let’s Make Some Magic: Step-by-Step Instructions
Ready to play? This is the fun part. We’ll go step-by-step, and I’ll be right here with you with all my best tips and tricks. Put on some happy music, and let’s get started!
Step 1: Prep Your Chocolate Eggs. Gently unwrap your hollow chocolate eggs. Now, we need to create an opening for our filling. My favorite method is to use a small, sharp serrated knife (like a tomato/petty knife) and very gently saw a small “hatch” or opening at the top. You’re aiming for an opening about the size of a quarter. Think of it like you’re opening a little treasure chest! Pro-Tip: If your eggs are the two-halves kind, simply pull them apart—you lucky duck! Place all your prepped egg shells on a plate or small baking sheet. If any break (it happens to the best of us!), consider it a chef’s snack and grab another.
Step 2: Whip the Cream to Soft Peaks. In a clean, cool bowl, pour in your chilled heavy cream. Using a hand mixer or stand mixer with the whisk attachment, beat the cream on medium-high speed until it just holds soft, billowy peaks. This means when you lift the beaters, the peak of cream curls over gently. Don’t go to stiff peaks yet! We’ll whip it a bit more later. Set this aside for a moment.
Step 3: Create the Cream Cheese Base. In a separate, larger bowl, beat your softened cream cheese on medium speed for about 1-2 minutes until it’s completely smooth, creamy, and no lumps remain. Scrape down the sides of the bowl with a spatula. This is crucial for a silky filling! Add the powdered sugar and vanilla extract. Beat again on low at first (to avoid a sugar cloud!), then medium until everything is fully incorporated and smooth.
Step 4: Marry the Creams & Achieve Fluffy Bliss. Here’s the key to a light, mousse-like filling: gentle folding. Add about one-third of your whipped cream to the cream cheese mixture. Use your spatula to gently fold it in—scoop down the side, across the bottom, and up over the top, rotating the bowl. This preserves the air bubbles. Once that’s incorporated, add the remaining whipped cream and fold gently until no white streaks remain. The mixture should be gloriously thick, smooth, and fluffy. Chef’s Hack: If you want to be extra fancy, transfer this filling to a piping bag fitted with a large round tip. It makes filling the eggs incredibly neat and easy!
Step 5: Fill Those Eggs! If you’re using a piping bag, simply insert the tip into the opening of each chocolate egg and pipe until the filling is nearly to the top. If you’re using a spoon, use a small teaspoon to carefully spoon the filling into each shell. Don’t overpack it—leave a tiny bit of room at the top if you’re adding toppings. Wipe away any little smudges with a clean finger.
Step 6: Decorate & Chill. Now for the artistic flair! Sprinkle your chosen toppings over the filled eggs—a pinch of cookie crumbs, a few mini chips, a shower of sprinkles. Then, carefully transfer the tray to your refrigerator. Let them chill for at least 30 minutes, or up to 2-3 hours. This chilling time is essential for the filling to firm up slightly, making them perfect for eating.
Serving Your Edible Masterpieces
Presentation is part of the fun! I love arranging these cheesecake eggs on a beautiful cake stand or a platter lined with pastel parchment paper. Scatter a few extra sprinkles, edible flowers, or even a few loose chocolate eggs around the base for a truly festive look. Serve them straight from the fridge with a smile, and get ready for the “oohs” and “aahs.” The contrast of the crisp chocolate shell giving way to the cool, creamy filling is an experience everyone will love.
Make It Your Own: Delicious Recipe Variations
The beauty of this recipe is how easily it adapts! Here are a few of my favorite twists:
- Lemon Berry Bliss: Add 1 teaspoon of finely grated lemon zest to the filling. Top each filled egg with a tiny dollop of seedless raspberry jam.
- Salted Caramel Pretzel: Drizzle the inside of the chocolate shell with a little salted caramel sauce before filling. Top the cheesecake with a tiny piece of salted pretzel.
- Cookies & Cream: Fold 2 tablespoons of finely crushed Oreo crumbs into the filling. Use a white chocolate egg shell and top with more crumbs.
- Mocha Buzz: Dissolve 1 teaspoon of instant espresso powder into the vanilla extract before adding it. Use a dark chocolate shell.
- Dairy-Free Swap: Use vegan cream cheese and coconut cream (chilled solid part only) whipped in place of heavy cream. Ensure your chocolate eggs are dairy-free.
Olivia’s Chef Notes & Kitchen Stories
This recipe has become my go-to spring signature, but it’s had its evolution! The first time I made the “grown-up” version, I got a bit overzealous with the filling and created what my husband lovingly called “cheesecake volcanoes” when they overflowed. Lesson learned: leave a little breathing room at the top!
I’ve also learned that these are fantastic make-ahead treats. You can assemble them completely the day before your event and just pull them out when you need them. They also travel surprisingly well for a picnic or potluck if kept in a cool, flat container. The best part? Seeing the sheer delight on people’s faces—especially kids—when they discover the surprise inside. It’s a little bite of joy, and that’s what homemade cooking is all about.
Your Questions, Answered: FAQs & Troubleshooting
Q: My chocolate egg cracked a lot when I cut it. What did I do wrong?
A: No worries! Chocolate can be temperamentous. You might have used too much pressure or a knife that wasn’t serrated. Try using a lighter touch and a gentle sawing motion. Warming the knife blade slightly under hot water and drying it can also help make a cleaner cut. If it cracks, just use it as your “taste tester” and grab another!
Q: My filling seems a bit runny. How can I fix it?
A: This usually happens if the cream cheese wasn’t full-fat, if it wasn’t soft enough to blend completely smooth, or if the heavy cream was under-whipped. For future batches, ensure your cream is cold and whip it well. For this batch, all is not lost! Just pop the filled eggs into the freezer for about 20 minutes instead of the fridge. They’ll firm up nicely, though you’ll want to eat them a bit sooner after taking them out.
Q: Can I use Cool Whip instead of whipping my own cream?
A: You absolutely can for a shortcut! Use an 8 oz tub of thawed Cool Whip and gently fold it into your sweetened, vanilla-infused cream cheese base. The texture will be slightly different—lighter and a bit airier—but still delicious.
Q: How long do these last in the fridge?
A: They are best enjoyed within 2-3 days. The chocolate shell may start to soften slightly over time from the moisture in the filling, but they’ll still taste amazing. I do not recommend freezing the assembled eggs, as the texture of the filling can become grainy upon thawing.

Cheesecake-Filled Chocolate Eggs : No-Bake Easter Dessert
Description
These no-bake cheesecake eggs are a fun, festive dessert that looks impressive but is surprisingly easy to make. Hollow chocolate eggs are filled with a fluffy, tangy cheesecake cream and topped with your favorite crunchy or colorful finishes. Perfect for Easter tables, spring parties, or a quick make-ahead treat.
Ingredients
Chocolate Shells
-
8–10 hollow chocolate eggs (milk, dark, or white)
Cheesecake Filling
-
8 oz (225 g) full-fat cream cheese, softened
-
¼ cup powdered sugar
-
½ tsp vanilla extract
-
½ cup cold heavy cream (or whipping cream)
Optional Toppings
-
Graham cracker or cookie crumbs
-
Mini chocolate chips
-
Sprinkles
-
Chopped nuts
-
Fresh berries
Instructions
-
Prepare the eggs
Carefully unwrap the chocolate eggs.
If sealed, gently cut a small opening at the top with a small serrated knife using a light sawing motion. If they come in halves, separate them. -
Whip the cream
In a cold bowl, beat the heavy cream until soft peaks form. Set aside. -
Mix the cheesecake base
In another bowl, beat the softened cream cheese until completely smooth.
Add powdered sugar and vanilla. Beat until creamy. -
Fold together
Gently fold the whipped cream into the cream cheese mixture in two additions until light and fluffy. -
Fill the eggs
Spoon or pipe the filling into each chocolate egg, leaving a little space at the top. -
Decorate
Add crumbs, sprinkles, nuts, or mini chips on top. -
Chill
Refrigerate at least 30 minutes to firm up before serving.
Notes
-
✅ Use full-fat cream cheese for best texture and stability.
-
✅ Make sure cream is cold before whipping.
-
✅ A piping bag makes filling cleaner and faster.
-
✅ If shells crack, use the pieces as crunchy topping.
-
✅ Too soft? Chill longer or freeze 15–20 minutes.
Quick Nutritional Overview
Please note: This is an approximate estimate per cheesecake-filled egg, based on using a standard milk chocolate shell and all listed filling ingredients without toppings. Values may vary based on specific brands and ingredient choices.
- Prep Time: 20 minutes
- Chill Time: 30 minutes
- Total Time: 50 minutes
- Servings: 8-10 eggs
Approximate Nutrition per Egg: Calories: 260 | Protein: 4g | Carbohydrates: 18g | Fat: 20g
Final Thoughts: Crack Open a World of Joy
Well, my friend, there you have it—your ticket to becoming the Easter dessert hero, no oven required. From a childhood kitchen rescue mission to the glossy, filled beauties you’re about to create, this recipe is a celebration of playfulness, nostalgia, and the pure delight of a delicious surprise.
Remember, perfection isn’t the goal here—joy is. Whether your first chocolate shell cracks a little (hello, chef’s snack!), your filling is a tad soft (a quick freezer fix!), or your sprinkles go a bit rogue, it’s all part of the fun. The real magic isn’t just in the eating, but in the making: the shared laughs, the sticky fingers, the proud moment you present your edible treasures.
These Cheesecake-Filled Chocolate Eggs are more than just a treat. They’re a conversation starter, a memory maker, and a beautiful reminder that the most special things often come from simple ingredients and a willing heart. So gather your eggs, your cream cheese, and your favorite people. Let the music play, let the creativity flow, and get ready to hear that wonderful sound: the crisp snap of chocolate giving way to creamy bliss, followed by the happiest silence of all—the sound of everyone enjoying a bite of pure, unadulterated happiness.
Thank you for letting me share this recipe—and a piece of my kitchen story—with you. Now, go make some magic of your own. I have a feeling your table is about to become the happiest place this Easter.
With love and a pocketful of sprinkles,
Olivia


