
Bunny-Shaped Spinach Dip Bread Bowl: Your New Party Showstopper!
Hello, my friend! Come on in, grab an apron, and let’s get ready to make something that’s going to have everyone at your table grinning from ear to ear. Is there anything better than the smell of freshly baked bread? Okay, maybe it’s the smell of freshly baked bread surrounding a pool of warm, creamy, garlicky spinach dip. Now we’re talking.
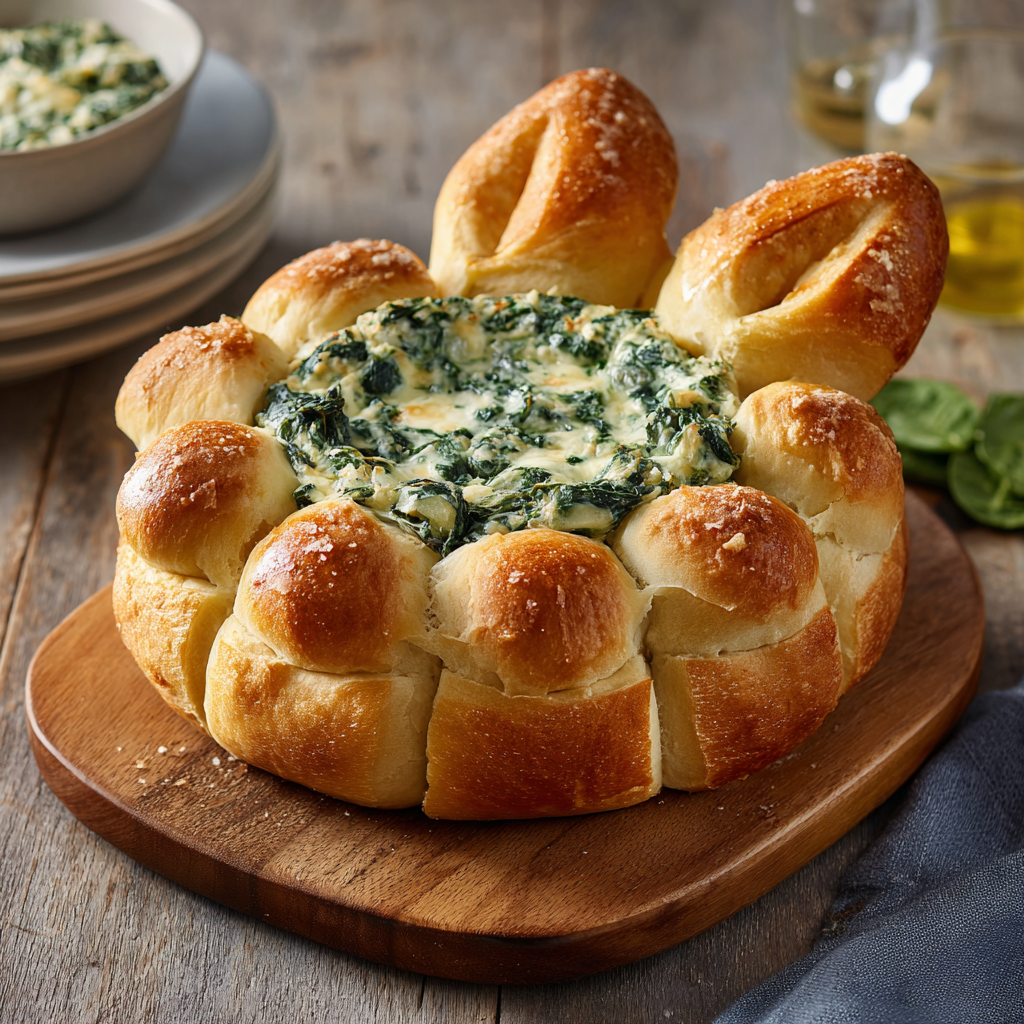
Today, we’re rolling up our sleeves (literally) to create the ultimate edible centerpiece: a Bunny-Shaped Spinach Dip Bread Bowl. This isn’t just food; it’s an experience. Imagine a soft, golden, pull-apart bread bunny, its belly hollowed out and filled with the most decadently cheesy spinach dip you’ve ever tasted. It’s playful, it’s delicious, and I promise, it’s way easier to make than it looks. This is the magic trick you pull out for Easter brunch, spring baby showers, garden parties, or any gathering where you want to hear a chorus of “Aww!” followed by “Mmmm.” It brings people together, sparks joy, and let’s be honest, it’s just really, really fun to tear into a bread bunny with your favorite people. So, let’s ditch the boring serving bowl and create a memory instead.
The Dip That Started It All: A Nostalgic Nibble
This recipe has its roots in one of my earliest (and messiest) kitchen memories. Every holiday at my Grandma Eleanor’s house featured her legendary “Green Goblin Dip,” a mysterious, deliciously creamy spinach concoction served in a hollowed-out rye bread round. My sister and I were obsessed. We’d strategically hover near the appetizer table, plotting how to snag the biggest chunks of soggy, dip-infused bread from the bowl’s edges without getting caught.
Years later, when hosting my first Easter, I wanted to capture that same magic but with a springtime twist. I remembered the joy of pulling that bread apart, of sharing it. Why not make the bread part of the show? Thus, the bread bunny was born—a tribute to Grandma’s dip, wrapped up in a shape that makes my inner kid (and my actual kids) do a happy dance. It’s that beautiful blend of nostalgic flavor and whimsical presentation that turns a simple snack into the heart of the party.
Gathering Your Ingredients: A Chef’s Notes
Here’s everything you’ll need to bring our bread bunny to life. Don’t stress about perfection—cooking is about creativity!
- 1 lb pizza dough (store-bought or homemade): This is our bunny’s body! Store-bought dough is a fantastic, consistent timesaver. I often grab it from the bakery section of my grocery store. If you’re feeling ambitious, your favorite homemade dough works wonderfully. Let it sit at room temp for 30 minutes before shaping—it becomes much more cooperative.
- 1 egg, beaten (for egg wash): This is the secret to that gorgeous, glossy, golden-brown finish. It gives our bunny a professional bakery shine.
- Olive oil, for brushing: A light brush adds flavor and helps the bread achieve a perfect crisp-tender texture.
- 8 oz cream cheese, softened: The lush, tangy base of our dip. Pro Tip: Leave it on the counter for a good hour before you start. Truly soft cream cheese blends into silky perfection with zero lumps.
- ½ cup sour cream or Greek yogurt: Sour cream gives classic tang, while Greek yogurt adds a lovely protein boost and slight zing. I use them interchangeably based on what’s in my fridge!
- 1 cup cooked spinach, squeezed VERY dry and chopped: This is crucial! Frozen chopped spinach, thawed and wrung out in a clean kitchen towel until it’s nearly crumbly, is my go-to. Excess water is the enemy of a thick, creamy dip.
- ½ cup shredded mozzarella: For that iconic, stretchy, mild cheesiness. Pre-shredded is fine, but blocks you shred yourself melt even creamier.
- ¼ cup grated parmesan: The flavor powerhouse. The salty, nutty punch takes the dip from good to “can I have the recipe?” good.
- 1 clove garlic, minced: Fresh is best here! It delivers a bright, aromatic kick that powdered garlic just can’t match.
- Salt and pepper, to taste: Always season in stages. Taste your dip mix before adding more—the cheeses already bring salt to the party.
Let’s Build Our Bunny: Step-by-Step Fun
Ready for the fun part? Let’s shape, bake, and fill! Put on some music, and don’t worry about making it “perfect.” A lopsided bunny has character.
- Preheat & Prep: Fire up your oven to 375°F (190°C). This is the ideal temperature for our dough to puff up beautifully without burning. Line a large baking sheet with parchment paper—trust me, it’s a lifesaver for cleanup.
- Shape the Bunny Body & Head: Take about two-thirds of your dough and form it into a smooth, oval-shaped ball. This is the bunny’s body. Place it on one end of your baking sheet. With the remaining third, form a smaller, round ball for the head and place it touching the top of the body. Gently press where they meet to fuse them slightly.
- Craft the Ears & Pull-Apart Balls: Here’s where personality comes in! Pinch off two small pieces of dough (you can borrow a tiny bit from the body if needed). Roll them into ropes and taper one end to form ears. Place them above the head. Now, take the rest of your dough (or use a second, smaller dough ball if you want more pieces) and roll marble-sized balls. Arrange them snugly around the body to create a “halo” of pull-apart pieces. They’ll bake together into a tear-and-share dream.
- Create the Dip Hollow: Using a small, sharp knife or the bottom of a round teaspoon, gently cut a shallow, wide circle into the center of the bunny’s body (not all the way through to the pan!). Remove this dough plug—you can bake it alongside as a chef’s treat! This well is where our glorious dip will live.
- Egg Wash & Bake: Beat that egg with a tablespoon of water and, using a pastry brush, give the entire bunny and its dough balls a gentle, even coat. This is what gives you that beautiful color. Follow with a very light brushing of olive oil. Slide your creation into the oven and bake for 18-22 minutes. You’re looking for a deep, golden brown all over.
- Mix the Dip (Chef’s Hack Time!): While the bunny bakes, make the dip. In a medium bowl, combine the softened cream cheese, sour cream, dried spinach, mozzarella, parmesan, and garlic. Mix until gloriously smooth and cohesive. Season to taste. Here’s my hack: if you have time, pop this dip in the fridge for 15 minutes while the bread cools slightly. A cooler dip won’t soak into the hot bread as quickly when you assemble.
- The Grand Assembly: Once your bread bunny is out of the oven and has cooled for just 5-10 minutes (you want it warm, not molten), carefully spoon the spinach dip into the hollowed-out center. Watch it pool enticingly—that’s the money shot. Serve immediately while everything is warm and inviting!
Serving Your Masterpiece: The Final Flourish
Presentation is part of the joy! Place your bunny on a large board or platter. Scatter some extra veggies like radish slices, snap peas, and carrot sticks (bunny food!) around it, alongside sturdy crackers and potato chips for dipping. I love adding sprigs of fresh dill or parsley for a pop of green. Don’t just bring it to the table—present it with a flourish. “Everyone, meet our guest of honor!” Then, demonstrate the pull-apart magic by tearing off a dough ball, dragging it through the dip, and enjoying the first bite. Watch the crowd gather.
Make It Your Own: Delicious Twists & Swaps
- Artichoke & Jalapeño: Swap the spinach for a drained can of artichoke hearts (chopped) and add 1-2 diced jalapeños for a kick.
- Buffalo Chicken: Mix 1 cup of shredded rotisserie chicken with ¼ cup of buffalo sauce into the cream cheese base. Omit spinach. Top with blue cheese crumbles after baking.
- Everything Bagel: Before baking, sprinkle the egg-washed dough generously with everything bagel seasoning. Use green onions in the dip.
- Dairy-Free: Use your favorite plant-based cream cheese, sour cream, and shredded cheeses. The shaping and baking process remains exactly the same!
- Crescent Roll Shortcut: In a pinch, use two cans of crescent roll dough. Unroll, piece together into a large rectangle, and shape your bunny on the pan. It bakes a little faster, so keep an eye on it!
Olivia’s Kitchen Notes: The Story Behind the Snack
This recipe has seen some… experimental phases. There was the “long-ear” incident of 2019 where the dough ears stretched during baking and my bunny looked more like a sleepy llama. (It still tasted amazing.) I’ve learned that a chill, not-too-sticky dough is easiest to shape. Over the years, I’ve added the ring of pull-apart balls because, frankly, we always ran out of bread for the dip! This ensures every last bit of that creamy filling finds a perfect carb vehicle. The biggest evolution? Fearlessness. The first time I made it, I was so nervous. Now, I know it’s meant to be fun, a little messy, and utterly delicious. It always works out, and it always brings smiles. That’s the real secret ingredient.
Your Questions, Answered!
Q: My dough is super sticky and hard to shape. Help!
A: No worries! This is common. Lightly flour your hands and your work surface. If the dough is very warm, you can even pop it in the fridge for 10 minutes to firm up. A little stickiness is okay—our bunny is homemade, not machine-made!
Q: Can I make any part of this ahead of time?
A> Absolutely! You have two great options: 1) Shape the bread bunny on the parchment-lined baking sheet, cover loosely with plastic wrap, and refrigerate for up to 24 hours before baking. Let it sit at room temp for 20 minutes before egg washing and baking. 2) Make the dip a full day ahead and store it covered in the fridge. Let it soften a bit at room temp before filling the bread.
Q: My dip seems a bit runny. What did I do wrong?
A> The culprit is almost always moisture in the spinach. Next time, really go to town squeezing it in that kitchen towel—you’ll be shocked how much water comes out! For this batch, you can stir in an extra tablespoon or two of grated parmesan to help thicken it up.
Q: The bread is done but the pull-apart balls in the middle aren’t golden. What now?
A> Great observation! Ovens can have hot spots. If the main body is perfectly browned, you can loosely tent the ears and outer edges with aluminum foil to prevent over-browning, and let it bake for another 3-5 minutes so the inner pieces catch up.
Bunny-Shaped Spinach Dip Bread Bowl (Pull-Apart Party Centerpiece)
Description
This Bunny-Shaped Spinach Dip Bread Bowl is the kind of dish that makes everyone smile before they even take a bite. Soft golden bread baked into a cute bunny shape surrounds a warm, creamy spinach cheese dip — perfect for parties, spring gatherings, or holiday tables. It looks impressive, but it’s surprisingly easy to make using pizza dough and a simple homemade dip.
Ingredients
Bread Bunny
-
1 lb pizza dough (store-bought or homemade), room temperature
-
1 egg, beaten (for egg wash)
-
1 tbsp olive oil
Spinach Dip
-
8 oz cream cheese, softened
-
½ cup sour cream or Greek yogurt
-
1 cup cooked spinach, squeezed very dry and chopped
-
½ cup shredded mozzarella
-
¼ cup grated parmesan
-
1 clove garlic, minced
-
Salt and pepper to taste
Instructions
-
Preheat oven to 375°F (190°C). Line a baking sheet with parchment paper.
-
Shape the bunny:
-
Use about ⅔ of the dough to form an oval body.
-
Use the remaining dough to form a round head and attach it.
-
Shape two ears from small dough pieces and place above the head.
-
Roll remaining dough into small balls and arrange around the body for pull-apart pieces.
-
-
Create the dip well:
Cut a shallow circle in the center of the body and remove the dough plug (don’t cut through to the pan). -
Brush & bake:
Brush all dough with egg wash, then lightly with olive oil.
Bake 18–22 minutes until golden brown. -
Make the dip:
Mix cream cheese, sour cream or yogurt, spinach, mozzarella, parmesan, garlic, salt, and pepper until smooth. -
Fill & serve:
Let bread cool 5–10 minutes, then spoon dip into the center well. Serve warm and pull apart to eat.
Notes
-
✅ Dry spinach thoroughly — squeeze hard in a towel to prevent watery dip.
-
✅ Room-temp dough shapes easier and won’t spring back.
-
✅ Chill the dip 15 minutes before filling to keep it thick.
-
✅ If bread browns too fast, loosely cover ears with foil.
-
✅ Add everything-bagel seasoning on top before baking for extra flavor.
Nutritional Info (Approximate)
Per serving (based on 10 servings): Calories: 210 | Fat: 12g | Carbs: 18g | Protein: 7g | Fiber: 1g. Remember, this is a celebratory treat meant for sharing and enjoying!
Final Thoughts: More Than Just a Recipe
This Bunny-Shaped Spinach Dip Bread Bowl is so much more than the sum of its parts. It’s a conversation starter, a memory maker, and a delicious testament to the fact that food should be fun. It bridges the gap between the nostalgic comfort of Grandma’s classic dip and the sheer joy of a playful, edible centerpiece.
Don’t let the shape intimidate you. The beauty lies in its homemade charm—whether your bunny looks poised for a magazine or delightfully whimsical, it will be met with the same delight. This recipe is designed to be forgiving, flexible, and, above all, a shared experience. It invites you into the kitchen, encourages you to put your own spin on it, and guarantees a moment of collective happiness when you bring it to the table.
So, embrace the light flour dusting on your counter, the smell of garlic and baking dough filling your kitchen, and the inevitable “Wow!” as you present your creation. You’re not just serving a snack; you’re serving an instant mood-lifter, a story, and a whole lot of love.
Now, go create your own kitchen magic. Your party showstopper awaits.
Happy baking, and even happier sharing!
With love from my kitchen to yours,
Olivia


