

Easy Homemade Popover Recipe – Light and Airy with Crisp Edges
The Magic of the Popover: Your New Kitchen Superpower
Hey there, friend! Come on in, grab an apron, and let’s talk about one of the most magical, satisfying, and downright impressive things you can bake with just a bowl and a whisk. I’m talking about classic popovers. If you’ve never experienced the joy of pulling a tray of these golden, towering puffs from your oven, you are in for the absolute best kind of treat.
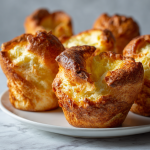
What’s not to love? They’re crispy and shatteringly golden on the outside, with a soft, steamy, and slightly eggy interior that’s just begging for a pat of melting butter or a drizzle of honey. The best part? They look like you spent years in a fancy pastry school, but the reality is gloriously simple: no yeast, no kneading, no complicated techniques. Just a humble batter of pantry staples that performs a little bit of oven sorcery.
Whether you’re dreaming of a cozy weekend breakfast, need a show-stopping side for your Sunday roast, or just want to bake something that will make everyone at the table go “WOW,” this popover recipe is your secret weapon. I’ve made these a hundred different ways, in a dozen different kitchens, and I’m here to guide you to popover perfection. So, let’s preheat that oven and make some magic together. Trust me, once you see them puff, you’ll be hooked for life.
My First Popover (& The Day I Fell in Love with Steam)
My popover story starts not in a fancy restaurant, but in my Nana’s warm, always-smelling-of-cinnamon kitchen. I must have been about ten, and I was her designated “batter whisker.” One rainy afternoon, instead of our usual chocolate chip cookies, she pulled out this weird, bumpy-looking metal pan. “Today, Olivia,” she said with a wink, “we’re making edible clouds.” I was skeptical. The batter was thinner than pancake mix, and she poured it into these scary-hot, butter-sizzling cups. “Now we wait,” she said, “and we do NOT open that door.”
I pressed my nose against the oven window, watching in pure disbelief as those sad little puddles of batter began to climb. They swelled upwards, forming crazy, uneven tops that looked like chef’s hats. When she finally pulled them out—golden, towering, and steaming—I was convinced it was actual magic. We ripped one open right there, the heat warming our faces, and slathered it with her homemade strawberry jam. The contrast of the crisp shell and the tender, almost hollow inside was a revelation. It was the day I learned that sometimes, the simplest recipes hold the most wonder. That sense of awe? I still feel it every single time I bake a batch.
Gathering Your Clouds: The Simple Ingredients
See? I told you it was simple! These are the building blocks for your edible architecture. Using room-temperature ingredients is a little chef’s secret for a smoother batter and better rise. If you forgot to take things out, place your eggs in a bowl of warm water for 5 minutes, and microwave the milk in 10-second bursts until it’s no longer cold.
- 1 cup all-purpose flour – The sturdy backbone. It gives structure to all those air pockets. For a slightly more tender popover, you can swap in 1/4 cup cake flour, but all-purpose works beautifully.
- 1 cup whole milk, at room temperature – The liquid that creates steam (the key to the “pop”!). Whole milk gives the best richness and browning. In a pinch, 2% works, but avoid skim for the best texture.
- 2 large eggs, at room temperature – The heroes! Eggs provide structure, richness, and help with the lift. They are non-negotiable for that classic texture.
- 1/2 teaspoon salt – The flavor enhancer. It balances everything and makes the popovers taste wonderfully of themselves. Don’t skip it!
- 1 tablespoon melted butter (plus more for greasing) – For flavor and a touch of tenderness. The butter for greasing is CRUCIAL—it helps create that crispy, flavorful exterior. Don’t be shy with it!
Let’s Make Some Magic: Step-by-Step Popover Perfection
Ready? Let’s do this. Follow these steps, embrace the “no-peeking” rule, and you’re guaranteed success.
Step 1: Preheat & Heat the Pan (This is the #1 Secret!)
Preheat your oven to a hot 425°F (220°C). Now, here’s the game-changer: place your empty popover pan or muffin tin right on the middle rack while the oven preheats. We want those cups screaming hot. This flash of heat when the batter hits is what starts the explosive rise and gives you that crispy bottom.
Step 2: Whisk Together the Wet Team
In a large bowl, whisk the room-temperature eggs and milk together until they’re completely combined and look a little frothy on top. This incorporates air, which is a good thing! A few bubbles are your friends.
Step 3: Bring in the Dry Crew
Add the flour and salt directly to the wet ingredients. Now, whisk! Go for it until the batter is mostly smooth. A few tiny lumps are absolutely fine—overmixing is the enemy of tenderness. Once it’s combined, whisk in the tablespoon of melted butter until it’s fully incorporated. The batter will be thin, like heavy cream. This is perfect. Let it rest for 5-10 minutes while your pan gets nuclear hot.
Step 4: The Sizzle & Pour
Carefully (I mean, oven-mitt hands, please!) pull the hot pan out of the oven. Immediately, add a small pat of butter or brush melted butter into each scorching-hot cup. It will sizzle and maybe even brown—that’s what you want! Quickly, divide the batter among the cups, filling each one about halfway to 2/3 full. The hot pan will start cooking the batter instantly.
Step 5: The Bake (& The Faith)
Slide the pan back into the oven quickly and close the door. Bake at 425°F for 20 minutes. DO NOT OPEN THE OVEN DOOR. I know it’s tempting, but that rush of cold air can deflate your rising masterpieces. After 20 minutes, reduce the heat to 350°F (without opening the door!) and bake for another 10-15 minutes. They’re done when they are a deep, glorious golden brown and feel dry/crisp to the touch.
Step 6: The Grand Finale
Pull them out! You might hear a faint crackling sound—that’s the music of success. Immediately, use a knife to loosen each popover and transfer them to a wire rack. This stops the bottoms from getting soggy. Poke a small slit in the side of each with a knife to let the steam escape and prevent sogginess inside.
Serving Your Edible Clouds
Popovers are at their peak the moment they are cool enough to handle. Serve them piled high in a basket or bowl, with all the accompaniments on the side. For breakfast or brunch, offer soft salted butter, local honey, fruit jams, or lemon curd. As a dinner side to roast beef, stew, or holiday ham, they are sublime with whipped honey butter or just a flaky sea salt sprinkle. The goal: let everyone tear into their warm, hollow popover and fill it with their own little bit of joy.
Play With Your Food: Fun Variations
Once you’ve mastered the classic, try these delicious twists!
- Herb & Cheese: Fold 1/2 cup grated Gruyère or sharp cheddar and 1 tablespoon of chopped fresh herbs (chives, thyme, rosemary) into the batter.
- Everything Bagel: Brush baked popovers with melted butter and sprinkle generously with everything bagel seasoning right after they come out of the oven.
- Sweet Cinnamon Sugar: Whisk 2 tablespoons of sugar into the dry ingredients. After baking, brush with butter and roll in cinnamon sugar while warm.
- Dairy-Free: Use a plain, unsweetened almond or oat milk and a neutral oil (like avocado) in place of the milk and butter.
- Yorkshire Pudding: For a savory version, use the fat from a beef roast (drippings) to grease the hot pan instead of butter. Serve with gravy!
Olivia’s Chef Notes & Kitchen Confessions
This recipe has been my faithful companion for years, evolving from my Nana’s vague “a bit of this, a cup of that” to this foolproof version. My biggest kitchen fail? I once got impatient and used a cold pan. The result was sad, muffin-like lumps. I learned my lesson! I’ve also found that a proper popover pan with tall, straight sides really does give the most dramatic “pop,” but a standard muffin tin makes absolutely delicious, slightly wider ones—no special equipment needed to start.
The funniest moment was when my dog, Biscuit, sat staring at the oven the entire bake time, head cocked, as if also wondering how on earth they were growing. He now knows the sound of the popover pan hitting the counter means buttery scraps are coming his way. Remember, baking is part science, part love. Don’t stress the small lumps, embrace the sizzle, and always, always make a mess. That’s where the memories are.
Popover FAQs & Troubleshooting
Q: My popovers didn’t pop! They’re dense. What happened?
A: The most common culprits are: 1) The pan wasn’t hot enough. Make sure you preheat it fully in the oven. 2) The oven door was opened too early. Treat it like a sacred rule! 3) The batter was overmixed, developing too much gluten. Mix just until combined.
Q: Can I make the batter ahead of time?
A: You can! Whisk it up, cover, and refrigerate for up to 24 hours. Let it come to room temperature for about 30 minutes and give it a gentle whisk before pouring into the hot pan. The rest can actually improve the texture.
Q: Why did they collapse after I took them out?
A: A small amount of deflation is normal as they cool. To minimize it, make sure they are fully baked (deep golden brown) and immediately poke a small slit in the side to release steam. Transferring them to a wire rack also helps.
Q: Can I use gluten-free flour?
A: Yes, but results vary. Use a 1:1 gluten-free all-purpose flour blend that contains xanthan gum. The texture may be slightly more delicate, but they will still puff beautifully!
Classic Popovers : Light, Puffy & Perfect Every Time
Description
These golden, towering puffs have a crisp shell, a soft steamy interior, and are shockingly easy to make. No yeast, no kneading—just simple pantry staples and a little oven magic.
Ingredients
-
1 cup all-purpose flour (or swap ¼ cup for cake flour for extra tenderness)
-
1 cup whole milk, room temperature (2% works in a pinch, skim not recommended)
-
2 large eggs, room temperature
-
½ tsp salt
-
1 tbsp melted butter (plus extra for greasing)
Optional Variations:
-
Herb & Cheese: Add ½ cup grated Gruyère or sharp cheddar + 1 tbsp fresh herbs
-
Everything Bagel: Brush with melted butter and sprinkle everything bagel seasoning
-
Sweet Cinnamon Sugar: Mix 2 tbsp sugar into dry ingredients; roll baked popovers in butter + cinnamon sugar
-
Dairy-Free: Use almond or oat milk + neutral oil instead of milk/butter
-
Instructions
Step 1: Preheat & Heat the Pan
Preheat oven to 425°F (220°C). Place your popover pan or muffin tin on the middle rack while the oven heats—this ensures the cups are screaming hot.
Step 2: Whisk Wet Ingredients
In a bowl, whisk together eggs and milk until frothy. A few bubbles are good!
Step 3: Add Dry Ingredients
Whisk in flour and salt until mostly smooth (tiny lumps are fine). Stir in melted butter. Batter should be thin, like heavy cream. Let rest 5–10 minutes.
Step 4: Sizzle & Pour
Remove hot pan carefully. Grease each cup with butter—it should sizzle. Pour batter into cups, filling ½ to 2/3 full.
Step 5: Bake
Bake at 425°F for 20 minutes without opening the door. Reduce heat to 350°F and bake 10–15 more minutes until deep golden and crisp.
Step 6: Cool Properly
Immediately loosen popovers with a knife and transfer to a wire rack. Poke a small slit in each to release steam and prevent sogginess.
Notes
Dense Popovers: Pan wasn’t hot enough, oven opened too early, or batter overmixed.
Collapsed After Cooling: Normal, but minimize by fully baking, slitting sides, and cooling on a wire rack.
Make Ahead: Batter can be refrigerated up to 24 hours; bring to room temp and whisk before baking.
Gluten-Free: Use a 1:1 GF all-purpose flour with xanthan gum. Texture slightly more delicate but still puffs.
Nutritional Information (Per Popover, Approximate)
Calories: 130 | Protein: 5g | Carbohydrates: 13g | Fat: 6g | Fiber: 0g
Remember, these are best enjoyed fresh and as part of a moment shared with others. So bake, share, and savor!
Final Thoughts
So there you have it—the simple, magical science of homemade popovers. From my Nana’s kitchen to yours, this recipe is more than just bread; it’s a little edible wonder, a lesson in patience, and proof that some of the most impressive things in life come from the humblest beginnings.
Remember, the keys are simple: a hot pan, a well-heated oven, and the discipline not to peek. Whether you stick to the classic version or embark on cheesy, herby, or sweet variations, each batch is a chance to create something truly special. Don’t be discouraged if your first batch isn’t perfect—mine weren’t either. Every popover tells a story, and even the slightly dense ones still taste wonderful slathered in jam.
At its heart, this recipe is about embracing the joy of process and the thrill of result. It’s about the sizzle of butter in a hot pan, the quiet mystery of the oven, and the collective “wow” when you bring your golden, towering creations to the table.
So go ahead—preheat that pan, whisk that batter, and bake with confidence. You’re not just making popovers; you’re making memories, one puffed-up, steamy, delicious cloud at a time.
Happy baking!
Olivia


