

The Ultimate No-Stress Sweet Treat: No-Bake Strawberry Cheesecake Cups
Hey there, friend! Come on in, grab an apron (a clean one, or a messy one—I won’t judge!), and let’s talk about one of life’s greatest little pleasures: dessert that doesn’t require you to preheat a single thing. If your kitchen is already feeling like a sunroom and the thought of turning on the oven makes you sweat, or if you’re just craving something sweet, creamy, and spectacular with about 10 minutes of actual effort, you have just hit the jackpot.
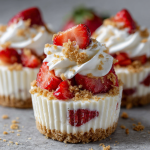
I’m talking about my No-Bake Strawberry Cheesecake Cups. These aren’t just a dessert; they’re a mood. They’re the joyful, breezy solution to last-minute potlucks, impromptu weeknight celebrations, and those “I definitely need something delightful right now” moments. Imagine a cloud of creamy, tangy cheesecake filling, sweet bursts of fresh strawberry, and a little crunch of graham cracker goodness, all layered up in a personal cup just for you. No slicing, no fuss, just pure, unadulterated joy in a jar (or a glass, or a cute ramekin!).
What I love most about this recipe is how it captures the soul-satisfying essence of a classic cheesecake but leaves all the stress and precision at the door. There’s no water bath to worry about, no cracks to fret over, and absolutely zero chance of over-baking. It’s forgiving, flexible, and designed to make you feel like a kitchen rockstar with minimal cleanup. Whether you’re a seasoned home cook or just starting to find your footing, these cups are your ticket to a crowd-pleasing triumph. So, let’s ditch the complicated instructions and dive into making something wonderfully simple and delicious. Your spoon is waiting!
Why These Cheesecake Cups Hold a Special Place in My Heart
This recipe always takes me back to my first “grown-up” dinner party. I was in my early twenties, living in a tiny apartment with an even tinier kitchen. I wanted to impress my new friends with a fancy dessert, so I ambitiously decided on a full-sized, baked New York-style cheesecake. Long story short, my oven had a mind of its own, I didn’t know what a water bath was, and I ended up with a delicious-tasting but… let’s say “geologically interesting” dessert that resembled the surface of the moon more than a smooth cheesecake.
I was so disappointed, but my friends were lovely and ate it anyway. The next week, craving redemption, I scoured my fridge and pantry. I had cream cheese, some leftover strawberries from a farmers’ market haul, and a sleeve of graham crackers. In a moment of “what’s the worst that could happen?”, I whipped everything together in a bowl, layered it into some old juice glasses, and popped them in the fridge. Twenty minutes later, I took a tentative bite. It was cool, creamy, perfectly sweet, and bursting with berry flavor. It was a revelation! It wasn’t the fancy dessert I’d failed at before; it was something better—effortless, personal, and packed with heart. That little kitchen “save” became my signature bring-along for years, and it’s a reminder that sometimes, the best recipes are born not from perfection, but from happy little accidents and the desire to simply share something good.
Gathering Your Sunshine Ingredients
Here’s everything you’ll need to create these little cups of happiness. The beauty is in the simplicity! I’ve added my chef-y notes next to each one because knowing your ingredients is the first step to feeling confident and creative in the kitchen.
- 8 oz (one block) full-fat cream cheese, softened: This is your star player. Full-fat is non-negotiable for that lush, creamy texture and authentic cheesecake flavor. Low-fat versions can make the filling watery. Pro Tip: “Softened” means it should give easily when poked—leave it on the counter for 1-2 hours. In a pinch, you can microwave it (out of the foil!) for 10-15 seconds, but don’t let it melt.
- 1/2 cup powdered sugar (confectioners’ sugar): It dissolves instantly into the cream cheese, giving us a silky-smooth filling without any graininess. You can sift it if it’s lumpy! For a less sweet option, start with 1/3 cup and taste.
- 1 cup whipped topping (like Cool Whip), thawed: This is our secret weapon for an impossibly light, fluffy texture. Make sure it’s fully thawed in the fridge for easy folding. Don’t have any? See the variations section for a homemade whipped cream swap!
- 1 cup fresh strawberries, finely diced: The juicy, vibrant heart of the dessert. Fresh is best here for that bright pop of flavor and color. Wash, hull (remove the green stem), and chop them into small, bite-sized pieces.
- 1/2 cup graham cracker crumbs: Our crunchy foundation! You can buy pre-crumbed or pulse whole crackers in a food processor. Chef’s Insight: For a deeper flavor, toast the crumbs in a dry pan for 2-3 minutes before using. It’s a game-changer!
- 2 tbsp unsalted butter, melted (optional for the base): This binds the crumbs together to form a more traditional, packable crust. If you prefer a looser, drier crumble topping texture, you can skip it!
- Extra whole or sliced strawberries for topping: For that gorgeous, “come eat me” presentation. A mint leaf or a light dusting of graham cracker crumbs also makes it look extra special.
Let’s Build Some Deliciousness: Step-by-Step
Ready? This is the fun part. We’re going layer by layer, and I’ll be right here with all my best tips to ensure your cheesecake cups are perfect.
Step 1: The Crunchy Base (Optional, but Recommended!)
If you’re using the melted butter, combine it with the graham cracker crumbs in a small bowl. Mix it with a fork until it looks like wet sand and holds together slightly when pinched. My Hack: If you want an even easier route, just use the dry crumbs! They’ll still add that wonderful texture and flavor. Spoon about 1.5-2 tablespoons of the crumb mixture (buttered or dry) into the bottom of each of your serving cups. I use clear glasses or mason jars so you can see the beautiful layers, but any small bowl, ramekin, or even a wine glass works! Use the back of a spoon to gently press it down to form a base. No need to pack it like concrete—just a gentle tamp.
Step 2: The Magical, Creamy Filling
In a medium mixing bowl, beat the softened cream cheese with an electric mixer (or a *very* determined whisk and strong arm) on medium speed for about 30 seconds until it’s smooth and creamy. Scrape down the sides of the bowl with a spatula. Add the powdered sugar and beat again on low, then medium, until fully combined and smooth. Key Tip: Scrape the bowl again! Cream cheese loves to hide unmixed bits at the bottom. Now, here’s the trick to keeping it fluffy: add your thawed whipped topping. Instead of beating it in, use your spatula to fold. Gently cut through the center of the mixture, scoop along the bottom, and fold it over the top. Turn the bowl and repeat until just combined and no white streaks remain. Over-mixing will deflate all that airy goodness!
Step 3: The Art of Layering
Grab your cups with the prepared crust. Spoon or pipe the creamy cheesecake filling over the crust, dividing it evenly among the cups. Leave a little room at the top for the berries! Now, take your diced strawberries and scatter a generous layer over the creamy filling. I love how the juicy berries start to mingle with the cream right away.
Step 4: The Patience Part (Or Not!)
You can absolutely eat these right now—I’ve done it many times, no shame! But for the best texture and flavor melding, cover the cups and pop them in the refrigerator for at least 20-30 minutes. This gives the crust time to set (if you used butter) and allows the flavors to get friendly. If you’re planning ahead, they’re even better after 2-3 hours.
Step 5: The Grand Finale
Right before serving, top each cup with your extra strawberries. A fan of slices, a halved berry, or just a single perfect one on top makes all the difference. That’s it! You’ve just created a stunning, no-bake dessert.
How to Serve These Berry Beauties
Presentation is part of the fun! I love serving these in clear glasses so everyone can admire the layers. Place them on a small plate with a teaspoon or a mini dessert spoon. For a party, create a “cheesecake cup bar”: set out the plain filled cups and small bowls of different toppings like blueberry compote, chocolate shavings, crushed cookies, or chopped nuts so guests can customize their own. They’re perfect for picnics (just keep them cool!), baby showers, or as the sweet ending to a summer BBQ. Simple, personal, and always a hit.
Make It Your Own: Delicious Twists & Swaps
- Lemon Berry Bliss: Add the zest of one lemon and a tablespoon of fresh lemon juice to the cream cheese filling. It brightens everything up beautifully.
- Chocolate Graham Crust: Swap the graham crackers for chocolate wafer or Oreo cookie crumbs (filling removed). A chocolate lover’s dream.
- Homemade Whipped Cream Version: Replace the whipped topping with 1 cup of heavy cream whipped to stiff peaks with 1 tbsp of the powdered sugar. Fold it in just the same.
- Mixed Berry Medley: Use a mix of strawberries, raspberries, and blueberries for a patriotic or colorful twist.
- Dairy-Free/Vegan: Use your favorite plant-based cream cheese and coconut whipped topping. Check that your graham crackers are vegan-friendly!
From My Kitchen to Yours: A Few Extra Thoughts
This recipe has been my trusty sidekick for so long, it’s evolved in the best ways. I once made a giant version in a trifle bowl for a neighborhood block party—it was gone in 15 minutes flat! My biggest lesson learned? Don’t stress about exact measurements. A few extra berries, a heavier hand with the crumbs… it all works out. This is a “feeling” recipe. Taste your filling before you layer it—want it tangier? A tiny splash of vanilla extract can add warmth. I’ve also been known to add a spoonful of strawberry jam to the diced berries for an extra glossy, sweet punch. Make it once as written, then play. That’s where the real kitchen magic happens.
Your Questions, Answered!
Q: My filling seems a bit runny. What happened?
A: This usually traces back to the cream cheese. If it wasn’t fully softened, it can create lumps, and over-mixing to compensate can break the filling. Also, make sure your whipped topping is fully thawed but not melted. To fix it, just pop the assembled cups in the freezer for 20-30 minutes to firm up quickly before serving.
Q: Can I make these ahead of time?
A: Absolutely! They are the perfect make-ahead dessert. Assemble them completely, cover tightly, and store in the fridge for up to 24 hours. Add the final fresh berry garnish right before serving so it stays pretty.
Q: What can I use instead of graham crackers?
A: Get creative! Digestive biscuits, vanilla wafers, shortbread cookies, or even crushed pretzels (for a sweet & salty vibe) make fantastic crusts. Just crush them to a similar crumb texture.
Q: Can I use frozen strawberries?
A: You can, but thaw and drain them *very* thoroughly in a colander, even patting them dry with a paper towel. Excess liquid from frozen berries will make your layers soggy. For best results, fresh is the way to go.
No-Bake Strawberry Cheesecake Cups : Quick, Creamy & Crowd-Loved
Description
These creamy, dreamy cheesecake cups are the ultimate no-stress dessert. Layered with a crunchy graham cracker base, fluffy cream cheese filling, and fresh strawberries, they’re perfect for last-minute gatherings, summer treats, or anytime you want dessert without turning on the oven.
Ingredients
Base:
-
½ cup graham cracker crumbs
-
2 tbsp unsalted butter, melted (optional)
Filling:
-
8 oz (1 block) full-fat cream cheese, softened
-
½ cup powdered sugar
-
1 cup whipped topping (like Cool Whip), thawed
Topping:
-
1 cup fresh strawberries, diced
-
Extra strawberries for garnish
Optional twists:
-
Lemon zest or juice
-
Chocolate wafer or Oreo crumbs for the base
-
Mixed berries
-
Dairy-free substitutes for vegan versions
Instructions
-
Prepare the Base:
-
Mix graham cracker crumbs and melted butter (if using) until slightly sticky.
-
Divide 1.5–2 tbsp per cup, pressing gently into the bottom.
-
-
Make the Filling:
-
Beat cream cheese until smooth. Add powdered sugar and mix until fully combined.
-
Gently fold in whipped topping, turning the mixture until just combined.
-
-
Assemble Cups:
-
Spoon or pipe filling over the crust in each cup.
-
Top with diced strawberries, leaving a little space for garnish.
-
-
Chill:
-
Refrigerate at least 20–30 minutes to set. Longer chilling (2–3 hours) improves texture and flavor melding.
-
-
Serve:
-
Top with extra strawberries and optional garnishes like mint, lemon zest, or graham cracker crumbs. Serve in clear cups for a layered effect.
-
Notes
-
Runny Filling: Ensure cream cheese is fully softened and whipped topping is thawed, not melted. Chill briefly in the freezer if needed.
-
Make Ahead: Assemble and refrigerate up to 24 hours. Add fresh garnish just before serving.
-
Substitutions: Use digestive biscuits, vanilla wafers, shortbread, or crushed pretzels for the base. Frozen strawberries must be thawed and drained thoroughly.
Nutritional Info (A Rough Estimate Per Serving)
This is a rough estimate based on the standard ingredients listed, using the butter crust and making 4 servings. Your specific brands and modifications will change this.
Calories: ~250 | Protein: 3g | Carbohydrates: 20g | Fat: 17g
Final Thoughts: A Sweet Reminder
If my first cheesecake taught me about the pressure of perfection, these little cups taught me about the joy of ease. They are my edible reminder that the best moments around the table aren’t built on flawless technique or hours of labor—they’re built on a spirit of generosity and a willingness to share something simple and made with heart.
I hope this recipe becomes more than just instructions for you. I hope it becomes a tool in your back pocket for creating your own moments of unexpected delight. Maybe it’s the dessert you throw together when friends drop by, or the special treat you make just for yourself on a Wednesday. However you use it, I hope it brings you the same sense of relaxed confidence and sweet satisfaction it’s brought me all these years.


