
The Ultimate No-Bake Easter Egg Cheesecake (That’s Almost Too Cute to Eat!)
Hey there, friend! Olivia here. Can you smell that? It’s the scent of spring slowly creeping in—fresh grass, blooming hyacinths, and, if you’re anything like me, the distinct, intoxicating aroma of chocolate that seems to permeate the entire month of April. Easter is just around the corner, and my mind (and heart) always turn to the same thing: creating a dessert that doesn’t just sit on the table, but celebrates.
We’ve all been there. You want to make something spectacular, something that makes the kids gasp and the adults sneak a second (or third) glance. But you also don’t want to spend your entire holiday weekend chained to the oven, covered in flour, and muttering about water baths. I hear you. That’s why I’m completely, utterly obsessed with this recipe. We’re taking those gorgeous, giant hollow chocolate Easter eggs—you know, the ones that feel like a treasure hunt prize—and transforming them into individual, edible cheesecake bowls. No baking required, just lots of mixing, a bit of chilling, and a whole lot of creative fun with the toppings.
This No-Bake Easter Egg Cheesecake is my love letter to joyful, stress-free holiday cooking. It’s whimsical, deeply delicious, and has that undeniable “wow” factor. It’s the kind of project that feels like play, and the result is a personalized dessert that looks like it came from a fancy patisserie. So, tie on your favorite apron (the messy one with the good vibes), and let’s make some sweet, edible magic together.
A Chocolate Egg Epiphany
This recipe was born from a happy accident a few Easters back. I had bought a couple of those enormous chocolate eggs, intending them to be pure decoration for my dessert table. My then five-year-old niece, Chloe, had other plans. With the stealth of a ninja and eyes full of wonder, she managed to “investigate” one, resulting in a beautifully cracked, halved egg shell. “It looks like a little boat, Auntie Liv!” she declared. And just like that, a lightbulb went off.
Instead of being disappointed, we looked at those chocolate halves as the most perfect dessert vessels imaginable. We whipped up a quick no-bake cheesecake filling, crushed some biscuits we had on hand, and made the most adorably messy “cheesecake boats.” The joy on her face, smeared with chocolate and cream cheese, was better than any perfectly sculpted cake I’d ever made. It reminded me that the best kitchen moments aren’t about perfection; they’re about creativity, laughter, and sharing something delightful. Now, making these cheesecake eggs is our little tradition, a sweet ritual that kicks off the spring season.
Gathering Your Easter Basket of Ingredients
Here’s everything you’ll need to create four stunning edible cheesecake eggs. I’ve added my little notes and swaps next to each one—because we’re all about flexibility here!
- 2 large hollow chocolate Easter eggs: The star of the show! Look for the ones that are about 6-8 inches tall, usually sold in supermarkets or candy stores around Easter. Chef’s Insight: If you can only find milk chocolate, go for it! Dark chocolate works beautifully too for a slightly less sweet, more sophisticated vibe.
- 1 cup digestive biscuits or graham crackers (crushed): This is our crust. Digestives have a lovely, slightly sweet, wheaty flavor, while graham crackers are the classic American choice. Substitution Tip: Any plain sweet cookie works—try Biscoff cookies for a caramel-spice twist, or even gluten-free biscuits if needed.
- 1/4 cup melted butter: This is the glue for our crust. Use unsalted so you control the saltiness. Chef’s Insight: For a richer flavor, try browning your butter first. It adds a gorgeous nutty note.
- 1 cup full-fat cream cheese, softened: Please, for the creamiest, dreamiest texture, use full-fat and let it sit on the counter for a good 30-60 minutes. The warmth of your kitchen is your best tool here.
- 1/2 cup powdered sugar: Also called icing sugar. It dissolves instantly into the cream cheese, preventing any graininess. Substitution Tip: You can use maple syrup or honey, but reduce the heavy cream by a tablespoon or two as liquids will thin the mixture.
- 1 teaspoon pure vanilla extract: The soul of the filling. The good stuff makes a difference!
- 1/2 cup heavy cream (whipping cream): We’re going to whip this to soft peaks to fold in. It gives the filling an incredible, cloud-like lightness. Make sure it’s very cold.
- For the Toppings: This is your playground! Mini chocolate eggs (of course), melted chocolate for drizzling (use the same type as your shell), and edible flowers like pansies, violets, or nasturtiums for a gorgeous spring touch. Important: Only use flowers labeled as edible from a reputable source.
Let’s Build Some Edible Magic: Step-by-Step
Alright, let’s get our hands busy! Don’t worry, I’m walking you through every step with all my favorite chef hacks.
Step 1: The Delicate Art of Egg Surgery. This is the only “scary” part, and I promise it’s easy. Take a large, sharp knife and run it under very hot water for a minute. Dry it off. Now, gently but firmly, press the point of the warm knife into the seam of the chocolate egg. The heat will slightly melt the chocolate, creating a clean break. Slowly work your way around the seam. You should end up with four beautiful, clean halves. If you get a few small cracks, don’t panic! We can hide them with toppings later. Pro-Tip: Do this over a piece of parchment paper to catch any chocolate shards or drops. You can remelt them for your drizzle!
Step 2: Crafting the Perfect Crust. Pop your biscuits into a zip-top bag and crush them with a rolling pin until you have fine crumbs. You want some tiny pieces for texture, but no big chunks. In a bowl, mix the crumbs with the melted butter until it resembles wet sand. Spoon this mixture evenly into the bottom of your four chocolate halves. Use the back of a small spoon or your fingers to gently press it into a firm, even layer. This gives our creamy filling a lovely textural contrast. Chef’s Hack: No rolling pin? A wine bottle or a heavy mug works in a pinch!
Step 3: The Cloud-Like Filling. In a large bowl, beat your softened cream cheese with an electric hand mixer (or a stand mixer with the paddle) until it’s completely smooth and lump-free. This is crucial! Add the powdered sugar and vanilla and beat again until fully incorporated. Now, in a separate, clean bowl, whip your cold heavy cream until it holds soft peaks. Be careful not to overwhip it into butter. Gently fold the whipped cream into the cream cheese mixture using a rubber spatula. Use a big, sweeping “fold” motion to keep all that lovely air in. You should have a thick, pillowy, and luscious mixture.
Step 4: The Fill & Chill. You can spoon the filling into the shells, but for a super-clean look, I love piping it. Scoop the filling into a large piping bag (or a sturdy zip-top bag with a corner snipped off) and pipe it evenly into each chocolate shell, over the crust. Smooth the tops with an offset spatula or the back of a spoon. Now, the hardest part: patience. Carefully transfer your filled eggs to a flat plate or tray and refrigerate for at least 3 hours, but ideally overnight. This sets the filling perfectly so it slices neatly.
Step 5: The Grand Finale – Decorate! This is where you become an artist. Just before serving, drizzle with melted chocolate, pile on the mini eggs, and tuck in a few edible flowers. The vibrant colors against the chocolate are simply stunning. Pro-Tip: If your melted chocolate is too thick for drizzling, add a tiny drop of neutral oil (like coconut or vegetable) to loosen it.
Serving Your Masterpiece
Presentation is everything! Place each cheesecake egg half on a small dessert plate or a nest of colorful shredded paper (the kind you find in Easter baskets). Add a sprig of fresh mint or a few berries on the side for a pop of color. Provide small dessert spoons and forks—your guests will need both to crack into the chocolate shell and scoop up the creamy filling. Get ready for the chorus of “oohs” and “aahs” as you bring these to the table!
Mix It Up! Creative Twists on the Classic
Once you’ve mastered the basic recipe, the flavor world is your oyster! Here are a few of my favorite spins:
- Lemon Berry Bliss: Add the zest of one lemon to the cream cheese filling. Top with a swirl of fresh raspberry coulis and fresh berries instead of mini eggs.
- Salted Caramel Pretzel: Use crushed pretzels for the crust. Swirl 1/4 cup of thick salted caramel sauce into the filling, and top with a drizzle of more caramel and a few pretzel pieces.
- Cookies & Cream: Use crushed Oreos (filling and all) for the crust and fold 1/2 cup of finely chopped Oreos into the cheesecake filling. Top with chocolate shavings.
- Vegan-Friendly Version: Use a high-quality vegan dark chocolate egg. For the crust, mix cookie crumbs with melted coconut oil. For the filling, blend soaked cashews with coconut cream, maple syrup, and vanilla until ultra-smooth. Chill until set.
- Mini Egg Inside-Out: Chop a handful of mini eggs and fold them directly into the cheesecake filling before piping for a fun, confetti-like surprise in every bite.
Olivia’s Chef Notes & Kitchen Stories
This recipe has truly evolved in my kitchen. The first time, I was so nervous about the shells breaking that I practically performed surgery. Now, I embrace a little “rustic” cracking—it adds character! One year, I even used the broken pieces to make a last-minute chocolate bark with the leftover filling. Waste not, want not!
A funny story: I once let my husband be in charge of whipping the cream. I turned around to find him using a fork, determined to “build arm muscle.” We laughed for ten minutes before I rescued him with the electric mixer. The moral? Use the right tools, friends. And maybe don’t put your spouse on cream-whipping duty.
Over time, I’ve learned that letting the filled eggs chill overnight is the absolute key to a perfect slice. It also makes Easter morning a complete breeze—all the work is done, and you just get to decorate and shine.
Your Questions, Answered!
Q: My chocolate shell cracked into more than two pieces! Can I still use it?
A: Absolutely! This is a “no-fail” project. If you have several pieces, you can use them like a mosaic. Press the pieces into a small ramekin or muffin tin lined with cling film, creating a new chocolate “bowl.” Fill as usual. It will be uniquely beautiful!
Q: My cheesecake filling seems too runny. What did I do wrong?
A: This usually happens for two reasons: 1) The cream cheese wasn’t full-fat or was too warm/soft, or 2) The heavy cream was under-whipped. To fix it, pop the whole mixture (in its bowl) into the fridge for 20 minutes, then re-whip it. It should firm up. If not, gently fold in a tablespoon of extra powdered sugar.
Q: Can I make these more than a day ahead?
A: You can make the filled eggs (through step 4) up to two days ahead. Keep them covered in the fridge. I highly recommend adding the toppings (especially fresh flowers and the chocolate drizzle) the day of serving for the freshest look and to prevent sogginess.
Q: How do I prevent a soggy biscuit base?
A: Make sure your butter is fully mixed with the crumbs so it acts as a seal. Also, don’t assemble the entire dessert more than a day in advance, as moisture from the filling will eventually soften the crust. It’ll still taste amazing, but for optimal texture, the 1-2 day timeline is perfect.

Easter Egg Cheesecake: No-Bake Dessert in Chocolate Egg Shells
Description
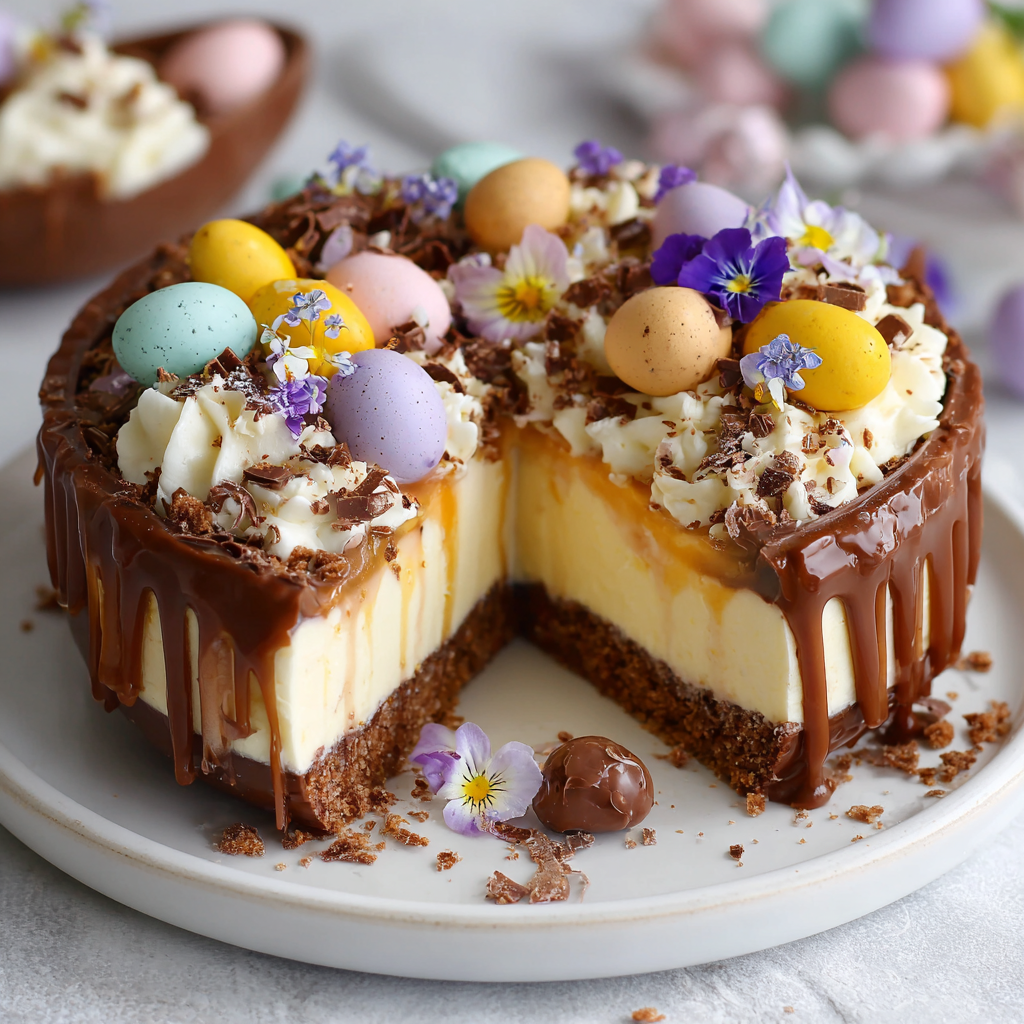
No-Bake Easter Egg Cheesecake
Individual Chocolate Egg Cheesecake Bowls – Cute, Fun, and Stress-Free!
Transform giant hollow chocolate Easter eggs into adorable, creamy, no-bake cheesecake desserts. Perfect for kids, parties, or just a sweet spring treat.
Ingredients
Chocolate Shells:
-
2 large hollow chocolate Easter eggs (6–8 inches)
Crust:
-
1 cup digestive biscuits or graham crackers, crushed
-
¼ cup melted unsalted butter
Cheesecake Filling:
-
1 cup full-fat cream cheese, softened
-
½ cup powdered sugar
-
1 tsp vanilla extract
-
½ cup heavy cream, cold
Toppings (Optional):
-
Mini chocolate eggs
-
Melted chocolate for drizzling
-
Edible flowers (pansies, violets, nasturtiums – safe and labeled)
Instructions
-
Break the Eggs:
Run a large, sharp knife under hot water, dry it, then gently press it along the egg’s seam to create clean halves. Place over parchment paper to catch shards. -
Make the Crust:
Crush biscuits in a zip-top bag. Mix with melted butter until resembling wet sand. Press evenly into the bottom of each chocolate egg half. -
Prepare the Filling:
-
Beat cream cheese until smooth.
-
Add powdered sugar and vanilla; mix again.
-
Whip heavy cream to soft peaks, then fold into the cream cheese mixture gently for a light, airy texture.
-
-
Fill the Eggs:
Pipe or spoon the cheesecake filling over the crust in each egg half. Smooth the top. Refrigerate at least 3 hours, ideally overnight. -
Decorate:
Drizzle with melted chocolate, add mini eggs, and place edible flowers on top just before serving.
Notes
-
Broken Shells: Use pieces to create small “chocolate bowls” in ramekins or muffin tins.
-
Crust Protection: Fully mix butter with crumbs to prevent sogginess. Assemble toppings the day of serving.
-
Flavor Twists:
-
Lemon Berry Bliss: Add lemon zest to filling, top with raspberry coulis & berries.
-
Salted Caramel Pretzel: Use pretzel crumbs for crust and swirl caramel into filling.
-
Cookies & Cream: Use crushed Oreos for crust & fold in finely chopped Oreos.
-
Vegan: Use vegan chocolate shells, coconut oil for crust, and a cashew-coconut cream filling.
-
Confetti Fun: Fold mini chocolate eggs into the filling before piping.
-
Nutritional Information (Per Serving – 1 Egg Half)
Please note: This is an approximate estimate based on the specific ingredients listed. Values will vary with substitutions.
Calories: ~325 | Total Fat: 22g | Saturated Fat: 13g | Cholesterol: 55mg | Sodium: 180mg | Total Carbohydrates: 28g | Dietary Fiber: 1g | Sugars: 22g | Protein: 4g
Final Thoughts
This No-Bake Easter Egg Cheesecake is more than just a dessert—it’s an experience. It’s about embracing the playful spirit of the season, turning simple chocolate into something magical, and creating memories that are as sweet as the treat itself.
In a world that often asks for perfection, this recipe celebrates creativity, simplicity, and joy. It proves that the most impressive desserts don’t require complex techniques—just a little imagination and a willingness to play with your food. Whether you’re making it with wide-eyed little helpers or crafting a beautiful centerpiece for your Easter table, these edible eggs are sure to delight everyone who sees (and tastes) them.
So, this Easter, put down the stress and pick up a chocolate egg. Let this recipe be your invitation to slow down, create something beautiful, and share a moment of pure, creamy, chocolatey happiness.
Wishing you a spring filled with sweetness, laughter, and delicious new traditions.
Happy Easter,
Olivia


