

Sunshine on a Plate: Welcome to Mini Berry Tart Bliss!
Hey there, friend! Come on in, grab an apron, and let’s chat about one of life’s simplest, most beautiful pleasures: a perfect, bite-sized dessert. You know the one. It looks like it came from the window of a tiny, magical Parisian patisserie, but it’s made with your own two hands, right in your cozy kitchen. If your heart does a little happy dance at the thought of buttery pastry, silky vanilla cream, and a burst of fresh, juicy berries, then you and I are already on the same delicious wavelength.
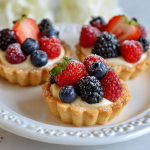
Today, we’re creating Mini Berry Tarts with Vanilla Bean Cream. These aren’t just desserts; they’re tiny edible celebrations. They’re what you make when you want to turn an ordinary Tuesday into something special, or when you need a show-stopping treat for a baby shower, brunch, or just because the berries at the market looked too good to pass up. The best part? They’re secretly simple. We’re going to walk through every single step together, with plenty of my favorite chef hacks and reassuring whispers. No fancy skills required—just a love for good food and the joy of creating something gorgeous. So, preheat your oven, and let’s make some berry-packed magic!
A Tale of Two Tarts: My Grandma’s Lessons in Love
This recipe always takes me back to my grandma’s linoleum-floored kitchen, a place perpetually dusted with flour and smelling of sugar. She wasn’t a “fancy” baker, but she was a generous one. Her version involved a big, free-form galette piled with whatever fruit was ripe, but the principle was the same: start with a good, honest crust and let the seasonal fruit shine.
I remember one sweltering summer afternoon, maybe eight years old, perched on a stool “helping” her pat dough into her old, warped tart pan. She’d let me painstakingly arrange the raspberries in concentric circles, never minding that my rows were wobbly and juice was running down my arms. “It’s not about perfect, Livvy,” she’d say, wiping her hands on her flower-print apron. “It’s about the love you fold into it. And the butter. Always the good butter.” These mini tarts are my homage to her—scaled down for modern gatherings, with a luxurious vanilla bean cream she’d have called “posh,” but with the same soul. It’s that feeling of sharing something made with care that I want to pass on to you.
Gathering Your Berry Best Friends: The Ingredients
Let’s break down our cast of characters. Using great ingredients is the first secret to a spectacular tart! Don’t worry if you need to swap something—I’ve got you covered.
- For the Tart Shells:
- 1¼ cups all-purpose flour: The foundation. It gives our shells structure. For a slightly more tender, nutty flavor, you can swap out ¼ cup for almond flour.
- ¼ cup powdered sugar: Sweetens the crust subtly and, because it contains cornstarch, helps keep it tender. Granulated sugar works in a pinch but will give a slightly grainier texture.
- ½ cup unsalted butter, cold and cubed: This is non-negotiable for flakiness! Cold butter creates little steam pockets as it bakes. I pop my cubed butter in the freezer for 10 minutes before starting. Unsalted lets us control the salt level.
- 1 egg yolk: Adds richness, flavor, and helps bind the dough. Save the white for a healthy omelet!
- 1–2 tbsp ice water: The “just enough” hydrator. Too much makes tough pastry. Start with one tablespoon and add drops from the second only if the dough won’t come together when pinched.
- For the Vanilla Bean Cream:
- 1½ cups whole milk: Full-fat is key for a luxuriously creamy texture. For a richer custard, sub half the milk with heavy cream.
- 1 vanilla bean (or 1 tsp vanilla bean paste): The star! A split and scraped bean gives incredible flavor and those gorgeous black specks. Paste is a fantastic, convenient alternative. In a true emergency, 2 tsp of pure vanilla extract works (add it after cooking).
- 3 egg yolks: They thicken the cream into a lush custard. Pro tip: Crack your eggs into your hand over a bowl, letting the whites slip through your fingers to catch the yolk cleanly.
- ⅓ cup sugar: Sweetens and balances the tart berries.
- 2 tbsp cornstarch: Our thickening guardian angel. It stabilizes the custard so it holds its shape in the shells. Arrowroot powder is a 1:1 substitute.
- 2 tbsp butter: Stirred in at the end for a silky mouthfeel and gorgeous sheen.
- For the Topping:
- Fresh mixed berries: The jewel box! Use what’s in season and looks best. A mix of colors and sizes (blueberries, raspberries, sliced strawberries, blackberries) is visually stunning.
- Optional: powdered sugar or apricot glaze: A dusting of powdered sugar is the easy, elegant finish. For a professional, glossy shine, warm a tablespoon of apricot jam with a teaspoon of water and brush it lightly over the arranged berries.
Let’s Get Baking: A Step-by-Step Adventure
Ready? We’ll tackle this in three easy acts: the shells, the cream, and the grand assembly. Put on some good music, and let’s do this!
Act I: The Buttery, Crisp Tart Shells
1. Make the Dough: In a food processor, pulse the flour and powdered sugar just to combine. Scatter the ice-cold butter cubes over top. Pulse 8-10 times until the mixture looks like coarse sand with some pea-sized butter bits remaining. Chef’s Whisper: This is the key to flakiness! If you don’t have a processor, use a pastry cutter or even grate the frozen butter into the flour and work it quickly with your fingertips.
2. Bring It Together: Whisk the egg yolk with 1 tbsp of ice water. Drizzle it over the flour mixture while pulsing. Stop as soon as the dough begins to clump. Pinch a bit—if it holds together, you’re done! If it’s too dry, add more ice water a teaspoon at a time.
3. Press & Chill: Turn the crumbly dough out onto a surface. Gently knead it once or twice just to form a disc. Don’t overwork it! Divide into 8-10 pieces and press each piece evenly into your mini tart pans (with removable bottoms if you have them!). Use a small glass or measuring cup to help press it neatly up the sides. Prick the bottoms all over with a fork. Chill for at least 15 minutes. This re-solidifies the butter and prevents major shrinking. Trust me on this chill time!
4. Bake to Golden Perfection: Preheat your oven to 350°F (175°C). Bake the chilled shells for 15-18 minutes, until they are lightly golden all over. Let them cool completely in the pans on a wire rack. They’ll crisp up as they cool.
Act II: The Silky Vanilla Bean Cream
1. Infuse the Milk: In a medium saucepan, pour the milk. Split your vanilla bean lengthwise and scrape out the tiny, fragrant seeds with the back of your knife. Add both the seeds and the empty pod to the milk. Heat over medium until it’s just beginning to simmer (little bubbles around the edges), then remove from heat. Let it steep for 15 minutes. This infuses every molecule with vanilla goodness!
2. Temper the Yolks: In a separate bowl, whisk the egg yolks, sugar, and cornstarch until it’s thick, pale, and smooth. This is called “blanching” and it helps prevent scrambled eggs in your custard. Now, slowly—and I mean a slow, thin stream—whisk about ½ cup of the warm vanilla milk into the yolk mixture. This gently raises their temperature. Then, you can whisk in the rest of the milk.
3. Cook to Creamy Bliss: Pour the entire mixture back into the saucepan. Cook over medium heat, whisking constantly and getting into the corners of the pan. It will thicken quite suddenly after a few minutes. Once you see the first big, lazy bubble plop to the surface, cook for one more minute while whisking vigorously. You’ve made pastry cream!
4. Finish and Chill: Remove from heat. Fish out and discard the vanilla pod. Whisk in the butter until it melts completely and the cream is gloriously smooth. Pour it into a clean bowl, press plastic wrap directly onto the surface (to prevent a skin), and chill for at least 1 hour. It will thicken up perfectly.
Act III: The Grand (& Easy) Assembly
1. Fill ‘Em Up: Once shells and cream are completely cool, spoon or pipe the vanilla cream into the tart shells, leaving a little rim.
2. Berry Artistry: Now for the fun part! Arrange your washed and dried berries in a gorgeous, colorful pattern. Get creative! I love a concentric circle of raspberries, a few plump blueberries tucked in, and a single pristine blackberry in the center.
3. The Final Flourish: Just before serving, dust lightly with powdered sugar using a fine-mesh sieve, or brush with that warm apricot glaze for a professional, fruity shine.
How to Serve These Little Showstoppers
Presentation is part of the fun! Arrange these mini tarts on a simple white platter or a rustic wooden board for a gorgeous contrast. For a party, I love placing each one on a tiny, individual dessert plate—it makes everyone feel special. They pair beautifully with a cup of strong coffee, a glass of sparkling wine, or a light herbal tea. The rule here? Keep it simple and let the tarts be the colorful, delicious stars they were born to be.
Make It Your Own: Delicious Twists & Swaps
- Lemon Zest Brightness: Add the zest of one lemon to the pastry cream along with the butter for a vibrant lemon-berry combo.
- Chocolate Dreams: Brush the inside of your cooled tart shells with melted dark chocolate before adding the cream. It adds a subtle barrier and a rich flavor layer.
- Dairy-Free Delight: Use a high-fat coconut milk for the pastry cream and vegan butter in both the crust and cream. The coconut adds a lovely flavor that works with berries.
- Ginger Snap Crust: Swap the flour for crushed ginger snap cookies mixed with a little melted butter for a spiced, no-bake crust alternative.
- Stone Fruit Fancy: In late summer, top with thinly sliced peaches, nectarines, or plums instead of (or mixed with) berries.
Olivia’s Kitchen Notes & Stories
This recipe is a living thing in my kitchen! It started as one big tart, but I found mini versions just make people smile more—everyone gets their own perfect little world. My biggest “disaster-turned-discovery” was the time I forgot to chill the dough. The shells shrank comically in the oven, like little pastry turtlenecks! Now I know: cold butter + chilled dough = tart shell success. I also used to be terrified of tempering eggs until I realized it’s just about going slow and trusting the process. If a few tiny bits do scramble, don’t panic! Just strain the finished cream through a fine-mesh sieve as you pour it into the bowl. No one will ever know, and you’ll feel like a total kitchen wizard.
Your Questions, Answered!
Q: Can I make these ahead of time?
A: Absolutely! That’s their superpower. Bake the shells and make the cream up to 2 days ahead. Store shells in an airtight container at room temp and the cream in the fridge. Assemble no more than 2-3 hours before serving so the shells stay crisp.
Q: My pastry cream is lumpy! What do I do?
A: First, don’t worry! We can fix it. Immediately strain it through a fine-mesh sieve into your bowl, pressing it through with a spatula. This will catch any cooked egg bits. Then whisk in the butter. It will save the texture completely.
Q: My tart shells got soggy after filling.
A: This usually means the shells or the cream weren’t totally cool before assembly. Make sure both are room-temp cool or chilled. A light brush of melted chocolate inside the shell (as mentioned in variations) also creates a fantastic moisture barrier.
Q: Can I use frozen berries?
A: I don’t recommend it for the fresh topping, as they release too much juice and can make things soggy. However, frozen berries are fantastic for making a quick compote or glaze to spoon under the fresh cream before adding berries!
Mini Berry Tarts with Vanilla Bean Cream : Elegant, Fresh & Bite-Sized Bliss
Description
Hey there, friend! If a dessert could smile back at you, this would be it. These Mini Berry Tarts are buttery, creamy, and bursting with fresh berries—tiny treats that look bakery-fancy but are completely doable at home. Crisp tart shells, silky vanilla bean cream, and jewel-toned berries come together in a dessert that feels special without being stressful.
Ingredients
For the Tart Shells
-
1¼ cups all-purpose flour
-
¼ cup powdered sugar
-
½ cup unsalted butter, cold and cubed
-
1 egg yolk
-
1–2 tablespoons ice water
For the Vanilla Bean Cream
-
1½ cups whole milk
-
1 vanilla bean (or 1 teaspoon vanilla bean paste)
-
3 egg yolks
-
⅓ cup sugar
-
2 tablespoons cornstarch
-
2 tablespoons butter
For the Topping
-
Fresh mixed berries (strawberries, raspberries, blueberries, blackberries)
-
Optional: powdered sugar or apricot glaze
Instructions
Preheat oven to 350°F (175°C).
In a food processor, pulse flour and powdered sugar to combine. Add cold butter and pulse until the mixture resembles coarse crumbs. Add egg yolk and 1 tablespoon ice water; pulse just until dough begins to clump. Add more water only if needed.
Divide dough into 8–10 portions and press evenly into mini tart pans. Prick bottoms with a fork. Chill for 15 minutes, then bake 15–18 minutes, until lightly golden. Cool completely.
Heat milk with vanilla bean seeds and pod until just simmering. Remove from heat and let steep 15 minutes.
Whisk egg yolks, sugar, and cornstarch until smooth. Slowly whisk warm milk into yolks, then return mixture to saucepan. Cook over medium heat, whisking constantly, until thick and bubbling. Cook 1 minute more.
Remove from heat, discard vanilla pod, and whisk in butter. Cover cream with plastic wrap pressed directly on the surface and chill at least 1 hour.
Fill cooled tart shells with vanilla cream. Top with fresh berries. Just before serving, dust with powdered sugar or brush lightly with warm apricot glaze.
Notes
-
Cold butter + chilled dough = crisp shells
-
Let shells and cream cool completely before assembling to avoid sogginess
-
Strain pastry cream if any lumps appear—instant fix
-
Brush shells with melted chocolate for a moisture barrier if making ahead
Nutritional Info (Per Tart, Approximate)
Calories: 220 | Fat: 13g | Saturated Fat: 8g | Carbohydrates: 22g | Sugar: 10g | Protein: 4g | Fiber: 1g
Remember, these are tiny treats meant to be savored! This info is an estimate based on the specific ingredients used.
Final Thoughts: A Tiny Taste of Joy
Making these Mini Berry Tarts isn’t just about baking—it’s about creating small, edible moments of delight. It’s the satisfaction of pressing dough into a pan, the meditative swirl of whisking custard, and the quiet pride of arranging a jewel box of berries into something beautiful.
This recipe proves that elegance doesn’t have to be complicated. With a little patience and care, you can craft a dessert that feels both special and deeply personal. It carries the warmth of my grandma’s kitchen, the lessons from my own happy accidents, and the simple truth that the best food is made to be shared—whether that’s with friends around a table or with yourself as a quiet afternoon treat.
Remember, your version doesn’t have to be perfect. A wobbly berry or a slightly lopsided shell just adds character. What matters is the love and attention you pour into each step. So embrace the process, lick the spoon, and don’t forget the most important ingredient: your own enjoyment.
I hope these little tarts bring as much sunshine to your table as they have to mine. Now, go on—bake, share, and savor every sweet, buttery, berry-filled bite. You’ve earned it.


