
When Dessert Needs to Hit the Road: Meet Your New Favorite Treat
Hey there, friend! Come on in, grab an apron, and let’s talk about one of life’s sweetest dilemmas. You know the feeling: that deep, soul-warming craving for a homemade dessert, but the reality of a packed schedule, a picnic basket that needs filling, or simply the desire to eat something delightful straight from the fridge. For years, I thought I had to choose between cozy, oven-warm comfort and grab-and-go convenience. That is, until I had a literal “jar-ring” revelation.
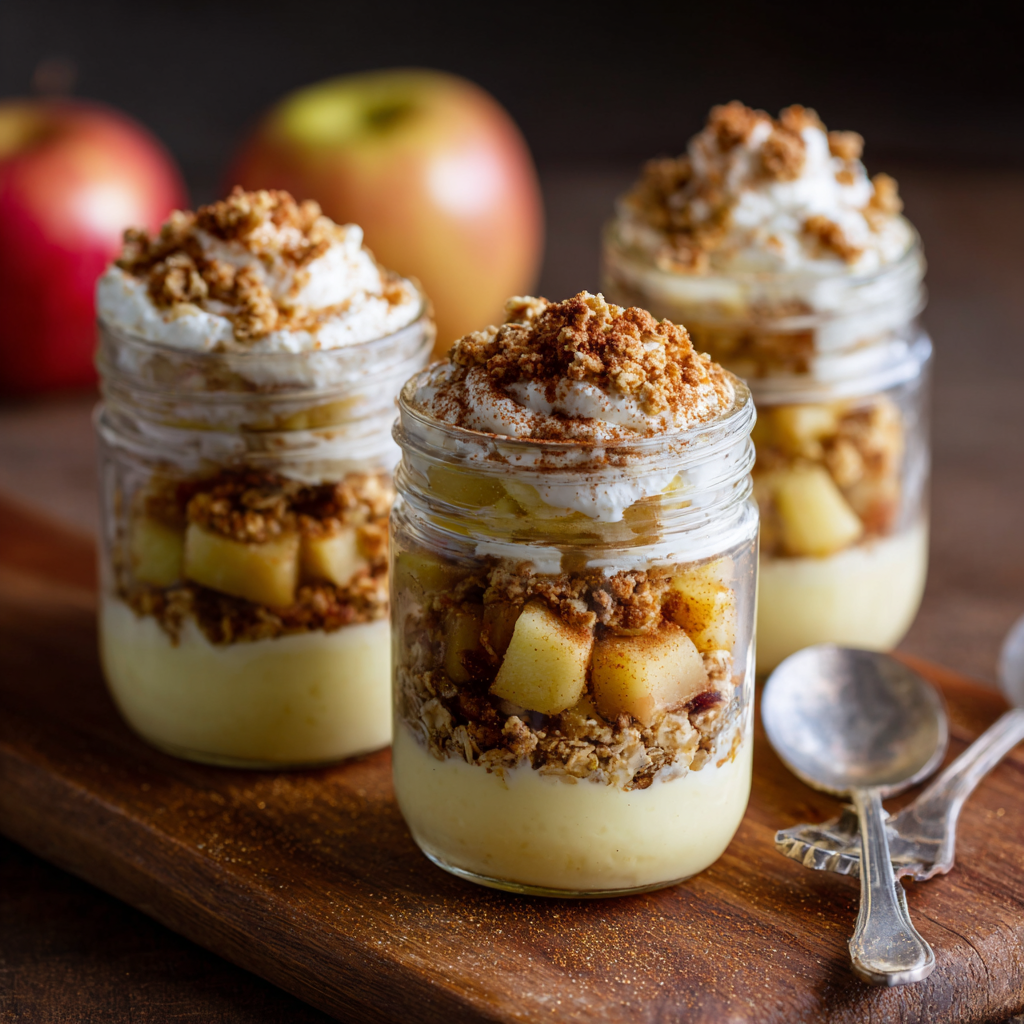
Today, I’m bubbling over with excitement to share with you my ultimate solution: Portable Apple Crumble Jars with a Luscious Custard Core. Imagine this: sweet, cinnamon-kissed apples, a hidden heart of creamy vanilla custard, and a buttery, golden oat crumble that stays perfectly crunchy. They bake up bubbly and glorious for a comforting warm dessert, then transform into a chilled, potted treat you can take anywhere. They’re the answer to last-minute guests, picnic envy, and that 3 p.m. snack attack that demands something special. This isn’t just a recipe; it’s a little edible hug that fits right in your hand. Let’s make magic happen.
The Apple Doesn’t Fall Far: A Nostalgic Crumb Trail
This recipe has its roots (quite literally) in my Grandma Eleanor’s kitchen. Every fall, we’d take a trip to the orchard, and the prize at the end of the day was always her legendary deep-dish apple crumble. The whole house would smell like cinnamon and butter, a scent so comforting it felt like a blanket. But here’s the funny thing—my favorite part wasn’t the first warm serving. It was the next day, sneaking spoonfuls of the cold leftovers straight from the pan in the fridge. The flavors had mingled, the custardy sauce from the apples had soaked into the topping a bit, and it was a whole new, incredible dessert.
These jars are my homage to that memory. I wanted to capture both experiences—the warm, bubbly comfort and the chilled, portable joy—in one perfect package. By adding that deliberate layer of custard, I’ve baked the “next-day magic” right into the first serving. It’s a dessert that tells a story, from my grandma’s oven to your hands, wherever you are.
Gathering Your Cozy Ingredients
Here’s the beautiful part: this fancy-looking dessert comes together with simple, wholesome ingredients. Let’s break them down. You’ll need 4-6 clean 8-oz mason jars or heatproof ramekins.
For the Apple Layer:
- 2 large apples, peeled and diced (about 2 heaping cups). Chef’s Insight: I love a mix for texture—one tart Granny Smith for punch and one sweeter variety like Honeycrisp or Fuji. Using different apples creates a more complex flavor!
- 1 tbsp pure maple syrup or light brown sugar. Substitution Tip: Honey works beautifully here too. The maple adds a lovely depth, but brown sugar gives that classic caramel note.
- ½ tsp ground cinnamon. The non-negotiable cozy spice!
- 1 tsp fresh lemon juice. Why it matters: This little splash prevents the apples from browning and adds a bright note that balances the sweetness.
For the Custard Core:
- ½ cup vanilla custard. Chef’s Confession: On busy days, a good-quality store-bought refrigerated custard is my secret weapon! For a from-scratch moment, my easy 3-ingredient version (see Chef’s Notes) is pure gold.
For the Crumble Topping:
- ½ cup old-fashioned rolled oats. Gluten-free note: Ensure these are certified GF if needed. They give the topping its iconic chew and texture.
- ¼ cup almond flour OR all-purpose flour. Why the choice? Almond flour adds a nutty richness and keeps things gluten-free. All-purpose flour makes a more traditional, crisp crumb. Both are fantastic!
- 2 tbsp cold unsalted butter or solid coconut oil. Tip: Cold fat is key for a crumbly, not greasy, topping. Cut it into small cubes before using.
- 1 tbsp light brown sugar. This caramelizes as it bakes for that gorgeous golden color.
- A generous pinch of cinnamon and salt. Salt is the secret weapon that makes all the other flavors pop!
Step-by-Step: Building Your Edible Masterpiece
Ready? Let’s create some layers of happiness. Preheat your oven to 350°F (175°C).
Step 1: The Cinnamon Apples
In a medium skillet over medium heat, combine your diced apples, maple syrup (or brown sugar), cinnamon, and lemon juice. No need for extra butter here! We’re going to cook this, stirring occasionally, for about 5-7 minutes. You want the apples to be just tender but not mushy—they’ll soften more in the oven. Chef’s Hack: If your apples release a lot of juice, let it simmer for an extra minute or two to reduce it slightly. This prevents a soggy bottom layer! Set aside to cool slightly.
Step 2: The “Crumble” in Crumble
In a mixing bowl, combine the rolled oats, your chosen flour, brown sugar, pinch of cinnamon, and pinch of salt. Add your cold, cubed butter or coconut oil. Now, get in there with your fingers! Pinch and rub the fat into the dry ingredients until you have a mixture that looks like coarse sand with some larger pebbly bits. Why fingers? This gives you the most control to create those perfect, uneven crumbs that bake up so textured and delightful. A fork or pastry cutter works too, but it’s less fun!
Step 3: The Joyful Assembly
Grab your jars or ramekins. Here’s the layering magic:
Layer 1: Divide the warm apple mixture evenly among the jars, pressing it down gently. This is your fruity foundation.
Layer 2: Now for the surprise! Spoon a generous dollop of custard right into the center of the apples. Aim for about 1.5-2 tablespoons per jar. Don’t spread it out—we want a concentrated core of creaminess.
Layer 3: Pile the oat crumble mixture generously on top, covering the custard completely and pressing it down just a tad. It will look beautifully rustic.
Pro-Tip: Place your filled jars on a baking sheet. This makes them infinitely easier to move in and out of the oven and catches any potential bubble-overs.
Step 4: Bake to Golden Perfection
Slide your baking sheet into the preheated oven. Bake for 15-20 minutes, until the crumble topping is a deep, golden brown and you can see the apple mixture bubbling enticingly around the edges. Your kitchen will smell absolutely heavenly.
Step 5: The Patient (or Not-So-Patient) Finale
Carefully remove the jars from the oven—they’ll be hot! Let them cool on the baking sheet for at least 10-15 minutes before digging in if you’re serving warm. This allows the custard core to set slightly and prevents a molten sugar tongue-burning. For the cold version, let them cool completely at room temperature before popping the lids on and transferring to the fridge.
How to Serve These Little Jars of Joy
The beauty is in the choice! For a warm, comforting dessert, serve them right in the jar with a long spoon, maybe with an extra drizzle of cold cream or a tiny scoop of vanilla ice cream on top for a hot/cold contrast. For the portable, chilled treat, simply screw on the lid once cool. Tuck one into a lunchbox, take them on a picnic, or gift them to a neighbor. I love adding a little twine bow and a tag for a personal touch. They’re self-contained, mess-free, and utterly charming.
Mix It Up! Recipe Variations
- Berry Bliss: Swap half the apples for fresh or frozen mixed berries (blueberries, raspberries, blackberries). The colors are stunning!
- Pear & Ginger Twist: Use ripe diced pears instead of apples and add ¼ tsp of ground ginger to the fruit layer for a zesty kick.
- Vegan & Dairy-Free: Use coconut oil in the crumble and choose a plant-based custard. It works like a dream.
- Nutty Crunch: Add 2 tablespoons of chopped pecans or walnuts to the crumble topping for extra texture.
- Chocolate Caramel Dream: Add a thin layer of salted caramel sauce under the custard, and sprinkle the top with dark chocolate chips before baking.
Chef’s Notes & Kitchen Stories
This recipe has evolved from many happy (and a few messy) experiments. The first time I made these, I got overzealous with the custard and it bubbled over spectacularly in the oven—hence the baking sheet tip! I’ve learned that a thicker custard works best. My quick 3-ingredient cheat’s custard: whisk 1 egg yolk, 1 tbsp sugar, and 1 tsp cornstarch into ¾ cup of warmed milk or cream. Cook over low heat, stirring constantly, until it thickens. Stir in ½ tsp vanilla extract. Voila!
These jars also have a magical way of making people smile. I once brought a batch to a potluck, and the sight of individual desserts made everyone’s eyes light up. It’s proof that a little personal touch goes a long way. Don’t stress about perfection—the charming, homemade look is part of the appeal!
FAQs & Troubleshooting
Can I make these ahead of time?
Absolutely! They are the ultimate make-ahead dessert. You can assemble the jars (with cold apple mixture) up to a day in advance, cover, and refrigerate. Just add 2-3 extra minutes to the bake time since you’re starting from cold. They also keep beautifully in the fridge for 3-4 days after baking.
My topping isn’t getting crunchy. What happened?
The usual suspect is butter that’s too soft or melted. Always start with cold fat. Also, ensure your oven is fully preheated and you’re baking until you see that uniform golden-brown color. If you’re using a very moist apple variety, pat the cooked apples dry with a paper towel before layering to avoid steam softening the crumble from below.
Can I use glass jars in the oven?
Yes, with caution! Standard Mason jars (like Ball or Kerr) are tempered to withstand canning temperatures and are generally safe for baking. The key is to avoid extreme thermal shock. Don’t place a cold jar directly into a hot oven or a hot jar directly into the fridge. Letting them cool gradually on the baking sheet is the trick. Always check jars for cracks or chips before using.
What’s the best way to reheat them?
For a single jar, 20-30 seconds in the microwave works in a pinch. For the best texture, pop them back in a 300°F oven for 8-10 minutes until warmed through. This re-crisps the topping beautifully.
Print
Portable Apple Crumble Jars with Custard Core (Perfect Hot or Cold)
Description
Sweet cinnamon apples, a hidden custard core, and a golden oat crumble—perfect warm or chilled, and completely portable! Ready in about 35 minutes.
Ingredients
Apple Layer:
-
2 large apples, peeled & diced (~2 cups)
-
1 tbsp maple syrup or light brown sugar
-
½ tsp ground cinnamon
-
1 tsp fresh lemon juice
Custard Core:
-
½ cup vanilla custard (store-bought or quick 3-ingredient version: egg yolk + sugar + cornstarch + ¾ cup warmed milk + ½ tsp vanilla)
Crumble Topping:
-
½ cup old-fashioned rolled oats
-
¼ cup almond flour or all-purpose flour
-
2 tbsp cold unsalted butter or solid coconut oil
-
1 tbsp light brown sugar
-
Pinch of cinnamon and salt
Instructions
-
Cook Apples:
-
In a skillet over medium heat, combine apples, syrup/sugar, cinnamon, and lemon juice. Cook 5-7 min until just tender. Let cool slightly.
-
-
Make Crumble:
-
In a bowl, mix oats, flour, sugar, cinnamon, and salt. Rub in cold butter or coconut oil with fingers until coarse crumbs form.
-
-
Assemble Jars:
-
Layer 1: Divide apples among jars.
-
Layer 2: Spoon 1.5–2 tbsp custard into the center of each jar.
-
Layer 3: Top with oat crumble, pressing slightly.
-
-
Bake:
-
Place jars on a baking sheet. Bake at 350°F (175°C) for 15-20 min until topping is golden and apples are bubbly.
-
-
Cool & Serve:
-
Warm: Cool 10-15 min and serve with cream or ice cream.
-
Chilled: Cool completely, cover, refrigerate. Perfect for grab-and-go or picnics.
-
Notes
-
Berry Bliss: Swap half apples for berries.
-
Pear & Ginger: Use pears + ¼ tsp ground ginger.
-
Vegan/Dairy-Free: Coconut oil in crumble + plant-based custard.
-
Nutty Crunch: Add 2 tbsp chopped pecans or walnuts to topping.
-
Chocolate Caramel: Add caramel under custard + sprinkle chocolate chips on top.
Chef’s Hack: Use cold fat in crumble and preheated oven for max crunch. Pat apple layer dry if too juicy.
Nutritional Information*
*This is an estimate for 1 of 4 jars, using almond flour, butter, and store-bought custard. Values will vary with substitutions.
- Calories: ~250
- Carbohydrates: 30g
- Fat: 12g
- Protein: 3g
- Fiber: 3g
Prep Time: 15 mins | Cook Time: 20 mins | Total Time: 35 mins | Servings: 4 individual jars
Final Thoughts: A Jar Full of Happy Endings
So, the next time life feels a little too hectic for homemade comfort, remember this: magic is just a few layers away. These Portable Apple Crumble Jars are more than a clever dessert—they’re a reminder that the coziest traditions can adapt, travel, and fit right into the palm of your hand. They capture the soul-warming essence of a time-honored classic and give it a delightful, modern twist.
Whether they’re cooling on your counter, tucked into a picnic basket, or waiting for you in the fridge, they promise a little moment of sweet, personal joy. From my grandma’s memory to your kitchen, I hope these jars bring you as much happiness in the making as they do in the eating. Now, go on—bake some love, and take it with you wherever you go.


