
The Cozy Magic of a One-Pan Wonder: Your New Favorite Dinner
Hey there, friend! Come on in, grab an apron, and pull up a stool. Can you smell that? It’s the warm, savory, irresistibly cheesy aroma of a dinner that’s bubbling away in the oven, promising to solve all of tonight’s “what’s for dinner?” dilemmas. If your idea of a perfect evening involves minimal cleanup, maximum flavor, and a meal that makes everyone at the table do a happy little wiggle, then you and I are already on the same page.
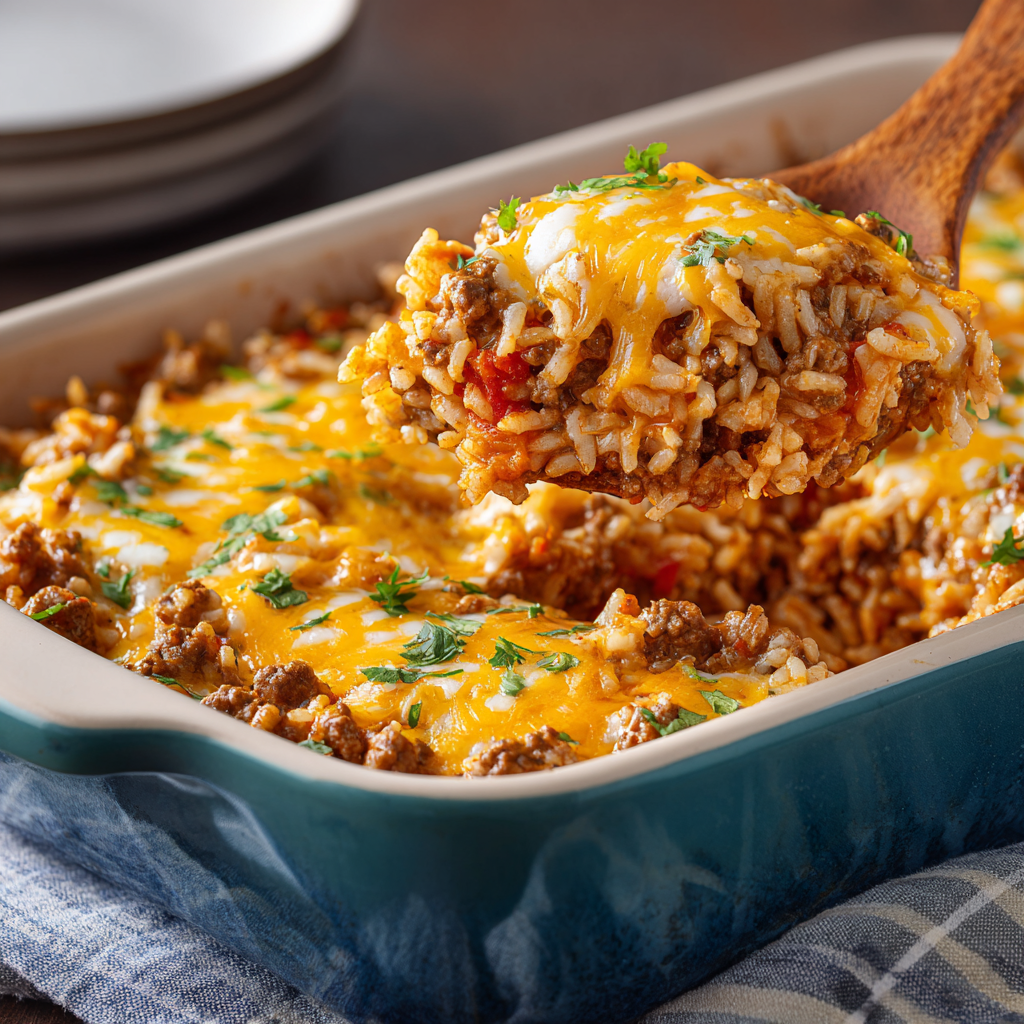
Today, we’re making my Cheesy Beef & Rice Bake. This isn’t just a casserole; it’s a cozy, comforting, all-in-one hug on a plate. Imagine savory ground beef and fluffy rice, simmered in a rich, seasoned broth, all smothered under a blanket of golden, melted cheese. It’s hearty, forgiving, and the very definition of family-style comfort food. The best part? You likely have most of the ingredients in your kitchen right now, and the process is as simple as browning, stirring, and baking. No fancy skills required—just a love for delicious, homemade food that brings people together. So, let’s preheat that oven and turn simple ingredients into something truly unforgettable.
Why This Bake Holds a Special Place in My Heart (and My Recipe Box)
This recipe takes me right back to my first apartment, with its tiny kitchen and even tinier budget. My roommate, Sarah, and I had a standing “Sunday Scramble” ritual. We’d survey our pantry, pool our resources (usually ground beef, rice, and whatever cheese was on sale), and attempt to create a meal that would feed us for days. Our early experiments were… let’s call them “creative.” But one rainy evening, this exact combination came together. The moment we pulled that bubbling dish from the oven, the entire apartment filled with the most incredible smell. We ate straight from the baking dish, laughing about our week, and I remember that profound feeling of “Wow, I made this. This is actually really good.” It was more than food; it was a triumph of resourcefulness, a shared victory, and the start of my belief that the best meals aren’t about perfection—they’re about heart, a little improvisation, and the joy of sharing. Every time I make this bake, it still tastes like that cozy, victorious feeling.
Gathering Your Flavor Squad: Ingredients & Insights
Here’s everything you’ll need to build this flavor-packed bake. Think of this list as your roadmap to deliciousness—I’ve added my little chef notes and swaps so you can make this recipe your own!
- 1 tablespoon Olive Oil: Just enough to get things sizzling. A neutral oil like avocado works too, but I love the hint of fruitiness from a good olive oil.
- 1 lb Ground Beef (85/15 or 90/10 lean/fat ratio is ideal): This gives you great flavor without too much excess grease to drain. For a lighter twist, ground turkey or chicken works beautifully!
- 1 medium Onion, finely diced: The sweet, aromatic base of our dish. No fresh onion? A tablespoon of onion powder in a pinch will do.
- 3 cloves Garlic, minced: Because every great savory dish starts with garlic. Feel free to add an extra clove if you’re a garlic enthusiast like me!
- 1 cup Long-Grain White Rice, uncooked: I prefer long-grain (like Jasmine or Basmati) for its fluffy, separate texture. Important: Do NOT use instant rice here; it will turn to mush.
- 2 cups Beef Broth: This is the flavor engine that cooks the rice. For a richer taste, use a low-sodium beef stock. Vegetable broth is a fine substitute.
- 1 (15 oz) can Tomato Sauce or Diced Tomatoes: Tomato sauce creates a smoother, sauciier base. Diced tomatoes will give you a chunkier, more textured bake. Use what you love!
- 1 tablespoon Worcestershire Sauce: Our secret umami weapon! It adds depth and a slight tang. In a true pinch, a dash of soy sauce mixed with a squeeze of lemon can mimic some of its complexity.
- 1 teaspoon Paprika (smoked or sweet): Smoked paprika adds a fantastic, subtle smokiness. Sweet paprika gives a gentler, sweeter pepper flavor. Your choice sets the tone!
- 1 teaspoon Kosher Salt & ½ teaspoon Black Pepper: Season as you go! I always start with these amounts and adjust at the end. Remember, broths and cheeses can be salty.
- 1 ½ cups Shredded Cheese (I use a mix): Here’s where the magic happens! I combine 1 cup shredded sharp cheddar for punch and ½ cup shredded mozzarella or Monterey Jack for that legendary stretch. Pre-shredded cheese is convenient, but shredding a block yourself melts creamier (and doesn’t have anti-caking agents).
Let’s Build the Bake: Simple Steps to Dinner Victory
Ready? Let’s transform these ingredients into your new comfort food classic. Follow along, and don’t forget my little commentary—it’s like I’m right there with you, pointing out the fun parts!
Step 1: Preheat & Prep. Start by heating your oven to 375°F (190°C). Lightly grease a 9×13 inch baking dish with butter, oil, or a quick spritz of cooking spray. This simple step is your insurance policy for easy serving later—no stuck-on bits!
Step 2: Brown the Beef & Build Flavor. In a large skillet (one that has a lid, if you have it!), heat the olive oil over medium heat. Add the diced onion and ground beef. Break up the beef with your spoon as it cooks. We’re looking for a nice, even brown here, not gray steam! Once the beef is no longer pink, add the minced garlic. Cook for just 60 seconds more until it’s wonderfully fragrant. Chef’s Tip: Don’t rush the browning. Those little crispy bits on the meat are pure flavor gold!
Step 3: The One-Pan Mix. This is the satisfying part! To the skillet with your beef and onions, stir in the uncooked rice. Let it toast for about 30 seconds—you’ll hear it sizzle a little. Then, pour in the beef broth, tomato sauce, Worcestershire sauce, paprika, salt, and pepper. Give it all a mighty good stir, scraping up any tasty browned bits from the bottom of the pan. Those bits are flavor boosters! Bring the mixture to a simmer. Chef’s Hack: Taste your broth now! This is the best time to adjust the seasoning before it goes into the oven.
Step 4: Bake to Perfection. Carefully pour the entire contents of your skillet into the prepared baking dish. Cover it tightly with aluminum foil. This is crucial—it creates a steamy environment that will cook the rice perfectly. Slide it into your preheated oven and bake for 35-40 minutes. Your kitchen will start to smell amazing. After the time is up, pull it out and check if the rice is tender and the liquid is absorbed.
Step 5: The Cheesy Finale. Here comes the fun! Remove the foil (watch out for steam!) and marvel at your nearly finished masterpiece. Now, sprinkle that glorious mountain of shredded cheese evenly over the top. Return the dish to the oven, uncovered, for another 10-15 minutes. You’re waiting for that cheese to be completely melted, bubbly, and maybe even have a few irresistible golden spots.
Step 6: The Patience Payoff. I know it’s hard, but let the bake rest for 5 minutes after pulling it from the oven. This allows the saucy rice to set a bit, making it easier to serve. It also saves everyone from burning the roof of their mouth on molten cheese—a true act of love!
Dishing it Up: How to Serve Your Masterpiece
Scoop generous portions straight from the dish into bowls. I love to add a final flourish—a sprinkle of fresh chopped parsley or chives adds a pop of color and freshness. For the ultimate comfort food plate, serve it alongside a simple green salad with a bright vinaigrette (to cut through the richness) or some steamed green beans or broccoli. A slice of crusty bread is also perfect for mopping up every last bit of that cheesy sauce. It’s a complete, satisfying meal that truly stands on its own.
Make It Your Own: Delicious Twists & Swaps
The beauty of this bake is its flexibility. Play with it! Here are a few of my favorite spins:
- Southwestern Fiesta: Swap in taco seasoning for the paprika, add a cup of frozen corn and a drained can of black beans with the rice. Top with pepper jack cheese and serve with salsa and avocado.
- Garden-Veggie Loaded: Add a diced bell pepper and 8 oz of sliced mushrooms when browning the onions. Stir in a cup of frozen peas right before adding the cheese.
- Creamy Dreamy Version: For extra indulgence, stir in ½ cup of sour cream or 4 oz of softened cream cheese after the bake comes out of the oven (before the cheese topping).
- “Shepherd’s Pie” Style: After the bake is done, top with a layer of creamy mashed potatoes instead of cheese and bake until golden.
- Spicy Kick: Add a diced jalapeño (seeds and all for heat!) with the onions, or mix ½ teaspoon of crushed red pepper flakes into the sauce.
Olivia’s Kitchen Notebook
Over the years, this recipe has been my trusty sidekick for potlucks, new parents, and “I need something easy” nights. It’s evolved from that first apartment experiment—I’ve learned that a dash of thyme or a pinch of mustard powder can add another layer of flavor. One hilarious fail? The time I accidentally used cinnamon instead of paprika (similar colored containers in a dim pantry!). We called it “Mystery Spice Bake” and surprisingly, it wasn’t terrible… but let’s just say I now label all my spices clearly! The moral is, don’t be afraid to make it your own. Cooking is about joy, not just following rules. This dish is a forgiving friend in your recipe repertoire.
Your Questions, Answered!
Q: My rice is still hard after baking. What happened?
A: This usually means there wasn’t enough liquid, the oven temp was off, or the dish wasn’t covered tightly enough. The steam is essential! Next time, ensure your foil seal is tight. If it happens, simply add a splash of hot broth or water, re-cover, and bake for another 10-15 minutes.
Q: Can I make this ahead of time?
A: Absolutely! Assemble the bake completely (through Step 3) in the baking dish, cover, and refrigerate for up to 24 hours. When ready to bake, you may need to add 5-10 minutes to the covered baking time since it’s starting cold. Add the cheese topping as directed.
Q: Can I use a different type of rice?
A> Brown rice requires more liquid and a longer cook time, so I don’t recommend a direct swap here. For brown rice, use 2 ½ cups broth and increase the initial covered bake time to 50-60 minutes before adding cheese.
Q: It’s a bit greasy. How can I prevent that?
A> If using higher-fat ground beef, be sure to drain any excess fat after browning, before adding the rice and liquids. Using a leaner beef (90/10 or 93/7) or ground turkey also solves this beautifully.

Cheesy Beef & Rice Bake : Easy Comfort Casserole Dinner
Description
Cheesy Beef & Rice Bake (One-Pan Dinner)
Prep Time: 15 minutes
Cook Time: 55 minutes
Total Time: 1 hour 10 minutes
Servings: 6
Ingredients
-
1 tablespoon olive oil
-
1 lb ground beef (85/15 or 90/10)
-
1 medium onion, finely diced
-
3 cloves garlic, minced
-
1 cup long-grain white rice (uncooked, not instant)
-
2 cups beef broth
-
1 (15 oz) can tomato sauce or diced tomatoes
-
1 tablespoon Worcestershire sauce
-
1 teaspoon paprika (smoked or sweet)
-
1 teaspoon kosher salt
-
½ teaspoon black pepper
-
1 ½ cups shredded cheese (cheddar, mozzarella, Monterey Jack, or a mix)
Instructions
-
-
Preheat oven to 375°F (190°C). Lightly grease a 9×13-inch baking dish.
-
Brown the beef: Heat olive oil in a large skillet over medium heat. Add ground beef and onion; cook until beef is browned. Add garlic and cook 1 minute until fragrant.
-
Build the base: Stir in uncooked rice and toast for 30 seconds. Add beef broth, tomato sauce, Worcestershire sauce, paprika, salt, and pepper. Stir well and bring to a gentle simmer.
-
Bake: Pour mixture into prepared baking dish. Cover tightly with foil and bake for 35–40 minutes, until rice is tender and liquid is absorbed.
-
Add cheese: Remove foil, sprinkle cheese evenly over the top, and bake uncovered for 10–15 minutes until melted and bubbly.
-
Rest & serve: Let rest 5 minutes before serving.
-
Notes
-
Drain excess grease after browning if using higher-fat beef.
-
Keep foil tightly sealed so the rice cooks properly.
-
Shred cheese from a block for the creamiest melt.
Nutritional Information*
Prep Time: 15 minutes | Cook Time: 55 minutes | Total Time: 1 hour 10 minutes | Servings: 6
*Estimated per serving: Calories: ~420 | Protein: 24g | Fat: 20g | Carbohydrates: 34g | Fiber: 2g
Note: Nutritional information is an estimate and will vary based on specific ingredients used and portion sizes.


