
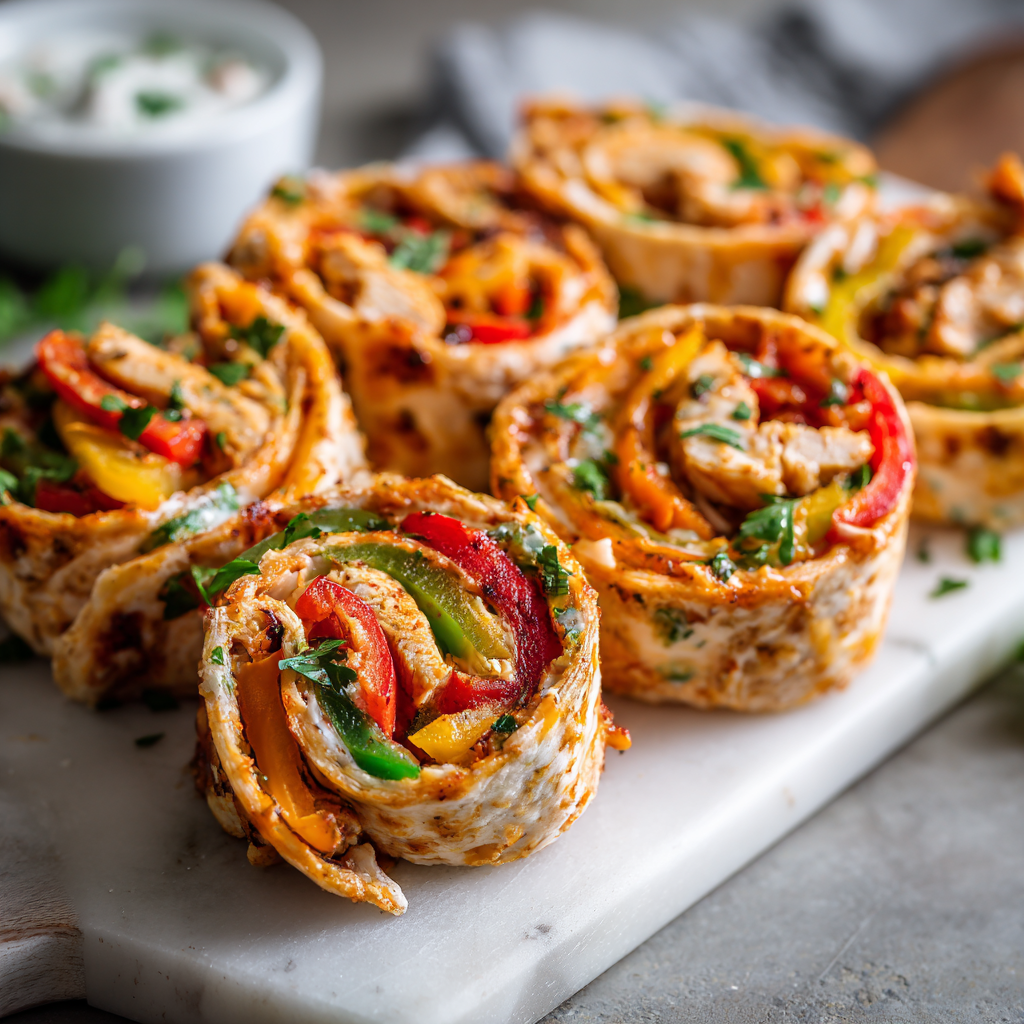
Rainbow Chicken Fajita Pinwheels: Your New Go-To for Fun, Flavorful Food!
Hey there, friend! Olivia here, waving from a kitchen that currently smells like a vibrant, sizzling fiesta. Have you ever looked at a classic dish and thought, “I love you, but how can we make you a little more… fun?” That’s the exact thought that sparked the creation of these Rainbow Chicken Fajita Pinwheels. We’re taking everything you adore about a sizzling skillet of fajitas—the juicy, spiced chicken, the sweet-and-smoky charred peppers, that incredible melty cheese—and we’re rolling it all up into a beautiful, bite-sized, totally irresistible package.
Imagine opening your lunchbox to find these colorful spirals of joy. Picture a party platter that disappears in minutes because everyone, from kids to gourmands, can’t resist grabbing just one more. These pinwheels are the ultimate kitchen multitasker: a meal-prep superstar, a crowd-pleasing appetizer, and a surefire way to make an ordinary Tuesday feel like a celebration. They’re packed with lean protein and a confetti of colorful veggies, proving that healthy eating doesn’t have to be boring. Best of all, you don’t need any fancy chef skills—just a love for great flavor and about 20 minutes of active kitchen time. So, tie on your favorite apron (the messy one with character is always my pick), and let’s roll up our sleeves and create some edible rainbows!
A Pinwheel of Happy Memories
This recipe always takes me right back to my first big “Friendsgiving” potluck. I was so nervous, wanting to bring something that looked impressive but was secretly easy to make. I remember staring into my fridge, seeing leftover fajita chicken and a rainbow of bell peppers, and having a lightbulb moment. What if I rolled it all up? I whipped up a batch, crossed my fingers, and brought them to the party. They were the first platter to be completely emptied! Watching my friends’ faces light up as they discovered the colorful layers inside each pinwheel was pure magic. It wasn’t just about the food; it was about creating a little moment of surprise and delight. That’s the spirit I hope these pinwheels bring to your table—a simple, joyful food that’s meant for sharing and creating your own happy memories.
Gathering Your Rainbow: Ingredients & Smart Swaps
Here’s your shopping list! The beauty of this recipe is its flexibility. Don’t be afraid to make it your own with what you have on hand.
- 2 cups Grilled Fajita-Seasoned Chicken Breast: Using pre-cooked, seasoned chicken is our biggest time-saver! I often grill a couple of extra breasts the night before. Chef’s Insight: For maximum flavor, toss your chopped, cooked chicken with an extra ½ teaspoon of fajita seasoning before adding it to the pinwheels. Rotisserie chicken works wonderfully here, too!
- 1 of each: Red, Yellow, Orange, and Green Bell Pepper: This is our “rainbow”! Each color brings a slightly different sweetness and crunch. Substitution Tip: No need to buy all four if you’re on a budget! Using just two colors (like red and green) still makes a gorgeous, festive pinwheel.
- ½ cup Cream Cheese, softened: This is the glue that holds our pinwheels together and adds a lovely, creamy tang. Chef’s Insight: Make sure it’s truly softened at room temperature for 30-60 minutes. This prevents tearing when you spread it and ensures a smooth, lump-free base.
- ¼ cup Sour Cream or Greek Yogurt: This loosens the cream cheese, making it spreadable. Greek yogurt adds a protein boost and tang, while sour cream offers classic richness.
- 1 tsp Fajita Seasoning: Store-bought is perfectly fine, but if you want to go homemade, a simple blend of chili powder, cumin, smoked paprika, garlic powder, and a pinch of salt is divine.
- 1 cup Shredded Cheddar or Pepper Jack Cheese: Cheddar gives you that classic, comforting melt, while Pepper Jack introduces a gentle, welcome heat. Substitution Tip: A Mexican blend cheese is also a fantastic choice here.
- 4 large (10-inch) Flour Tortillas: The canvas for our masterpiece! Chef’s Insight: Gently warming the tortillas for 10-15 seconds in the microwave makes them incredibly pliable and less likely to crack when you roll them.
Let’s Get Rolling: Your Step-by-Step Guide
Ready to build your edible art? Follow these steps for perfect, tightly-rolled pinwheels every single time.
- Create Your Creamy Glue. In a medium-sized bowl, combine your softened cream cheese, sour cream (or Greek yogurt), and that 1 teaspoon of fajita seasoning. Use a spatula or a hand mixer on low to beat it all together until it’s completely smooth and creamy. Now, fold in your shredded cheese. This mixture is your flavor-packed foundation!Chef’s Hack: If your cream cheese is still a bit chilly, pop the whole bowl (without the cheese) into the microwave for 10-second bursts, stirring in between, until it’s spreadable. Be careful not to melt it!
- Warm Your Canvas. This is a non-negotiable, friends-who-don’t-want-cracked-tortillas step! Stack your four tortillas on a plate and microwave them for about 15-20 seconds, just until they are warm and soft. A warm tortilla is a happy, flexible tortilla.
- Spread and Layer with Love. Lay one warm tortilla flat on your work surface. Using a spatula or the back of a spoon, spread a generous, even quarter of the cream cheese mixture all the way to the edges. This layer acts as a moisture barrier, keeping the tortilla from getting soggy from the chicken and peppers. Next, scatter about ½ cup of the fajita chicken evenly over the cream cheese. Finally, create your rainbow! Arrange a handful of the multi-colored bell pepper strips in a single layer over the chicken.Chef’s Hack: Leave about a 1-inch border at the top edge of the tortilla clean. This little naked strip will be the “seam” that helps the roll stick together and stay closed.
- The Tight Roll. Starting from the bottom edge (the one covered in filling), begin rolling the tortilla up and away from you. Use your fingers to tuck the filling in as you go. Roll as tightly as you can without squeezing the filling out the ends. Think “snug, not strangled.”
- Chill for a Perfect Slice. Individually wrap each tightly rolled tortilla in plastic wrap. Don’t skip this! The plastic wrap helps them hold their perfect cylindrical shape. Pop them into the refrigerator for at least 30 minutes, or up to 4 hours. This chilling step is what allows you to get those clean, beautiful pinwheels without any squishing.Chef’s Hack: In a hurry? The freezer is your best friend! Place the wrapped rolls in the freezer for 15-20 minutes. They’ll be firm and ready to slice in no time.
- Slice and Reveal! Unwrap your chilled rolls and place them on a cutting board. Using a sharp serrated knife, gently saw off the messy ends (a chef’s treat!). Then, slice the rest of the roll into 1-inch thick pinwheels. A sharp knife is key here—a dull one will squish your beautiful creation.
How to Serve These Colorful Spirals
Presentation is part of the fun! For a party, arrange the pinwheels on a large platter in a sunburst pattern or stack them artfully. Tuck a few lime wedges and fresh cilantro sprigs in between for a pop of green. For a lunchbox or meal prep, pack 4-5 pinwheels in a container with a side of salsa, guacamole, or a simple sour cream for dipping. They’re fantastic served chilled, straight from the fridge, or at room temperature, allowing the flavors to really sing.
Mix It Up! Creative Twists on the Classic
Once you master the basic formula, the sky’s the limit! Here are a few of my favorite variations:
- Southwest Ranch: Swap the fajita seasoning in the cream cheese for a packet of dry ranch seasoning. It’s a crowd-pleasing classic!
- Spicy Buffalo Chicken: Use shredded buffalo-seasoned chicken and swap the cheddar for blue cheese crumbles. Omit the peppers or use celery sticks for a cool crunch.
- Mediterranean Veggie: Skip the chicken. Use a base of hummus mixed with the cream cheese, and fill with chopped cucumber, sun-dried tomatoes, kalamata olives, and feta cheese.
- Low-Carb/Keto: Use low-carb tortillas or large, pliable lettuce leaves like butter lettuce or romaine hearts for a fresh, crunchy wrap.
Olivia’s Chef Notes & Kitchen Confessions
This recipe has evolved so much since that first Friendsgiving! My biggest “aha!” moment was realizing I could prep the entire filling the night before. I’ll mix the cream cheese spread, chop the chicken, and slice all the peppers, storing them in separate containers in the fridge. In the morning, it’s just an assembly line—warm, spread, roll, chill! It makes a busy morning feel effortless.
I also have a funny confession: I used to be so impatient with the chilling step. I’d try to slice a roll after 10 minutes and end up with a sad, squished log. I learned the hard way that patience (or a quick trip to the freezer) is the secret ingredient for picture-perfect pinwheels. Trust me on this one—your future, non-squished self will thank you!
Your Pinwheel Questions, Answered!
Q: Can I make these pinwheels ahead of time?
A: Absolutely! They are the ultimate make-ahead dish. You can assemble the whole rolls, wrap them tightly in plastic wrap, and store them in the refrigerator for up to 24 hours before slicing and serving. For the best texture and to prevent a soggy tortilla, I don’t recommend slicing them more than a few hours in advance.
Q: My tortillas keep cracking when I roll them. What am I doing wrong?
A: This is almost always a temperature issue. Cold tortillas are brittle! The key is to warm them up before you start. 15-20 seconds in the microwave, covered with a damp paper towel, will make them soft and pliable. Also, make sure your cream cheese mixture is soft and spreadable so it doesn’t tear the tortilla.
Q: How long do the pinwheels last in the fridge?
A: Once assembled and sliced, they will keep well in an airtight container in the refrigerator for 2-3 days. The tortilla may soften a bit over time, but they will still be delicious.
Q: Can I freeze these?
A: I don’t recommend freezing the fully assembled pinwheels, as the cream cheese and veggie texture can become watery upon thawing. However, you can freeze the un-sliced, tightly wrapped rolls for up to a month. Thaw overnight in the refrigerator before slicing.
Rainbow Chicken Fajita Pinwheels : Colorful, Bite-Sized & Meal-Prep Ready
Description
Rainbow Chicken Fajita Pinwheels
Prep Time: 20 minutes
Chill Time: 30 minutes
Total Time: 50 minutes
Ingredients
Filling
-
2 cups cooked fajita-seasoned chicken, chopped
(Grilled or rotisserie; toss with ½ tsp extra fajita seasoning if needed) -
1 red bell pepper, thinly sliced
-
1 yellow bell pepper, thinly sliced
-
1 orange bell pepper, thinly sliced
-
1 green bell pepper, thinly sliced
(Use any 2–4 colors you prefer.)
Creamy Spread
-
½ cup cream cheese, softened
-
¼ cup sour cream or Greek yogurt
-
1 tsp fajita seasoning
-
1 cup shredded cheddar or pepper jack
Wrap
-
4 large (10-inch) flour tortillas
(Warm to make pliable)
Instructions
1. Make the Creamy Spread
In a medium bowl, mix together cream cheese, sour cream (or Greek yogurt), and fajita seasoning until smooth. Stir in the shredded cheese.
2. Warm the Tortillas
Microwave stacked tortillas for 15–20 seconds to soften and prevent cracking.
3. Assemble
For each tortilla:
-
Spread ¼ of the cream cheese mixture evenly over the surface, all the way to the edges except for a 1-inch border at the top.
-
Scatter about ½ cup chicken evenly over the spread.
-
Add a layer of assorted bell pepper strips.
4. Roll
Starting from the bottom edge, roll tightly but without squeezing out the filling. Keep the top edge clean so it seals easily.
5. Chill
Wrap each roll tightly in plastic wrap. Chill for 30 minutes (or freeze for 15–20 minutes) to firm up.
6. Slice
Unwrap and slice off uneven ends. Cut each roll into 1-inch pinwheels using a sharp serrated knife.
Notes
-
Southwest Ranch: Swap fajita seasoning for ranch seasoning.
-
Buffalo Chicken: Use buffalo chicken + blue cheese.
-
Mediterranean: Use hummus + cucumber, olives, sun-dried tomatoes, feta.
-
Low-Carb: Use low-carb tortillas or large lettuce leaves.
Nutrition
- Calories: 220 cal Per Serving
- Fat: 13g
- Carbohydrates: 12g
- Protein: 15g
Nutritional Information*
Prep Time: 20 minutes | Chill Time: 30 minutes | Servings: ~32 pinwheels
Calories per 4 pieces: ~220 | Protein: 15g | Carbohydrates: 12g | Fat: 13g | Fiber: 2g | Sodium: ~430mg
*Please note: Nutritional information is an estimate and can vary based on the specific ingredients you use.
Final Thoughts
And there you have it! A recipe that’s as fun to make as it is to eat. These Rainbow Chicken Fajita Pinwheels are more than just a snack; they’re a little burst of joy, a testament to how a simple twist can transform the familiar into something spectacular. I hope this recipe becomes your secret weapon for easy entertaining and happy, colorful eating. Now, go roll up some rainbows and watch the smiles appear!


