
The Party Starter That Steals Every Show
Hey there, friend! Come on in, pull up a stool, and let’s talk about the star of the party. You know the one I’m talking about. It’s not the perfectly arranged veggie tray (though we love it for trying), and it’s not the store-bought dip that tastes, well, store-bought. No, it’s that one dish that has everyone hovering around the table, crackers in hand, eyes wide with that “what IS this magic?” look. In my kitchen, and hopefully soon in yours, that dish is always this Sweet & Spicy Pepper Jelly Cheeseball.
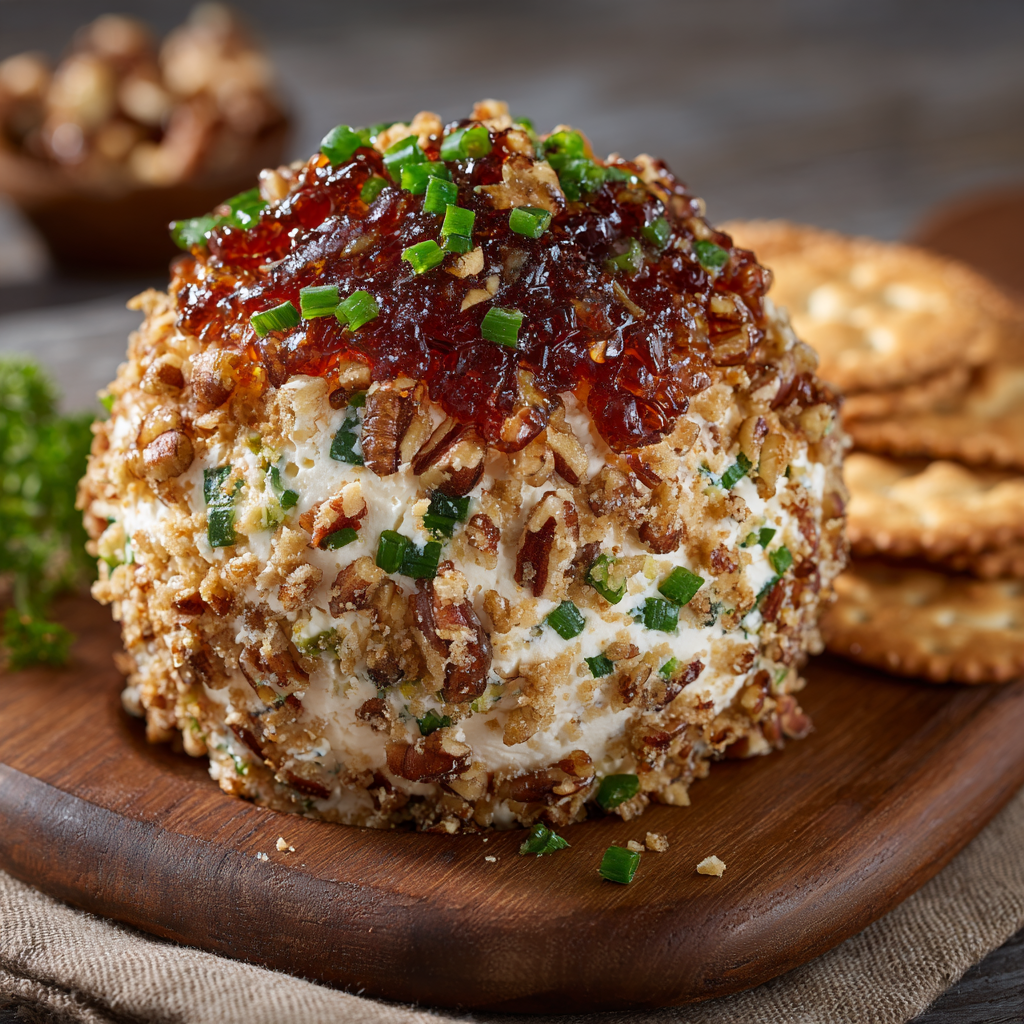
This isn’t just any cheeseball. This is a flavor experience. Imagine this: a creamy, tangy base of cream cheese and sharp cheddar, whipped with a whisper of smoky paprika and a hint of garlic. That alone is pretty fantastic. But then, we take it on a journey. We roll it in a glorious, sticky-sweet and gently spicy pepper jelly, creating this incredible sweet-and-savory glue. Then, we roll the whole beautiful mess in crunchy, buttery pecans and finish it with a confetti of fresh green onions for a pop of color and a little bite.
The result? Pure, unadulterated snack-time bliss. It’s the ultimate conversation starter, the centerpiece that makes your platter look like it was crafted by a gourmet chef, and the recipe that will have your friends and family begging you for the secret. The best part? It’s laughably easy to make. No fancy skills required, just a hungry heart and a willingness to get your hands a little messy (the sign of a great cook, if you ask me). So, let’s make some magic together!
A Cheeseball, A Crowd, and a Very Happy Memory
This recipe will always hold a special place in my heart because it was the star of my very first “big girl” holiday party I hosted. I was fresh out of college, living in my first apartment that was approximately the size of a postage stamp, and I was determined to throw a festive gathering. My budget was tight, my kitchen was tiny, but my enthusiasm was massive.
I needed something that felt impressive and gourmet but wouldn’t require me to juggle a million dishes in my oven-less kitchen (the main course was a slow-cooker chili, because priorities). I started playing with a classic cheeseball, but I wanted to make it mine. I had a jar of my aunt’s homemade pepper jelly in the fridge, a gift I’d been saving for a special occasion. In a moment of “what if?” inspiration, I slathered it on the outside of my cheeseball before rolling it in nuts. I held my breath when my friends tried it.
The reaction was instant. The room, which had been filled with chatter, went quiet for a second, followed by a chorus of “Oh my GOSH, Olivia, what is this?!” It was the hit of the party. That little cheeseball, born from pantry staples and a dash of courage, taught me a huge lesson: the best recipes aren’t about being complicated. They’re about bringing people together and creating a moment of pure, shared joy. Every time I make it now, I’m transported back to that cozy, crowded apartment, surrounded by good friends and great food.
Gathering Your Flavor All-Stars
Okay, let’s get down to business! Here’s your shopping list. I’ve included a few little chef-y insights and substitution ideas for each ingredient, because I believe a recipe should be a guide, not a rigid rulebook.
- 16 oz (2 blocks) Cream Cheese, softened: This is our creamy, dreamy foundation. Pro-Tip: For the love of smooth blending, PLEASE take the cream cheese out of the fridge at least an hour before you start. Room temp is non-negotiable for a lump-free cheeseball! If you’re in a pinch, you can microwave it (out of the foil!) for 15-20 seconds, but be careful not to melt it.
- 1 cup Sharp Cheddar Cheese, shredded: This brings the tang and the structure. I highly, highly recommend buying a block and shredding it yourself. The pre-shredded stuff is coated in anti-caking agents that can make your cheeseball a bit grainy. The flavor from a freshly shredded block of good, sharp cheddar is a total game-changer.
- 1/2 tsp Garlic Powder: We’re using powder here instead of fresh garlic for a reason! It distributes flavor evenly without the sharp, raw bite or potential moisture that fresh garlic can introduce.
- 1/4 tsp Smoked Paprika: This is our secret weapon for a subtle, smoky depth. It adds a wonderful warmth that plays so nicely with the sweet and spicy elements. If you only have regular paprika, that’s okay, but the smoked version is worth seeking out!
- 1/4 tsp Cayenne Pepper (optional): This is your dial for heat. A quarter teaspoon gives a gentle, background warmth. If you love spice, feel free to bump it up to 1/2 tsp. If you’re serving to spice-averse folks, you can leave it out entirely—the pepper jelly will still bring some heat.
- 1/3 cup Sweet and Spicy Pepper Jelly: The star of the show! You can find this in the jam/jelly aisle of most grocery stores. I’m a huge fan of brands like Tabasco or Stonewall Kitchen for this. If you can’t find “sweet and spicy,” a straight-up hot pepper jelly works beautifully too.
- 1/2 cup Chopped Pecans (for coating): They add a fantastic buttery crunch. Toasting them first in a dry skillet for a few minutes until fragrant will elevate the flavor to a whole new level! If you have a nut allergy, roasted sunflower seeds or even a coating of everything bagel seasoning would be a fantastic swap.
- 1/4 cup Green Onions, finely chopped (for garnish): This isn’t just for looks! The fresh, sharp bite of the green onion cuts through the richness of the cheese and adds a beautiful pop of color.
- Crackers, Breadsticks, or Raw Veggies for serving: My personal favorite is a sturdy, plain cracker like a water cracker or a buttery round, as they provide a neutral base for all that flavor. But honestly, it’s divine on just about anything!
Let’s Build Our Masterpiece: Step-by-Step
Ready to get your hands dirty? This is the fun part. Follow these steps, and you’ll have a flawless cheeseball in no time.
- Mix the Dreamy Base: In a medium-sized bowl, combine your softened cream cheese, shredded cheddar, garlic powder, smoked paprika, and cayenne (if using). Now, here’s my favorite method: use a hand mixer on medium speed for about 60-90 seconds. This incorporates a tiny bit of air and ensures everything is perfectly smooth and well-blended. You can absolutely do this by hand with a sturdy spatula, but the mixer is my little hack for a super creamy, lump-free texture. Scrape down the sides of the bowl halfway through to make sure no rogue cream cheese is hiding.
- Shape & Chill (The Patience Pays Off Step): Now, scrape your cheese mixture onto a large piece of plastic wrap. This is where we form our ball. I like to use the plastic wrap to help me—just bring the edges up and over the cheese, and twist the top to form a tight ball. You can also just use your (clean!) hands to shape it into a sphere on a plate. Once shaped, pop it into the fridge for a solid 30 minutes. Don’t skip this chill time! It firms up the cheeseball, making it much, much easier to handle for the next steps. A soft cheeseball is a messy cheeseball!
- The Glorious Jelly Layer: After its chill session, take your cheeseball out. Place your pepper jelly in a small bowl and give it a quick stir—sometimes it can be a little stiff. Using a small spatula or the back of a spoon, gently spread a thin, even layer of the jelly all over the surface of the cheeseball. It’s okay if it’s not perfectly smooth! A little rustic is charming. Your hands will get a bit sticky here, and that’s a sign you’re doing it right.
- The Crunchy Pecan Coat: Spread your chopped (and hopefully toasted!) pecans on a plate or a shallow bowl. Now, carefully roll your sticky, jelly-coated cheeseball in the pecans, gently pressing as you go to help them adhere. I like to pick it up and rotate it, patting the pecans onto any bare spots. You want a nice, even coat of that beautiful nutty crunch.
- The Final Flourish & Serve: Transfer your now-finished cheeseball to your serving platter. Right before serving, sprinkle the top with the finely chopped green onions. This keeps them bright and fresh. Place it in the center of your platter and surround it with an army of your favorite crackers, crisp breadsticks, or a rainbow of fresh veggie sticks. Then, watch it disappear!
Plating Your Party Star
Presentation is part of the fun! I love using a rustic wooden board or a beautiful slate platter for this cheeseball. It really makes the colors pop. Arrange your crackers and veggies artfully around it, and maybe tuck in a few sprigs of fresh herbs like parsley or rosemary for a little extra “wow” factor. Don’t forget to put out a small cheese knife or a couple of small spreaders to make it easy for your guests to dig in. Pro-tip: If you’re not serving it immediately, you can hold off on the green onion garnish until the last minute to keep it looking vibrant.
Make It Your Own: Creative Twists
The beauty of this recipe is its versatility. Feel like mixing it up? Here are a few of my favorite riffs:
- Bacon & Jalapeño: Add 1/2 cup of cooked, crumbled bacon and 2 tablespoons of finely minced pickled jalapeños to the cheese base. Use a jalapeño pepper jelly for an extra kick!
- Everything Bagel Vibe: Skip the pecans and roll the jelly-coated ball in everything bagel seasoning for that iconic savory flavor.
- Cranberry & Pecan (Holiday Style): Swap the pepper jelly for a whole-berry cranberry sauce and use dried cranberries in the mix along with the pecans for a festive, sweet-and-tart version.
- Herb Garden Delight: Fold 2 tablespoons of freshly chopped herbs like chives, dill, and parsley into the cheese base for a fresh, garden-fresh take.
Olivia’s Chef’s Notes & Kitchen Confessions
This recipe has evolved so much since that first party! I used to just mix everything together, but I found that layering the jelly on the outside creates this incredible burst of flavor with every bite that you just don’t get when it’s mixed in. It’s my #1 recommended “don’t change this” step.
One of my funniest kitchen fails with this was the time I was in a huge rush and tried to shape the cheeseball without chilling it first. Let’s just say I ended up with more of a “cheese puddle” than a ball. I had to scrape it all back into the bowl, chill it, and start over. We’ve all been there! The lesson? Respect the chill time. It’s your best friend for a picture-perfect cheeseball. These days, I sometimes even make a double batch and freeze one (without the garnish) for a last-minute lifesaver. Just thaw it in the fridge overnight and add your pecans and green onions before serving. It works like a dream!
Your Cheeseball Questions, Answered!
Over the years, I’ve gotten a lot of questions about this recipe. Here are the most common ones to help you troubleshoot like a pro.
Q: My cream cheese was still a little cold, and now my cheeseball is lumpy. Can I fix it?
A: Oh, I feel your pain! This is the most common hiccup. If the lumps are minor, you can try rolling the mixed cheese base between two sheets of parchment paper to smooth it out before chilling. If it’s really lumpy, your best bet is to embrace the “rustic” look or, if you have the patience, let it warm up a bit more and give it another good mix with your hand mixer. For next time, remember: patience is a virtue, and room-temperature cream cheese is a non-negotiable!
Q: Can I make this ahead of time?
A: Absolutely! In fact, I highly recommend it. You can make the entire cheeseball up to 2 days in advance. Just wrap it tightly in plastic wrap after the pecan coating and store it in the fridge. Hold off on the green onion garnish until just before you serve it to keep them fresh and bright.
Q: My pepper jelly is really thick and hard to spread. What can I do?
A> Great question! A quick and easy fix is to warm it gently. You can microwave it for 10-15 seconds in a microwave-safe bowl, or heat it in a small saucepan over low heat for a minute, stirring constantly. Just let it cool for a minute or two before spreading it on your chilled cheeseball so it doesn’t melt the cheese.
Q: I’m serving a crowd. Can I make this into mini cheeseballs?
A> Yes, and it’s a fantastic idea for a party! Instead of forming one large ball, use a small cookie scoop or a tablespoon to portion out the mixture. Roll them into bite-sized balls, chill, and then coat each one individually in a little jelly and pecans. They are adorable and so easy for guests to grab!

Sweet & Spicy Pepper Jelly Cheeseball : The Ultimate Party Starter
Description
Sweet & Spicy Pepper Jelly Cheeseball
A creamy, tangy, sweet-and-spicy crowd-pleaser that’s perfect for parties, holiday gatherings, or anytime you want a show-stopping appetizer.
Ingredients
-
16 oz (2 blocks) cream cheese, softened
-
1 cup sharp cheddar cheese, shredded
-
1/2 tsp garlic powder
-
1/4 tsp smoked paprika
-
1/4 tsp cayenne pepper (optional, adjust for heat)
-
1/3 cup sweet & spicy pepper jelly
-
1/2 cup chopped pecans, toasted
-
1/4 cup green onions, finely chopped (for garnish)
-
Crackers, breadsticks, or raw veggies for serving
Optional Variations:
-
Bacon & Jalapeño: Add 1/2 cup crumbled cooked bacon + 2 Tbsp minced pickled jalapeños; use jalapeño jelly
-
Everything Bagel: Roll in everything bagel seasoning instead of pecans
-
Cranberry & Pecan: Swap jelly for cranberry sauce, add dried cranberries
-
Herb Garden: Fold in 2 Tbsp fresh herbs (chives, dill, parsley)
Instructions
-
Mix Base:
In a medium bowl, combine cream cheese, cheddar, garlic powder, smoked paprika, and cayenne. Beat with a hand mixer 60–90 sec until smooth. Scrape sides halfway. -
Shape & Chill:
Form mixture into a ball using plastic wrap or hands. Chill 30 min until firm. -
Jelly Layer:
Stir pepper jelly, then gently spread a thin, even layer over chilled cheeseball. -
Pecan Coat:
Roll cheeseball in chopped toasted pecans, pressing lightly to adhere evenly. -
Garnish & Serve:
Place on a serving platter. Sprinkle with green onions just before serving. Surround with crackers, breadsticks, or veggie sticks
Notes
-
Room Temp Cream Cheese: Essential for a smooth, lump-free texture.
-
Thick Jelly: Warm gently 10–15 sec to make spreading easier.
-
Make-Ahead: Can be made 1–2 days in advance; add green onions at the last minute.
-
Mini Cheeseballs: Use a cookie scoop for bite-sized versions—perfect for parties.
Nutrition
- Calories: 220cal Per Serving
- Fat: 20g
- Carbohydrates: 6g
- Protein: 5g
Quick Nutrition & Prep Details
Servings: 10-12 | Prep Time: 15 minutes | Chill Time: 30 minutes
Calories: ~220 per serving | Carbs: 6g | Fat: 20g | Protein: 5g
*Please note: Nutritional information is an estimate and can vary based on the specific ingredients you use.
Final Thoughts: Your New Go-To Recipe Awaits
So, there you have it. The not-so-humble cheeseball that’s more than just a recipe—it’s a memory maker, a conversation starter, and a guaranteed ticket to becoming the host with the most.
Remember, the magic of this dish isn’t found in complex techniques or expensive ingredients. It’s in the joyful crunch of the pecans, the sweet-and-spicy kick of the jelly, and the creamy, tangy heart of the cheese. It’s in the messy, fun process of creating it and the shared “mmm”s of everyone who tries it.
You now have everything you need to create this show-stopping centerpiece. You have the story, the ingredients, the steps, and even the secrets to making it uniquely yours. So, trust yourself, embrace the simple joy of creating something delicious, and get ready to make your own happy memories around this irresistible appetizer.
Now, go forth and spread the joy—one cracker, one cheeseball, and one smiling face at a time. You’ve got this.
Happy cooking!
Olivia


