
Peanut Butter Cup Brownie Trifle: Your New Go-To Showstopper Dessert
Hey there, friend! Olivia here, welcoming you back to my cozy kitchen corner. Is there any duo in the world more iconic, more downright magical, than chocolate and peanut butter? It’s a match made in dessert heaven, a combination that makes you close your eyes and just savor the moment. I’m talking about that perfect balance of rich, fudgy chocolate and salty, creamy peanut butter that just… works.
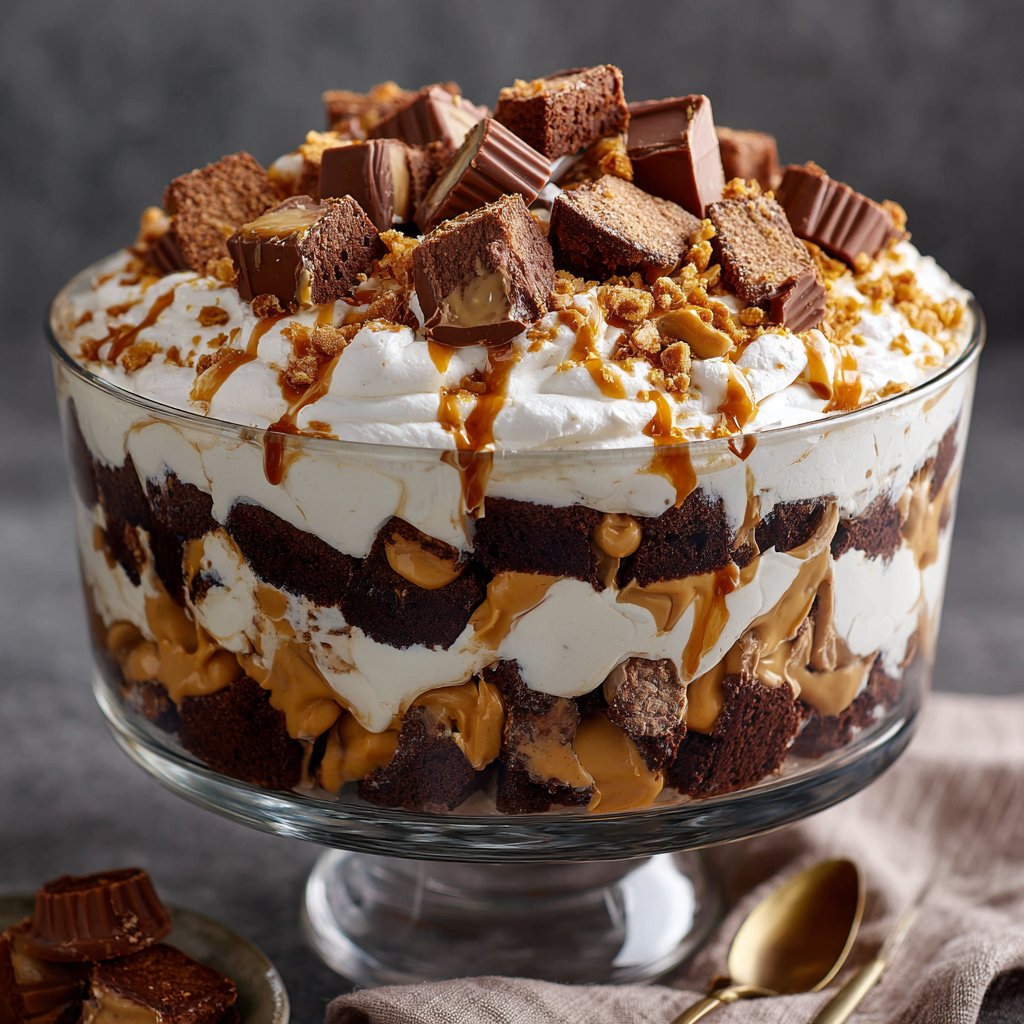
Today, we’re not just making a dessert. We’re creating a centerpiece. A conversation starter. A towering, glorious masterpiece that will have everyone gathering around the table with spoons at the ready: the one, the only, Peanut Butter Cup Brownie Trifle.
Now, I know what you might be thinking: “A trifle? That sounds fancy and complicated.” But let me stop you right there! This is the beauty of a trifle—it’s deceptively simple. We’re taking a few fantastic, store-bought shortcuts and layering them with so much love and flavor that the final product tastes like you spent all day in the kitchen. This dessert is all about the wow factor without the stress. It’s the ultimate dessert for busy hosts, potluck heroes, and anyone who believes that more is more when it comes to chocolate and peanut butter. So, tie on your favorite (probably messy) apron, and let’s build a dessert dream together!
A Sweet Slice of Memory
This recipe always takes me back to my first-ever “grown-up” dinner party in my tiny first apartment. I was so nervous! I wanted to impress my new friends with a dessert that screamed “effortless cool,” but my baking skills were… well, let’s call them ‘developing.’ A layer cake felt like a high-risk gamble. Cookies seemed too simple. Then I remembered my grandma’s trifle bowl—this gorgeous, heavy glass vessel that felt so special.
I decided to throw caution to the wind and create a layers-of-love dessert. I baked a pan of brownies (from a box, no shame!), whipped up a quick peanut butter pudding, and chopped a whole bag of peanut butter cups. As I built the layers in that beautiful bowl, my nerves melted away. It was like edible therapy. When I carried that towering, peanut-butter-cup-topped beauty to the table, the room went silent, followed by a chorus of “WOW!” It was an instant hit, and it’s been my secret weapon for making people feel loved and celebrated ever since. It’s a reminder that the best recipes aren’t about perfection; they’re about joy.
Gathering Your Dream Team: The Ingredients
Here’s your shopping list for pure bliss. Don’t be intimidated by the number of layers—we’re using smart shortcuts to make this incredibly easy. Read on for my little chef insights and substitution tips for each ingredient!
- 2 boxes of your favorite brownie mix (plus the eggs, oil, and water it calls for). Chef’s Insight: I go for a fudgy-style mix, not cakey, for that dense, rich texture. This is our trifle’s foundation, and we want it to be sturdy and decadent! If you’re a from-scratch champion, by all means, use your best homemade brownie recipe.
- 4 small boxes (3.4 oz each) of instant chocolate pudding mix. Substitution Tip: I love chocolate fudge flavor for extra depth, but regular chocolate works perfectly. If you can’t find small boxes, two 5.1 oz boxes will do the trick! For a cooked pudding texture, you can use chocolate cook-and-serve pudding, but you’ll need to let it cool completely before assembling.
- 6 cups of cold, cold milk. Chef’s Hack: I cannot stress this enough—the colder the milk, the quicker and thicker your pudding will set. I sometimes pop my milk in the freezer for 10-15 minutes before I start. Whole milk will give you the creamiest result, but 2% works great, too.
- 2 cups of creamy peanut butter. Chef’s Insight: Use a standard, no-stir creamy peanut butter for the smoothest incorporation into the pudding. The natural, oily kinds can sometimes separate. This is the glorious, salty-sweet ribbon that runs through our entire dessert!
- 32 oz container of Cool Whip (or your whipped topping of choice), thawed. Substitution Tip: If you’re not a Cool Whip fan, you can absolutely use an equal amount of freshly whipped heavy cream sweetened with a little powdered sugar. The trifle will be a bit less stable but incredibly delicious. Thawing is key here—a frozen block won’t fold in nicely!
- 16 full-size peanut butter cups, chopped. Chef’s Hack: I use the “party size” bag and give them a rough chop so you get big, satisfying chunks. Don’t pulverize them! We want texture. Pro-tip: throw them in the freezer for 10 minutes before chopping to prevent sticking.
Let’s Build This Beauty: Step-by-Step Instructions
Alright, team! This is where the magic happens. We’re building layers of flavor and texture. Get your biggest trifle bowl or a clear glass serving bowl ready—this is a dessert that’s meant to be seen!
Step 1: Bake & Cube Those Brownies.
First, preheat your oven and prepare your brownie mix according to the package directions for a 9×13 inch pan. I like to slightly under-bake them by a minute or two for an extra fudgy result—they’ll continue to cook as they cool. Let the brownies cool COMPLETELY. I mean it! If they’re warm, they’ll turn your pudding and whipped topping into a soupy mess. Once they’re cool, use a serrated knife to saw them into rough, bite-sized cubes. This is your delicious, chocolatey bedrock.
Step 2: Whip Up the Peanut Butter Pudding.
Now, for the star of the show! Grab a very large mixing bowl. Pour in your 6 cups of ice-cold milk and all four boxes of instant pudding mix. Whisk vigorously for a full two minutes. You’ll see it start to thicken beautifully right before your eyes. Now, add your 2 cups of creamy peanut butter. Little Chef Hack: To make the peanut butter easier to incorporate, you can microwave it for 15-20 seconds first—just until it’s slightly warmed and stir-able, not hot. Whisk it into the pudding until the mixture is completely smooth, creamy, and uniform. Give it a taste. Incredible, right? Pop this bowl in the fridge for 5-10 minutes to let it set up just a bit more while you get your other components ready.
Step 3: The Grand Layering Ceremony.
This is the fun, artistic part! We’re going to create two sets of identical layers for maximum impact.
- Layer 1: Scatter half of your brownie cubes in an even layer at the bottom of your trifle dish. Gently press them down just a bit.
- Layer 2: Spoon half of your glorious peanut butter pudding over the brownies. Use a spatula or the back of a spoon to spread it evenly to the edges of the bowl so you get a clean visual line.
- Layer 3: Carefully spread half of the thawed Cool Whip over the pudding layer. Again, spread it to the edges for that beautiful striped effect.
- Layer 4: Sprinkle half of your chopped peanut butter cups over the whipped topping.
Now, take a deep breath and repeat the entire process! Brownies, pudding, Cool Whip, and peanut butter cups. You should now have a magnificent, towering dessert.
Step 4: The Finishing Touches.
For the grand finale, take a few extra spoonfuls of Cool Whip and dollop it artistically on the very top. Garnish with a few whole or halved peanut butter cups to let people know exactly what they’re in for. If you’re feeling fancy, a drizzle of melted chocolate or warm peanut butter right before serving is just… *chef’s kiss*.
Step 5: The (Hard) Part Where You Wait.
I know, the temptation to dive in is real. But cover your trifle and refrigerate it for at least one hour, or ideally up to 4 hours. This crucial chilling time allows the flavors to meld and the layers to set, making it easy to scoop out perfect, beautiful servings.
How to Serve This Masterpiece
Presentation is part of the fun! Use a large, clear glass trifle bowl to show off all those gorgeous layers. When it’s time to serve, use a large serving spoon and dig all the way down to the bottom to ensure everyone gets a bit of every single layer in their bowl. That’s the trifle promise! I love serving this in pretty glass bowls or even mason jars for a individual touch. It’s rich, so a little goes a long way—but I’ve never known anyone to turn down seconds.
Get Creative! Recipe Variations
This recipe is a fantastic canvas for your creativity! Here are a few of my favorite twists:
- The Salty Sweet Crunch: Add a 1/2 cup of crushed pretzels as a separate layer between the pudding and the Cool Whip. The salty crunch is a game-changer.
- Mocha Magic: Whisk 1/2 to 1 teaspoon of instant espresso powder into your dry pudding mix. It won’t make it taste like coffee, just deeper and more chocolatey!
- Cookie Monster Version: Swap out the peanut butter cups for chopped Oreos or chocolate chip cookies.
- Lighter Twist: Use sugar-free pudding mix, low-fat milk, and a light whipped topping. The result is still delicious and feels a tad lighter.
- Nut-Free Friendly: Use SunButter (sunflower seed butter) instead of peanut butter and top with chopped chocolate bars instead of peanut butter cups.
Chef’s Notes: From My Kitchen to Yours
This recipe has truly evolved over the years. The first time I made it, I think I used one box of pudding and it barely covered the brownies! I’ve learned that more pudding and more peanut butter is always the right answer. One of my funniest kitchen fails involved trying to assemble this while the brownies were still slightly warm. Let’s just say my layers turned into a delicious, but homogenous, chocolate-peanut butter mush. A valuable lesson was learned that day!
Don’t be afraid to make this your own. The beauty of a trifle is its forgiving nature. No one will know if your layers aren’t perfectly straight. In fact, I think the rustic, “homemade” look is part of its charm. This dessert is about sharing and joy, so pour all that good energy into your bowl. I promise, it’s the secret ingredient.
FAQs & Troubleshooting: Your Questions, Answered!
Q: Can I make this trifle ahead of time?
A: Absolutely! This is a fantastic make-ahead dessert. You can assemble it completely, cover it tightly, and refrigerate it for up to 24 hours before serving. The flavors have even more time to get to know each other. I wouldn’t go much longer than that, as the brownies can start to get overly soft.
Q: My pudding layer seems runny. What did I do wrong?
A: The most common culprit is the milk not being cold enough. Instant pudding needs that shock of cold to activate the thickening agents properly. Also, make sure you’re whisking for the full two minutes—it needs that agitation. If it’s still a bit thin, don’t panic! Just pop it in the fridge for 15-20 minutes before assembling, and it will thicken up significantly.
Q: I don’t have a trifle bowl. What can I use instead?
A: No problem! Any large, clear glass bowl will work beautifully. You can also make individual portions in parfait glasses, mason jars, or even a 9×13 inch baking dish. You’ll lose the “wow” of the vertical layers, but the taste will be exactly the same.
Q: Can I use a different nut butter?
A: Of course! Almond butter or cashew butter would be delicious. Just keep in mind that the flavor will change. If you use a natural nut butter that tends to separate, give it a really good stir before measuring to incorporate the oils.
Print
Peanut Butter Cup Brownie Trifle : A Chocolate Lover’s Dream
Description
A towering, show-stopping dessert that layers fudgy brownies, creamy peanut butter pudding, Cool Whip, and chopped peanut butter cups. Perfect for parties, potlucks, or anytime you want to impress without stress.
Ingredients
Brownies:
-
2 boxes brownie mix + ingredients called for (eggs, oil, water)
-
Fudgy-style preferred
Pudding Layer:
-
4 small boxes (3.4 oz) instant chocolate pudding mix
-
6 cups cold milk
-
2 cups creamy peanut butter
Whipped Topping:
-
32 oz Cool Whip or thawed whipped topping
Peanut Butter Cups:
-
16 full-size, chopped
Optional Variations/Toppings:
-
Drizzle of chocolate or peanut butter
-
Crushed pretzels for crunch
-
Instant espresso powder in pudding mix for mocha twist
-
Swap peanut butter for SunButter, almond, or cashew butter for nut-free or flavor variations
Instructions
-
Bake Brownies:
Preheat oven and bake brownies per package directions in 9×13 pan. Cool completely, then cut into bite-sized cubes. -
Make Peanut Butter Pudding:
In a large bowl, whisk pudding mix and cold milk for 2 minutes until thick. Stir in peanut butter (slightly warmed if needed) until smooth. Chill 5–10 min. -
Layer Trifle (repeat twice):
-
Layer 1: Half of brownie cubes
-
Layer 2: Half of peanut butter pudding
-
Layer 3: Half of Cool Whip
-
Layer 4: Half of chopped peanut butter cups
Repeat all layers with remaining ingredients.
-
-
Finishing Touches:
Dollop extra Cool Whip on top and garnish with peanut butter cups or optional drizzle of chocolate/peanut butter. -
Chill:
Cover and refrigerate at least 1 hour (up to 4 hours) before serving to let layers set.
Notes
-
Serve in a clear trifle bowl, glass bowls, or individual mason jars.
-
Scoop from the bottom to get all layers in each serving.
-
Rich dessert—small portions are satisfying.
Nutrition
- Calories: 420 cal Per Serving
- Fat: 24g
- Carbohydrates: 45g
- Protein: 6g
Nutritional Information*
*Please note: This is an estimated calculation based on the specific ingredients listed and may vary based on the exact brands and products you use.
- Servings: About 20
- Prep Time: 25 minutes
- Chill Time: 1 hour (minimum)
- Calories: ~420 per serving
- Macronutrients (approx.): Carbs: 45g | Fat: 24g | Protein: 6g
Final Thoughts: Your Dessert Victory Awaits
And there you have it! What was once just a dream team of ingredients is now a breathtaking, spoon-ready masterpiece sitting proudly in your fridge. You’ve built something truly special—a dessert that’s as fun to make as it is to devour.
I hope this recipe becomes your new culinary confidante, the one you turn to when you need a guaranteed showstopper. Remember, the true magic of this trifle isn’t just in the layers of brownies, pudding, and peanut butter cups; it’s in the joy of sharing it. It’s in the “oohs” and “aahs” as you bring it to the table, the quiet moments of bliss as everyone takes their first bite, and the happy, full-bellied conversations that follow.
So, the next time a potluck, celebration, or just a serious chocolate-peanut butter craving calls, you know exactly what to do. Don’t stress about perfection. Embrace the layers, pour in the love, and watch it become the star of the show.
Happy layering, my friend!
With love and a full trifle bowl,
Olivia


