
Your New Favorite Snack is Here: Bacon Mac & Cheese Bombs!
Hey there, friend! Come on in, grab an apron, and get ready for some serious kitchen magic. Is there anything in the world that smells more like pure, unadulterated joy than bacon sizzling in a pan? Or the sight of bubbly, golden-brown cheese stretching from a baking dish? I’m Olivia Bennett, and I firmly believe that the best memories are made around delicious, comforting food. Today, we’re taking two of the greatest comfort foods of all time—crispy bacon and creamy mac & cheese—and we’re smashing them together into one incredible, bite-sized explosion of flavor. Welcome to the glorious world of Bacon Mac & Cheese Bombs.
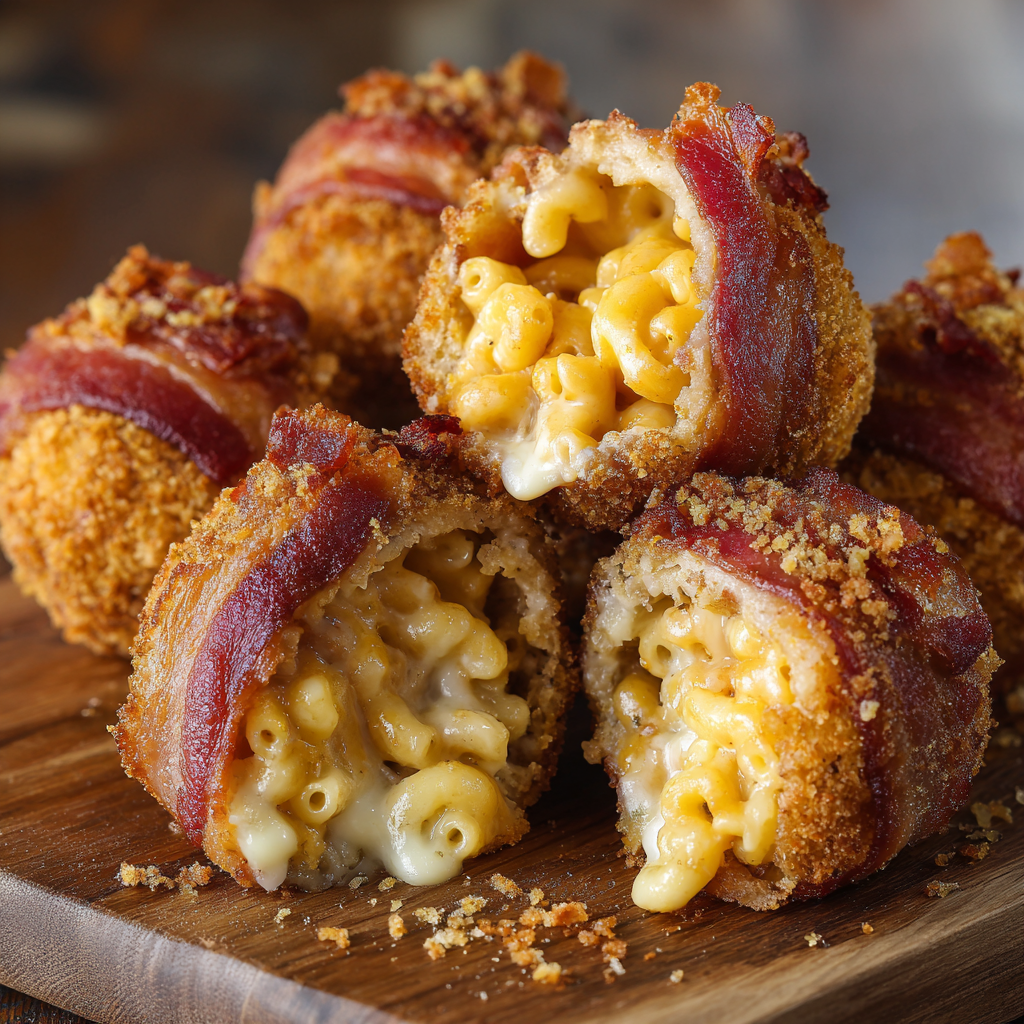
Imagine this: a perfectly crisp, golden shell giving way to a cloud of savory bacon, revealing a heart of the most decadent, gooey macaroni and cheese you’ve ever tasted. These little bombs are the ultimate party starter, the game-day hero, and the answer to your next serious comfort food craving. They look impressive, but I promise you, they are an absolute joy to make. We’re talking no fancy skills required, just a whole lot of enthusiasm for creating something unforgettable. So, if you’re ready to hear your friends and family erupt in cheers, let’s get our hands a little messy and make some magic happen!
The Happy Accident That Started It All
I have to confess, the genesis of this recipe was a beautiful, beautiful kitchen accident. Picture this: It was a chilly Sunday evening, and I had just finished testing a new stovetop mac & cheese recipe. It was rich, it was cheesy, it was everything I dreamed of. But, as life often goes, I got a phone call that pulled me away from the kitchen for a bit. I came back to find my magnificent macaroni and cheese… well, let’s just say it had firmed up considerably in the pot. My heart sank for a second. It was too thick to be that classic, creamy side dish.
But then I looked at the plate of bacon I’d cooked for BLTs the next day, and a lightbulb went off. What if I rolled this firm mac & cheese into balls? What if I wrapped them in that glorious bacon? A little flour, egg, and breadcrumb action later, and the first-ever Bacon Mac & Cheese Bomb was born. It was a little lopsided, but one bite told me we were onto something life-changing. It just goes to show that sometimes the best recipes aren’t meticulously planned; they’re born from a little bit of chaos and a whole lot of curiosity.
Gathering Your Flavor Arsenal
Here’s everything you’ll need to create these little spheres of happiness. The beauty of this recipe is in its simplicity and the quality of its core components. Let’s break it down!
- 2 cups thick, chilled mac & cheese: This is the heart of the bomb! Using chilled mac is the #1 chef secret here. It needs to be firm enough to roll. I love using my classic stovetop recipe and letting it cool completely in the fridge. If you’re short on time, a thick, store-bought version from the deli counter works wonderfully too!
- 1 cup shredded cheddar cheese: We’re doubling down on the cheese factor! I prefer sharp cheddar for a bigger flavor punch, but a Monterey Jack or a pepper jack would be fantastic for a little kick.
- 12 slices bacon: The crispy, savory armor. Standard-cut bacon works best here; thick-cut can be a bit tough to wrap. For an extra layer of flavor, try using a maple or applewood-smoked bacon!
- 1 cup all-purpose flour: Our first station in the breading line. The flour creates a dry surface for the egg to adhere to, ensuring our breadcrumbs stick and create that perfect crust.
- 2 eggs, beaten: The “glue” that holds our breadcrumb coating in place. I like to beat them with a tablespoon of water or milk to make them a little looser for easier dipping.
- 1 cup breadcrumbs: The source of that golden, crunchy exterior. Plain panko breadcrumbs will give you an incredibly light and crisp texture, while Italian-seasoned breadcrumbs add a lovely herby note. You can’t go wrong!
Let’s Build Some Bombs: A Step-by-Step Guide
Ready for the fun part? Let’s roll up our sleeves and transform these simple ingredients into the snack of your dreams. I’ll walk you through every step with my favorite chef hacks to ensure your bombs are absolutely perfect.
- Prep the Filling: In a medium bowl, gently mix your shredded cheddar cheese into the chilled mac & cheese. This is where we pack in that extra cheesy goodness! Now, for the forming. Using a cookie scoop or two spoons, portion out the mixture. The key here is to roll them firmly between your palms into tight, compact balls. If the mixture feels too sticky, don’t be afraid to lightly wet your hands. Place them on a parchment-lined baking sheet. Chef’s Hack: Pop this tray into the freezer for about 15 minutes. This extra chill makes them much easier to handle during the wrapping and breading process.
- The Bacon Wrap: Take a slice of bacon and, starting at one end, carefully wrap it around a mac & cheese ball. You want the ends of the bacon to meet, or slightly overlap, on the bottom of the ball. Gently press to seal. Don’t pull the bacon too tight, as it will contract while cooking. Repeat with all 12 balls. Once they’re all snug in their bacon blankets, return the tray to the fridge for another 10-15 minutes. This helps the bacon set and firm up, preventing it from unraveling later.
- The Breading Station: This is my favorite kitchen ritual! Set up three shallow bowls in an assembly line. Bowl one: all-purpose flour. Bowl two: your beaten eggs. Bowl three: breadcrumbs. Working with one bomb at a time, roll it in the flour until lightly coated, tapping off any excess. Next, dunk it completely in the beaten egg, letting the excess drip off. Finally, roll it in the breadcrumbs, pressing gently to make sure the entire surface is covered. Place the fully breaded bomb back on the baking sheet. This “dry-wet-dry” method is the golden rule for a flawless, non-greasy crust.
- Choose Your Cooking Adventure: You have options, and they are all delicious!
- Deep Fry (The Classic Crisp): Heat about 2 inches of a neutral oil (like canola or vegetable) in a heavy pot to 350°F (175°C). Use a thermometer for accuracy! Carefully lower 3-4 bombs at a time into the hot oil and fry for 2-3 minutes, until they are a deep, golden brown and the bacon is cooked through. Remove with a slotted spoon and let them drain on a wire rack set over a baking sheet. This method gives you the ultimate crispy texture.
- Air Fry (The Lighter Option): My go-to for a slightly lighter version! Arrange the bombs in your air fryer basket in a single layer, making sure they aren’t touching. Spray them generously with cooking spray. Air fry at 375°F (190°C) for 8-10 minutes, flipping them halfway through. They’ll be golden, crispy, and utterly delicious.
- Oven Bake (The Hands-Off Approach): No fryer? No problem! Preheat your oven to 400°F (200°C). Place the bombs on a wire rack set over a baking sheet (this allows hot air to circulate for even crisping). Bake for 18-20 minutes, or until the bacon is sizzling and the coating is golden.
- The Final, Crucial Step: However you cook them, let the bombs rest for about 5 minutes before serving. I know, the temptation is real, but trust me! This allows the molten cheese center to set just enough so you don’t burn the roof of your mouth, and it makes for the perfect gooey, rather than runny, texture.
How to Serve These Showstoppers
Presentation is part of the fun! I love serving these bombs on a large wooden board or a pretty platter for a rustic, shareable feel. Pile them high and watch them disappear. For dipping, the sky’s the limit! A simple side of cool, creamy ranch dressing is a classic pairing, but a spicy sriracha mayo or a tangy barbecue sauce takes them to a whole new level. Scatter some fresh chopped chives or parsley over the top for a pop of color and freshness that cuts through the richness perfectly.
Get Creative: Fun Flavor Twists!
Once you’ve mastered the classic, why not play with your food? Here are a few of my favorite ways to mix things up:
- Jalapeño Popper Style: Mix 2-3 tablespoons of finely diced jalapeños (seeds removed for mild, kept for spicy!) and 2 ounces of softened cream cheese into the mac & cheese before rolling.
- Buffalo Chicken: Stir in 1/2 cup of shredded cooked chicken and 1/4 cup of buffalo sauce into the mac & cheese. Serve with blue cheese dressing for dipping.
- Truffle Shuffle: Add a drizzle of truffle oil and 1/4 cup of grated Parmesan cheese to the mac & cheese base for a gourmet touch.
- Breakfast Bomb: Add 1/4 cup of cooked, crumbled breakfast sausage to the mac & cheese. Serve with maple syrup for dipping—trust me on this one!
Olivia’s Chef’s Notes & Kitchen Confessions
This recipe has become a staple in my home, especially during football season. It’s evolved from that first lopsided ball into the foolproof method I’m sharing with you today. The biggest lesson learned? The chill time is non-negotiable. I once tried to rush the process on a hungry Tuesday, and let’s just say I ended up with more of a “Bacon Mac & Cheese Pancake” situation. It still tasted amazing, but it wasn’t the beautiful bomb I was hoping for!
Don’t be intimidated by the multi-step process. You can absolutely prepare these ahead of time! You can bread the bombs, place them on a tray, and freeze them solid. Once frozen, transfer them to a zip-top bag. You can cook them straight from the freezer—just add a few extra minutes to the cooking time. Having a stash of these in your freezer is like having a secret weapon for last-minute guests.
Your Questions, Answered!
I’ve made these enough times (and received enough questions from friends!) to know what might come up. Here’s a little troubleshooting guide.
- Q: My mac & cheese balls are falling apart when I try to roll them. Help!A: This almost always means your mac & cheese isn’t cold enough or thick enough. The fridge (or even the freezer) is your best friend here. If it’s still too soft, you can try mixing in a tablespoon or two of extra shredded cheese or even a sprinkle of breadcrumbs to help absorb moisture and bind it together.
- Q: Can I make these ahead of time?A: Absolutely! You have two great options. 1) Assemble and bread the bombs, then keep them covered in the fridge for up to 24 hours before cooking. 2) Freeze them after breading (as mentioned above) for up to a month. Cook from frozen, adding a few extra minutes to the bake/air fry/fry time.
- Q: My bacon isn’t getting crispy in the oven/air fryer. What gives?A: This usually happens if the bacon is too thick or if the bombs are packed too closely together. Make sure you’re using standard-cut bacon and that there’s plenty of space around each bomb for the hot air to circulate. Giving them a light spray with oil before baking/air frying can also help the bacon render and crisp up.
- Q: What’s the best oil for deep frying?A: You want an oil with a high smoke point and a neutral flavor. My top choices are canola, vegetable, or peanut oil. And remember, keeping the oil at a steady 350°F is key—if it’s too cool, the bombs will absorb oil and become greasy; if it’s too hot, the outside will burn before the inside is hot.

Bacon Mac & Cheese Bombs
Description
Get ready for the ultimate comfort food mashup—bacon + mac & cheese = pure joy! These Bacon Mac & Cheese Bombs are golden on the outside, gooey and cheesy on the inside, and packed with smoky bacon flavor. Whether you deep fry, bake, or air fry them, these little bites will steal the show at any party, tailgate, or family gathering.
Ingredients
-
2 cups chilled mac & cheese (firm, not creamy)
-
1 cup shredded sharp cheddar cheese
-
12 slices bacon (standard-cut works best)
-
1 cup all-purpose flour
-
2 large eggs, beaten (with 1 tbsp water or milk)
-
1 cup breadcrumbs (Panko or Italian-style)
-
Oil for frying (or cooking spray for air fryer/oven)
Instructions
1. Prep the Filling:
Mix the shredded cheddar into the chilled mac & cheese. Scoop and roll into 12 firm balls. Chill or freeze for 15 minutes to firm up.
2. Wrap in Bacon:
Wrap each mac & cheese ball with one bacon slice, overlapping the ends slightly. Chill again for 10–15 minutes to help them hold their shape.
3. Set Up the Breading Station:
Prepare three shallow bowls:
-
Bowl 1: flour
-
Bowl 2: beaten eggs
-
Bowl 3: breadcrumbs
Coat each ball in flour, dip in egg, then roll in breadcrumbs. Press gently to ensure even coverage.
4. Choose Your Cooking Method:
-
Deep Fry: Heat oil to 350°F (175°C). Fry 3–4 bombs at a time for 2–3 minutes, until golden and crispy. Drain on a wire rack.
-
Air Fry: Place in the basket, spray lightly with oil, and air fry at 375°F (190°C) for 8–10 minutes, flipping halfway.
-
Bake: Place on a rack over a baking sheet. Bake at 400°F (200°C) for 18–20 minutes, until crisp and sizzling.
5. Rest & Serve:
Let the bombs rest for 5 minutes before serving (so the molten cheese doesn’t escape!).
Notes
Chill time is key! Cold mac & cheese makes shaping easy and prevents mess.
Standard bacon works best. Thick-cut doesn’t crisp evenly.
Freeze ahead. Bread and freeze the bombs for up to 1 month. Cook straight from frozen, adding a few extra minutes.
Nutritional Information (Per Bomb, Approximate)
Let’s be real, this is a treat! But information is power. These values are an estimate and can vary based on specific ingredients and cooking method (air frying will use less fat).
- Calories: 260
- Protein: 10g
- Fat: 16g
- Carbohydrates: 17g
Final Thoughts: Your New Go-To Recipe Awaits
And there you have it! From a happy kitchen accident to what I’m sure will become a legendary snack in your own home. These Bacon Mac & Cheese Bombs are more than just a recipe; they’re a little project filled with fun, flavor, and the promise of a truly spectacular bite.
Don’t let the multiple steps fool you—this is forgiving, joyful cooking at its best. Whether you’re prepping them for a crowd or making a batch to freeze for those “I deserve a treat” moments, the result is always worth it. That moment when you break one open and see that stretchy, cheesy center never fails to bring a smile.
So, what are you waiting for? Embrace the chaos, get your hands a little messy, and create something incredibly delicious. I can’t wait for you to experience the magic.
I’d love to hear how your bombs turn out! Tag me on social media @OliviasKitchen with #MacAndCheeseBombs so I can see your beautiful creations. Happy cooking!


