
No-Bake Chocolate Peanut Butter Crunch Bars: Your New Favorite 10-Minute Treat
Hey there, friend! Can you smell that? Okay, maybe not literally through the screen, but if you close your eyes and imagine, I’m betting you can almost taste it: the rich, melty sensation of dark chocolate, swirled with creamy, salty-sweet peanut butter, all held together with a delightful, crispy-crunchy texture that just makes you feel happy from the inside out. If your stomach is doing a little happy dance right now, you are absolutely my people.
We all have those moments, right? The 3 p.m. slump when only something chocolate will do. The “oops, I totally forgot I promised to bring a dessert” panic. Or just a random Tuesday night when you and your favorite person deserve a little homemade joy. That’s precisely where these No-Bake Chocolate Peanut Butter Crunch Bars come in to save the day. They are the superhero of the snack world—no cape required, just a bowl and a spoon.
This recipe is my love letter to simplicity. With just four main ingredients and zero need to turn on your oven, we’re creating a treat that feels indulgent, looks gorgeous, and is so incredibly easy you’ll have it memorized after the first time you make it. So, tie on your favorite apron (the messy one with the good memories), and let’s make something wonderfully, deliciously simple together.
The Day the Pantry Saved Me
I have to confess, the genesis of this recipe was a classic “kitchen sink” moment. It was a rainy Sunday a few years back, and my best friend was coming over for a much-needed catch-up session. I had promised a “proper bake,” but the day got away from me, and suddenly, she was texting that she was five minutes away. Cue the internal panic!
I flung open the pantry doors, my eyes scanning for a miracle. A half-used bag of chocolate chips winked at me from the shelf. Next to it, my trusty jar of peanut butter stood sentinel. And then, the box of cereal—the last little bit rattling around in the bottom, not enough for a full bowl. In a moment of pure, desperate inspiration, I grabbed all three. I melted, I stirred, I poured, and I crossed my fingers as I slid the pan into the fridge.
An hour later, over cups of steaming tea, we bit into these crunchy, salty-sweet bars. Her eyes went wide. “Olivia, this is incredible! What is this called?” I just laughed and said, “This is called ‘I-love-you-and-didn’t-want-to-serve-you-cereal-from-the-box’.” It was an instant hit, and it’s been a staple in my kitchen ever since. It’s proof that the best recipes aren’t always planned; sometimes, they’re discovered in a moment of happy chaos.
Gather Your Dream Team: The Ingredients
This is the beautiful part. We’re working with a short, superstar list. Every ingredient plays a crucial role, and I’ve got some fun swaps and chef-y insights for you so you can make this recipe your own.
- 1½ cups Chocolate Chips (semi-sweet or milk): This is the rich, velvety foundation of our bars. I usually go for semi-sweet because I love that deeper chocolate flavor that isn’t overly sweet, but milk chocolate is a dream if you’re catering to a sweeter tooth or little ones. Chef’s Insight: The quality of your chocolate matters here! A good brand like Ghirardelli or Guittard will give you a much smoother melt and a more luxurious taste. For a grown-up twist, try dark chocolate chips!
- ⅓ cup Creamy Peanut Butter Our binding agent and flavor powerhouse! The peanut butter brings a salty, nutty creaminess that cuts through the sweetness of the chocolate perfectly. Substitution Tip: Need it to be nut-free? SunButter (made from sunflower seeds) works amazingly well and gives a similar texture and flavor profile. You can also use any nut or seed butter you love—almond butter and cashew butter are fantastic here.
- 1 cup Rice Krispies Cereal: This is our textural hero! It provides that iconic, light, and airy crunch that makes these bars so fun to eat. They don’t get soggy, so every bite is perfectly crisp. Chef’s Insight: Don’t stir them in too vigorously! Gently fold them into the melted chocolate and peanut butter mixture to preserve their delightful crunch.
- Flaked Sea Salt (for topping): Don’t you dare skip this! A sprinkle of flaked sea salt just before chilling is the secret weapon. It elevates the chocolate, enhances the peanut butter, and creates a complex flavor profile that will have people saying, “Wow, what is in this?” Substitution Tip: If you don’t have flaked salt, a very light sprinkle of fine sea salt will work in a pinch, but the flaky stuff is worth seeking out for its texture and visual appeal.
Let’s Make Some Magic: The Step-by-Step
Ready? This is where the fun happens. We’re going from zero to hero in about 10 minutes of active time. I’ll walk you through every step with my favorite little hacks to ensure perfect bars every single time.
Step 1: The Gentle Melt
First, grab a medium heatproof bowl that fits snugly on top of a small saucepan. Fill the saucepan with about an inch of water and bring it to a gentle simmer—you want to see little bubbles, not a rolling boil. Now, add your chocolate chips and peanut butter to the bowl and place it over the simmering water, making sure the bottom of the bowl isn’t touching the water. This is called a bain-marie or double boiler, and it’s the best way to melt chocolate gently and evenly without scorching it. Chef’s Hack: If you’re in a hurry, the microwave works too! Just do it in 30-second bursts on medium power, stirring thoroughly between each burst. Be patient! Burnt chocolate is a sad thing.
Step 2: The Crispy Fold-In
Once your chocolate and peanut butter are completely smooth and velvety, take the bowl off the heat. Let it sit for just a minute to cool down slightly. This is a sneaky little trick to prevent the cereal from melting on contact. Now, dump in your cup of Rice Krispies. Using a flexible spatula, gently fold the cereal into the chocolate mixture. Chef’s Hack: “Fold” means to cut through the middle, scrape along the bottom, and turn the mixture over itself. We’re not stirring aggressively! We want to coat every single piece without crushing all the air out of our crispy cereal.
Step 3: The Pan & Smooth
Grab an 8×8-inch baking dish. For the love of easy cleanup and perfect bars, line it with parchment paper! Let the paper hang over two opposite sides—this creates “handles” that will let you lift the entire slab of bars out later. It’s a game-changer, I promise. Pour your chocolate-crunch mixture into the prepared pan. Use your spatula or the back of a spoon to spread it into an even layer, pushing it into the corners. Chef’s Hack: For a super smooth top, lightly wet your fingers or the back of a spoon and gently press and smooth the surface. It works like a charm!
Step 4: The Salty Finish
This is the final flourish! Take your flaked sea salt and, holding your hand up high, give it a good sprinkle over the entire surface. The height helps distribute the salt evenly. You’re not aiming for a salt crust here, just little flecks of salty goodness that will surprise and delight in every bite.
Step 5: The Patient Chill
Now, for the hardest part: waiting. Carefully transfer the pan to your refrigerator. You need to let it chill for at least one hour, or until it’s completely firm to the touch. Chef’s Hack: If you’re in a mega-rush, the freezer will set these up in about 20-25 minutes. Just don’t forget about them! Once they’re set, use your parchment paper handles to lift the whole block out onto a cutting board.
Step 6: The Grand Finale – Slice & Savor!
Using a sharp knife, slice the block into bars or squares. For clean cuts, you can run the knife under hot water and wipe it dry between slices. Then, do it—take that first bite. Hear the crunch? Taste that perfect balance? You did that! And it was so easy.
How to Serve & Shine
Presentation is part of the fun! These bars are gorgeous all on their own, but you can absolutely dress them up. For a casual treat, I stack them on a rustic wooden board or pile them high in a fun ceramic bowl. If you’re hosting, place each bar on a little square of parchment paper on a dessert plate for a chic, bakery-style look. They pair beautifully with a hot cup of coffee, a cold glass of milk, or even a drizzle of extra melted peanut butter for the true enthusiasts at your table. They’re the star of the show, so let them shine!
Get Creative: Recipe Variations
Once you’ve mastered the classic, the kitchen playground opens up! Here are a few of my favorite ways to mix things up:
- The “Trail Mix” Twist: Fold in ¼ cup of your favorite add-ins with the cereal. Think chopped dried cranberries, mini pretzel pieces, or even a handful of roasted, salted peanuts for an extra crunch.
- The Cookie Dough Dream: Replace the Rice Krispies with 1 cup of crushed-up Biscoff cookies or graham crackers. It creates a softer, more decadent bar that tastes like a candy bar you’d buy from a fancy chocolatier.
- The Double Chocolate Delight: Are you a chocoholic? Me too. Add 2 tablespoons of cocoa powder to the melted chocolate and peanut butter mixture for an intensely rich, double-chocolate experience.
- The Nut-Free Neapolitan: Use SunButter and white chocolate chips instead of semi-sweet. The result is a beautiful, creamy, nut-free bar that’s a total crowd-pleaser.
- The “Elvis” Special: After spreading the mixture into the pan, top it with thinly sliced bananas before you add the sea salt. It’s a delicious homage to the King’s favorite sandwich!
Chef’s Notes: From My Kitchen to Yours
This recipe has evolved in the best way possible. It started as that pantry-raid panic, but now it’s my go-to gift for new neighbors, new parents, or just a “thinking of you” treat. I almost always double the batch and keep one in the freezer for emergencies (and yes, a sudden chocolate craving totally qualifies as an emergency).
A funny story: I once tried to get fancy and use chunky peanut butter for extra texture. It was great, but my then-5-year-old nephew took one bite, looked at me very seriously, and said, “Auntie Liv, the crunchies are in the wrong place.” Out of the mouths of babes! So now, I stick to creamy for the base and let the cereal do all the crunchy talking. It just goes to show that the simplest versions are often the most loved. This recipe is a testament to the fact that you don’t need complexity to create something truly special and memorable.
Your Questions, Answered!
Q: My bars are too soft and don’t hold their shape. What happened?
A: This usually means they needed more chilling time. Make sure you’re giving them a full, uninterrupted hour in the fridge. If your kitchen is very warm, they might need even longer. Also, double-check your measurements—a little too much peanut butter or not enough chocolate can affect the firmness. If all else fails, the freezer is your best friend! They’ll set up rock-solid in there.
Q: Can I use natural peanut butter?
A: You can, but be cautious! Natural peanut butters (the kind that separate) often have a different consistency and can make the bars a bit oilier and less firm. If it’s all you have, give the jar a really, really good stir to fully incorporate the oil before you measure it out. For guaranteed results, a standard, homogenized creamy peanut butter like Jif or Skippy works best.
Q: How should I store these, and how long will they last?
A: Because of the chocolate, these bars must be stored in the refrigerator in an airtight container. They will stay perfectly crisp and delicious for up to one week. You can also freeze them for up to 3 months! Just layer them between parchment paper in a freezer-safe container. Thaw in the fridge or for a few minutes on the counter before eating.
Q: My chocolate seized and got grainy when I melted it. Can I fix it?
A: Oh, the dreaded seize! This happens when a tiny bit of steam or water gets into the chocolate. Prevention is key: make sure your bowl is completely dry. If it happens, don’t panic! Remove it from the heat immediately and stir in about a teaspoon of a neutral oil (like vegetable or coconut oil) for every ounce of chocolate. This can sometimes bring it back to a smooth state.

No-Bake Chocolate Peanut Butter Crunch Bars
Description
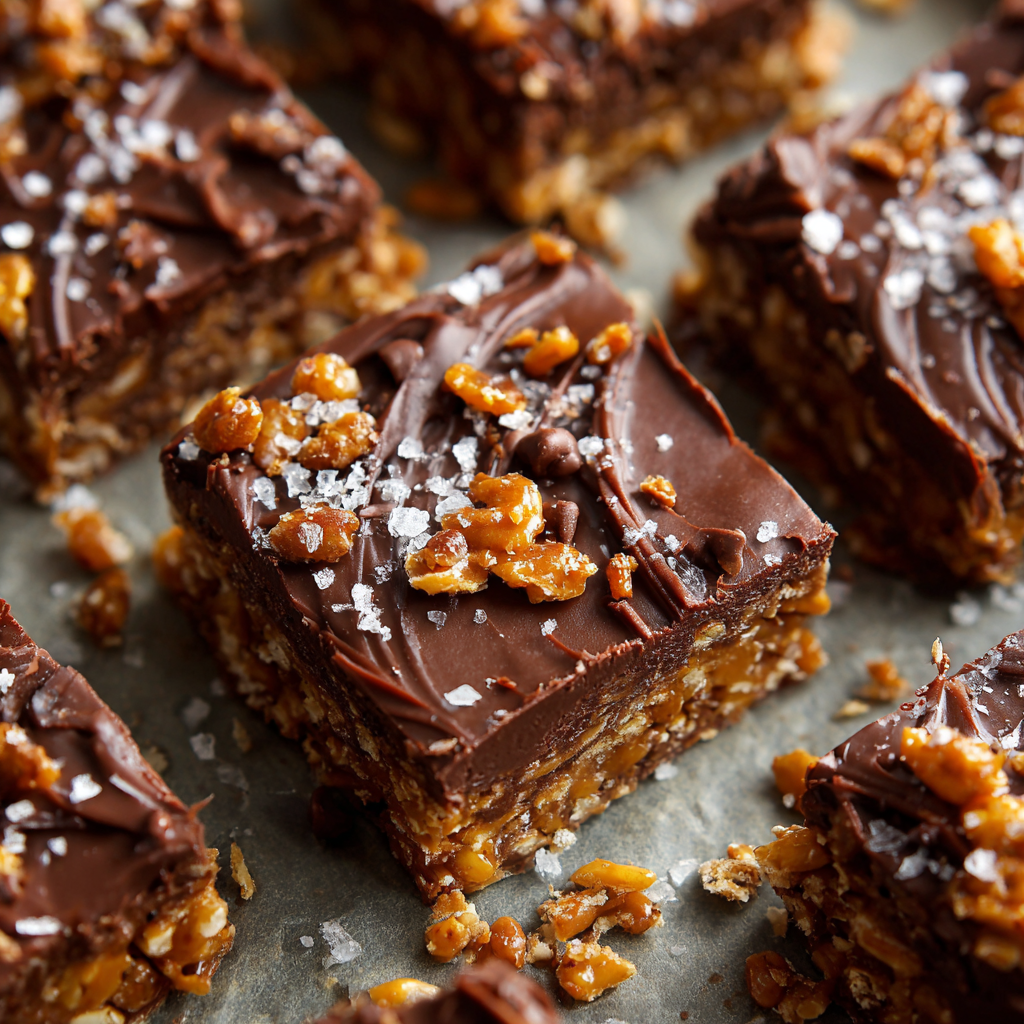
When chocolate cravings strike and you want something quick, crunchy, and wildly satisfying — these No-Bake Chocolate Peanut Butter Crunch Bars have your back. With just four simple ingredients and zero oven time, you’ll create a rich, melt-in-your-mouth treat that’s as easy as it is impressive. Smooth peanut butter, velvety chocolate, and crispy cereal come together in one glorious bite. Perfect for last-minute guests, after-school snacks, or those “I just need chocolate now” moments — this no-bake wonder is your new kitchen superhero.
Ingredients
-
1½ cups semi-sweet chocolate chips (or milk/dark, your choice)
-
⅓ cup creamy peanut butter (or almond, cashew, or sunflower butter)
-
1 cup Rice Krispies cereal (or any puffed rice cereal)
-
Flaked sea salt, for garnish
Optional Mix-Ins:
-
¼ cup crushed pretzels, chopped peanuts, or dried cranberries
-
2 tbsp cocoa powder for a double-chocolate version
-
1 tsp vanilla extract for extra depth
Instructions
-
Melt: In a heatproof bowl over simmering water, melt chocolate chips and peanut butter together until smooth. (Microwave option: 30-second bursts, stirring between each.)
-
Fold In: Remove from heat. Gently fold in the Rice Krispies until evenly coated.
-
Pan Prep: Line an 8×8-inch pan with parchment paper. Pour mixture in and spread evenly.
-
Top & Chill: Sprinkle with flaked sea salt. Chill in the fridge for 1 hour (or freezer for 25 mins) until firm.
-
Slice & Serve: Lift from the pan, cut into bars, and enjoy that perfect salty-sweet crunch.
Notes
-
For clean slices, run your knife under hot water and dry before cutting.
-
Want extra texture? Add mini marshmallows or crushed cookies.
-
Store in an airtight container in the fridge for up to 1 week or freeze for 3 months.
Quick Nutritional Info
This is just a rough estimate per bar (based on making 12 bars) to help you plan. Remember, it’s all about balance and enjoying treats made with love!
- Calories: ~190
- Carbs: 20g
- Protein: 3g
- Fat: 11g
- Sugar: 15g
- Fiber: 1g
- Sodium: 60mg
I so hope you love making and devouring these No-Bake Chocolate Peanut Butter Crunch Bars as much as I do. They’re more than just a recipe; they’re a reminder that the best things in life are often the simplest. Happy no-baking!
Final Thoughts: A Little Jar of Happiness
So there you have it. In the time it takes to watch half of your favorite sitcom, you can create a treat that feels like a warm hug in dessert form. These No-Bake Chocolate Peanut Butter Crunch Bars are more than just a recipe; they’re a reminder that joy doesn’t have to be complicated. It can be found right in your pantry, with a few simple ingredients and a willingness to embrace a little happy chaos.
They are proof that you don’t need a fancy degree or a day to spare to make something truly wonderful. You just need a bowl, a spoon, and the desire to create a little moment of sweetness for yourself or someone you love.
I hope this recipe becomes your secret weapon, your go-to gift, and your favorite 3 p.m. rescue. I hope it leads to your own stories of kitchen triumphs and happy, crumb-filled faces. Most of all, I hope it reminds you that some of life’s very best things are uncomplicated, unfussy, and blissfully no-bake.


