Your New Go-To Snack is Just 5 Minutes Away
Hey there, friend! Can you hear it? It’s the 3 PM slump calling. Your stomach is rumbling, your energy is dipping, and you’re staring into the pantry abyss, hoping something magical and satisfying will appear. We’ve all been there. You reach for a packaged granola bar, but the ingredient list reads like a science experiment—full of unpronounceable additives and a sugar content that’ll send you on a rollercoaster. Sound familiar?
Well, my fellow flavor enthusiast, I’m here to change that narrative for good. What if I told you that the most delicious, wholesome, and protein-packed snack could be yours in just five minutes of hands-on time? No oven, no fuss, no mystery ingredients. Just real, honest food that makes you feel incredible.
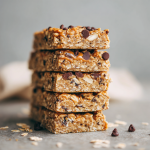
Today, we’re making my legendary 5-Ingredient No-Bake Granola Bars. These little bars are my kitchen superheroes. They’re chewy, a little sweet, deeply satisfying, and they stick with you through that afternoon meeting, school pick-up, or pre-workout session. They are the ultimate proof that “simple” doesn’t mean “boring.” In fact, simple is often the most delicious of all. So, tie on your favorite apron (messy stains are a badge of honor here!), and let’s create something wonderful together.
A Sweet Slice of Kitchen Memory
This recipe takes me right back to my grandma’s sun-drenched kitchen. She wasn’t a fancy chef, but she was a wizard with simple, good ingredients. She always had a tin of something homemade waiting for us—usually her famous “kitchen sink” cookies or a pan of her own version of these bars.
I remember one sweltering summer afternoon when the last thing anyone wanted to do was turn on the oven. My cousin and I were begging for a sweet treat. With a twinkle in her eye, Grandma pulled out her big yellow mixing bowl. In what seemed like mere moments, she had created a thick, sticky mixture, pressed it into a pan, and popped it into the fridge. “Patience is a virtue,” she’d say as we hovered nearby. That first cool, chewy, peanut-buttery bite was a revelation. It felt like love, condensed into a perfect, handheld bar. This recipe is my homage to her—to the magic of no-bake treats and the powerful, simple joy of feeding the people you love.
Gathering Your Dream Team: Just 5 Simple Ingredients
Here’s the beautiful part: we only need five core ingredients to make magic happen. Each one plays a starring role, and I’ll give you the inside scoop on why they work so well together.
- 1½ cups Rolled Oats (gluten-free if needed): This is our base, our foundation. Rolled oats (or old-fashioned oats) give these bars their wonderful chewy texture and heartiness. Chef’s Insight: Avoid using quick oats if you can, as they can make the bars a bit mushy. The sturdy texture of rolled oats holds up perfectly! If you need these to be gluten-free, just make sure your oats are certified GF.
- 1 cup Natural Peanut Butter or Almond Butter: This is our glue and our flavor powerhouse! It binds everything together and provides healthy fats and protein. Substitution Tip: You MUST use a natural, drippy peanut butter for this. The kind that’s just peanuts and maybe salt. The oily kinds with hydrogenated oils won’t bind correctly. Feel free to swap in almond butter, cashew butter, or even sunflower seed butter for a nut-free version!
- 1/2 cup Maple Syrup or Agave Nectar: Our natural sweetener and second binding agent. The maple syrup adds a subtle, warm flavor that pairs beautifully with the peanut butter. Substitution Tip: Agave works perfectly, and honey is a great option if you’re not strictly plant-based. Just note that honey will make the flavor a bit stronger.
- 1/2 cup Plant-Based Protein Powder (vanilla or unflavored): This is our secret weapon for a major protein boost, making these bars incredibly satiating. Chef’s Insight: The type of protein powder matters! I find that pea or brown rice protein blends work best for texture. If you don’t have protein powder, you can substitute with an additional ½ cup of oats and 2 tablespoons of ground flaxseed, though the protein content will be lower.
- 1/4 cup Mini Dairy-Free Chocolate Chips (optional, but highly recommended!): Because joy is a non-negotiable ingredient! The mini chips distribute little pockets of melty chocolate throughout every bite. Substitution Tip: No mini chips? Chop up a dark chocolate bar, or use dried fruit like cranberries or raisins for a different kind of sweet pop.
Let’s Get Mixing: Your Foolproof Guide to Perfect Bars
Ready for the easiest “cooking” you’ll do all week? Let’s do this! I’ll walk you through every step with my favorite chef hacks to ensure success.
- Combine the Wet Ingredients. Grab a large mixing bowl and add your peanut butter and maple syrup. Now, here’s a little chef hack: if your nut butter is straight from the fridge and a little stiff, pop the open jar in the microwave for 15-20 seconds to loosen it up. This makes it so much easier to mix! Stir, stir, stir until the two are completely smooth and beautifully combined. You should have a glossy, thick, and irresistible-looking mixture. (Yes, tasting a tiny spoonful at this stage is practically mandatory.)
- Incorporate the Dry Team. Now, dump in your rolled oats and protein powder. If you’re using the chocolate chips, hold off on them for just a second! Use a sturdy spatula or even your hands to mix everything together. You’ll notice the mixture will start to thicken up significantly. This is a good sign! Pro Tip: If you add the chocolate chips now, they might melt from the residual heat and moisture. By letting the oat mixture cool down for a minute, you’ll keep those chips intact.
- Fold in the Fun. Once the oat mixture is well-combined and has cooled slightly, now is the time to gently fold in those mini chocolate chips. This ensures you get distinct little chocolatey gems in every single bar, rather than a swirly, muddy-looking bar.
- Press, Don’t Pat. Line an 8×8-inch baking pan with parchment paper, leaving some overhang on two sides. This is your “sling” that will make removing the whole slab of bars a breeze later. Transfer the mixture into the pan. Now, for the most important step: PRESS. Don’t just pat it down. Use the bottom of a flat measuring cup, a glass, or your hands to press the mixture down as firmly and evenly as you possibly can. Apply some real muscle here! This compacts the bars, ensuring they hold together later and don’t crumble when you slice them.
- The Chill-Out Session. Pop the pan into the refrigerator for at least 30 minutes, or until the bars are completely firm. This chilling time is non-negotiable—it’s what allows the bars to set up and become sliceable. I sometimes let mine go for a full hour if I have the time. Patience, just like Grandma said!
- Slice and Celebrate! Once firm, use the parchment paper sling to lift the entire block of granola out of the pan. Place it on a cutting board and use a sharp knife to slice it into 10 rectangular bars (or 12 smaller ones, if you prefer). And just like that, you’re a snack-making superstar!
How to Serve Up Your Homemade Goodness
These bars are perfect straight from the fridge, all cool and firm. I love wrapping them individually in a little parchment paper and tying them with baker’s twine for a cute, grab-and-go treat. Toss one in your lunchbox, your gym bag, or your purse for a guaranteed happy moment later. They also make a fantastic, wholesome dessert alongside a cup of coffee or a cold glass of almond milk. However you serve them, do it with pride—you made this!
Mix It Up! 5 Delicious Twists on the Classic
The beauty of this base recipe is its incredible versatility. Once you’ve mastered the classic, get creative! Here are a few of my favorite variations:
- Tropical Vibes: Swap the peanut butter for almond butter, and mix in ¼ cup of chopped dried mango and 2 tablespoons of unsweetened shredded coconut.
- Trail Mix Bar: Replace the chocolate chips with a mix of 2 tablespoons each of dried cranberries, chopped almonds, and pumpkin seeds.
- Double Chocolate Craver: Use chocolate protein powder and swap the chocolate chips for cacao nibs for a deep, rich, less-sweet chocolate fix.
- Apple Pie Bar: Add 1 teaspoon of cinnamon and ¼ cup of finely chopped dried apples to the mixture. It tastes like fall in every bite!
- Nut-Free & Seed-Tastic: Use sunflower seed butter and swap the chocolate chips for sunflower seeds and a handful of dried cherries.
Olivia’s Kitchen Notes & Stories
This recipe has been a living, evolving thing in my kitchen for years. The first time I made them, I was so impatient that I tried to slice them after only 15 minutes in the fridge. Let’s just say I ended up with a delicious, albeit slightly crumbly, “granola bark” instead of bars! It was still devoured, but it taught me the importance of that firm chill.
I’ve also learned that the brand of protein powder can make a difference. Some absorb more moisture than others. If your mixture seems too dry and isn’t sticking together, don’t panic! Just add another tablespoon of maple syrup or nut butter. If it seems too wet and sticky, add another tablespoon or two of oats. Trust your instincts—you’ve got this!
These bars are a testament to my core cooking philosophy: good food doesn’t have to be complicated. It’s about using a handful of quality ingredients to create something that nourishes both body and soul. I hope this recipe becomes a trusted friend in your kitchen, just like it is in mine.
Your Questions, Answered!
I’ve gotten so many wonderful questions about these bars over the years. Here are the most common ones to help you on your no-bake journey!
Q: My bars are too crumbly and falling apart! What did I do wrong?
A: This is the #1 question, and it almost always comes down to two things: not enough binding agent or not enough pressure. First, make sure you’re using a natural, oily nut butter and enough maple syrup. Second, and this is crucial, you MUST press the mixture into the pan with serious force. Really compact it! If you’ve done both and they’re still crumbly, try adding an extra tablespoon of nut butter next time.
Q: Can I make these without protein powder?
A: Absolutely! As mentioned in the ingredients, you can substitute the ½ cup of protein powder with ½ cup of additional rolled oats and 2 tablespoons of ground flaxseed or chia seeds. The texture will be slightly different, but they’ll still be delicious and hold together well.
Q: How long do these bars last, and how should I store them?
A> Because they are no-bake and contain perishable ingredients, they need to be stored in an airtight container in the refrigerator. They will stay fresh and firm for up to 1 week. You can also freeze them for up to 3 months! Just layer them between parchment paper in a freezer bag and thaw in the fridge or at room temperature when you’re ready to enjoy.
Q: My mixture was too sticky to handle. How can I fix this?
A> This can happen if your nut butter was particularly runny or if your protein powder is a brand that doesn’t absorb much liquid. Don’t worry! Just gradually add more rolled oats, a tablespoon at a time, until the mixture becomes thick and less sticky to the touch.
5-Ingredient No-Bake Granola Bars : Simple, Protein-Packed, and Totally Addictive
Description
Say goodbye to store-bought snacks and hello to your new favorite homemade treat! These 5-Ingredient No-Bake Granola Bars are chewy, naturally sweet, and packed with real ingredients that actually fuel you. Made with oats, nut butter, and a touch of maple syrup, they’re the perfect grab-and-go snack for busy mornings, post-workout fuel, or that 3 PM craving. Simple, satisfying, and endlessly customizable—snacking just got a whole lot smarter (and tastier).
Ingredients
-
1½ cups rolled oats (GF if needed)
-
1 cup natural peanut or almond butter
-
½ cup maple syrup or agave nectar
-
½ cup vanilla or unflavored plant-based protein powder
-
¼ cup mini chocolate chips (optional, but highly recommended!)
Instructions
-
Mix Wet Ingredients: In a large bowl, combine peanut butter and maple syrup until smooth.
-
Add Dry Ingredients: Stir in oats and protein powder until thick and well blended. Let cool slightly, then fold in chocolate chips.
-
Press Firmly: Line an 8×8-inch pan with parchment. Transfer the mixture and press down firmly with a flat cup or your hands to compact.
-
Chill: Refrigerate for at least 30 minutes (1 hour for best results).
-
Slice & Enjoy: Lift out using parchment, slice into 10 bars, and store in the fridge.
Notes
-
Too crumbly? Add an extra spoonful of nut butter or syrup.
-
Too sticky? Stir in a bit more oats.
-
Store in the fridge for 1 week or freeze up to 3 months.
Nutrition
- Calories: 210 cal Per Bar
- Fat: 10g
- Carbohydrates: 18g
- Fiber: 3g
- Protein: 9g
Quick Nutrition Breakdown (Per Bar)
Please note: This is an estimate and can vary based on the specific brands of ingredients you use.
- Calories: ~210
- Protein: 9g
- Fat: 10g
- Carbohydrates: 18g
- Fiber: 3g
- Sugar: 7g
Love This Recipe? Save It For Later!
Your 5-Minute Snack Revolution Awaits
And there you have it—your ticket out of the 3 PM slump and into a world of wholesome, delicious energy. You’re no longer at the mercy of the pantry abyss; you are its master.
In just five minutes of active time, you can create a snack that’s not only a triumph of flavor and texture but a small act of self-care. These bars are more than just oats and peanut butter; they’re a promise to yourself that good food can be simple, and that you are worth those few extra minutes of preparation.
So, go on. Embrace the simple joy of creating something with your own hands. Wrap up a bar, tuck it into your bag, and face your day with the confident knowledge that a little piece of homemade goodness is waiting for you.