
The Ultimate Easy Sugar Cookies That Actually Hold Their Shape!
Hello, my fellow flavor-seekers! Can we just take a moment to appreciate the pure, unadulterated joy of a perfect sugar cookie? I’m talking about that soft, buttery, melt-in-your-mouth base that serves as a blank canvas for your wildest decorating dreams. The kind of cookie that makes you feel like a pastry artist, even if your primary kitchen tool is usually a trusty spatula.
If you’ve ever been locked in a battle with cookie dough that spreads into a puddle, losing its beautiful snowflake or intricate heart shape in the oven, raise your hand. (Don’t worry, mine is raised high! We’ve all been there.) That heartbreak ends today. I’m sharing my absolute go-to recipe for Easy Sugar Cookies that are famous for one thing: they. don’t. spread.
This isn’t just a recipe; it’s your ticket to cookie confidence. Paired with a glossy, dreamy frosting that sets to a beautiful finish, these cookies are the stars of every cookie swap, holiday party, and “just because” Tuesday. They’re soft, they’re flavorful, and they hold every single detail from your cookie cutters. So, tie on that apron (I promise, mine is already dusty with flour), and let’s create something wonderful together.
A Legacy of Sprinkles and Sweet Memories
This recipe always takes me right back to my Grandma Eleanor’s kitchen. It wasn’t a fancy kitchen—heck, the countertops were a lovely shade of 1970s avocado green—but it was the heart of our home. Every December, the air would grow thick with the scent of vanilla and butter, and the big, flour-dusted wooden board would come out. My job, from the time I could barely see over the counter, was to be the “Official Cookie Cutter Applier.”
I’d press those metal cutters into the chilled dough with the seriousness of a heart surgeon, carefully transferring the wobbly shapes to the baking sheet. Grandma would always save the last bit of dough for me to roll into a giant, misshapen “Olivia Cookie,” which she’d decorate with an absurd amount of rainbow sprinkles. We weren’t just making cookies; we were building traditions, one slightly lopsided star at a time. This recipe is an evolution of hers, tweaked and perfected over years to guarantee that perfect, no-spread shape. Every time I make them, I feel like she’s right there with me, reminding me that the best recipes are the ones made with love and shared with others.
Gathering Your Cookie Crew: The Ingredients
This is a double batch, because why go through all the effort for just a few dozen? Trust me, you’ll want extras. I’ve included my little chef insights for each ingredient so you know exactly what role it plays in our cookie masterpiece.
For the Sugar Cookies (Double Batch!):
- 2 cups (452 g) unsalted butter, softened: This is the soul of your cookie. Using unsalted butter lets you control the salt level. Chef’s Insight: “Softened” is key! It should be cool to the touch but leave a slight indent when you press it. Too soft/melted, and your cookies will spread.
- 2 cups (400 g) granulated sugar: Sweetness and structure. Creaming it with the butter creates tiny air pockets that give the cookie a tender crumb.
- 1 tablespoon vanilla extract: Don’t be shy! This provides that warm, classic flavor. For a next-level twist, try using vanilla bean paste for those beautiful little specks.
- 2 large eggs: Our binding agent, bringing the dough together and adding richness.
- 5 cups (630 g) all-purpose flour: The backbone. I highly recommend weighing your flour for accuracy. If you’re using cups, fluff your flour, spoon it into the cup, and level it off. No packing!
- 1 ½ teaspoons baking powder: Our secret weapon for a slight rise without spreading. It’s what gives the cookie a soft, cake-like texture while maintaining its shape.
- 1 ½ teaspoons table salt: The flavor enhancer! Salt balances the sweetness and makes all the other flavors pop. If you only have kosher salt, use a bit more.
For the Foolproof Sugar Cookie Frosting (Also a Double Batch!):
- 6 cups (750 g) powdered sugar, sifted: Sifting is non-negotiable here! It prevents lumps and creates the silkiest, smoothest frosting imaginable.
- 6-8 tablespoons milk: Start with 6 tablespoons. You can always add more, but you can’t take it out! We’re aiming for a thick but pipeable consistency.
- 4 tablespoons light corn syrup: This is the magic ingredient for a glossy, professional-looking shine that sets firmly. Don’t worry, you won’t taste it!
- 1 teaspoon vanilla extract: A flavor boost for the frosting.
- Gel food coloring (optional): Gel coloring is best because it provides vibrant color without thinning out your frosting like liquid dyes can.
- Sprinkles, etc.: Go wild! This is your moment to shine.
Let’s Get Baking: Your Step-by-Step Guide to Cookie Perfection
Ready to make some magic? Follow these steps, and you’ll be a sugar cookie superstar in no time. I’ve packed this section with all my favorite tips and hacks I’ve learned over the years.
Step 1: The Creaming Method is Everything. In the bowl of your stand mixer fitted with the paddle attachment (or a large bowl with a hand mixer), beat the softened butter and granulated sugar together on medium-high speed. Now, don’t rush this! Let it go for a full 2-3 minutes until the mixture is pale, fluffy, and wonderfully light. This step incorporates air, which is crucial for texture. Scrape down the bowl, then beat in the vanilla and eggs until just combined.
Step 2: The Dry Team Assembles. In a separate bowl, whisk together your flour, baking powder, and salt. This ensures the leavening is evenly distributed. With your mixer on low, gradually add the dry ingredients to the wet. Mix until the flour just disappears and a soft dough forms. Chef’s Hack: Stop mixing as soon as you no longer see dry flour. Overmixing can lead to tough cookies!
Step 3: The All-Important Chill Session. This is the step that guarantees no spreading. Divide your dough in half, flatten each half into a 1-inch thick disc, and wrap them tightly in plastic wrap. Chill for at least 2 hours, or up to 2 days. Chef’s Insight: Chilling the dough solidifies the butter, which means it takes longer to melt in the oven, preventing your beautiful shapes from melting into blobs. Patience is a virtue here!
Step 4: Roll, Cut, and Bake! Preheat your oven to a precise 350°F (175°C) and line your baking sheets with parchment paper. Take one disc of dough out of the fridge at a time. On a lightly floured surface, roll the dough to a consistent ¼-inch thickness. Use your favorite cookie cutters, dipping them in flour between cuts to prevent sticking. Place the shapes on your prepared baking sheets, leaving about an inch between them. Bake for 9-11 minutes. You’re looking for cookies that are set and maybe just barely starting to turn golden around the very bottom edge. The tops should still look pale. Chef’s Hack: For perfectly even baking, rotate your baking sheet halfway through.
Step 5: The Cool Down. Let the cookies cool on the baking sheet for 5 minutes before transferring them to a wire rack to cool completely. I know it’s tempting, but you must let them cool entirely before you even think about frosting! Warm cookies will melt your beautiful frosting into a sad puddle.
Step 6: Whip Up That Glossy Frosting. While the cookies cool, make your frosting. In a large bowl, whisk together the sifted powdered sugar, 6 tablespoons of milk, corn syrup, and vanilla. Whisk until it’s smooth and gloriously glossy. If it’s too thick, add more milk, one teaspoon at a time. If it’s too thin, add a bit more powdered sugar. Divide and tint with gel food coloring as desired.
Step 7: The Grand Finale – Decorate! You can use a piping bag with a tip for detailed work, or simply use a spoon or offset spatula to spread the frosting. Add your sprinkles or decorations immediately, as this frosting sets firmly at room temperature. Let the decorated cookies sit out, untouched, for about 4 hours or overnight until the frosting is firm to the touch.
Sharing the Sweetness: How to Serve Your Masterpieces
These cookies are a showstopper all on their own! Pile them high on a beautiful cake stand for a casual gathering. For something a little more special, I love placing them in little cellophane bags tied with a ribbon as a sweet homemade gift. They pair wonderfully with a cold glass of milk, a hot cup of coffee, or even a scoop of vanilla ice cream for an ultra-indulgent treat. However you serve them, do it with pride—you just baked like a pro!
Make It Your Own: Fun Recipe Variations
Once you’ve mastered the classic, the world is your cookie! Here are a few of my favorite twists:
- Lemon Zest Delight: Add the zest of two lemons to the dough and use a little lemon juice in place of some of the milk in the frosting for a bright, sunny flavor.
- Almond Elegance: Swap the vanilla extract in the dough and frosting for almond extract. It tastes like a fancy bakery cookie!
- Chocolate Dip: Skip the frosting and instead, dip half of each cooled cookie in melted chocolate. Let it set on parchment paper.
- Funfetti Fun: Mix ½ cup of rainbow sprinkles into the dough right after you add the dry ingredients. Instant party!
- Spiced Sugar Cookie: Add 2 teaspoons of cinnamon and a pinch of nutmeg to the dry ingredients for a warm, cozy flavor perfect for fall.
Olivia’s Kitchen Notes & Stories
This recipe has been a living, breathing thing in my kitchen for years. I once, in a pre-coffee haze, accidentally used powdered sugar instead of flour for rolling out the dough. Let me tell you, that was a sticky, sweet disaster we don’t need to repeat! Learn from my mistakes: always label your containers.
I’ve also learned that the dough is incredibly forgiving. If you over-chill it and it’s too hard to roll, just let it sit on the counter for 10-15 minutes. You can also re-roll the scraps without worrying about them getting tough—just chill the scraps again for 10 minutes before rolling. This recipe has evolved from my grandma’s “a little of this, a pinch of that” method to the foolproof version you see today, but the heart of it—the joy of creating and sharing—remains exactly the same.
Your Questions, Answered!
Q: My dough is too sticky to roll! What did I do wrong?
A: This usually happens if the butter was too soft or if you’re in a warm kitchen. No worries! Just add a tablespoon of flour at a time until the dough is manageable. More importantly, make sure you chill it thoroughly. A well-chilled dough is much easier to handle.
Q: Can I make this dough ahead of time?
A: Absolutely! You can make the dough, wrap the discs tightly, and refrigerate it for up to 2 days. You can also freeze it for up to 3 months. Just thaw it overnight in the fridge before rolling.
Q: Why did my cookies still spread a little?
A: The most common culprits are: 1) Your butter was too soft or partially melted. 2) You didn’t chill the dough long enough. 3) Your oven temperature is off—I highly recommend using an oven thermometer to check! 4) You used a different type of fat (like margarine) which has more water.
Q: My frosting is too thin/too thick. Help!
A> Easy fix! Too thin? Whisk in more sifted powdered sugar, a quarter cup at a time. Too thick? Add more milk, one teaspoon at a time, until it reaches your desired consistency. Remember, it’s always easier to thin it out than to thicken it up, so start with less liquid.
Easy Sugar Cookies & Sugar Cookie Frosting
Description
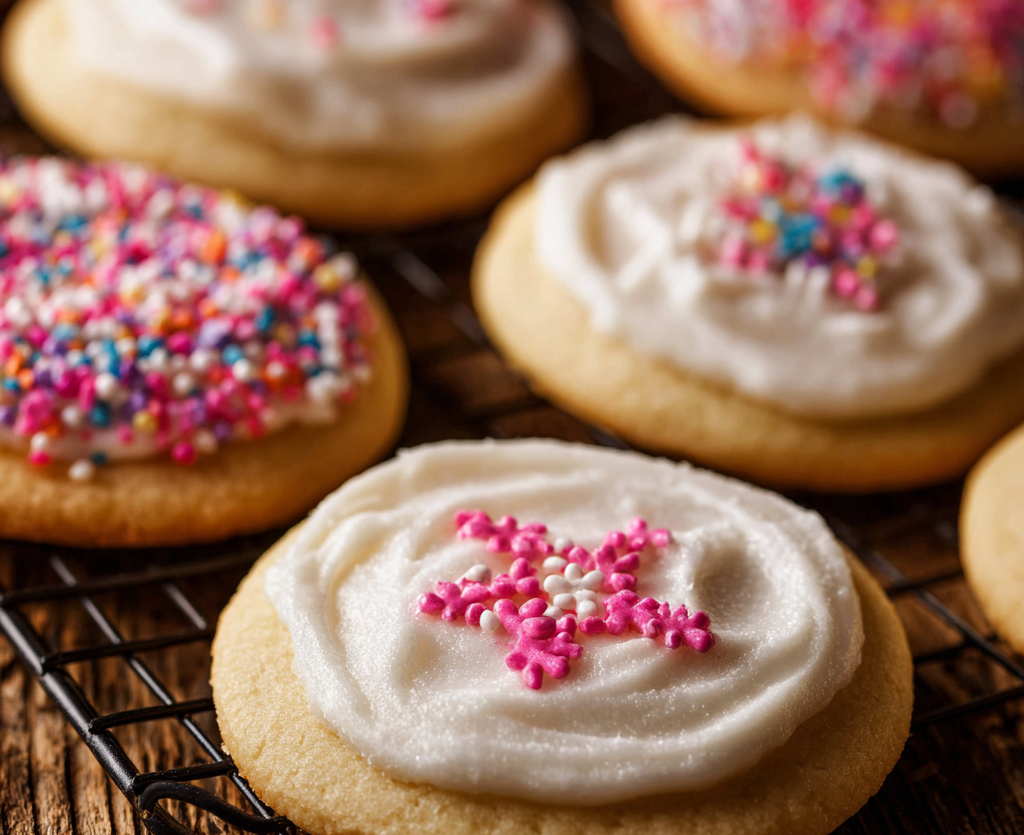
Say goodbye to cookie cutter heartbreak. These sugar cookies are soft, rich, and reliable — the kind that bake up beautifully without losing their design. Whether you’re crafting snowflakes, hearts, or dinosaurs, this dough keeps every detail sharp while staying melt-in-your-mouth tender. With a glossy, smooth frosting that sets perfectly, these cookies are a baker’s dream come true — simple, elegant, and irresistibly good.
Ingredients
For the Cookies
-
2 cups (452 g) unsalted butter, softened
-
2 cups (400 g) granulated sugar
-
1 Tbsp vanilla extract
-
2 large eggs
-
5 cups (630 g) all-purpose flour
-
1½ tsp baking powder
-
1½ tsp salt
For the Frosting
-
6 cups (750 g) powdered sugar, sifted
-
6–8 Tbsp milk
-
4 Tbsp light corn syrup
-
1 tsp vanilla extract
-
Gel food coloring (optional)
-
Sprinkles or decorations
Instructions
-
Cream butter & sugar until light and fluffy (2–3 min). Beat in vanilla and eggs.
-
Whisk dry ingredients separately, then add gradually to wet mixture until dough forms.
-
Divide & chill dough in discs for at least 2 hours (this step keeps the cookies from spreading!).
-
Preheat oven to 350°F (175°C). Roll dough to ¼ inch on a lightly floured surface. Cut shapes and place 1 inch apart on parchment-lined baking sheets.
-
Bake 9–11 min, until just set and pale golden at the edges. Cool completely before decorating.
-
Make frosting: Whisk powdered sugar, 6 Tbsp milk, corn syrup, and vanilla until smooth and glossy. Adjust consistency as needed. Tint and decorate! Let sit 4 hours (or overnight) to set.
Notes
-
Lemon Zest Love: Add zest of 2 lemons to the dough.
-
Almond Elegance: Swap vanilla for almond extract.
-
Chocolate Dipped: Half-dip cooled cookies in melted chocolate.
-
Funfetti Party: Stir ½ cup sprinkles into the dough.
Nutrition
- Calories: 130cal Per Serving
- Fat: 6 g
- Carbohydrates: 17 g
- Protein: 1 g
Nutritional Information (Approximate)
Yield: ~80 cookies (3-inch size)
Serving: 1 cookie
Calories: ~130 kcal
Final Thoughts: Your Cookie Canvas Awaits
And there you have it—the secrets to sugar cookie success, passed down through generations and perfected for your kitchen. This recipe is more than just a list of ingredients and steps; it’s a promise. A promise that you can create breathtaking, delicious cookies that hold their shape and hold a place in the memories of everyone who tries them.
Remember, the true magic of these cookies isn’t just in their no-spread reliability or their glossy, professional finish. It’s in the flour-dusted countertops, the laughter shared while decorating, and the proud moment you present a plate of cookies you made with your own hands. Whether you’re continuing a family tradition or starting a new one, you are now part of a legacy of bakers who understand that a little bit of patience (and a well-chilled dough!) leads to something truly special.
Please note: This is an estimate based on the ingredients used and may vary depending on specific brands and decoration additions.


