
Hey there, friend! Come on in, pull up a stool, and ignore the flour dusting on my apron. Can you smell that? It’s the sweet, nutty scent of one of my all-time favorite kitchen projects: homemade protein bars. There’s something so incredibly satisfying about whipping up a batch of these chewy, power-packed treats. It feels like a little act of love for your future self.
If you’ve ever stood in the grocery store aisle, squinting at the mile-long ingredient list on a packaged protein bar—filled with words you can’t pronounce and a price tag that makes you wince—then you and I are on the same page. I’ve been there, too. I wanted something real, something I could customize with my favorite flavors, and something that didn’t taste, well, like chalky cardboard.
That’s why I fell head-over-heels for this no-bake recipe. It’s the ultimate kitchen hack for busy lives. We’re talking about a simple mix of wholesome oats, your go-to protein powder, creamy nut butter, and a touch of natural sweetness. In about 10 minutes of active time, you can create a whole week’s worth of grab-and-go goodness. Whether you’re dashing out the door for work, need a post-yoga boost, or are just hunting for that 3 p.m. snack that won’t lead to a sugar crash, these bars are your new best friend. Let’s get mixing!
The Day My Kitchen Became a Fuel Station
This recipe truly found its forever home in my heart during a particularly chaotic (but wonderful) week a few years ago. My sister and her two energetic kids were visiting, and our house was a whirlwind of laughter, muddy shoes, and non-stop activity. We’d spend our mornings on long, exploratory hikes, and by the time we got back to the car, everyone was “hangry.” I’ll never forget the look on my nephew’s face when he unwrapped a store-bought bar I’d packed—it was a comical mix of betrayal and despair.
That evening, surrounded by the happy exhaustion of a day well spent, I decided enough was enough. I raided my pantry, determined to create a snack that was both delicious and genuinely nourishing. We mixed, we tasted, we added a few extra chocolate chips for good measure (a crucial step when cooking for kids, I might add). The moment we pulled the first batch out of the fridge, sliced them, and took a bite, I knew we had a winner. The kids devoured them, my sister asked for the recipe, and I felt that warm, fuzzy feeling that comes from feeding the people you love something made entirely by hand. Now, every time I make these bars, I’m transported back to that joyful, messy, perfect week.
Gathering Your A-Team Ingredients
The magic of this recipe is in its simplicity. Each ingredient plays a specific role in creating that perfect chewy, satisfying texture and flavor. Here’s the lineup:
- 2 cups Rolled Oats (Old-Fashioned): This is the hearty, fibrous backbone of our bar! Rolled oats give you that wonderful chew and keep you full for hours. Chef’s Insight: Don’t use quick oats if you can help it—they can get a bit mushy. For a gluten-free version, just make sure your oats are certified GF!
- 1 cup Protein Powder: The star of the show for that muscle-fueling power. Substitution Tip: Vanilla or chocolate work beautifully, but feel free to use your favorite flavor—even unflavored works great if you want the add-ins to shine. If you’re using a plant-based powder, note that it might absorb liquid differently than whey, so be prepared to adjust the milk.
- 1 cup Nut Butter: This is the glue and the rich, creamy flavor. Substitution Tip: I’m a peanut butter loyalist, but almond butter, cashew butter, or even sunflower seed butter (for a nut-free version) are all fantastic. Just make sure it’s the drippy, natural kind, not the super-stiff variety.
- 1/3 cup Honey or Maple Syrup: Our natural sweetener and binding agent! The honey adds a floral depth, while maple syrup gives a lovely, earthy sweetness. Chef’s Insight: If you prefer a less sweet bar, you can reduce this to 1/4 cup without issue.
- 1/4 cup Milk (any kind): This is our secret weapon for achieving the perfect texture. Substitution Tip: Dairy milk, almond milk, oat milk—whatever you have in your fridge will work perfectly. We add it gradually because the exact amount can vary depending on your protein powder and nut butter.
- Optional Add-Ins (The Fun Part!): This is where you make these bars your own! I love a mix of 1/4 cup mini chocolate chips (they melt slightly into the warm mixture, yum!), 2 tablespoons of chia seeds for an extra fiber boost, or a handful of dried cranberries or chopped apricots for a chewy, tart surprise. Shredded coconut is another fabulous addition!
Let’s Make Some Magic: Step-by-Step
Ready to see how quickly this all comes together? No oven pre-heating required—just a couple of bowls and some muscle. Let’s do this!
- The Dry Team Assemble! Grab a large mixing bowl and add your 2 cups of rolled oats and 1 cup of protein powder. Give them a good whisk. This isn’t just about mixing; it’s about breaking up any clumps in the protein powder and ensuring every future bar bite has a perfectly even distribution of goodness. Chef’s Hack: If your protein powder is particularly lumpy, you can sift it into the bowl with the oats. It feels fancy and makes a difference!
- Warm Up the Wet Ingredients. In a separate, microwave-safe bowl, combine your 1 cup of nut butter and 1/3 cup of honey or maple syrup. Pop it in the microwave and heat it in 20-second bursts, stirring well after each one. We just want it warm enough to become pourable and easy to mix—usually about 40-60 seconds total. Chef’s Commentary: Watch it closely! Overheating can cause the oils to separate. You can also do this in a small saucepan over low heat on the stovetop if you prefer.
- The Big Mix! Now, pour that warm, glorious, liquid gold (your nut butter and honey mixture) into the bowl with the dry ingredients. Use a sturdy spatula or even your hands to start combining everything. It will seem thick and a bit crumbly at first—that’s totally normal! This is where the patience and the milk come in.
- Find the Perfect Texture. Start adding your milk, one tablespoon at a time, mixing thoroughly after each addition. You’re looking for a texture that holds together firmly when you pinch a bit between your fingers, but isn’t so wet that it’s sticky or gloopy. You may not need the full 1/4 cup, or you might need a splash more. Trust your instincts here!
- Fold in the Fun Stuff. Once the base mixture is perfect, it’s time for the grand finale: your add-ins! Gently fold in your chocolate chips, seeds, or dried fruit until they’re evenly distributed. Chef’s Hack: If you’re using chocolate chips and don’t want them to melt at all, you can pop the mixed base (without add-ins) in the fridge for 10 minutes to cool it down before folding them in.
- Press and Pack. Line an 8×8-inch baking pan with parchment paper, leaving some overhang on two sides. This will create a sling so you can lift the whole block of bars out easily—a total game-changer for clean slicing! Transfer your mixture to the pan and press it down very firmly and evenly. I like to use the bottom of a flat measuring cup or a small glass, sometimes spritzed with a little cooking spray, to really compact the mixture. This is the secret to bars that don’t crumble later.
- The Patience Part. Cover the pan with plastic wrap or a lid and refrigerate it for at least 1-2 hours, or until completely firm. I know, the waiting is the hardest part! But this step is non-negotiable; it allows the oats to soften and all the ingredients to set up into the perfect bar texture.
- Slice and Celebrate! Once firm, use the parchment paper sling to lift the entire block onto a cutting board. Using a sharp knife, slice it into 10 or 12 bars. For a real pro look, you can individually wrap them in parchment paper for the ultimate on-the-go snack.
How to Serve Up Your Homemade Goodness
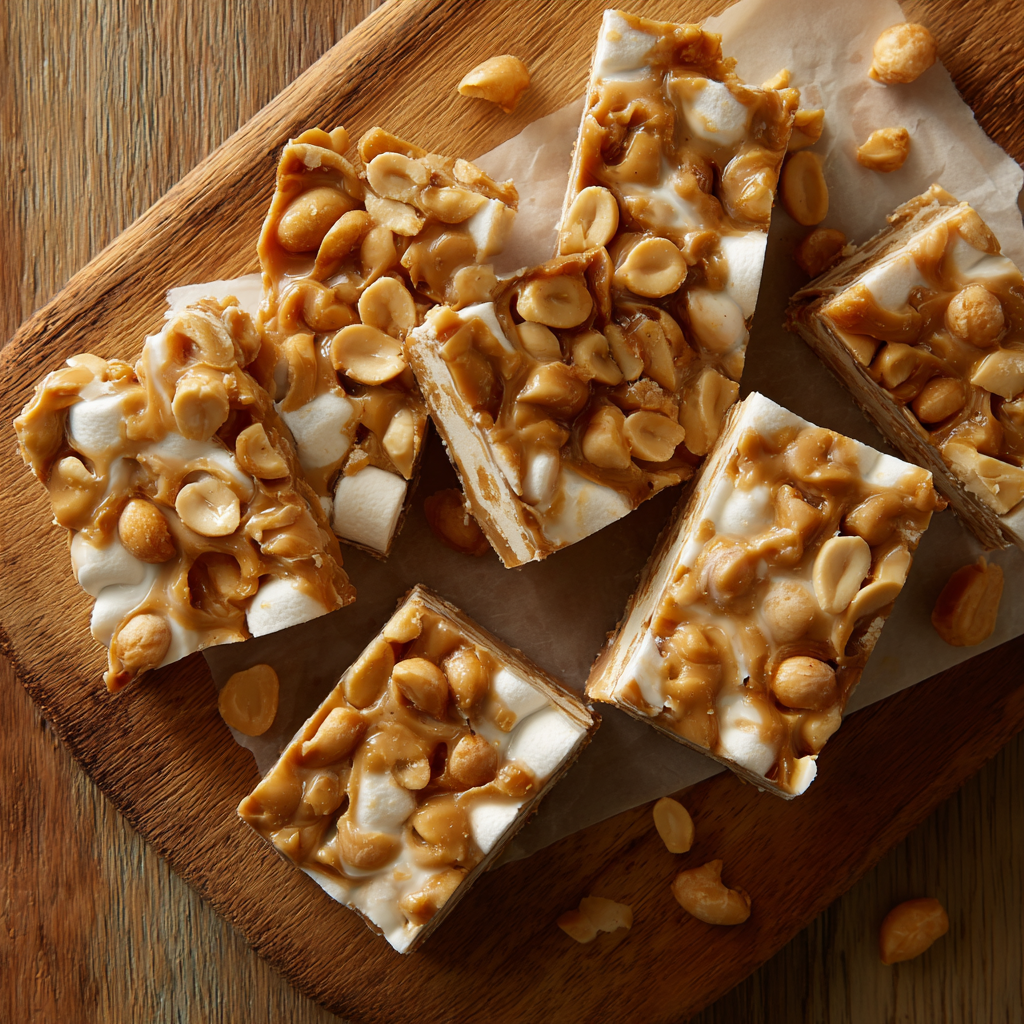
These bars are the definition of easy elegance! I love to stack them on a rustic wooden board for a casual brunch or pack them neatly in a bento box for a desk lunch. They are delicious straight from the fridge, with a firm, satisfying chew. For a slightly softer, more indulgent experience, let one sit at room temperature for 10-15 minutes before you eat it. I often enjoy mine with a hot cup of coffee in the morning or crumbled over a bowl of Greek yogurt for an extra protein punch!
Make It Your Own: Endless Flavor Twists!
The canvas of this recipe is begging for your personal touch. Here are a few of my favorite variations to get your creative juices flowing:
- Almond Joy: Use almond butter, add 1/4 cup of shredded coconut and 2 tablespoons of cacao nibs or dark chocolate chips.
- Gingerbread Spice: Use maple syrup and add 1 tsp cinnamon, 1/2 tsp ginger, and 1/4 tsp nutmeg to the dry ingredients. Fold in chopped crystallized ginger.
- Tropical Escape: Use vanilla protein powder and coconut milk. Fold in 1/4 cup of chopped dried mango and 2 tablespoons of toasted coconut.
- Double Chocolate Brownie: Use chocolate protein powder and add 2 tablespoons of unsweetened cocoa powder to the dry mix. Fold in dark chocolate chips.
- Nut-Free Sunflower Crunch: Use sunflower seed butter and add 2 tablespoons of sunflower seeds and 1/4 cup of dried cherries.
Olivia’s Chef’s Notes & Kitchen Confessions
This recipe has been a living, evolving entity in my kitchen. The first time I made it, I was so eager that I didn’t let it chill long enough. Let’s just say we ended up with delicious, protein-packed “crumble” instead of bars! We happily ate it with a spoon over ice cream, so no harm done. It was a good lesson in patience and the science of binding.
Over time, I’ve learned that the type of protein powder is the biggest variable. Plant-based powders like brown rice or pea protein tend to be thirstier, so don’t be shy with the extra milk if you’re using them. And a funny story: I once accidentally used mint chocolate chip protein powder because the container looked similar to my vanilla one. It was a happy accident that tasted like a healthy Thin Mint cookie! So don’t be afraid to experiment. The best recipes, like the best memories, often come from a little bit of beautiful chaos.
Your Questions, Answered!
I’ve gotten so many wonderful questions about these bars over the years. Here are the answers to the most common head-scratchers:
Q: My mixture is too dry and crumbly, even after adding the milk. What did I do wrong?
A: Don’t worry, this is a common fix! It usually means your nut butter was particularly thick or your protein powder is a super-absorber. Simply add more milk, one tablespoon at a time, until the mixture finally holds together. Conversely, if it’s too wet and sticky, add a bit more oat flour (just pulse some rolled oats in a blender) or protein powder until it firms up.
Q: Can I make these without protein powder?
A: You absolutely can! The texture will be a bit different—softer and less dense. To compensate, I’d recommend adding an extra 1/2 cup of oats and maybe 2 tablespoons of ground flaxseed to help with binding and nutrition.
Q: How should I store these bars, and how long will they last?
A: Because they are no-bake and contain perishable ingredients like nut butter and honey, they need to be stored in an airtight container in the refrigerator. They’ll stay fresh and perfect for up to two weeks. You can also freeze them for up to 3 months! Just layer them between parchment paper in a freezer bag and thaw overnight in the fridge or for a few minutes on the counter.
Q: My bars fell apart when I cut them! What happened?
A: This almost always comes down to two things: not pressing the mixture firmly enough into the pan, or not chilling it long enough. That pressing step is crucial—really put your back into it! And if you’re short on time, popping the pan in the freezer for 30-40 minutes can speed up the setting process.

Homemade Protein Bars
Description
Olivia’s No-Bake Protein Bars
These chewy, protein-packed bars are perfect for breakfast on-the-go, post-workout fuel, or a healthy snack any time of day. Fully customizable and made in about 10 minutes of active time—no oven required!
Ingredients
Dry Ingredients:
-
2 cups rolled oats (old-fashioned)
-
1 cup protein powder (vanilla, chocolate, or unflavored)
Wet Ingredients:
-
1 cup nut butter (peanut, almond, cashew, or sunflower seed butter)
-
1/3 cup honey or maple syrup
-
1/4 cup milk (any kind)
Optional Add-Ins:
-
1/4 cup mini chocolate chips
-
2 tbsp chia seeds
-
1/4 cup dried fruit (cranberries, apricots, mango)
-
1/4 cup shredded coconut
Instructions
-
Mix Dry Ingredients: In a large bowl, combine oats and protein powder. Whisk to break up clumps.
-
Warm Wet Ingredients: In a microwave-safe bowl, heat nut butter and honey/maple syrup in 20-second bursts until pourable. Stir well.
-
Combine: Pour wet mixture into dry ingredients. Mix until crumbly.
-
Adjust Texture: Add milk 1 tbsp at a time until mixture holds together when pinched but isn’t sticky.
-
Fold in Add-Ins: Stir in chocolate chips, seeds, or dried fruit.
-
Press & Chill: Line an 8×8-inch pan with parchment paper. Press mixture firmly and evenly into the pan. Cover and refrigerate 1–2 hours until firm.
-
Slice & Serve: Lift block using parchment overhang and cut into 10–12 bars. Optional: wrap individually for on-the-go convenience.
Notes
-
Almond Joy: Almond butter + shredded coconut + cacao nibs
-
Gingerbread Spice: Maple syrup + cinnamon, ginger, nutmeg + chopped crystallized ginger
-
Tropical: Vanilla protein powder + coconut milk + dried mango + toasted coconut
-
Double Chocolate: Chocolate protein powder + cocoa powder + dark chocolate chips
-
Nut-Free Sunflower Crunch: Sunflower seed butter + sunflower seeds + dried cherries
Nutritional Information*
*The following is an approximate estimate calculated without optional add-ins and will vary based on the specific brands of ingredients you use.
Per Bar (recipe makes 12 bars):
Calories: ~200 | Protein: 12g | Carbohydrates: 18g | Fat: 10g | Fiber: 3g | Sugar: 8g
Final Thoughts: You’ve Just Mastered Meal Prep Magic
And just like that, you’ve done it. You’ve reclaimed the power snack, transforming simple, wholesome ingredients into a batch of homemade fuel that’s ready for whatever your week throws at you. As you look at that neatly stacked container in your fridge, I hope you feel a deep sense of accomplishment. You didn’t just make bars; you crafted a solution—a promise to your future self for nourishing, delicious, and effortless fuel.
Remember, the true beauty of this recipe isn’t just in its perfect chew or its clever no-bake method. It’s in the confidence you gained by creating something with your own two hands. It’s in the freedom to customize a snack that fits your cravings and your life perfectly. And it’s in the small but powerful act of choosing real ingredients over a mysterious, store-bought list.
So, as you pack one into your gym bag or grab it on your way out the door, take a moment to appreciate your own capability. You’ve brought a little more intention, a little more health, and a whole lot of love into your daily routine.


