

Easy Peanut Butter Chocolate Chip Cookies: Your New 15-Minute Best Friend
Hey there, friend! Olivia here. Can we talk about cookie cravings for a second? You know the ones. They don’t send a polite email or schedule a meeting. Nope. They hit you out of nowhere on a Tuesday afternoon, demanding something warm, chewy, and deeply, profoundly satisfying. The kind of craving that makes the idea of creaming butter and sugar, dragging out the mixer, and waiting for dough to chill feel like an impossible mountain to climb.
Well, consider this recipe your secret tunnel straight to cookie bliss. I’m talking about the easiest, most ridiculously delicious Peanut Butter Chocolate Chip Cookies you will ever make. We’re talking one bowl, zero chill time, and from craving to cookie-in-hand in about 15 minutes flat. No fancy skills required, just a spoon, a bowl, and a whole lot of enthusiasm.
These cookies are my go-to for… well, everything. Last-minute picnic contribution? Check. Poolside snack that makes you the most popular person by the water? Absolutely. A quick baking project with kids that doesn’t leave your kitchen looking like a flour bomb went off? You bet. They’re soft, they’re chewy, they’re packed with rich peanut butter flavor, and they’re absolutely studded with pockets of melty chocolate. This isn’t just a recipe; it’s a little jar of joy waiting to be opened. So, tie on that apron (embrace the mess!), and let’s make some magic happen.
The Accidental Masterpiece: A Story of a Happy Kitchen Mistake
This recipe has a special place in my heart because it was born from a classic “baking emergency.” Picture it: my nephew’s birthday party, about an hour before guests are set to arrive. I had grand plans for an elaborate layer cake, only to realize I was completely out of butter. Panic mode! I stared into the pantry, my eyes landing on a giant jar of creamy peanut butter. Desperation is the mother of invention, right?
I started throwing things into a bowl—peanut butter, sugar, an egg—hoping against hope it would turn into something edible. I folded in some chocolate chips for good measure, crossed my fingers, and slid the first batch into the oven. What emerged were these puffy, golden, incredibly fragrant cookies. They were a hit! The kids devoured them, and the adults kept asking for the recipe, convinced it was some complex family secret. I just smiled, knowing the real secret was simplicity itself. Now, it’s the recipe I turn to when I need a guaranteed win, a reminder that sometimes the best things in life (and the kitchen) are the ones you don’t overthink.
Gather Your Ingredients: The Dream Team
Here’s the beautiful part: you probably have everything you need already. This is a pantry superhero recipe. Let’s break it down.
- 1 cup creamy peanut butter – This is the star! I recommend using a conventional, store-bought brand like Jif or Skippy for this recipe. The added oils and sugars help create the perfect texture. Natural peanut butter (the kind that separates) can make the cookies oily or dry. Chef’s Insight: If you’re a crunchy peanut butter fan, feel free to use it for a delightful texture!
- ¾ cup brown sugar – Brown sugar is non-negotiable here. Its molasses content adds moisture, a deeper flavor, and that classic chewy texture we’re after. Substitution Tip: In a pinch, you can use all granulated sugar, but your cookies will be a bit crisper and less chewy.
- 1 large egg – Our binding agent! It brings the dough together and provides structure. Make sure it’s at room temperature for easier mixing.
- 1 teaspoon vanilla extract – The flavor enhancer. It might seem simple, but it rounds out the peanut butter and chocolate flavors beautifully. Don’t skip it!
- ½ teaspoon baking soda – Our leavening agent. This is what gives the cookies their slight puff and lift. Make sure yours is fresh for the best results.
- ½ cup chocolate chips – Use semi-sweet for a perfect balance, but milk chocolate or dark chocolate chunks work wonderfully too. Chef’s Insight: I sometimes use a mix of chocolate chips and peanut butter chips for the ultimate peanut butter experience.
- Optional: Pinch of salt – If you’re using unsalted peanut butter, a tiny pinch of salt will help balance the sweetness and make the flavors pop.
Let’s Get Baking: The Foolproof Steps to Cookie Heaven
Ready? This is where the fun begins. I promise, it’s as easy as it sounds.
Step 1: Preheat and Prep. Fire up your oven to 350°F (175°C). Line a baking sheet with parchment paper. This is my number one kitchen hack for cookies—no sticking, easy cleanup, and perfectly golden bottoms. If you don’t have parchment, a light greasing will work, but parchment is the real MVP.
Step 2: The One-Bowl Wonder. In a medium-sized bowl, combine the peanut butter, brown sugar, egg, vanilla extract, and baking soda (and that optional salt, if using). Now, grab a sturdy spatula or a wooden spoon and mix until you have a smooth, cohesive dough. It will be thick and a bit sticky, but that’s exactly what we want. Chef’s Hack: If your brown sugar is a little lumpy, break it up with your fingers before adding it to the bowl to avoid sugary pockets.
Step 3: The Chocolate Fold-In. Add your chocolate chips to the bowl. Now, use a folding motion with your spatula to incorporate them. “Folding” just means you’re gently turning the dough over from the bottom onto itself, rather than stirring aggressively. This ensures the chips are evenly distributed without overworking the dough. Little Chef Tip: Save a small handful of chips to press onto the tops of the dough balls right before baking. This makes them look bakery-level beautiful!
Step 4: Scoop and Shape. Using a tablespoon-sized cookie scoop or just a regular spoon, portion out the dough. Roll it quickly between your palms to form a ball. Place them on your prepared baking sheet, leaving about 2 inches between each one—they will spread a little! Now, here’s the key: use a fork to gently press down on each ball to flatten it slightly. This creates those classic peanut butter cookie criss-cross marks and helps them bake evenly.
Step 5: Bake to Perfection. Pop the baking sheet into your preheated oven and bake for 9 to 11 minutes. The cookies are done when the edges look set and the tops are puffed and maybe have a few cracks. They might look a tiny bit underdone in the center, and that’s perfect! Do not overbake! This is the secret to a soft, chewy cookie. They will continue to set up as they cool.
Step 6: The Patience Test. This is the hardest part. Remove the baking sheet from the oven and let the cookies cool right on the pan for at least 5 minutes. They are very fragile when hot. After 5 minutes, you can transfer them to a wire rack to cool completely… or, you know, do what I do and enjoy one warm, with the chocolate still gloriously gooey.
How to Serve These Beauties
Presentation is part of the fun! For a casual treat, just pile them high on a rustic wooden board or in a simple ceramic bowl. If you’re feeling fancy, place a cookie on a small plate with a glass of cold milk for the ultimate nostalgic vibe. For a next-level dessert, sandwich a scoop of vanilla ice cream between two slightly warm cookies for an epic ice cream sandwich. However you serve them, get ready for compliments!
Get Creative: Recipe Variations
Once you’ve mastered the base, the world is your oyster! Try these fun twists:
- Peanut Butter Cup Explosion: Swap the chocolate chips for chopped-up Reese’s Peanut Butter Cups.
- Salty-Sweet Sensation: Use dark chocolate chips and sprinkle the dough balls with a tiny pinch of flaky sea salt before baking.
- Triple Nut Delight: Use ¾ cup peanut butter and ¼ cup of another nut butter (like almond or cashew butter), and add ¼ cup of chopped toasted walnuts or pecans.
- Gluten-Free Friendly: This recipe is naturally gluten-free! Just double-check that your baking soda and peanut butter are certified GF.
- Monster Cookie Vibes: Stir in ½ cup of old-fashioned oats for a heartier, chewier texture.
Chef’s Notes: From My Kitchen to Yours
This recipe has evolved so much since that first butter-less panic session! I’ve learned that using a heaping cup of peanut butter makes them even chewier, and that a dash of cinnamon is a surprisingly delicious addition. My husband likes to sneak in a handful of pretzel bits for a crunchy, salty twist. The best part about this recipe is that it invites you to play. It’s a forgiving, friendly dough that wants you to succeed.
I’ll never forget the time I was filming a video for this recipe and my cat, Whiskers, decided to make a surprise leap onto the counter right as I was pulling the tray out of the oven. Let’s just say we had a very dramatic, slow-motion-style save of the cookies (and the cat!). The cookies survived, and it’s now a cherished kitchen memory. That’s what it’s all about—the stories we create along the way.
FAQs & Troubleshooting: Your Questions, Answered!
Q: My cookies spread too much and came out flat. What happened?
A: This usually points to two things: 1) Your baking soda might be old and lost its potency. Test it by adding a pinch to vinegar—if it doesn’t bubble vigorously, it’s time for a new box. Or 2) You might be using a natural peanut butter that is too oily. Stick with conventional brands for the best structure.
Q: Can I double this recipe?
A: Absolutely! It doubles beautifully. Just mix everything in a larger bowl. You might need to bake in two batches to avoid overcrowding the oven, which can lead to uneven baking.
Q: The dough seems too sticky to handle. Help!
A: No problem! Pop the mixed dough into the refrigerator for 10-15 minutes. This will firm it up just enough to make scooping and rolling much easier. A little sticky is normal, though!
Q: How should I store these cookies, and do they freeze well?
A: Store them in an airtight container at room temperature for up to 5 days. They also freeze incredibly well! Place cooled cookies in a freezer bag for up to 3 months. You can even freeze the unbaked dough balls on a tray, then transfer to a bag. Bake from frozen, adding a minute or two to the baking time.
Easy Peanut Butter Chocolate Chip Cookies
Description
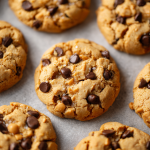
These cookies are soft, chewy, peanut-buttery, and studded with pockets of melty chocolate. Perfect for last-minute treats, baking with kids, or just because you deserve a little indulgence today.
Ingredients
-
1 cup creamy peanut butter (store-bought is best; crunchy works too)
-
¾ cup brown sugar
-
1 large egg (room temperature)
-
1 tsp vanilla extract
-
½ tsp baking soda
-
½ cup chocolate chips (semi-sweet preferred)
-
Optional: pinch of salt (if using unsalted peanut butter)
Tip: Break up brown sugar lumps with your fingers for smoother mixing.
Instructions
-
Preheat & Prep: Preheat oven to 350°F (175°C). Line a baking sheet with parchment paper.
-
Mix the Dough: In a medium bowl, combine peanut butter, brown sugar, egg, vanilla, baking soda, and salt. Mix until smooth.
-
Add Chocolate: Fold in chocolate chips gently. Save a few to press on top of dough balls for a bakery look.
-
Shape Cookies: Scoop tablespoon-sized portions, roll into balls, place 2 inches apart on the sheet, and gently flatten with a fork.
-
Bake: Bake 9–11 minutes, until edges are set and tops slightly cracked. Don’t overbake! Cookies will firm as they cool.
-
Cool & Enjoy: Let cool on the sheet 5 minutes before transferring to a wire rack. Or, enjoy warm with chocolate still melty!
Notes
-
Peanut Butter Cup Explosion: Swap chocolate chips for chopped Reese’s Cups.
-
Salty-Sweet: Use dark chocolate chips and sprinkle with flaky sea salt before baking.
-
Monster Cookie: Add ½ cup oats for extra chew.
-
Nut Twist: Mix in ¼ cup chopped nuts alongside the peanut butter.
Nutrition
- Calories: 160 cal Per Serving
- Fat: 10g
- Carbohydrates: 13g
Nutritional Information (Approximate, Per Cookie)
Calories: 160, Fat: 10g, Carbohydrates: 13g, Protein: 4g, Sugar: 10g
Prep Time: 5 minutes | Cook Time: 10 minutes | Total Time: 15 minutes | Servings: 18 cookies
Final Thoughts: Your New Go-To Recipe
And just like that, in the time it takes to watch a sitcom, you’ve created a batch of pure, uncomplicated joy. These cookies are proof that the best things in life don’t have to be complicated. They’re the culinary equivalent of a warm hug—reliable, comforting, and always there when you need them most.
This recipe is more than a list of ingredients; it’s a reminder that some of the greatest kitchen triumphs come from happy accidents and a little bit of improvisation. It’s your secret weapon for turning an ordinary day into something special, for creating smiles with minimal effort, and for always having a delicious answer to the question, “What’s for a treat?”
So, whether you’re baking for a crowd, for a quick solo snack, or with a little helper by your side, you now have a trusty friend in this recipe. Keep it bookmarked, share it freely, and never underestimate the power of a warm cookie and a cold glass of milk.


