
Forget the Jar: Let’s Make Zingy, Crunchy, Homemade Sauerkraut!
Hey there, friend! Come on in, pull up a stool, and let’s get our hands a little messy. Is there anything quite like the smell of something incredible happening in your kitchen? Not the instant-gratification kind of smell, but the slow, patient, magical kind. The kind that whispers of transformation and fills your home with the promise of something truly special. That’s the magic we’re making today.
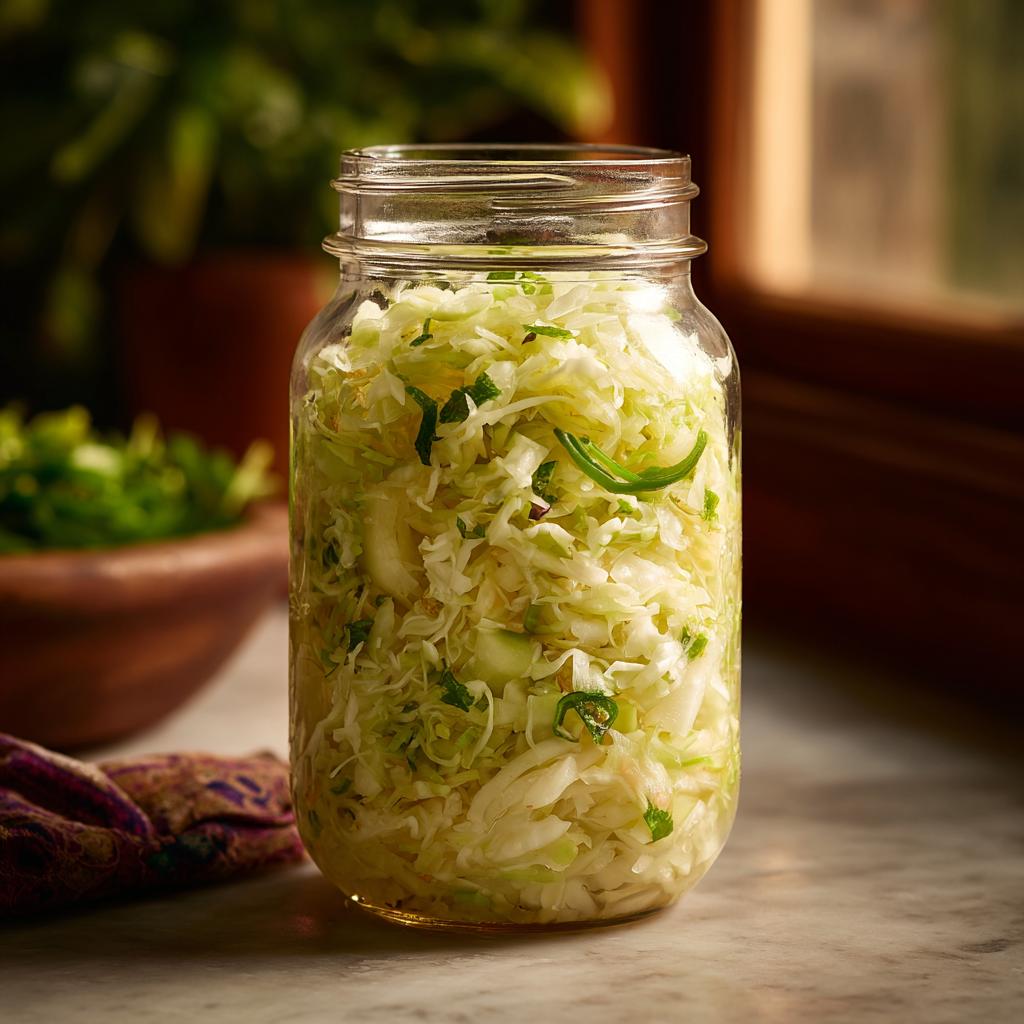
We’re talking about homemade sauerkraut. Now, before you picture dusty jars from a century ago, let me stop you right there. This isn’t your grandma’s kraut (though I love and respect her version!). This is a vibrant, living, zingy condiment that’s about to become your new kitchen obsession. We’re taking crisp green cabbage and, with a little patience and a lot of flavor, turning it into a tangy, probiotic powerhouse that crackles with every bite.
And because we love a good flavor adventure here, we’re not stopping at basic. We’re folding in the sweet, subtle crunch of green apple and a gentle, warming kick of fresh jalapeño. It’s a symphony of sweet, spicy, salty, and sour that will absolutely revolutionize your hot dogs, burgers, salads, and bowls. The best part? You don’t need any fancy equipment or a culinary degree. All you need is cabbage, salt, your two hands, and a willingness to embrace a little kitchen alchemy. Ready to make something unforgettable? Let’s dive in.
A Jar of Sunshine in the Middle of Winter
My love affair with fermentation started on a bleak, slushy February day. I was craving something bright and fresh, but the grocery store produce section was looking a little… sad. I remembered my great-aunt used to make her own pickles and kraut, and I figured, how hard could it be? I chopped, I salted, I massaged, and I stuffed it all into a giant jar. Then, I waited.
For over a week, that jar sat on my counter, bubbling away like a quiet, scientific experiment. I’d peek at it every day, wondering if I’d just created a science project disaster. But on day ten, I tentatively unscrewed the lid. The smell that wafted out wasn’t funky; it was complex, tangy, and alive. I took a bite, and my entire world brightened. That first taste of my own homemade kraut, bursting with a zingy vitality, was like capturing a little jar of summer sunshine. It was a powerful reminder that the most satisfying flavors often come from the simplest ingredients and a little bit of patience. Now, I always have a jar fermenting—it’s my edible, probiotic security blanket!
Gathering Your Fermentation Friends
Here’s the beautiful part: the ingredient list is gloriously short. The magic happens between the cabbage and the salt. Everything else is just for fun! This recipe makes a big batch (about 40 servings) because, trust me, you’ll want plenty to share and to last.
- 2 heads Green Cabbage (approx. 4–6 lbs total): This is our star! Look for heads that are firm, heavy for their size, and have vibrant, crisp outer leaves. The outer leaves are important—we’ll use them later! Chef’s Insight: The weight can vary, so we’ll go by the salt-to-cabbage ratio, not volume.
- 3–4 tbsp Natural Salt (1½–2 tsp per pound of cabbage): This is non-negotiable. You must use a salt without anti-caking agents or iodine, as they can interfere with fermentation. Fine sea salt, pickling salt, or Himalayan pink salt are perfect. Substitution Tip: Do not use table salt! The additives can give your kraut a metallic taste and inhibit the good bacteria.
- 2 tbsp Caraway Seeds (optional but classic): This is the quintessential kraut spice. It adds a wonderful, warm, anise-like flavor that just feels right. Substitution Tip: Not a fan? Try dill seeds, coriander seeds, or even a bay leaf for a different aromatic profile.
- 1 Green Apple, julienned: Our first twist! The apple adds a subtle, sweet crunch that beautifully balances the tangy saltiness. Granny Smith is perfect for its firm texture and tartness. Chef’s Insight: Julienne it (cut into matchsticks) so it integrates seamlessly with the shredded cabbage.
- 1 Small Jalapeño, thinly sliced: Twist number two! This isn’t about making it super spicy; it’s about a gentle, building warmth. Remove the seeds and membranes for just a hint of heat, or leave them in for a bigger kick. Substitution Tip: A pinch of red pepper flakes works in a pinch, but fresh is best!
- 1 tsp Mustard Seeds: The secret weapon! These little guys add a fantastic tangy, slightly pungent depth that makes the flavor profile incredibly complex. You’ll be surprised what a difference they make.
Let’s Get Our Kraut On: A Step-by-Step Guide
Don’t be intimidated! This process is incredibly meditative and satisfying. Put on some good music, and let’s get to work.
Step 1: Shred & Prep
Remove any wilted or damaged outer leaves from your cabbage heads. Set aside two of the nicest, largest outer leaves—we’ll need these later! Cut each cabbage in half and cut out the tough core. Now, shred it. You can use a sharp knife to slice it thinly, a mandoline (watch those fingers!), or the shredding disk on your food processor. Place all that beautiful shredded cabbage into the largest mixing bowl you own. Chef’s Hack: A food processor makes this step lightning fast. It’s a game-changer for large batches!
Step 2: Salt & Squeeze (The Arm Workout!)
Sprinkle the salt over the cabbage. Now, roll up your sleeves and get in there with clean hands! Start massaging, squeezing, and crushing the cabbage. At first, it will seem like there’s not enough liquid, but keep going. After about 5-10 minutes, you’ll feel the cabbage become limp and wet, and a pool of brine will form at the bottom of the bowl. This is liquid gold! Chef’s Commentary: This step is crucial. You’re not just mixing; you’re breaking down the cabbage cell walls to draw out its natural water, which becomes the brine that protects it during fermentation. Think of it as a therapeutic kitchen workout.
Step 3: Flavor Boost
Now, add in your caraway seeds, the julienned apple, sliced jalapeño, and mustard seeds. Mix everything together with your hands until the add-ins are evenly distributed throughout the cabbage mixture.
Step 4: Pack Tightly
Time to pack your fermentation vessel. You can use a dedicated fermentation crock, a very large glass jar, or a few regular-sized mason jars. Whatever you use, it must be scrupulously clean. Start transferring handfuls of the cabbage mixture into your jar(s). With every handful, press down firmly and aggressively with your fist or a kraut pounder. You want to eliminate any air pockets and encourage the brine to rise over the top of the cabbage. Chef’s Hack: The end of a rolling pin or a clean glass jar works perfectly as a pounder if you don’t have a fancy tool.
Step 5: Submerge & Cover
Once all your cabbage is packed tightly into the jar and completely covered by its own brine, it’s time to make sure it stays that way. Take one of the reserved whole cabbage leaves, fold it up, and place it on top of the shredded mix. This acts as a primary barrier. Then, you need a weight. A glass fermentation weight is ideal, but you can also use a small, clean zip-top bag filled with a little brine (so if it leaks, it doesn’t dilute your ferment). The goal is to keep every bit of cabbage pushed down under the brine. Finally, cover the jar with a cloth secured with a rubber band or a special fermentation lid that allows gases to escape but keeps bugs out. Chef’s Note: Do NOT screw a regular lid on tightly! The building CO2 gases need to escape, or you could have a jar explosion on your hands.
Step 6: Ferment & Wait
Place your jar(s) in a cool, dark spot (a kitchen cupboard or on the counter away from direct light) at room temperature (ideally 65-75°F). Now, the hard part: wait. Fermentation is a wild process, and the timeline depends on the temperature of your home. It can take anywhere from 10 to 21 days. Start tasting it with a clean fork around day 10. It’s ready when it’s reached a level of tanginess that you love!
Step 7: Taste & Store
Once your kraut is perfectly tangy and crunchy, remove the weight, screw on a regular lid, and move it to the refrigerator. The cold drastically slows down fermentation, preserving your kraut at its peak for months!
How to Serve Your Homemade Masterpiece
This kraut is so much more than a hot dog topper! Its bright, crunchy texture elevates everything it touches. I love it piled high on a grilled bratwurst with spicy mustard, of course. But try it stirred into a grain bowl for a probiotic punch, folded into a tuna or chicken salad for crunch, or as a topping for avocado toast. It’s incredible on pulled pork sandwiches, tacos, or even eaten straight from the jar with a fork as a healthy, gut-loving snack. Get creative!
Mix It Up: Endless Kraut Possibilities
The fun doesn’t stop here! Once you master the basic method, a world of flavor combinations opens up.
- Beet & Ginger: Add 1-2 shredded raw beets and a tablespoon of freshly grated ginger for a stunning pink kraut with a zesty kick.
- Classic Caraway: Stick with the traditional! Just cabbage, salt, and caraway seeds for a pure, nostalgic flavor.
- Turmeric & Black Pepper: Add 1 tbsp of grated fresh turmeric and 1 tsp of freshly cracked black pepper for an anti-inflammatory, golden-hued kraut.
- Vegan Kimchi-style: Add garlic, ginger, a dash of soy sauce (or coconut aminos), and a sprinkle of Korean chili flakes (gochugaru).
- Seed-Free: Simply omit the caraway and mustard seeds for an AIP-friendly version that still lets the apple and jalapeño shine.
Olivia’s Chef Notes & Kitchen Confessions
This recipe has evolved so much since that first February batch. I started adding the apple after a happy accident—a slice fell into the bowl while I was snacking, and I just went with it. Best mistake ever! The jalapeño was a request from my spice-loving partner, and it turned out to be the perfect balancing act.
A funny story: my first time, I was so paranoid about mold that I checked the jar ten times a day. I didn’t pack it down well enough, and a few tiny bits of cabbage floated to the surface and developed a little kahm yeast (harmless, but not pretty). I almost threw the whole batch out! I’ve since learned that as long as everything is submerged, you’re golden. The key is to be brave, trust the process, and keep everything under the brine. This kraut has become my go-to hostess gift, and it’s always a huge hit. There’s something so special about giving someone a jar of food you made with your own hands that’s also bursting with health.
Your Kraut Questions, Answered!
Q: I see bubbles and my jar is hissing when I open it. Is that normal?
A: Absolutely! Rejoice! Those bubbles and that hiss are the sound of successful fermentation. It means the lactic acid bacteria are happily doing their job, eating the sugars and producing carbon dioxide and acid. It’s a sign of a healthy, active ferment.
Q: There’s a white, cloudy film on top of the brine. Is it mold?
A: Cloudy brine is completely normal and expected—it’s a sign of a thriving microbial community. The thing to watch for is fuzzy, colorful mold (white, green, pink, black). If you see fuzzy mold, you should discard the batch. However, a white, flat, kind of powdery-looking film is usually harmless Kahm yeast, which is safe but can impart an off-flavor. You can skim it off the top and the kraut underneath is fine. Remember: if it’s colorful and fuzzy, toss it. If it’s white and flat, skim it.
Q: My kraut isn’t sour enough/took forever to ferment. What happened?
A: Temperature is the biggest factor here. If your house is on the cooler side (below 65°F), fermentation will proceed at a much slower pace. Be patient; it might take the full 3 weeks. Conversely, if it’s very warm, it will ferment faster. Taste is your best guide, not the calendar!
Q: The brine level dropped below the cabbage after a few days. What should I do?
A: This can happen as the cabbage absorbs liquid. It’s an easy fix! Simply make a fresh bit of brine by dissolving 1 teaspoon of salt in 1 cup of water. Pour just enough of this over your kraut to cover the exposed vegetables and re-weight it.

Zesty Homemade Sauerkraut
- Total Time: Varies by taste
Description
This kraut is alive with flavor—sweet apple, gentle jalapeño heat, and a tangy zing that wakes up anything it touches. All you need is cabbage, salt, and patience to unlock the magic of fermentation.
Ingredients
-
2 heads green cabbage (4–6 lbs total)
-
3–4 tbsp natural salt (1½–2 tsp per lb cabbage)
-
2 tbsp caraway seeds (optional)
-
1 green apple, julienned
-
1 small jalapeño, thinly sliced
-
1 tsp mustard seeds
Instructions
-
Shred & Prep – Save 2 large outer cabbage leaves. Shred cabbage, removing cores.
-
Salt & Massage – Sprinkle salt, massage 5–10 min until limp and brine forms.
-
Flavor Boost – Mix in caraway, apple, jalapeño, mustard seeds.
-
Pack – Firmly press into clean jars, packing tightly so brine rises above cabbage.
-
Submerge – Cover with reserved leaf + weight. Ensure all cabbage stays under brine.
-
Ferment – Cover loosely with cloth or vented lid. Store at room temp, 65–75°F, for 10–21 days. Taste after day 10.
-
Finish – When tangy and crunchy, remove weight, seal jar, and refrigerate. Keeps for months!
Notes
Use it on hot dogs, burgers, grain bowls, tacos—or eat it straight from the jar for a gut-healthy snack.
- Prep Time: 30 mins
A Little Nourishment Note
Per Serving (approx. 2 tbsp): Calories: ~12 | Carbs: 3g | Fat: 0g | Sugar: 1g | Rich in probiotics, fiber, Vitamin C, and antioxidants.
This is a true superfood! The fermentation process creates beneficial probiotics that support gut health, and cabbage itself is packed with nutrients.
Prep Time: 30 min | Fermentation Time: 10–21 days | Total Time: Varies based on taste
Final Thoughts: Your Jar of Patience & Pride
And there you have it—your very own jar of zingy, living, homemade sauerkraut. What started as a simple head of cabbage has transformed, through a little salt and a lot of patience, into something truly extraordinary. This isn’t just a condiment; it’s a testament to the magic of slow food and the incredible power of your own two hands.
Remember, fermentation is less of a exact science and more of a relationship. It asks you to be present, to observe, and to trust the process. That bubbling jar on your counter is a tiny ecosystem you helped create, a delicious reminder that the best things in life often can’t be rushed.
So don’t be afraid to peek, to taste, and to learn. Your first batch might be perfect, or it might teach you something for the next one. That’s the beauty of it. This kraut is yours—a unique, tangy, crunchy expression of your kitchen curiosity.


